1
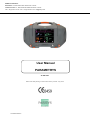
PARSYS Telemedicine Head office: 118 avenue de France 75013 Paris - France Technical center: 5-7, avenue de Paris 94300 Vincennes - France Tel: + 33 (0)1 60 31 70 40 - Fax: + 33 (0)1 64 02 31 93 - [email protected] User Manual PARAMETRYS 37-022 V2.1 Date of the first placing on the market of the product: July 2012 10/15/2015 Version User Manual Parametrys Ver 2.1 SUMMARY 1. COMPONENTS OF THE PARAMETRYS KIT ......................................................................................... 4 1.1 1.2 1.3 2. COMPONENTS......................................................................................................................................... 4 LIST AND MEANING OF THE SYMBOLS USED ............................................................................................... 5 W ARNINGS ............................................................................................................................................. 6 DEVICE DESCRIPTION ........................................................................................................................... 8 2.1 GENERAL INTRODUCTION......................................................................................................................... 8 2.1.1 Components ................................................................................................................................. 8 2.1.2 Integrated wired sensors .............................................................................................................. 9 2.1.3 Non wired Bluetooth sensors (optional) ....................................................................................... 9 2.1.4 Indicators & buttons ................................................................................................................... 10 2.1.5 Optional: using the ECG compartments of the dock ................................................................. 11 2.1.6 Optional: extracting the monitor from its dock ........................................................................... 11 2.2 FUNCTIONALITIES .................................................................................................................................. 12 2.2.1 Using the Exam mode ................................................................................................................ 12 2.2.2 Using the Monitoring mode ........................................................................................................ 12 2.2.3 Data transmission ...................................................................................................................... 12 2.2.4 Data printing ............................................................................................................................... 13 2.3 RECHARGING THE MONITOR ................................................................................................................... 14 2.3.1 Power cable ............................................................................................................................... 14 2.3.2 Battery’s level of the monitor...................................................................................................... 14 2.4 TURNING THE DEVICE ON AND OFF ......................................................................................................... 15 2.5 ADJUSTING THE ANGLE OF THE MONITOR’S SCREEN ................................................................................ 16 2.6 HANGING THE MONITOR TO A STRETCHER ............................................................................................... 16 3. SETUP .................................................................................................................................................... 17 4. USE SEQUENCES ................................................................................................................................. 18 4.1 PARAMETRYS’S MAIN SCREEN ................................................................................................................ 18 4.2 SOUND AND BRIGHTNESS ADJUSTING ..................................................................................................... 19 4.3 USAGE PRINCIPLES ............................................................................................................................... 20 4.3.1 After taking and validating measures ......................................................................................... 20 4.3.2 To keep, cancel or retake measures: ........................................................................................ 20 4.3.3 Record or delete data ................................................................................................................ 21 4.4 EXAMS PROTOCOLS .............................................................................................................................. 22 4.4.1 Capturing patient data ................................................................................................................ 22 4.4.2 Setting devices ........................................................................................................................... 23 4.4.3 Using the thermometer in Exam mode ...................................................................................... 23 4.4.4 Using in the blood pressure device in Exam mode ................................................................... 24 4.4.5 Using the oximeter in Exam mode ............................................................................................. 26 4.4.6 Optional: using the Telecardia ECG in Exam mode .................................................................. 28 4.4.7 Optional: using the Cardialys ECG in Exam mode .................................................................... 34 4.4.8 Display of the ECG traces obtained with Telecardia or Cardialys ............................................. 40 4.5 MONITORING......................................................................................................................................... 41 4.5.1 Launching the Monitoring’s function .......................................................................................... 41 4.5.2 Setting the devices ..................................................................................................................... 42 4.5.3 Handling support tools: Stopwatch, Timer, Metronome ............................................................. 42 4.5.5 Using the blood pressure device in Monitoring mode ................................................................ 43 4.5.6 Using the oximeter in Monitoring mode ..................................................................................... 45 4.5.7 Precisions on using the optional ECG’s cable with 5-lead clips ................................................ 47 4.5.8 Recording and sending the monitoring data .............................................................................. 49 4.6 ALARMS MANAGEMENT .......................................................................................................................... 50 4.6.1 Access to alarm settings: conditions and limits ......................................................................... 50 4.6.2 Monitoring alarms settings ......................................................................................................... 50 4.6.3 Alarms audio mute function ....................................................................................................... 53 4.6.4 Alarms and alarm messages ..................................................................................................... 54 10/15/2015 Version Page 2 of 71 User Manual Parametrys Ver 2.1 4.7 MANAGING THE COLLECTED DATA .......................................................................................................... 55 4.7.1 Analyzing recorded data ............................................................................................................ 55 4.7.2 Recorded data management ..................................................................................................... 55 4.7.3 Recorded data sharing ............................................................................................................... 56 4.7.3.1 4.7.3.2 Data printing .................................................................................................................................... 56 Data transmission ............................................................................................................................ 56 4.8 HELP .................................................................................................................................................... 57 4.8.1 Help with using medical devices ................................................................................................ 57 4.8.2 Nurse protocols (optional) .......................................................................................................... 57 4.8.3 Remote control ........................................................................................................................... 57 5. SOFTWARE UPDATE ............................................................................................................................ 58 6. TECHNICAL FEATURES OF THE MONITOR ...................................................................................... 59 6.1 6.2 6.3 6.4 6.5 6.6 6.7 MAIN FEATURES .................................................................................................................................... 59 ECG MONITORING ................................................................................................................................ 59 BREATHING RATE .................................................................................................................................. 60 OXIMETRY (SPO2) ............................................................................................................................... 60 BLOOD PRESSURE (NIBP) (NON-INVASIVE BLOOD PRESSURE) ................................................................ 60 CENTRAL (MAIN) UNIT ............................................................................................................................ 60 PROTECTING COVER ............................................................................................................................. 61 7. ELECTROMAGNETIC EMISSIONS....................................................................................................... 62 8. MAINTENANCE...................................................................................................................................... 65 8.1 8.2 8.3 8.4 8.5 8.6 8.7 CLEANING / DISINFECTION ..................................................................................................................... 65 PROCEDURE TO FOLLOW AFTER A DEVICE’S FALL .................................................................................... 65 PROCEDURE TO FOLLOW IN CASE IT RAINS OR SNOWS ............................................................................. 65 RESET PROCEDURE .............................................................................................................................. 65 METROLOGICAL CHECK ......................................................................................................................... 66 PRODUCT SCRAP TREATMENT ............................................................................................................... 66 CHECKING THE PRESSURE STATIC ACCURACY OF THE BLOOD PRESSURE ARM CUFF / AIR LEAKAGE MEASUREMENT OF THE BLOOD PRESSURE ARM CUFF. ...................................................................................... 66 9. TRAINED USERS ................................................................................................................................... 68 10. TROUBLESHOOTING ........................................................................................................................... 69 10.1 10.3 10.4 10.5 10.6 11. FORCED SHUT DOWN OF THE SYSTEM – RESET FUNCTION .................................................................. 69 SOFTWARE MALFUNCTIONING ............................................................................................................ 69 W IRED SENSORS MALFUNCTIONING ................................................................................................... 69 CHARGING LIGHT OF THE MONITOR IS ORANGE OR RED, WITHOUT ANY SOUND SIGNAL ......................... 69 CHARGING LIGHT OF THE MONITOR IS RED, WITH PIERCING SOUND SIGNAL .......................................... 70 PARSYS TELEMEDICINE WARRANTY AND AFTER-SALES SERVICE ........................................... 71 10/15/2015 Version Page 3 of 71 User Manual Parametrys Ver 2.1 We thank you for acquiring a multiparametric monitor Parametrys. We hope it will bring you full satisfaction in your everyday medical practice. 1. Components of the Parametrys kit 1.1 Components Please make sure that your Parametrys monitor includes all of the following: Standard monitor version: 1 multiparametric monitor equipped with: o 1 reinforced touch screen o 1 oximeter cable equipped with a finger sensor [SPO2] o 1 blood pressure cable equipped with standard sizes armband [NIBP]: Adult: Child: Infant: Large: 1 medical power cable (FRIWO: FW7405M/12) 1 User Manual Parametrys - EN 1 Warranty Certificate - EN Depending on the selected options: 1 ECG cord equipped with banana plugs [ECG] 1 dock station 1 12-lead Telecardia ECG 1 Telecardia Patient cable with 3 secured banana plugs 4 mm 1 arm limb clip – RED (AvR) 1 arm limb clip – YELLOW (AvL) 1 arm limb clip – GREEN (AvF) 1 12 to 18-lead Cardialys ECG 1 Cardialys Patient cable* (according to options) : o 12-lead o 18-lead 1 arm limb clip – BLACK (N) 1 “RESET” cable for ECG 1 car power cord 12V 1 water spray Ref: 25-013 Ref: 40-022 Ref: 23-020 Ref: 23-063 Ref: 23-056 Ref: 23-057 Ref: 23-058 Ref: 23-033 Ref: 16-004 Ref: 37-022 Ref: 37-003 Ref: 23-039 Ref: 25-020 Ref: 25-001 Ref: 23-029 Ref: 36-007 Ref: 36-008 Ref: 36-011 Ref: 25-005 Ref: 23-023 A or B Ref: 23-024 A or B Ref: 36-020 Ref: 23-051 Ref: 23-022 Ref: 36-006 In the event that one of the above elements was missing, please contact the After-Sales Service mentioned in the section 11. * Patient cables can have several types of plugs: 4mm banana plugs (Version B) or 4mm clip (Version A); this type should be specified when ordering. 10/15/2015 Version Page 4 of 71 User Manual Parametrys Ver 2.1 1.2 List and meaning of the symbols used Warning: consult attached documents Please read the notice BF type applied part Do not dispose of in the bin but through the appropriate recycling channels. Non-ionizing radiation Product manufactured by PARSYS Telemedecine Device climatic range of use or storage S/N Serial number Medical device European compliance 10/15/2015 Version Page 5 of 71 User Manual Parametrys Ver 2.1 1.3 Warnings PARSYS Telemedicine draws the attention of the user on the following points regarding: Using the device for one patient at a time Using Parametrys is exclusively to medical diagnosis of a single patient at a time. It cannot be used to establish a medical diagnosis of several patients simultaneously. It is therefore appropriate to user Parametrys to ensure that the equipment used is reserved for one patient only. Presence of other similar medical device in the area of use There may be a danger if alarm presets are used for a similar device to the Parametrys monitor, in a given area, that is to say another medical device that would measure the same parameter as the measured one by Parametrys: in the same area of use with different alarm limits. Alarm signals disabled: no visual or audible signal will only appear if the measurement alarms limits are exceeded Visual and audio alarm signals are totally disabled when: The measurement mode of the signal is not active, The user does not check the "Enabled" box in the alarms settings for the measurement (FC, SPO2, NIBP and RESP) (see 4.6.1). Presence of a high frequency surgical equipment in the area of use There may be a risk (burning) if using a high-frequency surgical device together with Parametrys in a given area. It is therefore imperative not to use these two devices simultaneously. Use of another electro-medical equipment connected to the patient There may be a risk if using another electro-medical device together with Parametrys on the same patient. It is up to the user to get information in advance on possible risks related to the simultaneous use of such equipment and Parametrys on the same patient. Use a defibrillator on the patient connected to Parametrys The Parametrys monitor is protected against defibrillation shocks. After a defibrillation shock, a delay of about 5 seconds is however necessary for the resumption of 5-lead ECG monitoring. 10/15/2015 Version Page 6 of 71 User Manual Parametrys Ver 2.1 Using the oximetry sensor (SPO2) on the patient It is important that the patient be as quiet and motionless as possible to avoid any unwanted movement that could lead to the appearance of motion artifacts inducing a SpO² value too low or a poor signal quality. It is also important to take into account of a possible low peripheral circulation of the patient (low perfusion) which could result in the appearance of motion artifacts inducing a SpO² value too low or a poor signal quality. Materials in contact with the skin The device is designed and manufactured to avoid any risk posed by the materials in contact with the patients or the user. The device is compliant with the materials biocompatibility directives. The device’s materials don’t induce any toxicity, effect or residual risks for children, pregnant and nursing women. 10/15/2015 Version Page 7 of 71 User Manual Parametrys Ver 2.1 2. Device description 2.1 General introduction 2.1.1 Components Parametrys includes the following two items: A central unit including a touch screen, wired sensors and one storage pocket, Optional: the dock including 2 storage and charging compartments for portable Bluetooth ECG from PARSYS Telemedicine: Telecardia and Cardialys. Cardialys© ECG Compartment Movable central unit Handle Telecardia© ECG Compartment Knob to extract the central unit Opening knob 1. Monitor with docking station 2. Monitor without dock Parametrys is a multiparametric monitor with a touch screen and autonomous battery. It helps to measure: in Exam mode, the monitor can take the following physiological measures: o the pulse’s oximetry (SpO² in %), o the heart rate (number of beats/min), o the non-invasive blood pressure measures (in mm of mercury). in Monitoring mode, the monitor can observe the following measures: o the pulse’s oximetry (SpO² in %), o the heart rate (number of beats/min), o the non-invasive blood pressure measures (in mm of mercury), o the respiratory rate (number of breathings/min) (optional), o a 5-lead ECG tracing (optional). 10/15/2015 Version Page 8 of 71 User Manual Parametrys 2.1.2 Ver 2.1 Integrated wired sensors Wired sensors are located in the black back pocket with a magnetic clasp: Blood pressure cable and arm cuff, Optical sensor of oximetry, Optional 5-lead ECG cable, with clips plugs. Blood pressure armband 3 to 5-lead ECG 3. Front side Oximeter sensor 4. Back side, storage pocket open Sensors and accessories are supplied with the monitor: Do NOT USE other models of sensors and accessories without having previously validated the compliance with PARSYS Telemedicine. 2.1.3 Non wired Bluetooth sensors (optional) As an option, your monitor may be equipped with a dock linked to the Telecardia and Cardialys ECGs. The devices are paired with the monitor. They can be stored and recharged in their compartment. 10/15/2015 Version Page 9 of 71 User Manual Parametrys 2.1.4 Ver 2.1 Indicators & buttons Touch screen Power plug On / Off Button Charging indicator of the Cardialys ECG Charging indicator of the monitor Charging indicator of the Telecardia ECG 5. Indicators and buttons Button: in front, a single button turns the monitor on and off (ON/OFF button). Connector: in front, a single connector (POWER 12V DC) used to plug the power cord. Charging indicator of the Monitor: Turned off: no power cable is connected to the monitor Blinking GREEN light: charge in progress Non-blinking GREEN light: monitor is fully charged (100%). Charging indicator of the Telecardia and Cardialys ECGs: Turned off: no ECG device in the compartment or ECG device fully charged (100%) Blinking GREEN light: charging in progress Non-blinking GREEN light: ECG device is fully charged (100%) (the light switch off then). If the charging indicator of the Monitor is ORANGE or RED, a major malfunctioning is signaled (see Troubleshooting, chapters 10.5 and 10.6). 10/15/2015 Version Page 10 of 71 User Manual Parametrys 2.1.5 Ver 2.1 Optional: using the ECG compartments of the dock To open and close the compartments, follow the instructions hereafter: Press on the bottom of the orange handle located along the compartment Open by using the slot located on top of the handler. 6. Opening of the compartment To guarantee the best transport conditions and connections at the charging decks, the ECG devices and must be placed in their compartments, according to the below images 7 and 8. 7. Right compartment for the Telecardia ECG 2.1.6 8. Left compartment for the Cardialys ECG Optional: extracting the monitor from its dock To extract and reinsert the central unit, please follow the instructions hereafter: Open the orange knobs located on each side of the transportation handle (see image 9) Pull the knobs up in a vertical position to clear the way for the extraction of the central unit (see image 10). 9. Opening knob 10/15/2015 Version 10. Extracting the central unit Page 11 of 71 User Manual Parametrys Ver 2.1 2.2 Functionalities 2.2.1 Using the Exam mode The user chooses his desired exams by pushing on the buttons of the device: Pulse’s oximetry (SpO² in %) Non-invasive pressure (in mm of mercury) optional: Telecardia ECG optional: Cardialys ECG 2.2.2 Using the Monitoring mode The user presses on the “Monitoring” button to turn on the monitoring screen. It is possible to capture the image of the selected settings on screen and transmit it. 11. Monitoring screen 2.2.3 Data transmission Parametrys can handle Bluetooth, GPRS and Ethernet network connections. An active 3G chip can be integrated in the monitor as an option. The Parametrys monitor can communicate via Bluetooth with a Mobile Pilot (TPL Systems) and transmit data compatible with the emergency radio network ANTARES. 10/15/2015 Version Page 12 of 71 User Manual Parametrys 2.2.4 Ver 2.1 Data printing Parametrys has a compartment made for the USB connectors, located at the back of the monitor. The USB plugs can be used to connect, for instance, a compatible printer. Connecteurs USB connectors USB 12. Location of the USB plugs It is also possible to connect a Bluetooth wireless mobile printer to the monitor. 10/15/2015 Version Page 13 of 71 User Manual Parametrys Ver 2.1 2.3 Recharging the monitor Parametrys has its own power with rechargeable batteries: Battery type: 2 LIPO (8,4v) elements, with a safety circuit of 6,5 Ah Running life and charging indicator: 4h in sleep mode, 2h in full usage Charging time: 2h30 Number of batteries delivered: one, internal and fixed. Parametrys is delivered without a change of battery: a battery change can only be done by the After Sales Services crew of PARSYS Telemedicine. 2.3.1 Power cable A low voltage power is necessary to ensure that the battery can be charged and that the Parametrys can be used from a 12V plug (vehicle) or wall plug (100 to 250V). Always use the given sector’s plug to power the monitor otherwise irreversible damages could occur and would not be covered by the device’s warranty. . Power plug Charging light 13. Location of the power connector and charging indicator 2.3.2 Battery’s level of the monitor The symbol representing a level of battery is located on the top right side of the monitor’s screen when it is turned on: it must be checked frequently. 14. Battery levels A window appears on the screen when the monitor level battery reaches 12% 10/15/2015 Version Page 14 of 71 User Manual Parametrys Ver 2.1 2.4 Turning the device on and off To turn on the device, press the ON/OFF button until the green light appears. Parametrys will be operational after around 1 minute. To turn off the device, press the “Turn off / Exit” button of the software. Using the “ON/OFF” button must stay rare. ON/OFF Button 15. ON/OFF button To turn on the device: Press the ON/OFF button until the green light is on: PARSYS Telemedicine logo appears with the message "Processing"; software home screen appears after about 1 minute; your monitor is now operational. As a standard PC: - press once the ON/OFF button for 1 to 2 seconds is enough to turn on the monitor, even if the display doesn't light up immediately; the continued pressure on the button should only be used to force the shutdown of the system in case of freeze. To turn off the device: Preferably use the "Quit" button in the software. Or BRIEFLY press (less than 2 seconds) on the ON/OFF button. Using the ON/OFF button in the front of the device to turn off the monitor should be exceptional. 10/15/2015 Version Page 15 of 71 User Manual Parametrys Ver 2.1 2.5 Adjusting the angle of the monitor’s screen Parametrys has its own adjusting clip with a vertical orientation, allowing an adjustment of the screen’s angle to the surrounding light. 16. Adjusting foot 2.6 Hanging the monitor to a stretcher Parametrys has 2 straps placed around the transport handle. These straps can be placed outwardly to hang the monitor to a standard stretcher. 17. Straps for stretcher 10/15/2015 Version Page 16 of 71 User Manual Parametrys Ver 2.1 3. Setup The Parametrys monitor is delivered with a pre-integrated and operational software. No software download or setup is necessary. In case of software malfunctioning, we please ask that you: NEVER attempt to fix the software by yourself. Contact the After-Sales Service of PARSYS Telemedicine. 10/15/2015 Version Page 17 of 71 User Manual Parametrys Ver 2.1 4. Use sequences 4.1 Parametrys’s main screen 18. Main screen Indicators: : Internal card connection : Bluetooth network : GPRS network : Date : Time : Monitoring stopwatch (starts at each activation of the monitoring function). : Adjusting the volume : Adjusting the brightness : Battery levels 10/15/2015 Version Page 18 of 71 User Manual Parametrys Ver 2.1 4.2 Sound and brightness adjusting Brightness indicator: Press on the icon in the upper right of the screen to access to the settings window. After setting, press on the “Accept” button (or “Cancel”) to make it disappear. Sound indicator: Press on the icon in the upper right of the screen to access to the settings window. After setting, press on the “Accept” button (or “Cancel”) to make it disappear. Whatever level applied, the sound may not be set below 50%. Each time you start the monitor, the sound is at its maximum in order to reactivate the default alarms settings. Sound setting impacts all the monitor’s sound signals, including ALARMS. When setting alarms, please always check the level sound setting of the monitor. 10/15/2015 Version Page 19 of 71 User Manual Parametrys Ver 2.1 4.3 Usage principles 4.3.1 After taking and validating measures If no patient has been identified before, the following message will appear: « Patient’s information seems incomplete. Go to Patient page? » You can then go back to the identification function in order to link a patient’s name with data. 4.3.2 To keep, cancel or retake measures: Press again the sensor’s button: « Delete »: The measure on screen is not recorded. « Restart »: Retake a measure, the previous measure will no longer be available. « Back »: Return to the main screen, the measure is recorded. In exam mode (no monitoring), we recommend that you perform the measures and then use the “Finalize” button. If you use the “Finalize” button after each measure, you must enter each time the Patient ID. Keeping the measure on screen is not enough to record it: you must then press “Finalize”. 10/15/2015 Version Page 20 of 71 User Manual Parametrys 4.3.3 Record or delete data In the bottom menu, the « Finalize » button Ver 2.1 « Back »: « Save »: « Email »: « Delete »: allows the following: Return to the main screen, the measures are retained but not recorded. Save the measures taken in the final exam file. Email the measures taken via a GPRS or Ethernet connection. Clear all the measures taken (confirmation needed). Keeping the measures on the screen is not enough to save them permanently: you have to use the "Finalize" button. 10/15/2015 Version Page 21 of 71 User Manual Parametrys Ver 2.1 4.4 Exams protocols 4.4.1 Capturing patient data 19. Edit Patient Information screen 1) 2) 3) 4) Press the button « EDIT PATIENT INFORMATIONS » on the main screen. Place the cursor on the desired field. Capture data using the touch keyboard. Two actions are available: « Back »: Validate the captured Patient’s information and go back to the main screen. « Reset »: Erase the captured Patient’s information. If you take measures without first capturing patient data, a reminder appears during data recording. 10/15/2015 Version Page 22 of 71 User Manual Parametrys 4.4.2 Ver 2.1 Setting devices 1. Press on the “Settings” button on the main screen. 2. Choose the chosen device to access its control panel. « Back »: « Oxi »: « Pressure »: « Automation »: « Support »: « E-mail »: « Language »: « Calibration »: Optional: « Telecardia »: « Cardialys »: 4.4.3 Return to the main screen. Set the oximetry measurement SPO2. Set the blood pressure measurement NIBP. Set data printing, converting and recording. Allow remote control of the device by an operator. Set the e-mail system. Choose the device use language. Calibrate the device blood pressure. Set Télécardia ECG. Set Cardialys ECG. Using the thermometer in Exam mode 1) Press the button « Edit Temperature » on the main screen. 2) Take the patient’s temperature. 3) Enter the temperature on the screen with the buttons “+” and “-“, then press the « Accept » button to validate the data. 10/15/2015 Version Page 23 of 71 User Manual Parametrys 4.4.4 10/15/2015 Version Ver 2.1 Using in the blood pressure device in Exam mode Page 24 of 71 User Manual Parametrys Ver 2.1 C. Press the “START BLOOD PRESSURE (NIBP)” button on the main screen to start the capture. D. In any case, the NIBP control panel appears. Check the settings then press the “Accept” button start the capture. E. At any time during the capture, you can stop the device by pressing the « Cancel » button F. When the capture is complete, the final measures appear on the main screen. 10/15/2015 Version Page 25 of 71 . to User Manual Parametrys 4.4.5 10/15/2015 Version Ver 2.1 Using the oximeter in Exam mode Page 26 of 71 User Manual Parametrys Ver 2.1 C. Press the « START OXIMETER (SPO2) » button on the main screen to start the capture. D. At any time during the capture, you can stop the device by pressing the « Cancel » button E. When the capture is complete, the final measures appear on the main screen. 10/15/2015 Version Page 27 of 71 . User Manual Parametrys 4.4.6 Ver 2.1 Optional: using the Telecardia ECG in Exam mode If you have a Telecardia ECG, we please ask that you follow the procedures hereafter in order to obtain a simultaneous 12-lead 12-channel ECG trace from the patient: 1) Press the « START TELECARDIA (ECG) » button on the main screen, the message « READY TO CAPTURE. » appears. 2) You can then start the ECG exam, the trace will be transmitted automatically to the monitor. 10/15/2015 Version Page 28 of 71 User Manual Parametrys 10/15/2015 Version Ver 2.1 Page 29 of 71 User Manual Parametrys 10/15/2015 Version Ver 2.1 Page 30 of 71 User Manual Parametrys 10/15/2015 Version Ver 2.1 Page 31 of 71 User Manual Parametrys 10/15/2015 Version Ver 2.1 Page 32 of 71 User Manual Parametrys 10/15/2015 Version Ver 2.1 Page 33 of 71 User Manual Parametrys 4.4.7 Ver 2.1 Optional: using the Cardialys ECG in Exam mode If you have the ECG Cardialys option, we please ask that you follow the procedures hereafter in order to obtain a simultaneous 12 to 18-lead ECG trace from the patient: 1) Press the « START CARDIALYS (ECG) » button on the main screen, the message « READY TO CAPTURE. » appears. 2) You can then start the ECG exam, the trace will be transmitted automatically to the monitor. 10/15/2015 Version Page 34 of 71 User Manual Parametrys 10/15/2015 Version Ver 2.1 Page 35 of 71 User Manual Parametrys 10/15/2015 Version Ver 2.1 Page 36 of 71 User Manual Parametrys 10/15/2015 Version Ver 2.1 Page 37 of 71 User Manual Parametrys 10/15/2015 Version Ver 2.1 Page 38 of 71 User Manual Parametrys 10/15/2015 Version Ver 2.1 Page 39 of 71 User Manual Parametrys 4.4.8 Ver 2.1 Display of the ECG traces obtained with Telecardia or Cardialys It is possible to examine a trace in greater details by using the following functions: Examination of the trace The cursor allows moving around the tracing on screen: - The arrows can move the trace, - The round central button can move the cursor itself. The « + » and « - » buttons help enlarge or shrink the trace’s image. Settings The « Settings » button is used to choose display formats and trace’s measures: : Strips : V Report : H Report : Grid : Measures : Calipers « Strips »: leads are displays in strips mode, classified vertically. « V Report »: vertical printing format, « portrait » mode. « H Report »: horizontal printing format, « landscape » mode. « Grid »: display or non-display of the background’s grid. « Measures »: display or non-display of ECG measures: « Calipers »: display or non-display of Calipers (measurement tool). 10/15/2015 Version Page 40 of 71 User Manual Parametrys Ver 2.1 4.5 Monitoring 4.5.1 Launching the Monitoring’s function Press the « Monitoring » button on the main screen: 20. Monitoring screen : Start taking measures. : Activate or turn off the sound signal during measures. : Activate and adjust the audible and visual alarm signals. : View and validate the alarm messages. 10/15/2015 Version Page 41 of 71 User Manual Parametrys 4.5.2 Ver 2.1 Setting the devices 1. Press on the « Settings » button on the monitoring screen bottom. 2. Press the chosen device to access the control panel. « Back »: « Oxi »: « Pressure »: « Resp »: « Automation »: « Volume »: « E-mail »: « Language »: 4.5.3 Return to the monitoring screen. Set the oximetry measurement SPO2. Set the blood pressure measurement NIBP. Set the respiration measurement RESP. Set data printing, converting and recording. Adjust the volume of the device. Set the e-mail system. Choose the device use language. Handling support tools: Stopwatch, Timer, Metronome 1. Press the « Tools » button 2. Choose: on the monitoring screen. « Stopwatch »: Start the Stopwatch support tool. « Metronome »: Start the Metronome support tool. « Timer »: Start the Timer support tool. 3. Start the selected tool by pressing the corresponding button. 10/15/2015 Version Page 42 of 71 User Manual Parametrys 4.5.5 10/15/2015 Version Ver 2.1 Using the blood pressure device in Monitoring mode Page 43 of 71 User Manual Parametrys C. Start the Monitoring mode by pressing the “Monitoring” button D. To start the blood pressure (NIBP) monitoring, press on the button the right of the Monitoring screen. Then press on the “Start” button Ver 2.1 on the main screen. localized on the NIBP area on to start the NIBP monitoring. E. The NIBP control panel appears. Check the settings, then press the “Accept” button monitoring. to start the F. The NIBP measure is automatically displayed on the NIBP area. 10/15/2015 Version Page 44 of 71 User Manual Parametrys 4.5.6 10/15/2015 Version Ver 2.1 Using the oximeter in Monitoring mode Page 45 of 71 User Manual Parametrys C. Start the Monitoring mode by pressing the “Monitoring” button on the main screen. D. To start the oximetry (SPO2) monitoring, press on the button of the Monitoring screen. Then press on the “Start” button Ver 2.1 localized on the SPO2 area on the right to start the SPO2 monitoring. E. The SPO2 measure is automatically displayed on the SPO2 area. 10/15/2015 Version Page 46 of 71 User Manual Parametrys 4.5.7 Ver 2.1 Precisions on using the optional ECG’s cable with 5-lead clips ECG, Breathing and Heart Rates: 10/15/2015 Version Page 47 of 71 User Manual Parametrys E. Start the ECG Monitoring by pressing the “Monitoring” button F. To start the heart rate (HR) monitoring, press on the button the Monitoring screen. Then press on the “Start” button is automatically displayed on the HR area. on the main screen. localized on the HR area on the right of to start the HR monitoring. The HR measure G. To start the breathing rate (RESP) monitoring, press on the button the right of the Monitoring screen. Then press on the “Start” button The RESP measure is automatically displayed on the RESP area. 10/15/2015 Version Ver 2.1 localized on the RESP area on to start the RESP monitoring. Page 48 of 71 User Manual Parametrys 4.5.8 Recording and sending the monitoring data 1. At all times, you can record or send data by pressing the “Capture” button screen. 2. Choose one of the following actions: Ver 2.1 « Back »: « Save »: « Email »: 10/15/2015 Version on the monitoring Return to the monitoring screen. Save the capture in the final exam file. Email the capture via a GPRS or Ethernet connection. Page 49 of 71 User Manual Parametrys Ver 2.1 4.6 Alarms management 4.6.1 Access to alarm settings: conditions and limits High priority alarm conditions PARSYS Telemedicine has classified all alarm conditions of Parametrys monitor in high priority, and declined audible and visual alarm signals in accordance with this priority. The definition of priority levels can’t be set or modified by the user of the monitor or the Client Administrator. Limited access to the settings of the alarms system The user has the ability: enable, disable, reset audible and visual alarm signals related to a measure (HR, NIBP, SPO2, RESP), set the minimum and maximum alarm limits associated to the measure, adjust the general audio level of the device, which affects audible signals of all alarms, enable, disable and set the pause of a particular alarm. The user can not: enable or disable the visual alarm signal related to a measure without enable or disable the associated audible alarm signal (the reverse is temporarily possible via the audio pause function), enable alarm signals related to a measure if this type of measure is this measure is inactive, change the minimum audio level of the monitor (set at 50%), which affects audible signals of all alarms, change the maximum audio pause time of an alarm (set to 90 seconds). 4.6.2 Monitoring alarms settings Reading of alarm icons related to measures (HR, NIBP (S, M, D), SPO2 and RESP): 10/15/2015 Version : Alarm signal activated, with minimum and maximum values limits : Alarm signal disabled (display without measurement) : Alarm signal disabled (display during measurement) Page 50 of 71 User Manual Parametrys Enabling / Disabling an alarm signal: Press on the alarm icon alarm settings window. Ver 2.1 corresponding to the measure (HR, SPO2, NIBP, RESP) to access to the o Check the « enabled » check box to activate the corresponding measurement alarm. o Or uncheck the « enabled » check box to disable the corresponding measurement alarm. If the « Enabled » is unchecked, the alarm corresponding to the measure (HR, SPO2, NIBP, RESP) is inactive: no visual or audible signal will appear in case of measurement alarm over limits. When an alarm is disabled: o the icon appears when measuring. o the icon appears when no measuring. Resetting a disabled alarm: When an alarm is disabled, the user can program the alarm activation automatic recovery after a defined time. Press the alarm icon settings window. To activate the reset function: 1. check « Automatic reset in », 2. set the restart time using the input window, 3. then validate. Alarm limits settings: Press the alarm icon settings window. Use the touchscreen keypad to possibly change the default limits values. 1. « Finish »: save the entered value. 2. « Default »: restore the default limits values. 10/15/2015 Version corresponding to the measure (HR, SPO2, NIBP, RESP) to access to the corresponding to the measure (HR, SPO2, NIBP, RESP) to access to the Page 51 of 71 User Manual Parametrys Ver 2.1 Default alarm limits values: Caption CF Name Min Max Heart rate 15 300 NIBP S Systolic pressure 30 255 NIBP A Average pressure 20 235 NIBP D Diastolic pressure 15 220 SPO2 Saturation 0 254 RESP Breathing rate 7 150 Alarms sound level settings: Sound indicator: Press on the icon in the upper right of the screen to access to the settings window. After setting, press on the “Accept” button (or “Cancel”) to make it disappear. Whatever level applied, the sound may not be set below 50%. Each time you start the monitor, the sound is at its maximum in order to reactivate the default alarms settings. Sound setting impacts all the monitor’s sound signals, including ALARMS. When setting alarms, please ALWAYS check the level sound setting of the monitor (see 4.2). Disabled alarms in case of inactive measurement mod: If the measurement mod is inactive, visual and audible alarms are disabled by default. Presence of other similar medical device in the area of use: There may be a danger if alarm presets are used for a similar device to the Parametrys monitor, in a given area, that is to say another medical device that would measure the same parameter as the measured one by Parametrys: o in the same area of use, o with different alarm limits. 10/15/2015 Version Page 52 of 71 User Manual Parametrys 4.6.3 Ver 2.1 Alarms audio mute function It’s possible to temporarily stop the alarms audio function (not visual): Press the alarm icon Press the Audio mute icon On the screen’s top right, this icon in the menu in the screen bottom, , appears to specify the Audio mute status. The default audio mute time was set at 30 seconds. This mute time may not exceed 90 seconds. The audio mute time is determined and set by the manufacturer: in any case, it cannot be set by the user or the Client administrator. Alarms audio unmute function It’s possible to restore the audio alarms function (not visual) before the automatic recovery (set by default at 30 seconds): Press the alarm icon Press the Audio unmute icon Maximum audio mute time in the menu in the screen bottom. . The maximum audio mute time allowed by the device is 99 min 59 s. The maximum audio mute time chosen and set by the manufacturer is 90 seconds: in any case, it cannot be set by the user or the Client administrator. 10/15/2015 Version Page 53 of 71 User Manual Parametrys 4.6.4 Ver 2.1 Alarms and alarm messages When an alarm occurs, the signal is both: Audible: alarm tone (except in Audio Mute status, see 4.6.3) Visual: FLASHING RED light on the screen bottom: 21. Alarm mode on monitoring screen To stop the alarm: It is necessary to read the alarm message by pressing the “Alarms” button “Validation” button to stop the alarm: Read the message and press on the « Accept » button 10/15/2015 Version then pressing on the . Page 54 of 71 User Manual Parametrys Ver 2.1 4.7 Managing the collected data 4.7.1 Analyzing recorded data 22. Recorded exams history 1. Press on the “History” button on the main screen. 2. Use the “Up” and “Down” arrows to browse the list. 3. Press twice on the selected line to access recorded data. 4.7.2 Recorded data management 1. Press on the “Options” button on the History screen. 2. Press on the desired data management action: “Back”: “Archive (Move)”: “Archive (Copy)”: “Delete”: 10/15/2015 Version Return to the History screen. Move the exam into the file “Archives”. Copy the exam into the file “Archives”. Permanently delete the exam from the History (confirmation needed). Page 55 of 71 User Manual Parametrys 4.7.3 Ver 2.1 Recorded data sharing 22. Recorded exam display The access to the “Share” function is also possible after a capture from the monitoring screen. 4.7.3.1 Data printing 1. Press on the « Share » button on the History screen. 2. Press on the desired printing action: « Back »: « Setup »: « Preview »: « Print »: Return to the selected recorded data. Adjust the printing settings and select the printer. Open a print preview of the selected recorded data. Start printing the selected recorded data. 4.7.3.2 Data transmission 1. Press on the « Share » button on the History screen. 2. Press on the desired sending action: « Back »: « Email »: « Antares»: 10/15/2015 Version Return to the selected recorded data. Send by Email the selected recorded data. (Optional) Send via the Antares emergency network the selected recorded data. The function launches the Bluetooth searching of the Antares connected device. Page 56 of 71 User Manual Parametrys Ver 2.1 4.8 Help 4.8.1 Help with using medical devices 1. Press on the « Help » button . 2. Select the chosen device to access functioning illustrations. « Back »: « Oxi »: « Pressure »: Optional: « Telecardia »: « Cardialys »: « ECG »: 4.8.2 Return to the main screen or the previous screen. Display the oximetry SPO2 help (see 4.4.5). Display the blood pressure NIBP help (see 4.4.4). Display the Telecardia ECG help (see 4.4.6). Display the Cardialys ECG help (see 4.4.7). Display the ECG Monitoring help (see 4.5.4). Nurse protocols (optional) Press on the “Protocols” button to access the menu, then select the desired nurse protocol to display it on the screen. Arrows allow you to go from one step to another. The installation of the optional "Nursing Protocols" completely replaces the "Help" function (see 4.8.1). 4.8.3 Remote control 1. Contact the After-Sales Services of PARSYS Telemedicine (see 11.). 2. Press on the “Settings” button control by an operator. 10/15/2015 Version then press on the “Support” button to activate the device remote Page 57 of 71 User Manual Parametrys Ver 2.1 5. Software update The Parametrys monitor is delivered with a preinstalled and operational software. The possible updates are done during maintenance. For each intervention, PARSYS Telemedicine contacts you to explain the updating procedures to follow. We please ask you to: NEVER ATTEMPT to update the software by yourself, Contact the After-Sales Services of PARSYS Telemedicine for any other questions. 10/15/2015 Version Page 58 of 71 User Manual Parametrys Ver 2.1 6. Technical features of the monitor 6.1 Main features Parametrys is a monitor made for an emergency use outside: class: dimensions: weight: materials / waterproofness norm: operating temperature: recharging temperature: fret and storage temperature: operating atmospheric pressure: recharging atmospheric pressure: fret and storage atmospheric pressure: operating relative humidity: recharging relative humidity: fret and storage relative humidity: electromagnetic conformity: IIb 310 x 277 x 150 mm (without dock), 360 x 300 x 150 mm (with dock) around 4 Kg (without dock) 6 Kg (with dock) IP54 5 ~ 45° C 5 ~ 40°C -10 ~ 50°C from 700 mb to 1060 mb from 700 mb to 1060 mb from 500 mb to 1060 mb from 30% to 75% from 30% to 75% from 10% to 85% EN 60 601-1-2 60601-1 60601-2-59 60601-1-8 6.2 ECG monitoring Monitoring functions done by an integrated 3/5-lead ECG card with alarms. Monitoring selected 3 and 5-lead ECG with I, II, III, AvR, AvF, V1 to V6. (1 free electrode assignable to one of the rapid lead). Commutable leads (by ‘’touch screen’’). Selection of the horizontal or vertical gain: gain 5, 10 and 20 mm/mV Detection of the pacemaker’s spike: from 4 to 700 mV of a length comprised between 0.2 and 2ms. Range for Heart Rate’s measurements: Adult: 15-300 bpm New Born / Pediatrics: 15-300 bpm Precision: 1% of 0 to 100 bpm, 2% above Resolution: 1 bpm Protection: o Against defibrillation’s shocks (> 5kV), o Against external electromagnetic interferences (H.F.) Answers in rates: o Diagnostic modes: 0.05 to 120 Hz - Monitoring: 0.5 to 75 Hz - Operation: 1 to 25 Hz. Grading signal: 1mv +/- 5% Rejection in common mode (50-60Hz): > 80 dB Measuring range: - 20 mV ~ 2.0mV (+/- 5mV) Alarm settings: +/- 0.8 mV High and low alarms: 15 to 300 bpm 10/15/2015 Version Page 59 of 71 User Manual Parametrys Ver 2.1 6.3 Breathing rate Measure of the breathing rate done with one of the ECG wires (D1 or D2): Measuring method : Measuring range Adult, Pediatrics and New Born: Resolution: Precision: High and Low Alarms (Adult and Pediatrics): Apnea detection by impedance variations (DII) from 1 to 150 bpm 1 bpm ± 2 bpm from 1 to 150 bpm 6.4 Oximetry (SPO2) Measuring range: Resolution: Precision: Measuring range of pulse rate: Resolution: Precision: High and low Alarms: 0 ~ 100% ± 1% +/- 2 from 100 to 80%, +/-3 from 79 to 70% 0 to 254 bpm 1 bpm +/- 2bpm or 2% 0 ~ 254 bpm 6.5 Blood pressure (NIBP) (Non-invasive blood pressure) Measuring method: oscillometric Measuring mode: o Manual – Automatic (from 1 to 240mn of interval between each measure). o Automatic (customizable cycles). Unit of measure: mmHg Measuring range: Adult Systolic / Diastolic, 15 to 255mmHg Measuring resolution: 1 mm Hg Measuring precision: +/- 5mmHg on average +/- 8mmHg maximum Alarms: high and low on Systolic – Medium – Diastolic o Systolic: from 30 to 255 mmHg in adult mode, 30 to 135 mmHg in new born mode o Medium: from 20 to 235 mmHg in adult mode, 20 to 125 mmHg in new born mode o Diastolic: de 15 to 220 mmHg in adult mode, 15 to 110 mmHg in new born mode 6.6 Central (main) unit Processor: Atom Z530 (Intel) Battery recharge card compatible with car power (10V 15V DC). Power: Input: 110-240V ~/ 50-60 Hz /1.1A Output: 12v, max. current consumption 3,8A DC Power supply model: FRIWO Desktop Power Supply Model: FW7405M/12 battery: internal Lithium Polymer 7,4V/6500mAh battery life: 3 years life cycle Bluetooth connectivity version 2.0 (EDR) Class 1 (100 mW). Optional: WiFi and GPRS connectivity Static Hard disk: 8 Gb Touch screen: 10’ resistive (usage with a glove is possible). Reinforced glass slab (6mm), complies with UL1950 resistance standard (equivalent to a 500gr ball’s fall from 1.3m in the center of the slab). Screen: 10.4’ SVGA (800x600). 10/15/2015 Version Page 60 of 71 User Manual Parametrys Ver 2.1 6.7 Protecting cover The protecting cover has the following functions: Storage and recharge of the equipment and accessories. Protection index of IP54 on the entire station, except for the case made for accessories (cables, clips ...). Cushioning of the station in operation: Straps for stretcher, Transport handle, Adjusting clip. Protected (IP54) external connectivity (RJ45, RJ11) and access to protected low pressure energy (IP54). Transparent to radio waves for the correct functioning of the Bluetooth™ network (no metallic cover). Materials: PA6 + Rubber Spray finish Reinforced touch screen. Connectivity: 1 x RJ45 (Ethernet network) + 1 x USB A Host V1.1/2.0 (peripheral USB printer type) + 1 x USB B Client V1.1/2.0 (emergency USB). 10/15/2015 Version Page 61 of 71 User Manual Parametrys Ver 2.1 7. Electromagnetic emissions Table 1: Directives and MANUFACTURER’S statement – ELECTROMAGNETIC EMISSIONS For all DEVICES and EM SYSTEMS Directives and manufacturer’s statement – electromagnetic emissions The device is made to be used in the electromagnetic environment specified below. The client or user of the device must ensure that the device is used in such environment. Emission trials Conformity RF Emissions CISPR 11 Group 1 RF Emissions CISPR 11 Harmonic Emissions CEI 61000-3-2 Pulse fluctuations/ Flicker CEI 61000-3-3 Electromagnetic environment – directives The device uses RF energy only through his internal functions. As a consequence, its RF emissions are very weak and are not likely to cause interferences in a nearby electronic device. Class B Non applicable The charging power box (catalogue product) must solely be used with the device in sleep mode, disconnected from the patient. Non applicable Table 2 – Directives and MANUFACTURER’S statement – electromagnetic IMMUNITY For all DEVICES and EM SYSTEMS Directives and manufacturer’s statement – electromagnetic immunity The device is made to be used in the electromagnetic environment specified below. The client or user of the device must ensure that the device is used in such environment. Immunity trials Trial level CEI 60601 Conformity level Electromagnetic environment – directives Electrostatic shocks (ES) +/- 6 kV in contact +/- 8 kV in the air Conforms 3 A/m Conforms Floors must be made of wood, concrete or ceramics. If the floors are topped with synthetic materials, it is important that the relative humidity remains at 30% at least. Magnetic fields at the rate of the electric network must have the distinctive levels of a representative place located in a commercial or hospital environment. CEI 61000-4-2 Magnetic field at the rate of the electric network (50/60 Hz) CEI 61000-4-8 10/15/2015 Version Page 62 of 71 User Manual Parametrys Ver 2.1 Table 3 – Directives and MANUFACTURER’S statement – electromagnetic IMMUNITY For all DEVICES and EM SYSTEMS Directives and manufacturer’s statement – electromagnetic emissions The device is made to be used in the electromagnetic environment specified below. The client or user of the device must ensure that the device is used in such environment. Emission trials Trial level CEI 60601 Conformity level Electromagnetic environment – directives The portable and mobile RF communicating devices should be not used nearer of any part of the medical devices, including cables, than the recommended separation distance, calculated from the transmitter frequency applicable equation. Recommended separation distance d= 1,2√P RF conducted disturbances CEI 61000-4-6 3 Veff from 150kHz to 80MHz 3 Veff d= 1,2√P from 80MHz to 800MHz d= 2,3√P from 800MHz to 2,5GHz RF radiated disturbances CEI 61000-4-3 3 V/m from 80 to 2,5GHz 3 V/m where P is the maximum output power of the transmitter in watts (W) according to the transmitter manufacturer and d is the recommended separation distance in meters (m) of separation. It should that field strengths from fixed RF transmitters, as determined by an electromagnetic survey on site a , should be less than the compliance level in each frequency range b.. Interferences may occur in the vicinity of equipment marked with the following symbol: NOTE 1: to 80MHz and to 800MHz, the higher d range frequency applies. NOTE 2: These guidelines may not apply in all situations. Electromagnetic propagation is affected by absorption and reflection from structures, objects and people. a Field strengths from fixed transmitters, such as base stations for radio (cellular / cordless) telephones and land mobile radios, amateur radio, AM / FM radio and TV broadcast cannot be predicted theoretically with accuracy. To assess the electromagnetic environment due to fixed RF transmitters, it should be considered to proceed to an electromagnetic survey on site. If the measured field strength in the location where the medical device is used, exceeds the applicable RF compliance level above, it is necessary to observe the behavior of the medical device, to check that the operation is normal. If abnormal performances are observed, additional measures may be necessary, such as reorienting or repositioning of the medical device on its operation site. b In the frequency range of 150kHz to 80MHz, it is appropriate that the field strengths are smaller than 3 V/m. 10/15/2015 Version Page 63 of 71 User Manual Parametrys Ver 2.1 Recommended separation distances between portable and mobile RF communicating devices and the medical device. The medical device is intended for use in an electromagnetic environment where radiated RF disturbances are controlled. The customer or the user of the device can help to prevent electromagnetic interference by maintaining a minimum distance between portable and mobile RF communicating device (transmitter), and the medical device, as recommended below, according to the maximum power emission of the communication device. Transmitter maximum assigned power output (W) Separation distance according to the transmitter frequency (m) from 150kHz to 80MHz from 150kHz to 80MHz from 150kHz to 80MHz d= 1,2√P d= 1,2√P d= 2,3√P 0,01 0,12 0,12 0,23 0,1 0,38 0,38 0,73 1 1,2 1,2 2,3 10 3,8 3,8 7,3 100 12 12 23 For transmitters whose maximum assigned transmission power is not given above, the recommended separation distance d in meters (m) can be estimated by using the transmitter frequency applicable equation, where P is the characteristic of the transmitter maximum transmission power in watts (W) according to its manufacturer. NOTE 1: to 80MHz and to 800MHz, the higher d range frequency applies. NOTE 2: These guidelines may not apply in all situations. Electromagnetic propagation is affected by absorption and reflection from structures, objects and people. 10/15/2015 Version Page 64 of 71 User Manual Parametrys Ver 2.1 8. Maintenance 8.1 Cleaning / Disinfection Cleaning and disinfection of the device can be done using cotton or a wipe soaked with a product like STERANIOS or an equivalent (glutaraldehyde solution 2%) on the plastic box. If some items have been in contact with blood, the recommended disinfecting product is INCIDIN FOAM. 8.2 Procedure to follow after a device’s fall Do NOT use the device if there are any mechanical damages to it after the fall. The device must be returned immediately to the After-Sales Services of PARSYS Telemedicine. 8.3 Procedure to follow in case it rains or snows When it rains or snows, splashing water drops or snowflakes on the touch screen can disrupt the use of the software (trigger non-desired functionality). It's necessary to check that the water drops or snowflakes don't generate non-desired actions to avoid the risk of errors or bugs. In case of rain or snow, we encourage you to protect as much as possible the operating touch screen and regularly wipe the water drops or the snowflakes on the touch screen. 8.4 Reset procedure If the device is still locked/blocked, the Reset function can be activated using the instructions hereafter: Use a fine tip tool (paper clip or sharp pencil), Turn the monitor around and open the back compartment, Move the sensors away to find the connectors’ compartment, Press the tip of your tool in the opening of the Reset button located at the top left corner of the compartment, Press and hold for a few seconds then release: the system reboots automatically. Connectors Connecteurs 23. Location of the connectors 10/15/2015 Version Bouton RESET RESET Button 24. Location of the Reset button Page 65 of 71 User Manual Parametrys Ver 2.1 8.5 Metrological check The metrological check of the device has been fixed to 1 year maximum, and must be done by the technical services of PARSYS Telemedicine. That service alone is the only one able to guarantee the operational metrological performances of the device during its entire running life. 8.6 Product Scrap Treatment According to the directive 2002/96/CE relating to DEEE electronic and electric devices, do not throw away in regular trash. Please bring waste to specialized collection points. 8.7 Checking the pressure static accuracy of the blood pressure arm cuff / Air leakage measurement of the blood pressure arm cuff. To check the static accuracy and the arm cuff air leakage pressure, you should first made a test bench by following one of two possible schemes: Medical Device Arm cuff 1 NIBP Input Manometer Inflating device 2 Arm cuff Medical Device NIBP Input Manometer When the test bench is made, please follow the following procedure: 1. From the main screen, press the “Settings” button 2. Press on the “Calibration” button 10/15/2015 Version . . Page 66 of 71 User Manual Parametrys Ver 2.1 3. A dialog allows the operator to select the initial arm cuff pressure, depending on the operation mode, either Adult, Neonatal or even manual. This value can be adjusted within the following ranges: Adult: 140-180 mmHg Neonat: 70-100 mmHg Manual: 10-200 mmHg 25. Arm cuff initial pressure settings window 4. During the test, a dialog displays in continuous the arm cuff pressure measure. 26. Arm cuff pressure measure test dialog 10/15/2015 Version Page 67 of 71 User Manual Parametrys Ver 2.1 9. Trained users It is imperative that users of Parametrys: have medical knowledge of doctor or nurse, hold the associate degree, have been trained in use of the device. 10/15/2015 Version Page 68 of 71 User Manual Parametrys 10. Troubleshooting 10.1 Forced shut down of the system – Reset function Ver 2.1 When the system is locked/blocked, the forced shut down of the Parametrys monitor can be obtained by pressing continuously on the ON/OFF button on the front side of the monitor, until the green light of the ON/OFF button disappears. If the device remains blocked, the Reset function can be activated (see procedure described in 8.4.). 10.2 No main screen when the device lights on When turning on the monitor, the software main screen (see 4.1) should appear after about one minute. If the main screen is not compliant to the screen showed in 4.1 (following the options): You NEVER ATTEMPT to modify the software on your own. You contact the After-Sales Services of PARSYS Telemedicine for any questions. 10.3 Software malfunctioning The Parametrys monitor is delivered with a pre-installed, operational software. The possible software updates are done during maintenance. For each update, PARSYS Telemedicine will contact you and explain to you the updating procedure. We please ask that: You NEVER ATTEMPT to install an update on your own. You contact the After-Sales Services of PARSYS Telemedicine for any questions. 10.4 Wired sensors malfunctioning We please ask you to check that: The sensors are correctly plugged in, The capturing protocol is respected (see 4.4), The sensors do not show any sign of damage. 10.5 Charging light of the monitor is Orange or Red, without any sound signal When the charging light of the monitor is Orange or Red, there is a critical low level of battery. In that case, you must: Turn off the device immediately: o By pressing the ON/OFF button in front of the monitor for at least 3 seconds, until the light of the button disappears, o Or by applying the reset procedure described in 8.4, Plug the monitor on a power source with the provided cord, Wait for the full recharge, Restart the monitor. 10/15/2015 Version Page 69 of 71 User Manual Parametrys 10.6 Ver 2.1 Charging light of the monitor is Red, with piercing sound signal When the charging light of the monitor is RED accompanied by a piercing sound single, Windows signals a major error. In that case, you must immediately turn off the device: By pressing the ON/OFF button in front of the monitor for at least 3 seconds, until the light of the button disappears, Or by applying the reset procedure described in 8.4. You can then restart the monitor. If you cannot restart the monitor, it must absolutely be sent back to the After-Sales Services of PARSYS Telemedicine. 10/15/2015 Version Page 70 of 71 User Manual Parametrys 11. Ver 2.1 PARSYS Telemedicine Warranty and After-Sales Service The Customer agrees to comply with the Warranty Conditions listed on the Warranty Certificate accompanying the Equipment. The Equipment is supplied with a one-year (1) warranty during which period the Customer will be able to exchange Equipment found to have a latent defect and subject to the Customer having informed PARSYS Telemedicine thereof in writing and in detail. In the event of a functional fault or failure of the Equipment, the Customer may contact PARSYS Telemedicine: by sending an e-mail to [email protected], or by calling the PARSYS Telemedicine After-Sales Service: o Monday to Friday, 10 a.m. to 12.30 p.m. and 2 p.m. to 6 p.m., except for holidays, o at +33 (0)1 60 31 51 71 or by sending a letter by recorded delivery with acknowledgement of receipt to: PARSYS Télémédecine - After-Sales Service 5-7, avenue de Paris 94300 Vincennes - FRANCE The PARSYS Telemedicine After-Sales Service identify the nature of the fault or failure of the Equipment before carrying out any repairs or replacing the defective Equipment. Beyond the warranty period, the Customer has the possibility of subscribing to a maintenance contract with the PARSYS Telemedicine sales service. 10/15/2015 Version Page 71 of 71