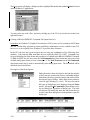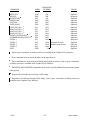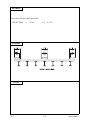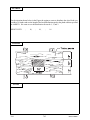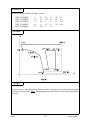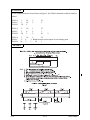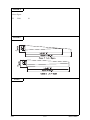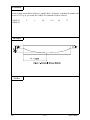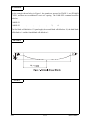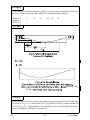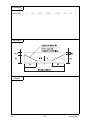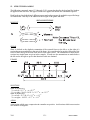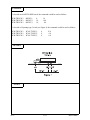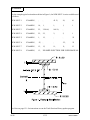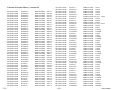
1
Bridge Rating & Analysis of Structural Systems BRASS - GIRDER™ Version 5 User Manual February 2003 Copyright© 1987- 2003 Wyoming Department of Transportation Disclaimer Portions of the contents of this system were developed cooperatively by the Federal Highway Administration and the Wyoming Department of Transportation Bridge Program. The Wyoming Department of Transportation and the Federal Highway Administration assume no liability or responsibility for and make no representations or warranties as to applicability or suitability of this computer system. Anyone making use thereof or relying thereon assumes all responsibility and liability arising from such use or reliance. AASHTO Specifications The Ultimate Strength Analysis (LFD) portions of BRASS-GIRDER is current with the AASHTO Standard Specifications for Highway Bridges, Sixteenth Edition, 1996, with 1997, 1998, 1999, and 2000 Interims, and the AASHTO Manual for Condition Evaluation of Bridges, 1994, with 1995, 1996, and 1998 Interims. The steel girder splice component of BRASSGIRDER is current with the AASHTO Standard Specifications for Highway Bridges with 1997 and 1998 Interims. There were numerous changes for splice analysis in the 1999 Interims and these changes have not been incorporated in BRASS-GIRDER. The standalone version, BRASSSPLICE, has been updated to the 1999 and 2000 interims. Only essential error correction has been performed on the Working Stress sections of the code. Working Stress resistance and ratings were held at the AASHTO 1983 Specifications through 1989 Interims and the AASHTO Manual for Maintenance Inspection of Bridges, 1983 (allowable operating stress for concrete shear uses the AASHTO Manual for Maintenance Inspection of Bridges, 1978) . This is a management decision made in order to focus limited resources on LFD and LRFD methods. Additional information may be obtained from: Gregg C. Fredrick, P.E. State Bridge Engineer Wyoming Department of Transportation 5300 Bishop Boulevard Cheyenne, WY 82009-3340 Telephone: (307) 777-4427 Fax: (307) 777-4279 E-Mail: [email protected] Web Page: http://wydotweb.state.wy.us/web/brass/index.html FTP Site: ftp://brass:[email protected] Technical Assistance: Micheal J. Watters, P.E. Telephone: (307) 777-4427 E-Mail: [email protected] When requesting Technical Assistance, please mail (or E-Mail) your input data set and mail (or FAX) a description of the problem, any error messages, any bridge drawings, and any hand computations which illustrates the concern. See page 2.12 for solutions to common errors. 2/03 i BRASS-GIRDER Installing BRASS-GIRDERTM The setup programs for all the BRASSTM programs are loaded on a single CD-ROM. Passwords are required to install each program. Listed below are the necessary system requirements to install BRASS-GIRDERTM on your computer’s hard drive. It is permissible but not desirable to load BRASSTM on a network. System Requirements Operating System: Microprocessor: Memory: Hard Disk Space: Virtual Memory: Disk Drive: Microsoft WindowsTM 95, 98, NT, 2000, Me, or XP Pentium class or higher 16 MB required, more is better Approximately 8 MB Maximum of approximately 140 MB CD-ROM drive Installing BRASS-GIRDER The following procedure describes how to install BRASS-GIRDERTM. This method may also be used for installation onto a network drive. 1. Start Windows. Windows NT users may need to log in as ADMINISTRATOR. 2. If you have installed this program before and have modified the library files (i.e. sections.lby, truck.lby, etc.), back up these files. They will be over written during installation. 3. Close all applications. 4. Insert the BRASS CD. 5. Select the Windows Start button, then select Run. 6. In the Run dialog box, do one of the following: • Type the letter of the drive containing the installation CD followed by a colon, the word girder, and the word \setup. For example, type e:girder\setup. OR • Select the Browse button, navigate to the directory named Girder on the CD, and select setup.exe. 7. Choose the OK button and follow the instructions on the screen. Setup does the following: • Asks you to close any open applications. • Prompts you to supply the directory path where the program files will be installed. • Prompts you to supply a program folder name in the Windows Start>Programs menu. 2/02 ii BRASS-GIRDER Once the files have been installed, some file property modifications might have to be made. The following steps are not required if the program was installed in the default directory. 1. Open Windows Explorer and select the directory where the BRASS-GIRDER program files are located. The default location is C:\BGIRDER\EXE. If you install BRASS- GIRDER in a drive other than C:, you must create a directory C:\BGIRDER\EXE. Though this directory is not used by the program, it must exist on the C: drive. 2. Highlight the file Girder.pif (it may appear in Explorer as only Girder with a MSDOS icon on the left). 3. Select File>Properties or click the right mouse button and select Properties. The Properties dialog will appear. 4. Select the Program tab. 5. Edit the Cmd line. Type the BRASS-GIRDER executable file name. 1. C:\BGIRDER\EXE\BRASSWIN.EXE 6. Next edit Working. Type the path to the working directory containing data files. 2. C:\BGIRDER\EXE 7. Click the OK button for the changes to be saved. 8. Highlight the file Util.pif (it may appear in Explorer as only Util with a MSDOS icon on the left). 9. Repeat items 3-7 to modify the directories for this shortcut. On step 5, type the BRASSGIRDER library utility executable filename. C:\BGIRDER\EXE\UTILWIN.EXE If you have installed this program before, your library files were over written during installation. If your library files were over written, replace the installed library files with your backups. It is possible for the environment space allocated for environment variables may be exceeded. If so, a DOS message will appear to indicate this. To increase the environment space, use the “SHELL” command in ‘C:\CONFIG.SYS’. Add or modify the following line: ‘SHELL=C:\COMMAND.COM\e:xxxx\p’ where xxxx is the amount of memory you wish to allocate. See DOS documentation for details. Reboot your PC after altering CONFIG.SYS. 2/00 iii BRASS-GIRDER How To Use this Manual The first sections of this manual are designed to act as a self help guide for the novice user and as a reference guide for the more experienced user. To the Novice: Recommended reading is the Introduction, (Section 1), General, (Section 2), and then a brief look through Section 4, Typical Command Sets. Next, thirty minutes or more reviewing the rest of the manual section by section is recommended to get an idea of the types of commands available for defining a problem. There are sets of commands related to logical units of a bridge such as deck, spans, cross sections, physical properties, cable positions, dead loads, live loads, standard shapes and standard truck files. One or two commands should be studied in detail noting the format of the command description and the structure of the command and following parameters. Each problem in BRASS is made up of a set of commands and associated parameters. The next step recommended for the novice is to pick out a set of plans for a very simple bridge and code a set of commands. A structure should be chosen which closely matches one of the Typical Command Sets. The description of the Section in which the command resides should be read carefully. These descriptions are on the first pages of each tabbed Section. If the above procedure is followed, the novice should be able to assemble a proper input data set (Command File). If the Command set does not work, contact your BRASS Advisor. To the User of Previous BRASS Versions: BRASS-GIRDER™ input is based on commands followed by up to twelve parameters. The parameters can be integer or floating point (contain a decimal) and need only be separated by a comma, column location does not matter so the input is “free format”. Each command has a three letter abbreviation. Several of the examples should be studied to get an idea of how the command structure language appears. We also suggest you read “To the Novice” preceding this and follow the procedures as necessary. 2/03 iv BRASS-GIRDER INDEX Page SECTION 1 SECTION 2 SECTION 3 SECTION 4 Introduction General and Graphical User Interface Instructions Command List Typical Command Sets 1.1 2.1 3.1 4.1 - Input Commands SECTION 5 SECTION 6 SECTION 7 SECTION 8 SECTION 9 SECTION 10 SECTION 11 SECTION 12 SECTION 13 SECTION 14 SECTION 15 7/99 Title and Comments System Aids Bridge Deck Analysis Girder Analysis Typical Cross Sections Span Description Material Properties Prestressing Strand Structure Loading Girder Section Design or Rating Ultimate Strength Concrete Design Truck and Standard Cross Section Libraries v 5.1 6.1 7.1 8.1 9.1 10.1 11.1 12.1 13.1 14.1 15.1 BRASS-GIRDER 7/99 vi BRASS-GIRDER 1. INTRODUCTION Bridge Rating and Analysis of Structural Systems BRASS-GIRDER™ assists the bridge engineer in the design and load capacity determination of highway bridges. BRASS-GIRDER™ utilizes finite element theory of analysis and current AASHTO specifications. The system computes moments, shears, axial forces, deflections, and rotations caused by dead loads, live loads, settlements and temperature change. These actions are utilized by various subroutines to design or rate user-specified sections of the deck or girder. BRIDGE CONFIGURATION may be specified by limits of typical web depth variations (Fig. 1), girder cross sections (Fig. 2) and bridge deck cross section (Fig. 3). 11/01 1.1 BRASS-GIRDER STAGE CONSTRUCTION may be modeled by respective cycles of the system for girder configuration and load application. Cycles are automatic if desired. GIRDER TYPES may be simple span, continuous, hinged, or cantilevered with integral legs and constructed of steel, timber, reinforced concrete or prestressed concrete. Composite steel and composite prestressed girders may be included. DEAD LOAD of structure members is automatically calculated if desired. Additional distributed loads and point loads may be applied in groups and each group assigned to a specific construction stage. Distributed loads may be uniform or tapered and divided into sections to model sequential slab pours. Loads due to prestressing are calculated and applied internally. LIVE LOADS may be moving trucks including AASHTO HS type trucks or AASHTO lane type loadings. A truck may have up to 24 axles. Up to ten trucks may be analyzed in one run. Impact may be user defined as specified by AASHTO or the user may reduce impact to model reduced speed limits. Concurrent actions and interactions are produced. DESIGN functions are included for (1) reinforcing steel in concrete decks or girders using working stress analysis. Results include bar cutoff lengths, stirrup size and spacing, (2) stiffener design on steel girders, (3) splice plate and fastener details, and (4) prestressed concrete girders. RATINGS of the maximum load carrying capacity may be determined in one run for four different stress levels: inventory, operating, posting and safe load capacity. PRESTRESSED GIRDER FEATURES ! Simple span for dead load, continuous span for live load. ! Straight, harped or parabolic cable paths. ! Secondary moments due to creep and shrinkage are accounted for. ! Stress relaxation of steel strand is accounted for as a function of time. ! Effects of temperature change can be analyzed at any stage. ! Support conditions can change from stage to stage. ! Results of individual loads may be obtained. ! Composite girders may be analyzed. GENERATORS for the mesh of links and nodes for finite element analysis and girder properties keep user input to a minimum. User defined libraries for standard girder shapes and trucks also reduce input requirements. BRASS INPUT LANGUAGE allows the bridge engineer to communicate with the problem-solving capabilities of BRASS using terminology common to the bridge engineering profession. System input is free format consisting of commands grouped logically to define the bridge structure, loads to be applied and the output desired. Figure 4 shows the command groups. 7/99 1.2 BRASS-GIRDER Figure 4 Command Groups OUTPUT -- data is logically arranged and self-explanatory. The amount of detail is controlled by the user. LANGUAGE -- used in BRASS-GIRDER™ is FORTRAN 90. 11/01 1.3 BRASS-GIRDER The BRASS Family BRASS is a family of programs that assists the engineer in many aspects of bridge design and rating. These programs are described below: BRASS-GIRDER(LRFD)™ -- A comprehensive system for the design and/or rating of highway bridges decks and girders using finite element theory of analysis and current AASHTO LRFD Specifications. BRASS-PIER™ -- Performs an analysis of a bridge transverse section at pier locations. The program provides a comprehensive analysis of bridge decks, piers, and selected foundation types. All AASHTO loads and group loads are considered. Live load is automatically positioned for maximum actions. Load factor and working stress computations are performed. BRASS-PIER(LRFD)™ -- Performs analysis of a bridge transverse section at pier locations. Provides a comprehensive analysis of bridge decks, piers, and selected foundation types. All AASHTO (LRFD) loads and group loads are considered. Live load is automatically positioned for maximum actions. BRASS-TRUSS™ -- Performs a comprehensive working stress analysis and rating of simple or continuous truss or girder floorbeam stringer type bridges. BRASS-CULVERT™ -- Performs analysis or design of one, two, three, or four barrel reinforced concrete rigid or flexible box culverts, with or without bottom slab. End skews can also be defined. Wall and slab thickness may be specified or the program will set the thickness. AASHTO guidelines are followed and Service Load Design, Load Factor Design, or Load and Resistance Factor Design may be specified. Member capacities are designed based on applied truck load, soil fill, self weight and water pressure. Standard AASHTO and user defined truck loadings can be specified. Output generated by the program includes: culvert geometry; moments, shears, and axial forces at tenth points; stresses; required area of reinforcement; steel design table; splice length; weights and volumes of steel and concrete; and influence ordinates. Critical design moments, shears, and axial forces for each member are summarized. Flexural rating computations may be optionally computed. BRASS-SPLICE™ -- Performs the design of field splices for rolled beam or welded plate steel girders. Design criteria are in compliance with the AASHTO Standard Specifications and WYDOT design practice. Load factor and working stress computations are performed. BRASS-PAD™ -- Performs the load factor design of bridge bearings constructed partially or wholly from elastomer, the purpose of which is to transmit loads and accommodate movements between a bridge and its supporting structure. It designs plain pads (consisting of elastomer only) and reinforced bearings (consisting of layers of elastomer restrained at their interfaces by integrally bonded steel plates or fabric). BRASS-POLE™ -- Performs a working stress analysis of cantilever sign, luminaire and signal support structures. Round or polygonal steel poles may be analyzed according to the AASHTO Standard Specifications. BRASS-DIST™ -- Performs a finite-strip element analysis to determine the factor for wheel load distribution for any axle spacing or width and any tire configuration of a truck placed at any position on the bridge deck. Standard trucks may also be used. NOTE: AASHTO formulas are based on empirical data and are applicable to six foot axle widths. BRASS-DIST™ will also give results for a simple beam "deck-to-girder" analysis for dead loads. 2/02 1.4 BRASS-GIRDER 2. GENERAL BRASS-GIRDER™ is designed to assist a bridge engineer in the design or rating of a bridge deck or girder. See page 2.2 for the types of bridges for which BRASS is applicable. To use BRASS-GIRDER™, the engineer inputs a series of "Commands" each followed by one or more parameters. The engineer describes: 1) the bridge deck, 2) the typical girder cross sections with their beginning and ending points along the girder, 3) the girder geometry such as span lengths, leg angles, etc., 4) the material properties, 5) applied dead and live loads, and 6) the allowable stresses to be used. "Typical Command Sets" are provided to help the engineer become acquainted with the system. These begin on page 4.1. BRASS-GIRDER™ uses numerous default values. If a Command parameter has a default value listed, the parameter may be left blank and the default value will be used. Be sure to enter zero if it is a valid value. Short descriptions of the Commands and their parameters are summarized in the BRASS-GIRDER™ Command Language Manual. If additional information is required, each short description of a command has the number reference for the full description. Each input data set or Command File must begin with one or two TITLE commands. Optional COMMENT commands may be used as often as needed to document the input series of commands. BRASS follows a specific command order for the problem description: 1) 2) 3) 4) Title Bridge Deck Typical girder cross sections Bridge span data C length C web depth variation C typical cross-section limits C cable path geometry C end restraints C hinges 5) Material properties 6) Dead & live loads 7) Allowable stresses The manual is arranged in the same order as above and an overview precedes each group of commands which is tabbed for quick reference. Additional overviews on prestress girders, composite steel and concrete girders, bridge decks, composite steel and concrete girders, prestressed concrete girders and ultimate strength concrete design are found on pages 7.1, 8.1 through 8.5, 12.1, 14.48 and 14.49. The analysis method utilized in BRASS-GIRDER™ for bridge decks is moment distribution. For girder analysis, the girder is discretized into nonprismatic beam elements and the finite element method is applied. 7/99 2.1 BRASS-GIRDER Bridge Types C Continuity Simple or continuous spans (up to 13 maximum). C Framed Joints Two dimensional framed joints are allowed as long as the structure is some variation of the figure below and span 1 is included. Examples: C Joint Restraint All joints may be restrained for horizontal or vertical translation and/or rotation. C Hinges A maximum of two hinges is allowed per span. C Cantilevers Cantilevered spans or portions of spans are allowed. C Settlement Known joint displacements may be imposed and the resulting actions determined. C Temperature The structure may be subjected to a given T and the resulting actions determined. C Bridge Decks Timber (plank or laminated) or reinforced concrete bridge decks may be analyzed. C Main Members (Service Load Design Method or Strength Design Method) Reinforced concrete Prestressed concrete Steel welded plate Rolled steel wide flange or I-beams Composite steel and concrete Timber (Service Load Design Method Only) 7/99 2.2 BRASS-GIRDER Input Format The commands guide the user in building an ASCII data file. This data file is developed in a command format. Each line begins with a command which describes data entries hereinafter referred to as parameters. A blank space following the command is required. The data may be entered as a real (including a decimal), an exponential (i.e. 12.345e4), an integer (excluding a decimal point) or an alpha character. Zero is not the same as a blank. Alpha characters are NOT case sensitive. Default entries are given with most commands and are employed by a blank field or by omission of the command in those cases where all default values are desired. Each command has a three character abbreviation which may be used in lieu of the full command name. Commands and their abbreviations are also NOT case sensitive. Commas are used to delineate parameters. The number of spaces between entries has no meaning, however, do not use tabs to separate entries. For example, if the third entry of a command is the only entry required, any of the following would be valid. COMMAND-EXAMPLE COMMAND-EXAMPLE CEX , , CEX , CEX , , , , 2.0 , 2 , , 2.0, 2 , , 2.0000 Continuation Character: A maximum of 80 characters is allowed per line in the data file. Some commands have numerous parameters and all of them may not fit on one line. Therefore, a continuation character may be used to indicate that another line follows which should be appended to the command line. A slash (/) is used as the continuation character and must be the last character in the input line. There is no limit on the number of continuation lines, however, the total number of characters for one command is 160. An example continuation is illustrated. COMMAND-EXAMPLE 123.4, 567.8, 901.2, 345.6, 789.0, 123.4, 567.8, / 901.2, 345.6 It is not required to build an input data set and run BRASS from Windows™. The user may use any ASCII text editor to create an ASCII data file. BRASS-GIRDER™ may be executed at the DOS prompt by entering ‘C:\BGIRDER\EXE> BRASS filename.DAT filename.OUT”. Route Option Often, a Bridge Rating Engineer must run all the bridges along a particular route to obtain load ratings for an overload vehicle. Effective use of the ROUTE option and the INCLUDE command will eliminate the need to manually change the truck configuration in every input data set whenever a new overload vehicle is routed through the state. First, create a file (i.e. LLOADS.DAT) containing only the appropriate truck command(s) which describe the overload vehicle: TRUCK-1 QUARRY1,QUARRY2 Next, replace the truck command(s) in every data set with the INCLUDE command: INCLUDE C:\BGIRDER\EXE\LLOADS.DAT In this manner, the user only need to change one file (LLOADS.DAT) whenever new loads are to be analyzed. Third, create a second file called BRIDGES.DAT (or whatever) which contains a list of all input data sets along the route to be analyzed. 7/99 2.3 BRASS-GIRDER AAA.DAT AAC.DAT AAD.DAT AAE.DAT AAF.DAT AAG.DAT AAH.DAT AAI.DAT AAJ.DAT AAK.DAT AAL.DAT AAM.DAT AAN.DAT This file can be created by hand, a database query, or Geographical Information System routing program. Finally, to run the entire set of bridges, enter: C:\BGIRDER\EXE> BRASS BRIDGES.DAT BRIDGES.OUT ROUTE KEEP - or C:\BGIRDER\EXE> BRASS BRIDGES.DAT BRIDGES.OUT ROUTE DELETE The ‘KEEP’ option will save the entire output file for each bridge. The ‘DELETE’ option will not save individual output files. In both cases, a summary file will be created (BRIDGES.OUT) which gathers all the rating information in a single file and a status file (filename.STS) is created to record whether a particular data set is executed properly. If ‘KEEP’ or ‘DELETE’ is omitted, the default is ‘DELETE’. NOTE: The ROUTE option is a DOS command and is not available in the Graphical User Interface. Microsoft Windows™ Graphical User Interface Introduction A Microsoft Windows™ based Graphical User Interface has been developed to take advantage of many of the features within the Windows™ environment. These features include user friendly graphical input forms (also called ‘dialog boxes’), on-line help, ‘point-and-shoot’ text editors, and drop down menu commands. This section is designed to help you get started with using the BRASSGIRDER™ Graphical User Interface (GUI). Running the Graphical User Interface (GUI) To enter the GUI, double-click on the application icon ‘BRASS GIRDER’ in the BRASS Program Group. Most of the BRASS dialog boxes have standard Windows functions. Dialog boxes created specifically for BRASS-GIRDER™ each have five additional buttons: 7/99 2.4 BRASS-GIRDER This button will write the data entered in the dialog box into the input data set. It will then close the dialog box and move on to the next command. This button will cancel the entries into the dialog box and will close the box. This button will write the data to the input data set and leaves the dialog box open. This function is useful when a particular command is to be repeated several times with minor changes to the data (i.e. several rows of reinforcing with minor changes in row location). If another line of the same command is desired (i.e., TLE or DBA), this button will “Refresh” or clear the previous input and reset variables to their default values. This button will access the help file for the displayed dialog box. NOTE: If two or more of the same commands are desired, do not use Write button for the final entry. Use the OK button. If you use Write and then OK, it will duplicate the last set of data. If you inadvertently click the Write button, you may double click the negative symbol in the upper left hand corner or the smallest window displayed to exit properly. This writes the values to the input file and exits the dialog box. In short OK performs Write and then Cancel in that order. Description of the File Option: COMMAND FILE: This will open the last command file (input data set) you were working on in this session, or will open a blank input data set named ‘input.pol’. New: Open a new command file. Open: Open a specific command file. Save: Save the current command file. Save As: Save current command file in the directory and name you specify. Print: Print current command file. Printer Setup: Open the windows printer setup to specify a printer. Exit: Exit BRASS-GIRDER™. 7/99 2.5 BRASS-GIRDER The Open option will display a dialog box that is slightly different than the standard Open box found in most Windows™ applications. You may select any of the ‘filter’ options by clicking any of the File Type check boxes in the lower right hand corner. Creating a BRASS-GIRDER™ Command File (Input Data Set): Remember, the Windows™ Graphical User Interface (GUI) is just a tool for creating an ASCII input data set. On-line help, program execution, and library maintenance are also available in the GUI, however, it is not required to use Windows™ to perform these functions. In the GUI, the user may create an input data set using any combination of the following three methods: 1) By selecting File, then New, the user is placed in DOS 5.0+ EDIT. Commands may be typed following the same format and procedures as outlined in the BRASS-GIRDER™ manual; 2) While in EDIT, the user may select the All Commands drop down menu then select any of the available dialog input forms to create commands; 3) The Path Generator (in the All Commands drop down menu) may be used to automatically select dialog input forms. The last method will be described in more detail later. Description of the Menu Option: Dialog boxes have been developed to describe the majority of steel, concrete, prestressed concrete, and timber bridges. Some dialog boxes are general in nature and can be used to describe any type of bridge. Other dialog boxes pertain to a specific type of bridge (i.e. steel). The user can control the types of dialog boxes to be displayed using the Menu option. Sub-option All Commands will permit the user to use any dialog box, regardless of bridge type. The other sub-options will modify the menu bar and permit the user to select only those dialog boxes which pertain to a specific bridge type. 7/99 2.6 BRASS-GIRDER Once the user has selected the appropriate menu bar, the dialog boxes from Title & System through Analysis Points may be displayed. NOTE: BRASS-GIRDER™ commands must be placed in the order they appear on this list and in the User Manual. 7/99 2.7 BRASS-GIRDER The Path Generator is an optional tool which prompts the user to define the type of structure to be analyzed. From this information, it provides a series of dialog boxes required to describe the structure. Once the structure has been defined on the Path Generator dialog box, the user can proceed to generate the input file by checking each of the EXECUTION boxes in sequence. Each box, when checked, will display the dialog boxes required to describe the bridge. Remember, the Path Generator displays only those forms that are required for the structure that has been defined. Additional data may be required for specific cases. Structure Type - Select the type of girder material. Number of Spans - Enter the number of spans in the bridge. The Path Generator can only generate dialog boxes for a maximum of six spans. Number of Typical Cross Sections - Enter the number of unique cross sections in the bridge. NOTE: Changes in web depth only, does not depict a separate cross-section. Web depth variations are described in the SPAN commands. Number of Analysis - Analysis points are usually selected at the 1.0, 1.4, 2.5, Points etc. points for a 3-span bridge. Enter the number of locations to be analyzed. Type of Rating/Design - Check if you want a Working Stress or Ultimate Strength (LFD) rating or design. For a Working Stress analysis, check the type(s) of rating desired. For a concrete Load Factor Design analysis, check the type(s) of rating desired. IMPORTANT: For a steel Load Factor Design analysis, the commands change from INV, OPG, PST, and SLD to Load Level 1, Load Level 2, Load Level 3, and Load Level 4. All Load Levels are needed to determine steel LFD ratings. It is strongly recommended you read the NOTES on page 14.9 of the Users Manual. Type of Rating Point Loads - Check if dead point loads are to be input. Uniform Dead Loads - Check if uniform dead loads are to be input. Define Wheel Fraction - Check if a user defined wheel fraction will be input for each truck. Define Impact Factor - Check if a user defined impact factor will be input for each truck. Define a Truck - Check if a truck from the Truck Library is to be analyzed, or if a unique truck configuration will be input. Lane Load - Check if lane loads are to be analyzed. 7/99 2.8 BRASS-GIRDER Type of Web Profile - Select the type of web profile which exists in each span. See page 10.2 of the Users Manual for an explanation of each ‘Web Profile’. EXECUTION - As described above, check each box, in order, to display the required dialog boxes. The Refresh button will reset the structure definition fields but will not affect the EXECUTION check boxes. If a file is created using the Path Generator, the user must be sure to carefully review the commands created. A helpful hint is to always note the commands indicated at the top of each dialog box that is displayed by the Path Generator. Effective Use of the Command File: Many GUI users prefer displaying the active Command File (or input data set) while entering data from the dialog boxes. This allows you to view the data while it is being added to the input data set. You can view the input data set at any time by pulling down the File menu and selecting Command File. If you are working with the Path Generator, the input data set you are creating will be placed behind the Path Generator window. To view the Command File, move the Path Generator window (or dialog box) to the side. This is done by clicking the mouse in the window title strip (at the top) and dragging the mouse (hold the left button down and move). Clicking anywhere in the Command File will bring the Command File to the front. Be sure to click anywhere in the Path Generator or dialog box to continue data input. WARNING! As with most commands in BRASS, the commands may require placement in the file in a specific order (refer to the BRASS manuals). Using the Commands menu, as well as the Path Generator, will place the command generated at the position of the cursor in the command file. If you have just opened the file to edit, the cursor is automatically placed at the top of the input file. Before leaving the Command File to input data from a dialog box, ensure the cursor is placed at the END of the Command File or at the location you wish to enter data. Individual commands may be inserted in a Command File at any time, in any place, from a dialog box. 7/99 2.9 BRASS-GIRDER First, open the Command File and place the cursor at the location you wish to insert the command (usually before the first character of the following command). When the dialog box exits, the new command line will be inserted. IMPORTANT: Be sure to place the cursor in the first space below the last command before continuing to enter data from dialog boxes. As always, the Command File may be edited at any time using standard editor commands. The Command File (input data set) must be saved and exited before executing BRASS-GIRDER™. Executing BRASS-GIRDER™ from the Graphical User Interface: To execute BRASS-GIRDER™, you must first open the Command File and then close it. This ‘activates’ the Command File and prepares it for execution. If you do not ‘activate’ the Command File, BRASS-GIRDER™ will execute the last Command File work that was performed on during the current session or it will execute the default file ‘input.pol’. Next, select Execute then Run BRASSGIRDER™. You will then be prompted for the input data set file name to run. The current ‘activated’ Command File will be placed in the Input Filename box and the Output Filename will be set to filename.OUT. Selecting the OK button will begin executing BRASS-GIRDER™. When BRASS-GIRDER™ begins execution, the screen will turn black and the status of the analysis will scroll by on the screen. Upon completion of the analysis, the BRASS-GIRDER™ GUI will reappear. To retain messages on the screen (in the case of input data set debugging), see section ‘Bugs, Gremlins and Other Problems’ below. 7/99 2.10 BRASS-GIRDER Running Library Maintenance: A separate executable program is used to perform Library Maintenance such as adding, deleting, changing, and printing the contents of the truck library (TRUCK.LBY), and the standard shapes library (SECTIONS.LBY). It is best to create your data set in the Library Utility GUI. From the Execute menu item, select Run Library Utility GUI. Once the input data set is created, select Execute>Run Library Maintenance. Exit this GUI to return to the BRASS-GIRDER™ GUI. Viewing BRASS Output Files Output files may be viewed using most text editors or word processors. Unfortunately, edit control, used by the GUI, does not utilize enough extended memory to load large output files. Therefore, you cannot view/edit large output files from inside the Graphical User Interface. An alternate editor is required. Smaller files, such as input data sets, may be viewed within the BRASS-GIRDER™ GUI. To alleviate this problem, there is a sub-option in the Execute drop down menu called My Editor. This sub-option allows you to use any text based editor (Norton Deskedit, Lancaster University’s Programmer’s File Editor) or any word processing program (Microsoft Word, Corel Word Perfect). To activate My Editor, add the following line to your AUTOEXEC.BAT file: set BRASS EDITOR=c:\wpwin60\wpwin.exe (Note: “BRASS EDITOR” must be upper case) where the directory and executable shown above is selected by the user. A shareware text editor called Programmer’s File Editor, written by Alan Phillips, Lancaster University Computer Centre, United Kingdom, has been included with BRASS-GIRDER™. It must be noted that this program is a shareware program and is not an essential component of BRASSGIRDER™. It is provided to the user, free of charge, as an optional text editor. The output is formatted for portrait page orientation, with margin settings of 0.5" for the top, bottom, and left and 0.3" for the right.. A mono-spaced font, such as 8 pt. Courier New, is required for column alignment. There are several commands available to the user to control the amount and type of output. These commands are located in: Command # #30 #40 #50 #60 #310 #460 #520 #823 #830 #980 #1030 #1065 #1080 #1170 #1190 #1240 #1340 2/03 Command SYSTEM-1 command SYSTEM-2 command SYSTEM-3 command DECK-CON command, parameter 1 ANALYSIS command, parameter 1 SPAN-A command, parameter 7 HINGE command, parameters 3 and 4 TRANSFER command, parameters 2 to 19 DEAD-LOAD command, parameter 1 DESIGN command, parameter 1 STEEL-1 command, parameters 1 and 10 STEEL-5 command, parameter 9 CONCRETE-1 command, parameters 1 and 7 PRESTRESS-1 command, parameter 1 and 10 TIMBER command, parameter 1 PRINT-TRUCK command PRINT-SECT command 2.11 Page 6.2 6.6 6.8 7.2 8.6 10.5 10.42 12.30 13.2 14.2 14.22 14.37 14.42 14.64 14.84 15.14 15.36 BRASS-GIRDER Three additional output files (TABLE1.TBL, TABLE2.TBL, and TABLE3.TBL) are created when BRASS-GIRDER™ is executed. These files are used by the AASHTOWare Virtis™ program to insert results into a database. Accessing Help You can use the on-line Help system to view information about any BRASS-GIRDER™ command or dialog box. To access the complete Help file, choose the Help command from the Menu bar: Clicking on any green text (hypertext) will place you in the Help section pertaining to that text. The Help file can also be accessed by pressing the Help button in any of the dialog boxes. Doing so will place you in the Help file pertaining to that particular command. You can also obtain help for a particular command by placing the cursor on any line in the Command File and pressing the <Ctrl F1> keys simultaneously. Refer to your Microsoft Windows™ documentation for directions using Help. Some users requested immediate notification that data was being written to the Command File. The menu item Help>Show Writes will display a dialog box that shows the data that was written to the Command File when the Write button is selected: If you inadvertently activated the function, you can disable it by choosing Help>Show Writes. Disabling the function should remove the check mark in front of the words Show Writes. 7/99 2.12 BRASS-GIRDER Bugs, Gremlins and Other Problems Inevitably, every user will have an input data set that will not run properly. Based on past experience, approximately 90% of all problem logs are user error. Naturally, this should be the first place to look when BRASS won’t run. A lot of error and warning messages have been written into the source code to handle the most common errors. It is nearly impossible to anticipate every error which may occur. When searching for coding errors, check the output file and/or screen messages for clues to the problem. Occasionally, error messages flash on screen too fast for reading. There are two methods to retain these messages on screen. First, run BRASS-GIRDER™ from the DOS prompt, as described on page 2.3. Second, edit the GIRDER shortcut file. In Windows Explorer, locate the file C:\BGIRDER \EXE\Girder. Explorer will display the MS-DOS icon with this file. Right click on the file and select Properties. Select the Program tab. To display all error messages, make sure the box saying Close on exit, in the lower portion of the dialog box, is not checked. Other common error messages are Math Error or Divide by Zero Error. This message usually indicates that some required data was not input. Check your input data set for omissions. If you cannot resolve the problem, you can request technical assistance using the procedures listed on page i. 7/99 2.13 BRASS-GIRDER 7/99 2.14 BRASS-GIRDER 3. LIST OF COMMANDS FOR JOB CONTROL: AGENCY AGY 1 User agency or company name. BRIDGE-NAME BRN 2 Structure number and feature intersected. LOCATION LOC 3 Reference marker location and route. ENGINEER ENG 4 Engineer who created input data set. TITLE TLE 10 COMMENT COM 20 Input Comments INCLUDE INC Reads an include file. END END 28 Separates multiple input data sets within a single Command File. SYSTEM-1 SY1 30 System Control No. 1. SYSTEM-2 SY2 40 System Control No. 2. Primarily a debugging aide by component. SYSTEM-3 SY3 50 System Control No. 3. Primarily a debugging aide by subroutine No. 25 Problem Title BRIDGE DECK: DECK-CON DCN 60 Bridge Deck Control DIST-CONTROL-DL DCD 65 Bridge Deck Dead Load Distribution Control DECKC-STG DSG 70 Stage construction control DECKC-COM DCM 80 Dead loads to be combined for concrete deck strength analysis. DECKC-MAT DMT 90 Concrete deck material factors for design or rating of concrete deck. DECKC-STR1 DS1 100 Allowable stresses. Required for design or rating of concrete deck. DECKC-STR2 DS2 110 Allowable stresses. Required for rating of concrete deck if posting and/or safe load capacity rating desired. DECKC-STR3 DS3 115 Value of Phi. Required for rating of concrete deck unless default values are used. 12/00 3.1 BRASS-GIRDER DECKC-DIM1 DD1 120 General dimensions. Required for concrete. DECKC-DIM2 DD2 130 General dimensions. Required for concrete curbs and/or median. DECKC-DIM3 DD3 140 General dimensions. Required for concrete. DECKC-DIM4 DD4 150 General dimensions. Required for concrete tapers. DECKC-DIM5 DD5 160 General dimensions. Not required for concrete tapers if no tapers or identical cantilevers. DECKC-GS DGS 170 Variable girder spacing. spacing varies. DECKC-BARA DBA 180 Repeat for each rebar in 1' width of deck. DECKC-LODG DLG 190 Deck dead loads. General information. DECKC-LODC DLC 200 Concentrated Dead Loads. Required for concentrated loads on concrete deck. Repeat as needed. DECKC-LODU DLU 210 Uniform dead loads. Required for uniform dead loads on concrete deck. Repeat as needed. DECKT-G1 DG1 220 General data for timber deck. DECKT-G2 DG2 230 General data for timber deck. DECKT-G3 DG3 240 General data for timber deck. DECKT-LWT1 DL1 250 Wheel load contact. Area dimensions for timber deck. DECKT-LWT2 DL2 260 Wheel load contact. Area dimensions for timber deck. DECKT-LWT3 DL3 270 Wheel load contact. Area dimensions for timber deck. DECKT-LWT4 DL4 280 Wheel load contact. Area dimensions for timber deck. DECK-TRK1 DT1 290 Live load. Required for design or rating. DECK-TRK2 DT2 300 Live load. Required for design or rating if more than 6 trucks to be rated or default for impact to be overridden. Required for concrete if STRUCTURE ANALYSIS: ANALYSIS ANL 310 General Data ANGLE-1 AN1 Leg angles 12/00 320 3.2 BRASS-GIRDER ANGLE-2 AN2 330 Leg angles TYPICAL CROSS SECTIONS: XSECT-STD XST 340 X-section properties. Required for standard cross sections called from standard sections file. XSECT-A XSA 350 X-section properties No. 1. This series required for each unique non-circular, non-standard or non-x-y coordinate defined x-section. XSECT-B XSB 360 Cross section properties No. 2. XSECT-C XSC 370 Cross section properties No. 3. XSECT-D XSD 380 Cross section properties No. 4. XSECT-E XSE 390 Cross section properties No. 5. XSECT-F XSF 400 Cross section properties No. 6. XSECT-G XSG 410 Cross section properties No. 7. Required to describe concrete or composite girder reinforcement. XSECT-H XSH 420 Cross section properties No. 8. Describe steel angles in a riveted girder. STIF-TRAN-GROUP STG 422 Used to define a group of transverse stiffeners with similar material and geometry. Required for steel girders when using the schedule-based input option and transverse stiffeners are to be analyzed. STIF-BEAR-GROUP SBG 424 Used to define a group of bearing stiffeners that have similar material and geometry. Required for steel girders when using the schedule-based input option and bearing stiffeners are to be analyzed. STIF-LONG-GROUP SLG 426 Used to define a group of longitudinal stiffeners with similar geometry. Required for steel girders when using the schedule-based input option and longitudinal stiffeners to be analyzed. STIRRUP-GROUP SIG 428 Used to define a group of stirrups with similar material and geometry. Required for concrete girders when using the schedule-based input option and stirrups are to be analyzed. XSECT-COORD1 XC1 430 Cross section properties No. 9. Required to define section by x-y coordinates. 12/00 3.3 BRASS-GIRDER XSECT-COORD2 XC2 440 Cross section properties No. 10. Required to define section by x-y coordinates. SPAN-A SPA 460 First in series. Required for each span as first of span series. SPAN-B SPB 470 Second in span series. SPAN-RANGE SPR 475 Used to allow the user to control the type of web depth variation within a span web depth range. Linear, elliptical (includes circular) and parabolic variations are allowed. SPAN-C SPC 480 Third in span series. SPAN-D SPD 490 Fourth in span series. Repeat as needed for additional cross section change points up to a maximum of 40. STEEL-GIRDERCONTROL SGC 492 Used to define control parameters for spans on a steel girder structure. Required for each span when using the schedule-based input option. STIFFENER-TRAN- STS SCHEDULE 493 Used to define the transverse stiffener size and spacing schedule along a span. Required for steel girders when using the schedule-based input option and transverse stiffeners are to be analyzed. STIFFENER-LONG- SLS SCHEDULE 494 Used to define the longitudinal stiffener size schedule along a span. Required for steel girders when using the schedule-based input option and longitudinal stiffeners are to be analyzed. BRACINGSCHEDULE BRS 495 Used to define the location of girder cross braces along a span. Required for steel girders when using the schedule-based input option and cross bracing is a factor in the analysis. LAT-SUPPORTSCHEDULE LTS 496 Used to define the lateral support of the top flange along a span. Required for steel girders when using the schedule-based input option and top flange lateral support is a factor in the analysis. STIRRUPSCHEDULE SIS 497 Used to define the stirrup group and spacing along a span. Required for concrete girders when using the schedulebased input option and stirrups are to be analyzed. SPAN DESCRIPTION: 11/01 3.4 BRASS-GIRDER SPAN-COPY SCP 498 Duplicate identical spans. FIXITY FIX 500 Span end restraints. Place in order in span series. FIX-SPRING FIS 505 Span end restraint. Spring constant for modeling elastic supports. STIF-BEARSCHEDULE SBS 507 SETTLEMENT SET 510 Used to define the location of bearing stiffeners by support points along a bridge. Required for steel girders when using the schedule-based input option and bearing stiffeners are to be analyzed. Span end movements. One card per span may be used. HINGE HNG 520 Hinge or special analysis point location. Place in order in span series. Required if hinges or special analysis points in span. GIRDER PROPERTIES: PROPERTIES-ST1 PS1 530 Steel structure properties No. 1. PROPERTIES-ST2 PS2 540 Steel structure properties No. 2. PROPERTIES-RC PRC 550 Reinforced concrete PROPERTIES-RCB PCB 560 Reinforced concrete ultimate strength preliminary and final run. Required if two different concrete strengths used. PROPERTIES-TIM PTM 570 Timber properties PROPERTIES-PC1 PC1 580 Prestressed concrete properties No. 1. PROPERTIES-PC2 PC2 590 Prestressed concrete properties No. 2. PROPERTIES-PC3 PC3 600 Prestressed concrete properties. Losses computed by PCI Method. PROPERTIES-PC4 PC4 610 Prestressed concrete properties No. 4. Losses computed by PCI Method. PROPERTIES-PC5 PC5 620 Prestressed concrete properties No. 5. Losses computed by PCI Method. PROPERTIES-PC6 PC6 625 Prestressed concrete properties for design. 630 Prestressed concrete strand properties No. 1. PRESTRESS PROPERTIES: STRAND-ST1 12/00 ST1 3.5 BRASS-GIRDER STRAND-ST2 ST2 640 Prestressed concrete strand properties No. 2. STRAND-ST3 ST3 650 STRAND-ST4 ST4 660 Prestressed concrete strand properties No. 3. Use when losses to be computed according to AASHTO 9.16.2.1.4. Prestressed concrete strand properties No. 4. Use when losses to be computed according to PCI general method. STRAND-ST5 ST5 665 Prestressed concrete strand properties for design. POST-TENSION1 PT1 670 Prestressed concrete strand properties. Required for post-tensioned strands. POST-TENSION2 PT2 680 Prestressed concrete strand properties. Required for anchorage loss of post-tensioned strands. CABLE-S1 CS1 690 Cable layout for straight reinforcement No. 1. CABLE-S2 CS2 700 Cable layout for straight reinforcement No. 2. CABLE-H1 CH1 710 Cable layout for harped strands. CABLE-H2 CH2 720 Cable layout for harped strands. CABLE-H3 CH3 730 Cable layout for identical evenly spaced rows. CABLE-P1 CP1 740 Cable layout for parabolic draped strands. CABLE-P2 CP2 750 Cable layout for parabolic draped strands. CABLE-PC1 CB1 760 Cable layout for parabolic draped strands for continuous spans. CABLE-PC2 CB2 770 Cable layout for parabolic draped strands for continuous spans. CABLE-PC3 CB3 780 Cable layout for parabolic draped strands for continuous spans. CABLE-DUP DUP 810 Spans having identical cable layouts. Repeat as needed. DEBOND DBD 820 Length of debonded strand. 5/01 3.6 BRASS-GIRDER TRANSFER XFR 823 Defines analysis points at the end of a transfer length of a strand. PS-BEAMOVERHANG PBO 824 Define beam overhang distance for a prestress beam. CABLE-DES CDS 825 Geometry of prestressing strands for design. PS-BEAM-SHEAR PBS 826 Shear equation selection. DEAD-LOAD DLD 830 Control. LOAD-DESCR LDE 840 Load group description. UNIFORM-DL1 UL1 850 Uniform dead load. One required for each section. POINT-DL PTD 860 Repeat for up to 70 point loads. TEMP-SETL TSL 870 Temperature and settlement stage control. LIVE-LOAD LLD 880 Live load control TRUCK-WFR TRW 900 Wheel fraction override. Repeat for trucks 7-10. TRUCK-IMP TRI 910 Impact factor override. Repeat for trucks 7-10. TRUCK-CODE1 TR1 920 Truck code No. 1. Not required if standard design trucks asked for or SPECIAL TRUCKS or SPECIAL LANE commands to follow. TRUCK-CODE2 TR2 930 Truck code No. 2. SPECIAL-TRUCK STR 940 Up to 24 axles on up to 10 trucks. Repeat as needed. SPECIAL-LANE SLN 950 Special lane load. Up to 5 allowable. AXLE-WF AWF 960 Define a wheel fraction per axle. FLOORBEAMCONTROL FBC 970 Define live load positioning parameters and output when analyzing floorbeams. FLOORBEAMTRAVELWAY FBW 972 Define travelway limits when analyzing floorbeams. FLOORBEAMTRUCK FBT 974 Define truck when analyzing floorbeams. DEAD LOAD: LIVE LOAD: 2/03 3.7 BRASS-GIRDER FLOORBEAMTRUCK-AXLE FBA 976 Define axle loads and spacings for a truck associated with a floorbeam analysis. FLOORBEAM-MPT FBM 978 Define lane width, axle loads, and spacings for a multiple presence truck associated with a floorbeam analysis. DESIGN DES 980 Design, review or rating control. INVENTORY INV 990 Working strength stress levels for design or inventory rating of steel or non-prestressed concrete girders. SECTION ANALYSIS: Ultimate strength analysis or inventory rating of prestressed or non-prestressed concrete girders. OPERATING OPG 1000 Working strength stress levels for design or operating rating of steel or non-prestressed concrete girders. Ultimate strength analysis or operating rating of prestressed or non-prestressed concrete girders. POSTING PST 1010 Working strength stress levels for design or posting rating of steel or non-prestressed concrete girders. Ultimate strength analysis or posting rating of prestressed or non-prestressed concrete girders. SAFE-LOAD SLD 1020 Working strength stress levels for design or safe load capacity rating of steel or non-prestressed concrete girders. Ultimate strength analysis or safe load capacity rating of prestressed or non-prestressed concrete girders. LOAD-LEVEL-1 LL1 1021 Load combination 1.3(D + 1.67L) for steel girder ultimate strength analysis. LOAD-LEVEL-2 LL2 1022 Load combination D + 1.67L for steel girder ultimate strength analysis. LOAD-LEVEL-3 LL3 1023 Load combination 1.3(D + L) for steel girder ultimate strength analysis. LOAD-LEVEL-4 LL4 1024 Load combination D + L for steel girder ultimate strength analysis. POINT-OFINTEREST POI 1025 Used to designate analysis points (points of interest) on the bridge when using the schedule-based input option. Optional. 2/03 3.8 BRASS-GIRDER INTERMEDIATEOUTPUT INO 1026 Used to designate analysis points for which intermediate output for the AASHTO specification checks are desired. This command is optional and used with the schedulebased input option. STEEL-1 SL1 1030 Steel girder section details No. 1. STEEL-2 SL2 1040 Steel girder section details No. 2. STEEL-3 SL3 1050 Steel girder section details No. 3. STEEL-4 SL4 1060 Steel girder section details No. 4. STEEL-5 SL5 1065 Steel girder section details No. 5. Required for splice design. STEEL-6 SL6 1066 Steel girder section details No. 6. Required for splice design. STEEL SECTION: CONCRETE SECTION: CONCRETE-1 CR1 1080 Concrete girder section details No. 1. CONCRETE-2 CR2 1090 Concrete girder section details No. 2. CONCRETE-3 CR3 1100 Concrete girder section details. preliminary and final run. Ultimate strength CONCRETE-4 CR4 1110 Concrete girder section details. preliminary run. Ultimate strength CONCRETE-5 CR5 1120 Concrete girder section details. preliminary run. Ultimate strength CONCRETE-6 CR6 1130 Concrete girder section details. Ultimate strength preliminary box-girder run and all final runs. Required for each span. CONCRETE-7 CR7 1140 Concrete girder section details. Ultimate strength final run. Required for each group. CONCRETE-8 CR8 1150 Concrete girder section details. Ultimate strength final run. Required for each 2 bars. Repeat as needed. CONCRETE-9 CR9 1160 Concrete girder section details. Ultimate strength final run and preliminary run. 1170 Prestress girder section details ultimate strength. PRESTRESS SECTION: PRESTRESS-1 2/03 PR1 3.9 BRASS-GIRDER PRESTRESS-2 PR2 1180 Prestress girder details. PRESTRESS-3 PR3 1181 Prestress concrete girder details for design. PRESTRESS-4 PR4 1182 Prestress concrete girder details for design. PRESTRESS-5 PR5 1183 Prestress concrete girder details for design. PRESTRESS-6 PR6 1184 Prestress concrete girder details for design. TMB 1190 Timber girder section details. NEW-TRUCK-1 NT1 1200 NEW-TRUCK-2 NT2 1210 NEW-TRUCK-3 NT3 1220 DELETE-TRUCK DTK 1230 PRINT-TRUCK PTK 1240 TIMBER SECTION: TIMBER TRUCK FILE EDIT: STANDARD SECTION FILE EDIT: NEW-SECT-1 NS1 1250 NEW-SECT-2 NS2 1260 NEW-SECT-3 NS3 1270 NEW-SECT-4 NS4 1280 NEW-SECT-5 NS5 1290 NEW-SECT-6 NS6 1300 NEW-SECT-7 NS7 1310 NEW-SECT-8 NS8 1320 DELETE-SECT DSC 1330 PRINT-SECT PSC 1340 2/03 3.10 BRASS-GIRDER 4. TYPICAL COMMAND SETS 1. Timber bridge deck rating. COMMAND < AGENCY < BRIDGE-NAME < LOCATION < ENGINEER TITLE COMMENT * INCLUDE * DECK-CON DECKT-G1 DECKT-G2 DECKT-G3 DECKT-LWT1 DECKT-LWT2 DECKT-LWT3 DECKT-LWT4 DECK-TRK1 DECK-TRK2 END < ABBR COMMAND NUMBER USAGE AGY BRN LOC ENG TLE COM INC DCN DG1 DG2 DG3 DL1 DL2 DL3 DL4 DT1 DT2 END 1 2 3 4 10 20 25 60 220 230 240 250 260 270 280 290 300 28 Optional Optional Optional Optional Required Optional Optional Required Required Required Optional Optional Optional Optional Optional Required Optional Optional Due to space constraints, no dialog screens are available in the Graphical User Interface. w These commands may be placed anywhere in the input data set. 12/00 4.1 BRASS-GIRDER 2. Reinforced Concrete Bridge Deck rating. Figure 20 COMMAND < AGENCY < BRIDGE-NAME < LOCATION < ENGINEER TITLE COMMENT * INCLUDE * DECK-CON DECK-MAT DECKC-STR1 DECKC-STR2 DECKC-STR3 DECKC-DIM1 DECKC-DIM2 DECKC-DIM3 DECKC-BARA DECKC-LODG DECKC-LODC DECK-TRK1 DECK-TRK2 END ABBR COMMAND NUMBER USAGE AGY BRN LOC ENG TLE COM INC DCN DMT DS1 DS2 DS3 DD1 DD2 DD3 DBA DLG DLC DT1 DT2 END 1 2 3 4 10 20 25 60 90 100 110 115 120 130 140 180 190 200 290 300 28 Optional Optional Optional Optional Required Optional Optional Required Optional Optional Optional Optional Required Required Required Required Optional Optional Required Optional Optional < Due to space constraints, no dialog screens are available in the Graphical User Interface. w These commands may be placed anywhere in the input data set. 12/00 4.2 BRASS-GIRDER 3. Simple Span Wide Flange Girder Bridge Rating. COMMAND < AGENCY < BRIDGE-NAME < LOCATION < ENGINEER TITLE COMMENT * INCLUDE * ANALYSIS XSECT-STD Í STIF-TRAN-GROUP Í STIF-BEAR-GROUP Í STIF-LONG-GROUP SPAN-A SPAN-C Í STEEL-GIRDER-CONTROL Í STIF-TRAN-SCHEDULE Í STIF-LONG-SCHEDULE Í BRACING-SCHEDULE Í LAT-SUPPORT-SCHEDULE FIXITY Í STIF-BEAR-SCHEDULE – HINGE PROPERTIES-ST1 – TRANSFER DEAD-LOAD LIVE-LOAD TRUCK-WFR TRUCK-IMP TRUCK-CODE1 TRUCK-CODE2 SPECIAL-TRUCK SPECIAL-LANE 12/00 ABBR AGY BRN LOC ENG TLE COM INC ANL XST STG SBG SLG SPA SPC SGC STS SLS BRS LTS FIX SBS HNG PS1 XFR DLD LLD TRW TRI TR1 TR2 STR SPN COMMAND NUMBER 1 2 3 4 10 20 25 310 340 422 424 426 460 480 492 493 494 495 496 500 507 520 530 823 830 880 900 910 920 930 940 950 4.3 USAGE One or more is required to define live load if parameter 6 of Live Load command is blank. Optional Optional Optional Optional Required Optional Optional Required Required Optional Optional Optional Required Required Optional Optional Optional Optional Optional Optional Optional Optional Optional Optional Required Required Optional Optional Optional Optional Optional Optional BRASS-GIRDER COMMAND ABBR COMMAND NUMBER AXLE-WF DESIGN ¬ INVENTORY OPERATING POSTING SAFE-LOAD † LOAD-LEVEL-1 † LOAD-LEVEL-2 † LOAD-LEVEL-3 † LOAD-LEVEL-4 Í POINT-OF-INTEREST Í INTERMEDIATE-OUTPUT STEEL-1 STEEL-2 STEEL-3 STEEL-4 END AWF DES INV OPG PST SLD LL1 LL2 LL3 LL4 POI INO SL1 SL2 SL3 SL4 END 960 980 990 1000 1010 1020 1021 1022 1023 1024 1025 1026 1030 1040 1050 1060 28 < Required for each analysis point desired. USAGE Optional Required Optional Optional Optional Optional Optional Optional Optional Optional Optional Optional Required Optional Optional Required Optional Due to space constraints, no dialog screens are available in the Graphical User Interface. w These commands may be placed anywhere in the input data set. Í These commands are used when the schedule-based option is selected. Due to space constraints, no dialog screens are available in the Graphical User Interface. – The HINGE and TRANSFER commands may be used to specify additional special analysis points (node points). ¬ Required for Allowable Stress Design (ASD) rating. † Required for Load Factor Design (LFD) rating. Due to space constraints, no dialog screens are available in the Graphical User Interface. 12/00 4.4 BRASS-GIRDER 4. Two Span Composite Steel and Concrete Welded Plate Girder Bridge Rating. Typical cross-section code ABBR COMMAND < AGENCY < BRIDGE-NAME < LOCATION < ENGINEER TITLE COMMENT * INCLUDE * ANALYSIS XSECT-A XSECT-B XSECT-C XSECT-G XSECT-A XSECT-B XSECT-C XSECT-G Í STIF-TRAN-GROUP Í STIF-BEAR-GROUP Í STIF-LONG-GROUP SPAN-A SPAN-C SPAN-D Í STEEL-GIRDER-CONTROL Í STIF-TRAN-SCHEDULE Í STIF-LONG-SCHEDULE Í BRACING-SCHEDULE Í LAT-SUPPORT-SCHEDULE FIXITY Í STIF-BEAR-SCHEDULE – HINGE SPAN-A SPAN-C SPAN-D Í STEEL-GIRDER-CONTROL Í STIF-TRAN-SCHEDULE Í STIF-LONG-SCHEDULE Í BRACING-SCHEDULE Í LAT-SUPPORT-SCHEDULE 12/00 AGY BRN LOC ENG TLE COM INC ANL XSA XSB XSC XSG XSA XSB XSC XSG STG SBG SLG SPA SPC SPD SGC STS SLS BRS LTS FIX SBS HNG SPA SPC SPD SGC Optional STS SLS BRS LTS COMMAND NUMBER 1 2 3 4 10 20 25 310 350 360 370 410 350 360 370 410 422 424 426 460 480 490 492 493 494 495 496 500 507 520 460 480 490 492 493 494 495 496 4.5 Cross Section 1 Cross Section 2 Span 1 Span 2 USAGE Optional Optional Optional Optional Required Optional Optional Required Required Required Required Optional Required Required Required Optional Optional Optional Optional Required Required Required Optional Optional Optional Optional Optional Required Optional Optional Required Required Required Optional Optional Optional Optional BRASS-GIRDER ABBR COMMAND Ë SPAN-COPY FIXITY Í STIF-BEAR-SCHEDULE – HINGE PROPERTIES-ST1 PROPERTIES-ST2 – TRANSFER DEAD-LOAD LOAD-DESCR UNIFORM-DL1 POINT-DL LIVE-LOAD TRUCK-WFR TRUCK-IMP TRUCK-CODE1 TRUCK-CODE2 SPECIAL-TRUCK SPECIAL-LANE AXLE-WF DESIGN ¬ INVENTORY OPERATING POSTING SAFE-LOAD † LOAD-LEVEL-1 † LOAD-LEVEL-2 † LOAD-LEVEL-3 † LOAD-LEVEL-4 Í POINT-OF-INTEREST Í INTERMEDIATE-OUTPUT STEEL-1 STEEL-2 STEEL-3 STEEL-4 < SCP FIX SBS HNG PS1 PS2 XFR DLD LDE UL1 PTD LLD TRW TRI TR1 TR2 STR SPN AWF DES INV OPG PST SLD LL1 LL2 LL3 LL4 POI INO SL1 SL2 SL3 SL4 COMMAND NUMBER 498 500 507 520 530 540 823 830 840 850 860 880 900 910 920 930 940 950 960 980 990 1000 1010 1020 1021 1022 1023 1024 1025 1026 1030 1040 1050 1060 One or more required to define live load if parameter 6 of Live Load Command is blank One set for each analysis point desired USAGE Optional Required Optional Optional Required Required Optional Required Optional Optional Optional Required Optional Optional Optional Optional Optional Optional Optional Required Optional Optional Optional Optional Optional Optional Optional Optional Optional Optional Required Required Required Required Due to space constraints, no dialog screens are available in the Graphical User Interface. w These commands may be placed anywhere in the input data set. Í These commands are used when the schedule-based option is selected. Due to space constraints, no dialog screens are available in the Graphical User Interface. Ë SPAN-COPY may be used in lieu of SPAN-A through SPAN-D commands. See provisions on page 10.30. – The HINGE and TRANSFER commands may be used to specify additional special analysis points (node points). ¬ Required for Allowable Stress Design (ASD) rating. † Required for Load Factor Design (LFD) rating. available in the Graphical User Interface. 12/00 4.6 Due to space constraints, no dialog screens are BRASS-GIRDER 5. Three span concrete girder or parabolically haunched reinforced concrete T girder bridge with integral columns. Girder rating. COMMAND < ABBR COMMAND NUMBER USAGE AGENCY < BRIDGE-NAME < LOCATION < ENGINEER AGY BRN LOC ENG 1 2 3 4 Optional Optional Optional Optional TITLE COMMENT * INCLUDE * ANALYSIS XSECT-A XSECT-B XSECT-G XSECT-A XSECT-B XSECT-G XSECT-A XSECT-B XSECT-G STIRRUP-GROUP Í SPAN-A SPAN-B SPAN-C SPAN-D STIRRUP-SCHEDULE Í FIXITY – HINGE SPAN-A SPAN-B SPAN-C SPAN-D Í STIRRUP-SCHEDULE Ë SPAN-COPY FIXITY – HINGE SPAN-A SPAN-B SPAN-C TLE COM INC ANL XSA XSB XSG XSA XSB XSG XSA XSB XSG SIG SPA SPB SPC SPD SIS FIX HNG SPA SPB SPC SPD SIS SCP FIX HNG SPA SPB SPC 10 20 25 310 350 360 410 350 360 410 350 360 410 428 460 470 480 490 497 500 520 460 470 480 490 497 498 500 520 460 470 480 Required Optional Optional Required Required Required Required Required Required Required Required Required Required Optional Required Required Required Required Optional Required Optional Required Required Required Required Optional Optional Required Optional Required Required Required 12/00 4.7 Cross Section 1 Cross Section 2 Cross Section 3 Span 1 Span 2 BRASS-GIRDER COMMAND ABBR COMMAND NUMBER USAGE SPAN-D Í STIRRUP-SCHEDULE Ë SPAN-COPY FIXITY – HINGE SPAN-A SPAN-C SPAN-D Í STIRRUP-SCHEDULE FIXITY – HINGE SPAN-A SPAN-C SPAN-D Í STIRRUP-SCHEDULE Ë SPD SIS SCP FIX HNG SPA SPC SPD SIS FIX HNG SPA SPC SPD 490 497 498 500 520 460 480 490 497 500 520 460 480 490 Required Optional Optional Required Optional Required Required Required Optional Required Optional Required Required Required SIS 497 Optional 498 500 520 550 823 830 840 850 860 870 880 910 920 930 940 950 960 980 990 1000 1010 1020 1025 1026 1080 1090 Optional Required Optional Required Optional Required Optional Optional Optional Optional Required Optional One or more required to Optional define live loads if Optional parameter 6 of Live Optional LLOAD Command is blank. Optional Optional Required Optional One or more Optional required for rating. Optional Optional Optional Optional One set for each Required point to be rated. Required SPAN-COPY FIXITY – HINGE PROPERTIES-RC – TRANSFER DEAD-LOAD LOAD-DESCR UNIFORM-DL1 POINT-DL TEMP-SETL LIVE-LOAD TRUCK-IMP TRUCK-CODE1 TRUCK-CODE2 SPECIAL-TRUCK SPECIAL-LANE AXLE-WF DESIGN INVENTORY OPERATING POSTING SAFE-LOAD Í POINT-OF-INTEREST Í INTERMEDIATE-OUTPUT CONCRETE-1 CONCRETE-2 SCP FIX HNG PRC XFR DLD LDE UL1 PTD TSL LLD TRI TR1 TR2 STR SPN AWF DES INV OPG PST SLD POI INO CR1 CR2 Span 3 Span 8 Span 9 < Due to space constraints, no dialog screens are available in the Graphical User Interface. w These commands may be placed anywhere in the input data set. Ë SPAN-COPY may be used in lieu of SPAN-A through SPAN-D commands. See provisions on page 10.30. Í These commands are used when the schedule-based option is selected. Due to space constraints, no dialog screens are available in the Graphical User Interface. – The HINGE and TRANSFER commands may be used to specify additional special analysis points (node points). 12/00 4.8 BRASS-GIRDER 6. Three span reinforced concrete slab bridge. Preliminary run for ultimate strength design only. NOTE: The option to use schedule-based input of stirrups and other shear data does not apply to the ultimate strength design option, so can not be used for this example. Also, do not exceed five spans. Commands for concrete T girder and box girder are the same as those listed for the slab bridge, except the XSECT-D command is an optional command. Also, the CONCRETE-6 command is required only for a box girder as noted. COMMAND COMMAND ABBR NUMBER USAGE < AGENCY < BRIDGE-NAME < LOCATION < ENGINEER TITLE COMMENT * INCLUDE * SYSTEM-1 ANALYSIS XSECT-A XSECT-B SPAN-A SPAN-B SPAN-C FIXITY SPAN-A SPAN-B SPAN-C Ë SPAN-COPY FIXITY SPAN-A SPAN-B SPAN-C Ë SPAN-COPY FIXITY PROPERTIES-RC PROPERTIES-RCB DEAD-LOAD LOAD-DESCR UNIFORM-DL1 POINT-DL LIVE-LOAD TRUCK-WFR 12/00 AGY BRN LOC ENG TLE COM INC SY1 ANL XSA XSB SPA SPB SPC FIX SPA SPB SPC SCP FIX SPA SPB SPC SCP FIX PRC PCB DLD LDE UL1 PTD LLD TRW 1 2 3 4 10 20 25 30 310 350 360 460 470 480 500 460 470 480 498 500 460 470 480 498 500 550 560 830 840 850 860 880 900 4.9 Optional Optional Optional Optional Required Optional Optional Optional Required Required Required Required Optional Required Optional Required Optional Required Optional Optional Required Optional Required Optional Optional Required Optional Required Optional Optional Optional Required Optional BRASS-GIRDER COMMAND ABBR TRUCK-IMP TRUCK-CODE1 TRUCK-CODE2 SPECIAL-TRUCK SPECIAL-LANE AXLE-WF DESIGN INVENTORY CONCRETE-3 CONCRETE-4 CONCRETE-5 k CONCRETE-6 k CONCRETE-6 k CONCRETE-6 CONCRETE-9 END TRI TR1 TR2 STR SLN AWF DES INV CR3 CR4 CR5 CR6 CR6 CR6 CR9 END COMMAND NUMBER 910 920 930 940 950 960 980 990 1100 1110 1120 1130 1130 1130 1160 28 USAGE One or more required to define live loads if parameter 6 of Live Load Command is blank. Optional Optional Optional Optional Optional Optional Required Optional Required Required Required Optional Optional Optional Required Optional < Due to space constraints, no dialog screens are available in the Graphical User Interface. w These commands may be placed anywhere in the input data set. Ë SPAN-COPY may be used in lieu of SPAN-A through SPAN-D commands. See provisions on page 10.30. k The CONCRETE-6 command is required and used only for a box-girder. 12/00 4.10 BRASS-GIRDER 7. Three span reinforced concrete slab. Final run for ultimate strength design only. NOTE: The option to use schedule-based input of stirrups and other shear data does not apply to the ultimate strength design option, so can not be used for this example. Also, do not exceed five spans. Commands for concrete T and box girder are the same as those listed for the slab bridge, except the XSECT-D command is an optional command. COMMAND COMMAND ABBR NUMBER USAGE < AGENCY < BRIDGE-NAME < LOCATION < ENGINEER TITLE COMMENT * INCLUDE * SYSTEM-1 ANALYSIS XSECT-A XSECT-B SPAN-A SPAN-C FIXITY SPAN-A SPAN-C Ë SPAN-COPY FIXITY SPAN-A SPAN-C Ë SPAN-COPY FIXITY PROPERTIES-RC PROPERTIES-RCB DEAD-LOAD LOAD-DESCR UNIFORM-DL1 POINT-DL LIVE-LOAD TRUCK-WFR TRUCK-IMP 12/00 AGY BRN LOC ENG TLE COM INC SY1 ANL XSA XSB SPA SPC FIX SPA SPC SCP FIX SPA SPC SCP FIX PRC PCB DLD LDE UL1 PTD LLD TRW TRI 1 2 3 4 10 20 25 30 310 350 360 460 480 500 460 480 498 500 460 480 498 500 550 560 830 840 850 860 880 900 910 4.11 Optional Optional Optional Optional Required Optional Optional Optional Required Required Required Required Required Optional Required Required Optional Optional Required Required Optional Optional Required Optional Required Optional Optional Optional Required Optional Optional BRASS-GIRDER COMMAND ABBR COMMAND NUMBER USAGE TRUCK-CODE1 TRUCK-CODE2 SPECIAL-TRUCK SPECIAL-LANE AXLE-WF DESIGN INVENTORY CONCRETE-3 CONCRETE-6 TR1 TR2 STR SLN AWF DES INV CR3 CR6 920 930 940 950 960 980 990 1100 1130 Optional Optional Optional Optional Optional Required Optional Required Required CONCRETE-7 CR7 1140 CONCRETE-8 CR8 1150 CONCRETE-6 CR6 1130 CONCRETE-7 CR7 1140 CONCRETE-8 CR8 1150 CONCRETE-6 CONCRETE-7 CR6 CR7 1130 1140 CONCRETE-8 CR8 1150 CONCRETE-9 END CR9 END One or more required to define live loads if parameter 6 of Live Load Command is blank Required for each group in span. Required for each 2 bars and/or bar sets in group. Span 1 Span 1 Required Required for each group in span. Required for each 2 bars and/or bar sets in group. Span 2 Span 2 Required Required for each group in span. Required for each 2 bars and/or bar sets in group. 1160 28 Span 3 Span 3 Required Optional < Due to space constraints, no dialog screens are available in the Graphical User Interface. w These commands may be placed anywhere in the input data set. Ë SPAN-COPY may be used in lieu of SPAN-A through SPAN-D commands. See provisions on page 10.30. 12/00 4.12 BRASS-GIRDER 8. Simple span timber bridge with plank deck. Rate deck and girder. COMMAND < AGENCY < BRIDGE-NAME < LOCATION < ENGINEER TITLE COMMENT * INCLUDE * DECK-CON DECKT-G1 DECKT-G2 DECKT-G3 DECKT-LWT1 DECKT-LWT2 DECKT-LWT3 DECKT-LWT4 DECK-TRK1 DECK-TRK2 ANALYSISANL XSECT-A XSECT-B SPAN-A SPAN-C FIXITY – HINGE PROPERTIES-TIM – TRANSFER DEAD-LOAD LOAD-DESCR UNIFORM-DL1 POINT-DL LIVE-LOAD TRUCK-WFR TRUCK-IMP TRUCK-CODE1 TRUCK-CODE2 SPECIAL-TRUCK SPECIAL-LANE AXLE-WF DESIGN INVENTORY OPERATING POSTING SAFE-LOAD TIMBER ABBR AGY BRN LOC ENG TLE COM INC DCN DG1 DG2 DG3 DL1 DL2 DL3 DL4 DT1 DT2 310 XSA XSB SPA SPC FIX HNG PTM XFR DLD LDE UL1 PTD LLD TRW TRI TR1 TR2 STR SPN AWF DES INV OPG PST SLD TMB COMMAND NUMBER USAGE 1 2 3 4 10 20 25 60 220 230 240 250 260 270 280 290 300 Optional Optional Optional Optional Required Optional Optional Required Required Optional Optional Optional Optional Optional Optional Required Optional One is Required for rating. Required 350 360 460 480 500 520 570 823 830 840 850 860 880 900 910 920 930 940 950 960 980 990 1000 1010 1020 1190 One or more is required to define live load if parameter 6 of Live Load command is blank. One or more required for rating. Required Required Required Required Optional Optional Required Optional Required Optional Optional Optional Required Optional Optional Optional Optional Optional Optional Optional Required Optional Optional Optional Optional Required < w Due to space constraints, no dialog screens are available in the Graphical User Interface. These commands may be placed anywhere in the input data set. – The HINGE and TRANSFER commands may be used to specify additional special analysis points (node points). 12/00 4.13 BRASS-GIRDER 9. Two span prestressed, AASHTO I-Girder - composite-design. NOTE: The option to use schedule-based input of stirrups and other shear data does not apply to the design of a prestressed concrete girder, so can not be used for this example. COMMAND < AGENCY < BRIDGE-NAME < LOCATION < ENGINEER TITLE COMMENT * INCLUDE * SYSTEM-1 ANALYSIS Í XSECT-STD XSECT-A XSECT-B XSECT-C XSECT-D XSECT-E SPAN-A SPAN-C FIXITY – HINGE SPAN-A SPAN-C FIXITY Ë SPAN-COPY – HINGE PROPERTIES-PC1 PROPERTIES-PC2 PROPERTIES-PC6 STRAND-ST5 12/00 12/00 ABBR COMMAND NUMBER USAGE AGY BRN LOC ENG TLE COM INC SY1 ANL XST XSA XSB XSC XSD XSE SPA SPC FIX HNG SPA SPC FIX SCP HNG PC1 PC2 PC6 ST5 1 2 3 4 10 20 25 30 310 340 350 360 370 380 390 460 480 500 520 460 480 500 498 520 580 590 625 665 Optional Optional Optional Optional Required Optional Optional Optional Required Optional Optional Optional Optional Optional Optional Required Required Required Optional Required Required Optional Optional Optional Required Optional Optional Required 4.14 Span 1 Span 2 BRASS-GIRDER COMMAND ABBR CABLE-DES DEAD-LOAD LIVE-LOAD l TRUCK-CODE1 AXLE-WF DESIGN PRESTRESS-3 PRESTRESS-4 PRESTRESS-5 PRESTRESS-6 END CDS DLD LLD TR1 AWF DES PR3 PR4 PR5 PR6 END COMMAND NUMBER 825 830 880 920 960 980 1181 1182 1183 1184 28 USAGE One set required for each span. Required Required Required Optional Optional Required Required Optional Optional Optional Optional < Due to space constraints, no dialog screens are available in the Graphical User Interface. w These commands may be placed anywhere in the input data set. Í The XSECT-COORD1 and XSECT-COORD2 commands may not be used for prestressed concrete girder design. Ë SPAN-COPY may be used in lieu of SPAN-A through SPAN-D commands. See provisions on page 10.30. l A minimum of two trucks (HS20T and LANEHS20) are required when designing a Prestressed Concrete Girder. – The HINGE command may be used to specify additional special analysis points (node points). 12/00 4.15 BRASS-GIRDER 10. Two Span prestressed, AASHTO I-Girder-composite-rating. COMMAND COMMAND ABBR NUMBER USAGE AGENCY < BRIDGE-NAME < LOCATION < ENGINEER < TITLE COMMENT * INCLUDE * SYSTEM-1 ANALYSIS XSECT-STD (1) XSECT-A XSECT-C (2) AGY BRN LOC ENG TLE COM INC SY1 ANL XST XSA XSC 1 2 3 4 10 20 25 30 310 340 350 370 Optional Optional Optional Optional Required Optional Optional Optional Required Required Optional Optional XSECT-G XSG 410 STIRRUP-GROUP Í SPAN-A SPAN-C STIRRUP-SCHEDULE Í FIXITY HINGE – SPAN-A SPAN-C SPAN-COPY Ë STIRRUP-SCHEDULE Í FIXITY HINGE – PROPERTIES-PC1 PROPERTIES-PC2 PROPERTIES-PC3 PROPERTIES-PC4 PROPERTIES-PC5 SIG SPA SPC SIS FIX HNG SPA SPC SCP SIS FIX HNG PC1 PC2 PC3 PC4 PC5 428 460 480 497 500 520 460 480 498 497 500 520 580 590 600 610 620 STRAND-ST1 STRAND-ST2 STRAND-ST3 STRAND-ST4 POST-TENSION1 POST-TENSION2 CABLE-S1 ST1 ST2 ST3 ST4 PT1 PT2 CS1 630 640 650 660 670 680 690 12/00 4.16 Required to define composite slab. Required when reinforcing steel in composite slab over support. Span 1 Span 2 Required when prestress losses to be calculated by PCI general method. One set required for each type of prestressing strand. Optional Optional Required Required Optional Optional Optional Required Required Optional Optional Required Optional Required Required Optional Optional Optional Required Optional Optional Optional Optional Optional Optional BRASS-GIRDER COMMAND ABBR COMMAND NUMBER USAGE CABLE-S2 CABLE-H1 CABLE-H2 CABLE-H3 CABLE-P1 CABLE-P2 CABLE-PC1 CABLE-PC2 CABLE-PC3 CABLE-DUP DEBOND – TRANSFER PS-BEAM-OVERHANG PS-BEAM-SHEAR DEAD-LOAD LOAD-DESCR UNIFORM-DL1 POINT-DL TEMP-SETL LIVE-LOAD TRUCK-WFR TRUCK-IMP TRUCK-CODE1 TRUCK-CODE2 SPECIAL-TRUCK SPECIAL-LANE AXLE-WF DESIGN INVENTORY OPERATING POSTING SAFE-LOAD POINT-OF-INTEREST PRESTRESS-1 PRESTRESS-2 END CS2 CH1 CH2 CH3 CP1 CP2 CB1 CB2 CB3 DUP DBD XFR PBO PBS DLD LDE UL1 PTD TSL LLD TRW TRI TR1 TR2 STR SLN AWF DES INV OPG PST SLD POI PR1 PR2 END 700 710 720 730 740 750 760 770 780 810 820 823 824 826 830 840 850 860 870 880 900 910 920 930 940 950 960 980 990 1000 1010 1020 1025 1170 1180 28 Optional Optional Optional Optional Optional Optional Optional Optional Optional Optional Optional Optional Optional Optional Required Optional Optional Optional Optional Required Optional Optional Optional Optional Optional Optional Optional Required Optional Optional Optional Optional Optional Required Optional Optional Use as required to define geometry of prestressing strands. Use as required to define geometry of prestressing strands. One or more required to define live load of parameter 6 of Live Load command is blank. One or more required for rating. One set for each point to be rated. < Due to space constraints, no dialog screens are available in the Graphical User Interface. w These commands may be placed anywhere in the input data set. Ë SPAN-COPY may be used in lieu of SPAN-A through SPAN-D commands. See provisions on page 10.30. – The HINGE and TRANSFER commands may be used to specify additional special analysis points (node points). Í These commands are used only when a LFD rating is desired and when the schedule-based option is selected. Due to space constraints, no dialog screens are available in the Graphical User Interface. 11/01 4.17 BRASS-GIRDER 11. Sample span, box girder rating. COMMAND < AGENCY < BRIDGE-NAME < LOCATION < ENGINEER TITLE COMMENT * INCLUDE * ANALYSIS XSECT-A XSECT-B XSECT-G Í STIRRUP-GROUP SPAN-A SPAN-C Í STIRRUP-SCHEDULE FIXITY – HINGE PROPERTIES-PC1 PROPERTIES-PC2 PROPERTIES-PC3 PROPERTIES-PC4 PROPERTIES-PC5 STRAND-ST1 STRAND-ST2 STRAND-ST3 STRAND-ST4 POST-TENSION1 POST-TENSION2 CABLE-S1 CABLE-S2 CABLE-H1 CABLE-H2 CABLE-H3 CABLE-P1 CABLE-P2 11/01 ABBR COMMAND NUMBER USAGE AGY BRN LOC ENG TLE COM INC ANL XSA XSB XSG SIG SPA SPC SIS FIX HNG PC1 PC2 PC3 PC4 PC5 ST1 ST2 ST3 ST4 PT1 PT2 CS1 CS2 CH1 CH2 CH3 CP1 CP2 1 2 3 4 10 20 25 310 350 360 410 428 460 480 497 500 520 580 590 600 610 620 630 640 650 660 670 680 690 700 710 720 730 740 750 Optional Optional Optional Optional Required Optional Optional Required Required Required Required Optional Required Required Optional Required Optional Required Required Optional Optional Optional Required Optional Optional Optional Optional Optional Optional Optional Optional Optional Optional Optional Optional 4.18 Repeat as required to describe section. Required when prestress losses to be calculated by PCI general method One set required for such type of prestressing strand. Use as required to define geometry of prestressing strands. BRASS-GIRDER COMMAND ABBR CABLE-PC1 CABLE-PC2 CABLE-PC3 CABLE-DUPDUP DEBOND – TRANSFER DEAD-LOAD LOAD-DESCR UNIFORM-DL1 POINT-DL PTD TEMP-SETL LIVE-LOAD TRUCK-WFR TRUCK-IMP TRUCK-CODE1 TRUCK-CODE2 SPECIAL-TRUCK SPECIAL-LANE AXLE-WF DESIGN INVENTORY OPERATING POSTING SAFE-LOAD POINT-OF-INTEREST PRESTRESS-1 PRESTRESS-2 END CB1 CB2 CB3 810 DBD XFR DLD LDE UL1 860 TSL LLD TRW TRI TR1 TR2 STR SLN AWF DES INV OPG PST SLD POI PR1 PR2 END COMMAND NUMBER USAGE 760 770 780 Optional Optional Optional Optional 820 823 830 840 850 Optional Optional Required Optional Optional Optional 870 880 900 910 920 930 940 950 960 980 990 1000 1010 1020 1025 1170 1180 28 One or more required to define live load if parameter 6 of Live Load command is blank One or more required for rating. One set for each point to be rated. Optional Required Optional Optional Optional Optional Optional Optional Optional Required Optional Optional Optional Optional Optional Required Optional Optional < Due to space constraints, no dialog screens are available in the Graphical User Interface. w These commands may be placed anywhere in the input data set. – The HINGE and TRANSFER commands may be used to specify additional special analysis points (node points). Í These commands are used only when a LFD rating is desired and when the schedule-based option is selected. Due to space constraints, no dialog screens are available in the Graphical User Interface. 5/01 4.19 BRASS-GIRDER 5/01 4.20 BRASS-GIRDER 5. PAGE HEADER AND COMMENTS The commands in this section define a header to be used on each page of output and optional comments used in the command set to help the user document the input. 12/00 5.1 BRASS-GIRDER 1 BRASS-GIRDER™ COMMAND NAME PURPOSE COMMAND DESCRIPTION AGENCY AGY Use to define the name of the agency or company that is running BRASS. This name appears on the BRASS output page headers. This command is optional. 1 COMMAND PARAMETER Agency Name Enter the name of the agency or company that is running BRASS. Up to 60 characters may be used. Default = “Wyoming Department of Transportation, Bridge Design Division” 12/00 5.2 BRASS-GIRDER EXAMPLE AGENCY GLANDT AND WATTERS ENGINEERS INC. FIGURES NOTES 12/00 5.3 BRASS-GIRDER 2 BRASS-GIRDER™ COMMAND NAME PURPOSE COMMAND DESCRIPTION BRIDGE-NAME BRN The BRIDGE-NAME command may be used to document the bridge number and short description of the feature intersected. This command is optional. 2 COMMAND PARAMETERS Structure Number Enter the bridge code or NBI structure number. Up to 15 characters may be used. Feature Intersected Enter a short description of the feature intersected. Up to 60 characters may be used. 12/00 5.4 BRASS-GIRDER EXAMPLE BRIDGE-NAME 5353NWI95, BRIDGE OVER SKUNK CREEK FIGURES NOTES 12/00 5.5 BRASS-GIRDER 3 BRASS-GIRDER™ COMMAND NAME PURPOSE COMMAND DESCRIPTION LOCATION LOC This command is used to define the bridge’s location by milepost (or kilometer post) and route. This command is optional. 2 COMMAND PARAMETERS Milepost or Kilometer Post Enter the milepost (or kilometer post) where the bridge is located. Route Name Enter the route name where the bridge is located. Up to 60 characters may be used. 12/00 5.6 BRASS-GIRDER EXAMPLE LOCATION 90.870, U.S. 14 CODY TO YELLOWSTONE PARK FIGURES NOTES 12/00 5.7 BRASS-GIRDER 4 COMMAND DESCRIPTION BRASS-GIRDER™ COMMAND NAME PURPOSE ENGINEER ENG This command is used to define the name of the engineer that is running the program. This command is optional. 1 COMMAND PARAMETER Engineer 12/00 Enter the name of the engineer that is running the program. Up to 60 characters may be used. 5.8 BRASS-GIRDER EXAMPLE ENGINEER JANE DOE P.E., BRIDGE ENGINEER FIGURES NOTES 12/00 5.9 BRASS-GIRDER 10 BRASS-GIRDER™ COMMAND NAME PURPOSE COMMAND DESCRIPTION TITLE TLE The data entered by this command is used to identify the output to the user. Agency name, page number and date are included as page heading. This command is required. 1 COMMAND PARAMETER One or two TITLE commands may be used and each can have up to 60 characters of information. TITLE commands must be the first in the sequence of input commands. 12/00 5.10 BRASS-GIRDER EXAMPLE TITLE FOUR SPAN CONCRETE T-GIRDER BRIDGE OVER CRAZY WOMAN CREEK. TITLE STATION 392+05 1-19-95. FIGURES NOTES 12/00 5.11 BRASS-GIRDER 20 COMMAND DESCRIPTION BRASS-GIRDER™ COMMAND NAME PURPOSE COMMENT COM The COMMENT command may be used to document the string of input commands. They may be inserted in any number in any location in the input after the TITLE command(s). 1 COMMAND PARAMETER One or more may be inserted as needed and each may contain up to 60 characters of descriptive data. 12/00 5.12 BRASS-GIRDER EXAMPLE COMMENT COMMENT INPUT SPAN DATA FOR SPANS 1-3. USE PARABOLIC DEPTH VARIATION. COMMENT COMMENT DEAD LOAD TO GIRDER ON FOLLOWING DEAD-LOAD COMMAND. COMMENT INCLUDES DECK, CURBS, RAIL AND WEARING SURFACE. FIGURES NOTES 12/00 5.13 BRASS-GIRDER 25 BRASS-GIRDER™ COMMAND NAME PURPOSE COMMAND DESCRIPTION INCLUDE INC This command is used to insert one or more BRASS-GIRDER™ commands contained in a data file. 1 COMMAND PARAMETER Included file name 12/00 Enter the name of the file to be included. If this file resides in a different directory then the executable program, the full path of the file must be given. 5.14 BRASS-GIRDER EXAMPLE PROPERTIES-ST1 490.000, 29000.0, 3.750, 20.00, 12.000000 DEAD-LOAD 1, 1.0448, , , COMMENT Use INCLUDE file lloads.dat to define live loads. INCLUDE c:\bgirder\exe\lloads.dat Note: If the file lloads.dat is in the same directory as your data set(s), the full path does not need to be defined. FIGURES NOTES INCLUDE commands can also be nested inside included files. BRASS-GIRDER™ reads the file until the INCLUDE command is encountered. The INCLUDE file is then opened and read sequentially until the end of the file is reached. BRASS then refers control back to the calling file and continues reading at the command following the INCLUDE command. This command can be used to separate structure data from applied live loads, analysis method, and applied load factors. This is important for routing purposes where the same permit vehicle is run across several structures. 12/00 5.15 BRASS-GIRDER 28 COMMAND DESCRIPTION BRASS-GIRDER™ COMMAND NAME END END This command is used to separate multiple input data sets within a single Command File. PURPOSE This command is not used when only one structure is described. This command may not be used with any of the commands in Chapter 15 (Library Maintenance). 0 COMMAND PARAMETERS 12/00 5.16 BRASS-GIRDER EXAMPLE TITLE BRIDGE OVER CRAZY WOMAN CREEK I-25 KP 567.232 EBL ANALYSIS 1, 0, 4 • • • • • STEEL-1 205 END TITLE BRIDGE OVER CRAZY WOMAN CREEK I-25 KP 568.489 WBL ANALYSIS 1, 0, 4 • • • • • STEEL-1 205 FIGURES NOTES This command must be placed at the end of a set of commands describing a single structure. 12/00 5.17 BRASS-GIRDER 12/00 5.18 BRASS-GIRDER 6. SYSTEM AIDES The following three commands are basically for assisting the Systems Analyst. However, they are available to the Engineer who desires to further comprehend the internal logic, equations and flow paths utilized in BRASS-GIRDER™. 10/98 6.1 BRASS-GIRDER 30 BRASS-GIRDER™ COMMAND NAME PURPOSE COMMAND DESCRIPTION SYSTEM-1 SY1 This command is used to obtain additional information from a run of BRASS. If used, the SYSTEM-1 command should follow the TITLE command. This command is optional. 6 COMMAND PARAMETERS Additional User Output This parameter controls the level of possible additional output that may be useful to the user. Except for prestressed girders, three levels of additional output are available, with level 3 producing the most output. Each level contains all of the output of the lower levels. A description of the levels (ITRACE) available for prestress rating follows: Note: For the analysis or rating of a prestressed girder, three levels of additional output are available for each of the following categories: rating computations, cable path generation, prestress loads generation, and prestress loss computation. Level 1 - Includes all output from levels 2, 5, and 8. Level 2 - A report of the data used for rating and the intermediate results, including: section properties, loads, allowable stresses and actual stresses (working stress), moment capacity (load factors). Level 3 - Level 2 plus a report of the intermediate results of the ultimate loss computations. Level 4 - Level 3 plus more detailed output of the ultimate moment capacity computations. Level 5 - A report of the input strand properties and data defining geometry of the strands. Level 6 - Level 5 plus a report of the strand area, location, and stresses plus a report of the friction loss computations. Level 7 - Level 6 plus more detailed output of the intermediate results of the friction loss computations. Level 8 - A report of the loads applied to the structure due to the change in prestress force. (Continued) 2/03 6.2 BRASS-GIRDER COMMAND PARAMETERS (Cont.) Level 9 - Level 8 plus a report of the intermediate results of the computation of the prestress loads. Level 10 - Level 9 plus more detailed output of the computation of the prestress loads. Levels 11 through 19 may be used to request additional output during the computation of prestress losses. BRASS 5 will calculate prestress losses according to either AASHTO I-9.16.2.1 or the PCI General Method. Levels 11, 12, or 13 may be used to request additional output from the AASHTO method or Stage 1 computations of the PCI General Method. Levels 14, 15, or 16 may be used to request additional output from Stage 2 of the PCI General Method and Levels 17, 18, or 19 may be used to request additional output from Stage 3 of the PCI General Method. Level Use for construction stage 11, 12, or 13 1 14, 15, or 16 2 17, 18 or 19 3 (or AASHTO Method) Level 12 - Adds a detailed report of the intermediate results of the loss computations for node points 1 and 2, row 1 and a table summarizing the losses for all rows and node points. Level 17 - A report of the data used to calculate the prestress losses. Level 19 - Adds a detailed report of the intermediate results of the loss computations for all node points and rows. (This level should be used only for debugging as excessive output is generated). Level 20 - Map of prestressed loads due to losses across elements. NOTE: For the design of reinforced concrete girders, three levels of output are available in each run as described below: Preliminary Run Level 1 - Will give additional data relating to minimum and maximum reinforcing and will output fatigue stresses. Level 2 - Level 1 plus output on shear stresses, distribution of flexure reinforcement requirements and will note if any compression reinforcement is outside compression zone. Level 3 - Levels 1 & 2 plus more detailed output. (Continued) 2/97 6.3 BRASS-GIRDER COMMAND PARAMETERS (Cont.) Final Run Level 1 - Will give additional output including that related to inflection points and fatigue. Level 2 - Level 1 plus more output including more information related to fatigue, intermediate cutoff locations and shear stresses. Level 3 - Levels 1 & 2 plus more detailed output. Program Path If this parameter is coded 1, the name of each subroutine called during the execution of the program will be printed on the right side of the output when the subroutine is called. The subroutine number and the component number in which it resides will also be printed. If this parameter is coded 2, only the subroutine names of those subroutines called for in the SYSTEM-2 and SYSTEM-3 commands are listed. NOTE: Parameters 3, 4 and 5 below apply only to prestress design. Minimum Output Normal execution of the prestress design program will produce several reports which are not needed until later stages of design. See page 14.71 for further explanation. In the earlier stages of design, these reports may be suppressed by coding 1. Minimum output only when overstress Code 1 to suppress the reports described above only when overstressing occurs. Detailed output of stirrup spacing Normal execution of the prestress design program will print a summary of stirrup spacing computed by 1979 Interim and by Article 9.20.2 - 1983 AASHTO specifications. If you want output of detailed computations of Article 9.20.2, Code 1. Output a summary report of prestress losses. Default = 0 Code 1 to output a summary report of prestress losses when calculated by the AASHTO method. 2/03 6.4 BRASS-GIRDER EXAMPLE SYSTEM-1 2, 1 This example calls for Level Two of additional output of interest to the user and turns on the trace of all subroutines called. FIGURES NOTES 2/97 6.5 BRASS-GIRDER 40 COMMAND DESCRIPTION BRASS-GIRDER™ COMMAND NAME PURPOSE SYSTEM-2 SY2 This command turns on traces of intermediate values from one or more BRASS components. The command may be repeated if more than 6 components are to be traced. This command is optional. 6 COMMAND PARAMETERS First Component Number Enter the number of the BRASS Component to be traced. Second Component Number Enter the number of the BRASS Component to be traced. Third Component Number Enter the number of the BRASS Component to be traced. Fourth Component Number Enter the number of the BRASS Component to be traced. Fifth Component Number Enter the number of the BRASS Component to be traced. Sixth Component Number Enter the number of the BRASS Component to be traced. 2/97 6.6 BRASS-GIRDER EXAMPLE SYSTEM-2 3, 5 The above will turn on a trace of components #3 and #5. #3 is Deck Analysis. #5 is Bridge Geometry. FIGURES NOTES 3/96 6.7 BRASS-GIRDER 50 COMMAND DESCRIPTION BRASS-GIRDER™ COMMAND NAME PURPOSE SYSTEM-3 SY3 This command turns on traces of intermediate values from one or more subroutines. The command may be repeated if more than 6 subroutines are to be traced. This command is optional. 6 COMMAND PARAMETERS First Subroutine Enter the number of the BRASS subroutine to be traced. Second Subroutine Enter the number of the BRASS subroutine to be traced. Third Subroutine Enter the number of the BRASS subroutine to be traced. Forth Subroutine Enter the number of the BRASS subroutine to be traced. Fifth Subroutine Enter the number of the BRASS subroutine to be traced. Sixth Subroutine Enter the number of the BRASS subroutine to be traced. 2/97 6.8 BRASS-GIRDER EXAMPLE SYSTEM-3 33, 34, 41 The above will turn on a trace of subroutines MESHDS, MESHGN, and PRGEN. FIGURES NOTES 3/96 6.9 BRASS-GIRDER 3/96 6.10 BRASS-GIRDER 7. BRIDGE DECK ANALYSIS This component calculates stresses and load rating factors for concrete or timber bridge sections. The required reinforcing steel area may be determined for a concrete deck by the working stress method. Load rating factors can be calculated either by the strength or working stress design method. The commands for this component, if used, must be executed prior to the commands for executing girder analysis. This allows the bridge deck rating factors to be compared with girder ratings for determination of the controlling ratings. The weight of curbs and/or median are calculated and placed on the deck based on the dimensions input and unit weight of the material. In addition the weight of railing, barriers, overlays, etc., may be considered. The weight of a wearing surface may also be entered. The plan dimensions of the wearing surface may be defined by the curbs and median, or by the user. Live load moments due to truck wheel loads are calculated in accordance with Article 3.24.3, AASHTO Standard Specifications for Highway Bridges. With the wheel load placed one foot from the curb, these moments include cantilever moments IAW Article 3.24.5. Wheel loads are input by the user. Maximum moments and shears are calculated for the deck analysis. The dead load reactions to the girders may be applied as the longitudinal dead load per foot for girder analysis. The user may differentiate the various load stages by using a stage code. The result will be coordinated with the staging of loads for girder analysis. 2/02 7.1 BRASS-GIRDER 60 BRASS-GIRDER™ COMMAND NAME PURPOSE COMMAND DESCRIPTION DECK-CON DCN DECK-CON is the control command for bridge deck analysis. It is required whenever a bridge deck is analyzed. Parameters one and three are the only parameters applicable for timber decks. 6 COMMAND PARAMETERS Analysis Control Code 1: Concrete design by the working strength method is desired. BRASS will determine the area of reinforcement required for a one foot wide strip of transverse concrete deck. Code 2: Rating of either a concrete or a timber deck is desired. This is the only valid code for timber decks. Code 3: Distribution of the dead load of the deck and its appurtenances to the supporting girders is desired. This is only valid for concrete decks. No deck rating is performed. See Note 1 Analysis Girder Concrete decks only. If timber deck, leave blank. Code girder number for which dead load reaction will be applied. See Note 2. The reaction at this girder due to a 1' wide strip of deck and its appurtenances will be applied to the analysis girder as a continuous uniform load on top spans. To obtain girder number, count from left to right. Leave Blank: No dead load reaction due to the deck and its appurtenances is applied to the analysis girder. Use parameters on the DEAD-LOAD command to input loads. Code 0: The maximum reaction at any girder due to the deck and its appurtenances will be applied to the analysis girder as a continuous uniform load on top spans. Note: Code blank if the deck is a part of the girder as in the case of a reinforced concrete T-girder. (Continued) 2/00 7.2 BRASS-GIRDER COMMAND PARAMETERS (Cont.) Continuity Default = 2 If the deck is continuous over 3 or more girders, code 2 . If simple span supported by two girders, code 1. Girder type Default = 1 * Not required for timber decks. Code 1: Steel or prestressed I-beams supporting girders. Code 2: Concrete supporting girders. Analysis Type Default = 1 Code 1: Working strength analysis. Code 2: Ultimate strength analysis. (Use default for timber decks (working stress analysis only.) Intermediate Output Control Default = 0 1 = Intermediate output for dead load distribution methods Tributary Area, Transverse Simple Beam, & Uniformity Distribution to all girders. See Note 1. 2 = Intermediate output for concrete service load design. 3 = Intermediate output for deck analysis and moment distribution. 11/01 7.3 BRASS-GIRDER EXAMPLE Refer to Figure 1: DECK-CON 3, 3, , 1, , The first blank will default to 2 and the second blank will default to 1. Refer to Figure 2: DECK-CON 2 FIGURES See Examples Above Concrete Deck The dead load reaction to girder #3 due to dead loads will be passed to the girder analysis component. Figure 1 Timber Deck Figure 2 NOTES 3. The primary use of option 3 is to obtain the reactions to each girder supporting the deck. These could be used for pier or abutment design. Therefore, no reinforcing steel data (DECKC-BARA command) or live load data (DECK-TRK1 & 2 commands) are input. Distribution of the dead load to the supporting girders is normally accomplished using moment distribution. If a deck rating is NOT to be performed and the user wishes to distribute the loads using Tributary Area, Transverse Simple Beam, or Uniformly Distributed to all girders, use the DIST-CONTROL-DL command. 2. If Analysis Control (parameter 1) is coded a ‘2' (rating of the deck), the method of distributing deck dead loads to the girders will be by moment distribution only. The DISTCONTROL-DL command may not be used. 11/01 7.4 BRASS-GIRDER 3/96 7.5 BRASS-GIRDER 65 BRASS-GIRDER™ COMMAND NAME PURPOSE COMMAND DESCRIPTION DIST-CONTROL-DL DCD Use to control the method of distributing deck dead loads to the girders. This command is required if the deck loads are to be distributed to the bridge and a deck rating will not be performed. 3COMMAND PARAMETERS Stage 1 Method Default = TCB Enter a code to indicate the method to use to distribute deck loads in Stage 1 to the girder of interest. TA = Tributary area TSB = Transverse simple-beam TCB = Transverse continuous beam (Moment Distribution) See Notes Stage 2 Method Default = TCB Enter a code to indicate the method to use to distribute deck loads in Stage 2 to the girder of interest. TA TSB UD TCB Stage 3 Method Default = TCB Enter a code to indicate the mthod to use to distribute deck loads in Stage 3 to the girder of interest. TA TSB UD TCB 11/01 = Tributary area = Transverse simple-beam = Uniformly distributed to all girders = Transverse continuous beam (Moment Distribution) See Notes = Tributary area = Transverse simple-beam = Uniformly distributed to all girders = Transverse continuous beam (Moment Distribution) See Notes 7.5a BRASS-GIRDER EXAMPLE To distribute deck dead loads to the girder of interest using the transverse simple-beam method for stage 1, code as follows: DIST-CONTROL-DL TSB FIGURES NOTES Transverse continuous beam method assumes prismatic properties based on the gross deck section. Non-prismatic effects such as haunches are not considered in the analysis. 11/01 7.5b BRASS-GIRDER 70 BRASS-GIRDER™ COMMAND NAME COMMAND DESCRIPTION DECKC-STG DSG This command controls appurtenances (curb, rail, etc.) loading to the analysis girder when modeling a structure constructed in stages. PURPOSE This command is optional and can only be used when the "Analysis Girder", parameter -2- of the DECK-CON command is non-blank. 4 COMMAND PARAMETERS Slab stage Default = 1 Code the construction stage when the uniform load per foot due to the weight of the deck is to be applied to the analysis girder. Only 1, 2, or 3 is a valid stage. Curb stage Default = 1 Code the construction stage when the uniform load per foot due to the weight of the curbs is to be applied to the analysis girder. Only 0, 1, 2, or 3 is valid. Median stage Default = 1 Code the construction stage when the uniform load per foot due to the weight of the median is to be applied to the analysis girder. Only 0, 1, 2, or 3 is valid. Wearing surface stage Default = 1 Code the construction stage when the uniform load per foot due to the weight of the wearing surface is to be applied to the analysis girder. Only 0, 1, 2, or 3 is valid. Note: 3/96 Code 0 to specify that the load does not exist. 7.6 BRASS-GIRDER EXAMPLE In many cases this command will not be required as the structure will be constructed in one stage. The following example is for a composite steel and concrete bridge where the deck is poured in stage 1 (non-composite section supports the load) and the curbs and wearing surface are placed in the second stage (after the deck concrete has hardened and the girder act compositely). DECKC-STG , 2, 0, The first blank defaults to 1. 2 FIGURES NOTES 3/96 7.7 BRASS-GIRDER 80 COMMAND DESCRIPTION BRASS-GIRDER™ COMMAND NAME PURPOSE DECKC-COM DCM This command controls the loads used in analyzing a concrete bridge deck independent of the combination of distributed loads to be carried by the analysis girder. It might be used when steel deck forms are left in place. This command is optional and only has meaning if the "Analysis Girder", parameter -2- of the DECK-CON command is non-blank. 3 COMMAND PARAMETERS Omit stage 1 loads Code 1 if stage one loads are to be omitted from the deck analysis but will still be distributed and applied to the analysis girder. Omit stage 2 loads Code 1 if stage two loads are to be omitted from the deck analysis but will still be distributed and applied to the analysis girder. Omit stage 3 loads Code 1 if stage three loads are to be omitted from the deck analysis but will still be distributed and applied to the analysis girder. 3/96 7.8 BRASS-GIRDER EXAMPLE Suppose the engineer does not want the weight of the concrete deck to be carried by the deck as a stage 1 load as this weight is supported by steel deck forms. There is also a sidewalk section placed in stage 2 which the engineer does not want applied for the deck analysis desired. See Figure. DECKC-COM 1,1 FIGURES NOTES 3/96 7.9 BRASS-GIRDER 90 COMMAND DESCRIPTION BRASS-GIRDER™ COMMAND NAME PURPOSE DECKC-MAT DMT This command captures the materials factors for the concrete in the structural portion of the deck. This command may be omitted if the default values are desired, otherwise it is required for all concrete decks. 3 COMMAND PARAMETERS f'C Default = 4.000 Ksi Enter the 28 day compressive strength of the concrete, f ' C in kips/sq in. fy Default = 60.000 Ksi Enter the yield stress of the reinforcing steel used in the bridge deck in kips/sq in. n Default = 8 Enter the modular ratio of steel to concrete for the bridge deck. 3/96 7.10 BRASS-GIRDER EXAMPLE DECKC-MAT 3.250, 40, 10 FIGURES NOTES 2/97 7.11 BRASS-GIRDER 100 COMMAND NAME PURPOSE COMMAND DESCRIPTION BRASS-GIRDER™ DECKC-STR1 DS1 This command controls the percent of allowable stress used in working stress analysis or the load factors to be applied for ultimate strength analysis. This applies to the concrete and reinforcement used in the bridge deck and is required for design or inventory and operating ratings of a concrete deck unless the default values are acceptable. Each parameter has two meanings as described below. 4 COMMAND PARAMETERS f S , Inventory Default = 0.4 (Working Stress) or γ , Inventory Default = 1.3 (Load Factor) Enter the decimal fraction of the yield strength of the reinforcing steel used in the bridge deck, f S , to be used for design or inventory rating by the working strength analysis method. f ' C , Inventory Default = 0.4 (Working Stress) or β L , Inventory Default = 1.67 (Load Factor) Enter the decimal fraction of the 28 day compressive strength of the deck concrete, f ' C , to be used for design or inventory rating by the working strength analysis method. f S , Operating Default = 0.6 (Working Stress) or γ , Operating Default = 1.3 (Load Factor) Enter the decimal fraction of the yield strength of the deck reinforcing steel, f S , used for the determination of the operating rating of the deck. f ' C , Operating Default = 0.55 (Working Stress) or β L , Operating Default = 1.0 (Load Factor) Enter the decimal fraction of the 28 day compressive strength of the deck concrete, f 'C , to be used for the determination of the operating rating of the deck. 2/03 Enter the load factor, ( (see AASHTO 3.22) to be used for inventory rating. Enter the coefficient for live load, βL to be used for inventory rating. See Notes. Enter the load factor, γ (see AASHTO 3.22) to be used for operating rating. Enter the coefficient for live load, βL to be used for operating rating. See Notes. 7.12 BRASS-GIRDER EXAMPLE For a bridge deck constructed of concrete having a 28 day compressive strength of 3250 psi and reinforced with steel deformed bars having a yield strength of 40000 psi, if the following is used: DECKC-STR1 0.35, 0.3, 0.45, 0.5, BRASS performs a design or inventory rating analysis based on 0.35 x 40000 = 14000 psi and 0.3 x 3250 = 975 psi for resteel and concrete allowable stresses. It will perform an operating rating analysis based on 0.45 x 40000 = 18000 psi and 0.5 x 3250 = 1625 psi for reinforcing steel and concrete allowable stresses. FIGURES NOTES In accordance with the AASHTO Manual for Condition Evaluation of Bridges, Article 6.5.3, and Standard Specifications for Highway Bridges, Article 3.22, BRASS sets A1 = γ * β D and A2 = γ * β L. 2/03 7.13 BRASS-GIRDER 110 COMMAND DESCRIPTION BRASS-GIRDER™ COMMAND NAME PURPOSE DECKC-STR2 DS2 This command controls the percent of allowable stress used in working stress analysis or the load factors to be applied for ultimate strength analysis. This applies to the concrete and reinforcing steel used in the bridge deck and is required for the Posting and Safe Load ratings (working stress analysis) or ultimate strength analysis ratings of a concrete deck. Each parameter has two meanings as described below. 4 COMMAND PARAMETERS f ' S , Posting (Working Stress) or Enter the decimal fraction of the yield strength of the deck reinforcing steel to be used for the determination of the posting rating of the deck. γ , Posting (Load Factor) Enter the load factor, γ (see AASHTO 3.22) to be used for posting rating. f ' C , Posting (Working Stress) or Enter the decimal fraction of the 28 day compressive strength of the deck concrete, f ' C , to be used for posting rating by the working strength analysis method. β L , Posting Enter the coefficient for live load, β L to be used for posting rating. See Notes. (Load Factor) f S , Safe Load Capacity (Working Stress) or γ , Safe Load Capacity Enter the decimal fraction of the yield strength of the deck reinforcing steel, f S , used for the determination of the safe load capacity rating of the deck. Enter the load factor, γ (see AASHTO 3.22) to be used for safe load capacity rating. (Load Factor) f ' C , Safe Load Capacity (Working Stress) or Enter the decimal fraction of the 28 day compressive strength of the deck concrete, f ' C , to be used for the determination of the safe load capacity rating of the deck. β L , Safe Load Capacity Enter the coefficient for live load, β L to be used for safe load capacity. See Notes. (Load Factor) 2/03 7.14 BRASS-GIRDER EXAMPLE For a bridge deck constructed of concrete having a 28 day compressive strength of 3250 psi and reinforced with steel deformed bars having a yield strength of 40000 psi, the following is coded: DECKC-STR2 .55, 0.45, 0.5, 0.4 BRASS performs posting rating analysis based on 0.55 x 40000 = 22000 psi and 0.45 x 3250 = 1463 psi for resteel and concrete allowable stresses. It will perform a safe load capacity rating analysis based on 0.5 x 40000 = 20000 psi and 0.4 x 3250 = 1300 psi for reinforcing steel and concrete allowable stresses. FIGURES NOTES In accordance with the AASHTO Manual for Condition Evaluation of Bridges, Article 6.5.3, and Standard Specifications for Highway Bridges, Article 3.22, BRASS sets A1 = γ * β D and A2 = γ * β L. 2/03 7.15 BRASS-GIRDER 115 COMMAND NAME PURPOSE COMMAND DESCRIPTION BRASS-GIRDER™ DECKC-STR3 DS3 This command allows the user to input the value of phi for moment capacity for each rating level. This may be used when requesting the load factor rating of a concrete deck. If this command is omitted, the default values will be used. 4 COMMAND PARAMETERS Phi m (inventory) Enter the value of Phi (resistance factor) for moment for inventory rating. Default = 0.9 Phi m (operating) Enter the value of Phi (resistance factor) for moment for operating rating. Default = 0.9 Phi m (posting) Enter the value of Phi (resistance factor) for moment for posting rating. Default = 0.9 Phi m (safe load) Enter the value of Phi (resistance factor) for moment for safe load rating. Default = 0.9 10/97 7.15a BRASS-GIRDER EXAMPLE Suppose that the engineer wants to run a rating using the Load and Resistance Rating method outlined in the AASHTO Guide Specifications for Strength Evaluation of Existing Steel and Concrete Bridges, 1989. Based on Table 3(b), a resistance factor of 0.75 is chosen. Since only one level of rating is used with the method prescribed by this document, the DECKC-STR3 would be coded as follows: DECKC-STR3 0.75 FIGURES NOTES 10/97 7.15b BRASS-GIRDER 120 COMMAND DESCRIPTION BRASS-GIRDER™ COMMAND NAME PURPOSE DECKC-DIM1 DD1 This is the first in a series of commands used to describe the dimensions of the cross-section of a concrete bridge deck. It is always required for a concrete deck analysis. A maximum of 50 girders may be entered. 5 COMMAND PARAMETERS NG Enter the number of girders supporting the deck. See Figure. D2 If the girder spacing is constant enter the center to center distance between girders in feet. If the spacing varies, code 1 and use one or more DECKC-GS commands to describe the spacing. See Figure. D3 Default = 1/2 girder width (D14 on Page 7.20) Enter the length of the left cantilever in feet. See Figure and Notes. D4 Default = D3 Enter the length of the right cantilever in feet. See Figure and Notes. D5 Enter the distance from the left edge of the deck to the left edge of the median. If no median leave blank. 11/01 7.16 BRASS-GIRDER EXAMPLE For the deck shown in the Figure below: DECKC-DIM1 7, 8, 4, , 27.75 FIGURES NOTES Overall deck width is calculated internally. If left cantilever is not input, its length will be automatically set to 1/2 the girder top width. The right cantilever will default to the left cantilever length. This length will be used to calculate weight but not actions. 3/96 7.17 BRASS-GIRDER 130 COMMAND DESCRIPTION BRASS-GIRDER™ COMMAND NAME DECKC-DIM2 DD2 This is the second in a series of commands describing the dimensions of the cross-sectional view of a concrete bridge deck. PURPOSE It is required if the concrete deck has curbs or a median. 6 COMMAND PARAMETERS D7 Enter the width of the bottom of the left curb in feet. See Figure. D8 Enter the width of the top of the left curb in feet. See Figure. D9 Default = D7 Enter the width of the bottom of the right curb in feet. See Figure. D10 Default = D8 Enter the width of the top of the right curb in feet. See Figure. D11 Enter the width of the bottom of the median in feet. See Figure. D12 Enter the width of the top of the median in feet. See Figure. 7/99 7.18 BRASS-GIRDER EXAMPLE For the deck shown in the Figure below: DECKC-DIM2 4, 3.8333, , , 4.5, 4.3333 FIGURES NOTES 2/97 7.19 BRASS-GIRDER 140 COMMAND DESCRIPTION BRASS-GIRDER™ COMMAND NAME DECKC-DIM3 DD3 This is the third in a series of commands describing the dimensions of the cross-section of a concrete bridge deck. PURPOSE It is required for concrete bridge deck analysis. 7 COMMAND PARAMETERS T Enter the thickness of the slab in inches used to determine the moment capacity of the deck section. Generally the total depth of the slab is used unless there is a topping course applied later. See Figure. D14 Enter the width of the girder in inches where it supports the deck. See Figure. BRASS will calculate all the effective distances based upon girder type. D15 If there is a supporting soffit at interior girders, enter the distance in feet from the centerline of the girder to the beginning of the taper or if there is no taper enter the distance to the edge of the soffit. See Figure. D16 Default = D15 If there is a supporting soffit at interior girders, enter the distance in feet from the centerline of the girder to the end of the taper or if there is no taper enter the distance to the edge of the soffit. See Figure. D17 If there is a supporting soffit, enter the thickness of the soffit in inches. See Figure. D6 If there are curbs or median, enter the thickness of the curbs and median in inches. See Figure. D31 Enter the thickness of the top flange, in inches, for steel stringers or prestressed beams. See Figure. If this entry is left blank (such as in old BRASS data sets) the top flange width to thickness ratio will be assumed to be 4.1. 7/99 7.20 BRASS-GIRDER EXAMPLE For the deck shown in the Figure below: DECKC-DIM3 8, 12, 0.75, 1.25, 3, 6 FIGURES NOTES Soffits on interior girders are assumed to always be symmetrical about the vertical centerline of the girder. The dimensions described may also be used to describe fillets on concrete girders. 3/96 7.21 BRASS-GIRDER 150 COMMAND NAME PURPOSE COMMAND DESCRIPTION BRASS-GIRDER™ DECKC-DIM4 DD4 This is the fourth in a series of commands describing the dimensions of the cross sectional view of a concrete bridge deck. It is required if there are soffits above the exterior girders. 6 COMMAND PARAMETERS D19 Enter the distance from the centerline of the left exterior girder in feet to the beginning of the left taper or if there is no taper enter the distance to the left edge of the soffit. See Figure. D20 Default = D19 Enter the distance from the centerline of the left exterior girder in feet to the end of the left taper or if there is no taper enter the distance to the left edge of the soffit. See Figure. D23 Enter the thickness of the left soffit in inches. D21 Default = D19 If the soffit is not symmetrical about the centerline of the left exterior girder, enter the distance from the centerline of the left exterior girder to the beginning of the right taper or if there is no taper the distance in feet to the right edge of the soffit. See Figure. D22 Default = D20 If the soffit is not symmetrical about the centerline of the leftexterior girder, enter the distance from the centerline of the left exterior girder to the end of the right taper or if there is no taper the distance in feet to the right edge of the soffit. See Figure. D24 Default = D23 Enter the thickness of the right soffit in inches. 7/99 7.22 BRASS-GIRDER EXAMPLE For the deck shown in the figure below: DECKC-DIM4 1.25, 2.25, 3, , 1.75 3" D24 3" D23 FIGURES 1.25' D19 1.25' D21 1.75' D22 2.25' D20 DECK DIMENSIONS NOTES If there is a soffit on one side of a girder, there must be one on the opposite side. 2/00 7.23 BRASS-GIRDER 160 COMMAND NAME PURPOSE COMMAND DESCRIPTION BRASS-GIRDER™ DECKC-DIM5 DD5 This is the fifth in a series of commands describing the dimensions of the cross section of a concrete bridge deck. It is required if there are tapers on the soffit above the right exterior girder. 6 COMMAND PARAMETERS D27 Enter the distance from the centerline of the right exterior girder in feet to the beginning of the left taper or if there is no taper enter the distance to the left edge of the soffit. See Figure. D28 Default = D27 Enter the distance from the centerline to the right exterior girder in feet to the end of the left taper or if there is no taper enter the distance to the left edge of the soffit. See Figure. D30 Enter the thickness of the left soffit in inches. D25 Default = D27 If the soffit is not symmetrical about the centerline of the right exterior girder, enter the distance from the centerline of the right exterior girder to the beginning of the right taper or if there is no taper the distance in feet to the right edge of the soffit. See Figure. D26 Default = D28 If the soffit is not symmetrical about the centerline of the right exterior girder, enter the distance from the centerline of the right exterior girder to the end of the right taper or if there is no taper the distance in feet to the right edge of the soffit. See Figure. D29 Default = D30 Enter the thickness of the right soffit in inches. 7/99 7.24 BRASS-GIRDER EXAMPLE For the deck shown in the figure below: DECKC-DIM5 1.25, 1.75, 3, , 2.25 1.25' D27 D25 D29 3" 1.25' 3" D30 FIGURES 2.25' 1.75' D26 D28 DECK DIMENSIONS NOTES If there is a soffit one one side of a girder, there must be one on the opposite side. 2/00 7.25 BRASS-GIRDER 170 BRASS-GIRDER™ COMMAND NAME COMMAND DESCRIPTION DECKC-GS DGS This command defines the spacing of the girders when the girders are not evenly spaced. This command must be used when the second parameter on the DECKC-DIM1 command is 1. PURPOSE BRASS will analyze a deck supported on as many as 50 girders (49 spaces). If there are more than 6 spaces repeat this command for the additional spaces required. 6 COMMAND PARAMETERS Space 1 (or Space 7, 13...) Numbering the supporting girders from left to right, enter the space, in feet, between girders #1 and #2 (or #7 and #8, etc., if a repeat command). Space 2 (or Space 8, 14...) Numbering the supporting girders from left to right, enter the space, in feet, between girders #2 and #3 (or #8 and #9, etc., if a repeat command). Space 3 (or Space 9, 15...) Numbering the supporting girders from left to right, enter the space, in feet, between girders #3 and #4 (or #9 and #10, etc., if a repeat command). Space 4 (or Space 10, 16...) Numbering the supporting girders from left to right, enter the space, in feet, between girders #4 and #5 (or #10 and #11, etc., if a repeat command). Space 5 (or Space 11, 17...) Numbering the supporting girders from left to right, enter the space, in feet, between girders #5 and #6 (or #11 and #12, etc., if a repeat command). Space 6 (or Space 11, 18...) Numbering the supporting girders from left to right, enter the space, in feet, between girders #6 and #7 (or #12 and #13, etc., if a repeat command). 11/01 7.26 BRASS-GIRDER EXAMPLE For the figure shown below: DECKC-GS DECKC-GS 7, 9, 6, 11 5, 7, 8, 8 FIGURES NOTES 10/97 7.27 BRASS-GIRDER 180 COMMAND NAME PURPOSE COMMAND DESCRIPTION BRASS-GIRDER™ DECKC-BARA DBA This command defines the reinforcing steel in a concrete bridge deck. There are three possible locations for reinforcing steel in each analysis location (positive moment area, negative moment area, and cantilever). The input is based on a one foot wide analysis strip of the deck. This command is required for the rating or design of a concrete bridge deck. Repeat for each reinforcing steel bar size in the one foot wide strip. 4 COMMAND PARAMETERS Bar Size Enter the bar size (number) of the reinforcing bar to be described. This command is ignored for a concrete deck design. Distance from Bottom Inches Enter the distance in inches from the bottom of the deck to the center of the reinforcing bar. See DIST in Figure. Spacing Inches Enter the horizontal distance in inches to the next reinforcing bar of the same size. If the next reinforcing bar of the same size lies outside the one foot wide strip to be analyzed, only enter one bar. See SP in Figure. This command is ignored for a concrete deck design. Moment Region Enter the appropriate code describing the moment region in which this reinforcing bar lies. See Figure and notes. This command is ignored for a concrete deck design. 1 Positive moment region B-B 2 Negative moment region C-C 3 Cantilever moment region A-A 10/98 7.28 BRASS-GIRDER EXAMPLE For the Figure shown below: DECKC-BARA 6, 2, 16, (Compression Steel - Optional) DECKC-BARA 6, 5.5, 16, (#6 Crank Bar) DECKC-BARA 5, 5.5, 16, (#5 Transverse Steel - Top of Slab) DECKC-BARA 6, 2, 8, (#6 Crank Bar and #6 Transverse Steel - Bottom of Slab) DECKC-BARA 5, 5.5, 16, (Compression Steel - Optional) 2 2 Section C-C (For Section A-A, See Note) 2 1 Section B-B 1 FIGURES NOTES Rebar data for cantilever moment region may be omitted if it is the same as the negative moment region. 2/97 7.29 BRASS-GIRDER 190 COMMAND DESCRIPTION BRASS-GIRDER™ COMMAND NAME PURPOSE DECKC-LODG DLG This command defines several of the material parameters and dimensions needed for the program to calculate the dead load of the deck, curbs, median, and wearing surface. This command also controls the placement of wheel loads during live load computations. This command is required for the analysis of concrete decks unless all defaults are used. 5 COMMAND PARAMETERS W1 Default = 0.150 Enter the density of the concrete used in the deck, curbs, and median in kips per cubic foot. W2 Default = 0.018 Enter the weight of one square foot of the wearing surface in kips. See Note 2. XL Default, left curb edge of the travel way. Enter the distance in feet from the left edge of the deck to the left edge of the travel way. This distance controls placement of the wheel loads for cantilever actions and the limits of the wearing surface if it exists. XR Default, right curb defines right edge of travel way. Enter the distance in feet from the left edge of the deck to the right edge of the travel way. This distance controls placement of the wheel loads for cantilever actions and the limits of the wearing surface if it exists. D13 Default = T, the first parameter coded on the DECKC-DIM3 command. Enter the thickness, in inches, of slab to be used in the calculation the slab weight if it is different than the thickness used to determine the deck strength. 7/99 7.30 BRASS-GIRDER EXAMPLE For the Figure shown below: DECKC-LODG , 0.018, , , 8.25 FIGURES NOTES 1. BRASS will deduct the base area of the median from the area subjected to W2, wearing surface load. 2. BRASS will apply wearing surface as a stage 2 load when the second parameter of the DECKCON command is non-blank. 7/99 7.31 BRASS-GIRDER 200 COMMAND DESCRIPTION BRASS-GIRDER™ COMMAND NAME DECKC-LODC DLC This command allows the user to apply concentrated loads to the bridge deck. PURPOSE This command is optional. It may be repeated as needed to describe up to a maximum of 9 point loads. 4 COMMAND PARAMETERS Load Description Code This parameter causes the effects due to this point load to be labeled in the output with one of the following names. Enter the number opposite the label desired. New Jersey Barrier Traffic Railing Pedestrian Railing Light Standard Utilities Miscellaneous 1 2 3 4 5 6 P Enter the amount of the point load in kips/ft (parallel to girder). See Figure. XP Enter the distance if feet from the left edge of the bridge deck to the point of application of the point load. See Figure. Stage Default = 1 Enter the construction stage in which this point load is to be applied so that it becomes effective on the analysis girder. 3/96 7.32 BRASS-GIRDER EXAMPLE For the figure shown below: DECKC-LODC DECKC-LODC 4, 2, 0.0400, 0.035, 0.0 0.625 FIGURES NOTES 1. The bridge is a non-composite girder slab with a 60 foot span. For analysis, non-composite bridges use only Stage 1 construction. Therefore, the default value of 1 for stage is used. 2. The light standard weighs 1.2 kips and the weight is considered to act over 30 feet. Therefore, the weight per foot equals (1.2/30 = 0.040 kips/ft). 3. The guardrail weighs 0.035 kips/ft and the weight is considered to act over the entire span of 60 feet. 4. The loads used in these examples can be entered using other commands, they are just cited here as examples. Note: The moment at the base of the light standard due to wind could be entered as a couple of forces at a small distance apart. 3/96 7.33 BRASS-GIRDER 210 COMMAND DESCRIPTION BRASS-GIRDER™ COMMAND NAME PURPOSE DECKC-LODU DLU This command allows the user to apply uniform loads to the bridge deck. The wearing surface, the weight of the deck itself, curbs and median are calculated internally. This command is optional. It may be repeated as needed to describe up to a maximum of 9 different uniform loads. 5 COMMAND PARAMETERS Load Description Code The parameter causes the effects due to this uniform load to be labeled in the output with one of the following names. Enter the number corresponding to the label desired. Concrete topping (non-wearing surface) Asphalt topping (non-wearing surface) Sidewalk (not defined by curb dimensions) Miscellaneous 1 2 3 4 W Enter the uniform load in kips/sq. ft. XW Enter the distance in feet from the left edge of the deck to the beginning of the uniform load. XWI Enter the width in feet of the uniform load. Stage Default = 1 Enter the construction stage in which this uniform load is to be applied so that it becomes effective on the analysis girder. 3/96 7.34 BRASS-GIRDER EXAMPLE For the Figure shown below: DECKC-LODU 3, 0.05, 0, 8.0, 1 FIGURES NOTES 3/96 7.35 BRASS-GIRDER 220 BRASS-GIRDER™ COMMAND NAME COMMAND DESCRIPTION DECKT-G1 DG1 This command defines general data related to timber bridge decks. PURPOSE It is required for rating of timber decks 6 COMMAND PARAMETERS Spacing Enter the distance in feet centerline to centerline between the stringers supporting the timber deck. See Figure. Stringer Width Enter the width in inches of the supporting stringers. See Figure. P-Width Default = 12 Enter the width in inches of the flooring member. This could be either the width of a plank or a laminated panel. For continuous laminated (no panels) leave this parameter blank. P-Depth Default = 3 Enter the depth (thickness) in inches of the flooring member. This could be either the thickness of a plank or the thickness of a laminated panel. WDECK Default = 50 Enter the weight in pounds of a cubic foot of the decking material. WSURF Default = 18 Enter the weight in pounds of a square foot of the wearing surface material resting on the timber deck. 3/96 7.36 BRASS-GIRDER EXAMPLE For the Figure shown below and a material weight of 60 lbs/cu.ft. DECKT-G1 2.1667, 5, , 4, 60, 43.33 FIGURES NOTES 3/96 7.37 BRASS-GIRDER 230 BRASS-GIRDER™ COMMAND NAME COMMAND DESCRIPTION DECKT-G2 DG2 This command defines general data related to timber bridge decks. PURPOSE It is required for rating of timber decks. 5 COMMAND PARAMETERS Inventory Bending Default = 2100 Enter the allowable bending stress in pounds per square inch for calculating the inventory rating of the deck. Inventory Shear Default = 95 Enter the allowable shear stress in pounds per square inch for calculating the inventory rating of the deck. Operating Bending Default = 2394 Enter the allowable bending stress in pounds per square inch for calculating the operating rating of the deck. Operating Shear Default = 126 Enter the allowable shear stress in pounds per square inch for calculating the operating rating of the deck. Flooring Type Default = 4 Enter the code shown below for the type of flooring (deck). Plank Floor Nail laminated separate panels Glue laminated separate panels Continuous or nail connected 'nail connected panels' Connected glue laminated panels 3/96 7.38 1 2 3 4 5 BRASS-GIRDER EXAMPLE For a timber bridge deck constructed of planks of 'Dense Select Structural Douglas Fir - Larch' for which a policy has been adapted of utilizing 1200 psi allowable tension parallel to the grain (bending) for inventory rating determination, 1650 psi for operating rating determination, and 95 psi allowable horizontal shear for inventory rating determination. Note: Shear does not apply for plank decks. DECKT-G2 1200, , 1650, , 1 FIGURES NOTES Defaults are based on Douglas Fir-Larch, Select Structural (West Coast Lumber Inspection Bureau) 2" x 4" thick and 2" x 4" wide (used at 19% maximum moisture content) for dry conditions. Also based on 2" x 4" laminated decks. These defaults are from the 1989 AASHTO Specifications, with 1991 interims. The defaults were not changed with the newer specifications to allow previous data sets to run without modifications. 3/96 7.39 BRASS-GIRDER 240 BRASS-GIRDER™ COMMAND NAME PURPOSE COMMAND DESCRIPTION DECKT-G3 DG3 This command defines allowable stresses for bending and shear for posting rating and safe load capacity rating of timber bridge decks. This command is required when posting and safe load capacity ratings of timber decks are desired. 4 COMMAND PARAMETERS Posting Bending Enter the allowable bending stress in pounds per square inch for calculating the 'posting' rating of a timber deck. Posting Shear Enter the allowable shear stress in pounds per square inch for calculating the 'posting' rating of a timber deck. Safe Load Capacity Bending Enter the allowable bending stress in pounds per square inch for calculating the 'safe load capacity' rating of a timber deck. Safe Load Capacity Shear Enter the allowable shear stress in pounds per square inch for calculating the ‘safe load capacity’ rating of a timber deck. 3/96 7.40 BRASS-GIRDER EXAMPLE For a timber bridge deck constructed of planks of 'Dense Select Structural Douglas Fir - Larch' for which a policy has been adapted of utilizing 1425 psi allowable tension parallel to the grain (bending) for posting rating determination, 1420 for safe load capacity rating determination, and 113 psi allowable horizontal shear for 'posting' rating determination, 112 for 'safe load capacity' rating determination. DECKT-G3 1425, 113, 1420, 112 FIGURES NOTES The hypothetical policy used above was based on posting midway between inventory and operating rating and safe load capacity at 65 of inventory rating. 55 See Notes on page 7.39. 3/96 7.41 BRASS-GIRDER 250 COMMAND DESCRIPTION BRASS-GIRDER™ COMMAND NAME PURPOSE DECKT-LWT1 DL1 This command defines the wheel load distribution lengths and widths to timber decking for trucks 1, 2, & 3. This command is optional and if not used, BRASS will calculate the wheel length and width based on the type of flooring and criteria in AASHTO 3.3.0 and AASHTO 3.25.1. 6 COMMAND PARAMETERS Truck #1 Length Default = AASHTO 3.30 Enter the length in inches of the wheel load distribution area desired for truck #1. This is the length perpendicular to the flooring. See Figure. Truck #1 Width Default = AASHTO 3.25.1 Enter the width in inches of the wheel load distribution area desired for truck #1. This is the width parallel to the flooring. Truck #2 Length Default = AASHTO 3.30 Enter the length in inches of the wheel load distribution area desired for truck #2. This is the length perpendicular to the flooring. See Figure. Truck #2 Width Default = AASHTO 3.25.1 Enter the width in inches of the wheel load distribution area desired for truck #2. This is the width parallel to the flooring. Truck #3 Length Default = AASHTO 3.30 Enter the length in inches of the wheel load distribution area desired for truck #3. This is the length perpendicular to the flooring. See Figure. Truck #3 Width Default = AASHTO 3.25.1 Enter the width in inches of the wheel load distribution area desired for truck #3. This is the width parallel to the flooring. 3/96 7.42 BRASS-GIRDER EXAMPLE For the situation shown below in the Figure the engineer wants to distribute the wheel load over a width of 16 inches and use the length of the load distribution equal to the plank width as specified in AASHTO. He wants to use the distribution for trucks 1, 2, and 3. DECKT-LWT1 , 16, , 16, , 16 FIGURES NOTES 3/96 7.43 BRASS-GIRDER 260 COMMAND DESCRIPTION BRASS-GIRDER™ COMMAND NAME PURPOSE DECKT-LWT2 DL2 This command defines the input wheel load distribution lengths and widths to timber decking for trucks 4, 5, & 6. This command is optional and if not used, BRASS will calculate the wheel length and width based on the type of flooring and criteria in AASHTO 3.30 and AASHTO 3.25.1. 6 COMMAND PARAMETERS Truck #4 Length Default = AASHTO 3.30 Enter the length in inches of the wheel load distribution area desired for truck #4. This is the length perpendicular to the flooring. See Figure. Truck #4 Width Default = AASHTO 3.25.1 Enter the width in inches of the wheel load distribution area desired for truck #4. This is the width parallel to the flooring. Truck #5 Length Default = AASHTO 3.30 Enter the length in inches of the wheel load distribution area desired for truck #5. This is the length perpendicular to the flooring. See Figure. Truck #5 Width Default = AASHTO 3.25.1 Enter the width in inches of the wheel load distribution area desired for truck #5. This is the width parallel to the flooring. Truck #6 Length Default = AASHTO 3.30 Enter the length in inches of the wheel load distribution area desired for truck #6. This is the length perpendicular to the flooring. See Figure. Truck #6 Width Default = AASHTO 3.25.1 Enter the width in inches of the wheel load distribution area desired for truck #6. This is the width parallel to the flooring. 3/96 7.44 BRASS-GIRDER EXAMPLE For the situation shown below in the Figure, the engineer wants to distribute the wheel load over a width of 16 inches and use the length of the load distribution equal to the plank width as specified in AASHTO. This distribution is used for trucks 4, 5 and 6. DECKT-LWT2 , 16, , 16, , 16 FIGURES NOTES 3/96 7.45 BRASS-GIRDER 270 COMMAND DESCRIPTION BRASS-GIRDER™ COMMAND NAME PURPOSE DECKT-LWT3 DL3 This command defines the input wheel load distribution lengths and widths to timber decking for trucks 7, 8, & 9. This command is optional and if not used, BRASS will calculate the wheel length and width based on the type of flooring and criteria in AASHTO 3.30 and AASHTO 3.25.1. 6 COMMAND PARAMETERS Truck #7 Length Default = AASHTO 3.30 Enter the length in inches of the wheel load distribution area desired for truck #7. This is the length perpendicular to the flooring. See Figure. Truck #7 Width Default = AASHTO 3.25.1 Enter the width in inches of the wheel load distribution area desired for truck #7. This is the width parallel to the flooring. Truck #8 Length Default = AASHTO 3.30 Enter the length in inches of the wheel load distribution area desired for truck #8. This is the length perpendicular to the flooring. See Figure. Truck #8 Width Default = AASHTO 3.25.1 Enter the width in inches of the wheel load distribution area desired for truck #8. This is the width parallel to the flooring. Truck #9 Length Default = AASHTO 3.30 Enter the length in inches of the wheel load distribution area desired for truck #9. This is the length perpendicular to the flooring. See Figure. Truck #9 Width Default = AASHTO 3.25.1 Enter the width in inches of the wheel load distribution area desired for truck #9. This is the width parallel to the flooring. 3/96 7.46 BRASS-GIRDER EXAMPLE For the situation shown below in the Figure, the engineer wants to distribute the wheel load over a width of 16 inches and use the length of the load distribution equal to the plank width as specified in AASHTO. This distribution is used for trucks 7, 8, & 9. DECKT-LWT3 , 16, , 16, , 16 FIGURES NOTES 3/96 7.47 BRASS-GIRDER 280 COMMAND DESCRIPTION BRASS-GIRDER™ COMMAND NAME PURPOSE DECKT-LWT4 DL4 This command defines the input wheel load distribution lengths and widths to timber decking for truck 10. This command is optional and if not used, BRASS will calculate the wheel length and width based on the type of flooring and criteria in AASHTO 3.30 and AASHTO 3.25.1. 2 COMMAND PARAMETERS Truck #10 Length Default = AASHTO 3.30 Enter the length in inches of the wheel load distribution area desired for truck #10. This is the length perpendicular to the flooring. See Figure. Truck #10 Width Default = AASHTO 3.25.1 Enter the width in inches of the wheel load distribution area desired for truck #10. This is the width parallel to the flooring. 7/99 7.48 BRASS-GIRDER EXAMPLE For the situation shown below in the Figure, the engineer wants to distribute the wheel load over a width of 16 inches and use the length of the load distribution equal to the plank width as specified in AASHTO. He wants to use this distribution for Truck 10. DECKT-LWT4 , 16 FIGURES NOTES 3/96 7.49 BRASS-GIRDER 290 BRASS-GIRDER™ COMMAND NAME COMMAND DESCRIPTION DECK-TRK1 DT1 This command defines wheel loads of trucks 1 through 6 to be applied to either a timber deck or a concrete deck. This command is required for a design or rating of a bridge deck. PURPOSE 6 COMMAND PARAMETERS Truck 1 Enter the weight in kips of the maximum wheel load of truck #1. See Notes. Truck 2 Enter the weight in kips of the maximum wheel load of truck #2. See Notes. Truck 3 Enter the weight in kips of the maximum wheel load of truck #3. See Notes. Truck 4 Enter the weight in kips of the maximum wheel load of truck #4. See Notes. Truck 5 Enter the weight in kips of the maximum wheel load of truck #5. See Notes. Truck 6 Enter the weight in kips of the maximum wheel load of truck #6. See Notes. 11/01 7.50 BRASS-GIRDER EXAMPLE To rate a concrete deck for three trucks (HS20T, Wyoming TYPE3S2, & Wyoming TYPE3-3) and applying the tandem axle option for calculating live load moment (see Note 2 below), the following example would be correct: DECK-TRK1 16, -9, -7.75 FIGURES NOTES 1. If a girder analysis is desired following a deck analysis, the number of trucks entered here must agree with the number entered in the TRUCK-CODE1 and TRUCK CODE2 Commands. See Notes on page 13.23. 2. The AASHTO Manual for Maintenance Inspection of Bridges, 1983, Section 5.3.3, allowed the engineer to use the following equations to compute the effects of a tandem axle having spans from 2' to 7': E = 0.36 S + 2.58 (Distribution of a Wheel Load) M = + 0.25 (P/E)S (Freely Supported Spans) M = 0.2 (P/E)S (Continuous Spans) For spans over 7', E = 0.063 S + 4.65. To invoke this option, the user would input the wheel load as a negative number (see example above). The 1994 edition of the AASHTO Manual for Maintenance Inspection of Bridges, Section 6.7.2.1, removed this option and states “In general, stresses in the deck do not control the load rating except in special cases. The calculation of bending moments in the deck should be in accordance with AASHTO Design Specifications.” If the engineer wants to continue using the 1983 equations, the option to input tandem loads as a negative number will remain available in BRASS. It is the engineer’s responsibility to determine the loads from the tandem axle to be entered in this command. 11/01 7.51 BRASS-GIRDER 300 BRASS-GIRDER™ COMMAND NAME PURPOSE COMMAND DESCRIPTION DECK-TRK2 DT2 This command defines wheel loads of trucks 7 through 10 to be applied to either a timber deck or a concrete deck. It is also used to input the amount of impact. This command is required if there are more than 6 trucks and/or the user wishes to override the impact default. 6 COMMAND PARAMETERS Truck #7 Enter the weight in kips of the maximum wheel load of truck #7. See Notes. Truck #8 Enter the weight in kips of the maximum wheel load of truck #8. See Notes. Truck #9 Enter the weight in kips of the maximum wheel load of truck #9. See Notes. Truck #10 Enter the weight in kips of the maximum wheel load of truck #10. See Notes. Span Impact Default = 0.3 for Concrete, 0.0 for Timber. Enter the live load impact as a decimal fraction that is to be used for the actions in the deck spanning the girders. For 0.0 impact, as in the case of a timber deck, enter 0.0. Cantilever Impact Default = 0.3 for Concrete, 0.0 for Timber. Enter the live load impact as a decimal fraction that is to be used for the actions on the cantilever portion of the span. For 0.0 impact, as in the case of a timber deck, enter 0.0. 11/01 7.52 BRASS-GIRDER EXAMPLE To rate a deck for trucks 7, 8, and 9 which are for this example of HS20T, a Wyoming Type3S2 and a Wyoming Type3-3, and the desired live load impact is 0.2: DECK-TRK2 16, 9, 7.75, , 0.2, 0.2 FIGURES NOTES If a girder analysis is desired following a deck analysis, the number of trucks entered here must agree with the number entered in the TRUCK-CODE1 and TRUCK-CODE2 Commands. See Notes on page 13.23. 11/01 7.53 BRASS-GIRDER 3/96 7.54 BRASS-GIRDER 8. GIRDER ANALYSIS Two specific tasks are required of the user to model a structure through commands to this component: 1. Define girder cross sections along each span or supporting member. This is done by defining each unique cross section in the structure and the ranges along each span where each typical cross section begins and ends. BRASS-GIRDER supports three different methods of describing a typical cross section as shown below. In addition, a cross-section may be circular as in the case of a integral column or be modeled as a floorbeam (see Chapter 13). Cross section dimensional properties may vary uniformly from one typical cross section to the next when the cross section is defined by elements of an I. Figure 1 2. Input is minimized through selection of spans from the "basic structure", Figure 2, which is also referred to as a cell layout. The "continuous type layout", is to be used when there are more than six continuous spans. Most bridge structures can be modeled using members from this layout. 2/03 8.1 BRASS-GIRDER Figure 2 Define the length of each span or supporting member and the depths, d, as a function of position along the member. Illustrated below are variations of the “basic structure” which may be modeled. Figure 3 2/03 8.2 BRASS-GIRDER The possible depth variations are shown below and on Page 8.4. Ranges and restrictions are: 1. Maximum number of unique cross sections for one structure is one hundred. 2. Maximum number of cross section ranges for any one span is forty. 3. Maximum number of web depths for a span is fifteen. 4. Ranges for web depth are always measured from left to right from the center line of bearing of the span. 5. Span number one of the designer's structure must be the same as span number one of the basic structure. 6. Maximum number of continuous spans is thirteen. 7. Maximum number of cells is six. 8. The left end of vertical (or canted) spans are considered to be at the top. 2/03 8.3 BRASS-GIRDER 2/03 8.4 BRASS-GIRDER This page intentionally left blank. 2/03 8.5 BRASS-GIRDER 310 BRASS-GIRDER™ COMMAND NAME PURPOSE COMMAND DESCRIPTION ANALYSIS ANL This is the first command of the "Structural analysis component" and sets control parameters. This command is always required for girder analysis. It must be preceded by either TITLE, COMMENT, or the last command of a bridge deck analysis. 9 COMMAND PARAMETERS Output Control A single digit code to control the printout options of this component. Code 0 will suppress all but minimal output, Code 1 will produce a list of girder properties at each node point on the structure in addition to minimal output. See page 2.11 for more information on output control. Structure Type Default = 0 Two types of structure types are possible. Code 0 for frame type or less than 7 continuous, or 1 for a non-frame structure with more than 6 continuous spans. See Figure 1, Page 8.13. Sequence (Type of Structure) A single digit code to represent the type of construction and the construction sequence or staging to be modeled. This code will set the program path controls for construction stage and type of loads at specific stages. Code Result 1 Timber bridge with one stage. All loads are applied to that stage. 2 Reinforced concrete bridge with one construction stage. All loads are applied to that stage. However, code “21" for a reinforced concrete girder slab bridge to meet the provisions of AASHTO 8.19.1. (Continued) 2/03 8.6 BRASS-GIRDER COMMAND PARAMETERS (Cont.) Code Result 3 Non-composite steel girder bridge with one construction stage. All loads are applied to that stage. 4 Composite steel and concrete with sustained dead load on the composite section. There are three stages modeled in this sequence. First the bridge is modeled as noncomposite and all stage 1 loads are applied. Next the bridge is modeled as composite steel and concrete with the modular ratio adjusted to allow for creep, usually 3n, and all stage 2 loads should be sustained loads such as curbing, railing, wearing surface and median where creep would be a factor. The structure is next modeled as a composite steel and concrete with the modular ratio adjusted for creep. Live loads, which are temporary, are then applied to this. Stage 1 Stage 2 Stage 3 41 Composite steel and concrete box girder. See Note 8. (Continued) 2/03 8.7 BRASS-GIRDER COMMAND PARAMETERS (Cont.) Code 5 Result Composite steel and concrete without sustained dead load on the composite section. There are two stages modeled in this sequence. First the bridge is modeled as non-composite and all stage 1 (dead loads) are applied. Next the bridge is modeled as composite steel and concrete and all live loads are applied. Stage 1 Stage 2 6 Prestressed concrete girders, non-composite. Refer to the PROPERTIES-PC2 command No. 590 which controls simple or continuous span. See Note 7. A. Simple span, pretensioned or post tensioned. There is one stage of construction and all loads are applied to that stage. Do not code more than one span. (Continued) 2/03 8.8 BRASS-GIRDER COMMAND PARAMETERS (Cont.) B. Post tensioned continuous spans. There is one stage of construction and all loads are applied to that stage. Strands are all post tensioned. Falsework remains in place until after post tensioning. Entry 4 of the PROPERTIES-PC2 command must be coded 3. Note: BRASS cannot analyze a post tensioned frame structure with integral legs. Code 7 Result Prestressed concrete composite for live load. Also refer to PROPERTIES-PC2 command No. 590 which controls simple or continuous span. See Note 7. A. Simple span composite. There are two stages of construction for this sequence. First the girder is modeled as non-composite and all stage one loads are applied. These are generally the deck and diaphragms. Secondly, the girder is modeled as composite and the stage 2 loads such as curb and wearing surface and live loads are applied. Do not code more than one span. (Continued) 2/03 8.9 BRASS-GIRDER COMMAND PARAMETERS (Cont.) B. Simple span non-composite for dead load made continuous composite for live load by non-prestressed reinforcement. There are 2 stages of construction in this sequence. In the first stage the structure is modeled as simple span non-composite so BRASS places a hinge at each support and stage one loads such as girder and diaphragm weight are applied. Secondly, the bridge is made continuous connecting the girders over the supports using non-prestressed reinforcement. Hinges are removed. The structure also becomes composite at this time. The stage 2 loads, such as the curbs, live loads and loads due to differential creep and shrinkage, are applied. See Note 1. (Continued) 2/03 8.10 BRASS-GIRDER COMMAND PARAMETERS (Cont.) Reinforced Concrete Shear Equation Default = 1 Code 1 to evaluate reinforced concrete shear using AASHTO Equation 8- 48. Code 2 to evaluate reinforced concrete shear using AASHTO Equation 8- 49. Thermal Expansion Coefficient Default = 0.00065 Enter the thermal expansion coefficient for the girder material per 100E Fahrenheit. For example, for a steel girder code 0.00065. Generate Points of Interest Default = 0 See Note 6 Enter one of the following codes to indicate if and how points of interest are to be generated. 0 = No point of interest data will be generated. Use commands listed in Note 5, as applicable, to define the points of interest. 1 = Points of interest at all tenth points along each top span will be analyzed. See Notes 2 and 5. 2 = Points of interest at all tenth points along all spans will be analyzed. See Notes 2 and 5. 3 = Points of interest at all tenth points along each top span and user-defined points of interest will be analyzed. See Notes 2, 3 and 5. 4 = Points of interest at all tenth points on all spans and userdefined points of interest will be analyzed. See Notes 2, 3 and 5. 5 = Only user-defined points of interest will be analyzed. See Notes 2, 3 and 5. If points of interest are to be generated, the program will apply schedule-based data input by the user to the appropriate points of interest. Ignore Prestress Shear Default = 1 See Note 4 Code 1 if prestress shear rating is to be ignored. The default is 1 which enables old LFD data sets without prestress shear data to run to completion. Code 0 if prestress shear rating is desired. Ignore Positive Moments Over Interior Supports Default = 0 Code 1 if positive moments over interior supports is to be ignored for simple span pretensioned prestressed girders made continuous for live load. Ignore Compression Reinforcement for Analysis of NonPrestressed Reinforced Concrete Only Default = 0 Code 1 to have reinforcement steel rows 4 and 5 (see XSECT-G command on Page 9.20) ignored for positive moment and rows 1, 2, and 3 ignored for negative moment. This would generally be an option for the rating of reinforced concrete slab bridges. If ‘1' is entered, the rows of reinforcing steel in the compression area will be ignored at all points of interest when calculating moment capacity. Note: This does not apply to composite steel or prestressed concrete girders. 2/03 8.11 BRASS-GIRDER EXAMPLE For a 3 span composite steel and concrete girder bridge, a printout of girder properties is desired and only user-defined points of interest will be analyzed: ANALYSIS 1, 0, 4, , , 5 For a 3 span composite steel and concrete girder bridge, minimal output is desired, the thermal expansion coefficient is 0.00060, and points of interest are to be generated along the top span only: ANALYSIS 0, 0, 4, , 0.00060, 1 FIGURES NOTES 1. At this time, BRASS cannot model continuous post-tensioned pretensioned hollow core slabs with additional positive and negative non-prestressed reinforcement in the negative moment region. 2. One or more INTERMEDIATE-OUTPUT commands (1026) may also be used. See pages 14.21a and 14.21c. 3. One or more POINT-OF-INTEREST commands (1025) are required for the additional user defined points. 4. Prestress shear rating requires schedule based input of shear data. See Command 428, STIRRUP-GROUP, Command 497, STIRRUP-SCHEDULE, and Command 1025, POINTOF-INTEREST. Do not use the PRESTRESS-1 and PRESTRESS-2 commands. 5. Do not use the STEEL-1, STEEL-2, STEEL-4, CONCRETE-1, CONCRETE-2, PRESTRESS-1, and PRESTRESS-2 commands with this option. 2/03 8.12 BRASS-GIRDER NOTES 6. The stirrup schedule based commands may not be used when requesting allowable stress design ratings for reinforced concrete or prestressed concrete girders. 7. Prestressed concrete girders can only be rated using Load Factor Design. 8. Generally, steel and concrete composite box girders have a wide thin bottom flange that is internally stiffened. At this time, BRASS handles the section as an equivalent I-beam and does not account for internal stiffening of the bottom flange. Hence, when rated for negative moment capacity, the bottom flange will generally fail in compression as it will have a low Fcr which is calculated by the formula (4400 x t/b)**2 <= Fy. When the girder is coded as ‘41', the program will assume the bottom flange is stiffened and the thickness meets AASHTO Equation 10-139 and the yield stress Fy will be used for the rating. 2/03 8.13 BRASS-GIRDER 320 BRASS-GIRDER™ COMMAND NAME PURPOSE COMMAND DESCRIPTION ANGLE -1 AN1 This command defines the angle of the legs (columns) with respect to the top spans. This command is optional and required only when there are upright members not perpendicular to the top spans. 6 COMMAND PARAMETERS β1 Default = 90E Enter the angle β 1 in degrees between the horizontal and member 7. See Figures. β2 Default = 90E Enter the angle β 2 in degrees between member 1 and member 8. See Figures. β3 Default = 90E Enter the angle β 3 in degrees between member 3 and member 9. See Figures. β4 Default = 90E Enter the angle β 4 in degrees between member 3 and member 10. See Figures. β5 Default = 90E Enter the angle β 5 in degrees between member 5 and member 11. See Figures. β6 Default = 90E Enter the angle β 6 in degrees between member 5 and member 12. See Figures. 2/97 8.14 BRASS-GIRDER EXAMPLE For the example structure shown in Figure 3 below: ANGLE-1 , 65, 65 FIGURES NOTES 2/97 8.15 BRASS-GIRDER 330 BRASS-GIRDER™ COMMAND NAME PURPOSE COMMAND DESCRIPTION ANGLE-2 AN2 This command defines the angle of leg (column) (member 13) with respect to the top spans. This command is optional and required only when member 13 is not perpendicular to the top span. 1 COMMAND PARAMETER β7 Default = 90E 2/97 Enter the angle β7 in degrees between member 6 and member 13. See Figures. 8.16 BRASS-GIRDER EXAMPLE For the example structure shown in Figure 3 below: ANGLE-2 115 FIGURES B 115 NOTES 2/03 8.17 BRASS-GIRDER 2/97 8.18 BRASS-GIRDER 9. TYPICAL CROSS SECTIONS AND SCHEDULE GROUP DATA The XSECT-xxxx commands are to be used to describe up to a maximum of 100 girder cross sections. Four methods may be used. 1. Standard section file. BRASS contains a file of standard rolled shapes and other standard girder cross sections. Cross sections which reside on the Standard Section File are accessed with the XSECT-STD command. 2. Cross section by elements. A cross section with elements such as web, top flange, bottom flange, cover plates, and fillets is described by the XSECT-A through XSECT-H commands. 3. Cross section by coordinates. In the case of irregularly shaped cross sections, the cross section may be described by the x, y coordinates of its exterior and interior perimeter points using the XSECT-COORD1 and XSECT-COORD2 commands. NOTE: These commands can only be used to generate cross section properties and get actions due to loads. When using these commands, BRASS cannot analyze the strength of the section or perform ratings. 4. A circular cross section can be described by the cross section number 101. No XSECT-xxxx commands are required. The web depth defined by the SPAN-A command gives the diameter of the circular section. The web case must be 1. The cross section number used in the SPAN-C and SPAN-D must be 101. 5. When describing a prestressed concrete girder, a constant cross section may be required between supports except for changes to the composite concrete deck dimensions and/or composite concrete deck reinforcing steel. End blocks will affect the neutral axis location and may cause incorrect end moments to be applied to the beam. This problem will occur when the end of the development length + debond length falls within the end block. If omission of the end block creates a low shear capacity, a second analysis may be performed with the end block in place. Another option would be to increase the % of the concrete in shear in the region of the end block based on the area of the additional concrete. See the STIRRUP-SCHEDULE command, parameter 6. If the end block section is omitted, the additional weight of the concrete due to the end block may be applied using the LOAD-DESCR and UNIFORM-DL1 commands. Each unique cross section except circular cross sections is given a cross section number. Define each non-circular cross section number in ascending order using appropriate XSECT-xxxx commands. The “GROUP” commands are used to describe the properties of various elements such as transverse stiffeners and stirrups that are then located on the girder by the use of “SCHEDULE” commands for each span which are defined in Chapter 10. 2/03 9.1 BRASS-GIRDER 340 BRASS-GIRDER™ COMMAND NAME PURPOSE COMMAND DESCRIPTION XSECT-STD XST This command allows the user to describe girder cross sections by a number for which the cross section properties are stored in a library. This library may be created and maintained by the user. See Section 15. This command is optional and may be repeated as 100 unique cross section numbers are allowed. 6 COMMAND PARAMETERS Cross Section Number Enter the number for the unique cross section to be described by the library Standard Designator entered in the next command parameter. Up to 100 unique cross section numbers are allowed. Some may be defined by this command and others may be defined by input parameters using XSECT-A through XSECT-H commands or by XSECT-COORD1 & 2 commands. The order of entering cross section numbers should be sequential. In other words a mix of commands to describe girder cross sections may be utilized as long as the cross section numbers are sequential. See Notes. Standard Designator Enter the designated code for the standard cross section to be stored under the cross section number in the preceding parameter. A list of standard cross sections available in the BRASS library may be printed separately, see Section 15. See Note 3. Cross Section Number Enter the number for the unique cross section to be described by the library Standard Designator entered in the next command parameter. Up to 100 unique cross section numbers are allowed. Some may be defined by this command and others may be defined by input parameters using XSECT-A through XSECT-H commands or by XSECT-COORD1 & 2 commands. The order of entering cross section numbers should be sequential. In other words a mix of commands to describe girder cross sections may be utilized as long as the cross section numbers are sequential. See Note 4. Standard Designator Enter the designated code for the standard cross section to be stored under the cross section number in the preceding parameter. A list of standard cross sections available in the BRASS library may be printed separately, see Section 15. See Note 3. (Continued) 10/98 9.2 BRASS-GIRDER COMMAND PARAMETERS (Cont.) Cross Section Number Enter the number for the unique cross section to be described by the library Standard Designator entered in the next command parameter. Up to 100 unique cross section numbers are allowed. Some may be defined by this command and others may be defined by input parameters using XSECT-A through XSECT-H commands or by XSECT-COORD1 & 2 commands. The order of entering cross section numbers should be sequential. In other words, a mix of commands to describe girder cross sections may be utilized as long as the cross section numbers are sequential. See Note 4. Standard Designator Enter the designated code for the standard cross section to be stored under the cross section number in the preceding parameter. A list of standard cross section available in the BRASS library may be printed separately, see Section 15. See Note 3. 10/98 9.3 BRASS-GIRDER EXAMPLE See figure and notes. XSECT-STD XSECT-A XSECT-C XSECT-STD 1, WN36X150 (See Note 3) 1, 36 15, 1.5, 0, 15, 1.5 2, WN36X280, 3, W36X176 (See Note 3) FIGURES Figure 18 NOTES 1. The yield stress of the rolled steel shapes defaults to 36 ksi. This may be overridden by using the XSECT-A command, one for each cross section number. 2. The above codes are for this example only and may not reside in your particular standards library. It is possible to add elements to a standard section as for example top & bottom cover plates. To do this, use the same cross section number and the appropriate commands. See example above. 3. In the standard sections library, some standard shapes begin with “W” and “WN” (i.e., W24X76 and WN24X76). In 1985, AISC changed the dimensions of several steel shapes while keeping the same designation. To differentiate between the two types (especially when the older shape is needed to perform a rating) an “N” was added to the shape designation to indicate a NEW shape. 4. Do not use if XSA-XSG commands to follow as in the case of composite or cover plated section. If cover plates are going to be added to a standard section, using XSA-XSG commands, the standard section must be the only Standard Designator in the XST command. If more than one standard section is used in the structure, add other XST commands as needed. If both standard sections and welded plate girders are used in a structure, do not use the XSECTSTD Command. Code the standard sections as welded plate girders using the appropriate average dimensions. 10/97 9.4 BRASS-GIRDER 10/97 9.5 BRASS-GIRDER 350 BRASS-GIRDER™ COMMAND NAME PURPOSE COMMAND DESCRIPTION XSECT-A XSA This series of commands (XSECT-A through XSECT-H) of which this is the first, allows the user to describe girder cross sections made up of the elements of an I along with cover plates and fillets. This command is required when cross sections are to be defined in this way. Up to 100 unique cross sections may be defined. Cross section elements may be added to cross sections described in the standard sections library or by x-y coordinates of perimeter points. A set or partial set of XSECT-A through XSECT-H is required for each cross section so described. 5 COMMAND PARAMETERS Cross Section Number Enter the unique cross section number to be defined by the following parameters on this command and XSECT-B through XSECT-H commands. The order of entering cross section numbers must be sequential. See Note 1. Fy Default = 36 If this is a steel girder, enter the yield strength of the web steel in ksi. Fy Top Flange Default = Fy web If this is a steel girder, enter the yield strength of the top flange in ksi. Fy Bottom Flange Default = Fy web If this is a steel girder, enter the yield strength of the bottom flange in ksi. Cover Plate Indicator Code 1 if this cross section is in a non-composite region AND has a steel top cover plate. See Note 2. Leave blank if this cross section is in a composite region of a composite steel and concrete bridge and has a steel top cover plate. See Notes on Page 9.7 and 9.22 regarding how BRASS computes slab steel reinforcing in a composite section. 2/03 9.6 BRASS-GIRDER EXAMPLE For a girder cross section with cross section number = 1, composed of A36 steel, the XSECTA command would be coded as follows: XSECT-A 1, 36, FIGURES NOTES 1. When describing a prestressed concrete girder, a constant cross section may be required between supports except for changes to the composite concrete deck dimensions and/or composite concrete deck reinforcing steel. End blocks will affect the neutral axis location and may cause incorrect end moments to be applied to the beam. This problem will occur when the end of the development length + debond length falls within the end block. If omission of the end block creates a low shear capacity, a second analysis may be performed with the end block in place. Another option would be to increase the % of the concrete in shear in the region of the end block based on the area of the additional concrete. See the STIRRUP-SCHEDULE command, parameter 6. If the end block section is omitted, the additional weight of the concrete due to the end block may be applied using the LOAD-DESCR and UNIFORM-DL1 commands. 2. BRASS-GIRDER™ will not accommodate a steel-concrete section with a top steel cover plate and composite slab or rebar. To describe a top steel cover plate in a composite section, merge the cover plate area into the top flange and do not code a "1" as the cover plate indicator. See note on Page 9.21. 2/03 9.7 BRASS-GIRDER 360 BRASS-GIRDER™ COMMAND NAME PURPOSE COMMAND DESCRIPTION XSECT-B XSB This is the second in a series of commands to allow the user to describe a typical girder cross section made up of the elements of a I along with cover plates and fillets. 7 COMMAND PARAMETERS WT T Enter the thickness of the web at the top of the web, in inches. See WT T in Figure 1. WTB Default = WT T Enter the thickness of the web at the bottom of the web, in inches. See WT B in Figure 1. B2 Enter the width, in inches, of the bottom flange. See B 2 in Figure 1 and Note 3. B3 Default = B 2 Enter the width, in inches, of the top flange. See B 3 in Figure 1. For concrete T girders, see Note 2. For steel girders, see Note 3. T1 Enter the thickness, in inches, of the top flange. See T 1 in Figure 1. T2 Default = T 1 Enter the thickness, in inches, of the bottom flange. See T2 in Figure 1. Code 0 if no bottom flange. B4 Default = B 3 For concrete T girders, enter the top flange width, in inches, to be used to calculate the girder self weight. See Note 2. 7/99 9.8 BRASS-GIRDER EXAMPLE For the typical girder cross section shown below in Figure 2, enter: XSECT-B .75, , 14, , 1.5, 1.5 FIGURES NOTES 1. A typical cross section can be defined by one or more of the elements as long as one element is the web and the elements are contiguous. For example, a timber beam can be described by WT only. The web depth is described by SPAN-A and SPAN-B commands as it may vary longitudinally. A concrete T girder may be defined by WT, B3, T1, and B4. 2. For concrete T girders, BRASS uses the value of the effective top flange width (B3) to calculate the section properties. When wide girder spacings exist, the effective flange width for section properties is limited by AASHTO 8.10.1.1, which may be less than the girder spacing. Generally, B4 will equal the girder spacing. 3. For a girder section composed of a web plate, angles, and flange plates, see Notes on page 9.23. 7/99 9.9 BRASS-GIRDER EXAMPLE 7/99 9.10 BRASS-GIRDER COM ***** Cross Section Information ***** COM XSECT-A 1 XSECT-B 0.50, , 36.00, , 0.25, 0.75 COM XSECT-A 2 XSECT-B 0.50, , 36.00, , 0.25, 0.50 XSECT-C , , , 24.00, 0.75 COM XSECT-A 3 XSECT-B 0.50, , 44.375, , 0.25, 0.50 COM COM ***** Span Length and Section Layout ***** COM SPAN-A 1, 67.00, 4, 8.0, 6.0 SPAN-B 8.0, 10.0, 19.0, 57.0, 19.0, 61.0 SPAN-B 8.0 SPAN-RANGE 1, 1, 1, 1,1 SPAN-C 1, 10.0, 1, 2 SPAN-D 12.0, 3, 3, 55.0, 3,3 SPAN-D 57.0, 2, 1, 67.0, 1 EQUIVALENT FULL SECTION OF A STEEL BOX GIRDER WITH VARYING WEB DEPTH EXAMPLE EXAMPLE NOTES NOTE: The above examples illustrate how box beam cross sections can be approximated so the dimensions can be entered into BRASS commands. 7/99 9.11 BRASS-GIRDER 370 BRASS-GIRDER™ COMMAND NAME PURPOSE COMMAND DESCRIPTION XSECT-C XSC This, the third in the series of commands, allows the user to describe a typical girder cross section made up of the elements of an I with possible cover plates. 6 COMMAND PARAMETERS B4 Enter the width of the effective concrete flange, in inches, for a composite prestressed or steel girder section or the width of a top cover plate for a steel girder section. See B4 in Figure 1 and Notes 1, 2, and 3. T3 Enter the effective concrete flange thickness, if composite, in inches, or the thickness of the top cover plate. See T3 in Figure 1 and Notes 1, 2, and 3. D4 Default = 0 Enter the distance, in inches, between the top of the top flange and the bottom of the composite slab or cover plate. See D4 in Figure 1. B5 Enter the width, in inches, of the bottom cover plate. See B5 in Figure 1 and Note 3. T4 Enter the thickness, in inches, of the bottom cover plate. See T4 in Figure 1 and Note 3. D5 Default = 0 Enter the distance, in inches, between the bottom flange and the bottom cover plate. See D5 in Figure 1. 2/00 9.12 BRASS-GIRDER EXAMPLE For the typical girder cross section shown below in Figure 2, enter: XSECT-C 82, 8, 0, 14, 1.5, 0 FIGURES NOTES 1. The dead load of the effective concrete flange width is not included in the girder dead load. The weight of a steel cover plate is included in the girder dead load. 2. For prestressed composite concrete girder ratings, do not adjust the width of the effective concrete slab (B 4 ) using the modular ratio (n = ES / EG ). BRASS does adjust the effective flange width prior to calculating the section properties. Also, IAW AASHTO Specifications 8.10, 9.81, 10.38.3, and 10.50.2.3, the reinforcing steel should be included in the effective flange width before transformation. In other words, enter the reinforcing steel in the effective flange width and not in the adjusted width. 3. If a standard section has an effective concrete flange, a top cover plate, or a bottom cover plate as part of the section defined in the standard sections library, parameters 1, 2, 4, and/or 5 will not override the library values. If the value for the girder area is not in the library (see Notes 1 and 2 on page 15.21), BRASS-GIRDER™ will compute the total area (girder plus cover plates), total moment of inertia about the x axis, and distance from the bottom of the bottom cover plate to the centroid of the total section. These values will be shown in the BRASS-GIRDER™ analysis output file for the standard section. If an effective concrete flange is coded here or entered in the standard section library, it will not be added until Stage 2. 7/99 9.13 BRASS-GIRDER 380 BRASS-GIRDER™ COMMAND NAME PURPOSE COMMAND DESCRIPTION XSECT-D XSD This, the fourth in the series of commands allows the user to describe a typical girder cross section made up of the elements of an I with fillets and/or tapers. This command is required if the cross section contains fillets and/or tapers. See Notes. 6 COMMAND PARAMETERS F1 Enter the height in inches of the top tapers. See F 1 in Figure 2. F2 Enter the distance in inches to the top tapers. See F 2 in Figure 2. F3 Enter the height in inches of the top fillets. See F 3 in Figures 1 and 2. F4 Enter the width in inches of the top fillets. See F 4 in Figures 1 and 2. F5 Default = F 1 Enter the height in inches of the bottom tapers. See F 5 in Figure 2. F6 Default = F 2 Enter the distance in inches to the bottom tapers. See F 6 in Figure 2. 2/97 9.14 BRASS-GIRDER EXAMPLE For the typical girder section shown below in Figure 3, enter: XSECT-D 3, , 4, 4, 0 FIGURES NOTES Filets and tapers are not used in calculating the moment or shear strength of reinforced, nonprestressed I or T beams. Do not use tapers unless fillets are present. 10/97 9.15 BRASS-GIRDER 390 BRASS-GIRDER™ COMMAND NAME PURPOSE COMMAND DESCRIPTION XSECT-E XSE This, the fifth in the series of commands allows the user to describe a typical girder cross section made up of the elements of an I with fillets and/or tapers. This command is required if the cross section contains fillets. 2 COMMAND PARAMETERS F7 Default = F 3 See Page 9.14 Enter the height in inches of the bottom fillets. See F 7 in Figures 1 and 2. F8 Default = F 4 See Page 9.14 Enter the width in inches of the bottom fillets. See F 8 in Figures 1 and 2. 3/96 9.16 BRASS-GIRDER EXAMPLE For the typical girder section shown below in Figure 3, enter: XSECT-E 10, 10, FIGURES NOTES 3/96 9.17 BRASS-GIRDER 400 BRASS-GIRDER™ COMMAND NAME COMMAND DESCRIPTION XSECT-F XSF This command defines the location of reinforcing steel for which the area is to be calculated by BRASS. PURPOSE This command is required for reinforced concrete girder reinforcement design. It is related to a cross section code and should be placed in order in the series. 2 COMMAND PARAMETERS D1 Enter the desired distance to the centroid of reinforcing steel for design. BRASS will calculate the required area of reinforcement for the loads applied to the typical cross section being described. The distance to be entered in inches is from the bottom of the section to the centroid of the bottom row of reinforcement. See D 1 in Figure 1. D4 Enter the desired distance in inches to the centroid of the upper row of reinforcing steel the area of which is to be calculated by BRASS. See D 4 Figure 1. 3/96 9.18 BRASS-GIRDER EXAMPLE It is desired to determine the area of reinforcing steel required in the typical cross section shown below in Figure 2. The required steel is to have its centroid at (a) - (a) & (b) - (b). Enter: XSECT-F 2.5, 3.5 FIGURES NOTES BRASS will use D1 and D4 for the location of tension and/or compression reinforcement as required to carry the design loads. 3/96 9.19 BRASS-GIRDER 410 BRASS-GIRDER™ COMMAND NAME PURPOSE COMMAND DESCRIPTION XSECT-G XSG This command defines the reinforcing steel in a typical cross section of reinforced concrete or continuous reinforcement in a composite steel and concrete girder. The 7th in the series available for describing a typical cross section. It is required for the rating or review of a reinforced concrete girder bridge or a composite steel and concrete girder bridge having continuous reinforcement in regions of negative moment. Repeat as often as needed. 4 COMMAND PARAMETERS Row Number Enter row number 1, 2, 3, 4, 5, 6, or 7. Row 1, 2, and 3 are reserved for bottom reinforcing and rows 4 and 5 are reserved for top reinforcing. Rows 6 and 7 are reserved for rebar in a composite slab (#6 in bottom and #7 in the top). See Figures. For steel girders with a composite deck, see Note 1. For prestressed composite girders, see Note 2. For multispan precast, prestressed concrete girders, see Note 3. Number of Bars Enter the number of bars of this bar size in this row. This may be a fractional number as may be required in the case of a slab bridge or in the effective flange of a T-girder. Bar Size Enter the bar size of the reinforcing bars to be described in this row. If more than one size appears in a row, repeat the command with the new bar size and same row number. Distance to Bar Center Enter the distance in inches from the bottom of the girder if this is row 1, 2, or 3. Enter the distance from the top of the girder if this is row 4 or 5. Enter the distance to the top of the top flange if row 6 or 7. See Figures. 2/00 9.20 BRASS-GIRDER EXAMPLE For a typical rectangular cross section shown below in Figure 1, it is desired to calculate the load rating capacity of the cross section based on the reinforcing steel shown. The command would be used as follows: XSECT-G XSECT-G XSECT-G XSECT-G 1, 2, 4, 4, 5, 2, 2, 2, 8, 9, 8, 7, 2 4 3 3 FIGURES 10/98 9.21 BRASS-GIRDER 1. For steel girders with a composite slab, BRASS-GIRDER™ converts rows 6 & 7 to an equivalent steel cover plate. Do not use in regions of positive moment where both a composite slab and a steel top cover plate exist (See Note on Page 9.7). The weight of the equivalent steel cover plate is not included in the dead load of the girder. BRASS-GIRDER™ does not allow the input of reinforcing steel in the concrete slab to add to the strength of the section. The user may input the concrete slab dimensions or he may input the reinforcing steel data but not both in a cross section. Basically the user must define a composite section for positive moment and a composite section for negative moment. Therefore, the second term in the equation (10-123) and in (10-125) does not apply. Because the stresses in the concrete slab are generally low because of the size of the effective slab, we have assumed that ignoring the reinforcing steel is reasonable. In areas where the cross section only includes the reinforcing steel and is intended for negative moment but some positive moment may exist, the program does output a message that advises the user as follows: NOTE: BRASS does not calculate the plastic moment capacity including rebar for positive moment at this time. BRASS uses the greater of the plastic moment cap, w/o rebar or the elastic cap, w/rebar if braced. The above note is printed under the analysis point under consideration. In areas of negative movement of a composite steel and concrete girder bridge, the slab should not be input on the XSECT-C command when reinforcing steel is input. 2. For prestressed composite girders, both the reinforcing steel and slab may be entered and BRASS-GIRDER will calculate the correct section capacity based on the sign of the moments. 3. Due to the configuration of the spans, live loads placed in some multispan precast, prestressed concrete girder bridges cause some postive moments to occur over the bents. If no steel is defined to carry this moment, a zero rating will be output. Figure 2 on the previous page shows how 4 #5 bars were cast into the girder ends and welded together using 2" x 2" angles to carry this positive moment. This steel is defined in the XSECT-G command as row #1. 2/00 9.22 BRASS-GIRDER 10/98 9.23 BRASS-GIRDER 420 BRASS-GIRDER™ COMMAND NAME COMMAND DESCRIPTION XSECT-H XSH This command describes angles used with a web plate to make up an I girder. PURPOSE This command is valid for girder properties and girder dead and live load actions. However, if the girder is to be analyzed by the strength (load factor) design analysis method, see commands 1040 and 1050 for more information. 6 COMMAND PARAMETERS Top Angles Vertical Leg Enter the length in inches of the vertical leg of the top angles. Top Angles Horizontal Leg Enter the length in inches of the horizontal leg of the top angles. Top Angles Leg Thickness Enter the thickness in inches of the top angles Bottom Angles Vertical Leg Enter the length in inches of the vertical leg of the bottom angles. Bottom Angles Horizontal Leg Enter the length in inches of the horizontal leg of the bottom angles. Bottom Angles Leg Thickness Enter the thickness in inches of the bottom angles. 10/98 9.24 BRASS-GIRDER EXAMPLE XSECT-H 5, 5, 1, 5, 5, 1 NOTES BRASS-GIRDER™ analyzes built up sections using angles in two different ways - with flange plate(s) and without flange plate(s). WITH FLANGE PLATES For sections coded with either a top or bottom flange plate in the XSECT-B command, BRASS will convert the total angle area to an equivalent triangular fillet. BRASS will dimension the fillet such that the centroid of the equivalent triangular fillet will be located at the same point as the original angle. Web depth should be entered as the distance between the inside faces of the flange plates. NOTE: IIN4 may be higher than actual. WITHOUT FLANGE PLATES For sections without flange plates, BRASS will set the flange geometry equal to the portion of the angles comprising the flange. The portion of the angles connected to the web will be converted to an equivalent triangular fillet. BRASS will dimension the fillet such that the centroid of the equivalent triangular fillet will be located at the same point as the vertical leg of the angle. Web depth should be measured as the distance between the inside faces of the horizontal leg of the angles. NOTE: IIN4 may be higher than actual. 10/98 9.25 BRASS-GIRDER BRASS-GIRDER™ 422 COMMAND NAME PURPOSE COMMAND DESCRIPTION STIF-TRAN-GROUP STG Use to define a group of transverse stiffeners that have similar geometry. The transverse stiffener groups defined with this command are used when defining the transverse stiffener schedule on the STIF-TRAN-SCHEDULE command. The STEEL-GIRDER-CONTROL command must also be used when using this command. 5 COMMAND PARAMETERS Transverse Stiffener Group Number Enter a unique number to define this group of transverse stiffeners. Width Enter the width of the transverse stiffener, in inches. Thickness Enter the thickness of the transverse stiffener, in inches. If a transverse stiffener design is desired, follow the instructions in Note 3 on Page 14.4. Type Factor Enter the transverse stiffener type factor. Default = 2.4 Fy Default = 36.0 ksi 11/01 Stiffener Pairs: B = 1.0 Single Angles: B = 1.8 Single Plates: B = 2.4 Enter the yield stress of the steel used for the transverse stiffeners. 9.26 BRASS-GIRDER EXAMPLE To define a group of transverse stiffeners that are made of a pair of 1/2" x 4" A36 plates, code as follows: STIF-TRAN-GROUP 1, 4, 0.5, 1.0, 36 FIGURES NOTES 10/98 9.27 BRASS-GIRDER 424 COMMAND DESCRIPTION BRASS-GIRDER™ COMMAND NAME PURPOSE STIF-BEAR-GROUP SBG Use to define a group of bearing stiffeners that have similar geometry. The bearing stiffener groups defined with this command are used when defining the bearing stiffener schedule on the STIF-BEAR-SCHEDULE command. The STEEL-GIRDER-CONTROL command must also be used when using this command. 5 COMMAND PARAMETERS Bearing Stiffener Group Number Enter a unique number to define this group of bearing stiffeners. Bearing Stiffener Width, D2 If the analysis point being considered is at a support and a rating of the load carrying capacity of the bearing stiffener is desired, enter the width of the bearing stiffener, in inches. See Figure. Brass will calculate the load carrying capacity based on two stiffeners of size D2 by D3. If a bearing stiffener design is desired, follow the instructions in Note 3 on Page 14.4. Bearing Stiffener Thickness, D3 If the analysis point being considered is at a support and a rating of the load carrying capacity of the bearing stiffener is desired, enter the thickness of the bearing stiffener, in inches. See Figure. Bearing Stiffener Clip, D4 Default = 0.75 Enter the bearing stiffener clip dimension , in inches, parallel to the bottom flange of the girder. Only required at a span end if bearing stiffener analysis is desired. See Figure. Bearing Stiffener fy Default = 36.0 ksi Enter the yield stress of the steel used for bearing stiffeners, in kips/sq. inch. Only required at a span end if bearing stiffener analysis is desired. 11/01 9.28 BRASS-GIRDER EXAMPLE To define a bearing stiffener consisting of two grade 50, 1" x 6" plates with 1.125" clips for the fillet weld of the web to the flange, code as follows: STIF-BEAR-GROUP 1, 6, 1, 1.125, 50 FIGURES NOTES 10/98 9.29 BRASS-GIRDER 426 COMMAND DESCRIPTION BRASS-GIRDER™ COMMAND NAME PURPOSE STIF-LONG-GROUP SLG Use to define a group of longitudinal stiffeners that have similar geometry. The longitudinal stiffener groups defined with this command are used when defining the longitudinal stiffener schedule on the STIF-LONG-SCHEDULE command. The STEEL-GIRDER-CONTROL command must also be used when using this command. 5 COMMAND PARAMETERS Longitudinal Stiffener Group Number Enter a unique number to define this group of longitudinal stiffeners. Longitudinal Stiffener Width Enter the width of the longitudinal stiffener, in inches. See Figure. If a longitudinal stiffener design is desired, follow the instructions in Note 3 on Page 14.4. Longitudinal Stiffener Thickness Enter the thickness of the longitudinal stiffener, in inches. See Figure. Longitudinal Stiffener Location Default = Web Depth/5 Enter the distance, in inches, from the center of the longitudinal stiffener to the face of the flange denoted by the next parameter. Longitudinal Stiffener Reference Enter ‘T’ if the distance to the longitudinal stiffener is measured from the face of the top flange. Enter ‘B’ if the distance is measured from the face of the bottom flange. See Figure. 11/01 9.30 BRASS-GIRDER EXAMPLE To define a group of longitudinal stiffeners that are made with 5/16" x 4" A36 plates located at 14" above the bottom of the web, code as follows: STIF-LONG-GROUP 1, 4, 0.3125, 14, B FIGURES NOTES 10/98 9.31 BRASS-GIRDER 428 COMMAND DESCRIPTION BRASS-GIRDER™ COMMAND NAME PURPOSE STIRRUP-GROUP SIG Use to define a group of stirrups that have similar geometry. The stirrup groups defined with this command are used when defining the stirrup schedule on the STIRRUP-SCHEDULE command. 3 COMMAND PARAMETERS Stirrup Group Number Enter a unique number to define this group of stirrups. Stirrup Area Enter the area in inches2 of the reinforcing steel in a stirrup. This will generally be twice the area of the reinforcing steel making up the stirrup. Stirrup Angle Default = 90E Enter the angle between the stirrup and the horizontal. See Figure 1. 2/03 9.32 BRASS-GIRDER EXAMPLE For vertical double leg #4 stirrup, code as follows: STIRRUP-GROUP 1, 0.4 FIGURES NOTES 10/98 9.33 BRASS-GIRDER 430 COMMAND NAME PURPOSE COMMAND DESCRIPTION BRASS-GIRDER™ XSECT-COORD1 XC1 This set of commands, XSECT-COORD1 and XSECT-COORD2, describes a girder cross section by the x and y coordinates of points around the exterior perimeter and interior perimeter. These commands may be used when a typical cross section cannot be defined by an I section or is not in the standard shapes library. These commands are used ONLY to obtain the cross-section properties and actions due to loads. They may not be used for design , review, or rating. This command may NOT be used for the design of a prestressed concrete girder or a voided concrete slab. 1 COMMAND PARAMETER Cross-Section Number Enter the unique cross section to be described by x, y coordinates on the XSECT-COORD2 commands to follow. Note: up to 20 unique cross section numbers are allowed. Some may be defined by a standard name (XSECT-STD command) and some may be defined by describing parts of an I (XSECT-A XSECT-H commands). In other words a mix of commands may be used to describe girder cross sections as long as the cross section numbers are sequential. 11/01 9.34 BRASS-GIRDER EXAMPLE If typical cross section 2 is to be described by x, y coordinates, enter: XSECT-COORD1 2 FIGURES NOTES This set of commands may be used to model an unusual girder shape. BRASS will calculate the properties of the section and with these properties a structural model will be generated. Dead and live loads may be applied to this model and actions obtained. The DESIGN and following commands should not be used as the subroutines in the program for calculating stresses and the strength of a section are basically designed for specific section shapes. 11/01 9.35 BRASS-GIRDER 440 COMMAND NAME PURPOSE COMMAND DESCRIPTION BRASS-GIRDER™ XSECT-COORD2 XC2 This set of commands, XSECT-COORD1 and XSECT-COORD2, describes a girder cross section by the x and y coordinates of points around the exterior perimeter and interior perimeter. These commands may be used when a typical cross section cannot be defined by an I section or is not in the standard shapes library. These commands are used ONLY to obtain the cross-section properties and actions due to loads. They may not be used for design , review, or rating. This command may NOT be used for the design of a prestressed concrete girder or a voided concrete slab. 6 COMMAND PARAMETERS XI Enter the x coordinate in inches of the Ith perimeter point of the typical cross section to be defined. See Figure and Notes. YI Enter the y coordinate in inches of the Ith perimeter point of the typical cross section to be defined. See Figure and Notes. X I+1 Enter the x coordinate in inches of the I + 1 perimeter point of the typical cross section to be defined. See Figure. Y I+1 Enter the y coordinate in inches of the I + 1 perimeter point of the typical cross section to be defined. See Figure. X I+2 Enter the x coordinate in inches of the I + 2 perimeter point of the typical cross section to be defined. See Figure. Y I+2 Enter the y coordinate in inches of the I + 2 perimeter point of the typical cross section to be defined. See Figure. Etc. to I + N N maximum = 59 ( 60 points ) 11/01 9.36 BRASS-GIRDER EXAMPLE For the section shown below in Figure 1, enter: XSECT-COORD2 XSECT-COORD2 XSECT-COORD2 XSECT-COORD2 XSECT-COORD2 1, 16, 1.5, 19, 17, 21, 1.5, 18, 4, 16.5, 28, 13.5, 1, 24, 1, 21, 13, 21, 4, 21, 28, 10, 17, 24, 1.5 16 16.5 16.5 FIGURES NOTES For positive areas, enter the points in clockwise order, for negative areas (voids) enter the points in counter-clockwise order. Note: The beginning point of the whole section must be repeated for each void. 10/98 9.37 BRASS-GIRDER 11/01 9.38 BRASS-GIRDER 10. SPAN DESCRIPTION Each span of a structure must be described by a subset of the commands defined in this chapter. These commands are repeated in blocks of commands for each span. See Typical Command Set 4 on page 4.5. Each command description explains if a command is required to be included in the block. Several types of commands are described below. The SPAN-xxx commands define the longitudinal girder geometry in terms of cross sections. This includes the web, flanges, and cover plates. The SPAN-A and SPAN-C commands are always required. The xxxx-SCHEDULE commands define the longitudinal placement of girder appurtenances such as transverse stiffeners, stirrups, bearing stiffeners, etc. These define the range or location of appurtenances defined by the xxxx-GROUP commands. Appropriate xxxx-SCHEDULE commands are required if schedule-based input is requested by parameter 6 of the ANALYSIS command. The FIXITY command defines the restraints at the end of each span and are required for each span unless the defaults are correct. The optional SETTLEMENT command describes support settlements. The optional HINGE command describes hinge locations and/or defines a maximum of two points per span where additional node points are desired in the finite element model. **********NOTE********** Numerical instability may result in the finite element analysis model if adjacent elements have grossly different stiffness. If the length of an element is less than 0.099 feet, the program will detect an error condition and stop with an error message. BRASS-GIRDER™ places node points at span 1/10 points, the end of each web range, each cross section range, each hinge location, and each special analysis point location. If numerical instability error occurs, review the data presented by the error message for the location of the problem and then adjust one of the web or cross section ranges or other data that has caused two node points to be too close to each other. Tenth points cannot be changed. IMPORTANT: When node points are generated, ones that are too close together (less than 0.12 feet) will be merged into one node point. The girder properties report turned on by a “1" in parameter one of the ANALYSIS command will report each generated node followed by girder properties. Span Lengths vs. Girder Lengths As of Version 5.7, BRASS-GIRDER™ has the capability for pretensioned prestressed concrete girders to specify an overhang length. The overhang length is the distance from the end of the girder to the centerline of the bearing. Debond and transfer/development lengths are automatically adjusted as needed for this overhang length and they are to be dimensioned from the end of the girder. The user should follow the directions in each related command. For simple spans made continuous for live load, BRASS still ignores the gap between the end of the girders over the piers. 5/01 10.1 to 10.3 BRASS-GIRDER 460 COMMAND NAME PURPOSE COMMAND DESCRIPTION BRASS-GIRDER™ SPAN-A SPA This is the first of a series of commands defining each span of a structure. The longitudinal dimensions of each span, beginning and ending points of typical cross sections and web depth variation are entered. The SPAN-A command is always required in each series and a series is always required for each span of a structure. See Note on Page 10.7 Note: Spans are described from Left to Right or from Top to Bottom. 7 COMMAND PARAMETERS Span No. Default = 1 Enter the number of the span being described. See "BASIC STRUCTURE" and "CONTINUOUS TYPE LAYOUT" in Figure 1 for span numbering order. Span Length Enter the length of the span, in feet. Important - Read section “Span Lengths vs. Girder Lengths” on page 10.1 Web Case Default = 1 Enter the web case type for this span. See Notes and Figure 2. Code Description 1 Linear Varying and Circular (see page 9.1, para. 4) NOTE: Do not code a “1" if a standard cross section is input. See Web Case 5. 2 Linear Haunch with Parallel Horizontal Flanges Between Haunch(es) 3 Parabolic Haunch with Parallel Horizontal Flanges Between Haunch(es) NOTE: Option 3 is a concave only. (Continued) 7/99 10.4 BRASS-GIRDER COMMAND PARAMETERS (Cont.) Code 4 Description Complex Girder Depth See pages 8.3 and 10.6 for examples. NOTE: This option may require the use of the SPANRANGE command (see page 10.10). 5* Standard sections input, web depth will be extracted along with other data from the Standard Sections Library. 6* Typical cross sections described by the x - y coordinates of perimeter points. Web depth has no significance. *If Web Case = 5 or 6 no further web data is required. If Web Case is less than 5, continue. D1 Enter the web depth in inches at the left end of the span. For vertical or canted spans, the left end of the span is considered at the top. See D1 in Figure 3. For sections composed of angles, see Figure on page 9.23. NOTE 1: See Pages 8.4 and 10.7 for explanation of web depth. Web depth includes the depth of tapers and fillets. NOTE 2: If a circular section, this is the diameter of the section. D2 Default = D1 Enter the web depth in inches at the right end of the span. See D2 in Figure 2. R1 Enter web range #1 in feet. See Range No. 1 in Figure 2. Not required for Web Case = 1, uniform varying Intermediate Output Default = 0 Intermediate output for Web Case 4. 0 = No output, 1 = Output. Only input once (Span #1). 7/99 10.5 BRASS-GIRDER EXAMPLE The example shown in Figure 4 will also be used for the example in the SPAN-B Command. The SPAN-A Command would be coded as shown in bold print: COM Span 1 series SPAN-A 1, 34, 3, 48, 72, 0 SPAN-B 48, 26.5, 48 COM COM Span 2 series SPAN-A 2, 36, 3, 72, , 13 SPAN-B 48, 22, 48 COM COM Span 3 series SPAN-A 3, 28, 4, 72, 48, 14 SPAN-B 48 FIGURES Figure 2 7/99 10.6 BRASS-GIRDER NOTES When modeling a multispan bridge, one span may be a standard shape and another span may be built up sections. Though a span may consist of various standard sections or built up sections, a combination of standard sections and built up sections may not reside together in a span. FIGURES 10/98 10.7 BRASS-GIRDER 470 BRASS-GIRDER™ COMMAND NAME PURPOSE COMMAND DESCRIPTION SPAN-B SPB This is the second in a series of commands defining each span of a structure. The longitudinal dimensions of each span, beginning and ending points of typical cross sections and web depth variation are entered. The first parameter of the SPAN-B command is required for web depth cases 2, 3, & 4. The remaining parameters are used as needed to fully describe web depth cases 2, 3, & 4. The SPAN-B command may be used up to five times as necessary. 6 COMMAND PARAMETERS D3 (also D6, D9, D12, D15) Enter the next web depth in inches at the right end of web range #1. See D3 in Figure 1. Range #2 (also R5, R8, R11, R14) Enter the length in feet of web range #2. See Range #2 in Figure 1. Not required if Range #2 equals span length. D3 or D4 (also D7, D10, D13, D16) Enter the next web depth in inches at the right end of web range #2. If web case equals 2 or 3 enter D 3. If web case equals 4, enter D 4. See Figure 1. Range #3 (also R6, R9, R12) Web case 4 only. Enter the length in feet of web range #3. Not required if Range #3 equals span length. See Figure 1, web case 4. D5 (also D8, D11, D14) Web case 4 only. Enter the next web depth in inches at the right end of web range #3. See D 5 in Figure 1. Range #4 (also R7, R10, R13) Web case 4 only. Enter the length in feet of web range #4. Not required if Range #4 equals span length. See Figure 1, web case 4. 11/01 10.8 BRASS-GIRDER EXAMPLE The example shown in Figure 4 will also be used for the example in the SPAN-A Command. The SPAN-B Command would be coded as shown in bold print: COM Span 1 series SPAN-A 1, 34, 3, 48, 72, 0 SPAN-B 48, 26.5, 48 COM COM Span 2 series SPAN-A 2, 36, 3, 72, , 13 SPAN-B 48, 22, 48 COM COM Span 3 series SPAN-A 3, 28, 4, 72, 48, 14 SPAN-B 48 FIGURES 7/99 10.9 BRASS-GIRDER 475 COMMAND DESCRIPTION BRASS-GIRDER™ COMMAND NAME SPAN-RANGE SPR The purpose of this command is to control the type of web depth variation between span ranges defined with the SPAN-A and SPAN-B commands when web case 4 is selected. This command is optional if only immediate breaks are desired. PURPOSE 14 COMMAND PARAMETERS Web Depth Variation between left end of span and the end of Range 1 Default = Blank (Immediate Break) Web Depth Variation between the end of Range 1 and the end of Range 2 Default = Blank (Immediate Break) For each parameter below, enter the appropriate code: Code Web Depth Variation 1 Linear Variation 2 Elliptical Variation, Concave Down 3 Parabolic Variation, Concave Down 4 Elliptical Variation, Concave Up 5 Parabolic Variation, Concave Up See Figures and Notes. Web Depth Variation between the end of Range 2 and the end of Range 3 Default = Blank (Immediate Break) Web Depth Variation between the end of Range 3 and the end of Range 4 Default = Blank (Immediate Break) Web Depth Variation between the end of Range 4 and the end of Range 5 Default = Blank (Immediate Break) Web Depth Variation between the end of Range 5 and the end of Range 6 Default = Blank (Immediate Break) Web Depth Variation between Range 6 and the end of Range 7 Default = Blank (Immediate Break) (Continued) 10/98 10.10 BRASS-GIRDER COMMAND PARAMETERS (con’t) Web Depth Variation between the end of Range 7 and the end of Range 8 Default = Blank (Immediate Break) Web Depth Variation between the end of Range 8 and the end of Range 9 Default = Blank (Immediate Break) Web Depth Variation between the end of Range 9 and the end of Range 10 Default = Blank (Immediate Break) Web Depth Variation between the end of Range 10 and the end of Range 11 Default = Blank (Immediate Break) Web Depth Variation between the end of Range 11 and the end of Range 12 Default = Blank (Immediate Break) Web Depth Variation between the end of Range 12 and the end of Range 13 Default = Blank (Immediate Break) Web Depth Variation between the end of Range 13 and the end of Range 14 Default = Blank (Immediate Break) 10/98 10.11 BRASS-GIRDER EXAMPLE For the figure shown below, the values for R1 and R2 were input, and the program sets the value for R3. Code the SPAN-RANGE command as follows: SPAN-A 1, 100, SPAN-B 40, 70 SPAN-RANGE 3, 4, 50, 60, 1, 3, 30 Note: This is similar to the Web Case 3 but Web Case 4 is needed to describe two different web depths at each end of the linear section. FIGURES * Not input as a range NOTES End of span range = last range used + 1 Horizontal Here Concave Up Concave Down 2/00 10.12 BRASS-GIRDER Special Cases for Parabolic Web Variations. There are several conditions involving parabolic web variation that must be noted for parabolas that are concave down. If a parabola is concave down and a line joining the ends of the parabola slopes down to the right the following conditions apply: 1. If the range to the left of the parabola is linear and slopes down to the right, the parabola will be adjusted so that the left end of the parabola is tangent to the slope of the linear range. 2. If one or more ranges to the right are also parabolic and a line joining the ends of the parabolas slopes down to the right, the parabolas will be combined into one parabola automatically. If the end points of the original parabolas do not fall on the new parabola, an error will occur. The user is responsible to insure that multiple parabolas can be combined into one. If a parabola is concave down and a line joining the ends of the parabola slopes up to the right the following conditions apply: 1. If the range to the right of the parabola is linear and slopes up to the right, the parabola will be adjusted so that the right end of the parabola is tangent to the slope of the linear range. 2. If one or more ranges to the right are also parabolic and a line joining the ends of the parabolas slopes up to the right, the parabolas will be combined into one parabola automatically. If the end points of the original parabolas do not fall on the new parabola, an error will occur. The user is responsible to insure that multiple parabolas can be combined into one. 2/00 10.13 BRASS-GIRDER 480 BRASS-GIRDER™ COMMAND NAME PURPOSE COMMAND DESCRIPTION SPAN-C SPC This is the third in a series of commands defining each span of a structure. The longitudinal dimensions of each span, beginning and ending points of typical cross sections and web depth variation are entered. The SPAN-C command is required for all spans. Its purpose is to define changes in typical cross section along the span. 4 COMMAND PARAMETERS SLT Enter the cross section number representing the typical cross section at the left end of the span. This number must correspond to a cross section number defined by either XSECT-STD, XSECT-A through XSECT-H, or XSECT-COORD1 and XSECT-COORD2 commands. If the cross section is circular, code 101 and no further data will be required for this span. See Figure 1. R1 Enter the distance in feet from the left end of the span to the first point on the span where the cross section changes. If there are no changes in cross section, enter the span length. See R1 in Figure 1. Note: When describing a prestressed concrete girder, a constant cross section may be required between supports except for changes to the composite concrete deck dimensions and/or composite concrete deck reinforcing steel. End blocks will affect the neutral axis location and may cause incorrect end moments to be applied to the beam. This problem will occur when the end of the development length + debond length falls within the end block. If omission of the end block creates a low shear capacity, a second analysis may be performed with the end block in place. Another option would be to increase the % of the concrete in shear in the region of the end block based on the area of the additional concrete. See the STIRRUP-SCHEDULE command, parameter 6. If the end block section is omitted, the additional weight of the concrete due to the end block may be applied using the LOADDESCR and UNIFORM-DL1 commands. SL1 Default = SLT Enter the cross section number representing the cross section on the left of the first cross section change point. If this cross section number is not the same as SLT, BRASS will vary all cross section properties linearly from 0 feet to R1 (including web thickness but not web depth - web depth variation is defined by the SPAN-A and SPAN-B commands). This is typical of all ranges between cross section change points. See SL1 in Figure 1. SR1 Default = SL1 2/03 Enter the cross section number representing the cross section on the right of the first cross section change point. If there is no immediate change at this point but the cross section begins to taper to the next change point or to the end of the span, leave this parameter blank. This parameter is not required if R1 equals the span length. 10.14 BRASS-GIRDER EXAMPLE For the example structure shown below in Figure 2, the SPAN commands would be coded as follows: SPAN-A SPAN-C SPAN-D 1, 1, 30, 30, 24, 2 1, 1, 32 2 SPAN-A SPAN-C SPAN-D 2, 2, 24, 30, 6, 3, 1, 2, 2, 32 3 30, SPAN-A SPAN-C SPAN-D 3, 2, 14, 30, 6, 1, 2 1, 32 2 Blank because section tapers to next change point. 1, 30, 1 FIGURES 40. 11/01 10.15 BRASS-GIRDER 490 BRASS-GIRDER™ COMMAND NAME PURPOSE COMMAND DESCRIPTION SPAN-D SPD This is the fourth in a series of commands defining each span of a structure. The longitudinal dimensions of each span, beginning and ending points of typical cross sections and web depth variations are entered. The SPAN-D command is required for spans having one or more cross section change points. It may be repeated as needed to define up to a maximum of 40 change points. 6 COMMAND PARAMETERS RX x = number of change point Enter the distance (range) in feet from the left end of the span to cross section change point x (next one from left). See R2 in Example and Figure 1. SLX Enter the cross section number representing the typical cross section on the left of the first cross section change point. See SL2 in Example and Figure 1. SRX Default SLX Enter the cross section number representing the typical cross section on the right of the cross section change point. See SR2 in Example and Figure 1. If there is no immediate change at this point but the cross section begins to taper to the next change point or end of the span, leave this parameter blank. This parameter is not required if RX equals the span length. RX x = number of change point Enter the distance (range) in feet from the left end of the span to cross section change point x (next one from left). See R3 in Example and Figure 1. SLX Enter the cross section number representing the typical cross section on the left of the first cross section change point. See SL3 in Example and Figure 1. SRX Default SLX Enter the cross section number representing the typical cross section on the right of the cross section change point. See SR3 in Example and Figure 1. If there is no immediate change at this point but the cross section begins to taper to the next change point or end of span, leave this parameter blank. This parameter is not required if RX equals the span length. 11/01 10.16 BRASS-GIRDER EXAMPLE For the example span shown below in Figure 2 the SPAN-D command would be ended as follows: NOTE: The SPAN-C command is also shown to illustrate how the two would correlate: SPAN-C SPAN-D SPAN-D SPAN-D SPAN-D 1, 22, 42, 62, 90, 12, 2, 4, 6, 8 1, 3, 5, 7, 2 32, 52, 72, 3, 5, 7, 4 6 8 FIGURES 40. 11/01 10.17 BRASS-GIRDER 492 COMMAND DESCRIPTION BRASS-GIRDER™ COMMAND NAME STEEL-GIRDER-CONTROL SGC Use to define control parameters for spans on a steel girder structure. This command is required when inputting data for analysis points using schedule based input. PURPOSE The data entered on this command will be used in the generation of point of interest commands for steel girders. Repeat as needed for up to 50 ranges. 10 COMMAND PARAMETERS Span Number Enter the span number. Start Distance Enter the distance, in feet, from the left end of the span to the start of the range for which the following control parameters are to apply. Range Length Enter the range length, in feet, for which the following control parameters are to apply. Section Type Default = 2 Enter one of the following codes to describe the type of steel girder at this analysis point (see Notes): 2 = Non-composite rolled or welded steel girder. 3 = Riveted. See Note, STEEL-2 command. 4 = Composite steel & concrete section where dead load moment is positive (tension in bottom of section). See Note 1. 5 = Composite steel and concrete section where the dead load moment is negative (tension in top of the section). See Note 1. 41 = The steel girder cross section at this point may be compact and the girder cross sections at the adjacent pier(s) are compact or moment released (i.e. hinge or pin connected) and you desire the program to check AASHTO Equation 10-129b and 10-129c. If you want the section at this point to be analyzed as non-compact, code 4. See Note 2. (Continued) 2/03 10.18 BRASS-GIRDER COMMAND PARAMETERS (con’t) Web Angle Default = 0.0 Enter the angle θ in degrees if the web is not vertical. Allowable Fatigue Stress Default = 1 x 10¹⁰ (The default allows the user to remove it from rating, if desired) Enter the allowable fatigue stress in ksi. Ultimate Strength Design/Rating only. Operating Rating Based on Serviceability Default = 0 Enter 1 if LFD operating rating check for steel girders for serviceability is to be skipped. C b - For Positive Bending Moment Default = Computed Using AASHTO 10.48.4.1 This parameter allows the user to override the calculation of C b for positive bending moment. C b - For Negative Bending Moment Default = Computed Using AASHTO 10.48.4.1 This parameter allows the user to override the calculation of C b for negative bending moment. Girder Type Default = 2 Enter the code below for the type of girder at the point of bearing. Required entry for a rolled beam girder when a bearing stiffener analysis is desired. 2/03 1 = Rolled Beam 2 = Welded Plate 10.19 BRASS-GIRDER EXAMPLE Span 1 of a bridge is 100' long. It is composite from the left end to 75' from the left end. The STEEL-GIRDER-CONTROL command would be used as follows: STEEL-GIRDER-CONTROL STEEL-GIRDER-CONTROL 1, 1, 0, 75, 75, 25, 4, 2, , , FIGURES NOTES 1. To determine whether to use option 4 or 5 for the type of steel girder, refer to the typical cross section defined at this point. If the cross section includes the composite slab in the calculation of the moment of inertia of the section, enter 4 (see Note 2 below). If negative moment occurs at this point, the concrete slab will be in tension and the moment of inertia will be in error. BRASS will print a message explaining the condition and action taken. If the cross section is composite and does include slab reinforcement, enter 5 (see Note 2 below). If positive moment occurs, the concrete slab will be in compression and the moment of inertia will be in error. BRASS will print a message explaining the condition and action taken. Please refer to AASHTO 10.50.1.1.2 2. The following does not apply to hybrid girder sections: Code 41 if the girder cross section at this point may be compact and the girder cross sections at the adjacent pier(s) are compact or moment relieved (i.e. hinge or pin connected) and you desire the program to check AASHTO Equation 10-129b and 10-129c. If you want the section at this analysis point to be analyzed as non-compact, code 4. Suggestion: BRASS may be run with the pier points coded (the 200, 300, 400, points, etc.) with the intermediate output turned on to see if the sections at those points are compact. Also note that compactness is a function of loading and load factors, hence compactness is not always simple to determine. If BRASS is run to establish compactness, the engineer should revise all (or the appropriate) load cases and levels by reviewing the intermediate output for the pier sections. 10/98 10.20 BRASS-GIRDER 10/98 10.21 BRASS-GIRDER 493 COMMAND DESCRIPTION BRASS-GIRDER™ COMMAND NAME STIF-TRAN-SCHEDULE STS Use to define the ranges and spaces for transverse stiffener groups along the length of a span. PURPOSE Repeat as needed for up to 50 ranges. 5 COMMAND PARAMETERS Span Number Enter the span number. Stiffener Group Number Enter the stiffener group number for this range. The number must be defined with the STIF-TRAN-GROUP command. Spacing Enter the spacing, in inches, between the transverse stiffeners in this range. Start Distance Enter the distance, in feet, from the left end of the span to the start of the transverse stiffener data described for this range. Range Length Default = Length to end of span Enter the range, in feet, of the transverse stiffeners described by parameters 2 and 3. 11/01 10.22 BRASS-GIRDER EXAMPLE Given: A girder with various spaces of transverse stiffeners and with bearing stiffeners at each end (over the bearings). For span 1, with transverse stiffener group 1, and spaced at 12" o.c. over the first 2' of span, then 18" over the next 9', then 36" over the middle 27', then 18" over the next 9', and then 12" over the rest of the span, code as follows: STIF-TRAN-SCHEDULE STIF-TRAN-SCHEDULE STIF-TRAN-SCHEDULE STIF-TRAN-SCHEDULE STIF-TRAN-SCHEDULE 1, 1, 1, 1, 1, 1, 1, 1, 1, 1, 12, 18, 36, 18, 12, 0, 2 2, 9 11, 27 38, 9 47, 2 For this example, BRASS-GIRDER does not specifically place a stiffener at the 12" point, 24" point, 42" point, etc. During the analysis, BRASS-GIRDER only knows that anywhere within the first 2' range, the minimum spacing is 12" and at the 2' point the maximum spacing is 18". FIGURES NOTES The shear capacity of a section is determined, among other factors, by the spacing of stiffeners (refer to AASHTO). Stiffeners are spaced within a range. For a girder, range length must include all ranges in which it is desired to establish stiffener spacings. A range length must include that portion of a girder for which capacity incorporates transverse stiffeners; up to and including the end of the girder, even with bearing stiffeners. For those portions of a girder in which a range length of stiffeners has not been defined, capacity will be determined without stiffeners. BRASS-GIRDER has a built in tolerance of 6". If a Point of Interest lies within 6" of a change point of transverse stiffener spacing, the program will use the maximum spacing at that change point. This is a conservative approach. For example, if you have a transverse stiffener at 80' on a 100' span and the first stiffener to the left of that point is 40 inches away and the first stiffener to the right of that point is 20 inches away, the shear strength will be computed for a 40" spacing. If a Point of Interest is located at 80' - 6" (which is within 6" of the stiffener change point), a 40" spacing will still be used. 11/01 10.23 BRASS-GIRDER 494 COMMAND DESCRIPTION BRASS-GIRDER™ COMMAND NAME STIF-LONG-SCHEDULE SLS Use to define the longitudinal stiffener schedule along a span. PURPOSE Repeat as needed for up to 50 ranges. 4 COMMAND PARAMETERS Span Number Enter the span number. Longitudinal Stiffener Group Number Enter the longitudinal stiffener group number for this range. The number must be defined with the STIF-LONG-GROUP command. Start Distance Enter the distance, in feet, from the left end of the span to the start of the longitudinal stiffener being described. Longitudinal Stiffener Length Default = Length to end of the span Enter the length, in feet, of the longitudinal stiffeners being described. 7/99 10.24 BRASS-GIRDER EXAMPLE A 2-span structure has 150' spans and a longitudinal stiffener located over the interior support, 20' each side of the support. For longitudinal stiffener group code 1, code as follows: STIF-LONG-SCHEDULE 1, 1, 130, 20 STIF-LONG-SCHEDULE 2, 1, 0, 20 FIGURES NOTES 10/98 10.25 BRASS-GIRDER 495 COMMAND DESCRIPTION BRASS-GIRDER™ COMMAND NAME PURPOSE BRACING-SCHEDULE BRS Use to define the schedule of cross bracing in a steel girder. This schedule will be used to determine the unbraced lengths at points of interest along the structure. Repeat as needed for up to 50 ranges. 4 COMMAND PARAMETERS Span Number Enter the span number. Spacing Enter the spacing, in feet, of the cross bracing in this range. Start Distance Enter the distance, in feet, from the left end of the span to the start of the spacing being described. See Notes. Range Length Enter the length, in feet, of the range of the spacing being described. See Notes. 2/00 10.26 BRASS-GIRDER EXAMPLE For a 150' simple-span bridge with cross bracing located as shown in Figure 1, code as follows: BRACING-SCHEDULE BRACING-SCHEDULE BRACING-SCHEDULE BRACING-SCHEDULE 1, 1, 1, 1, 10, 20, 15, 10, 0, 30, 90, 120, 30 60 30 30 FIGURES NOTES BRASS assumes that girders will be braced at the top and bottom at supports (span ends). If the distance to the cross frame places the cross frame in an adjacent span, BRASS will use the distance to the span end. Additionally, if the point of support is the top of an integral column and the first cross frame is at the support with the column, code the distance to the cross frame as the distance to the span end, minus 0.1 feet. This is necessary so that BRASS will know whether to use the moment to the left or to the right of the support. The first range must begin at 0.0 feet. 2/00 10.27 BRASS-GIRDER 496 COMMAND DESCRIPTION BRASS-GIRDER™ COMMAND NAME PURPOSE LAT-SUPPORT-SCHEDULE LTS Use to define the schedule of lateral support of the top flange in a steel girder. This command indicates that the deck provides lateral support to the top flange over a specified range. This is generally used when portions of the top flange are embedded in the slab and thereby laterally supported. Repeat as needed for up to 50 ranges. 3 COMMAND PARAMETERS Span Number Enter the span number. Start Distance Enter the distance, in feet, from the left end of the span to the start of the location where lateral support is provided. Range Length Enter the length, in feet, of the range over which lateral support is provided. 7/99 10.28 BRASS-GIRDER EXAMPLE For rating a 36' simple-span non-composite bridge where the top flange is embedded in the deck which is assumed to provide lateral support to the top flange along the entire length of the girder, code as follows: LAT-SUPPORT-SCHEDULE 1, 0, 36 FIGURES NOTES 10/98 10.29 BRASS-GIRDER 497 COMMAND DESCRIPTION BRASS-GIRDER™ COMMAND NAME PURPOSE STIRRUP-SCHEDULE SIS Use to define the stirrup schedule and other control data along a span. NOTE: The stirrup schedule based commands and other data may not be used when requesting allowable stress design ratings for reinforced concrete girders. Repeat as needed for up to 50 ranges. This command is required for each span if points of interest are to be generated (parameter 6 of the ANALYSIS command is coded non zero). 11 COMMAND PARAMETERS Span Number Enter the span number. Stirrup Group Number Enter the stirrup group number for this range. The number must be defined with the command STIRRUP-GROUP. Code NA if there are no stirrups, as in the case of a slab bridge. See Note 2. Stirrup Spacing Enter the longitudinal spacing, in inches, between the stirrups in this range. Start Distance Enter the distance, in feet, from the left end of the span to the start of the range being described. See Note 3. Range Length Enter the range length, in feet, of the stirrups being described. Default = Range to end of the span % Shear Default = See Note 1 NOTE: The following six parameters should only be used with the first STIRRUP-SCHEDULE command per span. See Example. Enter the percent of concrete section to be used in resisting shear normal to the member. This may be used in the rating of a concrete section for shear when the section is wholly or partially cracked. Axial Load Indicator Default = See Note 1 Enter 1 if axial load at this analysis point is to be ignored. This could apply in the case of a sidewall of a box culvert which is to be analyzed as a beam. Shear Indicator Default = See Note 1 Enter 1 if shear is to be ignored as in the case of a reinforced concrete slab bridge (see AASHTO 1.3.2(F)) or if prestressed girder shear is to be ignored. See Note 4. Lightweight Concrete Shear Factor Default = See Note 1 If the girder is constructed of reinforced concrete with lightweight aggregates, enter the shear factor for lightweight concrete (see AASHTO 8.15.5.2). VDIST, Left End of Span Default = See Note 1 Enter the distance, in feet, from the centerline of the support to the shear face to be used for stirrup analysis at the left end of the span. See Figure 1 and Note 5. VDIST, Right End of Span Default = See Note 1 Enter the distance, in feet, from the centerline of the support to the shear face to be used for stirrup analysis at the right end of the span. See Note 5. 2/03 10.30 BRASS-GIRDER EXAMPLE For stirrup group code 1 with a 6" spacing for the first 10' of span 2 and 12" spacing over the remainder of the span of 36', code as follows: STIRRUP-SCHEDULE STIRRUP-SCHEDULE 2, 1, 6, 0, 10 , 2, 1, 12, 10, 26 100, , , 1, 4, 4 FIGURES NOTES 1. This command may be repeated as needed for up to 50 times. The first time this command is used for each span, the user must enter values for all parameters (there are no defaults, therefore, in most cases, parameter 6 should be initially set to 100% and parameter 9 set to 1.0). When the command is repeated, the default values are taken from the parameters entered in the previous use of the command within the same data set. 2. When there are no stirrups, code the start distance as 0.0 and the range length equal to the span length so that parameters 6 thru 11 apply to the entire span. Include a STIRRUP-SCHEDULE command for each span. 3. When there are stirrups, the first range for a span should start at 0.0 feet. If the first range for the span does not start at 0.0 feet, parameters 6 through 11 will not be set for the span from 0.0 feet to the beginning of the first range. Ranges must be contiguous. 4. Ignoring shear can be used by range. For example, if you want to ignore shear in the first and last 2.0 feet of the span, code the first range from 0 to 2.0 feet and set the ignore shear indicator to 1. In the second range, set the shear indicator back to 0 (do not leave blank or it will default to 1). Then code the last range as 2.0 feet before the end of the span and set the shear indicator to 1. 5. These entries are intended for non-prestressed concrete girders only. If you want to have the program check prestress shear at 2.0 feet from the ends of the span instead of at the ends of the span, code the shear indicator as 1 as in Note 4 above, then using the POINT-OF-INTEREST command, code POIs at 2.01 feet from each end and use option 3 on the sixth parameter of the ANALYSIS command. 5/01 10.31 BRASS-GIRDER 498 BRASS-GIRDER™ COMMAND NAME PURPOSE COMMAND DESCRIPTION SPAN-COPY SCP This is used to duplicate spans which are identical or symmetric to a span previously defined using the SPAN-A, SPAN-B, SPAN-C, and SPAN-D commands. 3 COMMAND PARAMETERS New Span Number Enter the new span number for which properties are to be generated. Span Number to Copy Enter the span number from which new span properties are to be generated. Symmetric Span Flag Default = 0 If the new span to be generated is symmetric from the span being copied, enter a 1. If the span is the same, enter 0. 10/98 10.32 BRASS-GIRDER EXAMPLE For a 2-span structure with Span-2 being the mirror image of Span-1, the BRASS commands coded to define each span would be coded as follows: SPAN - A SPAN - C SPAN - D SPAN - D FIXITY SPAN-COPY FIXITY 1, 1, 69.50, 92.25, 1, 92.25, 7.50, 2, 4 1, 5 1, 3, 2 81.5, 3, 4 0, 0, 1, 0 2, 0, 1, 1, 1 0, SPAN 1 SPAN 2 0, 1, 0 FIGURES NOTES 1. Default fixity is assumed at each end unless the FIXITY command is input. Also, any user defined boundary springs, support settlements, or hinge locations need to be redefined for the new span using the appropriate commands. 10/98 10.33 BRASS-GIRDER 500 BRASS-GIRDER™ COMMAND NAME PURPOSE COMMAND DESCRIPTION FIXITY FIX This is the fifth in a series of commands defining each span of a structure. This command describes the end conditions of a span. It is required for each span unless the defaults are all appropriate. Note: spans are described from Left to Right or from top to bottom. 6 COMMAND PARAMETERS Horizontal Left or Top End Restraint Default = 1 Code 1 if the left end of the span is restrained against horizontal movement. Code 0 if the left end is free to move horizontally. If left blank it will default to 1. See Note 1. Vertical Left or Top End Restraint Default = 1 Code 1 if the left end of the span is restrained against vertical movement. Code 0 if the left end is free to move vertically. If left blank, it will default to 1. See Note 1. Rotational Left or Top End Restraint Default = 0 Code 1 if the left end of the span is restrained against rotation. Code 0 if the left end is free to rotate. If left blank it will default to 0. See Note 1. Horizontal Right or Bottom End Restraint Default = 0 Code 1 if the right end of the span is restrained against horizontal movement. Code 0 if the right end is free to move horizontally. If left blank it will default to 0. See Note 1. Vertical Right or Bottom End Restraint Default = 1 Code 1 if the right end of the span is restrained against vertical movement. Code 0 if the right end is free to move vertically. If left blank it will default to 1. See Note 1. Rotational Right or Bottom End Restraint Default = 0 Code 1 if the right end of the span is restrained against rotation. Code 0 if the right end is free to rotate. If left blank it will default to 0. See Note 1. 10/98 10.34 BRASS-GIRDER EXAMPLE For the conditions of end restraint shown below in Figure 1, the FIXITY command would be coded as follows: SPAN-A .............. SPAN-B .............. : FIXITY 1, 1, SPAN-A .............. SPAN-B .............. : FIXITY 0, 1, SPAN-A .............. SPAN-B .............. : FIXITY 0, 1, 0, 0, 1, 0 For span 1 series 0, 0, 1, 0 For span 2 series 0, 0, 1, 0 For span 3 series See Note 2. FIGURES NOTES 1. For a structure with integral legs (i.e., a “K” bridge - See Figure 1, Page 10.4, BASIC STRUCTURE), using spans 7 through 13, the fixity at the top of the span would be coded 0, 0, 0. 2. If defaults were taken for the above example the FIXITY commands would be as follows: not required For span 1 series FIXITY 0 For span 2 series FIXITY 0 For span 3 series The fixity at a span end or joint need only be defined once. 11/01 10.35 BRASS-GIRDER 505 BRASS-GIRDER™ COMMAND NAME PURPOSE COMMAND DESCRIPTION FIX-SPRING FIS This is the sixth in a series of commands defining each span of a structure. This command may be used to define spring constants of springs restraining supports. This allows the modeling of elastic supports. Spring constants can be applied to supports fixed by a 1 in the FIX command. 6 COMMAND PARAMETERS Horizontal left End Spring Constant Default = 4 * Enter the spring constant in Kips/in. of the imaginary spring restraining the left end of the span from horizontal movement. Vertical left End Spring Constant Default = 4 * Enter the spring constant in Kips/in. of the imaginary spring restraining the left end of the span from vertical movement. Rotational left End Spring Constant Default = 4 * Enter the spring constant in In.Kips/radian of the imaginary spring restraining the left end of the span from rotational movement. Horizontal right End Spring Constant Default = 4 * Enter the spring constant in Kips/in. of the imaginary spring restraining the right end of the span from horizontal movement. Vertical right End Spring Constant Default = 4 * Enter the spring constant in Kips/in. of the imaginary spring restraining the right end of the span from vertical movement. Rotational right End Spring Constant Default = 4 * Enter the spring constant in In.Kips/radian of the imaginary spring restraining the right end of the span from rotational movement. * See note: 12/00 10.36 BRASS-GIRDER EXAMPLE Assume that the abutments of a two span bridge are setting on elastic soil with a modulus of 50 tons per inch. This situation could be modeled by using the FIX-SPRING command in the span series: Span 1 FIXITY FIX-SPRING Span 2 FIXITY FIX-SPRING 1, , , 1, 100 0, 0, 1, 0 0, 1, , 0, , 0, 100 1, , 0 FIGURES NOTES A support restraint must be "fixed" if it is to be modeled with a spring. Default = 4 if restrained. 10/98 10.37 BRASS-GIRDER 507 COMMAND DESCRIPTION BRASS-GIRDER™ COMMAND NAME STIF-BEAR-SCHEDULE SBS Use to define the bearing stiffener schedule for supports. PURPOSE This command may be repeated as needed for up to 26 times. 2 COMMAND PARAMETERS Support Point Enter the support point (100, 110, 200, 210, 300, 310, etc.) Stiffener Group Number Enter the stiffener group number for this range. The number must be defined with the STIF-BEAR-GROUP command. 12/00 10.38 BRASS-GIRDER EXAMPLE For a 3-span structure with similar bearing stiffeners at exterior supports (group 1) and similar bearing stiffeners at interior supports (group 2), code as follows: SPAN-A 1, SPAN-C 1, FIXITY 1, 1, 0, 0, 1, 0 STIF-BEAR-SCHEDULE SPAN-A 2, SPAN-C 1, FIXITY 0, 1, 0, 0, 1, 0 STIF-BEAR-SCHEDULE SPAN-A 3, SPAN-C 1, FIXITY 0, 1, 0, 0, 1, 0 STIF-BEAR-SCHEDULE STIF-BEAR-SCHEDULE 55.125, 55.125 5 100, 1 70.000, 70.000 5 200, 2 55.125, 55.125 5 300, 310, 2 1 FIGURES NOTES 11/01 10.39 BRASS-GIRDER 510 COMMAND NAME PURPOSE COMMAND DESCRIPTION BRASS-GIRDER™ SETTLEMENT SET This is the seventh in a series of commands defining each span of a structure. This command describes given translations of a span end. The most general use would be to evaluate the effect of pier or abutment settlement on the structure. This command is optional. 6 COMMAND PARAMETERS Left end horizontal movement Enter the movement in inches of the left end of the span horizontally (parallel to x axis). Movement to the right is positive, movement to the left is negative. Left end vertical movement Enter the movement in inches of the left end of the span vertically (parallel to y axis). Movement downwards is positive, movement upwards is negative. Left end rotational movement Enter the rotational movement in degrees of the left end of the span. Clockwise rotational movement is positive, counterclockwise is negative. Right end horizontal movement Enter the movement in inches of the right end of the span horizontally (parallel to x axis). Movement to the right is positive, movement to the left is negative. Right end vertical movement Enter the movement in inches of the right end of the span vertically (parallel to y axis). Movement downwards is positive, movement upwards is negative. Right end rotational movement Enter the rotational movement if degrees of the right end of the span. Clockwise rotational movement is positive, counterclockwise is negative. See Notes. 10/98 10.40 BRASS-GIRDER EXAMPLE For the condition of settlement shown below in Figure 1, the SETTLEMENT command would be entered once in the span 1 series. It would not need to be entered again for the span 2 series of commands. SETTLEMENT , , , , 1.023 Span 1 series. FIGURES NOTES The settlement at a span end or joint need only be defined once. However, you must code the support settlement when it is first encountered when moving left to right. Thus, in the example shown above, the settlement command would be input after the FIXITY command for span 1 only. BRASS-GIRDER™ applies settlement and temperature loads to the structure and calculates the resulting actions. The load effects are printed as separate load cases and are combined with dead load actions for the calculation of stresses with the same load factors as applied to dead load. If the user desires a different load factor for settlement and/or temperature, multiply the settlement (temperature) by that factor prior to input. 10/98 10.41 BRASS-GIRDER 520 COMMAND DESCRIPTION BRASS-GIRDER™ COMMAND NAME PURPOSE HINGE HNG This is the eighth and last in a series of commands defining each span of a structure. This command describes the location of hinges and special analysis points (node points) in a span. Up to two hinges and/or two special analysis points are allowed per span using this command. If additional special analysis points are needed, use the TRANSFER command. This command is optional. 4 COMMAND PARAMETERS 1st Hinge Enter the distance in feet from the left end of the span to the first hinge in the span. See Figure 1 & Note. 2nd Hinge Enter the distance in feet from the left end of the span to the second hinge in the span. See Figure 1 & Note. 1st Special Analysis Point BRASS automatically creates node points at locations needed to perform analysis. To obtain properties or actions and displacements at some point other than those, enter the distance in feet from the left end of the span to that point. See Figure 1. 2nd Special Analysis Point Enter the distance in feet from the left end of the span to the second special analysis point. See Figure 1. 5/01 10.42 BRASS-GIRDER EXAMPLE For the span shown below which contains one hinge and two special analysis points, the HINGE command would be coded as follows: HINGE 35, , 16.3, 22 FIGURES NOTES Hinges may not be placed at span ends, but may be positioned at a point greater than 0.12 feet either side of a support. This will produce basically the same effect. Two hinges may not be put at a support. 10/98 10.43 BRASS-GIRDER 10/98 10.44 BRASS-GIRDER 11. MATERIAL PROPERTIES The PROPERTIES-xxxx commands are used as needed to describe the material properties of the girders. Only those commands pertaining to the type of material are required unless the command parameter defaults are OK. Prestressing strand properties are described in the STRAND-xxxx command set. 3/96 11.1 BRASS-GIRDER 530 BRASS-GIRDER™ COMMAND NAME COMMAND DESCRIPTION PROPERTIES-ST1 PS1 This command is used to define material properties of steel or steel and concrete composite girders. PURPOSE If the default values are satisfactory, then this command may be omitted. 4 COMMAND PARAMETERS Unit Weight Default = 490 pcf Enter the unit weight of the steel used in the girder in lbs. per cubic foot. ES Default = 29000 ksi Enter the modulus of elasticity of the girder material in kips per square inch. f 'C Default = 4 ksi Enter the breaking strength of the composite concrete at the time desired. Usually this is the 28 day test strength. Enter in kips per square inch. *Use the following parameter only when designing a splice. fY Splice Plates Default = 36.0 ksi 3/96 Enter the yield strength of the splice plate material in kips per square inch. 11.2 BRASS-GIRDER EXAMPLE PROPERTIES-ST1 , , 3.250 This will give a unit weight of steel of 490 lbs. per cubic foot with a modulus of elasticity of 29000 ksi and composite concrete with 3.250 ksi breaking strength. FIGURES NOTES 3/96 11.3 BRASS-GIRDER 540 BRASS-GIRDER™ COMMAND NAME COMMAND DESCRIPTION PROPERTIES-ST2 PS2 This command defines the material properties for composite steel and concrete girders. PURPOSE If the default values are satisfactory then the command may be omitted 3 COMMAND PARAMETERS n Default = 8 Enter the ratio of the modulus of elasticity of steel to the modulus of elasticity of concrete, n, for the calculation of composite girder properties for short term loadings (live load). n SUSTAINED Default = 3 n Enter the ratio of the modulus of elasticity of steel to the modulus of elasticity of concrete, n SUSTAINED, for the calculation of composite girder properties for long term (sustained) loadings. fY Default = 60 Ksi Enter the yield strength in kips per square inch of reinforcing steel in the composite slab that will provide additional negative moment capacity to the section. 3/96 11.4 BRASS-GIRDER EXAMPLE PROPERTIES-ST2 for n= 10 n SUST fY 10, 30, 40 = 30 = 40 ksi FIGURES NOTES 2/97 11.5 BRASS-GIRDER 550 COMMAND DESCRIPTION BRASS-GIRDER™ COMMAND NAME PURPOSE PROPERTIES-RC PRC This command defines the material properties for a reinforced concrete girder. This command is always required for reinforced concrete structures. 6 COMMAND PARAMETERS Unit Weight Default = 150 pcf Enter the unit weight of the reinforced concrete used in the girder in lbs per cubic foot. EC Defaults to AASHTO 8.7 Enter the modulus of elasticity of the girder concrete in kips per square inch. See Notes. n Default = 8 Enter the ratio of the modulus of elasticity of the reinforcing steel to the modulus of elasticity of the girder concrete. f 'C Default = 4 ksi Enter the breaking strength of the girder concrete at the time desired. Usually this is the 28 day test strength. Enter in kips per square inch. fY Default = 60 ksi Enter the specified yield stress of the steel reinforcement used in the reinforced concrete girder in kips per square inch. f YS Default = 40 ksi Enter the specified yield stress of the reinforcing steel used for stirrups in the reinforced concrete girder in kips per square inch. 2/97 11.6 BRASS-GIRDER EXAMPLE PROPERTIES-RC 150, 3000, 10, 3.250, 40, 40 For: Unit weight of concrete = 150 lbs. per cubic foot. = 3000 ksi EC E S/E C = 10 f'C fY f YS = 3.250 ksi = 40 ksi for main reinforcement = 40 ksi for stirrups FIGURES NOTES The Unit Weight of concrete used to calculate EC when the default is used equals the Unit Weight (defined in parameter #1) minus 5 lbs. to account for the reinforcing steel. 2/97 11.7 BRASS-GIRDER 560 BRASS-GIRDER™ COMMAND NAME PURPOSE COMMAND DESCRIPTION PROPERTIES-RCB PCB This command defines properties for the concrete in the bottom of a reinforced concrete girder. This command is only required when the concrete strengths of the top and bottom of the girder are different when using ultimate strength analysis. Corresponding value for the top should be input with the PROPERTIES-RC command. 2 COMMAND PARAMETERS f'C Enter the breaking strength of the concrete in the bottom of the girder at the time desired. Usually this is the 28 day test strength. Enter in kips per square inch. n - Bottom Enter the ratio of the modulus of elasticity of the reinforcing steel to the modulus of elasticity of the concrete in the bottom of the girder. 11/01 11.8 BRASS-GIRDER EXAMPLE Assume a reinforced concrete T-girder is composed of two different strengths of concrete. The concrete in the flange has a compressive strength of 4 ksi and the concrete in the stem has a compressive strength of 3.25 ksi. For the bottom, E S / E C = 9. PROPERTIES - RCB 3.25, 9 FIGURES NOTES The compressive strength in the flange with the corresponding n value should be input with the PROPERTIES-RC command. 3/96 11.9 BRASS-GIRDER 570 BRASS-GIRDER™ COMMAND NAME PURPOSE COMMAND DESCRIPTION PROPERTIES-TIM PTM This command defines material properties for a timber girder. This command is required for only timber girders. 5 COMMAND PARAMETERS FB Default = 1600 Enter the allowable unit stress in pounds per square inch for the extreme fiber in bending for structural lumber. (See Note 2.) FV Default = 85 Enter the allowable unit stress in pounds per square inch for horizontal shear for structural lumber. (See Note 2.) FC Default = 625 Enter the allowable unit stress in pounds per square inch for compression perpendicular to the grain for structural lumber. (See Note 2.) Unit Wt. Default = 50 Enter the unit weight of the timber girder in lbs./cu. ft. E TIM Default = 1600 Enter the modulus of elasticity of timber girder material in ksi. 3/96 11.10 BRASS-GIRDER EXAMPLE For "Select Structural Douglas Fir-Larch" enter: PROPERTIES-TIM 2100, 95, 385 See Table 1.10.1A in AASHTO 1.10.1, 1989 with 1991 interims FIGURES NOTES 1. Defaults are based on Douglas Fir-Larch, Select Structural (West Coast Lumber Inspection Bureau) for beams and stringers with no correction for moisture, based on Wyoming conditions and deck of laminated 2" x 4" with asphalt cover. 2. Values entered for design stresses are assumed to contain all adjustment factors, as defined in AASHTO equations (13-2), (13-10) and (13-11). 3/96 11.11 BRASS-GIRDER 580 COMMAND DESCRIPTION BRASS-GIRDER™ COMMAND NAME PURPOSE PROPERTIES-PC1 PC1 This series of commands, (PROPERTIES-PC1 through PROPERTIES-PC5), in which this is the first, describes the properties of the prestressed, and non-prestressed concrete and the non-prestressed reinforcement. This command is always required for a prestressed concrete system. 11 COMMAND PARAMETERS w Default (Prestressed concrete rating only) = 150 lbs./cu. ft. Enter the unit weight of the girder concrete, w, in pounds per cubic foot. This value is used to calculate the weight of the girder for structural analysis. f 'C Prestressed Default = 5.0 ksi Enter the 28-day compressive strength of the prestressed concrete, f 'C , in kips per square inch. f 'C Non-prestressed Default = 4.0 ksi Enter the 28-day compressive strength of the non-prestressed concrete slab and diaphragms over the support, f 'C , in kips per square inch. E C Prestressed Default = AASHTO 8.7.1 Enter the modulus of elasticity of the prestressed concrete, E C, in kips per square inch. See Note 1. E C Non-prestressed Default = AASHTO 8.7.1 Enter the modulus of elasticity of the non-prestressed concrete, E C, in kips per square inch. See Note 1. Not used in prestressed concrete girder design. f 'CI Default = 4.5 ksi Enter the compressive strength of the prestressed concrete at the time of the initial transfer of stress from the prestressing steel to the concrete, f 'CI , kips per square inch. E C Prestressed at Time of Transfer Default = AASHTO 8.7.1 Enter the modulus of elasticity of the prestressed concrete at time of transfer of stress. See Note 1. Box Beam Default = none If this is a pretensioned box beam and diaphragms are cast integrally within the box, code 1. BRASS will add the weight of the diaphragms to the beam weight for calculating moment at release. Use load group 1 to enter the diaphragm weight. Moment for f cir Code 1 if moment used to determine f cir (AASHTO 9.16.2.1.1) is to be based on the moment at the point of interest under consideration. Leave blank or 0 if the moment used for f cir is to be based on the maximum moment in the span under consideration. (Continued) 11/01 11.12 BRASS-GIRDER COMMAND PARAMETERS (Cont.) Distance for Positive Moment Strand Omit Enter the distance in inches from the top of the girder for omitting strands for positive moment capacity determination. Enter 0 or blank if not desired. See Note 3 and Figure. Distance for Negative Moment Strand Omit Enter the distance in inches from the bottom of the girder for omitting strands for negative moment capacity determination. Enter 0 or blank if not desired. See Note 3 and Figure. 7/99 11.12a BRASS-GIRDER EXAMPLE PROPERTIES-PC1 150, 5, 4, 4075, 3650, 4.5, 3865, , 1, 8 For: Unit weight of concrete = 150 lb./cu. ft. f 'C prestressed concrete = 5000 psi f 'C non-prestressed concrete = 4000 psi E C prestressed concrete = 4075 ksi E C non-prestressed concrete = 3650 ksi f 'C I prestressed concrete at time of initial transfer = 4500 psi E C prestressed concrete at time of transfer = 3865 ksi Omit top strands for positive moment capacity (see figure). FIGURES NOTES 1) When parameters 4, 5, and 7 are not input, BRASS will calculate E C using AASHTO equation 8.7.1 - E C = w1.5 33/f’c. Values used for f 'C will default as follows: f 'C = Parameter 2 for prestressed concrete Parameter 3 for non-prestressed concrete Parameter 6 for prestressed concrete at time of transfer 2) The value of W (Unit Weight - Parameter #1) is reduced by 5 lbs. to account for the reinforcing steel. 3) In some cases, the user may wish to ignore certain strands for moment capacity calculations. 7/99 11.12b BRASS-GIRDER 7/99 11.13 BRASS-GIRDER 590 COMMAND NAME PURPOSE COMMAND DESCRIPTION BRASS-GIRDER™ PROPERTIES-PC2 PC2 This is the second in a series of commands describing the properties of the prestressed, and non-prestressed concrete and the nonprestressed reinforcement. This command is always required for prestressed concrete rating. 5 COMMAND PARAMETERS f Y Girder Default = 60 ksi Enter the yield stress of the non-prestressed reinforcement in kips/sq. in. This parameter is only required for a composite structure. f Y Stirrups Default = 40 ksi Enter the yield stress of the stirrups in kips/sq. in.. Relative Humidity Default = 60% If the program will be calculating the time dependent losses, enter the mean annual relative humidity, in percent. Continuity Enter 0 or blank for simple span. Enter 1 if the structure is composed of simple spans, made continuous by composite action and non-prestressed reinforcement. Option ‘2' is no longer available. Enter 3 for cast-in-place continuous spans, post-tensioned, with dead load supported by false work. Loss Method* Enter the method, which must be entered in capital letters, for calculating the time-dependent prestress losses. INPUT AASHTO PCI - Losses to be input by user (STRAND-ST2 Command). Losses to be calculated according to AASHTO 9.16.2.1. See Note. Losses to be calculated according to the PCI General Method. * Not required for the Kansas Prestressed Design module. 5/01 11.14 BRASS-GIRDER EXAMPLE PC2 60, 40, 60, 1, INPUT For: f Y = 60 ksi Girder reinforcing steel f Y = 40 ksi Stirrups Mean Annual Relative Humidity = 60% Structure composed of simple spans made continuous by composite action and non-prestressed reinforcement. Losses will be input by user. FIGURES NOTES AASHTO method is not valid for composite structures made continuous by additional prestressing. 3/96 11.15 BRASS-GIRDER 600 BRASS-GIRDER™ COMMAND NAME PURPOSE COMMAND DESCRIPTION PROPERTIES-PC3 PC3 This is the third in a series of commands describing the properties of prestressed and non-prestressed concrete and non-prestressed reinforcements. This command is required when losses are to be calculated by the PCI General Method. 6 COMMAND PARAMETERS UCR Enter the ultimate loss of prestress due to creep of concrete, ksi per ksi of compressive stress in the concrete. Maturity Coefficient Default = 1.00 To account for the effects of creep due to the age of the concrete and the length of moist cure, enter the factor, which may be taken from the Table (See Notes) or from appropriate research data. USH Enter the ultimate loss of prestress due to shrinkage of concrete, ksi. tS Enter the time, in days, between the end of curing and the initial prestressing. t CONT Enter the time, in days, from the initial prestressing until the structure is made continuous. t COMP Enter the time, in days, from the initial prestressing until the structure is made composite. 3/96 11.16 BRASS-GIRDER EXAMPLE PC3 13.51, , 14.777, The blank will default to 1. 1, 20, 30 UCR = 13.51 USH = 14.777 1 day from end of curing until initial prestressing. 20 days from initial prestressing until continuity. 30 days from initial prestressing until composite. FIGURES NOTES Creep factors for various ages or prestress and periods of cure. Age of prestress transfer, days Period of cure, days Creep factor, MCF 3 5 7 10 20 30 40 3 5 7 7 7 7 7 1.14 1.07 1.00 0.96 0.84 0.72 0.60 Ref. Modern Prestressing Concrete, Second Edition, by James R. Libby, Van Nostrand Reinhold, 1977, Page 553. 3/96 11.17 BRASS-GIRDER 610 BRASS-GIRDER™ COMMAND NAME PURPOSE COMMAND DESCRIPTION PROPERTIES-PC4 PC4 This is the fourth in a series of commands describing the properties of prestressed and non-prestressed concrete and non-prestressed reinforcement. This command is required when losses are to be calculated by the PCI General Method. 6 COMMAND PARAMETERS Service Life Default = 50 years Enter the service life of the structure, in years. Time of analysis Default = Service Life Enter the time, in years, from the initial prestressing until the analysis is desired. For most applications, the analysis time is the service life. t1 Enter the time of application, in days, measured from initial prestressing, of Stage 1 superimposed dead load applied to all top spans, DLD command. t2 Enter the time of application in days, measured from initial prestressing, of Stage 2 superimposed dead load applied to all top spans, DLD command. t3 Enter the time of application in days, measured from initial prestressing, of Stage 3 superimposed dead load applied to all top spans, DLD command. ICHAR Default = 1 Enter the loss characteristic code. See note. 3/96 11.18 BRASS-GIRDER EXAMPLE PC4 40, 5, 20, 30, 50, 1 For: 40 year service life. Age of structure at analysis = 5 years. Stage 1 load applied at 20 days. Stage 2 load applied at 30 days. Stage 3 load applied at 50 days. FIGURES NOTES The calculation of losses according to the PCI General Method relies on constants which approximate the conditions of the materials used in the structure. BRASS was written using values for the constants which were based on a summary of existing research data and to allow the user to substitute values which more closely approximate the structure being analyzed. This involves a modification of the program by a program analyst (subroutine pcloss.f, variable PATAP). The user would select this alternate set of constants by inputting a loss characteristic code of 2. 12/00 11.19 BRASS-GIRDER 620 BRASS-GIRDER™ COMMAND NAME PURPOSE COMMAND DESCRIPTION PROPERTIES-PC5 PC5 This is the fifth in a series of commands describing the properties of prestressed and non-prestressed concrete and non-prestressed reinforcement. This command may be used if the losses are to be calculated by the PCI General Method and additional time intervals are desired. 6 COMMAND PARAMETERS Additional time #1 Enter additional time #1, in days. Additional time #2 Enter additional time #2, in days. Additional time #3 Enter additional time #3, in days. Additional time #4 Enter additional time #4, in days. Additional time #5 Enter additional time #5, in days Additional time #6 Enter additional time #6, in days. 3/96 11.20 BRASS-GIRDER EXAMPLE PC5 2, 90 Losses to be calculated at 2 and 90 days in addition to the times chosen by the program based on input. FIGURES NOTES 2/97 11.21 BRASS-GIRDER 625 BRASS-GIRDER™ COMMAND NAME PURPOSE COMMAND DESCRIPTION PROPERTIES -PC6 PC6 This command describes the properties of prestressed concrete for the Kansas Prestressed Design module. 4 COMMAND PARAMETERS Ultimate Shrinkage Default = 0.600 x 10E - 3 in./in. Enter the ultimate shrinkage loss. Age at release Default = 18 hours Enter the age (in hours) at release of the pretensioning. Erelease Default = Enter the modulus of elasticity of the prestressed girder at the age of release. 1.5 w 33(f ’ci) .5 Creep factor Default = Results obtained using PCA method. 2/97 Enter a dimensionless ratio for the creep factor for deflection. This factor is multiplied with the beam deflection at release to obtain creep deflection. For a zero creep deflection, enter 0.0001. 11.22 BRASS-GIRDER EXAMPLE PROPERTIES-PC6 , 24 Ultimate shrinkage loss defaults to 0.600 x 10 -3 in./in. Pretensioning released at 24 hr. 1.5 E at release defaults to w 33(f ’ci) .5 FIGURES NOTES 2/97 11.23 BRASS-GIRDER 630 COMMAND NAME PURPOSE COMMAND DESCRIPTION BRASS-GIRDER™ STRAND-ST1 ST1 This series of commands (STRAND-ST1 through STRAND-ST4 and POST-TENSION1 through POST-TENSION2) of which this is the first, describes the properties of the prestressing strands. Up to 3 sets of strand properties may be defined. 6 COMMAND PARAMETERS Strand Code Enter the unique strand properties code to be defined by the following parameters on this command, STRAND-ST2 through STRAND-ST3 and POST-TENSION1 through POST-TENSION2. Codes must be sequential. Three codes are allowed. Strand Type Default = 1 Enter 1 if the strand is a stress-relieved strand. Enter 2 if the strand is a low-relaxation strand. Method Default = 1 Enter 1 if the strand is pretensioned. Enter 2 if the strand is post-tensioned. f *Y Default = 0.85 f 'S for stress relieved Default = 0.9 f 'S for low relaxation Enter the yield point stress of the strand in kips/sq. in. f 'S Enter the ultimate strength of the strand in kips/sq. in. ES Default = 28000 Enter the modulus of elasticity of the strand in kips/sq. in. 2/97 11.24 BRASS-GIRDER EXAMPLE STRAND-ST1 1, 1, 1, 260, 270, 28000 For: Strand #1. Stress-Relieved Strand. Pretensioned Strand. 260000 yield point stress. 270000 ultimate strength. 28000 modulus of elasticity. FIGURES NOTES 2/97 11.25 BRASS-GIRDER 640 COMMAND DESCRIPTION BRASS-GIRDER™ COMMAND NAME PURPOSE STRAND-ST2 ST2 This is the second in a series of commands describing the properties of the prestressing strands. This command would be used when the default values are not applicable or the losses are input by the user. 7 COMMAND PARAMETERS Default = .7 for Stress Relieved Strands Default = .75 for Low Relaxation Strand Enter the ratio of the initial stress in the strand to the ultimate strength of the strand. ∆ f final NOTE: The next 3 parameters are used for an unbonded cable, and are optional for a bonded cable. Anchorage losses should be entered on Command #680, POST-TENSION2. When command PROPERTIES-PC2, Parameter #5 is coded INPUT, enter the final loss in the prestressing strands, excluding friction, in kips per square inch. See Note 1. ∆ f composite When command PROPERTIES-PC2, Parameter #5 is coded INPUT, enter the loss of stress in the prestressing strand, excluding friction, between the time the strand is stressed and the time the structure is made composite, in kips per square inch. See Note 1. ∆ f continuous For a structure which is simple span for dead load and made continuous for live load, when command PROPERTIES-PC2, Parameter #5 is coded INPUT, enter the loss of stress in the prestressing strand, excluding friction between the time the strand is stressed and the time the structure is made continuous, in kips per square inch. See Note 1. Anchorage For a pretensioned strand, leave blank for a bonded strand, otherwise enter 1 for a strand that is anchored at the girder end. See Note 2. LT For a pretensioned strand, enter the transfer or development length, from the beam end, in feet. See Figure and Note 3. Reduction Factor for Initial Tendon Stress Default = 0.63 for Stress Relieved Strands Default = 0.69 for Low Relaxation Strands Enter the reduction factor for initial tendon stress according to AASHTO 9.16.2.1.2. 2/03 11.26 BRASS-GIRDER EXAMPLE ST2 .7, 45, 35, 30, , 2.5 FIGURES NOTES 1. For post-tensioned girders, BRASS automatically calculates the friction losses. 2. Setting the anchorage flag for pretensioned strands to 1 would be a very rare occurrence and has the following effect: The transfer/development length is ignored for this strand code. The length or application of debond is not logical in this case and should not be input using the DEBOND command. All post-tensioned girder strands are assumed anchored by BRASS. Therefore, this parameter only applies for those rare occasions when pretensioned strands are anchored. 3. Transfer length (Allowable Stress Design) describes the distance needed for the strand to be imbedded into the concrete to be able to carry the service load tensile force on the strand. See Figure above. Development length (Ultimate Strength Design - LFD) describes the distance needed for the strand to be embedded in the concrete to be able to develop the ultimate strength of the strand. In summary, the STRAND-ST2 parameter for LT, gives BRASS the distance through which the strand develops full load or strength, the DEBOND command tells BRASS how far from the end of the girder the transfer length begins (per row of strand). 2/03 11.27 BRASS-GIRDER 650 BRASS-GIRDER™ COMMAND NAME PURPOSE COMMAND DESCRIPTION STRAND-ST3 ST3 This is the third in a series of commands describing the properties of the prestressing strands. This command would be used when the losses are to be calculated according to AASHTO 9.16.2.1.4 and the default values are not applicable. 4 COMMAND PARAMETERS A1 *Default = 20000 for stress-relieved strand, 5000 for low-relaxation strand Enter the relaxation coefficient, A1. See notes. A2 *Default for pretensioned members = 0.0, for posttensioned members, defaults are 0.3 for stress-relieved strand, and 0.07 for lowrelaxation strand Enter the relaxation coefficient, A2. See notes. A3 *Defaults for post-tensioned members are 0.4 for stressrelieved strand, 0.1 for lowrelaxation strand Enter the relaxation coefficient, A3. See notes. A4 *Defaults for post-tensioned members are 0.2 for stressrelieved strand, 0.05 for lowrelaxation strand Enter the relaxation coefficient, A4. See notes. 10/97 11.28 BRASS-GIRDER EXAMPLE ST3 20000, .3, .4, .2 FIGURES NOTES References AASHTO 9.16.2.1.4 Pre-tensioned members CRS = A1 - A2FR - A3ES - A4(SH + CRC) (Eqns. 9-10 and 9-10A) References AASHTO 9.16.2.1.4 (9-11) Post-tensioned members CRS = A1 - A2FR - A3ES - A4(SH + CRC) (Eqns. 9-11, 9-11A and 9-12) 10/97 11.29 BRASS-GIRDER 660 BRASS-GIRDER™ COMMAND NAME PURPOSE COMMAND DESCRIPTION STRAND-ST4 ST4 This is the fourth in a series of commands describing the properties of the prestressing strands. This command is required when losses are to be calculated according to the PCI General Method. 4 COMMAND PARAMETERS COEF1 Default = 10 for stress-relieved strand, 45 for low-relaxation strand Enter the relaxation coefficient #1. See notes. COEF2 Default = .55 Enter the relaxation coefficient #2. See notes. COEF3 Default = .05 Enter the relaxation coefficient #3. See notes. ts For a pretensioned strand, enter the time, in days, between the stressing of the strand and the transfer of stress from this strand to the concrete. 2/97 11.30 BRASS-GIRDER EXAMPLE ST4 10, .55, .05, 3 FIGURES NOTES Ref. Modern Prestressed Concrete, Second Edition by James R. Libby, VanNorstrand Reinhold, 1977, Page 554. The loss due to relaxation, RET, may be calculated by the following equation: RET = fst ((log24t - log24t1) / COEF1) * (fst / fpy - COEF2) where fst / fpy - COEF2 $ COEF3 fpy = 0.85 fpu 2/97 11.31 BRASS-GIRDER 665 BRASS-GIRDER™ COMMAND NAME PURPOSE COMMAND DESCRIPTION STRAND-ST5 ST5 This command describes the properties of prestressing steel for design. This command is required for the Kansas Prestressed Design module, not prestressed concrete rating. 6 COMMAND PARAMETERS Area P*s Strand Default = 0.153 sq. in. Enter the area of one prestressing strand, in square inches. f ’s Enter the ultimate strength of the prestressing strand, in kips per square inch. f *Y Default = 0.90 f ’s for low-relaxation strands or 0.85 f ’s for stress-relieved strands. Enter the yield point stress of the prestressing strand, in kips per square inch. Jacking stress Default = 0.75 f ’s for low-relaxation, 0.70 f ’s for stress-relieved and ‘OTHER’ Enter the Jacking Stress, in kips per square inch. E P*s steel Default = 28,000 ksi Enter the modulus of elasticity of the prestressing strand, in kips per square inch. Strand Type Enter LOW for low relaxation strands. Enter STR for stress-relieved strands. Enter OTH for other strand types. 2/97 11.32 BRASS-GIRDER EXAMPLE STRAND-ST5 , 270, , , , LOW Area of one prestressing strand defaults to 0.153 sq. in. f ’s = 270 ksi. f *Y defaults to 243.0 ksi (270 X 0.9). Jacking stress defaults to 202.5 ksi (270 X 0.75) E of the prestressing steel defaults to 28,000 ksi. Low relaxation strands. FIGURES NOTES 2/97 11.33 BRASS-GIRDER 670 COMMAND NAME PURPOSE COMMAND DESCRIPTION BRASS-GIRDER™ POST-TENSION1 PT1 This is the fifth in a series of commands describing the properties of prestressing strands. This command is required for post-tensioned strands. 5 COMMAND PARAMETERS Bonding Enter 1 if the strand is unbonded throughout its entire length. K Enter the friction wobble coefficient for the strand, in k/ft. µ Enter the friction curvature coefficient for the strand. Elastic Shortening Default = 0.5 Enter the factor for loss of prestress due to elastic shortening of member. For normal prestressing operations the factor will be .5. Tension End Default = 0 Enter 0, or leave blank, if the strand is tensioned from the left end of the span. Enter 1, if the strand is tensioned from the right end of the span. Enter 2, if the strand is tensioned from both ends. 10/98 11.34 BRASS-GIRDER EXAMPLE POST-TENSION1 1, .0020, .30, .5, 2 FIGURES NOTES 3/96 11.35 BRASS-GIRDER 680 COMMAND NAME PURPOSE COMMAND DESCRIPTION BRASS-GIRDER™ POST-TENSION2 PT2 This is the sixth and last in a series of commands describing the properties of prestressing strands. This command is used to account for the loss of prestress due to anchorage set. 2 COMMAND PARAMETERS Î fA Enter the anchorage loss at the stressing end, in kips/sq.in. LA Enter the distance from the stressing end to the point where the anchorage loss is zero, in feet. 3/96 11.36 BRASS-GIRDER EXAMPLE Refer to Figure PT2 22.81, 81 FIGURES NOTES 3/96 11.37 BRASS-GIRDER 3/96 11.38 BRASS-GIRDER 12. PRESTRESSING STRAND The following commands are used to describe the location of prestressing strands in the girder. CABLE LAYOUT COMMANDS The input of the cable layouts requires one or more of the following four series of commands: CABLE - S1 and CABLE - S2 CABLE - H1 through CABLE - H3 CABLE - P1 and CABLE - P2 CABLE - PC1 through CABLE - PC3 - for straight pretensioned strands for harped pretensioned strands for parabolic draped post tensioned strands for reversed parabolic post tensioned strands in continuous spans and the command: CABLE - DUP - which duplicates spans with identical layouts. These commands may be combined in any sequence to define up to 20 rows per span. The row number for each span must be numbered consecutively. Example: NOTE: BRASS does not have the capability of analyzing a combination of pretensioned and post tensioned strands in a single girder. 5/01 12.1 BRASS-GIRDER 690 BRASS-GIRDER™ COMMAND NAME PURPOSE COMMAND DESCRIPTION CABLE-S1 CS1 This set of commands, CABLE-S1 and CABLE-S2, defines the properties and geometry of straight strands. Note: This command may be used for a precast, prestressed concrete girder rating only. 5 COMMAND PARAMETERS SPAN Enter the number of the span for which the layout is being described. ROW Enter the number of the row being described. The rows must be numbered consecutively bottom to top. Number of Strands Enter the number of strands in this row. Area Enter the area of each strand, in sq. in. D1 Enter the distance from the top of the girder to the centroid of this row, in inches. 11/01 12.2 BRASS-GIRDER EXAMPLE For the layout shown below which is Row 1 for Span 2, containing 5 strands with an area of .153 sq. in. per strand, the CABLE-S1 command would be coded as: CABLE - S1 CABLE - S2 2, 1, 5, .153, 52 FIGURES NOTES 3/96 12.3 BRASS-GIRDER 700 BRASS-GIRDER™ COMMAND NAME COMMAND DESCRIPTION CABLE-S2 CS2 This command defines the properties of the strand and rows which are identical to the initial row. PURPOSE This command is not required if the values for the first two parameters equal the default values and there are no additional identical rows. Note: This command may be used for a precast, prestressed concrete girder rating only. 5 COMMAND PARAMETERS Stage Default = 1 Enter the stage of construction in which this row of strands is tensioned. Strand Code Default = 1 Enter the strand properties code representing the properties of the strands in this row. This code must correspond to a strand code defined by STRAND-ST1 through ST4 commands. Continuity Default = 0 This parameter applies to post-tensioned girders only. For interior spans: Leave blank, or enter 0 if this row is not continuous over either support. Enter 1 if this row of strands is continuous over the left support. Enter 2 if this row of strands is continuous over the right support. Enter 3 if this row of strands is continuous over both supports. Identical Rows If more than one row of strands are identical (number of strands, area of each strand, strand type; and are equally spaced) enter the number of additional rows. D2 For identical rows, enter the vertical spacing in inches between each row. 11/01 12.4 BRASS-GIRDER EXAMPLE For the layout shown below, Span 2, with the strands stressed in Stage 2 and Strand type 2, the CABLE-S2 command would be coded as: CS2 2, 2, 1, 2, 2 FIGURES NOTES 12/00 12.5 BRASS-GIRDER 710 COMMAND DESCRIPTION BRASS-GIRDER™ COMMAND NAME CABLE-H1 CH1 This set of commands, CABLE-H1 through CABLE-H3, defines the properties and geometry of harped strands. PURPOSE Note: This command may be used for a precast, prestressed concrete girder rating only. 6 COMMAND PARAMETERS Span Enter the number of the span for which the layout is being described. Row Enter the number of the row being described. The rows must be numbered consecutively bottom to top. Number of Strands Enter the number of strands in this row. Area Enter the area strand, in sq. in. D1 Enter the distance from the top of the girder to the centroid of the row of strands at the left end, in inches. D2 Enter the distance from the top of the girder to the centroid of the row of strands at the harp points, in inches. 11/01 12.6 BRASS-GIRDER EXAMPLE For the example structure shown below in Figure 1, with SPAN No. = 1 ROW No. = 1 No. Strands = 5 AREA OF EACH STRAND = .153 sq. in. CABLE-H1 command would be coded as: CABLE-H1 1, CABLE-H2 CABLE-H3 1, 5, .153, 48 72 FIGURES 3/98 12.7 BRASS-GIRDER 720 BRASS-GIRDER™ COMMAND NAME COMMAND DESCRIPTION CABLE-H2 CH2 This is the second in a series of commands defining the properties and geometry of harped strands. PURPOSE Note: This command may be used for a precast, prestressed concrete girder rating only. 5 COMMAND PARAMETERS D3 Default = D1 Enter the distance from the top of the girder to the centroid of the row of strands at the right end of the span, in inches. X1 Enter the distance from the left end of the span to the first harp point, in feet. See Note. X2 Enter the distance from the left end of the span to the second harp point, in feet. See Note. Stage Default = 1 Enter the Stage of Construction in which this strand is tensioned. Strand Code Default = 1 Enter the strand properties code representing the properties of the strands in this row. This code must correspond to a strand code defined by STRAND-ST1 through STRAND-ST4 commands. 11/01 12.8 BRASS-GIRDER EXAMPLE For the example structure shown below in Figure 1, with strands stressed in stage 1, strand type 1, the CABLE-H2 command would be coded as: CABLE-H1 CABLE-H2 72, CABLE-H3 30, 45, 1, 1 FIGURES NOTES For accurate calculation of the vertical component of the strand force, node points must be located at the harp points. See TRANSFER command, page 12.30. 7/99 12.9 BRASS-GIRDER 730 BRASS-GIRDER™ COMMAND NAME PURPOSE COMMAND DESCRIPTION CABLE-H3 CH3 This is the third in a series of commands defining the properties and geometry of strands identical to the row of strands first described. This command is required only if there are additional identical rows above the one described on the CH1 and CH2 commands. Note: This command may be used for a precast, prestressed concrete girder rating only. 3 COMMAND PARAMETERS Identical Rows If more than one row of strands are identical (number of strands, area of each strand, strand type; and equally spaced) enter the number of additional rows. D4 For identical rows, enter the vertical spacing between each row, at the ends of the span, in inches. D5 Default = D4 For identical rows, enter the vertical spacing between each row, at the harp points, in inches. 11/01 12.10 BRASS-GIRDER EXAMPLE For 4 additional rows spaced at 6" at the ends of the span and 2" at the center of the span, the CABLE-H3 command would be coded as: CABLE-H1 CABLE-H2 CABLE-H3 4, 6, 2 FIGURES NOTES 3/96 12.11 BRASS-GIRDER 740 BRASS-GIRDER™ COMMAND NAME PURPOSE COMMAND DESCRIPTION CABLE-P1 CP1 This set of commands CABLE-P1 and CABLE-P2, defines the properties and geometry of parabolic strands. Note: This command may be used for a precast, prestressed concrete girder rating only. 6 COMMAND PARAMETERS SPAN Enter the number of the span for which the layout is being described. ROW Enter the number of the row being described. The rows must be numbered consecutively bottom to top. Number of Strands Enter the number of strands in this row. Area Enter the area of each strand in square inches. D1 Enter the distance from the top of the girder to the centroid of the row of strands at the left end of the span, in inches. D2 Enter the distance from the top of the girder to the centroid of the row of strands at the low point of the drape, in inches. 11/01 12.12 BRASS-GIRDER EXAMPLE For the example shown below in Figure 1, which is Row 1 for Span 2, containing 20 strands with an area of .153 sq. In. per strand, the CABLE-P1 command would be coded as: CABLE-P1 CABLE-P2 2, 1, 20, .153, 24, 72 FIGURES NOTES 3/96 12.13 BRASS-GIRDER 750 BRASS-GIRDER™ COMMAND NAME COMMAND DESCRIPTION CABLE-P2 CP2 This is the second command defining the properties and geometry of parabolic draped strands. This command is required when the parameter values are not the same as the default values. PURPOSE Note: This command may be used for a precast, prestressed concrete girder rating only. 6 COMMAND PARAMETERS X1 Default = 1/2 span length Enter the distance from the left end of the girder to the low point of the drape, in feet. D3 Default = D1 Enter the distance from the top of the girder to the centroid of the row of strands at the right end of the span, in inches. Stage Default = 1 Enter the Stage of construction in which this strand is tensioned. Strand Code Default = 1 Enter the strand properties code representing the properties of the strands in this row. This code must correspond to a strand code defined by STRAND-ST1 through STRAND-ST4 commands. Identical Rows If more than one row of strands are identical (number of strands, area of each strand, and strand type; and are equally spaced), then enter the number of additional rows. D4 For identical rows, enter the spacing in inches, between each row. 11/01 12.14 BRASS-GIRDER EXAMPLE For the example shown below in Figure 1, the strands are stressed in STAGE 1, are STRAND TYPE 1, and there are an additional 3 rows at 4" spacing. The CABLE-P2 command would be coded as: CABLE-P1 CABLE-P2 , , , , 3, 4 The first blank will default to 1/2 span length, the second blank will default to 24, the third blank will default to 1 and the fourth blank will default to 1. FIGURES NOTES 3/96 12.15 BRASS-GIRDER 760 BRASS-GIRDER™ COMMAND NAME PURPOSE COMMAND DESCRIPTION CABLE-PC1 CB1 This set of commands, CABLE-PC1 through CABLE-PC3, defines the properties and geometry of parabolic draped strands reversed for continuity. This command must be followed by the CABLE-PC2 and CABLE-PC3 commands. See Notes. Note: This command may be used for a precast, prestressed concrete girder rating only. 6 COMMAND PARAMETERS SPAN Enter the number of the span for which the layout is being described. ROW Enter the number of the row being described. The rows must be numbered consecutively. Number of Strands Enter the number of strands in this row. Area Enter the area of each strand in sq. in. D1 Enter the distance from the top of the girder to the centroid of the row of strands, at the left end of the span, in inches. D2 Enter the distance from the top of the girder to the centroid of the row of strands, at the left inflection point, in inches. 11/01 12.16 BRASS-GIRDER EXAMPLE For the example shown below in Figure 1, which is row 10 for span 2, containing 20 strands with an area of .153 sq. in. per strand, the CABLE-PC1 command would be coded as: CABLE-PC1 CABLE-PC2 CABLE-PC3 2, 10, 20, .153, 60, 84 FIGURES D2 = D1 and D4 = D5 for no NOTES For the slope to be the same on each side of the inflection point, the ratio of (D2-D1)/X1 must equal the ratio of (D 3-D 2)/(X 2-X 1) and the ratio of (D 5-D 4)/(SPAN LENGTH-X3) must equal the ratio of (D 3-D 4)/(X 3-X 2). If these ratios are not equivalent, an error message will be placed in the output file and BRASS-GIRDER™ will terminate. 2/03 12.17 BRASS-GIRDER 770 BRASS-GIRDER™ COMMAND NAME PURPOSE COMMAND DESCRIPTION CABLE-PC2 CB2 This is the second command defining the geometry of parabolic draped strands, reversed for continuity. This command must be followed by the CABLE-PC3 command. See Notes. Note: This command may be used for a precast, prestressed concrete girder rating only. 6 COMMAND PARAMETERS X1 Enter the distance from the left end of the span to the left inflection point, in feet. D3 Enter the distance from the top of the girder to the centroid of the row of strands at the low point of the drape, in inches. X2 Default = 1/2 span length Enter the distance from the left end of the span to the low point of the drape, in feet. D4 Default = D2 Enter the distance from the top of the girder to the centroid of the row of strands at the right inflection point, in inches. X3 Default = (Span Length - X1) Enter the distance from the left end of the span to the right inflection point, in feet. D5 Default = D1 Enter the distance from the top of the girder to the centroid of the row of strands at the right end of the span, in inches. 11/01 12.18 BRASS-GIRDER EXAMPLE For the example shown below, the CABLE-PC2 command would be coded as: CABLE-PC1 CABLE-PC2 CABLE-PC3 10, 132, 30, 84, 50, 60 FIGURES NOTES For the slope to be the same on each side of the inflection point, the ratio of (D2-D1)/X1 must equal the ratio of (D 3-D 2)/(X 2-X 1) and the ratio of (D 4-D 5)/(SPAN LENGTH-X3) must equal the ratio of (D 3-D 4)/(X 3-X 2). If these ratios are not equivalent, an error message will be placed in the output file and BRASS-GIRDER™ will terminate. 7/99 12.19 BRASS-GIRDER 780 BRASS-GIRDER™ COMMAND NAME PURPOSE COMMAND DESCRIPTION CABLE-PC3 CB3 This is the third command defining the properties of parabolic draped strands, reversed for continuity and to duplicate additional identical evenly spaced rows. See Notes. Note: This command may be used for a precast, prestressed concrete girder rating only. 5 COMMAND PARAMETERS Stage Default = 1 Enter the Stage of construction in which this strand is tensioned. Strand Code Default = 1 Enter the strand properties code representing the properties of the strands in this row. This code must correspond to a strand code defined by STRAND-ST1 through STRAND-ST4 commands. Identical Rows If more than one row of strands are identical (number of strands, area of each strand and strand type; and equal spacing) enter the number of additional rows. D6 For identical rows, enter the spacing in inches between each row. Continuity Leave blank, or enter 0, if this row is continuous over both supports. Enter 1 if this row is coupled (anchored) over the left support and continuous over the right support. Enter 2 if this row is coupled (anchored) over the right support and continuous over the left support. Enter 3 if this row is coupled (anchored) over both supports. 2/03 12.20 BRASS-GIRDER EXAMPLE CABLE-PC1 CABLE-PC2 CABLE-PC3 2, 1, 3, 24 Describe a row of Type 1 strands stressed in STAGE 2. There are 3 additional identical rows with a spacing of 24 inches. FIGURES NOTES For the slope to be the same on each side of the inflection point, the ratio of (D2-D1)/X1 must equal the ratio of (D 3-D 2)/(X 2-X 1) and the ratio of (D 4-D 5)/(SPAN LENGTH-X3) must equal the ratio of (D 3-D 4)/(X 3-X 2). If these ratios are not equivalent, an error message will be placed in the output file and BRASS-GIRDER™ will terminate. 5/01 12.21 - 12.25 BRASS-GIRDER 810 COMMAND DESCRIPTION BRASS-GIRDER™ COMMAND NAME CABLE-DUP DUP This command defines duplicate spans which have identical strand layouts. This command may be used a maximum of 4 times. PURPOSE Note: This command may be used for a precast, prestressed concrete girder rating only. 6 COMMAND PARAMETERS Span Enter the span for which the cable layout has been described. First Identical Enter the first identical span. If all spans are identical, code ALL. Second Identical Enter the second identical span. Third Identical Enter the third identical span. Fourth Identical Enter the fourth identical span. Fifth Identical Enter the fifth identical span. 11/01 12.26 BRASS-GIRDER EXAMPLE For a 5 span structure with spans 2, 3, and 4 having identical cable layouts, the CABLE-DUP command would be coded as: CABLE-DUP 2, 3, 4 FIGURES NOTES This command does not duplicate DEBOND. 3/96 12.27 BRASS-GIRDER 820 COMMAND DESCRIPTION BRASS-GIRDER™ COMMAND NAME DEBOND DBD This command defines which strands are debonded and the length of the debond for pre-tensioned straight strands only. PURPOSE Note: This command may be used for a precast, prestressed concrete girder rating only. 6 COMMAND PARAMETERS SPAN Enter the span number. ROWB Enter the beginning row number. ROWE Default = ROWB Enter the ending row number. Number of Strands Enter the number of strands in each row to be debonded. XD1 Enter the length of debond at the left end of the beam, in feet. XD2 Default = XD1 Enter the length of debond at the right end of the beam, in feet. 7/99 12.28 BRASS-GIRDER EXAMPLE For the example shown below the DEBOND command would be coded as: DEBOND 1, 1, , 3, 4, 4 2, , 2, 6, 6 3, , 2, 8, The blank will default to 1. DEBOND 1, The blank will default to 2. DEBOND 1, The first blank will default to 3 and the second blank will default to 8. FIGURES NOTES 1. This command is not valid for a post-tensioned girder. 2. In the BRASS-GIRDER™ output file, the program generates a new row for the debonded strands, unless all the strands in the row are debonded. For example, when the user inputs five strands (2 normal and 3 debonded), in row 1 (as shown in the figure above), the output file will print results for row 1 (2 strands) and row 8 (3 debonded strands). 12/00 12.29 BRASS-GIRDER 823 BRASS-GIRDER™ COMMAND NAME PURPOSE COMMAND DESCRIPTION TRANSFER XFR This command may be used to define up to 18 additional node points, per span, on a timber, steel, reinforced concrete or prestressed concrete girder such as harp points. This command may not be used for a precast, prestressed concrete girder design or a reinforced concrete girder design. 19 COMMAND PARAMETERS Span No. Enter the number of the span being described. First Additional Node Point Location (Feet) Enter the distance in feet from the left end of the span (not beam) to the first additional node point in the span. See Figure 1 Second Additional Node Point Location (Feet) Enter the distance in feet from the left end of the span (not beam) to the second additional node point in the span. See Figure 1. Repeat for up to 18 Additional Node Points 12/00 12.30 BRASS-GIRDER EXAMPLE The HINGE command, page 10.42, allows the user to select locations where a node point will be inserted. The TRANSFER command allows you to select up to 18 additional node points along the span. TRANSFER 1, 1.75, 5.75, 7.75, 9.75, 90.25, 92.25, 94.25, 98.25 FIGURES NOTES 12/00 12.31 BRASS-GIRDER 824 COMMAND DESCRIPTION BRASS-GIRDER COMMAND NAME PURPOSE PS-BEAM-OVERHANG PBO Used to specify the beam overhang past the centerline of bearing for a prestress beam when pretensioned strands are used. This command is optional. See Note 3. 3 COMMAND PARAMETERS Span Number Enter the number of the span for which the beam overhangs are being defined. Beam Overhang (Left End) Enter the beam overhang distance, in inches, past the centerline of bearing at the left end of the span. See Figure 1 and Notes. Default = 0.0 or if span number > 1, then Default = Beam Overhang (Left End) of Span 1 Beam Overhang (Right End) Enter the beam overhang distance, in inches, past the centerline of bearing at the right end of the span. See Figure 1 and Notes. Default = Beam Overhang (Left End) or if span number > 1, then Default = Beam Overhang (Right End) of Span 1 2/03 12.32 BRASS-GIRDER EXAMPLE If the beam overhang past the centerline of bearing at each end of a simple span is 6 inches, code as: PS-BEAM-OVERHANG 1, 6, 6 FIGURES NOTES 1. If debond lengths are specified, the debond lengths are measured from the end of the beam. Transfer and development lengths are measured from the end of the beam. See command 640, STRAND-ST2. 2. The strand profile is not adjusted to account for the beam overhang. The vertical and horizontal distances describing the strand profile reference the end of the span, not the end of the beam. 3. Warning: Do not use unless the transfer/development length + debond is greater than the overhang length. 2/03 12.33 BRASS-GIRDER 825 COMMAND NAME PURPOSE COMMAND DESCRIPTION BRASS-GIRDER™ CABLE-DES CDS This command defines the geometry of the prestressing strands for design. This command is required once for each span. 8 COMMAND PARAMETERS Span Enter the span number. Number of Strands If JFORCE (PRESTRESS-3 command, parameter No. 8) is 1 or 2, enter the number of prestressing strands. If JFORCE is 0, leave blank. Min E Enter the distance from the bottom of the girder to the centroid of the strand pattern at mid-span, in inches. Y1 Enter the distance from the bottom of the girder to the centroid of the strand pattern at the left end of the span, in inches. Y2 Enter the distance from the bottom of the girder to the centroid of the strand pattern at the right end of the span, in inches. X1 Enter the distance to the first harp point, in feet. X2 Enter the distance to the second harp point, in feet. JPARA Code 0 if this span has harped strands. Code 1 if this span has parabolic strands. Leave X1 and X2 blank. Code -1 if this span has only straight strands. Leave Y1, Y2, X1, and X2 blank. 7/99 12.34 BRASS-GIRDER EXAMPLE CABLE-DES 1, 26, 3.85, 17.38, 17.38, 32, 32, 0 FIGURES NOTES 7/99 12.35 BRASS-GIRDER 826 BRASS-GIRDER™ COMMAND NAME PURPOSE COMMAND DESCRIPTION PS-BEAM-SHEAR PBS This command is used to control the computational method of shear resistance for simple span prestress girders made continuous for live load. This command is optional. 5 COMMAND PARAMETERS Near Interior Support Positive Moment Default = 2 Enter one of the following options for computing shear resistance: 1. Vci, Vcw Current AASHTO Specifications 2. 1979 AASHTO Interim Specifications 3. As reinforced concrete, per current AASHTO Specifications Near Interior Support Negative Moment Default = 3 Enter one of the following options for computing shear resistance: 1. Vci, Vcw Current AASHTO Specifications 2. 1979 AASHTO Interim Specifications 3. As reinforced concrete, per current AASHTO Specifications Away From Interior Support Positive Moment Default = 1 Enter one of the following options for computing shear resistance: 1. Vci, Vcw Current AASHTO Specifications 2. 1979 AASHTO Interim Specifications 3. As reinforced concrete, per current AASHTO Specifications Away From Interior Support Negative Moment Default = 1 Enter one of the following options for computing shear resistance: 1. Vci, Vcw Current AASHTO Specifications 2. 1979 AASHTO Interim Specifications 3. As reinforced concrete, per current AASHTO Specifications Near Support Definition, % Default = 25% Enter the % of span length to be used to determine “near” support. 11/01 12.36 BRASS-GIRDER EXAMPLE PS-BEAM-SHEAR 1, 1, 1, 1, 25 FIGURES NOTES 11/01 12.37 BRASS-GIRDER 11/01 12.38 BRASS-GIRDER 13. STRUCTURE LOADING The following commands, pages 13.2 through 13.30, are used to describe the dead and live loads to be applied to the structure. The type of loads to be applied will dictate the commands required. Dead loads may be divided into 4 different groups and each group may be applied in a specified stage of construction. This may be in addition to the weight of the girder and deck. SIGN CONVENTION MOMENT SHEAR Shear is defined as the algebraic summation of the external forces to the left or to the right of a section that are perpendicular to the axis of the beam. It is considered to be positive if the sum of the forces to the left is up or the sum of the forces to the right is down. The calculations for shear at two sections in a simple beam are given in the example. In each case the summations are made both to the left and to the right to prove that identical results are obtained. EXAMP LE SOLUTION Shear at section a-a: Va-a to left = 25.7 K 8 , or +25.7 K Va-a to right = 20+15+16-25.3 = 25.7 K 9 , or +25.7 K Shear at section b-b: Vb-b to left = 25.7-20-15 = 9.3 K 9 = -9.3 K Vb-b to right = 16-25.3 = 9.3 K 8 = -9.3 K AXIAL Axial actions which cause compression in a member are positive. Axial actions which cause tension in a member are negative. 3/96 13.1 BRASS-GIRDER LIVE LOAD ACTIONS For live load actions, BRASS creates influence lines with ordinates at 1/denominator times the length of span one. The denominator defaults to 100, but may be controlled by the user by parameter 4 of the LIVE-LOAD command. Truck wheel loads and uniform loads are placed on these influence lines and the sum of the ordinates affected are used to calculate the actions. If a wheel load falls between two ordinates, the program uses the closest ordinate. No interpolation is done. Similarly, a lane load is placed on ordinates of the proper sign, but a small amount may be neglected because of the end triangles (zero to the first ordinate with value). Therefore, the results are approximate, but because of the many points on the influence line, the results are generally very close to the exact answer. This may become a factor on when span one is less than 50 feet. If so, the denominator can be increased. If the denominator causes the distance between ordinates to be less than 0.1 feet, the program automatically reduces the denominator until the restriction is satisfied. Further explanation is contained in the description of the fourth parameter of the LIVE-LOAD command. BRASS-GIRDER Rating of Floorbeams Herein, the longitudinal direction is parallel to the centerline of the roadway and the transverse direction is parallel to the floorbeam. The rating of a steel floorbeam is similar to the rating of a steel longitudinal girder whereby the calculation of girder properties, structural analysis, and determination of strength can be addressed in a similar manner. Dead loads may be passed to BRASS-GIRDER as uniform or point loads; selfweight can be determined by BRASS-GIRDER based on section properties. The primary difference is in the computation of the live load effects. Live loads to be applied to the floorbeam are truck wheel line reactions (TWLR). In general, the live load to be applied to a floorbeam for a typical truck is two wheel-line reactions spaced six feet apart. TWLR must be determined by the longitudinal analysis of either a stringer, or a deck in the case of stringer-less systems. The computation of the TWLR is performed separately from the floorbeam analysis. A longitudinal analysis/rating program such as BRASS-GIRDER may be used to perform longitudinal analysis to obtain the TWLR. Impact is calculated during the floorbeam analysis based on the length of the floorbeam or as input by the user. Therefore, impact should not be used during the longitudinal analysis to determine the TWLRs. BRASS-GIRDER automatically places transversely the TWLRs on a floorbeam to calculate the live load effects. One or more sets of TWLRs are placed upon the floorbeam in many possible positions so that the controlling position is determined. See figures below. 2/03 13.1a BRASS-GIRDER Load Positioning For the above, the lanes are placed in all possible positions with the wheel lines within the lanes set in all possible positions for each case. For example, the combinations below are included in the analysis: The factors that are involved in determining possible positions are: a. b. c. d. Width and position of travel way(s). This defines the location of curbs or curb to median, etc. Distance between TWLRs (axle gauge) which is usually six feet. Number of TWLRs which is usually two but can be as many as 20. Traffic lane width, which is generally 12 feet as specified in AASHTO 3.6.2, but could be wider for an overload truck with a wheel gage greater than the typical six feet. e. Number of traffic lanes to be allowed on the floorbeam. This value is computed, but may be defined by the user. For example, the user may require that a large overload be the only load permitted on the bridge at the time of crossing. In another case, the user may want one or more additional trucks to be on the bridge at the same time the truck being rated is on the bridge. f. Additional multiple presence truck(s) (MPTs) for multiple presence analysis are additional TWLRs for the truck(s) to be placed in adjacent traffic lanes. These truck(s) could be the same as the 2/03 13.1b BRASS-GIRDER g. h. i. j. primary truck being rated, or may be different, such as the placement of a typical vehicle next to a permit vehicle. The number of MPTs will be the number of traffic lanes minus one, or as limited by the user. The user may define up to 10 rating trucks and 10 MPTs so that each primary truck may have a specific MPT. The location of the floorbeam with respect to the travelway must be defined. This is done using the FLOORBEAM-TRAVELWAY command. Primary rating truck lane width (design lane). This is generally ten feet as specified in AASHTO Figure 3.7.6A but can be wider for a permit truck with a wheel gage greater than the normal six feet. MPT load lane width. This is generally ten feet as specified in AASHTO Figure 3.7.6A but could be wider for a truck with a wheel gage greater than the normal six feet. The increment of movement distance (step) may be controlled by the user. Lanes and truck positions within lanes are shifted by the "step" for each load case. This step distance defaults to one foot. Based on the above information, BRASS-GIRDER automatically places one or more sets of TWLRs (primary and MPTs) on a floorbeam in many positions and calculates maximum and minimum actions and the associated load ratings at each 1/10 point along the floorbeam, or at special points of interest as specified by the user. 2/03 13.1c BRASS-GIRDER This page intentionally left blank 2/03 13.1d BRASS-GIRDER 830 BRASS-GIRDER™ COMMAND NAME PURPOSE COMMAND DESCRIPTION DEAD-LOAD DLD This command controls the output of actions and displacements and defines superstructure dead loads and temperature change. If performing a prestressed girder DESIGN analysis, see Note 2. This command is always required. 7 COMMAND PARAMETERS Output Control Default = 1 This parameter may be used to reduce the amount of program output. If coded: 0 = No moments, shears, reactions, or deflections output. 1 = Moments, shears, reactions, and deflections at 1/10 points will be printed. 2 = Moments, shears, reactions, and deflections at all node points will be printed. 3 = Moments, shears, reactions, deflections, and concurrent actions at 1/10 points will be printed. 4 = Moments, shears, reactions, deflections, and concurrent actions at all node points will be printed. 5 = Moments, shears, reactions, deflections, and interactions will be printed (future capability - not currently operational). If the second parameter of the DECK-CON command was nonblank, then the stage 1 dead load to the girder will be automatically applied based on the weight of the deck as distributed to the analysis girder. If there is no stage construction, always use stage 1. Stage 1 Superstructure Dead Load Default = Load as calculated in deck component. If the DECK-CON option was not used, enter the uniform dead load per foot in kips/ft. to be applied in stage 1. This will generally be the distributed weight of the deck concrete (composite or noncomposite) on the analysis girder. Stage 2 Superstructure Dead Load Default = Load as calculated in deck component. This parameter is for defining stage 2 superstructure dead loads. It is not required for non-stage construction or if the DECK-CON option was used and it would generally be used to apply sustained superstructure loads such as curbs and railing to a composite girder. Enter in kips/ft. Stage 3 Superstructure Dead Load Default = Load as calculated in the deck component. This parameter is for entering stage 3 superstructure dead loads. It is not required for non-stage construction or if the DECK-CON option was used. It would generally be used to apply prestressing loads to the girder in stage 3 of construction. Enter in kips/ft. See Note 4. ∆T Enter the change in temperature in degrees Fahrenheit if the actions due to temperature change are desired. See Notes 1, 3, and 6. (Continued) 11/01 13.2 BRASS-GIRDER COMMAND PARAMETERS (Cont.) Additional Self-weight (F/L) Enter an additional self-weight (in terms of force per unit length, k/ft) to be applied to the girder in stage 1. This value may be positive or negative. See Note 4. Additional Self-weight (%) Enter an additional self-weight (in terms of percentage) to be applied to the girder in stage 1. This value may be positive or negative. See Note 4. 7/99 13.2a BRASS-GIRDER EXAMPLE For the loading described below, the DEAD-LOAD command would be coded as follows assuming full output is desired and no temperature change to be analyzed: DEAD-LOAD 3, 1.123, 0.092 FIGURES NOTES 1. A positive value of ∆ T denotes a temperature increase. 2. For prestressed design only, superstructure dead load for Stage 2 is defined in the PRESTRESS-3 command (1181). Any value entered in parameter 3 will be overwritten by the PR3 command. See command 1181 (PR3) for definition of Stage 2 dead loads. The DLD command is still required for BRASS-GIRDER™ to run. For example, a typical entry might resemble the following line: DLD 3. 1,0.0,0.0, BRASS-GIRDER™ applies settlement loads, temperature loads, and group loads (see LOAD-DESCR command) to the structure and calculates the resulting actions. The load effects are printed as separate load cases and are combined with dead load actions for the calculation of stresses with the same load factors as applied to dead load. If the user desires a different load factor for settlement and/or temperature, multiply the settlement (temperature) by that factor prior to input. (Continued) 11/01 13.3 BRASS-GIRDER NOTES (Cont.) 4. For the load factor analysis of steel girders, BRASS does not analyze stage 3 dead loads. Treat temporary stage 3 dead loads, such as temporary concrete traffic barriers, as stage 2 dead loads. 5. Total self-weight will be computed as: TSW = [GW x (1 + ASWP/100)] + ASWF where: TSW = total self weight (force/length) GW = girder self-weight (force/length) ASWP = additional self-weight in terms of percentage ASWF = additional self-weight in terms of force per unit length 6. BRASS cannot analyze a prestressed concrete girder bridge if the temperature change load is applied to the continuous stage, AND, the girders are simple span made continuous for live load, AND, the support conditions are pinned at more than only the left support. 11/01 13.3a BRASS-GIRDER 840 COMMAND NAME PURPOSE COMMAND DESCRIPTION BRASS-GIRDER™ LOAD-DESCR LDE This command labels the load groups to help clarify program output. This refers directly to the load group number as defined on either the UNIFORM-DL1 or POINT-DL commands. This command may be repeated as needed to describe up to 4 different load groups. See Notes. It is optional. 4 COMMAND PARAMETERS Load Group Number Enter a number from 1 to 4 representing the load group to be named by the following parameter. Stage Default = 1 Enter the stage in which this load group is applied. Time of Application Enter the time in days of application of this load group from initial prestressing if this is a prestressed concrete girder. Load Group Name Enter up to 40 characters describing the load group. 2/97 13.4 BRASS-GIRDER EXAMPLE If “load group” #1 was used to represent a slab pour sequence, in Stage 1, on a nonprestressed girder bridge, it could be named by using the LOAD-DESCR command as follows: LOAD-DESCR 1, 1, , SLAB POUR-SEQUENCE ONE FIGURES NOTES 1. Only 3 group loads are allowed for prestress girders. 2. Do not use this command when using the Kansas Prestress Design module. 3. For precast, prestressed box beams, with integral diaphragms, see Parameter 8 of the PROPERTIES-PC1 command. 13.5 850 COMMAND NAME PURPOSE COMMAND DESCRIPTION BRASS-GIRDER™ UNIFORM-DL1 UL1 This command defines uniform loads to be applied to the structure. This command could be used in lieu of or in conjunction with parameters 2, 3, & 4 of the DEAD-LOAD command to describe slab placement sequence. This command is optional. 5 COMMAND PARAMETERS Dead loads applied to the structure may be organized into load groups. A load group may be composed of uniform and/or point loads. In the case of a prestressed concrete girder bridge, only 3 load groups are allowed and the 4th is reserved for prestressing loads. Each load group may have up to 38 sections, a section being as shown below: A UNIFORM-DL1 and UNIFORM-DL2 would be required to describe each section. Non-uniform distributed loads as shown below may be input, however, they must begin and end at a node point. The HINGE and/or TRANSFER commands may be used to add additional node points (additional analysis points). Span Number Enter the span number which that section of uniform load to be described is placed. If the load is on top spans, this parameter may be left blank. D LEFT Enter the distance if feet from the left end of the span to the beginning point of this section of the distributed load. If the load is on top spans, then enter the distance from the left end of the bridge and leave span number blank. If the load varies, the beginning point must be at a node point. (Continued) 10/98 13.6 BRASS-GIRDER COMMAND PARAMETERS (Cont.) M LEFT Enter the magnitude in kips per foot at the left end of this section of the distributed load. If the load varies, then this starting point must be at a node point. Node points are automatically placed at span 1/10th points, at all cross section change points, at hinge points and at special analysis points as described by the HINGE or TRANSFER command. Negative loads are allowable. See Notes. D RIGHT Enter the distance in feet from the left end of the span to the ending point of this section of the distributed load. If the load is on top spans, then enter the distance from the left end of the bridge and leave span number blank. M RIGHT Default = M LEFT Enter the magnitude in kips per foot at the right end of this section of the distributed load. If the load varies, then this ending point must be at a node point. Negative loads (upward) are allowable. See Notes. 3/96 13.7 BRASS-GIRDER EXAMPLE For the loading shown if Figure 1, the UNIFORM-DL1 command would be used as follows: LOAD-DESCR UNIFORM-DL1 UNIFORM-DL1 LOAD-DESCR UNIFORM-DL1 UNIFORM-DL1 1, , , 2, , , , 10, 140, 2, 0.0, 100, , 1.5, 1.5, , 1.3, 1.3, LOAD GROUP No. 1 1.5 K/Ft. 90 190 LOAD GROUP No. 2 1.3 K/Ft. STAGE 2 50 175 FIGURES Load group 1 to be placed in stage 1 of construction and load group 2 to be placed in stage 2 of construction. NOTES Loads always act normal to the member. “Positive” deflections are down relative to the member. Do not use this command when using the Kansas Prestress Design module. 11/01 13.8 BRASS-GIRDER 3/96 13.9 BRASS-GIRDER 860 BRASS-GIRDER™ COMMAND NAME COMMAND DESCRIPTION POINT-DL PTD This command defines concentrated dead loads to be applied to the structure. PURPOSE This command may be repeated as needed to describe up to 70 point loads in each load group. 4 COMMAND PARAMETERS PX Enter the magnitude of the x component of the point load in kips based on the axis as shown in Figure 1. PY Enter the magnitude of the y component of the point load in kips based on the axis as shown in Figure 1. Span Number Enter the span number upon which the point load is acting. If the load is on a top span, this parameter may be left blank. Distance Enter the distance from the left end of the span to the point of application of the load. If span number was left blank, enter the distance from the left end of the bridge. 3/96 13.10 BRASS-GIRDER EXAMPLE To apply the point loads to a structure as described below in Figure 2, the POINT-DL command would be used as follows: POINT-DL POINT-DL , , 12, 6, , , 18 72 FIGURES “Positive” vertical deflections are down. NOTES Do not use this command when using the Kansas Prestress Design module. 11/01 13.11 BRASS-GIRDER 870 BRASS-GIRDER™ COMMAND NAME COMMAND DESCRIPTION TEMP-SETL TSL This command controls the stage(s) of construction in which forces due to temperature and/or settlement are applied. PURPOSE This command is optional. See the DEAD-LOAD command. 2 COMMAND PARAMETERS Stage T Default = 1 Enter the stage of construction in which the forces due to temperature change are to be applied to the structure. See Notes. Stage S Default = 1 Enter the stage of construction in which the forces due to settlement are to be applied to the structure. 11/01 13.12 BRASS-GIRDER EXAMPLE Assume that a composite steel and concrete bridge is constructed in 3 stages. The dead load on the non-composite girder (stage 1), the sustained dead load on the composite section allowing for creep (stage 2), and the live load on the composite section (stage 3), no creep. It would be reasonable to apply temperature change in stage 3 as it is not a long term sustained load and apply settlement in stage 2. TEMP-SETL 3, 2 FIGURES NOTES BRASS cannot analyze a prestressed concrete girder bridge if the temperature change load is applied to the continuous stage, AND, the girders are simple span made continuous for live load, AND, the support conditions are pinned at more than only the left support. 11/01 13.13 BRASS-GIRDER 880 COMMAND DESCRIPTION BRASS-GIRDER™ COMMAND NAME LIVE-LOAD LLD This command controls the application of live loads and sidewalk live loads to the structure. PURPOSE This command is required for live load analysis. IMPORTANT: Read page 13.1a for a description of the live load algorithm. 8 COMMAND PARAMETERS Direction Control Default = 3 This parameter may be used to reduce the execution time. If the structure is symmetrical longitudinally about its midpoint, it is only necessary to move a truck up milepost or down milepost. If the structure is not symmetrical longitudinally but traffic only moves in one direction then only use the direction of traffic to reduce run time. If the structure is not symmetrical longitudinally and traffic moves both directions then use both directions. Codes: 1. Traffic moves up milepost (left to right). 2 Traffic moves down milepost (right to left). 3. Traffic moves both directions. Wheel Fraction Enter the decimal fraction of a wheel line that is to be applied to the girder being analyzed. See AASHTO 3.23. See Notes. % Impact Default = 100 Enter the percent of impact to be used. BRASS will calculate the impact to be used as per AASHTO 3.8.2.1. This parameter may be used to reduce or increase that impact. For example, if it is planned to move an overload truck over the structure at a very slow speed, it may be desired to enter 0.0 in this parameter which would in effect take out all the impact. If a bridge deck is extremely rough it may be desirable to increase the impact by say 25 %. This parameter would then be entered as 125. Point Load and Wheel Advancement Denominator Default = 100 BRASS-GIRDER™ places a unit load at incremental distances across the deck spans. The influence of this unit load is used to generate live load actions. To obtain reasonable accuracy and run time this value defaults to 1/100 of the length of span 1. To reduce run time a smaller denominator may be input such as 50 then 1/50 of the length of span 1 will be used. To obtain more precise answers input a larger denominator. On occasion slight asymmetry of live load actions is exhibited where expected. In such cases increase this parameter to improve the accuracy. (Continued) 2/03 13.14 BRASS-GIRDER COMMAND PARAMETERS (Cont.) Sidewalk Load If sidewalk live load is to be applied to the girder, enter the amount in lbs. per foot. BRASS will position this loading for maximum effect. A “fraction of sidewalk live load” similar to a truck wheel fraction is set to 1.0 by BRASS. See NOTES, Page 13.16. Standard Truck Code 1 if it is desired to analyze the structure for an AASHTO HS20 truck load and an AASHTO HS20 lane load. These truck loads will be automatically numbered Truck #1 and Truck #2. If subsequent trucks are entered using the TRUCK-CODE1, SPECIAL-TRUCK or SPECIAL-LANE commands, number these trucks beginning with Truck #3. If no other live loads are desired omit further live load commands. Note: If this is used in conjunction with a bridge deck analysis, two trucks must be entered in the bridge deck analysis. Fixed Impact Factor Default = AASHTO Article 3.8.2, EQ. (3-1) Code a fixed impact factor if a constant factor (independent of span length) is to be used, otherwise leave blank for AASHTO default. For example, a 20 percent increase due to impact should be entered as 0.20. Parameter No. 3, % Impact, is used in conjunction with this command. For example, % impact = 50 and Fixed Impact = 0.20, then the net impact factor is 0.50 (0.20) + 1 = 1.10. Fixed Truck Position This parameter allows the user to obtain ratings for a truck sitting in a fixed position. Code the distance, in feet, from the left end of the bridge to the front axle of the truck. IMPORTANT: There can only be one truck input and the Directional Control (Parameter 1) must be coded “1" (Traffic moves up milepost (left to right)). 11/01 13.15 BRASS-GIRDER EXAMPLE For a typical girder with no sidewalk loading, longitudinal symmetry, and no desired change to impact or wheel advancement increment: LIVE-LOAD 1, Wheel fraction assumed. 1.5455 Girder spacing 8.5 = 1.5455 5.5 FIGURES NOTES Sidewalk live load is applied as an additional truck load with a wheel fraction of 1.00 and no impact. Sidewalk live load is always the last live load, i.e., if there are 6 live loads (trucks and/or lane loads) sidewalk live load will be considered as "truck #7". Also, sidewalk live load counts as one when considering the maximum of 10 live loads. See AASHTO 3.14 and 3.22 when evaluating the effects of live load. BRASS-GIRDER™ does not add stresses due to sidewalk live load to the stresses due to dead load and truck live loads and compare to 125 % allowable stress. The deflections output by BRASS-GIRDER™ include the effects of impact and scaled by the same wheel fractions as the live load actions. BRASS makes no compensation for deflection based on multiple girders or total section I. The engineer can obtain deflections based on other distribution by proportioning the wheel fractions. 2/00 13.16 BRASS-GIRDER 3/96 13.17 BRASS-GIRDER 900 COMMAND NAME PURPOSE COMMAND DESCRIPTION BRASS-GIRDER™ TRUCK-WFR TRW This command assigns individual wheel fractions to trucks. Input parameters in this command will override parameter -2- of the LIVE-LOAD command. This command is optional. It may be repeated if needed for trucks 7 through 10. 6 COMMAND PARAMETERS WFR 1 (OR 7) Enter the wheel fraction to be applied to the wheel line weights of truck number 1. (or truck number 7). WFR 2 (OR 8) Enter the wheel fraction to be applied to the wheel line weights of truck number 2. (or truck number 8). WFR 3 (OR 9) Enter the wheel fraction to be applied to the wheel line weights of truck number 3. (or truck number 9). WFR 4 (OR 10) Enter the wheel fraction to be applied to the wheel line weights of truck number 4. (or truck number 10). WFR 5 Enter the wheel fraction to be applied to the wheel line weights of truck number 5. WFR 6 Enter the wheel fraction to be applied to the wheel line weights of truck number 6. 3/96 13.18 BRASS-GIRDER EXAMPLE Assume it is desired to override the wheel fraction to be used on trucks #3, 8, & 9: TRUCK-WFR ,,1.40 TRUCK-WFR ,1.40,1.40 FIGURES NOTES 3/96 13.19 BRASS-GIRDER 910 BRASS-GIRDER™ COMMAND NAME PURPOSE COMMAND DESCRIPTION TRUCK-IMP TRI This command assigns individual percents of impact to be applied to truck loadings. Input parameters in this command will override parameter -3- of the LIVE-LOAD command. This command is optional. It may be repeated if needed for trucks 7 through 10. 6 COMMAND PARAMETERS IMP 1 (OR 7) Enter the percent of impact to be applied to truck number 1. (or 7). IMP 2 (OR 8) Enter the percent of impact to be applied to truck number 2. (or 8). IMP 3 (OR 9) Enter the percent of impact to be applied to truck number 3. (or 9). IMP 4 (OR 10) Enter the percent of impact to be applied to truck number 4. (or 10). IMP 5 Enter the percent of impact to be applied to truck number 5. IMP 6 Enter the percent of impact to be applied to truck number 6. 3/96 13.20 BRASS-GIRDER EXAMPLE Assuming that trucks #4 and 8 are special overload trucks that are restricted to 35 mph over structures and impact is to be reduced by ½ (50 %). TRUCK-IMP TRUCK-IMP , , , 50 , 50 FIGURES NOTES 3/96 13.21 BRASS-GIRDER 920 COMMAND NAME PURPOSE COMMAND DESCRIPTION BRASS-GIRDER™ TRUCK-CODE1 TR1 This command defines truck loads by a "truck code". This truck code must have been previously stored in the Truck Library along with axle weight and spacing data defining the truck. Trucks may be specified by use of this command and/or the SPECIAL-TRUCK and SPECIAL-LANE commands. See command 1240 for an explanation of printing the Truck Library. 6 COMMAND PARAMETERS Truck Code 1 Enter the code for the first truck to be applied to the structure. Truck Code 2 Enter the code for the second truck to be applied to the structure. Truck Code 3 Enter the code for the third truck to be applied to the structure. Truck Code 4 Enter the code for the fourth truck to be applied to the structure. Truck Code 5 Enter the code for the fifth truck to be applied to the structure. Truck Code 6 Enter the code for the sixth truck to be applied to the structure. 3/96 13.22 BRASS-GIRDER EXAMPLE TRUCK-CODE1 HS20T, TYPE3, MILITARY, DUMP1 FIGURES NOTES AASHTO (TYPE 3, TYPE 3S2, and TYPE 3-3) and Wyoming rating trucks (WYOTYPE 3, WYOTYPE3S2, and WYOTYPE 3-3 shown above) represent just a few of the types of trucks that are already coded in the truck library. There should be a direct correlation between the first truck applied here and the first truck's wheel weight applied by the DECK-TRK1 command. The same applies to the second through tenth trucks as well. The number of trucks must also agree. 10/97 13.23 BRASS-GIRDER 930 COMMAND NAME PURPOSE COMMAND DESCRIPTION BRASS-GIRDER™ TRUCK-CODE2 TR2 This command defines truck loads 7 through 10 by a "Truck Code". This truck code must have been previously stored in the Truck Library along with axle weight and spacing data defining the truck. Trucks may be specified by use of this command and/or the SPECIAL-TRUCK and SPECIAL-LANE command. See command 1240 for an explanation of printing the Truck Library. 4 COMMAND PARAMETERS Truck Code 7 Enter the code for the seventh truck to be applied to the structure. Truck Code 8 Enter the code for the eighth truck to be applied to the structure. Truck Code 9 Enter the code for the ninth truck to be applied to the structure. Truck Code 10 Enter the code for the tenth truck to be applied to the structure. 12/00 13.24 BRASS-GIRDER EXAMPLE TRUCK-CODE2 MX, MXC, MILITARY, SINGLE FIGURES NOTES 3/96 13.25 BRASS-GIRDER 940 BRASS-GIRDER™ COMMAND NAME PURPOSE COMMAND DESCRIPTION SPECIAL-TRUCK STR This command defines a truck that is not stored in the "Truck Library". It may be repeated as needed to define a truck with up to 24 axles and up to 10 trucks may be defined if all 10 are defined by this command. It may be used in conjunction with the TRUCKCODE1 and TRUCK-CODE2 or SPECIAL-LANE commands. 6 COMMAND PARAMETERS Truck Number Enter the number of the truck to be defined by this command. It cannot be a number already defined by the TRUCK-CODE1, TRUCK-CODE2, or SPECIAL-LANE commands. Truck Wheel Load 1, 3, 5, 7, 9, 11, 13, 15, 17, 19, 21, or 23 Enter the truck wheel load in kips of the first wheel if this is the first command, the third wheel load if the second command, the fifth wheel load if the third command, etc. Wheel Spacing 1-2, 3-4, 5-6, 7-8, 9-10, 11-12, 13-14, 15-16, 17-18, 19-20, 21-22, or 23-24 Enter the spacing in feet between the first and second wheels if this is the first command, the third and fourth if this is the second command, the fifth and sixth if this is the third command, etc. Truck Wheel Load 2, 4, 6, 8, 10, 12, 14, 16, 18, 20, 22, or 24 Enter the truck wheel load in kips of the second wheel if this is the first command, the fourth wheel if the second command, the sixth wheel if the third command, etc. Wheel Spacing 2-3, 4-5, 6-7, 8-9, 10-11, 12-13, 14-15, 1617, 18-19, 20-21, or 22-23 Enter the spacing in feet between the second and third wheels if this is the first command, the fourth and fifth if the second command, the sixth and seventh if the third command, etc. HS Type Truck Enter 1 if this is an HS type truck with variable rear axle spacing to 30'. Only required once. 3/96 13.26 BRASS-GIRDER EXAMPLE For the truck shown if Figure 1 below the SPECIAL-TRUCK command would be used as follows: SPECIAL-TRUCK SPECIAL-TRUCK SPECIAL-TRUCK SPECIAL-TRUCK SPECIAL-TRUCK 1, 1, 1, 1, 1, 4, 8, 12, 8, 7, 18, 5, 14, 5, 5, 9, 8, 12, 8, 7 16 16 12 22 FIGURES NOTES The number of the truck entered in this section must agree with the number specified in Section 7, Bridge Deck Analysis. Truck numbers must be consecutive beginning with any trucks input previously. For example, if three trucks were entered on the TRUCK-CODE1 command, then the first truck number entered by this command must be number 4. Negative axle loads or axle loads of 0.0 are not allowed. 11/01 13.27 BRASS-GIRDER 950 COMMAND NAME PURPOSE COMMAND DESCRIPTION BRASS-GIRDER™ SPECIAL-LANE SLN This command describes a lane load that is not stored in the "Truck Library". It may be repeated if more than one lane load is needed to be defined by this command. 5 COMMAND PARAMETERS Truck No. Enter the number of the truck to be defined by this command. It cannot be a number already defined by the TRUCK-CODE1, TRUCK-CODE2, or SPECIAL-LANE commands. Uniform Lane Load Enter the uniform lane load in kips per foot equivalent to one wheel line. This would be ½ of the lane load as usually described. Concentrated Load for Shear Enter the concentrated load for shear in kips equivalent to a wheel line. This would be ½ of the concentrated load for shear as usually described. Concentrated Load for Moment Enter the concentrated load for moment in kips equivalent to a wheel line. This would be ½ of the concentrated load for moment as usually described. Truck Weight (Optional) Enter the total weight of the truck in tons. 3/96 13.28 BRASS-GIRDER EXAMPLE For the lane load shown in Figure 1, the SPECIAL-LANE command would be as follows: SPECIAL-LANE 1, 0.36, 14.5, 10 FIGURES NOTES Note: 3/96 The number of trucks entered in this section must agree with the number specified in Section 7, Bridge Deck Analysis. Truck numbers must be consecutive beginning with any trucks input previously. For example, if three trucks were in the TRUCK-CODE1 command, then the first truck entered by this command must be number 4. 13.29 BRASS-GIRDER 960 BRASS-GIRDER™ COMMAND NAME PURPOSE COMMAND DESCRIPTION AXLE-WF AWF This command allows the user to override the wheel fraction for any axle on any truck. This command is optional and may be repeated as many times as needed. NOTE: This command may be used only for truck loads, no lane loads. 3 COMMAND PARAMETERS Truck No. Enter the number of the truck to override the wheel fraction. See Notes. Axle No. Enter the axle number of the truck, starting from the front. Wheel Fraction Enter the wheel fraction to be applied for this axle. 12/00 13.30 BRASS-GIRDER EXAMPLE DEAD-LOAD 1, 1.031 LIVE-LOAD 3, 1.37 TRUCK-CODE1 TYPE3, LANEHS20, TYPE3-3 COMMENT COMMENT SET WHEEL FRACTIONS FOR AXLE 2 AND 3 ON THE TYPE3 COMMENT TRUCK TO 1.75 COMMENT AXLE-WF 1, 2, 1.75 AXLE-WF 1, 3, 1.75 COMMENT COMMENT SET WHEEL FRACTIONS FOR AXLE 4 AND 5 ON THE TYPE3-3 COMMENT TRUCK TO 1.75 COMMENT AXLE-WF 3, 4, 1.75 AXLE-WF 3, 5, 1.75 FIGURES NOTES Truck numbers are assigned sequentially from the TRUCK-CODE1 and TRUCK-CODE2 commands. In the example above, the TYPE3 truck is #1, the LANEHS20 is #2, and the TYPE3-3 truck is #3. If a “1" is entered in parameter 6 of the LIVE-LOAD command (which instructs BRASS to analyze the HS-20T and LANEHS20 loads) they will be automatically numbered truck #1 and truck #2. If subsequent trucks are entered using the TRUCK-CODE1, SPECIAL-TRUCK or SPECIAL-LANE commands, these trucks are numbered beginning with truck #3. 12/00 13.31 BRASS-GIRDER 970 BRASS-GIRDER™ COMMAND NAME PURPOSE COMMAND DESCRIPTION FLOORBEAM-CONTROL FBC This command controls the analysis parameters for a floorbeam rating. 5 COMMAND PARAMETERS Increment of Movement Default = 1.0 foot Enter the distance lanes and axles within lanes will be moved each time as they are ‘stepped’ across the floorbeam as maximum actions are sought. The smaller the number, the finer the analysis, but run time will increase. See Note 1. Unit Point Load Advancement Denominator Default = 50 BRASS-GIRDER places a unit load at incremental distances across the floorbeam spans. The influence of this unit load is used to generate live load actions for each truck's transverse wheel line weights. To obtain reasonable accuracy and run time this value defaults to 1/50 of the length of span 1 of the floorbeam. NOTE: If the first span of the floorbeam is a short cantilever, a denominator value producing an advancement length of one foot or less would be reasonable. To reduce run time a smaller denominator may be input, such as 25, then 1/25 of the length of span 1 will be used. To obtain more precise answers input a larger denominator. On occasion slight asymmetry of live load actions is exhibited where expected. In such cases increase this parameter to improve the accuracy. % Impact Default = 100% Enter the percent of impact to be used. BRASS will calculate the impact to be used per AASHTO Article 3.8.2. This parameter may be used to reduce or increase that impact. For example, if it is planned to move an overload truck over the bridge at a very low speed, it may be desired to enter 0.0 for this parameter which would in effect take out all the impact. If, for example, the bridge deck is extremely rough, it may be desirable to increase the impact 25%. This parameter would then be entered as 125. See Note 2. Fixed Impact Factor Default = AASHTO Article 3.8.2 Enter a fixed impact factor if a constant factor (independent of span length) is to be used, otherwise leave blank for the AASHTO default. For example, a 20 percent increase in live load effect due to impact should be entered as 0.20. Parameter #3, ‘% Impact’, is used in conjunction with this command. For example, if % Impact = 0.20, then the net impact factor is (0.50 x 0.20) + 1 = 1.10. See Note 2. Output Control 2/03 Enter 1 to obtain the output of the location and weight of wheel lines for each position at which loads are applied to the floorbeam during analysis for maximum actions. 13.32 BRASS-GIRDER EXAMPLE For the following bridge floorbeam configuration shown in Figure 1, the typical input would be: FLOORBEAM-CONTROL 1, 100, 100, , 1 FLOORBEAM-TRAVELWAY 1, 3, 36 FLOORBEAM-TRUCK 1, PD-1, 100, 16, 18, 2, 1, 42, Piedmont Heavy No.1 FLOORBEAM-TRUCK-AXLE 1, 30, 4, 30, 4, 30, 4, 30 FIGURES Step 1 - Performed before this analysis Step 2 - Analyze Floor Beam NOTES 1. The increment of movement distance (step) may be controlled by the user. Lanes and truck positions within lanes are shifted by the "step" for each load case. This step distance defaults to one foot. 2. The parameters for impact on this command may be overridden by using the similar parameters on the FLOORBEAM-TRUCK command if it is desired to use different impacts for individual rating trucks. 2/03 13.33 BRASS-GIRDER 972 BRASS-GIRDER™ COMMAND NAME PURPOSE COMMAND DESCRIPTION FLOORBEAM-TRAVELWAY FBW This command may be repeated for additional travelways. Note: If more than one travelway is entered, the median width is the distance to the left edge of the right travelway minus the distance to the right edge of the left travelway. Travelways may not overlap. 3 COMMAND PARAMETERS Travelway Number Default = 1 Enter the number of the travelway. Number the travelways in sequential ascending order beginning with the leftmost travelway as number 1. Travelway Start Distance (feet) Default = 0.0 Enter the distance to the left edge of the travelway. Travelway width (feet) Enter the width of the travelway. 2/03 13.34 BRASS-GIRDER EXAMPLE For the following bridge floorbeam configuration shown in Figure 1, the typical input would be: FLOORBEAM-CONTROL 1, 100, 100, , 1 FLOORBEAM-TRAVELWAY 1, 3, 36 FLOORBEAM-TRUCK 1, PD-1, 100, 16, 18, 2, 1, 42, Piedmont Heavy No.1 FLOORBEAM-TRUCK-AXLE 1, 30, 4, 30, 4, 30, 4, 30 FIGURES Step 1 - Performed before this analysis Step 2 - Analyze Floor Beam NOTES 2/03 13.35 BRASS-GIRDER 974 BRASS-GIRDER™ COMMAND NAME PURPOSE COMMAND DESCRIPTION FLOORBEAM-TRUCK FBT This command defines the parameters associated with a rating truck set of wheel line reactions. It will always precede one or two FLOORBEAM-TRUCK-AXLE commands that will describe the wheel line reactions for the truck parameters entered with this command. Up to 10 trucks are allowed. 9 COMMAND PARAMETERS Truck Number Enter the number of the primary rating truck for which the following data applies. Truck Name Enter the truck name (code). Up to 12 characters are allowed. % Impact Default = % entered on the FLOORBEAMCONTROL command Enter the percent of impact to be used. BRASS will calculate the impact to be used per AASHTO Article 3.8.2. This parameter may be used to reduce or increase that impact. For example, if it is planned to move an overload truck over the bridge at a very low speed, it may be desired to enter 0.0 for this parameter which would in effect take out all the impact. If, for example, the bridge deck is extremely rough, it may be desirable to increase the impact 25%. This parameter would then be entered as 125. See Note 1. Design Lane Width (feet) Default = Axle Width + 4 Feet Enter the width of the design lane for this rating truck. Traffic Lane Width (feet) Default = Design Lane Width + 2 Feet Enter the width of the traffic lane. See Note 2. Maximum number of traffic lanes for this rating truck. Default = 1 + integer number of multi-presence lanes possible Enter the maximum number of traffic lanes to be loaded for the rating of this truck on the floorbeam (up to 10 maximum). This will determine the number of multiple presence trucks allowed with this rating truck. See Page 13.33 for more information. Multiple Presence Truck Number Enter the number of the multiple-presence truck to be placed with this rating truck. Leave blank if no multiple-presence trucks to be used. Enter the total weight of the truck in tons. This will be used in the rating report. Truck Weight (Required) Truck description 2/03 Enter a description for this rating truck. Up to 40 characters may be used. 13.36 BRASS-GIRDER EXAMPLE For the following bridge floorbeam configuration shown in Figure 1, the typical input would be: FLOORBEAM-CONTROL 1, 100, 100, , 1 FLOORBEAM-TRAVELWAY 1, 3, 36 FLOORBEAM-TRUCK 1, PD-1, 100, 16, 18, 2, 1, 42, Piedmont Heavy No.1 FLOORBEAM-TRUCK-AXLE 1, 30, 4, 30, 4, 30, 4, 30 FIGURES Step 1 - Performed before this analysis Step 2 - Analyze Floor Beam NOTES 1. The parameters for impact on this command will override the similar parameters on the FLOORBEAM-CONTROL command if it is desired to use a different impact for this rating truck. 2. Passing clearance is computed as (design lane width - axle width) / 2. 2/03 13.37 BRASS-GIRDER 976 BRASS-GIRDER™ COMMAND NAME PURPOSE COMMAND DESCRIPTION FLOORBEAM-TRUCK-AXLE FBA Describe the axle (wheel line reactions and gauges) for a truck associated with a floor beam analysis. This command may be repeated if there are more than 6 wheel lines. 13 COMMAND PARAMETERS Truck Number Enter the number of the primary rating truck for which the following data applies. Wheel Line Reaction 1 or 7 (kips) Enter the wheel line reaction for the first wheel line if this is the first command. Enter the wheel line reaction for the seventh wheel line if this is the second command. Gage 1 or 7 (feet) Default = 6 ft Enter the distance from the first wheel line to the second wheel line if this is the first command. Enter the distance from the seventh wheel line to the eighth wheel line if this is the second command. Wheel Line Reaction 2 or 8 (kips) Enter the wheel line reaction for the second wheel line if this is the first command. Enter the wheel line reaction for the eighth wheel line if this is the second command. Gage 2 or 8 (feet) Default = 6 ft Enter the distance from the second wheel line to the third wheel line if this is the first command. Enter the distance from the eighth wheel line to the ninth wheel line if this is the second command. Wheel Line Reaction 3 or 9 (kips) Enter the wheel line reaction for the third wheel line if this is the first command. Enter the wheel line reaction for the ninth wheel line if this is the second command Gage 3 or 9 (feet) Default = 6 ft Enter the distance from the third wheel line to the fourth wheel line if this is the first command. Enter the distance from the ninth wheel line to the tenth wheel line if this is the second command. Wheel Line Reaction 4 or 10 (kips) Enter the wheel line reaction for the fourth wheel line if this is the first command. Enter the wheel line reaction for the tenth wheel line if this is the second command (Continued) 2/03 13.38 BRASS-GIRDER COMMAND PARAMETERS (Cont.) Gage 4 or 10 (feet) Default = 6 ft Enter the distance from the fourth wheel line to the fifth wheel line if this is the first command. Enter the distance from the tenth wheel line to the eleventh wheel line if this is the second command. Wheel Line Reaction 5 or 11 (kips) Enter the wheel line reaction for the fifth wheel line if this is the first command. Enter the wheel line reaction for the eleventh wheel line if this is the second command Gage 5 or 11 (feet) Default = 6 ft Enter the distance from the fifth wheel line to the sixth wheel line if this is the first command. Enter the distance from the eleventh wheel line to the twelfth wheel line if this is the second command. Wheel Line Reaction 6 or 12 (kips) Enter the wheel line reaction for the sixth second wheel line if this is the first command. Enter the wheel line reaction for the twelfth wheel line if this is the second command Gage 6 (feet) Default = 6 ft Enter the distance from the sixth wheel line to the seventh wheel line if the seventh wheel line exists (repeat this command as needed to describe all wheel lines). 2/03 13.39 BRASS-GIRDER EXAMPLE For the following bridge floorbeam configuration shown in Figure 1, the typical input would be: FLOORBEAM-CONTROL 1, 100, 100, , 1 FLOORBEAM-TRAVELWAY 1, 3, 36 FLOORBEAM-TRUCK 1, PD-1, 100, 16, 18, 2, 1, 42, Piedmont Heavy No.1 FLOORBEAM-TRUCK-AXLE 1, 30, 4, 30, 4, 30, 4, 30 FIGURES Step 1 - Performed before this analysis Step 2 - Analyze Floor Beam NOTES 2/03 13.40 BRASS-GIRDER This page intentionally left blank. 2/03 13.41 BRASS-GIRDER 978 BRASS-GIRDER™ COMMAND NAME PURPOSE COMMAND DESCRIPTION FLOORBEAM-MPT FBM Describe lane widths and axles (wheel line reactions and gauges) for a multiple presence truck associated with a rating truck for floor beam analysis. This command may be repeated if there are more than 6 wheel lines. 15 COMMAND PARAMETERS Multiple Presence Truck Number Enter the number of the Multiple Presence Truck (MPT) for which the following TWRLs apply. Design Lane Width (feet) Default = Axle Width + 4 Feet Enter the width of the design lane. Traffic Lane Width (feet) Default = Design Lane Width + 2 Feet Enter the width of the traffic lane. Wheel Line Reaction 1 or 7 (kips) Enter the wheel line reaction for the first wheel line if this is the first command. Enter the wheel line reaction for the seventh wheel line if this is the second command. Gage 1 or 7 (feet) Default = 6 ft Enter the distance from the first wheel line to the second wheel line if this is the first command. Enter the distance from the seventh wheel line to the eighth wheel line if this is the second command. Wheel Line Reaction 2 or 8 (kips) Enter the wheel line reaction for the second wheel line if this is the first command. Enter the wheel line reaction for the eighth wheel line if this is the second command. Gage 2 or 8 (feet) Default = 6 ft Enter the distance from the second wheel line to the third wheel line if this is the first command. Enter the distance from the eighth wheel line to the ninth wheel line if this is the second command. Wheel Line Reaction 3 or 9 (kips) Enter the wheel line reaction for the third wheel line if this is the first command. Enter the wheel line reaction for the ninth wheel line if this is the second command Gage 3 or 9 (feet) Default = 6 ft Enter the distance from the third wheel line to the fourth wheel line if this is the first command. Enter the distance from the ninth wheel line to the tenth wheel line if this is the second command. (Continued) 2/03 13.42 BRASS-GIRDER COMMAND PARAMETERS (Cont.) Wheel Line Reaction 4 or 10 (kips) Enter the wheel line reaction for the fourth wheel line if this is the first command. Enter the wheel line reaction for the tenth wheel line if this is the second command Gage 4 or 10 (feet) Default = 6 ft Enter the distance from the fourth wheel line to the fifth wheel line if this is the first command. Enter the distance from the tenth wheel line to the eleventh wheel line if this is the second command. Wheel Line Reaction 5 or 11 (kips) Enter the wheel line reaction for the fifth wheel line if this is the first command. Enter the wheel line reaction for the eleventh wheel line if this is the second command Gage 5 or 11 (feet) Default = 6 ft Enter the distance from the fifth wheel line to the sixth wheel line if this is the first command. Enter the distance from the eleventh wheel line to the twelfth wheel line if this is the second command. Wheel Line Reaction 6 or 12 (kips) Enter the wheel line reaction for the sixth second wheel line if this is the first command. Enter the wheel line reaction for the twelfth wheel line if this is the second command Gage 6 (feet) Default = 6 ft Enter the distance from the sixth wheel line to the seventh wheel line if the seventh wheel line exists (repeat this command as needed to describe all wheel lines). 2/03 13.43 BRASS-GIRDER EXAMPLE For the following bridge floorbeam configuration shown in Figure 1, the typical input would be: FLOORBEAM-CONTROL 1, 100, 100, , 1 FLOORBEAM-TRAVELWAY 1, 3, 36 FLOORBEAM-TRUCK 1, PD-1, 100, 16, 18, 2, 1, 42, Piedmont Heavy No.1 FLOORBEAM-TRUCK-AXLE 1, 30, 4, 30, 4, 30, 4, 30 FLOORBEAM-MPT 1, 10, 12, 20, 6, 20 FIGURES Step 1 - Performed before this analysis Step 2 - Analyze floorbeam NOTES Passing clearance is computed as (design lane width - axle width) / 2.. 2/03 13.44 BRASS-GIRDER 14. GIRDER SECTION DESIGN AND RATING The commands in this section are utilized to determine load effects for the cross section at specific points along the girder. Either a design analysis or a rating analysis may be performed at these points. Up to 212 specific analysis points (points of interest) may be analyzed in one run. The commands required will depend upon the type of analysis desired and the type of girder material. The use of the commands associated with analysis points is optional and several alternatives for generating the analysis points and associated data are available. BRASS-GIRDER™ allows the user to either generate analysis points by using the schedule-based option (see Parameter 6 of the ANALYSIS command) based on 1/10 points and/or user specified points (see the POINT-OF-INTEREST command) or by entering appropriate sets of the following commands for steel, concrete, prestressed concrete or timber sections. For prestressed concrete girders, no additional data on the PRESTRESS-1 thru PRESTRESS-2 commands are required other than the analysis point number. The POINT-OF-INTEREST and the INTERMEDIATE-OUTPUT commands will also work for prestress as long as the PRESTRESS-1 thru PRESTRESS-2 commands are used only to define the analysis point (i.e. PR1 104). Note that the schedule-based input option is only valid for steel and non-prestressed concrete girders. Data entered in the steel and non-prestressed concrete girders schedule-based input may be overridden by using the STEEL-1, STEEL-2, STEEL-4, CONCRETE-1, or CONCRETE-2 commands. Allowable Stress Levels BRASS-GIRDER™ rates several elements such as flanges, bearing stiffeners, stirrups, reinforcing steel, etc. for up to 4 different stress levels. These are controlled by the INVENTORY, OPERATING, POSTING, and SAFE-LOAD commands. There may be cases when the user does not want to rate one of these elements. If the input parameter giving the ratio of allowable stress over yield stress for the element has a default value, then enter a large value for that ratio so that the load rating factor for that element will be large (Working Stress analysis only). If the input parameter does not have a default value, either leave it blank or enter a large value for the ratio of allowable stress over yield stress. Load rating factors for elements that are not applicable or are to be ignored will be output as asterisks or “NA”. 12/00 14.1 BRASS-GIRDER 980 BRASS-GIRDER™ COMMAND NAME COMMAND DESCRIPTION DESIGN DES This command allows the user to control the type of analysis of girder sections at user specified analysis points. It also allows input of girder height for a lateral wind bracing check. PURPOSE It is required if the user desires an analysis of specified girder sections for stresses, load ratings, stiffener design, stirrup design, etc. 3 COMMAND PARAMETERS Run Control and Report Type Default = 1 Enter 1 for BRASS to sort through the actions produced by each truck and perform a design only for the truck that produces the maximum action. See Notes 1 and 3. Also, enter 1 if an ultimate strength design of a steel girder splice is desired. Enter 2 if a review analysis is desired. This will generate a report of stresses due to each live load individually combined with dead load. Enter 3 if a rating analysis and report is desired. This will generate a report of stresses and a report of rating factors for each live load individually combined with dead load. See Note 1 and 2. Enter 4 to perform a design for each truck. See Notes 1 and 3. Analysis Method Enter 0 or blank for working stress (service load) analysis. Not valid for prestressed girders. If a strength design method (load factor) analysis is desired, enter one of the following option codes: Enter 1 if a load rating analysis of steel, concrete, or prestressed girder by the strength design method is desired (1st parameter = 3) or if a preliminary concrete design run (1st parameter = 1) by the strength design method is desired. A preliminary concrete design run will give required areas of reinforcing steel at locations throughout the bridge length for corresponding effective depths determined from calculations based upon the input data. Enter 2 if a final concrete design run is desired. (Continued) 2/03 14.2 BRASS-GIRDER COMMAND PARAMETERS (Cont.) Lateral Wind Bracing (Applicable to service load analysis of exterior composite steel girders only) If this is the design of an exterior steel girder and a report of lateral wind bracing requirements [per AASHTO 10.20.2] is desired, enter the height in feet of structure above the girder that will be exposed to wind. BRASS will add the girder depth to this at each analysis point and check wind bracing requirements. Wind bracing requirements are based on the allowable stress in the bottom flange. The option can only be used with parameter 2 set to blank or 0 (service load). 10/98 14.3 BRASS-GIRDER EXAMPLE For the rating of a bridge by the working stress design method, a typical DESIGN command would be coded as follows: DESIGN 3 For the rating of a bridge by the strength design method, a typical DESIGN command would be coded as follows: DESIGN 3, 1 FIGURES NOTES 1. Requires an INVENTORY or LOAD-LEVEL-1 command. 2. In the case of composite structures, reports of stresses due to dead load actions will be output as well as live load stresses and combined stresses. 3. Currently BRASS can design transverse, longitudinal and bearing stiffeners for load factor (strength) design. If the user requires a design, leave the input parameters related to the dimensions of all three types of stiffeners blank. Also, leave the transverse stiffener spacing blank. When using the design option, only use the LOAD-LEVEL-1 command. Also, input a 1 or 4 in the first parameter of the DESIGN command. When the design is nearly finalized, run a rating using the girder and stiffener dimensions output and include the other LOAD-LEVEL-2 through 4 commands to check for serviceability, fatigue and overload. Be sure to input a 3 in the first parameter of the DESIGN command. The design can then be finalized with one or more iterations, as needed. NOTE: This option designs all three types of stiffeners. BRASS does not have the capability to design one or two types separately. 2/03 14.4 BRASS-GIRDER 3/96 14.5 BRASS-GIRDER 990 COMMAND DESCRIPTION BRASS-GIRDER™ COMMAND NAME INVENTORY INV This command controls the stress levels or load factors for determining the inventory rating or design of a girder. PURPOSE Select the parameters for Working Stress or Ultimate Strength as applicable. For steel ultimate strength analysis, use the LOADLEVEL-1 through LOAD-LEVEL-4 commands. IMPORTANT: See Note 1. 6 OR 10 COMMAND PARAMETERS Working Stress Analysis - For Steel Girders and NonPrestressed Reinforced Concrete Girders, use the following 6 parameters. Rebar Default = 0.4 Enter the ratio of allowable stress over yield stress for inventory rating or design for reinforcing steel for concrete girders or composite slab. Concrete Default = 0.4 Enter the ratio of allowable stress over 28-day compression stress for inventory rating or design for concrete for reinforced concrete girders or composite slab. Structural Steel Default = 0.55 Enter the ratio of allowable stress over yield stress of structural steel for inventory rating or design for steel girders. Timber Default = 1.0 Enter the ratio of allowable stress over design stress for inventory rating of timber girders. Stirrups Default = 0.5 Enter the ratio of allowable stress over yield stress for inventory rating or design for reinforcing steel to be used as stirrups in reinforced concrete girders. Bearing Stiffeners Default = 0.8 Enter the ratio of allowable stress over yield stress of structural steel used for end bearing on bearing stiffeners for inventory rating or design of steel girders. (Continued) 2/03 14.6 BRASS-GIRDER COMMAND PARAMETERS (Cont.) Ultimate Strength Analysis - For Non-Prestressed Reinforced Concrete Girders use the following 6 parameters. For Prestressed Concrete Girders use the following 10 parameters. g, Gamma Default = 1.3 Enter the load factor for ultimate strength analysis (see AASHTO 3.22) to be used for inventory rating. See Note 2. β D Beta Dead Load Default = 1.0 Enter the coefficient for dead load for ultimate strength analysis (see AASHTO 3.22) to be used for inventory rating. See Note 2. β L Beta Live Load Default = 1.67 Enter the coefficient for live load for ultimate strength analysis (see AASHTO 3.22) to be used for inventory rating. See Note 2. Φ M Phi Moment Default = 0.9 for reinforced concrete Default = 1.0 for prestressed concrete Enter the reduction factor for moment capacity for ultimate strength analysis (see AASHTO 8.16.1.2 and 9.14). This reduction factor will be used for inventory, operating, posting, and safe load rating or design. See Note 3. Φ V Phi Shear Default = 0.85 for reinforced concrete Default = 0.90 for prestressed concrete Enter the reduction factor for shear capacity for ultimate strength analysis (see AASHTO 8.16.1.2 and 9.14). This reduction factor will be used for inventory, operating, posting, and safe load rating or design. See Note 3. Φ MN Phi Moment NonPrestressed Default = 0.9 Enter the strength reduction factor for moment strength (nonprestressed concrete in a prestressed structure). This reduction factor will be used for inventory, operating, posting, and safe load rating or design. See Note 3. Concrete Tension Factor Default = 6.0 Enter the factor to be applied to the square root of f ‘c for calculating the allowable stress for concrete tension for inventory rating. See Note 4. First Concrete Compression Factor Default = 0.6 Enter the factor to be applied to f ‘c for calculating the allowable stress for concrete compression for inventory rating. See Note 4. Second Concrete Compression Factor Default = 0.4 Enter the factor to be applied to f ‘c for calculating the allowable stress for concrete compression for inventory rating. See Note 4. Non-Prestressed Concrete Compression Factor Default = 0.4 Enter the factor to be applied to f ‘c for calculating the allowable stress for concrete compression for inventory rating (service load check) for the non-prestressed concrete for composite prestressed girders. See AASHTO Standard Specifications, Article 8.15.2.1.1 and Note 4. 2/03 14.7 BRASS-GIRDER EXAMPLE For the working stress rating of a steel girder at inventory level, the INVENTORY command could be coded as follows: INVENTORY , , 0.50, , , 0.75 The load capacity would be calculated based on 0.5 times yield stress for Flexure and Shear and 0.75 times yield stress for bearing stiffeners in bearing. FIGURES NOTES 1. In previous versions of BRASS-GIRDER, this command may have been used in lieu of the LOAD-LEVEL-1 command to define Load Level 1 for steel ultimate strength analysis. In this case, the program is backwards compatible so existing data sets will still run using the INVENTORY command. If the user accepted the defaults in the INVENTORY command, they will be the same defaults as the LOAD-LEVEL-1 command. 2. In accordance with the AASHTO Manual for Condition Evaluation of Bridges, Article 6.5.3, and Standard Specifications for Highway Bridges, Article 3.22, BRASS sets A1 = g * β D and A2 = g * β L. 3. In previous versions of BRASS-GIRDER, the user was allowed to input values for Phi in the INVENTORY, OPERATING, POSTING, and SAFE-LOAD commands. Since BRASS only uses the Phi factors input in the INVENTORY command, these three parameters have been removed from the other commands. If archived BRASS-GIRDER data sets contain these three parameters in the OPERATING, POSTING, and SAFE-LOAD commands, the program will no longer read these commands. 4. See Section 6.6.3.3 of the AASHTO Manual for Condition Evaluation of Bridges, Second Edition, Interim 1996. 2/03 14.8 BRASS-GIRDER 11/01 14.9 BRASS-GIRDER 1000 COMMAND DESCRIPTION BRASS-GIRDER™ COMMAND NAME OPERATING OPG This command controls the stress levels or load factors for determining the operating rating or design of a girder. This command is required for an operating rating. PURPOSE Select the parameters for Working Stress or Ultimate Strength as applicable. For steel ultimate strength analysis, use the LOADLEVEL-1 through LOAD-LEVEL-4 commands. IMPORTANT: See Note 1 6 OR 3 COMMAND PARAMETERS Working Stress Analysis - For Steel Girders and NonPrestressed Reinforced Concrete Girders, use the following 6 parameters. Rebar Default = 0.6 Enter the ratio of allowable stress over yield stress for operating rating for reinforcing steel for concrete girders or composite slab. Concrete Default = 0.55 Enter the ratio of allowable stress over 28-day compression stress for operating rating for concrete for reinforced concrete girders or composite slab. Structural Steel Default = 0.75 Enter the ratio of allowable stress over yield stress of structural steel for operating rating for steel girders. Timber Default = 1.33 Enter the ratio of allowable stress over design stress for operating rating of timber girders. Stirrups Default = 0.75 Enter the ratio of allowable stress over yield stress for operating rating for reinforcing steel to be used as stirrups in reinforced concrete girders. Bearing Stiffeners Default = 0.9 Enter the ratio of allowable stress over yield stress of structural steel used for end bearing on bearing stiffeners for operating rating of steel girders. Ultimate Strength Analysis - For Non-Prestressed Reinforced Concrete or Prestressed Concrete Girders use the following 3 parameters. g, Gamma Default = 1.3 Enter the load factor for ultimate strength analysis (see AASHTO 3.22) for operating rating. See Note 2. B D Beta Dead Load Default = 1.0 Enter the coefficient for dead load for ultimate strength analysis (see AASHTO 3.22) for operating rating. See Note 2. β L Beta Live Load Default = 1.0 Enter the coefficient for live load for ultimate strength analysis (see AASHTO 3.22) for operating rating. See Note 2. 2/03 14.10 BRASS-GIRDER EXAMPLE For the working stress rating of a steel girder at operating level, the OPERATING command could be coded as follows: OPERATING , , 0.70, , , 0.85 The load capacity would be calculated based on 0.70 times yield stress for flexure and shear and 0.85 times yield stress for bearing stiffeners in bearing. NOTES 1. In previous versions of BRASS-GIRDER, this command may have been used in lieu of the LOAD-LEVEL-2 command to define Load Level 2 for steel ultimate strength analysis. In this case, the program is backwards compatible so existing data sets will still run using the OPERATING command. If the user accepted the defaults in the OPERATING command, they will be the same defaults as the LOAD-LEVEL-2 command. 2. In accordance with the AASHTO Manual for Condition Evaluation of Bridges, Article 6.5.3, and Standard Specifications for Highway Bridges, Article 3.22, BRASS sets A1 = g * β D and A2 = g * β L. 2/03 14.11 BRASS-GIRDER 1010 COMMAND DESCRIPTION BRASS-GIRDER™ COMMAND NAME POSTING PST This command controls the stress levels or load factors for determining the posting rating of a girder. This command is required for a posting rating. PURPOSE Select the parameters for Working Stress or Ultimate Strength as applicable. For steel ultimate strength analysis, use the LOADLEVEL-1 through LOAD-LEVEL-4 commands. IMPORTANT: See Note 1. 6 OR 3 COMMAND PARAMETERS Working Stress Analysis - For Steel Girders and NonPrestressed Reinforced Concrete Girders, use the following 6 parameters. Rebar Enter the ratio of allowable stress over yield stress for posting rating for reinforcing steel for concrete girders or composite slab. Concrete Enter the ratio of allowable stress over 28-day compression stress for posting rating for concrete for reinforced concrete girders or composite slab. Structural Steel Enter the ratio of allowable stress over yield stress for structural steel for posting rating for steel girders. Timber Enter the ratio of allowable stress over design stress for posting rating of timber girders. Stirrups Enter the ratio of allowable stress over yield stress for posting rating for reinforcing steel to be used as stirrups in reinforced concrete girders. See Note 2. Bearing Stiffeners Enter the ratio of allowable stress over yield stress of structural steel used for end bearing on bearing stiffeners for posting rating of steel girders. Ultimate Strength Analysis - For Non-Prestressed Reinforced Concrete or Prestressed Concrete Girders use the following 3 parameters. g, Gamma Enter the load factor for ultimate strength analysis (see AASHTO 3.22) for posting rating. See Note 3. β D Beta Dead Load Enter the coefficient for dead load for ultimate strength analysis (see AASHTO 3.22) for posting rating. See Note 3. β L Beta Live Load Enter the coefficient for live load for ultimate strength analysis (see AASHTO 3.22) for posting rating. See Note 3. 2/03 14.12 BRASS-GIRDER EXAMPLE 1. For the working stress rating of a steel girder at posting level, the POSTING command could be coded as follows: POSTING , , 0.50, , , 0.75 The load capacity would be calculated based on 0.5 times yield stress for flexure and shear and 0.75 times yield stress for bearing stiffeners in bearing. 2. For the working stress rating of a reinforced concrete girder at posting level, if the user inputs a stirrup allowable strength of 0.75 in the OPERATING command, Parameter 5, and he wants the posting rating to be the same as the operating rating, the user would enter 0.75 in the POSTING command, Parameter 5. The shear strength for posting would then be the shear strength for operating times 0.75/0.75. 3. For the working stress rating of a reinforced concrete girder at posting level, if the user wants the posting rating to be 10% below the operating rating shear capacity, he would input 90% of 0.75 = 0.675 for the allowable stirrup stress for posting. NOTES 1. In previous versions of BRASS-GIRDER, this command may have been used in lieu of the LOAD-LEVEL-3 command to define Load Level 3 for steel ultimate strength analysis. In this case, the program is backwards compatible so existing data sets will still run using the POSTING command. If the user accepted the defaults in the POSTING command, they will be the same defaults as the LOAD-LEVEL-3 command. 2. The posting shear strength rating of a reinforced concrete girder is based on the total shear strength of the section for operating rating times the ratio of Parameter 5, POSTING command, divided by Parameter 5, OPERATING command. Basically, the posting shear rating is based on the ratio, posting/operating, of the allowable operating stirrup stress. 3. In accordance with the AASHTO Manual for Condition Evaluation of Bridges, Article 6.5.3, and Standard Specifications for Highway Bridges, Article 3.22, BRASS sets A1 = g * β D and A2 = g * β L. 2/03 14.13 BRASS-GIRDER 1020 COMMAND DESCRIPTION BRASS-GIRDER™ COMMAND NAME SAFE-LOAD SLD This command controls the stress levels or load factors for determining the safe load capacity rating of a girder. This command is required for a safe load capacity rating. PURPOSE Select the parameters for Working Stress or Ultimate Strength as applicable. For steel ultimate strength analysis, use the LOADLEVEL-1 through LOAD-LEVEL-4 commands. IMPORTANT: See Note 1. 6 OR 3 COMMAND PARAMETERS Working Stress Analysis - For Steel Girders and NonPrestressed Reinforced Concrete Girders, use the following 6 parameters. Rebar Enter the ratio of allowable stress over yield stress for safe load capacity rating for reinforcing steel for concrete girders or composite slab. Concrete Enter the ratio of allowable stress over 28-day compression stress for safe load capacity rating for concrete for reinforced concrete girders or composite slab. Structural Steel Enter the ratio of allowable stress over yield stress for structural steel for safe load capacity rating for steel girders. Timber Enter the ratio of allowable stress over design stress for safe load capacity rating of timber girders. Stirrups Enter the ratio of allowable stress over yield stress for safe load capacity rating for reinforcing steel to be used as stirrups in reinforced concrete girders. See Note 2. Bearing Stiffeners Enter the ratio of allowable stress over yield stress of structural steel used for end bearing on bearing stiffeners for safe load capacity rating of steel girders. Ultimate Strength Analysis - For Non-Prestressed Reinforced Concrete or Prestressed Concrete Girders use the following 3 parameters. g, Gamma Enter the load factor for ultimate strength analysis (see AASHTO 3.22) for safe load capacity rating. See Note 3. β D Beta Dead Load Enter the coefficient for dead load for ultimate strength analysis (see AASHTO 3.22) for safe load capacity rating. See Note 3. β L Beta Live Load Enter the coefficient for live load for ultimate strength analysis (see AASHTO 3.22) for safe load capacity rating. See Note 3. 2/03 14.14 BRASS-GIRDER EXAMPLE 1. For the working stress rating of a steel girder at safe load capacity level, the SAFE-LOAD command could be coded as follows: SAFE-LOAD , , 0.50, , , 0.75 The load capacity would be calculated based on 0.5 times yield stress for flexure and shear and 0.75 times yield stress for bearing stiffeners in bearing. 2. For the working stress rating of a reinforced concrete girder at safe load level, if the user inputs a stirrup allowable strength of 0.75 in the OPERATING command, Parameter 5, and he wants the safe load rating to be the same as the operating rating, the user would enter 0.75 in the SAFELOAD command, Parameter 5. The shear strength for safe load would then be the shear strength for operating times 0.75/0.75. 3. For the working stress rating of a reinforced concrete girder at safe load level, if the user wants the safe load rating to be 10% below the operating rating shear capacity, he would input 90% of 0.75 = 0.675 for the allowable stirrup stress for safe load. NOTES 1. In previous versions of BRASS-GIRDER, this command may have been used in lieu of the LOAD-LEVEL-4 command to define Load Level 4 for steel ultimate strength analysis. In this case, the program is backwards compatible so existing data sets will still run using the SAFELOAD command. If the user accepted the defaults in the SAFE-LOAD command, they will be the same defaults as the LOAD-LEVEL-4 command. 2. The safe load shear strength rating of a reinforced concrete girder is based on the total shear strength of the section for operating rating times the ratio of Parameter 5, SAFE-LOAD command, divided by Parameter 5, OPERATING command. Basically, the safe load shear rating is based on the ratio, safe load/operating, of the allowable operating stirrup stress. 3. In accordance with the AASHTO Manual for Condition Evaluation of Bridges, Article 6.5.3, and Standard Specifications for Highway Bridges, Article 3.22, BRASS sets A1 = g * β D and A2 = g * β L. 2/03 14.15 BRASS-GIRDER 1021 BRASS-GIRDER™ COMMAND NAME COMMAND DESCRIPTION LOAD-LEVEL-1 LL1 This command controls the load factors, coefficients and reduction factors for Load Level 1 for steel ultimate strength analysis. PURPOSE This command is required for design or inventory rating unless the defaults are correct. 6 COMMAND PARAMETERS g, Gamma Default = 1.3 Enter the load factor for steel ultimate strength analysis to be used for load level 1. See Notes 1 and 3. β D Beta Dead Load Default = 1.0 Enter the coefficient for dead load for steel ultimate strength analysis to be used for load level 1. See Notes 1 and 3. β L Beta Live Load Default = 1.67 Enter the coefficient for live load for steel ultimate strength analysis to be used for load level 1. See Notes 1 and 3. Φ M Phi Moment Default = 1.0 Enter the reduction factor for moment capacity for steel ultimate strength analysis to be used for load level 1 design. See Notes. Φ V Phi Shear Default = 1.0 Enter the reduction factor for shear capacity for steel ultimate strength analysis to be used for load level 1 design. See Notes. Φ B Phi Bearing Default = 1.0 Enter the reduction factor for bearing stiffener resistance for steel ultimate strength analysis to be used for load level 1 design. See Notes. 2/03 14.16 BRASS-GIRDER EXAMPLE For the ultimate strength (LFD) rating of a steel girder, the LOAD-LEVEL-1 command could be coded as follows: LOAD-LEVEL-1 1.3, 1.0, 1.67, 1.0, 1.0, 1.0 NOTES 1. The ultimate strength (LFD) ratings for steel are determined by the table below. This table is generated at the end of the rating results as output for user clarity. Load Level Command to be Used Load Combination Strength 1 2 3 4 LOAD-LEVEL-1 LOAD-LEVEL-2 LOAD-LEVEL-3 LOAD-LEVEL-4 1.3(D + 1.67L) D + 1.67L 1.3(D + L) D+L Inv N/A Oper N/A Serviceability Serviceability Steel/Reinf. Fatigue N/A Inv N/A Oper N/A N/A N/A Inv The ultimate strength rating for inventory and operating level use all LOAD-LEVEL-1, LOADLEVEL-2, LOAD-LEVEL-3, and LOAD-LEVEL-4 commands, which are required to define the table above. These commands are used to define load levels and not a rating level. Currently, steel ultimate strength posting and safe load ratings are not available for steel girders. * 2. These fields allow the user to decrease strength of a section. Note that the phi factor is applied to all calculations associated with a particular action. For example, a phi = 0.9 for moment is used in all rating calculations involving moment; i.e., all rating factors except shear and bearing. * Load level 1 is automatically generated and levels 2 - 4 are generated only if their respective commands are entered. 3. In accordance with the AASHTO Manual for Condition Evaluation of Bridges, Article 6.5.3, and Standard Specifications for Highway Bridges, Article 3.22, BRASS sets A1 = g * β D and A2 = g * β L. 2/03 14.17 BRASS-GIRDER 1022 COMMAND DESCRIPTION BRASS-GIRDER™ COMMAND NAME LOAD-LEVEL-2 LL2 This command controls the load factors, coefficients and reduction factors for Load Level 2 for steel ultimate strength analysis. PURPOSE This command is required for design or inventory rating unless the defaults are correct. 6 COMMAND PARAMETERS g, Gamma Default = 1.0 Enter the load factor for steel ultimate strength analysis to be used for load level 2. See Notes 1 and 3. β D Beta Dead Load Default = 1.0 Enter the coefficient for dead load for steel ultimate strength analysis to be used for load level 2. See Notes 1 and 3. β L Beta Live Load Default = 1.67 Enter the coefficient for live load for steel ultimate strength analysis to be used for load level 2 . See Notes 1 and 3. Φ M Phi Moment Default = 1.0 Enter the reduction factor for moment capacity for steel ultimate strength analysis to be used for load level 2 design. See Notes. Φ V Phi Shear Default = 1.0 Enter the reduction factor for shear capacity for steel ultimate strength analysis to be used for load level 2 design. See Notes. Φ B Phi Bearing Default = 1.0 Enter the reduction factor for bearing stiffener resistance for steel ultimate strength analysis to be used for load level 2 design. See Notes. 2/03 14.18 BRASS-GIRDER EXAMPLE For the ultimate strength (LFD) rating of a steel girder, the LOAD-LEVEL-2 command could be coded as follows: LOAD-LEVEL-2 1.0, 1.0, 1.67, 1.0, 1.0, 1.0 NOTES 1. The ultimate strength (LFD) ratings for steel are determined by the table below. This table is generated at the end of the rating results as output for user clarity. Load Level Command to be Used Load Combination Strength 1 2 3 4 LOAD-LEVEL-1 LOAD-LEVEL-2 LOAD-LEVEL-3 LOAD-LEVEL-4 1.3(D + 1.67L) D + 1.67L 1.3(D + L) D+L Inv N/A Oper N/A Serviceability Serviceability Steel/Reinf. Fatigue N/A Inv N/A Oper N/A N/A N/A Inv The ultimate strength rating for inventory and operating level use all LOAD-LEVEL-1, LOADLEVEL-2, LOAD-LEVEL-3, and LOAD-LEVEL-4 commands, which are required to define the table above. These commands are used to define load levels and not a rating level. Currently, steel ultimate strength posting and safe load ratings are not available for steel girders. * 2. These fields allow the user to decrease strength of a section. Note that the phi factor is applied to all calculations associated with a particular action. For example, a phi = 0.9 for moment is used in all rating calculations involving moment; i.e., all rating factors except shear and bearing. * Load level 1 is automatically generated and levels 2 - 4 are generated only if their respective commands are entered. 3. In accordance with the AASHTO Manual for Condition Evaluation of Bridges, Article 6.5.3, and Standard Specifications for Highway Bridges, Article 3.22, BRASS sets A1 = g * β D and A2 = g * β L. 2/03 14.19 BRASS-GIRDER 1023 COMMAND DESCRIPTION BRASS-GIRDER™ COMMAND NAME LOAD-LEVEL-3 LL3 This command controls the load factors, coefficients and reduction factors for Load Level 3 for steel ultimate strength analysis. PURPOSE This command is required for operating rating unless the defaults are correct. 6 COMMAND PARAMETERS g, Gamma Default = 1.3 Enter the load factor for steel ultimate strength analysis to be used for load level 3. See Notes 1 and 3. β D Beta Dead Load Default = 1.0 Enter the coefficient for dead load for steel ultimate strength analysis to be used for load level 3. See Notes 1 and 3. β L Beta Live Load Default = 1.0 Enter the coefficient for live load for steel ultimate strength analysis to be used for load level 3. See Notes 1 and 3. Φ M Phi Moment Default = 1.0 Enter the reduction factor for moment capacity for steel ultimate strength analysis to be used for load level 3 design. See Notes. Φ V Phi Shear Default = 1.0 Enter the reduction factor for shear capacity for steel ultimate strength analysis to be used for load level 3 design. See Notes. Φ B Phi Bearing Default = 1.0 Enter the reduction factor for bearing stiffener resistance for steel ultimate strength analysis to be used for load level 3 design. See Notes. 2/03 14.20 BRASS-GIRDER EXAMPLE For the ultimate strength (LFD) rating of a steel girder, the LOAD-LEVEL-3 command could be coded as follows: LOAD-LEVEL-3 1.3, 1.0, 1.0, 1.0, 1.0, 1.0 NOTES 1. The ultimate strength (LFD) ratings for steel are determined by the table below. This table is generated at the end of the rating results as output for user clarity. Load Level Command to be Used Load Combination Strength 1 2 3 4 LOAD-LEVEL-1 LOAD-LEVEL-2 LOAD-LEVEL-3 LOAD-LEVEL-4 1.3(D + 1.67L) D + 1.67L 1.3(D + L) D+L Inv N/A Oper N/A Serviceability Serviceability Steel/Reinf. Fatigue N/A Inv N/A Oper N/A N/A N/A Inv The ultimate strength rating for inventory and operating level use all LOAD-LEVEL-1, LOADLEVEL-2, LOAD-LEVEL-3, and LOAD-LEVEL-4 commands, which are required to define the table above. These commands are used to define load levels and not a rating level. Currently, steel ultimate strength posting and safe load ratings are not available for steel girders. * 2. These fields allow the user to decrease strength of a section. Note that the phi factor is applied to all calculations associated with a particular action. For example, a phi = 0.9 for moment is used in all rating calculations involving moment; i.e., all rating factors except shear and bearing. * Load level 1 is automatically generated and levels 2 - 4 are generated only if their respective commands are entered. 3. In accordance with the AASHTO Manual for Condition Evaluation of Bridges, Article 6.5.3, and Standard Specifications for Highway Bridges, Article 3.22, BRASS sets A1 = g * β D and A2 = g * β L. 2/03 14.21 BRASS-GIRDER 1024 COMMAND DESCRIPTION BRASS-GIRDER™ COMMAND NAME LOAD-LEVEL-4 LL4 This command controls the load factors, coefficients and reduction factors for Load Level 4 for steel ultimate strength analysis. PURPOSE This command is required for inventory and operating rating unless the defaults are correct. 6 COMMAND PARAMETERS g, Gamma Default = 1.0 Enter the load factor for steel ultimate strength analysis to be used for load level 4. See Notes 1 and 3. β D Beta Dead Load Default = 1.0 Enter the coefficient for dead load for steel ultimate strength analysis to be used for load level 4. See Notes 1 and 3. β L Beta Live Load Default = 1.0 Enter the coefficient for live load for steel ultimate strength analysis to be used for load level 4. See Notes 1 and 3. Φ M Phi Moment Default = 1.0 Enter the reduction factor for moment capacity for steel ultimate strength analysis to be used for load level 4 design. See Notes. Φ V Phi Shear Default = 1.0 Enter the reduction factor for shear capacity for steel ultimate strength analysis to be used for load level 4 design. See Notes. Φ B Phi Bearing Default = 1.0 Enter the reduction factor for bearing stiffener resistance for steel ultimate strength analysis to be used for load level 4 design. See Notes. 2/03 14.21a BRASS-GIRDER EXAMPLE For the ultimate strength (LFD) rating of a steel girder, the LOAD-LEVEL-4 command could be coded as follows: LOAD-LEVEL-4 1.0, 1.0, 1.0, 1.0, 1.0, 1.0 NOTES 1. The ultimate strength (LFD) ratings for steel are determined by the table below. This table is generated at the end of the rating results as output for user clarity. Load Level Command to be Used Load Combination Strength 1 2 3 4 LOAD-LEVEL-1 LOAD-LEVEL-2 LOAD-LEVEL-3 LOAD-LEVEL-4 1.3(D + 1.67L) D + 1.67L 1.3(D + L) D+L Inv N/A Oper N/A Serviceability Serviceability Steel/Reinf. Fatigue N/A Inv N/A Oper N/A N/A N/A Inv The ultimate strength rating for inventory and operating level use all LOAD-LEVEL-1, LOADLEVEL-2, LOAD-LEVEL-3, and LOAD-LEVEL-4 commands, which are required to define the table above. These commands are used to define load levels and not a rating level. Currently, steel ultimate strength posting and safe load ratings are not available for steel girders. * 2. These fields allow the user to decrease strength of a section. Note that the phi factor is applied to all calculations associated with a particular action. For example, a phi = 0.9 for moment is used in all rating calculations involving moment; i.e., all rating factors except shear and bearing. * Load level 1 is automatically generated and levels 2 - 4 are generated only if their respective commands are entered. 3. In accordance with the AASHTO Manual for Condition Evaluation of Bridges, Article 6.5.3, and Standard Specifications for Highway Bridges, Article 3.22, BRASS sets A1 = g * β D and A2 = g * β L. 2/03 14.21b - h BRASS-GIRDER 1025 COMMAND DESCRIPTION BRASS-GIRDER™ COMMAND NAME PURPOSE POINT-OF-INTEREST POI Use to designate points of interest when option 3, 4 or 5 is selected for parameter six of the ANALYSIS command. This command may be repeated as needed. A total of 212 points of interest may be specified. This command is optional. 10 COMMAND PARAMETERS Point of Interest Define as 101, 102.5, 302, etc. See Notes. Point of Interest Define as 101, 102.5, 302, etc. See Notes. Point of Interest Define as 101, 102.5, 302, etc. See Notes. Point of Interest Define as 101, 102.5, 302, etc. See Notes. Point of Interest Define as 101, 102.5, 302, etc. See Notes. Point of Interest Define as 101, 102.5, 302, etc. See Notes. Point of Interest Define as 101, 102.5, 302, etc. See Notes. Point of Interest Define as 101, 102.5, 302, etc. See Notes. Point of Interest Define as 101, 102.5, 302, etc. See Notes. Point of Interest Define as 101, 102.5, 302, etc. See Notes. 7/99 14.21i BRASS-GIRDER EXAMPLE To generate analysis for points of interest 104, 200, and 205, and when the sixth parameter of the ANALYSIS command is coded 5, code as follows: POI 104, 200, 205 FIGURES NOTES IMPORTANT: Specified points of interest must be within .001 times the span length of a structural analysis node point. This is 1/100th of tenth points. For example, if a node point is at 46.25' from the left end of a 100' span, the 1/10 point location is 104.625 (the 4.625 tenth point). The point of interest input must be between 104.615 and the 104.635 (i.e. 104.62 will work). Node points are automatically generated at all 1/10 points of all spans and at all cross section or web depth change locations. Additional node points may be entered by using the HINGE command and the TRANSFER command (prestress). 2/00 14.21j BRASS-GIRDER 1026 BRASS-GIRDER™ COMMAND NAME PURPOSE COMMAND DESCRIPTION INTERMEDIATE-OUTPUT INO Use to designate points of interest for which intermediate (detailed) output for the AASHTO Specification checks is desired. This command may be repeated as needed. A total of 212 points of interest may be specified. However, the amount of output generated for each point is significant. This command is optional. 10 COMMAND PARAMETERS Point of Interest Define as 101, 102.5, 302, etc. See Notes. Point of Interest Define as 101, 102.5, 302, etc. See Notes. Point of Interest Define as 101, 102.5, 302, etc. See Notes. Point of Interest Define as 101, 102.5, 302, etc. See Notes. Point of Interest Define as 101, 102.5, 302, etc. See Notes. Point of Interest Define as 101, 102.5, 302, etc. See Notes. Point of Interest Define as 101, 102.5, 302, etc. See Notes. Point of Interest Define as 101, 102.5, 302, etc. See Notes. Point of Interest Define as 101, 102.5, 302, etc. See Notes. Point of Interest Define as 101, 102.5, 302, etc. See Notes. 10/98 14.21k BRASS-GIRDER EXAMPLE To generate intermediate output at points of interest 104, 200, and 205, code as follows: INO 104, 200, 205 FIGURES NOTES IMPORTANT: Specified points of interest for intermediate output must have been automatically generated or input using the POINT-OF-INTEREST command. 10/98 14.21l BRASS-GIRDER 1030 BRASS-GIRDER™ COMMAND NAME PURPOSE COMMAND DESCRIPTION STEEL-1 SL1 This is the first in a series of commands to describe factors affecting the design or rating analysis of a particular point along the girder. It is required when designing certain aspects of a steel girder or rating a steel girder for load capacity. This series of commands is required for each of up to 212 analysis points allowed. 10 COMMAND PARAMETERS Analysis Point Enter the span point at which an analysis of the girder section is desired. Use the following format: 104 = *106.5 = 110 = 200 = 4/10 of distance from left end of span 1 along span 1. 65/100 of distance from left end of span 1 along span 1. 10/10 of distance from left end of span 1 along span 1. Basically this is the right end of span 1. 0/10 of distance from left end of span 2 along span 2. Basically this is the left end of span 2. *Note: Only 1/10 points may be analyzed on a span unless there is a node point at the desired location created by a cross-section change or a special analysis point from the HINGE command. Section Type Enter one of the following codes to describe the type of steel girder at this analysis point (see Notes 1, 2, and 3): 2 = Non-composite rolled or welded steel girder. 3 = Riveted. See Note, STEEL-2 command. 4 = Composite steel & concrete section where dead load moment is positive (tension in bottom of section). See Note 1. 5 = Composite steel and concrete section where the dead load moment is negative (tension in top of the section). See Note 1. 41 = The composite steel girder cross section at this point may be compact and the girder cross sections at the adjacent pier(s) are compact or moment released (i.e. hinge or pin connected) and you desire the program to check AASHTO Equation 10-129b and 10-129c. If you want the section at this analysis point to be analyzed as noncompact, code 4. See Note 2. (Continued) 2/03 14.22 BRASS-GIRDER COMMAND PARAMETERS (Cont.) Web Angle Default = 0.0 Enter the angle θ in degrees if the web is not vertical. See Note 3. Transverse Stiffener Spacing Inches If this is a rating analysis of an existing girder or a splice design is desired at the analysis point being considered, enter the longitudinal spacing in inches of the transverse stiffeners in the area of the analysis point and to be used in determining the load carrying capacity of the section. If zero or a blank is input, it is assumed that no transverse stiffeners exist. For a splice design, the shear strength of the girder used in the design of the splice will be determined from this input. See Note 3. Transverse Stiffener Width If a rating is desired at the analysis point being considered, enter the width of one intermediate transverse stiffener in inches. See Note 3. If a transverse stiffener design is desired, follow the instructions in Note 3 on Page 14.4. Transverse Stiffener Thickness If a rating is desired at the analysis point being considered, enter the thickness of one intermediate transverse stiffener in inches. See Note 3. f Y Transverse Stiffener Material Default = 36 ksi Enter the yield stress of the steel used for intermediate transverse stiffeners. See Note 3. IBS Default = 2.4 Enter the intermediate transverse stiffener type factor. See Note 3. 1.0 1.8 2.4 = Stiffener Pairs = Single Angles = Single Plates If 1.0 is coded, the program will calculate the properties based on two stiffeners. AASHTO (10-31a), (10-110) Tension Field Action Flag Default = 0 Intermediate Output Default = 0 (not output) 12/00 Used in Working Stress Design method only. Leave blank for Ultimate Strength Design method. Flag = 0 Ignore combined shear and bending. Eliminates tension field action from allowable shear equation (AASHTO EQ 10.26). Flag = 1 Account for combined shear and bending - if necessary. Includes tension filed action in the allowable shear equation (AASHTO EQ 10.29). Enter a 1 if a detailed output report is desired for most of the AASHTO Specification checks. This feature outputs intermediate values which aid in hand computations. Rating factor calculations for each load level and truck are also given. Load Factor method only. Enter a 0 to suppress this report. 14.23 BRASS-GIRDER EXAMPLE For the rating of a welded plate girder transversely stiffened by 1/2" x 4" intermediate transverse stiffeners (A36 single plates) at 18 inch intervals near the 4/10 span point of span 1, the STEEL-1 command would be coded as follows: STEEL-1 104, , , 18, 4, 0.5, 36, 2.4 NOTES 1. To determine whether to use option 4 or 5 for the type of steel girder, refer to the typical cross section defined at this point. If the cross section includes the composite slab in the calculation of the moment of inertia of the section, enter 4 (see Note 2 below). If negative moment occurs at this point, the concrete slab will be in tension and the moment of inertia will be in error. BRASS will print a message explaining the condition and action taken. If the cross section is composite and does include slab reinforcement, enter 5 (see Note 2 below). If positive moment occurs, the concrete slab will be in compression and the moment of inertia will be in error. BRASS will print a message explaining the condition and action taken. Please refer to AASHTO 10.50.1.1.2 2. The following does not apply to hybrid girder sections: Code 41 if the girder cross section at this point may be compact and the girder cross sections at the adjacent pier(s) are compact or moment relieved (i.e. hinge or pin connected) and you desire the program to check AASHTO Equation 10-129b and 10-129c. If you want the section at this analysis point to be analyzed as non-compact, code 4. Suggestion: BRASS may be run with the pier points coded (the 200, 300, 400, points, etc.) with the intermediate output turned on to see if the sections at those points are compact. Also note that compactness is a function of loading and load factors, hence compactness is not always simple to determine. If BRASS is run to establish compactness, the engineer should revise all (or the appropriate) load cases and levels by reviewing the intermediate output for the pier sections. 2/97 14.24 BRASS-GIRDER NOTES 3. If you have used the STIFF-TRAN-GROUP, STEEL-GIRDER-CONTROL, and/or STIFTRAN-SCHEDULE commands, this parameter (or any non-blank entry in this parameter) may be used to override the input from the commands listed above for the analysis point defined in parameter 1 of the STEEL-1 command. The default values for this command will not be activated for this override feature. 12/00 14.25 BRASS-GIRDER 1040 BRASS-GIRDER™ COMMAND NAME PURPOSE COMMAND DESCRIPTION STEEL-2 SL2 This is the second in a series of commands to describe factors affecting the design or rating analysis of a particular point along the girder. It is required when designing certain aspects of a steel girder or rating a steel girder for load capacity. This series of commands is required for each of up to 212 analysis points allowed. 8 COMMAND PARAMETERS Longitudinal Stiffeners Default = 0 If the welded plate girder section to be rated for load capacity has longitudinal stiffeners at this analysis point, enter 1. See Note 2. For other types of sections or for design analysis, leave blank. Unsupported Length of Compression Flange Default = 0 Used in Working Stress Design method only. Leave blank for Ultimate Strength Design method. (See STEEL-4 command for Ultimate Strength Design method.) Enter the unsupported length, in feet, of the compression flange at this analysis point. In a positive moment region, only stage 1 is considered. The unsupported length is assumed to be zero for stage 2 & 3 (composite slab). For stage 2 or stage 3, enter the unsupported length, in feet, in the negative moment region. For example, at an interior support where there is negative moment, if the analysis point is 200, the distance to enter would be the distance in span 2 along the bottom flange to the first lateral bracing or to the inflection point, whichever is shorter. Longitudinal Stiffener Location Default = Web Depth/5 Enter the distance, in inches, from the center of the longitudinal stiffener to the face of the flange denoted by the next parameter. See Note 3. Longitudinal Stiffener Reference Enter ‘T’ if the distance to the longitudinal stiffener is measured from the face of the top flange. Enter ‘B’ if the distance is measured from the face of the bottom flange. See Figure and Note 3. INET If this is a non-composite riveted section, enter the net moment of inertia in inches4 of the cross section at this analysis point. This moment of inertia will be used by BRASS for calculation of stresses for all stages. (f = Mc) INET This parameter is optional and is not valid for composite sections or load factor analysis. See Note 1. (Continued) 12/00 14.26 BRASS-GIRDER COMMAND PARAMETERS (con’t) DCENTROID If this is a riveted section, enter the distance in inches from the bottom of the bottom flange to the centroid of the net section. This would be used only if this distance is different than it is for the gross section. This parameter is optional and is not valid for load factor analysis. See Note 1. Longitudinal Stiffener Width (in), LSW If a rating has been requested and longitudinal stiffeners exist, enter the longitudinal stiffener width. See Figure and Notes 2 and 3. If a longitudinal stiffener design is desired, follow the instructions in Note 3 on Page 14.4. Note: Longitudinal stiffeners are assumed to be made out of the same material as the transverse stiffeners. Longitudinal Stiffener Thickness (in), LST 12/00 If a rating has been requested and longitudinal stiffeners exist, enter the longitudinal stiffener thickness. See Figure and Notes 2 and 3. 14.27 BRASS-GIRDER EXAMPLE For the rating at the 2.0 of a welded plate girder bridge longitudinally stiffened in the area of the supports and lateral bracing 10 feet from the support. STEEL-2 1, 10, , , , , 4, .3125 FIGURES NOTES 1. At this time, BRASS-GIRDER™ does not accommodate built up steel sections comprised of angles, plates and rivets or bolts when the strength design (load factor) analysis method is selected. See input parameter #2 of the DESIGN command. Also, BRASS-GIRDER™ cannot accomodate composite sections. No reductions or adjustments are made by BRASSGIRDER™ to allow for reduced section due to holes. Data entered in parameters 5 or 6 of the STEEL-2 command or parameters 1, 2, or 5 of the STEEL-3 command are ignored when load factor analysis is selected. If desired, the user may calculate an equivalent smaller section to account for the rivet holes and enter it as a welded or rolled beam (composite or noncomposite). 2. Due to changes in the AASHTO Standard Specifications, these parameters are required when longitudinal stiffeners are input. 7/99 14.28 BRASS-GIRDER NOTES 3. If you have used the STIF-LONG-GROUP command, this parameter (or any non-blank entry in this parameter) may be used to override the input from the commands listed above for the analysis point defined in parameter 1 of the STEEL-1 command. The default values for this command will not be activated for this override feature. 12/00 14.29 BRASS-GIRDER 1050 BRASS-GIRDER™ COMMAND NAME COMMAND DESCRIPTION STEEL-3 SL3 This is the third in a series of commands to describe factors affecting the design or rating analysis of a particular point along the girder. It is required for rating riveted steel girders, composite steel and concrete girders, or steel girders with cover plates. PURPOSE This series of commands is required for each of up to 212 analysis points allowed - working stress analysis only. This command is not valid for load factor analysis. See Notes. 5 COMMAND PARAMETERS Net area of web If this is a riveted section, enter the net area of the web in square inches for vertical shear calculation. This is optional for the rating of a riveted plate girder. % A TOP If this is a riveted section enter the percent of the area of the top flange to be used in calculation of the horizontal shear at the top of the web. This is optional for the rating of a riveted plate girder. Allowable Shear for Top Cover Plate or Composite Flange If a rating for horizontal shear is desired, and if this is a steel section with a top cover plate or a composite flange, enter the allowable shear in lbs/linear inch of girder length at the junction between the top flange and the cover plate or composite slab. Used for shear flow calculations. Allowable Shear for Bottom Cover Plate If a rating for horizontal shear is desired, and if this is a steel section with a bottom cover plate, enter the allowable shear in lbs/linear inch of girder length at the junction between the bottom flange and the cover plate or composite slab. Used for shear flow calculations. % A BOTTOM If this is a riveted section, enter the percent of the area of the bottom flange to be used in calculation of the horizontal shear at the bottom of the web. This is optional for the rating of a riveted plate girder. 10/98 14.30 BRASS-GIRDER EXAMPLE For the riveted section shown below, the STEEL-3 command would be coded as follows: STEEL-3 8, 12.5, , , 10.0 FIGURES NOTES At this time, BRASS-GIRDER™ does not accommodate built up steel sections comprised of angles, plates and rivets or bolts when the strength design (load factor) analysis method is selected. See input parameter #2 of the DESIGN command. No reductions or adjustments are made by BRASS-GIRDER™ to allow for reduced section due to holes. Data entered in parameters 5 or 6 of the STEEL-2 command or the STEEL-3 command are ignored when load factor analysis is selected. If desired, the user may calculate an equivalent smaller section to account for the rivet holes and BRASS will treat it as a welded or rolled beam. 10/98 14.31 BRASS-GIRDER 1060 COMMAND DESCRIPTION BRASS-GIRDER™ COMMAND NAME PURPOSE STEEL-4 SL4 This is the fourth in a series of commands to describe factors affecting the design or rating analysis of a particular point along the girder. It is required for the design or rating of bearing stiffeners or ultimate strength steel design or rating brace location details. This series of commands is required for each of up to 212 analysis points allowed. 12 COMMAND PARAMETERS fy Bearing Stiffener Default = 36 ksi Enter the yield stress of the steel used for bearing stiffeners in kips/sq. inch. Only required at a span end if bearing stiffener analysis is desired. See Note 5. Bearing Stiffener Clip Default = 0.75 Code the bearing stiffener clip dimension in inches parallel to the bottom flange. Only required at a span end if bearing stiffener analysis is desired. See Figure and Note 5. Girder Type Default = 2 Enter the appropriate code below for the type of girder at the point of bearing. Required entry for a rolled beam girder when a bearing stiffener analysis is desired. 1 2 Bearing Stiffener Thickness If the analysis point being considered is at a support and a rating of the load carrying capacity of the bearing stiffener is desired, enter the thickness of the bearing stiffener in inches. See BST below and Note 5. If a bearing stiffener design is desired, follow the instructions in Note 3 on Page 14.4. Bearing Stiffener Width If the analysis point being considered is at a support and a rating of the load carrying capacity of the bearing stiffener is desired, enter the width of the bearing stiffener in inches. See BSW below. BRASS will calculate the load carrying capacity based on two stiffeners of size BST by BSW. See Note 5. = Rolled beam = Welded plate Reference: AASHTO 10.34.6 (Continued) 2/03 14.32 BRASS-GIRDER COMMAND PARAMETERS (Cont.) Lateral/Support and Bracing Default = 0 Note: This parameter is required for Load Factor (ultimate strength) analysis only and can be used in positive moment regions for staged construction. See Note 1. Code: 0 = There is not a cross frame at this location, the deck does not provide lateral support for the top flange in this area. 1 = There is a cross frame at this location, the deck provides lateral support for the top flange in this area. 2 = There is not a cross frame at this location, the deck provides lateral support for the top flange in this area. Note: In the case of a composite steel and concrete structure, if there are shear connectors at this point, code 1 or 2. BRASS will assume the top flange is laterally unsupported by the deck for stage one loadings, if this is a design run. 3 BLEFT Default = 0 = There is a cross frame at this location, the deck does not provide lateral support for the top flange in this area. Note: This parameter is required for Load Factor (ultimate strength) analysis only and can be used in positive moment regions for staged construction. See Note 1. Enter the distance, in feet, to the first cross frame to the left of this analysis point. See Notes 2 and 3. BRIGHT Default = 0 Note: This parameter is required for Load Factor (ultimate strength) analysis only and can be used in positive moment regions for staged construction. See Note 1. Enter the distance, in feet, to the first cross frame to the right of this analysis point. See Notes 2 and 3. Allowable Fatigue Stress Default = 1 X 10¹⁰ ksi (The large value for a default allows the user to remove it from rating, if desired). Enter the allowable fatigue stress in ksi. Ultimate Strength Design/Rating only. See Note 5. Operating Rating Based on Serviceability Default = 0 Enter 1 if the LFD operating rating check for steel girders for serviceability is to be skipped. See Note 5. C b - For Positive Bending Moment Default = Computed Using AASHTO 10.48.4.1 This parameter allows the user to override the calculation of C positive bending moment. See Note 5. b for C b For Negative Bending Moment Default = Computed Using AASHTO 10.48.4.1 This parameter allows the user to override the calculation of C negative bending moment. See Note 5. b for 12/00 14.33 BRASS-GIRDER EXAMPLE For the rating of a welded plate structure with 1 inch x 6 inch bearing stiffeners made from A36 steel and 1 inch clips for the fillet weld of web to flange: STEEL-4 36, 1, 2, 1, 6 FIGURES NOTES 1. For a load rating, checking AASHTO specifications for a dead load stage(s) of composite girders is not done. If you need stiffener checks in the dead load stage(s), request the design option on the DESIGN command. 2. This makes the assumption that cross frames are vertical X, K or channel type braces that support the top and bottom. 3. BRASS assumes that girders will be braced at the top and bottom at supports (span ends). If the analysis point under consideration is not at a support and if the distance to the cross frame places the cross frame in an adjacent span, BRASS will use the distance to the span end. 4. If the point of support is the top of an integral column and the first cross frame is at the support with the column, code the distance to the cross frame as the distance to the span end, minus 0.1 feet. This is necessary so that BRASS will know whether to use the moment to the left or to the right of the support. 10/98 14.34 BRASS-GIRDER NOTES 5. If you have used the STIF-BEAR-GROUP and/or STEEL-GIRDER-CONTROL commands, this parameter (or any non-blank entry in this parameter) may be used to override the input from the commands listed above for the analysis point defined in parameter 1 of the STEEL-1 command. The default values for this command will not be activated for this override feature. 12/00 14.35 BRASS-GIRDER 1065 BRASS-GIRDER™ COMMAND NAME PURPOSE COMMAND DESCRIPTION STEEL-5 SL5 This is the fifth in a series of commands to describe factors affecting the design or rating analysis of a particular point along the girder. This command is required for an ultimate strength design of a steel girder splice. The steel girder splice component of BRASS-GIRDER is current with the AASHTO Standard Specifications with 1997 and 1998 Interims. There were numerous changes for splice analysis in the 1999 Interims and these changes have not been incorporated. 9 COMMAND PARAMETERS IMPORTANT: The INVENTORY, OPERATING, POSTING, and SAFE-LOAD commands must be used when performing an ultimate strength design of a steel girder splice. See Note 1 on page 14.9 Splice Design Indicator Default = N If a splice design is desired, indicate the girder (left/right) which will control the design. This girder’s cross-section properties and yield strength(s) will be used in the splice design. N = No splice design is desired L = Left girder to control splice design R = Right girder to control splice design Cycles Enter the code of the number of stress cycles to which the splice is to be subjected. Code Cycles 1 100,000 2 500,000 3 2,000,000 4 over 2,000,000 FK Code the distance, in inches, from centerline of web to the edge of the inner flange splice plates (see Figure). WK Code the minimum distance in inches from a flange to the edge of a web splice plate (see Figure). (Continued) 11/01 14.36 BRASS-GIRDER COMMAND PARAMETERS (Cont.) MEM Code the number representing the member type. 1 = Welded plate w/4" X 4" bolt spacing 2 = Rolled beam w/3" X 3" bolt spacing 3 = Welded plate w/3" X 3" bolt spacing Surface Code Default = A Code the surface condition of bolted parts. See AASHTO Table 10.57A. (1995) Class of Surface A B C Surface Condition of Bolted Parts Clean mill scale and blast-clean surface width Class A coating Blast-cleaned surface and blast-clean surfaces with Class B coating Hot-dip galvanized surfaces roughened by wire brushing after galvanizing. Additional lines of transverse fasteners in top splice Default = 0 Enter 1 if two additional lines of transverse fasteners are desired for the top flange splice because of the indirect splice condition, otherwise leave blank (see Note 4). Additional lines of transverse fasteners in bottom splice Default = 0 Enter 1 if two additional lines of transverse fasteners are desired for the bottom flange splice because of the indirect splice condition, otherwise leave blank (see Note 4). Intermediate output Default = 0 Enter 1 if intermediate output is desired for splice design. This feature will output the value of most calculations made during the splice design. 3/96 14.37 BRASS-GIRDER EXAMPLE If a steel girder splice design using 500,000 cycles, clean mill scale surface condition, FK = 1.5 inches, WK = 2.5 inches, and welded plate with 4" X 4" spacing, the command would be coded as follows: STEEL-5 L, 2, 1.5, 2.5, 1, A, , , FIGURES NOTES 1. Steel splice design is done according to AASHTO 10.18 and Wyoming standard practice. For complete discussion of splice design assumptions and limitations consult BRASSSPLICE documentation. 2. Load factors used in splice design are as follows: Strength - Load Level 1: g (βDL* DL + βLL * LL) Overload - Load Level 2: DL + βLL * LL Fatigue - Load Level 4: βLL* LLrange 3. See PROPERTIES-ST1 for defining yield strength of splice plate material. See STEEL1 for defining the shear strength of the girder used in the splice design as based on a stiffened or unstiffened girder. 4. Splice design does not consider eccentricity of forces at fillers as described in AASHTO 10.18.1.2 and 10.18.1.3. 5. Yield strengths for girder and splice plate material must conform to those in AASHTO Table 10.2A or may be entered less than 36 ksi. If entered less than 36 ksi, Fu will be taken as 52 ksi in the design calculations. 3/96 14.38 BRASS-GIRDER 3/96 14.39 BRASS-GIRDER 1066 BRASS-GIRDER™ COMMAND NAME PURPOSE COMMAND DESCRIPTION STEEL-6 SL6 This is the sixth in a series of commands to describe factors affecting the design or rating analysis of a particular point along the girder. This command is required for an ultimate strength design of a steel girder splice. 5 COMMAND PARAMETERS NRDS Default = 1 Code one of the following to indicate structure redundancy. 0 = Non-redundant type structure 1 = Redundant type structure ITHRW Default = 0 Bolt threads included/excluded from shear plane of web splice plates. 0 = Bolt threads excluded from shear plane 1 = Bolt threads included in shear plane ITHRDT Default = 0 Bolt threads included/excluded from shear plane of top flange splice plates. 0 = Bolt threads excluded from shear plane 1 = Bolt threads included in shear plane ITHRDB Default = 0 Bolt threads included/excluded from shear plane of bottom flange splice plates. 0 = Bolt threads excluded from shear plane 1 = Bolt threads included in shear plane IWTHR Default = 0 Weathering Steel Indicator 0 = Steel is not weathering steel 1 = Steel is weathering steel 3/96 14.40 BRASS-GIRDER EXAMPLE A steel girder splice design for a redundant type structure, with bolt threads excluded from the shear planes of the web and top and bottom flanges, and weathering type steel, the command would be as follows: STEEL-6 1, 0, 0, 0, 1 FIGURES NOTES Final determination of whether threads are in the shear plane may need to be decided after an initial splice run to determine the thickness of splice plates (see AASHTO 10.24.1.8). 3/96 14.41 BRASS-GIRDER 1080 COMMAND DESCRIPTION BRASS-GIRDER™ COMMAND NAME PURPOSE CONCRETE-1 CR1 This is the first in a series of two commands to describe factors affecting the design or rating analysis of a particular point along the girder. It is required when designing certain aspects of a reinforced concrete girder or rating a reinforced concrete girder for load capacity. This set of commands is required for each of up to 212 analysis points allowed. 7 COMMAND PARAMETERS Analysis Point Enter the span point at which an analysis of the girder section is desired. Use the following format: 104 = 4/10 of distance from left end of span 1 along span 1. *106.5 = 65/100 of distance from left end of span 1 along span 1. See note below. 110 = 10/10 of distance from left end of span 1 along span 1. Basically this is the right end of span 1. 200 = 0/10 of distance from left end of span 2 along span 2. Basically this is the left end of span 2. *Note: Only 1/10 points may be analyzed on a span unless there is a node point at the desired location created by a crosssection change or a special analysis point from the HINGE command or TRANSFER command. % Shear Default = 100.0 Enter the percent of concrete section to be used in resisting shear normal to the member. This may be used in the rating of a concrete section for shear when the section is wholly or partially cracked. See Notes. Lightweight Concrete Shear factor Default = 1.0 If the girder is constructed of reinforced concrete with lightweight aggregates, enter the shear factor for lightweight concrete (see AASHTO 8.15.5.2). See Notes. V DIST Default = depth of section If the analysis point under consideration is a support, enter the distance in feet from the centerline of the support to the shear face to be used for stirrup design. See Figure 1. (Continued) 12/00 14.42 BRASS-GIRDER COMMAND PARAMETERS (Cont.) θS Default = 90 E If stirrups in the area of this analysis point are inclined, enter the angle in degrees between the stirrup and the horizontal. See Figure 2 and Notes. Axial Load Indicator Default = 0 Enter 1 if axial load at this analysis point is to be ignored. This could apply in the case of a sidewall of a box culvert which is to be analyzed as a beam. See Notes. Intermediate Output Default = 0 (no output) Enter a 1 if a detailed output report is desired for most of the AASHTO Specification checks. This feature outputs intermediate values which aid in hand computations. It allows the user to see how BRASS-GIRDER™ calculates section flexural and shear capacity at the analysis point considered. Load Factor method only. Enter a 0 to suppress this report. 12/00 14.43 BRASS-GIRDER EXAMPLE Assume analysis of the 2.0 point of a reinforced continuous concrete T girder is desired. The section is sound (no cracks), stirrups are vertical, normal weight concrete has been used, and shear is to be determined at 3 feet from the centerline of the supporting integral column: CONCRETE-1 200, 100, , 3 FIGURES NOTES If you have used the STIRRUP-GROUP and/or STIRRUP-SCHEDULE commands, this parameter (or any non-blank entry in this parameter) may be used to override the input from the commands listed above for the analysis point defined in parameter 1 of the CONCRETE-1 command. The default values for this command will not be activated for this override feature. 12/00 14.44 BRASS-GIRDER 3/96 14.45 BRASS-GIRDER 1090 COMMAND NAME PURPOSE COMMAND DESCRIPTION BRASS-GIRDER™ CONCRETE-2 CR2 This is the second in a series of two commands to describe factors affecting the design or rating analysis of a particular point along the girder. It is required when designing a slab bridge or rating a girder bridge with stirrups. 3 COMMAND PARAMETERS Shear Indicator Default = 0 Enter 1 if shear is to be ignored as in the case of a reinforced concrete slab bridge (see AASHTO 1.3.2(F)). See Notes. A STIRRUPS Code the area of reinforcing steel in a stirrup at or adjacent to this analysis point. This will generally be twice the area of the rebar making the stirrup. See Notes. Stirrup Spacing Enter the longitudinal spacing in inches between stirrup in the area of the analysis point under consideration. See Notes. 12/00 14.46 BRASS-GIRDER EXAMPLE Assume a rating is desired of the 1.4 point of a reinforced concrete T-girder. Stirrups are rectangular made from #4 reinforcing steel and placed at 10 inch centers: CONCRETE-2 , 0.40, 10 FIGURES NOTES If you have used the STIRRUP-GROUP and/or STIRRUP-SCHEDULE commands, this parameter (or any non-blank entry in this parameter) may be used to override the input from the commands listed above for the analysis point defined in parameter 1 of the CONCRETE-1 command. The default values for this command will not be activated for this override feature. 12/00 14.47 BRASS-GIRDER Ultimate Strength Concrete Design These components will design reinforced concrete box girders, T-girders and slab bridges with five or less spans by the load factor method. Two separate runs are used for the design of a superstructure. The first run is called the "Preliminary Run" and determines required areas and stirrup spacings at points along the bridge. The second run is called the "Final Run" and determines actual cutoff locations of bar groups. The output from the preliminary run will allow accurate selection of bar sizes, bar locations, bar groupings and cutoff preferences to be input for the final run. Each run utilizes data generated at tenth points of the spans by the "Structural Analysis Component" and "Structural Loading Component". Therefore, each run must include these components. Either run allows the following options to be used: 1). Different concrete strengths can be considered for the top and bottom of a member. 2). Moments at the faces of interior supports can be used for design. 3). Compression flange widths can vary from span to span for design of positive reinforcement in Tgirders. The width used for the reinforcement design will be the width near the center of the span as input for the Structure Analysis component. 4). Moments immediately right and left of an interior support can be of different magnitudes as a result of the different stiffnesses of the interior supports and superstructure. Both runs for the reinforced concrete design uses constant flange thicknesses and web thicknesses throughout the bridge. The final run also uses a constant web depth throughout the bridge but the preliminary run will account for variable web depths. Neither run considers any axial or torsion loadings on the member. Slab bridges must be input using the web depth and thickness. Stirrup spacings are given at a distance "d" from the face of the support as well as at the end of each span. The shear at "d" from the face of the support is determined by interpolating between the maximum shear values for the point at the end of the span and for the adjacent tenth point. In each run, if the centroid of the total steel area being checked for fatigue is outside of the compression zone, the minimum stress is taken as zero. If the centroid of the total steel area opposite of that being checked for fatigue is outside the compression zone, the compression steel area is taken as zero for determining the maximum stress. The preliminary run checks requirements for flexure, distribution of flexural reinforcement at maximum moment locations, minimum reinforcing of AASHTO 8.17.1, maximum allowable reinforcing, continuing reinforcement into the supports for positive moment reinforcement, continuing reinforcement beyond the point of inflection for negative moment reinforcement, flexure bond for positive reinforcement according to AASHTO 8.24.2.3, and fatigue. Minimum required areas are given for the above conditions along with the maximum allowable area and stirrup spacings. If the reinforcing at the point considered does not undergo stress reversal, the minimum required area to meet fatigue requirements is only given if it could govern the design at that point. When stress reversal does occur, a list is given of the minimum required tension area for an assumed area of compression reinforcement. The minimum compression area used is the minimum required area for flexure, continuing reinforcement or minimum reinforcing, while the maximum compression area considered will be the lesser of twice the minimum compression area, the maximum allowable 3/96 14.48 BRASS-GIRDER reinforcing area or the minimum compression area plus 33 square inches. The assumed areas of compression reinforcement are incremented by 1 square inch for the first six times and then incremented by 2 square inches until one of the above requirements is met. Some of the assumed compression areas with corresponding required tension areas will not be printed if the tension area is considered equal to the required tension area calculated for the minimum compression area given. For distribution of flexural reinforcement requirements, the value input for the maximum bar size is used with the area required for flexure to determine the minimum number of bars that will be considered. The final run checks the same requirements as the preliminary run plus requirements of AASHTO 8.24.1.1, 8.24.1.2 and 8.24.1.4. Bar groups are input for each span and interior support according to the preference they are to be cut off. A desired cutoff location may be input and this will be the actual cutoff location, provided the group does not need to extend farther. When flexure reinforcement located within the width of the member used to compute shear strength is terminated in a tension zone, additional shear reinforcement will be given if needed to meet the requirements of AASHTO 8.24.1.4.1 and 8.24.1.4.2, if 8.24.1.4.3 is not met. The final run will not be completed and the following noted, if requirements for flexure, fatigue or AASHTO 8.24.2.3 cannot be met for the maximum areas of reinforcing input or if the requirement for the maximum allowable reinforcement is not met. If the requirement for distribution of flexural reinforcement at maximum moment locations is not met, this will be noted but the run will be completed. If fatigue governs the amount of maximum reinforcing required for a span or interior support, the number of groups required to meet fatigue can only be one greater than the number of groups required for flexure. If the requirements of AASHTO 8.24.2.3 are not met at an inflection point, the group required to extend to the inflection point to meet the requirement will be extended into the adjacent support. If the cutoff location of a group is given at the end of a span, it is assumed that the bars in the group will be adequately anchored. The requirements of AASHTO 8.24.1.2.1 are used to determine theoretical cutoff locations for all actual cutoffs not running into a support, to account for possible shifts in the moment diagrams. The final run uses the moments of each live load case separately in determining inflection points and cutoff locations between tenth points. As already mentioned, the final run allows the designer to input his preference for the order groups are to be cut off and also specify exact locations of desired cutoff points on either or both sides of a group. If desired cutoff locations are input, these locations need to be such that the preference for the order groups will be cutoff still is correct. In other words, an error may result if the value for a desired cutoff location results in a bar being terminated farther away from the maximum moment location than a termination point for a lower numbered group on the same side of the maximum moment location. If moments at the face of interior supports are used, desired cutoff locations should be input for the maximum group used over the interior support to assure proper development of that group. If the cross section used by the program is different than the actual cross sections throughout the bridge or if the actual reinforcing details desired are different than that used by the program, some hand calculations and possible adjustments for things such as stirrup spacing or cutoff locations may be necessary after the appropriate run is made. Also, after the final run, sections in AASHTO not checked by this program, such as parts of 8.17.2, should be checked. 3/96 14.49 BRASS-GIRDER 1100 COMMAND NAME PURPOSE COMMAND DESCRIPTION BRASS-GIRDER™ CONCRETE-3 CR3 This command defines factors affecting the design of concrete girders by the Ultimate Strength Design method. This command is required for both the ultimate strength preliminary run and final run. 6 COMMAND PARAMETERS Shear Indicator Default = 0 Enter 1 if shear is to be ignored as in the case of a reinforced concrete slab bridge (see AASHTO 3.24.3). Ratio - Fatigue Default = 0.3 Enter the ratio of base radius to height of rolled-on transverse deformation of the main reinforcing; when an actual value is not known use 0.30. This will be used to check Fatigue Stress limits (see AASHTO 8.16.8.3). Span Length Indicator Default = 0 Enter indicator of span length to be used for interior supports in determining the effective tension flange width for a T-girder. 0 = Average of adjacent spans. 1 = Minimum of adjacent spans. 2 = Maximum of adjacent spans. Left R A Enter the additional embedment length in inches, R A , at the left simple support for flexural bond requirements (see AASHTO 8.24.2.3). Right R A Enter the additional embedment length in inches, R A , at the right simple support for flexural bond (see AASHTO 8.24.2.3). Z Default = 170 Enter value of Z for distribution of flexural reinforcement requirements (see AASHTO 8.16.8.4). 3/96 14.50 BRASS-GIRDER EXAMPLE Assume a three span reinforced concrete T-girder with moderate exposure conditions is being designed. Span #1 is 48 feet, span #2 is 63 feet and span #3 is 48 feet. The ratio for the reinforcing bars being used is unknown and an average of the span lengths is desired to be used at the interior supports. The value of R A at both ends of the bridge is 13 inches. CONCRETE-3 , , , 13, 13 FIGURES NOTES 3/96 14.51 BRASS-GIRDER 1110 COMMAND NAME PURPOSE COMMAND DESCRIPTION BRASS-GIRDER™ CONCRETE - 4 CR4 This command defines distances and the location of reinforcement from the extreme tension fibers. Each distance input to the centroid of the total positive reinforcement will be analyzed and required areas of steel at locations throughout the bridge will be given. This command is required for the ultimate strength preliminary run. 6 COMMAND PARAMETERS Top Cover Enter the minimum thickness of concrete cover in inches from the top extreme tension fiber to the center of the negative reinforcing bar closest to it. This will be used for all locations for the negative reinforcement in checking distribution of flexure reinforcement requirements. Bottom Cover Enter the minimum thickness of concrete cover in inches from the bottom extreme tension fiber to the center of the positive reinforcing bar closest to it. This will be used for all locations for the positive reinforcement in checking distribution of flexure reinforcement requirements. Positive Distance 1 Enter first distance in inches from extreme tension fiber to centroid of total positive reinforcement. Positive Distance 2 Enter second distance in inches from extreme tension fiber to centroid of total positive reinforcement. Positive Distance 3 Enter third distance in inches from extreme tension fiber to centroid of total positive reinforcement. Box Girder Enter 1 if this is a reinforced concrete box girder section. 3/96 14.52 BRASS-GIRDER EXAMPLE Assume a preliminary run is desired for a reinforced concrete T-girder. The clearance at the bottom will be 1.5 inches of clear cover over the stirrup. The stirrup is assumed to be a #5 bar and #10 bars in the bottom layer are assumed to be the approximate bar size which will extend into the supports. The top of the T will have #6 bars running transversely which have 2.5 inches of clear cover over them. The negative reinforcing will be in a single layer directly below the transverse reinforcing and is assumed to be #8 bars for the preliminary run. It is assumed that the total positive reinforcing will consist of two rows with an approximate spacing between the rows of 3.5 inches. Three different locations for the total positive reinforcing is considered adequate to size the bars for the final run. CONCRETE-4 3.75, 2.76, 2.76, 4.16, 4.51 FIGURES NOTES 3/96 14.53 BRASS-GIRDER 1120 COMMAND NAME PURPOSE COMMAND DESCRIPTION BRASS-GIRDER™ CONCRETE-5 CR5 This command defines the distance and location of the centroid of each total negative reinforcing group to be considered in the ultimate strength preliminary run. Each distance input to the centroid of the total negative reinforcement will be analyzed and required areas of steel at locations throughout the bridge will be given. Also maximum bar sizes and steel areas are input. 6 COMMAND PARAMETERS Negative Distance 1 Enter first distance in inches from extreme tension fiber to centroid of total negative reinforcement. Negative Distance 2 Enter second distance in inches from extreme tension fiber to centroid of total negative reinforcement. Max. Bar Size (Positive) Enter the maximum bar size which should be considered for positive moment reinforcement. Max. Bar Size (Negative) Enter the maximum bar size which should be considered for negative moment reinforcement. Stirrup Area 1 Enter the area of stirrups in sq. in. which the required maximum spacing will be determined for. Stirrup Area 2 If desired, enter a second area of stirrups in square inches which the required maximum spacing will be determined for. 3/96 14.54 BRASS-GIRDER EXAMPLE Using the example for CONCRETE-4, the single layer of negative reinforcing will be input along with bar sizes noted which will be considered maximum sizes to be used. Spacing for #5 stirrups is desired. CONCRETE-5 3.75, , 10, 8, 0.62 FIGURES NOTES 3/96 14.55 BRASS-GIRDER 1130 COMMAND DESCRIPTION BRASS-GIRDER™ COMMAND NAME PURPOSE CONCRETE-6 CR6 This is the first of a series of commands (CONCRETE-6, CONCRETE-7, and CONCRETE-8) required to define reinforcement groups for which cutoff locations will be determined. A series is required for each span. This series is required only for the ultimate strength final run. For the preliminary or final run of a box-girder, entries 5 & 6 are needed for distribution of flexure reinforcement requirements. 6 COMMAND PARAMETERS Span No. Enter the number of the span for which positive reinforcement is to be described. Spans shall be numbered in consecutive order from left to right, starting with No. 1. Number of Top Reinforcing Groups Enter the total number of groups of negative reinforcement to be input which are to be located over the interior support at the right of the designated span. Leave blank if support at right is an exterior support. Number of Bottom Reinforcing Groups Enter the total number of groups of positive reinforcement to be input for this span. Clear Span Length Enter the clear span length in feet for this span. Box Girder's Bottom Flange Effective Tension Width Enter the effective tension flange width in inches to be used for the reinforcement in the bottom flange of this span. Box Girder's Top Flange Effective Tension Width Enter the effective tension flange width in inches to be used for the top flange reinforcement located over the interior support at the right of the designated span. Leave blank if support at right is an exterior support. 3/96 14.56 BRASS-GIRDER EXAMPLE Assume span #1 of a three span T-girder is being defined. The negative reinforcing over the first interior support which will continue into spans #1 and #2 is desired to have half of the bars terminated before they reach the point of inflection. The positive reinforcing which is not required to continue into the supports is desired to be cutoff at two different locations on each side of the point of maximum positive moment. The clear span for span #1 is 45 feet. CONCRETE-6 1, 2, 3, 45 FIGURES NOTES 3/96 14.57 BRASS-GIRDER 1140 COMMAND NAME PURPOSE COMMAND DESCRIPTION BRASS-GIRDER™ CONCRETE-7 CR7 This command is to define each positive or negative reinforcing group. This command will be used and followed by as many CONCRETE-8 commands as required to define the first group and then repeated with the same sequence of commands until all positive and negative groups for the designated span have been defined. 6 COMMAND PARAMETERS Reinforcement Type Enter 1 if group of positive reinforcement is to be defined. Enter 2 if group of negative reinforcement is to be defined. Group No. Enter the designated number of the group to be defined. Numbers must be in consecutive order starting with one for both positive and negative reinforcement. Group #1 shall be the group most preferred to continue into the supports for positive reinforcement or to extend beyond the point of inflection for negative reinforcement. Group No. 2 shall be that group desired to be cutoff farthest from the point of maximum moment (not considering Group No.1). Group No. 3 shall be the next farthest and so on. Number of bars or bar sets in group Enter the total number of bars and/or bar sets in the group. Basic development length factor Default = 1 Enter the factor for this group to be taken times the basic development length according to AASHTO 8.25. Left Cutoff Distance (Optional) Enter distance in feet to where actual left cutoff location is desired. For positive reinforcement, this distance is measured left of the midpoint of the span. For negative reinforcement, this distance is measured left of the end of the span at an interior support. This cutoff location will be used only when it is determined that this group will not be required to extend past this location. Right Cutoff Distance (Optional) Enter distance in feet to where actual right cutoff location is desired. For positive reinforcement, this distance is measured right of the mid-point of the span. For negative reinforcement, this distance is measured right of the end of the designated span at an interior support. This cutoff location will be used only when it is determined that this group will not be required to extend past this location. 3/96 14.58 BRASS-GIRDER EXAMPLE Assume that we are defining Group 2 of the positive reinforcement of span 1 whose span length is 48 feet. It is desired that Group 2 should extend into the abutment and extend as far as required right of the point of maximum positive moment. According to the AASHTO Specification a value of 0.8 should be multiplied times the basic development length of this group. CONCRETE-7 1, 2, 3, 0.8, 24 FIGURES NOTES In Figure 1 shown above, Group 1 will be extended into the supports and Group 3 will be the first group to be cutoff with is termination point closest to the point of maximum positive moment. The group being defined, No. 2, will be the second group to be cutoff on the right side of the span while it will run into the abutment on the left side of the span. 3/96 14.59 BRASS-GIRDER 1150 COMMAND NAME PURPOSE COMMAND DESCRIPTION BRASS-GIRDER™ CONCRETE-8 CR8 This command defines reinforcing bars that are in the group previously defined by the CONCRETE-8 command. Each bar in the group must be defined. This must be done by inputting each individual bar separately unless bars of the same size and same distance to nearest extreme fiber are input as a group using the correct percent of area to give the total area. Repeat this command until all bars in group are defined. 6 COMMAND PARAMETERS Bar Size Enter the bar size. The minimum bar size is a #3 and the maximum is a #14. D1 Enter the distance in inches from the centroid of the bar to the nearest extreme fiber. Percent of area Default = 100 Enter percent of area of given bar size to be used. Bar Size Enter the bar size. The minimum bar size is a #3 and the maximum is a #14. D1 Enter the distance in inches from the centroid of the bar to the nearest extreme fiber. Percent of area Default = 100 Enter percent of area of given bar size to be used. 3/96 14.60 BRASS-GIRDER EXAMPLE Assume that three #10 bars identified in Figure 1 comprise a group whose bars are being defined. CONCRETE-8 10, 2.75, , 10, 6.25, 200 FIGURES NOTES The two bars in the top row of this group could have been entered first if desired, since bars of a group may be entered in any order regardless of size or location. 3/96 14.61 BRASS-GIRDER 1160 COMMAND DESCRIPTION BRASS-GIRDER™ COMMAND NAME PURPOSE CONCRETE-9 CR9 This command defines flexural bond considerations at simple supports, design moments at faces of interior support and shear reinforcements. This command is required for the ultimate strength preliminary and final runs. Entry No. 1 is needed only for the final run while all other entries are required or optional for both runs. 6 COMMAND PARAMETERS A stirrups Code the area of reinforcing steel in sq. in. for a stirrup whose spacing will then be determined for the final run. Distance (Interior Support Face) Enter distance from end or beginning point of span lengths input to face of interior support in inches. This will be used to calculate the shear value at 'd' from the face of the support. Distance (Exterior Support Face) Enter distance from end or beginning point of span lengths input to face of exterior support in inches. This will be used to calculate the shear value at 'd' from the face of the support. Left Compressive Reaction Enter 1 if reinforcement running into the left simple support is not considered confined by a compressive reaction for checking flexural bond requirements (see AASHTO 8.24.2.3). Right Compressive Reaction Enter 1 if reinforcement running into the right simple support is not considered confined by a compressive reaction for checking flexural bond requirements (see AASHTO 8.24.2.3). Distance (Interior Support Face) Moment If design moment is desired to be taken at face of interior supports enter distance in inches from end or beginning point of span lengths input to face of interior support. 3/96 14.62 BRASS-GIRDER EXAMPLE Assume a reinforced concrete T-girder is being designed under the final run using single #5 stirrups. The reinforcing running into both abutments are considered confined by a compressive reaction for the maximum shear force at the abutments. The distance from the end point of the exterior span to the face of the abutment is 1'3" and the distance from the end point of the interior spans to the face of the interior supports is 1'9". Design moments are not desired at the face of the support. CONCRETE-9 .62, 21, 15 FIGURES NOTES 2/97 14.63 BRASS-GIRDER 1170 COMMAND NAME PURPOSE COMMAND DESCRIPTION BRASS-GIRDER™ PRESTRESS-1 PR1 This is the first in a series of two commands to describe factors affecting the rating of a particular point along the girder. It is required when rating a prestressed girder for load capacity. This series of commands is required for each of up to 212 analysis points allowed. See Note 1. 10 COMMAND PARAMETERS Analysis Point Enter the span point at which an analysis of the girder section is desired. Use the following format: 104 = 4/10 of distance from left end of span 1 along span 1. *106.5 = 65/100 of distance from left end of span 1 along span 1. See note below. 110 = 10/10 of distance from left end of span 1 along span 1. Basically this is the right end of span 1. 200 = 0/10 of distance from left end of span 2 along span 2. Basically this is the left end of span 2. *Note: Only 1/10 points may be analyzed on a span unless there is a node point at the desired location created by a crosssection change or a special analysis point from the HINGE command or TRANSFER command. f * SU Default to AASHTO 9.17.4 Enter the average stress in the prestressing steel at ultimate load, in ksi, for strands defined as Strand Code #1 on the STRAND-ST1 Command. f * SU Default to AASHTO 9.17.4 Enter the average stress in the prestressing steel at ultimate load, in ksi, for strands defined as Strand Code #2 on the STRAND-ST1 Command. f * SU Default to AASHTO 9.17.4 Enter the average stress in the prestressing steel at ultimate load, in ksi, for strands defined as Strand Code #3 on the STRAND-ST1 Command. (Continued) 10/98 14.64 BRASS-GIRDER COMMAND PARAMETERS (Cont.) IMPORTANT: See Notes 2 and 3 for the following two parameters. Enter the nominal moment capacity, in ft-kip, for positive moment. MN+ MN - Enter the nominal moment capacity, in ft-kip, for negative moment. (Input as a positive value.) Leave Blank Leave this parameter blank. Leave Blank Leave this parameter blank. Leave Blank Leave this parameter blank. Intermediate Output For Shear Default = 0 (not output) Enter a 1 if a detailed output report, for shear only, is desired for most of the AASHTO Specification checks. This feature outputs intermediate values which aid in hand computations. Enter a 0 to suppress this report. 2/00 14.65 BRASS-GIRDER EXAMPLE Assume this is a prestressed girder, simple span for DL made continuous for LL by reinforcement over the support in the composite slab. The moment capacity at the support is 1831.6 ft-k for negative moment and 497.2 ft-k for positive moment. The 2.0 and 2.5 span points are to be rated. Two PRESTRESS-1 commands would be required. PRESTRESS-1 PRESTRESS-2 PRESTRESS-1 200 497.2, 205 1831.6 FIGURES NOTES 1. The operating rating is based on the ultimate moment capacity of the section. Therefore, the tensile stress of the prestressed strand is not checked. 2. Normally, BRASS computes the positive and negative moment capacities based on the properties and configuration of the girder and strands. A feature was included in BRASS which allows the user to override the calculated strength of the section based on observed cracking, girder damage, other deterioration, or other engineering logic pertinent to the evaluation of the structure. Inputting values for the following two parameters instructs BRASS to bypass the computation of moment capacities and use the values input by the user. These parameters are intended to only increase or decrease the moment capacity and should not be used to model a section using moment capacities only. As always, strand information must be input using the PROPERTIES-PC2 and STRAND-ST* commands. This information is used in the computation of secondary moments due to prestress loss. 3. If a moment capacity is 0, it must be coded as 0, and not as a blank. Otherwise the program will attempt to calculate a moment capacity. 2/00 14.66 BRASS-GIRDER 3/96 14.67 BRASS-GIRDER 1180 COMMAND NAME PURPOSE COMMAND DESCRIPTION BRASS-GIRDER™ PRESTRESS-2 PR2 This is the second in a series of two commands to describe factors affecting the rating of a particular point along a prestressed girder. It may be used when the user desires to check the load capacity based on a moment capacity when the stress in the layer of tendons nearest the extreme tension fiber reach 90% of the yield point stress and the user desires to input the moment capacity. 2 COMMAND PARAMETERS M90%+ Enter the moment capacity based on 90% yield stress in extreme tension row of strands, in ft-k, for positive moment. M90% - Enter the moment capacity based on 90% yield stress in extreme tension row of strands, in ft-k, for negative moment. Enter as a positive number. 10/97 14.68 BRASS-GIRDER EXAMPLE Assume this is a prestressed box-girder, working stress analysis. The moment capacity of the section when strand nearest the extreme tension fiber reaches 90% of the yield point stress is 54691 ft-k for positive moment and 0 for negative moment. PRESTRESS-2 54691, 0 FIGURES NOTES If the moment capacity is 0.0 it must be coded as 0, and not as a blank, otherwise the program will attempt to calculate a moment capacity. 3/96 14.69 BRASS-GIRDER 3/96 14.70 BRASS-GIRDER Prestressed Concrete Girder Design This component will design prestressed concrete girders in accordance with AASHTO specifications. Either simple-span structures or structures that are simple-span for dead load and made continuous for live load may be designed. Table 1 lists the output reports available. Reports 1 through 31 are printed as a group, span by span. Reports 32 through 40 pertain to the structure as a whole and are printed after Reports 1 through 31. Reports 12 through 32 and 34 through 40 may be eliminated by entering 1 in parameter 3 of the SYSTEM-1 command "Minimum Output". Also, entering a 1 in parameter 4 of the SYSTEM-1 command instead of parameter 3 will eliminate the above reports only where overstressing occurs. Reports 19 through 28 will only be printed if 1 is entered in parameter 5 of the SYSTEM-1 command "Detailed output of stirrup spacing" and "Minimum output" has not been specified. Note: When performing a Prestressed Concrete Girder Design, a minimum of two trucks (HS20T and LANEHS20) are required to run the program. The main part of the current Kansas Prestress Module was written approximately 25 years ago and now contains over 10,000 lines of code. The program was written as a manual iteration design tool with the following analysis steps in mind. a) The engineer makes a guess for the strand eccentricitics at the center and ends of the beam. He runs the program in design mode to have it calculate the number of strands required. b) Using the number of strands obtained from step a) as a reference, the engineer manually calculates eccentricities for actual strand patterns at the center and beam ends. Using the program in analysis mode with minimal output, he checks the output for overstresses for the input strand quantity and eccentricities. c) Step b) is repeated with new strand eccentricities and strand quantities until overstresses are eliminated and an optimized design is achieved. d) The engineer then turns on detailed output and enters the final strand quantities and eccentricities. The program will then report final analysis results for stress checks, negative moment slab reinforcing steel requirements, beam to slab shear stirrup requirements, and positive restraint moment checks. The Prestressed Concrete Girder Design component was developed by the Kansas Department of Transportation. Questions pertaining to design parameters and analysis methods may be directed to: Loren Risch, P.E. Special Assignments Engineer Kansas Department of Transportation Docking State Office Building 9th Floor North Topeka, Kansas 66612 Telephone: (785) 296-3761 Fax: (785) 296-6946 7/99 14.71 BRASS-GIRDER Report No. 1 2 3 4 5 6 7 8 9 10 11 12 13 14 15 16 17 18 19 20 21 22 23 24 25 26 27 28 29 30 31 32 33 34 35 36 37 38 39 40 Report Description Dimensions and Properties P*S Steel Properties & Losses Dead Load Moments at Tenth Points Dead Load Shear at Tenth Points Design Shear, Moment & Reactions Cable Profile Horizontal and Vertical P*S Forces Dead Load Stresses Beam Stresses due to Live Load & P*S Forces Beam Stresses due to Dead Load Plus P*S Forces Beam Stresses at Initial & Final Conditions Slab Stresses due to Dead and Live Load Ultimate Moment Computations - Reinforcement Index, Depth of Compression Block, etc. Ultimate Moments Required and Provided for Positive Live Load Moment Ultimate Moments Required for Negative Live Load Moment Ultimate Shear Computed Stirrup Spacing (1979 Interim 1.6.13) VCW - Positive Moment - Nominal Shear Strength Provided by Concrete When Diagonal Cracking Results From Excessive Principal Stress in Web Positive Cracking Moment for Shear Design VCI - Positive Moment - Nominal Shear Strength Provided by Concrete When Diagonal Cracking Results from Combined Shear and Moment Maximum Ultimate Shear - Positive Moment Stirrup Spacing - Positive Moment Depth of Beam VCW - Negative Moment Maximum Ultimate Shear - Negative Moment Negative Cracking Moments for Shear Design VCI - Negative Moment Stirrup Spacing - Negative Moment Depth of Beam Stirrup Spacing Summary - Positive Moment Condition Stirrup Spacing Summary - Negative Moment Condition Final Stirrup Spacing Summary Horizontal Shear Between Slab and Top of Beam Deflections Summary of Support Reactions PCA Method - Summary of Final Stresses with Restraint Moment Analysis PCA Method - Summary of Restraint End Moments and Analysis Values PCA Method - Design of Extended P*S Strands to Resist Positive Restraint Moment PCI Method - Summary of Final Stresses with Restraint Moment Analysis PCI Method - Summary of Restraint End Moments and Analysis Values PCI Method - Design of Extended P*S Strands to Resist Positive Restraint Moment Comparison of Stresses and End Strand Design for Positive Moment Connection by PCA and PCI Method Table 1 - Prestress Girder Design Description of Output Reports 3/96 14.72 BRASS-GIRDER 3/96 14.73 BRASS-GIRDER 1181 COMMAND NAME PURPOSE COMMAND DESCRIPTION BRASS-GIRDER™ PRESTRESS-3 PR3 This is the first in a series of two commands to define factors affecting the design of prestressed concrete girders. This set of commands is required for each span. Prestressed girder DESIGN only. 10 COMMAND PARAMETERS Span Enter the number of the span. Beam Length Enter the beam length, in feet. See Figure and Note 1. Actual Slab Thickness Enter the thickness of the composite slab, in inches. DELTA-B Enter the weight of any additional dead loads, in kips per foot, to be added to the beam weight. These are loads that will be present when the prestessing force is applied. This could include stay-in-place box beam forms, decorative elements running the length of the girder, or any other beam add on weights. The beam self-weight itself will be calculated by the program using the input beam dimensions and concrete unit weight. DELTA-S Enter the weight of any additional slab dead loads, in kips per foot, which are added to the non-composite slab weight. This could include the weight of the non-composite dead load of the slab outside the effective flange width region, soffits, slab thickening, and fillets. The non-composite slab dead load within the effective flange width region will be calculated by the program using the input slab thickness, effective flange width and concrete unit weight. DELTA-C Enter the weight of any curbs, railing, or medians, in kips per foot, to be added as composite dead loads. Any future wearing surface dead loads should be entered using the next parameter. See Note 2. FWS Enter the weight of the Future Wearing Surface for Span-1 in Kips per foot. This is the weight of the FWS applied along the girder line. This parameter is required to allow the Kansas Prestress Design module to make comparisons between designs with and without the FWS. If this value changes from span-to-span the additional Stage 2 dead loads for subsequent spans can be defined using the appropriate LDE, UL1, and PTD, commands (840, 850, and 860 respectively). Keep in mind that all comparisons will be based on the value of the FWS for Span-1. See Note 2. (Continued) 12/00 14.74 BRASS-GIRDER COMMAND PARAMETERS (Cont.) JFORCE Enter 0 if the program is to determine the number of prestressing strands and compute the values for ALOSS and PSI. The AASHTO Method will be used. Enter 1 if the number of strands and values for ALOSS and PSI are to be input. Enter 2 if the number of strands is to be input and the program is to compute the values of ALOSS and PSI. The AASHTO Method will be used. ALOSS (Total losses minus release losses) If JFORCE is 1, enter the prestressing losses after release (ALOSS), in kips per square inch. If JFORCE is 0 or 2, leave blank and the program will calculate prestressing losses (AASHTO) after release. PSI (Jacking force minus release losses) If JFORCE is 1, enter the initial prestressing force after jacking losses (PSI), in kips. If JFORCE is 0 or 2, leave blank. 3/96 14.75 BRASS-GIRDER EXAMPLE PRESTRESS-3 1, 84.167, 8.5, 0, .035, .034, .200, 0 Span 1 Beam Length = 84.167 ft. Actual Slab Thickness = 8.5 in. DELTA-B = 0 DELTA-S = 35 lb./ft. DELTA-C = 34 lb./ft. FWS = .200 kips/ft. JFORCE = 0 (Program will compute number of strands, ALOSS and PSI) FIGURES NOTES 1. If the beam length exceeds the span length, enter the span length. 2. If you wish to have Stage 2 dead load vary in a general way, leave Parameter-6 (DELTA-C) blank and enter only the Span-1 FWS. Adjustments for Span-2 and subsequent spans can be made by entering the appropriate LDE, UL1, and PTD commands (840, 850, and 860 respectively). These commands are entered following the DLD command. For example, if the superstructure dead load for Stage 2 changes from Span-1 to Span-2 (i.e., possibly due to a change in girder spacing) an adjustment from the value entered for FWS of Span-1 can be made up or down by defining additional Stage 2 dead loads using the appropriate LDE, UL1, and PTD commands for the span under consideration. Keep in mind that all comparisons are still based on the value of the FWS for Span-1. 3. Loads entered in the DEAD-LOAD command will be overwritten by loads entered this command. 12/00 14.76 BRASS-GIRDER 3/96 14.77 BRASS-GIRDER 1182 COMMAND NAME PURPOSE COMMAND DESCRIPTION BRASS-GIRDER™ PRESTRESS-4 PR4 This command defines the location and weight of the diaphragms for prestressed concrete girders. This command must follow a PRESTRESS-3 command. Prestressed girder DESIGN only. 6 COMMAND PARAMETERS S1 Enter the distance from the left end of the span to the first diaphragm, in feet. S2 Enter the distance between the first and second diaphragms, in feet. S3 Enter the distance between the second and third diaphragms, in feet. P1 Enter the weight of the first diaphragms, in kips. P2 Enter the weight of the second diaphragm, in kips. P3 Enter the weight of the third diaphragm, in kips. 3/96 14.78 BRASS-GIRDER EXAMPLE PRESTRESS-4 42.08, , , 3.30 FIGURES NOTES 3/96 14.79 BRASS-GIRDER 1183 COMMAND NAME PURPOSE COMMAND DESCRIPTION BRASS-GIRDER™ PRESTRESS-5 PR5 This command defines the allowable tension stresses and the allowable compressive stress in the composite slab. This command is optional. Prestressed girder DESIGN only. 4 COMMAND PARAMETERS TENLL Default = 0 ksi Enter the allowable tension in the bottom of the girder when the structure is fully loaded, in kips per sq. in. TENBB Default = 3xSQRT (f 'c prestressed) Enter the allowable tension in the bottom of the girder after creep and shrinkage losses, in kips per sq. in. See Note. TENTB Default = 3xSQRT (f 'ci prestressed) Enter the allowable tension in the top of the girder at release, in kips per sq. in. See Note. FC - SLAB Default = 0.40 f 'c slab Enter the allowable compressive stress in the composite slab, in kips per sq. in. 7/99 14.80 BRASS-GIRDER EXAMPLE PRESTRESS-5 .100 Allowable tension when fully loaded = 100 psi All other values default. FIGURES NOTES For a zero allowable tension, enter 0.001. 3/96 14.81 BRASS-GIRDER 1184 COMMAND DESCRIPTION BRASS-GIRDER™ COMMAND NAME PRESTRESS-6 PR6 This command defines the area of shear reinforcement, age of the girder at continuity, length of extension of prestressing strand, and type of curing. This command is optional. PURPOSE Prestress girder DESIGN only. 4 COMMAND PARAMETERS AV Default = 0.40 sq.in. Enter the area of one stirrup, in sq. in. Age Default = 35 days Enter the time, in days, between casting of the girder and the girder becoming continuous. Extension Default = 36 in. Enter the length of the extension of the prestressing strand from the ends of the girder, in inches. Curing Enter MOIST for moist curing of the girder or STEAM for steam curing. 7/99 14.82 BRASS-GIRDER EXAMPLE PRESTRESS-6 , 30, , MOIST Stirrup area defaults to 0.4 sq. in. Girders made continuous at 30 days. Extension length defaults to 30 in. Moist curing. FIGURES NOTES 3/96 14.83 BRASS-GIRDER 1190 BRASS-GIRDER™ COMMAND NAME PURPOSE COMMAND DESCRIPTION TIMBER TMB This command defines factors affecting the rating of a particular point along a timber girder. It is required when rating a timber girder for load capacity for each of up to 212 analysis points. 4 COMMAND PARAMETERS Analysis Point Enter the span point at which an analysis of the girder section is desired. Use the following format: 104 = 4/10 of distance from left end of span 1 along span 1. *106.5 = 65/100 of distance from left end of span 1 along span 1. See Note below. 110 = 10/10 of distance from left end of span 1 along span 1. Basically this is the right end of the span 1. 200 = 0/10 of distance from span 2. Basically this is the left end of span 2. *Note: Only 1/10 points may be analyzed on a span unless there is a node point at the desired location created by a crosssection change or a special analysis point from the HINGE command. LB If the analysis point under consideration is at a support, enter the length of bearing in inches. See B in Figure 1. DB If the analysis point under consideration is at a support enter the distance in inches from the end of the member to the beginning of the bearing area. See DB in Figure 1. WB If the analysis point under consideration is at a support enter the width of the bearing area in inches. See WB in Figure 1. 10/98 14.84 BRASS-GIRDER EXAMPLE Assume it is desired to rate the 1.0 and the 1.5 span points on a timber girder. WB, DB, and LB are 4, 12, and 10 inches respectively. Two TIMBER commands would be required. TIMBER 100, TIMBER 105 10, 12, 4 FIGURES NOTES 3/96 14.85 BRASS-GIRDER 3/96 14.86 BRASS-GIRDER 15. TRUCK & STANDARD CROSS SECTION LIBRARIES BRASS-GIRDER™ has two permanent, updatable libraries which contain descriptive data for trucks and standard cross sections. This section describes the libraries and the commands required to print, change, or add to the libraries. As currently defined, the libraries will hold data for up to 200 trucks and up to 2,000 standard cross sections. The library capacity may be expanded if necessary, however, a computer programmer would be required. Note: A separate executable program must be run to make changes to the libraries (util.exe). The commands in this section will not execute in the same program as those commands preceding this section. Users can execute this program from the "EXECUTE" drop down menu in the Graphical User Interface (Run Library Maintenance) or by entering: "C:\BGIRDER\EXE>UTIL filename.DAT filename.OUT" The END command may not be used when performing library maintenance. 7/99 15.1 BRASS-GIRDER Standard Shapes Library - Elements Required Keyfield - User input of to 12 alpha numeric characters Examples: W12X56, AASHTO-IV, WYO-ST6 Library elements: Field Description: 1. Section Designation A12 2. Description of Section 40 Characters 3. Nominal Depth (Inches) F6.1 4. Weight per foot (Lbs) F7.2 5. Area (Sq. In.) F7.2 6. Actual Depth (Inches) F6.2 7. Top Flange Width (Inches) F7.3 8. Bottom Flange Width (Inches) F7.3 9. Top Flange Thickness (Inches) F6.3 10. Bottom Flange Thickness (Inches) F6.3 11. Top Web Width (Inches) F6.3 12. Bottom Web Width (Inches) F6.3 13. Web Depth (Inches) F7.3 14. Moment of Inertia X axis (In4) F10.1 15. Moment of Inertia Y axis (In4) F10.1 16. Z Plastic Modulus Y axis (In3) F9.1 17. Z Plastic Modulus X axis (In3) F9.1 18. Top Cover Plate Width (Inches) F7.3 19. Bottom Cover Plate Width (Inches) F7.3 20. Top Cover Plate Thickness (Inches) F7.3 21. Bottom Cover Plate Thickness (Inches) F6.3 22. Clearance top of top flange to bottom of top cover plate (Inches) F6.3 23. Clearance bottom of bottom flange to top of bottom cover plate (Inches) F6.3 3/96 15.2 BRASS-GIRDER 24. Distance from bottom of bottom flange to x-x neutral axis (Inches) F6.3 25. Taper dimension F1 (Inches) F7.3 26. Taper dimension F2 (Inches) F7.3 27. Fillet dimension F3 (Inches) F7.3 28. Fillet dimension F4 (Inches) F7.3 29. Taper dimension F5 (Inches) F6.3 30. Taper dimension F6 (Inches) F6.3 31. Fillet dimension F7 (Inches) F6.3 32. Fillet dimension F8 (Inches) F6.3 33. Distance above centroid to analysis plane number 1 (Inches) F7.3 34. Distance above centroid to analysis plane number 2 (Inches) F7.3 35. Distance above centroid to analysis plane number 3 (Inches) F7.3 36. Distance below centroid to analysis plane number 5 (Inches) F7.3 37. Distance below centroid to analysis plane number 6 (Inches) F7.3 38. Distance below centroid to analysis plane number 7 (Inches) F7.3 39. 35 Blank Characters. 3/96 15.3 BRASS-GIRDER 3/96 15.4 BRASS-GIRDER Truck Library - Elements required Keyfield - User input up to 12 alpha numeric. Examples: HS20T, LANEHS20, MILITARY Library Elements: Field Description: 1. Truck Code A12 2. Uniform weight per foot for lane load equivalent to one wheel line (Kips/ft) F7.3 3. Concentrated load for shear for one wheel line (Kips) F7.3 4. Concentrated load for moment for on wheel line (Kips) F7.3 5. Total weight of truck (Tons) F7.3 6. 14 Blank Characters 7. Description of truck 40 Characters 8. Weight of wheel load #1 (Kips) Axle weight - 2 F7.3 9. Distance to axle #1 (always 0.0) F7.3 10. Weight of wheel load #2 (Kips) Axle weight - 2 F7.3 11. Spacing from axle #1 to axle #2 (Feet) F7.3 Repeat for each axle up to 24 axles. 54. Weight of wheel load #24 (Kips) Axle weight - 2 F7.3 55. Spacing from axle #23 to axle #24 (Feet) F7.3 3/96 15.5 BRASS-GIRDER 1200 COMMAND NAME PURPOSE COMMAND DESCRIPTION BRASS-GIRDER™ NEW-TRUCK-1 NT1 This command adds a lane load type of truck to the "Truck Library" or updates an existing lane load type of truck on the truck library. To update, enter the truck code and the parameter(s) that are to be changed. This command is required for adding either a truck or lane load to the "Truck Library". 5 COMMAND PARAMETERS Truck Code (Required) Up to 11 alpha numeric characters to identify the truck to be described by the following parameters. If updating an existing entry be sure to use exactly the same truck code as currently resides on the library. See Notes. Uniform Lane Load Enter the uniform load per foot equivalent to one wheel line. This would be the usual lane load divided by 2. Use kips/foot. Concentrated Load for Shear Enter the concentrated load for shear equivalent to one wheel line. This would be the usual value divided by 2. Use kips. Concentrated Load for Moment Enter the concentrated load for moment equivalent to one wheel line. This would be the usual value divided by 2. Use kips. Truck Weight (Required) Enter the total weight of the truck in tons. This will be used in the rating report. 3/96 15.6 BRASS-GIRDER EXAMPLE To store an AASHTO HS20 lane load on the "Truck Library", the command would be used as follows: NEW-TRUCK-1 LANEHS20, 0.32, 13, 9, 36 FIGURES NOTES The truck code for an AASHTO HS type truck with variable axle spacing must begin with the letters HS. This is the signal to BRASS to vary the rear axle spacing from 14 feet to 30 feet by one foot increments. Truck codes for AASHTO lane loads must begin with LANE. See Note on page 15.1 for instructions to run the Truck/Sections Library update program. 3/96 15.7 BRASS-GIRDER 1210 COMMAND NAME PURPOSE COMMAND DESCRIPTION BRASS-GIRDER™ NEW-TRUCK-2 NT2 This command is used to enter up to 40 characters to describe a truck stored in the "Truck Library". 2 COMMAND PARAMETERS Truck Code (Required) Enter the truck code of the truck to which the following descriptive data will apply. Description Enter up to forty characters to describe the truck. 3/96 15.8 BRASS-GIRDER EXAMPLE To describe an AASHTO HS20 lane load, the command could be used as follows: NEW-TRUCK-2 LANEHS20, AASHTO LANE LOAD FOR HS20 TRUCK FIGURES NOTES 3/96 15.9 BRASS-GIRDER 1220 COMMAND NAME PURPOSE BRASS-GIRDER™ COMMAND DESCRIPTION NEW-TRUCK-3 NT3 This command describes the wheel weights and spacings of a truck to be added to the "Truck Library" or to update an existing truck in the library. To update, enter the truck code and the parameter(s) that are to be changed. Repeat as often as needed. 4 COMMAND PARAMETERS Truck Code (Required) Up to 12 alpha numeric characters to identify the truck to be described by the following parameters. If updating an existing entry be sure to use exactly the same truck code as currently resides in the library. Wheel Number Enter the wheel number to be described by the following two parameters - count wheel number beginning at the front of the truck. Wheel Weight Enter the weight of the wheel in kips. Spacing to Wheel #+1 Enter the distance in feet from this wheel # to the wheel # + 1. If this is the last wheel number, enter 0 or leave blank. 3/96 15.10 BRASS-GIRDER EXAMPLE To describe an AASHTO HS20 truck, the command would be used as follows: NEW-TRUCK-3 NEW-TRUCK-3 NEW-TRUCK-3 HS20T, 1, HS20T, 2, HS20T, 3, 4, 16, 16, 14 14.0 0.0 To describe a Wyoming type 3 truck (see Figure 1) the command would be used as follows: NEW-TRUCK-3 NEW-TRUCK-3 NEW-TRUCK-3 WYO TYPE3,1, WYO TYPE3,2, WYO TYPE3,3, 4, 9, 9, 15.0 4.0 0.0 FIGURES NOTES 10/97 15.11 BRASS-GIRDER 1230 BRASS-GIRDER™ COMMAND NAME COMMAND DESCRIPTION DELETE-TRUCK DTK This command allows the user to delete trucks from the "Truck Library". PURPOSE This command may be repeated if more than 6 trucks are to be deleted. 6 COMMAND PARAMETERS Truck Code Enter the truck code of the first truck to be deleted. Truck Code Enter the truck code of the second truck to be deleted. Truck Code Enter the truck code of the third truck to be deleted. Truck Code Enter the truck code of the fourth truck to be deleted. Truck Code Enter the truck code of the fifth truck to be deleted. Truck Code Enter the truck code of the sixth truck to be deleted. 3/96 15.12 BRASS-GIRDER EXAMPLE To delete the truck whose code is WYOTYPE 3 the command would be used as follows: DELETE-TRUCK WYOTYPE 3 FIGURES NOTES See Note on page 15.1 for instructions to run the Truck/Sections Library update program. 10/97 15.13 BRASS-GIRDER 1240 COMMAND NAME PURPOSE COMMAND DESCRIPTION BRASS-GIRDER™ PRINT-TRUCK PTK This command is used to print all or part of the "Truck Library". 6 COMMAND PARAMETERS Truck Code Enter the truck code of the first truck for which data is to be printed. This parameter may be used to control the printing of either a summary listing or a complete listing of the "Truck Library". For summary listing, enter LIST. For complete listing, enter DUMP. Truck Code Enter the truck code of the second truck for which data is to be printed. Truck Code Enter the truck code of the third truck for which data is to be printed. Truck Code Enter the truck code of the fourth truck for which data is to be printed. Truck Code Enter the truck code of the fifth truck for which data is to be printed. Truck Code Enter the truck code of the sixth truck for which data is to be printed. 3/96 15.14 BRASS-GIRDER EXAMPLE To print the entire "Truck Library" the command would be used as follows: PRINT-TRUCK DUMP To print the axle weight and spacing data for several trucks in the "Truck Library" the command would be used as follows: PRINT-TRUCK HS20T, WYOTYPE3 FIGURES NOTES See Note on page 15.1 for instructions to run the Truck/Sections Library update program. 3/96 15.15 BRASS-GIRDER 1250 COMMAND NAME PURPOSE COMMAND DESCRIPTION BRASS-GIRDER™ NEW-SECT-1 NS1 This is the first in a series of eight required commands used to add a standard girder cross section to the “Standard Sections Library” or update an existing standard girder cross section in the “Standard Sections Library.” To update a cross section property, enter the Section Code and the parameter to be changed. If no parameters are to be changed, the command may be omitted. 6 COMMAND PARAMETERS Section Code (Required) Enter up to 12 alpha numeric characters to identify the girder cross section to be described by the following parameters. When adding a new section, ensure the Section Code does not already exist in the library. If updating an existing entry, be sure to use exactly the same Section Code as currently resides in the library. See Note 1. Nominal Depth If this is an AISC standard rolled shape or an AASHTO PCI girder, enter the nominal depth of the section, in inches. This depth is not used in calculations, only as an identifier. Weight Per Foot Enter the weight per lineal foot, in pounds, of the section. Area Enter the cross-sectional area, in square inches, of the girder section (flanges, web, fillets, and tapers only). Enter 0.0 or blank if you want BRASS-GIRDER™ to calculate the area. See Notes 2 and 3. Actual Depth Enter the actual total depth of the section, in inches. Top Flange Width Enter the width of the top flange, in inches. 10/98 15.16 BRASS-GIRDER EXAMPLE See Page 15.32 FIGURES NOTES 1. In the standard sections library, some standard shapes begin with “W” and “WN” (i.e., W24X76 and WN24X76). In 1985, AISC changed the dimensions of several steel shapes while keeping the same designation. To differentiate between the two types (especially when the older shape is needed to perform a rating) an “N” was added to the shape designation to indicate a NEW shape. 2. If a zero or blank is entered for the area, BRASS-GIRDER™ will compute the girder area, girder moment of inertia about the x axis, and the distance from the bottom of the bottom flange to the girder centroid. These results will be stored internally in BRASS-GIRDER™ prior to analysis. These results will not be added to the library itself. NOTE: If you want BRASSGIRDER™ to compute the girder area, you must also enter a zero or blank for moment of inertia about the x axis (NEW-SECT-3 command, parameter 3), and distance from the bottom of the bottom flange to the girder centroid (NEW-SECT-5 command, parameter 3). 3. During analysis BRASS-GIRDER™ will compute the total area (girder plus cover plates), total moment of inertia about the x axis, and the total distance from the bottom of the bottom cover plate to the centroid using: 1) The girder section properties and dimensions entered in the library; 2) The girder section properties computed by BRASS (see Note 2 above); and 3) User defined dimensions entered in the XSECT-x commands (see Note 3 on page 9.13). The combined girder and cover plate results will be shown in the BRASS-GIRDER™ analysis output file for the standard section. If an effective concrete flange is coded in the XSECT-C or is entered in the standard section library, it will not be applied until Stage 2. 10/98 15.17 BRASS-GIRDER 1260 COMMAND DESCRIPTION BRASS-GIRDER™ COMMAND NAME PURPOSE NEW-SECT-2 NS2 This is the second in a series of eight required commands used to add a standard girder cross section to the “Standard Sections Library” or update an existing standard girder cross section in the “Standard Sections Library.” To update a cross section property, enter the Section Code and the parameter to be changed. If no parameters are to be changed, the command may be omitted. 6 COMMAND PARAMETERS Section Code (Required) Enter up to 12 alpha numeric characters to identify the girder cross section to be described by the following parameters. If updating an existing entry be sure to use exactly the same Section Code as currently resides in the library. Bottom Flange Width Enter the width of the bottom flange in inches. Top Flange Thickness Enter the thickness of the top flange in inches. Bottom Flange Thickness Enter the thickness of the bottom flange in inches. Top Web Width Enter the web width at the top of the web in inches. Bottom Web Width Enter the web width at the bottom of the web in inches. 10/98 15.18 BRASS-GIRDER EXAMPLE See Page 15.32 FIGURES NOTES 3/96 15.19 BRASS-GIRDER 1270 COMMAND NAME PURPOSE COMMAND DESCRIPTION BRASS-GIRDER™ NEW-SECT-3 NS3 This is the third in a series of eight required commands used to add a standard girder cross section to the “Standard Sections Library” or update an existing standard girder cross section in the “Standard Sections Library.” To update a cross section property, enter the Section Code and the parameter to be changed. If no parameters are to be changed, the command may be omitted. 6 COMMAND PARAMETERS Section Code (Required) Enter up to 12 alpha numeric characters to identify the girder cross section to be described by the following parameters. If updating an existing entry be sure to use exactly the same Section Code as currently resides in the library. Web Depth Enter the depth of the web between flanges in inches. See Figures. Moment of inertia x axis Enter the moment of inertia about the x axis, in inches4, of the girder section (including flanges, web, tapers, and fillets). Enter 0.0 or blank if you want BRASS- Girder to compute this value. Important: See Notes 1 and 2. Moment of inertia y axis Enter the moment of inertia about the y axis, in inches4, of the girder section (including flanges, web, tapers, and fillets). See Note 3. Z Plastic Modulus y axis Enter the plastic modulus in, inches3, about the y axis. If you want BRASS-GIRDER™ to compute the plastic modulus, leave this parameter blank. Z Plastic Modulus x axis Enter the plastic modulus, in inches3, about the x axis. If you want BRASS-GIRDER™ to compute the plastic modulus, leave this parameter blank. 10/98 15.20 BRASS-GIRDER EXAMPLE See Page 15.32 FIGURES NOTES 1. If a zero or blank is entered for the area (NEW-SECT-1 command, parameter 4), BRASSGIRDER™ will compute the girder area, girder moment of inertia about the x axis, and the distance from the bottom of the bottom flange to the girder centroid. These results will be stored internally in BRASS-GIRDER™ prior to analysis. These results will not be added to the library itself. NOTE: If you want BRASS-GIRDER™ to compute the girder moment of inertia about the x axis, you must also enter a zero or blank for area (NEW-SECT-1 command, parameter 4), and distance from the bottom of the bottom flange to the girder centroid (NEW-SECT-5 command, parameter 3). 2. During analysis BRASS-GIRDER™ will compute the total area (girder plus cover plates), total moment of inertia about the x axis, and the total distance from the bottom of the bottom cover plate to the centroid using: 1) The girder section properties and dimensions entered in the library; 2) The girder section properties computed by BRASS (see Note 1 above); and 3) User defined dimensions entered in the XSECT-x commands (see Note 3 on page 9.13). The combined girder and cover plate results will be shown in the BRASS-GIRDER™ analysis output file for the standard section. If an effective concrete flange is coded in the XSECT-C or is entered in the standard section library, it will not be applied until Stage 2. 3. BRASS-GIRDER™ will not compute the moment of inertia about the y axis based on library values. The user must input this value. 10/98 15.21 BRASS-GIRDER 1280 COMMAND DESCRIPTION BRASS-GIRDER™ COMMAND NAME PURPOSE NEW-SECT-4 NS4 This is the fourth in a series of eight required commands used to add a standard girder cross section to the “Standard Sections Library” or update an existing standard girder cross section in the “Standard Sections Library.” To update a cross section property, enter the Section Code and the parameter to be changed. If no parameters are to be changed, the command may be omitted. 6 COMMAND PARAMETERS Section Code (Required) Enter up to 12 alpha numeric characters to identify the girder cross section to be described by the following parameters. If updating an existing entry be sure to use exactly the same Section Code as currently resides in the library. Top Cover Plate Width Enter the width of the top cover plate or composite slab in inches. See Notes. Bottom Cover Plate Width Enter the width of the bottom cover plate in inches. See Notes. Top Cover Plate Thickness Enter the thickness of the top cover plate on composite slab in inches. See Notes. Bottom Cover Plate Thickness Enter the thickness of the bottom cover plate in inches. See Notes. Top Cover Plate Clearance Enter the vertical clearance between the top of the top flange and the bottom of the top cover plate or composite slab in inches. 10/98 15.22 BRASS-GIRDER EXAMPLE See Page 15.32 FIGURES NOTES 1. If a standard section has an effective concrete flange, a top cover plate, or a bottom cover plate as part of the section defined in the standard sections library, parameters 1, 2, 4, and/or 5 of the XSECT-C command will not override the library values. 2. During analysis BRASS-GIRDER™ will compute the total area (girder plus cover plates), total moment of inertia about the x axis, and the total distance from the bottom of the bottom cover plate to the centroid using: 1) The girder section properties and dimensions entered in the library; 2) The girder section properties computed by BRASS (see Note 1, page 15.21); and 3) User defined dimensions entered in the XSECT-x commands (see Note 3 on page 9.13). The combined girder and cover plate results will be shown in the BRASS-GIRDER™ analysis output file for the standard section. If an effective concrete flange is coded in the XSECT-C or is entered in the standard section library, it will not be applied until Stage 2. 10/98 15.23 BRASS-GIRDER 1290 COMMAND NAME PURPOSE COMMAND DESCRIPTION BRASS-GIRDER™ NEW-SECT-5 NS5 This is the fifth in a series of eight required commands used to add a standard girder cross section to the “Standard Sections Library” or update an existing standard girder cross section in the “Standard Sections Library.” To update a cross section property, enter the Section Code and the parameter to be changed. If no parameters are to be changed, the command may be omitted. 6 COMMAND PARAMETERS Section Code (Required) Enter up to 12 alpha numeric characters to identify the girder cross section to be described by the following parameters. If updating an existing entry be sure to use exactly the same Section Code as currently resides in the library. Bottom Cover Enter the vertical clearance between the top of the bottom cover plate and the bottom of the bottom flange in inches. y-Bar Enter the vertical distance from the bottom of the bottom flange to the x-x neutral axis of the girder section, in inches. See Notes. F1 Enter the taper dimension F1 in inches. See Figure 2. F2 Enter the taper dimension F2 in inches. See Figure 2. F3 Enter the fillet dimension F3 in inches. See Figures 1 and 2. 10/98 15.24 BRASS-GIRDER EXAMPLE See Page 15.32 FIGURES NOTES 1. If a zero or blank is entered for the area (NEW-SECT-1 command, parameter 4), BRASSGIRDER™ will compute the girder area, girder moment of inertia about the x axis, and the distance from the bottom of the bottom flange to the girder centroid. These results will be stored internally in BRASS-GIRDER™ prior to analysis. These results will not be added to the library itself. NOTE: If you want BRASS-GIRDER™ to compute the distance from the bottom of the bottom flange to the girder centroid, you must also enter a zero or blank for area (NEW-SECT-1 command, parameter 4), and girder moment of inertia about the x axis (NEW-SECT-3 command, parameter 3). 2. During analysis BRASS-GIRDER™ will compute the total area (girder plus cover plates), total moment of inertia about the x axis, and the total distance from the bottom of the bottom cover plate to the centroid using: 1) The girder section properties and dimensions entered in the library; 2) The girder section properties computed by BRASS (see Note 1 above); and 3) User defined dimensions entered in the XSECT-x commands (see Note 3 on page 9.13). The combined girder and cover plate results will be shown in the BRASS-GIRDER™ analysis output file for the standard section. If an effective concrete flange is coded in the XSECT-C or is entered in the standard section library, it will not be applied until Stage 2. 10/98 15.25 BRASS-GIRDER 1300 COMMAND NAME PURPOSE COMMAND DESCRIPTION BRASS-GIRDER™ NEW-SECT-6 NS6 This is the sixth in a series of eight required commands used to add a standard girder cross section to the “Standard Sections Library” or update an existing standard girder cross section in the “Standard Sections Library.” To update a cross section property, enter the Section Code and the parameter to be changed. If no parameters are to be changed, the command may be omitted. 6 COMMAND PARAMETERS Section Code (Required) Enter up to 12 alpha numeric characters to identify the girder cross section to be described by the following parameters. If updating an existing entry be sure to use exactly the same Section Code as currently resides in the library. F4 Enter the fillet dimension F4 in inches. See Figures 1 and 2. F5 Enter the taper dimension F5 in inches. See Figure 2. F6 Enter the taper dimension F6 in inches. See Figure 2. F7 Enter the fillet dimension F7 in inches. See Figures 1 and 2. F8 Enter the fillet dimension F8 in inches. See Figures 1 and 2. 10/98 15.26 BRASS-GIRDER EXAMPLE See Page 15.32 FIGURES NOTES 3/96 15.27 BRASS-GIRDER 1310 COMMAND NAME PURPOSE COMMAND DESCRIPTION BRASS-GIRDER™ NEW-SECT-7 NS7 This is the seventh in a series of eight required commands used to add a standard girder cross section to the “Standard Sections Library” or update an existing standard girder cross section in the “Standard Sections Library.” To update a cross section property, enter the Section Code and the parameter to be changed. If no parameters are to be changed, the command may be omitted. 6 COMMAND PARAMETERS Section Code (Required) Enter up to 12 alpha numeric characters to identify the girder cross section to be described by the following parameters. If updating an existing entry be sure to use exactly the same Section Code as currently resides in the library. Distance to Plane 1 Enter the distance from the x-x neutral axis to analysis plane #1 in inches. See Figure 1. Distance to Plane 2 Enter the distance from the x-x neutral axis to analysis plane #2 in inches. See Figure 1. Distance to Plane 3 Enter the distance from the x-x neutral axis to analysis plane #3 in inches. See Figure 1. Distance to Plane 5 Enter the distance from the x-x neutral axis to analysis plane #5 in inches. See Figure 1. Distance to Plane 6 Enter the distance from the x-x neutral axis to analysis plane #6 in inches. See Figure 1. 10/98 15.28 BRASS-GIRDER EXAMPLE See Page 15.32 FIGURES NOTES Analysis planes may be designated as desired by the user. In general, stresses will be calculated at the analysis planes by f = Mc where c is the distance from the analysis plane to the centroid. I 3/96 15.29 BRASS-GIRDER 1320 COMMAND DESCRIPTION BRASS-GIRDER™ COMMAND NAME PURPOSE NEW-SECT-8 NS8 This is the eighth in a series of eight required commands used to add a standard girder cross section to the “Standard Sections Library” or update an existing standard girder cross section in the “Standard Sections Library.” To update a cross section property, enter the Section Code and the parameter to be changed. If no parameters are to be changed, the command may be omitted. 3 COMMAND PARAMETERS Section Code (Required) Enter up to 12 alpha numeric characters to identify the girder cross section to be described by the following parameters. If updating an existing entry be sure to use exactly the same Section Code as currently resides in the library. Distance to Plane #7 Enter the distance from the x-x neutral axis to analysis plane #7 in inches. See Figure 1. Cross Section Description Enter up to forty characters used to describe the cross section. 10/98 15.30 BRASS-GIRDER EXAMPLE To describe a typical cross section, the command would be used as follows: NEW-SECT-8 EXAMPLE, 13, WYOMING STANDARD NO. 1625N Also See Page 15.32 FIGURES NOTES 3/96 15.31 BRASS-GIRDER EXAMPLE For the example typical section shown below in Figure 1, the NEW-SECT-# series would be used as follows: NEW-SECT-1 EXAMPLE, , , 42.13, 24, 10 NEW-SECT-2 EXAMPLE, 10, 1, 1, 1, 1 NEW-SECT-3 EXAMPLE, 22, 3548.90, 168.50, , NEW-SECT-4 EXAMPLE, 22, 22, 2, 2, 1 NEW-SECT-5 EXAMPLE, 1, 12, , , .25 NEW-SECT-6 EXAMPLE, .25, , , .25, .25 NEW-SECT-7 EXAMPLE, 15, 12, 11, 11, 12 NEW-SECT-8 EXAMPLE, 15, EXAMPLE SECTION FOR USER MANUAL See Note on page 15.1 for instructions to run the Truck/Sections Library update program. 10/98 15.32 BRASS-GIRDER 3/96 15.33 BRASS-GIRDER 1330 COMMAND DESCRIPTION BRASS-GIRDER™ COMMAND NAME DELETE-SECT DSC This command is used to delete sections from the "Standard Shapes Library". PURPOSE This command may be repeated if more than 6 sections are to be deleted. 6 COMMAND PARAMETERS Section Code Enter the section code of the first set of cross section data to be deleted from the "Standard Shapes Library". Section Code Enter the section code of the second set of cross section data to be deleted from the "Standard Shapes Library". Section Code Enter the section code of the third set of cross section data to be deleted from the "Standard Shapes Library". Section Code Enter the section code of the fourth set of cross section data to be deleted from the "Standard Shapes Library". Section Code Enter the section code of the fifth set of cross section data to be deleted from the "Standard Shapes Library". Section Code Enter the section code of the sixth set of cross section data to be deleted from the "Standard Shapes Library". 3/96 15.34 BRASS-GIRDER EXAMPLE To delete the data for the typical cross section named EXAMPLE, the command would be utilized as follows: DELETE-SECT EXAMPLE FIGURES NOTES See Note on page 15.1 for instructions to run the Truck/Section Library update program. 3/96 15.35 BRASS-GIRDER 1340 COMMAND DESCRIPTION BRASS-GIRDER™ COMMAND NAME PRINT-SECT PSC This command is used to print all or part of the "Standard Shapes Library". PURPOSE This command may be repeated if necessary. To print the entire library, leave all six parameters blank. 6 COMMAND PARAMETERS Section Code Enter the section code of the first set of typical cross section data to be printed. See Notes. This parameter may be used to control the printing of either a summary listing or a complete listing of the "Standard Shapes Library". For summary listing, enter LIST. For complete listing, enter DUMP. Section Code Enter the section code of the second set of typical cross section data to be printed. See Notes. Section Code Enter the section code of the third set of typical cross section data to be printed. See Notes. Section Code Enter the section code of the fourth set of typical cross section data to be printed. See Notes. Section Code Enter the section code of the fifth set of typical cross section data to be printed. See Notes. Section Code Enter the section code of the sixth set of typical cross section data to be printed. See Notes. 10/98 15.36 BRASS-GIRDER EXAMPLE To print the data for the cross section code EXAMPLE, the command would be utilized as follows: PRINT-SECTEXAMPLE FIGURES NOTES The output file created by this command is simply an echo of the user defined standard section library values. The area, moment of inertia, and the distance to the centroid of the section are relative to the girder section composed of the flanges, web, fillets, and tapers. It does not include the section properties of the cover plates or effective concrete slab. For this reason, the values in this output file may not equal the values in the BRASS-GIRDER™ analysis output which includes the combination of the section properties of the girder with the section properties of the cover plates and/or an effective flange (depending on the stage). See Note on page 15.1 for instructions to run the Truck/Sections Library update program. 10/98 15.37 BRASS-GIRDER 10/98 15.38 BRASS-GIRDER Contents of Truck Library - truck.lby TRUCK CODE: TRUCK CODE: TRUCK CODE: TRUCK CODE: TRUCK CODE: TRUCK CODE: TRUCK CODE: TRUCK CODE: TRUCK CODE: TRUCK CODE: TRUCK CODE: TRUCK CODE: TRUCK CODE: TRUCK CODE: TRUCK CODE: TRUCK CODE: TRUCK CODE: TRUCK CODE: TRUCK CODE: TRUCK CODE: TRUCK CODE: TRUCK CODE: TRUCK CODE: TRUCK CODE: TRUCK CODE: TRUCK CODE: TRUCK CODE: TRUCK CODE: TRUCK CODE: TRUCK CODE: TRUCK CODE: TRUCK CODE: TRUCK CODE: TRUCK CODE: TRUCK CODE: TRUCK CODE: TRUCK CODE: TRUCK CODE: TRUCK CODE: TRUCK CODE: TRUCK CODE: 2/03 HS25T LANEHS25 HS20T LANEHS20 HS15T LANEHS15 H20T H15T H10T MILITARY TYPE3 TYPE3S2 TYPE3-3 TRIPLE SINGLE LANEH20 LANEH15 MX MXC T1 T2 T3 T4 T5 T6 T7 T8 T9 T10 T11 T12 T13 T9A T10A T11A T12A T13A T1B T2B T3B T4B AASHTO HS25-44 (MS 22.5) TRUCK AASHTO HS25-44 (MS 22.5) LANE AASHTO HS20-44 (MS 18) TRUCK AASHTO HS20-44 (MS 18) LANE AASHTO HS15-44 (MS 13.5) TRUCK AASHTO HS15-44 (MS 13.5) LANE AASHTO H20-44 (M 18) TRUCK AASHTO H15-44 (M 13.5) TRUCK AASHTO H10 TRUCK AASHTO ALTERNATE MILITARY LOADING AASHTO TYPE 3 RATING TRUCK AASHTO TYPE 3S2 RATING TRUCK AASHTO TYPE 3-3 RATING TRUCK WYOMING TRIPLE RATING TRUCK WYO CONSTRUCTION SINGLE (SCRAPER) H20-44 AASHTO LANE LOAD H15-44 AASHTO LANE LOAD AIR FORCE MX MISSLE CARRIER AIR FORCE MX MISSLE CANISTER OVERLOAD TRUCK 1 OVERLOAD TRUCK 2 OVERLOAD TRUCK 3 OVERLOAD TRUCK 4 OVERLOAD TRUCK 5 OVERLOAD TRUCK 6 OVERLOAD TRUCK 7 OVERLOAD TRUCK 8 OVERLOAD TRUCK 9 OVERLOAD TRUCK 10 OVERLOAD TRUCK 11 OVERLOAD TRUCK 12 OVERLOAD TRUCK 13 97.5 T TRUCK 100.5 T TRUCK 110.5 T TRUCK 121.5 T TRUCK 124.5 T TRUCK TRUCK T1B - 50T TRUCK T2B - 53T TRUCK T3B - 65T TRUCK T4B - 57.5T TRUCK CODE: TRUCK CODE: TRUCK CODE: TRUCK CODE: TRUCK CODE: TRUCK CODE: TRUCK CODE: TRUCK CODE: TRUCK CODE: TRUCK CODE: TRUCK CODE: TRUCK CODE: TRUCK CODE: TRUCK CODE: TRUCK CODE: TRUCK CODE: TRUCK CODE: TRUCK CODE: TRUCK CODE: TRUCK CODE: TRUCK CODE: TRUCK CODE: TRUCK CODE: TRUCK CODE: TRUCK CODE: TRUCK CODE: TRUCK CODE: TRUCK CODE: TRUCK CODE: TRUCK CODE: TRUCK CODE: TRUCK CODE: TRUCK CODE: TRUCK CODE: TRUCK CODE: TRUCK CODE: TRUCK CODE: TRUCK CODE: TRUCK CODE: TRUCK CODE: TRUCK CODE: TRUCK CODE: 15.39 T5B T6B T7B T8B T9B T10B T11B T12B T13B CR1 GETT1 GETT2 MASH608 MASH610 F3 F1 F4 F2 MODTYPE3-3 ATA2 ATA1 ATA3 ATA4 ATA5 ATA6 ATA7 ATA8 ATA9 ATA10 JAKES PRESS1 PRESS3 PRESS2 PRESS1A PRESS2A CRANE TCLOSE SAVAGE PRESS3A1 PRESS3A2 F1MOD PRESS3A3 TRUCK T5B - 66.5T TRUCK T6B - 63.5T TRUCK T7B - 69.5T TRUCK T8B - 68T TRUCK T9B - 89T TRUCK - 92T TRUCK T11B - 102.5T TRUCK T12B - 114.5T TRUCK T13B - 117.5T 151 TON OVERLOAD TRUCK DOUBLE-WIDE OVERLOAD SINGLE-WIDE OVERLOAD MASHBURN OVERLOAD TRUCK 2 LANES WIDE MASHBURN OVERLOAD TRUCK 2 LANES WIDE OVERLOAD TRUCK FORMULA DEVELOPMENT OVERLOAD TRUCK FORMULA DEVELOPMENT OVERLOAD TRUCK FORMULA DEVELOPMENT OVERLOAD TRUCK FORMULA DEVELOPMENT 141 KIP LONGER COMBINATION VEHICLE SHORT TRAILER 3S2 82K GVW. 0.000 0.000 0.000 0.000 0.000 0.0 TRI-AXLE 6 AXLE 92K GVW STAA DOUBLE 5 AXLE 92K GVW ROCKY MOUNT DOUBLE 7 AXLE 105K GVW WHI B TRAIN 9 AXLE 105K GVW SHT TURNPIKE DBL 9 AXLE 105K GVW WHI TRIPLE TRAILER 7 AXLE 115K GVW TURNPIKE DOUBLE 9 AXLE 115K GVW TURNPIKE DOUBLE 9 AXLE 130K GVW 14 FT WIDE WITH NARROW DOLLYS EXCHANGER BOX ABSORBER BOX COLUMN BOX EXCHANGER BOX COLUMN BOX PAUL JOHNSON CRANE 5-18-89 WYOMING TYPE PICKUP TRUCK OVERWGT LOAD FOR SAVAGE INDUSTRIES ABSORBER BOX ABSORBER BOX OVERLD TRUCK FORMULA DEVELOPMENT ABSORBER BOX BRASS-GIRDER TRUCK CODE: TRUCK CODE: TRUCK CODE: TRUCK CODE: TRUCK CODE: TRUCK CODE: TRUCK CODE: TRUCK CODE: TRUCK CODE: TRUCK CODE; TRUCK CODE: TRUCK CODE: TRUCK CODE: TRUCK CODE: 2/03 QUARRY1 QUARRY2 RANGER RANGER1 RANGER2 RANGER3 RANGER4 RANGER5 RANGER6 RANGER7 P13 WYOTYPE 3 WYOTYPE 3S2 WYOTYPE 3-3 OVERWEIGHT LOAD FOR GRANITE CANYON QUARRY OVERWEIGHT LOAD FOR GRANITE CANYON QUARRY OVERWEIGHT LOAD FOR RANGER TRANSPORT OVERWEIGHT LOAD FOR RANGER1 TRANSPORT OVERWEIGHT LOAD FOR RANGER2 TRANSPORT OVERWEIGHT LOAD FOR RANGER3 TRANSPORT OVERWEIGHT LOAD FOR RANGER4 TRANSPORT OVERWEIGHT LOAD FOR RANGER5 TRANSPORT OVERWEIGHT LOAD FOR RANGER6 TRANSPORT OVERWEIGHT LOAD FOR RANGER7 TRANSPORT MAX CALIF PERMIT VEHICLE WYOMING TYPE 3 RATING TRUCK WYOMING TYPE 3S2 RATING TRUCK WYOMING TYPE 3-3 RATING TRUCK 15.40 BRASS-GIRDER Contents of Sections Library - sections.lby SECTION CODE: SECTION CODE: SECTION CODE: SECTION CODE: SECTION CODE: SECTION CODE: SECTION CODE: SECTION CODE: SECTION CODE: SECTION CODE: SECTION CODE: SECTION CODE: SECTION CODE: SECTION CODE: SECTION CODE: SECTION CODE: SECTION CODE: SECTION CODE: SECTION CODE: SECTION CODE: SECTION CODE: SECTION CODE: SECTION CODE: SECTION CODE: SECTION CODE: SECTION CODE: SECTION CODE: SECTION CODE: SECTION CODE: SECTION CODE: SECTION CODE: SECTION CODE: SECTION CODE: SECTION CODE: SECTION CODE: SECTION CODE: SECTION CODE: SECTION CODE: SECTION CODE: SECTION CODE: SECTION CODE: 2/03 WN44X335 WN44X290 WN44X262 WN44X230 WN40X593 WN40X503 WN40X431 WN40X372 WN40X321 WN40X297 WN40X277 WN40X249 WN40X215 WN40X199 WN40X174 WN40X466 WN40X392 WN40X331 WN40X278 WN40X264 WN40X235 WN40X211 WN40X183 WN40X167 WN40X149 WN36X300 WN36X280 WN36X260 W36X275 W36X250 WN36X245 W36X240 W36X231 WN36X230 WN36X210 WN36X194 W36X192 W36X190 WN36X182 W36X176 W36X175 WIDE FLANGE WIDE FLANGE WIDE FLANGE WIDE FLANGE WIDE FLANGE WIDE FLANGE WIDE FLANGE WIDE FLANGE WIDE FLANGE WIDE FLANGE WIDE FLANGE WIDE FLANGE WIDE FLANGE WIDE FLANGE WIDE FLANGE WIDE FLANGE WIDE FLANGE WIDE FLANGE WIDE FLANGE WIDE FLANGE WIDE FLANGE WIDE FLANGE WIDE FLANGE WIDE FLANGE WIDE FLANGE WIDE FLANGE WIDE FLANGE WIDE FLANGE WIDE FLANGE WIDE FLANGE WIDE FLANGE WIDE FLANGE WIDE FLANGE WIDE FLANGE WIDE FLANGE WIDE FLANGE WIDE FLANGE WIDE FLANGE WIDE FLANGE WIDE FLANGE WIDE FLANGE 44X335 44X290 44X262 44X230 40X593 40X503 40X431 40X372 40X321 40X297 40X277 40X249 40X215 40X199 40X174 40X466 40X392 40X331 40X278 40X264 40X235 40X211 40X183 40X167 40X149 36X300 36X280 36X260 36X275 36X250 36X245 36X240 36X231 36X230 36X210 36X194 36X192 36X190 36X182 36X176 36X175 SECTION CODE: SECTION CODE: SECTION CODE: SECTION CODE: SECTION CODE: SECTION CODE: SECTION CODE: SECTION CODE: SECTION CODE: SECTION CODE: SECTION CODE: SECTION CODE: SECTION CODE: SECTION CODE: SECTION CODE: SECTION CODE: SECTION CODE: SECTION CODE: SECTION CODE: SECTION CODE: SECTION CODE: SECTION CODE: SECTION CODE: SECTION CODE: SECTION CODE: SECTION CODE: SECTION CODE: SECTION CODE: SECTION CODE: SECTION CODE: SECTION CODE: SECTION CODE: SECTION CODE: SECTION CODE: SECTION CODE: SECTION CODE: SECTION CODE: SECTION CODE: SECTION CODE: SECTION CODE: SECTION CODE: SECTION CODE: SECTION CODE: 15.41 W36X173 WN36X170 W36X167 W36X164 WN36X160 WF36X160 W36X158 W36X155 WN36X150 WF36X150 W36X147 WN36X135 W33X260A W33X260B W33X245 WN33X241 W33X240A W33X240B W33X230 WN33X221 W33X220A W33X220B W33X210 W33X202 W33X200A W33X200B W33X167 W33X165 WN33X152 W33X152A W33X152B W33X143 WN33X141 W33X138 W33X135 W33X132 WN33X130 W33X125A W33X125B W33X125C WN33X118 W30X240A W30X240B WIDE FLANGE 36X173 WIDE FLANGE 36X170 WIDE FLANGE 36X167 WIDE FLANGE 36X164 WIDE FLANGE 36X160 WIDE FLANGE 36 X 160 - 1950'S WIDE FLANGE 36X158 WIDE FLANGE 36X155 WIDE FLANGE 36X150 WIDE FLANGE 36 X 150 - 1950'S WIDE FLANGE 36X147 WIDE FLANGE 36X135 WIDE FLANGE 33X260A WIDE FLANGE 33X260B WIDE FLANGE 33X245 WIDE FLANGE 33X241 WIDE FLANGE 33X240A WIDE FLANGE 33X240B WIDE FLANGE 33X230 WIDE FLANGE 33X221 WIDE FLANGE 33X220A WIDE FLANGE 33X220B WIDE FLANGE 33X210 WIDE FLANGE 33X202 WIDE FLANGE 33X200A WIDE FLANGE 33X200B WIDE FLANGE 33X167 WIDE FLANGE 33X165 WIDE FLANGE 33X152 WIDE FLANGE 33X152A WIDE FLANGE 33X152B WIDE FLANGE 33X143 WIDE FLANGE 33X141 WIDE FLANGE 33X138 WIDE FLANGE 33X135 WIDE FLANGE 33X132 WIDE FLANGE 33X130 WIDE FLANGE 33X125A WIDE FLANGE 33X125B WIDE FLANGE 33X125C WIDE FLANGE 33X118 WIDE FLANGE 30X240A WIDE FLANGE 30X240B BRASS-GIRDER SECTION CODE: SECTION CODE: SECTION CODE: SECTION CODE: SECTION CODE: SECTION CODE: SECTION CODE: SECTION CODE: SECTION CODE: SECTION CODE: SECTION CODE: SECTION CODE: SECTION CODE: SECTION CODE: SECTION CODE: SECTION CODE: SECTION CODE: SECTION CODE: SECTION CODE: SECTION CODE: SECTION CODE: SECTION CODE: SECTION CODE: SECTION CODE: SECTION CODE: SECTION CODE: SECTION CODE: SECTION CODE: SECTION CODE: SECTION CODE: SECTION CODE: SECTION CODE: SECTION CODE: SECTION CODE: SECTION CODE: SECTION CODE: SECTION CODE: SECTION CODE: SECTION CODE: SECTION CODE: SECTION CODE: SECTION CODE: SECTION CODE: 2/03 W30X220A W30X220B WN30X211 W30X210 W30X200A W30X200B W30X200C WN30X191 W30X190A W30X190B W30X181 W30X180A W30X180B W30X180C W30X175 WN30X173 W30X173A W30X173B W30X172 W30X165 W30X163 W30X151 W30X149 W30X138 W30X137 W30X135 WN30X132 W30X131 W30X129 W30X125 WN30X124 W30X122 W30X121 W30X120A W30X120B WN30X116 W30X115A W30X115B W30X110 WN30X108 WN30X99 W28X186 W28X180 WIDE FLANGE WIDE FLANGE WIDE FLANGE WIDE FLANGE WIDE FLANGE WIDE FLANGE WIDE FLANGE WIDE FLANGE WIDE FLANGE WIDE FLANGE WIDE FLANGE WIDE FLANGE WIDE FLANGE WIDE FLANGE WIDE FLANGE WIDE FLANGE WIDE FLANGE WIDE FLANGE WIDE FLANGE WIDE FLANGE WIDE FLANGE WIDE FLANGE WIDE FLANGE WIDE FLANGE WIDE FLANGE WIDE FLANGE WIDE FLANGE WIDE FLANGE WIDE FLANGE WIDE FLANGE WIDE FLANGE WIDE FLANGE WIDE FLANGE WIDE FLANGE WIDE FLANGE WIDE FLANGE WIDE FLANGE WIDE FLANGE WIDE FLANGE WIDE FLANGE WIDE FLANGE WIDE FLANGE WIDE FLANGE 30X220A 30X220B 30X211 30X210 30X200A 30X200B 30X200C 30X191 30X190A 30X190B 30X181 30X180A 30X180B 30X180C 30X175 30X173 30X173A 30X173B 30X172 30X165 30X163 30X151 30X149 30X138 30X137 30X135 30X132 30X131 30X129 30X125 30X124 30X122 30X121 30X120A 30X120B 30X116 30X115A 30X115B 30X110 30X108 30X99 28X186 28X180 SECTION CODE: SECTION CODE: SECTION CODE: SECTION CODE: SECTION CODE: SECTION CODE: SECTION CODE: SECTION CODE: SECTION CODE: SECTION CODE: SECTION CODE: SECTION CODE: SECTION CODE: SECTION CODE: SECTION CODE: SECTION CODE: SECTION CODE: SECTION CODE: SECTION CODE: SECTION CODE: SECTION CODE: SECTION CODE: SECTION CODE: SECTION CODE: SECTION CODE: SECTION CODE: SECTION CODE: SECTION CODE: SECTION CODE: SECTION CODE: SECTION CODE: SECTION CODE: SECTION CODE: SECTION CODE: SECTION CODE: SECTION CODE: SECTION CODE: SECTION CODE: SECTION CODE: SECTION CODE: SECTION CODE: SECTION CODE: SECTION CODE: 15.42 W28X175 W28X166 W28X165A W28X165B W28X156 W28X147 W28X145 W28X133 W28X119 W28X113 W28X112 W28X106 W28X105A W28X105B W28X104 W28X100 W28X97 W28X91 W28X85 W27X190 WN27X178 W27X177 W27X175 W27X166 W27X163 WN27X161 W27X160 W27X156 W27X154 WN27X146 W27X145 W27X137 W27X124 WN27X114 W27X112A W27X112B W27X106 W27X104 WN27X102 W27X102 W27X98 W27X97 WN27X94 WIDE FLANGE WIDE FLANGE WIDE FLANGE WIDE FLANGE WIDE FLANGE WIDE FLANGE WIDE FLANGE WIDE FLANGE WIDE FLANGE WIDE FLANGE WIDE FLANGE WIDE FLANGE WIDE FLANGE WIDE FLANGE WIDE FLANGE WIDE FLANGE WIDE FLANGE WIDE FLANGE WIDE FLANGE WIDE FLANGE WIDE FLANGE WIDE FLANGE WIDE FLANGE WIDE FLANGE WIDE FLANGE WIDE FLANGE WIDE FLANGE WIDE FLANGE WIDE FLANGE WIDE FLANGE WIDE FLANGE WIDE FLANGE WIDE FLANGE WIDE FLANGE WIDE FLANGE WIDE FLANGE WIDE FLANGE WIDE FLANGE WIDE FLANGE WIDE FLANGE WIDE FLANGE WIDE FLANGE WIDE FLANGE 28X175 28X166 28X165A 28X165B 28X156 28X147 28X145 28X133 28X119 28X113 28X112 28X106 28X105A 28X105B 28X104 28X100 28X97 28X91 28X85 27X190 27X178 27X177 27X175 27X166 27X163 27X161 27X160 27X156 27X154 27X146 27X145 27X137 27X124 27X114 27X112A 27X112B 27X106 27X104 27X102 27X102 27X98 27X97 27X94 BRASS-GIRDER SECTION CODE: SECTION CODE: SECTION CODE: SECTION CODE: SECTION CODE: SECTION CODE: SECTION CODE: SECTION CODE: SECTION CODE: SECTION CODE: SECTION CODE: SECTION CODE: SECTION CODE: SECTION CODE: SECTION CODE: SECTION CODE: SECTION CODE: SECTION CODE: SECTION CODE: SECTION CODE: SECTION CODE: SECTION CODE: SECTION CODE: SECTION CODE: SECTION CODE: SECTION CODE: SECTION CODE: SECTION CODE: SECTION CODE: SECTION CODE: SECTION CODE: SECTION CODE: SECTION CODE: SECTION CODE: SECTION CODE: SECTION CODE: SECTION CODE: SECTION CODE: SECTION CODE: SECTION CODE: SECTION CODE: SECTION CODE: SECTION CODE: 2/03 W27X91A W27X91B W27X91C W27X90 W27X85A W27X85B WN27X84 W27X83 W26X171 W26X160A W26X160B W26X157 W26X151 W26X150 W26X145 W26X144 W26X138 W26X101 W26X98 W26X91 W26X90A W26X90B W26X86A W26X86B W26X81 WN24X162 W24X160 W24X150 W24X149 W24X148 WN24X146 W24X145 W24X141 W24X140A W24X140B W24X133 W24X132 WN24X131 W24X130 W24X129 W24X128 W24X121 W24X120A WIDE FLANGE WIDE FLANGE WIDE FLANGE WIDE FLANGE WIDE FLANGE WIDE FLANGE WIDE FLANGE WIDE FLANGE WIDE FLANGE WIDE FLANGE WIDE FLANGE WIDE FLANGE WIDE FLANGE WIDE FLANGE WIDE FLANGE WIDE FLANGE WIDE FLANGE WIDE FLANGE WIDE FLANGE WIDE FLANGE WIDE FLANGE WIDE FLANGE WIDE FLANGE WIDE FLANGE WIDE FLANGE WIDE FLANGE WIDE FLANGE WIDE FLANGE WIDE FLANGE WIDE FLANGE WIDE FLANGE WIDE FLANGE WIDE FLANGE WIDE FLANGE WIDE FLANGE WIDE FLANGE WIDE FLANGE WIDE FLANGE WIDE FLANGE WIDE FLANGE WIDE FLANGE WIDE FLANGE WIDE FLANGE 27X91A 27X91B 27X91C 27X90 27X85A 27X85B 27X84 27X83 26X171 26X160A 26X160B 26X157 26X151 26X150 26X145 26X144 26X138 26X101 26X98 26X91 26X90A 26X90B 26X86A 26X86B 26X81 24X162 24X160 24X150 24X149 24X148 24X146 24X145 24X141 24X140A 24X140B 24X133 24X132 24X131 24X130 24X129 24X128 24X121 24X120A SECTION CODE: SECTION CODE: SECTION CODE: SECTION CODE: SECTION CODE: SECTION CODE: SECTION CODE: SECTION CODE: SECTION CODE: SECTION CODE: SECTION CODE: SECTION CODE: SECTION CODE: SECTION CODE: SECTION CODE: SECTION CODE: SECTION CODE: SECTION CODE: SECTION CODE: SECTION CODE: SECTION CODE: SECTION CODE: SECTION CODE: SECTION CODE: SECTION CODE: SECTION CODE: SECTION CODE: SECTION CODE: SECTION CODE: SECTION CODE: SECTION CODE: SECTION CODE: SECTION CODE: SECTION CODE: SECTION CODE: SECTION CODE: SECTION CODE: SECTION CODE: SECTION CODE: SECTION CODE: SECTION CODE: SECTION CODE: SECTION CODE: 15.43 W24X120B W24X120C W24X120D WN24X117 W24X115 W24X114 W24X113 W24X110A W24X110B W24X108 W24X107 W24X105A W24X105B WN24X104 W24X104 W24X100A W24X100B W24X100C W24X100D W24X99 W24X95A W24X95B W24X95C W24X94 WN24X94 W24X93 W24X90A W24X90B W24X90C W24X87 W24X85A W24X85B W24X85C W24X85D W24X84A W24X84B WN24X84 W24X83 W24X82 W24X81 W24X80A W24X80B W24X79A WIDE FLANGE WIDE FLANGE WIDE FLANGE WIDE FLANGE WIDE FLANGE WIDE FLANGE WIDE FLANGE WIDE FLANGE WIDE FLANGE WIDE FLANGE WIDE FLANGE WIDE FLANGE WIDE FLANGE WIDE FLANGE WIDE FLANGE WIDE FLANGE WIDE FLANGE WIDE FLANGE WIDE FLANGE WIDE FLANGE WIDE FLANGE WIDE FLANGE WIDE FLANGE WIDE FLANGE WIDE FLANGE WIDE FLANGE WIDE FLANGE WIDE FLANGE WIDE FLANGE WIDE FLANGE WIDE FLANGE WIDE FLANGE WIDE FLANGE WIDE FLANGE WIDE FLANGE WIDE FLANGE WIDE FLANGE WIDE FLANGE WIDE FLANGE WIDE FLANGE WIDE FLANGE WIDE FLANGE WIDE FLANGE 24X120B 24X120C 24X120D 24X117 24X115 24X114 24X113 24X110A 24X110B 24X108 24X107 24X105A 24X105B 24X104 24X104 24X100A 24X100B 24X100C 24X100D 24X99 24X95A 24X95B 24X95C 24X94 24X94 24X93 24X90A 24X90B 24X90C 24X87 24X85A 24X85B 24X85C 24X85D 24X84A 24X84B 24X84 24X83 24X82 24X81 24X80A 24X80B 24X79A BRASS-GIRDER SECTION CODE: SECTION CODE: SECTION CODE: SECTION CODE: SECTION CODE: SECTION CODE: SECTION CODE: SECTION CODE: SECTION CODE: SECTION CODE: SECTION CODE: SECTION CODE: SECTION CODE: SECTION CODE: SECTION CODE: SECTION CODE: SECTION CODE: SECTION CODE: SECTION CODE: SECTION CODE: SECTION CODE: SECTION CODE: SECTION CODE: SECTION CODE: SECTION CODE: SECTION CODE: SECTION CODE: SECTION CODE: SECTION CODE: SECTION CODE: SECTION CODE: SECTION CODE: SECTION CODE: SECTION CODE: SECTION CODE: SECTION CODE: SECTION CODE: SECTION CODE: SECTION CODE: SECTION CODE: SECTION CODE: SECTION CODE: SECTION CODE: 2/03 W24X79B W24X76 WN24X76 W24X74A W24X74B W24X74C W24X73 W24X72 W24X71 W24X70A W24X70B W24X69 WN24X68 WN24X62 W24X61 WN24X55 W22X132 W22X124 W22X116 W22X108 W22X101 W22X96 W22X89 W22X83 W22X77 W22X73 W22X71 W22X68 W22X67 W22X65 W22X62 W22X58A W22X58B W22X54 WN21X147 W21X142 W21X136 WN21X132 W21X132 W21X127 WN21X122 W21X122 W21X112 WIDE FLANGE WIDE FLANGE WIDE FLANGE WIDE FLANGE WIDE FLANGE WIDE FLANGE WIDE FLANGE WIDE FLANGE WIDE FLANGE WIDE FLANGE WIDE FLANGE WIDE FLANGE WIDE FLANGE WIDE FLANGE WIDE FLANGE WIDE FLANGE WIDE FLANGE WIDE FLANGE WIDE FLANGE WIDE FLANGE WIDE FLANGE WIDE FLANGE WIDE FLANGE WIDE FLANGE WIDE FLANGE WIDE FLANGE WIDE FLANGE WIDE FLANGE WIDE FLANGE WIDE FLANGE WIDE FLANGE WIDE FLANGE WIDE FLANGE WIDE FLANGE WIDE FLANGE WIDE FLANGE WIDE FLANGE WIDE FLANGE WIDE FLANGE WIDE FLANGE WIDE FLANGE WIDE FLANGE WIDE FLANGE 24X79B 24X76 24X76 24X74A 24X74B 24X74C 24X73 24X72 24X71 24X70A 24X70B 24X69 24X68 24X62 24X61 24X55 22X132 22X124 22X116 22X108 22X101 22X96 22X89 22X83 22X77 22X73 22X71 22X68 22X67 22X65 22X62 22X58A 22X58B 22X54 21X147 21X142 21X136 21X132 21X132 21X127 21X122 21X122 21X112 SECTION CODE: SECTION CODE: SECTION CODE: SECTION CODE: SECTION CODE: SECTION CODE: SECTION CODE: SECTION CODE: SECTION CODE: SECTION CODE: SECTION CODE: SECTION CODE: SECTION CODE: SECTION CODE: SECTION CODE: SECTION CODE: SECTION CODE: SECTION CODE: SECTION CODE: SECTION CODE: SECTION CODE: SECTION CODE: SECTION CODE: SECTION CODE: SECTION CODE: SECTION CODE: SECTION CODE: SECTION CODE: SECTION CODE: SECTION CODE: SECTION CODE: SECTION CODE: SECTION CODE: SECTION CODE: SECTION CODE: SECTION CODE: SECTION CODE: SECTION CODE: SECTION CODE: SECTION CODE: SECTION CODE: SECTION CODE: SECTION CODE: 15.44 WN21X111 W21X108 W21X104 W21X103 WN21X101 W21X101 W21X98 W21X96A W21X96B WN21X93 W21X92 W21X89A W21X89B W21X86 WN21X83 W21X82 W21X80 W21X77 W21X76 W21X75 WN21X73 WN21X68 W21X67 W21X64 W21X63 WN21X62 W21X60A W21X60B W21X59 W21X58A W21X58B W21X58C W21X58D WN21X57 W21X55A W21X55B WN21X50 W21X49 WN21X44 W20X149 W20X146 W20X142 W20X140 WIDE FLANGE WIDE FLANGE WIDE FLANGE WIDE FLANGE WIDE FLANGE WIDE FLANGE WIDE FLANGE WIDE FLANGE WIDE FLANGE WIDE FLANGE WIDE FLANGE WIDE FLANGE WIDE FLANGE WIDE FLANGE WIDE FLANGE WIDE FLANGE WIDE FLANGE WIDE FLANGE WIDE FLANGE WIDE FLANGE WIDE FLANGE WIDE FLANGE WIDE FLANGE WIDE FLANGE WIDE FLANGE WIDE FLANGE WIDE FLANGE WIDE FLANGE WIDE FLANGE WIDE FLANGE WIDE FLANGE WIDE FLANGE WIDE FLANGE WIDE FLANGE WIDE FLANGE WIDE FLANGE WIDE FLANGE WIDE FLANGE WIDE FLANGE WIDE FLANGE WIDE FLANGE WIDE FLANGE WIDE FLANGE 21X111 21X108 21X104 21X103 21X101 21X101 21X98 21X96A 21X96B 21X93 21X92 21X89A 21X89B 21X86 21X83 21X82 21X80 21X77 21X76 21X75 21X73 21X68 21X67 21X64 21X63 21X62 21X60A 21X60B 21X59 21X58A 21X58B 21X58C 21X58D 21X57 21X55A 21X55B 21X50 21X49 21X44 20X149 20X146 20X142 20X140 BRASS-GIRDER SECTION CODE: SECTION CODE: SECTION CODE: SECTION CODE: SECTION CODE: SECTION CODE: SECTION CODE: SECTION CODE: SECTION CODE: SECTION CODE: SECTION CODE: SECTION CODE: SECTION CODE: SECTION CODE: SECTION CODE: SECTION CODE: SECTION CODE: SECTION CODE: SECTION CODE: SECTION CODE: SECTION CODE: SECTION CODE: SECTION CODE: SECTION CODE: SECTION CODE: SECTION CODE: SECTION CODE: SECTION CODE: SECTION CODE: SECTION CODE: SECTION CODE: SECTION CODE: SECTION CODE: SECTION CODE: SECTION CODE: SECTION CODE: SECTION CODE: SECTION CODE: SECTION CODE: SECTION CODE: SECTION CODE: SECTION CODE: SECTION CODE: 2/03 W20X135A W20X135B W20X127 W20X125 W20X120 W20X115 W20X113 W20X112 W20X107 W20X100A W20X100B W20X99 W20X98 WN20X98 W20X95A W20X95B W20X95C W20X95D W20X90A W20X90B W20X88 W20X85A W20X85B W20X85C W20X85D W20X82 W20X81A W20X81B W20X81C W20X80A W20X80B W20X80C W20X80D W20X78A W20X78B W20X75A W20X75B W20X75C W20X74 W20X73 W20X72 W20X70A W20X70B WIDE FLANGE WIDE FLANGE WIDE FLANGE WIDE FLANGE WIDE FLANGE WIDE FLANGE WIDE FLANGE WIDE FLANGE WIDE FLANGE WIDE FLANGE WIDE FLANGE WIDE FLANGE WIDE FLANGE WIDE FLANGE WIDE FLANGE WIDE FLANGE WIDE FLANGE WIDE FLANGE WIDE FLANGE WIDE FLANGE WIDE FLANGE WIDE FLANGE WIDE FLANGE WIDE FLANGE WIDE FLANGE WIDE FLANGE WIDE FLANGE WIDE FLANGE WIDE FLANGE WIDE FLANGE WIDE FLANGE WIDE FLANGE WIDE FLANGE WIDE FLANGE WIDE FLANGE WIDE FLANGE WIDE FLANGE WIDE FLANGE WIDE FLANGE WIDE FLANGE WIDE FLANGE WIDE FLANGE WIDE FLANGE 20X135A 20X135B 20X127 20X125 20X120 20X115 20X113 20X112 20X107 20X100A 20X100B 20X99 20X98 20X98 20X95A 20X95B 20X95C 20X95D 20X90A 20X90B 20X88 20X85A 20X85B 20X85C 20X85D 20X82 20X81A 20X81B 20X81C 20X80A 20X80B 20X80C 20X80D 20X78A 20X78B 20X75A 20X75B 20X75C 20X74 20X73 20X72 20X70A 20X70B SECTION CODE: SECTION CODE: SECTION CODE: SECTION CODE: SECTION CODE: SECTION CODE: SECTION CODE: SECTION CODE: SECTION CODE: SECTION CODE: SECTION CODE: SECTION CODE: SECTION CODE: SECTION CODE: SECTION CODE: SECTION CODE: SECTION CODE: SECTION CODE: SECTION CODE: SECTION CODE: SECTION CODE: SECTION CODE: SECTION CODE: SECTION CODE: SECTION CODE: SECTION CODE: SECTION CODE: SECTION CODE: SECTION CODE: SECTION CODE: SECTION CODE: SECTION CODE: SECTION CODE: SECTION CODE: SECTION CODE: SECTION CODE: SECTION CODE: SECTION CODE: SECTION CODE: SECTION CODE: SECTION CODE: SECTION CODE: SECTION CODE: 15.45 W20X69 W20X68 W20X66 W20X65A W20X65B W20X65C W20X65D W20X64A W20X64B W20X64C W20X63 W20X62 W20X60A W20X60B W20X59 W20X56 W20X55 W18X124 WN18X119 W18X114 WN18X106 W18X105 W18X100A W18X100B W18X99 WN18X97 W18X96 W18X93A W18X93B W18X92A W18X92B W18X90A W18X90B W18X88 WN18X86 W18X86A W18X86B W18X85A W18X85B W18X85C W18X81 W18X80A W18X80B WIDE FLANGE WIDE FLANGE WIDE FLANGE WIDE FLANGE WIDE FLANGE WIDE FLANGE WIDE FLANGE WIDE FLANGE WIDE FLANGE WIDE FLANGE WIDE FLANGE WIDE FLANGE WIDE FLANGE WIDE FLANGE WIDE FLANGE WIDE FLANGE WIDE FLANGE WIDE FLANGE WIDE FLANGE WIDE FLANGE WIDE FLANGE WIDE FLANGE WIDE FLANGE WIDE FLANGE WIDE FLANGE WIDE FLANGE WIDE FLANGE WIDE FLANGE WIDE FLANGE WIDE FLANGE WIDE FLANGE WIDE FLANGE WIDE FLANGE WIDE FLANGE WIDE FLANGE WIDE FLANGE WIDE FLANGE WIDE FLANGE WIDE FLANGE WIDE FLANGE WIDE FLANGE WIDE FLANGE WIDE FLANGE 20X69 20X68 20X66 20X65A 20X65B 20X65C 20X65D 20X64A 20X64B 20X64C 20X63 20X62 20X60A 20X60B 20X59 20X56 20X55 18X124 18X119 18X114 18X106 18X105 18X100A 18X100B 18X99 18X97 18X96 18X93A 18X93B 18X92A 18X92B 18X90A 18X90B 18X88 18X86 18X86A 18X86B 18X85A 18X85B 18X85C 18X81 18X80A 18X80B BRASS-GIRDER SECTION CODE: SECTION CODE: SECTION CODE: SECTION CODE: SECTION CODE: SECTION CODE: SECTION CODE: SECTION CODE: SECTION CODE: SECTION CODE: SECTION CODE: SECTION CODE: SECTION CODE: SECTION CODE: SECTION CODE: SECTION CODE: SECTION CODE: SECTION CODE: SECTION CODE: SECTION CODE: SECTION CODE: SECTION CODE: SECTION CODE: SECTION CODE: SECTION CODE: SECTION CODE: SECTION CODE: SECTION CODE: SECTION CODE: SECTION CODE: SECTION CODE: SECTION CODE: SECTION CODE: SECTION CODE: SECTION CODE: SECTION CODE: SECTION CODE: SECTION CODE: SECTION CODE: SECTION CODE: SECTION CODE: SECTION CODE: SECTION CODE: 2/03 W18X80C W18X80D W18X78 W18X77 WN18X76 W18X75A W18X75B W18X75C W18X75D W18X75E W18X74 W18X72 WN18X71 W18X70A W18X70B W18X70C W18X69 W18X67A W18X67B WN18X65 W18X65A W18X65B W18X64 WN18X60 W18X60 W18X59A W18X59B W18X58 W18X57 WN18X55 W18X55 W18X54A W18X54B W18X53 W18X52 W18X51 WN18X50 W18X49A W18X49B W18X48A W18X48B W18X47 W18X47X WIDE FLANGE 18X80C WIDE FLANGE 18X80D WIDE FLANGE 18X78 WIDE FLANGE 18X77 WIDE FLANGE 18X76 WIDE FLANGE 18X75A WIDE FLANGE 18X75B WIDE FLANGE 18X75C WIDE FLANGE 18X75D WIDE FLANGE 18X75E WIDE FLANGE 18X74 WIDE FLANGE 18X72 WIDE FLANGE 18X71 WIDE FLANGE 18X70A WIDE FLANGE 18X70B WIDE FLANGE 18X70C WIDE FLANGE 18X69 WIDE FLANGE 18X67A WIDE FLANGE 18X67B WIDE FLANGE 18X65 WIDE FLANGE 18X65A WIDE FLANGE 18X65B WIDE FLANGE 18X64 WIDE FLANGE 18X60 WIDE FLANGE 18X60 WIDE FLANGE 18X59A WIDE FLANGE 18X59B WIDE FLANGE 18X58 WIDE FLANGE 18X57 WIDE FLANGE 18X55 WIDE FLANGE 18X55 WIDE FLANGE 18X54A WIDE FLANGE 18X54B WIDE FLANGE 18X53 WIDE FLANGE 18X52 WIDE FLANGE 18X51 WIDE FLANGE 18X50 WIDE FLANGE 18X49A WIDE FLANGE 18X49B WIDE FLANGE 18X48A WIDE FLANGE 18X48B WIDE FLANGE 18X47 W18 taken from AISC 1940 SECTION CODE: SECTION CODE: SECTION CODE: SECTION CODE: SECTION CODE: SECTION CODE: SECTION CODE: SECTION CODE: SECTION CODE: SECTION CODE: SECTION CODE: SECTION CODE: SECTION CODE: SECTION CODE: SECTION CODE: SECTION CODE: SECTION CODE: SECTION CODE: SECTION CODE: SECTION CODE: SECTION CODE: SECTION CODE: SECTION CODE: SECTION CODE: SECTION CODE: SECTION CODE: SECTION CODE: SECTION CODE: SECTION CODE: SECTION CODE: SECTION CODE: SECTION CODE: SECTION CODE: SECTION CODE: SECTION CODE: SECTION CODE: SECTION CODE: SECTION CODE: SECTION CODE: SECTION CODE: SECTION CODE: SECTION CODE: SECTION CODE: 15.46 W18X46A WN18X46 W18X46B W18X45 WN18X40 WN18X35 W16X115 W16X114 W16X107 W16X105 WN16X100 W16X100 W16X96 W16X90A W16X90B WN16X89 W16X88 W16X87 W16X83A W16X83B W16X81 W16X78 WN16X77 W16X76A W16X76B W16X75 W16X72 W16X71 W16X68 WN16X67 W16X66 W16X64 W16X63 W16X61 W16X58A W16X58B WN16X57 W16X57 WN16X50 W16X50 WN16X45 W16X45 W16X43 WIDE FLANGE WIDE FLANGE WIDE FLANGE WIDE FLANGE WIDE FLANGE WIDE FLANGE WIDE FLANGE WIDE FLANGE WIDE FLANGE WIDE FLANGE WIDE FLANGE WIDE FLANGE WIDE FLANGE WIDE FLANGE WIDE FLANGE WIDE FLANGE WIDE FLANGE WIDE FLANGE WIDE FLANGE WIDE FLANGE WIDE FLANGE WIDE FLANGE WIDE FLANGE WIDE FLANGE WIDE FLANGE WIDE FLANGE WIDE FLANGE WIDE FLANGE WIDE FLANGE WIDE FLANGE WIDE FLANGE WIDE FLANGE WIDE FLANGE WIDE FLANGE WIDE FLANGE WIDE FLANGE WIDE FLANGE WIDE FLANGE WIDE FLANGE WIDE FLANGE WIDE FLANGE WIDE FLANGE WIDE FLANGE 18X46A 18X46 18X46B 18X45 18X40 18X35 16X115 16X114 16X107 16X105 16X100 16X100 16X96 16X90A 16X90B 16X89 16X88 16X87 16X83A 16X83B 16X81 16X78 16X77 16X76A 16X76B 16X75 16X72 16X71 16X68 16X67 16X66 16X64 16X63 16X61 16X58A 16X58B 16X57 16X57 16X50 16X50 16X45 16X45 16X43 BRASS-GIRDER SECTION CODE: SECTION CODE: SECTION CODE: SECTION CODE: SECTION CODE: SECTION CODE: SECTION CODE: SECTION CODE: SECTION CODE: SECTION CODE: SECTION CODE: SECTION CODE: SECTION CODE: SECTION CODE: SECTION CODE: SECTION CODE: SECTION CODE: SECTION CODE: SECTION CODE: SECTION CODE: SECTION CODE: SECTION CODE: SECTION CODE: SECTION CODE: SECTION CODE: SECTION CODE: SECTION CODE: SECTION CODE: SECTION CODE: SECTION CODE: SECTION CODE: SECTION CODE: SECTION CODE: SECTION CODE: SECTION CODE: SECTION CODE: SECTION CODE: SECTION CODE: SECTION CODE: SECTION CODE: SECTION CODE: SECTION CODE: SECTION CODE: 2/03 W16X40 WN16X40 W16X39 W16X38 W16X37 WN16X36 W16X35A W16X35B WN16X31 WN16X26 W15X147 W15X141 W15X140 W15X135 W15X127 W15X111 W15X108 W15X105 W15X104 W15X100 W15X99A W15X99B W15X95 W15X94 W15X91 W15X90 W15X85A W15X85B W15X85C W15X81A W15X81B W15X80A W15X80B W15X80C W15X75A W15X75B W15X75C W15X75D W15X74 W15X73 W15X72A W15X72B W15X72C WIDE FLANGE WIDE FLANGE WIDE FLANGE WIDE FLANGE WIDE FLANGE WIDE FLANGE WIDE FLANGE WIDE FLANGE WIDE FLANGE WIDE FLANGE WIDE FLANGE WIDE FLANGE WIDE FLANGE WIDE FLANGE WIDE FLANGE WIDE FLANGE WIDE FLANGE WIDE FLANGE WIDE FLANGE WIDE FLANGE WIDE FLANGE WIDE FLANGE WIDE FLANGE WIDE FLANGE WIDE FLANGE WIDE FLANGE WIDE FLANGE WIDE FLANGE WIDE FLANGE WIDE FLANGE WIDE FLANGE WIDE FLANGE WIDE FLANGE WIDE FLANGE WIDE FLANGE WIDE FLANGE WIDE FLANGE WIDE FLANGE WIDE FLANGE WIDE FLANGE WIDE FLANGE WIDE FLANGE WIDE FLANGE 16X40 16X40 16X39 16X38 16X37 16X36 16X35A 16X35B 16X31 16X26 15X147 15X141 15X140 15X135 15X127 15X111 15X108 15X105 15X104 15X100 15X99A 15X99B 159X5 15X94 15X91 15X90 15X85A 15X85B 15X85C 15X81A 15X81B 15X80A 15X80B 15X80C 15X75A 15X75B 15X75C 15X75D 15X74 15X73 15X72A 15X72B 15X72C SECTION CODE: SECTION CODE: SECTION CODE: SECTION CODE: SECTION CODE: SECTION CODE: SECTION CODE: SECTION CODE: SECTION CODE: SECTION CODE: SECTION CODE: SECTION CODE: SECTION CODE: SECTION CODE: SECTION CODE: SECTION CODE: SECTION CODE: SECTION CODE: SECTION CODE: SECTION CODE: SECTION CODE: SECTION CODE: SECTION CODE: SECTION CODE: SECTION CODE: SECTION CODE: SECTION CODE: SECTION CODE: SECTION CODE: SECTION CODE: SECTION CODE: SECTION CODE: SECTION CODE: SECTION CODE: SECTION CODE: SECTION CODE: SECTION CODE: SECTION CODE: SECTION CODE: SECTION CODE: SECTION CODE: SECTION CODE: SECTION CODE: 15.47 W15X71 W15X70A W15X70B W15X70C W15X70D W15X69A W15X69B W15X69C W15X66A W15X66B W15X65A W15X65B W15X65C W15X65D W15X64 W15X60A W15X60B W15X60C W15X60D W15X60E W15X59A W15X59B W15X57 W15X56A W15X56B W15X55A W15X55B W15X55C W15X55D W15X54 W15X52 W15X51 W15X50A W15X50B W15X50C W15X49A W15X49B W15X48 W15X47 W15X46A W15X46B W15X45 W15X44 WIDE FLANGE WIDE FLANGE WIDE FLANGE WIDE FLANGE WIDE FLANGE WIDE FLANGE WIDE FLANGE WIDE FLANGE WIDE FLANGE WIDE FLANGE WIDE FLANGE WIDE FLANGE WIDE FLANGE WIDE FLANGE WIDE FLANGE WIDE FLANGE WIDE FLANGE WIDE FLANGE WIDE FLANGE WIDE FLANGE WIDE FLANGE WIDE FLANGE WIDE FLANGE WIDE FLANGE WIDE FLANGE WIDE FLANGE WIDE FLANGE WIDE FLANGE WIDE FLANGE WIDE FLANGE WIDE FLANGE WIDE FLANGE WIDE FLANGE WIDE FLANGE WIDE FLANGE WIDE FLANGE WIDE FLANGE WIDE FLANGE WIDE FLANGE WIDE FLANGE WIDE FLANGE WIDE FLANGE WIDE FLANGE 15X71 15X70A 15X70B 15X70C 15X70D 15X69A 15X69B 15X69C 15X66A 15X66B 15X65A 15X65B 15X65C 15X65D 15X64 15X60A 15X60B 15X60C 15X60D 15X60E 15X59A 15X59B 15X57 15X56A 15X56B 15X55A 15X55B 15X55C 15X55D 15X54 15X52 15X51 15X50A 15X50B 15X50C 15X49A 15X49B 15X48 15X47 15X46A 15X46B 15X45 15X44 BRASS-GIRDER SECTION CODE: SECTION CODE: SECTION CODE: SECTION CODE: SECTION CODE: SECTION CODE: SECTION CODE: SECTION CODE: SECTION CODE: SECTION CODE: SECTION CODE: SECTION CODE: SECTION CODE: SECTION CODE: SECTION CODE: SECTION CODE: SECTION CODE: SECTION CODE: SECTION CODE: SECTION CODE: SECTION CODE: SECTION CODE: SECTION CODE: SECTION CODE: SECTION CODE: SECTION CODE: SECTION CODE: SECTION CODE: SECTION CODE: SECTION CODE: SECTION CODE: SECTION CODE: SECTION CODE: SECTION CODE: SECTION CODE: SECTION CODE: SECTION CODE: SECTION CODE: SECTION CODE: SECTION CODE: SECTION CODE: SECTION CODE: SECTION CODE: 2/03 W15X43 W15X42A W15X42B W15X42C W15X42D W15X41A W15X41B W15X41C W15X40 W15X39A W15X39B W15X38 W15X37A W15X37B W15X36A W15X36B W15X36C W15X35A W15X35B W15X33 WN14X730 WN14X665 WN14X605 WN14X550 WN14X500 WN14X455 WN14X426 WN14X398 WN14X370 WN14X342 W14X320 W14X314 WN14X311 W14X287 WN14X283 W14X264 WN14X257 W14X246 W14X237 WN14X233 W14X228 W14X219 WN14X211 WIDE FLANGE WIDE FLANGE WIDE FLANGE WIDE FLANGE WIDE FLANGE WIDE FLANGE WIDE FLANGE WIDE FLANGE WIDE FLANGE WIDE FLANGE WIDE FLANGE WIDE FLANGE WIDE FLANGE WIDE FLANGE WIDE FLANGE WIDE FLANGE WIDE FLANGE WIDE FLANGE WIDE FLANGE WIDE FLANGE WIDE FLANGE WIDE FLANGE WIDE FLANGE WIDE FLANGE WIDE FLANGE WIDE FLANGE WIDE FLANGE WIDE FLANGE WIDE FLANGE WIDE FLANGE WIDE FLANGE WIDE FLANGE WIDE FLANGE WIDE FLANGE WIDE FLANGE WIDE FLANGE WIDE FLANGE WIDE FLANGE WIDE FLANGE WIDE FLANGE WIDE FLANGE WIDE FLANGE WIDE FLANGE 15X43 15X42A 15X42B 15X42C 15X42D 15X41A 15X41B 15X41C 15X40 15X39A 15X39B 15X38 15X37A 15X37B 15X36A 15X36B 15X36C 15X35A 15X35B 15X33 14X730 14X665 14X605 14X550 14X500 14X455 14X426 14X398 14X370 14X342 14X320 14X314 14X311 14X287 14X283 14X264 14X257 14X246 14X237 14X233 14X228 14X219 14X211 SECTION CODE: SECTION CODE: SECTION CODE: SECTION CODE: SECTION CODE: SECTION CODE: SECTION CODE: SECTION CODE: SECTION CODE: SECTION CODE: SECTION CODE: SECTION CODE: SECTION CODE: SECTION CODE: SECTION CODE: SECTION CODE: SECTION CODE: SECTION CODE: SECTION CODE: SECTION CODE: SECTION CODE: SECTION CODE: SECTION CODE: SECTION CODE: SECTION CODE: SECTION CODE: SECTION CODE: SECTION CODE: SECTION CODE: SECTION CODE: SECTION CODE: SECTION CODE: SECTION CODE: SECTION CODE: SECTION CODE: SECTION CODE: SECTION CODE: SECTION CODE: SECTION CODE: SECTION CODE: SECTION CODE: SECTION CODE: SECTION CODE: 15.48 W14X202 WN14X193 W14X184 WN14X176 W14X167 WN14X159 W14X158 W14X150 WN14X145 W14X142 W14X136 W14X135 WN14X132 W14X127 W14X125 WN14X120 W14X119 HN14X117 W14X115 W14X111 WN14X109 W14X106 W14X105 W14X103 HN14X102 WN14X99 W14X96 W14X95A W14X95B WN14X90 HN14X89 W14X87 W14X86 W14X85 W14X84 WN14X82 W14X78 W14X75 WN14X74 HN14X73 W14X68 WN14X68 W14X61 WIDE FLANGE WIDE FLANGE WIDE FLANGE WIDE FLANGE WIDE FLANGE WIDE FLANGE WIDE FLANGE WIDE FLANGE WIDE FLANGE WIDE FLANGE WIDE FLANGE WIDE FLANGE WIDE FLANGE WIDE FLANGE WIDE FLANGE WIDE FLANGE WIDE FLANGE WIDE FLANGE WIDE FLANGE WIDE FLANGE WIDE FLANGE WIDE FLANGE WIDE FLANGE WIDE FLANGE WIDE FLANGE WIDE FLANGE WIDE FLANGE WIDE FLANGE WIDE FLANGE WIDE FLANGE WIDE FLANGE WIDE FLANGE WIDE FLANGE WIDE FLANGE WIDE FLANGE WIDE FLANGE WIDE FLANGE WIDE FLANGE WIDE FLANGE WIDE FLANGE WIDE FLANGE WIDE FLANGE WIDE FLANGE 14X202 14X193 14X184 14X176 14X167 14X159 14X158 14X150 14X145 14X142 14X136 14X135 14X132 14X127 14X125 14X120 14X119 14X117 14X115 14X111 14X109 14X106 14X105 14X103 14X102 14X99 14X96 14X95A 14X95B 14X90 14X89 14X87 14X86 14X85 14X84 14X82 14X78 14X75 14X74 14X73 14X68 14X68 14X61 BRASS-GIRDER SECTION CODE: SECTION CODE: SECTION CODE: SECTION CODE: SECTION CODE: SECTION CODE: SECTION CODE: SECTION CODE: SECTION CODE: SECTION CODE: SECTION CODE: SECTION CODE: SECTION CODE: SECTION CODE: SECTION CODE: SECTION CODE: SECTION CODE: SECTION CODE: SECTION CODE: SECTION CODE: SECTION CODE: SECTION CODE: SECTION CODE: SECTION CODE: SECTION CODE: SECTION CODE: SECTION CODE: SECTION CODE: SECTION CODE: SECTION CODE: SECTION CODE: SECTION CODE: SECTION CODE: SECTION CODE: SECTION CODE: SECTION CODE: SECTION CODE: SECTION CODE: SECTION CODE: SECTION CODE: SECTION CODE: SECTION CODE: SECTION CODE: 2/03 WN14X61 W14X58A W14X58B W14X53 WN14X53 W14X48 WN14X48 WN14X43 W14X42A W14X42B W14X39 WN14X38 W14X38A W14X38B W14X37 W14X36 WN14X34 W14X33 W14X32 W14X30 WN14X30 WN14X26 WN14X22 HN13X100 HN13X87 HN13X73 HN13X60 WN12X336 WN12X305 WN12X279 WN12X252 WN12X230 WN12X210 WN12X190 WN12X170 W12X161 WN12X152 WN12X136 W12X133 WN12X120 WN12X106 W12X99 WN12X96 WIDE FLANGE WIDE FLANGE WIDE FLANGE WIDE FLANGE WIDE FLANGE WIDE FLANGE WIDE FLANGE WIDE FLANGE WIDE FLANGE WIDE FLANGE WIDE FLANGE WIDE FLANGE WIDE FLANGE WIDE FLANGE WIDE FLANGE WIDE FLANGE WIDE FLANGE WIDE FLANGE WIDE FLANGE WIDE FLANGE WIDE FLANGE WIDE FLANGE WIDE FLANGE WIDE FLANGE WIDE FLANGE WIDE FLANGE WIDE FLANGE WIDE FLANGE WIDE FLANGE WIDE FLANGE WIDE FLANGE WIDE FLANGE WIDE FLANGE WIDE FLANGE WIDE FLANGE WIDE FLANGE WIDE FLANGE WIDE FLANGE WIDE FLANGE WIDE FLANGE WIDE FLANGE WIDE FLANGE WIDE FLANGE 14X61 14X58A 14X58B 14X53 14X53 14X48 14X48 14X43 14X42A 14X42B 14X39 14X38 14X38A 14X38B 14X37 14X36 14X34 14X33 14X32 14X30 14X30 14X26 14X22 13X100 13X87 13X73 13X60 12X336 12X305 12X279 12X252 12X230 12X210 12X190 12X170 12X161 12X152 12X136 12X133 12X120 12X106 12X99 12X96 SECTION CODE: SECTION CODE: SECTION CODE: SECTION CODE: SECTION CODE: SECTION CODE: SECTION CODE: SECTION CODE: SECTION CODE: SECTION CODE: SECTION CODE: SECTION CODE: SECTION CODE: SECTION CODE: SECTION CODE: SECTION CODE: SECTION CODE: SECTION CODE: SECTION CODE: SECTION CODE: SECTION CODE: SECTION CODE: SECTION CODE: SECTION CODE: SECTION CODE: SECTION CODE: SECTION CODE: SECTION CODE: SECTION CODE: SECTION CODE: SECTION CODE: SECTION CODE: SECTION CODE: SECTION CODE: SECTION CODE: SECTION CODE: SECTION CODE: SECTION CODE: SECTION CODE: SECTION CODE: SECTION CODE: SECTION CODE: SECTION CODE: 15.49 W12X92 WN12X87 W12X85 HN12X84 W12X83 W12X82 WN12X79 W12X77 W12X76 W12X75 HN12X74 WN12X72 W12X71 W12X70A W12X70B W12X66A W12X66B W12X66C WN12X65 W12X65A W12X65B W12X65C W12X64 HN12X63 W12X61 W12X60A W12X60B W12X60C W12X60D W12X60E W12X60F WN12X58 W12X56A W12X56B W12X55A W12X55B W12X55C W12X55D W12X55E W12X55F WN12X53 HN12X53 W12X52 WIDE FLANGE WIDE FLANGE WIDE FLANGE WIDE FLANGE WIDE FLANGE WIDE FLANGE WIDE FLANGE WIDE FLANGE WIDE FLANGE WIDE FLANGE WIDE FLANGE WIDE FLANGE WIDE FLANGE WIDE FLANGE WIDE FLANGE WIDE FLANGE WIDE FLANGE WIDE FLANGE WIDE FLANGE WIDE FLANGE WIDE FLANGE WIDE FLANGE WIDE FLANGE WIDE FLANGE WIDE FLANGE WIDE FLANGE WIDE FLANGE WIDE FLANGE WIDE FLANGE WIDE FLANGE WIDE FLANGE WIDE FLANGE WIDE FLANGE WIDE FLANGE WIDE FLANGE WIDE FLANGE WIDE FLANGE WIDE FLANGE WIDE FLANGE WIDE FLANGE WIDE FLANGE WIDE FLANGE WIDE FLANGE 12X92 12X87 12X85 12X84 12X83 12X82 12X79 12X77 12X76 12X75 12X74 12X72 12X71 12X70A 12X70B 12X66A 12X66B 12X66C 12X65 12X65A 12X65B 12X65C 12X64 12X63 12X61 12X60A 12X60B 12X60C 12X60D 12X60E 12X60F 12X58 12X56A 12X56B 12X55A 12X55B 12X55C 12X55D 12X55E 12X55F 12X53 12X53 12X52 BRASS-GIRDER SECTION CODE: SECTION CODE: SECTION CODE: SECTION CODE: SECTION CODE: SECTION CODE: SECTION CODE: SECTION CODE: SECTION CODE: SECTION CODE: SECTION CODE: SECTION CODE: SECTION CODE: SECTION CODE: SECTION CODE: SECTION CODE: SECTION CODE: SECTION CODE: SECTION CODE: SECTION CODE: SECTION CODE: SECTION CODE: SECTION CODE: SECTION CODE: SECTION CODE: SECTION CODE: SECTION CODE: SECTION CODE: SECTION CODE: SECTION CODE: SECTION CODE: SECTION CODE: SECTION CODE: SECTION CODE: SECTION CODE: SECTION CODE: SECTION CODE: SECTION CODE: SECTION CODE: SECTION CODE: SECTION CODE: SECTION CODE: SECTION CODE: 2/03 WN12X50 W12X50A W12X50B W12X50C W12X49 W12X48 W12X47 WN12X45 W12X45A W12X45B W12X44A W12X44B W12X44C W12X40A WN12X40 W12X40B W12X40C W12X40D W12X40E W12X40F W12X39A W12X39B W12X39C W12X38A W12X38B W12X37 W12X36A W12X36B W12X36C W12X36D WN12X35 W12X35A W12X35B W12X34A W12X34B W12X33 W12X32A W12X32B W12X32C W12X31A W12X31B W12X31C W12X31D WIDE FLANGE WIDE FLANGE WIDE FLANGE WIDE FLANGE WIDE FLANGE WIDE FLANGE WIDE FLANGE WIDE FLANGE WIDE FLANGE WIDE FLANGE WIDE FLANGE WIDE FLANGE WIDE FLANGE WIDE FLANGE WIDE FLANGE WIDE FLANGE WIDE FLANGE WIDE FLANGE WIDE FLANGE WIDE FLANGE WIDE FLANGE WIDE FLANGE WIDE FLANGE WIDE FLANGE WIDE FLANGE WIDE FLANGE WIDE FLANGE WIDE FLANGE WIDE FLANGE WIDE FLANGE WIDE FLANGE WIDE FLANGE WIDE FLANGE WIDE FLANGE WIDE FLANGE WIDE FLANGE WIDE FLANGE WIDE FLANGE WIDE FLANGE WIDE FLANGE WIDE FLANGE WIDE FLANGE WIDE FLANGE 12X50 12X50A 12X50B 12X50C 12X49 12X48 12X47 12X45 12X45A 12X45B 12X44A 12X44B 12X44C 12X40A 12X40 12X40B 12X40C 12X40D 12X40E 12X40F 12X39A 12X39B 12X39C 12X38A 12X38B 12X37 12X36A 12X36B 12X36C 12X36D 12X35 12X35A 12X35B 12X34A 12X34B 12X33 12X32A 12X32B 12X32C 12X31A 12X31B 12X31C 12X31D SECTION CODE: SECTION CODE: SECTION CODE: SECTION CODE: SECTION CODE: SECTION CODE: SECTION CODE: SECTION CODE: SECTION CODE: SECTION CODE: SECTION CODE: SECTION CODE: SECTION CODE: SECTION CODE: SECTION CODE: SECTION CODE: SECTION CODE: SECTION CODE: SECTION CODE: SECTION CODE: SECTION CODE: SECTION CODE: SECTION CODE: SECTION CODE: SECTION CODE: SECTION CODE: SECTION CODE: SECTION CODE: SECTION CODE: SECTION CODE: SECTION CODE: SECTION CODE: SECTION CODE: SECTION CODE: SECTION CODE: SECTION CODE: SECTION CODE: SECTION CODE: SECTION CODE: SECTION CODE: SECTION CODE: SECTION CODE: SECTION CODE: 15.50 W12X31E W12X31F W12X30A W12X30B WN12X30 W12X30C W12X29 W12X28A W12X28B W12X28C W12X28X W12X27A W12X27B W12X27C WN12X26 W12X25A W12X25B W12X25C W12X25D WN12X22 WN12X19 W12X16 WN12X16 WN12X14 WN10X112 WN10X100 W10X89 WN10X88 WN10X77 W10X72 WN10X68 W10X66 W10X64 W10X63 WN10X60 W10X59 HN10X57 W10X56 WN10X54 W10X54 W10X50 WN10X49 W10X49 WIDE FLANGE 12X31E WIDE FLANGE 12X31F WIDE FLANGE 12X30A WIDE FLANGE 12X30B WIDE FLANGE 12X30 WIDE FLANGE 12X30C WIDE FLANGE 12X29 WIDE FLANGE 12X28A WIDE FLANGE 12X28B WIDE FLANGE 12X28C W12 taken from AISC 1940 WIDE FLANGE 12X27A WIDE FLANGE 12X27B WIDE FLANGE 12X27C WIDE FLANGE 12X26 WIDE FLANGE 12X25A WIDE FLANGE 12X25B WIDE FLANGE 12X25C WIDE FLANGE 12X25D WIDE FLANGE 12X22 WIDE FLANGE 12X19 WIDE FLANGE 12X16 WIDE FLANGE 12X16 WIDE FLANGE 12X14 WIDE FLANGE 10X112 WIDE FLANGE 10X100 WIDE FLANGE 12X89 WIDE FLANGE 10X88 WIDE FLANGE 10X77 WIDE FLANGE 10X72 WIDE FLANGE 10X68 WIDE FLANGE 10X66 WIDE FLANGE 10X64 WIDE FLANGE 10X63 WIDE FLANGE 10X60 WIDE FLANGE 10X59 WIDE FLANGE 10X57 WIDE FLANGE 10X56 WIDE FLANGE 10X54 WIDE FLANGE 10X54 WIDE FLANGE 10X50 WIDE FLANGE 10X49 WIDE FLANGE 10X49 BRASS-GIRDER SECTION CODE: SECTION CODE: SECTION CODE: SECTION CODE: SECTION CODE: SECTION CODE: SECTION CODE: SECTION CODE: SECTION CODE: SECTION CODE: SECTION CODE: SECTION CODE: SECTION CODE: SECTION CODE: SECTION CODE: SECTION CODE: SECTION CODE: SECTION CODE: SECTION CODE: SECTION CODE: SECTION CODE: SECTION CODE: SECTION CODE: SECTION CODE: SECTION CODE: SECTION CODE: SECTION CODE: SECTION CODE: SECTION CODE: SECTION CODE: SECTION CODE: SECTION CODE: SECTION CODE: SECTION CODE: SECTION CODE: SECTION CODE: SECTION CODE: SECTION CODE: SECTION CODE: SECTION CODE: SECTION CODE: SECTION CODE: SECTION CODE: 2/03 W10X45A WN10X45 W10X45B W10X44 W10X43 W10X42A HN10X42 W10X42B W10X41 W10X40A W10X40B WN10X39 W10X37 W10X36 W10X35A W10X35B W10X34 WN10X33 W10X33 W10X32A W10X32B W10X31A W10X31B W10X30A W10X30B WN10X30 W10X30C W10X30D W10X29A W10X29B W10X29C W10X29D W10X28A W10X28B W10X27 WN10X26 W10X26A W10X26B W10X25A W10X25B W10X25C W10X25D W10X25E WIDE FLANGE WIDE FLANGE WIDE FLANGE WIDE FLANGE WIDE FLANGE WIDE FLANGE WIDE FLANGE WIDE FLANGE WIDE FLANGE WIDE FLANGE WIDE FLANGE WIDE FLANGE WIDE FLANGE WIDE FLANGE WIDE FLANGE WIDE FLANGE WIDE FLANGE WIDE FLANGE WIDE FLANGE WIDE FLANGE WIDE FLANGE WIDE FLANGE WIDE FLANGE WIDE FLANGE WIDE FLANGE WIDE FLANGE WIDE FLANGE WIDE FLANGE WIDE FLANGE WIDE FLANGE WIDE FLANGE WIDE FLANGE WIDE FLANGE WIDE FLANGE WIDE FLANGE WIDE FLANGE WIDE FLANGE WIDE FLANGE WIDE FLANGE WIDE FLANGE WIDE FLANGE WIDE FLANGE WIDE FLANGE 10X45A 10X45 10X45B 10X44 10X43 10X42A 10X42 10X42B 10X41 10X40A 10X40B 10X39 10X37 10X36 10X35A 10X35B 10X34 10X33 10X33 10X32A 10X32B 10X31A 10X31B 10X30A 10X30B 10X30 10X30C 10X30D 10x29A 10X29B 10X29C 10X29D 10X28A 10X28B 10X27 10X26 10X26A 10X26B 10X25A 10X25B 10X25C 10X25D 10X25E SECTION CODE: SECTION CODE: SECTION CODE: SECTION CODE: SECTION CODE: SECTION CODE: SECTION CODE: SECTION CODE: SECTION CODE: SECTION CODE: SECTION CODE: SECTION CODE: SECTION CODE: SECTION CODE: SECTION CODE: SECTION CODE: SECTION CODE: SECTION CODE: SECTION CODE: SECTION CODE: SECTION CODE: SECTION CODE: SECTION CODE: SECTION CODE: SECTION CODE: SECTION CODE: SECTION CODE: SECTION CODE: SECTION CODE: SECTION CODE: SECTION CODE: SECTION CODE: SECTION CODE: SECTION CODE: SECTION CODE: SECTION CODE: SECTION CODE: SECTION CODE: SECTION CODE: SECTION CODE: SECTION CODE: SECTION CODE: SECTION CODE: 15.51 W10X25F W10X24 W10X23A W10X23B W10X23C W10X23D W10X23E W10X22A W10X22B WN10X22 W10X22C W10X22D W10X22E W10X21A W10X21B W10X21C WN10X19 WN10X17 WN10X15 WN10X12 W10X11 W9X48 W9X44 W9X43 W9X38 W9X36 W9X35A W9X35B W9X35C W9X33 W9X32 W9X30A W9X30B W9X29 W9X28A W9X28B W9X27 W9X26 W9X25A W9X25B W9X25C W9X24A W9X24B WIDE FLANGE WIDE FLANGE WIDE FLANGE WIDE FLANGE WIDE FLANGE WIDE FLANGE WIDE FLANGE WIDE FLANGE WIDE FLANGE WIDE FLANGE WIDE FLANGE WIDE FLANGE WIDE FLANGE WIDE FLANGE WIDE FLANGE WIDE FLANGE WIDE FLANGE WIDE FLANGE WIDE FLANGE WIDE FLANGE WIDE FLANGE WIDE FLANGE WIDE FLANGE WIDE FLANGE WIDE FLANGE WIDE FLANGE WIDE FLANGE WIDE FLANGE WIDE FLANGE WIDE FLANGE WIDE FLANGE WIDE FLANGE WIDE FLANGE WIDE FLANGE WIDE FLANGE WIDE FLANGE WIDE FLANGE WIDE FLANGE WIDE FLANGE WIDE FLANGE WIDE FLANGE WIDE FLANGE WIDE FLANGE 10X25F 10X24 10X23A 10X23B 10X23C 10X23D 10X23E 10X22A 10X22B 10X22 10X22C 10X22D 10X22E 10X21A 10X21B 10X21C 10X19 10X17 10X15 10X12 10X11 9X48 9X44 9X43 9X38 9X36 9X35A 9X35B 9X35C 9X33 9X32 9X30A 9X30B 9X29 9X28A 9X28B 9X27 9X26 9X25A 9X25B 9X25C 9X24A 9X24B BRASS-GIRDER SECTION CODE: SECTION CODE: SECTION CODE: SECTION CODE: SECTION CODE: SECTION CODE: SECTION CODE: SECTION CODE: SECTION CODE: SECTION CODE: SECTION CODE: SECTION CODE: SECTION CODE: SECTION CODE: SECTION CODE: SECTION CODE: SECTION CODE: SECTION CODE: SECTION CODE: SECTION CODE: SECTION CODE: SECTION CODE: SECTION CODE: SECTION CODE: SECTION CODE: SECTION CODE: SECTION CODE: SECTION CODE: SECTION CODE: SECTION CODE: SECTION CODE: SECTION CODE: SECTION CODE: SECTION CODE: SECTION CODE: SECTION CODE: SECTION CODE: SECTION CODE: SECTION CODE: SECTION CODE: SECTION CODE: SECTION CODE: SECTION CODE: 2/03 W9X24C W9X23A W9X23B W9X23C W9X22 W9X21A W9X21B W9X21C W9X21D W9X21E W9X21F W9X20A W9X20B W9X20C W9X20D W9X19A W9X19B WN8X67 WN8X58 WN8X48 WN8X40 W8X37 W8X36 HN8X36 WN8X35 W8X33 W8X32A W8X32B WN8X31 W8X30A W8X30B W8X29 W8X28 WN8X28 W8X27A W8X27B W8X26 W8X25A W8X25B W8X25C W8X25D W8X25E W8X24A WIDE FLANGE WIDE FLANGE WIDE FLANGE WIDE FLANGE WIDE FLANGE WIDE FLANGE WIDE FLANGE WIDE FLANGE WIDE FLANGE WIDE FLANGE WIDE FLANGE WIDE FLANGE WIDE FLANGE WIDE FLANGE WIDE FLANGE WIDE FLANGE WIDE FLANGE WIDE FLANGE WIDE FLANGE WIDE FLANGE WIDE FLANGE WIDE FLANGE WIDE FLANGE WIDE FLANGE WIDE FLANGE WIDE FLANGE WIDE FLANGE WIDE FLANGE WIDE FLANGE WIDE FLANGE WIDE FLANGE WIDE FLANGE WIDE FLANGE WIDE FLANGE WIDE FLANGE WIDE FLANGE WIDE FLANGE WIDE FLANGE WIDE FLANGE WIDE FLANGE WIDE FLANGE WIDE FLANGE WIDE FLANGE 9X24C 9X23A 9X23B 9X23C 9X22 9X21A 9X21B 9X21C 9X21D 9X21E 9X21F 9X20A 9X20B 9X20C 9X20D 9X19A 9X19B 8X67 8X58 8X48 8X40 8X37 8X36 8X36 8X35 8X33 8X32A 8X32B 8X31 8X30A 8X30B 8X29 8X28 8X28 8X27A 8X27B 8X26 8X25A 8X25B 8X25C 8X25D 8X25E 8X24A SECTION CODE: SECTION CODE: SECTION CODE: SECTION CODE: SECTION CODE: SECTION CODE: SECTION CODE: SECTION CODE: SECTION CODE: SECTION CODE: SECTION CODE: SECTION CODE: SECTION CODE: SECTION CODE: SECTION CODE: SECTION CODE: SECTION CODE: SECTION CODE: SECTION CODE: SECTION CODE: SECTION CODE: SECTION CODE: SECTION CODE: SECTION CODE: SECTION CODE: SECTION CODE: SECTION CODE: SECTION CODE: SECTION CODE: SECTION CODE: SECTION CODE: SECTION CODE: SECTION CODE: SECTION CODE: SECTION CODE: SECTION CODE: SECTION CODE: SECTION CODE: SECTION CODE: SECTION CODE: SECTION CODE: SECTION CODE: SECTION CODE: 15.52 WN8X24 W8X24B W8X23A W8X23B W8X22A W8X22B W8X22C W8X21A W8X21B WN8X21 W8X21C W8X21D W8X21E W8X20A W8X20B W8X20C W8X20D W8X20E W8X19A W8X19B W8X18A WN8X18 W8X18B W8X18C W8X18D W8X18E W8X17A W8X17B W8X17C W8X17D W8X17E W8X17F W8X17G W8X17H W8X16 WN8X15 WN8X13 WN8X10 W7X26 W7X25 W7X22A W7X22B W7X21 WIDE FLANGE WIDE FLANGE WIDE FLANGE WIDE FLANGE WIDE FLANGE WIDE FLANGE WIDE FLANGE WIDE FLANGE WIDE FLANGE WIDE FLANGE WIDE FLANGE WIDE FLANGE WIDE FLANGE WIDE FLANGE WIDE FLANGE WIDE FLANGE WIDE FLANGE WIDE FLANGE WIDE FLANGE WIDE FLANGE WIDE FLANGE WIDE FLANGE WIDE FLANGE WIDE FLANGE WIDE FLANGE WIDE FLANGE WIDE FLANGE WIDE FLANGE WIDE FLANGE WIDE FLANGE WIDE FLANGE WIDE FLANGE WIDE FLANGE WIDE FLANGE WIDE FLANGE WIDE FLANGE WIDE FLANGE WIDE FLANGE WIDE FLANGE WIDE FLANGE WIDE FLANGE WIDE FLANGE WIDE FLANGE 8X24 8X24B 8X23A 8X23B 8X22A 8X22B 8X22C 8X21A 8X21B 8X21 8X21C 8X21D 8X21E 8X20A 8X20B 8X20C 8X20D 8X20E 8X19A 8X19B 8X18A 8X18 8X18B 8X18C 8X18D 8X18E 8X17A 8X17B 8X17C 8X17D 8X17E 8X17F 8X17G 8X17H 8X16 8X15 8X13 8X10 7X26 7X25 7X22A 7X22B 7X21 BRASS-GIRDER SECTION CODE: SECTION CODE: SECTION CODE: SECTION CODE: SECTION CODE: SECTION CODE: SECTION CODE: SECTION CODE: SECTION CODE: SECTION CODE: SECTION CODE: SECTION CODE: SECTION CODE: SECTION CODE: SECTION CODE: SECTION CODE: SECTION CODE: SECTION CODE: SECTION CODE: SECTION CODE: SECTION CODE: SECTION CODE: SECTION CODE: SECTION CODE: SECTION CODE: SECTION CODE: SECTION CODE: SECTION CODE: SECTION CODE: SECTION CODE: SECTION CODE: SECTION CODE: SECTION CODE: SECTION CODE: SECTION CODE: SECTION CODE: SECTION CODE: SECTION CODE: SECTION CODE: SECTION CODE: SECTION CODE: SECTION CODE: SECTION CODE: 2/03 W7X20A W7X20B W7X20C W7X20D W7X20E W7X19 W7X18A W7X18B W7X17A W7X17B W7X17C W7X15A W7X15B W7X15C W7X15D W7X15E W7X14 W6X46 W6X41A W6X41B W6X37 W6X32 W6X30 W6X27A W6X27B WN6X25 W6X25 W6X23A W6X23B W6X22A W6X22B W6X21 W6X20A WN6X20 W6X20B W6X20C W6X18A W6X18B W6X18C W6X18D W6X17A W6X17B W6X16A WIDE FLANGE WIDE FLANGE WIDE FLANGE WIDE FLANGE WIDE FLANGE WIDE FLANGE WIDE FLANGE WIDE FLANGE WIDE FLANGE WIDE FLANGE WIDE FLANGE WIDE FLANGE WIDE FLANGE WIDE FLANGE WIDE FLANGE WIDE FLANGE WIDE FLANGE WIDE FLANGE WIDE FLANGE WIDE FLANGE WIDE FLANGE WIDE FLANGE WIDE FLANGE WIDE FLANGE WIDE FLANGE WIDE FLANGE WIDE FLANGE WIDE FLANGE WIDE FLANGE WIDE FLANGE WIDE FLANGE WIDE FLANGE WIDE FLANGE WIDE FLANGE WIDE FLANGE WIDE FLANGE WIDE FLANGE WIDE FLANGE WIDE FLANGE WIDE FLANGE WIDE FLANGE WIDE FLANGE WIDE FLANGE 7X20A 7X20B 7X20C 7X20D 7X20E 7X19 7X18A 7X18B 7X17A 7X17B 7X17C 7X15A 7X15B 7X15C 7X15D 7X15E 7X14 6X46 6X41A 6X41B 6X37 6X32 6X30 6X27A 6X27B 6X25 6X25 6X23A 6X23B 6X22A 6X22B 6X21 6X20A 6X20 6X20B 6X20C 6X18A 6X18B 6X18C 6X18D 6X17A 6X17B 6X16A SECTION CODE: SECTION CODE: SECTION CODE: SECTION CODE: SECTION CODE: SECTION CODE: SECTION CODE: SECTION CODE: SECTION CODE: SECTION CODE: SECTION CODE: SECTION CODE: SECTION CODE: SECTION CODE: SECTION CODE: SECTION CODE: SECTION CODE: SECTION CODE: SECTION CODE: SECTION CODE: SECTION CODE: SECTION CODE: SECTION CODE: SECTION CODE: SECTION CODE: SECTION CODE: SECTION CODE: SECTION CODE: SECTION CODE: SECTION CODE: SECTION CODE: SECTION CODE: SECTION CODE: SECTION CODE: SECTION CODE: SECTION CODE: SECTION CODE: SECTION CODE: SECTION CODE: SECTION CODE: SECTION CODE: SECTION CODE: SECTION CODE: 15.53 W6X16B W6X16C WN6X16 W6X16D W6X15A W6X15B W6X15C W6X15D WN6X15 W6X15E W6X14 W6X13A W6X13B W6X12A W6X12B W6X12C WN6X12 W6X12D W6X11A W6X11B WN6X9 W6X8 WN5X19 W5X18A W5X18B W5X17 WN5X16 W5X16 W5X15 W5X14A W5X14B W5X13A W5X13B W5X12A W5X12B W5X12C W5X10 W5X9A W5X9B W5X9C W4X16 W4X13A WN4X13 WIDE FLANGE WIDE FLANGE WIDE FLANGE WIDE FLANGE WIDE FLANGE WIDE FLANGE WIDE FLANGE WIDE FLANGE WIDE FLANGE WIDE FLANGE WIDE FLANGE WIDE FLANGE WIDE FLANGE WIDE FLANGE WIDE FLANGE WIDE FLANGE WIDE FLANGE WIDE FLANGE WIDE FLANGE WIDE FLANGE WIDE FLANGE WIDE FLANGE WIDE FLANGE WIDE FLANGE WIDE FLANGE WIDE FLANGE WIDE FLANGE WIDE FLANGE WIDE FLANGE WIDE FLANGE WIDE FLANGE WIDE FLANGE WIDE FLANGE WIDE FLANGE WIDE FLANGE WIDE FLANGE WIDE FLANGE WIDE FLANGE WIDE FLANGE WIDE FLANGE WIDE FLANGE WIDE FLANGE WIDE FLANGE 6X16B 6X16C 6X16 6X16D 6X15A 6X15B 6X15C 6X15D 6X15 6X15E 6X14 6X13A 6X13B 6X12A 6X12B 6X12C 6X12 6X12D 6X11A 6X11B 6X9 6X8 5X19 5X18A 5X18B 5X17 5X16 5X16 5X15 5X14A 5X14B 5X13A 5X13B 5X12A 5X12B 5X12C 5X10 5X9A 5X9B 5X9C 4X16 4X13A 4X13 BRASS-GIRDER 2/03 SECTION CODE: SECTION CODE: SECTION CODE: SECTION CODE: SECTION CODE: SECTION CODE: SECTION CODE: SECTION CODE: SECTION CODE: SECTION CODE: SECTION CODE: SECTION CODE: SECTION CODE: SECTION CODE: SECTION CODE: SECTION CODE: SECTION CODE: SECTION CODE: SECTION CODE: SECTION CODE: SECTION CODE: SECTION CODE: SECTION CODE: SECTION CODE: SECTION CODE: SECTION CODE: SECTION CODE: SECTION CODE: SECTION CODE: SECTION CODE: SECTION CODE: SECTION CODE: SECTION CODE: SECTION CODE: W4X13B W4X13C W4X11A W4X11B W4X10A W4X10B W4X10C W4X10D W4X9A W4X9B W4X8A W4X8B W4X7A W4X7B W4X7C W4X7D W4X6A W4X6B W3X9A W3X9B W3X7A W3X7B W3X6A W3X6B W3X6C W3X6D W3X6E W3X5A W3X5B W3X5C W3X5D W3X5E AASHTO-I AASHTO-IB SECTION CODE: SECTION CODE: SECTION CODE: SECTION CODE: SECTION CODE: SECTION CODE: SECTION CODE: AASHTO-II AASHTO-III AASHTO-IV AASHTO-V AASHTO-VI K3 K4 WIDE FLANGE 4X13B WIDE FLANGE 4X13C WIDE FLANGE 4X11A WIDE FLANGE 4X11B WIDE FLANGE 4X10A WIDE FLANGE 4X10B WIDE FLANGE 4X10C WIDE FLANGE 4X10D WIDE FLANGE 4X9A WIDE FLANGE 4X9B WIDE FLANGE 4X8A WIDE FLANGE 4X8B WIDE FLANGE 4X7A WIDE FLANGE 4X7B WIDE FLANGE 4X7C WIDE FLANGE 4X7D WIDE FLANGE 4X6A WIDE FLANGE 4X6B WIDE FLANGE 3X9A WIDE FLANGE 3X9B WIDE FLANGE 3X7A WIDE FLANGE 3X7B WIDE FLANGE 3X6A WIDE FLANGE 3X6B WIDE FLANGE 3X6C WIDE FLANGE 3X6D WIDE FLANGE 3X6E WIDE FLANGE 3X5A WIDE FLANGE 3X5B WIDE FLANGE 3X5C WIDE FLANGE 3X5D WIDE FLANGE 3X53 AASHTO I-GIRDER 28 IN MOD AASHTO TYPE I MANUFACT IN CASPER AASHTO I-GIRDER 36 IN AASHTO I-GIRDER 45 IN AASHTO I-GIRDER 54 IN AASHTO I-GIRDER 63 IN AASHTO GIRDER 72 IN KANSAS-K3 KANSAS-K4 SECTION CODE: 15.54 MONT-A THIS SECTION IS MANUFACTURED BY BY UNITED PRESTRESS BRASS-GIRDER