1
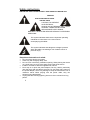
INSTRUCTION MANUAL USB direct recording turntable MODEL: L-85 Please read and follow these instructions before using your unit. www.lenco.com Safety instructions .............................................................................. 3 Assembly ............................................................................................ 6 Description ......................................................................................... 7 Mains connection ............................................................................... 9 Amplifier connection .......................................................................... 9 Technical specification ....................................................................... 9 Service and support ......................................................................... 10 2 Safety instructions IMPORTANT SAFETY INSTRUCTIONS ‐ READ CAREFULLY BEFORE USE. CAUTION RISK OF ELECTRICAL SHOCK DO NOT OPEN CAUTION: TO PREVENT AN ELECTRICAL SHOCK, DO NOT REMOVE ANY COVER SCREWS. THERE ARE NO USER SERVICEABLE PARTS INSIDE. REQUEST A QUALIFIED SERVICE PERSON TO PERFORM SERVICING. This symbol indicates that there are important operating maintenance instructions in the user manual accompanying this tablet. This symbol indicates that dangerous voltage is present within this tablet, constituting a risk of electric shock or personal injury. Keep these instructions in mind: Do not use this device near water. Clean only with a slightly damp cloth. Do not cover or block any ventilation opening. When placing the device on a shelf, leave 5 cm (2”) free space around the whole device. Install in accordance with the supplied user manual. Don’t step on or pinch the power adaptor. Be very careful, particularly near the plugs and the cable’s exit point. Do not place heavy items on the power adaptor, which may damage it. Keep the entire device out of children’s reach! When playing with the power cable, they can seriously injure themselves. Unplug this device during lightning storms or when unused for a long period. 3 Keep the device away from heat sources such as radiators, heaters, stoves, candles and other heat-generating products. Avoid using the device near strong magnetic fields. ESD can disturb normal usage of this device. If so, simply reset and restart the device following the instruction manual. During file transmission, please handle with care and operate in a static-free environment. Safety instructions - continued WARNING! NEVER INSERT AN OBJECT INTO THE PRODUCT THROUGH THE VENTS OR OPENINGS. HIGH VOLTAGE FLOWS THRU THE PRODUCT AND INSERTING AN OBJECT CAN CAUSE ELECTRIC SHOCK AND/OR SHORT CIRCUIT INTERNAL PARTS. FOR THE SAME REASON, DO NOT SPILL WATER OR LIQUID ON THE PRODUCT. Do NOT use in wet or moist areas such as bathrooms, steamy kitchens or near swimming pools. Do not use this device when condensation may occur. This tablet is produced according to all current safety regulations. The following safety tips should safeguard users against careless use and dangers involved with such use. Although this device is manufactured with the utmost care and checked several times before leaving the factory, it is still possible that problems may occur, as with all electrical appliances. If you notice smoke, an excessive build-up of heat or any other unexpected phenomena, you should disconnect the plug from the main power socket immediately. This device must be well ventilated at all time! This device must operate on a power source as specified on the specification label. If you are not sure of the type of power supply used in your home, consult your dealer or local power company. The socket outlet must be installed near the equipment and must be easily accessible. Do not overload AC outlets or extension cords. Overloading can cause fire or electric shock. Devices with Class 1 construction should be connected to a main socket outlet with a protective earthed connection. Devices with Class 2 construction do not require a earthed connection. Keep away from rodents. Rodents enjoy biting on power cords. Always hold the plug when pulling it out of the main supply socket. Do not pull the power cord. This can cause a short circuit. Avoid placing the device on any surfaces that may be subject to vibrations or shocks. 4 To protect the device during a thunderstorm, unplug the AC power adaptor When the device is not in use for long periods, unplug the AC power adaptor for safety reasons. To clean the device, use a soft dry cloth. Do NOT use solvents or petrol based fluids. To remove severe stains, you may use a damp cloth with dilute detergent. The supplier is not responsible for damage or lost data caused by malfunction, misuse, modification of the device or battery replacement. Safety instructions - continued Do not interrupt the connection when the device is formatting or transferring files. Otherwise, data may be corrupted or lost. The USB memory stick should be plugged into the unit directly. Don’t use an USB extension cable because it can cause interference resulting in failing of data. Information for power adaptor 1. Power supply adaptor 2. Manufacturer: HON-KWANG 3. Model number:HK-AD-120A100-EU 4. Adaptor type: External AC adaptor 5. Use only original AC adaptor 6. Use only the power supply listed in the user instructions 5 Assembly Drive belt: The belt and turntable platter have been installed properly at factory, but the belt may be loose during transportation. If so, the following procedures will be taken for belt installation by yourself. A. Remove the rubber mat from the turntable platter and the E ring from the turntable shaft, then release the turntable platter from the shaft B. Put the drive belt on the inner rim of the turntable platter and pull it through the hole C. Hold the belt with your fingers and place the belt onto the motor pulley as shown in the drawing. Clip the E ring on the shaft and place the rubber mat onto the turntable platter. Caution: 1. Make sure that the drive belt is not twisted or distorted. 2. Avoid oil. Oil splashes will make the belt slippery. D. Auto Return Reset: Always do the reset for Auto Return once you move this product. The mechanism of Auto Return will rotate irregularly when moving and it will cause the malfunction of Auto Return. The following steps will reset the mechanism to normal. 1. Place a record on the platter and play it. 2. Manually lever the tone arm and place it to the blank part of the end of the record. 3. The mechanism of Auto Return function will be adjusted properly and the tone arm will automatically return to the arm rest. 6 Description 7 1. Adaptor: Use this adaptor when playing 45 RPM records. 2. Platter: Place a record here to play. 3. 33/45 RPM Switch: Switch 33 or 45 rpm for playing a record at a correct speed. 4. REC: Press it to enter into record mode. 5. SPLIT For stopping the current recording, forming a record file manually and then going on recording the next track. 6. Pick-up arm stand 7. Pick-up Arm Lift Stick: To raise up and down the Pick-up Arm and cue at a proper place of a vinyl. 8. Pick-up Arm Lock: Use this to lock the Pick-up Arm in place when not in use. 9. Dust Cover: Use this to protect the turntable from exposure to dust. The cover may be opened or removed during use, but should remain closed when the turntable is not in use. 10. RCA Line Out Cable Connect the RCA line out to a mixer or an amplifier in your sound system. 11. Power Switch: For turning the power on or off through this switch. Please switch off the unit after finishing the playing to save the energy.. 12. Power Adaptor Connect this adaptor to an AC outlet of the proper voltage. 13. USB Port Input: Plug in a USB Pen Drive for recording the music from a record. *The design is only for USB Flash Drive. To prevent the power supply is not sufficient and overheated of the circuit(IC), always get the external power supply if using a hard drive. 14. Reject Press it to force the arm to return directly to the arm rest 15. LED USB Record Operation and LED Signal Indication USB storage device is not plugged. -> LED light is off 8 USB storage device is plugged in -> LED flashes When the system is ready to record. -> LED light is on Press REC button to start recording. -> LED blinks slowly. Press SPLIT button to create new file in the recording. Press REC button again to stop recording. -> LED is flashing for a short time, then LED light is stably on again. Note: Do not remove the USB storage device if the LED is flashing. Mains connection Ensure that the mains voltage of your home corresponds to the operating voltage of the unit. Your unit is ready to be connected to a correct voltage of your location. Amplifier connection Connect RCA line out cable (10) to the AUX input on your amplifier: ‐ Red plug into R channel input. ‐ White plug into L channel input. ‐ Place the record of your choice on the turntable. If it is a 45 rpm, do not forget to place the adaptor (1) on the record spindle. ‐ Choose the desired playing speed: o 33 rpm -> button unlocked o 45 rpm-> button locked. ‐ Release the pick-up arm clip. ‐ Place the cartridge vertically over the first track of the record, the turntable starts turning. ‐ When the record is over, the pick-up arm returns to its rest , the turntable stops turning Take care that the pick-up lift stick is in forward-turned (lift down), close pick-up arm lock to secure pick-up arm. Technical specification Power Supply: AC100-240 60/50HZ Power Consumption: 12W Wow & Flutter: 0.25% 9 Distortion: 3%~4% S/N: 50 dB Audio Output Voltage: 500mV ±200mV USB: 5V/500 mA Service and support For information: For support: www.lenco.com http://lencosupport.zendesk.com Lenco helpdesk: Germany The Netherlands Belgium France 0900-1520530 (Local charges) 0900-23553626 (Local charges + 1ct p/min) 02-6200115 (Local charges) 03-81484280 (Local charges) The helpdesk is accessible from Monday till Friday from 9 AM till 6 PM. When contacting Lenco, you will always be asked for the model and serial number of your product. The serial number can be found on the back of the device. Please write down the serial number below: Model: L-85 Serial number:_________________________________ Lenco offers service and warranty in accordance to European law, which means that in case of repairs (both during and after the warranty period) you should contact your local dealer. Important note: It is not possible to send products that need repairs to Lenco directly. Important note: If this unit is opened or accessed by a non-official service center in any way, the warranty expires. This device is not suitable for professional use. In case of professional use, all warranty obligations of the manufacturer will be voided. If at any time in the future you should need to dispose of this product please note that: Waste electrical products should not be disposed of with household waste. Please recycle where 10 facilities exist. Check with your Local Authority or retailer for recycling advice. (Waste Electrical and Electronic Equipment Directive) Products with the CE marking comply with the EMC Directive (2004/108/EC) and the Low Voltage Directive (2006/95/EC) issued by the Commission of the European Community. The declaration of conformity may be consulted at https://lencosupport.zendesk.com/forums/22413161‐CE‐Documents ®All rights reserved 11