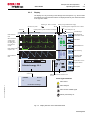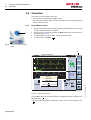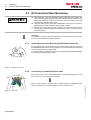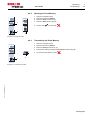
1
DEFIGARD 5000®
Art. no.: 0-48-0060 Rev.: a
*0-48-0060*
Defibrillator and Monitor
User Guide
Sales and Service Information
The SCHILLER sales and service centre network is world-wide. For the address of your
local distributor, contact your nearest SCHILLER subsidiary.
In case of difficulty a complete list of all distributors and subsidiaries is provided on our
internet site:
http://www.schiller.ch
Sales information can also be obtained from:
[email protected]
Manufacturer
SCHILLER Médical S.A.S.
4, rue Louis Pasteur
F-67162 Wissembourg
Web:
Tel: + 33 3 88 63 36 00
Fax: +33 3 88 94 12 82
E-mail: [email protected]
www.schiller.fr
Address headquarters
SCHILLER AG
Altgasse 68
CH-6341 Baar, Switzerland
Web:
Article no.: 0-48-0060 Rev.: a
Issue date: 05.12.05
S.Art.no.: 2.510599
Tel: +41 (0) 41 766 42 42
Fax: +41 (0) 41 761 08 80
E-mail: [email protected]
www.schiller.ch
DEFIGARD 5000
User Guide
Art. no.: 0-48-0060 Rev.: a
Table of Contents
1
Safety Notes .............................................. 5
1.1
Responsibility of the User .................................................. 5
1.2
Intended Use ........................................................................ 5
1.3
Organisational Measures..................................................... 6
1.4
Operational Precautions ...................................................... 6
1.5
Operation with other Devices .............................................. 7
1.6
Maintenance .......................................................................... 7
1.7
General Safety Notes ........................................................... 8
1.8
Additional Terms .................................................................. 8
1.8.1
1.8.2
Implied Authorisation.......................................................................... 8
Terms of Warranty ............................................................................. 8
1.9
Display Symbols/Indicators................................................. 9
1.9.1
1.9.2
1.9.3
1.9.4
Symbols Used in this User Guide ...................................................... 9
Symbols Used on the Device ........................................................... 10
Symbols Used on the Battery........................................................... 10
Symbols Used on the Electrode Package........................................ 11
2
Components and Operation .................. 12
2.1
Design.................................................................................. 12
2.1.1
2.1.2
Available Options ............................................................................. 13
Overview of the Configurable Settings............................................. 13
2.2
Operating Elements............................................................ 14
2.2.1
2.2.2
2.2.3
2.2.4
2.2.5
Front Side.........................................................................................
Back Panel .......................................................................................
Paddle Operation Elements .............................................................
LEDs ................................................................................................
Display .............................................................................................
3
Start-up and Initial Preparation ............. 18
3.1
Mains and Battery Operation............................................. 18
3.1.1
3.1.2
3.1.3
Connecting the Unit to the Mains and Switching it on...................... 18
Battery Operation ............................................................................. 19
Operation with External Constant Voltage Source........................... 19
14
15
16
16
17
3.2
Switching off and Disconnecting from Mains.................. 20
3.2.1
3.2.2
3.2.3
Internal Safety Discharge................................................................. 20
Mains Supply Interruption ................................................................ 20
Ensuring Operational Readiness ..................................................... 20
3.3
Inserting Printing Paper .................................................... 21
3.4
Operation............................................................................. 22
3.4.1
3.4.2
Direct Menu Access ......................................................................... 22
Accessing Menus and Function Keys via Display Fields ................. 23
4
Monitoring ............................................... 24
4.1
Softkeys, Waveforms and Measurement Fields .............. 24
4.2
Alarm Messages ................................................................. 25
4.3
ECG and Heart Rate Monitoring ........................................ 26
Page 1
DEFIGARD 5000
Page 2
4.3.1
4.3.2
4.3.3
4.3.4
4.3.5
4.3.6
4.3.7
Quick Diagnosis of the ECG Using Defibrillation Electrodes ...........
Connecting a 3-Lead ECG Patient Cable ........................................
Connecting a 4- or 10-Lead ECG Patient Cable..............................
Starting ECG Monitoring ..................................................................
Monitoring a Pacemaker Patient......................................................
ECG Menu .......................................................................................
ECG Error Messages.......................................................................
26
26
27
28
28
29
29
4.4
SPO2 Monitoring.................................................................
Starting SpO2 Monitoring and Test..................................................
SpO2 Menu......................................................................................
SpO2 Error Messages .....................................................................
30
4.4.1
4.4.2
4.4.3
4.5
NIBP Monitoring.................................................................. 32
4.5.1
4.5.2
4.5.3
Starting NIBP Monitoring ................................................................. 33
NIBP Menu....................................................................................... 34
NIBP Error Messages ...................................................................... 34
4.6
Trend Display ...................................................................... 35
4.6.1
4.6.2
4.6.3
Displaying Trends ............................................................................ 35
Deleting the Trend Memory ............................................................. 37
Transmitting the Event Memory ....................................................... 37
5
Defibrillation ............................................38
5.1
Rules and Safety Notes...................................................... 38
5.1.1
5.1.2
Additional Safety Notes for SAED Mode.......................................... 39
Defibrillating Children....................................................................... 39
5.2
General Function ................................................................ 40
5.2.1
5.2.2
Activating the Manual or Automatic Defibrillation Mode................... 40
Manual Defibrillation - Procedure..................................................... 40
5.3
Manual Defibrillation Using Paddles................................. 41
5.3.1
Marking Events ................................................................................ 41
5.4
Manual Defibrillation Using Pads...................................... 42
5.4.1
5.4.2
5.4.3
Applying the Pads ............................................................................ 42
Checking the Electrodes .................................................................. 43
Manual Defibrillation Using Pads - Procedure ................................. 44
5.5
Internal Defibrillation.......................................................... 45
5.6
Synchronised Defibrillation ............................................... 46
5.6.1
5.6.2
Switching to Synchronised Defibrillation .......................................... 46
Synchronised Defibrillation – Procedure.......................................... 47
5.7
Semiautomatic Defibrillation ............................................. 48
5.7.1
5.7.2
Semiautomatic Defibrillation (SAED) – Procedure........................... 48
Defibrillation - Procedure ................................................................. 51
5.8
Defibrillator Error Messages.............................................. 53
6
Pacemaker ...............................................54
6.1
Pacemaker Function........................................................... 54
6.1.1
6.1.2
6.1.3
Fixed-Rate Mode (Fix) ..................................................................... 54
Demand Mode ................................................................................. 54
Overdrive Mode ............................................................................... 54
6.2
Safety Notes ........................................................................ 55
6.3
Guidelines for the Application of External Pacemakers . 55
6.3.1
Attaching the Pacer Pads ................................................................ 56
6.4
Start-up of the Pacemaker ................................................. 57
6.4.1
6.4.2
Pacemaker Display .......................................................................... 57
Selecting Pacemaker Mode ............................................................. 57
Art. no.: 0-48-0060 Rev.: a
30
31
31
Art. no.: 0-48-0060 Rev.: a
DEFIGARD 5000
User Guide
6.4.3
6.4.4
6.4.5
Pacemaker Settings Operational Mode Fix...................................... 58
Demand Mode.................................................................................. 58
Overdrive Mode................................................................................ 59
7
Finishing the Therapy ............................ 60
8
Intervention Summary ........................... 61
8.1
Printing Curves and Measured Values ............................. 62
8.1.1
8.1.2
Example of a Defibrillator Shock Printout......................................... 62
Printer Error Messages .................................................................... 62
9
Default and User-Defined Thresholds .. 63
9.1
User-Defined Thresholds ................................................... 64
9.1.1
9.1.2
9.1.3
9.1.4
9.1.5
ECG Menu .......................................................................................
SpO2 Menu ........................................................................................
NIBP Menu.......................................................................................
User-Defined Thresholds Menu ...................................................
Unit Settings Menu ........................................................................
10
Default Values ......................................... 67
10.1
Default Threshold Values for Adults ................................ 67
10.2
Default Threshold Values for Neonates ........................... 67
10.3
Default Device Settings ..................................................... 68
10.3.1
10.3.2
10.3.3
10.3.4
10.3.5
10.3.6
10.3.7
Alarms ..............................................................................................
NIBP.................................................................................................
Language .........................................................................................
Screen Colour ..................................................................................
Mains Filter.......................................................................................
Serial Number ..................................................................................
Hardware Number............................................................................
10.4
Working Hour Meter .......................................................... 69
10.5
Ethernet ............................................................................... 69
10.6
Options ................................................................................ 69
10.7
Releases .............................................................................. 70
10.8
PC Download ..................................................................... 70
10.9
Locking the Device ............................................................ 70
11
Maintenance ............................................ 71
11.1
Maintenance Interval .......................................................... 71
11.1.1
11.1.2
11.1.3
11.1.4
Visual Unit Check.............................................................................
Defibrillator Test ...............................................................................
Functional Test.................................................................................
Alarm Tests ......................................................................................
11.2
Maintenance Interval for the Battery ................................ 73
64
64
65
65
66
68
68
68
68
68
68
69
71
71
72
72
11.2.1 Battery Disposal ............................................................................... 73
11.2.2 Disposal at the End of the Device's Useful Life ............................... 73
11.3
Cleaning .............................................................................. 74
11.3.1 Cleaning the Casing......................................................................... 74
11.3.2 Accessories and Disposables .......................................................... 74
11.4
Error Detection ................................................................... 75
11.4.1 General Errors.................................................................................. 75
Page 3
DEFIGARD 5000
11.4.2
Technical Error Messages ............................................................... 76
12
Technical Data ........................................77
12.1
System Data ........................................................................ 77
12.2
Defibrillation Pulse ............................................................. 79
12.3
Technical Data - Measured Values.................................... 81
12.3.1
12.3.2
12.3.3
12.3.4
ECG .................................................................................................
NIBP - Non-Invasive Blood Pressure...............................................
SpO2 - Pulsoximetry ........................................................................
Storage of Intervention (Option).......................................................
12.4
Technical Pacemaker Data ................................................ 82
13
Appendix .................................................83
13.1
Accessories DEFIGARD 5000............................................ 83
81
81
82
82
Literature ............................................................................. 85
13.3
Glossary .............................................................................. 85
14
Index ........................................................87
Art. no.: 0-48-0060 Rev.: a
13.2
Page 4
DEFIGARD 5000
User Guide
Safety Notes
Responsibility of the User
1
1.1
1 Safety Notes
1.1
Responsibility of the User
V
V
V
V
V
V
V
V
1.2
Intended Use
V
V
V
V
V
V
Art. no.: 0-48-0060 Rev.: a
The device must only be used by qualified physicians or other persons (only
AED mode) trained in early defibrillation.
The numerical and graphical results as well as any interpretation suggested by
the device must be examined with respect to the patient's overall clinical condition and the quality of the recorded data.
The indications given by this equipment are not a substitute for regular checking
of vital functions.
Make sure that the user has read and understood the user guide, and especially
these safety notes.
Damaged or missing parts must be replaced immediately.
It is the owner's responsibility that the valid regulations for safety and prevention
of accidents are observed.
The device must be stored inaccessible to children.
Properly dispose of the package material and make sure it is out of children's
reach.
V
V
V
The DEFIGARD® 5000 is a defibrillator used for the treatment of ventricular fibrillation (VF) and ventricular tachycardia (VT). The DG 5000 additionally has a
pacemaker function. The monitoring side of the DEFIGARD 5000 gives the most
important parameters: ECG, SpO2 and NIBP and allows continuous monitoring
of the patient from the beginning to the end of the intervention.
The device is only intended for single patient use.
The DEFIGARD® 5000 is intended for hospital use.
The device can be used for adults and children with the corresponding accessory.
The defibrillator may only be used if the following symptoms are found:
– non-responsive
– no respiration
– no pulse
The defibrillator must not be used in semiautomatic mode (AED) if the person:
– is responsive
– is breathing
– has pulse
The DEFIGARD® 5000 is an emergency device that must be ready for use at
any time and in any situation. Make sure that the device is always connected to
the mains or vehicle power supply.
Only operate the device in accordance with the specified technical data.
Do not use the device in areas where there is any danger of explosion or in the
presence of flammable gases such as anaesthetic agents.
Page 5
1
1.3
Safety Notes
Organisational Measures
1.3
DEFIGARD 5000
Organisational Measures
V Before using the unit, ensure that an introduction regarding the unit functions
and the safety precautions has been provided and understood.
V Always store the user guide handy near the device. Make sure that the user
guide is always complete and readable.
V In addition to this user guide, also legal and other binding regulations for the prevention of accidents and for environment protection must be observed.
1.4
Operational Precautions
Art. no.: 0-48-0060 Rev.: a
V This user guide, and especially these safety notes, must be read and observed.
V Danger of electric shock!
The energy applied to the patient can be conducted through the patient to other
persons, who may suffer a lethal electric shock. For this reason:
– Do not touch the patient, the electrodes or other conducting objects during a defibrillation
– Do not defibrillate the patient in a puddle of water or on other conducting surfaces.
– Switch the device off when it is no longer used.
V To grant the patient's safety, it must be ensured that neither the electrodes, including the neutral electrode, nor the patient, or persons touching the patient,
come into contact with conducting objects (e.g. RS-232 interface - see Fig. 3.1 on
page 15), even if these are earthed.
V Changes, including concerning operational behaviour, affecting safety must be
immediately reported to the responsible.
V Only connect original SCHILLER accessories to the device.
V Before switching on, check if the unit's casing and electrode connection are undamaged.
V Do not expose the device to great temperature variations over a long period of
time. Too great temperature variances can cause condensation water on the
unit. If condensing water should occur nevertheless, dry the unit, the defibrillation electrodes and all connections.
V Special caution must always be taken on intracardiac application of medical
equipment. Especially make sure that no conducting parts connected to the isolated patient input (patient, plug, electrodes, sensor) come into contact with other, earthed conductive objects, as this might short-out the patient's isolation and
remove the protection of the isolated input.
V Position the device so that there is no possibility of it falling on the patient or floor.
Page 6
DEFIGARD 5000
User Guide
1.5
Safety Notes
Operation with other Devices
1
1.5
Operation with other Devices
Use only accessories and other parts recommended or supplied by SCHILLER
AG. Use of other than recommended or supplied parts may result in injury, inaccurate information and/or damage to the unit.
V The patient can be endangered by too high leakage currents (summation of
leakage currents) if:
– several devices are connected to the patient
– other equipment is connected to the DEFIGARD 5000
For this reason, devices that are not required should be disconnected from the
patient, and only equipment approved by SCHILLER may be connected to the
DEFIGARD 5000.
V
V
V
V
V
V
V
1.6
Maintenance
V
Art. no.: 0-48-0060 Rev.: a
Accessory equipment connected to the analogue and digital interfaces must be
certified according to the respective IEC standards (e.g. IEC/EN 60950 for data
processing equipment and IEC/EN 60601-1 for medical equipment). Furthermore, all configurations shall comply with the valid version of the system standard
IEC/EN 60601-1-1. Everyone who connects additional equipment to the signal input part or signal output part configures a medical system, and is therefore responsible that the system complies with the requirements of the valid version of
the system standard IEC/EN 60601-1-1. If in doubt, consult the technical service
department or your local representative.
Magnetic and electrical fields of X-ray equipment, tomographs, radio systems,
cellular phones etc. can disturb the unit's function. Avoid using such devices and
keep a sufficient distance from them.
The charging of energy and the release of the defibrillation impulse can disturb
other devices. Check these devices before their further use.
Sensors and devices that are not defibrillation proof must be disconnected from
the patient before a shock is triggered.
If the patient has a pacemaker implanted, do not position the electrode directly
onto the pacemaker. Check the pacemaker after the defibrillation.
The input terminals of the DEFIGARD® 5000 are protected against the influences of high-frequency electrosurgical equipment. Nevertheless, precautions must
be observed when high-frequency devices are used at the same time. To reduce
the risk of burns in the case of a failure of the neutral HF electrode, a distance
of at least 15 cm must always be kept between the defibrillation electrodes and
the HF surgical electrodes. If in doubt, disconnect the electrodes and sensors
from the unit during use of a HF surgical device.
V
V
V
V
Danger of electric shock! Do not open the device. No serviceable parts inside.
Refer servicing to qualified personnel only.
Before cleaning, switch the unit off and remove the battery.
Do not use high temperature sterilisation processes (such as autoclaving). Do
not use e-beam or gamma radiation sterilisation.
Do not use aggressive or abrasive cleaners.
Do not, under any circumstances, immerse the device or cable assemblies in liquid.
Page 7
1
1.7
Safety Notes
General Safety Notes
DEFIGARD 5000
1.7
General Safety Notes
V Operating a device with a defective casing or defective cables constitutes a danger to the patient or user! For this reason:
– Immediately replace a damaged unit, or damaged cables and connections.
1.8
Additional Terms
1.8.1
Implied Authorisation
Possession or purchase of this device does not convey any express or implied license to use the device with replacement parts which would alone, or in combination with this device, fall within the scope of one or more patents relating to this device.
1.8.2
Terms of Warranty
Your SCHILLER DEFIGARD 5000 is warranted against defects in material and manufacture for the duration of one year (as from date of purchase). Excluded from this
guarantee is damage caused by an accident or as a result of improper handling. The
warranty entitles free replacement of the defective part. Any liability for subsequent
damage is excluded. The warranty is void if unauthorised or unqualified persons attempt to make repairs.
In case of a defect, send the apparatus to your dealer or directly to the manufacturer.
The manufacturer can only be held responsible for the safety, reliability, and performance of the apparatus if:
• assembly operations, extensions, readjustments, modifications, or repairs are carried out by persons authorized by him, and
• the DEFIGARD 5000 and approved attached equipment is used in accordance
with the manufacturer's instructions.
Art. no.: 0-48-0060 Rev.: a
There are no express or implied warranties which extend beyond the warranties
hereinabove set forth. SCHILLER makes no warranty of merchantability or fitness for
a particular purpose with respect to the product or parts thereof.
Page 8
DEFIGARD 5000
User Guide
Safety Notes
Display Symbols/Indicators
1.9
Display Symbols/Indicators
1.9.1
Symbols Used in this User Guide
1
1.9
The hazard levels are classified in accordance with ANSI Z535.4. The following overview shows the used safety symbols and pictograms used in this manual.
For an imminently hazardous situation which, if not avoided, will result in death or
serious injury.
For a potentially hazardous situation which, if not avoided, could result in death or
serious injury.
For a potentially hazardous situation which, if not avoided, may result in minor or
moderate injury. It may also be used to alert against damage to equipment.
For general safety notes like those in this chapter.
For electrical hazards, warnings or precautionary measures when dealing with electricity.
NOTE For possibly dangerous situations, which could lead to damage to property or
system failure or IMPORTANT for helpful user information.
Art. no.: 0-48-0060 Rev.: a
Reference to other user guides.
Page 9
1
1.9
Safety Notes
Display Symbols/Indicators
1.9.2
DEFIGARD 5000
Symbols Used on the Device
BF symbol. The device's signal input is defibrillation protected.
Signal input type CF: High-insulation port, suited for intracardiac application, defibrillation protected.
Notified body for CE certification. (G-MED)
Note: Follow the instructions in the documentation.
SCHILLER potential equalisation.
Symbol for the recognition of electrical and electronic equipment
The device must be disposed of in a municipally approved collection point or recycling centre when it is no longer required.
Improper disposal harms the environment and human health due to dangerous substances contained in the equipment.
1.9.3
Symbols Used on the Battery
The unit/component can be recycled.
Battery may not be disposed of with domestic refuse.
Do not burn, saw up or crash the battery.
Rechargeable battery
Storage temperature for the battery:
Unlimited: 0...+40 °C
Expiration date
Page 10
Art. no.: 0-48-0060 Rev.: a
Do not short the battery
DEFIGARD 5000
User Guide
1.9.4
Safety Notes
Display Symbols/Indicators
1
1.9
Symbols Used on the Electrode Package
Open the electrode package
Peel off the protective foil
Disposable item; do not reuse
Do not bend packing
Storage temperature for the electrodes
Art. no.: 0-48-0060 Rev.: a
Expiration date
Page 11
2
2.1
Components and Operation
Design
DEFIGARD 5000
2 Components and Operation
The DEFIGARD® 5000 is a lightweight mains and battery powered defibrillator featuring an ECG monitor, a recorder, SpO2 measurement, NIBD and a transcutaneous
pacemaker. It is designed for clinical use. Defibrillation is possible in non-synchronised or synchronised mode.
Moreover, the device can be switched to automatic defibrillation (AED operation) by
pressing a single key.
Biocompatibility
The parts of the product described in this user guide, including all accessories, that
come in contact with the patient during the intended use, fulfil the biocompatibility requirements of the applicable standards. If you have questions in this matter, please
contact SCHILLER.
2.1
Power Supply
Design
The DEFIGARD® 5000 is either powered by the mains or an integrated rechargeable
battery. The capacity of one battery is sufficient for:
• 190 shocks with max. energy or
• 2 hours monitoring
Defibrillator
The DEFIGARD® 5000 is a defibrillator featuring biphasic pulsed defibrillation im-
External cardiac pacemaker
The DEFIGARD® 5000 pacemaker function can at any time be activated via the adhesive electrodes. In the menu, the fix, demand and overdrive operational modes
can be selected.
Monitoring
The DEFIGARD® 5000 monitoring function gives all important parameters – ECG,
SpO2 and NIBP. The parameters are indicated in figures and as waveforms on the
large LCD display.
Data storage
The ECG and trends are saved in the device. Three ECG curves can be printed on
the integrated printer:
Data transmission
• Easy transmission of a 12 lead ECG by GSM or standard modem connected to the
back of the device
• USB connector for use with for example, a memory stick to copy the stored data
• Ethernet connector for software updates
Page 12
Art. no.: 0-48-0060 Rev.: a
pulse – Multipulse Biowave®. The defibrillation is done using paddles, disposable
adhesive electrodes (pads) or spoons (internal defibrillation), which also measure
the ECG signal for the analysis. Adhesive electrodes for children and adults are
available. The device recognises the connected electrodes and selects the defibrillation energy levels accordingly. In the AED mode, the user will be given visual and
audible instructions (display/loudspeaker).
DEFIGARD 5000
User Guide
2.1.1
Components and Operation
Design
2
2.1
Available Options
• Additional battery, type Li/ion; 10.8 V, 4.3 A
2.1.2
Overview of the Configurable Settings
The following settings can be configured by the SCHILLER after-sales service:
Art. no.: 0-48-0060 Rev.: a
• Voice volume
• Energy levels of the first, second and third shocks, individually for adults and children
Page 13
2
2.2
Components and Operation
Operating Elements
DEFIGARD 5000
2.2
Operating Elements
2.2.1
Front Side
On/off key
Analysis key
Shock key
Loudspeaker
Microphone
Navigation and configuration
key
Paper compartment
release
Softkeys
Paddle
Start printer
Paddle
NIBP connection
SpO2 connection
Page 14
Control elements of the DG5000's front
Art. no.: 0-48-0060 Rev.: a
Fig. 2.1
ECG patient cable connection
DEFIGARD 5000
Components and Operation
Operating Elements
User Guide
2.2.2
2
2.2
Back Panel
1
2
3
10
4
9
5
8
Fig. 2.2
7
6
Control elements at the DG5000's back
Art. no.: 0-48-0060 Rev.: a
(1)
(2)
(3)
(4)
(5)
(6)
(7)
(8)
Swing-out fastening bows
Additional battery (option)
Signal output (QRS trigger, 1-channel ECG, remote alarm)
USB connector for use with a memory stick to copy the stored data
Fuses
Mains connector
Potential equalisation
Connection for an external constant voltage source 11.5...48 VDC (e.g ambulance)
(9) RS-232 interface for GSM or standard modem
(10) Ethernet connector for software updates
V
The plug-in connections are only designed for the connection of equipment or
accessories supplied by SCHILLER.
Page 15
2
2.2
Components and Operation
Operating Elements
2.2.3
DEFIGARD 5000
Paddle Operation Elements
Keys for energy charging and release
of the defibrillation impulse
Energy selection key
Key for start and
stop of the recorder
Fig. 2.3
2.2.4
Paddles operation elements
LEDs
The LEDs give the following information:
1
3
Keys and LEDs
Art. no.: 0-48-0060 Rev.: a
Fig. 2.4
2
(1) Operation with external constant voltage source
(2) Flashes while the battery is being recharged
(3) Unit connected to the mains
Page 16
DEFIGARD 5000
Components and Operation
Operating Elements
User Guide
2.2.5
2
2.2
Display
The display can vary according to the settings and used options. E.g. when 4 leads
are selected, the SpO2 waveform field is not displayed and only the measured values
to the right are visible.
Battery charge status/mains supply
Patient type - adult or neonate
Remaining alarm suppression time or alarm
OFF
Synchronous pulse
Date/time
Display field for system and alarm messages
Alarm delayed or off
Function keys
System messages
ECG waveform
field
HR
ECG
When more than
3 ECG curves
are displayed,
the SpO2 waveform field is removed.
ECG amplitude
0.25/0.5/1/2 cm/mV
ECG leads
Volume QRS tone
ECG calibration
impulse 1 mV
Start recording
SpO2 waveform
field
Start/stop NIBP
measurement
Manual
Synchro
Paddle
Selected energy: 90 J
Display field for defibrillator or pacemaker mode
N
Confirmation or turning off of alarms
I
B
P
Start printer
NIBP measuring field
NIBP mode interval, manual or continuous
P
A
C
E
DEMAND
80 P/min
P
0 mA
Alarm Type Indicators
Alarm active
Art. no.: 0-48-0060 Rev.: a
Pacemaker message
Alarm delayed
Alarm off with audible signal
Alarms permanently off
Fig. 2.5
Display elements of the DEFIGARD 5000
Page 17
3
3.1
Start-up and Initial Preparation
Mains and Battery Operation
DEFIGARD 5000
3 Start-up and Initial Preparation
V Danger of electrical shock. Do not operate the unit if the earth connection is suspect or if the mains lead is damaged or suspected of being damaged.
V Please read the safety notes in section 1 before initial operation.
V Danger of explosion! The device is not designed for use in areas where an explosion hazard may occur. Also, it is not permitted to operate the defibrillator in
an oxygen-enriched environment or in the presence of flammable substances
(gas) or anesthetics. Oxygenation in the vicinity of the defibrillation electrodes
must be strictly avoided.
V Danger of electrical shock. The DEFIGARD® 5000 is a high-voltage therapy device. Improper use of the device can endanger life. Always follow the instructions
given in this user guide.
V The user must make sure that there are no conductive connections between the
patient and other persons during ECG analysis and defibrillation.
V Avoid defibrillation in very moist or wet surroundings.
3.1
Mains and Battery Operation
3.1.1
Connecting the Unit to the Mains and Switching it on
1.
Connect the mains cable to the rear of the unit (3) and to the mains
(100 V – 240 V). The mains voltage LED
is lit and the battery charge LED
flashes.
2.
3.
Press the on/off button.
4.
Check the settings according to section Default and User-Defined Thresholds on
page 63.
Connect the other needed cables.
5.
1
3
Connections
To prevent leakage current, the device must be connected to the room's central potential equalisation via the potential equalisation socket.
A potential equalisation cable (article no. U50030) can be obtained from SCHILLER.
Page 18
Art. no.: 0-48-0060 Rev.: a
Fig. 3.1
2
If necessary, connect the potential equalisation cable (2) to the central potential
equalisation socket.
DEFIGARD 5000
Start-up and Initial Preparation
Mains and Battery Operation
User Guide
3.1.2
3
3.1
Battery Operation
Charging the Battery
Important
The internal battery is automatically recharged when the device is connected to the
mains (or an external constant voltage source). The battery requires approx. 1 hour
to be 80% recharged.
1
The recharging of the battery is indicated by the LED below the battery symbol.
– LED (1) flashes while the battery is being recharged.
Fig. 3.2
LED battery operation
Battery Low Indication
When the battery is low, a flashing battery symbol is displayed at the top of the
screen. The arrows show which of the batteries (upper or lower ) is low.
Fig. 3.3
Battery low indication
3.1.3
Operation with External Constant Voltage Source
The DEFIGARD® 5000 can be connected to an external 11.5...48 V constant voltage
source (e.g. vehicle battery) by a technician (see 1, Fig. 3.1). For this, the following
must be observed:
• The negative terminal of the ambulance power supply must be connected to chassis.
• The connecting leads must have a minimum diameter of 1.5 mm2. All terminals and
plugs must be designed to withstand high currents.
• The positive lead must be protected with a 10 A fuse.
lights up when the device is powered from the external DC
Art. no.: 0-48-0060 Rev.: a
– The LED
source.
Page 19
3
3.2
Start-up and Initial Preparation
Switching off and Disconnecting from Mains
3.2
DEFIGARD 5000
Switching off and Disconnecting from Mains
1.
2.
3.
4.
Press the on/off button.
Select Yes using the configuration key (1).
Confirm the selection by pressing the configuration key.
Remove the mains cable Fig. 3.1 to disconnect the device from the mains if you
do not want to recharge the battery.
1
3.2.1
Internal Safety Discharge
The DEFIGARD® 5000 has an internal safety discharge circuit for internal discharge of the stored energy. The defibrillator displays the message "Internal discharge" during the safety discharge. The energy is internally discharged when
• the shock is not delivered within 20 s of charging
• a lead failure occurs
• a lower energy value is selected while the defibrillator is charging
• a shock is delivered into open air
• the battery voltage is insufficient
• the device is defective
• the device is turned off
Furthermore the residual energy stored in the defibrillator 100 ms after shock release
is always discharged internally.
3.2.2
Mains Supply Interruption
If the mains supply is interrupted, the device automatically switches over to battery
operation. The user settings are maintained. These settings can be saved.
Ensuring Operational Readiness
• Do not expose the device to direct sunlight, or extremely high or low temperatures.
The ambient temperature should be in the range of 0 °C...50 °C. Lower or higher
ambient temperatures will have a negative impact on the battery's life.
To ensure its readiness for use, the device runs a self-test to check the unit and the
battery. The self-test is run:
• when the device is turned on
• automatically (the self-test intervals can be defined by the user in the settings).
If the device detects an error during the self-test, an error message is displayed.
Page 20
Art. no.: 0-48-0060 Rev.: a
3.2.3
DEFIGARD 5000
User Guide
3.3
Start-up and Initial Preparation
Inserting Printing Paper
3
3.3
Inserting Printing Paper
Important
The device is delivered without printing paper installed. Only use original SCHILLER
printing paper. The thermo-paper is sensitive to heat, humidity and chemical vapours. Store the paper in a cool and dry area.
1.
2.
3.
Press the locking catch (1) upwards. The printer door opens downward.
Insert paper and pull it up. Be sure that the paper lies behind the cover (2).
Close the cover. Be sure that the paper lies exactly between the rails (3).
1
2
Art. no.: 0-48-0060 Rev.: a
3
Page 21
3
3.4
Start-up and Initial Preparation
Operation
3.4
DEFIGARD 5000
Operation
The menus can be accessed in two ways:
• Direct access by pressing the navigation button
• By turning the navigation button to select the desired box and then pressing the
button to enter the menu
3.4.1
Direct Menu Access
1.
1
Fig. 3.4
3.
Press the navigation button (1). When the button is pressed twice, the main menu
is directly opened and step 2 is dropped.
The main menu is opened by pressing the Menu softkey (2). The main menu is
displayed. (See Fig. 3.5)
To select, display or modify a menu, turn and press the button.
4.
To exit a menu, press Enter
2.
.
Turn and press the navigation
button
2
System messages
HR
ECG
Menu
Edition
Sync
Main menu
ECG Menu
Manual
Paddle
Synchro
NIBP Menu
SpO2 Menu
Selected energy: 90 J
Fig. 3.5
N
I
B
P
Display with main menu
The threshold values can be changed either via the different menus or directly in the
threshold menu
.
The time, volume and printer configuration can be set in the unit settings menu
.
Page 22
Art. no.: 0-48-0060 Rev.: a
DIA
DEFIGARD 5000
3.4.2
1
3
3.4
Accessing Menus and Function Keys via Display Fields
1.
Fig. 3.6
Start-up and Initial Preparation
Operation
User Guide
2.
3.
Select the desired display field using the navigation button (1). The selected display field (2) is shown with a different background colour and flashes. The
softkeys (3) change their functions depending on the selected field.
The selected menu (4) is displayed by pressing the navigation button.
To leave the menu, press the navigation button twice.
Turn and press the navigation
button
3
2
System messages
HR
ECG Menu
Number of curve(s)
ECG
3
Lead channel 1
I, II, III
Lead channel 2
DEFI
0.5
QRS beep
HR
SpO2
Medium
Speed
25 mm/s
Patient
Adult
High threshold
DIA
Low threshold
130
40
Manual
Paddle
DIRECT
Exit
4
Menu access via display field
Art. no.: 0-48-0060 Rev.: a
Fig. 3.7
Page 23
4
4.1
Monitoring
Softkeys, Waveforms and Measurement Fields
DEFIGARD 5000
4 Monitoring
The operation and menu access are detailed on page 22.
4.1
Softkeys, Waveforms and Measurement
Fields
The waveform and measurement fields are automatically displayed when the device
is switched on, whereas the ECG and SpO2 are only displayed when the corresponding patient cable or sensor is connected.
The device can basically be operated via the softkeys on the right of the display. The
functions of these keys vary according to the selected waveform field.
System messages
HR
Manual
DIRECT
Paddle
ECG
N
I
B
P
Selected energy: 90 J
The settings that are defined via the softkeys or menus remain saved when the unit
is switched off and will automatically be active when it is switched on again.
Page 24
Art. no.: 0-48-0060 Rev.: a
Settings
DEFIGARD 5000
User Guide
4.2
1
HR
Monitoring
Alarm Messages
4
4.2
Alarm Messages
Physiological Alarms
2
When a measurement reading exceeds an alarm limit, an alarm is triggered after
3 seconds and
• the measurement value field 3 flashes red
• an interrupted alarm sounds (4 beeps/s)
• An error message is displayed on the top of the alarm field
ECG
Technical Alarms
3
4
When a technical error occurs:
• An error message is displayed on the top of the alarm field
• an interrupted alarm sounds (2 beeps/s)
• A question mark is displayed instead of the measurement reading (4)
• if a threshold value is exceeded, -?- is displayed.
Contrary to alarms due to violation of alarm limits, which must be acknowledged by
pressing a key (5) according to the settings, this alarm clears automatically as soon
as its cause is no longer present.
Suppressing an Alarm Sound
Suppress the alarm by pressing the button (5):
5
Fig. 4.1
Alarm indicators
• If you press the button briefly, the alarm remains suppressed for 2 min and the symbol (1) is replaced by the remaining time in minutes.
• If you keep the button pressed for approx. 3 s, it remains shut off until it is reactivated by the same button. The ∞ symbol is displayed instead of the time (1) and a
beep sounds every 2 min.
The measurement reading will flash red until it returns to the normal range.
Activating the Alarm Sound
To reactivate the alarm, press the button (5) again.
In some countries it is not permitted to disable audio alarms permanently.
Therefore, this function can be configured. (See page 68, section 10.3.1.)
Alarm Symbols (2)
Art. no.: 0-48-0060 Rev.: a
Alarm active
Alarms suppressed for 2 minutes. This symbol is displayed when the alarm suppression key (5) is pressed.
Threshold value alarms off (except min. HR and min. pulse SpO2). This symbol is displayed when the alarm suppression key (5) is pressed, but only if the alarm settings
are off. Technical alarms will still be issued.
Alarms permanently off. This symbol is displayed when the alarm suppression key
(5) is pressed for 3 s, but only if the alarm settings in the device settings menu are
permanently off.
(See page 68, section 10.3.1.)
Page 25
4
4.3
Monitoring
ECG and Heart Rate Monitoring
4.3
DEFIGARD 5000
ECG and Heart Rate Monitoring
V False diagnosis . Only use silver/silver-chloride electrodes if the patient may
have to be defibrillated while the ECG is being displayed. Other electrodes may
create high polarisation voltages and the ECG trace on the monitor and on the
recording may simulate cardiac arrest.
V Danger of destroying the device during defibrillation! The device is only type CF
protected if the original SCHILLER patient cables are used.
V Patients with a pacemaker must be observed continuously because the heart
rate from the pacemaker might still be registered in case of a cardiac arrest or
some arrhythimas.
Important
The guidelines for patient electrode placement are provided as an overview only.
They are not a substitute for medical expertise.
4.3.1
Quick Diagnosis of the ECG Using Defibrillation Electrodes
For a quick diagnosis, the ECG signal can be recorded from the patient's thorax using
the defibrillation electrodes. In all other situations, we recommend acquiring the ECG
via ECG electrodes and the patient cable.
If no patient cable is connected, the ECG is automatically sensed with the defibrillation electrodes (lead designation "DEFI").
Fig. 4.2
Defibrillation electrodes
4.3.2
Connecting a 3-Lead ECG Patient Cable
ECGs acquired with a 3 or 4-lead patient cable are automatically displayed in channels 1 and 2, if no other parameter is activated.
Red
Yellow
Fig. 4.3
Page 26
3-lead cable
When a patient cable is connected and the adapter module for defibrillation electrodes is inserted, you can select the signal source in the ECG menu.
Art. no.: 0-48-0060 Rev.: a
Green
DEFIGARD 5000
User Guide
4.3.3
Monitoring
ECG and Heart Rate Monitoring
4
4.3
Connecting a 4- or 10-Lead ECG Patient Cable
ECGs acquired with the 10-lead cable are displayed in all three channels, if no other
parameter is activated.
Red
Yellow
White
white to C1...C6
When a patient cable is connected and the adapter for defibrillation electrodes is inserted, you can select the signal source in the ECG menu.
Green
Black
4- and 10-lead cable
Art. no.: 0-48-0060 Rev.: a
Fig. 4.4
Page 27
4
4.3
Monitoring
ECG and Heart Rate Monitoring
4.3.4
Starting ECG Monitoring
1.
2.
3.
4.
Amplitude
0.25, 0.5, 1, 2 cm/mV
Display of amplitudes
I...V6
Fig. 4.5
DEFIGARD 5000
Apply the electrodes as shown in Fig. 4.3 or Fig. 4.4.
Connect the patient cable to the ECG signal input.
Define the ECG settings directly via the softkeys.
Open the ECG menu and check the settings.
ECG softkeys
4.3.5
Monitoring a Pacemaker Patient
V Erroneous HR readout. In the monitoring of pacemaker patients, we cannot exclude the possibility of pacer pulses being counted as QRS complexes. Therefore, pacemaker patients should always be watched closely. We recommend
monitoring pacemaker patients by means of the plethysmogram (
source = SpO2 in the ECG or SpO2 menu).
HR
When monitoring the heart rate of pacemaker patients, it is important that the device
will only count the QRS complexes and reject the pacer pulses.
The DEFIGARD® 5000 has an electronic pacer pulse suppression algorithm which
rejects the pacer pulses so they are not counted as QRS complexes. Depending on
the pacemaker model used and on the position of the electrodes, the compensation
pulse following every pacer pulse may be considered as a QRS complex. In this situation and when the pacer pulse is ineffective, the displayed heart rate may lead to
a misinterpretation, and the device will not give alarm in the case of bradycardia or
asystole. It depends on the pacer pulse parameters whether or not the compensation
pulse is counted as a QRS complex.
For pacemaker patients, the ECG signal amplitude should be greater than 1 mV.
Fig. 4.6
Page 28
Indication HR source SpO2
Art. no.: 0-48-0060 Rev.: a
If the source of the heart rate is SpO2, this is indicated by the HR <- SpO2 symbol and
a flashing S.
DEFIGARD 5000
Monitoring
ECG and Heart Rate Monitoring
User Guide
4.3.6
4
4.3
ECG Menu
Menu
Parameter
Description
Value
ECG
a
Number of the curves displayed. When the
number is 6, SpO2 is not displayed.
0 / 1 / 2 / 3 / 6 /12
Lead channel 1
Preselection of the standard waveform
groups that should be displayed.
Defi/I, II, III/aVR, aVL, AVF/V1,V2,V3/
V4, V5, V6
Lead channel 2
Preselection of the standard waveform
groups that should be displayed.
bDefi/I, II, III/aVR, aVL, AVF/V1, V2,
V3/V4, V5, V6
ECG amplitude setting.
0.25 / 0.5 / 1 / 2 cm/mV
c
Source based on which the heart rate
should be determined.
HR
QRS sound
Volume of the systolic sound
Off/Low/Medium/High
Speed
Speed of the ECG curve display
25/50 mm/s
Patient
Selection of patient type
Adult/Neonate
d
High threshold
High heart rate threshold
140...300/Off
c
Lower heart rate threshold
Off/60 (range 30...125)
Number of curve(s)
Low threshold
a.
b.
c.
d.
ECG/HR
SpO2
The number of displayed ECG curves and selectable leads is determined by the type of the patient cable connected.
The "Defi" option is only available when a patient cable and an adapter module with defibrillation electrodes are connected.
When the patient has a cardiac pacemaker, the HR source must be set to SpO2 (see page 28).
The threshold values are only displayed after the user's threshold values have been opened once in the threshold values menu.
(See page 63, section 9.)
4.3.7
ECG Error Messages
Cause
CONNECT THE ELECTRODES!
• Electrodes not attached to the pa- « Check the contact between the electrodes and the patient; come off; bad contact
tient's body
• Electrodes defective; line break « Check the ECG cable and electrodes
• Device defective
« Have the device repaired
Remedy
FIBRILLATION
• Ventricular fibrillation or tachycar- « Physiological alarm!
dia with a rate exceeding 180 p/
min
Art. no.: 0-48-0060 Rev.: a
Alarm
Page 29
4
4.4
Monitoring
SPO2 Monitoring
DEFIGARD 5000
4.4
SPO Monitoring
2
• The pulsoximeter enables the continuous non-invasive monitoring of the functional
oxygen saturation of the arterial haemoglobin and the pulse rate. When the signal
is received from the patient sensor, this signal is used to calculate the patient's
functional oxygen saturation and pulse rate.
• The display shows the continuous progress of the numeric SpO2, pulse rate,
plethysmographic waveform and signal quality values.
• The displayed plethysmographic curve is not proportional to the pulse volume.
• The update period of the measurement readings on the display is 0.2 seconds.
• According to the relevant standards, the temporary alarm suppression must be set
to a maximum of 2 minutes.
V Only use sensors listed in the order information for SpO2 measurement with the
DEFIGARD® 5000. Other oxygen transducers (sensors) may lead to improper
performance.
V The information in this user guide does not overrule the instructions given in the
user guide of the sensor, which must also be observed.
V Never use a pulsoximeter during MR imaging. Induced current could potentially
cause burns, and the pulsoximetry may affect the image and the accuracy of the
measurements.
V Before using the sensor, carefully read the sensor directions for use.
V Tissue damage can be caused by incorrect application or use of a sensor. Inspect the sensor site as described in the sensor directions for use to ensure skin
integrity and correct positioning and adhesion of the sensor.
V Do not use damaged patient cables, damaged sensors or a sensor with exposed
optical components.
V Substances causing disturbances: Carboxyhaemoglobin can lead to falsely high
measurement readings. The degree of the deviation approximately corresponds
to the quantity of carboxyhaemoglobin. Colours or substances containing colours that influence the natural blood pigments can also lead to incorrect measurement readings.
V Exposure to excessive illumination, such as surgical lamps (especially those
with xenon light source), bilirubin lamps, fluorescent lights, infrared heating
lamps or direct sunlight, can affect the performance of an SpO2 sensor. To prevent exposure to excessive illumination, ensure that the sensor is correctly applied and that it is covered with an opaque material, if required. If these measures are neglected, excessive illumination can lead to incorrect measurements.
V Change the position of the sensor at least every 4 hours, and every 2 hours if
the perfusion is low.
3
1
Fig. 4.7
Page 30
2
SpO2 measurement field
Starting SpO2 Monitoring and Test
2.
Apply the SpO2 sensor to the patient. Insert the patient's forefinger into the probe
as far as it will go, and make sure that the finger tip covers all of the probe window.
This is to prevent that extraneous light reaches the photodetector.
Activate the module by connecting the SpO2 sensor to the device.
3.
Set the lower SpO2 alarm limit to 99%.
4.
5.
When the measured value exceeds the alarm limit, an alarm is issued.
Reset the alarm limit to its original value.
1.
Art. no.: 0-48-0060 Rev.: a
4.4.1
DEFIGARD 5000
Monitoring
SPO2 Monitoring
User Guide
4.4.2
SpO2 Menu
Menu
Parameter
Description
Value
SpO2
SpO2 curve
Display of the SpO2 curve
Yes/no
(1)
Average
Definition of the integration time for the calculation of the displayed average value
8/16 seconds
aSource
based on which the heart rate
should be determined
HR
Speed
Speed of the SpO2 curve display
25/50 mm/s
Patient
Selection of patient type
Adult/Neonate
High pulse threshold
High pulse alarm limit
(130...250)/Off
Low pulse threshold
Low pulse alarm limit
Off/50 (range 30...125)
(3)
bHigh
SpO2 threshold
High oxygen alarm limit
100/Off (range 55...250)
(2)
bLow
SpO2 threshold
Low oxygen alarm limit
Off/85 (range 50...99)
a.
b.
4
4.4
ECG/HR
SpO2
When the patient has a cardiac pacemaker, the HR source must be set to SpO2 (see page 28).
The threshold values are only displayed after the user's threshold values have been opened once in the threshold values
menu. (See page 63, section 9.)
4.4.3
SpO2 Error Messages
Cause
Remedy
Low perfusion
• Weak pulse
• Bad sensor positioning
« Check/reapply the sensor
TOO MUCH LIGHT!
• Sensor is disturbed by ambient light
« Reduce ambient light
CAPTOR PROBLEM!
• Sensor failed
« Replace the sensor
ARTEFACTS!
• Measurement disturbed by external influ- « Patient must not move
ences
SENSOR OFF PATIENT!
• Sensor not connected to the patient or
lose
« Check the contact between the sensor and the
patient
SEARCH PULSE!
• Device is searching for the pulse
« Make sure that the sensor is well connected to
the patient
CAPTOR PROBLEM!
• Wrong or defective sensor
« Replace the sensor
NO CAPTOR!
• SpO2 sensor failed or disconnected
« Replace the sensor
Art. no.: 0-48-0060 Rev.: a
Alarm
Page 31
4
4.5
Monitoring
NIBP Monitoring
DEFIGARD 5000
4.5
NIBP Monitoring
The non invasive blood pressure is measured by the oscillometric method. The criteria for this method are the pressure pulsations superimposed, with every systole,
on the air pressure in the cuff, rather than the associated sounds (there is no microphone in the cuff).
The module performs single measurements and automatic measurements at selectable intervals.
During blood pressure measurements the cuff must be on a level with the heart. If
this is not ensured, the hydrostatic pressure of the liquid column in the blood vessels
will lead to incorrect results. When the patient is sitting, standing or supine during
measurements, the cuff is automatically at the correct level.
The blood pressure can be measured in mmHg or in kPa.
V To prevent extensive pressure on the extremity, it is very important to choose
the correct cuff size and to check the setting in the panel System/Patient (Adult,
Pediatric, Neonatal).
V In case of long-term monitoring or automatic operation, the connected body areas of the patient and the extremity to which the cuff is attached must be
checked regularly for signs of ischaemia, purpura and/or neuropathy.
V The cuff must not be attached to a limb that is already used for interventions
such as infusions.
V To prevent incorrect measurement results, make sure that the tube is not compressed.
Art. no.: 0-48-0060 Rev.: a
To prevent erroneous SpO2 measurements, the blood pressure cuff should not be
positioned on the limb on which the SpO2 is measured.
Page 32
DEFIGARD 5000
Monitoring
NIBP Monitoring
User Guide
4.5.1
4
4.5
Starting NIBP Monitoring
1.
2.
Patient
Patient type
Cycle times or manual
measurement
Start of NIBP measurement
Fig. 4.8
Note the cuff size for the respective patient type.
The cuff is attached to the left or right upper arm. About 4 cm above the elbow (on
children and infants a little closer).
3. Connect the cuff tubing to the connection sleeve and make sure it properly locks
into place.
4. Define the NIBP settings directly via the softkeys.
– Patient type – adult or neonate. (Indicated at the top right.)
– Setting of the cycle time or manual measurement
– Start of the NIBP measurement
5.
6.
7.
Open the NIBP menu and check the settings.
Start the NIBP measurement by pressing the softkey.
To disconnect the cuff tube, press the milled shell of the connecting sleeve backwards.
NIBP softkey
Display of the cycle time or
manual measurement
N
The following settings are available for the cycle time:
3/3 min
Manual
Continuous
Time remaining until the next measurement/cycle time
The measurement is manually initiated by pressing the softkey.
A measurement is taken every 10 seconds for a certain period
of time. The period can be set in the range of 5...15 min.
I
B
P
The NIBP measurement must be initiated via the NIBP start softkey, regardless of
this setting.
NIBP measuring field
When the measurement is started, the measurement readings are replaced by the
cuff pressure and the number of attempts.
Art. no.: 0-48-0060 Rev.: a
Fig. 4.9
Page 33
4
4.5
Monitoring
NIBP Monitoring
DEFIGARD 5000
4.5.2
Menu
Parameter
NIBP
Description
Value
Cycle time setting
Manual, Continuous or cycle of 1/2/3/
5/10/15/20/30/40/90 minutes
Patient
Selection of patient type
Adult/Neonate
Unit
Unit setting of mmHg or kPa
mmHg / kPa
Calibration
Calibration of the NIBP module
This function requires a password from
the service department
a
High systolic alarm limit
180 (70...250)
Low systolic alarm limit
70 (Off/50...225)
High SYS threshold
aLow
SYS threshold
a
High MAP threshold
High alarm limit for average pressure
160 (25...250)
a
Low MAP threshold
Low average limit for average pressure
50 (Off/20...245)
a
High DIA threshold
High diastolic alarm limit
110 (15...200)
Low diastolic alarm limit
40 (Off/10...195)
aLow
DIA threshold
The threshold values are only displayed after the threshold menu has been opened once. (See section 9, page 63.)
4.5.3
NIBP Error Messages
Alarm
Cause
Remedy
NIBP error
• NIBP module failed
« Replace the device
Zero pressure
• No pressure can be measured
• Device defective
« Check cuff and connection
« Replace the device
Low pressure
• Pressure below limits
« Check cuff and connection
Insufficient pressure
• Pressure in the cuff remains too
low
« Check cuff and connection for leaks
Bad cuff
• Pressure too high because
- Too small cuff applied
- Tube buckled
« Check cuff and connection
Measure too long
• Measurement time exceeded with « Check cuff and connection
no results
« Make sure that the cuff is well applied
ARTEFACTS!
• Measurement disturbed by exter- « The patient must not move during measurement
nal influences
Low pulse
• Pulse amplitude too low
« Apply cuff correctly
Measure too old
• Last measurement more than
15 minutes ago
« None (just for information); if required, start a new measurement
Pump >20 s
• Pumping running time exceeded « Check cuff and connection for leaks
Page 34
Art. no.: 0-48-0060 Rev.: a
a.
NIBP Menu
DEFIGARD 5000
User Guide
4.6
Monitoring
Trend Display
4
4.6
Trend Display
The trends present the vital signs collected over a period of time in an easy to read
format. You can choose between the graphic format (trend curve) and the tabular format.
4.6.1
Displaying Trends
1.
2.
3.
4.
5.
1
Press the navigation button.
Press the Edition softkey.
Press the trend key (1).
Press trend curve (2) or trend table (3) key.
Configure the desired curves or table values in the respective menu and confirm
your settings with OK. The table or curve is displayed.
2
3
Fig. 4.10 Accessing the trend displays
Curve Settings
HR P/min
Yes
SpO2 %
Yes
Up to two curves can be displayed.
NIBP mmHg
NO
1.
2.
OK
Select the curve combination with Yes.
Confirm your settings with OK. The trend display is opened.
Fig. 4.11 Curve settings
Art. no.: 0-48-0060 Rev.: a
Table Settings
HR P/min
Yes
SpO2 %
Yes
NIBP mmHg
NO
Period
2 min
OK
When "NIBP Measure" is selected for the "Period" parameter, the selected values are
recorded for every NIBP measurement.
1.
2.
3.
Select the required table values with Yes.
Select the desired recording period.
Confirm with OK. The trend display is opened.
Fig. 4.12 Table settings
Page 35
4
4.6
Monitoring
Trend Display
DEFIGARD 5000
Trend Display for HR/SpO2 Curves
Moving forward and backward by one page
Exit
Change of the time axis in the
range of 1 to 24 hours
Change of the vertical
scale
Trend Table
To the beginning of the table
HR
p/min
75
75
75
75
75
75
75
75
75
75
75
75
75
75
SpO2
%
98
98
98
98
98
98
98
98
98
98
98
98
98
98
NIBP
mmHg
120 / 75
/
/
/
/
120 / 75
/
/
/
/
120 / 75
/
/
/
Exit
Forward or backward To the end of
the table
Page 36
Art. no.: 0-48-0060 Rev.: a
Time
14:00
14:02
14:04
14:06
14:08
14:10
14:12
14:14
14:16
14:18
14:20
14:22
14:24
14:26
Table printout
DEFIGARD 5000
Monitoring
Trend Display
User Guide
4.6.2
1
4
4.6
Deleting the Trend Memory
1.
2.
3.
4.
Press the navigation button.
Press the function key Edition.
Press the trend function key (1).
Press the delete function key (3).
5.
Confirm with
or cancel with
.
2
3
Fig. 4.13 Deleting trend data
4.6.3
Transmitting the Event Memory
1.
2.
3.
4.
Press the navigation button.
Press the function key Edition.
Press the memory function key (1).
Transmit the data by pressing the transmission function key (2).
5.
To cancel the transmission, press
.
2
1
Art. no.: 0-48-0060 Rev.: a
Fig. 4.14 Transmitting trend data
Page 37
5
5.1
Defibrillation
Rules and Safety Notes
DEFIGARD 5000
5 Defibrillation
5.1
Rules and Safety Notes
Observe the following guidelines to ensure successful and safe defibrillation. Otherwise the lives of the patient, the user and bystanders are in danger.
V The patient must:
– not come into contact with other persons during defibrillation.
– not come into contact with metal parts, e.g. bed or litter, or be positioned on wet
ground (rain, accident in swimming pool), to prevent unwanted pathways for the
defibrillation current, which may endanger the assistants.
V Do not allow the defibrillation electrodes to come into contact with other electrodes or metal parts which are in contact with the patient.
V The patient's chest must be dry, as moisture causes unwanted pathways for the
defibrillation current. For safety, wipe off flammable skin cleansing agents.
V Owing to the high currents, there is a risk of skin burns at the site of the electrodes. This is why the electrodes must not be placed on or above:
– the sternum, clavicle or mamillas
V Immediately prior to the shock, the heart massage (CPR) and artificial respiration must be stopped and bystanders must be warned.
V Defibrillating a patient with an implanted pacemaker is likely to impair the pacemaker function or cause damage to the pacemaker. For this reason, do not apply
the defibrillation electrodes in the vicinity of the pacemaker, have an external
pacemaker at hand, and check the implanted pacemaker for proper functioning
as soon as possible after the shock.
Art. no.: 0-48-0060 Rev.: a
V Equipment damage! Sensors and devices that are not defibrillation proof must
be disconnected from the patient before a shock is triggered.
Page 38
DEFIGARD 5000
User Guide
5.1.1
Defibrillation
Rules and Safety Notes
5
5.1
Additional Safety Notes for SAED Mode
In addition to the guidelines set forth in section 5.1, the following rules must be observed when using an SAED, as failure to do so may compromise the success of the
defibrillation or endanger the patient's life.
V
V
V
V
V
5.1.2
The user is committed to verify the prerequisites for the use of the SAED by
checking for lack of consciousness, lack of breathing and lack of circulatory
signs using the ABCD system (BLS algorithm).
The device must only be used if the following symptoms are found:
– non-responsive
– no respiration
– no pulse
If, in the course of treatment, a patient spontaneously regains consciousness, a
defibrillation shock that may have been advised just before must not be delivered.
To ensure correct analysis of the heart rhythm, the patient must lie as still as possible and must not be touched, as this can lead to incorrect analysis results due
to artefacts.
If, in SAED mode, the ECG signal changes such that the shock is not recommended, the shock delivery is automatically blocked.
Defibrillating Children
V
Art. no.: 0-48-0060 Rev.: a
V
Please note that less energy is needed for children.
For the first defibrillation of infants and small children using biphasic shock, approx. 1 joule/kg body weight is released. An increase to 2 joules/kg body weight
is possible when the defibrillation is repeated.
For the defibrillation of children, the pediatric clip-on electrodes must be attached to the paddles or pediatric pads must be used.
Page 39
5
5.2
Defibrillation
General Function
DEFIGARD 5000
5.2
General Function
• The DEFIGARD® 5000 works with biphasic pulsed defibrillation impulse. Depending on the factory settings, the device either switches automatically from synchronized to non-synchronized defibrillation or the mode has to be changed manually using the Sync button.
• The required energy for a successful defibrillation depends on the patient's age,
thickness of the tissue and constitution. For emergency medical treatment, AHA/
ERC recommend (biphasic impulse):
– 1st shock with 90 joules; if unsuccessful
– 2nd shock with 130 joules; if unsuccessful
– 3rd shock with 180 joules
• When a patient cable is connected, you can select in the ECG menu if the ECG
should be recorded via the separate ECG electrodes or the defibrillation electrodes. You can select a higher energy value while the defibrillator is charging. The
device will charge to the new level. It is not possible, however, to reduce the
charged energy. In this case, the stored energy will be discharged internally and
you will have to recharge the defibrillator.
5.2.1
Activating the Manual or Automatic Defibrillation Mode
When the device is switched on, it selects the defibrillation mode based on the connected electrodes.
• Paddles = manual defibrillation
• Spoons = manual defibrillation
• Adhesive electrodes = manual or automatic defibrillation (configurable)
You can switch from automatic to manual defibrillation by pressing the relevant
softkey.
5.2.2
Manual
DIRECT
Manual Defibrillation - Procedure
1.
Paddle
Selected energy: 90 J
Charge of the required energy with
– paddles via the energy selection switch and the red charging/release button
– adhesive electrode or spoon via keyboard
2. Release of the shock with
– paddles via both red charging/release buttons
– adhesive electrode and spoon via shock button on the device
Less energy
Charge
Fig. 5.1
Page 40
Defibrillator window
Art. no.: 0-48-0060 Rev.: a
More energy
DEFIGARD 5000
User Guide
5.3
Defibrillation
Manual Defibrillation Using Paddles
5
5.3
Manual Defibrillation Using Paddles
V
V
Delivering a shock to a patient normal heart rhythm may induce ventricular fibrillation. For this reason, first read the general rules and safety information in section 5.1.
Electric shock hazard! Turn off the device before exchanging the defibrillation
electrodes; exchanging the electrodes on a charged defibrillator initiates an internal safety discharge.
• The defibrillation shock can be triggered only when the electrodes are applied to
the patient and the skin resistance does not exceed a certain level. Otherwise the
energy will be discharged internally when the shock is released!
• When the shock is not delivered within 20 s of charging, it will be discharged internally.
1.
2.
3.
4.
Remove the paddles from their compartments.
Carefully dry the paddles and the handles in particular, if they are wet.
Apply an ample amount of electrode cream to the paddle surfaces.
Apply the paddles as shown in Fig. 5.2:
STERNUM:
Keys for energy charging and release
of the defibrillation impulse
Energy selection key
Fig. 5.2
right sternal edge at the level of the 2nd intercostal space
APEX:
left axillary line at the level of the 5th intercostal space
5. Select the required energy via the energy selection button.
6. Initiate charging by pushing one of the red buttons on the paddles. The bar diagram shows the energy charging process.
7. Do not touch the patient any more and warn all those present.
8. As soon as the charging process is completed,
– a beep sounds
– the message "Defibrillator ready" is displayed
– the two shock keys on the paddles light up
9. Press the paddles firmly down onto the thorax.
10. Simultaneously press both buttons on the paddles.
After delivery of the shock, the audio signal stops and the recorder starts (if configured). The recording can be stopped at any time by pressing the green button
on the paddle or the button on the device (see "recording" section).
11. Monitor the patient's ECG.
12. When no further shocks are required, switch the energy selection button back to
"0" and turn the device off.
13. Finish the therapy. (See page 60.)
Paddle application
Art. no.: 0-48-0060 Rev.: a
5.3.1
Marking Events
Each time you push the event button, the menu with your event texts will appear. You
can select one of these texts with the softkey and this text will be recorded in the data
report with the time of day.
The key texts are configurable.
Fig. 5.3
Event button
Page 41
5
5.4
Defibrillation
Manual Defibrillation Using Pads
5.4
DEFIGARD 5000
Manual Defibrillation Using Pads
V Delivering a shock to a patient with normal heart rhythm may induce ventricular
fibrillation. For this reason, first read the general rules and safety information in
sections 5.1 and 5.2.
V Electric shock hazard! Turn off the device before exchanging the defibrillation
electrodes; exchanging the electrodes on a charged defibrillator initiates an internal safety discharge.
5.4.1
Applying the Pads
V Only use the pads up to their expiration date. Please note that the indicated expiration date only applies if the vacuum pack is intact.
V The pads are pre-gelled, so there is no need to use extra contact agent.
V Do not reuse the pads.
Adult and Pediatric Electrodes
Large electrodes
The large electrodes are intended for adults and children from a body weight of
25 kg.
Small electrodes
The small electrodes are intended for children with a body weight under 25 kg.
Applying the Electrodes
V Good contact between the skin and the adhesive electrodes must be ensured.
Suntan oil, sand or salt reduce the adhesive quality.
V The applied pads must have good contact with the patient's skin, and air bubbles
under the pads must be avoided. To do so, stick on one end of the pad, then
smooth it out to the other end.
2.
3.
4.
Fig. 5.4
Page 42
Electrode application points
Clean and dry the application points for the electrodes (Fig. 5.4). Shave if the patient's chest is hairy. Only clean the skin by vigorously rubbing it with a dry cloth.
Apply one electrode above the right nipple. Do not apply it on the clavicle (uneven).
STERNUM: right sternal edge at the level of the 2nd intercostal space
Apply the other electrode slantwise below the left breast as illustrated in Fig. 5.4.
APEX: left axillary line at the level of the 5th intercostal space
Make sure that the connections are positioned on the outside so they do not
hinder heart massage (CPR).
Art. no.: 0-48-0060 Rev.: a
1.
DEFIGARD 5000
User Guide
5.4.2
Defibrillation
Manual Defibrillation Using Pads
5
5.4
Checking the Electrodes
If the resistance between the skin and an electrode is too high, the message CONNECT THE ELECTRODES is issued. Proceed as follows:
1.
Art. no.: 0-48-0060 Rev.: a
2.
3.
4.
5.
Alternately press the electrodes/pads down firmly and check when the message
disappears. Carefully press that pad onto the patient's skin once again.
If the message does not disappear,
remove both defibrillation electrodes
wipe rests of contact agent off with a cloth
shave the two application points to remove the epidermal skin layer
apply new defibrillation pads to these points
Page 43
5
5.4
Defibrillation
Manual Defibrillation Using Pads
5.4.3
DEFIGARD 5000
Manual Defibrillation Using Pads - Procedure
1.
2.
Connect the electrode cable to the adapter.
When the device is started in SAED mode, switch to manual mode by pressing
the
softkey. A safety discharge is first carried out and the energy is set to
130 J.
Adult Pads
DIRECT
3.
4.
Select the energy via the softkeys.
Initiate the energy charging by pressing "Charge".
Selected energy: 130 J
V Danger of electric shock!
• Do not, under any circumstances, touch the patient during shock delivery.
• Make sure that the patient does not touch any conducting objects.
More energy
5.
Trigger the shock by pressing the button
.
Less energy
Charge
Manual defibrillation using pads
Art. no.: 0-48-0060 Rev.: a
Fig. 5.5
Page 44
DEFIGARD 5000
User Guide
5.5
Defibrillation
Internal Defibrillation
5
5.5
Internal Defibrillation
V
Patient hazard! Use only sterilised electrodes for internal defibrillation. Sterilise
internal electrodes before each use (see section 10 "Maintenance").
Spoon-shaped electrodes whose contours must match the dimensions of the heart
are used for internal defibrillation. The electrode surface must make full contact with
the heart. Internal electrodes are available in four different sizes (see order information in section 12). As the electrodes are in direct contact with the heart, less energy
is required than for external (transthoracic) application. Therefore, the defibrillator
does not accept energy settings above 30 joules. The following energy levels are
available: 2, 4, 6, 8, 15, 30 joules.
Manual
DIRECT
Spoons
1.
2.
Connect the spoons' electrode cable to the adapter.
Position the spoons on the heart.
3.
4.
Select the energy using the +/- J keys.
Initiate the energy charging by pressing "Charge".
Selected energy: 15 J
V Danger of electric shock!
• Do not, under any circumstances, touch the patient during shock delivery.
• Make sure that the patient does not touch any conducting objects.
More energy
5.
Trigger the shock by pressing the button
.
Art. no.: 0-48-0060 Rev.: a
Less energy
Charge
Fig. 5.6
Defibrillator window
Page 45
5
5.6
Defibrillation
Synchronised Defibrillation
5.6
DEFIGARD 5000
Synchronised Defibrillation
V Erroneous triggering, interpretation hazard.
– For synchronised defibrillation, the ECG electrodes should be applied as far
from the defibrillation electrodes as possible (e.g. on the limbs).
– Use only silver/silver-chloride electrodes, if you acquire the ECG via separate
ECG electrodes. These electrodes prevent polarisation voltages which may be
caused by the defibrillation shock, resulting in an ECG trace on the monitor
screen or recording that simulates cardiac arrest.
V Disturbed ECG trigger! Signal Signal noise may disturb the ECG signal and
cause artefacts. This must be considered chiefly in the synchronised mode and
in demand pacing. For this reason, the following should be observed:
– Do not touch the device during defibrillation to prevent electrostatic noise
– Keep the patient cable away from power cords, transformers etc.
V To achieve adequate ECG signal quality for reliable triggering, ensure that
– the ECG signal is free of artefact
– there are no major fluctuations in amplitude
– the displayed trigger pulses are positioned exactly over the R-wave
5.6.1
Switching to Synchronised Defibrillation
The mode can be changed manually or automatically.
1.
2.
3.
Sync
Go to the defibrillator window using the navigation key.
Press the key. The Sync key appears.
Using the Sync key, select synchronised or direct defibrillation. The setting Synchro (1) or Direct is displayed in the defibrillator window.
1
Manual
Paddles
Synchro
Selected energy: 90 J
Switching to/display of synchronised defibrillation
Art. no.: 0-48-0060 Rev.: a
Fig. 5.7
Page 46
DEFIGARD 5000
User Guide
5.6.2
Defibrillation
Synchronised Defibrillation
5
5.6
Synchronised Defibrillation – Procedure
For synchronised defibrillation, the defibrillation shock is delivered in synchronisation
with the heart action, as the heart is still working. As a prerequisite, the patient's ECG
signal must be supplied to the defibrillator. After the physician has triggered the defibrillation shock, the trigger signal for the actual shock delivery will be derived from
the subsequent QRS complex (25 ms after the trigger mark on the monitor screen
(1)).
The defibrillation mode can be switched automatically or manually between unsynchronised and synchronised, depending on the factory settings (this setting can be
found in the Defibrillator menu - see page 66, section 9.1.5).
1
2
Manual
Paddles
Synchro
Selected energy: 90 J
Fig. 5.8
Synchronised defibrillation
Synchronised defibrillation using
paddles
When the switchover is automatic, the DEFIGARD® 5000 switches to the synchronised mode when it detects a QRS complex. If no QRS complex is detected for more
than 3 seconds, the message SYNCRO (2) is replaced by SYNCHRO END and an audible signal sounds. After 3 more seconds, it switches from SYNCHRO (2) to DIRECT
defibrillation.
With devices set to manual switch, the mode is changed using the key. However, if
the device does not detect a QRS complex in the synchronised mode, the shock will
be delivered directly after 6 seconds. We recommend performing synchronised defibrillation with pads and at the same time acquiring the ECG signal via the pads. As
an alternative, the ECG can be acquired with ECG electrodes. You select the signal
source with the source button in the ECG menu.
When using paddles for synchronised defibrillation, you can configure if the ECG
must be recorded via separate ECG electrodes (Synchro using paddle - No) or if
the recording can be done using either separate ECG electrodes or the paddles
(Synchro using paddle - Yes). Defibrillation with pads is described on page 42; defibrillation with paddles on page 41, and the application of ECG electrodes on page
42. Check that with each QRS complex
Art. no.: 0-48-0060 Rev.: a
• the QRS beep sounds
• the trigger marks (1 - Fig. 5.8) and the "QRS blip" appear
Be aware that after initiation of the shock the actual shock will be released with the
next trigger signal derived from the ECG.
Page 47
5
5.7
Defibrillation
Semiautomatic Defibrillation
5.7
DEFIGARD 5000
Semiautomatic Defibrillation
V Delivering a shock to a patient normal heart rhythm may induce ventricular fibrillation. For this reason, first read the general rules and safety information in sections 5.1 and page 5.1.139.
V Electric shock hazard! Turn off the device before exchanging the defibrillation
electrodes; exchanging the electrodes on a charged defibrillator initiates an internal safety discharge.
V Do not use the anterior-posterior electrode placement for semiautomatic defibrillation.
V If, in the course of treatment, a patient spontaneously regains consciousness, a
defibrillation shock that may have been advised just before must not be delivered.
V During HF surgical interventions, ECG analysis is not permitted in the semiautomatic mode.
5.7.1
Semiautomatic Defibrillation (SAED) – Procedure
The user is guided through all operation steps by spoken and displayed instructions.
Automatic
DIRECT
Pads Adult
The SAED mode is automatically activated when the adapter for adhesive electrodes
is inserted. (See page 66, section 9.1.5.)
After start-up, the user is prompted by a flashing symbol to connect the pads. When
the analysis key is pressed, there is a spoken message that the electrodes should be
connected to the patient, if this has not been done yet. After this, the user is advised
to stay clear of the patient. The analysis takes approximately 10 seconds.
Device detects a shockable rhythm
If the analysis program detects a shockable rhythm, the defibrillation energy is
charged and the user is prompted to deliver the shock. Shockable rhythms are:
• Ventricular fibrillation
• Ventricular tachycardia with a rate exceeding 180 p/min
Even if the device detects a shockable rhythm, a shock must only be delivered if lack
of breathing and lack of circulatory signs have been established.
If the shock is not successful, the device automatically charges the defibrillation energy for a second or a third shock.
Shock
Adults
Neonates
1
130 joules
15 joules
2
130 joules
30 joules
3
150 joules
50 joules
The SCHILLER after-sales service can adjust different energy settings.
Page 48
Art. no.: 0-48-0060 Rev.: a
The following standard energy levels are preset:
DEFIGARD 5000
Shock unsuccessful
User Guide
Defibrillation
Semiautomatic Defibrillation
5
5.7
If also the 3rd shock is unsuccessful, the device prompts the user to:
• carry out alternately artificial respiration and heart massage.
• start a new ECG analysis after one minute. Depending of the configuration, this
new analysis can be started automatically.
Shock successful
After a successful shock, the device prompts the user to:
•
Device detects no shockable rhythm
check the patient's respiration and circulation and
– if no signs of circulation are present, to alternately carry out artificial respiration
and heart massage
– if signs of circulation are present, to move the patient to the lateral position
If the analysis program does not detect a shockable rhythm, the device informs the
user about the further steps:
Art. no.: 0-48-0060 Rev.: a
• informs that no shock is required
• prompts the user to check the patient's respiration and circulation
– if no signs of circulation are present, to alternately carry out artificial respiration
and heart massage
– if signs of circulation are present, to move the patient to the lateral position
– after one minute, prompts the user again to start a new ECG analysis. Depending on the configuration, this new analysis can be started automatically.
Page 49
5
5.7
Defibrillation
Semiautomatic Defibrillation
DEFIGARD 5000
Voice Support in SAED Mode
When the device is switched on, it carries out a self-test and indicates the software
and hardware version. The following instructions will be spoken by the device:
Language
Display
Note
Stick electrodes on bare and dry chest
CONNECT THE ELECTRODES!
Technical alarm:
PRESS THE ELECTRODES
Technical alarm:
Poor connection; press the electrodes
Electrodes not yet applied. The message disappears as soon as the electrodes are correctly applied and the resistance is below 250 Ohm.
The contact between the electrodes and the skin
is not sufficient. The patient resistance is in the
range of 250 to 400 Ohm.
Press the green button
PRESS THE GREEN BUTTON
Do not touch the patient. Analysis in
progress.
DO NOT TOUCH THE PATIENT
ANALYSIS IN PROGRESS
Motion detected; stop the motion
MOTION DETECTED
STOP MOTION
Heart rhythm analysis is started.
Technical alarm:
The patient was moved during the analysis and
the device could not carry out the analysis.
Device recommends a shock
Do not touch the patient, charging
DO NOT TOUCH THE PATIENT, CHARGING IN
PROGRESS
Stand clear of patient, press orange button
PRESS ORANGE BUTTON
TO SHOCK
Device does not recommend a shock
Shock not recommended
CHECK FOR SIGNS OF CIRCULATION
If no signs of circulation, give two breaths,
then 15 chest compressions - continue.
15 CHEST COMPRESSIONS
THEN 2 RESCUE
BREATHS - CONTINUE
Art. no.: 0-48-0060 Rev.: a
Check for signs of circulation
Page 50
DEFIGARD 5000
User Guide
5.7.2
Defibrillation
Semiautomatic Defibrillation
5
5.7
Defibrillation - Procedure
When the device is switched on, it gives spoken and displayed instructions up to the
defibrillation. Exactly follow the instructions.
Step 1
Switching on and Preparing the Device
1.
2.
3.
4.
5.
6.
Fig. 5.9
Insert the adapter for the adhesive electrodes.
Switch on the device by pressing the green button.
Check the state of the patient.
Connect the electrode cable to the adapter.
You are prompted to apply the electrodes.
Apply the defibrillation electrodes (see section 5.4.1, page 42). The message
CONNECT THE ELECTRODES is switched off as soon as the device measures
an acceptable electrode resistance. If it is not switched off, see section 5.4.1.
Switch unit on
Step 2
Analysis
7.
8.
You are prompted to start the analysis.
Press the blue button. You are prompted not to touch the patient any more.
If the device detects ventricular fibrillation or ventricular tachycardia with a heart rate
exceeding 180 pulse/min, shock delivery follows (see step 4 - Shock Delivery); otherwise continue with Step 4, Cardiopulmonary Resuscitation.
Art. no.: 0-48-0060 Rev.: a
Fig. 5.10 Analysis
Page 51
5
5.7
Defibrillation
Semiautomatic Defibrillation
Step 3
DEFIGARD 5000
Shock Delivery
As soon as the energy for a shock is charged, the device prompts the user to deliver
the shock by pressing button 3.
V Danger of electric shock!
• Do not, under any circumstances, touch the patient during shock delivery.
• Make sure that the patient does not touch any conducting objects.
9.
Deliver the shock by pressing the button
.
After shock delivery, the device checks if the shock has been successful by carrying out an automatic analysis. If the shock was not successful, the steps 2 to 3
are repeated once or twice, whereas the preset energy levels for the 2nd and 3rd
shocks are charged. Then step 4 follows.
Step 4
Cardiopulmonary Resuscitation
10. Check the patient.
– If no sings of circulation are present, carry out cardiopulmonary resuscitation.
Alternate between two breaths and 15 cardiac massages for one minute. After
one minute, the device begins again with Step 2, Cardiopulmonary Resuscitation.
– If circulatory signs are present, move the patient onto his or her side.
Page 52
Art. no.: 0-48-0060 Rev.: a
Prompt to check the patient's respiration and circulation.
DEFIGARD 5000
Defibrillation
Defibrillator Error Messages
User Guide
5.8
5
5.8
Defibrillator Error Messages
Cause
Remedy
SYNCHRO END
• No pulse
« Check ECG
BAD CASSETTE
• Wrong cassette connected
• Cassette has not completely
locked into place
« Use the correct cassette
« Lock the cassette into place
Art. no.: 0-48-0060 Rev.: a
Alarm
Page 53
6
6.1
Pacemaker
Pacemaker Function
DEFIGARD 5000
6 Pacemaker
6.1
Pacemaker Function
The pacemaker is the module for external transthoracic stimulation of the heart.
The pacemaker offers two modes of operation, demand and fixed-rate pacing. The
overdrive mode can be used to correct conditions of tachycardia. In demand mode,
the pacemaker requires an ECG signal for synchronisation.
The same, large-surface adhesive electrodes used for defibrillation are also employed for pacing. They ensure good electrical contact with the skin. These electrodes and a 40 ms square-wave pulse reduce painful muscle contractions provoked
by excessive current density.
It is not possible to simultaneously connect pads for defibrillation and for pacing.
Pacer rate, pulse width and current are checked when the device is turned on and
during operation; therefore a functional test of the pacemaker module is not necessary.
6.1.1
Fixed-Rate Mode (Fix)
In this operating mode, the module delivers pacing pulses with user-defined current
at a user-defined rate. The selected rate remains constant and is not affected by intrinsic actions of the patient's heart. This is the preferred mode for cases of cardiac
arrest.
6.1.2
Demand Mode
In demand mode, the pacemaker does not deliver pacing pulses as long as the patient's intrinsic heart rate exceeds the set pacing rate. When the heart rate drops below the pacing rate, the pacemaker starts emitting stimulation pulses. This can only
be ensured by continued monitoring of the ECG. The pacemaker receives the necessary ECG signal via the ECG electrodes. If the module is not able to reliably identify QRS complexes, it will stimulate the heart permanently in demand mode.
The demand mode is the recommended pacing mode when the patient is at risk of
developing bradycardia or even asystole as a result of a critical event. As the pacemaker function is controlled by the patient's ECG, the harmful competition between
intrinsic and external stimulation, which could induce ventricular fibrillation, is excluded.
6.1.3
Overdrive Mode
This operating mode should be selected to correct conditions of tachycardia. The
heart is stimulated with a rate that is above the intrinsic heart rate. At the end of the
intervention, the heart rate should return to a normal rhythm.
Page 54
Art. no.: 0-48-0060 Rev.: a
In the overdrive mode, the pacer will operate at three times the selected rate.
DEFIGARD 5000
User Guide
6.2
6
6.2
Safety Notes
V
Shock hazard!
Never touch the pads or the patient's body near the pads while the pacemaker
is in use.
V
Patient hazard, equipment failure!
Equipment delivering electrical energy to the patient at the same time as the
pacemaker can disturb the pacemaker function. Particularly HF surgery equipment used on a pacemaker patient may cause interference, preventing the detection of QRS complexes. In this situation, the pacemaker must be set to fixedrate pacing (FIX). Also please note that leakage currents could be transferred to
other electric circuits, interfering with the functioning of devices connected to
these circuits.
For safety reasons, the external pacemaker should be disconnected from the
patient in this situation and an internal pacemaker should be used.
Accessories, wearing parts and disposables that affect the safe use of the pacemaker and that are to be used in conjunction with the pacemaker must be tested
for safety and approved by an authorised test laboratory.
V
V
6.3
Pacemaker
Safety Notes
Guidelines for the Application of External
Pacemakers
These guidelines apply to all pacemakers, irrespective of type and manufacturer.
All electrical devices that deliver energy to patients in any form or have an electrically
conductive connection to the patient are a potential source of danger.
Art. no.: 0-48-0060 Rev.: a
As the user is responsible for the safe application of the devices, observance of the
instructions given in the user manual and of the guidelines below is of utmost importance.
• Pacemakers must only be used under the supervision of qualified and authorised
staff.
• Observe the user guide for the pacemaker's operation.
• The patient must not be left unattended during pacing.
• It is assumed that the patient's ECG is being monitored to be able to assess the
effect of pacing.
• When positioning the patient, take care that no electrically conductive connections
exist between the patient and earthed metal parts (puddles of water, for instance,
are capable of conducting the electrical current). Although the pacer current output
is required to be floating, this is an additional safety precaution to ensure that the
pacemaker current pulse flows only between the pacemaker electrodes.
• Set all values for the pacemaker to position 0, or the lowest value.
• Position stationary pacemakers close to the patient.
• After each defibrillation, check that the pacemaker is functioning properly.
Page 55
6
6.3
Pacemaker
Guidelines for the Application of External Pacemakers
6.3.1
DEFIGARD 5000
Attaching the Pacer Pads
• The same electrodes used for defibrillation are also employed for pacing.
• For children with a body weight under 15 kg, pads with a surface of 28 cm2 should
be used.
• For children weighing more than 15 kg, pads with a surface of 78 cm2 should be
used.
The application of electrodes is detailed in section 5.4.1 on page 42.
Anterior-Posterior Placement
1.
Apply the dorsal electrode (+) to the left scapular area and the precordial electrode (-) near the left lower sternal edge.
2. Connect the pace pads to the device.
If the dorsal electrode cannot be used, apply anterior-anterior placement.
Dorsal electrode
Fig. 6.1
Anterior-posterior placement
Anterior-Anterior Placement
1.
2.
Anterior-anterior placement
Art. no.: 0-48-0060 Rev.: a
Fig. 6.2
Apply the “+” electrode on the right side below the clavicle and the “-” electrode to
the left of the axillary line on a level with the 5th intercostal space so they do not
hinder heart massage.
Connect the pace pads to the device.
Page 56
DEFIGARD 5000
Pacemaker
Start-up of the Pacemaker
User Guide
6.4
6
6.4
Start-up of the Pacemaker
• The device can at any time be switched from defibrillation to pacing mode if required.
• When the pacemaker is switched on, the current value is set to 0.
6.4.1
Softkeys for defibrillator
Softkeys for pacemaker
Pacemaker Display
1.
Select the defibrillator display using the navigation button.
2.
Display the pacemaker function by pressing the STIM softkey
.
The softkeys for the pacemaker settings (Fig. 6.3) and the pacemaker values are displayed.
mA +
mA P x3
Charge
On-off
DEFI
STIM
Freq
Fig. 6.3
DEFI and STIM softkeys
6.4.2
Mode
Menu
Selecting Pacemaker Mode
1.
2.
3.
4.
Select the defibrillator display using the navigation button.
Press the navigation button. The Mode softkey is displayed.
Press the Mode key to select the operational mode Fix or Demand.
The operational mode is displayed in the defibrillation window (1).
1
Edition
Art. no.: 0-48-0060 Rev.: a
S
T
I
M
Fig. 6.4
Dem
40
35
p/min
mA
Pacemaker mode
Page 57
6
6.4
Pacemaker
Start-up of the Pacemaker
6.4.3
Softkeys for pacemaker
P+
mA +
P-
mA -
P x3
P x3
DEFI
DEFI
Current
Freq
Fig. 6.5
1.
2.
3.
Display pacemaker and select operational mode fix. (See page 57.)
Set the pacer rate using the function keys P +/-.
Display the keys for the pacer output by pressing the Current softkey.
V
Shock hazard!
Never touch the pads or the patient's body near the pads while the pacemaker is
in use.
Set the pacer output using the buttons mA +/- until the heart will certainly react on
the stimulation.
After completion of the therapy, set the pulse rate and current to the minimum value before carefully tearing off the electrodes from the patient.
5.
Softkeys for pacemaker
40
p/min
Fig. 6.6
Pacemaker Settings Operational Mode Fix
4.
6.4.4
S
T
I
M
DEFIGARD 5000
Dem
35
mA
Intrinsic heart rate indicator
1.
2.
3.
Record an ECG with patient cable as described in section on page 25.
Attach the pacer pads (See page 56.)
Display pacemaker and select operational mode Demand. (See page 57.)
4.
Increase the pulse rate using the button P + until the
5.
6.
7.
symbol on the display
starts flashing. The pulse rate has now reached or slightly exceeded the intrinsic
heart rate.
Increase the impulse current using the button mA + until the heart reacts to the
stimulation (QRS complexes visible on the display).
Now set the required pulse rate using the P +/- keys.
When the therapy is finished, switch the pacemaker off and carefully remove the
electrodes.
Art. no.: 0-48-0060 Rev.: a
flashes
Demand Mode
Page 58
DEFIGARD 5000
User Guide
6.4.5
Softkeys for pacemaker
mA +
mA -
Pacemaker
Start-up of the Pacemaker
6
6.4
Overdrive Mode
1.
2.
3.
4.
5.
Start the pacemaker as described in section 6.4 on page 57.
Set the pacemaker mode to Fix. The P x3 softkey is displayed.
Keep P x3 pressed while increasing the pulse current using the button mA + until
the heart has reached the pacemaker's rate.
Now let the P x3 key go. The heart should continue to beat with a normal heart
rate.
Finish the therapy.
P x3
DEFI
Freq
Softkeys for pacemaker
Art. no.: 0-48-0060 Rev.: a
Fig. 6.7
Page 59
7
6.4
Finishing the Therapy
Start-up of the Pacemaker
DEFIGARD 5000
7 Finishing the Therapy
1.
2.
3.
4.
Art. no.: 0-48-0060 Rev.: a
5.
6.
Switch the device off as soon as the therapy is finished (keep the button pressed
for approx. 2 seconds).
Disconnect the plug of the electrode line.
Carefully remove the electrodes from the patient's skin.
Discard the disposable pads immediately after use to prevent their reuse (hospital waste).
Sterilise the spoon electrodes immediately after use.
Clean the device as described in section 10.
Page 60
DEFIGARD 5000
User Guide
Intervention Summary
Start-up of the Pacemaker
8
6.4
8 Intervention Summary
To document the intervention, the ECG (30 minutes, 1 lead) and the intervention
(500 events max.) are saved.
Overview of events documented with date and time:
Power on
Start of analysis
Analysis result
Defibrillator charging
Defibrillation shock
Internal discharge
Switchover to manual operation
Electrode alarm
"Battery low" alarm
Activation of a vital signs module
Deactivation of a vital signs module
Asystole alarm (manual mode)
Fibrillation/flutter alarm (manual mode)
Event button
Art. no.: 0-48-0060 Rev.: a
•
•
•
•
•
•
•
•
•
•
•
•
•
•
Page 61
8
8.1
Intervention Summary
Printing Curves and Measured Values
8.1
DEFIGARD 5000
Printing Curves and Measured Values
The curves and parameter settings to be printed and the printing length are described on page 66, section 9.1.5.
Fig. 8.1
Start/stop printout key
1.
Press the Start/stop printout key. If no or a 3-lead ECG cable is connected, the
set curves are printed directly. With a 4 - or 10-lead patient cable, the keys for the
available print options are displayed.
2.
3.
Start the printout by pressing the respective print option key.
The printout can be stopped at any time using the start/stop printout key.
Print Options
1
(1) Printout of the set curves with set printing length and parameter values. (The
print settings are described in section 9.1.5.)
(2) Printout of the set curves until the printout is stopped using the start/stop key,
and the parameter values. (The print settings are described in section 9.1.5.)
(3) Printout of all ECG curves and measured values.
2
3
Print option keys
8.1.1
Example of a Defibrillator Shock Printout
Text block with registration
data
ECG curve
:
:
:
08 / 09 / 20 05 1 6: 4 4
De f i s ho c k
E CG
8 s e c on ds
¦ W d el ¦ I p at ¦ R pa t
¦ 1 3 1 J ¦ 48 A ¦ 5 6 Ω
D EFI
8.1.2
Printer Error Messages
Alarm
Cause
Remedy
RECORDER: NO PAPER!
• No paper in the printer
« Insert paper
RECORDER: DOOR OPEN! • Printer door is open
« Close the door
RECORDER: TIME OUT!
« Remove the paper jam
Page 62
Readings of the monitored parameters
2 5 mm/ s 0. 5 Hz - 2 5Hz
DG 5 00 0 95 0 00 67
V0 2. 0 0 12 /0 9 /2 0 05 1 3: 3 4
S ta rt :
Cu rve (s)
H i s t or y
Shock energy and current
• Paper jam in the printer
¦
¦
HR
Sp O 2
NIBP sys
Ma p
DIA
:
:
:
:
:
71 bp m
98 %
12 5 mm Hg
09 5 mm Hg
09 0 mm Hg
Art. no.: 0-48-0060 Rev.: a
Fig. 8.2
DEFIGARD 5000
User Guide
Default and User-Defined Thresholds
Printing Curves and Measured Values
9
8.1
9 Default and User-Defined
Thresholds
For the monitoring of vital parameters, physiological alarm thresholds are preset in
the DEFIGARD® 5000, which are activated when the device is turned on. The device
distinguishes between default and user-defined thresholds for adults and neonates. The user-defined thresholds can be changed in the respective menus; the
default thresholds are changed in the device configuration menu (see page 67,
section 10).
All changes are saved. When the device is put into operation for the first time, the
user-defined thresholds are identical with the default thresholds.
1.
Main menu
ECG Menu
SpO2 Menu
2.
3.
4.
5.
Press the navigation button. When the navigation button is pressed twice, the
main menu is directly opened and step 2 is dropped.
Press the Menu softkey. The main menu is displayed.
Select, display and modify the menu by turning and pressing the button.
To access the threshold menu directly, press
.
The time, volume and printer configuration can be set via the unit settings button
.
NIBP Menu
Main menu
Art. no.: 0-48-0060 Rev.: a
Fig. 9.1
Page 63
9
9.1
Default and User-Defined Thresholds
User-Defined Thresholds
9.1
DEFIGARD 5000
User-Defined Thresholds
The settings are detailed in section 4. The following table gives an overview of the
user-defined thresholds, with the factory defaults in bold letters.
9.1.1
ECG Menu
The thresholds are only displayed after the user's threshold values have been
opened once in the threshold values menu
.
Menu
Parameter
Value
ECG
Number of curve(s)
0 / 1 / 2 / 3 / 6 /12
Lead channel 1
Defi/I, II, III/aVR, aVL, AVF/V1, V2,
V3/V4, V5, V6
Lead channel 2
aDefi/I, II, III/aVR, aVL, AVF/V1, V2,
V3/V4, V5, V6
0.25/0.5/1/2 cm/mV
HR
ECG/HR
QRS beep
Off/Low/Medium/High
Speed
25/50 mm/s
Patient
Adult/Neonate
High threshold
(140...300)/Off
Low threshold
Off/60 (range 30...125)
SpO2
a. The "Defi" option is only available when a patient cable and an adapter module
with defibrillation electrodes are connected.
9.1.2
SpO2 Menu
The threshold values are only displayed after the user's threshold values have been
opened once in the threshold values menu
.
Parameter
Value
SpO2
SpO2 curve
Yes/no
Average Cycles
8/16 seconds
HR
Page 64
ECG/HR
Speed
25/50 mm/s
Patient
Adult/Neonate
High pulse threshold
(130...250)/Off
Low pulse threshold
Off/50 (range 30...125)
High SpO2 threshold
100/Off (range 55...250)
Low SpO2 threshold
Off/85 (range 50...99)
SpO2
Art. no.: 0-48-0060 Rev.: a
Menu
DEFIGARD 5000
Default and User-Defined Thresholds
User-Defined Thresholds
User Guide
9.1.3
9
9.1
NIBP Menu
The thresholds are only displayed after the user's threshold values have been
opened once in the threshold values menu
.
Menu
Parameter
NIBP
9.1.4
Value
Manual, Continuous or cycle of 1 / 2 /
3 / 5 /10 /15 /20 / 30 / 40 / 90 minutes
Patient
Adult/Neonate
Unit
mmHg / kPa
High SYS threshold
180 (70...250)
Low SYS threshold
70 (Off/50...225)
High MAP threshold
160 (25...250)
Low MAP threshold
50 (Off/20...245)
High DIA threshold
110 (15...200)
Low DIA threshold
40 (Off/10...195)
User-Defined Thresholds Menu
The thresholds menu is accessed via the menu or threshold key
can be selected and changed using the navigation key.
. The values
Menu
Parameter
Min.
Max.
Unit
ECG
HR
70
150
p/min
SpO2
NIBP
PULS
50
130
p/min
%
85
100
%
SYS
70
180
mmHg
Map
50
160
mmHg
DIA
40
110
mmHg
With the Default key, the default threshold values are copied into the operator table.
Default
With the
key, all values are deactivated.
With the Quick Set key, all values are derived from the current measured values.
– Low threshold = -20 %
– High threshold = +20 %
Art. no.: 0-48-0060 Rev.: a
Quick Set
Fig. 9.2
Exit the menu by pressing Enter.
Softkeys in the threshold menu
Page 65
Default and User-Defined Thresholds
User-Defined Thresholds
9.1.5
DEFIGARD 5000
Unit Settings Menu
Access the unit settings menu via the menu or the
selected and changed using the navigation button.
Menu
Defibrillator
Demo mode
Page 66
button. The values can be
Parameter
• Day
Value
Note
-
When the date and time are changed, the data
in the trend memory is deleted.
-
• Month
-
• Year
-
-
• Hour
-
-
• Minute
-
-
• Date format
DD/MM/YY or MM/DD/YY
• Summer/winter time
Yes/no
-
• Alarm sound
High, Medium, Low
-
• QRS sound
High, Medium, Low, Off
-
• Pace sound
High, Medium, Low, Off
-
• Key sound
High, Medium, Low, Off
-
• Language
High, Medium, Low, Off
-
• Manual printing
ECG, Puls, ECG/ECG, ECG/ Selection of values to be printed on
Puls
manual printouts
• Alarm printing
ECG, Puls, ECG/ECG, ECG/ Selection of values to be printed on auPuls, ECG/Alarm
tomatic printouts (“Printing on alarm”)
• Printing on alarm
No, HR only, All alarms
• Printing on shock
Yes, No
• History
“No history” or “8 s”
Printout including 8 seconds before the
printout trigger
• Printing length (page)
2, 3, 4, 5, 6
Number of pages per printout
• Lead change (page)
2, 3, 4
Length of lead printouts
• Synchro modification
“Key” or “Automatic”
• Synchro at start
“Direct” or “Synchro”
• Synchro with paddles
Set to Yes or No
• Mode at start
“SAED” or “Manual”
• ERC protocol
1 or 3 min
For demonstration only
Only accessible with a pass- Display of curves and measured values
word
without sensors
Alarm events which should trigger a
printout
Art. no.: 0-48-0060 Rev.: a
9
9.1
DEFIGARD 5000
Default Values
Default Threshold Values for Adults
User Guide
10
10.1
10 Default Values
To change the default values, access the DEVICE CONFIGURATION menu as follows:
« Keep the navigation button pressed while switching on the device.
DEVICE CONFIGURATION
Saving the Values
After the threshold values and parameters have been set, the device must be
switched off.
[Ether]
Options
Releases
Fig. 10.1 DEVICE CONFIGURATION
menu
10.1
Default Threshold Values for Adults
Menu
Parameter
Min.
Max.
Unit
ECG
HR
50
130
p/min
SpO2
PULS
50
130
p/min
%
85
100
%
SYS
70
180
mmHg
Map
50
160
mmHg
DIA
40
110
mmHg
NIBP
Art. no.: 0-48-0060 Rev.: a
10.2
Default Threshold Values for Neonates
Menu
Parameter
Min.
Max.
Unit
ECG
HR
50
130
p/min
SpO2
NIBP
PULS
50
130
p/min
%
85
100
%
SYS
50
140
mmHg
Map
40
120
mmHg
DIA
30
100
mmHg
Page 67
10
Default Values
10.3 Default Device Settings
DEFIGARD 5000
10.3
Default Device Settings
10.3.1
Alarms
Menu
Parameter
• -4 % SpO2 alarm
Value
• Elec. fault with paddles
Yes/no
• Physiological alarms
Locked/Not locked
• 2’ alarm rejection at start
Yes/no
Yes/no
Yes/no
Permanent alarm switch-off
Menu
Page 68
Parameter
• CONT mode length
Value
• Cycle after CONT mode
3 min (1 - 90 min)
5 min (5 - 15 min)
Parameter
Value
Deutsch, English, Français,
Italiano, Português, Español
Parameter
Value
Screen Colour
Colour 1, 2, 3
Menu
Parameter
Value
Mains Filter
Mains filter
50, 60 Hz, None
Menu
Parameter
Value
Serial Nb
Serial Nb
Can only be changed by the
manufacturer
Screen Colour
Menu
10.3.6
Yes/no
Language
?
10.3.5
Yes/no
• Defi ready in SAED
Language
Menu
10.3.4
Yes/no
• Alarms in SAED
NIBP
NIBP
10.3.3
• VF alarm in manual
Mains Filter
Serial Number
Art. no.: 0-48-0060 Rev.: a
10.3.2
This setting is not allowed in
all countries
DEFIGARD 5000
Default Values
Working Hour Meter
User Guide
10.3.7
10.4
10
10.4
Hardware Number
Menu
Parameter
Value
Hardware Nb
Hardware Nb
Can only be changed by the
manufacturer
Working Hour Meter
Menu
Parameter
Value
Runtime
Days/hours/minutes
Standby
Days/hours/minutes
Lower battery
Capacity in %
Upper battery
Capacity in %
The working hour meter can only be reset by the manufacturer.
10.5
10.6
Ethernet
Menu
Parameter
Value
[Ether]
Mac address
Can only be changed by the
manufacturer
Ip address
User Defined
Subnet mask
User defined
Gateway
User defined
Menu
Parameter
Value
Options
SpO2
Yes/no
Options
Non Invasive Blood Pressure Yes/no
Yes/no
Semiautomatic mode
Yes/no
Pacemaker
Yes/no
ECG memory
Yes/no
Art. no.: 0-48-0060 Rev.: a
Printer
Page 69
10
Default Values
10.7 Releases
DEFIGARD 5000
10.7
10.8
Releases
Menu
Parameter
Value
Releases
Group
Soft xy
FPGA
xy
Host
xy
Analog
xy
Pacemaker
xyxy
SPO2
xy
NIBP
xy
ECG
xy
VF / VT
xy
Power
xy
Defibrillator
xy
PC Download
This function is only used for software downloads. To leave the menu, press the "Delete" key twice.
10.9
Locking the Device
Transport Lock
A locked device will switch off automatically if it is not operated for 5 seconds.
To unlock the device, follow the instructions on the screen.
Art. no.: 0-48-0060 Rev.: a
This menu can only be accessed with the factory password.
Page 70
DEFIGARD 5000
User Guide
Maintenance
Maintenance Interval
11
11.1
11 Maintenance
11.1
Maintenance Interval
Note
The unit must be serviced on a regular basis. The test results must be recorded and
compared to the values in the accompanying documents.
The following table indicates the intervals and responsibilities of the maintenance
work required.
Interval
Before each use
Monthly
Every 4 months
Maintenance
• Visual inspection of the device and electrodes
• Visual inspection of the device and electrodes
• Check of the electrodes' expiration date
• Function inspections according to the instructions
Responsible
« User
« User
« User
Every 12 months
• All measurement inspections and calibration according to the instruc- « Service staff authorised by
tions in the service handbook
SCHILLER AG
Every 5 years
• Battery replacement
11.1.1
« User
Visual Unit Check
Inspect the device and electrodes for the following:
« Device casing not deformed?
« Electrode connection undamaged?
« Expiration date on the electrode package
Defective units or damaged cables must be replaced immediately.
11.1.2
Defibrillator Test
This test can only be carried out with paddles.
V
Art. no.: 0-48-0060 Rev.: a
V
1.
2.
3.
Danger of electrical shock. The metal parts of the paddles must not be touched
while a shock is triggered.
To prevent the bleeder resistor from overheating, this test must never be carried
out several times in a series.
Connect the paddles and set the energy to 90 joules.
Hold the paddles together and trigger a shock into the device.
Recorder printout with the message: DEFIBRILLATOR TEST – Date – OK.
Page 71
11
Maintenance
11.1 Maintenance Interval
DEFIGARD 5000
11.1.3
Functional Test
« Switch the device on and carry out a self-test.
11.1.4
Heart rate
Alarm Tests
1.
2.
Start the ECG monitoring (see section 4.3.4, page 28).
Set the high and then the low heart rate threshold below/above the measured values.
3. An alarm is issued.
Reset the alarm limits to their original values.
SpO2
See section 4.4, page 30.
NIBP
1.
2.
3.
4.
Start the NIBP monitoring (see section 4.5.1, page 33).
Set the NIBP alarm limits below/above the measured values and take a new
measurement.
When the measured value exceeds the alarm limit, an alarm is issued.
Reset the alarm limits to their original values.
Art. no.: 0-48-0060 Rev.: a
If the device does not behave as described in this user guide, there is an error that
must be repaired by the after-sales service.
Page 72
DEFIGARD 5000
User Guide
11.2
Maintenance
Maintenance Interval for the Battery
11
11.2
Maintenance Interval for the Battery
Important
The battery is maintenance free during its normal life.
The battery must be replaced after five years, regardless of whether the device has
been used or not.
11.2.1
Battery Disposal
V
V
Danger of explosion! Battery may not be burned or disposed of domestic refuse.
Danger of acid burns! Do not open or heat up the battery.
The battery is to be disposed of in municipally approved areas or sent back to
SCHILLER AG.
11.2.2
Disposal at the End of the Device's Useful Life
The device must be disposed of in a municipally approved collection point or recycling centre.
If there is no local collection point or recycling centre in your area, you can return the
device to the distributor or the manufacturer for proper disposal. In this way, you contribute to the recycling and other forms of utilisation of old electrical and electronic
equipment.
Art. no.: 0-48-0060 Rev.: a
Improper disposal harms the environment and human health due to dangerous substances contained in electrical and electronic equipment.
Page 73
11
Maintenance
11.3 Cleaning
DEFIGARD 5000
11.3
Cleaning
11.3.1
Cleaning the Casing
V Switch the unit off before cleaning and remove the battery. Do not, under any circumstances, immerse the apparatus into a cleaning liquid or sterilise with hot water, steam, or air.
V Do not use any phenol-based agents or peroxide compounds for cleaning.
« Wipe the unit's casing with a tissue dampened in a cleaning or disinfection solution (70% alcohol). Make sure that no liquid enters the unit.
« Discard the disposable pads immediately after use to prevent their reuse (hospital waste).
« The paddles and their leads can be cleaned and disinfected by wiping them down
with a gaze pad moistened with soap water or disinfectant. Before using the paddles again, however, make sure that they are not completely dry.
« The spoon electrodes can be cleaned in the same way. Further more, these electrodes and the connection cables can be sterilised with ethylene oxide, vapour
(134 °C) or ionising radiation. Ensure that internal defibrillation electrodes are
sterilised before each use!
« Before cleaning the electrode or sensor leads, disconnect them from the device.
The lines can be cleaned and disinfected by wiping them down with a gaze pad
moistened with cleaning agent or disinfectant. Do not immerse the cable connectors in liquid. The device can be cleaned with all cleaning agents and disinfectants commonly used in hospitals.
11.3.2
Accessories and Disposables
V Always use SCHILLER replacement parts and disposables, or products approved by SCHILLER. Failure to do so may endanger life and invalidate the guarantee.
Art. no.: 0-48-0060 Rev.: a
Your local representative stocks all the disposables and accessories for the DEFIGARD® 5000. A full list of all SCHILLER representatives can be found on the
SCHILLER website (www.schiller.ch). In case of difficulty, contact our head office in
Switzerland. Our staff will be pleased to help process your order or to provide any details for all SCHILLER products.
Page 74
DEFIGARD 5000
Error
11.4
Error Detection
11.4.1
General Errors
Cause
The screen is not lit when • Battery not correctly inserted or
the device is switched on
defective
• Device defective
The device
switched off
cannot
Maintenance
Error Detection
User Guide
be • Green button was pressed for
less than 3 seconds
• Device defective
11
11.4
Remedy
« Correctly insert or replace the battery
« Replace the device
« Keep the green button pressed for at least 3 seconds
« Replace the device
No analysis
• ECG signal too weak
• ECG signal disturbed by electromagnetic waves
• Patient moved or touched during
the analysis
• Device defective
« Resume the heart massage
« Switch off the interfering device, e.g. wireless equipment
or handy, or move the patient out of the noise field
« The patient must not move or be touched during the
analysis
« Replace the device
No shock can be delivered
• Battery charge too low
• Electrode defect caused by resuscitation measures
• Heart rate has changed
• Device defective
« Change batteries
« Reapply electrodes
Art. no.: 0-48-0060 Rev.: a
« Repeat the analysis
« Replace the device
Page 75
11
Maintenance
11.4 Error Detection
DEFIGARD 5000
11.4.2
Technical Error Messages
Alarm
CARD ERROR!
• Technical error
« Replace the device
ANALOG BOARD!
• Technical error
« Replace the device
POWER CARD ERROR!
• Technical error
« Replace the device
Trend Error
• Technical error
« Replace the device
PROCESSOR ERROR
• Technical error
« Replace the device
PROGRAM ERROR
• Technical error
« Replace the device
ERROR DETECTION CIRCUIT FAILED
• Technical error
« Replace the device
SELECTED ENERGY VOLTAGE REFERENCE
FAILED
• Technical error
« Replace the device
ANALOG/DIGITAL CONVERTER ERROR
• Technical error
« Replace the device
CHARGE TRANSISTOR ERROR
• Technical error
« Replace the device
SAFETY DISCHARGE CIRCUIT FAILED
• Technical error
« Replace the device
COMPENSATION EPROM FAILED
• Technical error
« Replace the device
SHOCK BUTTON FAILED
• Technical error
« Replace the device
• Technical error
« Replace the device
• Technical error
« Replace the device
IGBT ERROR
• Technical error
« Replace the device
PIC POWER SUPPLY FAILED
• Technical error
« Replace the device
NO COMPATIBILITY BETWEEN HARDWARE
AND SOFTWARE
• Technical error
« Replace the device
Art. no.: 0-48-0060 Rev.: a
DEFI TIME OUT
CHARGE CIRCUIT FAILED
Page 76
DEFIGARD 5000
User Guide
Technical Data
System Data
12
12.1
12 Technical Data
Where nothing else is indicated, the data refer to a temperature of 25 °C.
12.1
System Data
Manufacturer
SCHILLER MEDICAL
Device name
DEFIGARD® 5000
Dimensions
289 x 271 x 177 mm (h x l x w)
Weight
5.3 kg
Protection case
IPX 1 (drip-proof)
Power Supply
Voltage
Power consumption
Battery operation
Fuses
External power supply
100 - 240 VAC 50/60 Hz
120 VA
Up to 2 hours; up to 4 hours with additional battery
2 x 200 mA (T) at 250 VAC, 2 x 315 mA (T) at 115 VAC
11.5 - 48 VDC max., 2.5 A
The unit is suitable for use in networks according to IEC 60601-1-2.
Battery
Battery type
Autonomy
Lithium/ion 10.8 V, 4.3 Ah
190 shocks with maximum energy or 2 hour monitoring (with one battery)
Environmental conditions
For operation
For storage and transport
•
•
•
•
0 ºC...40 ºC relative humidity at 30...95% (noncondensing)
Atmospheric pressure 500...1060 hPa
-10 ºC...50 ºC relative humidity at 0...95% (noncondensing)
Atmospheric pressure 700...1060 hPa
Display
Art. no.: 0-48-0060 Rev.: a
Type
Dimensions
Printer
High-resolution colour LCD, backlit
211.4 x 158.4 mm (10.4 “)
High resolution thermo-printer
Resolution
8 dots/mm (amplitude-axis), 40 dots/mm (time-axis) at 25 mm/s
Paper
Thermoreactive, Z-folded, 72 mm width, length approx. 20 m
Print speed
25, 50 mm/s
Recording tracks
3-channel display, with optimal width of 72 mm
Connections
ECG patient cable , SpO2, NIBP
Page 77
12
Technical Data
12.1 System Data
DEFIGARD 5000
• RS-232
• Analog for QRS trigger, 1-channel ECG and remote alarm (no delay compared to
device alarm)
• USB
• Ethernet
• For pins and the signal type, please contact the SCHILLER after-sales service.
Safety standard
IEC/EN 60601-2-4
The device is designed for 2500 shocks
EMC
• IEC/EN 60601-1-2
• IEC/EN 60601-2-4
• CISPR 11 class B
The device can be exposed to the following interferences without any impairment:
• Static discharge up to 8 kV
• Energy in the radio frequency range up to 20 V/m (80...2500 MHz, 5 Hz modulated)
• Magnetic fields of 100 A/m, 50 Hz
Conformity
CE according to directive 93/42/EEC class IIb
Safety class
Class I according to IEC/EN 60601-1
Art. no.: 0-48-0060 Rev.: a
Interfaces
Page 78
DEFIGARD 5000
User Guide
12.2
Form
12
12.2
Defibrillation Pulse
• Biphasic pulsed defibrillation impulse with fixed physiological optimum phase durations
• Near stabilisation of the emitted energy in function with the patient resistance using pulse-pause modulation depending on the measured patient resistance.
Standard energy settings
Adult AED
Paediatric AED
Paddle
Adhesive electrodes
Internal
Art. no.: 0-48-0060 Rev.: a
Technical Data
Defibrillation Pulse
Deviation at 50Ω: ± 3 J oder ± 15 % (the higher value is assumed)
• 130/130/150 joules (configurable)
• 15/30/50 joules (configurable)
(automatic switch when the pediatric electrodes are connected)
• 0, 2, 4, 8, 15, 30, 50, 90, 130, 180 joules
• 2, 4, 8, 15, 30, 50, 70, 90, 110, 130, 150, 180 joules
• 2, 4, 6, 8, 15, 30 joules
Charging time for shock
(Time used to charge the storage capacitor to the max. energy of 180 J in manual
mode)
• with full battery
• with 90 V mains voltage after
15 discharges with max. energy
emission
• from switch-on of the device with
paddles
• from switch-on of the device with
pads
8 seconds
9 seconds
18 seconds
25 seconds
Cycle Time Rhythm Analysis –
Shock Standby in AED Mode
• with full battery
• with 90 V mains voltage after
15 discharges with max. energy
emission
• from switch-on of the device to
charge at max. energy
Cycle time shock - shock
1st shock = 20 s; 2nd shock = 40 s; 3rd shock = 60 s
1st shock = 20 s; 2nd shock = 40 s; 3rd shock = 60 s
1st shock = 35 s; 2nd shock = 55 s; 3rd shock = 75 s
<25 s
Page 79
12
Technical Data
12.2 Defibrillation Pulse
DEFIGARD 5000
Operating Modes
Synchronised with heart action 25 ms after R wave
Unsynchronised
AED
Charge control and monitoring
• Automatic shock recommendation of analysis in AED mode
• Using the set wheel on the paddle
• Using the device's keyboard
Display of selected energy
Patient resistance
30...220 Ω
Display of shock standby
Key
is lit
Shock delivery
Using key
Safety discharge when:
• the battery voltage is insufficient
• the device is defective
• the device is turned off
Shock delivery
• Via applied disposable adhesive defibrillation electrodes
• Via paddles
• Via spoons
Defibrillation electrode connection
External defibrillation
Internal defibrillation
Defibrillation electrodes
Adult electrode
Pediatric electrode
VF/VT detection
BF type
Type CF
Electrode cable 1.95 m long
• 78 cm2 active surface
• 28 cm2 active surface
Conditions for ECG analysis
VF/VT detection is only based on the ECG signal.
Minimum amplitude for analysable signals > 0.15 mV; signals < 0.15 mV are assessed as asystole
Shock recommendation
Sensitivity 96.4 %
Correct detection of shockable rhythms
Specificity 99.8 %
Correct detection of non-shockable rhythms These values were determined with an
AHA database containing VF and VT with or without artefacts.
:
Page 80
Art. no.: 0-48-0060 Rev.: a
In case of VF and VT (VT > 180 p/min)
DEFIGARD 5000
User Guide
Technical Data
Technical Data - Measured Values
12.3
Technical Data - Measured Values
12.3.1
ECG
12
12.3
Leads
Simultaneous, synchronous recording of all 9 active electrodes giving 12 leads
Patient cable
3-,4-, 10-lead cable, type CF
Heart rate
Range
Accuracy
• 30 – 300 beats/min
• ±2 beats/min
Lead display
Selection of 1 or 12 simultaneous leads
Sensitivity
0.25, 0.5, 1, 2 cm/mV programmable
ECG amplifier
Band pass
0.5...35 Hz or 0.05...150 Hz (depending on the ECG source)
Blockage caused by defibrillation shock
12.3.2
Max. 5 seconds
NIBP - Non-Invasive Blood Pressure
Measurement
Automatic or manual
Measuring method
Oscillometric
Connection
Type CF
Measurement range
Adults
Neonates
± 3 mmHg and ± 2 beats/min
Art. no.: 0-48-0060 Rev.: a
Accuracy
• Sys 30...255 mmHg, dia 15...220 mmHg
• Sys 30...135 mmHg, dia 15...110 mmHg
Page 81
12
Technical Data
12.4 Technical Pacemaker Data
12.3.3
DEFIGARD 5000
SpO2 - Pulsoximetry
Amplifier
Masimo™
Operation
Normal and sensitive
Accuracy
SpO2
• Adults 1 to 100% ± 2 digits
• Neonates 70 to 100% ± 3 digits
PP
• 25...240/min ± 4 digits
Calibration range
70...100%
Connection
Type CF
Measurement range
SpO2 1...100%
PP 25...240/min
Displayed range
1...100%
Blockage caused by defibrillation shock
Max. 10 seconds
12.3.4
Storage of Intervention (Option)
Saving
ECG
Events
45 minutes
500 pcs.
12.4
Operating Modes
Technical Pacemaker Data
• Demand
• Fixed-rate mode
• Overdrive (pulse frequency x 3)
Form
Duration
Pulse rate
Pulse current
Signal connection
Readiness for operation
Page 82
Rectangle
40 ms (20 ms overdrive mode) ± 10%
Configurable in steps of 40...210 beats/min, ± 5%
Configurable in the range of 0...150 mA, ± 5%
Type CF, defibrillation protected
Immediately
Art. no.: 0-48-0060 Rev.: a
Stimulation pulse
DEFIGARD 5000
Appendix
Accessories DEFIGARD 5000
User Guide
13
13.1
13 Appendix
13.1
Accessories DEFIGARD 5000
Defibrillation accessories
Article no.
Article description
1-101-3002
Adapter module for internal defibrillation
W1410013
Connection cable for spoon electrodes
W1409505
Spoon electrodes, pediatric, oval 43 x 27 mm - 9 cm2
W1403835
Spoon electrodes, pediatric, round 45 mm - 16 cm2
W1403834
Spoon electrodes, neonatal, 6 cm2
6-34-0005
Spoon electrodes, adult (pkg of 2), 54 cm2
1-101-3000
Paddle cassette
35131
Defibrillation gel (250 ml)
1-101-3001
Adapter module pads
EASY ELEC
Adult pads
0-21-0000
Pediatric pads
0-21-0008
Defibrillation paddle adapter for children (x1)
Article no.
Article description
W1402037
10-lead patient cable, clip, 45° plug
W1409608
3-lead patient cable, clip, 45° plug
U50063
4-lead patient cable, clip, 45° plug
W1402262
4-lead patient cable, banana plug, 45° plug
72365
ECG electrodes 34 mm, (x50) for clip cable
72366
ECG electrodes with holding strap, 34 mm, (x50) for banana plug cable
Article no.
Article description
2.100408
Disposable sensor for adults LNOP/ADT (x20)
2.100409
Disposable sensor for children LNOP/ADT (x20)
0-05-0003
SPO2 Masimo extension cable 2.5 m
0-05-0010
SPO2 Masimo extension cable 5 m
0-05-0011
SPO2 Masimo extension cable 10 m
2.100303
SPO2 Masimo finger sensor, adult
2.100305
SPO2 Masimo finger sensor, pediatric
ECG accessories
Art. no.: 0-48-0060 Rev.: a
SpO2 accessories
Page 83
13
Appendix
13.1 Accessories DEFIGARD 5000
DEFIGARD 5000
NIBP accessories
Article no.
Article description
U50128
Adult cuff 14 cm
U50129
Pediatric cuff 7 cm
W1405268
Air hose 1.5 m
0-22-0001
Air hose 3 m
Article no.
Article description
0-21-0013
Pacemaker/defibrillation pads adult
Pacemaker accessories
Various accessories
Article description
2.300005
Power cable 2P+T, 2.5 m, 90° plug, European standard
W1403916
Connection cable 12 VDC - 30 V
0-50-0000
Paper
2.200132
Additional rechargeable battery Li/ion 10.8V, 4.3 Ah
U50030
Earth cable
Art. no.: 0-48-0060 Rev.: a
Article no.
Page 84
DEFIGARD 5000
User Guide
13.2
Appendix
Literature
13
13.2
Literature
European Resuscitation Council
(2000)
Guidelines 2000 for Cardiopulmonary Resuscitation and Emergency Cardiovascular
Care. Resuscitation 46.
American Heart Association
(2000)
Guidelines 2000 for Cardiopulmonary Resuscitation and Emergency Cardiovascular
Care. Suppl. to Circulation Volume 102 – Number 8.
ISBN 0-87 493-325-0.
Cansell A. (2000)
Wirksamkeit und Sicherheit neuer Impulskurvenformen bei transthorakaler Defibrillation - Biphasische Impulskurvenformen - Notfall & Rettungsmedizin,
Springer Verlag 3 : 458 – 474.
13.3
Glossary
ABCD
The primary ABCD
A = Airways (check if airways are free)
B = Breathing (artificial respiration)
C = Circulation (circulatory signs or cardiac massage)
D = Defibrillation
ACLS
Advanced Cardivascular Life Support. (ACLS Manual AHA 2001)
AED
Automatic external defibrillator
BLS
Basic Life Support (artificial respiration and cardiac massage)
CPR is frequently used synonymously
CPR
Cardiopulmonary resuscitation
PEA
Pulseless electrical activity
Ventricular tachycardia
VF
Ventricular fibrillation
Art. no.: 0-48-0060 Rev.: a
VT
Page 85
DEFIGARD 5000
Art. no.: 0-48-0060 Rev.: a
13
Appendix
13.3 Glossary
Page 86
Index 14
DEFIGARD 5000
User Guide
14 Index
A
NIBP softkey............................................... 33
Accessories and disposables ..................... 74
Activating the audio alarm .......................... 25
Alarm indicators.......................................... 25
Alarm messages......................................... 25
O
Operating elements .................................... 14
Operational readiness ................................ 20
Options ....................................................... 13
B
Battery
Battery life ............................................. 77
Battery disposal .......................................... 73
Battery type ................................................ 77
Biocompatibility........................................... 12
P
Pacemaker
Fixed-rate mode (Fix)............................ 54
Pacemaker patients.................................... 28
Patient resistance....................................... 80
Physiological alarms................................... 25
C
Charge control and monitoring ................... 80
Cleaning ..................................................... 74
Configurable settings.................................. 13
Cycle time shock - shock............................ 79
R
D
Functional test ............................................ 72
Safety discharge......................................... 80
Self-test ...................................................... 72
Semiautomatic defibrillation ....................... 48
Shock delivery ............................................ 80
Shock successful........................................ 49
Shock unsuccessful.................................... 49
Shockable rhythm................................. 48, 49
SpO2 error messages ................................ 31
SpO2 Menu ................................................ 31
SPO2 monitoring ........................................ 30
Standard energy settings ........................... 79
Step 2 - analysis......................................... 51
Step 3 - shock delivery ............................... 52
Step 4 - cardiopulmonary resuscitation ...... 52
Suppressing an alarm sound...................... 25
Symbols on the device ............................... 10
Symbols used on the battery...................... 10
Symbols used on the electrode package ... 11
Synchronised defibrillation ......................... 46
Synchronised defibrillation using paddles .. 47
I
T
Danger of electric shock ............................... 6
Danger of explosion.................................... 18
Defibrillation - procedure ............................ 51
Defibrillation pulse ...................................... 79
Demand mode ............................................ 54
E
ECG error messages.................................. 29
ECG Menu.................................................. 29
ECG, quick diagnosis ................................. 26
Electrodes - adult and pediatric .................. 42
Electrodes - apply....................................... 42
Error Detection ........................................... 75
Event marks................................................ 41
F
Art. no.: 0-48-0060 Rev.: a
Internal defibrillation ................................... 45
L
LEDs........................................................... 16
M
Recharging time ......................................... 79
S
Technical alarms ........................................ 25
Terms of Warranty........................................ 8
Threshold values ........................................ 65
V
VF/VT detection.......................................... 80
Voice support ............................................. 50
Maintenance interval .................................. 71
Maintenance interval for the battery ........... 73
Manual defibrillation.................................... 40
Manual defibrillation using paddles ............ 41
Manual defibrillation using pads ................. 42
N
NIBP measuring field.................................. 33
NIBP Menu ................................................. 34
Page 87
Index
DEFIGARD 5000
Art. no.: 0-48-0060 Rev.: a
14
Page 88