1
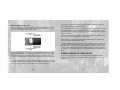
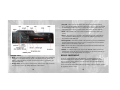
COPS 2170: THE POWER OF LAW
USER MANUAL
PLAY HUNDREDS OF THE GREATEST GAMES EVER MADE,
VISIT WWW.GAMETAP.COM AND GET YOUR FREE TRIAL NOW!
GameTap is pleased to offer an online library of original game manuals. We have made these manuals available to create a more
complete gaming experience -- and because some of them are pretty entertaining. Be aware that the representations,
warranties, and guarantees (including replacement options) made in these manuals are no longer valid, and that GameTap and
the original publisher are not responsible for honoring them.
Control information for a PC title will, in most cases, accurately reflect the game’s controls within GameTap. Please note that game
controller instructions for console games won’t be correct. Feel free to ignore any installation instructions -- GameTap handles all
the complex stuff for you.
Finally, please do not call the phone numbers that occasionally appear in the manuals. We're not sure anyone will pick up. If you
do have questions about games within the GameTap service, please contact Customer Support at gametap.com.
90198M
INTRODUCTION
Welcome to COPS 2170: The Power of Law.
It is the future. The government watches over everything for the “safety of the public.”
Society is completely under their control. Cyber links are implanted into each newborn
child, marking their host with a unique ID. Cities have turned into monstrous urban
centers giving the term “urban sprawl” a hazardous new meaning.
This is the world our protagonist, Katy, lives in. She is a recent graduate of the police
academy, an excellent student, and an exceptional athlete. On this morning, she wakes
up thinking that this day will be just like any other. She is unaware that her new
assignment on the recent terror attacks plaguing the city will place her directly in the
path of an evil genius.
COPS 2170: The Power of Law is a hybrid of RPG and Tactical Strategy. The central storyline unfolds in the future where the cyberpunk culture and a highly-urban oriented
society have populated North America. Players will control Katy and her team of up
to seven police agents who are attempting to eliminate the criminal element in their
metropolis.
INSTALLATION
To install COPS 2170: The Power of Law, simply place the COPS 2170: The Power of
Law CD 1 in the CD-Rom. When the COPS 2170 Autorun menu loads, select ‘Install’ to
start the installation process.
Should the Autorun fail, explore the CD 1. Then double-click the setup.exe file. This will
manually start the installation process.
1
COPS 2170: The Power of Law system requirements:
•
•
•
•
•
•
•
•
•
Windows 98/ME/2000/XP
Pentium III 800 MHz
128 MB RAM
32 MB Video Card
700 MB Hard Disk Space
4x CD-ROM
DirectX 9.0
DirectX Compatible Sound Card
Windows Compatible Mouse and Keyboard
ough knowledge of nanotechnology. Important – an inadequate score on the exam
may result in a demotion that will force the officer to repeat the Basic Training course.
Authorization System Main Menu – Security inside the High Town Police
Department (HTPD) is very tight and we take pride in keeping it that way. If we cannot ensure our own safety within our department, how can citizens be expected to
have confidence in our ability to ensure their safety in the streets? For this reason,
entering the HTPD is only possible once the Inner Security System authorization procedure is complete. The whole process is described later in the Manual.
For the latest version of DirectX see http://www.microsoft.com/directx
Controlling your units – Part of your duties as a police officer will require you to take
other units under your command. This part of the manual will instruct you how to do
this in the most efficient manner.
Note: Strategy First and MiST Land cannot be held responsible for any damage sustained to your system software if installed on a noncompliant OS, software or hardware configuration.
Equipment and your units – Being a squad leader makes you responsible for the
health of your units and the condition of the equipment they use. NO unit should ever
be without a firearm.
HOW TO USE THIS MANUAL
Supporting units – If you wish your units to be adequately equipped, then you must
post a request to one of the Store Masters. He will look into it. If he approves your
request, you will be given a form to complete. This part of Manual describes the
process of filling out this Special Equipment Request form according to all standards,
instructions, and rules.
The Manual is the most important book in a police officer’s life. You must keep
your Manual in good condition and have direct access to it at all times.
The contents of this Manual are separated into several parts so that the information
you desire can be referenced quickly and easily.
Officer Training – Contains information that every officer must know. It is a base set
of courses that include: Jurisprudence, Crime Prevention, Tactics, Modern Firearms, First
Aid, and Nanotechnology. The Nanotechnology course has an exam that each officer is
required to pass. It is impossible to use today’s high-tech equipment without a thor-
2
Personal Information Console (PIC) – Every police officer is issued a PIC. This device
will serve the officer throughout his career. The PIC is attached to the arm (left or
right). It has a wide range of functions and generally makes an officer’s life easier. All
functions of the PIC are covered in this section of the manual.
3
You and your units – This section of the manual will instruct you on the most recent
unit management techniques. It will teach you to recognize your unit’s parameters and
how to use them efficiently. These should be monitored early and often.
Urban fighting – Regardless of how skilled a diplomat you are, sooner or later you
will have to use your firearm. This section of the Manual describes, in detail, how to
use weapons in ‘uncontrolled situations’, how to evade unnecessary causalities, how to
quickly examine the tactical situation, and how to identify criminals among civilians.
Weapon storage – This section of the Manual contains information on all weapons
and equipment currently available to the police force.
Rules of the road – You may be called upon to cover great distances across the
Megapolis. In these cases, you will have access to police vehicles (in the most dire
cases you may temporarily seize civilian vehicles). This section of the manual explains
the rules of operating a vehicle in the streets of the Megapolis.
Conventions used in the Manual
These regulations assume you use standard means of controlling computer devices
and are aware of the following abbreviations:
LMB – left mouse button;
RMB – right mouse button;
MMB – middle mouse button (wheel);
MW– mouse wheel.
If you do not understand the following terms, you should consult your OS documents.
Click, Double click, Drag, Cursor
4
OFFICER COURSE
To earn the right to be called an officer, each candidate must complete this course.
Take it seriously and you could become a real police officer, if you pass the exams that
is.
Drill instructions
There are certain aspects of Megapolis you should be familiar with to facilitate your
movement through the city:
1. The Megapolis is divided into separate platform cities placed one above the other.
The three platforms from bottom to top are, Lower City, Upper City, and the grand
Sky City – the peak of human creation. Getting from one platform to another is possible only through the use of special elevators or police cruisers. Using ‘light’ vehicles is prohibited since the Bill of Travel was passed. If ever this Bill is violated, the
perpetrator’s vehicle is immediately destroyed regardless of the owner’s identity.
2. Each platform city is divided into levels and sectors. Unsanctioned travel to another
sector during a mission is strictly prohibited by the service regulations for city combat, and may lead to the partial or complete identity modification of the perpetrator.
Maneuvering in the streets
Character movement is free (real time). If an enemy appears in the area, Reality (global virtual reality system) will switch perception into ‘accelerated mode’, which allows
you to manage the battle step-by-step. Long ago this was called ‘turn-based combat’.
You will perceive this as a sequence of your subordinates’ actions (your turn) and the
reactions of the enemy (enemy’s turn). Of course, your subordinates’ actions are influenced by their physical condition as well as any other factors (such as heavy armor).
5
The territory available to your subordinates for movement during combat is divided
into “hexes”. Let’s give these hexes a more detailed look:
White Hexes are used to designate any traversable areas. If you see a white hex,
it means you can move there. It is necessary to point out that white hexes show
the boundaries of the accessible area dependant on your physical parameters.
Green Hexes show your path of travel. If you click the LMB, the green hexes will
show the path to be taken by your subordinate (if the “show path” parameter is
activated).
Red Hexes designate transfer zones between sectors. By putting all your subordinates on these hexes and pressing the “END TURN” button or the “ENTER” key on
the keyboard, you will travel to another sector after confirming the query.
Please note…
While you are capable of moving around freely during peaceful moments, all actions
during combat are turn-based. The turn-based mode is automatically activated when
hostiles are in the area.
Once a combat cycle begins, you will give orders to your subordinates and see them
carried out – while it is YOUR turn. When you and your subordinates use up all of your
movement points which are relative units used to signify how far your subordinates
are able to move in ‘turn-based combat’, you will have to press the “END TURN” button or the “ENTER” key. This will transfer the turn to your enemies, your allies, and
civilians, who also carry out their action in turn-based mode.
As soon as the last enemy is neutralized, the turn-based mode will switch itself off…
6
Features of the city
In some sectors, you will need to use an elevator to reach certain areas. To use an elevator, simply have your subordinate (one or several at a time) step on its platform and
press the “USE” button. Alternately, click on the platform with the LMB while holding
“ALT”.
LAW COURSE
You are a representative of the law, the hand of justice, sworn to protect it and regular
citizens. This means you DO NOT break the law.
Along with detailing the laws you are to uphold and follow, this course will address
human rights and your conduct when dealing with citizens of the System. This course
is not compulsory, as you’ve already studied all of this during your training at the
Academy. Nevertheless, you must remember the most important law of all: “Ignorance
of the law does not remove the responsibility for breaking it”. For this reason, we recommend taking this refresher course to reinforce your Academy studies.
Friendly fire
There will be times during a gunfight when your colleagues or other representatives of
the System could appear in the line of fire. In situations like these, it is recommended
that you hold your fire and reposition to a clear field of view. Any recklessness in such
a situation will be punished to the full extent of our laws. Proving that you wounded a
friendly target will be very complicated, if not impossible, but lethal occurrences can
and will be uncovered by a simple ballistic analysis, so be careful when choosing your
target. Three such infractions will be enough to become a completely “new” person.
7
Panic among the civilian population
Problems often arise when civilians are in the vicinity of a special operation. Despite
frequent guidelines and bans, many curious citizens voluntarily enter operation locations, thereby putting their lives in danger. It is not uncommon, and this behavior leads
to additional obstacles on the battlefield. Be extremely careful. Although these citizens
are violating System instructions, you will be held responsible for their death by friendly fire. Once noted in your personal file, these incidences may greatly thwart your
career.
This especially concerns personnel of class B and C. Class D personnel who have
killed a civilian will automatically have their identity modified.
MEDICAL COURSE
This course is meant to familiarize you with the different types of medical equipment
you will have access to, their effects, and means of use.
Standard medkit – An Ampoule containing a solution with active nanoparticles which
is used to treat cuts, bruises, and minor burns. Artificially accelerates the regenerative
processes of the body aiding the renewal of damaged areas. The ampoule contains 4
cc’s of medicine. A special hypodermic needle allows a maximum injection of 1 cc at
a time.
Improved medkit – A pistol-syringe with a large ampoule which is used to treat serious injuries, sprains, fractures, and moderate burns. CAUTION: It will deplete all physical resources. Not recommended for frequent use by the Association of Universal
Doctors. The ampoule contains 6 cc’s of medicine. The special regulator allows a maximum injection of 2 cc’s at a time.
8
Paramedic kit – A complex kit containing a wide range of nano-robots of the “full
reconstruction” type, which is used to treat severe injuries and burns. If used in a timely fashion, it is possible to reattach severed body parts while in the field. This kit contains four sets of nano-robots.
Special medical implants will be covered later in the Nanotechnology course.
To use a medkit, you must hold it in your hands and click the LMB on the medkit icon.
Then simply click on the person in need of treatment. Click once again on the medkit
icon to deactivate it.
NANOTECHNOLOGY COURSE
The police force has access to the System’s latest developments in nanotechnology,
and you, as an officer will have access to some of them, be it weapons, implants, or
other equipment of active or passive use. For this reason, you must know the basics of
nanotechnology and be able to correctly use nanotech equipment. Improper use of
this type of equipment could lead to your death or the death of your subordinates.
This course is considered mandatory since you’ll have to use nanotechnology in some
way during your service.
Implants – These are special nano-devices which will enhance existing abilities or add
new ones to the user. They are implanted into the body and interact with the nervous
system, the muscles, and the circulatory system.
Early implants were installed by surgical means, inside special laboratories. Today the
process is so simple even a child could do it. Included in the implants package, are
the instructions and a special device for the implantation process. All you have to do is
read the instructions, insert the implant into a special slot in the device, attach the
device to the appropriate part of the body, and press a button. The implantation
process takes only a few seconds. Unfortunately, removing an implant requires more
9
than just a special device. It requires a special laboratory, where a skilled surgeon performs the necessary surgery. Removing implants is hazardous to the health, since the
body and the brain get accustomed to the new parameters.
Energy shields are special generators that create a field that provides protection from
bullets, fragments, and energy weapons for a limited period of time. Once this time
runs out, the generator automatically shuts off to recharge. There are two versions in
existence, differing in capacity, range of effect, and availability.
To use an energy shield you must hold it in your hands, activate it (click on the shield
icon with the LMB), and throw it to the location desired (the most frequent spot is at
one’s feet – to shield oneself from all sides).
Portable video camera – The body of this special micro-camera is made of very
durable material, allowing it to be used like a grenade, albeit with a different purpose.
During police operations, it is common practice to throw this camera around corners.
This allows the officer to assess the situation and plan ahead while the criminals don’t
suspect a thing. It is difficult to detect the camera with the naked eye, and the sound
of its impact cannot be recognized among the city’s fuss.
Scanners – These devices are activated automatically by holding them in your hand.
They can scan the surrounding area within their range, detecting all signs of life. Walls
and obstacles are no hindrance to such scanners. This allows the detection of criminals, even if they are hiding. Remember, officer! Scanners are very useful devices,
greatly simplifying life especially during raids.
WEAPON TRAINING
There are many tools used to fight crime. The more common ones are weapons. There
is a wide range of newly developed weapons by military corporations such as Simoto,
MaK, MaG, and others at your disposal.
10
Weapons are divided into three subclasses: Projectile, energy, and thrown. Projectile
weapons include different pistols, assault rifles, rifles, cannons, grenades, and rocket
launchers. Energy weapons include energy rifles, cannons, and mounts. Thrown
weapons are grenades.
You have the ability to use different firing modes: Aimed, burst fire, and normal fire.
Remember, because of their design, some weapons cannot be used in burst mode.
Aimed fire – This firing mode is highly recommended. The additional time needed to
aim results in a much higher accuracy rate than other firing modes.
Normal fire – Situations may arise where it is not ‘convenient’ to aim and fire. This is
when normal fire is used. Because of the urgency you won’t have time to aim carefully,
but your rate of fire will be higher than if using aimed fire. According to statistics, a
police officer will fire approximately twice as many bullets in this mode than with
aimed fire.
Burst fire– Automatic weapons allow officers to fire bursts, giving an additional bonus
in combat. Usually this results in low accuracy due to the recoil. Even the most experienced shots will be unable to aim carefully using this mode, but often in sticky situations, accuracy is not what’s important. It’s the rate of fire that counts. You will probably need less time to fire a burst than an aimed shot, but normal fire is still the quickest.
For a weapon to fire, you’ll need to load it with the correct ammunition. There are several ammo types available, each one used for a specific purpose. Unlike ammo for
energy weapons which only differ in capacity, ammunition for projectile weapons
comes in a wide assortment:
Standard – Regular ammunition, available to civilians.
11
Improved – An improved version of standard ammunition. Usually have improved
characteristics for ballistics and killing power.
.60 – Is the “police” caliber used mainly by police and security forces. Use of this caliber requires a permit.
Modified – A special modification of standard ammunition. The particular improvement depends on ammo caliber.
1.2 (or .50) – Is an intermediate rifle caliber. Use and storage of this ammo type
requires a special license and a certificate of mental health (according to instruction
43/234 of the Internal Security Department of the System Counsel). Even though this
caliber is smaller than the police caliber, it packs more punch, and its smaller size
guarantees better penetration.
Sniper – Ammunition for snipers. Improved range and lower bullet dispersion guarantee a more accurate trajectory.
Shock – Special police ammunition used to immobilize criminals until they are safely
apprehended. There is also an improved version – pain ammo.
Electric – Special police ammo used for disorienting and demoralizing criminals.
Under the influence of such ammo, a human’s coordination is usually disrupted, making him an easy target.
Explosive – Special military ammo used against small groups of enemies. This ammo
type explodes on impact, damaging everyone unlucky enough to be in the immediate
vicinity.
Incendiary – Special military ammo used to hit a group of enemies. This ammo is
useful for spreading panic among enemy ranks. The projectile explodes on impact dispersing a flammable matter, which ignites immediately and keeps burning for a long
time, inflicting serious damage. The Counsel has considered banning this ammo for
being inhumane. Thus far, the ban has been adopted by only a few police organizations.
As well as being categorized by type, ammunition is also categorized by caliber:
.40 – Is the so-called “civilian” caliber, available for mass use. Use of this ammo does
not require a permit.
12
1.6 (or .65) – Is the “army” caliber allowed only by military organizations, police
assault squads, and Special Forces of the System Security Services (S.S.S.). A civilian
caught using this ammo risks loosing his identity.
1.8 (or .75) – Is the “hunting” caliber. We are talking about the “Martian hunt” of
course, since there are no longer any forests and the only place you’d see an animal is
inside the zoo-zones, where hunting is strictly prohibited. Using this type of ammo
requires having a hunting license and an active Martian visa.
2 (or .80) – Is the machine gun caliber. It is used in large-caliber machine guns and
mini-cannons during assault missions. This caliber was also highly acclaimed during
the suppression of the Martian miner revolts.
2.4 (or .96) – Is the most powerful caliber for portable cannons used by the space
infantry. Cannons of this caliber could be used to knock down an aircraft or breach
walls and destroy metal structures. Only the armed forces of the System are allowed to
use this caliber.
2.1 (or 21) – Are grenades for handheld launchers. They are a very convenient and
effective weapon against large enemy crowds. Not available for sale. Supplied to
organizations only by special order.
13
2.3 (or 23) – Mini-rocket. This new trend in the field of heavy weaponry is more accurate than grenades, although of lesser damage capacity. Not available for sale.
Supplied to organizations only by special order.
Each type of ammo has its range, beyond which it becomes ineffective. In such situations, the firing mechanism is stopped automatically. When you sight your target, this
mechanism evaluates the range to the target and automatically calculates its effectiveness using the ammo and weapon parameters; then it allows you to shoot or not. But
nothing can stop you firing chaotically. This is done by pressing and holding the
“CTRL” key without having selected a target. The cursor will go into targeting mode and
you can shoot in any direction regardless of effectiveness.
TACTICAL TRAINING
You may be a sniper who trains every day, but if you know nothing about tactics, sooner or later you’ll be lying dead in some dark dead corner on the lower levels of our city
and forgotten by everybody.
Remember the rules written herein, know them by heart, write them down, make sure
they are up to date, and keep this paper with you on every mission:
1. Never stay in a close group. Use a scatter formation and act alone or in pairs, or
an enemy can throw a grenade at your feet and we will have to strike your name
from of our personnel list – you and all your squad.
2. Always plan your actions but be ready for the unpredictable.
3. If your enemy is standing in a group and you have grenade – use it!
4. Remember: It’s better to take cover and reload than hit nothing and die.
5. Use Medic kits – avoid death.
14
6. Don’t bother aiming when at short range and surrounded.
7. The use of grenades and heavy weapons against lone targets is an unacceptable
misuse of precious ammunition.
8. There’s no sense carrying a lot of guns. This will not make you tougher – it will
make you slower.
9. A Sniper in a perfect position can do a lot of “good”.
10. There’s no 100% bulletproof armor. So when you are deciding on armor, you will
have to make a choice between speed and protection. Will you opt to be really
agile but skip the protection or maybe you will want to be well protected but slow.
STORING USEFUL INFORMATION
Solving crimes efficiently necessitates keeping many facts at hand. For that purpose,
each officer is issued a PIC (Personal Information Console). The main purpose of the
PIC is to automatically record any important information you learn. The full list of functions will be shown in another part of the Manual.
CONTROLLING YOUR UNITS
This is a very important part of a squad leader’s work. The maximum number of units
in your police squad is six. This has been shown to be the optimal size of a squad for
police work. You will be granted reinforcements when extraordinarily tough situations
occur.
You will not have a full squad at the very beginning of your career. You will have a
maximum of 2-3 units under your command, but as you progress and advance in rank
you will have more options and soon you will command a full squad of our finest men
and women.
15
Physical condition of your units
You have access to all the necessary information about your units at all times. In the
top left corner you can see icons that represent your units. Green numbers represent
their action points, while red ones indicate health.
You can also see additional information on this panel: What wounds your units have
and what type of damages are applied to them.
In the bottom right corner you can see a log panel. It displays all the information about
every event in the field. It can be minimized, maximized, and scrolled. There is also a
PIC notification button. When it is lit, you have some new information. Click it and you
will access your PIC.
If you have robots under your control, their icons will be shown at the top from left to
right. You can click them with LMB to select your robots.
Enemy indicators are shown at the right side from bottom to top. If you double click
on them, the camera will focus on the enemy.
If you have vehicles under the control of one of your units, then at the top right corner
you can see vehicle icons with some technical information about the vehicles. To order
your unit to drive a vehicle, select him and click LMB on a vehicle. In order to operate
a vehicle, select it first by clicking on its icon with the LMB. If you click on a passenger
in a vehicle, you can order him to get out by clicking the LMB at one of the shown exit
hexes.
You can contact your units using these icons. Just click with the LMB on an icon and
the corresponding unit will be selected. You will then be able to issue orders to that
unit. If you click on a unit’s icon with the RMB, you can access their inventory. You
may also use your keyboard to select your units by pressing the unit’s number from 1
to 6.
GIVING ORDERS TO YOUR UNITS
To give an order to your unit, you must select him/her first by clicking the LMB on
him/her or his/her icon or by pressing his/her number key. You can’t give orders to
multiply units.
In the bottom left corner you can see the Personnel Control Panel. Here you can check
what weapon a unit is using, what stance he is in, and what firing mode he has adopted. You can change all of this by clicking LMB on the corresponding buttons.
16
17
3. Use/Talk – When your unit encounters active objects (door, person, terminal,
etc…), you can order him/her to interact with it (open, talk, use). Just click the LMB
on it. Sometimes it will be necessary to choose the special interaction mode; it is
represented on the panel by a “Hand” button. This mode is used for using lifts.
4. Hack – This is similar to the “Use” action except that it can only be applied to
robots.
5. Shoot – This action can be executed by two methods: Target an enemy with the
cursor and click the LMB on them, or press and hold “CTRL” key and target any
object then click the LMB on it.
6. Throw grenade – This action is similar to the previous one, except you will throw a
grenade instead of firing your weapon. Select a grenade in the Personnel Control
Panel or place it in the hands of your unit.
7. Turn – To turn your unit in a desired direction, hold down the “SHIFT” button and
click the LMB in that direction.
8. Reload – To reload a weapon, you can press the “RELOAD” button on Personnel
Control Panel or press the “E” key on your keyboard. You can also do it directly on
the inventory screen by dragging ammo on a weapon.
Available orders
1. Move – Select your unit and click the LMB in a desired location; your unit will move
to that place in its chosen stance. To speed up the moving process, double click
LMB in a desired location. If your unit encounters any trouble in getting there, his
move action will stop.
2. Change stance – There are three moving modes (stances): Run, walk, and crouch.
You can choose a stance by clicking LMB on the action buttons.
18
USING EQUIPMENT
To use any equipment that your units might have, you should switch from the
Personnel Control Panel to inventory mode by pressing the “BACKPACK” button.
Current equipment will be shown in place of a weapon. You can scroll through the
equipment using the arrows.
Select a desired item and click the LMB on it. Depending on the type of item, you may
be required to choose a target.
19
SUBORDINATE EQUIPMENT MANAGEMENT
The control panel is not used to access all your subordinates’ equipment. This is done
in a separate screen, which can be opened by pressing the “I” key or clicking the RMB
on the portrait of the subordinate. In the first case, the inventory of the highlighted
subordinate will open. In the second, the inventory of the subordinate you clicked on
will open.
2. Body - Here you can place an armored jacket, which will protect your subordinate
from bullets and splinters.
3. Hands - Here you can place the default weapon used by your subordinate.
4. The left pocket - Here you can place anything you like. Slots such as this one are
divided into cells, which define the size of the pocket. Equipment takes up a certain
number of cells in space. If a piece of equipment fits in a slot, it can be put there.
All of your subordinate’s available equipment is shown to their right. You can also see
any equipment on the ground next to them. You may switch between subordinates by
using the arrows on the screen next to the name, and by clicking the LMB on their
portraits.
5. The right pocket – It differs from the left pocket only by its position.
In the left part there is more detailed information about the subordinate, such as his
abilities, a large portrait, and also a button which will give you access to his biography.
7. Ground slot – Items in this slot are close by your subordinate on the ground; there
is no limit to the amount of things in this slot so look carefully. To scroll through its
content, use the arrows.
The right top corner shows the subordinate’s encumbrance. The bigger it is, the slower
your subordinate will move. If he is overloaded, he will not move at all.
6. Backpack - Here it is possible to hold everything you need. It is much larger than
the pockets.
Storage of ammunition
Each subordinate may have up to ten implants. There are special slots for them on the
equipment screen.
Ammunition is an important component in planning any operation. Nothing ruins a
good plan like running out of ammo. Ammunition can use up a lot of space in the
inventory. Make sure to combine like types of ammo. Simply drag similar clips together. They will be combined to save space.
To install the implant, you should move it to the slot for implants, and it will be activated. But remember - taking out an implant that has been activated is impossible.
Disposal of unnecessary item(s)
Installation of implants
Distribution of equipment
Equipment can be distributed to the following slots:
1. Head - Here you can place power necklaces which will protect your subordinate
from power weapons. Only one can be equipped at a time.
20
Any item may be left on the ground simply by transferring it to the ground slot. These
items will disappear. It is, however, safer by far to store items in a box or a storehouse.
This way, if you need the item(s) at some later time, you will know exactly where to
find them.
21
The storehouse
The Storehouse is where you will receive new equipment and trade in any old items.
There are two separate storehouses in the Police Department of Megapolis City: Arms
and Nanotech. In the Arms storehouse you will find weapons, ammunition, grenades,
armored suits, and power hoops. In the Nanotech storehouse you will find medicines,
implants, scanners, surveillance equipment, and power screens. To take advantage of
storehouse services, consult the manager of the storehouse.
Selecting items from a storehouse
Once you have spoken to a storehouse manager and completed all the forms, you will
have access to the storehouse terminal. Your PIC will automatically connect with it and
will display the storehouse screen. This screen allows you to look through the storehouse contents and take the equipment you need. Equipment is stored by category
(weapon, ammo, grenades, and special equipment in the Arms storehouse). Select a
category and look through the inventory by using the up and down arrows. Choose
items by clicking the ‘Take’ button. Once you have selected items, drag them from the
selection grid to your inventory on the right.
ITEMS AND THE STORE
The procedure for checking items into storage is similar. Simply drag them from your
inventory into the selection grid and click the ‘Check’ button. These items will be registered under your name and then transferred to the storehouse. They can be reclaimed
at a later date*.
you will not have full access to all items early in your career. As you advance in rank,
you will be granted access to more powerful items.
Rules of the Store
You can check any item(s) at any storehouse, even if it is not the specialty of the storehouse. To avoid confusion, we recommend you check an item(s) at a store specific to
that item(s).
* Keep in mind that you are not the only one who uses the store. Also, any equipment
in the storehouse is considered property of the High Town Police Department regardless of whom it has been registered under (or whether it has been gained in the line
of duty). Any piece of equipment may be given to other teams, so do not be surprised
if you cannot find the items you were just looking for in the store.
PIC (PERSONAL INFORMATION CONSOLE)
PIC – Is a very important device for every police operative. It contains all the important
information that you acquire during your career. It also has many functions that can
make it easier to perform your duty.
Access to the PIC can be gained by pressing the “J” key on your keyboard or by clicking
on the PIC icon in the lower right corner of the screen.
«…loss, damage or any other type of harm to your PIC is treated as a crime and will
be punished by the Law…»
Functions
Items at the Store
The assortment of items at the store may vary from time to time. Besides, there is a
limit for lower ranks to access certain types of weapons and equipment. That’s why
22
The PIC has wide functionality and allows you to quickly gain access to information
you need. Want to know the recent news? Switch to news mode. Want to recall certain
parameters of your weapon? Nothing can be easier; choose the appropriate section
23
and recall it. Interested in knowing more about a specific organization? Go in the corresponding section and read. And that’s not all. Information is constantly updating. You
can also upload new information for yourself. Simply connect your PIC to any information or service terminal.
News mode
The news mode is on by default when you activate your PIC, and also when you return
from any other mode. In this mode, you have access to all information channels
streaming breaking news. You can change active channel and scroll news in the selected channel. We recommend you stay up to date, so read the news periodically. It may
help you while on duty.
Operation mode
When you get a task or receive important information, it is automatically noted down
and always accessible for you in the operation mode. However, once a case is closed,
as per instructions of the Public Control Group ?7-611, all information pertinent to that
case is erased from the PIC memory.
To activate this mode, it is necessary for you to press the “DIARY” button on the PIC
screen. With the help of arrows, you can thumb through the cases and records in the
PIC.
If you “have reached a deadlock” in any case, consult the information in the diary.
Information mode
Activate this mode by pressing the “DATABASE” button on the PIC screen. Choose the
category you wish to consult and use the arrows to navigate the contents.
24
This mode contains information on various subjects: Weapons specs, equipment
descriptions, information about organizations and important persons, and descriptions
of robots and vehicles. Information on different vehicles and equipment is automatically up loaded to the PIC memory when in direct contact with that item. Any
Information about organizations, persons, and robots can be received through information terminals.
YOU AND YOUR SUBORDINATES
Your subordinates are important elements of your career. Without them it would be
much more difficult for you to carry out your duty to society. Therefore, it is necessary
for you to know all their strengths and weaknesses in order to use their abilities correctly. Also, it is necessary to watch and direct their development. A cohesive group
can conquer any challenge. As you advance in rank, you will have the opportunity to
add more experienced specialists to your group. Remember, you cannot take an
employee into your group who has a rank which is higher than yours. It will contradict
the Charter of Internal Service and the principle of one-man management in police
service.
Attributes
Every person has a set of attributes which impact on that person’s effectiveness in various aspects of police duty. These attributes can be improved by gaining enough experience to level up. Some events can cause a unit’s attributes to decrease, but only temporarily. Attributes can also be improved by implants.
Strength – Determines the weight that a person can carry and amount of action
points they have.
25
Agility – Represents the rate at which action points are consumed. The higher the
attribute the lower the rate. Therefore, more can be done with the same amount of
action points.
Accuracy – Determines the accuracy with which you shoot a weapon and throw a
grenade.
Reaction – Determines how quickly one reacts to events during any course of action.
Higher reaction grants the ability to interrupt an enemy’s turn and prevents the enemy
from interrupting your turn.
Action points – Will determine what one can do during a turn. Different actions cost
different amounts of action points.
Shock resistance – This parameter represents the ability of a person to resist shock
damage.
Electric resistance – This parameter represents the ability of a person to resist electric
damage.
Flame resistance – This parameter represents the ability of a person to resist damage
caused by fire and high temperatures.
Intellect – Determines what weapons and equipment a person can use and the ability
to hack certain types of robots.
Current experience – Experience that a person has already gained.
Sight – Determines how far a person can see.
Experience cap for next level – Experience that a person has to gain to reach the
next level.
Health – Is a digital representation of a person’s health; higher is better. If it drops to
zero, the person dies.
Mechanics – Determines what vehicles a person can drive.
Level – Officer’s current level. When a new level is reached, skill points are granted.
These can be spent to improve parameters. Different persons are granted different
amounts of skill points.
Other parameters:
URBAN FIGHTING
Rank – A very important parameter that impacts on many things such as quality, quantity, and accessibility of equipment. Your rank also determines who you can command.
Advancing in rank depends directly on your success while on duty and any patronage
from high command.
The crime rate is very high at present, especially at the lowest levels of our fine City.
We consider that any police operation is similar to a military one. So you must know
all tactical methods used by the army during urban combat.
Morale – This parameter represents the stability of one’s mind. If it drops too low then
it affects your actions. Morale can be lowered by situations where you are outnumbered, wounds, etc… Morale can be restored by killing enemies, healing wounds,
etc…
26
1. Be alert – enemies may be in any building, looking out from any window. They can
be any person.
2. Before you go around a corner, make sure there’s no one waiting for you. But if
there is someone, look for a way to come in from behind him. Use your special
27
video camera wisely. Throw it and it will show you everything in its operational
radius.
Identifying criminals
3. Use ammo wisely. Do not shoot long bursts at distant targets which are small in
numbers.
All enemies appearing in your field of view are represented by special icons (red rectangles with ordered numbers) at the right side of your screen. You may use the LMB
on these icons to focus your camera on a specific enemy.
4. Think fast and act quickly. If you can’t kill the enemy with one shot, at least wound
him and take cover.
Additionally, if you point the mouse cursor on an enemy, the cursor will automatically
change to “attack mode.” That’s another way to identify an enemy.
5. Use grenades against large groups of enemies.
JOINT OPERATIONS
6. Remember, enemies have grenades too. So act in pairs, and do not become a mass
target.
In some situations, you may get help from other police squads in the area where you
are operating. In this case, you will have to follow rules of joint operations.
7. If you are outnumbered, use your head. Lure your enemies into tricky places and
use your grenades and burst fire to dispose of them.
You must not shoot if there are friendly units in your line of fire.
8. Before engaging an enemy, scout the area.
If you have taken friendly fire, do not reply. The guilty person(s) will be punished without your participation.
Calculating tactical situations
Before you begin to execute your tactical solution to a given tactical situation, you
need to examine it and calculate the possible outcome(s) of your actions. You must
find strategic positions for your units where they can hold out for a long period of time
and fight effectively. It would also be very wise of you to find possible routes for
retreat.
Units can find cover behind most large objects such as cars, buildings, etc…
Use any tactical advantages provided by other squads. While they are fighting, get to
the enemy from the blind side and catch them by surprise.
Defending citizens
In the course of action, some civilians may get in your line of fire. Any collateral damage to civilians is strictly prohibited. Watch your line of fire. Do not allow criminals to
harm or kill civilians either. You must protect the citizens of our glorious city at all
costs.
TRAFFIC RULES
The Academy does not offer cadets driver training, but instead concentrates on other
police skills. If your division has an assigned driver, you will not be trained in driving.
28
29
Despite this, we strongly recommend studying this course in the manual, as your driver
may be killed or put out of action when you need him/her most.
To appoint the driver, it is necessary for you to choose the driver and to LMB click on a
transport. The driver will approach and sit in the vehicle. If his/her qualifications meet
the requirements of the vehicle, then he/she will be able to operate it. This also
applies to the rest of your subordinates. If there is additional space in the vehicle, your
remaining subordinates will be considered passengers.
You must select a vehicle before you can operate it. Do this by LMB clicking on the
vehicle or by LMB clicking on its icon in the right top corner of the screen. After that,
you can give movement orders to the vehicle.
Hitting pedestrians and knocking them over is very easy when operating these vehicles.
Be careful. Injuring innocent citizens is frowned upon. It will affect your career and if
you happen to hit your own colleague – well, I hope you enjoy your “new life”.
CAMERA MANAGEMENT
Management of the camera is carried out both with the keyboard and the mouse.
Camera zooming is possible with the help of the mouse wheel, but also by moving the
mouse forward and back while pressing down on the RMB and LMB. From the keyboard, use the UP and DOWN arrow keys while pressing the SHIFT key.
Driver Requirements
Rotation of the camera can be operated by moving the mouse in the necessary direction while pressing the RMB. From the keyboard, the camera can be rotated in a horizontal plane by means of the LEFT and RIGHT arrow keys while pressing the SHIFT key.
Rotate the camera in the vertical plane by using the PAGEUP and PAGEDOWN keys
while pressing the SHIFT key.
A driver needs different qualifications to operate different vehicles. Some vehicles are
so simple that a baby could operate them, while others could not be managed by the
most experienced Martian trucker.
Movement of the camera in the horizontal plane is accomplished by moving the cursor
to the edges of the screen. The camera will automatically move in the direction of the
cursor on the edge of the screen.
To have the driver exit the vehicle, select him/her, and then LMB click on any of hexes
highlighted around the vehicle. Passengers are unloaded in the same way.
Needless to say, a driver is important, and so is his development. Therefore, if you
have decided that driving is not for you, you should keep a close watch on how your
subordinate driver progresses. Do not find yourself in a situation where you need an
advanced Uber-tank but you have no one capable of driving it.
Safety measures
Vehicles can be useful, but they are also dangerous; especially to the surrounding people. And we are not even talking about tanks. We’re talking about the most ordinary
passenger transports.
30
31
THE KEYBOARD AND THE MOUSE
CREDITS
The game can be played using a mouse and keyboard hotkeys. The mouse will be your
main interface tool.
Game by:
Vitaly Shutov
User Interface:
Pavel Duvanov
MiST land - South:
Director:
Vitaly Shutov
Effects Programming:
Michail Lepakhin
CTRL ............................Changes the cursor to attack mode (depending on the weapon in hand)
ENTER...........................End turn
SPACE...........................Focuses the cursor on the currently selected character
J .....................................Open PIC
M ....................................Options menu
I .....................................Access the inventory interface
N ...................................Next character (focuses the cursor)
F5 ...................................Quick Save
F9 ..................................Quick Load
F10.................................Quick Exit
C .....................................Crouch
R .....................................Run
W....................................Walk
< .....................................Aimed shot
> .....................................Normal shot
/......................................Burst shot
1,2,3,4,5,6...................Subordinates
ALT.................................Use
H ...................................Hack
ESC ................................If a character is selected, this will remove the selection. If no one is selected, the options menu opens.
HOME...........................Show / Hide roofs in the game
NUMPAD + ...............Increases the size of message window
NUMPAD - .................Reduces the size of message window
TAB ................................See character names
L ....................................Show visibility ranges
SHIFT + LMB ...........Face character to specific point
G + LMB......................Swap places with NPC
A + LMB......................Move all team members to specified point
E......................................Reload weapon (if ammo is available)
LMB Double Click...Acceleration of action
LMB ..............................Stop action (during action)
CTRL + 0..., 9.............Focuses on enemy
B ....................................Toggle backpack on/off
[ ] ..................................Cycle through items in the backpack
Y .....................................Toggle first person view on/off
32
Development Director:
Alexander Sorokin
Lead artist:
Igor Mikhal'chishin
Designers:
Petr Morozov
Sergey Kritsky
Level Designers:
Igor Mikhal'chishin
Sergey Chabrov
Models:
Sergey Chabrov
Nadya Anufrieva
Denis Kudaev
Animations:
Alexey Baryzhnikov
Sergey Chabrov
2D Graphics:
Petr Morozov
Interface:
Sergey Kritsky
Effects&Lighting:
Vitaly Shutov
Lead Programmer:
Sergey Zagursky
Utilities:
Alexander Sorokin
Head of Video:
Vadim Shabat'ko
Artists:
Nadya Anufrieva
Dmitriy Parkin
MiST land Support:
Strategy First Inc.
Finance Director:
Olesja Tokarenko
Producer
Jay Podilchuk
QA Manager:
Dmitriy Babkin
Director of Marketing
Steve Milburn
RC Manager:
Maxim Tumin
Localization Manager
Jay Podilchuk
Office Manager:
Natalia Goleva
Manufacturing
Coordinator
Emanuel Protopapas
Web Master:
Alexander Pelikh
Animations:
Alexey Baryzhnikov
Vladimir Yarmolik
BETA-TESTING
Maksim Voznyuk
Sergey Tverdyukov
Andrey Chuprina
Alexander Gorbunov
Victor Petruk
Sergey Pugachev
Scenario:
Vitaly Shutov
Game Design:
Vitaly Shutov
Maxim Tumin
Graphic Design
Les Parsons
Web Design
Hugo Trepanier
PR Associate
Alison Sutton
Customer Support
Brock Beaubien
President
Don McFatridge
Manual:
Maxim Tumin
Senior V.P.
Brian Clarke
Sound:
Alexander Shukaev
Andrey Belov
V.P. Creative
Development
Richard Therrien
Music:
Alexander Shukaev
www.sensorica.com
V.P. Systems
Dave Hill
Guitar:
Metalizer
33
For customer support visit:
WWW.GAMETAP.COM