1
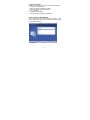
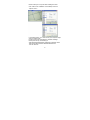
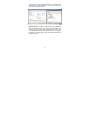
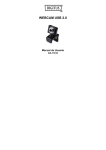
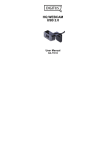
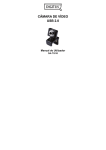
WEBCAM USB 2.0 User Manual DA-71810 Product Introduction Thank you for using the new generation digital webcam. This webcam works with a USB port to be connected with PC. It is an ideal webcam for its plug and play and real-time transmission. Its mini size, easily carrying, high resolution and high speed make your life more colorful and make your long distance communications fresh and vivid. Technical Specification * High Resolution CMOS Color Sensor * Resolution: 300K Pixels (interpolated 30M) * Video Format: 24bit True Color * Interface: USB2.0, compatible with USB1.1 * Transmission Speed: 640*480 25frames/second 2560*1920 15frames/second 6324*4742 15frames/second * Dynamic Range: ≥72db * Imaging Distance: 5CM to infinity * Built-in Image Compression * Automatic White Balance * Automatic Color Compensation * Manual Snapshot (Snapshot button is necessary for this) * With Microphone 1 System Requirement * IBM PC compatible computer or notebook with USB port * Pentium200 or Higher CPU * WIN XP/VISTA/7/ LINUX /MAC System * Hard Drive Remaining Space≥20MB * CD—ROM Drive * Internal Storage≥32MB * VGA Display Card Available for DIRECTX Driver Installation (WINDOWS XP) Connect webcam to PC. After hardware founded, put “CD Driver” disk in the CD-Rom and an interface as below would come out automatically. Click “Next” 2 Click “Install” Click “Finish” 3 Please restart your computer after installing the driver. Click “USB 2.0 PC CAMERA” in the desktop and click “Options” menu In the setting option, you could choose your required output size and capture size. Dynamic maximum interpolation by software: 30Mega Pixels (6324*4742), the following is: 4000*3000/3876*2584/2560*1920/2034*1728/2048*1536/ 1600*1200/1280*1024/640*480/352*288/320*240/ 176*144/160*120 4 The save path for the default picture taken by software is in “My Pictures” of “My Documents”, or you can change the save path. Like below picture: Special notice: the output of taking picture by hardware is 300K Pixels (640*480); short press snapshot button, you can take pictures; Long press the button 3 seconds, then short press the button is special effect function. Long press the button 3 seconds again, then Short press the button is snapshot function. 5 Choosing “Frame Type, Letter Out and Mosaic Setting” 1. In “Frame Type”, choose your favorite special-effects and click “OK”. 2. In “Letter Out”, could input words you like → click “Apply Effect” → inputted words will bring out in “USB 2.0 PC CAMERA” video window → click “ok” to finish. 3. In “mosaic setting” of special-effects window, drag ” drop-down button → image will appear in “ various shades of “mosaic” change. Mosaic setting range: 0~24. 6 4. Choose “options” menu → choose “Video Capture…” option → “Properties” window comes out → in “Face Page” to choose your favorite special-effects → special-effects will show in “USB 2.0 PC CAMERA” window → click “OK”. 5. “shortcut” In the lower right corner of the desktop, 7 there is a shortcut icon “ ”, right click this icon, you could set up special effect/ frequency. Notice: Don’t use fingers or any other sharp or coarse items to touch the camera. Soft cotton cloth is highly recommended to clean the optics parts. Don’t use this product when ambience is too hot or cold or dusty. Please avoid this product dropping heavily. Heavily dropping will cause it not to work well. 8