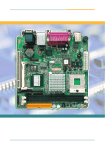
Download ETX-CM manual
Transcript
ETX-CM ETX Module User’s Guide Rev. 2.00 May 1, 2008 Customer Service Contact Info: Quanmax Inc. 4F, No. 415, Ti-Ding Blvd. Sec. 2 NeiHu District, Taipei 114 Taiwan Tel: +886-2-2799-2789 Fax: +886-2-2799-7399 Visit our site at: www.quanmax.com © 2008 Quanmax Inc. All rights reserved. The information in this user’s guide is provided for reference only. Quanmax does not assume any liability arising out of the application or use of the information or products described herein. This user’s guide may contain or reference information and products protected by copyrights or patents and does not convey any license under the patent rights of Quanmax, nor the rights of others. Quanmax is a registered trademark of Quanmax. All trademarks, registered trademarks, and trade names used in this user’s guide are the property of their respective owners. All rights reserved. This user’s guide contains information proprietary to Quanmax. Customers may reprint and use this user’s guide in other publications. Customers may alter this user’s guide and publish it only after they remove the Quanmax name, cover, and logo. Quanmax reserves the right to make changes without notice in product or component design as warranted by evolution in user needs or progress in engineering or manufacturing technology. Changes which affect the operation of the unit will be documented in the next revision of this user’s guide. CONTENTS 1. USER INFORMATION .................................................................................................... 1 1.1 About This Manual.................................................................................................. 1 1.2 Unpacking.............................................................................................................. 1 1.3 Warranty Policy ...................................................................................................... 1 1. Limited Warranty................................................................................................. 1 2. INTRODUCTION............................................................................................................. 2 2.1 ETX-CM ................................................................................................................. 2 2.2 ETX Documentation ............................................................................................... 2 2.3 ETX Benefits .......................................................................................................... 2 3. SPECIFICATIONS .......................................................................................................... 4 3.1 Functional Specifications ........................................................................................ 4 3.2 Mechanical Specifications....................................................................................... 5 2. Dimensions ........................................................................................................ 5 3.3 Electrical Specifications .......................................................................................... 5 3. Supply Voltage.................................................................................................... 5 4. Supply Voltage Ripple .......................................................................................... 5 5. Supply Current (typical, DOS prompt) ...................................................................... 6 6. CMOS Battery Power Consumption .......................................................................... 6 7. APM1.2 Support .................................................................................................. 6 3.4 Environmental Specifications .................................................................................. 7 8. Temperature....................................................................................................... 7 9. Humidity ........................................................................................................... 7 4. CORE FUNCTIONS ........................................................................................................ 8 4.1 Block Diagram........................................................................................................ 8 4.2 CPU....................................................................................................................... 9 4.3 Northbridge ............................................................................................................ 9 10. System Memory Support...................................................................................... 9 11. Integrated Display Interface ...............................................................................10 4.4 Southbridge...........................................................................................................10 12. PCI 32-bit Interface ..........................................................................................11 13. IDE Controller ..................................................................................................11 14. USB 2.0 ..........................................................................................................11 15. System Management Bus (SMBus)........................................................................11 4.5 Super I/O ..............................................................................................................12 4.6 On-board Watchdog Timer.....................................................................................12 4.7 TV Encoder / DVI Transmitter ................................................................................12 4.8 AC’97 Codec .........................................................................................................12 4.9 Backup Interface to BIOS.......................................................................................12 5. CONNECTOR X1 SUBSYSTEMS.................................................................................. 13 5.1 PCI Bus ................................................................................................................13 5.2 USB ......................................................................................................................13 5.3 Audio ....................................................................................................................13 5.4 3.3V Power Supply for External Components .........................................................13 ETX-CM User’s Guide iii Contents 6. CONNECTOR X2 SUBSYSTEMS.................................................................................. 14 6.1 ISA Bus Slot..........................................................................................................14 7. CONNECTOR X3 SUBSYSTEMS.................................................................................. 15 7.1 VGA/LVDS Output.................................................................................................15 7.2 TV-Out / DVI .........................................................................................................15 7.3 Serial Ports (1 and 2).............................................................................................16 7.4 PS/2 Keyboard/Mouse ...........................................................................................16 7.5 IrDA ......................................................................................................................16 7.6 Parallel Port ..........................................................................................................16 7.7 Floppy...................................................................................................................17 8. CONNECTOR X4 SUBSYSTEMS.................................................................................. 18 8.1 IDE Ports ..............................................................................................................18 8.2 Ethernet ................................................................................................................18 8.3 Power Control .......................................................................................................19 16. Power Good / Reset Input...................................................................................19 8.4 Power Management ..............................................................................................19 17. ATX PS Control .................................................................................................19 18. External SMI Interrupt.......................................................................................19 8.5 Miscellaneous Circuits ...........................................................................................19 19. Speaker ..........................................................................................................19 20. Battery ...........................................................................................................20 21. I2C Bus ...........................................................................................................20 9. SPECIAL FEATURES ................................................................................................... 21 9.1 Watchdog Timer ....................................................................................................21 10. DESIGN CONSIDERATIONS ........................................................................................ 22 10.1 Thermal Management............................................................................................22 10.2 Threaded Heatspreader Dimensions ......................................................................23 11. APPENDIX A: SYSTEM RESOURCES.......................................................................... 24 11.1 Interrupt Request (IRQ) Lines ................................................................................24 11.2 Direct Memory Access (DMA) Channels .................................................................24 11.3 Memory Area ........................................................................................................25 11.4 I/O Address Map ...................................................................................................25 11.5 Peripheral Component Interconnect (PCI) Devices .................................................26 11.6 Inter-IC (I2C) Bus ...................................................................................................26 12. APPENDIX B: BIOS OPERATION................................................................................. 27 12.1 Determining the BIOS Version ...............................................................................27 12.2 Setup Guide ..........................................................................................................27 22. Start Award BIOS Setup Utility ............................................................................27 12.3 Main Menu ............................................................................................................28 12.4 Standard CMOS Features......................................................................................30 12.5 Advanced BIOS Features ......................................................................................34 12.6 Advanced Chipset Features ...................................................................................37 12.7 Integrated Peripherals ...........................................................................................40 12.8 Power Management Setup.....................................................................................44 12.9 PnP/PCI Configurations .........................................................................................48 Contents iv ETX-CM User’s Guide 12.10 12.11 12.12 12.13 12.14 12.15 PC Health Status..................................................................................................49 Frequency/Voltage Control ...................................................................................50 Load Fail-Safe Defaults ........................................................................................50 Load Optimized Defaults ......................................................................................50 Supervisor/User Password Setting ........................................................................51 Exit Selection .......................................................................................................52 13. APPENDIX C: ETX CONNECTOR PINOUTS................................................................. 53 13.1 Connector Locations..............................................................................................53 13.2 Connector X1 (PCI Bus, USB, Audio) .....................................................................54 13.3 Connector X2 (ISA Bus).........................................................................................55 13.4 Connector X3 (VGA, LCD, Video, COM1 and COM2, LPT/Floppy, Mouse, Keyboard) 56 23. Parallel Port / Floppy Interfaces ..........................................................................57 13.5 Connector X4 (IDE 1, IDE 2, Ethernet, Miscellaneous) ............................................58 13.6 DVI Connector.......................................................................................................58 14. APPENDIX D: DOCUMENT-REVISION HISTORY ......................................................... 59 ETX-CM User’s Guide v Contents This page intentionally left blank. Contents vi ETX-CM User’s Guide 1. USER INFORMATION 1.1 About This Manual This guide is designed to be used as step-by-step instructions for installation, and as a reference for operation, troubleshooting, and upgrades. Unpacking 1.2 1.3 1) After opening the box, save it and the packing material for possible future shipment. 2) Remove all items from the box. If any items listed on the purchase order are missing, notify customer service immediately. 3) Inspect the product for damage. If there is damage, notify customer service immediately. Warranty Policy 1. Limited Warranty Quanmax Inc.’s detailed Limited Warranty policy can be found under at Support at www.quanmax.com. Please consult your distributor for warranty verification. The limited warranty is void if the product has been subjected to alteration, neglect, misuse, or abuse; if any repairs have been attempted by anyone other than Quanmax or its authorized agent; or if the failure is caused by accident, acts of God, or other causes beyond the control of Quanmax or the manufacturer. Neglect, misuse, and abuse shall include any installation, operation, or maintenance of the product other than in accordance with the user’s guide. No agent, dealer, distributor, service company, or other party is authorized to change, modify, or extend the terms of this Limited Warranty in any manner whatsoever. Quanmax reserves the right to make changes or improvements in any product without incurring any obligation to similarly alter products previously purchased. ETX-CM User’s Guide 1 User Information 2. INTRODUCTION 2.1 ETX-CM The ETX-CM is an ETX (Embedded Technology eXtended) form factor computer-onmodule combining the performance of the Intel® Pentium® M Processor (1MB L2 cache, FC-mPGA package) with the high integration of the Intel® 855GME chipset and I/O Controller Hub ICH4. Featured are a 400MHz processor system bus, and 266/333MHz DDR SODIMM up to 1GB maximum. The ETX-CM is fully compliant with the ETX Component SBC™ Specification V2.6. This computer-on-module features a 32-bit/33MHz cPCI Bus Interface, USB v2.0, audio, serial ports, parallel port, keyboard/mouse, Ethernet, and IDE. The flexibility of the ETX computer-on-module concept allows the baseboard designer to optimize how each of these functions is physically implemented. 2.2 ETX Documentation This product manual serves as one of three principal references for an ETX design. It documents the specifications and features of ETX-CM modules. The other two references include: 2.3 • The ETX Component SBC™ Specification defines the ETX module form factor, pinout, and signals. You should read this first. • The ETX Component SBC™ Design Guide serves as a general guide for baseboard design, with a focus on maximum flexibility to accommodate a range of ETX modules. ETX Benefits Embedded technology extended (ETX) modules are very compact (~100mm square, 12mm thick), highly integrated computers. All ETX modules feature a standardized form factor and a standardized connector layout that carry a specified set of signals. This standardization allows designers to create a single-system baseboard that can accept present and future ETX modules. Introduction 2 ETX-CM User’s Guide ETX modules include common personal computer (PC) peripheral functions such as: • Graphics • Parallel, Serial, and USB ports • Keyboard/mouse • Ethernet • Sound • IDE The baseboard designer can optimize exactly how each of these functions implements physically. Designers can place connectors precisely where needed for the application on a baseboard designed to optimally fit a system’s packaging. Peripheral PCI or ISA buses can be implemented directly on the baseboard rather than on mechanically unwieldy expansion cards. The ability to build a system on a single baseboard using the computer as one plug-in component simplifies packaging, eliminates cabling, and significantly reduces system-level cost. A single baseboard design can use a range of ETX modules. This flexibility can differentiate products at various price/performance points, or to design future proof systems that have a built-in upgrade path. The modularity of an ETX solution also ensures against obsolescence as computer technology evolves. A properly designed ETX baseboard can work with several successive generations of ETX modules. An ETX baseboard design has many advantages of a custom, computer-board design but delivers better obsolescence protection, greatly reduced engineering effort, and faster time to market. ETX-CM User’s Guide 3 Introduction 3. SPECIFICATIONS 3.1 Functional Specifications • Processor: • • • • • • Chipset: • • Intel® 855GME Graphic Memory Controller Hub (GMHC) Intel® I/O Controller Hub 4 (ICH4) • Processor option: 2MB, 1MB, or 512kB onboard L2 cache • 400 MHz system bus Cache: Bus: Memory: • • Four USB 2.0 ports (OHCI) Onboard Ethernet: • • Specifications Two EIDE interfaces, Ultra ATA/100, 100MB/sec Universal Serial Bus (USB) • • Shared with LPT signals Enhanced Intelligent Drive Electronics (EIDE): • • Shared with floppy signals Enhanced Parallel Port (EPP) and Extended Capabilities Port (ECP) with bidirectional capability Floppy (optional): • • 2x TTL (16550 compatible), IrDA support Parallel Port (LPT1) • • • Winbond W83627HF Serial Ports • • • One DDR-SODIMM 266/333MHz up to 1GB Super I/O: • • Intel® Pentium® M Processor 478 μFC-PGA Intel® Celeron® M Processor 478 μFC-PGA 10BASE-T/100BASE-T LAN Controller integrated in ICH Intel® 82562GT 10/100 Mbps Platform LAN Connect 4 ETX-CM User’s Guide • • • 3.2 Video : • • • • CRT display Dual Channel 24-bit LVDS TV-out DVI • • Integrated in ICH4 AC’97 Link for Audio and Telephony CODECs • AwardBIOS PnP 4Mb Flash with console redirection Audio: BIOS: • PS/2 keyboard/mouse controller • Watchdog timer (WDT) • Real-time clock (requires external battery) Mechanical Specifications 2. Dimensions 3.3 • 95.0 mm x 114.0 mm (3.75” x 4.5”) • Height approx. 10.8 mm (0.43”); 12.5mm (0.49”) w/ Heat Spreader Electrical Specifications 3. Supply Voltage • 5V DC +/- 5% 4. Supply Voltage Ripple • 100 mV peak to peak 0 - 20 MHz ETX-CM User’s Guide 5 Specifications 5. Supply Current (typical, DOS prompt) Power-consumption tests were executed under WinXP SP2 and with mouse and keyboard. All tested boards were fully equipped. All boards were equipped with 256MB SDRAM. The BIOS setting for the PS/2 mouse was set to Enabled. CPU Clock Mode Power Consumption Celeron® M Processor 1.3 GHz Full On Idle Suspend 5.23 A 2.81 A 1.96 A 6. CMOS Battery Power Consumption RTC Voltage Current Winbond W83627HF 2.5V 3.0V 1.8 µA 2.8 µA CMOS battery power consumption was measured with an ETX module on a standard ETX evaluation board. The system was turned off and the battery was removed from the evaluation board. 2.5 V or 3.0 V of power was supplied using a DC power supply. These values should not be used to calculate the CMOS battery lifetime. 7. APM1.2 Support The CPU clock is stopped in standby and suspend mode. Specifications 6 ETX-CM User’s Guide 3.4 Environmental Specifications 8. Temperature • Operating (with heatspreader-plate assembly): • • • Ambient temperature: 0 to +60 °C Maximum heat-spreader plate temperature: 0 to +60 °C (*) Nonoperating: -10 to +85 °C See the Thermal Management chapter for additional information. Note: * The maximum operating temperature with the heatspreader plate is the maximum measurable temperature on any spot on the heatspreader’s surface. You must maintain the temperature according to the above specification. • Operating (without heatspreader-plate assembly): • • Maximum operating temperature: 0 to +60 °C (**) Nonoperating: -10 to +85 °C See the Thermal Management chapter for additional information. Note: ** The maximum operating temperature is the maximum measurable temperature on any spot on a module’s surface. You must maintain the temperature according to the above specification. 9. Humidity • Operating: 10% to 90% (noncondensing) • Nonoperating: 5% to 95% (noncondensing) ETX-CM User’s Guide 7 Specifications 4. CORE FUNCTIONS 4.1 Block Diagram CPU Pentium® M Celeron® M Socket 478 μFCPGA IDE Bus 200-pin SODIMM socket Intel® 855GME Intel PHY 10/100 LAN 82562GT SDRAM DDR333 Memory Controller VGA Analog VGA DDR 333 Northbridge DVOB DVO ISA Bus DVOC 24-bit LVDS Chrontel CH7305 HUB Interface 1.5 TV Out Chrontel CH7009 DVI ITE ISA Bridge IT8888G Southbridge 20-pin connector Intel® ICH4 PCI Controller EIDE ATA Ethernet MAC PCI Bus Realtek ALC203 AC'97 Codec v2.3 Audio I2C LPC USB 2.0 WDT F75111R USB 2.0 x4 FWH BIOS Keyboard Mouse LPT1/FDD Winbond LPC Super I/O W83627HF LPC debug port IrDA COM1/COM2 Core Functions 8 ETX-CM User’s Guide 4.2 CPU The ETX-CM supports a single Intel® Pentium® M or Celeron® M Processor in a 478 μFC-PGA package. The processor features: 4.3 • Supports Intel® Architecture with Dynamic Execution • High performance, low-power core • On-die, primary 32-kbyte instruction cache and 32-kbyte write-back data cache • On-die, up to 2-MB L2 cache with Advanced Transfer Cache Architecture • Advanced Branch Prediction and Data Prefetch Logic • Streaming SIMD extensions 2(SSE2) • 400MHz source-synchronous FSB • Advanced Power Management features including Enhanced Intel® SpeedStep® technology Northbridge The Intel® 855GME GMCH features: • 400 MHz FSB • System memory supports 333MHz DDR-SDRAM with ECC • Provides multiple display ports: one progressive scan analog monitor and two DVO ports (used for LVDS and DVI/TV-out) • Direct Media Interface (DMI) between GMCH and ICH4, 2GB/s point-to-point DMI to ICH4 • Package: Micro-FCBGA, 732-pin 10. System Memory Support • One SO-DIMM, single-sided or double-sided, with unbuffered DDR 266/333MHzSDRAM (with or without ECC) • x8 and x16 width DDR SDRAM devices with densities of 128-Mb, 256-Mb, and 512-Mb technology. • Maximum of 1 GB of system memory with high-density 512-Mb technology devices ETX-CM User’s Guide 9 Core Functions 11. Integrated Display Interface The 855GME integrated display interface supports an analog CRT and two DVO ports (used for LVDS and DVI/TV-out). • Analog CRT DAC • • • • • LVDS (Chrontel CH7305 via DVOB) • • • • • • • • • • • • Single / Dual LVDS transmitter Supports pixel rate up to 165M pixels/sec Supports up to UXGA resolution (1600 x 1200) LVDS low jitter PLL LVDS 24-bit or 18-bit output 2D dither engine for 18-bit output Panel protection and power down sequencing Programmable power management Fully programmable through serial port Complete Windows and DOS driver support Variable voltage interface to graphics device DVI and TV-out (Chrontel CH7009 via DVOC) • • • • • • • 4.4 Supports max. DAC frequency up to 400 MHz 24-bit RAMDAC support DDC2B compliant Up to 2048x1536 mode support @ 60Hz DVI Transmitter up to 165M pixels/second TV output supporting graphics resolutions up to 1024x768 pixels Supports RGB and YCrCb Support for all NTSC and PAL formats Provides CVBS, S-Video and SCART (RGB) outputs TV connection detect 10-bit video DAC outputs Southbridge The Intel® ICH4 features: • PCI 33-bit/33MHz Bus interface • Two parallel IDE channels support up to two devices, up to Ultra ATA-100 • Integrated LAN Controller provides 10/100 Mbit/sec Ethernet support • Audio Interface • AC’97 Link for Audio and Telephony CODECs • Four USB 2.0 ports • SMBus 2.0 interface support • Firmware Hub I/F supports BIOS memory size up to 8 Mbytes Core Functions 10 ETX-CM User’s Guide 12. • Low Pin Count (LPC) I/F supports two Master/DMA devices • GPIO • Enhanced DMA Controller • Power Management Logic — ACPI 2.0 compliant • Package: 31mm x 31mm, 421 pin BGA PCI 32-bit Interface ETX-CM supports one PCI 33MHz / 32bits interface compliant to PCI Local Bus Specification, Revision 2.2. All PCI signals are 5 V tolerant. The ICH4 integrates a PCI arbiter that supports up to four external PCI bus masters in addition to the internal ICH4 requests. 13. IDE Controller The ICH4 IDE controller features two sets of interface signals (Primary and Secondary) that can be independently enabled, tri-stated or driven low. The ICH4 IDE controller supports both legacy mode and native mode IDE interface. In native mode, the IDE controller is a fully PCI compliant software interface and does not use any legacy I/O or interrupt resources. The IDE interfaces of the ICH4 can support several types of data transfers: • • 14. Programmed I/O (PIO) Ultra ATA/33/66/100 USB 2.0 The ICH4 has one EHCI high-speed USB 2.0 Host Controller that supports 4 USB 2.0 ports. Over-current detection on all USB ports is supported. USB legacy devices, such as keyboard, mouse and floppy drive are supported and can be enabled / disabled in BIOS options. In addition, USB floppy boot feature is also implemented on all USB ports. 15. System Management Bus (SMBus) The ICH4 provides an SMBus 2.0 compliant host controller as well as an SMBus Slave Interface. The Host controller provides a mechanism for the processor to initiate communications with SMBus peripherals (slaves). The ICH4 is also capable of operating in a mode in which it can communicate with I2C compatible devices. The Slave Interface allows an external master to read from or write to the ICH4. Write cycles can be used to cause certain events or pass messages, and the read cycles can be used to determine the state of various status bits. ETX-CM User’s Guide 11 Core Functions 4.5 Super I/O The LPC-based Winbond W83627HF Super I/O controller provides the following functionality: 4.6 • Two high-speed 16550 compatible UARTs with 16-byte send/receive FIFOs • Support IrDA version 1.0 SIR protocol with maximum baud rate up to 115.2K bps • Parallel Port, Floppy Drive Port, Keyboard/Mouse Controllers On-board Watchdog Timer The ETX-CM implements a two-stage watchdog timer on the Fintek F75111R Low Power GPIO device. 4.7 TV Encoder / DVI Transmitter The Chrontel CH7009 enables the ETX-CM to support TV and DVI output. 4.8 AC’97 Codec The ETX-CM supports AC’97 via the Realtek ALC203, a 20-bit DAC and 18-bit ADC fullduplex AC'97 2.3 compatible stereo audio CODEC designed for PC multimedia systems, including host/soft audio, and AMR/CNR based designs. 4.9 Backup Interface to BIOS The ETX-CM provides a backup interface to BIOS in order to give the user an opportunity to write to the flash even when the BIOS is corrupted and inaccessible for the system. Users can alter the ID of the on-board BIOS and utilize the backup BIOS on EEPROM to boot the system. Core Functions 12 ETX-CM User’s Guide 5. CONNECTOR X1 SUBSYSTEMS 5.1 PCI Bus The implementation of this subsystem complies with the ETX Specification. Implementation information is provided in the ETX Design Guide. Refer to the documentation for additional information. 5.2 USB The ICH4 has one EHCI high-speed USB 2.0 Host Controller that supports 4 USB 2.0 ports. Over-current detection on all USB ports is supported. Configuration The USB controllers are PCI bus devices. The BIOS allocates required system resources during configuration of the PCI bus. 5.3 Audio The ETX-CM supports AC’97 via the Realtek ALC203, a 20-bit DAC and 18-bit ADC fullduplex AC'97 2.3 compatible stereo audio CODEC designed for PC multimedia systems, including host/soft audio, and AMR/CNR based designs. The controller supports a Line In, a Line Out, and a Mic In interface. Configuration The audio controller is a PCI bus device. The BIOS allocates required system resources during configuration of the PCI device. 5.4 3.3V Power Supply for External Components The ETX-CM offers the ability to connect 3.3V devices to the onboard generated supply voltage. Pin 12 and Pin 16 of Connector X1 are used to connect to the +3.3V ±5% power supply. The maximum external load is 500mA. Do not connect 3.3V pins to an external 3.3V supply. For additional information, refer to the ETX Design Guide. ETX-CM User’s Guide 13 Connector X1 Subsystems 6. CONNECTOR X2 SUBSYSTEMS 6.1 ISA Bus Slot The ISA Bus is provided by the ITE IT8888G PCI-to-ISA Bridge Chip. The implementation of this subsystem complies with the ETX Specification. Implementation information is provided in the ETX Design Guide. Refer to the documentation for additional information. Connector X2 Subsystems 14 ETX-CM User’s Guide 7. CONNECTOR X3 SUBSYSTEMS 7.1 VGA/LVDS Output The Intel® 855GME GMCH incorporates extensions to the GX1 processor’s display subsystem. These include: • VGA Graphics : • • • • GMCH internal VGA controller CRT: 2048x1536x8bit@60Hz resolution Max. shared memory 64MB LCD Panel: • • • Dual Channel 24-bit LVDS via Chrontel CH7305 165 Mpixels/sec Max. resolution UXGA 1600x1200 Configuration The graphics controller requires the following resources: • An IRQ • Several I/O addresses • Memory-address blocks in high memory The BIOS allocates the resources during AGP configuration. Many resources are set for compatibility with industry-standard settings. 7.2 TV-Out / DVI The Chrontel CH7009 enables the ETX-CM to support TV and DVI output. • • • • • • • DVI Transmitter up to 165M pixels/second TV output supporting graphics resolutions up to 1024x768 pixels Supports RGB and YCrCb Support for all NTSC and PAL formats Provides CVBS, S-Video and SCART (RGB) outputs TV connection detect 10-bit video DAC outputs See Section 13.6 for DVI Connector pin definitions. ETX-CM User’s Guide 15 Connector X3 Subsystems 7.3 Serial Ports (1 and 2) The implementation of the serial-communication interface complies with the ETX Specification. Implementation information is provided in the ETX Design Guide. Refer to the documentation for additional information. Configuration The serial-communication interface uses I/O and IRQ resources. The resources are allocated by BIOS during POST configuration and are set to be compatible with common PC/AT settings. Use the BIOS setup to change some parameters that relate to the serial-communication interface. 7.4 PS/2 Keyboard/Mouse The implementation of the keyboard interface complies with the ETX Specification. Implementation information is provided in the ETX Design Guide. Refer to the documentation for additional information. Configuration The keyboard uses I/O and IRQ resources. The BIOS allocates the resources during POST configuration. The resources are set to be compatible with common PC/AT settings. Use the BIOS setup to change some keyboard-related parameters. 7.5 IrDA The ETX-CM is capable of IrDA SIR operation. This feature is implemented in the Winbond W83627HF Super I/O device. Contact technical support for help with this feature. 7.6 Parallel Port The parallel-communication interface shares signals with the floppy-disk interface. The implementation of this parallel port complies with the ETX Specification. Implementation information is provided in the ETX Design Guide. Refer to the documentation for additional information. Configuration The parallel-communication interface uses I/O, IRQ, and DMA resources. The resources are allocated by BIOS during POST configuration and are set to be compatible with common PC/AT settings. You can change some parameters of the parallelcommunication interface through the BIOS setup. Connector X3 Subsystems 16 ETX-CM User’s Guide 7.7 Floppy The floppy-disk interface shares signals with the parallel-communication interface. The floppy interface is limited to one drive (drive_1). A standard floppy cable has two connectors for floppy drives. One connector has a non-twisted cable leading to it; the other has a twisted cable leading to it. When using the floppy interface, you must connect the floppy drive to the connector (drive_1) that has the non-twisted cable leading to it. The implementation of this subsystem complies with the ETX Specification. Implementation information is provided in the ETX Design Guide. Refer to the documentation for additional information. Configuration The floppy-disk controller uses I/O, IRQ, and (in some modes) direct memory access (DMA) resources. These resources are allocated by BIOS during POST configuration and are set to be compatible with common PC/AT settings. You can change some parameters of the parallel-communication interface through the BIOS setup. ETX-CM User’s Guide 17 Connector X3 Subsystems 8. CONNECTOR X4 SUBSYSTEMS 8.1 IDE Ports The implementation of this subsystem complies with the ETX Specification. Implementation information is provided in the ETX Design Guide. Refer to those documents for additional information. Configuration Primary and secondary IDE host adapters are PCI bus devices. The BIOS configures them during PCI device configuration. You can disable them by using the BIOS setup. Resources used by the primary and secondary IDE host adapters are compatible with the PC/AT. Note: Award BIOS will not recognize a Slave device on an IDE port if there is no Master device connected to the same IDE port. 8.2 Ethernet • 10BASE-T/100BASE-T LAN Controller integrated in ICH The ICH4’s integrated LAN controller includes a 32-bit PCI controller that provides enhanced scatter-gather bus mastering capabilities and enables the LAN controller to perform high-speed data transfers over the PCI bus. Its bus master capabilities enable the component to process high level commands and perform multiple operations, which lowers processor utilization by offloading communication tasks from the processor. Two large transmit and receive FIFOs of 3 KB each help prevent data underruns and overruns while waiting for bus accesses. This enables the integrated LAN controller to transmit data with minimum interframe spacing (IFS). The ICH4 integrated LAN controller can operate in either full-duplex or half-duplex mode. In full-duplex mode the LAN controller adheres with the IEEE 802.3x Flow Control specification. Half duplex performance is enhanced by a proprietary collision reduction mechanism. • Intel® 82562GT 10/100 Mbps Platform LAN Connect The 82562GT is a highly-integrated device designed for 10 or 100 Mbps Ethernet systems. It is based on IEEE 10BASE-T and 100BASE-TX standards. The IEEE 802.3u standard for 100BASE-TX defines networking over two pairs of Category 5 unshielded twisted pair cable or Type 1 shielded twisted pair cable. They are also 3.3 V devices available in a 48-pin Shrink Small Outline Package (SSOP). Connector X4 Subsystems 18 ETX-CM User’s Guide The 82562GT complies with the IEEE 802.3u Auto-Negotiation standard and the IEEE 802.3x Full Duplex Flow Control standard. The 82562G/GT and 82562ET/EM also include a PHY interface compliant to the current platform LAN connect interface. Go to the Intel website to obtain the latest drivers. Configuration The Ethernet interface is a PCI device. The BIOS setup automatically configures it. Note: The Ethernet interface works according to the common criteria of the embedded technology market segment. 8.3 Power Control 16. Power Good / Reset Input The ETX-CM provides an external input for a power good signal or a manual reset pushbutton. The implementation of this subsystem complies with the ETX Specification. Implementation information is provided in the ETX Design Guide. Refer to those documents for additional information. 8.4 Power Management 17. ATX PS Control The ETX-CM can control the main power output of an ATX-style power supply. The implementation of this subsystem complies with the ETX Specification. Implementation information is provided in the ETX Design Guide. Refer to the documentation for additional information. 18. External SMI Interrupt Contact technical support for information on this feature. 8.5 Miscellaneous Circuits 19. Speaker The implementation of the speaker output complies with the ETX Specification. Implementation information is provided in the ETX Design Guide. Refer to the documentation for additional information. ETX-CM User’s Guide 19 Connector X4 Subsystems 20. Battery The implementation of the battery input complies with the ETX Specification. Implementation information is provided in the ETX Design Guide. Refer to the documentation for additional information. In compliance with EN60950, on the ETX-CM, there are at least two current-limiting devices (resistor and diode) between the battery and the consuming component. 21. I2C Bus The ETX-CM provides a software-driven I2C port to communicate with external I2C slave devices. This port is implemented on ETX Pins I2DAT and I2CLK. Connector X4 Subsystems 20 ETX-CM User’s Guide 9. SPECIAL FEATURES 9.1 Watchdog Timer This feature is implemented in the Fintek F75111R Low Power GPIO device. You can configure the Watchdog Timer (WDT) from the BIOS setup to start after a set amount of time after power-on boot. The application software should strobe the WDT to prevent its timeout. Upon timeout, the WDT resets and restarts the system. This provides a way to recover from program crashes or lockups. Configuration The ETX-CM implements a two-stage watchdog timer on the Fintek F75111R Low Power GPIO device: • Timer 1 has a range of 0 to 127 seconds and triggers NMI. • Timer 2 has a range of 0 to 256 seconds or minutes and triggers Reset. Contact technical support for information on programming and operating the WDT. ETX-CM User’s Guide 21 Special Features 10. DESIGN CONSIDERATIONS 10.1 Thermal Management A heat-spreader assembly is available for the ETX-CM. The heat-spreader plate on top of this assembly is NOT a heat sink. It works as an ETX-standard thermal interface to use with a heat sink or other cooling device. External cooling must be provided to maintain the heat-spreader plate at proper operating temperatures. Under worst-case conditions, the cooling mechanism must maintain an ambient air and heatspreader plate temperature of 60° C or less. The aluminum slugs and thermal pads on the underside of the heat-spreader assembly implement thermal interfaces between the heatspreader plate and the major heatgenerating components on the ETX-CM. About 80 percent of the power dissipated within the module is conducted to the heat-spreader plate and can be removed by the cooling solution. The total power consumption of the ETX-CM is 25 watts at Full On and 14 watts at Idle (Celeron® M 1.3GHz with 256 MB DDR333 – see Section 3.3 Electrical Specifications). Design the cooling solution accordingly. You can use many thermal-management solutions with the heat-spreader plates, including active and passive approaches. The optimum cooling solution varies, depending on the ETX application and environmental conditions. Please see the ETX Design Guide for further information on thermal management. Design Considerations 22 ETX-CM User’s Guide 10.2 Threaded Heatspreader Dimensions ETX-CM User’s Guide 23 Design Considerations 11. APPENDIX A: SYSTEM RESOURCES 11.1 Interrupt Request (IRQ) Lines IRQ # Used For 0 1 2 3 4 5 6 7 8 9 10 11 12 13 Timer0 keyboard controller Cascade COM2 COM1 Sound Floppy disk controller LPT1 Real Time Clock free COM3 COM4 PS/2 Mouse Floating point unit (FPU / NPU / Math coprocessor) Primary IDE channel Secondary IDE channel 14 15 Comment Note (1) Note (1) Note (1) Note (1) Note (1) Note (2) Note (2) Note (1) Note (1) Note (1) Notes:1 If the “Used For” device is disabled in setup, the corresponding interrupt is available for other devices. 2 Only available if the baseboard is equipped with I/O controller SMC FDC37C669. Note (1) also applies. 11.2 Direct Memory Access (DMA) Channels DMA # 0 1 2 3 4 5 6 7 Used for Sound FDC LPT Cascade Sound Available Yes No No No No No Yes Yes Comment Note (1) Note (1) Unavailable if LPT used in ECP mode. Note (1) Note: If the “Used For” device is disabled in setup, the corresponding interrupt is available for other devices. Appendix A: System Resources 24 ETX-CM User’s Guide 11.3 11.4 Memory Area Upper Memory Used for C0000h - CFFFFh VGA BIOS D0000h - DFFFFh USB E0000h - FFFFFh System BIOS Comment Available if USB Legacy Support is disabled in BIOS setup I/O Address Map The I/O-port addresses of the ETX-CM are functionally identical with a standard PC/AT. The following I/O ports are used: I/O Address 00h – 0Fh C0h – DFh 20h , 21h 2Eh, 2Fh A0h, A1h 40h – 43h (XT/AT) 44h – 47h (PS/2) 60h – 64h 90h – 96h F0h – FFh 170h – 177h 1F0h – 1F7h 200h – 22Fh 220h – 22Fh 295h, 296h 279h , A79h 2F8h – 2FFh 330h, 331h 378h – 37Ah 3B0h – 3BFh 3C0h – 3CFh 3D4h – 3D9h 3F0h – 3F7h 3F6h, 3F7h 3F8h – 3FFh 0CF8h 0CFCh ETX-CM User’s Guide Used for Comment 8237DMA Controller 8259A PIC SuperIO Access Port 8259A PIC 8254PIT KeyBoard Controller PS/2 P OS Math Co-Processor,X87 Unit Secondary IDE Primary IDE GAME I/O Sound Blaster / AD Lib HW Monitor Access Port Plug and Play Configuration Register COM2 MIDI Port Parallel Printer Port MDA / MGA EGA / VGA CGA/CRT Register, Controller and Palette Register Floppy Diskette Enhanced IDE COM1 PCI Configuration Register/Address PCI Configuration Register/data 25 Appendix A: System Resources 11.5 11.6 Peripheral Component Interconnect (PCI) Devices PCI Device PCI Interrupt Comment Ethernet South Bridge Slot1 Slot2 Slot3 Slot4 ISA Bridge INTE INTA INTB INTC INTD - Uses an internal REQ/GNT pair Uses an internal REQ/GNT pair AD19 AD20 AD21 AD22 AD23 Inter-IC (I2C) Bus I2C Address Used For 2Eh 9Ch A0h D2h Super I/O WatchingDog Timer DDR SO-DIMM Clock Generator Appendix A: System Resources Comment 26 ETX-CM User’s Guide 12. APPENDIX B: BIOS OPERATION 12.1 Determining the BIOS Version To determine the AwardBIOS version, immediately press the Pause key on your keyboard as soon as you see the following text display in the upper left corner of your screen: Phoenix - Award BIOS v6.00PG, An Energy Ally Copyright 1984-2003, Phoenix Technology, LTD. ETX-CM BIOS RX.XX 12.2 Setup Guide The AwardBIOS Setup Utility changes system behavior by modifying the BIOS configuration. The setup program uses a number of menus to make changes and turn features on or off. Note: Selecting incorrect values may cause system boot failure. To recover, load the Failsafe values by pressing <F6>. If you are unable to enter BIOS, it might be necessary to “Clear CMOS” to reset these values. 22. Start Award BIOS Setup Utility To start the AwardBIOS setup utility, press <del> when the following string appears during bootup. Press <del> to enter Setup The Main Menu then appears. ETX-CM User’s Guide 27 Appendix B: BIOS Operation 12.3 Main Menu Once you enter the AwardBIOS™ CMOS Setup Utility, the Main Menu will appear on the screen. The Main Menu allows you to select from several setup functions and two exit choices. Use the arrow keys to select among the items and press <Enter> to accept your choice and enter the sub-menu. Phoenix - AwardBIOS CMOS Setup Utility ¾Standard CMOS Features ¾Frequency/Voltage Control ¾Advanced BIOS Features Load Fail-Safe Defaults ¾Advanced Chipset Features Load Optimized Defaults ¾Integrated Peripherals Set Supervisor Password ¾Power Management Setups Set User Password ¾PnP/PCI Configurations Save & Exit Setup ¾PC Health Status Exit Without Saving ↑ ↓ →←: Select Item Esc: Quit F10: Save & Exit Setup Time, Date, Hard Disk Type…. Note: A brief description of each highlighted selection appears at the bottom of the screen. Setup Items: The main menu includes the following main setup categories. Recall that some systems may not include all entries. Each category is described in detail in the sections which follow. • Standard CMOS Features: Use this menu for basic system configuration. • Advanced BIOS Features: Use this menu to set the Advanced Features available on your system. • Advanced Chipset Features: Use this menu to change the values in the chipset registers and optimize your system's performance. • Integrated Peripherals: Use this menu to specify your settings for integrated peripherals. • Power Management Setup: Use this menu to specify your settings for power management. • PnP / PCI Configuration: Appendix B: BIOS Operation 28 ETX-CM User’s Guide This entry appears if your system supports PnP / PCI. • PC Health Status This menu displays the current CPU temperature, the fan speeds, voltages etc. • Frequency/Voltage Control This setup page controls the CPU clock and frequency ratio. • Load Fail-Safe Defaults: Use this menu to load the BIOS default values for the minimal/stable performance required for your system to operate. • Load Optimized Defaults: Use this menu to load the BIOS default values that are factory settings for optimal performance and system operations. While Award has designed the custom BIOS to maximize performance, the factory has the right to change these defaults to meet their needs. • Supervisor / User Password: Use this menu to set User and Supervisor Passwords. • Save & Exit Setup: Save CMOS value changes to CMOS and exit setup. • Exit Without Save: Abandon all CMOS value changes and exit setup. ETX-CM User’s Guide 29 Appendix B: BIOS Operation 12.4 Standard CMOS Features The items in the Standard CMOS Setup Menu are divided into 10 categories. Each category includes no, one or more setup items. Use the arrow keys to highlight the item and <PgUp> or <PgDn> keys to select the value you want for each item. Note the “Halt On” option which allows you to select the situation in which you want the BIOS to stop the POST process and notify you. Phoenix - AwardBIOS CMOS Setup Utility Standard CMOS Features Date (mm:dd:yy): Time (hh:mm:ss): ¾ IDE Primary Master ¾ IDE Primary Slave ¾ IDE Secondary Master ¾ IDE Secondary Slave Mon, Mar 6 2006 16:19:20 Item Help ____________________________ [13579 MB] [None] [None] [None] Menu Level Change the day, month, year and century Drive A [1.44M, 3.5 in.] Video Halt On [EGA/VGA] [All Errors] Based Memory Extended Memory Total Memory ¾ 640K 515072K 516096K ↑↓→←Move Enter: Select +/-/PU/PD: Value F10: Save ESC: Exit F1: General Help F5: Previous Values • F6: Fail-safe defaults F7: Optimized Defaults Date: Options- Month/DD/YYYY Set the system date. Note that the 'Day' automatically changes when you set the date. • Time: Options- HH : MM : SS Set the system time. • IDE Primary/Secondary Master: Options are available in the sub-menu (described in the IDE Adapters section below) Press <Enter> to enter the sub-menu and select detailed options. • IDE Primary/Secondary Slave: Options are available in the sub-menu (described in the IDE Adapters section below) Press <Enter> to enter the sub-menu and select detailed options. • Drive A: Appendix B: BIOS Operation 30 ETX-CM User’s Guide Options- None/360K, 5.25 in/1.2M, 5.25 in/720K, 3.5 in/1.44M, 3.5 in/2.88M, 3.5 in Select the type of floppy disk drive installed in your system. • Video: Options- EGA/VGA/CGA 40/CGA 80/MONO Select the default video device. • Halt On: Options- All Errors/No Errors/All, but Keyboard/All, but Diskette/All, but Disk/Key Select the situation in which you want the BIOS to stop the POST process and notify you. • Base Memory: Options- N/A Displays the amount of conventional memory detected during boot up. • Extended Memory: Options- N/A Displays the amount of extended memory detected during boot up. • Total Memory: Options- N/A Displays the total memory available on the system. ETX-CM User’s Guide 31 Appendix B: BIOS Operation IDE Adapters The IDE adapters control the hard disk drive. Use a separate sub-menu to configure each hard disk drive. Phoenix - AwardBIOS CMOS Setup Utility IDE Primary Master IDE HDD Auto-Detection [Press Enter] IDE Primary Master Access Mode [Auto] [Auto] Capacity 13579 MB Cylinder Head Precomp Landing Zone Sector 26310 16 0 26309 63 Item Help ____________________________ Menu Level ¾¾ To auto-detect the HDD’s size, head... on this channel ↑↓→←Move Enter: Select +/-/PU/PD: Value F10: Save ESC: Exit F1: General Help F5: Previous Values • F6: Fail-safe defaults F7: Optimized Defaults IDE HDD Auto-Detection: Options- Press Enter Press Enter to auto-detect the HDD on this channel. If detection is successful, the utility will fill the remaining fields on this menu. • IDE Primary Master: Options- None, Auto and Manual Selecting "Manual" lets you set the remaining fields on this screen. Selects the type of fixed disk. "User Type" will let you select the number of cylinders, heads, etc. Note: PRECOMP=20335 means NONE! • Access Mode: Options- CHS, LBA, Large and Auto Choose the access mode for this hard disk • Capacity: Options- Auto Display your disk drive size Disk drive capacity (approximate). Note that this size is usually slightly greater than the size of a formatted disk given by a disk-checking program. Appendix B: BIOS Operation 32 ETX-CM User’s Guide *The following options are selectable only if the 'IDE Primary Master' item is set to 'Manual' • Cylinder: Options- Min = 0, Max = 20335 Set the number of cylinders for this hard disk. • Head: Options- Min = 0, Max = 255 Set the number of read/write heads. • Precomp: Options- Min = 0, Max = 20335 **** Warning: Setting a value of 20335 means no hard disk! • Landing zone: Options- Min = 0, Max = 20335 • Sector: Options- Min = 0, Max = 255 Number of sectors per track ETX-CM User’s Guide 33 Appendix B: BIOS Operation 12.5 Advanced BIOS Features This section allows you to configure your system for basic operation. You have the opportunity to select the system's default speed, boot-up sequence, keyboard operation, shadowing and security. Phoenix - AwardBIOS CMOS Setup Utility Advanced BIOS Features Virus Warning Quick Power On Self Test First Boot Device Second Boot Device Third Boot Device Boot Other Device Boot Up Floppy Seek Boot Up NumLock Status Gate A20 Option Typematic Rate Setting x Typematic Rate (Chars/Sec) x Typematic Delay (Msec) Security Option APIC Mode Small Logo(EPA) Show [Disabled] [Enabled] [CDROM] [HDD-0] [USB-HDD] [Enabled] [Disabled] [On] [Fast] [Disabled] 6 250 [Setup] [Enabled] [Disabled] Item Help ____________________________ Menu Level ¾ ↑↓→←Move Enter: Select +/-/PU/PD: Value F10: Save ESC: Exit F1: General Help F5: Previous Values • F6: Fail-safe defaults F7: Optimized Defaults Virus Warning: Allows you to choose the VIRUS Warning feature for IDE Hard Disk boot sector protection. If this function is enabled and someone attempts to write data into this area, the BIOS will show a warning message on the screen and sound an alarm beep. Enabled---Activates automatically when the system boots up and causes a warning message to appear when anything attempts to access the boot sector or hard disk partition table. Disabled---No warning message will appear when anything attempts to access the boot sector or hard disk partition table. • Quick Power On Self Test: This option speeds up the Power On Self Test (POST) which runs when you power up the computer. If it is set to Enabled, BIOS will shorten or skip some check items during POST. Enabled---Enable quick POST Disabled--- Normal POST Appendix B: BIOS Operation 34 ETX-CM User’s Guide • First/Second/Third Boot Device: The BIOS will attempt to load the operating system from the devices specified here as the first, second and third boot devices. Options-Floppy, LS/ZIP, Hard Disk, CDROM, LAN and Disabled. • Boot Other Device: When enabled, the system will search all other possible locations for an operating system if it fails to find one in the devices specified under the first, second, and third boot devices. Options- Enabled, Disabled • Boot Up Floppy Seek: If enabled, the system will seek for disk drives during boot up. Disabling will speed boot up. Options- Enabled, Disabled. • Boot Up NumLock Status: Select the powe- on state for NumLock. Options- On, Off • Gate A20 Option: Select if the chipset or the keyboard controller should control GateA20. Normal---A pin in the keyboard controller controls GateA20 Fast---Lets the chipset control GateA20 • Typematic Rate Setting Manually set the Typematic Rate or the Typematic Delay. • Typematic Rate (Chars/Sec) The highest number of characters that can be typed in a second on the keyboard. • Typematic Delay (Msec) The time (in milliseconds) needed before pressing again a key on the keyboard. ETX-CM User’s Guide 35 Appendix B: BIOS Operation • Security Option: Select whether a password is required every time the system boots or only when you enter setup. System---The system will not boot and access to Setup will be denied if the correct password is not entered at the prompt. Setup---The system will boot, but access to Setup will be denied if the correct password is not entered at the prompt. Note: To disable security, select PASSWORD SETTING at the Main Menu. You will be asked to enter password. Do not type anything and just press <Enter> to disable security. Once security is disabled, the system will boot and you can enter Setup freely. • APIC MODE Selecting Enabled enables APIC device mode reporting from the BIOS to the operating system. Options- Enabled, Disabled. • Small Logo (EPA) Show: This field enables the showing of the EPA logo located at the upper right of the screen during boot up. Options- Enabled, Disabled. Appendix B: BIOS Operation 36 ETX-CM User’s Guide 12.6 Advanced Chipset Features This section allows you to configure the system based on the specific features of the installed chipset. This chipset manages bus speeds and access to system memory resources, such as DRAM and the external cache. It also coordinates communications between the conventional ISA bus and the PCI bus. Please note that these items should never need to be altered. The default settings have been chosen because they provide the best operating conditions for your system. The only time you might consider making any changes would be if you discovered that data was being lost while using your system. Phoenix - AwardBIOS CMOS Setup Utility Advanced Chipset Features x x x x x DRAM Timing Selectable CAS Latency Time Active to Precharge Delay DRAM RAS# To CAS# Delay DRAM RAS# Precharge DRAM Data Integrity Mode MGM Core Frequency System BIOS Cacheable Video BIOS Cacheable Memory Hole At 15M-16M Delayed Transaction Delay Prior to Thermal AGP Aperture Size (MB) [By SPD] [2.5] [7] [3] [3] [Non-ECC] Auto Max 400/333MHz [Enabled] [Disabled] [Disabled] [Enabled] [16 Min] [64] ** On-Chip VGA Setting ** On-Chip VGA On-Chip Frame Buffer Size Boot Display LVDS Resolution [Enabled] [32MB] [CRT] [800 X 600] Item Help ____________________________ Menu Level ¾ ↑↓→←Move Enter: Select +/-/PU/PD: Value F10: Save ESC: Exit F1: General Help F5: Previous Values • F6: Fail-safe defaults F7: Optimized Defaults DRAM Timing Selectable: This selection provides the option to select DRAM timing detection using Serial Presence Detect (SPD) or by manually setting it. Options- Manual, By SPD. • CAS Latency Time: When synchronous DRAM is installed, the number of clock cycles of CAS latency depends on the DRAM timing. Options- 2, 2.5. ETX-CM User’s Guide 37 Appendix B: BIOS Operation • Active to Precharge Delay This option selects the active to precharge delay. Options- 5, 6, 7. • DRAM RAS# To CAS# Delay: This option allows you to insert a timing delay between the CAS and RAS strobe signals, used when DRAM is written to, read from, or refreshed. Fast gives faster performance; and Slow gives more stable performance. This option applies only when synchronous DRAM is installed in the system. Options- 2, 3. • DRAM RAS# Precharge: If an insufficient number of cycles are allowed for the RAS to accumulate its charge before DRAM refresh, the refresh may be incomplete and the DRAM may fail to retain data. Fast gives faster performance; and Slow gives more stable performance. This option applies only when synchronous DRAM is installed in the system. Options- 2, 3. • DRAM Data Integrity Mode: This option enables/disables the DRAM ECC integrity mode. Options- Non-ECC, ECC. • MGM Core Frequency This field sets the frequency of the DRAM memory installed. The default setting is Auto Max 400/333MHz. • System BIOS Cacheable: Selecting "Enabled" allows caching of the system BIOS ROM at F0000hFFFFFh, resulting in better system performance. However, if any program writes to this memory area, a system error may result. Options- Enabled, Disabled. • Video BIOS Cacheable: Selecting "Enabled" allows caching of the video BIOS, resulting in better system performance. However, if any program writes to this memory area, a system error may result. Options- Enabled, Disabled. Appendix B: BIOS Operation 38 ETX-CM User’s Guide • Memory Hole At 15M-16M: You can reserve this area of system memory for ISA adapter ROM. When this area is reserved, it cannot be cached. The user guides for peripherals that need to use this area of system memory usually discuss their memory requirements. Options- Enabled, Disabled. • Delayed Transaction The chipset has an embedded 32-bit posted write buffer to support delay transactions cycles. Select Enabled to support compliance with PCI specification version 2.1. • Delay Prior to Thermal This field activates the CPU thermal function after the systems boots for the set number of minutes. The options are 4, 8, 16 and 32 Min. • AGP Aperture Size (MB): This option determines the effective size of the Graphic Aperture used for a particular GMCH configuration. It can be updated by the GMCH-specific BIOS configuration sequence before the PCI standard bus enumeration sequence takes place. If it is not updated then a default value will select an aperture of maximum size. Options- 4, 8, 16, 32, 64, 128 and 256. ** On-Chip VGA Setting** • On-Chip VGA Allows you to enable and disable the on-chip VGA. • On-Chip Frame Buffer Size: This item allows you to control the on-chip frame buffer size. Options- 1M, 4M, 8M, 16M and 32M. • Boot Display The default setting is CRT. Other options are: LVDS, CRT+LVDS, DVI, TV, and CRT+DVI • LVDS Resolution The default setting is 800 X 600. Other options are: 1024 X 768, 1280 X 1024, 1400 X 1050, and 1600 X 1200. ETX-CM User’s Guide 39 Appendix B: BIOS Operation 12.7 Integrated Peripherals Phoenix - AwardBIOS CMOS Setup Utility Integrated Peripherals ¾ OnChip IDE Device ¾ Onboard Device ¾ SuperIO Device ¾ Console Redirection Item Help ____________________________ [Press Enter] [Press Enter] [Press Enter] [Press Enter] Menu Level ¾ ↑↓→←Move Enter: Select +/-/PU/PD: Value F10: Save ESC: Exit F1: General Help F5: Previous Values F6: Fail-safe defaults F7: Optimized Defaults OnChip IDE Device: OnChip IDE Device On-Chip Primary PCI IDE IDE Primary Master PIO IDE Primary Slave PIO IDE Primary Master UDMA IDE Primary Slave UDMA On-Chip Secondary PCI IDE IDE Secondary Master PIO IDE Secondary Slave PIO IDE Secondary Master UDMA IDE Secondary Slave UDMA [Enabled] [Auto] [Auto] [Auto] [Auto] [Enabled] [Auto] [Auto] [Auto] [Auto] IDE HDD Block Mode [Enabled] Item Help ________________________ Menu Level ¾ ↑↓→←Move Enter: Select +/-/PU/PD: Value F10: Save ESC: Exit F1: General Help F5: Previous Values • F6: Fail-safe defaults F7: Optimized Defaults OnChip Primary/Secondary PCI IDE: The integrated peripheral controller contains an IDE interface with support for two IDE channels. Select "Enabled" to activate each channel separately. Options- Enabled, Disabled. • IDE Primary/Secondary Master/Slave PIO: The four IDE PIO (Programmed Input/Output) fields let you set a PIO mode (0-4) for each of the four IDE devices that the onboard IDE interface supports. Modes 0 through 4 provide successively increased performance. In Auto mode, the system automatically determines the best mode for each device. Options- Auto, Mode 0, Mode 1, Mode 2, Mode 3 and Mode 4. h IDE Primary/Secondary Master/Slave UDMA: Ultra DMA/33 implementation is possible only if your IDE hard drive supports it and the operating environment includes a DMA driver (Windows 95 OSR2 or a third-party IDE bus master driver). If your hard drive and your system software both support Ultra DMA/33, select "Auto" to enable BIOS support. Options- Auto, Disabled. Appendix B: BIOS Operation 40 ETX-CM User’s Guide Onboard Device Onboard Device USB Controller USB 2.0 Controller USB Keyboard Support USB Mouse Support AC97 Audio Init Display First [Enabled] [Enabled] [Enabled] [Enabled] [Auto] [Onboard/AGP] Item Help ____________________________ Menu Level ¾ ↑↓→←Move Enter: Select +/-/PU/PD: Value F10: Save ESC: Exit F1: General Help F5: Previous Values • F6: Fail-safe defaults F7: Optimized Defaults USB / USB 2.0 Controller: Select "Enabled" if your system contains a Universal Serial Bus (USB) / USB 2.0 controller and you have USB peripherals. Options- Enabled, Disabled. • USB Keyboard Support: Select "Enabled" if your system contains a Universal Serial Bus (USB) controller and you have a USB keyboard. Options- Enabled, Disabled. • USB Mouse Support: Select "Enabled" if your system contains a Universal Serial Bus (USB) controller and you have a USB mouse. Options- Enabled, Disabled. • AC’97 Audio: This item allows you to decide to auto or disable the chipset family to support AC’97 Audio. Options- Auto, Disabled. • Init Display First: This item allows you to decide to whether to activate the PCI Slot or Onboard/AGP VGA first. Options- PCI Slot, Onboard/AGP. ETX-CM User’s Guide 41 Appendix B: BIOS Operation SuperIO Device SuperIO Device Onboard FDC Controller Onboard Serial Port 1 Onboard Serial Port 2 UART Mode Select RxD , TxD Active IR Transmission Delay UR2 Duplex Mode Use IR Pins FDD / LPT Select Parallel Port Mode EPP Mode Select ECP Mode Use DMA Game Port Address Midi Port Address Midi Port IRQ [Enabled] [3F8/IRQ4] [2F8/IRQ3] [Normal] [Hi,Lo] [Enabled] [Half] [IR-Rx2Tx2] [378/IRQ7] [SPP] [EPP1.7] [3] [201] [330] [10]] Item Help ____________________________ Menu Level ¾ ↑↓→←Move Enter: Select +/-/PU/PD: Value F10: Save ESC: Exit F1: General Help F5: Previous Values F6: Fail-safe defaults F7: Optimized Defaults • Onboard FDC Controller: Select "Enabled" if your system has a floppy disk controller (FDC) installed on the system board and you wish to use it. If you have installed an add-in FDC or the system has no floppy drive, select Disabled. Options- Enabled, Disabled. • Onboard Serial Port 1/Port 2: Select an address and corresponding interrupt for the first and second serial ports. Options- Disabled , 3F8/IRQ4, 2F8/IRQ3, 3E8/IRQ4, 2E8/IRQ3, and Auto. • UART Mode Select: This item allows you to select the UART mode. Options- IrDA, ASKIR and Normal. • Parallel Port Mode This field allows you to determine parallel port mode function. Options- SPP, EPP ECP, EPP + ECP and Normal. Appendix B: BIOS Operation 42 ETX-CM User’s Guide Console Redirection Console Redirection Console Redirection Baud Rate Agent Connect via Agent wait time(min) Agent after boot [Enabled] [19200] [NULL] [1] [Disabled]] Item Help ____________________________ Menu Level ¾ Enabled - Attempt to redirect console via COM port Disabled – Disable console redirection ↑↓→←Move Enter: Select +/-/PU/PD: Value F10: Save ESC: Exit F1: General Help F5: Previous Values • F6: Fail-safe defaults F7: Optimized Defaults Console Redirection: Select "Enabled" to attempt to redirect console via COM port. Select "Disabled" to disable console redirection. • Baud Rate: Specify Baud Rate of console redirection. Options- 9600, 19200, 38400, 57600, and 115200. • Agent wait time: Set the timeout for the connection. Options- 1, 2, 4, and 8 Min. • Agent after boot: This setting determines whether to keep the connection running after OS boot. Options- Enabled, Disabled. ETX-CM User’s Guide 43 Appendix B: BIOS Operation 12.8 Power Management Setup The Power Management Setup allows you to configure your system to most effectively save energy while operating in a manner consistent with your own style of computer use. Phoenix - AwardBIOS CMOS Setup Utility Power Management Setup ACPI Function Power Management Video Off Method Video Off In Suspend Suspend Type Modem Use IRQ Suspend Mode HDD Power Down Soft-Off by PWR-BTTN PWRON After PWR-Fail CPU THRM-Throttling Power On by Ring Resume by Alarm x Date(or Month) Alarm x Time(hh:mm:ss) Alarm [Enabled] [Min Saving] DPMS] [Yes] [Stop Grant] [3] 1 Hour 15 Min [Instant-Off] [Former-Sts] [50.0%] [Enabled] [Disabled] 0 0:0:0 Item Help ____________________________ Menu Level ¾ ↑↓→←Move Enter: Select +/-/PU/PD: Value F10: Save ESC: Exit F1: General Help F5: Previous Values F6: Fail-safe defaults F7: Optimized Defaults • ACPI Function: This item allows you to enable or disable the Advanced Configuration and Power Management(ACI). Options- Enabled, Disabled. • Power Management: This item allows you to select the type (or degree) of power saving and is directly related to the following settings: HDD Power Down, Suspend Mode (see next page). Min. Power Saving: Minimum power management. Suspend Mode = 1 hr., and HDD Power Down = 15 min. Max. Power Saving: Maximum power management -- Suspend Mode = 1 min., and HDD Power Down = 1 min. User Defined: Appendix B: BIOS Operation 44 ETX-CM User’s Guide Allows you to set Suspend Mode and HDD Power Down individually. Suspend Mode ranges from disabled to 1 hr., and HDD Power Down ranges from disabled to 15 min. ETX-CM User’s Guide 45 Appendix B: BIOS Operation • Video Off Method: This determines the manner in which the monitor is blanked. Blank Screen: This option only writes blanks to the video buffer. V/H SYNC+Blank: This selection will cause the system to turn off the vertical and horizontal synchronization ports and write blanks to the video buffer. DPMS: Initial display power management signaling. • Video Off In Suspend: This determines the manner in which the monitor is blanked. Options- Yes, No. • Suspend Type: Select the Suspend Type. Options- PWRON Suspend, Stop Grant. • Modem Use IRQ: This determines the IRQ, which can be applied in MODEM use. 3 (default)/ 4 / 5 / 7 / 9 / 10 / 11 / NA. • Suspend Mode: When enabled and a set time of system inactivity has elapsed, all devices except the CPU will be shut off (see Power Management on previous page). • HDD Power Down: When enabled and a set time of system inactivity has elapsed, the hard disk drive will be powered down while all other devices remain active (see Power Management on previous page). Options- Enabled, Disabled. • Soft-Off by PWR-BTTN: Configures the power button function: Instant-Off: The power button functions as a normal power-on/-off button. Delay 4 Sec: The system is turned off if the power button is pressed for more than four seconds. Appendix B: BIOS Operation 46 ETX-CM User’s Guide • PWRON After PWR-Fail: Allows you to set the the “Power On After Power Fail” function. Options- Former-Status, On, Off • CPU THRM-Throttling: Allows you to set the amount of CPU THRM-Throttling. Options- 87.5%, 75.0%, 62.5%, 50.0% (default), 37.5%, 25.0%, 12.5% • Power On by Ring: This field enables or disables powering on of the system through a modem connected to the serial port. Options- Enabled, Disabled. • Resume by Alarm: When “Enabled”, your can set the date and time at which the RTC (real-time clock) alarm awakens the system from Suspend mode. Options- Enabled, Disabled. • Date (or Month) Alarm: Select a date in the month when you want the alarm to go off. Set the time you want the alarm to go off • Time (hh:mm:ss) Alarm: Set the time you want the alarm to go off ETX-CM User’s Guide 47 Appendix B: BIOS Operation 12.9 PnP/PCI Configurations This section describes the configuration of the PCI bus system. PCI, or Personal Computer Interconnect, is a system which allows I/O devices to operate at speeds nearing the speed the CPU itself uses when communicating with its own special components. This section covers some very technical items and it is strongly recommended that only experienced users make any changes to the default settings. Phoenix - AwardBIOS CMOS Setup Utility PnP/PCI Configurations x x PNP OS Installed Reset Configuration Data [Yes] [Disabled] Item Help _________________________ Resources Controlled By IRQ Resources DMA Resources [Auto (ESCD)] Press Enter Press Enter Menu Level ¾ Select Yes if you are using a Plug and Play capable operating system Select No if you need the BIOS to configure non-boot devices ↑↓→←Move Enter: Select +/-/PU/PD: Value F10: Save ESC: Exit F1: General Help F5: Previous Values F6: Fail-safe defaults F7: Optimized Defaults • PNP OS Installed Enable the PNP OS Install option if it is supported by the operating system. • Reset Configuration Data: Normally, you leave this field Disabled. Select "Enabled" to reset the Extended System Configuration Data (ESCD) when you exit Setup and you have installed a new add-on and the system reconfiguration has caused such a serious conflict that the operating system cannot boot. Options- Enabled, Disabled. • Resources Controlled By: This item allows you to automatically configure all the boot- and Plug and Playcompatible devices. If you select Auto, all the interrupt request (IRQ) and DMA assignment fields are cleared, as the BIOS automatically assigns them. Appendix B: BIOS Operation 48 ETX-CM User’s Guide 12.10 PC Health Status Phoenix - AwardBIOS CMOS Setup Utility PC Health Status CPU Warning Temperature SYS Temperature CPU Temperature VCore VCCP +3.3 V +5 V 5VSB (V) Shutdown Temperature [Disabled] 24ºC / 75ºF 36ºC / 96ºF 0.92V 1.05V 3.39V 5.13V 4.96V [Disabled] Item Help ____________________________ Menu Level ¾ ↑↓→←Move Enter: Select +/-/PU/PD: Value F10: Save ESC: Exit F1: General Help F5: Previous Values F6: Fail-safe defaults F7: Optimized Defaults • CPU Warning Temperature: This field allows the user to set the temperature so that when the temperature is reached, the system sounds a warning. This function can help prevent damage to the system that is caused by overheating. Options: Disabled , 50°C/122°F, 53°C/127°F, 56°C/133°F, 60°C/140°F, 63°C/145°F, 66°C/151°F, and 70°C/158°F. • SYS/CPU Temperature: Shows the current System/CPU temperature. • VCore/VCCP/3.3V/+5V/12V/ 5VSB: Detect the system’s voltage status automatically. • Shutdown Temperature: This item allows you to set up the CPU shutdown Temperature. Options- Disabled, 60ºC / 140ºF, 65ºC / 149ºF, 70ºC / 150ºF and 75ºC / 167ºF. ETX-CM User’s Guide 49 Appendix B: BIOS Operation 12.11 Frequency/Voltage Control Phoenix - AwardBIOS CMOS Setup Utility Auto Detect PCI CLK Spread Spectrum Modulated Enabled Disabled Item Help ____________________________ Menu Level ¾ ↑↓→←Move Enter: Select +/-/PU/PD: Value F10: Save ESC: Exit F1: General Help F5: Previous Values F6: Fail-safe defaults F7: Optimized Defaults Frequency/Voltage Control • Auto Detect PCI CLK: When "Enabled", this item will auto detect if the PCI slot has any devices and will send the clock signal to the PCI devices. When disabled, it will send the clock signal to the PCI slot. Options- Enabled, Disabled. • Spread Spectrum Modulated: This item allows you to enable or disable the Spread Spectrum Modulated function. Options- Disabled, Enabled. 12.12 Load Fail-Safe Defaults When you press <Enter> on this item you get a confirmation dialog box with a message similar to: Load Fail-Safe Defaults (Y/N)? N Pressing 'Y' loads the BIOS default values for the most stable, minimalperformance system operation. 12.13 Load Optimized Defaults When you press <Enter> on this item you get a confirmation dialog box with a message similar to: Load Optimized Defaults (Y/N)? N Pressing 'Y' loads the default values which are the factory settings for optimalperformance system operation. Appendix B: BIOS Operation 50 ETX-CM User’s Guide 12.14 Supervisor/User Password Setting You can set either the supervisor or the user password, or both. The differences between them are: Supervisor: is allowed to enter Setup and change the options. User: is allowed to enter Setup but not to change the options. When you select either function, the following message will appear at the center of the screen to assist you in creating a password. ENTER PASSWORD: Type the new password, up to eight characters in length, and press <Enter>. The new password will clear any previously entered password from CMOS memory. You will be asked to confirm the password. Type the password again and press <Enter>. You may also press <Esc> to abort the change. To disable a password, just press <Enter> when you are prompted to enter the password. A message will confirm that password protection will be disabled. Once the password is disabled, the system will boot and you can enter Setup freely. PASSWORD DISABLED. When a password has been enabled, you will be prompted to enter it every time you try to enter Setup. This prevents an unauthorized person from changing any part of your system configuration. Additionally, when you have enabled a password, you can also require the BIOS to request the password every time your system is rebooted. This would prevent unauthorized use of your computer. You can determine when the password is requested in the BIOS Features Setup Menu and its Security option (see above). If the Security option is set to "System", a password will be required both at boot and on entry into Setup. If set to "Setup", a password is required only when trying to enter Setup. ETX-CM User’s Guide 51 Appendix B: BIOS Operation 12.15 Exit Selection • Save & Exit Setup Pressing <Enter> on this item asks for confirmation: Save to CMOS and EXIT (Y/N)? Y Pressing "Y" stores the selections you made in CMOS - a special section of memory that stays on after you turn your system off. The next time you boot your computer, the BIOS configures your system according to the Setup selections stored in CMOS. After saving the values, the system is restarted. • Exit Without Saving Pressing <Enter> on this item asks for confirmation: Quit without saving (Y/N)? Y This allows you to exit Setup without storing any changes in CMOS. The previous selections remain in effect. This exits the Setup utility and restarts your computer. Appendix B: BIOS Operation 52 ETX-CM User’s Guide 13. APPENDIX C: ETX CONNECTOR PINOUTS The pinouts for ETX Interface Connectors X1, X2, X3, and X4 are documented for convenient reference. Please see the ETX Specification and ETX Design Guide for detailed, design-level information. 13.1 Connector Locations X4 X2 X3 X1 top view (connectors only) side view (connectors only) ETX-CM User’s Guide 53 Appendix C: ETX Connector Pinouts 13.2 Connector X1 (PCI Bus, USB, Audio) Pin Signal Pin Signal Pin Signal Pin Signal 1 3 5 7 9 11 13 15 17 19 21 23 25 27 29 31 33 35 37 39 41 43 45 47 49 GND PCICLK3 GND PCICLK1 REQ3# GNT2# REQ2# REQ1# GNT0# VCC SERIRQ AD0 AD1 AD4 AD6 CBE0# AD8 GND AD10 AD11 AD12 AD13 AD14 AD15 CBE1# 2 4 6 8 10 12 14 16 18 20 22 24 26 28 30 32 34 36 38 40 42 44 46 48 50 GND PCICLK4 GND PCICLK2 GNT3# 3V GNT1# 3V RESERVED VCC REQ0# 3V AD2 AD3 AD5 AD7 AD9 GND AUXAL MIC AUXAR ASVCC SNDL ASGND SNDR 51 53 55 57 59 61 63 65 67 69 71 73 75 77 79 81 83 85 87 89 91 93 95 97 99 VCC * PAR GPERR# PME# LOCK# TRDY# IRDY# FRAME# GND AD16 AD17 AD19 AD20 AD22 AD23 AD24 VCC * AD25 AD28 AD27 AD30 PCIRST# INTC# INTA# GND 52 54 56 58 60 62 64 66 68 70 72 74 76 78 80 82 84 86 88 90 92 94 96 98 100 VCC * SERR# RESERVED USB2# DEVSEL# USB3# STOP# USB2 GND CBE2# USB3 AD18 USB0# AD21 USB1# CBE3# VCC * AD26 USB0 AD29 USB1 AD31 INTD# INTB# GND Notes: * To protect external power lines of peripheral devices, make sure that: • The wires have the right diameter to withstand the maximum available current • The enclosure of the peripheral device fulfils the fire-protection requirements of IEC/EN60950 Appendix C: ETX Connector Pinouts 54 ETX-CM User’s Guide 13.3 Connector X2 (ISA Bus) Pin Signal Pin Signal Pin Signal Pin Signal 1 3 5 7 9 11 13 15 17 19 21 23 25 27 29 31 33 35 37 39 41 43 45 47 49 GND SD14 SD13 SD12 SD11 SD10 SD9 SD8 MEMW# MEMR# LA17 LA18 LA19 LA20 LA21 LA22 LA23 GND SBHE# SA0 SA1 SA2 SA3 SA4 SA5 2 4 6 8 10 12 14 16 18 20 22 24 26 28 30 32 34 36 38 40 42 44 46 48 50 GND SD15 MASTER# DREQ7 DACK7# DREQ6 DACK6# DREQ5 DACK5# DREQ0 DACK0# IRQ14 IRQ15 IRQ12 IRQ11 IRQ10 IO16# GND M16# OSC BALE TC DACK2# IRQ3 IRQ4 51 53 55 57 59 61 63 65 67 69 71 73 75 77 79 81 83 85 87 89 91 93 95 97 99 VCC * SA6 SA7 SA8 SA9 SA10 SA11 SA12 GND SA13 SA14 SA15 SA16 SA18 SA19 IOCHRDY VCC * SD0 SD2 SD3 DREQ2 SD5 SD6 IOCHK# GND 52 54 56 58 60 62 64 66 68 70 72 74 76 78 80 82 84 86 88 90 92 94 96 98 100 VCC * IRQ5 IRQ6 IRQ7 SYSCLK REFSH# DREQ1 DACK1# GND DREQ3 DACK3# IOR# IOW# SA17 SMEMR# AEN VCC * SMEMW# SD1 NOWS# SD4 IRQ9 SD7 RSTDRV GND Notes: * To protect external power lines of peripheral devices, make sure that: • The wires have the right diameter to withstand the maximum available current • The enclosure of the peripheral device fulfils the fire-protection requirements of IEC/EN60950 ETX-CM User’s Guide 55 Appendix C: ETX Connector Pinouts 13.4 Connector X3 (VGA, LCD, Video, COM1 and COM2, LPT/Floppy, Mouse, Keyboard) Pin Signal Pin Signal 1 3 5 7 9 11 13 15 17 19 21 23 25 27 29 31 33 35 37 39 41 43 45 47 49 GND R HSY VSY DETECT# LCDDO16 LCDDO17 GND LCDDO13 LCDDO12 GND LCDDO8 LCDDO9 GND LCDDO4 LCDDO5 GND LCDDO1 LCDDO0 VCC * DCC_DAT DCC_CLK BIASON COMP SYNC 2 4 6 8 10 12 14 16 18 20 22 24 26 28 30 32 34 36 38 40 42 44 46 48 50 GND B G DDCK DDDA LCDDO18 LCDDO19 GND LCDDO15 LCDDO14 GND LCDDO11 LCDDO10 GND LCDDO7 LCDDO6 GND LCDDO3 LCDDO2 VCC * LTGIO0 BLON# DIGON Y C Notes: * To protect external power lines of peripheral devices, make sure that: • The wires have the right diameter to withstand the maximum available current • The enclosure of the peripheral device fulfils the fire-protection requirements of IEC/EN60950 Appendix C: ETX Connector Pinouts 56 ETX-CM User’s Guide 23. Parallel Port / Floppy Interfaces You can configure ETX parallel port interfaces as conventional PC parallel ports or as an interface for a floppy disk drive. You can select the operating mode in the BIOS settings or by a hardware mode select pin. If pin X3-51 (LPT/FLPY#) is grounded at boot time, the floppy support mode is selected. If the pin is left floating or is held high, parallel-port mode is selected. The mode selection is determined at boot time. It cannot be changed until the next boot cycle. Pin 51 53 55 57 59 61 63 65 67 69 71 73 75 77 79 81 83 85 87 89 91 93 95 97 99 Parallel Port Mode Pinout Signal Pin Signal LPT/FLPY# VCC * STB# RESERVED IRRX IRTX RXD2 GND RTS2# DTR2# DCD2# DSR2# CTS2# TXD2 RI2# VCC * RXD1 RTS1# DTR1# DCD1# DSR1# CTS1# TXD1 RI1# GND 52 54 56 58 60 62 64 66 68 70 72 74 76 78 80 82 84 86 88 90 92 94 96 98 100 Pin RESERVED GND AFD# PD7 ERR# PD6 INIT# GND PD5 SLIN# PD4 PD3 PD2 PD1 PD0 VCC * ACK# BUSY PE SLCT# MSCLK MSDAT KBCLK KBDAT GND 51 53 55 57 59 61 63 65 67 69 71 73 75 77 79 81 83 85 87 89 91 93 95 97 99 Floppy Support Mode Pinout Signal Pin Signal LPT/FLPY# VCC * RESERVED RESERVED IRRX IRTX RXD2 GND RTS2# DTR2# DCD2# DSR2# CTS2# TXD2 RI2# VCC * RXD1 RTS1# DTR1# DCD1# DSR1# CTS1# TXD1 RI1# GND 52 54 56 58 60 62 64 66 68 70 72 74 76 78 80 82 84 86 88 90 92 94 96 98 100 RESERVED GND DENSEL RESERVED HDSEL# RESERVED DIR# GND RESERVED STEP# DSKCHG# RDATA# WP# TRK0# INDEX# VCC * DRV MOT WDATA# WGATE# MSCLK MSDAT KBCLK KBDAT GND Notes: * To protect external power lines of peripheral devices, make sure that: • The wires have the right diameter to withstand the maximum available current • The enclosure of the peripheral device fulfils the fire-protection requirements of IEC/EN60950 ETX-CM User’s Guide 57 Appendix C: ETX Connector Pinouts 13.5 Connector X4 (IDE 1, IDE 2, Ethernet, Miscellaneous) Pin Signal Pin Signal Pin Signal Pin Signal 1 3 5 7 9 11 13 15 17 19 21 23 25 27 29 31 33 35 37 39 41 43 45 47 49 GND 5V_SB PS_ON PWRBTN# KBINH# RSMRST# ROMKBCS# EXT_PRG VCC * OVCR# EXTSMI# SMBCLK SIDE_CS3# SIDE_CS1# SIDE_A2 SIDE_A0 GND PDIAG_S SIDE_A1 SIDE_INTRQ BATLOW# SIDE_AK# SIDE_RDY SIDE_IOR# VCC * 2 4 6 8 10 12 14 16 18 20 22 24 26 28 30 32 34 36 38 40 42 44 46 48 50 GND PWGIN SPEAKER BATT LILED# ACTLED# SPEEDLED# I2CLK VCC * GPCS# I2DAT SMBDATA SMBALRT# DASP_S PIDE_CS3# PIDE_CS1# GND PIDE_A2 PIDE_A0 PIDE_A1 GPE1# PIDE_INTRQ PIDE_AK# PIDE_RDY VCC * 51 53 55 57 59 61 63 65 67 69 71 73 75 77 79 81 83 85 87 89 91 93 95 97 99 SIDE_IOW# SIDE_DRQ SIDE_D15 SIDE_D0 SIDE_D14 SIDE_D1 SIDE_D13 GND SIDE_D2 SIDE_D12 SIDE_D3 SIDE_D11 SIDE_D4 SIDE_D10 SIDE_D5 VCC * SIDE_D9 SIDE_D6 SIDE_D8 GPE2# RXD# RXD TXD# TXD GND 52 54 56 58 60 62 64 66 68 70 72 74 76 78 80 82 84 86 88 90 92 94 96 98 100 PIDE_IOR# PIDE_IOW# PIDE_DRQ PIDE_D15 PIDE_D0 PIDE_D14 PIDE_D1 GND PIDE_D13 PIDE_D2 PIDE_D12 PIDE_D3 PIDE_D11 PIDE_D4 PIDE_D10 VCC * PIDE_D5 PIDE_D9 PIDE_D6 CBLID_P PIDE_D8 SIDE_D7 PIDE_D7 HDRST# GND Notes: * To protect external power lines of peripheral devices, make sure that: • The wires have the right diameter to withstand the maximum available current • The enclosure of the peripheral device fulfils the fire-protection requirements of IEC/EN60950. 13.6 DVI Connector The DVI connector onboard the ETX-CM module is SMD type 20-pin 0.5mm pitch. Pin Signal Pin Signal 1 2 3 4 5 6 7 8 9 10 +5V +5V GND GND TDC0TDC0+ GND TDC1TDC1+ GND 11 12 13 14 15 16 17 18 19 20 TDC2TDC2+ GND TCL+ TCLGND I2C clock I2C data GND Hot Plug Detect Appendix C: ETX Connector Pinouts 58 ETX-CM User’s Guide 14. APPENDIX D: DOCUMENT-REVISION HISTORY Revision Date Edited by 1.0 1.01 1.10 1.11 1.12 06/02/2006 06/13/2006 07/20/2006 09/08/2006 12/27/2006 JC JC JC JC JC ETX-CM User’s Guide 59 Changes Initial Release Minor error correction BIOS chapter update, minor corrections Update website information Correct Serial Port information Appendix D: Document-Revision History


