1
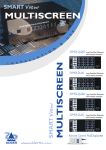
L-com
®
CONNECTIVITY
PRODUCTS
45 Beechwood Drive North Andover, MA 01845
V: 978.682.6936 F: 978.689.9484
[email protected] www.L-com.com
ISO 9002 Registered
Toll Free Ordering and Technical Support
800-341-5266
SmartView
MULTISCREEN
Installation and Use
Model
Description
SVMS4-Quad
4 port SmartView Multiscreen
with 4 monitor connections
SVMS4-Dual
4 port SmartView Multiscreen
with 2 monitor connections
SVMS2-Quad
2 port SmartView Multiscreen
with 4 monitor connections
SVMS2-Dual
2 port SmartView Multiscreen
with 2 monitor connections
RC1
Remote Control
Pad / Display
www.addertec.com
SmartView Multiscreen Intelligent CPU Switches
About this manual
SmartView Multiscreen - Installation and Use
First edition (August 2001)
Part No. ADD0040/1
(c) 2001 Adder Technology Ltd.
www.addertec.com
All rights reserved. Whilst every precaution has been taken in the preparation of this
manual, Adder Technology Ltd assumes no responsibility for errors or omissions.
Neither is any liability assumed for damages resulting from the use of the information
contained herein. We reserve the right to change the specifications, functions and
circuitry of the product without notice. All trademarks acknowledged.
Safety information
For use in dry, oil free indoor environments only.
Do not attempt to service the SmartView Multiscreen yourself.
Follow all warnings and instructions marked on the SmartView Multiscreen, its
optional power adapter and its accessories.
Warning - live parts contained within optional power adapter.
No user serviceable parts within optional power adapter - do not dismantle.
Replace the optional power adapter with a manufacturer approved type only.
If you use a power extension cord with the SmartView Multiscreen, make sure the
total ampere rating of the devices plugged into the extension cord does not
exceed the cord’s ampere rating. Also, make sure that the total ampere rating of
all the devices plugged into the wall outlet does not exceed the wall outlet’s
ampere rating.
SmartView Multiscreen
Installation and Use
Page 1
Warranty
Adder Technology Ltd warrants that this product shall be free from defects in
workmanship and materials for a period of one year from the date of original
purchase. If the product should fail to operate correctly in normal use during the
warranty period, Adder will replace or repair it free of charge. No liability can be
accepted for damage due to misuse or circumstances outside Adder’s control. Also
Adder will not be responsible for any loss, damage or injury arising directly or
indirectly from the use of this product. Adder’s total liability under the terms of this
warranty shall in all circumstances be limited to the replacement value of this
product.
If any difficulty is experienced in the installation or use of this product that you are
unable to resolve, please contact your supplier.
Trademarks
All trademarks mentioned in this manual are acknowledged to be the property of the
respective trademark owners.
Adder is a registered trademark of Adder Technology Limited.
Compaq is a registered trademark of Compaq Computer Corporation.
Hewlett-Packard is a registered trademark of Hewlett-Packard.
IBM, PC/AT, PS/2, RS/6000 and ThinkPad are registered trademarks of
International Business Machines Corporation.
Logitech, MouseMan+ and Pilot Mouse+ are trademarks of Logitech Inc.
Microsoft and Windows are registered trademarks, and IntelliMouse is a trademark
of Microsoft Corporation.
Velcro is a trademark of Velcro USA Inc.
SmartView Multiscreen
Installation and Use
Page 2
Radio Frequency Energy
Shielded cables must be used with this equipment to maintain compliance with radio
frequency energy emission regulations and ensure a suitably high level of immunity
to electromagnetic disturbances.
European EMC directive 89/336/EEC
This equipment has been tested and found to
comply with the limits for a class B computing
device in accordance with the specifications in
the European standard EN55022. These limits
are designed to provide reasonable protection
against harmful interference. This equipment
generates, uses and can radiate radio frequency
energy and if not installed and used in
accordance with the instructions may cause
harmful interference to radio or television
reception. However, there is no guarantee that
harmful interference will not occur in a particular
installation. If this equipment does cause
interference to radio or television reception,
which can be determined by turning the
equipment on and off, the user is encouraged to
correct the interference with one or more of the
following measures: (a) Reorient or relocate the
receiving antenna. (b) Increase the separation
between the equipment and the receiver. (c)
Connect the equipment to an outlet on a circuit
different from that to which the receiver is
connected. (d) Consult the supplier or an
experienced radio / TV technician for help.
FCC Compliance Statement (United States)
This equipment generates, uses and can radiate
radio frequency energy and if not installed and
used properly, that is, in strict accordance with
the manufacturer’s instructions, may cause
interference to radio communication. It has been
tested and found to comply with the limits for a
class A computing device in accordance with the
specifications in Subpart J of part 15 of FCC
rules, which are designed to provide reasonable
protection against such interference when the
equipment is operated in a commercial
environment. Operation of this equipment in a
residential area may cause interference, in
which case the user at his own expense will be
required to take whatever measures may be
necessary to correct the interference. Changes
or modifications not expressly approved by the
manufacturer could void the user’s authority to
operate the equipment.
Canadian Department of Communications
RFI statement
This equipment does not exceed the class A
limits for radio noise emissions from digital
apparatus set out in the radio interference
regulations of the Canadian Department of
Communications.
Le présent appareil numérique n’émet pas de
bruits radioélectriques dépassant les limites
applicables aux appareils numériques de la
classe A prescrites dans le règlement sur le
brouillage radioélectriques publié par le
ministère des Communications du Canada.
SmartView Multiscreen
Installation and Use
Page 3
Contents
1. Introduction .................................................................................... 6
1.1 Key features ........................................................................................... 6
1.2 Package contents .................................................................................. 8
1.3 Remote controller contents .................................................................... 8
1.4 Product information ............................................................................... 9
2. Installation ...................................................................................... 12
2.1 What you will need ................................................................................ 12
2.2 Mounting the SmartView Multiscreen .................................................... 13
2.3 Connecting your devices ....................................................................... 13
2.4 ‘Interface powered' operation without the optional power adapter ........ 14
2.5 Configuring your PCs ............................................................................ 14
2.6 Configuring the SmartView Multiscreen ................................................ 14
2.7 Summary of SmartView Multiscreen configuration options .................... 15
2.8 Resetting the SmartView Multiscreen without
disconnecting your devices .................................................................. 17
2.9 Other useful installation information ...................................................... 18
2.10 Re-enabling a disconnected PS/2 mouse ........................................... 18
2.11 Hot plugging the SmartView Multiscreen into running systems
and re-enabling disconnected PS/2 CPU mouse connections ............ 19
2.12 Upgrading the SmartView's flash memory .......................................... 20
SmartView Multiscreen
Installation and Use
Page 4
3. Using the SmartView Multiscreen ............................................... 23
3.1 Power on status ..................................................................................... 23
3.2 Front panel keys and remote controller.................................................. 23
3.3 Status display......................................................................................... 24
3.4 Switching operation................................................................................ 25
3.5 Keyboard hotkey control ........................................................................ 25
3.6 Mouse control......................................................................................... 26
3.7 RS232 control ........................................................................................ 27
3.8 Cascading SmartView Multiscreens ...................................................... 27
3.9 Synchronising SmartView Multiscreens for multiple video head
applications ........................................................................................... 29
4. SmartView Multiscreen configuration options ........................... 31
4.1 Screen saver time delay ........................................................................ 31
4.2 Autoscan lock on mode and delay time ................................................ 31
4.3 Mouse mode and mouse switching of channels .................................... 32
4.4 Keyboard hotkey combination ............................................................... 34
4.5 Cycling between all channels or just the active channels ..................... 34
4.6 Firmware functions (version query, mouse restore and reset) .............. 34
4.7 Setting a security password .................................................................. 35
4.8 Cascade query code ............................................................................. 36
4.9 Resolving slow mouse problems ........................................................... 36
4.10 Exit configure mode ............................................................................ 37
Appendices
A - Cable and connector specifications ................................................................ 38
B - Problem solving .............................................................................................. 43
SmartView Multiscreen
Installation and Use
Page 5
1. Introduction
Thank you for purchasing the SmartView Multiscreen. Your SmartView Multiscreen
is a high performance Keyboard, Video monitor and Mouse (KVM) sharing device
which supports a wide range of PC hardware and software platforms. The
Multiscreen is a new concept in KVM switches and enables you to benefit from all
the convenience of the proven SmartView switches whilst taking advantage of the
multiple monitor facilities available on many modern computers.
Computers fitted with multiple video cards are becoming more common as operating
systems have developed to make use of the extended video "real estate" offered by
multiple monitors. The increased display area enables more information to be
presented to the user without reducing the resolution. The Multiscreen enables
several computers equipped with these multiple video facilities to be controlled from
a keyboard, mouse and an array of monitors. All the monitors and the keyboard and
mouse are switched together from one computer to the next giving you full control of
the wider picture.
1.1 Key features
Control several multi-video enabled PCs with from a single keyboard, mouse and
a bank of monitors.
Dual and quad video head models available with two or four computer ports.
Two or more SmartViews may be synchronously switched by linking their options
ports.
Switch 4,8,12 or 16 monitors together by synchronising Multiscreens.
Excellent for banking, security and engineering applications.
Supports high bandwidth monitors at resolutions up to 1920 x 1440 with an
excellent video transfer characteristic - high bandwidth and low distortion.
Continuous keyboard and mouse emulation on all ports ensures problem free
computer bootup.
Interface powered operation – SmartView Multiscreen draws its power from the
connected computers for maximum convenience.
SmartView Multiscreen
Installation and Use
Page 6
Intelligent switching feature enables users to switch between all ports or just the
active ports.
Mixed AT/PS2 keyboards and PS2/RS232 mice supported as standard.
Flash upgradeable - SmartView Multiscreen's firmware may be upgraded by
connecting a computer's serial port and running a download program.
Can be cascaded to provide a video switching network.
Video channels support Display Data Channel (DDC/DDC1/DDC2) signalling.
Password security prevents unauthorised use.
User options stored in EEPROM memory.
Optional remote control module for convenient operation.
Channel switching by front panel key, keyboard hotkey, or 3 button mouse.
Automatically restores keyboard and mouse states when channel changed.
Supports keyboard modes 1,2 and 3 and mouse prompt and stream modes for
maximum compatibility.
Can be controlled remotely via an RS232 serial port.
Includes screen saver, auto-scan and variable hotkey options.
Supports Microsoft IntelliMouse, IntelliMouse Explorer and other common wheel
mice.
Mouse restoration functions to enable ‘hot plugging’ of certain systems.
Keyboard, mouse and SmartView Multiscreen resets may be performed without
disconnecting devices.
Supports IBM ThinkPad ‘Y’ cables.
Power and activity indication confirm correct operation.
Standard cable connections make installation easy and inexpensive.
All ports are active simultaneously – all PCs may all be booted at the same time.
Robust metal case ensures good shielding and video quality.
Supports desktop and laptop PCs, RS6000s, DEC Alphas, and Silicon Graphics
computers .
SmartView Multiscreen
Installation and Use
Page 7
Supports very wide range of software including Windows 3.X, WFWG, 95, 98,
2000, NT,ME, XP, DOS, Unix, Linux, NetWare, OS/2, BSD etc.
Supports the additional shortcut, web access and media control keys found on
extended keyboards.
May be connected to AdderView GEM products for synchronised switching
applications.
Optional power adapter can be used for ‘video only’ or cascade applications.
1.2 Package contents
SmartView Multiscreen.
This installation guide.
(Please note that a power adapter is NOT required for most applications and so is
not included. This may be purchased separately if required - part code
SVMSPSU).
1.3 Remote controller contents (part code: RC1)
Remote control module.
Velcro strip for mounting remote controller.
SmartView Multiscreen
Installation and Use
Page 8
1.4 Product information
Figure 1 - SmartView Multiscreen front view
Figure 2a - SmartView Multiscreen rear view (Model SVMS4-Quad)
SmartView Multiscreen
Installation and Use
Page 9
Figure 2b - SmartView Multiscreen rear view (Model SVMS4-Dual)
Figure 2c - SmartView Multiscreen rear view (Model SVMS2-Quad)
SmartView Multiscreen
Installation and Use
Page 10
Figure 2d - SmartView Multiscreen rear view (Model SVMS2-Dual)
Figure 3 - Remote control pad / display (optional accessory - part RC1)
SmartView Multiscreen
Installation and Use
Page 11
2. Installation
2.1 What you will need
Cables to connect the SmartView Multiscreen to each of your PC keyboard, video
and mouse ports. Cable specifications are given in appendix A. For convenience we
suggest that you connect your keyboard, mouse and first video port using an Adder
3-in-1 combination cable. Additional video ports may then be connected using videoonly cables.
Monitors with standard VGA/SVGA (15 pin) connectors that will work when
connected directly to each of your PCs. SmartView Multiscreen supports low and
high resolution monitors.
A standard AT or PS/2 style keyboard. If you are using an AT keyboard with a 5
pin connector you may connect this to the SmartView Multiscreen using a standard
AT to PS/2 keyboard adapter.
A PS/2 style two or three button Microsoft or Logitech compatible mouse or a
Microsoft IntelliMouse / IntelliMouse Explorer compatible mouse. If you wish to use
the mouse to switch the SmartView Multiscreen's channel then you will need a three
button mouse or an IntelliMouse.
(The
SmartView Multiscreen supports ‘Internet Mice’ that are compatible with the
Microsoft IntelliMouse. These are fitted with a wheel or other scroll control and
sometimes have additional buttons. Examples are: Microsoft IntelliMouse, Logitech
Pilot Mouse+, Logitech MouseMan+, Genius NetMouse and Genius NetMouse Pro.)
A suitable mouse driver for your PCs. Supported types are:
- PS/2 or RS232 two button mouse driver (any manufacturer).
- Microsoft mouse driver (including IntelliMouse).
- Logitech mouse driver (including two button, three button and wheel mouse).
Use of PS/2 and RS232 style mice with the SmartView Multiscreen - All of the
mouse connections from SmartView Multiscreen to PCs support either a PS/2 or an
RS232 mouse. SmartView Multiscreen automatically converts from the PS/2 mouse
commands to RS232 serial mouse commands. Serial mice types are selected by
using an adapter as described in Appendix A. The SmartView will operate without a
mouse connected if you do not wish to use one.
SmartView Multiscreen
Installation and Use
Page 12
2.2 Mounting the SmartView Multiscreen
The SmartView Multiscreen has been designed for use on a desktop or shelf in
close proximity to the user’s monitor and peripherals. The optional remote controller
may be used if you wish to locate the SmartView Multiscreen on a desk or shelf that
is some distance from the monitor and peripherals.
2.3 Connecting your devices
Ensure that the optional power adapter is disconnected from the SmartView
Multiscreen and that all the devices which are to be attached are switched off.
Connect the shared keyboard, PS/2 mouse and monitors to the connectors at the
rear of the SmartView Multiscreen (see figs 1, 2 and 3). Next, connect each
computer system unit in turn with the keyboard cable, mouse cable and video
cables. For the keyboard, mouse and first video port, Adder 3-in-1
keyboard/video/mouse cables are recommended for maximum convenience. Any
unused computer connections can be left unconnected. To connect computers with
serial mouse connections and AT style keyboard connections use the adapters
specified in appendix A. If you have an existing 6-pin mini-DIN to 9-pin serial adapter
that came with a mouse it may not be suitable for use with the SmartView as there
are several different standard wiring configurations for these adapters.
The SmartView Multiscreen is now ready for use and will start to operate as soon as
one of the attached PCs is powered on. If you are connecting to PCs using cables
that are longer than 5 metres or are cascading the SmartView Multiscreen to another
SmartView Multiscreen you will need to use the optional power adapter. When using
the optional power adapter, ensure that it is connected to the mains and powering
the SmartView Multiscreen before you switch on the connected computers. Failure
to switch the SmartView Multiscreen and computers on in the correct order can lead
SmartView Multiscreen
Installation and Use
Page 13
to the mouse and/or keyboard not being recognised by the computers when they are
switched on.
2.4 ‘Interface powered’ operation without the optional power
adapter
The SmartView Multiscreen draws its power from the connected computers via the
keyboard cables. A single keyboard connection is normally sufficient to power the
SmartView Multiscreen provided that the cable is no longer than 5 metres. If more
than one computer is connected then the power will be intelligently drawn from all
computers. Cables longer than 5 metres may be used provided that the SmartView
Multiscreen is already powered by another connected computer or the optional
power adapter. If you are cascading the SmartView Multiscreen to another
SmartView Multiscreen then a power adapter must be connected to all SmartView
Multiscreens.
2.5 Configuring your PCs
Configure your PC in the same way that you would if your keyboard, mouse and
monitor were all connected directly to your PC. SmartView Multiscreen emulates
Microsoft compatible serial, IntelliMouse, IntelliMouse Explorer and PS/2 mice, so
ensure that your PC software is configured for a Microsoft mouse of the correct type.
Refer to the list of supported drivers in section 2.1.
2.6 Configuring the SmartView Multiscreen
The SmartView Multiscreen is supplied pre-configured with factory defaults which
are suitable for most applications. There are a number of more advanced options
which can be set by the user. These are stored in the SmartView Multiscreen's
EEPROM memory and are retained when the power is disconnected.
The options may be changed whilst the SmartView Multiscreen is in configure mode.
You may enter configure mode at initial power on or whilst the SmartView
Multiscreen is running:
SmartView Multiscreen
Installation and Use
Page 14
To enter configure mode at power on:
Switch off all the attached PCs and the SmartView Multiscreen. Hold down the front
panel key whilst powering on the SmartView Multiscreen. Remember that the
SmartView Multiscreen draws its power from any attached PC via the keyboard
cable and so will power itself on when the attached PC is switched on or when the
optional power adapter is connected. Do not release the key until the SmartView
Multiscreen displays 'C' to show that it has entered configure mode.
To enter configure mode whilst the SmartView Multiscreen is running:
Hold down the front panel key for 5 seconds until the front panel display shows ‘C’.
In configure mode, options are entered by typing a letter followed by a number
followed by (return). Use ESC to abort the entry of an option. The SmartView
Multiscreen will remain in configure mode until you type 'E' (return).
For example: to set hotkey option 2 type the following at the 'C' prompt
H2f
(at SmartView Multiscreen 'C' prompt)
To exit configure mode type:
Ef
2.7 Summary of SmartView Multiscreen configuration options
Full details of each of the configuration options and their uses are given in section 4.
B1 - screen saver disabled (default)
B2 - Blank screen after 1 minute of inactivity
B3 - Blank screen after 2 minutes of inactivity
B4 - Blank screen after 4 minutes of inactivity
B5 - Blank screen after 8 minutes of inactivity
B6 - Blank screen after 12 minutes of inactivity
B7 - Blank screen after 16 minutes of inactivity
B8 - Blank screen after 20 minutes of inactivity
SmartView Multiscreen
Installation and Use
Page 15
L1 - SmartView Multiscreen locks on to active ports only during autoscanning
(default)
L2 - SmartView Multiscreen locks on to every port during autoscanning
L3 - SmartView Multiscreen powers on in autoscan mode and locks on to active
ports only
L4 - SmartView Multiscreen powers on in autoscan mode and locks on to all ports
L5 – Allow the mouse to run at any speed (default)
L6 – Don't allow the mouse to run at very slow speeds
L7 - Cascade query code = AD (default)
L8 - Cascade query code = EF
T1 - 2 seconds autoscan delay time before switching to next port (default)
T2 - 5 seconds autoscan delay time before switching to next port
T3 - 7 seconds autoscan delay time before switching to next port
T4 - 10 seconds autoscan delay time before switching to next port
T5 - 15 seconds autoscan delay time before switching to next port
T6 - 20 seconds autoscan delay time before switching to next port
T7 - 30 seconds autoscan delay time before switching to next port
T8 - 60 seconds autoscan delay time before switching to next port
U1 - SmartView Multiscreen channels are switchable using a 3 button mouse
or IntelliMouse (default)
(SmartView Multiscreen reports 2 button mouse mode to PCs)
U2 - SmartView Multiscreen channels are not switchable using 3 button mouse
or IntelliMouse
(SmartView Multiscreen reports 2 button mouse mode to PCs)
U3 - SmartView Multiscreen channels are not switchable using 3 button mouse
or IntelliMouse
(SmartView Multiscreen reports 3 button mouse mode to PCs)
U4 - SmartView Multiscreen channels are switchable using 3 button mouse
or IntelliMouse
(SmartView Multiscreen reports IntelliMouse mode to PCs)
U5 - SmartView Multiscreen channels are not switchable using 3 button mouse
or IntelliMouse
(SmartView Multiscreen reports IntelliMouse mode to PCs)
SmartView Multiscreen
Installation and Use
Page 16
U7 – Cycle between all ports when switching with ‘Hotkeys + Tab’ or three button
mouse (default)
U8 – Cycle between active ports only when switching with ‘Hotkeys + Tab’ or three
button mouse
H1 - Hotkey combination is CTRL + ALT + command key (default)
H2 - Hotkey combination is CTRL + SHIFT + command key
H3 - Hotkey combination is ALT + SHIFT + command key
H4 - Hotkey combination is RIGHT ALT + command key
H5 - Hotkey combination is LEFT ALT + RIGHT ALT + command key
H6 - Hotkey combination is LEFT CTRL + LEFT ALT + command key
H7 - Hotkey combination is RIGHT CTRL + RIGHT ALT + command key
H8 - No hotkey combination enabled
F1 - Display firmware first digit
(Note: F1 is F followed by 1 NOT l)
F2 - Display firmware second digit
F3 - Display firmware third digit
F5 - Restore PS/2 mouse function
F6 - Restore IntelliMouse function
F8 - RESET all configurations to default settings. (Display confirms with 'r').
P - Sets password - see section 4.6 for instructions.
E - Exits configure mode and returns the SmartView Multiscreen to normal operation
mode.
2.8 Resetting the SmartView Multiscreen without disconnecting
your devices
The SmartView Multiscreen draws its power from the connected computers and
therefore may only be fully powered down when all the connected computers have
been switched off or disconnected. However, the SmartView Multiscreen may be
reset without disconnecting or powering down your computers by using the reset
switch on the underside of the unit. Performing a reset using this switch performs a
complete hardware reset on the SmartView Multiscreen and is equivalent to
switching off the power. To perform a hardware reset, move option switch 8 to the
ON position (halt and reset) and then back to the OFF position (normal operation).
SmartView Multiscreen
Installation and Use
Page 17
2.9 Other useful installation information
PC boot up sequence - When your PCs are powered on they communicate with
any attached keyboards and mice and setup parameters required by the particular
operating system. It is necessary for the SmartView Multiscreen to be attached and
powered on during this sequence so that it can give the required responses and
keep track of all the modes and settings requested by each of the connected PCs.
Mouse characteristics - do not unplug a PS/2 mouse connection from a PC whilst
the PC is on. Due to the design of PS/2 mice communications the mouse function on
the PC will be lost and you will have to re-boot the PC to regain normal operation.
Unplugging the mouse from the SmartView Multiscreen will also cause it to stop
operating when it is plugged back in. RS232 mice can usually be unplugged and
plugged back in provided that a mouse was connected when the operating system
initially booted. The SmartView Multiscreen is fitted with a PS/2 mouse recovery
system which allows you to disconnect and re-connect the shared mouse without
powering down the system (although this is generally not advisable) - see section
2.10 for details.
Keyboard and mouse mode switching - The SmartView Multiscreen keeps a log
of the keyboard and mouse mode and resolution settings requested by each of the
connected PCs. These settings are automatically restored to the shared keyboard
and mouse when the SmartView Multiscreen channel is switched thus ensuring
maximum software compatibility. The keyboard num, caps and scroll lock states are
an obvious example of this process.
2.10 Re-enabling a disconnected PS/2 mouse
If you disconnect the shared PS/2 mouse from the SmartView Multiscreen by
accident during operation then the mouse operation will be lost when the mouse is
plugged back in. To avoid having to reboot the entire system in this situation the
SmartView Multiscreen is fitted with an automatic mouse recovery system.
With the PS/2 mouse disconnected, change the channel using the keypad or
keyboard hotkeys. The SmartView Multiscreen detects that the mouse has been
disconnected and triggers the automatic recovery system. Plug in the PS/2 mouse
and the SmartView Multiscreen will re-initialise it.
Alternatively you can reset the keyboards and mice by holding down the front panel
key for 5 seconds. When the character ‘C’ is displayed on the front of the SmartView
SmartView Multiscreen
Installation and Use
Page 18
Multiscreen, press the front panel key again. A complete power off reset of the
connected keyboards and mice will then be performed. This function only resets the
shared keyboard and mice that are plugged into the control port. It does not affect
the status of any of the other ports on the switch or the CPU connections.
2.11 Hot plugging the SmartView Multiscreen into running systems
and re-enabling disconnected CPU PS/2 mouse connections
It is advisable to switch off the systems that are going to be connected to the
SmartView Multiscreen before installation. However, if this is not possible then most
systems can be hot plugged by using the SmartView Multiscreen’s mouse
restoration functions. The keyboard connection will normally restore itself
automatically.
On many PCs, mouse movement will be lost if the PS/2 mouse is unplugged and
plugged back in whilst the PC is running. Mouse movement can then only be
restored by rebooting the PC. This is because the mouse drivers only setup and
enable the mouse when the PC is initially booted.
If you have switched off your SmartView Multiscreen or you are attempting to ‘hot
plug’ it into a system that is already running, you may be able to restore lost mouse
movement using the SmartView Multiscreen's mouse restoration functions.
Mouse restoration functions should be used with care as unpredictable results
may occur if the wrong mouse type is selected. If in doubt restore the mouse
by powering down the PC normally.
Standard PS/2 mouse data uses a different data format to IntelliMouse data and so
two reset functions are provided on the SmartView Multiscreen. The type of data
format expected by the PC depends upon the driver and the type of mouse that was
connected when the driver was booted. The following table may be used as a guide.
Note that the mouse reset functions predict the likely mouse resolution settings but
may not restore the speed or sensitivity of the mouse exactly as they were when the
PC originally booted.
SmartView Multiscreen
Installation and Use
Page 19
Type of mouse / system
Connected at bootup
Driver type Likely expected
data format
PS/2
PS/2
IntelliMouse / SmartView MS
IntelliMouse / SmartView MS
PS/2 only
IntelliMouse
PS/2 only
IntelliMouse
Suggested
restoration
PS/2
PS/2
PS/2
IntelliMouse
F5
F5
F5
F6
To restore lost mouse movement on a CPU connected to the SmartView
Multiscreen:
1) Select the CPU that has lost its mouse movement
2) Press the select key on the front of the SmartView Multiscreen for 5 seconds until
‘C’ is displayed. You are now in configure mode.
3) To restore a PS/2 mouse connection press
F 5 f
Or, to restore an IntelliMouse connection press
F 6 f
4) Exit from configure mode by typing
E f
5) Test the mouse movement by moving the mouse a short distance.
F5 - Restore PS/2 mouse function
F6 - Restore IntelliMouse function
2.12 Upgrading the SmartView's flash memory
The SmartView Multiscreen uses flash memory technology which enables the
firmware code to be upgraded by the user. Upgrades are performed by connecting a
PC's serial port to the SmartView's options port and running an upgrade program on
the PC. This upgrade program downloads the new firmware to the SmartView and
checks that the data has been programmed correctly.
SmartView Multiscreen
Installation and Use
Page 20
To perform a firmware upgrade on your SmartView Multiscreen you will need a
suitable serial upgrade cable and an IBM PC compatible computer with an RS232
serial port and an operating system that supports DOS. Upgrade cables may be
purchased for Adder Technology or may be made using the wiring specification
given in Appendix A4. You will also need to download the latest version of the
SmartView Multiscreen firmware which is available free of charge at
www.addertec.com.
To perform a flash upgrade on the SmartView Multiscreen:
Step 1 - Connect your computer to the SmartView
Connect your computer's serial port to the SmartView Multiscreen's options port
(labelled OPTIONS/FLASH).
Step 2 - Select flash upgrade mode using option switch 7
Move option switch 7 on the underside of the SmartView Multiscreen to the ON
position.
Step 3 - Reset the SmartView Multiscreen
Reset the SmartView Multiscreen by moving option switch 8 to the ON position (halt
and reset) and then back to the OFF position (normal operation). Alternatively you
may reset the SmartView by powering off all the attached computers and removing
the optional power adapter.
Step 4 - Ensure that the SmartView is powered on
Ensure that the SmartView is powered on. It is normally possible to upgrade the
SmartView when it is powered from a single computer, however it is good practice to
ensure that there is the maximum possible power availability during flash upgrades
and so if possible ensure that all the computers are powered on. The upgrade
program monitors the SmartView's voltage and will not allow an upgrade to be
performed if the voltage is insufficient.
The display should now show:
SmartView Multiscreen
Installation and Use
Page 21
Step 5 - Run the upgrade program
The latest version of the SmartView Multiscreen firmware is available from the Adder
Technology website at www.addertec.com. The SmartView Multiscreen uses the
same firmware as the AdderView GEM product. The program and data files are
supplied as a pair e.g.
AVG129.EXE
AVG129.HEX
and should be downloaded to the same directory on your PC. Run the file
AVGxxx.EXE (e.g. AVG129.EXE) and follow the on-screen instructions. During the
upgrade the display will show an upper case U and the dot will flash to show that the
upgrade is in progress.
The display will again show a lower case U when the download is complete. Move
option switch 7 to the OFF position to exit upgrade mode and start normal operation.
You may check the new firmware version by entering configure mode and using the
firmware version query function.
Some useful issues to bear in mind when performing flash upgrades
The upgrade program rewrites the SmartView's firmware code. If the upgrade
process is interrupted then the SmartView will have invalid code and will not be able
to operate. It is therefore good practice to ensure that the upgrade process is always
fully completed. A partial or failed upgrade may be rectified by performing another
upgrade. If the upgrade process is interrupted accidentally then you should
immediately repeat the upgrade process without moving switch 7 from the flash
upgrade (ON) position. Switch 7 forces the SmartView into flash upgrade mode and
prevents the upgraded code from being run. Running faulty or partially upgraded
code may have unpredictable results and may damage your SmartView or
computing equipment. For obvious reasons, the code that the SmartView uses to
perform upgrades is not itself upgradeable - a common problem on some flash
upgradeable products that could effectively be destroyed by a partial upgrade!
WARNING - Running faulty or partially upgraded code may have unpredictable
results and may damage your SmartView or computing equipment.
SmartView Multiscreen
Installation and Use
Page 22
3. Using the SmartView Multiscreen
This section explains the general operation of the SmartView Multiscreen. We
recommend that you read this section before starting to use the product.
3.1 Power on status
At power on the SmartView Multiscreen selects computer 1 and displays '1'. If a
password has been set then ‘P’ will be displayed and the SmartView Multiscreen will
remain locked until a valid password is entered.
3.2 Front panel key and remote controller
The front panel key is used to select which channel is currently controlled by the
shared keyboard, mouse and monitor ports. Pressing the key during normal
operation will cause the next channel to be selected.
The key can also be used to access the SmartView Multiscreen’s configuration
mode (see section 2.6). To do this press the key and hold it down for 5 seconds until
‘C’ appears on the SmartView Multiscreen’s front panel display.
An optional remote controller is also available which replicates the front panel key
and display, but can be located remotely from the SmartView Multiscreen. This is
SmartView Multiscreen
Installation and Use
Page 23
particularly useful in applications where the SmartView Multiscreen is located away
from the desktop. The remote controller can be conveniently attached to your
keyboard with a couple of Velcro strips to give instant channel information and key
control.
3.3 Status display
The status display usually shows the currently selected port. If autoscan mode is
selected, the segments will illuminate in sequence in a clockwise direction
interspersed with a display of the currently selected channel. If SmartView
Multiscreen has been locked, ‘P’ will be displayed until a valid password has been
typed to unlock the unit. Data flow from the mouse or keyboard causes the dot to
flash.
SmartView Multiscreen
Installation and Use
Page 24
3.4 Switching operation
When you select a port, your keyboard and mouse will control the computer that is
connected to that port and the video feeds from that that computer will be displayed
on the monitors. For example, if you select channel 2 then the video signal arriving
at port 2A will be sent to the monitor that is attached to port A. Video arriving at ports
2B, 2C and 2D will be displayed on the monitors attached to ports B, C and D
respectively.
3.5 Keyboard hotkey control
SmartView Multiscreen can be conveniently controlled by selecting channel,
autoscan mode or security locking from the keyboard. All of the hotkey control
commands are invoked by holding down the two hotkeys and then pressing a
command key. By default, the two hotkeys are ‘CTRL’ and ‘ALT’, although other
combinations can be selected by reconfiguring the hotkeys (see section 4.4). Once
the hotkey command has been activated you will need to release the hotkeys and
the command key before a new hotkey command is accepted by the SmartView
Multiscreen. HOTKEYs + TAB is an exception and this allows you to 'tab through'
the ports by holding down the hotkeys and repeatedly pressing TAB.
The hotkey command are summarised below (note that the numbers on the numeric
keypad do not form part of a valid hotkey) :
‘HOTKEYs’ and ‘1’ - selects channel 1
‘HOTKEYs’ and ‘2’ - selects channel 2
‘HOTKEYs’ and ‘3’ - selects channel 3
‘HOTKEYs’ and ‘4’ - selects channel 4
‘HOTKEYs’ and ‘TAB’ - selects the next channel
‘HOTKEYs’ and ‘A’ - selects autoscan mode where each channel is displayed for
the selected time (see section 4.2). To cancel autoscan mode simply select any
fixed channel either by hotkey or using the SmartView Multiscreen button.
‘HOTKEYs’ and ‘0’ – switches off the video signal and displays 0. This will cause
some monitors to go into standby mode or switch off. The video signal can be reenabled by selecting a channel.
‘HOTKEYs’ and ‘L’ - disables the SmartView Multiscreen's keyboard and mouse
SmartView Multiscreen
Installation and Use
Page 25
and displays 0. The video signal is switched off. If a password has not been set then
the SmartView Multiscreen can be re-enabled by selecting a channel. If a password
has been set then the SmartView Multiscreen displays 'P' to indicate that a valid
password must be entered to unlock the switch. Simply type the same key
combination as was set during configuration (see section 4.7) followed by the
(return) key. Note - if anyone has typed at the keyboard whilst in secure mode, it will
be necessary to type (return) first to clear the invalid password, then type the valid
password followed by (return) again.
Examples of common hotkey sequences (assuming CTRL + ALT hotkey option):
To select channel 2:
press
ba2
release
2ba
To 'tab through' channels:
press
ba v release v press v
release
v press v release vba
3.6 Mouse control
Computers may conveniently be selected using a three button mouse. In order to
switch to the next computer simply hold down the central mouse button (the wheel
mouse button on an IntelliMouse) and click on the left hand mouse button to select
the next computer or the right hand mouse button to select the previous computer. If
the SmartView has been set to scan active ports then the next or previous active
channel will be selected. If it has been set to scan all ports then the next or previous
numerical channel in sequence will be selected (see section 4.5 for more details).
Mouse switching may be enabled or disabled by setting options during configuration
(see section 4.3). When mouse switching is disabled the third button or wheel button
state is ‘passed through’ the SmartView and seen by the application software.
SmartView Multiscreen
Installation and Use
Page 26
Hold down centre button (
)
Press and release left hand button
Hold down centre button (
)
Press and release right hand button
(
(
) to select next computer
) to select previous computer
3.7 RS232 control
SmartView Multiscreen can be controlled by a remote RS232 device. To select a
channel the data rate of the sending device must be set to 1200 baud, 8 bits, no
parity and 1 stop bit. No handshaking is used by the SmartView Multiscreen. Simply
send the character for the channel which needs to be selected, for example ASCII
‘1’ (hex code 31) will select channel 1, ASCII ‘2’ (hex code 32) will select channel 2
and so on. The SmartView will echo the ASCII character back to the sending device
when the channel has been changed. The serial interface pins are found on the
options connector on the rear of the SmartView. Pin assignments for this connector
are given in appendix A.
3.8 Cascading SmartView Multiscreens
SmartView Multiscreen switches can be connected together to expand the number
of connected computers. When cascading SmartView Multiscreens a power adapter
(SVMSPSU) must be connected to each SmartView Multiscreen. SmartView
Multiscreens can be connected in a cascaded tree structure. This can be particularly
useful where clusters of computers are located some distance from each other
because each unit acts as data booster and can each be up to 30 metres away from
the next SmartView Multiscreen. The channel can be selected on remote SmartView
Multiscreen units using an extension of the HOTKEY control .
SmartView Multiscreen
Installation and Use
Page 27
A typical cascade of two SmartView Multiscreens
For example, consider a situation where two SmartView Multiscreen units are
connected together as shown above. To connect to the computer attached to port 3
on SmartView Multiscreen B the user would hold down the hotkey keys then press
‘2’ followed by ‘3’, whilst keeping the hotkey keys pressed. This will have the effect
of connecting to port ‘3’ of the SmartView Multiscreen which is connected into port
SmartView Multiscreen
Installation and Use
Page 28
‘2’ of the first SmartView Multiscreen unit A.
For example to connect to port 3 on the SmartView Multiscreen cascaded off port 2
of your first SmartView Multiscreen use:
press
ba2release 2
press
3release 3ba
3.9 Synchronising SmartView Multiscreens for applications that
require synchronised switching of more than four monitors
A single SmartView Multiscreen supports up to four monitors. For applications that
require switching of more than four monitors, multiple SmartViews may be
connected together so that they operate in a synchronised manner. Whenever the
SmartView's channel is switched it sends an RS232 command out on its serial
interface. The SmartView switches its channel if it receives the same command on
its serial interface. Consequently, by linking the serial interfaces a master unit may
be made to automatically switch a daisy chain of slaved units as shown in the
diagram below. The slave units will require the optional power adapters because
they cannot draw their power from the video link alone.
The SmartView Multiscreen may also be synchronised together with AdderView
GEM products as their OPTIONS ports operate in the same way.
SmartView Multiscreen
Installation and Use
Page 29
Synchronised SmartView Multiscreens used to
switch eight video channels together
SmartView Multiscreen
Installation and Use
Page 30
4. SmartView Multiscreen configuration
options
All the options described in this section are entered in SmartView Multiscreen
configure mode - see section 2.6 for instructions on entering configure mode.
4.1 Screen saver time delay
SmartView Multiscreen contains a programmable screen saver which will blank the
display after the set time delay with no keyboard or mouse activity. Simply typing at
the keyboard or moving the mouse will re-enable the display. The SmartView's 7segment display will flash whilst the SmartView Multiscreen is in screen save mode.
B1 - screen saver disabled (default)
B2 - Blank screen after 1 minute of inactivity
B3 - Blank screen after 2 minutes of inactivity
B4 - Blank screen after 4 minutes of inactivity
B5 - Blank screen after 8 minutes of inactivity
B6 - Blank screen after 12 minutes of inactivity
B7 - Blank screen after 16 minutes of inactivity
B8 - Blank screen after 20 minutes of inactivity
4.2 Autoscan ‘lock on’ mode and delay time
SmartView Multiscreen can be set to select each channel in turn for a period of time
set by the autoscan delay time. Autoscan mode is entered by typing the hotkey keys
together with ‘A’. By default, only those channels which have a powered up
computer connected to them will be scanned. Sometimes it may be desirable to
scan all channels, even if the attached computer is switched off (this will simply
show a blank screen when it is selected). All the SmartView Multiscreen’s ports will
be scanned if option L2 is selected. Some applications may also require the
SmartView Multiscreen to power on in autoscan mode. This feature can be selected
using the L3 or L4 options.
SmartView Multiscreen
Installation and Use
Page 31
L1 - SmartView Multiscreen only locks on to active ports during autoscanning
(default)
L2 - SmartView Multiscreen locks on to every port in turn during autoscanning
L3 - SmartView Multiscreen powers on in autoscan mode and locks on to active
ports only
L4 - SmartView Multiscreen powers on in autoscan mode and locks on to all ports
T1 - 2 seconds autoscan delay time before switching to next port (default)
T2 - 5 seconds autoscan delay time before switching to next port
T3 - 7 seconds autoscan delay time before switching to next port
T4 - 10 seconds autoscan delay time before switching to next port
T5 - 15 seconds autoscan delay time before switching to next port
T6 - 20 seconds autoscan delay time before switching to next port
T7 - 30 seconds autoscan delay time before switching to next port
T8 - 60 seconds autoscan delay time before switching to next port
Note: Autoscan mode is ended simply by selecting a fixed channel using the
keypad, the keyboard hotkeys or the mouse.
WARNING - Many modern monitors are fitted with automatic power save relays
and will switch off after a few seconds if connected to an inactive PC. If you
are using such a monitor you must not use the L2 feature. Constant switching
on and off of your monitor's relay will eventually damage your monitor.
4.3 Mouse mode and mouse switching of channels
A three button PS/2 mouse or an IntelliMouse can be used to switch channels on the
SmartView Multiscreen. To switch to the next channel, the user simply holds down
the central button or wheel button and presses the left or right hand button to
change the channel (see section 3.6). If the user does not wish to take advantage of
this feature, it can be disabled by selecting U2, U3 or U5. If the third button is being
used to switch the SmartView Multiscreen then it is not available for use with PC
software although the function of an IntelliMouse wheel is not affected.
Consequently in modes U1, U2 and U4 the SmartView Multiscreen reports to the
PCs that a 2 button mouse is connected. If you wish to use the full function of a 3
button mouse or IntelliMouse for your PC software then you should select options
U3 or U5.
SmartView Multiscreen
Installation and Use
Page 32
The SmartView Multiscreen supports ‘Internet Mice’ that are compatible with the
Microsoft IntelliMouse. These are fitted with a wheel or other scroll control and
sometimes have additional buttons.
Examples are:
Microsoft IntelliMouse
Logitech Pilot Mouse +
Logitech MouseMan+
Genius NetMouse
Genius NetMouse Pro
Standard PS/2 and IntelliMouse compatible mice can be connected to the control
port. You may configure your CPUs using Microsoft PS/2 or IntelliMouse drivers in
any combination as required. The IntelliMouse features are supported on both PS/2
and RS232 CPU connections. When using PS/2 CPU connections, the SmartView
Multiscreen will automatically configure itself to the type of mouse requested by the
driver. If you are using RS232 CPU connections then you will need to select mouse
options U4 or U5 to enable the IntelliMouse features.
U1 - SmartView Multiscreen channels are switchable using a 3 button mouse
or IntelliMouse (default)
(SmartView Multiscreen reports 2 button mouse mode to PCs)
U2 - SmartView Multiscreen channels are not switchable using 3 button mouse
or IntelliMouse
(SmartView Multiscreen reports 2 button mouse mode to PCs)
U3 - SmartView Multiscreen channels are not switchable using 3 button mouse
or IntelliMouse
(SmartView Multiscreen reports 3 button mouse mode to PCs)
U4 - SmartView Multiscreen channels are switchable using 3 button mouse
or IntelliMouse
(SmartView Multiscreen reports IntelliMouse mode to PCs)
U5 - SmartView Multiscreen channels are not switchable using 3 button mouse
or IntelliMouse
(SmartView Multiscreen reports IntelliMouse mode to PCs)
SmartView Multiscreen
Installation and Use
Page 33
4.4 Keyboard hotkey combination
The keyboard hotkey combination is used to change a channel, set autoscan mode
or secure the product (so that the password needs to be typed before it can be used
again). The following keyboard hotkey combinations can be selected. These hotkey
combinations are used together with the command keys to trigger the required
SmartView Multiscreen function. The left and right alt key combination is particularly
suitable for extended keyboards where additional keys can be programmed to act as
a combination of other keys. Such keyboards are supplied with some Gateway 2000
computers. Programming spare keys to trigger the hotkey combination allows
channels to be selected via a single key stroke.
H1 - 'CTRL' and 'ALT' keys together (left or right hand keys operate) (default)
H2 - 'CTRL' and 'SHIFT' keys together (left or right hand keys operate)
H3 - 'ALT' and 'SHIFT' keys together (left and right hand keys operate)
H4 - 'RIGHT ALT' key
H5 - 'LEFT ALT' and 'RIGHT ALT' keys together
H6 - ‘LEFT CTRL’ and ‘LEFT ALT’ keys together
H7 - ‘RIGHT CTRL’ and ‘RIGHT ALT’ keys together
H8 - No hotkey enabled
4.5 Cycling between all channels or just the active channels
The SmartView Multiscreen can be set to cycle between all channels or just the
active channels when using ‘Hotkeys + Tab’ or a three button mouse to switch the
channel. This avoids wasting time viewing channels that are not active. Option are:
U7 – Cycle between all ports when switching with ‘Hotkeys + Tab’ or three button
mouse (default)
U8 – Cycle between active ports only when switching with ‘Hotkeys + Tab’ or three
button mouse
4.6 Firmware functions (version query, mouse restore and reset)
For technical support purposes, it may be necessary to find the firmware release
version for the control software in your SmartView Multiscreen. For example, if the
release version is v1.29 the response shown to F1f
F1f will be a brief display of
the digit ‘1’, then F2f
F2f will be a brief display of the digit ‘2’, then F3f
F3f will
be a brief display of the digit ‘9’. You can reset all of the configured options back to
SmartView Multiscreen
Installation and Use
Page 34
the factory default states by typing F8f
F8f. Use options F5f
F5f and
F6f
F6f to restore mouse function on disconnected PS/2 CPU mouse
connections.
F1 - Display firmware first digit (Note: F1 is F followed by 1 NOT l)
F2 - Display firmware second digit
F3 - Display firmware third digit
F5 - Restore PS/2 mouse function to the currently selected CPU’s mouse port
F6 - Restore IntelliMouse function to the currently selected CPU’s mouse port
F8 - Reset all configurations to factory default settings. An ‘r’ will show briefly on the
display to confirm that the reset has been completed.
4.7 Setting a security password
There are many situations where unrestricted access to corporate file servers or
sensitive information needs to be controlled. In such circumstances, the SmartView
Multiscreen can be locked away in a room or secure cabinet and controlled
remotely. In this mode typing the keyboard hotkeys together with 'L' will blank the
screen, disconnect the keyboard and mouse from all of the computers and display
‘P’ on the SmartView Multiscreen display. Control can only be regained by typing the
correct password on the keyboard.
To set the password in configure mode, first type ‘P’ then (return). The display on
SmartView Multiscreen will change to show ‘=' and you can then type your
password. The password is not case sensitive and can be any combination of key
strokes, including the function keys, but excluding the (ctrl), (alt), (shift) and (return)
keys. When you have typed in your password type (return) to register it in the stored
memory. Do not worry if you type the password incorrectly, you can always re-enter
configure mode and set the password again. If you have lost the password and the
SmartView Multiscreen is locked, the unit may be unlocked by powering down the
SmartView Multiscreen, entering configure mode at power on (see section 2.6), and
performing a complete reset using the F8 function.
NOTE - The password consists of a combination of key strokes rather like the code
to a safe. The key strokes are not case sensitive and can include all the keys on the
keyboard (except ctrl, alt, shift and enter). Consequently the following 'password'
would be valid:
oFRED g
SmartView Multiscreen
Installation and Use
Page 35
4.8 Cascade query code
The SmartView Multiscreens use a special ‘query code’ to detect whether or not they
are connected to another SmartView Multiscreen. By default your SmartView
Multiscreen uses query code AD. SmartView Pro (another range of keyboard /
mouse / video switches from Adder Technology) units with firmware versions less
than 1.09 used query code EF. This was found to conflict with a small number of
other (rare) devices that used the same query code so an alternative query code
was provided to ensure compatibility. Either query code may be used but you should
make sure that all cascaded SmartView Multiscreen and SmartView Pro units are
set to use the same query code. If any of the cascaded SmartView Pros have
firmware versions less than 1.09 then the cascade query code for all the SmartView
Multiscreens and SmartViews should be set to EF.
L7 – Cascade query code = AD (default)
L8 – Cascade query code = EF
4.9 Resolving slow mouse problems
Due to certain technical reasons some systems running particular combinations of
operating system and mouse drivers are sensitive to small timing changes relating to
mouse communications. The introduction of a switch like the SmartView inevitably
causes some timing changes and in rare cases interactions have been observed
that causes the mouse to run very slowly. Certain HP Vectra computers running
later versions of Windows NT with Logitech mouse drivers and Logitech mice have
been observed to exhibit such interactions with older switches. One solution to this
problem is to change the mouse driver.
The SmartView Multiscreen is a high performance device that is carefully
engineered to minimise such interactions and should not exhibit this characteristic.
Nevertheless such interactions are unpredictable and so the SmartView is fitted with
a feature that ensures that the mouse can never operate at a very slow rate
regardless of such interactions. This feature is activated using the following options:
L5 – Allow the mouse to run at any speed (default)
L6 – Don't allow the mouse to run at very slow speeds
SmartView Multiscreen
Installation and Use
Page 36
4.10 Exit configure mode
When you have finished configuring any special options, simply type ‘E’ followed by
(return) to exit configure mode and return to normal operation mode. The attached
computers can now be switched on.
SmartView Multiscreen
Installation and Use
Page 37
Appendix A. Cable and connector
specifications
IMPORTANT NOTE
The maximum cable lengths supported vary widely between devices and
cables. It may be possible to use cables that are longer than those specified
below with certain PCs and peripherals but this cannot be guaranteed. If you
experience problems try using shorter cables.
A1. Keyboard, monitor and mouse to SmartView Multiscreen
All of the shared devices plug directly into the relevant ports at the rear of the
SmartView Multiscreen. If you use an AT style keyboard you will need an AT (5 pin
DIN female) to PS/2 (6 pin mini-DIN male) converter.
Cable specification (self-powered operation):
Keyboard, monitor and mouse cables should be no longer than 2 metres.
Cable specification (with optional power adapter):
Keyboard, monitor and mouse extension cables can be used to increase the
distance from SmartView Multiscreen up to 10m. Most keyboards and mice will also
operate at distances of 20 metres.
A2. SmartView Multiscreen to PCs 1 to 4
Cable specifications:
Video - 15 pin high density male D connector to 15 pin high density male D
connector wired as a standard VGA PC to monitor cable. There are two types
commonly available. The best type cables which will give excellent quality are
constructed with coaxial cable cores. Cheaper ‘data’ cables are often used, but can
degrade video quality if used over longer distances. Avoid using 'data' cables longer
than 2 metres unless the video quality is not important. Good quality coaxial video
cables may be run at distances up to 30 metres with little loss of video quality. If you
SmartView Multiscreen
Installation and Use
Page 38
wish to make use of the DDC (Display Data Channel) capabilities of the SmartView
Multiscreen then you will need to use cables that have the DDC signalling lines
connected (pins 12 and 15 on the 15-way video connector). Not all video cables
have these DDC lines connected.
Keyboard and PS/2 mice - 6 pin mini-DIN male connector to 6 pin mini-DIN male
connector with all lines connected straight through (1-1,2-2 etc.). If the PC has a 5pin DIN AT style keyboard connector you will need a PS/2 to AT keyboard adapter
6-pin mini-DIN female to 5-pin DIN male (readily available). For ‘interface powered’
operation without the optional power adapter the cables should be no longer than 5
metres (see section 2.4 for more details). For operation with the power adapter,
cables should be no longer than 30 metres.
RS232 serial mice - these require a special converter to connect the RS232 lines
present on the SmartView Multiscreen mouse ports to the RS232 port on a PC.
Cables should be no longer than 30 metres.
NOTE - There are several common wiring specifications for 6-pin mini-DIN to
9-pin serial adapters. If you have an adapter that has been supplied with a
mouse it may have a completely different internal wiring to that shown above
and may not be compatible with the SmartView
SmartView Multiscreen
Installation and Use
Page 39
Recommended cables:
3-in-1 keyboard, video and mouse combination cable - For convenience,
neatness and high video quality we recommend the Adder brand 3-in-1 combination
cables for the keyboard, mouse and first video head connections. These cables are
constructed with tri-coax video links to ensure that high video quality is maintained.
They also support DDC signalling and are colour coded in PC99 specification
colours for your convenience. These match the colours used on the back of your
SmartView Multiscreen and most modern PCs. These cables are available in various
different lengths to suit your requirements. They may be purchased with or without
the adapters for AT keyboards and RS232 serial mice. Please quote the following
part codes when ordering from your supplier.
Part code
VKVM-2M
VKVM-2M-AT
VKVM-5M
VKVM-5M-AT
VKVM-10M
VKVM-10M-AT
Description
3-in-1 Adder cable
3-in-1 Adder cable, with AT and serial adapters
3-in-1 Adder cable
3-in-1 Adder cable, with AT and serial adapters
3-in-1 Adder cable *
3-in-1 Adder cable, with AT and serial adapters *
Length
2 metres
2 metres
5 metres
5 metres
10 metres
10 metres
* The optional power adapter may be required (see section 2.4).
SmartView Multiscreen
Installation and Use
Page 40
A3. Options port pin assignments
The 15 way D connector located on the back of the SmartView Multiscreen (labelled
OPTIONS / FLASH) provides connections for the remote control module and allows
an external RS232 device to control the SmartView Multiscreen. See section 3.7 for
more details.
Pin 9 = GND
Pin 10 = TXD
Pin 11 = RXD
Other pins to be left unconnected
A.4 Flash upgrade cable connection
The cable connections shown below are to connect either COM1 or COM2 of a PC
to the SmartView Multiscreen to allow flash upgrades.
SmartView Multiscreen
Installation and Use
Page 41
A.5 RS232 synchronisation cable pin assignments
The cable connections shown below are to connect two SmartView Multiscreens
together for synchronised operation (see section 3.9)
SmartView Multiscreen
Installation and Use
Page 42
Appendix B.
Problem Solving
Problem:
Poor video quality with smearing fuzziness or ripple.
Action:
Use screened coaxial video cables to connect your devices to the SmartView Multiscreen.
Problem:
Mouse does not move cursor on screen.
Action:
Ensure that the mouse and computer are both connected to SmartView Multiscreen before power is
connected and ensure that the SmartView Multiscreen is powered on before the attached computer.
Ensure that your software is configured to accept a Microsoft compatible mouse of the type that you
have connected (PS/2 or RS232). If you move the mouse and the activity indicator (dot on 7 segment
display) does not flash then the SmartView Multiscreen is not receiving data from the mouse. Check
the mouse connection to the SmartView Multiscreen, try resetting the mouse using the reset function
(section 2.10) or re-powering the SmartView Multiscreen. If you are attempting to connect the
SmartView Multiscreen to a CPU with a PS/2 mouse connection that has not been powered down then
you will need to use the mouse restoration functions F5 or F6 (see section 2.11).
Problem:
Keyboard does not function or functions intermittently. Num lock light does not always come on when
the num lock key is pressed.
Action:
Some older keyboards were designed for use with specific computers and are not truly AT or PS/2
compatible. These are not common but if you experience problems try another keyboard.
Problem:
Mouse causes channel to change.
Action:
Some cheaper mice are not fully compatible with the SmartView Multiscreen and can lose data
causing the channel to be changed (if mouse switching of channels is enabled). If you experience this
problem then change the mouse and use a Microsoft, Logitech, IBM, Compaq or Hewlett-Packard
type. Ensure that you are using a Microsoft compatible mouse driver on your PC. Some other
manufacturers’ drivers may switch the mouse to use a proprietary mouse data format not supported
by the SmartView Multiscreen. If you have unplugged and re-connected a mouse to the SmartView
Multiscreen then ensure that you reset it using the mouse reset function (see section 2.10).
Problem:
Mouse jumps around the screen after disconnecting the mouse cable or powering down the
SmartView Multiscreen.
Action:
If you have disconnected and re-connected a CPU mouse cable or you have powered down the
SmartView Multiscreen then the mouse data format may be out of synchronisation with that required
by the PC (PS/2 or Intellimouse). Try the ‘restore Intellimouse’ function (F6) to resolve the problem or
re-power the CPU.
SmartView Multiscreen
Installation and Use
Page 43
Problem:
Mouse moves very slowly but otherwise functions correctly.
Action:
Change the mouse driver to a Microsoft type or take the action recommended in section 4.9.
SmartView Multiscreen
Installation and Use
Page 44
www.addertec.com
SmartView Multiscreen Intelligent CPU Switches