1
Rev1.0" " " " " " " " " " " " " " " " " " " " " " " " " " " " " " " " " " " " " " " " " " " " " " " " " " " " " " " " " " " " " " " " " " " " " " " " English"
!
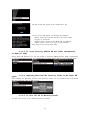
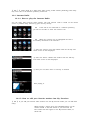
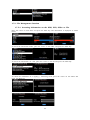
Contents!
"
Important" safety" instructions" ………………………………………………………………………………………………………" 7"
"
1"
"
"
1. Product! overview" …………………………………………………………………………………………………………." 9"
" " " " " " " " 1>1." Front" view" ………………………………………………………………………………………………………………." 9"
1>2." Rear" view" ………………………………………………………………………………………………….……………." 9"
1>3." View" of" remote" control" and" key" function" ……………………………………………………………..10"
"
2. Prepare" ……………………………………………………………………………………………………………….…….……" 11"
2>1." Check" the" contents" of" X30" package" …………………………………………………………….……….." 11"
2>2." Install" AAA" batteries" into" the" remote" controller" ………………….……………………….………." 11"
2>3." Optional" items," WiFi" USB" dongle" …………………........................................................................." 11"
2>4." Purchased" X30" without" storage" …….………………………………………………….……..……………." 12"
" " " " 2>4>1." HDD" installation" ……………………………………………………………………………..……………" 12"
" " " " 2>4>2." HDD" Format" ……………………………………………………………………………………..…………." 12"
2>5." Purchased" X30" with" an" internal" storage" installed" ………………..………….……………..……." 12"
"
3. Connection" ……………………………………………………………………………………………………………………." 12"
3>1." Power" connection" ……………………………………………………………………........................................" 12"
3>2." External" devices" connection" ...……………………………………………………………..…………………." 12"
"
4. Turn! ON! and! Start" …………………………………………………………………….………….…..…………………." 13"
4>1." Wizard" Setup" (Setup" Assistant)" ………………………………………………….…….…...………………..13"
4>2." Turn" ON" for" normal" use" ………………………………………………………….…….………..……………….13"
"
5. SETUP" ……………………………………………………………………………………………………………………………." 14"
5>1." Music" DB" …………………………………………………………………………………………………...……………14"
5>1>1." Display" Mode" …………………………………………………………………………………....……….….14"
5>1>2." Album" View" …………………………………………………………………………..……….…....…….…..14"
5>1>3." Storage" for" Music" DB" ……………………………………………………..……..……….……….…….15"
5>1>4." Recovery" ………………………………………………………………………………………….…….....……15"
5>1>4>1." How" to" run" Music" DB" Recovery" function" …………………….………..……...….15"
5>1>4>2." Music" DB" Recovery" run" ……………………………………….……….……..….…….….15"
5>1>4>3." To" create" ‘Recovery" MM>DD" hh>mm’" folder" automatically"
" " " " " " " " On" HDD(or" USB)" ……………………………………………………………………….……….16"
5>1>4>4." Importing" files" from" the" ‘Recovery’" folder" to" the" Music" DB" again……16"
5>1>4>5." To" clear" the" list" on" Recovery" result" ………………………………………..………….17"
" " " " " " " " " " " 5>1>5." Backup" …………………………………………………………………………………..……………..…………17"
" " " " " " " " " " " 5>1>6." Restore" …………………………………………………………………………………………………..………..18"
5>2." CD" Ripping" ……………………………………………………………………………………………………………." 18"
" " " 5>2>1." Bit" Rate" and" Quality" …………………………………………………………………………………….." 18"
" " " 5>2>2." Audio" Format" (Audio" Rip" Format)" ……………………..………………………….…………….." 19"
" " " 5>2>3." FreeDB" TextCode" ………………………………………………………………………………………….." 19"
" " " 5>2>4." FreeDB" Install" ……………………………………………………………………………………………….." 19"
" " " 5>2>5." FreeDB" Update" ……………………………………………………………………………………………..." 20"
5>3." Audio" ………………………………………………………………………………………………………………………20"
5>3>1." Player" View………………………………………………………………………………..……………………..20"
5>3>2." Equalizer" (Preset" EQ" and" Custom" EQ)" ……………………………………….…………………..20"
" " " 5>3>3." Digital" Out" ...............................................................…………………………………..…….…………21"
" " " 5>3>4." Speaker" Out" ……………………..……………………………………………………….……….…………..21"
" " " 5>3>5." Line" Out" (Analog" Out)" …………………………………………………………………………………." 21"
" " " 5>3>6." DRC" (Dynamic" Range" Compression)" Mode" …………………………………..……………." 22"
" " " 5>3>7." Recording" Sample" Rate" …………………………………………………………………..……………" 22"
" " " 5>3>8." Gapless" Play" ……………………………………………………………………………….….………………22"
" " " 5>3>9." Slide" Show" Effect" ………………………………………………………………………………………….." 22"
" " " 5>3>10." Slide" Show" Time" …………………………………………………………………………………………." 23"
5>4." Network" ……………………………………………………………………….………………….….….………………." 23"
" " " 5>4>1." Wired" Setup" …………………………………………………….………………………..….……………….." 23"
" " " " " " " " 5>4>1>1." DHCP" (Auto" IP)" ………………………………………………………………………………….." 23"
" " " " " " " " 5>4>1>2." Static" IP" ……………………………………………….………………………………………..……" 24"
" " " 5>4>2." Wireless" Setup" ………………………………………………….….………………….………………………24"
" " " 5>4>3." Network" Info" …………………………………………………….…………………………………………….24"
"
2"
" " " 5>4>4." Wireless" Info" …………………………………………………….……………………………………………..24"
5>5." Network" Service" …………………………………………………….…..……………………………………………25"
" " " 5>5>1." Samba" Server" …………………………………………….…………………….…….……………………….25"
" " " 5>5>2." Web" Server" ………………………………………………….……………………….……..………………….25"
" " " " " " " 5>5>2>1." How" to" enable" Web" Server" ………………….…………………..….………………………26"
" " " " " " " 5>5>2>2." How" to" start" WebInterface" ………………………………….………………………..…….26"
" " " 5>5>3." UPnP" Server" ……………………………………………………..…………….………………………..…….28"
" " " 5>5>4." FTP" Server" ……………………………………………………………………….…………………….………28"
5>6." Internet" Service" ……………………………………………………….…………….…………………..……..…….28"
5>7." System" …………………………………………………………………………………….………………..……………" 29"
" " " 5>7>1." OSD" Language" ………………………………………….………………….……………….…..…………" 29"
5>7>2." Auto" Play" ……………………………………………………………………………………………..……....." 29"
5>7>3." Resume" Play" ………………………………………………………………..…………...…………..….….." 29"
5>7>4." Factory" Reset" ……………………………..…………………………………...……..….……………..….." 30"
5>7>5." HDD" Sleep" …………………………………………………………………………..………………………." 30"
5>7>6." HDD" format" ……………………………………………………………….……..…………………………..30"
" " " " 5>7>6>1." Brand" new" HDD" (not" partitioned" HDD)" ……………….…………………..……….30"
" " " " 5>7>6>2." Used" HDD" (Partitioned" HDD)" …………………………………………..……..……….31"
5>7>7." NTFS" Fix" ……..………………………………………………………………………………………….….…31"
5>7>8." Brightness" ……..………………………………………………………………….….………….….…….." 31"
5>7>9." Alarm" …………………………………………………………………………………………………………" 32"
5>7>10." Auto" Shutdown" ………………………………………………………………………………………...33"
5>7>11." Scroll" Speed" …………………………………………………………………………………………….." 33"
5>8." Time" …………………………………………………………….……………………………….…….………………." 37"
" " " " " " " " " " " 5>8>1." Time" Format" ……………….……………………………………………………….……....……………." 34"
" " " " " " " " " " " 5>8>2." Time" Set" (Internet)" …………………………………………………………….………….………….." 34"
" " " " " " " " " " " 5>8>3." Time" Set" (Manual)" ….……………………………………………………………..……….………….." 35"
" " " " " " " " 5>9." Firmware" …………………………………………………………………………………….……….……………….35"
" " " " " " " " " " " 5>9>1." Current" Firmware" ……………………………………………………………………….……………….35"
" " " " " " " " " " " 5>9>2." Update" by" manual" (Firmware" update" by" manual)" ………………..…….……………..35"
" " " " " " " " " " " 5>9>3." Update" by" auto" (Automatic" Firmware" Update" by" network)" …………….………..36"
" " " " " " " " " " " 5>9>4." What’s" Automatic" Firmware" Update" by" network" ?" …………………..…….………….36"
"
6. CD! Database(Music! DB)" …………………………………………………..…………………………………….…" 36"
6>1." What" is" CD" Database(Music" DB)" of" X30" ?" ……………..………….……..…………………….….." 36"
6>2." What" is" FreeDB" ?" ……………………………………………………………………….…………………………37"
"
7. CD! Loading(Ripping)" ………………………………………………………………………..……..……………….." 37"
7>1." When" the" X30" is" connected" to" network" (internet)…………….………………………………." 37"
" " " 7>1>1." Ripping" All" …………………………………………………………………………..………...……………" 38"
" " " 7>1>2." Ripping" Track" ……………………………………………………………………………..………………." 39"
7>2." In" the" case" that" X30" is" NOT" connected" to" network" (Internet)" ……..………..……..……" 40"
" " " 7>2>1." Ripping" All" ………………………………………………………………………………….………..…….." 40"
" " " 7>2>2." Ripping" Track" ……………………………………………………………………………….………...……" 41"
7>3." If" the" FreeDB" is" installed" onto" the" hard" disk" of" the" X30……………………….………..….." 41"
7>4." To" check" the" status" of" CD" ripping" and" converting………………….…………………..…..….." 42"
"
8. How! to! use! the! Music! DB(database)……………………………………………………….…………..……" 42" "
8>1." Play" music" loaded(ripped)" onto" the" X30.…………………………………………….……….….….." 42"
8>2." SEARCH" function" ………………………………………………………………………………….……….…….." 44"
8>3." How" to" manage" Music" DB" ………………………………………………………………….……….………" 45"
" " " 8>3>1." Deleting" or" renaming" music" in" the" Music" DB……………………..…..……..….………." 45"
" " " 8>3>2." How" to" export" music" from" the" Music" DB" to" other" storage" devices…..…..……46"
" " " 8>3>3." History" function" ………………………………….…………………………………………..……………47"
"
9. Editing" the" TAG" information" of" the" music" in" the" Music" DB…………..………....….…..….…….." 47"
"
10. Audio! CD! direct! play" ………………………………………….……………….……………..………….…….…….." 47"
10>1." If" the" X30" is" connected" to" a" network" (Internet)………………….……………………….….…." 47"
10>2." If" the" X30" is" NOT" connected" to" network" (Internet)" ………………………………....……..…" 48"
"
3"
10>3." In" case" that" you" have" installed" the" FreeDB" data" onto" the" "
hard" disk" of" the" X30" ………………………………………………………………………………….….….…...……." 48"
11. Data! CD! direct! play" ………………………………………………………………….……………….……….…...…." 49"
!
12. Playlist! ! ………………………………………………………….…………………….………………...……..…..……….." 49"
12>1." Playlist" …………………………………………………………….…………………………….………….……….…49"
" " " 12>1>1." How" to" make" a" Playlist" ……………………………………………………….……..………………49"
" " " 12>1>2." How" to" add" songs" to" a" playlist" whilst" playing" music" ……………..……………..….51"
" " " 12>1>3." How" to" play" a" Playlist" ………………………………………………………………..……………….51"
" " " 12>1>4." How" to" edit" a" Playlist" ………………………………………………………………..………..…..….52"
12>2." My" Playlist" (Virtual" Playlist)………………………………………………………….…….…………..……" 52"
12>3." Advanced" My" Playlist" (Virtual" Playlist)" ………………….….…………....….……….…………..…." 53"
"
13. The! Music! Streaming! function! ………….………………………….……………...…..……………..………..." 53"
13>1." UPnP" Server/Client" and" Samba" Server/Client" function" …………..………....………………" 53"
13>2." Multiple" X30’s" on" the" same" network" ……………………………………....….……....…….………" 54"
13>3." The" X30" works" as" a" Music" Server" with" Sonos………………" …………..……………….………" 54"
"
14. I! –! Service" …………………………..…………………………………………..…………………………..…..…...……..." 54"
14>1." Internet" Radio" …………………………….………………………………………..……….….….….……….…" 55"
14>1>1." How" to" play" the" internet" radio………………………………………..……….………………" 55"
14>1>2." How" to" add" your" favorite" stations" into" My" Favorites" ………....……...…………." 56"
14>1>3." How" to" play" My" Favorites" ……………………………………………………..……..……..….." 56"
14>1>4." How" to" run" a" search" function" on" the" Internet" Radio" …………………..…….…..." 56"
14>1>5." Recording" from" the" Internet" Radio" ………………………………….…………..…………" 56"
" " " " " " " " " 14>1>5>1." How" to" record" ……………………………………………………….…………….………" 57"
" " " " " " " " " 14>1>5>2." Where" is" the" recorded" file" stored?............................................................" 57"
" " " " " " " " " 14>1>5>3." The" recorded" file" name" structure………………………….…….…….…….….." 57"
" " " " " " " " " 14>1>5>4." How" to" edit" the" recorded" file" ……………………………….….…….…….……." 58"
14>1>6." Reservation" Recording" ………………………………………………………..….…….…………" 58"
14>1>6>1." How" to" set" reservation" recording" ……………………………………….………" 58"
14>1>6>2." How" to" work" ………………………………………………………………………………." 59"
14>2." Online" Music" Service" (Simfy)………….………………………………………..……….……..……….…" 59"
"
15. FM! Radio! …………………………..…………………………………………..…………………………..…..……….…..." 60"
15>1." How" to" play" FM" Radio" ………….………………………………………..……….…….….……..…………" 60"
15>2." How" to" record" FM" Radio" ……………………………………………………………………………………" 61"
16. USB! host! port! for! USB! devices" …………………………………………...………………….………............." 61"
17. Browser! …………………………………………………………………………………………..……………………….……61"
17>1." Play" audio" file" data" CD’s..………………………………………………..…………..……….…………......62"
17>2." File" Management" ……………………………………………………………………………..………………..." 62"
17>2>1." Accessing" information" on" the" HDD," USB," folder" or" file" ………….………………." 62"
" " " " 17>2>2." TAG" Edit" ……………………………………………………………………………………………………" 63"
" " " " 17>2>3." Import" to" DB" ………………………………………………………………………….…..……………" 63"
" " " " 17>2>4." Copy" Files" ……………………………………………………………………………………..…………" 64"
" " " " 17>2>5." Move" Files" ……………………………………………………………………………….…….……….." 64"
" " " " 17>2>6." Delete" Files" …………………………………………………………………………….……….………" 65"
" " " " 17>2>7." PLS" or" M3U" files" with" Internet" Radio" stations" …………………………..…….……." 65"
"
18. Input! ………………………………………………………………………………………………..……………………...……65"
" " " " " " " " 18>1." How" to" play" an" external" device" via" Input" ……………………………………..…….………........65"
" " " " " " " " 18>2." How" to" record" ……………………………………………………………………………………………….……66"
" " " " " " " " 18>3." Where" is" the" recorded" file" stored?" ……………………………………………………………………" 67"
" " " " " " " " 18>4." How" to" edit" the" recorded" file" ……………………………………………………………………………" 67"
" " " " " " " " 18>5." How" to" rip" (convert)" the" edited" file" into" other" formats" (MP3," FLAC" or" OGG)"
" " " " " " " " " " " " " And" load" onto" the" Music" DB" …………………………………………………………………………….." 68"
"
19. Extra! function" …………………………………………………………………………………………………..…………" 69"
19>1." Volume" Balancing" …………………………………………………………………………………….……….." 69"
19>2." External" Screen" ………………………………………………………………………………………….………." 69"
"
4"
19>3." Photo" Slide" Show" ……………………………………………………………………………………….…….." 70"
19>4." Listing" by" Text" or" Album" cover" art" …………………………………………………………….……...70"
19>5." LYRICS" ………………………………………………………………………………………………………….………71"
19>6." Bookmark" ……………………………………………………………………………………………………..……." 71"
19>7." Preset" E.Q." (Equalizer)" ……………………………………………………………………………………..…." 72"
19>8." Custom" E.Q." (Equalizer)" ………………………………………………………………………………………" 72"
19>9." Resume" Play" ……………………………………………………………………………………………………...." 73"
19>10." CLOCK" and" Display(LCD)" OFF………………………………………….…………………..….………..." 73"
19>11." Changing" the" play" mode" ………………………………………………………………….…..….….…." 73"
19>12." Alarm" set" ………………………………………………………………………………………………….….….." 74"
19>13." Auto" Shutdown" ………………………………………………………………………………………….……" 75"
19>14." Sleep" mode" ………………………………………………………………………..…………………..….……." 75"
19>15." Auto" Play" ……………………………………………………………………………..…………………..….….." 75"
19>16." Shortcut" to" find" file" in" all" list" modes" ……………………………………………….……………." 76"
19>17." Seek" function" on" the" Playing" Screen……………" ……………………………………………….." 76"
20. Specification" ……………………………………………………………………….………..………….………………...." 76"
21. Troubleshooting" …………………………………………………………….………………………..…………….….." 77"
Important! safety! instructions!
"
For" your" own" safety," please" read" the" following" important" safety" instructions" carefully" before"
attempting" to" connect" this" unit" to" the" main" power" supply." They" will" enable" you" to" get" the" best"
performance" from" the" unit."
1.Read" the" instructions."
2.Keep" the" instructions."
3.Heed" all" warnings."
4.Follow" all" instructions."
5.Do" not" use" this" product" near" water."
6.Clean" only" with" dry" cloth."
7.Do" not" block" any" ventilation" openings." Install" in" accordance" with" the" manufacturer’s" instructions."
8.Do" not" remove" the" casing" of" this" product."
9.Only" use" this" product" indoors." Do" not" expose" the" product" to" water," rain" or" high" humidity."
10.Keep" this" product" away" from" direct" sunlight," naked" flames" or" heat."
11.Do" not" install" near" any" heat" sources" such" as" radiators," heat" registers," stoves," or" other"
electrical" equipment(including" amplifiers)" that" produce" much" heat."
12.Do" not" place" any" other" electrical" equipment" on" the" product."
13.Do" not" place" any" sources" of" danger" on" the" product(e.g." objects" containing" liquid," burning"
candles)"
14.This" product" includes" batteries." Please" refer" to" safety" and" disposal" instructions" for" batteries" in"
this" user" manual."
15.Unplug" this" product" during" lightning" storms" or" when" unused" for" long" periods" of" time."
16.Refer" all" servicing" to" qualified" service" personnel." Servicing" is" required" when" the" product" has"
been" damaged," such" as" the" power" supply" cord," damaged" plug," liquid" spillage," objects" dropped" on"
the" unit," exposure" to" rain" or" moisture," does" not" operate" properly," or" has" been" dropped."
"
WARNING"
- Using" headphones" at" a" high" volume" can" impair" your" hearing." This" product" can" produce"
sounds" in" decibel" ranges" that" may" cause" hearing" loss" for" a" normal" person," even" for"
exposure" less" than" a" minute." The" higher" decibel" ranges" are" offered" for" those" that" may"
be" experiencing" some" hearing" loss." Over" time" your" hearing" ‘comfort" level’" adapts" to"
higher" volumes" of" sound," so" after" prolonged" listening," what" sounds" ‘normal’" can" actually"
be" loud" and" harmful" to" your" hearing." To" guard" against" this," set" your" volume" to" a" safe"
level."
- Loudspeakers" :" Before" making" any" connections" to" loudspeakers," make" sure" all" power" is"
turned" off" and" only" use" suitable" interconnects."
- Only" use" attachments/accessories" specified" and" supplied" by" the" manufacturer."
FCC" regulations"
"
"
NOTE:" THE" MANUFACTURER" IS" NOT" RESPONSIBLE" FOR" ANY" RADIO" OR" TV" INTERFERENCE"
CAUSED" BY" UNAUTHORIZED" MODIFICATIONS" TO" THIS" EQUIPMENT." SUCH" MODIFICATIONS"
"
5"
COULD" VOID" THE" USER" AUTHORITY" TO" OPERATE" THE" EQUIPMENT."
"
" This" equipment" has" been" tested" and" found" to" comply" with" the" limits" for" a" Class" B"
digital" device," pursuant" to" Part" 15" of" the" FCC" Rules." These" limits" are" designed" to" provide"
reasonable" protection" against" harmful" interference" in" a" residential" installation." This" equipment"
generates," uses" and" can" radiate" radio" frequency" energy." If" not" installed" and" used" in" accordance"
with" the" instructions," may" cause" harmful" interference" to" radio" communications." However," there" is"
no" guarantee" that" interference" will" not" occur" in" a" particular" installation." If" this" equipment" does"
cause" harmful" interference" to" radio" or" television" reception," which" can" be" determined" by" turning"
the" equipment" off" and" on," the" user" is" encouraged" to" try" to" correct" the" interference" by" one" or"
more" of" the" following" measures."
- Re>orient" or" relocate" the" receiving" antenna."
- Increase" the" separation" between" the" equipment" and" receiver."
- Connect" the" equipment" into" an" outlet" on" a" circuit" different" from" that" to" which" the"
receiver" is" connected."
- Consult" the" dealer" or" an" experienced" radio/TV" technician" for" help."
"
"
"
"
"
"
"
"
"
"
"
"
"
"
"
"
"
"
"
"
"
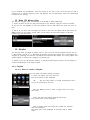
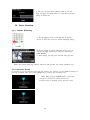
1. Product! overview!
"
1N1.! Front! View!
"
"
"
"
"
"
"
Mute/Volume" Knob"
Power/Standby" button" "
Power/Standby" Indicator"
Headphone"
USB" Host" port"
AUX" In"
Remote" control" receiver"
CD>ROM" Drive"
"
CD" Eject" button"
LCD" screen"
OK/PAUSE/SCROLL" knob"
INPUT" button"
RETURN" button"
STOP" button"
6"
NENU" button"
" NOTE"
1)" Press" INPUT" button" and"
RETURN" button" simultaneously,"
you" may" go" to" Playing" Screen."
2)" On" Playing" Screen," turning"
OK/PAUSE/SCROLL" works" just" like"
PREVIOU/NETX" keys" of" remote."
Turning" it" with" it" pressed" works"
just" like" SEEK" +15/>15."
"
"
"
"
!
1N2.! Rear! View" " " " "
"
"
"
"
"
"
"
"
Power" Switch"
AC" Power" Inlet(with" fuse)"
Speaker" Out" terminals(8" ohm)"
Digital" Out" terminals(Toslink," Coaxial,"
AES/EBU" XLR)"
Analog" Out" terminals(RCA," R/L)"
Digital" IN" terminals(Toslink," Coaxial)"
Analog" IN" terminals(RCA," R/L)"
FM" Radio" antenna"
HDMI" Out(for" video" only)"
Ethernet" LAN"
USB" Host" connectors"
Storage(SATA" HDD" or" SSD)" Drive" drawer" "
!
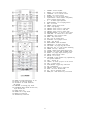
1N3.! View! of! Remote! Controller! and! each! key’s! function!
"
7"
1.
2.
3.
4.
5.
6.
7.
8.
9.
10.
11.
12.
13.
14.
15.
16.
17.
18.
19.
20.
21.
22.
23.
24.
25.
26.
27.
28.
29.
30.
31.
32.
33.
34.
35.
36.
37.
38.
39.
40.
41.
!
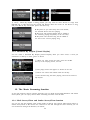
" 42." SEEK/>15:" Seek" backward" by" 15" sec"
" 43." MY" PL:" To" make" My" Playlist"
" 44." AD" MY" PL:" To" make" advanced"
" My" Playlist"
" 45." SHUFFLE:" To" change" play" mode"
" 46." FAVORITE:" Make" i>Radio" favorite" list/"
" " " " Open" favorite" list"
" 47." EJECT:" Eject" CD"
48." SLEEP:" Go" to" sleep" mode"
Prepare!
49." 2.
BLUE"
key:" Reserved"
50." 2.
YELLOW"
key:" Reserved"
Prepare!
"
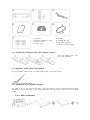
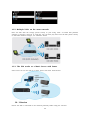
2N1.! Check! the! contents! of! X30! package!
!
"
8"
POWER" :" Power" ON/OFF"
RADIO" :" Go" to" FM" radio" screen"
I>SERVICE" :" Go" to" i>Service" screen"
HOME" :" Go" to" home" screen"
SEARCH" :" To" pop" up" search" menu"
Alphanumeric" :" Enter" number" &" alphabet/"
Seek" at" Playing" Screen" mode"
!" " :" To" delete" typed" alphabet"
NOW" PLAYING" :" Go" to" Playing" Screen"
REC" :" To" record"
MENU" :" Popup" menu" screen"
STOP" :" Stop" playing"
ARROW" :" Move" cursor" to" upper" side" "
ARROW" :" Move" cursor" to" left" side"
ARROW" :" Move" cursor" to" down" side"
BEFORE/CANCEL" :" Go" back" to" upper" level"
TEXT/ART" :" To" switch" text" or" art" mode"
PREVIOUS" :" Play" previous" music"
NEXT" :" Play" next" music"
RIP" :" Pop" up" ripping" menu"
PLAYLIST" :" Go" to" playlist" screen"
SORT" :" Sort" file" list"
BOOK" MARK" :" Make" bookmark"
PRESET" E.Q" :" To" select" preset" E.Q"
TAG" EDIT" :" To" popup" tag" edit" screen"
RED" Color" key" :" To" open" volume" balancing"
GREEN" color" key" :" Reserved"
CLOCK" :" Digital" clock" display/OFF" screen"
SCREEN" :" To" switch" LCD" or" HDMI" screen"
INPUT" :" To" popup" input" selecting" screen"
MUTE" :" Mute/unmute" sound"
SETUP" :" Go" to" setup"
CAP/NUM" :" Toggle" numeric" key," alphabet" key"
and" special" characters"
VOL+" :" Volume" up"
LYRICS" :" To" show" up" lyrics" on" the" screen"
VOL>" :" Volume" down"
PLAY/PAUSE" :" Toggle" Play" and" Pause"
OK" :" Confirmation"
ARROW" :" Move" cursor" to" right" side"
INFO" :" Get" more" detailed" info"
E.Q." :" Pop" up" equalizer" menu"
SEEK/+15" :" Seek" forward" by" 15" seconds."
①" X30" unit," "
②" Remote" controller" +" AAA" " "
batteries" x" 2EA"
③" Power" cord"
④" Manual"
⑤" FreeDB" data" CD"
⑥" FM" Radio" Antenna"
⑦" Screw" to" install" storage"
!
"
"
2N2.! Install! AAA! batteries! into! the! remote! control.!
"
Open" the" battery" door" and"
insert" the" batteries."
"
"
"
2N3.! Optional! items,! WiFi! USB! dongle!
"
If" you" purchased" optional" items," the" WiFi" USB" dongle," it" looks" like" below."
"
"
801.11b/g/n" WiFi" USB" dongle"
2N4.! Purchased! X30! without! storage.!
"
You" need" a" 3.5”" or" 2.5”" SATA" hard" disk" or" SSD," and" install" it" into" the" X30" like" below" picture"
and" format" it." For" formatting" of" the" installed" storage" into" X30," please" refer" to" the" 5>7>6." HDD"
format."
"
2N4N1.! HDD! installation!
"
"
"
9"
"
"
【" TIP" 1" 】" X30" supports" 3.5”" or" 2.5”" SATA" hard" disk" and" solid" state" drive" (SSD)"
"
2N4N2.! HDD! Format!
"
※" Refer" to" the" 5>7>6." HDD" Format"
"
2N5.! Purchased! X30! with! an! internal! storage! installed.!
"
Check" whether" the" storage" is" formatted," or" not." If" the" storage" is" not" formatted," please" format" it"
according" to" the" 5>7>6." HDD" Format."
"
3. Connection!
"
3N1.! Power! connection!
Connect" power" to" the" X30" via" the" power" inlet" and" switch" on" the" rear" of" the" X30."
"
3N2.! External! devices! Connection!
Refer" to" the" rear" view" on" page" 9." Various" devices" can" be" connected" to" X30" like" below" according"
to" your" purpose."
"
" " Speaker" Out" terminal(8ohm)" :" Bookshelf" speaker" or" floor" standing" (power" load)"
speakers"
"
" Digital" Out" (Toslink," Coaxial," AES/EBU" XLR)" :" External" DAC," etc"
"
" Analog" Out(RCA," R/L)" :" External" amplifier," etc"
"
" FM" Radio" Antenna" connector" :" FM" Radio" antenna" "
"
" USB" Host" ports:" WiFi" USB" dongle," external" USB" devices," etc"
Turn!
and!
Start!
" 4.
HDMI"
Out" :" On!
External"
screen"
like" TV," etc"
"
4N1.! Wizard! Setup! (Setup! Assistant)!
Without" HDD" installed;" if" you" are" installing" the" HDD" you" will" meet" the" Setup" Assistant" (Wizard"
Setup)" as" shown" below." Switch" the" unit" on" at" the" rear" of" X30" and" then" power" it" on" with" the"
remote" controller" or" the" power" button" on" the" front" of" the" X30." "
"
Select" OK" and" confirm" with" the" OK" key" to" start" Wizard" Setup." If" you" want" to" run" the" set" up"
after" booting" up," you" can" select" CANCEL" at" the" 1st" step."
"
"
" TIP" " " You" will" be" asked" about"
formatting" the" HDD" only" if" the" HDD" installed"
has" NOT" been" formatted."
"
"
4N2.! Turn! ON! for! normal! use!
"
Switch" the" unit" on" at" the" rear" of" the" X30." The" power" LED" will" be" ON" with" green" color." Power"
it" on" using" the" remote" control" or" the" power" button" on" the" front" of" the" X30." The" power" LED"
color" will" be" changed" to" blue" and" start" booting" –" The" X30" should" take" about" one" minute" to"
boot" up" as" it" is" looking" to" see" if" a" network" is" connected."
"
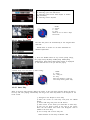
After" the" X30" is" powered" ON," the" below" screen" will" show" up" in" sequence."
1)" Booting" image" " " " " " " " " 2)" Booting" completed" and" ready" for" use"
10"
"
"
"
"
"
"
"
"
"
""
"
"" Music" DB:" Play" loaded(ripped)" music" in"
X30" Music" DB" folder."
"" Playlist:" Make" Playlist" and" play" it."
"" I>Service" :" Play" i>Radio" or" online" music" " "
service"
"" FM" Radio:" Play" FM" radio"
"" CD" Play/Rip:" Load(rip)" CD" or" play" it" " "
directly."
"" 5. SETUP!
"" Browser" :" See" all" storages" such" as" hard" " "
disk" of" X30," USB" host" and" networked"
storages."
"" Input" :" See" all" input" terminals" like" "
Coaxial," Toslink," RCA" R/L" and" AUX" IN"
"" Setup" :" Change" the" settings"
"
Go" into" SETUP" menu" with" remote" controller."
You" can" select" each" item" with" the" arrow" key" and" confirm"
it" with" the" OK" button."
"
"
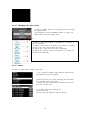
5N1.! Music! DB!
Select" the" Display" Mode" and" confirm" with" the" OK" button."
"
"
5N1N1.! Display! Mode!
You" may" set" one" of" six(6)" options," see" below." For" example," if" you" set" Title," the" Music" DB" will"
display" the" title(song)" list" when" you" go" into" the" Music" DB.(※" default" :" Album)"
※" Default" :" Album"
"
"
"
"
"
"
"
" Each" mode" displays" like" below"
"" Album" :" Album" list" " track" list" of" the" album"
"" Title" :" Track(song)" list"
"" Artist/Track" :" Artist" list" " Title(song)" list"
"" Artist/Album" :" Artist" list" " Album" list" of" the" artist" " "
Track" (song)" list" of" the" album"
"" Genre/Track" :" Genre" list" " Title(song)" list" of" the" genre"
"" Genre/Album" :" Genre" list" " Album" list" of" the" genre" " "
Title(song)" list" of" the" album"
5N1N2.! Album! View!
"
You" can" set" the" list" to" show" albums" in" the" Music" DB" by" its" album" name(text)" or" album" cover"
art" using" this" setup.(" ※" default" :" text" mode" )"
"
11"
"
※" Artist" view," Genre" view" and" Track" view" also" are" available."
5N1N3.! Storage! for! Music! DB! !
"
You" can" select" either" the" internal" HDD" (SSD)" or" USB" for" Music" DB" storage."
(" ※" Default" is" Internal" HDD(SSD))"
"
[CAUTION]"
※" NOTE:" Please" remember" to" check" this" setting" first" when" you" see" ‘Query" Error’" on" the" screen"
in" trying" access" to" your" music" DB." For" example," you" will" see" ‘Query" Error’" on" the" screen" when"
you" try" accessing" your" Music" DB" of" internal" (installed)" HDD" with" Music" DB" storage" set" to" USB."
"
※" When" you" use" an" external" USB" hard" disk," please" make" sure" to" supply" Power" to" the" external"
USB" hard" disk" in" case" the" external" USB" hard" disk" is" designed" originally" to" connect" to" a" Power"
supply."
"
"
5N1N4.! Recovery!
"
It" is" possible" for" damage" or" errors" to" occur" on" the" album" or" files" in" the" Music" DB" when" you"
run" several" functions" like;" ‘Rename," Delete," Copy" to" DB," or" CD" ripping’" etc." If" there" are" errors" n"
the" Music" DB," the" X30" may" not" play" the" files" properly" or" may" not" rip" CDs" properly." The" Music"
DB" Recovery" function" will" help" to" clear" these" problems."
"
"
5N1N4N1.! How! to! run! Music! DB! Recovery! function!
"
" Go" to" the" Music" DB." ②" Select" Recovery" and" press" the" OK" key."
※" It" will" take" some" time" to" start" and" finish" if" your" Music" DB" is" quite" large."
"
"
"
"
"
5N1N4N2.! Music! DB! Recovery! run!
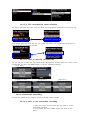
After" you" run" the" Music" DB" Recovery," as" shown" above," you" can" see" the" results" of" the" Recovery"
as" displayed" below."
Go" to" Music" DB" of" SETUP" and" select" Recovery" Result."
"
12"
"
"
"
The" left" screen" will" appear" if" your" Music" DB" is" OK"
"
"
"
"
"
The" left" screen" will" appear" if" something" was" dubious"
※" ‘Moved’" means" the" song" file" moved" to" ‘Recovery’" folder."
※" ‘song" file’" is" actual" file."
※" ‘Deleted’" means" the" info" in" the" Music" DB" was" deleted."
※" ‘Album’," ‘genre’," ‘artist’" and" ‘song’" are" just" info(text"
file)." They" are" not" actual" music" files."
"
5N1N4N3.! To! create! ‘Recovery! MMNDD! hhNmm’! folder! automatically!
on! HDD! (or! USB)!
"
During" Music" DB" Recovery" run," the" X30" creates" a" ‘Recovery" MM>DD" hh>mm’" folder" automatically"
on" the" internal" HDD" (or" USB)." The" checked" files" or" album" folders" will" be" stored" (moved)" there."
"
"
"
5N1N4N4.! Importing! files! from! the! ‘Recovery’! folder! to! the! Music! DB!
again.!
After" checking" the" files" have" moved" to" the" ‘Recovery’" folder," you" can" import" them" to" the" Music"
DB" again" with" the" ‘Copy" to" DB’" function."
"
"
5N1N4N5.! To! clear! the! list! on! Recovery! Result!
"
You" can" clear" the" list" on" the" Recovery" Result" as" follows:"
"
13"
①" Place" the" cursor" on" the" screen" of" the" Recovery" Result."
②" Select" the" list" you" want" to" clear" with" the" RIGHT" key"
③" Press" the" MENU" key"
④" You" can" clear" all" or" selected" list" only."
"
"
"
"
5N1N5.! Backup!
"
You" can" backup" your" Music" DB" to" an" external" USB" hard" disk."
※You" need" an" external" USB" hard" disk" drive" which" has" a" bigger" capacity" than" the" Music" DB."
"
"
"
"
①" Connect" the" external" USB" HDD" to" the" USB" host" port" of" the" X10."
②" Go" to" Music" DB" of" SETUP" and" select" Backup," and" confirm" with" the"
OK" button."
③" You" can" see" the" external" USB" HDD" as" shown" below." Select" and"
confirm" with" the" OK" key." You" will" see" the" Music" DB" size" and" Backup"
device" size," see" example" below." Press" the" OK" key" to" start" backup."
"
"
"
"
5N1N6.! Restore!
You" can" restore" the" backup" data" in" the" Music" DB" of" the" X30."
"
①" Connect" the" backup" device" to" the" USB" host" port" of" the" X30."
"
②" Go" to" the" Music" DB" of" SETUP" and" select" Restore," and" confirm" it" with" the" OK" button."
"
③" You" can" see" the" backup" device" and" select" it," confirm" using" the" OK" key" to" start" Restore."
"
"
"
"
5N2.! CD! Ripping!
Select" CD" Ripping" and" confirm" it" with" the" OK" button." The" below" items" will" be" displayed.!
"
14"
!
!!!
!
5N2N1.! Bit! Rate! and! Quality!
"
You" can" select" bit" rate" and" the" quality" level" for" ripping" to" MP3" files."
"
There" are" two" (2)" items.(This" is" for" ripping" a" CD" to" an" MP3" file)"
□ Compressed" Rate" :" 128K" /" 192K" /" 320K" " " " [default]" 192K"
□ Quality" level" :" Excellent" /" Best" /" Good" /" Fast" /" Very" fast" " " [default]" Very" fast"
"
Select" one" of" the" above" options" and" confirm" with" the" OK" button" on" the" remote" control."
"
【" TIP" ①" 】" The" time" required" to" rip" a" CD" to" MP3" format" based" on" each" quality" level" option" is"
shown" below."
Option" of" quality" level"
Normal" playing" time"
Required" time" to" convert" to" MP3"
Excellent"
"
X" 1.5" (150%)"
The" time" required" to"
Best"
X" 1.08" (108%)"
play" music" in" CD"
Good"
X" 1" (100%)"
normally."
Fast"
X" 3/4" (75%)"
Very" fast[Default]"
X" 1/3" (33.3%)"
"
"
【" TIP" ②" 】" Estimated" Storage" capacity"
CD" Ripping" option"
500GB" HDD"
1" TB" HDD"
2" TB" HDD"
4" TB" HDD"
WAV(uncompressed)"
650" CDs"
1,300" CDs"
2,600" CDs"
5,200" CDs"
"
Compressed" Rate"
"
"
"
"
"
128K"
7,500" CDs"
15,000" CDs"
30,000" CDs"
60,000" CDs"
MP3" /"
192K"
5,000" CDs"
10,000" CDs"
20,000" CDs"
40,000" CDs"
OGG"
320K"
3,000" CDs"
6,000" CDs"
12,000" CDs"
24,000" CDs"
These" figures" may" vary" slightly" according" to" the" number" of" tracks" on" a" CD"
"
5N2N2.! Audio! Format! (Audio! Rip! Format)!
"
You" can" select" one" of" the" following" audio" formats" for" CD" Ripping;"
※" default" is" WAV"
!
5N2N3.! FreeDB! TextCode!
In" the" case" that" the" FreeDB" text" is" broken," you" may" try" changing" the" FreeDB" TextCode" as"
shown" below."
"
"
5N2N4.! FreeDB! Install!
"
15"
You" can" install" the" FreeDB" data" to" the" storage" of" the" X30" as" a" FreeDB" data" (DVD)" is" supplied"
by" the" manufacturer." Once" you" install" the" FreeDB" data" to" the" X30" the" inserted" CD"
information(metadata" like" title," album" name," artist," etc)" will" be" displayed" on" the" X30" screen"
without" network" connection."
"
To" install" the" FreeDB" data" to" the" X30" hard" disk," insert" the" FreeDB" data" DVD" into" the" CD" slot" of"
the" X30" and" go" to" SETUP" and" select" FreeDB" to" install." You" will" see" the" CD," select" and" confirm"
with" the" OK" button." " The" X30" will" shut" down" and" reboot" to" start" installing" the" FreeDB" data"
automatically.!
5N2N5.! FreeDB! Update!
You" can" get" a" FreeDB" update" from" the" Cocktail" Audio" website" (www.cocktailaudio.com)."
To" update" your" copy" the" FreeDB" load" the" file" downloaded" from" www.cocktailaudio.com" to" a"
memory" stick" and" insert" the" memory" stick" into" the" USB" host" port" of" the" X30." Navigate" to" SETUP"
and" select" FreeDB" Update." Press" the" OK" button." You" can" see" the" USB" memory" and" select" it" with"
the" OK" button" to" find" the" FreeDB" update" file." Confirm" with" the" OK" button" to" begin" the"
installation."
"
5N3.! Audio!
Select" Audio" and" confirm" it" with" the" OK" key"
"
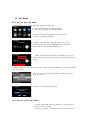
"
5N3N1.! Player! View!
You" can" set" one" of" the" following;" Cover" &" List," Music" Info" or" List" Only."
" NOTE" :" Using" INFO" button" of" remote" control," you"
can" change" player" view" to" Cover" &" List," Music" Info" or"
List" Only" like" below."
"
※" Default:" Cover" &" List"
"
[! Cover! &! List! ]! ! ! ! ! ! ! ! ! ! ! ! ! ! ! ! ! ! [! Music! info! ]! ! ! ! ! ! ! ! ! ! ! ! ! ! ! ! ! ! [! List! Only! ]!
"
"""
"""
"
5N3N2.! Equalizer! (Preset! E.Q! and! Custom! E.Q)!
You" can" set" one" of" the" following;" Normal" →" Classical→" Club" →" Concert" Hall" →" Dance" →" Live"
→" Party" →" Pop" →" Reggae" →" Rock" →" Soft" →" Soft" Rock" →" Techno" →" Bass" →" Bass" &" Treble"
→" Treble" →" Vocal" →" Custom" EQ" →" Normal"
"
16"
①" Select" Equalizer" and" confirm" it" with" OK" key" to" open"
the" preset" EQ" list" like" below."
"
②" Select" one" of" 18" options"
"
※" NOTE:" Equalizer" works" in" Speaker" Out" (inside"
amplifier)" only."
"
" NOTE:" During" playing," you" can" also" change" preset" E.Q" using" Preset" E.Q" button." For" custom"
equalizer" setting," press" E.Q" button" of" remote" control."
" " " " " " " [" Preset" E.Q." ]" " " " " " " " " " " " " " " " [" Custom" E.Q" ]" " " " " " " " " " [" Preset" E.Q" +" Custom" E.Q" ]"
"
※" NOTE:" For" more" detailed" explanation," refer" to" the" 19>7." Preset" E.Q." and" 19>8." Custom" E.Q."
"
5N3N3.! Digital! Out!
You" can" set" one" of" five" (5)" options" like" OFF," Pass>through," 48Khz," 96Khz" and" 192Khz"
1)" OFF" :" No" signal" from" Digital" Out"
2)" Pass>through" :" Original" resolution(Frequency)"
3)" 48Khz" :" Max" 48Khz" frequency"
4)" 96Khz" :" Max" 96Khz" frequency"
5)" 192Khz" :" Max" 192Khz" frequency" "
※" Default" :" 96Khz"
"
"
5N3N4.! Speaker! Out!
You" can" set" as" ON" or" OFF" here."
When" you" want" to" use" the" amplifier" of" the" X30,"
the" speaker" out" should" be" set" as" ON"
"
" Default" :" ON"
"
"
5N3N5.! Line! Out! (Analog! Out)!
ON" or" OFF" can" be" set" here"
In" case" that" you" want" to" use" an" external" amplifier,"
the" line" out" (Analog" Out)" should" be" set" as" ON," and"
the" external" amplifier" should" be" connected" to" the"
line" out" (analog" out)" at" the" rear" of" the" X30."
"
" Default" :" ON"
"
"
"
5N3N6.! DRC! (Dynamic! Range! Compression)Mode!
17"
" NOTE:" DRC" Mode" works" in" Speaker" Out" mode" only."
※" Default" :" ON"
"
"
5N3N7.! Recording! Sample! Rate!
"
" Default" :" 96Khz"
"
When" you" record" by" X30," you" can" set" Recording" Sample" Rate"
by" one" (1)" of" three" (3)" options" like" 48Khz," 96Khz," 192Khz."
"
" NOTE:" The" higher" sample" rate," the" more" recoding" space" is"
needed."
"
5N3N8.! Gapless! Play!
"
The" X30" supports" gapless" playback" function" for" MP3" file," WAV" and" FLAC" file" only."
" " Default" :" ON"
"
【" TIP" 】"
LAME>encoded" MP3" file" only" supported"
The" Gapless" play" function" works" properly" on" ‘Repeat" All’" and" ‘Normal’" modes" only." For"
example" in" ‘Shuffle’" mode" Gapless" play" is" not" supported"
"
5N3N9.! Slide! Show! Effect!
"
Six" (6)" options" are" available" like" All," Fade" in" &"
out," Transition," Rotation," Flip" and" None."
"
"
"
" NOTE:" For" detailed" explanation," refer" to" 19>3." Photo" Slide" Show."
5N3N10.! Slide! Show! Time!
"
You" can" set" show" time" and" effect" time" according" to" your" taste."
"
" Show" time" :" The" time" required" to" show" one" photo"
※" Effect" time" :" The" time" required" to" transit" one" photo" to" other"
photo" "
"
"
"
"
NOTE:" For" detailed" explanation," refer" to" 19>3." Photo" Slide" Show."
5N4.! Network!
"
18"
※" Make" sure" your" Ethernet" cable" or" a" USB" WiFi" dongle" is" connected."
"
Select" Network" and" press" the" OK" button."
" Select" Network" and" confirm" with" the" OK" button."
" Select" Wired" Setup" or" Wireless" Setup" and" confirm" it" with" OK"
button."
" TIP" " To" check" network" information," press" Network" Info."
"
"
"
5N4N1.! Wired! Setup!
5N4N1N1.! DHCP(Auto! IP)!
" Select" DHCP(Auto" IP)" and" confirm" with" the" OK" button."
There" is" no" need" to" enter" any" values."
" Select" OK" and" confirm" with" the" OK" button."
"
"
"
"
" The" screen" shots" shown" on" the" left" will" be" displayed" if" the"
network" is" connected" successfully."
"
"
"
"
5N4N1N2.! Static! IP!
" Select" Static" IP" and" confirm" with" the" OK" button."
" Enter" the" values" such" as;" IP" Address," Subnet" mask," etc."
" Select" OK" and" confirm" with" the" OK" button"
"
"
" The" screen" to" the" left" will" be" shown" if" the" network" is"
connected" successfully."
"
"
"
5N4N2.! Wireless! Setup.!
" Select" Wireless" Setup" and" confirm" with" the" OK" button." The" available" AP" will" be" displayed" as"
shown" below."
"
19"
"
" Select" proper" AP" and" confirm" with" the" OK" button." ③" If" the" AP" has" a" password," enter" it" and"
select" OK" and" confirm" with" the" OK" button."
"
"
5N4N3.! Network! Info!
Select" Network" Info" and" confirm" with" the" OK" key." You"
can" see" the" network" information" displayed" as" shown"
below."
"
"
"
5N4N4.! Wireless! Info!
Select" Wireless" Info" and" confirm" with" the" OK" key." You"
can" check" the" Wireless" LAN" signal" strength," see" below"
screen" shot."
"
"
"
5N5.! Network! Service!
"
Select" Network" Service" and" confirm"
with" the" OK" key." There" are" several"
items" like" Samba" Server," Web"
Server," UPnP" Server" and" FTP" Server."
"
"
"
"
"
5N5N1! Samba! Server!
"
If" you" would" like" to" see" the" folders" on" the" X30" hard" disk" through" your" network" connected" PC"
you" can" set" up" the" following:"
"
" Select" Samba" Server" and" confirm" with" the" OK" key." Set" Samba" Server" as" ON," see" below"
" ※" default" :" OFF"
"
" Select" Samba" Server" and" confirm" with" the" OK" button."
"
20"
"
"
"
" Select" Host" Name" and" Workgroup."
" Enter" host" name" and" workgroup" name" and" select" OK" and" confirm" with" the" OK" button."
5N5N2! Web! Server!
"
With" the" Web" Server" function" of" the" X30," you" can" enjoy" the" following" functions:"
" Add" album" cover" art" to" all" albums" stored" (ripped)" in" the" X30" Music" DB" through"
internet."
" Edit" ID3>tag" information" of" each" song"
" Play" and" control" the" X30" through" the" WebInterface"
" Make" playlists" with" songs" stored" in" the" Music" DB" of" the" X30"
" For" detailed" information," refer" to" the" X30>Webinterface" User" Guide" on" the" Cocktail" Audio"
website(www.cocktailaudio.com)"
"
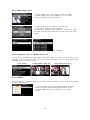
5N5N2N1.! How! to! enable! Web! Server!
Select" Web" Server" and" confirm" with" the" OK" key." Set" to" ON" as" shown" below"
Select" Reinstall" and" confirm" with" the" OK" key" to" run" it" as" shown" below."
!
!
!
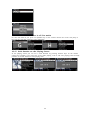
5N5N2N2.! How! to! start! WebInterface!
"
The" X30" WebInterface" is" available" in" two" formats;" one" for" PC(tablet" PC" also)," the" other" is" for"
smart" phones."
①" You" can" get" the" IP" address" of" your" X30" from" SETUP."
②" Type" in" the" IP" address" (for" example," 192.168.0.4)" into"
the" address" window" in" the" web" browser" of" the" PC" or"
Smart" phone," see" below."
"
"
"
"
"
"
"
21"
PC! Screen!
Smart! Phone! screen! "
"
Main! screen!
※! Refer! to! the! X30N
WebInterface! User! Guide!
to! learn! how! to! use! the!
WebInterface,! !
Place! the! mouse! cursor! on!
the! cocktailAudio!
!
The! popup! menu! will!
show! up! like! below!
!
"
You! can! select! one! of!
nine(9)! items! according!
to! your! purpose.!
"
"
"
22"
For! example,! if! you!
select! ‘Album’,! you! can!
list! all! albums! in! the!
Music! DB.! You! can! play!
by! album! and! add!
album! art,! edit,! delete!
and! assign! albums! to! a!
playlist.!
!
!
5N5N3! UPnP! Server!
!!!!!!!!!!!!!!!!"
"
If" you" have" a" device" (like" a" PC)" which" supports" UPnP" client" protocol," you" can" play" music" stored"
in" the" X30" Music" DB" through" the" UPnP" device."
"
Default" setting" for" UPnP" Server" is" ON," see" below."
"
"
"
5N5N4! FTP! Server!
Select" FTP" Server" and" confirm" with" the" OK" key." Set" it" to" ON." You" will" need" to" enter" the" User"
Name." Default" password" is" 0000." You" may" change" password" should" you" wish" to."
"
【" TIP" 】" You" may" use" the" FTP" program" like" ‘File" Zilla’." The" character" should" be" set" as" ‘UTF>8’."
"
"
5N6.! Internet! Service!
"
This" setup" is" for" Online" Music" Service" like" Simfy." The" Simfy" service" is" available" in" the" following"
countries" only" like" Germany," Austria," Switzerland" and" South" Africa."
"
①" You" need" to" subscribe" to" Simfy"
(www.simfy.com)" to" get" user" name"
and" password."
②" Go" to" SETUP" /" Internet" Service"
/" Simfy."
"
"
"
"
23"
③" Put" user" name" and" password"
④" Then," you" can" use" Simfy."
"
"
"
" For" detail" information" on" how" to" use" Simfy," please" refer" to" the" Simfy" User" Guide."
5N7.! System!
"
" Select" System" and" confirm" with" the" OK" button."
"
"
5N7N1.! OSD! Language.!
"
"
!
" Select" OSD" Language" and" confirm" with" the" OK" button."
Supported" languages" will" be" displayed."
" Select" your" preferred" language" and" confirm" with" the" OK"
button."
"
" TIP" " " Default" is" English."
5N7N2.! Auto! Play!
"
Select" Auto" Play" and" confirm"
with" the" OK" button." You" can"
set" it" to" ON" or" OFF."
"
" Default" :" OFF"
"
【" TIP" 】" For" detailed" explanation" of" Auto" Play" function," refer" to" 19>15." Auto" Play."
"
5N7N3.! Resume! Play!
When" you" boot" up" the" X30," it" will" automatically" resume" playing" the" music" in" the" Music" DB,"
Browser" or" i>Radio" from" where" it" was" last" stopped." "
Select" Resume" Play" and"
confirm" with" the" OK" key."
Set" it" as" ON" as" shown" left."
"
"
※" Default" is" OFF"
"
【" TIP" 】"
This" function" does" NOT" work" in" the" case" that" the" ‘Alarm’" function" or" ‘Auto" Play’" function" is"
enabled."
Function" priority" :" Alarm" function" >>>>#" Auto" Play" function" >>>>>#" Resume" Play" function"
"
5N7N4.! Factory! Reset!
"
"
24"
To" restore" changed" values" of"
setup," select" Factory" Reset"
and" confirm" with" the" OK"
button."
"
"
"
5N7N5.! HDD! Sleep!
You" can" make" X30" HDD" go" to" sleep" mode" by" this" setting." There" are" five" (5)" options" like" OFF,"
10" Min," 20" Min," 30" Min" and" 1" Hour." During" the" selected" time," if" no" access" to" HDD," the" HDD"
goes" into" sleep" mode."
"
"
"
" For" the" X30" to" wake" up" from"
HDD" sleep" mode," it" takes" 3~4"
seconds." During" this" time," the" X30’s"
response" to" the" input" signal" from"
remote" control" will" be" delayed."
5N7N6.! HDD! format!
" NOTE:" HDD" Format" function" of" the" X30" does" not" support" multi>partitioning." If" you" would" like"
to" make" two" (2)" partitions" on" the" HDD" we" recommend" this" is" done" using" your" computer."
"
5N7N6N1.! Brand! New! HDD! (not! partitioned! HDD)!
!
" NOTE" 1:" X30" provides" two" kinds" of" file" systems" for" hard" disk" format." One" is" NTFS," the" other"
is" Linux" file" system." You" may" select" one" of" them" during" hard" disk" format" procedure."
"
" NOTE! 2:! Linux! file! system! is! more! stable,! and! speed! is! also! faster! than! NTFS.!
"
①" Install" the" HDD" into" the" X30" and" power"
it" ON."
②" Go" to" System" of" SETUP," and" select" HDD"
Format," as" shown" left."
"
"
"
"
③" You" will" be" asked" to" select" Linux" or"
NTFS." Select" one" of" them."
④" It" will" start" formatting" process" by" itself."
⑤" X30" will" reboot" automatically."
"
5N7N6N2.Used! HDD! (partitioned! HDD)!
"
[Warning]! HDD! format! will! clear! all! data! in! the! HDD!!
①" Go" to" HDD" Format" of" SETUP," and"
confirm" with" the" OK" button."
②" It" will" show" total" size" and" current" file"
system"
"
"
"
"
25"
"
"
③" Select" Linux" or" NTFS"
"
④" It" will" start" formatting" and" reboot"
automatically."
"
"
!
5N7N7.! NTFS! Fix!
You" can" check" and" fix" the" NTFS" file" system" of" the" X30" HDD" as" follows." "
"
Select" NTFS" Fix" and" confirm" with" the" OK" key."
"
【" Caution" 】" We" recommend" you" NOT" to" run" this" function" if" the" NTFS" file" system" of" the" X30"
hard" disk" has" no" problems."
"
5N7N8.! Brightness!
"
You" can" control" the" brightness" level" of" the" LCD."
Select" Brightness" and" confirm" with" the" OK" key." You" can" set"
the" brightness" using" the" LEFT/RIGHT" arrow" key" on" the" remote"
control."
"
"
"
5N7N9.! Alarm!
"
You" can" set" six" (6)" alarm" settings" on" the" X30." " "
"
" Go" to" Alarm" at" SETUP," and" confirm" it" with" OK" key."
The" following" screen" will" appear."
"
"
" Select" the" line" you" require" and" press" the" OK" button."
The" following" screen" will" appear."
" NOTE:" The" time" should" be" set" minimum" 10" minutes"
later" than" current" time." "
"
"
"
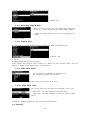
"
" Set" time," cycle" and" sound" source."
" Set" Snooze" ON."
26"and" confirm" it" with" OK" button."
" Select" OK"
" Selecting" time" with" up/down" button."
" Selecting" cycle" with" OK" button"
" Selecting" sound" source" from" Playlist" or" iRadio"
(My" Favorites)"
" Selecting" snooze" ON/OFF"
"
"
"
"
"
"
"
※" NOTE:" In" case" that" Alarm" is" set," the" below" icon" will" show" up" on" the" playing" screen."
※" NOTE"
A" :" Alarm"
2" :" Two"
D" :" Day"
Alarm" is" set" as" ‘after" 2" days" from"
now’."
""""
"
"
"
"
"
"
"
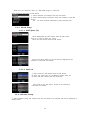
5N7N10.! Auto! Shutdown!
"
The" X30" will" be" powered" off" automatically" at" the" assigned" time" and" date."
"
" Go" to" SETUP" and" select" System."
" Select" Auto" Shutdown" and" confirm"
with" the" OK" key"
" Select" from" the" list" and" confirm."
"
"
"
" You" can" set" the" time" on" the" X10"
" Once" the" time" is" set" move" cursor" onto" the" OK" icon"
and" confirm" with" the" OK" key."
"
" ※" NOTE" :" Use" the" arrow" key" (UP/Down)" to" change" the" values." Use" the" arrow" key" (left/right)"
to" move" the" cursor." Press" the" OK" key" to" change" ‘Repeat’." Use" the" arrow" key" (left/right)" to" set"
ON/OFF."
!
" The" left" screen" will" show." Press" the" RETURN" key" to"
save" the" setting" and" exit" this" setup."
!
!
" NOTE:" Auto" shutdown" does" not" work" properly" if" you"
set" the" shutdown" time" ‘within" 3" minutes" of" the" power"
"
※NOTE:" In" case" that" Auto" shutdown" is" set," the" below" icon" will" show" up" on" the" playing" screen."
"
27"
"""
"
"
"
※NOTE"
D" :" Auto" Shutdown"
3" :" three"
H" :" Hour"
After" 3" hours" later," X30" will"
shutdown"
"
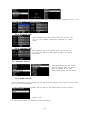
5N7N11.! Scroll! Speed!
"
Long" text" is" scrolling" on" the" screen." You" can" set" its" speed" like" below."
※" Default" :" Level" 1"
5N7N12.! List! Line! Count!
The" number" of" text" lines" displayed" on" the" screen" is" selectable" according" to" your" taste" like" below."
※" NOTE"
Default" for" internal" LCD:" 7" lines"
Default" for" external" screen:" 11" lines"
"
"
"
5N8.! Time!
"
You" can" set" time" format" and" time" via" internet" or" by" manual" here." "
"
"
"
5N8N1.! Time! Format!
X30" displays" the" time" while" playing" the" internet" radio."
Pressing" the" CLOCK" key" displays" time."
X30" can" display" one" of" two" ways," AM/PM" or" 24Hours." You"
can" select" which" here." "
"
"
"
"
"
5N8N2.! Time! Set! (Internet)!
" Select" Time" Set" (Internet)" and" confirm" it"
with" the" OK" button." All" the" time" options"
will" be" displayed" as" below."
"
【" TIP" 】" Make" sure" that" the" X30" is" connected" to" network" (internet)" before" you" try" time" setting"
28"
"
" Select" your" preferred" time" and" confirm" it" with" OK" button."
"
" TIP" " Default" :" GMT+00" London"
by" Time" Set" (Internet)."
"
"
"
5N8N3.! Time! Set! (Manual)!
Without" a" network" (internet)" connection," you" can" set" time" manually."
" Select" Time" Set" (Manual)" as" in" the" above" picture" and"
confirm" it" with" the" OK" button."
" Input" your" time" manually" and" select" OK" to" confirm" it" with"
OK" button."
"
"
5N9.! Firmware"
You" can" check" the" current" firmware" version" of" your" X30" and" install" the" updated" new" firmware."
Select" Firmware" and" confirm" with" the" OK" key."
"
""
"
5N9N1.! Current! firmware!
"
You" can" check" the" current" firmware"
version" as" shown" below." Select"
Current" Version" and" confirm" with" the"
OK" key."
"
"
"
"
"
"
5N9N2.! Update! by! manual! (Firmware! update! by! manual)!
"
" Obtain" the" new" firmware" first" and" put" it" onto" the" root"
directory" of" USB" memory" stick" or" the" HDD" of" the" X30."
" Plug" the" USB" memory" stick" into" the" USB" host" port" of" the" X30."
" Go" to" SETUP" and" select" Firmware" Update" and" confirm" with" the"
OK" key."
" Select" the" storage" device" containing" the" new" firmware."
" Select" xxxxxxxxxx.pkg" file" and" confirm" with" the" OK" key"
"
"
Select" OK" and" confirm" with" the" OK" button." The" X30" will" reboot" automatically" to" update" the" X30."
"
"
"
29"
5N9N3.! Update! by! auto! (Automatic! Firmware! Update! by! network)!
"
The" X30" will" automatically" update" the"
firmware" through" the" network." If" you"
don’t" wish" this" done" automatically" you" can"
change" the" setting" to" OFF," see" left."
"
※" Default" :" ON"
"
5N9N4.! What’s! Automatic! Firmware! Update! by! network?!
"
This" function" is" available" only" when" X30" is" connected" to" a" network" (internet)." In" the" instance"
that" a" higher" version" of" the" firmware" exists" at" our" server" system," your" X30" will" check" it"
automatically" when" the" X30" boots" up."
※" NOTE:" If" CANCEL" is" selected," the" folder" [New" Firmware]"
is" created" automatically" in" the" internal" hard" disk" (or" USB),"
then" the" X30" will" not" ask" for" a" Firmware" Update" when"
booting" up." If" you" delete" [New" Firmware]" through" Browser,"
it" will" ask" again."
" NOTE:" There" is" no" actual" data" in" the" [New" Firmware]"
folder."
"
"
"
"
※" If" OK" is" selected" the" X30" will" try" downloading" and" extracting" it" automatically." " The" X30" will"
reboot" automatically" to" update" the" firmware," see" sequence" below:"
"
"
"
6. CD! Database! (Music! DB)!
"
6N1.! What! is! the! CD! database! (Music! DB)! of! the! X30! ?!
"
The" Music" DB" is" a" database" of" the" music" loaded" (ripped)" to" the" X30" (onto" the" storage)," you" can"
edit" the" CD" information" of" each" track" such" as" the" title," album," artist," year" and" genre," that" are"
stored" in" the" Music" DB." You" can" search" any" of" your" music" easily" by" title," album," artist," year" or"
genre."
"
When" the" X30" is" connected" to" the" internet/network" the" CD" information" can" be" retrieved" from"
the" FreeDB" database" on" the" internet." A" USB" keyboard" or" the" supplied" remote" control" can" be"
used" to" edit" the" tag" information" of" the" CD" (which" you" may" find" incorrect" or" incomplete)" that"
will" eventually" be" stored" on" the" X30" Music" DB."
"
6N2.! What! is! FreeDB! ?!
"
FreeDB" is" a" database" used" to" look" up" CD" information" using" the" network" (internet)." This" is" done"
by" the" X30" (using" a" FreeDB" aware" application)" that" calculates" a" (nearly)" unique" disc" ID" for" a" CD"
inserted" into" your" optical" drive." As" a" result," the" X30" displays" the" artist," album," track" list" and"
some" additional" information." Since" all" information" is" submitted" by" FreeDB" users," there" are" likely"
to" be" several" different" sets" of" information" for" the" same" CD" or" no" information" for" a" certain" CD."
"
7. CD! Loading(Ripping)!
"
"
30"
All" music" that" you" load" (rip)" onto" the" X30" will" be" stored" in" hidden" folder" (the" name" of" the"
folder" is" .DB)," that" cannot" be" seen."
【 " TIP" ①" 】 " It" is" recommended" that" you" connect" to" the" internet" to" make" use" of" the" FreeDB"
when" loading" (ripping)" your" CDs."
"
"
"
7N1.! When! the! X30! is! connected! to! network! (internet)!
!
!Make" sure" to" connect" X30" to" network" (internet)" before" inserting" CD" into" X30."
"
"
"
"
"
" Insert" CD" into" X30."
" Select" CD" Play/Rip" icon" and" press" OK" button."
Wait" for" a" moment" until" X30" checks" FreeDB" CD" database" and"
retrieves" the" CD" tag" information."
"
" TIP" " " If" the" X30" is" connected" to" the" internet," but" displays"
the" track" lists" instead" of" the" actual" music" titles," eject" the" CD" &"
re>insert" it" into" the" optical" drive" again."
" For" CD" loading(ripping)," press" the" MENU" button."
Then" the" below" popup" screen" is" displayed" showing" “Ripping"
All”."
"
"
"
"
" " " " " 7N1N1.! Ripping! All!
"
This" procedure" is" for" loading" (ripping)" a" whole" CD."
" Select" Ripping" All" and" press" OK" button."
Then" the" below" screen" is" displayed."
"
"
" Select" one" of" four(4)" options(WAV," MP3," OGG," FLAC)" and"
press" OK" button."
Then," the" below" screen" is" displayed."
"
"
"
The" X30" retrieves" each" information" (title," artist," etc)" from"
the" FreeDB" CD" database."
"
" Move" the" cursor" onto" the" CD" icon" like" below."
"
" Press" the" CD" icon" with" OK" key" and" you" will" see" the"
picture" below."
"
31"
"
" Select" one" of" the" 4" options:" 7Digital," Google," Allcdcovers" "
or" Storage’." And," confirm" with" the" OK" key."
"
"
" The" X30" will" process" 3" steps:"
Searching/Downloading/displaying"
"
"
""
" Select" one" album" art" for" your" CD"
and" confirm" it" with" the" OK" key."
"
"
" The" selected" art" will" be" downloaded."
" You" will" be" prompted" OK/Other/Cancel."
" Select" OK" to" confirm." The" confirmed" art" will" be" placed"
onto" the" CD" icon."
"
"
"
" Now," everything" is" ready" to" start"
the" CD" ripping." Select" OK" to" confirm"
the" start" of" CD" ripping."
" Now" the" CD" will" be" ripped" to" the"
MusicDB"
"
"
When" the" Ripping" has" finished:"
"
Press" OK" key" to" eject" the" CD."
"
"
7N1N2.! Ripping! Tracks"
"
This" procedure" is" for" loading" (ripping)" individual" tracks."
"
"
32"
" Select" Ripping" Tracks" and" confirm" with" the" OK" button."
The" below" screen" is" displayed."
"
"
"
"
"
" Select" the" track(s)" you" want" to" load" (rip)" with" RIGHT" ARROW" key." After" finishing"
" selecting," select" OK" and" confirm" with" the" OK" button." The" selected" track(s)" color" will" change"
" to" red" color."
" Select" one" of" the" 4" file" type" options" and" confirm" with"
the" OK" button."
From" here," next" procedures" are" same" as" the" ‘Ripping" All’"
"
【 " TIP" ③" 】 " When" a" CD" is" inserted" into" the" optical" drive," the" X30" loads" (rips)" the" CD" to" a"
WAV" format" first," even" if" the" MP3" option" was" chosen." The" X30" then" converts" the" WAV" file" into"
MP3" format" afterwards" in" the" background." The" X30" continues" to" do" convert" the" files" if" it" is"
turned" on." The" X30" will" pause" the" conversion" process" during" ripping."
"
【" TIP" ④" 】! Explanation! of! each! item! on! the! ripping! screen.!
"
" Title" of" track" being" ripped" "
" Number" of" tracks" to" be" ripped/" total"
no" of" tracks" in" CD."
" Title" of" playing" time"
" Total" time" for" playing"
" Equivalent" play" time"
" Ripped" time"
" Equivalent" play" time"
"
"
"
"
7N2.! In! the! case! that! the! X30! is! NOT! connected! to! a! network! (internet).!
"
" Insert" CD" into" X30."
" Select" CD" Play/Rip" icon" and" press" OK."
Track" list" is" displayed" as" in" the" screen" below."
"
"
"
"
" For" loading" (ripping)," press" MENU" button."
The" below" screen" “Ripping" All”" is" displayed."
"
" TIP" " Without" a" network(internet)" connection," the"
inserted" CD" will" get" metadata" (tag" info)" if" you" installed"
FreeDB" onto" X30" storage." The" FreeDB" data" CD" is" bundled"
in" the" X30" package."
33"
"
"
"
"
7N2N1.! Ripping! All"
"
This" procedure" is" for" loading" (ripping)" all" the" tracks" on" CD."
" Select" Ripping" All" and" confirm" it" with" OK" button."
"
"
" Select" one" of" the" 4" file" type" options" and" confirm" by"
pressing" the" OK" button." The" below" screen" will" be" shown."
"
"
"
"
" Enter" the" info" with" remote" controller" or" USB" keyboard."
You! must! enter! Album! name! to! go! to! next! step.!
"
" TIP" " " To" use" USB" keyboard," ensure" to" connect" a" USB"
keyboard" into" the" X30" before" you" boot" the" unit."
"
" Select" OK" to" confirm" the" entry." Then," loading" (ripping)"
"
will" start" as" in" the" picture" below."
Now" loading" (ripping)."
"
"
" Loading" (ripping)" has" finished." Select" OK" and" confirm" by"
pressing" OK." The" screen" below" will" be" displayed."
"
"
" If" you" did" not" enter" info" for" title," artist," year" or" genre" on"
the" previous" step," you" can" enter" all" the" info" here."
" After" entering" the" info," select" OK" and" confirm" it" by"
pressing" the" OK" button."
"
※" NOTE" :" You" can" edit" tag" information" for" loaded" CDs" in" Music" DB" of" the" X30" easily" through"
"
34"
WebInterface."
"
7N2N2.! Ripping! Tracks"
This" procedure" is" almost" the" same" except" you" are" required" to" select" the" track" you" wish" to" load"
(rip)."
"
7N3.! If! the! FreeDB! is! installed! onto! the! storage! of! the! X30!
"
If" you" installed" the" FreeDB" database" onto" the" storage" of" the" X30" via" the" supplied" DVD" it" will"
work" as" if" the" X30" is" connected" to" network(internet)." The" X30" will" display" the" CD" information"
from" the" FreeDB" database" installed" onto" the" storage."
7N4.! To! check! the! status! of! CD! ripping! and! converting.!
"
You" can" check" the" status" of" CD" ripping" and" converting" by" this" function." "
①" Place" the" cursor" on" the" album" you" want" to" check."
②" Press" INFO" key"
"
"
"
③" The" status" information" will" show"
up" like" left."
"
"
" NOTE:" If" you" wish" to" check" the" information" and" the" status" of" the" conversion" process" for" the"
whole" of" the" Music" DB" of" the" X30," go" to" the" home" screen." Place" the" cursor" on" the" Music" DB"
icon" and" Press" the" INFO" key."
"
"
"
""
"
8. How! to! use! the! Music! DB(database)!
!
8N1.! Play! music! loaded! (ripped)! onto! the! X30.!
"
【" TIP" ①" 】" As" soon" as" you" finish" loading" (ripping)" a" CD" into" MP3" format," go" to" Music" DB" and"
select" the" loaded" music" and" play." You" can" see" the" loaded" music" format" is" still" WAV" not" MP3." To"
understanding" the" reason" for" this" please" refer" to" the" 【" TIP" ③" 】" of" 7" CD" Loading" (Ripping)."
"
The" Music" DB" contains" loaded" (ripped)" music."
"
" Select" Music" DB" icon," confirm" with" the" OK" button."
The" album" list" is" displayed" as" shown" below."
"
"
35"
" Select" the" album" you" wish" and" confirm" with" the" OK"
button."
All" the" music" in" the" album" is" displayed," see" below."
"
"
"
" Select" from" the" music" list" and" confirm" with" the" OK"
button" to" start" playing" the" music."
"
"
"
Now" playing" !!!!!!"
"
"
"
【" TIP" ②" 】Pressing" the" INFO" key" will" change" the" screen" as" follows;" "
[! Playing! Screen! ]! ! ! ! ! ! ! ! ! ! ! ! ! ! ! [! INFO! Screen! ]! ! ! ! ! ! ! ! ! ! ! ! ! ! [! Title! List! Screen! ]!
"""
"""
"
"
【" TIP" ③" 】" On" the" album" list" screen," press" the" MENU" button" on" the" remote" control," to" show"
other" categories" such" as" artist/track" list," artist/album" list," genre/track" list," genre/album" list" or"
titles," see" below"
"
"
"
"
"
"
"
"
"
"
【" TIP" ④" 】" Playing" screen" >>>>>>>" press" INFO" button" >>>>>>>" Detailed" info" of" current" music"
"
"
36"
"
"
"
"
"
"
"
"
"
"
"
"
"
"
"
"
""""""
Title" of" current" music"
Title" of" previous" music"
Title" of" current" music"
Title" of" next" music"
Play" mode"
Alarm" set" icon"
Auto" shutdown" set" icon"
Sleep" set" icon"
#" of" music" playing" /" Total" music" #"
Total" time" of" current" music"
Play" icon"
Played" time" of" current" music"
Album" art" of" current" music"
"
Title" of" current" music." Artist"
Album" Genre" Year"
File" format/Bit" rate/Frequency"
Play" mode"
#" of" music" playing" /" Total" music#"
Total" time" of" current" music"
Play" icon"
Played" time" of" current" music"
Album" art" of" current" music"
8N2.! SEARCH! function.!
"
In" the" case" that" there" are" many" album" lists" in" Music" DB," the" search" feature" can" be" useful."
"
SEARCH" function"
"
"
" On" the" album" list" screen," press" SEARCH" button" to"
display" the" above" screen."
" Enter" the" album" name" into" the" album" name" field" using"
the" remote" control."
"
※" NOTE:" To" view" corresponding" lists" type" the" first" few"
characters" of" the" album"
"
【" TIP" ⑤" 】" You" can" run" the" SEARCH" function" by" artist" from" the" artist" list" screen," by" genre" on"
the" genre" list" screen" or" by" title" on" the" title" list" screen," see" below."
"
"
8N3.! How! to! manage! Music! DB!
"
"
The" X30" allows" you" to" manage" the" Music" DB." You" can" delete" or" rename" albums," artists" and"
genre." You" can" import" music" from" other" storage" devices" (USB" memory" sticks" or" other" hard" disks)"
to" Music" DB" folder."
37"
"
"
8N3N1.! Deleting! or! renaming! music! in! the! Music! DB.!
"
"
"
"
" Open" the" album" list," artist" list" or" genre" list."
" Place" the" cursor" on" the" list" you" would" like" to"
delete/rename."
" Press" the" MENU" button." The" menu" screen" is" displayed" as"
shown" below."
" Select" Delete" or" Rename" and" confirm" with" the" OK" button."
"
"
"
"
" Select" OK" and" confirm" with" the" OK" button."
" TIP" " " You" can" also" run" this" function" for" the" artist" list"
and" the" genre" list" by" using" the" same" procedure." "
"
"
"
"
"
"
"
8N3N2.! How! to! export! music! from! the! Music! DB! to! other! storage!
devices! (HDD! or! USB).! !
"
You" can" export" music" from" the" Music" DB" to" other" storage" devices" such" as;" an" external" HDD" or"
USB" by" following" the" steps" below:"
"
"
" Go" into" the" Music" DB" using" the" remote" control." You" can" see"
the" Album" list." Select" the" folder(Album)" or" the" music" you" wish" to"
export."
" Press" the" MENU" key" and" select" Export" Songs," see" screen" shots"
shown" on" the" left"
" Confirm" with" the" OK" key," to" display" the" next" screen," shown"
below."
" Select" the" destination;" HDD" or" USB" and" confirm" with" OK"
the" key." Then" the" below" screen" is" then" displayed."
"
"
" Select" New" Folder" and" confirm" with" the" OK" button" to"
create" a" new" folder." The" below" screen" is" then" displayed."
"
"
"
" Titled" the" input" folder" and" select" OK" and" confirm" with" the"
OK" key"
"
" For" example," if" you"
38" input" Diva" –" The" Singles" Collection" and"
confirm," the" below" screen" is" then" displayed."
"
"
"
" Place" the" cursor" on" Diva" –" The" Singles" Collection" and" select"
using" the" OK" button." The" below" screen" is" then" displayed."
"
"
" Select" Export" Start" and" confirm" with" the" OK" key." " The"
Export" function" will" commence."
"
"
Now" exporting" music" !!!"
"
8N3N3.! History! function!
"
You" can" list" a" maximum" of" 10" recently" played" songs" from" the" Music" DB" using" this" function."
" Go" into" the" Music" DB"
" Press" the" MENU" key"
" Select" ‘History’" and" confirm" with" the" OK" key," as" shown" in"
the" screen" shot" on" the" left."
"
"
9. Editing! the! TAG! information! of! the! music! in! the! Music! DB!
"
You" can" edit" the" TAG" information" of" music" such" as" the" title," artist," album," year" or" genre" by"
following" the" steps" below:"
" Place" the" cursor" on" the" music" you" wish" to" edit."
" Press" the" MENU" button" and" select" TAG" Edit" and" confirm"
with" the" OK" button." The" screen" below" is" then" displayed."
"
"
"
"
"
" Using" the" remote" control" or" USB" keyboard" you" can" edit" the"
information."
" Select" OK" and" confirm" with" the" OK" button."
"
" TIP" " You" can" edit" loaded" CDs" in" the" Music" DB" of" the"
X30" easily" using" the" WebInterface." Please" refer" to" the" X30" –"
WebInterface" User" Guide."
10.! Audio! CD! direct! play!
"
"
39"
10N1.! If! the! X30! is! connected! to! a! network! (internet)!
"
"
"
"
" Insert" a" CD" into" the" X30."
" Select" the" CD" Play/Rip" icon" and" press" the" OK" button."
" TIP" " If" the" X30" is" connected" to" the" FreeDB" CD" database"
through" the" network," the" below" screen" will" be" displayed."
" Select" the" music" you" would" like" to" play" and" press" the" OK"
button."
"
The" playing" screen" is" shown" below"
"
"
Now" playing" !!!!!!!"
"
"
【 " TIP" ③" 】 " If" you" press" the" INFO" button" on" the" above" Playing" Screen," you" can" see" detailed"
information" for" the" music" currently" playing," see" screen" shot" below."
"
"
"
10N2.! If! the! X30! is! NOT! connected! to! a! network! (internet)!
"
" Insert" a" CD" and" select" CD" Play/Rip" icon" and" confirm" with"
the" OK" button."
The" track" list" is" displayed" as" shown" below"
"
"
" Select" the" track" you" wish" to" play" and" confirm" with" the" OK"
button." The" track" will" then" start" playing"
"
"
Now" playing" !!!!!!!!!"
"
"
10N3.! In! the! case! that! you! have! installed! the! FreeDB! data! onto! the! storage!
of! the! X30!
"
40"
"
If" you" installed" the" FreeDB" data" onto" the" storage" of" the" X30," it" will" work" just" like" the" X30" is"
connected" to" a" network" (internet)." The" X30" displays" the" CD" information" from" the" FreeDB" data"
installed" on" the" storage."
"
"
11.! Data! CD! direct! play!
The" X30" will" support" music" files" burned" to" CD" R/RW" or" DVD" R/RW" discs"
" Insert" the" data" CD" into" the" X30" and" navigate" to" the" Browser" using" the" remote" controller." "
" You" will" see" the" CDROM." ③" Select" and" confirm" with" the" OK" button" and" select" the" music" to"
play."
"
【" TIP" 】" If" you" wish," you" can" import" the" music" on" the" CD" to" the" Music" DB" of" X30." Press" the"
MENU" button" on" the" remote" control" when" on" the" music" list" and" select" Import" to" DB" and"
confirm" with" the" OK" button."
!
!
12.! Playlist!
"
The" X30" has" three" (3)" kinds" of" playlist." The" 1st" one" is" just" the" normal" Playlist" function," the" 2nd"
is" ‘My" Playlist’," and" the" 3rd" is" ‘Advanced" My" Playlist’." The" normal" Playlist" does" not" disappear" by"
stopping" or" powering" off." However," My" Playlist" and" Advanced" My" Playlist" are" virtual" playlist." The"
virtual" playlist" is" removed" by" stopping" or" powering" off."
"
" NOTE:" If" you" run" ‘My" Playlist" function’" or" ‘Advanced" My" Playlist" function’," the" My" Playlist" is"
created" automatically" in" the" Playlist" folder."
"
12N1.! Playlist"
!
12N1N1.! How! to! make! a! Playlist!
"
Ensure" there" are" music" files" in" the" Music" DB" before" making" a" Playlist."
"
"
" Select" the" Playlist" icon" and" press" OK."
The" screen" below" is" then" displayed."
"
" TIP" " " The" Auto" Play" folder" is" created" automatically" and" it"
can" not" be" removed" by" the" user."
" Press" the" MENU" button" to" show" a" popup" menu," see" screen"
shot" below."
"
" Select" New" PLS" and" confirm" with" the" OK" button."
The" screen" below" is" then" displayed."
"
"
"
" Enter" a" playlist" name" and" select" OK." Confirm" the" selection"
with" the" OK" button." "
41"
The" album" list" is" then" displayed" in" the" Music" DB," as" shown"
below."
"
"
"
"
"
"
"
" TIP" " " You" can" add" music" to" a" playlist" by" track" or" by" album."
" You" may" see" +" icon" at" the" end" of" the" cursor" on" an" album."
Press" the" PLAYLIST" key" to" add" the" album" to" the" playlist."
" NOTE:" You" can" move" the" cursor" by" using" the" arrow" key"
(UP/DOWN)"
⑥" Press" the" OK" key" if" you" would" like" to" go" down" the" track" list"
of" an" album" "
⑦" You" can" add" more" music" (tracks)" or" albums" using" the" above"
procedure."
⑧" After" adding" a" track" or" album," press" RETURN" to" go" to" the"
screen" shown" below."
"
"
"
"
"
"
"
⑨" Select" OK" and" confirm" with" the" OK" button."
"
Then," the" playlist" 1" is" stored" in" the" Playlist" folder," see" below."
You" can" view" the" playlist" if" you" go" into" the" Playlist" folder"
through" the" Playlist" icon" on" the" home" screen."
Playlist" has" been" created"
"
"
" NOTE:" To" add" more" songs" or" albums" to" the" playlist" you" have" created," move" the" cursor" onto"
the" intended" playlist" and" press" the" MENU" key."
"
"
"
"
"
12N1N2.! How! to! add! songs! to! a! Playlist! whist! playing! music!
"
When" you" are" enjoying" music" from" the" Music" DB" and" you" come" across" a" track" you" would" like"
to" add" to" a" playlist," you" can" add" it" to" an" existing" playlist" in" the" Playlist" folder" by" following" the"
following" steps:"
"
[! Playing! Screen! ]!
"
" " Press" the" PLAYLIST" key" whilst" in" ‘Playing" Screen’" mode" as" shown" above."
"
" Select" the" playlist" you" would" like" to" add" the" song" to."
" Confirm" with" the" OK" key" and" the" song" will" 42"
be" stored" in" the" selected" playlist."
"
"
"
"
12N1N3.! How! to! play! a! Playlist!
"
" Select" the" Playlist" icon" on" the" remote" control" or" press" the"
PLAY" LIST" hotkey" on" the" remote" control." The" following" screen"
is" then" displayed."
"
"
"
" Select" the" Playlist" you" would" like" to" play" and" confirm"
with" the" OK" button."
You" will" then" see" the" music" in" the" playlist" as" shown" below."
"
"
"
" Select" the" music" you" would" like" to" play" and" confirm" with" the"
OK" button" to" play" the" selected" music."
"
" TIP" " " If" you" set" the" play" mode" as" Repeat" All," all" music" in"
the" selected" playlist" will" be" played" continuously" in" sequence."
"
"
"
"
12N1N4.! How! to! edit! a! Playlist!
Go" to" the" Playlist" screen." Press" the" MENU" button" on" the" remote" control." You" can" delete" existing"
playlists," add" music" to" existing" playlists" or" clear" music" from" an" existing" playlist."
"
"
12N2.! My! Playlist! (Virtual! Playlist)!
"
This" is" a" virtual" playlist" function." After" you" have" made" a" My" Playlist," it" will" be" removed" if" you"
stop" playing" or" power" off." This" function" works" only" in" the" Music" DB." It" will" not" work" in" the"
Browser." "
" Place" the" cursor" on" the" list" of" songs," albums," artists,"
discography" or" genres."
"
"
"
"
"
" Press" the" MY" PL" key" on" the" remote" control."
" The" selected" album" will" be" played" after" showing" [Creating"
"
Playlist" ‘My" Playlist’]" as" shown" below."
" If" you" go" into" the" folder" of" Play" List" with" the" RETURN" key,"
there" will" be" My" Playlist" displayed"
43"
""
""
"
"
【 " TIP" 】 " When" My" Playlist" is" being" played," you" may" look" for" more" albums" or" songs" with"
RETURN" key" to" add" them" into" the" current" My" Playlist." Place" the" cursor" on" the" album" or" song,"
and" press" MY" PL" key." The" below" picture" will" show" up."
"
"" Play" Now:" If" you" select" Play" Now" and" confirm,"
the" selected" album" will" start" playing."
"" Play" Last:" The" selected" album" will" be" added" to"
the" currently" playing" list(album)" as" the" last" entry."
"" Play" Next:" The" selected" song" will" be" added" to"
the" next" of" the" current" playing" song."
"
"
12N3.! Advanced! My! Playlist" (Virtual! Playlist)!
"
You" can" create" a" Advanced" My" Playlist" (Virtual" Playlist)" when" you" come" across" a" track" you"
would" like" to" add" by" its" artist," genre" or" album."
"
" When" you" come" across" the" track," press" the" AD" MY"
PL" key" at" the" ‘Playing" Screen," see" left."
"
"
"
"
" The" popup" menu" will" appear" as" shown" on" the" left."
" Select" one" choice" and" confirm" with" the" OK" key"
" The" selected" song" will" start" playing," and" will" be" stored" as"
My" Playlist."
"
"
"
"
13.! The! Music! Streaming! function!
"
As" the" X30" supports" various" network" protocols" such" as;" UPnP" Server/Client/Renderer" and" Samba"
Server/Client," you" can" enjoy" various" Music" Streaming" functions" with" the" X30."
"
"
13N1.! UPnP! Server/Client! and! Samba! Server/Client! function!
"
You" can" use" the" X30" together" with" various" kinds" of" devices" that" support" UPnP" Server/Client" or"
Samba" Server/Client." If" the" devices" are" connected" to" the" X30" through" the" same" network," you" can"
see" the" devices" through" the" Browser," see" below;"
44"
"
"
"
"
"
"
"
13N2.! Multiple! X30’s! on! the! same! network.!
"
Place" the" X30" with" the" storage" (music" server)" in" your" living" room." A" second" X30" (without"
storage)" is" placed" in" room" #1" or" room" #2." You" can" then" play" files" from" the" X30" (music" server)"
on" the" X30’s" without" storage’s," see" schematic" below."
"
"
"
13N3.! The! X30! works! as! a! Music! Server! with! Sonos.!
"
Sonos" users" can" use" the" X30" as" a" music" server" with" their" Sonos" device."
"
"
14.! INService!
"
Ensure" the" X30" is" connected" to" the" network" (internet)" before" using" the" i>Service."
"
45"
【" TIP" ①" 】" There" might" be" a" slight" delay" when" tuning" i>radio" stations" (buffering)." This" delay"
may" occur" due" to" the" network" (internet)" connection."
"
14N1.! Internet! Radio!
"
14N1N1.! How! to! play! the! Internet! Radio.!
"
You" can" enjoy" many" internet" radio" stations." The" X30" internet" radio" is" based" on" the" Reciva"
server." It" provides" many" stations" by" genre" and" by" country."
"
" TIP" " If" the" X30" is" not" connected" to" a" network" (internet),"
you" will" not" be" able" to" select" the" i>Service" icon"
"
"
"
"
"
"
" TIP" " When" the" i>Service" icon" is" highlighted" the" X10" is"
successfully" connected" to" the" network."
"
" Select" the" i>Service" icon" and" confirm" with" the" OK" key." The"
below" screen" is" then" displayed."
" Select" the" Reciva" i>Radio" and" confirm" with" the" OK" key."
The" below" screen" is" then" displayed."
"
"
③" Here" you" can" select" Genre" or" Country" as" desired"
"
"
Now" playing" !!!"
"
"
"
"
14N1N2.! How! to! add! your! favorite! stations! into! My! Favorites.!
"
【" TIP" 】" If" you" add" your" favorite" radio" stations" into" the" My" Favorite" folder" you" can" find" them"
easily."
"
Whilst" playing" a" station" press" the" FAVORITE" button" on" the"
remote" control"46"
to" add" the" station" to" your" Favorites" list."
The" station" will" then" appear" in" the" My" Favorite" folder," as"
"
shown" left."
"
"
"
"
14N1N3.! How! to! play! My! Favorites.!
"
Once" you" have" made" a" My" Favorites" list," pressing" the"
FAVORITE" key" takes" will" take" you" into" the" My" Favorites"
list." Alternatively," you" can" access" the" My" Favorites" list" by"
pressing" the" MENU" button" on" the" Internet" Radio" screen,"
see" left,"
"
"
"
"
"
"
"
"
14N1N4.! How! to! a! run! search! function! on! the! Internet! Radio"
"
You" can" search" for" a" station" on" the" Internet" Radio" as"
follows;" on" the" Internet" Radio" screen," press" the" SEARCH"
button" on" the" remote" control," the" left" screen" will" then" be"
displayed." Input" the" first" few" alphabetical" characters" of" the"
station" and" select" OK" and" confirm" with" the" OK" key."
Similar" named" stations" are" also" displayed."
"
14N1N5.! Recording! from! the! Internet! Radio"
"
※" NOTE" 1:" We" recommend" NOT" to" record" continuously" for" over" three" (3)" hours."
※" NOTE" 2:" Space" required" for" recording" in" MP3" format:" 1" hour(54MB)/2" hours(108MB)/3"
hours(162MB)"
※" NOTE" 3:" X30" will" record" i>Radio" by" the" formats" like" MP3," AAC" or" ASF" according" to" the"
station’s" streaming" format."
"
14N1N5N1.! How! to! record"
"
①" While" the" I>Radio" is" playing," press" the" REC" button" to" start" recording."
②" Press" the" STOP" button" to" stop" recording"
" " " [" Playing" ]" " " " " " " " " " " " " " " " " " " [" Recording" ]" " " " " " " " " " " " " " " " " [" Playing" ]"
"
"
"
"
"
14N1N5N2.! Where! is! the! recorded! file! stored! ?"
"
The" X30" creates" a" [IRadio" Recording]" folder" on" the" hard" disk" automatically" when" recording" has"
started." All" recorded" files" are" stored" in" the" IRadio" Recording" folder," see" below."
"
47"
"
"
"
14N1N5N3.! The! recorded! file! name! structure"
"
The" station" will" show" the" music" title," see" below," the" recorded" file" name" will" be" the" music" title."
"
"
"
""""""""""""""""""
"
"
If" the" station" does" not" show" any" title," see" screen" shot" below," the" recorded" file" name" will" be"
‘year>month>day>time" (minute/second)."
"
"
""""""""""""""""""""
14N1N5N4.! How! to! edit! the! recorded! file"
"
"
You" can" edit" the" recorded" file" easily" with" the" file" management" function." Place" the" cursor" on" the"
recorded" file" and" press" the" MENU" button" to" run" the" following" functions:"
" " " " " [" TAG" Edit" ]"
"
"
" " " " " [" Import" to" DB" ]" " " " " " " " " " " " " " " " [" Copy" File" ]" " " " " " " " " " " " " " " " [" Move" file" ]"
"
"
14N1N6.! Reservation! Recording"
"
This" function" works" for" the" stations" stored" in" the" My" Favorites" folder."
"
14N1N6N1.! How! to! set! reservation! recording"
"
"
①" Place" the" cursor" on" the" station" that" you" want" to" set" for"
reservation" recording."
48" then" POPUP" option" will" show" up" like"
②" Press" MENU" key,"
below."
"
"
③" Select" ‘Reservation" Recording’" and" confirm" with" OK" key."
"
"
④" On" left" screen," you" can" set" for" date," month," year," time,"
recording" duration," etc."
"
" NOTE:" We" recommend" NOT" to" record" continuously" for"
over" 3" hours."
"
"
14N1N6N2.! How! to! work"
"
1)! In! case! that! you! powered! X30! off! after! recording! setting! (e.g.! 4:00PM! /!
record! for! 3! M! )!
"
"
"
"
X30" will" start" booting" up" automatically" at" 3:57PM(3" minutes" before" set" time" 4:00PM)"
X30" will" start" playing" the" station" at" 3:59PM" (1" minute" before" set" time" 4:00PM)." Volume"
is" set" as" ‘Mute’" automatically."
X30" will" start" recording" the" station" at" 4:00PM" and" keep" recording" by" 4:03PM."
X30" will" power" off" automatically" by" itself" as" soon" as" it" finishes" recording" at" 4:03PM."
2)! In! case! that! you! keep! X30! powered! ON! after! recording! setting(e.g.!
4:00PM! /! record! for! 3M! ).!
"
"
"
X30" will" stop" current" job" (playing)" and" start" playing" the" station" at" 3:59PM" (1" minute"
before" set" time)."
X30" will" start" recording" the" station" at" 4:00PM" and" keep" recording" by" 4:03PM."
X30" will" stop" recording" at" 4:03PM" and" keep" playing" the" station" continuously."
"
3)! Set! for! multiple! stations!
You" can" set" reservation" recording" for" multiple" stations." But," set" time" must" NOT" be" overlapped"
each" other." Of" course," you" have" to" consider" needed" time" for" each" activity" described" above" (How"
to" work)." If" you" do" not" give" interval" enough" for" each" station" and" each" activity," this" function" will"
not" work" properly.(e.g." You" set" recording" at" 4:00PM," and" you" powered" off" X30" at" 3:58PM." This"
is" wrong" setting)."
"
! NOTE:! The! recorded! file! will! be! stored! in! the! ‘IRadio! Recording’! folder! of! hard! disk.!
You! can! see! it! through! ‘Browser’.! You! can! edit! the! recorded! file! with! the! Tag! Edit!
function.!
!
14N2.! Online! Music! Service! (Simfy)!
"
Simfy" is" now" available" in" limited" countries" like"
Germany," Austria," Switzerland" and" South" Africa" only."
"
"
! NOTE:! To! learn! how! to! use! Simfy,! please! refer! to! separate! Simfy! user’s! guide.!
49"
"
"
"
"
"
15.! FM! Radio!
"
15N1.! How! to! play! FM! Radio!
"
※" NOTE:" Make" sure" to" install" FM" Radio" antenna" properly" first."
①" Select" FM" Radio" icon" to" start" FM" Radio"
②" X30" will" try" seeking" all" stations" available"
"
"
③" Select" one" station" and" confirm" it" with" OK" key."
" ④" It" will" start" playing" like" left"
" NOTE:" On" the" playing" screen" like" above," you" can" do"
fine" tuning" with" the" arrow" (UP/DOWN)" keys," and" seek"
station" with" the" arrow" (LEFT/RIGHT)" keys."
"
"
"
"
※" NOTE:" In" countries" where" RDS" is" available," you" may" see"
station" name" info" and" text" data" info" in" the" red" square" like" left"
picture."
"
"
"
"
※" NOTE:" Place" the" cursor" on" the" station" list" screen," and" press" MENU" key" to" show" up" POPUP"
menu" like" below."
※"
You" can" run" useful" functions" like" Rename," Delete," Seek" All,"
Clear" &" Seek" All"
"
"
"
The" left" is" for" renaming" the" station"
"
"
"
15N2.! How! to! record! FM! Radio!
"
"
①" When" playing" FM" radio," press" REC" key" on" the" playing"
screen" to" start" recording."
②" To" stop" recording,"
press" STOP" button" of" remote" control."
50"
"
"
※" Recorded" file" information" according" to" the" Recording" Sample" Rate"
Recorded" File"
*1)" Recording"
Size/Recording"
Sample"
File" name" structure"
Sample" Rate"
time"
Rate"
Format"
48Khz"
691MB/1" Hour"
48Khz"
Station" name(Frequency)+Year+"
WAV"
Month+date+Time"
96Khz"
1,383MB/1" Hour" 96Khz"
192Khz"
2,767MB/1" Hour" 192Khz"
*1)" Recording" Sample" Rate" :" You" can" set" as" you" want" at" SETUP"
"
※" NOTE:" You" can" edit" the" recorded" file" and" import" it" to" the" Music" DB." Refer" to" 18>4." How" to"
edit" the" recorded" file" and" 18>5." How" to" rip" (convert)" the" edited" file" into" other" formats" (MP3,"
FLAC" or" OGG)" and" load" onto" the" Music" DB."
"
16.! USB! host! port! for! USB! devices!
You" can" use" various" USB" devices" like" USB" memory" stick," MP3" Player," USB" external" hard" disk," etc"
with" the" USB" host" port" of" X30." ①" Plug" the" USB" device" into" the" USB" host" port" of" the" X30." ②"
Go" into" the" Browser" screen." The" USB" device" appears" in" the" browser" screen" as" shown" below."
"
"
17.! Browser!
"
If" you" go" to" the" Browser" icon," you" can" run" the" following" functions."
"
"
17N1.! Play! audio! file! data! CD’s!
!
The" X30" supports" data" CD’s" with" recorded" audio" files." The" X30" supports" various" audio" files" such"
as;" APE/CUE," HD" FLAC," HD" WAV," MP3," FLAC," WAV," WMA," M4A," AAC," ALAC," AIFF," AIF," Ogg"
Vorbis," PCM," PLS," M3U," etc."
"
" Insert" the" data" CD" into" the" X30." ②" Select" the" Browser" icon" and" confirm" with" the" OK" button."
You" will" see" the" data" CD." Select" the" music" you" would" like" and" play" using" the" OK" button."
"
51"
"
"
17N2.! File! Management! function!
!
17N2N1.! Accessing! information! on! the! HDD,! USB,! folder! or! file.!
"
Place" the" cursor" on" each" drive" and" press" the" INFO" key." The" information" is" displayed" as" shown"
below."
"
To" check" the" information" folder," place" the" cursor" on" the" folder" and" press" the" INFO" key."
"
To" check" the" information" on" a" file," place" the" cursor" on" the" file" and" press" the" INFO" key."
"
"
"
"
To" check" the" information" of" a" ripping" /" converting" result," place" the" cursor" on" the" album" and"
press" the" INFO" key."
"
"
"
"
"
52"
17N2N2.! TAG! Edit!
"
This" function" is" only" valid" for" files" not" for" folders" or" disks."
Place" the" cursor" on" the" file" you" would" like" to" edit" and" press" the" MENU" key." Select" Edit" Tag" and"
the" edit" screen" is" displayed," see" below."
"
"
17N2N3.! Import! to! DB!
"
You" can" import" a" folder" or" file" from" the" HDD," USB" or" CD" to" the" Music" DB."
To" import" a" folder" or" file" to" the" Music" DB" follow" the" steps" below:"
"
" Place" the" cursor" on" the" folder" or" the" file" you" would" like"
to" import" to" the" Music" DB"
" Press" the" MENU" key" and" select" Import" to" DB" and" confirm"
with" the" OK" key" to" commence" importing."
"
" NOTE:" When" importing" all" the" music" from" a" folder" to" the" Music" DB" the" album" name" of" all"
the" music" in" the" folder" must" be" same." "
"
" You" can" select" ‘move’" or" ‘copy’."
"
" NOTE:" If" you" select" ‘move’," the" importing" speed" will" be" faster" than" copy." But," the" original" file"
or" folder" will" not" exist" at" the" original" place" any" more."
Now" copying" to" Music" DB" !!!!"
"
"
17N2N4.! Copy! Files!
"
You" can" copy" files" or" folders" by" following" the" procedure" below:"
" Place" the" cursor" on" the" file" or" folder" you" would" like" to"
copy"
" Press" the" MENU" key" and" select" Copy" Files." The" screen"
below" is" then" displayed."
"
"
"
53"
From" here," refer" to" 8>3>2." How" to" export" music" from" the"
Music" DB" to" other" storage" devices," as" the" procedure" is"
exactly" same."
"
"
17N2N5.! Move! Files!
"
You" can" move" files" or" folders" using" the" following" procedure:"
" Place" the" cursor" on" the" file" or" folder" you" would" like" to"
copy"
" Press" the" MENU" key" and" select" Copy" Files." The" screen"
below" is" then" displayed."
"
"
From" here," refer" to" 8>3>2." How" to" export" music" from" the"
Music" DB" to" other" storage" devices," as" the" procedure" is"
exactly" same."
"
"
"
17N2N6.! Delete! Files!
"
You" can" delete" file" or" folder" using" the" following" procedure:" "
" Place" the" cursor" on" the" file" or" folder" you" would" like" to"
delete"
" Press" the" MENU" key" and" select" Delete" Files." Confirm"
with" the" OK" button" to" start" deleting."
"
"
"
17N2N7.! .PLS! or! .M3U! files! with! internet! radio! stations!
"
If" you" wish" to" play" an" individual" internet" radio" station" using" the" X30," you" will" need" to" create" a"
PLS" or" M3U" file" and" put" the" file(PLS" or" M3U)" onto" the" storage" or" USB" host" of" the" X30." Once"
you" have" created" the" file" you" can" play" the" station" through" the" X30" Browser," see" example" below."
"
"
18.! Input!
"
18N1.! How! to! play! an! external! device! via! Input!
"
As" X30" has" various" Input" connectors" like" AUX" In," Analog" IN" (LINE" IN)," and" Digital" IN" (Toslink"
and" COAXIAL)," you" can" connect" external" devices" like" TV," player" or" etc" to" the" X30" and" record" the"
audio" (signal)" coming" from" outside" device."
"
"
" Connect" external" device" to" the" X30" properly"
"
54"
※" NOTE" :" When" connecting" external" device" to" X30," be"
careful" to" connect" both" devices" via" proper" connectors" and"
cables." "
"
"
" Play" the" external" device."
" Select" the" proper" input" and" confirm" it" with" OK" key"
"
"
Now" playing!"
"
"
" NOTE:" The" playing" screen" via" digital" inputs" like" Toslink"
or" Coaxial" will" show" the" input" sample" rate" of" the" source"
file" like" left" picture."
"
"
"
18N2.! How! to! record!
"
While" playing" music" through" the" Input" of" the" X30," press"
the" REC" button" to" start" recording" the" music" playing," see"
screen" shot" to" the" left." Press" the" STOP" button" to" stop"
recording."
"
"
"
" NOTE" :" Explanation"
"
1)" Record" Sample" Rate:" 192Khz:" This" is" decided" according" to" the" setting" of" the"
"
Recording" Sample" Rate" at" SETUP."
"
2)" 00:12" :" Recording" time"
"
3)" 9.3" M" /" 318.5" G" :" File" size" of" the" recording" file" /" Total" size" of" the" storage"
"
"
※" Recorded" file" information" according" to" the" Recording" Sample" Rate"
Recorded" File"
*1)"
Size/Recording"
Sample"
File" name" structure"
Format"
Recording"
time"
Rate"
Sample" Rate"
48Khz"
691MB/1" Hour"
48Khz"
Year>month>date>time"
96Khz"
1,383MB/1" Hour" 96Khz"
192Khz"
2,767MB/1" Hour" 192Khz"
*1)" Recording" Sample" Rate" :" You" can" set" as" you" want" at" SETUP"
"
"
55"
WAV"
"
"
"
"
18N3.! Where! is! the! recorded! file! stored! ?!
"
If" you" start" recording," the" X30" creates" the" folders" automatically" where" the" recorded" files" are"
stored."
①" Select" Browser" icon" on" the" home" screen," and" confirm"
it" with" OK" key."
②" Select" HDD1" and" confirm" it" with" OK" key"
"
"
③" Select" Browser" icon" on" the" home" screen," and" confirm"
it" with" OK" key."
④" Select" HDD1" and" confirm" it" with" OK" key"
"
"
⑤" There" will" be" folders" like" ANALOG" IN," AUX" IN," FM"
Radio," TOSLINK"
⑥" Select" proper" folder" and" confirm" it" with" OK" key" to"
see" the" recorded" file."
"
"
※" NOTE:" The" folder" will" be" named" according" to" the"
Input" for" recording."
"
"
"
18N4.! How! to! edit! the! recorded! file"
"
①" Place" the" cursor" on" the" Recording" folder" (like" Analog"
IN," AUX" IN," FM" Radio," TOSLINK," etc)" or" on" the" recorded"
file" in" the" folder," and" press" the" MENU" button."
"
"
"
56"
③" Select" TAG" Edit" and" confirm" with" the" OK" key," the" edit"
screen" will" be" displayed" as" follows."
"
"
"
②" Put" the" Title," Artist," Album," Year" or" Genre." If" you" put"
same" album" name" into" each" recorded" file," all" files" which"
have" the" same" album" name" will" be" sent(imported)" to" the"
same" folder" (album)" in" the" Music" DB" when" you" try"
ripping" (loading)" the" edited" files" to" the" Music" DB."
"
※" The" edited" file" name" will" be" changed" to" [Album" name]+Title"
"
18N5.! How! to! rip! (convert)! the! edited! file! into! other! formats! (MP3,! FLAC!
or! OGG)! and! load! onto! the! Music! DB"
"
※" NOTE:" Before" trying" to" convert" the" recorded" file" you" should" edit" the" recorded" file" first."
"
①" Place" the" cursor" on" the" edited" file," and" press" the" RIP"
button" on" the" remote" control."
"
"
②" Select" the" format" (MP3," OGG," FLAC" or" WAV)" you"
would" like," and" confirm" with" the" OK" button."
③"
"
"
③" The" edit" screen" will" be" displayed." Press" the" OK" key"
again" if" there" is" no" item" to" be" edited."
"
"
④" The" file" will" start" loading" onto" the" Music" DB"
"
⑤" Go" to" the" Music" DB" icon" on" the" home" screen" and"
check" the" Album" list."
"
"
57"
⑥" You" will" see" Test" Album" (Album" titled" at" the" edit"
step)" and" press" the" INFO" button" to" check" the" converting"
status," as" shown" left."
"
"
"
19.! Extra! Function!
"
"
19N1.! Volume! Balancing!
"
①" On" the" playing" screen," press" RED" key" of" remote"
control" to" open" the" screen" for" volume" balancing" setting"
"
"
②" On" the" screen" of" volume" balancing" setting," you" can"
control" Left/Right" volume" level" using" the" arrow" key"
(LEFT/RIGHT)"
③" After" setting," you" may" save" and" exit" using" any" key"
"
"
※" NOTE:" The" volume" balancing" function" works" for" X30" speaker" out" (inside" amplifier)" only."
"
"
19N2.! External! Screen!
If" you" want" to" use" an" external" screen" like" TV," monitor," etc," connect" it" to" the" HDMI" connector" of"
the" X30" via" HDMI" cable." And," press" SCREEN" key" to" activate" the" external" screen."
"
" NOTE:" After" pressing" SCREEN" button" it" will" take"
around" 5~6" seconds" to" change" screen" from"
internal" screen" to" external" screen," and" vice" versa."
"
"
"
"
"
"
58"
19N3.! Photo! Slide! Show!
"
①" Prepare" photo" file" in" the" storage" of" X30" or" in" USB."
②" While" playing" music," press" MENU" key" on" the" Playing"
Screen" to" popup" menu" list" like" below."
"
"
③" Select" Slide" Show" and" confirm" it" with" OK" key."
④" You" will" be" guided" to" select" photo" file."
⑤" Select" the" 1st" photo" file" and" confirm" it" with" OK" key." Then,"
the" slide" show" will" start" based" on" all" photo" files" in" the" same"
folder."
"
"
""
"
※" NOTE:" You" can" set" ‘Slide" Show" Effect’" and" ‘Slide" Show" Time’" at" SETUP"
"
19N4.! Listing! by! Text! or! Album! cover! art!
"
You" can" list" up" all" information" (like" album," title," genre," artist," etc)" on" the" screen" of" X30" by" text"
or" album" cover" art." You" can" select" one" of" text" mode" and" album" cover" art" mode" easily" using"
TEXT/ART" button" of" remote" control."
"
" " " " " " " [! Text! mode! ]! ! ! ! ! ! ! [! Small! album! cover! art! ]! ! ! ! [! Big! album! cover! art! ]!
"
"
"
"
19N5.! LYRICS!
"
LYRICS" function" is" to" display" lyrics" on" the" screen" during" playing" in" case" that" the" song" playing"
has" lyrics" file(.LRC" file)."
①" On" the" playing" screen," press" LYRICS" button" of" remote"
control." The" lyrics" will" be" displayed" like" below" picture."
②" Press" LYRICS" key" again" to" go" back" to" the" playing"
screen."
"
"
"
59"
" NOTE" 1:" LYRICS" function" works" at" Browser" mode" only,"
not" at" Music" DB."
" NOTE" 2:" If" lyrics" is" broken" on" the" screen," you" need" to"
check" OSD" language" setting" and" LRC" file" language" "
"
"
"
19N6.! BOOKMARK!
"
Files" can" be" bookmarked" while" playing" them." This" function" is" useful" for" long" files" such" as" audio"
books."
"
" Press" the" BOOKMARK" button" on" the" playing" screen."
" The" bookmarked" music" or" story" is" stored" in" the"
Bookmark" list" as" shown" below."
"
"
" If" you" would" like" to" list" up" the" bookmarked" music" or"
story," and" play" it," press" the" BOOKMARK" button" on" any"
screen" (except" playing" screen)."
"
"
" If" you" would" like" to" delete" bookmarked" music" or" story,"
press" the" MENU" key" on" the" Book" Mark" list" screen," shown"
left."
" Select" Delete" and" confirm" with" the" OK" button."
"
"
"
19N7.! Preset! E.Q(Equalizer)!
"
When" music" is" playing" you" can" change" the" Preset" equalizer" setting" by" pressing" the" Preset" E.Q."
button"
"
The" default" setting" is" Normal."
By" pressing" Preset" E.Q" button," you" can" change" like" Normal"
" Classical " Club" " Concert" Hall" " Dance" " Live" " Party" "
Pop" " Reggae" " Rock" " Soft" " Soft" Rock" " Techno" " Bass"
" Bass" &" Treble" " Treble" " Vocal" " Custom" EQ" " Normal"
"
"
"
"
" NOTE:" Preset" E.Q" works" for" X30’s" Speaker" Out" (inside" amplifier)"
"
"
19N8.! Custom! E.Q! (Equalizer)!
"
You" can" customize" equalizer" setting" according" to" your" taste."
"
"
" Press" E.Q"60"
button" of" remote" control" to" show" up" Custom"
E.Q" screen" like" left."
" Control" the" level" for" each" frequency" using" the" arrow"
(UP/DOWN)" key."
" Select" each" frequency" using" the" arrow" (LEFT/RIGHT)"
key."
" Finishing" setting," you" can" move" the" cursor" to" OK" icon"
"
"
"
"
"
"
" NOTE:" Combination" of" Preset" E.Q" and" Custom" E.Q"
On" the" custom" E.Q" setting" screen," press" Preset" button" to" set"
(select)" one" of" preset" equalizer" list." This" will" help" you" to"
customize" equalizer" easily."
"
"
"
19N9.! Resume! Play!
"
When" you" boot" up" the" X30," it" will" automatically" resume" playing" the" music" in" the" Music" DB,"
Browser" or" i>Radio" from" where" it" was" last" stopped."
Select" Resume" Play" and" confirm"
with" the" OK" key."
Set" it" as" ON" as" shown" left."
"
"
※" Default" is" OFF"
【" TIP" 】"
This" function" does" NOT" work" in" the" case" that" the" ‘Alarm’" function" or" ‘Auto" Play’" function" is"
enabled."
Function" priority" :" Alarm" function" >>>>#" Auto" Play" function" >>>>>#" Resume" Play" function"
"
"
19N10.! CLOCK! and! Display! (LCD)! OFF!
"
"
"
"
Whilst" playing," press" the" CLOCK" button." The" digital" clock" will"
be" displayed," see" left." And," press" it" once" again," the" LCD" will" be"
OFF" like" below." This" function" is" useful" when" you" are" listening"
to" music" at" night" as" the" light" from" the" screen" is" reduced." Exit"
from" LCD" OFF" mode" by" pressing" if" any" button" on" the" remote"
control."
61"
"
LCD" OFF" mode"
"
19N11.! Changing! the! play! mode!
"
" Press" the" MENU" button" on" the" playing" screen" to" change"
the" playing" mode."
" Alternatively," press" the" SHUFFLE" button" to" change" the"
mode" without" using" the" popup" menu."
"
"
" Normal" :" Play" all" the" music" in" an" album" or" in" a" folder" at"
once" in" sequence."
" Shuffle" :" Play" music" in" an" album" or" in" a" folder" at" random."
" Once" :" Play" the" current" music" once" only."
" Repeat" One" :" Play" the" current" music" repeatedly"
" Repeat" All" :" Play" all" music" in" an" album" or" in" a" folder" in"
sequence" and" repeatedly"
"
"
19N12.! Alarm!
"
You" can" set" six(6)" alarm" settings" on" the" X30." " "
"
" Go" to" Alarm" at" SETUP," and" confirm" it" with" OK" key."
The" following" screen" will" appear."
"
"
" Select" the" line" you" require" and" press" the" OK" button."
The" following" screen" will" appear."
" NOTE:" The" time" should" be" set" minimum" 10" minutes"
later" than" current" time." "
" Set" time," cycle" and" sound" source."
" Set" Snooze" ON."
" Select" OK" and" confirm" it" with" OK" button."
"
"
"
62"
" Selecting" time" with" up/down" button."
" Selecting" cycle" with" OK" button"
" Selecting" sound" source" from" Playlist" or" iRadio"
(My" Favorites)"
" Selecting" snooze" ON/OFF"
"
"
"
"
※" NOTE:"
A" :" Alarm"
2" :" Two"
D" :" Day"
Alarm" is" set" as" ‘after" 2" days"
from" now’." "
"""""
"
"
19N13.! Auto! Shutdown!
The" X30" will" power" off" automatically" at" the" assigned" date"
and" time."
"
" NOTE:" Refer" to" section" 5>7>10" Auto" Shutdown" for"
detailed" explanation."
"
"
19N14.! Sleep! mode"
" Press" the" SLEEP" button" on" any" screen" (except" setup),"
the" popup" Sleep" Off/Sleep" 10Min/Sleep" 20Min/Sleep"
30Min/Sleep" 1Hour/Sleep" 2Hour/Sleep" 3Hour" is" displayed."
" The" X30" will" be" set" as" per" the" last" popup"
"
"
NOTE:" Sleep" icon" will" show" up" after" setting."
"
"
"""""
※" NOTE:"
S" :" Sleep"
56" :" Fifty" six"
M" :" Day"
After" 56" minutes," it" will" go"
into" Sleep" mode" (power" off)."
"
19N15.! Auto! Play!
"
What" is" the" Auto" Play" function?" When" the" power" is" ON," Auto" Play" function" allows" the" X30" to"
boot" up" and" start" playing" automatically" the" song" in" the" Auto" Play" folder" in" the" Playlist" on" the"
home" screen."
"
" Navigate" to" the" Playlist" to" Auto" Play."
" Place" the" cursor" on" Auto" Play" and" press" the" MENU"
button."
" Select" Add" Song" and" press" the" OK" button."
" Place" cursor" on" the" music" you" would" like" to" Auto" Play."
" You" can" see" plus(+)" mark" at" the" end" of" the" cursor."
Press" the" 63"
OK" button." The" music" will" disappear" and" be"
added" to" the" Auto" Play."
"
" Go" to" Setup" and" set" Auto" Play" ON."
"
" NOTE:" Default" of" Auto" Play" in" SETUP" :" OFF"
"
"
"
19N16.! Shortcut! to! find! files! in! all! list! modes!
On" each" list" mode" if" you" press" an" alphabet" key" on" the" remote" control" the" cursor" will" jump" to"
the" first" file" will" that" character" at" the" beginning."
"
"
19N17.! Seek! function! on! the! Playing! Screen!
At" the" playing" screen" you" can" run" a" seek" function" by" pressing" numeric" keys" on" the" remote"
control." For" example," if" you" press" the" 5" key" while" playing" a" file" it" will" start" playing" from" the" 50%"
position" of" the" file" based" on" total" playing" time."
"
"
"
"
"
"
"
"
"
"
"
"
"
"
"
"
"
"
"
"
"
"
"
"
"
64"
20.! Specification!
Model" name"
Host" CPU" " &"
Memory"
CD" Player"
Interface"
Amplifier"
(Speaker" Out)"
ANALOG" OUT"
DIGITAL" OUT"
ANALOG"
INPUT"
DIGITAL"
INPUT"
TUNER"
Connectivity"
POWER"
SUPPLY"
Supported"
Storage"
"
CA>X30"
Embedded" 700Mhz" MIPS"
Main" Memory(4Gbit," DDR2" 800Mhz)"
Firmware" Memory(4Gbit)"
Type"
Front" Loading"
Supported"
CD," CD>DA," CD>R," CD>RW," DVD>R/RW"
media"
Supported"
DXD" 24bit/352.8Khz," APE/CUE," HD" FLAC," HD"
audio"
WAV," MP3," FLAC," WAV," WMA," M4A," AAC," ALAC,"
codec" &"
AIFF," AIF," Ogg" Vorbis," PCM," PLS," M3U," etc."
format"
5"" TFT" LCD(800x480" pixel)" on" the" front"
External" big" screen" like" TV" to" be" connected" through" HDMI"
connector"
Remote" Control"
Customized" Web" Interface" (Web" UI)" for" Web" Browser" like"
Internet" Explorer," FireFox," Chrome," Safari."
Free" UPnP" app" available" in" app" store" or" market" for" iOS" and"
Android"
Rated" output" :" 50W" +" 50W" @" 1Khz," 8" ohm," 0.1%" THD"
"
LINE" OUT"
Dynamic" Range" :" 127" dB(2" V" rms," Stereo)"
(L" &" R" RCA)" THD+N" :" 0.0004%"
Headphone"
6.35mm" jack" on" the" front,"
Out"
500mW+500mW@1Khz,"
32" ohm," 0.1%" THD"
Toslink" x" 1"
Sample" Rate" :" up" to" 24bit/192Khz"
COAXIAL" x" 1" SPDIF" 75ohm" RCA," Sample" Rate" :" up" to"
24bit/192Khz"
AES/EBU"
110ohm," Sample" Rate" :" up" to" 24bit/192Khz"
XLR" x" 1"
LINE" IN" X" 1" L" &" R" RCA" at" the" rear," 2V" rms"
AUX" IN" X" 1" 3.5mm" Phone" Jack" on" the" front," 800mV" rms"
Toslink" x" 1"
Sample" Rate" :" up" to" 24bit/192Khz"
COAXIAL" x" 1" Sample" Rate" :" up" to" 24bit/192Khz"
FM" Radio"
Tuning" Range(FM" 87.5" –" 108Mhz)"
FM" Antenna" input" impedance" :" 75ohm"
unbalance"
Remarks"
"
"
"
"
"
DAC" IC" :"
Burr>Brown"
PCM1792A"
"
"
"
"
"
RDS" is"
supported"
3" x" USB" Host" ports"
Network"
Wired"
Wireless"
(Optional)"
Front"
1x" USB" Host"
"
Rear"
2x" USB" Host"
"
801.11b/g/n" WiFi" USB" dongle(Optional)"
HDMI" OUT(video" only)" x" 1"
Connecting" to" external" big" screen" like" TV" for"
GUI" display" and" photo" slide" show"
Audio" Power" Supply"
Linear" Power" Supply"
Isolated" power"
source"
CPU" Power" Supply"
150W" internal" SMPS"
Hard" disk"
2.5”" SATA," up" to" 1TB"
Removable" storage" try"
(drawer)" is" provided"
3.5:" SATA," up" to" 4TB"
SSD"
‘2.5”" SATA," up" to" 500GB"
File" system"
Linux" and" NTFS"
65"
Supported" audio" codec" &"
format"
DXD" 24Bit/352.8Khz," APE/CUE," MP3," HD" WAV,"
HD" FLAC," WAV," WMA," M4A," Apple" Lossless,"
AAC," AIFF," AIF," Ogg" Vorbis," PCM," Playlist(PLS,"
M3U)"
Network" &"
Internet"
UPnP" server/client/media" renderer,"
"
Samba" server/client," FTP" server," Web" server,"
etc"
Supported"
Network"
protocol"
"
Streaming" Playback"
Hi>res" 24bit/192Khz" network" streaming" playback"
File"
Copy," delete," rename," importing" and" exporting" between" X30"
management"
storage" and" NAS" or" networked" PC"
Remote" control" via" mobile"
devices"
Control" remotely" by" iPhone," iPad" and" Android"
base" devices."
Customized" Web" UI"
Music" database" of" X30" can" be" controlled" and"
managed" by" the" customized" Web" UI" via" IE,"
Firefox," Chrome" and" Safari."
Internet"
Service"
Supported"
OSD" Lang."
Internet" Radio" :" Reciva" internet" radio"
Online" Music" Service" :" Simfy"
<" note" *" >" depends" on" countries"
"
"
English," German," French," Spanish," Italian," Polish," Czech," Dutch," Traditional"
Chinese," Russian," Danish," Korean," etc" (" To" be" added" by" request)"
Power"
Source"
Mechanical"
AC" 220V" >" 240V," 50/60Hz" (For" Europe)"
"
<" note" *" >" We" will" support" 110V" countries" also."
"
Material"
Front" :" 8mm" thickness" aluminum" /" Chassis" :" Metal"
Dimension"
without" foot"
435mm(W)" x" 325mm(D)" x" 88mm(H)"
with" foot"
435mm(W)" x" 325mm(D)" x" 98.5mm(H)"
Certificate"
CE," FCC," EMI," etc"
※" Specification" may" be" changed" without" notification."
21.Troubleshooting!
"
"
1." There" is" no" power."
1>1." Make" sure" the" power" cord" is" connected."
1>2." Check" the" X30" is" switched" ON" at" the" rear" panel."
1>3." Make" sure" the" plug" is" fully" inserted" into" the" wall" socket."
"
2." The" X30" does" not" respond" to" the" remote" control."
2>1." Replace" remote" batteries"
2>2." Check" for" interference" from" other" IR" sources"
2>3." Reduce" the" distance" between" the" remote" control" and" the" X30."
"
3." The" X30" does" not" display" the" network>shared" folder" on" your" PC"
" " " 3>1." Check" the" network" connection" status" between" the" X30" and" your" PC"
3>2." According" to" the" network" environment" there" may" be" a" time" delay" in" connecting" to" the"
network."
3>3." Try" rebooting" the" X30" and" configure" the" network" setup" again."
""
4." No" sound" from" the" speaker" during" music" file" play" back"
" " " 4>1." Check" if" the" MUTE" function" in" ON"
" " " 4>2." Check" the" speaker" cable" connection" status."
" " " 4>3." Check" the" volume" level"
" " " 4>4." Check" the" speaker" out" setting" at" SETUP." It" should" be" set" as" ON"
"
66"
"
5." The" X30" does" not" read" the" disc."
" " " 5>1." Check" if" you" have" inserted" the" disc" upside" down."
" " " 5>2." Check" to" see" if" the" disc" is" scratched" or" dirty."
"
6." The" disc" is" skipping"
" " " 6>1." Check" for" scratches" or" dirty."
" " " 6>2." Make" sure" that" the" X30" is" on" a" firm" surface" and" not" subject" to" vibrations."
"
7." There" is" a" hum" coming" from" the" speaker."
" " " Make" sure" that" all" cable" connections" are" secure."
"
67"