1
Rational Imaging Installation Manual
Rational Imaging
INSTALLATION
Version 6.1.0
Copyright 1993-2001
Intuitive Software Technology
30 Hackamore Lane, Suite #6
Bell Canyon, CA 91307
The material presented in this publication is copyright-protected 1993-2001 by Intuitive Software Technology
and may not be reproduced in any form, by any method for any purpose without the prior written consent of IST.
Information in this document is subject to change without notice. It is against the law to copy the software, except
in accordance with the terms of the licensing agreement.
05.08.2001
1
Rational Imaging Installation Manual
Table of Contents
I.
OVERVIEW................................................................................................................................................................. 1
A.
B.
C.
II.
SUMMARY.............................................................................................................................................................. 1
GETTING HELP ........................................................................................................................................................ 1
QUICK START ......................................................................................................................................................... 1
SYSTEM REQUIREMENTS................................................................................................................................ 2
A.
B.
C.
III.
HARDWARE CONFIGURATION................................................................................................................................. 2
SOFTWARE ENVIRONMENT ..................................................................................................................................... 3
SUPPORTED IMAGING SCANNERS ............................................................................................................................ 4
PLANNING YOUR PACS SYSTEM................................................................................................................... 6
A.
B.
IV.
P REPARE SYSTEM WORKSHEET .............................................................................................................................. 6
DEFINITION OF WORKSHEET COMPONENTS ............................................................................................................ 8
DATABASE SERVER.......................................................................................................................................... 12
A.
B.
C.
D.
V.
SUMMARY............................................................................................................................................................ 12
GENERAL INFORMATION....................................................................................................................................... 12
SOLARIS INSTALLATION ....................................................................................................................................... 13
RATIONAL IMAGING INSTALLATION ..................................................................................................................... 14
SATELLITE WORKSTATION........................................................................................................................... 17
A.
B.
C.
D.
VI.
SUMMARY............................................................................................................................................................ 17
SOLARIS INSTALLATION ....................................................................................................................................... 18
RATIONAL IMAGING INSTALLATION ..................................................................................................................... 18
CONFIGURATION................................................................................................................................................... 19
MULTI-DATABASE CONNECTIVITY............................................................................................................ 22
A.
B.
C.
CREATING A NEW DATABASE.............................................................................................................................. 22
CREATING MULTIPLE SERVERS.............................................................................................................................. 23
COPY EXAMS BETWEEN DATABASES ................................................................................................................... 25
VII.
UPGRADING A WORKSTATION ................................................................................................................... 26
A.
SUMMARY............................................................................................................................................................ 26
B.
SCHEDULE UPGRADE TIME.................................................................................................................................... 26
C.
BACKUP DATABASE FILES ................................................................................................................................... 26
D.
BACKUP APPLICATIONS ........................................................................................................................................ 26
E.
BACKUP SYSTEM FILES......................................................................................................................................... 27
F.
BACKUP USER TEMPLATES AND DEFAULTS.......................................................................................................... 27
G.
INSTALL NEW VERSION ........................................................................................................................................ 27
H.
DATABASE UPGRADES ......................................................................................................................................... 28
I. CONFIGURATION ....................................................................................................................................................... 29
J. TESTING .................................................................................................................................................................... 29
VIII.
TAPE BACKUP DEVICE............................................................................................................................... 30
A.
B.
C.
SOLARIS INSTALLATION ....................................................................................................................................... 30
TESTING................................................................................................................................................................ 30
CONFIGURATION................................................................................................................................................... 31
IX.
JUKEBOX INSTALLATION ............................................................................................................................. 33
A.
B.
05.08.2001
HARDWARE CONFIGURATION............................................................................................................................... 33
AIT DRIVE P REPARATION..................................................................................................................................... 34
1
Rational Imaging Installation Manual
C.
D.
E.
F.
G.
X.
DIFFERENTIAL LOW VOLTAGE SCSI CARD (INSTALL NOTES).............................................................................. 35
SOLARIS INSTALLATION ....................................................................................................................................... 36
TESTING................................................................................................................................................................ 36
CONFIGURATION................................................................................................................................................... 37
REMOVING EXISTING AP UNIX DRIVERS ................................................................................................................ 38
VIDAR FILM SCANNER INSTALLATION.................................................................................................... 39
A.
B.
C.
D.
XI.
SUNOS INSTALLATION......................................................................................................................................... 39
SOLARIS INSTALLATION ....................................................................................................................................... 39
TESTING................................................................................................................................................................ 40
CONFIGURATION................................................................................................................................................... 40
MODEM INSTALLATION................................................................................................................................. 41
A.
B.
C.
D.
MODEM SETUP ..................................................................................................................................................... 41
SOLARIS INSTALLATION ....................................................................................................................................... 42
TESTING................................................................................................................................................................ 42
CONFIGURATION................................................................................................................................................... 42
XII.
RAPTOR VIDEO CARD INSTALLATION ..................................................................................................... 43
A.
B.
SUMMARY............................................................................................................................................................ 43
INSTALLATION...................................................................................................................................................... 43
XIII.
DISPLAY CALIBRATION............................................................................................................................. 44
A.
B.
C.
D.
E.
F.
INSTALLATION...................................................................................................................................................... 44
CALIBRATION PROCEDURE .................................................................................................................................... 45
SMPTE P ATTERN................................................................................................................................................ 46
DOME MONITOR CALIBRATION ............................................................................................................................ 46
ALL MONITOR CALIBRATION................................................................................................................................ 47
P RINTER CALIBRATION......................................................................................................................................... 47
XIV.
CANON DIGITIZER....................................................................................................................................... 48
A.
B.
C.
D.
SCANNER CONFIGURATION ................................................................................................................................... 48
SOLARIS INSTALLATION ....................................................................................................................................... 49
RISCANC SETUP .................................................................................................................................................... 50
CANON CFS300 CALIBRATION ........................................................................................................................... 51
XV.
DISK INSTALLATION........................................................................................................................................ 54
A.
B.
C.
UNIX P REPARATION ............................................................................................................................................. 54
ADDING TO THE RATIONAL IMAGING SYSTEM ....................................................................................................... 55
TESTING................................................................................................................................................................ 55
XVI.
ASPECT DICOM INTERPRETER INSTALLATION............................................................................... 56
A.
B.
C.
UPGRADING .......................................................................................................................................................... 56
KODAK CONFIG P ARAMETERS ............................................................................................................................. 56
CONFIGURATION STEPS ........................................................................................................................................ 57
XVII.
RIS CONNECTIVITY INSTALLATION...................................................................................................... 58
A.
LICENSING ............................................................................................................................................................ 58
B.
RILINK CONFIGURATION ....................................................................................................................................... 58
C.
RIDELIVERD CONFIGURATION ................................................................................................................................ 59
D.
MESSAGE TESTING................................................................................................................................................ 61
E.
RILINK TROUBLESHOOTING................................................................................................................................... 62
F.
RIDELIVERD TROUBLESHOOTING ........................................................................................................................... 63
G.
RIDISTRIBUTE P REFETCH CONFIGURATION ........................................................................................................... 63
H.
STUDY CONTENT NOTIFICATION .......................................................................................................................... 64
I. RIDELIVER – MANUAL RECONCILIATION.................................................................................................................... 65
05.08.2001
2
Rational Imaging Installation Manual
J.
DELETING OLD MESSAGES (WORKLIST, PREFETCH, AND SCNEXAM) ........................................................................... 66
XVIII.
RIQUERYD INSTALLATION ....................................................................................................................... 67
A.
B.
C.
D.
E.
F.
G.
FUNCTIONALITY ................................................................................................................................................... 67
CONFIGURATION................................................................................................................................................... 67
INSTALLATION...................................................................................................................................................... 68
MULTIPLE DATABASES ........................................................................................................................................ 68
EFILM – INSTALL TEST CLIENT............................................................................................................................. 69
EFILM – CONFIGURE DICOM STORAGE SCP ...................................................................................................... 69
EFILM – CONFIGURE QUERY RETRIEVE ................................................................................................................. 69
XIX.
RIPRINTQ INSTALLATION......................................................................................................................... 71
A.
B.
C.
D.
E.
F.
G.
H.
LICENSING ............................................................................................................................................................ 71
REQUIRED FILES.................................................................................................................................................... 71
RIPRINTQ CONFIGURATION................................................................................................................................... 71
RIPRINTQ P RINTER ADDITION ............................................................................................................................... 73
RUN AS BACKGROUND P ROCESS........................................................................................................................... 73
TESTING................................................................................................................................................................ 73
RESET QUEUE ....................................................................................................................................................... 74
DELETE P RINTP AGES IN THE QUEUE ..................................................................................................................... 74
XX.
BLAST INSTALLATION .................................................................................................................................... 76
A.
B.
C.
BLAST SETUP ....................................................................................................................................................... 76
INSTALLING HYPERTERM ON THE PC .................................................................................................................... 77
TESTING................................................................................................................................................................ 77
XXI.
LASERCAMERA (FILM) INSTALLATION............................................................................................... 79
A.
B.
C.
D.
E.
SUNOS INSTALLATION......................................................................................................................................... 79
SOLARIS INSTALLATION ....................................................................................................................................... 79
CONFIGURATION................................................................................................................................................... 80
KODAK CONFIGURATION...................................................................................................................................... 81
TESTING................................................................................................................................................................ 81
XXII.
OPERATORS MANUAL INSTALLATION................................................................................................. 83
A.
B.
C.
SUNOS INSTALLATION......................................................................................................................................... 83
SOLARIS INSTALLATION ....................................................................................................................................... 83
CONFIGURATION................................................................................................................................................... 83
XXIII.
NETWORK ARCHITECTURE ..................................................................................................................... 84
A.
B.
C.
D.
CLIENT SERVER RELATIONSHIPS ........................................................................................................................... 84
CENTRALIZED DATABASE .................................................................................................................................... 84
DISTRIBUTED IMAGE DIRECTORIES ....................................................................................................................... 84
NETWORK DEPENDENCY AND RELIABILITY........................................................................................................... 85
XXIV.
ADMINISTRATIVE TASKS ........................................................................................................................... 87
A.
B.
C.
SYSTEM DIAGNOSTICS .......................................................................................................................................... 87
ACCESSING/CHANGING DATABASE CONFIGURATION INFORMATION .................................................................... 89
P ERFORM SYSTEM BACKUP .................................................................................................................................. 93
XXV.
CHANGE SERVER HOST............................................................................................................................. 95
A.
B.
SUMMARY............................................................................................................................................................ 95
P ROCEDURE .......................................................................................................................................................... 95
XXVI.
SYSTEM MAINTENANCE ............................................................................................................................ 98
A.
B.
SHUTDOWN DATABASE SERVER........................................................................................................................... 98
SHUTDOWN ADD-ON WORKSTATION ................................................................................................................... 99
05.08.2001
3
Rational Imaging Installation Manual
XXVII.
DATABASE ERRORS...............................................................................................................................101
A.
OVERVIEW ..........................................................................................................................................................101
B.
P REVENTING USE OF THE DATABASE DURING ANALYSIS AND MAINTENANCE.......................................................101
C.
DETERMINING THE DATABASE ERRORS................................................................................................................101
D.
REMOVING DUPLICATE KEYS ...............................................................................................................................102
E.
MISSING DATA POINTERS ....................................................................................................................................103
F.
EXPORTING THE DATA IN A DATABASE...............................................................................................................103
G.
IMPORTING THE DATA AND CREATING A NEW DATABASE ...................................................................................103
H.
OPTIMIZING DATABASE QUERIES .......................................................................................................................104
I. EXAMPLE PROCEDURE FOR MISSING DATABASE LINKS .............................................................................................104
J. DETERMINING THE DATABASE VERSION..................................................................................................................107
XXVIII.
REBUILD SERVER - EMERGENCY ...................................................................................................108
A.
B.
C.
D.
OVERVIEW ..........................................................................................................................................................108
SYSTEM P REPARATION .......................................................................................................................................108
RIBUILD - RETRIEVE DATABASE FROM ARCHIVE TAPE .......................................................................................109
REDUNDANT SERVER ..........................................................................................................................................110
XXIX.
INSTALLATION WORKSHEET.................................................................................................................112
A.
SUMMARY..........................................................................................................................................................112
B.
WORKSTATION IS THE MAIN DATABASE SERVER.................................................................................................113
C.
WORKSTATION IS THE REDUNDANT DATABASE SERVER ......................................................................................115
D.
WORKSTATION IS MULTIPLE DATABASE SERVER IN A NETWORK ....................................................................117
E.
WORKSTATION IS THE SATELLITE WORKSTATION ...............................................................................................119
F.
WORKSTATION IS A STAFF WORKSTATION (RIDISPLAY) .....................................................................................121
G.
EXTRA IMAGE P ARTITION/DISK (OTHER THAN /IMG) .........................................................................................123
H.
EXTRA SUN COLOR MONITOR(S) ............................................................................................................124
I. INSTALL DOME VIDEO ADAPTER WITH DATARAY MONITOR ....................................................................................125
J. CANON P OSTSCRIP T P RINTER(S).................................................................................................................127
K.
SEEMOR REFERRING WORKSTATION P RINTER(S) ...............................................................................................128
L.
REMOTE LOW -BANDWIDTH WORKSTATION P RINTER(S) ...................................................................................129
M.
FILM (LASERLINK) P RINTER.....................................................................................................................130
N.
VIRTUALRAD P RINTER ...............................................................................................................................131
O.
DICOM P RINTER ...........................................................................................................................................132
P.
GE CT & MR SCANNERS (5X AND ABOVE USING ADVANTAGENET ) ..................................................................133
Q.
GE MR SCANNERS (SIGNA 4X) .................................................................................................................134
R.
DICOM SCANNERS .......................................................................................................................................135
S.
NUCLEAR MEDICINE SCANNERS (INTERFILE FORMAT) ..................................................................136
T.
LUNAR MR SCANNERS ...............................................................................................................................137
U.
GATEWAY WORKSTATION (LOW BANDWIDTH) .................................................................................138
V.
TAPE DRIVE (STANDALONE P RIMARY ARCHIVE) ................................................................................................139
W.
JUKEBOX (SECONDARY ARCHIVE).......................................................................................................................140
X.
VIDAR FILM DIGITIZER ...............................................................................................................................141
Y.
CANON CFS300 FILM DIGITIZER ..............................................................................................................142
Z.
MODEM ON WORKSTATION .....................................................................................................................143
AA. BLAST REQUIRED TO SEND IMAGES TO PC’S/MAC’S. ......................................................................................144
BB. RIS CONNECTIVITY ......................................................................................................................................145
CC. USER SETUP ...................................................................................................................................................146
DD. MOVE DATABASE TO NEW SERVER........................................................................................................147
EE.
CHANGE HOSTNAME OF RATIONAL IMAGING WORKSTATION ..............................................................................149
FF.
RATIONAL IMAGING UP GRADE (VERSION 4.1 OR LATER)...............................................................150
GG. RATIONAL IMAGING UP GRADE (P RIOR TO VERSION 4.1)................................................................151
HH. UPGRADE INFORMIX SOFTWARE ...........................................................................................................152
XXX.
05.08.2001
INDEX..............................................................................................................................................................153
4
Rational Imaging Installation Manual
I.
A.
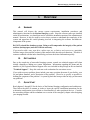
Overview
SUMMARY
This manual will discuss the current system requirements, installation procedures and
administrative functions for the Rational Imaging system. Since the software comes pre-installed
on the RI workstations, you should not need to consult the installation portion of the administrator's
manual. However, it may be useful to review these sections to understand the complexity of the
system and appreciate the careful planning involved in integrating the software and hardware
components of the system.
DO NOT reinstall the database system. Doing so will compromise the integrity of the patient
archives (backup tapes) and will VOID the warranty.
If you need to add a user, tape drive, archive tape set, or limit a user's access to a particular
facilities images, then read the sections of this manual which describe such functions. The table of
contents combined with the index should help you locate the desired information quickly.
B.
GETTING HELP
Due to the complexity of networked imaging systems, consult our technical support staff when
initially changing or adding new system information. Information regarding the phone and fax
numbers of your regional technical support office was included in this package on the card marked
"Technical Support". Keep this card near each workstation for convenient access.
If you wish to report a problem, please include your name, position, the name of your facility, your
fax and phone numbers, and a description of the problem. Please be as specific as possible in
defining the symptoms of the problem. A system log book has been provided to help you document
any problems.
C.
QUICK START
Read chapters I through III for the basics of the Rational Imaging configuration and architecture.
Then follow the table of contents or index to locate the specific installation instructions for the
workstation configuration (server/Main or client/Satellite) or other peripheral devices. Consider
the networking chapter and the redundant server section of the emergency chapter when designing
your imaging network.
05.08.2001
1
Rational Imaging Installation Manual
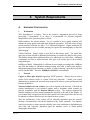
II. System Requirements
A.
HARDWARE CONFIGURATION
1.
Workstation
SUN SparcStation 2 or higher. Due to the extensive computation involved in image
processing, a SparcStation 10 or above is recommended for efficient diagnostic
interpretation where processing time is critical.
High resolution, fast refresh monitor. Use of a smaller or lower quality monitors will
degrade the image quality and could limit diagnostic perception. SUN has a line of large
screen monitors sufficient for MR, CT or Ultrasound diagnosis. Higher resolution 2K
greyscale monitors are also available and may be required for mammography or ultra fine
detail imaging.
1GByte hard disk. Images require a great deal of disk storage space. The initial disk
space may become limited as additional workstations or scanners are added to the system.
The database design allows additional disks to be added with very little effort. Additional
workstations can also be added and their disk space will become part of the available
image disk space.
64MBytes of RAM. Although this is sufficient for most single processing tasks, 64MBytes
may limit the number of concurrent multi-processing tasks such as multi-exam displays,
background import/export functions, or display of exams requiring a great deal of memory
such as Cardiac MRI. Therefore 128MBytes of RAM is recommended.
2.
Network
Copper or Fiber optic network supporting TCP/IP protocols. Routers may be used to
restrict local network traffic or control Wide-Area networks. Consult your system
administrator to optimize the network when image traffic reduces system performance and
becomes prohibitive.
Network hardware for the scanners you wish to include in the network. Talk with the
scanner manufacturer or our technical support staff to determine which scanners are
network compatible with the Rational Imaging system. The scanners supported by
Rational Imaging as of this manual's printing are specified at the end of this chapter. If
your scanner does not appear on this list, then contact our technical staff since this list will
be updated as software interfaces are developed for these systems.
Since the performance of the system will be integrally dependent upon the network,
develop it conscientiously with careful attention to any future expansion. Use duplicity
wherever necessary to ensure network reliability since each workstation is dependent upon
each other and especially dependent upon the database server to obtain patient
demographic information.
05.08.2001
2
Rational Imaging Installation Manual
3.
Printer
Canon's Paper Film Imager has been manufactured with the highest quality components to
produce high resolution diagnostic hardcopy. Even so, the printer is susceptible to adverse
environmental conditions and may require maintenance from time to time. It is
recommended procedure to print the SMPTE quality control pattern once each day,
dating the reverse side of the print, to document any degradation or systematic artifacts.
Slight imperfections will be more visible on the uniform background squares of the
SMPTE image than on noisy images containing randomly dispersed quantum mottle.
Pay close attention to Canon's recommendations for the use and storage procedures of
the paper used for diagnostic hardcopy. Preliminary research has demonstrated that poor
quality paper, or over exposure to humidity, may produce visible artifacts and nonuniformity.
4.
Tape Drive
HP DDS2 or Sony DDS3 DAT archive tape drive. Dual tape drives are highly
recommended to minimize the likelihood of data loss due to dirty heads or tape
malfunction. Follow the protocols developed for dual tape set archival specified in the
User's Manual.
The DDS2 capacity is 4GB Native on 120m tapes. The DDS3 capacity is 12GB native on
125m tapes. Both drives achieve approx 1.5 compression on medical images.
Use only high quality verified data cartridges for your primary archives which have been
recommended by the tape drive manufacturer. Since these archive tapes are a minimal
expense (approx 5 cents per patient), it is not worth it to take chances with low quality
tapes.
B.
SOFTWARE ENVIRONMENT
1.
UNIX Operating System
SunOS 4.1.3 or 4.1.4 UNIX operating system (Solaris 1.x). Solaris 2 versions now
available (Solaris 2.5 recommended).
2.
Open Windows Graphical Interface
Open Windows Version 3.0 - 3.1. The graphical workspace provided by SUN has been
optimized during installation to provide the highest quality diagnostic environment. It can
be changed to suit a particular user's preference using the functions described in Sun's
Deskset applications manual.
3.
Informix Database Software
This commercial database has been incorporated to provide optimal network efficiency,
standard query language (SQL), and maximal information integrity. Consult the user's
manual for information regarding the database structure and use extreme caution when
interfacing your own applications with this database. Any unauthorized modification of
these database tables without the specific written consent of IST and Canon will void the
warranty and may corrupt the integrity of the system.
05.08.2001
3
Rational Imaging Installation Manual
4.
Rational Imaging System
The Rational Imaging system has been pre-installed on your workstation and may be
reinstalled from the disks provided by Canon. Warning: these applications have been
keyed to your workstation's unique host ID and will not work on other workstations. If the
motherboard of the system is replaced, or if system maintenance is required, then contact
your sales representative for a new authorization code.
5.
Tape Device Driver
The tape device drivers (/dev/nrcdt0, /dev/nrcht0, or /dev/nrht0) have been developed to
utilize the high speed components of the Hewlitt Packard DAT tape drive. The normal
SCSI device driver may be used with this drive (/dev/nrst0), however you will notice
considerable performance degradation especially when trying to retrieve exams near the
end of the tape. When the "/dev/nrcht0" device driver is used, the DAT drive will use a
hardware lossless compression algorithm built into the DAT drive to compress the image
information. This compression will increase the tape capacity by approximately a factor of
2, however the compressed tapes will be unreadable on standard DAT tape drives without
compression. If compatability with other existing DAT drives is important, then use the
"/dev/nrht0" device driver. Make sure to specify the non-rewindable tape device driver
specified by the 'n' in "/dev/nrht0".
The new Sony DDS3 drive uses a device called “/dev/nrcdt0”.
C.
SUPPORTED IMAGING SCANNERS
1.
Import Images
The following images are currently supported for import:
• General Electric's Signa 4x MR scanner. A Data General ethernet adapter kit is
required and is available through General Electric.
• General Electric's Genesis 5x MR scanner. The MR scanner comes with an ethernet
card sufficient for image transfer.
• Generel Electric's Genesis 5x CT scanner. An additional SUN ethernet adapter kit is
required and is available through General Electric. Warning: use of the gantry's
network adapter may effect scanning.
• General Electric's Genesis 5x Independent Console. The IC workstation comes with an
ethernet card sufficient for image transfer.
• Siemens MR Magnetom Impact with a SUN host. Image connectivity has been
established, however some of the header information is still missing making crossreferencing impossible as of now.
• Lunar MR Scanner.
• Additional scanners using DICOM protocols will also be able to connect. Check with
your sales representative for a current list of tested scanners.
Note: check with our technical support staff before accepting scanner upgrades to make
sure that the upgrades do not effect the ethernet interfaces.
2.
Export Images
The following images are currently supported for export:
• General Electric's Signa 4x MR scanner
• General Electric's Signa 5x MR scanner
05.08.2001
4
Rational Imaging Installation Manual
• General Electric's Signa 5x CT scanner
Note: availability of export functions will be limited by DICOM compatability and each
manufacturer's endorsement of this transfer capability. Current liability issues may
prohibit dual transfer capabilities.
3.
Drag-and-drop Import
RI'port supports the standard Open Windows convention of drag-and-drop. If an image file
has a known header, then the file can be dragged over the sensitive rectangle on the RI'port
console and imported into the system. Groups of images can also be imported in this
fashion. See chapter 5 in the user's manual for more information on the operations of this
function.
The following images are currently supported for drag-and-drop import
• General Electric’s Genesis 5x MR, CT, and IC images.
• General Electric's Signa 4x MR images.
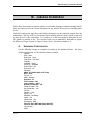
4.
Incoming Directory
A directory called the “incoming” directory has been created to import images from
foreign databases (usually set up as /img/incoming). By simply copying images into this
directory and renaming them based on their origin or image format, the database will
recognize these images and update the database. The unix program which operates in the
background (daemon) and which performs this function is “riupdate”. Make sure to rename
the images after copying so that the image transfer is complete before the images will be
recognized by riupdate. Use the following naming conventions for each image type:
Format
GEgen.host.#
GEsig.#
RIint.#
RIdicom.#
Smmag.host.exm-ser-img.ima
RIlunar.#
Examples
GEgen.mr1.1
GEsig.1, GEsig.2
RIint.1, RIint.2
RIdicom.1, RIdicom.2
Smmag.ct1.9995-3-24.ima
RIlunar.1
Image Type
GE Genesis 5x format
GE Signa 4x format
Interfile format
DICOM format
Siemens MR image
Lunar MR image
The images can also be put in a temporary directory under /img/incoming, and then just
rename the directory with the previous conventions. Do not rename the directory until all
the images within are completely transferred. This will signal “riupdate” to load the
images into the database.
05.08.2001
5
Rational Imaging Installation Manual
III. Planning Your PACS System
A.
PREPARE SYSTEM WORKSHEET
Installation of the Rational Imaging system is very complex in that it must be configured
correctly to interact with the other existing workstations. If this is the first RI workstation
in your facility (the database server), then it must be configured to interact with the
scanners over the newly installed network.
Additionally, system security and
accountability require the creation of user accounts which will prevent unauthorized access
to both the workstation and the Rational Imaging system. This will take some planning
and our staff has been trained to guide you in this preliminary effort. Once the system has
been installed, it will require minimal effort unless new users are required or an additional
workstation or scanner is added.
The information described in this chapter will be configured during the installation.
Consult with our technical staff, the service engineers of the various imaging equipment,
and your own systems administrator to coordinate the network addressing and user
configuration.
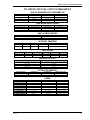
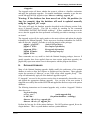
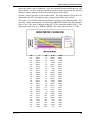
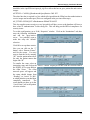
The following worksheet has been prepared to demonstrate a typical configuration and
help you understand the various components involved. Actual worksheets will be made
available during the installation for you to fill in the desired information.
05.08.2001
6
Rational Imaging Installation Manual
EXAMPLE INSTALLATION WORKSHEET
SUN OR SCANNER HOST INFORMATION
HOSTNAME
sunrise
cardiol
mr1_sj
ct1_sj
ALIAS
Sunrise
Cardiology
MR1@SJ
CT1@SJ
INTERNET
194.3.55.15
194.3.55.18
194.3.55.19
194.3.55.20
PHYSICAL DIR
/img
/img
/img2 (disk 2)
HOST LINKED DIR
/net/sunrise/img
/net/cardiol/img
/net/cardiol/img2
TYPE
SUN
SUN
GE Genesis 5x MR
GE Genesis 5x CT
SUN IMAGE DIRECTORIES
ALIAS
Sunrise #1
Cardiol #1
Cardiol #2
HOST
sunrise
cardiol
cardiol
UNIX ACCESS GROUPS
GROUP NAME
imaging
informix
UNIQUE GROUP ID
100
101
NETWORK PRINTERS
HOSTNAME
canon
canon_ct
ALIAS
Canon PFI
Canon@CT
INTERNET
194.3.55.16
194.3.55.21
QUEUE DIR
/home/ist/print
/home/ist/print
2
ERROR LOG
/home/ist/print/queue/canon_errs
/home/ist/print2/queue/canon_errs
TAPE DRIVES
HOSTNAME
sunrise
cardiol
DEVICE
/dev/nrcht0
/dev/nrcht0
NAME
DAT1@Sunrise
DAT1@Cardiol
BLOCKS
20
20
CLEAN TIME
90000
90000
MBYTES
6000
6000
ARCHIVE TAPE SET
ARCHIVE NAME
Primary
Secondary
LiverStudy
JonesExams
Type
Primary
Secondary
Normal
Normal
PATIENT DATABASES
DATABASE NAME
radiology
cardiol
DIRECTORY
//DBHost/db
//CardiolHost/db
RESTRICTED
0
1
RESTRICTED USER
jones
USERS
USERNAME
ALIAS
UNIQUE ID
GROUP ID
HOME DIR
TEMPLATE DIR
DEFAULT DIR
PRINT DIR
PASSWORD
DATABASE ACCESS
05.08.2001
imaging
Imaging
102
100 (imaging)
/net/sunrise/home/imaging
/net/sunrise/img/templates
/net/sunrise/img/defaults
/home/ist/print
images
radiology
smith
Dr. Smith
103
100
/net/sunrise/home/imaging
/net/sunrise/img/templates
/net/sunrise/img/defaults
/home/ist/print
on!call
radiology
jones
A.K.Jones, M.D.
104
100
/net/cardiol/home/jone
/net/cardiol/img/tmplt
/net/cardiol/img/dflt
/home/ist/print
transplant!
radiology, cardiol
7
Rational Imaging Installation Manual
B.
DEFINITION OF WORKSHEET COMPONENTS
1.
Host Information
A network consists of multiple workstations communicating together over an ethernet
backbone. In order for these workstations to co-exist on the same network, they must
follow rules for existence. The following parameters are required for network
compatibility.
Hostname: The first is that each workstation must have a unique hostname. This name
will be used to send and retrieve information from the workstations. We recommend that
you use lowercase characters for the hostname since UNIX is case sensitive. Also limit
the hostname to as few characters as possible since long names consume space for each of
the hosts and the NFS linked image directories.
Alias: The name which will be displayed and used within the Rational Imaging system.
Uppercase letters may be used to distinguish components of the name. Try to restrict the
length of the alias as much as possible. For example, a workstation at Stan University in
the department of radiology might be given a hostname of "stan_rad" and an alias of
"StanRadiol".
Internet address: You must assign a unique internet address for workstations to exist
simultaneously on a local area network. If you are planning to install a wide area network
and interact with other global networks, then it is recommended to obtain registered
internet addresses so that you will not conflict with other networks as they are attached.
Type: The following types of workstations will use the Rational Imaging system and must
be configured in the system tables of the database:
SUN RI Workstation
GE Genesis MR
GE Genesis CT
GE 4x MR
GE Genesis Independent Console
DICOM Version 3
Interfile format
Siemens Magnetom MR
This information is added to the "host" table and must also be configured in the "/etc/hosts"
file of each workstation.
2.
Image Directories
The Rational Imaging system uses a distributed architecture for storing images. This
allows you to add additional disk drives to any of the RI workstations, and then add the
new configuration parameters into the system table "image_dir". NFS links are used to
transparently access the images no matter where they are located.
The following information is therefore required to configure these directories:
Physical directory: The physical location on a selected workstation which you have
created to store the images. Do not use the database or UNIX operating system partitions
as image directories, or you may crash the database (or UNIX) if you run out of disk space
while importing images.
05.08.2001
8
Rational Imaging Installation Manual
Host Linked Directory: The directory structure defined on each workstation to allow you
to NFS link these directories. By convention, the workstation hostname follows /net to
allow network automounting (eg: /net/hostname/img_partition/database/exam...). This
will allow the images to be accessed from any workstation. In a single database
environment, or where separate partitions are used for each databases images, the database
element of the path can be ignored.
Alias: The alias for the image directory. This is a brief name by which you will refer to
the directory. We recommend a brief acronym for the hostname and maybe a disk number
if multiple image directories are attached to a particular system.
Hostname: The hostname of the workstation that is physically linked to the disk.
3.
Unix Access Groups
Unix assigns group names and unique group IDs to individual's who share a similar
function. For example, since all of the users of the Rational Imaging system have one
function in common, imaging, they will be assigned to this group. Therefore, first the group
must be created in the "/etc/group" file, and then each user must be configured as a member
of this group in the "/etc/passwd" file.
The main purpose of the UNIX group is to give consistent security and file access to a
group of users. As a member of the imaging group, you will be given read and write
permission to access any of the files created within the Rational Imaging system (images,
exam demographics, etc...).
Group name: The name of the group defined in the "/etc/group" file.
Group ID: The unique number assigned to this group.
4.
Network Printers
The Canon printer is a network device much like the RI workstations. It must follow the
rules for configuring network workstations as described above.
Hostname: The hostname should be defined as a unique name consisting of as few
characters as reasonable possible to describe the workstation.
Alias: The alias will be used to refer to the workstation within the RI system.
Internet address: The internet address is the unique network address for the printer.
Queue Directory: The queue directory is a directory where the UNIX print program will
maintain a queue of print pages during printing. This directory must also be specified in
the "/etc/printcap" file.
Error Log: The name of the error log file should also exist in the print queue directory.
This file will record an errors which occur with the printer (disk space full, printer turned
off, network down, etc...).
5.
Tape Drives
Tape drives, used for archiving and long term storage of exam information, are physically
attached to the RI workstations via SCSI connections. It is important for Rational Imaging
to know where these devices are attached and various parameters specific to these
devices. This information will be added to the "tape_drive" table.
Hostname: The hostname of the workstation that the tape drive is attached to.
05.08.2001
9
Rational Imaging Installation Manual
Device: The device driver for the tape drive. WARNING: Use the non-rewindable
device driver as specified by the 'n' in "/dev/nrcht0".
Name: The alias for the tape drive which will be used by the Rational Imaging software.
Blocks: The number of blocks which are written consecutively. UNIX commonly uses 20
blocks, however higher values may improve performance (Since 20 is the default among
UNIX workstations, we recommend this value for compatibility.
Clean Time: The number of minutes of use before the heads require cleaning. Hewlett
Packard recommends that the heads be cleaned every 25 hours of use. The is equivalent to
90,000 minutes. The database keeps track of the drive usage, and will warn you
automatically when it is time to clean the heads.
MBytes: The approximate storage capacity of a tape in MBytes. Since compression may
be used, and the compression factor will vary, this number will only be an estimate. Also
the storage capacity will depend upon whether 60 meter or 90 meter tapes are used. A
compressed 90 meter tape should be able to conservatively hold 3 GBytes (3000 MBytes).
A 120 meter tape will hold 6 Gbytes. A 125 meter tape (DDS3) will hold 12Gbytes. Each
of these will hold approx 1.5x the native capacity when compressed. Thus a DDS3 125
meter tape should hold approx 18Gbytes.
6.
Tape Archives
The values entered into the table "archive" are used to define sets of tapes with a common
base. For example, one tape set (group of tapes) may consist of all the primary patient
archives for a facility and be labeled "Initial". Another tape set may be used for duplicity
(secondary backup), and be called "Active". You may also create tape sets for individual
purposes such as research projects or personal archives.
Tape Set: The name of the archive, as it will be physically labeled on the tape and written
in the digital label at the beginning of the tape. This name will be used to refer to the tape
set in the RIstore program.
7.
Patient Databases
The patient databases which control the demographic and image information for a group of
images. Rational Imaging is usually configured with one database, giving everyone access
to the images within. However, the capability exists to create separate databases and limit
the access to these databases to certain individuals. This may be necessary where multiple
facilities or departments are involved.
Name: The name of the database as it was created on disk during installation. If the
physical directory is "radiology.dbs", then the database name is "radiology".
Directory: The host and directory that the database is located in. This should be entered
in the following format “//hostname/db_dir”.
Restricted: Whether the database is restricted. If not restricted (=0), then any user created
in the "users" table will have access to that database. If it is restricted (=1), then an entry
in the "databases" table must exist for each user that is allowed access.
User: If restricted, the user name (or key from the "users" table) who is allowed access.
The database entry must be created multiple times on restricted databases for each of the
authorized users.
05.08.2001
10
Rational Imaging Installation Manual
8.
Users
The user information is gathered and entered into the "/etc/passwd" file for UNIX access,
and into the "users" system table for the Rational Imaging system. A Rational Imaging
user must also have UNIX access, however the reverse is not true.
Username: An individual unique username must be assigned to each user within the
system. This name is limited to 8 characters. Lowercase letters are recommended.
Alias: The alias used to refer to the user. This name is the formal name which the
Rational Imaging system will display. For example, "smithj" may be the username for the
alias "John H. Smith, M.D.".
Unique ID: A unique user ID must be assigned to configure the UNIX user account
properly. This ID must be assigned in the "/etc/passwd" file on EACH workstation.
Group ID: The group ID must also be assigned and should be given the same number as
the imaging group.
Home Directory: The home directory for the user's account. Multiple users may share a
home directory if given group permission, or each may be given their own home directory.
Separate locations require slightly more effort to configure and maintain, however this
isolates the damage that an individual may due when changing his/her personal preferences
such as background color, menu structure and other UNIX or Open Windows parameters.
Template Directory: The template directory is the location defined to contain the "load"
and "print" templates for the RI system. Usually one location is used by all, however in the
case of multiple departments or facilities, multiple template directories may be required to
optimize each appropriately.
Default Directory: The default directory is used to store each program's default
parameters. Preferences such as window location and startup features may be customized
for each of the programs. If everyone shares a common default directory, then a common
interface is maintained. For those who wish to customize their own interface, assign a new
default directory and copy the files from the current default directory to the new directory.
Print Directory: The print directory is used to store the temporary files created during the
print process. Each print page consumes approx 7-24 MBytes of disk space, so use a
directory with sufficient space if you are printing multiple print pages for each exam. Do
not use directory partitions which will corrupt the database or UNIX operating system if
they become full with these temporary files ("/", "/usr", "/databasedir"). After successful
printing, the images are removed. Do not use a NFS linked directory otherwise additional
network traffic will result.
Password: The personal password for the user. This should be changed on a regular
basis to maintain system security. Always change a password if other people know your
current password.
Database Access: Duplicate information already entered in the image databases table
described above.
05.08.2001
11
Rational Imaging Installation Manual
IV. Database Server
A.
SUMMARY
The database server is a mandatory component of the Rational Imaging system and will
maintain the patient information for the current images within the system, and an archive
database for locating exams on the various tape archive sets. The server may also be used
as an imaging workstation for facilities with a low case load.
The Rational Imaging system will be pre-installed by the manufacturer and will be
configured on-site by our professional installation staff. The previous chapter provides
guidance for determining your system configuration. Once the system parameters have
been defined and approved by Canon, the installation process can begin.
B.
GENERAL INFORMATION
Before you begin, make sure that you have the following materials:
1. Sun Workstation to be installed
2. CDROM drive
3. Solaris CD
4. DAT tape drive or Jaz drive
5. SCSI cables
6. Tools
7. Rational Imaging installation tape or jazz disk
8. Rational Imaging installation manual
9. Informix licenses (INET for satellite, INET & SE & ESQL for main and
redundant server)
10. Rational Imaging licenses
11. APunix licenses (for DAT or JUKEBOX installations)
You will be prompted for information during the UNIX installation. Use the following
guidelines to help you complete this installation.
Hostname: Give the workstation a name which will be unique to the network it is on.
This name may be personal or reflect the location of the system. For example, if the
workstation is in Dr. Joseph's office, then joseph may be an appropriate name. Or if it is
the third workstation in the reading room, diag3 may fit. Or if the workstation is located in
the MR department and use to display brain scans then perhaps mr_brain. Since all names
are case sensitive in UNIX, it is a general convention to keep these names and user names
in lower case. It is also best to keep these names short yet specific. The RI database
limits host names to 32 characters, however much shorter names are recommended
(8-12 characters).
05.08.2001
12
Rational Imaging Installation Manual
Internet Address: Set up the network internet address for the workstation. These values
should be registered with internet and coordinated with your facilities systems
administrator, especially if wide area connectivity is being considered. These addresses
will probably be Class C addresses (above 192 for the first numeric component of the
address) if less than 256 workstations will be connected within the local imaging network.
Routers can combine networks with different base addresses, so this is not really a serious
limitation.
The SUN administrator's manual describes how internet addressing should be assigned.
Each device on the network needs a unique address, much like your home. The post office
knows where to deliver your mail depending on your street address, city, state, and zip
code. The same is true for computers. When your computer sends a command to
"mri_scanr1", a system file called "/etc/hosts" will have the correct address for that
device. Your computer will then broadcast the address and the command over the
network. When the computer with that address (mri_scanr1) sees the command, it will
answer the calling party with appropriate TCP/IP network commands. Understand that this
is a very brief description of networking, which can become much more complex. Consult
with our professional installation staff and your system's administrator regarding this
information.
C.
SOLARIS INSTALLATION
This part of the installation will be pre-installed or will be accomplished by your RI
representative in the event of a system or hard disk failure.
Make sure to have all the hardware attached and powered up prior to loading the Solaris
operating system. Otherwise Unix may not recognize the tape drives, Jukeboxes, or Vidar
scanners attached to the system and the following installations will fail. If this hardware is
added after the Solaris operating system has been added, make sure to let Unix reconfigure
for it by typing “boot -r” at the boot prompt “OK>”.
Many of the following instructions will be described in detail in the manuals provided by
the various manufacturers of the system components. Since the manufacturers may update
these instructions from time to time, we will refer you to those manuals for the most current
instructions.
Boot from the Solaris system cdrom. Insert the disk into the CD drive, and enter “boot
cdrom” from the boot prompt “OK>”. Follow the software installation instructions
provided by SUN for the UNIX and Open Windows environment. Use the following
sections as guidance during this installation.
If you are using an Ultra 5 or 10, the cdrom may not be recognized. Use the following
command at the boot prompt to boot the cdrom on these systems:
nvalias extcd /pci@1f,0/pci@1/pci@1/SUNW,isptwo@4/sd@6,0:f
boot extcd
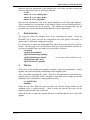
Go through the format procedure to enter the following partition information. Remember to
“label” the disk in the partition menu AND in the format menu. If you do not label the disk
in the format menu, then the partitioning will not be completed correctly.
05.08.2001
13
Rational Imaging Installation Manual
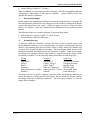
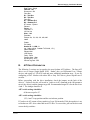
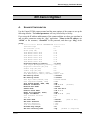
Format Partition Information: Format the hard disk drive in the workstation. The
following recommendations are for a small outpatient facility with 1 RI workstation and 1
or 2 scanners. Additional disk space can be added for larger facilities. Contact technical
support to customize the configuration for your particular facility. Partition a 1.0 GByte
hard disk as follows:
a
b
c
d
e
f
g
h
Database Server
32MB
/
(UNIX root partition)
128MB
Swap for 64MB RAM (256MB for 128 MB RAM)
1002MB
Entire Disk
recommended + 75MB /opt
(Solaris packages & Rational Imaging)
100MB
/db
(database files)
recommended
/usr
(UNIX programs)
24MB
/export/home (user accounts)
remaining
/img
(image partition - remainder of disk)
UNIX Software Selection: Load the UNIX operating system using the graphical interface
and make sure to add the following packages by customizing the “End User System
Support”:
a)
4.1 Heterogeneous
b)
Audio
c)
Basic Networking
d)
Direct XLib
e)
OpenLook Include Files (Inside OpenWindows folder)
f)
On-line Manual Pages
g)
Point to Point Protocol
h)
Sun Fast Ethernet/FastWide SCSI
i)
System Accounting
When this section has been completed, UNIX Solaris should be installed on the
workstation and "root" or superuser access will be available. Log in at the workstation's
login prompt as root and complete the rest of the installation. The superuser account must
be used to perform critical installations, as normal user's do not have sufficient permission
to access the critical system files. You may perform the operations from the UNIX shell,
or log into Open Windows to perform the following installations. Open Windows is
recommended since you will be able to perform multiple functions at once in the graphical
user environment.
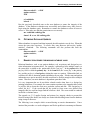
D.
RATIONAL IMAGING INSTALLATION
Use the following instructions to load the Rational Imaging packages from the installation
tape.
Log in as root (superuser).
Start Open Windows by entering the following command at the UNIX prompt:
/usr/openwin/bin/openwin -noauth↵
Open a commandtool to type in from the workspace menu under programs. Insert the
Rational Imaging " install jaz disk" into the Jaz drive and mount it using the correct SCSI
05.08.2001
14
Rational Imaging Installation Manual
ID of the Jaz drive. If you do not know the SCSI ID, use probe-scsi at the boot prompt to
determine the ID or any conflicts with other devices.
mkdir /jaz↵
mount -F ufs /dev/dsk/c0t2d0s0 /jaz↵ (for SCSI ID = 2)
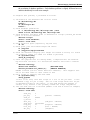
Open the "console" and type the following commands at the UNIX prompt to add the
ISTdb, ISTmain, and ISTri packages (and other additional packages that are required):
pkgadd -d /jaz/sol2/pkg↵
Select the numbers for ISTdb, ISTmain and ISTri packages in that order:
1) ISTdb723↵
2) ISTmain↵
3) ISTri↵
These packages were designed to automatically install the selected components.
Sometimes, depending upon which packages were selected, the postinstall scripts in the
packages will specify additional installation procedures. Watch the screen for any
recommendations. The ISTdb723 package requires the execution of “install_informix”.
The ISTmain package requires a script called “install_main”, and the ISTri package
requires the operation of the licensing facilities.
After installing ISTdb, ISTmain and ISTri, run the following script:
/opt/ISTri/install/install_informix↵
This script installs the Informix database software. Make sure that no errors occur during
installation. You may with to run “dbaccess” to ensure that the software is installed
correctly. If any errors did occur, correct them by removing the package “pkgrm
ISTdb723”, reinstalling the package “pkgadd –d /img/sol2/pkg”, and executing
“/opt/ISTri/install/install_Informix”. You do not need to reload all the other packages.
After ensuring that Informix has been loaded successfully, run the following script:
/opt/ISTri/install/install_main↵
This script will install the informix licenses, create the databases required for Rational
Imaging, and initialize the tables in these databases for initial operation.
The following commands will enter the passwords for the various accounts. Enter the
following commands and enter a password associated with each. Do not use the root
password for these accounts.
passwd imaging↵
passwd informix↵
If no password is desired on imaging, then modify the /etc/default/login file and change
PASSREQ=YES to PASSREQ=NO. Edit the /etc/shadow file and remove the password
information between the first and second colons (“:”) for imaging.
Use the following command to license the executable applications from the ISTri package.
Replace license_file with the correct name and path of the true license file. This file can
be obtained from www.IntuitiveSoftware.com.
/opt/ISTri/bin/add_license < license_file↵
05.08.2001
15
Rational Imaging Installation Manual
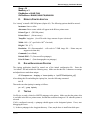
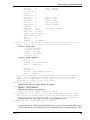
Modify the CMD_LINE parameters in the following files.
/usr/openwin/bin/textedit /opt/ISTri/bin/expire_locks↵
/usr/openwin/bin/textedit /opt/ISTri/bin/reset_modems↵
/usr/openwin/bin/textedit /etc/inittab↵
A sample of the inittab file is as follows:
r1:34:respawn:su - imaging -c "exec riconnect /img/incoming"
r3:34:respawn:su - imaging -c "exec riqueued >>&/opt/ISTri/log/inittab_riq.log"
r2:34:respawn:su - imaging -c "exec riupdate /img/incoming radiology"
r4:34:respawn:/opt/ISTri/bin/ridicomd -f -p 104 -t RI_DICOM /img/incoming
r5:34:respawn:su - imaging -c "exec riupdate –c /opt/ISTri/etc/adac_cfg /img/adac
radiology"
r6:34:respawn:/opt/ISTri/bin/ridicomd -f -p 105 -t RI_DICOM /img/adac
Check the following files to enable the redundant server. This will enable the nightly
backup of the database server to another sun workstation, and facilitate tape backups of the
database copy on each initialized tape. First, determine the redundant server. If this is the
same system, then at least have ridundant and backup_radiology use a partition other than
the normal /db partition (eg /img/db). This will maintain a copy of the database, and
ensure the database integrity in the event of a catastrophy. If only backup_DATABASE
exists in the /opt/ISTri/bin directory, then rename it to backup_radiology for the
“radiology” database. If multiple databases have been created (unusual), then each
database has to have a backup_dbname associated with it.
/usr/openwin/bin/textedit /opt/ISTri/bin/ridundant↵
/usr/openwin/bin/textedit /opt/ISTri/bin/backup_radiology↵
Exit OpenWindows and reboot the computer.
exit↵ (select exit from the workspace menu)
reboot↵
(at the login prompt)
The Rational Imaging system should be prepared at this point. Login using the account
"imaging" which was created during the installation.
imaging↵
(at the login prompt)
Check the window layout, the background color, and the main environment menu to make
sure that the installation was successful.
Use the configuration button on RIlogin (the disk icon) to check the available applications.
05.08.2001
16
Rational Imaging Installation Manual
V. Satellite Workstation
A.
SUMMARY
Additional workstations can easily be added to the Rational Imaging system. These
workstations will be able to perform all of the functions that the database server performs,
such as importing images, reviewing diagnostic exams, and archiving. Configure each
additional workstation are your needs required. Do you need an additional tape drive for
dual tape backup? Do you need additional disk space for image storage? Is this
workstation going to be in a different facility? These are questions which will influence
the type of workstation purchased and the additional peripheral devices attached to the
workstation.
We will assume for the purposes of this chapter, that the workstation is only going to be
used as an additional visualization workstation, and that only additional disk space will be
added for image storage. Since the database server has already been installed and is
operational, we must configure this workstation to interact effectively with the existing
network and with the existing patient database. Use the worksheets described in chapter II
to acquire the appropriate information for this installation. Consult with our professional
installation staff and your systems administrator whenever you are adding additional
workstations to the network. An improperly configured workstation can confuse the
network and halt the operation of ALL of the workstations on the network. Not only
network operations may be affected, operational tasks requested of the workstations (such
as scanning) may also not be able to be performed or will be very slow due to the network
timeouts and CPU engaged in "fixing" this communication link.
Once you have determined the system parameters for this installation and they have been
approved by Canon and your system's administrator, the installation process can begin.
Before you begin, make sure that you have the following materials:
1. Sun Workstation to be installed
2. CDROM drive
3. Solaris CD
4. DAT tape drive or Jaz drive
5. SCSI cables
6. Tools
7. Rational Imaging installation tape or Jaz disk
8. Rational Imaging installation manual
9. Informix licenses (INET for satellite, INET & SE & ESQL for main and
redundant server)
10. Rational Imaging licenses
11. APunix licenses (for DAT or JUKEBOX installations)
05.08.2001
17
Rational Imaging Installation Manual
B.
SOLARIS INSTALLATION
This part of the installation will be pre-installed or will be accomplished by your RI
representative in the event of a system or hard disk failure.
Install the hardware per the manufacturer's instruction manuals.
Follow the instructions for the Main database server (page 14) with regards to loading
the Solaris operating system.
If this workstation is designated to be the redundant server (backup for the server
database), then configure the /db partition to have the same disk space as the server.
If this workstation is not going to be a redundant server, then use the space allocated for the
/db partition towards the /img partition. Do not create a /db partition unless this
workstation is a main server or a redundant server.
C.
RATIONAL IMAGING INSTALLATION
Use the following instructions to load the Rational Imaging packages from the installation
disk.
Log in as root (superuser).
Start Open Windows by entering the following command at the UNIX prompt:
/usr/openwin/bin/openwin -noauth↵
Open a commandtool to type in from the workspace menu under programs. Insert the
Rational Imaging " install jaz disk" into the Jaz drive and mount it using the correct SCSI
ID of the Jaz drive. If you do not know the SCSI ID, use probe-scsi at the boot prompt to
determine the ID or any conflicts with other devices.
mkdir /jaz↵
mount -F ufs /dev/dsk/c0t2d0s0 /jaz↵ (for SCSI ID = 2)
Open the "console" and type the following commands at the UNIX prompt to add the ISTsat
and ISTri packages (and other additional packages that are required):
pkgadd -d /jaz/sol2/pkg↵
Select the numbers for ISTsat and ISTri packages in that order:
1) ISTsat↵
2) ISTri↵
These packages were designed to automatically install the selected components.
Sometimes, depending upon which packages were selected, the postinstall scripts in the
packages will specify additional installation procedures.
Watch for these
recommendations during installation The ISTsat package requires a script called
“install_sat”, and the ISTri package requires the operation of the licensing facilities.
After installing both of these packages, run the script:
/opt/ISTri/install/install_sat↵
This script will install the informix license for INET and install the user accounts and local
environments.
05.08.2001
18
Rational Imaging Installation Manual
The following command will enter the passwords for the imaging account. Do not use the
root password for these accounts.
passwd imaging↵
passwd informix↵
If no password is desired on imaging, then modify the /etc/default/login file and change
PASSREQ=YES to PASSREQ=NO. Edit the /etc/shadow file and remove the password
information between the first and second colons (“:”) for imaging.
Use the following command to license the executable applications from the ISTri package.
Replace license_file with the correct name and path of the true license file. This file can
be obtained from www.IntuitiveSoftware.com.
/opt/ISTri/bin/add_license < license_file↵
Modify the CMD_LINE parameters in the following files.
/usr/openwin/bin/textedit /etc/inittab↵
/usr/openwin/bin/textedit /opt/ISTri/bin/reset_modems↵
Check the following files to enable the redundant server. This will enable the nightly
backup of the database server to another sun workstation, and facilitate tape backups of the
database copy on each initialized tape. First, determine the redundant server. If this is the
same system, then at least have backup_radiology use a partition other than the normal /db
partition (eg /img/db). This will maintain a copy of the database, and ensure the database
integrity in the event of a catastrophy. If only backup_DATABASE exists in the
/opt/ISTri/bin directory, then rename it to backup_radiology for the “radiology” database.
/usr/openwin/bin/textedit /opt/ISTri/bin/backup_radiology↵
Exit OpenWindows and reboot the computer.
exit↵ (select exit from the workspace menu)
reboot↵
(at the login prompt)
The Rational Imaging system should be prepared at this point. Login using the account
"imaging" which was created during the installation.
imaging↵
(at the login prompt)
D.
CONFIGURATION
The following modifications must also be performed to have the satellite workstation
recognize the existing database, and have the other RI workstations recognize the existence
of the new workstation. With the workstation on the network, it may be necessary to use
remote shell “rsh” to perform some of these steps on the other workstations.
If the new workstation has been installed with a newer version of Rational Imaging than the
main server, then you will either need to upgrade all of the existing workstations including
the server to the current version, or you will need to bring this workstation’s applications
down to the prior version. The upgrade procedure is described in the next chapter. To
downgrade the current version, copy all the files from the ISTri directory of the main
server or another satellite station to the ISTri directory of this workstation.
rsh server_hostname ↵
05.08.2001
19
Rational Imaging Installation Manual
su↵
tar cpf /img/istri.tar /opt/ISTri↵
rsh new_host↵
su↵
tar xpf /net/server_hostname/img/istri.tar↵
Perform this step prior to any configuration because some of the files will need to be
modified under this directory.
On the new workstation, the “/etc/hosts” file must be updated with each of the hosts on the
network. On solaris systems, the file is “/etc/inet/hosts”. You can either use “vi” and
enter these manually, or use “textedit”, and copy and paste the values from those found in
the /etc/hosts file on the server.
/usr/openwin/bin/textedit /etc/inet/hosts↵
You will also need to add the users to the “/etc/passwd” file and create their home
directories on this system. Make sure that all the Rational Imaging workstations have the
same list of users and hosts. Keep the userID, groupID, and IP addresses consistent. Use
the following commands to add users to a Solaris workstation.
admintool↵
(or useradd↵)
Modify the /etc/hosts.equiv file to reflect all of the RI hosts on the network.
/usr/openwin/bin/textedit /etc/hosts.equiv↵
The following modifications should be performed on the database server.
Change to the “/opt/ISTri/admin” directory and use risetup add the host and image
partition to the RI database.
cd /opt/ISTri/admin↵
(/home/ist/bin = SunOS)
./risetup ↵
Use add_host to enter the information for the new RI host.
Use add_dir to enter the information for the new image partition. These directories are
automounted and should be accessed as “/net/new_hostname/img”.
Log in to EACH of the other RI workstations and complete the following:
Add the new hostname and internet address to the /etc/hosts file.
Add the new hostname to the “/etc/hosts.equiv” file on each workstation.
Update the new users in the “/etc/passwd” file on each workstation.
This should complete the installation procedure for the new RI workstation. You may now
login as “imaging” on the new workstation and update the Rational Imaging environment.
imaging↵
(at the login prompt)
Modify the environment for Rational Imaging as follows: 1) Close down any applications
other than the console (Help, File manager...). 2) Enlarge the console window (so error
logs can easily be visualized), and close the console to its iconic form. 3) Select
Properties from the workspace menu and adjust the background color using the custom
selection. A dark saturated hue is best for diagnostic imaging. 4) Select “imaging” from
05.08.2001
20
Rational Imaging Installation Manual
the workspace menu and make sure that rilogin appears in the upper right corner of the
screen. 5) With rilogin present, and the console closed on a dark background, select “Save
Workspace” from the workspace menu under utilities. Each time you log in, the
workspace will return to this initial setup.
Use the configuration button on RIlogin (the disk icon) to check the available applications.
05.08.2001
21
Rational Imaging Installation Manual
VI. Multi-Database Connectivity
A.
CREATING A NEW DATABASE
Rational Imaging allows multiple databases to be configured to separate departments, or to
provide support for research, referring access or teaching files.
05.08.2001
1.
Creating a new patient database
To create a new database for these purposes, use the "create_db.sql" script as
follows. If the database is on another server, make sure that the server is setup for
a multi-server environment as described in the section "Creating Multiple Servers".
su - imaging
cd /opt/ISTri/install
vi create_db.sql (change the name of the database from radiology to another name)
cd /db
(or user another database partition for the new database).
dbaccess - /opt/ISTri/install/create_db
chmod -R a+rw new_db_name.dbs
2.
Making the database available to all users
Once the new database is created, you will have to make the database available
through the "rilogin" database. Use "risetup" to add the new database and configure
the hosts and image directories.
cd /opt/ISTri/admin
risetup
5) Add database access to rilogin
Enter the database name, the directory in the format "//hostname/db", and "n" if the
database is not to be restricted (all users can access the new database). If you enter
"y" to the restricted question, then you will be prompted to select a user for access
to the database. You will need to run "5) add database" for each user to is to have
access to the restricted database.
3.
Allocating hosts and image directories
Use "risetup" to add hosts, users, and image directories to the new database as
follows. Remember to enter the new database name when prompted by risetup.
Also, you must add "imaging" to the new database at least.
Add user to rilogin
(do this for all users who will use the database)
Add user to new_database
(Add the "imaging" user).
Add user to new_database
(do this for other users)
Add host to new_database (Add the hosts which will need access)
Add imagedir to new database (Add the image directories)
Add host to rilogin
(Add the hosts which will need access)
WARNING: For hosts which share 2 or more databases, the new image directories
MUST NOT be in the other databases. For example, if "/net/host/img" exists for
22
Rational Imaging Installation Manual
the database "radiology", then you must not use this for the new "cardiology"
database. Instead, create a subdirectory under /img called "cardiology" and add the
new image directory "/net/host/img/cardiology". It is by convention that we use the
name of the new database "cardiology in this example" as the subdirectory under
/img to separate the database image partition.
We could have used
"/net/host/img/radiology" as a convention for all the "radiology" databases,
however most facilities will not use a multi-database environment, and thus the
extra subdirectory would have needlessly extended the length of the image path.
Multi-database Schematic
Informix Server (se, sql, inet)
/db (database partition)
rilogin.dbs
(Login database controls access to both databases)
radiology.dbs
host1
image dir (/net/host1/img) Most common image dir
image dir (/net/host1/img2)
host2
image dir (/net/host2/img/radiology)
teaching.dbs
host1
image dir (/net/host1/img/teaching)
host3
image dir (/net/host3/img) This dir is not in radiology
B.
CREATING MULTIPLE SERVERS
Multiple Informix servers are similar to having multiple databases. There will be one or
more databases supported on each server, and each database will be independent of each
other when multiple servers are used. This is useful when the imaging databases are
separated by critical communications lines, and require independent operation (eg: A T1
line connecting 2 hospitals). Rational Imaging allows 2 hospitals to have separate
databases, each with independent central archives and a group of workstations displaying
the images. In this scenario however, physicians must choose the correct database to
access their exams. In addition, some users may not be given access to a particular
database, while others may have full access. If the communications line is severed
between the two hospitals, they will continue to operate independently, however the
physicians at hospital A (database A) will not be able to access images from hospital B
(database B).
Hospital A (Mercy)
Hospital B (Saint Luke)
Database A: Mercy
Database B: StLuke
Server: mercyserver
Server: stlukeserver
Informix sqlexec: sqlmercy port 1525
Informix sqlexec: sqlstluke port 1526
host:
rr1
host:
stluke1
imagedir: /net/rr1/img
imagedir: /net/stluke1/img
Archives: Primary, Secondary
Archives: SL_Primary, SL_Secondary
In the above example, physicians working on rr1, can log into Mercy to look at Mercy's
exams, or they can log into StLuke, and access Saint Luke's exams. Similarly, physicians
05.08.2001
23
Rational Imaging Installation Manual
at Saint Lukes working on stluke1 can log into StLuke to access their exams, or log into
Mercy to access Mercy's exams.
In addition, RIlocate can be used to copy exams from one database to the other database.
The normal ethernet conventions requiring unique IP addresses and subnets must be
adhered to in these Wide Area Networks. The separate names for the archive sets
(Primary and SL_Primary) are not required, however if the facilities should decide to
centralize their databases in the future to 1 database, it will make things easier.
05.08.2001
1.
Informix configuration
In order for Informix to communicate independently with each server, the informix
server process (sqlexecd) must be configured to run on separate ports on each
server. Thus Mercy uses port 1525 (the default), and StLuke uses 1526.
This configuration is done to the "/opt/informix/etc/sqlhosts" file. Each line of
this file specifies an alias for the server (usually just the hostname), the ethernet
protocol (tcp), the actual server hostname, and the sqlexecd service name set up in
the "/etc/services" file. In the above example, this file would look like the
following:
The sqlhosts file on both mercyserv and stlukeserv would look like:
mercyserver tcp mercyserver sqlmercy
stlukeserver tcp stlukeserver sqlstluke
The /etc/services file on both mercyserv and stlukeserv would look like:
sqlmercy
1525/tcp
# Mercy's Server
sqlstluke
1526/tcp
# Saint Luke's Server
The /etc/init.d/ri.install on mercyserv would have the line:
/opt/informix/lib/sqlexecd sqlmercy &
The /etc/init.d/ri.install on stlukeserv would have the line:
/opt/informix/lib/sqlexecd sqlstluke &
Reboot the systems after these configurations have been made, or kill and restart the
sqlexecd process.
In multi-server environments, the "rilogin" database may be independent for each
facility, however both controlling login databases must have the same information
for the databases, hosts, and users as specified in the following tables. These
tables must be updated when new hosts, users or databases are added.
Users
(add all users who need access to each database)
Host
(add the hostname of each RI workstation)
Databases (add database access)
2.
Unix configuration
Other than the /etc/services file (used for configuring the informix sqlexecd
process), each of the following files must also be configured for each workstation:
/etc/hosts
(must contain ALL hosts in the network)
/etc/passwd
(use admintool to add all users to each workstation)
/etc/hosts.equiv
(must contain all RI workstations)
/etc/services
(see previous section)
/etc/init.d/ri.install (see previous section)
3.
Rational Imaging configuration
The application licenses must be added to each of the rilogin databases:
24
Rational Imaging Installation Manual
setenv RILOGDB //server/db/rilogin
add_license < license_file
The following files must also be checked to make sure that they are configured
correctly. Each will specify a database and other configuration parameters which
may need to be modified in the multi-database environment.
/etc/inittab
/opt/ISTri/bin/reset_modems
C.
COPY EXAMS BETWEEN DATABASES
RIlocate can be used to copy exams from one database to the other database. The two
exams once separated, will be treated independently (e.g.: print pages created after it has
been copied, will not be available in the other database). This is useful, however, when
exams need to be sent to other Rational Imaging systems for a second opinion. It is also
useful when one database has been used as an Emergency database (in use when a T1
communications line has failed), and then the staff wish to move the exams back into the
working database once the T1 lines comes back up.
05.08.2001
25
Rational Imaging Installation Manual
VII. Upgrading a Workstation
A.
SUMMARY
This section describes the procedures involved in upgrading the Rational Imaging software
on a workstation. Installation scripts have been created to automate this procedure,
however in some cases, system configuration of new features may be required. Make sure
to read the README file associated with each upgrade version. This file will specify the
detailed upgrade procedures for each specific version. Follow the upgrades in order and
DO NOT SKIP any upgrades, especially those that alter the database architecture. You can
determine the current Rational Imaging version by viewing the /opt/ISTri/bin/riVERSION
file.
B.
SCHEDULE UPGRADE T IME
Notify the facility that you will be performing the upgrade. This involves sending them a
list of the new features and upgraded capabilities. It will also allow you to schedule any
downtime if this is required. Generally, if only the binary applications are being modified,
then each workstation can be upgraded independently. Thus, only that workstation being
upgraded will be out-of-use during the upgrade. However if the database architecture is
being upgraded during the specific upgrade, then ALL the workstations must be upgraded
and the entire system will be down until the work is complete.
C.
BACKUP DATABASE FILES
Use the following instructions to backup the database files:
Log in as root (superuser).
cd /db↵
tar cpf /img/db.tar *.dbs↵
This command will archive all the database tables into a file called /img/db.tar.
D.
BACKUP APPLICATIONS
Use the following instructions to backup the Rational Imaging application files:
Log in as root (superuser).
cd /opt↵
tar cpf /img/ist.tar ISTri↵
This command will archive all the applications into a file called /img/ist.tar.
05.08.2001
26
Rational Imaging Installation Manual
E.
BACKUP SYSTEM FILES
If you are upgrading from SunOS to Solaris, then you should backup the system files under
/etc. Otherwise skip this section.
Log in as root (superuser).
cd / ↵
tar cpf /img/system.tar etc↵
This command will archive most of the OS system files into an archive called
/img/system.tar.
F.
BACKUP USER T EMPLATES AND DEFAULTS
It is also usually a good idea to backup all of the user configurations and templates. Use
the following instructions backup the Rational Imaging template files:
Log in as imaging.
cd /opt/ISTri/admin↵
risetup↵
11) List users in rilogin and radiology↵
(locate the template/default directories)
Log in as root (superuser).
cd /img↵
(the root of the template directories)
tar cpf /img/config.tar defaults templates↵
This command will archive all the files in the /img/defaults and /img/templates directories
into a file called /img/config.tar.
G.
INSTALL NEW VERSION
Use this section of the manual in addition to the README file associated with each
version. The README file will give last minute details which may require user
intervention and post-install configuration procedures.
Rational Imaging versions starting with 3.2 have automated scripts which apply most of the
upgrades. This section will describe this automated procedure. The manual procedure
prior to this version is described in detail in the README file associated with each
version “upgrades/ver_x.x.x/README”.
These upgrades pertain to Solaris systems only. SunOS systems should be upgraded to
Solaris prior to upgrading the Rational Imaging software in the facility. If this can not be
done and the upgrade is required, then use the README instructions to upgrade the system
with the SunOS binaries.
Use the following instructions to upgrade the Rational Imaging packages from the
installation disk.
Log in as root (superuser).
/usr/openwin/bin/openwin -noauth↵
cd upgrades/ver_x.x.x/patch↵
05.08.2001
27
Rational Imaging Installation Manual
./riupgrade↵
The riupgrade script will detect whether the system is a Main or a Satellite workstation
and apply the appropriate upgrades. For manual installations, remember to use the next
section and apply the SQL upgrade scripts “dbaccess radiology upgrade_db”.
Warning: If the database has been moved out of the /db partition (to
/img for example), then the database will need to updated manually
using the “upgrade_db” script.
This script will apply the database upgrades described in the following section if the
server is detected correctly. This can be verified by watching for the commands
“UPGRADING PATIENT DATABASE: radiology”. If these commands are seen on the
server, then the upgrade has been performed successfully provided no warnings or errors
are issued.
The riupgrade script will also apply patches to the main software and update the pkginfo
information for Rational Imaging. It also stores new checksum information for each file
and will allow the “pkgchk” procedure to verify the integrity of the packages.
pkginfo | grep IST↵
(look for IST packages)
pkginfo –l ISTri↵
(list complete information)
pkgparam ISTri↵
(list upgrade information)
pkgchk ISTmain↵
(check package integrity)
pkgchk ISTri↵
These commands are very useful to check the Rational Imaging packages, however if
partial upgrades have been applied (beta-test inter-version application upgrades), the
pkgchk may report some minor errors or discrepancies with the program checksums.
H.
DATABASE UPGRADES
Many of the Rational Imaging upgrades slightly modify the architecture of the patient
database in order to allow new features or optimize previous functions. These upgrades
require the operation of “dbaccess” to run a SQL script called “upgrade_db.sql”. This
script will automatically apply all of the database upgrades required.
If “riupgrade” was used in the previous section, then it automatically detected the server
and applied the appropriate database upgrades. You can skip to the next section if
riupgrade successfully detected the SERVER and applied the dbaccess script to the patient
databases.
The following instructions are for manual upgrades only, or where “riupgrade” failed to
detect the server.
Log in as imaging
cd ver_x.x.x↵
(on the upgrade disk)
ls /db/*.dbs↵
(list patient databases…radiology)
dbaccess /db/radiology upgrade_db↵
dbaccess /db/other_db upgrade_db↵
Perform the last step for all the patient databases. DO NOT perform upgrade_db on the
rilogin database. This is a system database and not a patient database.
05.08.2001
28
Rational Imaging Installation Manual
Dbaccess alters the permissions of the database files, so to make sure that everyone has
read/write permission, issue the following command:
cd /db↵
chmod -R a+rw radiology.dbs↵
chmod -R a+rw other_db.dbs↵
chmod -R a+rw rilogin.dbs↵
Issue the last command for each of the patient databases and for the rilogin database.
These commands are very important, as the database archive may not function properly if
read/write permissions are not set correctly. The initialize tape function and copy_db
procedures may also fail and the redundant database will be compromised.
I.
CONFIGURATION
The riupgrade script will automate most of the configuration required. Check the
README file to make sure that the configuration has been applied successfully, or
whether there is additional configuration required.
It is always wise to check the configurable files and make sure that they have not been
altered. The following list of files should be checked to make sure that the variables are
set correctly (database and server name vary from facility to facility):
/etc/inittab
/opt/ISTri/bin/ridundant
/opt/ISTri/bin/backup_radiology
/opt/ISTri/bin/backup_otherdb
(if any other patient databases exist)
/opt/ISTri/bin/expire_locks
/opt/ISTri/bin/reset_modems
J.
T ESTING
If any errors occurred during the upgrade procedure, report them immediately. Partial
upgrades may affect the integrity and operation of the imaging system.
After successfully upgrading the system. Run all of the applications to ensure that they
perform properly. Especially, test the “ridundant” script on the server to make sure that the
redundant copy of the database is being updated correctly.
cd /opt/ISTri/bin
ridundant
Watch for any errors from this script and make sure that the backup database on the
redundant server is copied correctly. Check to make sure that the disk space for the
database partition (under /db) is sufficient.
Notify the facility to report any irregular behavior or problems that may be a result of the
upgrade.
05.08.2001
29
Rational Imaging Installation Manual
VIII. Tape Backup Device
The following instructions will show how to install an archive tape drive onto a Rational Imaging
workstation. Make sure that you have the appropriate license information before proceeding with
this installation.
A.
SOLARIS INSTALLATION
Make sure that the tape drive is recognized by the workstation. If the drive was not on
during the Solaris installation, then reboot the computer using “reboot -r” with the power
on the drive.
Obtain the appropriate DAT license information prior to installing this package.
Login as root, since you will need superuser privileges to perform this step of the
installation.
Insert the Solaris Rational Imaging tape, and select the package ISTarc from the list of
packages on the tape as follows:
su↵
pkgadd -d /dev/rmt/0n↵
select the number for ISTarc↵
It may be required to run the install_juke process with imaging’s environment.
csh↵
source /home/imaging/.cshrc↵
cd /opt/ISTri/install↵
install_arc↵
The post-installation script will run a program called apinstall. Click on the “Apunix HP
DAT drivers” and then click on “Start Installation”. Enter the license information when
prompted to do so.
Reboot the computer to make sure that the new drivers are recognized and working
properly.
B.
T ESTING
The following instructions will test whether you can obtain the status of the tape drive,
rewind the tape drive, and read and write information to the tape drive. If your drive was
installed in the secondary tape position, then use "/dev/nrcht1" in place of "/dev/nrcht0" for
all the commands below.
05.08.2001
30
Rational Imaging Installation Manual
1.
Tape status
Turn the tape drive ON, insert a blank tape into the tape drive, and enter the following
command at the UNIX prompt:
mt -f /dev/nrcht0 stat
The tape drive should respond with status information and should not report any errors.
2.
Rewind the tape
Enter the following command at the UNIX prompt:
mt -f /dev/nrcht0 rew
The tape drive should not report any errors. You can obtain the status of the tape again and
the file no should be set to 0.
3.
Write some information to the tape
To test the read/write capabilities of the drive, make sure that the write-protect tab on the
tape is in the OFF position and enter the following UNIX commands:
tar cvf /dev/nrcht0 /etc/hosts
The tape drive should respond by archiving the "hosts" file and displaying the filename
when it has archived it.
Rewind the tape and list the tapes directory by using the following command to ensure that
the write process was successful:
mt -f /dev/nrcht0 rew
tar tvf /dev/nrcht0
4.
Eject the tape
To eject the tape, you can either press the button on the front of the tape drive or enter the
following UNIX commands:
mt -f /dev/nrcht0 off
The proper operation of these commands is imperative if the Rational Imaging archiving
applications are to function properly.
C.
CONFIGURATION
Use risetup to have the new tape drive recognized by the Rational Imaging system.
Log into the database server, change to the /opt/ISTri/admin directory, and run risetup.
Then use the option to add a new tape drive. Use the defaults whenever you have a
question about the parameters.
cd /opt/ISTri/admin↵
risetup↵
add new tape drive↵
The tape space parameter is the maximum Mbytes on a single tape. Use the following table
for the correct parameter for DDS2 tape drives (Model 1533A).
Length
Compressed MBytes
60m
2600
05.08.2001
31
Rational Imaging Installation Manual
90m
120m
125m
3000
6000
18000
The archive applications will automatically detect the end of media, so entering too large a
value will not affect the reliability, it will only make the tape space gauge inaccurate.
Entering too small a number will cause the archiving mechanism to stop prior to the end of
the tape, and thus some tape capacity will be wasted.
05.08.2001
32
Rational Imaging Installation Manual
IX. Jukebox Installation
Follow these instructions to install a jukebox on a Rational Imaging workstation running SunOS.
Make sure that you have the license information for the jukebox drivers prior to installing these
drivers.
Install and configure the tape drives and jukebox parameters per the instruction manual from the
manufacturer. Specify SCSI ID’s for the tape drive(s) and the jukebox robotics which are not used
by other devices on the workstation. Use “probe-scsi” at the boot prompt to determine the scsi
ID’s which are currently in use. ID’s between 4 and 6 are recommended. Remember to jumper
the HP drives (Target 4=jump 2) (Target 5=jump 2 & 0). Set robotics handler as 6.
A.
HARDWARE CONFIGURATION
Use the following settings as examples for setting up the Qualstar Jukebox. For more
complete information, see the Qualstar technical manuals.
Handler,
Busy - Wait
Door Open - Abort
Filter Days - 120 Days
Inventory
Invalidate - Sentry
Power On - Invalidate
Source Drive - No
Source I/O - No
Mechanic
Model TLS-24144 (4420 on AIT Juke)
BCR - None
I/O Port - A
Mode - Random
Seq Drive - D1
First Location - A01
Last Lockation – 4B13
Number of Cartridge - 144
Power On Clear - Yes
Use Private Slot - Yes
I/O Port
Call Key - 1 Min
Export - Yes
Extended - Not Ready
Import - Yes
Import Scan - Yes
Slot Access - Both
Drive D1- Sony SDT-9000 (Sony 500 AIT2)
Drive D2- Sony SDT-9000 (Sony 500 AIT2)
Log ( all ON )
SCSI
05.08.2001
33
Rational Imaging Installation Manual
Data Phase - Single
Different - NO
Disconnect - ON
Drive Bus
D1 - This Bus
D2 - This Bus
Drive IDS
D1 – Random ID 4
D2 – Random ID 5
DT access - Ejected
Element
Drives - 2
Fixed Slot - 6
I/O Port Yes
Slots - 144
Emulation
Exabye 10e, 10i, 120, 210, 440, 480
Native
Enable
Err: Native
Hander ID - 0, LUN - 0
Inq - Native (string , Qualstar TLS 24144, 1.51 )
Mode Parameter
Element Add
LCD Display
Parity - Abort
Storage Order - Mag
Synchronous - OFF
Volume Tag Pad - SPC
B.
AIT D RIVE PREPARATION
The following 2 sections are in regard to the new Qualstar AIT Jukebox. The Sony AIT
drives are no longer Single-Ended SCSI. Rather, they are Differential Low Voltage
devices, and require a LVD SCSI card and some additional installation steps. If you are
configuring a DAT Jukebox with either HP or Sony DAT drives, please skip the next 2
sections.
Before proceeding with the drive installation, check the jumpers on the back of the
drive(s). Failure to do this will result in "probe-scsi-all" command at the OK prompt to
not see the drive(s) and the changer target Ids. Recommended target ID’s for the drives are
4 and 5. The changer should be 0.
AIT2 switch settings should be:
all down except for S7.
AIT1 switch settings should be:
1,2,3,4 and 7 in up position and the rest in down position.
If "probe-scsi-all" returns a Sony tapedrive of type 300 instead of 500, the tapedrive is set
to emulate an AIT1 drive rather than an AIT2 drive.To correct this, pull out the drive and
correct the dip switches.
05.08.2001
34
Rational Imaging Installation Manual
C.
DIFFERENTIAL LOW VOLTAGE SCSI CARD (INSTALL NOTES)
The first thing to mention is that the new Sony AIT2 tapedrives are Low Voltage
Differential (LVD) SCSI devices,and unlike the Sony DAT drives which are Single Ended
SCSI devices, only one LVD can be properly connected to the SunSwift PCI SCSI card,
and even in this case the cable length from the Sun to the Juke shouldnot exceed 3ft. Longer
length cables or the presence of more than one drive will cause the reduction in SCSI
transfer rate and the disabling of the wide SCSI mode during bootup by the Sun SCSI
controller. The only solution to this problem is to use an LVD SCSI controller instead of an
SE type SCSI controller. After talking to Qualstar,we decided to try the new Antares
Ultra2-Wide PCI LVD SCSI controller (part # p0068). A 6ft cable can be used with
this controller.
Before proceeding with the card installation,on the Jukebox side, check and set the jumpers
on the back of the drive(s) as well as on the front panel. Failure to do this will result in
"probe-scsi-all" command at the OK prompt to not see the drive(s) and the changer target
Ids.
On the Antares card there are 3 switches which should be set so that the termination on the
card side is enabled. The default setting is for 1 and 3 to be in up position and for 2 to be
in down position. This is the correct setting for enabling termination on the Sun units
running Solaris.
On the jukebox make sure that you have an appropriate multimode terminator. A
multimode terminator should be provided by Qualstar and it should have a writing on it
saying "LVD-SE".The single ended Sun or other terminators will not work.
The correct instalation steps for the Antares card are as follows:
1. Install the card in an empy PCI slot.
2. Boot up the system, login as root, insert the included floppy and type "volcheck" to tell
the system volume manager to look for the floppy.
3. Use the included floppy disk to install the basic drivers for the card,but instead of
following the steps in the install guide which is incorrect, simply copy the floppy
contents into a newly made directory, then go to the /floppy/floppy0/Solaris/2.6 and
use " pkgadd -d ANTRglm2.sol26" to install the driver package.
4. Now you can use the standard procedure to install the juke package and enter the
appropriate licenses and serial numbers obtained from apunix.Please note that the the
existing Sony DAT drivers as well as the existing changer drivers work fine with the
new AIT1 and AIT2 drives,and even though Apunix has a driver named Sonyait in their
website,this is the same SonyDAT driver with only a new name. Please be aware that
as of now, Solaris 7 does not see the changer driver and thus the juke systems should
have Solaris 2.6 on them.
5. Reboot the system with reconfigure option ( -r).
6. After the system comes up make sure that the apunix drivers (nrcdt0, nrcdt1 and ch0)
are symbollically linked to the correct AIT devices by the following commands:
cd /dev
ls -al nrcdt0
05.08.2001
35
Rational Imaging Installation Manual
ls -al nrcdt1
ls -al ch0
If there is any problems,make sure that the "probe-scsi-all" at the OK prompt sees the
devices. Also make sure that the scsi cable is securely connected on both end. This is
important since the apunix wide to wide scsi cables have pins that are a bit more reccessed
than the same type sun cables. Failure to securely connect and tigthen the cable will cause
intermittent connection problems.
D.
SOLARIS INSTALLATION
Make sure that both the jukebox and tape drive(s) are recognized by the workstation. If the
drives were not on during the Solaris installation, then reboot the computer using “reboot r” with the power on. Also the ISTarc archive package should also be installed prior to the
ISTjuke application.
Login as root, since you will need superuser privileges to perform this step of the
installation.
Insert the Solaris Rational Imaging tape, and select the package ISTjuke from the list of
packages on the tape as follows:
su↵
pkgadd -d /dev/rmt/0n↵
select the number for ISTjuke↵
It may be required to run the install_juke process with imaging’s environment.
csh↵
source /home/imaging/.cshrc↵
cd /opt/ISTri/install
install_juke
The post-installation script will run a program called apinstall. Click on “APunix HP
DAT drivers” and then click on Install. Enter the license information when prompted to do
so. Repeat the installation for the APunix changer device.
Reboot the computer to make sure that the new drivers are recognized and working
properly.
E.
T ESTING
The following instructions will test whether the changer device driver is operating
properly.
1.
Jukebox status
Turn the jukebox ON, insert a blank tape into slot 1, and enter the following command at
the UNIX prompt:
change status
The tape drive should respond with status information and should not report any errors.
05.08.2001
36
Rational Imaging Installation Manual
2.
Insert the tape into the drive
Enter the following command at the UNIX prompt:
change 1 drive1
3.
Move the tape from the drive to slot 2
To test the read/write capabilities of the drive, make sure that the write-protect tab on the
tape is in the OFF position and enter the following UNIX commands:
mt -f /dev/nrcht0 off
Make sure that the tape has ejected before giving the next command:
change drive1 2
4.
Eject the tape
change 2 door
Use the eject button to remove the tape from the security door.
F.
CONFIGURATION
Use the configuration button on RIlogin (the disk icon) to add RIbox to the list of available
applications.
Use risetup to have the new jukebox recognized by the Rational Imaging system.
Log into the database server, change to the /opt/ISTri/admin directory, and run risetup.
Then use the option to add the new jukebox. Use the defaults whenever you have a
question about the parameters.
cd /opt/ISTri/admin↵
risetup↵
add new tape drive↵
add new jukebox↵
associate the tape drive with a jukebox↵
add available jukebox slots↵
associate a tapeset with a jukebox drive↵
Use the RIbox application to load the jukebox. The jukebox can be configured as a
Primary, Secondary or Combined jukebox. The combined setting is only recommended if
there are 2 drives in the jukebox. The initial and active tapesets will be assigned to be
archived on separate drives. If only 1 jukebox is desired, then use an external tape drive
for the Primary archive and take the tapes offsite as soon as they are full.
In RIbox, click on the Queue Status button and then on Stop Queue. Then click on Queue
Status again to show the jukebox slots. Once the slots are displayed, click on the
RECOMMENDATIONS button to have it configure and load the tapes. This button will be
used for normal operation. The other functions are only to be used under abnormal
conditions when the jukebox does not correctly recognize the state of the jukebox.
05.08.2001
37
Rational Imaging Installation Manual
G.
REMOVING EXISTING APUNIX DRIVERS
If you are upgrading the APunix drivers, or upgrading from DAT to AIT, you will need to
remove the current drivers to perform a fresh install. To do this, use the following steps:
cd /opt/ISTri/archive/install
uninstall dt
uninstall ch
unlink nrcdt0
unlink nrcdt1
unlink ch0
05.08.2001
38
Rational Imaging Installation Manual
X. Vidar Film Scanner Installation
Follow these instructions to install a Vidar XR12 film scanner on a Rational Imaging workstation
running SunOS. Make sure that the Vidar scanner is on during this installation.
A.
SUNOS INSTALLATION
Login as root, since you will need superuser privileges to perform this step of the
installation.
Retrieve the device drivers for SunOS from the vidar partition on the installation tape.
cd /home ↵
mt -f /dev/nrst0 fsf 3↵
(skip to the correct tape partition)
tar xvf /dev/nrst0↵
cd /home/vidar↵
Perform the installation per the instructions in the README and installation files under the
vidar directory.
Reboot the computer to make this driver active. WARNING: Use the instructions
provided in the System Maintenance section (page 98) regarding how to shutdown and
reboot the UNIX workstation. DO NOT simply power cycle the computer.
B.
SOLARIS INSTALLATION
Make sure that the Vidar scanner is recognized by the workstation. If the scanner was not
on during the Solaris installation, then reboot the computer using “reboot -r” with the
power on.
Login as root, since you will need superuser privileges to perform this step of the
installation.
Insert the Solaris Rational Imaging tape, and select the package ISTvidar from the list of
packages on the tape as follows:
pkgadd -d /dev/rmt/0n↵
select the number for ISTvidar↵
After installing the ISTvidar package, run the script “install_vidar”.
/opt/ISTri/install/install_vidar↵
Reboot the computer to make sure that the new drivers are recognized and working
properly.
05.08.2001
39
Rational Imaging Installation Manual
C.
T ESTING
Use RIscan to test the operation of the new scanner.
D.
CONFIGURATION
Use the configuration button on RIlogin (the disk icon) to add RIscan to the list of available
applications.
Remember to use add_license to license the use of RIscan properly.
05.08.2001
40
Rational Imaging Installation Manual
XI. Modem Installation
Follow these instructions to install a modem on the Rational Imaging workstation. This will
provide an important means of support for the network.
A.
MODEM SETUP
Rational Imaging currently supports US Robotics Sportster modems of 28.8 baud or
greater. The switches on these modems should be set as follows:
1. OFF
Normal DTR
2. OFF
Verbal results
3. ON
Enable result codes
4. OFF
Do not suppress echo
5. OFF
Enable auto-answer
6. OFF
Sends Carrier Detect
7. OFF
Resets modem Y0 on power up
8. ON
Enables AT command set recognition
To initialize the modem for software flow control, connect it to any SUN or PC
PC - install modem and run terminal program
SUN - connect modem and run “tip -38400 /dev/cua/a”
Enter the following commands to the modem:
AT↵
(modem should respond with OK)
AT &F1↵
AT X0 &A0 &K0↵
AT S0=1 S11=50 S12=50 S13=1 S19=15 &W↵
AT I4↵
(check configuration)
These commands will prepare the modem for SUN communications and will save these
instructions in the modems non-volatile memory. Thus, when the modem is turned off and
then back on, the modem will be initialized correctly.
You can also run the application “/opt/ISTri/bin/risetmodem” to initialize the modem
parameters. This will program the modem and save the configuration so that it will reset to
the correct settings after each call and after recycling the power.
05.08.2001
41
Rational Imaging Installation Manual
B.
SOLARIS INSTALLATION
Login as root, since you will need superuser privileges to perform this step of the
installation.
Insert the Solaris Rational Imaging tape, and select the package ISTmodem from the list of
packages on the tape as follows:
pkgadd -d /dev/rmt/0n↵
select the number for ISTmodem↵
After installing the ISTmodem package, perform the following operations.
/opt/ISTri/install/install_modem↵
cd /opt/ISTri/admin↵
risetup↵
add user “telerad” to rilogin↵
add user “telerad” to radiology↵
passwd telerad↵
Reboot the computer to make sure that the modem is recognized and working properly.
C.
T ESTING
Use tip to test the ability to dial out with the modem.
tip -38400 /dev/cua/a↵
at↵
atdt1-222-333-4444↵
(test the connection with a know service)
~.
(to exit tip)
Use another computer and modem to test the dial-in capabilities. The new modem should
allow you to dial in and login from another workstation.
Try to log in as “telerad” and make sure that RIaccess is activated appropriately. If there
are no patients or database errors, then make sure the .cshrc has the appropriate references
to the database server.
D.
CONFIGURATION
Add a additional users as necessary to access the database remotely. The on-call accounts
should be configured similarly to the “telerad” account.
05.08.2001
42
Rational Imaging Installation Manual
XII. Raptor Video Card Installation
A.
SUMMARY
This section has been added to supplement the installation instructions provided by Raptor.
This video card offers a better solution for graphics display on Ultra 5 workstations with 1
monitor. It removes the hidden line erase artifacts that are present on the Sun m64 chip. It
does have problems with 2 monitors however, as the cursor appears on both monitors. So
only use this card on single head units.
B.
INSTALLATION
Use the following instructions to install and configure the raptor video card in an Ultra 5.
1. Power down the computer and insert the raptor card
2. Reboot with –r to reconfigure the drivers
3. Insert the raptor CD, change to /cdrom/cdrom0, and run the script “./install_all” as
root.
4. Halt the computer
5. At the OK prompt, enter “setenv pcib-probe-list 1,3”
6. At the OK prompt, enter “reset”
7. While the system reboots, change the monitor cable to the raptor card video out.
8. Run OpenWindows
9. In a commandtool, enter “GFXconfig -depth 8 -res 1280x1024x76”.
10. If the video appears correct with colors, click yes to accept the changes.
11. Save and exit this configuration application
12. reboot the computer and confirm that the video graphics are correct.
05.08.2001
43
Rational Imaging Installation Manual
XIII. Display Calibration
A.
INSTALLATION
Use the Sun manuals to install the SBUS video cards and the monitors to the Sun
workstation. Then install any additional drivers necessary to make the monitor work
under OpenWindows. The high-resolution greyscale monitors running on the DOME card
require special drivers provided by Dome. Use the Dome manual to install these drivers,
as each video card requires a separate set of driver applications.
Reboot the system using the "reboot -r " command so that the new devices are configured.
su
reboot -- -r
(or "boot -r" at the boot prompt)
Edit the ".login" file of each of the users (imaging in particular - /home/imaging/.login) to
add the second (or third) display. The syntax is as follows:
$OPENWINHOME/bin/openwin -noauth -dev /dev/cgsix0 left -dev /dev/cgsix1 right
The first device configured on this line will be considered the console device by
OpenWindows. If there are any problems getting the new monitor recognized by
OpenWindows, use the dmesg command to check the device name, and the resolution of the
display adapter. If the device does not exist, try the "reboot -r" command again to make
sure that the device has been configured by Solaris.
dmesg | grep cgsix (replace cgsix with the name of the device if different)
cgsix0 at sbus0: SBus slot 2 0x0 SBus level 5 sparc ipl 9
cgsix0 is /iommu@f,e0000000/sbus@f,e0001000/cgsix@2,0
cgsix0: screen 1152x900, single buffered, 1M mappable, rev 7
cgsix1 at sbus0: SBus slot 3 0x0 SBus level 5 sparc ipl 9
cgsix1 is /iommu@f,e0000000/sbus@f,e0001000/cgsix@3,0
cgsix1: screen 1152x900, single buffered, 1M mappable, rev 11
If the video card is capable of higher resolutions than specified, see the dual_head script in
the hardware section of the jaz installation disk to help configure the resolution for the
video card (or contact the manufacturer of the video board). The particular card listed
above is a TurboGX card with only 1M of RAM, so it can not display greater than
1152x900 resolution. A TurboGXplus card, however, has 4M, and can display
1280x1024.
05.08.2001
44
Rational Imaging Installation Manual
B.
CALIBRATION PROCEDURE
The Rational Imaging system has parameters which can be configured to help standardize
the display of images across the imaging network. This means that the images should be
displayed similarly on any monitor within the network. In order to achieve this while using
different monitors (greyscale, color, hires, hiluminance), we have added configurable
parameters to the database for each monitor. If these parameters have not been set, then
default values will be used.
The first step is to determine the lowest black level where a 5% difference in contrast can
be visualized. Each monitor (even of the same manufacturer) has a different Black Level
below which no image information will be seen.
Turn off the lights
(set the lights to normal viewing conditions)
ricalibrate &
(run the ricalibrate program)
Use the mouse to stretch the ricalibrate window to cover most of the screen area. Drag it
by the corners. Then click on the right mouse button over the ricalibrate window and
select "Black Level Test". This will display a medium gray window with a cross-hatch
image in the center. Use the left and middle mouse buttons to adjust the cross-hatch
intensity till it is just visible. This will generally be a number between 2500 and 10000
depending upon the monitor. The value displayed up in the upper-left portion of ricalibrate
is the number to use for the minimum black level when configuring the monitor parameters.
If this value is set too low, then low image intensities will not bee seen properly. And if
the value is set too high, then the image will appear too bright and washed out. Click on
the left mouse to decrease the intensity until the pattern disappears. Then click on the right
mouse button several times until the pattern can be seen fairly well. You can run
ricalibrate on both monitors at the same time to make sure that the cross-hatch pattern
appears similarly on both monitors. Record the intensity for each monitor.
The next step is to add the new monitor parameters to the Rational Imaging system. Use the
following procedure for each monitor within the system:
Login as imaging on the database server
cd /opt/ISTri/admin
risetup
42) Add monitor in database
host_key: (select the host_key for this workstation)
screen no: (0 is the left most screen)
minimum black level: (use the intensity you identified with ricalibrate)
maximum black level: (accept default 65535)
x: (bottom left x coordinate of screen relative to other monitors)
y: (bottom left y coordinate of screen relative to other monitors)
width: (width of display)
height: (height of display)
gamma: (Use 1.0 unless a densitometer has measured the linearity)
If these parameters are entered properly, then RIview should be able to display all of the
digital intensities within the SMPTE test pattern image or any diagnostic image.
05.08.2001
45
Rational Imaging Installation Manual
C.
SMPTE PATTERN
Display the SMPTE (Society of Motion
Pictures and Television Engineers) pattern to
make sure that the entire range of digital
intensities is visualized. If this image is not
on the system, you can import it from the GE
scanners "camera", or drag it from the
"installation jaz disk" onto the "drag-n-drop
rectangle" in the upper right corner of the
RIport application.
5% Contrast
•
Login as imaging
•
Select RIview from the program bar
•
Click on Select Exam and select SMPTE
or Camera to display the test pattern.
•
Select the "Window/Level" mouse mode
on the toolbar
•
Double click over the image to set the intensity to: L1024/W101.
•
Click on the View mouse mode and check the intensity ranges in the image
With RIview displaying the image through these window/level settings, all of the digital
intensities in the image should be visualized. A good test of this is the 5% square patterns
in the 0% intensity and 100% intensity squares. You should be able to see these 5%
regions on ALL monitors. The range of intensities and the visualized contrast between
each 10% step should be similar in the white and black regions. You may want to create a
copy of this window and move it to the other monitors so that you can check the calibration
of all the monitors on the workstation.
If the 5% pattern in the black region can not be visualized under typical lighting conditions
(used for primary interpretation with dimmed lights), then the minimum intensity is set too
low. Go back into risetup and edit the monitors that can not display both the white and
black 5% contrast patterns. Increase the minimum intensity until both can be visualized.
D.
DOME MONITOR CALIBRATION
The following 2 sections have been added thanks to Bill Harris from Canon.
Check to see if the SMPTE or CAMERA images is listed in the patient list of Riview. If it
is not, drag it from the Cdrom under images to the drag-n-drop rectangle of Riport. This
will load it into the system. Or you can use Riport to get the CAMERA exam from a GE
scanner.
Set all of the monitors to their factory defaults. On the Sun monitors, use the reset button.
On the portrait monitors, you will need to adjust them to 60foot-lamberts.
Open the File Manager on the portrait monitor and Drag the DOMEcalib file from the
DOME directory to the /opt directory on the Sun. Attach the Suction cup to the dome video
card. Click on the DOME calib application and place the suction cup in the center of the
05.08.2001
46
Rational Imaging Installation Manual
white box on the screen and click OK. Next choose the White Level Test. Here is where
you need to set the white level to 60 foot-lamberts. You will need to adjust the contrast
and brightness to achive the correct value. Once you reach the correct value, check the
black level. It should be 0.23 foot-lamberts. Click on the next button and the calibration
procedure will check the range of intensities and calibrate the video card for this particular
monitor. Do this for all greyscale monitors.
E.
ALL MONITOR CALIBRATION
Open up a command tool and type ricalibrate. Expand the window to cover the screen, and
use the right mouse button to select “White Line Pattern”. This will test the electron gun
alignment. You should see sharp clear lines with no color at the edges. Use the RGB
alignment buttons to optimize the sharpness. You should not see any red or blue tint at the
edges of the lines.
Then use the right mouse button to select the “Black Level Test”. Click on the middle
mouse button to lower the intensity until the black is “Black” but you can still see the 5%
grey grid. Perform this test in the ambient room light which will be used for reading
exams. This value is normally around 3000 to 5000 depending upon the monitor.
Use risetup on the server to add a monitor (or edit a monitor) and change the black level to
that determined in the prior step. Then confirm the operation of this setting by running a
new Riview process displaying the SMPTE pattern. The 5% patterns should be visible
both in the white and in the dark box (100 and 0 percent). Note: each time the monitor
black level is changed, Riview must be run again to load the new value. If the black level
is too low, the dark 5% value will not be easily visible. If the black level is too high, the
image will not appear “black” and will look washed out. Make sure that the SMPTE
image is displayed with all of intensities (Level of 1024 and Window of 101). This will
ensure that you are seeing all of the available digital intensities. Print the image to test the
printer calibration.
F.
PRINTER CALIBRATION
Create a print page with the SMPTE images and make sure that the window/level settings
on the print page have a level of 1024 and a window of 101. This print page should then
display the entire range of digital intensities within the test pattern.
Print the print page to the available printers in the network on a regular basis to make sure
that all of the intensities are visualized. If the 5% contrast regions can not be seen, or if
any artifacts or streaks appear on the image, call your service engineer to calibrate the film
or paper printer.
If all of the monitors and printers are calibrated in this manner, then the diagnostic images
should appear similarly on each monitor and hardcopy throughout the network.
05.08.2001
47
Rational Imaging Installation Manual
XIV.Canon Digitizer
A.
SCANNER CONFIGURATION
Use the Canon CFS300 scanner manual and the menu options of the scanner to set up the
following defaults. The bolded parameters will vary from facility to facility.
If you set up the IP address and hostname of the scanner and then save that, you can telnet in
and set these parameters using the “diag” application. Telnet to the IP address, use
“cfs300” as the username, “canon300” as the password, and then type “diag” at the
prompt.
************** SET-UP INFORMATION *************
Interface Ttpe
: TCP/IP
LCD Contrast (1~8)
: 6
Alarm (OFF, ON)
: ON
35cm Width Pixel Size
: 175
30cm Width Pixel Size
: 175
28cm Width Pixel Size
: 175
25cm Width Pixel Size
: 175
20cm Width Pixel Size
: 175
18cm Width Pixel Size
: 175
Grayscale Depth(1,8,12bits)
: 12 bits
Data Output(Transparency,Density): Density
Grayscale Inversion (No,Yes)
: No
X-Axis Flip (No,Yes)
: No
Y-Axis Flip (No,Yes)
: No
LUT Type(Linear, SqRoot, Hist)
: Linear
Scan Mode(Single, Multi, Barcode): Multi Film
Max Density Value
: 3.200000
Min Density Value
: 0.000000
Data Byte Order(LITTLE, BIG)
: LITTLE ENDIAN
Data Compression(NONE, JPEG)
: NONE
File Format(DICOM, JPEG, PGM)
: PGM
Network IP Address
: 192.1.1.2
(Scanner)
Network Host Name
: cfs3O0
Subnet Mask
: 255.255.255.0
Default Route Addr.
: 192.1.1.1
Ether Port Type(AUI, RJ45)
: RJ45
Target IP Address
: 192.1.1.3
(Sun)
Data Transfer Protocol
: FTP
Port No
: 21
FTP User Name
: cfsscan
(user on Sun)
FTP User Password
: cfsscan!
PGM File Extension
: .pgm
Lock File Extension
: .lck
Filname Body Length
: 24
FTP Put Directory Name
: img
(linked to /img/scan)
05.08.2001
48
Rational Imaging Installation Manual
Hard Disk Installed?
Use Hard Disk Buffer?
JPEG Chip Installed?
JPEG Method
Barcode Reader Installed?
Use Barcode Reader?
Serial Number
Scan Counter
Barcode Study Number
:
:
:
:
:
:
:
:
:
Yes
Yes
Yes
Hardware JPEG
Yes
No
SN100009
257
200
The 175um pixel size specifies a (2032x2467) image. This is what is required to meet
ACR standards for primary interpretation. If they are using the system for on-call work, it
is preferable to reduce the matrix size to increase speed of transmission to the radiologist’s
home. Do this by changing the pixel size parameter to 350 (1016x1233).
14in x 25.4cm/inch x 1000um/mm / 175um = 2032
14in x 25.4cm/inch x 1000um/mm / 350um = 1016
B.
SOLARIS INSTALLATION
Login as root, since you will need superuser privileges to perform this step of the
installation.
Insert the Solaris Rational Imaging tape, and select the package ISTscanc from the list of
packages on the tape as follows:
pkgadd -d /dev/rmt/0n↵
select the number for ISTscanc↵
Enter a password for cfsscan which was created during the package add.
Password cfsscan↵
Reboot the computer to make sure that the modem is recognized and working properly.
If this host does not have INET, and will be forwarding the images to another workstation,
use the following instructions. If this workstation does have INET, and will store the
images locally in /img/incoming for riupdate to pick up, then skip to the next section.
Configure the file /opt/ISTri/bin/ritransmit to send the images to another workstation.
Then copy /opt/ISTri/bin/riceive to the other RI workstation and configure it there to
receive the images from ritransmit.
rcp /opt/ISTri/bin/riceive remote_host:/opt/ISTri/bin↵
rsh remote_host↵
vi /opt/ISTri/bin/riceive↵
Enter the ritransmit script name “/opt/ISTri/bin/ritransmit” into the transmit script in
configuration popup of Riscanc.
RIscanc will require licensing via a file in /opt/ISTri/bin if the informix inet application is
not loaded on the system. Since riscanc will not be able to attach to the server without
inet, it must be able to obtain licenses in the "/opt/ISTri/bin/.rilicense" file. The file
structure is the same as the licenses received from the IST website.
05.08.2001
49
Rational Imaging Installation Manual
Hostname Hostid ProgramName LicenseInfo
Make sure to remove any unnecessary lines from this file.
C.
RISCANC SETUP
RIscanc is the scanning application which will receive the digitized films, associate them
with a particular patient, and then add them to the Rational Imaging patient database. It
was designed to work independently on a Solaris PC, and then transmit the images to a
Rational Imaging workstation over ethernet. It can also be run on a Rational Imaging
workstation and simply put the images into the /img/incoming directory to be loaded into
database by "riupdate". Compression can be used to facilitate network transmission over
low-bandwidth networks (ISDN or 256k Frame Relay).
The riscanc comes with default parameters, however some of them will need to be changed
for a particular facility. Run riscanc and click on the config button to change these
defaults:
Login as imaging
riscanc
config button
In the config popup, the following parameters need to be set:
Scanner hostname : Enter the hostname of the canon digitizer
Image dir: "/img/scan" Select a directory where the images will be sent from the
scanner
Scan dir: "/img/incoming" Select the directory where the images will be
transmitted to when the transmit button is clicked.
Transmit script: Enter the name of the unix script which will then take the images,
compress them, and send them to a Rational Imaging workstation. If the
workstation has "riupdate" running along with "inet", then this script is not
necessary and can be left blank. NOTE, make sure to leave this field
blank if riscanc is running with Informix. Otherwise riupdate will not be
able to recognize the images in the incoming directory.
Edit the "/etc/hosts" file and add the canon digitizer host. Make sure that you can ping the
digitizer when it is on.
su
vi /etc/hosts
(add canon digitizer "cfs300")
ping cfs300
Configure the scan user "cfsscan" and the "img" directory
admintool
(add cfsscan with a /home/imaging home directory)
mkdir /img/scan
chown imaging /img/scan
chgrp imaging /img/scan
chmod a+rwx /img/scan
ln -s /img/scan /home/imaging/img
05.08.2001
50
Rational Imaging Installation Manual
Try to telnet to the workstation as "cfsscan" and change to the "img" directory. If you can
do this, then the scanner will be able to deposit images there.
telnet rihostname
login as cfsscan
cd img
If a transmit script is being used to send the images to a remote Rational Imaging
workstation, then make sure to edit the script and configure the parameters such as the
hostname of the remote host and the directory to deposit the images. Also, you may need to
add the Rational Imaging host to the /etc/hosts file.
D.
CANON CFS300 C ALIBRATION
The Canon CFS300 is capable of
measuring optical densities throughout the
diagnostic range. Normal films have
optical densities in the range of 0 to 2.5.
Over-exposed films require hot lamps to
visualize the extended range of 2.5 to 3.5.
The Canon digitizer is capable of
digitizing intensities throughout this range
(0-3.5), however the information content
between 3.0 and 3.5 optical density units
is questionable due to the extreme
quantum limitations (Low X-Ray exposure
results in high quantum mottle better
known as noise). It may be better to set
the limits of the digitizer from 0 to 3.0
based on a set of test results we will
describe in the following procedure.
To measure the digitizer's linearity and
range, obtain a test film which has
calibrated optical densities from 0 to 3.5
OD. Set the scanner's optical density
range from 0 to 3.5, and use the linear
transformation table. Digitize the test pattern with sufficient spatial resolution (175um or
less) and display the resultant image in RIview. The image should look like the image at
the right.
Change the mouse mode in RIview to text mode, and select the intensity option. Then drag
out rectangles within each densitometric step on the image. Make sure that the intensities
are well within the step, otherwise the standard deviation and mean measurements will be
inaccurate. You may need to change the window and level of the image to see the steps
clearly. Changing these values does not affect the measurements, as the measurements are
obtained directly from the 16bit original image. Once you release the mouse button, the
mean and standard deviation will be displayed automatically. Use a densitometer (usually
found in the dark room) to measure the optical densities of the steps.
Use a spreadsheet application to enter both the known optical densities (measured with the
densitometer) and the measured digital intensity. This should give you a linear curve
05.08.2001
51
Rational Imaging Installation Manual
unless the system is out of calibration. Also, the standard deviation should increase with
optical density. At some point the standard deviation becomes greater than the expected
anatomic contrast, and thus will limit the resolving power of the system.
Perform a linear regression on the measured data. The slope should be linear (R>0.95)
and should utilize the 12 bit dynamic range (y-intercept should be close to 4095).
The results of our CFS300 calibration procedure are shown in the following graph. This
particular scanner demonstrated excellent linearity (R=0.997) and used the entire dynamic
range of the 12 bit data (y-intercept within 0.5% of the maximum intensity 4095). The
regressions results were: y = -1245.6x + 4075.5. The x-intercept occurred at 3.27 OD.
OD
0.07
0.12
0.21
0.31
0.42
0.51
0.62
0.75
0.87
0.98
1.09
1.21
1.31
1.45
1.58
1.7
1.81
1.92
2.06
2.2
2.32
2.42
2.54
2.69
2.82
2.97
3.1
05.08.2001
X
3994.5
3935.3
3826.2
3699.7
3565.9
3449.5
3319.2
3164.7
2996.8
2855.5
2720.8
2562.6
2427.4
2249.2
2092.7
1924.2
1789.4
1660.6
1484.5
1312.4
1171.5
1045.1
897.3
738.4
584.4
383.5
230.3
SD
1.6
3.1
1.8
1.7
1.8
2.1
2.2
2.7
3.5
3.7
4.6
4.5
5.2
6.2
7.6
8.8
11.7
14.5
20
23.9
32.3
40.2
49.8
74.4
99.2
143.2
147.2
X-SD
3992.9
3932.2
3824.4
3698
3564.1
3447.4
3317
3162
2993.3
2851.8
2716.2
2558.1
2422.2
2243
2085.1
1915.4
1777.7
1646.1
1464.5
1288.5
1139.2
1004.9
847.5
664
485.2
240.3
83.1
X+SD
3996.1
3938.4
3828
3701.4
3567.7
3451.6
3321.4
3167.4
3000.3
2859.2
2725.4
2567.1
2432.6
2255.4
2100.3
1933
1801.1
1675.1
1504.5
1336.3
1203.8
1085.3
947.1
812.8
683.6
526.7
377.5
52
Rational Imaging Installation Manual
3.23
3.41
3.57
122.7
63.9
37.7
123.2
91.5
70.8
-0.5
-27.6
-33.1
245.9
155.4
108.5
Additional calibration may be required to obtain a linear result. If this is necessary,
follow the instructions in the Canon installation manual. It is our understanding that by
entering the optical density and digital intensity for several points, the system can calibrate
itself to provide a linear result. The exact calibration equations will be published in this
section as soon as they are identified.
Caution: make sure that your data is accurate otherwise the calibration procedure may
introduce non-linearities into the scanner which will alter the diagnostic content of the
image. The CCD components of the system have an inherently linear response throughout
the spectrum of visible light. Therefore, additional calibration should not be required.
This procedure will document the linearity and range of the scanner however, and will be a
good reference if the quality of the images should degrade over time. Make sure that you
document the following parameters:
Optical Density Range (set in scanner)
Image bits (16 should be selected)
Resolution (175um recommended)
Optical Density Values (Measured with densitometer)
Intensity measurements (mean and standard deviation measured with RIview)
05.08.2001
53
Rational Imaging Installation Manual
XV. Disk Installation
The following section will describe how to add an extra disk to the Rational Imaging workstation
for image storage.
A.
UNIX PREPARATION
In order to add a disk to an existing Unix workstation, the SCSI ID must be set so that it
will not conflict with the other devices. To do this, use the "probe-scsi" command at the
boot prompt to see the existing devices.
halt
(halt the workstation)
probe-scsi
Set the scsi id of the disk (with jumpers if necessary) to an unused value (Disks are usually
between 0-3. The tape devices are 4,5. The CDROM is 6. The boot disk is defaulted to
SCSI target ID #3. The Jukebox changer is usually set to 0.
Format the disk using the unix format command.
format
select disk
defects
extract original defects
quit
partition
enter the partition information (Split up large disks).
label
quit
label
(Make sure that you label the disk again in the main menu)
format
quit
Create a new file system on the partition.
newfs /dev/rdsk/c0t2d0s6 (Controller 0, SCSI target #2, Drive 0, Partition 6)
Make a new mount point for the image partition (/img2, /img3, …)
mkdir /img2
mount -F ufs /dev/dsk/c0t2d0s6 /img2
(SCSI ID #2, Partition 6)
chown imaging /img2
chgrp imaging /img2
chmod 777 /img2
Add the following line to the /etc/vfstab file so the directory will be mounted at bootup.
05.08.2001
54
Rational Imaging Installation Manual
/dev/dsk/c0t2d0s6
/dev/rdsk/c0t2d0s6
/img2
ufs
3
yes -
Export the filesystem so that other workstations can see it by adding the following line to
the /etc/dfs/dfstab file. Run this command at the commandline, or reboot the system to
export this filesystem.
share -F nfs -o rw /img2
B.
ADDING TO THE RATIONAL IMAGING SYSTEM
Login to the database server and use "risetup" to add the new image directory.
login as "imaging" on the server
cd /opt/ISTri/admin
risetup
7) Add image directory to database
Use the convention (/net/host/imgdir/database). You can exclude the database portion if
there is only 1 database (/net/host/imgdir).
C.
T ESTING
Login to another workstation and see if the image directory is available. If the other
directories are currently exported to this workstation, then it may take some time to be
recognized.
ls /net/newdiskhost/img2
05.08.2001
55
Rational Imaging Installation Manual
XVI.Aspect DICOM Interpreter Installation
Aspect Electronics manufacturers a DICOM Print Class SCP “black box” which will receive
DICOM print pages and print them to older non-DICOM laser cameras (Kodak, 3M, etc). Check
with Aspect for a list of supported cameras. This section is added to help install the Aspect
interpreter. If problems occur, please consult the Aspect installation manual.
A.
UPGRADING
The interpreter must be at version 3.05 or greater. If it is not, please contact Aspect Electronics to
have them email the latest revision to you. You will receive an Interp.zip file, which you simply
put on the configuration floppy in the root directory before configuration. We have added Version
3.05 Interp.zip to the Aspect directory on the IST Installation CDROM.
B.
KODAK CONFIG PARAMETERS
The Kodak laser camera requires a dedicated digital interface on their laser printer to provide the
connection with the interpreter.
The aspect installation floppy must be edited to prepare for certain printers. The following
parameters may be used to setup for a Kodak laser camera:
AE_Title= Laser
Max rows=4800
Max columns=4096
Top margin=10
Digital_parity=even (even/odd/none)
Control=KCL (M952/P831/SPCI/KCL)
Baud rate=9600 (1200/2400/9600)
Parity_bit=none (even/odd/none)
Data_bits=8 (7/ 8)
Stop_bits=1 (1/2)
Media change-disable
Network address= (enter correct address)
On the Kodak printer, the configuration parameters were as follows:
Com. Port=2
Host protocol=KCL (Kodak Control Link)
Image data port id=1
Image parity=even
Com port parity=none
Data length=8
Baud rate=9600
Driver type=RS232
05.08.2001
56
Rational Imaging Installation Manual
C.
CONFIGURATION STEPS
Aspect’s Interpreter is a box that takes as input DICOM images through its RJ45 ethernet input
port, and converts the data into digital format used by non-dicom medical laser printers. The
output ports of this box include a 37 pin data output named “PRINTER”, a 9pin host control output
called “HOST CTRL”, and a SCSI II output port for scsi printer connections. There is also a 9 pin
input port called “HAND CTRL” which is used for connecting an optional keypad for setup and
configuration. Without the keypad, a floppy install disk must be prepared and configured.
The interpreter must be configured to the facilities network. The following instructions allow you
to do this.
1) Put the Aspect system floppy disk in a floppy drive of your PC
2) Run “command” from the Start | Run menu on a PC.
3) Type “edit a:/system.ini”
4) Scroll down using the arrow keys until you reach the [network] section.
5) Modify the IP-address, the Subnet-mask, and the Router
6) Save the file
7) Remove the cover of the Interpreter and insert the floppy disk
8) Turn on the Power and wait until you hear 2 consecutive beeps
9) Turn off the Power, Remove the floppy and re-install the cover
10) Follow the instructions in the Aspect manual to install the printer cables.
11) Turn off the power on the Laser Camera
12) Plug in the network cable and turn on the power, first to the aspect (wait for the beeps), then on
the laser camera. At this point there will be an active connection between the units.
13) Install RiprintQ and begin testing
05.08.2001
57
Rational Imaging Installation Manual
XVII.RIS Connectivity Installation
Rilink and Rideliverd are background processes used in the RIS connectivity package. Rilink
receives HL7 messages from RIS systems, and writes each message into a specified directory on
disk. Rideliverd reads each message, and determines how to handle it based on the type of
message. An ORU message is a report message containing a verified report, and rideliverd will
try to associate the report with a matching exam. A ORM message, or general order message, is
used to provide worklist (scheduling) information and also alter patient demographics. If
everything works correctly, Rilink will receive and deposit the messages. Rideliverd will read
each message, provide the functionality required, and then delete each successfully handled
message. Thus the hl7msg directory should only provide temporary storage for messages being
processed.
Rideliver is a third application in the RIS connectivity package which allows manual
reconciliation of mis-matched reports.
A.
LICENSING
The following licenses are provided when the “RIS Connectivity Package” is ordered:
rilink
rideliverd
rideliver
The following sections describe the installation and testing of each of these applications.
B.
RILINK CONFIGURATION
Make sure that all 3 applications are version 5.1.0n or greater:
get_version /opt/ISTri/bin/rilink
get_version /opt/ISTri/bin/rideliverd
get_version /opt/ISTri/bin/rideliver
Create directory for temporary storage of messages:
mkdir /img/hl7msg
chmod 777 /img/hl7msg
Rilink is a background process run out of the inittab. Edit the /etc/inittab and enter the following
line:
r7:34:respawn:su – imaging –c “exec rilink –d /img/hl7msg –i 5000 –n”
The following options are specified by default:
05.08.2001
58
Rational Imaging Installation Manual
-d directory: Temporary message directory
-I port#in: Port number to receive messages on (Get from RIS vendor)
-n: Do not provide ACK message for each received message. The default mode is to
provide an ACK message.
The following options are also available for troubleshooting:
-o port#out: Output port number if the ACK is to be sent
-f logfile: Specify logfile if run in verbose mode
-v: Verbose – output debugging information
Make sure that the rilink process is running. If it is not, see the troubleshooting section.
ps –ef | grep rilink
C.
RIDELIVERD CONFIGURATION
Configure the rideliverd config file. There are several default files (for each RIS vendor) in the
/opt/ISTri/etc. Copy the closest one to a new config file as follows (IDX assumed):
cd /opt/ISTri/etc
cp rideliverd_idx_cfg rideliverd_cfg
Modify the /opt/ISTri/etc/rideliverd_cfg file to suit the facility’s needs. The following parameters
are available:
05.08.2001
Correct: Y
Specifies that the demographics should be corrected to match the
RIS information (If N, the the demographics on the PACS will not
be altered by Rideliverd).
DBalias:
Specify the database alias found in the rilogin “databases” table
Outfile:
Specify the name of the logfile
RISDir:
Specify the name of the temporary hl7msg directory
(/net/host/img/hl7msg). Make sure that you specify the NFS format
so that RIdeliver can be run from ANY host to reconcile the
messages.
Verbose:
Specify a number between 0 and 9. 0 is the least verbose, and 9 the
most. The messages will be put to the Outfile. Errors will also be
generated in the syslog.
WriteHdr: Y
For reports, include the HL7 message demographics in the header of
the report. If the report already has a demographic header, you may
set this to N.
HostOut:
Enter the hostname of the host to send Storage Commit messages to.
PortOut:
Enter the port number to send the storage commit messages to.
StorCmtDelay:
Enter the number of seconds to delay before sending the storage
commit. Leave enough time to make sure that riupdate has
processed the images. 600 is recommended.
59
Rational Imaging Installation Manual
NoFileSleep:
Enter the time to wait if there are no files in the directory to process.
This is usually set to 60 seconds. However, if IDX wants faster
response time to Exam Display messages, this may be set to 5
seconds.
PrefetchExamLimit:
Enter the total number of exams (starting with the most recent) to
retrieve when a prefetch message is sent.
PrefetchExamAgeLimit:
Enter the number of months to go back from the current date
for retrieving exams. If this is set to 24, then only the last 2 years
worth of exams will be retrieved. If this parameter is not set, then 7
years is assumed = 84.
DefaultModality:
Enter the modality to enter in the worklist table if the modality is not
specified in the message. Usually 34 “RG” is used. This will then
fill the modality for Riscanc with “RG”.
Field:
Each field statement determines the mapping of each parameter in
the HL7 message.
Each RIS vendor may have different
configuration parameters. The following organization is specified
after the Field parameter
FieldName – name of the parameter (syntax must not be changed)
SegmentName – name of the HL7 segment (OBX, OBR, PID…)
FieldPosition – position in the segment (begins with 0, 1, 2 where 0
is the segment name such as ORC)
SubFieldPosition – If the field is separated by ^ characters, then this
value will allow you to specify sub-positions. If 0, then the entire
field is used even though ^ may be present. (eg: If 2 is specified and
the data contains “this^is^a^test”, then “is” will be used. If 0 is
specified, then “this^is^a^test” will be used”
CharOffset – enter the character offset of the data in the field. This
is used to locate a time in a combined date/time field. (eg: If
“10241988 10:34” is the data, the a value of 9 would return
“10:34”).
Format – The following formats can be used to read and convert the
data.
0 – No format change
1: Name format (last^first^middle -> last,first middle)
2: Date Format (yyyymmdd -> mm/dd/yyyy)
3: Date Format (yyyymmdd -> yyyy-mm-dd)
4: Time Format (hhmmss -> hh:mm)
5: Time Format (hhmmss -> hh:mm)
6: Date Format (mm/dd/yyyy -> mm/dd/yyyy)
7: Date Format (mm/dd/yyyy -> yyyy-mm-dd)
05.08.2001
60
Rational Imaging Installation Manual
8: Time Format (hh:mm:ss -> hh:mm:ss)
9: Time Format (hh:mm:ss -> hh:mm)
RIdeliverd is a background process run out of the inittab. Edit the /etc/inittab and enter the
following line:
r8:34:respawn:su – imaging –c “exec rideliverd –c /opt/ISTri/etc/rideliverd_cfg”
Make sure that the rideliverd process is running. If it is not, see the troubleshooting section.
ps –ef | grep rideliverd
D.
MESSAGE T ESTING
Send the following messages and confirm the results.
1.
ORM Message: (Scheduled Event)
Check to make sure that there is an entry in the radiology “worklist” table:
Select * from worklist;
Use RIscanc to see if the worklist item is available for “Scheduled” backfill. Make sure
that all elements are available.
Also check to see that an entry was added to the prefetch table.
Select * from prefetch;
Ridistribute can be configured to retrieve these exams the night before the exam is
scheduled to be acquired. See the last section of this chapter to configure ridistribute for
prefetch.
2.
ORU Message: (Report Event)
Check to make sure that there is a report available for the associated exam. Load the exam
in Riview, and then click the “Report” button. The report should be able to be viewed. If
the report is not associated with the exam (not in the /img/exam_key/reports directory),
then check the “reportqueue” manual reconciliation table in radiology
Select * from reportqueue;
If the report was sent here (help up due to a mismatch), use RIdeliver to list the report and
match it to a correct exam. You should be able to view the report in RIdeliver. If you can
not, adjust the config setting for “Report Segment: 5”. It should be 5, but some RIS
vendors put the report in 4 (MedFax). If this still can not produce a viewable report, then
edit the actual message file and look in the OBX segment for the report. It should be quite
visible.
Determine the field position, and adjust RIdeliver config and the
/opt/ISTri/etc/rideliverd_cfg config file.
3.
ZRQ Message: (Storage Commit sent by Canon Connector)
This message will be present in the /img/hl7msg directory until it is actually replied to.
This will be N seconds after the message was sent as specified in the
/opt/ISTri/etc/rideliverd config file.
05.08.2001
61
Rational Imaging Installation Manual
When it is successfully handled, it will be deleted. Check the canon connector to make
sure that it received and processed the storage commit acknowledgement. You can also
check the rideliverd.log logfile specified in the config file.
4.
EXM Message: (IDX request to display exam)
Check to make sure that an exam was launched (appears as an Riview icon at the bottom of
the screen) on the specified workstation. The command used to launch riview may have
permission problems, or maybe the unix user is not available on the remote workstation.
Test the current workstation (server) if the exam is not displayed. You can test the
command permission by executing the command manually (replace server with the real
server, ##exam_key## with the exam’s database exam#, and radiology with the name of
the database):
rsh –l username hostname “riview //server/db/rilogin ##exam_key## 1 0 //server/db radiology” &
Correct any permission problems.
If these messages were sent, deliverd, and produced the expected results, then you will not need to
review the following sections.
E.
RILINK T ROUBLESHOOTING
Use this section to step through the processes and test or troubleshoot the applications.
To test Rilink, it is best to turn off rideliverd. To do this, change the “respawn” element in the
inittab to “off”.
r8:34:respawn:su – imaging –c “exec rideliverd –c /opt/ISTri/etc/rideliverd_cfg”
init Q
ps -ef | grep rideliverd
kill –9 ##rideliverd_pid##
Now send some messages from the RIS system. Do they appear in the /img/hl7msg directory. If
not, turn off rilink in the inittab (similar to specified above only use the line for rilink and kill the
rilink process). If they do appear, skip to the section on testing rideliverd.
Run rilink manually with the following options
rilink -d /img/hl7msg -I 5000 -f /img/rilink.log -n -v
This will put Rilink in verbose mode, and after you send a message, see if there is any useful
information in the logfile. If no information is logged, then rilink probably is not receiving any
messages and maybe the port number is wrong. You may see messages like the following during
normal operation:
Incoming: 5000
Outgoing: 5001
New rilink process starting: 20296
Before while Mon Jul 31 14:28:39 2000
before accept
The previous lines show that Rilink is waiting for messages (accept). If messages should be
recognized, the following lines will be logged:
After accept
05.08.2001
62
Rational Imaging Installation Manual
Tue Aug 1 10:11:54 2000
Before Read: begin processing 208 bytes
Write file: /net/andromeda/img/hl7msg/rilinktmp.1
ORU Aug 1 10:11:55 2000
Done processing
Before Read……
The previous lines show that Rilink received a 208 byte message on Aug 1 at 10:12 and wrote a
message file for a ORU type message.
F.
RIDELIVERD T ROUBLESHOOTING
Use this section to troubleshoot RIdeliverd.
To test Rideliverd, it is best to turn it off and run it manually. To do this, change the “respawn”
element in the inittab to “off”.
r8:34:respawn:su – imaging –c “exec rideliverd –c /opt/ISTri/etc/rideliverd_cfg”
init Q
ps -ef | grep rideliverd
kill –9 ##rideliverd_pid##
With some messages in the /img/hl7msg directory,
/opt/ISTri/etc/rideliverd_cfg and run rideliverd manually.
set
the
verbose
mode
in
edit /opt/ISTri/etc/rideliverd_cfg
rideliverd -c /opt/ISTri/etc/rideliverd_cfg
Check the logfile specified in /opt/ISTri/etc/rideliverd_cfg to see what output may be useful.
Make sure that the debug level is set to 9 to make sure to get the most amount of information. If the
mapping is incorrect, record the RIS vendor, version number, and get their HL7 specs so that new
mapping files may be created.
G.
RIDISTRIBUTE PREFETCH CONFIGURATION
Ridistribute is used to handle the prefetch capabilities due to its versatile distribute capabilities
and the ability to configure it to retrieve to a specified set of hosts based on available disk
capacity.
The first step is to create a ridistribute configuration file for prefetch on the server
(/opt/ISTri/etc/rid_prefetch). This should already be present any only require customization.
The elements of this file are as follows:
include(/net/server/img/ridistribute_defaults)
LockFile: /opt/ISTri/etc/.rid_prefetch.lck
SelDest: All
Process: Prefetch
05.08.2001
63
Rational Imaging Installation Manual
The “SelDest” command may be altered to specify only certain hosts such as “All.Diag” or
“All.BitBucket”. The include statement must point to the ridistribute_defaults for the system disk
configuration.
Once this config file is created, simply add a entry to imaging’s crontab to run ridistribute and
prefetch the exams based on the specified criteria (by Total Number, or by most current in
months). Ridistribute will add the exams to the “jukequeue” table which are scheduled for the next
day. You can run ridistribute manually “ridistribute –c rid_prefetch”, and then run Ribox to see if
any exams have been added to the queue.
To edit the crontab entry for imaging, login as imaging and edit the crontab using vi with the
following statements (remember to use vi editing syntax):
Setenv EDITOR vi
Crontab –e
The entry in the crontab for prefetch is:
0 23 * * * exec csh –c “/opt/ISTri/bin/ridistribute –c /opt/ISTri/etc/rid_prefetch”
This will activate the prefetch process at 11:00pm (23:00) the night before.
The query used to activate the items in the prefetch table is:
Select * from prefetch where exam_date <= today+1;
H.
STUDY CONTENT NOTIFICATION
IDX and possibly other RIS vendors are requesting exam status information from our PACS. The
want to know whether the exam is on our system, whether it has been archived or not, or maybe the
exam has been deleted and is no longer available. This is done through DICOM Study Content
Notification. Each time a new exam is imported into our PACS, an entry is made in the “scnexam”
table with the exam_key, exam Instance UID and other exam specific information. On a regular
basis (usually every minute), riscn checks this table and will deliver the messages to the RIS
vendor’s port. When successfully sent, the message will be deleted. The following notification
events are currently logged and forwarded in riscn (Status – Description):
1) New exam imported into PACS
2) Exam archived and removed (Only available if retrieved)
3) Exam retrieved from jukebox and now available again
4) Tape removed from jukebox (exams only available via phone request)
5) Tape inserted back into jukebox (exams may be retrieved)
6) Exam Deleted before archiving (No longer available on the PACS)
If riscn is not configured, then the messages will be logged in examscn, and they will be deleted
after 7 days from the time of insertion(see “Deleting Old Messages”). Also, Version 6.0.0 of
Rational Imaging is REQUIRED for this functionality.
To configure riscn as a background process, add the following statement to /etc/inittab
r9:34:respawn:su – imaging –c “exec riscn –c RIS_AE –a PACS_AE rishost port# //server/db/radiology”
Then try adding exams, or archiving them, to see whether the SCN messages are being added to
scnexam.
05.08.2001
64
Rational Imaging Installation Manual
select * from scnexam;
After 60 seconds or so, the messages should disappear from scnexam and be recognized by the RIS
system. If this is too quick, you can turn off riscn (change respawn to off in /etc/inittab, then “init
Q”). Then when you add exams or delete them, you will see the entries.
In version 6.1.0, Riscn can not disable any scanners that SCN messages are not needed, or not
wanted at the RIS system. This may include exams from another facility or remote scanner. To
disable this scanner, simply add the scanner host key into the “disable_scn” table using the
following SQL command in dbaccess:
Insert into disable_scn select host_key from host where alias=”ScannerAlias”;
Use the correct “ScannerAlias” which is already in the database. This is the scanner name which
appears in the patient list under the Scanner heading.
If the host is disabled, all exams coming from this scanner will not generate SCN messages of any
type.
I.
RIDELIVER – MANUAL RECONCILIATION
If the reports are not getting assigned to the exam and Riview can not see them, then there is
probably a problem with the exam accession number and MRN match. Exams which do not match
EXACTLY, will be put in the table “reportqueue”. The application “rideliver” can then be run to
manually match the report with the correct exam.
RIdeliver has a top panel which lists the reports in “reportqueue”. It shows report information
such as Name, ID, Sex, DOB, Accession #, Exam Date. The bottom panel is the PACS normal
patient selection window. It has tabs and search elements which will allow the user to locate the
correct exam for a selected report.
If you simply select a report, RIdeliver will attempt to locate possible matches (MRN or
Accession or Name matches). This will make it easier to find the mismatch, and deliver the
report. To do this, simply select the correct exam, and then click “deliver”.
You can also view the report to check for additional information by clicking “view”. And if no
match is found, or the exam has already been archived, then you may delete the report by clicking
“delete”.
The current RIS report delivery mechanism requires that the exam not be archived until the report
has been matched. Generally speaking, if exams are aged for 3 days before archival and removing,
then the report needs to get back to the PACS in this time, and any manual reconciliation required
must be performed before the exam is removed to tape. In the future when more RIS vendors
support bidirectional HL7 requests for reports, then Riview will actually be able to query the RIS
system for the report, and this storage mechanism will become unnecessary.
WARNING: It is also very important to only accept verified (signed) reports from the RIS. Let
them know that we have no ability to update the reports if they have not been signed, and thus we
may archive inaccurate information if the report has not been signed. The RIS vendors we have
dealt with so far, have been able to only send reports when they are complete and verified. Also,
educate the staff (technologists) as to the importance of accurate MRN and accession number
information.
05.08.2001
65
Rational Imaging Installation Manual
J.
DELETING OLD MESSAGES (WORKLIST, PREFETCH, AND SCNEXAM)
On Canon PACS databases without RIS connectivity, the SCN (Study Content Notification)
messages would build up and not be distributed. Even on systems with Rilink and Rideliverd
enabled, there needs to be a way to delete the old worklist items, and prefetch entries from these
tables.
This is handled in a stored procedure called “unlock_expired”. The normal purpose of this routine
was to unlock exams whose locks had expired. Since it does this once a day in the cronjob
“expire_locks” on the server, it makes a good place to put other periodic cleanup routines.
Unlock_expired, as it is distributed, will use the following SQL commands to delete entries in
these tables.
delete from worklist where study_date < today - 14;
delete from prefetch where exam_date < today - 7;
delete from scnexam where inserted < today - 7;
You can check these tables to make sure that they do not contain “old” messages.
select * from worklist;
05.08.2001
66
Rational Imaging Installation Manual
XVIII.RIqueryd Installation
A.
FUNCTIONALITY
RIqueryd provides the Rational Imaging system with DICOM Query/Retrieve functionality.
What this means is that other image display systems can query our database, get a list of patients
currently on the system (not in archive), and transfer those exams for displaying within these
remote systems. This interface is very important in that it gives universal (standard) access to
images stored within our database. The query/retrieve functionality is only available in Rational
Imaging version 6.0 and above. For prior versions, please upgrade the Rational Imaging system
software to version 6.0 before proceeding with the riqueryd configuration.
B.
CONFIGURATION
There is one configuration required for riqueryd. It is “riqueryd_cfg” normally, and is located in
/opt/ISTri/etc. However the filename and location are configurable. We recommend that
riqueryd be run on the image manager, since the database operations can run more efficiently.
However, it may also be preferable to use a clinical display workstation that is not being used to
frequently. There is some processing required to prepare the patient lists and images for DICOM
transfer to these remote workstations.
The format of the configuration file “riqueryd_cfg” is as follows:
database= //pacs1/db/radiology
debug= 0
idx= 0
AETITLE1= ae_title hostname comment port_number vendor
AETITLE2= CANON_QR pacs1 QueryRetrieve 5001 IST
AETITLE3= EFILM_SCP efilm-host RemoteViewing 4006 Efilm
Enter the correct database definition on the first line. If you are uncertain as to the syntax, make
sure that riexamine can connect to it “riexamine –d //pacs1/db/radiology”. If this returns OK,
then the syntax is correct.
If problems occur, the debug level can be set as high as 99 to enhance the verbosity of riqueryd.
Increase the debug level, and then run riqueryd from the commandline (not from inittab) to see the
associations occurring and any errors that may be generated.
If IDX is querying our database, then the current version requires idx=1 to be set. All other
workstations should have this set to 0.
The following lines in the configuration file define the AE titles and workstations that are allowed
to connect to this server. The first line is present to define the options. The second line defines
the actual server configuration. For example, riqueryd will be running on pacs1, accepting
requests for AE_TITLE CANON_QR on port number 5001. The rest of the information is to
document the entry.
05.08.2001
67
Rational Imaging Installation Manual
The next lines give each workstation authorization to connect and retrieve images. At least one
definition of the server is required, and one line per remote workstation to allow query / retrieve
operation. The client definitions define the Efilm AE_TITLE (set up in the process manager for
Storage SCP), the hostname or IP address of the remote host, and the port number that the images
will be received under.
You will also need to define a directory where riqueryd can store temporary images during the
transfer process. This is because it will need to bring them over from one of our NFS mounted
PACS workstations, and then process and transfer them out to the Query/Retrieve client. Simply
use unix to create and set the permissions on this directory.
mkdir /img/query
chmod 777 /img/query
Once you configure the two AE title lines (one for the server, and one for the remote client), the
client should be able to get the patient list. It is recommended that you test this by running riqueryd
from the commandline, in verbose mode, with the priority set high to test this capability. This will
help you troubleshoot any problems.
riqueryd -c /opt/ISTri/etc/riqueryd_cfg -d /img/query 5001
Once this process has been verified, you can use the next section to automate the installation and
operation of riqueryd. This will maintain operation of the server even during reboots.
C.
INSTALLATION
To set up the automated operation of riquery, you need to add the following entry to the /etc/inittab
file. You will need to be root to make this entry. The entry for riqueryd should look similar to:
r8:34:respawn:su – imaging –c “exec
/img/query 5001 >>& /opt/ISTri/log/riqueryd_log”
/opt/ISTri/bin/riqueryd
–q
–c
/opt/ISTri/etc/riqueryd_cfg
–d
This line needs to be entered as one line. It can not be broken up into two lines. Make this change
as follows:
su
vi /etc/inittab
init Q
The init Q is necessary to tell init to reread the config file and process the new changes. This is all
that is required to install riqueryd. You may want to confirm the operation of the riqueryd process
by using “ps –ef | grep riqueryd” to list the operating processes.
D.
MULTIPLE DATABASES
In the event that the facility has multiple databases, and they want the ability to query/retrieve from
each of these databases, just set up riqueryd with 2 separate configuration files, and run them on 2
(or more) port numbers. The following lines in /etc/inittab would allow Efilm (for example) to
query from 2 separate databases. Just modify riqueryd_rad_cfg to point to the “radiology”
database, and riqueryd_card_cfg to point to the “cardiology” database.
r8:34:respawn:su – imaging –c “exec /opt/ISTri/bin/riqueryd –q –c /opt/ISTri/etc/riqueryd_rad_cfg –d
/img/query 5001 >>& /opt/ISTri/log/riqueryd_log”
r9:34:respawn:su – imaging –c “exec /opt/ISTri/bin/riqueryd –q –c /opt/ISTri/etc/riqueryd_card_cfg –d
/img/query 5002 >>& /opt/ISTri/log/riqueryd2_log”
05.08.2001
68
Rational Imaging Installation Manual
Each database needs its own configuration file and its own port number.
E.
EFILM – INSTALL T EST CLIENT
To test the dicom query/retrieve, download the latest version of Efilm (www.efilm.net) and use
this client to test the dicom transfer (both ridicom, and riqueryd). Download the executable
installation script, and double click on it to install Efilm. Accept the default locations and
configurations.
To configure Efilm, you must configure both the DICOM storage class to receive images, and the
DICOM query/retrieve to search and request exams to be sent from RI to the Efilm station. Set up
the dicom storage class first, and use Ridicom to test the transmission of an exam.
F.
EFILM – CONFIGURE DICOM STORAGE SCP
Bring up the “Process Manager” from the Efilm menu (under the Start menu). Click on the DICOM
Server, and select the “settings” button. Lets configure the AE_TITLE and Port number to
“EFILM_SCP” and port “4006”. Click “OK” and answer Yes to restart processes. You can now
quit the process manager. This will be started automatically each time you reboot.
Now we can test Ridicom to send an exam to
Efilm. Bring up Ridicom and add a new
destination. The new destination should have
the correct information (Alias=efilm, Remote
Host=64.249.104.194,
Called
AE
Title=EFILM_SCP, Port=4006, Calling AE
Title=RI_DICOM). Save the new destination.
Now select an exam (MR or CT preferably),
select the efilm destination, and click on
“transmit images”. Ridicom should process the
images, send them, and then report “Transfer
Complete” on the status bar.
You can now click on Efilm on the desktop of
your PC, and then click on the “?” button to
select the exam. It should be listed under the
“Local Exams” tab.
G.
EFILM – CONFIGURE QUERY RETRIEVE
You can now proceed to testing the Query/Retrieve capabilities. The first thing to do is to setup a
Query/Retrieve server inside of Efilm. The following image shows the parameters required to
setup this server. It requires a description which will appear on the Patient Select window, and
the detailed parameters of the query/retrieve server. RIqueryd should be configured on the Sun
workstation (usually the database server) to allow these queries as described previously.
RIqueryd requires 2 lines in its config file to allow the query retrieve to work for the host. The
first line is to allow the efilm host to get a list of patients and identify the Query/Retrieve
AE_TITLE (CANON_QR). The second line tells RIqueryd where to send the patient list and the
images. This was set up previously as the storage class SCP (EFILM_SCP). The following line
05.08.2001
69
Rational Imaging Installation Manual
should be in the /opt/ISTri/etc/riqueryd_cfg file to allow this host to get a patient list and retrieve
images:
AETITLE1= CANON_QR andromeda QueryRetrieve 5001 IST
The other line that is required is a line which tells riquerd that the Efilm host has authorization to
receive images and on what port (This was configured in the previous efilm steps):
AE_TITLE2= EFILM_SCP efilm-hostname EfilmSCP 104 IST
This also supplies some security as every host which will have access to the database will have to
have a line of “authentication” in this config file. This will help provide HIPAA compliance for
security issues.
To set this configuration, go to “Edit | Properties” window. Click on the “destinations” tab, then
enter the following information
and add the query/retrieve
server. You probably want to
make this entry the “default”
selection.
Click OK to accept these entries.
Now you can click on the “?”
button, select “Remote Exams”,
and list the exams. You may
want to limit the list by entering
“B*” into the patient name tab to
list only the patient names that
begin with “B”.
To transfer the exam, select an
interesting exam, and click on the “retrieve” button. RIqueryd will then send the selected exam to
the EFILM_SCP or port 4006 on
the efilm client.
The efilm
network queue will appear and
the status should change from
“Pending”, to “Active” to ‘Idle’
at which point the exam had been
completely transferred.
The
exam should not show up in the
“Local Exam” tab in the patient
selection window.
05.08.2001
70
Rational Imaging Installation Manual
XIX.RIprintq Installation
RIprintq is a background process started out of inittab to allow the Rational Imaging applications
to print to a DICOM print class provider laser-camera. It is controlled by a table in the database
“printqueue” which contains entries for each printpage which needs to be printed. Each
application (eg: RIview) will print a page to a known directory (temporary storage such as
/img/print), and then create a timestamped entry in printqueue. RIprintq will print these pages on a
first come-first served FIFO basis. Since multiple workstations may be printing at the same time,
it will also try to keep the printpages for a particular exam together. However, if these printpages
are being generated too slowly, it will not tie up the printer waiting for other printpages for a
particular exam.
A.
LICENSING
Each riprintq process supports 1 printer. Thus you must obtain licenses for each printer to be
connected, even if riprintq is used on the same workstation. Contact Canon for these licenses and
specify the number of printers to connect.
Also each riprintq application only supports one database. Thus licenses must be ordered for each
database supported.
B.
REQUIRED FILES
The application and sample configuration files already exist on a Version 4.0.1 workstation.
RIprintq will not work with versions before this since the required table “printqueue” does not
exist on Version 4.0.0 and before.
There are two files required for RIprintq operation. The first is the application itself:
/opt/ISTri/bin/riprintq
The second is the controlling configuration file for riprintq:
/opt/ISTri/etc/riprintq_cfg
Enter the appropriate information into riprintq_cfg, and then specify this file on the commandline.
The name of this file may be changed if multiple printers are supported from a particular
workstation. The following command will start it manually. See the following section describing
how to setup an inittab entry.
/opt/ISTri/bin/riprintq -c /opt/ISTri/etc/riprintq_cfg &
C.
RIPRINTQ CONFIGURATION
The configuration file “riprintq_cfg” contains the following information which must be specified:
05.08.2001
71
Rational Imaging Installation Manual
1.
Database
Enter the database name in informix format “//server/db/radiology”.
2.
Printer
Enter the printer alias which appears on the RIview printpage.
3.
Host
Enter the hostname of the DICOM print class provider.
4.
Calling
Enter the calling AE_TITLE of the Rational Imaging Workstation.
RI_PRINT
5.
The default is
Called
Enter the calling AE_TITLE as specified by the DICOM host manufacturer.
6.
Port
Enter the TCP/IP port number which the RIprintq application will listen and communicate
on.
7.
Sleep
Enter the number of seconds to wait before checking the printqueue table for new entries.
The default is 30. If pages have just been printed, then the delay will be reduced to 0
seconds, and will gradually increase to the specified setting as contiguous checks return no
available print pages to print. This way there will be minimal delay between successive
pages.
8.
MaxRetry
Enter the number of times to retry the print pages before giving up on it. If the printer goes
offline, gets jammed, or is just busy at the time, this will allow riprintq to compensate.
RIprintq will wait “Sleep” seconds before attemting to retry an unsuccessful page.
9.
FilmMedium
Enter the acceptable film medium for the printer. The default is “BLUE FILM”.
10.
OkFilmSizes
Enter the film size specifications (DICOM) which are acceptable to the printer. These will
override the requested printed size specified by the print page. If the printer likes only
blank film sizes, use “OkFilmSizes = BLANK”. If multiple sizes are ok, then enter both of
them separated by a comma (no spaces) “OkFilmSizes = 11INX17IN,8INX10IN”.
A typical configuration file to connect to an Agfa printer will be as follows (The ‘=’ character is
very important, do not exclude it):
Database = //pacs1/db/radiology
Printer = Agfa
Host = agfadicom
Calling = RI_PRINT
Called = ADVT
Port = 2104
05.08.2001
72
Rational Imaging Installation Manual
Sleep = 30
MaxRetry = 3
FilmMedium = BLUE FILM
OkFilmSizes = BLANK,14INX17IN,8INX10IN
D.
RIPRINTQ PRINTER ADDITION
Use “risetup” to install a DICOM printer (Option #8). The following options should be entered:
hostname: Same as Alias
alias name: Enter a name which will appear in the RIview printer menu.
Printer Type: 8 (DICOM printer)
Printer Host: 0 (Not necessary)
Temp Dir: /img/print (Local Dir with a large amount of space is desired)
Width: 1400 (14” specified in 100th of an inch)
Height: 1700 (17”)
Resolution: 150 (Recommended – will result in 7.5MB image file – Printer may not
support more than this)
Command: (Leave Blank)
Default JPEG: 75 (Does not effect printpage)
Print Pt Name: 1 (Print demographics on printpage)
E.
RUN AS BACKGROUND PROCESS
The riprintq application should be started out of the inittab configuration file. Enter the
“/etc/inittab” file and include the following entry. Make sure that the first 2 characters are unique
and adjust them to make them unique.
r5:34:respawn:su – imaging –c “exec riprintq –c /opt/ISTri/etc/riprintq_cfg”
After editing this file and adding the riprintq line, issue the following command:
init Q
Then make sure that riprintq is running as follows:
ps –ef | grep riprintq
F.
T ESTING
Use RIview to send a clinical or SMPTE printpage to the printer. Make sure that the printer alias
is available in the RIview printers menu, and that the resolution changes to 150 when this printer is
selected.
If all is configured correctly, a printpage should appear on the designated printer. If not, start
debugging the errors.
1) Is there a printpage in the /img/print directory. If not, maybe there is insufficient disk space
05.08.2001
73
Rational Imaging Installation Manual
2) Is the riprintq process running “ps –ef | grep riprintq”. If not, there may be a configuration
problem. Try starting it manually as described previously and check for errors. Use the
verbose mode “-v” and you will see the results in the syslog error file.
riprintq -v -c /opt/ISTri/etc/riprintq_cfg
3) Does ritodicom add a correct header to the printpage file? Create a file named “info_file” to
check this application. You will need to find the “exam_key” as the database exam number
specified on the patient’s demographic page in RIview. The width and height should be
correct if you are using 150dpi for 14x17 films. You can get the image details from the
printqueue table in radiology “select * from printqueue”.
Database = //pacs1/db/radiology
ImgFile = /img/print/RIimag.#
OutFile = /img/print/DicomImage
ExamKey = 514
Width = 2100
Height = 2750
Depth = 8
Number = 1
Then run ritodicom as follows:
ritodicom –c info_file
If everything was configured correctly, a new file /img/print/DicomImage should be found in
the /img/print directory. You can use DicomDump to make sure that the header is correct.
4) Does riprintd correctly print the file. Use the following syntax:
riprintd -c ADVT -p -t RI_PRINT -v dicomhost 104 /img/print/DicomImage
This application is run in verbose mode so that the errors can be detected. Try different
calling (-c) and called (-t) AE_TITLES to see if the authentification is correct.
Try setting the filmsize and medium parameters and see if the dicom image will print them. If
it does, then include the acceptable parameters in the riprintq_cfg file.
riprintd -a ‘14INX17IN’ –b ‘BLUE FILM’ -c ADVT -p -t RI_PRINT -v dicomhost
104 /img/print/DicomImage
G.
RESET QUEUE
RIprintq has a commandline option to reset the queue (change the n_retry of all items to 0). This
will allow pages which had errors to be printed. The commandline option is:
riprintq -c /opt/ISTri/etc/riprintq_cfg -r
The maintenance menu (under the OpenWindows main window) has a new option to “Reset the
DICOM print queue” also.
H.
DELETE PRINTPAGES IN THE QUEUE
RIprintq has a commandline option to delete items in the queue. It will delete the printpages
destined for the configured printer in “/opt/ISTri/etc/riprintq_cfg”. It will also remove the
printpages from the “/img/print” directory. The commandline option is:
05.08.2001
74
Rational Imaging Installation Manual
riprintq -c /opt/ISTri/etc/riprintq_cfg -d
The maintenance menu (under the OpenWindows main window) has a new option to “Reset the
DICOM print queue” also.
05.08.2001
75
Rational Imaging Installation Manual
XX. Blast Installation
Follow these instructions to install the blast package on the Rational Imaging workstation. This
will provide an important means of distributing images over serial modems. The functionality
added by this software allows RIcall to transmit the images directly to a remote PC using a modem
without having to dial-in to the system and download the images.
A.
BLAST SETUP
First install the modem per the instructions in the previous section. Then use the following
commands to install the blast software under the /opt/blast directory:
1. Log onto the workstation with the modem as “root”.
2. Change to the blast directory on the jaz drive.
3. Run the script “install_blast”. This will install the blast software. Install the blast
software under /opt/blast and enter the serial number acquired from ProAmerica
or IST.
4. Modify the “.cshrc” file in each users home directory (eg: /home/imaging) to
include the following:
setenv BLASTDIR /opt/blast
setenv PATH ${PATH}:/opt/blast
Add the modem entry in risetup using
1. cd /opt/ISTri/admin
2. risetup
3. Select “46) Add modem in radiology”. Enter the information into the script. Use
the defaults to guide your responses.
Finally, use RIcall to enter the remote computers information and complete the installation.
1. Login as imaging
2. Make sure that “riqueued” is running on the workstation “ps -ef | grep riq”. If it is
not, edit the “/opt/ISTri/bin/load_riconnect” file to enable riqueued and execute
this script. RIqueued is required for the modem queueing.
3. Run RIcall.
4. Select an exam to display.
5. Click on “Send via modem”.
6. Click on “Phone Book” under the send via modem popup.
05.08.2001
76
Rational Imaging Installation Manual
7. Enter the correct information for the remote receive station.
You have now completed the setup involved in preparing for blast.
B.
INSTALLING HYPERTERM ON THE PC
To receive images from the Sun workstation, the remote computer must have a host
communications package such as hyperterm (which comes standard with Windows 95).
Run hyperterm to create a “Receive” icon which the physicians can run to receive images
as follows:
1. Go to Start | Programs | Accessories | Hyperterm.
2. Run hyperterm.exe
3. Enter a name for the new profile “Receive Images”
4. Enter the phone information, however remember that this profile will not be dialing
out, it will just be receiving images.
5. Click on “cancel” so that it does not dial.
6. Select Transfer | Receive File, and enter the correct destination for the images
“c:\images” or “d:\seemor\images”. When you save this profile, it will remember this
information.
7. Type “ATZ” in the hyperterm window and make sure that the modem responds “OK”.
8. Type “AT&F1M0S0=1S7=45S11=50Y0&W0” followed by a return. The modem
should respond OK. If it does not, enter the string again. This will program the modem
for auto-answer mode. It also will store this setup in non-volatile memory so that even
if the modem is turned off, it will still be in auto-answer mode when it is turned back
on.
9. Select File | Save to save the modem profile.
10. Select File | Exit to exit hyperterm.
11. Find the new “Receive Images” icon and drag it onto the desktop for the physician.
12. Now test the icon by double clicking on it. Select cancel (because you do not want it to
dial). Then press AT and make sure that the modem responds OK. Also make sure that
at the bottom of the hyperterm window, it says “CONNECTED”.
C.
T ESTING
To test the blast installation and modem connectivity, run the blast program and try to
connect to the remote computer.
1. Login as imaging.
2. cd /opt/blast
3. blast
4. Select a profile. Press enter to select a desired profile, then use modify to change the
phone number for a test facility. If there is a local PC which can be used to receive
images, this will work very well since you can see the communication on both ends.
05.08.2001
77
Rational Imaging Installation Manual
5. Select Online
6. Before dialing, prepare the remote PC by loading hyperterm, and typing AT to make
sure that the modem is connected. The modem must also be set up for auto-answer by
typing “ATS0=1” in hyperterm if it is not already enabled. See the SeeMor
instructions for more information on PC Hyperterm, or Microsoft’s instruction booklet,
or you may use any PC communications package which supports zmodem. Most
communications packages support reliable zmodem transmission.
7. Select Connect. This will dial the remote PC. You will see the modem connect, but
you will not get a login like you will with a Sun computer. To test an actually
connection, dial a Sun workstation and go through the login process under “Terminal”.
8. You can use “Ctrl K” twice to exit from the Terminal mode, and “Ctrl A” to exit from
the menus of blast. Once the modem has connected to the PC, you can type “Ctrl K”
twice to exit from the terminal mode, and then press “F” for Filetransfer and “S” for
Send. Enter a filename to send to the PC for testing purposes.
9. If the file sends correctly, then the blast install process has been completed
successfully. If there are any problems, refer to the blast documentation for further
assistance.
05.08.2001
78
Rational Imaging Installation Manual
XXI.LaserCamera (film) Installation
Follow these instructions to install a Cemax LaserLink card on a Rational Imaging workstation.
A.
SUNOS INSTALLATION
Login as root, since you will need superuser privileges to perform this step of the
installation.
Retrieve the device drivers for SunOS from the cemax partition on the installation tape.
cd /home ↵
mt -f /dev/nrst0 fsf 10↵
(skip to the correct tape partition)
tar xvf /dev/nrst0↵
cd /home/cemax↵
Perform the installation per the instructions in the README and installation files under the
cemax directory.
Reboot the computer to make this driver active. WARNING: Use the instructions
provided in the System Maintenance section (page 98) regarding how to shutdown and
reboot the UNIX workstation. DO NOT simply power cycle the computer.
B.
SOLARIS INSTALLATION
Shutdown the system and install the LaserLink card. Attach the cables to the laser camera
with the help of the laser camera’s service engineer. Have the service engineer configure
the digital board on the laser camera to Cemax’s specifications.
Reboot the workstation using “-r” to have the workstation recognize the new hardware.
Login as root, since you will need superuser privileges to perform this step of the
installation.
Insert the Solaris Rational Imaging disk, and select the package ISTfilm from the list of
packages on the tape as follows:
pkgadd -d /jaz/sol2/sparc/pkg↵
select the number for ISTfilm↵
Obtain a license for rifilm and install it on the server.
rsh server
add_license < rifilm_license_file
05.08.2001
79
Rational Imaging Installation Manual
Read the /opt/ISTri/film/README file and make sure that all of the installation steps have
been performed. Depending on the Sun OS used, there may be some patches to apply prior
to the INSTALL script.
After installing the ISTfilm package, perform the following operations.
cd /opt/ISTri/film
./INSTALL
(install drivers)
reboot –r
cd /opt/ISTri/film
mv camcap camcap.old
addcam
(to add a new laser camera)
ln –s /opt/ISTri/film/camcap /opt/ISTri/bin/camcap
ln –s /opt/ISTri/film/filmer /opt/ISTri/bin/filmer
After creating the camcap file, edit it and set the following parameters:
Edit /opt/ISTri/film/camcap
DefFormat = “1 on 1”
MaxHSize = 6000
MaxVSize = 6000
C.
CONFIGURATION
Log in to the database server and use risetup to add a new printer called “XRayFilm” or
“Kodak”.
cd /home/ist/admin↵
risetup↵
add a new printer↵
name = Kodak
(this name must match the camcap file)
width = 1400
height = 1700
resolution = 150
directory = /net/cemax_host/img/film
Save this configuration, and RIview will then print film images to the selected directory.
There will be 2 files in the directory for each print page: 1) RIimag* is the image file, 2)
RIfilm* is the job control file. Once RIview prints these images, you can test filmer by
typing:
/opt/ISTri/bin/filmer –c /opt/ISTri/bin/camcap /img/film/RIfilm###
If filmer runs without error, then rifilm will operate correctly. RIfilm is started
automatically by “load_riconnect” when the licenses are added to the database server.
Since “check_ri_daemons” calls load_riconnect and runs as a cronjob, rifilm will be
loaded automatically when the system is licensed. If it is not, check rifilm manually to
make sure that there are no errors reported “rifilm /img/film”. Also check load_riconnect
and make sure that the rifilm loading section is not commented out.
05.08.2001
80
Rational Imaging Installation Manual
D.
KODAK CONFIGURATION
The following configurations were provided by Kodak for their Laser Camera. If
problems persist with these settings, try using Odd parity as this has been found to work on
some cameras.
1/3/96
CEMAX tech support
BASED ON ERROR MESSAGES: (PROBLEMS.1)
Bill Atkinson from CEMAX provided this configuration.
email [email protected]
800-898-5688
camera port parameters may be wrong
control errors
channel config using KCL config is Q
host protocol type : 1
command port ID# 3
enable aux keypad NO
page prealloc NO
image data param line timer 5
image parity 1 (EVEN) -- 6/10/98 Amir found ODD parity works at
Inglewood.
transfer mode 1 (PARTIAL)
sync mode 2
XLP upgraded with NOT FIXED RESOLUTION - VARIABLE
command port config
stop bit 1
parity 0
data length 8
9600 baud
driver type 422
receive frame timeout 30
start timer 2
acq wait timer 180
start timeout counter 65535
acq wait timeout counter 3
max rejects counter 3
Call corporate office to get config for CEMAX modality...
right protocol RS422/449
RS232 is default and is wrong
Timeouts need to be checked...
XLP right... need the following
acknowledge wait timeout 180 seconds
receive frame timeout 30 seconds
MODALITY SETTINGS
E.
T ESTING
The cemax directory contains test images, test scripts and the filming applications required
to send images to Kodak, 3M, or Dupont Laser Cameras. Modify the “camcap” file
05.08.2001
81
Rational Imaging Installation Manual
according to the instructions, and then use “filmer” to test the camera link with the test
images and scripts.
cd /opt/ISTri/film
filmer –c camcap kodak.fjob1
Then use RIview to print some images to /img/film. Use filmer to see if these print
successfully.
cd /img/film
ls
/opt/ISTri/bin/filmer –c /opt/ISTri/bin/camcap /img/film/RIfilm###
Finally, try rifilm to make sure that the images are printed and deleted.
/opt/ISTri/bin/rifilm /img/film
05.08.2001
82
Rational Imaging Installation Manual
XXII.Operators Manual Installation
Rational Imaging has a postscript manual which may be installed and viewed on the Rational
Imaging workstations.
A.
SUNOS INSTALLATION
Login as root, since you will need superuser privileges to perform this step of the
installation.
Retrieve the device drivers for SunOS from the apunix partition on the installation tape.
cd /home ↵
mt -f /dev/nrst0 fsf 11↵
(skip to the correct tape partition)
tar xvf /dev/nrst0↵
B.
SOLARIS INSTALLATION
Login as root, since you will need superuser privileges to perform this step of the
installation.
Insert the Solaris Rational Imaging tape, and select the package ISTman from the list of
packages on the tape as follows:
pkgadd -d /dev/rmt/0n↵
select the number for ISTman↵
C.
CONFIGURATION
The manuals may be displayed by double-clicking on them from the file manager.
05.08.2001
83
Rational Imaging Installation Manual
XXIII.Network Architecture
A.
CLIENT SERVER RELATIONSHIPS
The Rational Imaging PACS system maintains an enhanced form of client server
relationships. Since the login database is used to control access to the various patient
databases, this database could be considered a SERVER in the natural sense since each of
the workstations depends upon it for information. However, in the Rational Imaging
environment there may be many servers. Each workstation that maintains a patient
database can be considered a server. Normally, there will be one patient database for an
outpatient radiology practice. However, it may be advantageous to have several patient
databases, one for each of the departments or facilities involved in a Wide-Area-Network
architecture. Since there are advantages and disadvantages to both approaches, consult
with our technical representatives during the planning stages of the Rational Imaging
installation to determine which scenario would best suit your facility.
B.
CENTRALIZED DATABASE
The login database and each of the patient databases can be considered, by themselves, to
be centralized, since all of the information contained in the database tables is maintained
on their individual workstations. This architecture works fine for the patient demographic
information and system information, since it requires very little storage space and minimal
effort to distribute the information to inquiring applications.
The result of this architecture is that any workstation on the network can obtain a list of
patients, exams, series, images or various archive information. Also, all of the
workstations will receive the same updated information as exams are added or removed
(archived) from the database tables. This method of maintaining the PACS information
optimizes the reliability and ease of operation since the knowledge of where the actual
databases, or images, are located, is transparent to the operator.
C.
DISTRIBUTED IMAGE DIRECTORIES
A centralized database architecture is not appropriate for the image data however, since
the network traffic would be tremendously increased by images always coming from ONE
workstation (the server). What makes the images different from the demographic exam
information, THEIR SIZE!. Each exam should be maintained on the workstation where the
images will be reviewed. In a multi-facility scenario, it would be inefficient and
unthinkable to locate all of the images on one workstation, since each time you wanted to
review the case, it would have to come across the network to your workstation. This
would not only tie up the network, it would also overwhelm the database server resulting
in very poor performance. An alternative to this approach is to locate the images in the
05.08.2001
84
Rational Imaging Installation Manual
facility where they were acquired or where the images will eventually be read. Therefore,
the images only need to traverse the network twice, once during import into the PACS
system (onto the RI workstation), and once during archiving and auto-removal (usually
during the night to minimize daytime network traffic).
This distributed approach to image storage is efficient and versatile, since anyone can
access the images no matter what workstation they are at. If a second opinion is required,
a physician at the other facility could simply select the patient and the images would be
retrieved across the network for their review. The physician will only notice a slight delay
since the images are coming across the network and not from their local disk drive. These
simplistic database techniques provide intuitive access to any exams within the imaging
system, while maintaining performance of the mission-critical components of the network.
D.
NETWORK DEPENDENCY AND RELIABILITY
Due to the centralized and distributed components of the PACS system, there is a high
dependence on network and workstation reliability. If the network were to go down
between a remote workstation and the database server, then access to the remote
workstation's images would be impossible even though the images may reside on the
remote disk drive. Since the remote workstation would not be able to communicate with
the database server (obtain a list of patients), it would not be able to find out where those
images were located.
1.
Server Crash
This dependence requires careful planning to minimize the chance of occurrence. If the
network server were to go down, obviously it has catastrophic repercussions. How do you
rebuild the database and what happens to the archive information on ALL YOUR
TAPES???
Don't panic yet, each time you initialize a new archive tape, the current login, patient and
archive databases are backed up at the beginning of that tape. While this does take some of
the tape space (approx 10-20MBytes), it is an inexpensive insurance policy (510cents/tape) to have in the event of a hard disk crash corrupting the database tables. The
databases can thus be rebuilt once the workstation has been repaired, or it can be
transferred to another workstation making that system the database server.
2.
Add-on Workstation Crash
Even if an addon workstation were to crash, all of the exams on that system may be lost.
Using proper protocols for patient archival is one way to minimize the loss of image data.
Archive the exams on the primary tape as soon as possible. Do not remove the exams from
the scanner until they exist on tape. Use duplicate backup tapes to protect against theft,
fire, or improper tape handling. Archive one of the tape sets at another facility or take it
off-site as soon as possible. These protocols should be followed with great diligence in
order to protect your data.
3.
Network Crash
If the network were to go down, then communication to the scanners, to the database
server, and between the other workstations would be limited. The ability of the Rational
Imaging system to recover from this event depends upon the length of time and the nature of
the network problems.
05.08.2001
85
Rational Imaging Installation Manual
Since each of the workstations depend upon the database server for exam information, if
the connection to the server were to go down, all of the workstations would be affected. If,
however, only one add-on workstation were to be isolated from the network, then that
workstation would be inoperable and all of the images on that workstation's disk would be
inaccessible. Notify the other system users to avoid trying to access the images on that
workstation since errors will result.
To avoid network problems, use duplicity wherever possible. If you are connecting three
facilities (A, B, and C) with T1 lines between A and B, and A and C, then add an
additional low speed line (maybe ISDN) between B and C in the event that one of the T1
lines goes down. This will allow the network to function during the repair even though the
performance will be slightly decreased. You may also purchase a third T1 line between B
and C, however the cost of doing so for insurance purposes may be prohibitive compared
to ISDN.
05.08.2001
86
Rational Imaging Installation Manual
XXIV.Administrative Tasks
A.
SYSTEM DIAGNOSTICS
To list the current Rational Imaging version applied to the workstation, enter the following
command:
more /opt/ISTri/bin/riVERSION↵
We have included a diagnostic utility to print the current machine status to the Paper Film
Imager. Please run this program and include its output with your letter. To operate the
program enter the following command at the UNIX console:
/opt/ISTri/bin/richeck↵
RIcheck reports the following system parameters:
• current date
• username
• hostname
• hostid
• RI programs and version numbers
• disk partitions and usage
• memory diagnostics
• environment variables
An example output file is shown below (richeck.dat):
-------------------------------------------------------Rational Imaging - Diagnostic Utility v1.1
Fri May 20 14:35:23 PDT 1994
imaging console May 19 06:13
tech ttya May 20 14:35
Hostname: RI_host
Host ID: 12345abc
PROGRAM VERSIONS--------------------------------rimove Version 3.23e
riport Version 3.9E
ristore Version 2.26W
riview Version 1.98U
ridesign Version 1.0P
rilogin Version 1.0L
riconnect Version 1.0H
DISK DIAGNOSTICS--------------------------------Filesystem
kbytes used avail capacity Mounted on
/dev/sd3a
10911 4135 5685 42% /
/dev/sd3g
286255 194813 62817 76% /usr
/dev/sd0a
189858 87830 83043 51% /home
/dev/sd3h
893574 502041 302176 62% /images
MEMORY DIAGNOSTICS------------------------------PID TT STAT TIME COMMAND
05.08.2001
87
Rational Imaging Installation Manual
0 ? D 0:15 swapper
1 ? IW 0:00 /sbin/init 2 ? D 0:22 pagedaemon
55 ? S 1:37 portmap
60 ? IW 0:00 keyserv
69 ? I 0:10 in.routed
75 ? I 0:12 (biod)
86 ? IW 0:00 syslogd
94 ? IW 0:00 /usr/lib/sendmail -bd -q1h
106 ? I 1:19 (nfsd)
107 ? I 1:18 (nfsd)
108 ? IW 0:00 rpc.mountd -n
111 ? IW 0:00 rpc.statd
112 ? IW 0:00 rpc.lockd
118 ? IW 0:00 /usr/local/bin/rpc.pcnfsd /usr/tmp
120 ? S 1:40 /home/informix/lib/sqlexecd
130 ? S 0:08 /usr/bin/screenblank -d 300
136 ? S 13:26 update
139 ? IW 0:00 cron
145 ? IW 0:00 inetd
149 ? IW 0:00 /usr/lib/lpd
166 ? IW 0:00 /RI_host/home/ist/bin/riconnect
338 ? IW 0:00 rpc.rquotad
2085 co IW 0:00 -csh (csh)
2139 co IW 0:00 /bin/sh /usr/openwin/bin/openwin -noauth
2141 co IW 0:00 /usr/openwin/bin/xinit -- /usr/openwin/bin/xnews :0
2142 co S 19:15 /usr/openwin/bin/xnews :0
2149 co IW 0:00 sh /usr/openwin/lib/Xinitrc
2157 co IW 0:00 sv_xv_sel_svc
2158 co IW 0:00 vkbd -nopopup
2159 co IW 0:00 dsdm
2163 co IW 0:25 olwm -syncpid 2162
2164 co IW 0:00 olwmslave
2171 co IW 0:23 /RI_host/home/ist/bin/rilogin
2175 co IW 0:32 /home/informix/lib/sqlexec imaging 5.00.UC2
2720 co IW 0:07 /RI_host/home/ist/bin/riview
4290 co S 0:41 /RI_host/home/ist/bin/riport
4291 co S 2:57 /home/informix/lib/sqlexec imaging 5.00.UC2
4292 a IW 0:00 -csh (csh)
4300 a S 0:00 /bin/sh richeck
4319 a R 0:00 ps -ax
2170 p0 IW 0:00 cmdtool -Wp 0 566 -Ws 896 233 -WP 3 833 -Wi -C
2172 p0 IW 0:00 -bin/csh (csh)
SWAP DIAGNOSTICS------------------------------313/582 files
296/352 inodes
57/138 processes
43372/66636 swap
ENVIRONMENT VARIABLES---------------------------DBPATH=/RI_host/home/ist
HOME=/home/tech
INFORMIXDIR=/home/informix
LOGNAME=tech
OPENWINHOME=/usr/openwin
PATH=.:/home/tech:/usr/openwin/bin/xview:/usr/openwin/bin:/usr/bin:/usr/ucb:/etc:
/usr/etc:/RI_host/home/ist/bin:/home/informix/bin
PWD=/RI_host/home/ist/bin
RILOGDB=/RI_host/home/ist/rilogin
RIPROGDIR=/RI_host/home/ist/bin
SHELL=/bin/csh
SQLEXEC=/home/informix/lib/sqlexec
USER=tech
DIAGNOSIS COMPLETE-------------------------------
05.08.2001
88
Rational Imaging Installation Manual
B.
ACCESSING/CHANGING DATABASE CONFIGURATION INFORMATION
This section will describe the script files which have been created for your convenience to
add, list or modify the various database system parameters. These scripts are driven by a
major menu system called “risetup”.
These files are located in the "/home/ist/admin" (/opt/ISTri/admin for Solaris) directory.
Change to this directory on the database server, run risetup, and select the desired
command from the menu:
cd /home/ist/admin
(Solaris 1)
cd /opt/ISTri/admin
(Solaris 2)
risetup
1.
Change current database
This function will change the patient database selected. The following operations may be
performed on the selected patient database.
2.
Create user account
This function will create user accounts in UNIX. It will copy the “imaging” account setup
into a new home directory. Operate this function as “root”.
3.
Add user to rilogin
This script will add new user information into the rilogin table.
4.
Add user to patient database
Add a new user to each patient database.
5.
Add database access to rilogin
This script will notify the login database “rilogin”, that multiple databases exist. It will
allow the operator to enter new databases for restricted or unrestricted access. This script
will also designate user access for restricted databases.
6.
Add host to patient database
This script will add a new Rational Imaging Workstation or scanner to the patient
database.
7.
Add image directory to patient database
This function will configure a new disk directory as an active image directory. Make sure
that this directory is unique among all the databases that have access to this host (ie: The
cardiology and radiology databases can not both have the image dir /net/host/img. Make
the directories specific to the database such as /net/host/img/cardiol and
/net/host/img/radiol).
8.
Add printer to patient database
This script will allow all users to access Canon PaperFilm Printers on the network.
9.
Add tape drive to patient database
Add a tape drive for archive/retrieve purposes to a Rational Imaging workstation.
05.08.2001
89
Rational Imaging Installation Manual
10.
Add archive tape set to patient database
Initialize a new archive tape set in a selected patient database. This will allow the storage
of exams on specific tape sets for research or personal needs.
11.
List users in rilogin and the selected patient database
List the configuration parameters for each user in the login database and the selected
patient database.
12.
List database access in rilogin
List the available databases and the restricted access parameters
13.
List hosts in patient database
List all available hosts and the configuration parameters in the selected database
14.
List image directories in patient database
List all of the image partitions configured for the Rational Imaging workstations.
15.
List printers in selected patient database
List the available Canon PaperFilm printers
16.
List tape drives in patient database
List the tape drives which will be available for archival/retrieval by RIstore.
17.
List archive tape sets in patient database
List all the tape sets available to RIstore which have been created in the selected patient
database.
18.
Edit users in rilogin
Modify the configuration parameters for a selected user in the login database.
19.
Edit user in patient database
Modify the parameters for a user in the selected patient database.
20.
Edit database access in rilogin
Change the database access and restrict or unrestrict a selected database.
21.
Edit host in patient database
Modify the host information in the selected patient database.
22.
Edit image directory in patient database
Change the name or alias of an image directory configured for the Rational Imaging
workstations.
23.
Edit printer in patient database
Modify the printer information in the selected database.
24.
Edit tape drive in patient database
Change the parameters of the tape drives configured for archival / retrieval.
05.08.2001
90
Rational Imaging Installation Manual
25.
Edit archive tape set in patient database
Modify the parameters of selected tape set in a patient database.
26.
Delete user in rilogin
Delete a user from rilogin. This will restrict the use of the Rational Imaging system for
former employees. DO NOT delete a user from the patient database since many operational
workflow flags have been linked to their user accounts. You can remove the user accounts
from the UNIX workstations however.
27.
Delete database access in login database
Delete access to a particular database for all or individual users
28.
Delete host in patient database
Delete a non-functional host from the patient database. MAKE SURE that there are no
exams on the host before it is deleted.
29.
Delete image directory in selected patient database
Remove an image directory from a specified host. MAKE SURE that there are not exams
on the image partition before it is deleted.
30.
Delete printer from patient database
Delete a printer which no longer needs to be accessed from the selected patient database
31.
Delete tape drive from the patient database
Delete a selected tape drive from the patient database.
32.
Delete archive tape set in patient database
Delete an archive tape set from the selected patient database. Make sure that their were no
exams on the tape set, or that the exams no longer need to be retrieved or logged.
33.
List all tables in the patient database
This function will list all the current tables in the selected patient database. Use this
function to get the most current details on the architecture and fields of the patient database
tables.
34.
List all tables in rilogin
List all of the tables and their related fields in the login database. This will present the
most current architecture of this database structure.
35.
Activate/Deactivate a host in the patient database
Use this function to designate a host as “inactive” during maintenance. This will notify all
programs/users that the exams and functions of the workstation will be inactive during this
period. Use this function to reactivate the host.
36.
Clear use flags in the patient database
When the use flags have become contaminated because of hardware problems, use this
function to clear all of the exams and show them as “not in use”.
05.08.2001
91
Rational Imaging Installation Manual
37.
Add a Jukebox to the patient database
Use this function to add a new jukebox to a selected Rational Imaging workstation.
38.
Associate a tape drive with a Jukebox in the patient database
First, define a new tape drive for a given host, then use this function to associate that tape
drive with a previously defined Jukebox. Some Jukeboxes contain up to 6 drives.
39.
Add available slots to a Jukebox in the patient database
During the initial Jukebox configuration, this function must be run to define the number of
available slots within the Jukebox. DO NOT define more slots than physically available
on the Jukebox.
40.
List Jukebox in patient database
Use this function to list all of the defined Jukeboxes
41.
Delete Jukebox in patient database
Delete a selected jukebox from the selected patient database
42.
Add Monitor to patient database
Use this function to configure the monitors in an initial installation. Use the defaults unless
you have determined the actual black levels and gamma using the ricalibrate function.
43.
List Monitor in patient database
List the defined monitors and their parameters in the selected patient database
44.
Edit Monitor in patient database
Edit the configuration parameters of a selected monitor
45.
Delete Monitor in patient database
Delete a selected monitor in the patient database.
46.
Add modem in patient database
Specify the operational parameters of a modem attached to a Rational Imaging workstation.
47.
List modem in patient database
List the parameters of the available modems.
48.
Edit modem in patient database.
Edit the operational parameters of a selected modem.
49.
Delete modem in patient database
Delete a selected modem from the patient database
50.
Unlock expired exam in patient database
Manually unlock all the exams where the lockdate aging has expired. This function will be
automatically accomplished nightly on the server using a cron job under imaging.
05.08.2001
92
Rational Imaging Installation Manual
51.
Associate a tapeset with a Jukebox drive in Radiology
Select the tapesets which will be supported on a particular jukebox. The primary and
secondary tapesets should be archived on different drives.
52.
Edit tapeset support for a Jukebox in radiology
Edit the tapesets associated with a selected jukebox.
53.
List jukebox support for tapesets in radiology
List the tapesets which are supported on a selected jukebox.
54.
Delete jukebox tapeset support in radiology
Delete the tapesets which are supported on a selected jukebox.
C.
PERFORM SYSTEM BACKUP
The best way to ensure reliability and prevent against hardware malfunctions is to keep a
current backup of each workstation. This can be done easily using the tape drives
provided for archival. BE CAREFUL not to use a tape for backup which has been
labeled as a patient archive tape.
Insert a BLANK TAPE into the appropriate tape drive and use the following instructions to
backup the workstation's disk partitions. Perform this operation as superuser and while the
workstation is not being used (in the evening if possible). The SUN manuals recommend
operating in the single-user environment for a complete backup, however this will stop the
access to any exams on the workstation during the backup. This may therefore, not be
possible.
1.
Local backup on a system with a tape drive attached.
To perform backup of the system partions of your current workstation, first determine the
current disk configuration and partition information by entering the following command at
the UNIX prompt:
df↵
This program will list all of the disk partitions (beginning with "/dev") and the NFS
mounted partitions (beginning with a hostname).
Use the following command to archive the disk partition "/dev/rsd3a" to the tape. You
must use the "raw" disk device. For example if "df" lists "/dev/sd0g" as a disk partition,
then archive it by specifying "/dev/rsd0g" as the device. (This command is valid for the
SunOS version 4.1.3, if another version is being used, verify the parameters using the
Administrator's manual provided by SUN).
dump 0dsbfu 54000 6000 126 /dev/nrcht0 /dev/rsd3a↵
Repeat the previous command for each of the disk partitions and then rewind the tape using
the following commands:
mt -f /dev/nrcht0 rew↵
mt -f /dev/nrcht0 off↵
Label the tape appropriately, turn on the write-protect feature, and store in a safe place.
05.08.2001
93
Rational Imaging Installation Manual
2.
Backup of a remote system with no tape drive.
Log into the workstation with the tape drive and perform the archival of the remote
workstation from here.
First obtain the disk configuration of the remote workstation by logging into it and running
the "df" command.
rsh hostname ↵
df↵
exit↵
This program will list all of the disk partitions (beginning with "/dev") and the NFS
mounted partitions (beginning with a hostname).
When you have returned to the local workstation using "exit", use the following command
to archive the disk partition "/dev/rsd3a" to the tape. You must use the "raw" disk device.
For example if "df" lists "/dev/sd0g" as a disk partition, then archive it by specifying
"/dev/rsd0g" as the device. (This command is valid only if both the workstations are
operating under SunOS version 4.1.3. If another version is being used, verify the
parameters using the Administrator's manual provided by SUN). Replace thost with the
name of the current host with the tape drive attached, and replace rhost with the name of
the remote host. This command is shown on two lines due to limited space, however it
should only be typed on one line.
rsh rhost rdump 0dsbfu 54000 6000 126 thost:/dev/nrcht0 /dev/rsd3a↵
Repeat the previous command for each of the disk partitions and then rewind the tape using
the following commands:
mt -f /dev/nrcht0 rew↵
mt -f /dev/nrcht0 off↵
Label the tape appropriately, turn on the write-protect feature, and store in a safe place.
05.08.2001
94
Rational Imaging Installation Manual
XXV.Change Server Host
A.
SUMMARY
If the server was installed as a system that becomes used heavily, it may be necessary to
move the server host to another machine that is less active. Try to choose a system that is
not used for image review (or at least only light review) so that memory limitations do not
cause problems. Also, try not choose a system which is serving images, as the disk access
for the database will be restricted. Optimally, a dedicated server is best to improve
memory and disk access for the database. Remember, the database tries to retain its
indexes in RAM, so if other applications are constantly moving the database info into swap
space, then the efficiency of the server will be cut dramatically.
B.
PROCEDURE
1)
Schedule at least 1 hour to perform the conversion.
2)
Make sure that no images are being transferred to the workstations.
3)
Kill all "ri*" and "sql*" processes on the server
su
/opt/ISTri/bin/slay ri
/opt/ISTri/bin/slay sql
4)
Backup the radiology and rilogin databases.
cd /db
tar cpf /img/dbBackup.tar *.dbs
5)
Rename the radiology database
mv radiology.dbs radiology.old
mv rilogin.dbs rilogin.old
6)
Log in to the new server
7)
Rename the new server's informix directory
cd /opt
mv informix infold
8)
Make a new informix directory on the new server
mkdir /opt/informix
chown informix /opt/informix
chgrp imaging /opt/informix
9)
Install SQL, SE, INET informix applications from CD into "/opt/informix"
10) License SQL
cd /opt/informix
./installesql
05.08.2001
95
Rational Imaging Installation Manual
11) License SE
cd /opt/informix
./installse
12) License INET
cd /opt/informix
./installnet
13) Copy the databases to the new server
cd /db
tar xpf /net/oldservername/img/dbBackup.tar
14) If a different version of Informix was loaded on the server, you will need to perform
the following commands. Delete the radiology.old once the database has been tested.
Perform these steps as "imaging".
cd /db
mkdir /img/db
dbexport -o /img/db /db/radiology
mv radiology.dbs radiology.old
dbimport -i /img/db radiology
dbaccess radiology - <<EOF
update statistics;
EOF
15) Modify each user's ".cshrc" file to point RILOGDB to the correct server
16) Modify each user's ".select_db" to specify correct servers
17) Perform the last 2 steps on ALL workstations for ALL users
18) Copy /etc/init.d/ri.install on old server to the new server
19) Comment out the line which loads sqlexecd in "ri.install" on the OLD server. Make
sure that you comment the “if” and “fi” statements also.
#if [ -f /opt/informix/lib/sqlexecd ]; then
# /opt/informix/lib/sqlexecd &
#fi
20) Modify ridundant on new server (change ridundant host)
21) Add ridundant to imaging's crontab on new server
22) Remove ridundant from imaging's crontab on old server
23) Modify backup_radiology on new server (change ridundant host)
24) copy ridundant and backup_radiology to ALL hosts /opt/ISTri/bin
cd /opt/ISTri/bin
rcp ridundant hostname:/opt/ISTri/bin
rcp backup_radiology hostname:/opt/ISTri/bin
25) Modify auto_archive.dat data files to point to correct database location
26) Modify reset_modems to point to correct database location
27) Copy reset_modems to ALL workstations
cd /opt/ISTri/bin
rcp reset_modems hostname:/opt/ISTri/bin
28) Use risetup to edit the database directory "//newhost/db" (Option 20).
29) Modify the /etc/hosts.equiv to add all RI workstations on the server
05.08.2001
96
Rational Imaging Installation Manual
30) Modify the /.rhosts to add all RI workstations on the server
31) Remove server cronjobs from the Old server (expire_locks, ridundant)
su
csh
setenv EDITOR vi
crontab -e
(“dd” to delete unwanted lines, “:wq” to save/quit)
32) Add server cronjobs to the New server (expire_locks, ridundant)
crontab -e
(“i” to insert lines, “esc” to stop insert, “:wq”)
33) Reboot all systems
34) Test all systems (RIview should be able to display images)
35) Test ridundant and backup_radiology
36) Test archiving
37) Resume operations
05.08.2001
97
Rational Imaging Installation Manual
XXVI.System Maintenance
A.
SHUTDOWN DATABASE SERVER
1.
Preparation for system shutdown
In order to move the system or perform system maintenance, it may become necessary to
shutdown the system. If you are shutting down the database server containing Informix SE
and the database files, no one will be able to use the RI system during the down time. If
maintenance is to be prolonged, use the following procedure:
•
Install the Informix SE and ESQL-C on another workstation (Redundant Server).
•
Notify the other users not to use RI until further notice.
•
Archive and remove all of the exams on the RI system.
•
Copy the RI database files to the other workstation. Make sure that no users or
programs are using the database files during this transfer.
•
Change each user's environment variable RILOGDB to the new workstation's database
directory "//new_workstation_name/db/rilogin".
•
Notify the other users that they may resume operation of the RI system. Remind them
not to use any image disks associated with the system being repaired.
•
Perform the instructions in the next few sections on shutting down the workstation.
Always archive all of the patients on the RI system before halting the
database server. This will minimize the loss of data should a disk
malfunction occur during system startup. Coordinate this effort with
our technical support staff to prevent loss of data.
2.
Shutdown Instructions
Use the following commands to perform system shutdown. DO NOT DEVIATE FROM
THESE INSTRUCTIONS OR HARD DISK ERRORS MAY RESULT!
05.08.2001
•
Logout if you are currently logged in as an RI user.
•
Log in as root and give the correct password. If you do not know the password,
contact technical support.
•
Type: sync<enter> to synchronize the disk and remove from memory any unwritten
disk information.
98
Rational Imaging Installation Manual
•
Type: shutdown -h now (shutdown -y -g0 -i0 [Solaris]) to shut down the system
immediately. This will notify other workstations with beeps combined with a notice
appearing in their main console that shutdown is eminent.
B.
SHUTDOWN ADD-ON WORKSTATION
1.
Preparation for system shutdown
In order to move a system or perform system maintenance, it may become necessary to
shutdown the workstation. If you are shutting down the client workstation (not the
database server) then the procedure is less complicated:
•
Notify the other users that the workstation will be down and that the exams on that
workstation will be inaccessible. Remind them not to use any image disks associated
with the system being repaired.
•
Use RI'port to determine the exams located on this workstation. Sort the exams by
"location". Archive and remove all of the exams on the RI system if possible. Or you
can use Riport to move the exams to another workstation. If the workstation is only
going to be down for a few moments, then this step may be skipped.
•
If the system will be down for a long time or is being removed from the Rational
Imaging system, then delete this workstation from the database tables "host" in the
rilogin database. Also delete the image directories attached to this system. This will
prevent access while the system is being repaired.
•
Use “set_active” in the /home/ist/admin directory to set the workstation as inactive (0).
This will notify the other workstations that the system is out of commission for a while.
•
Complete the system shutdown as described in the following section.
•
Notify the other users that they may resume operation of the RI system.
•
Perform the instructions in the next few sections on shutting down the workstation.
2.
Shutdown Instruction
Use the following commands to perform system shutdown. DO NOT DEVIATE FROM
THESE INSTRUCTIONS OR HARD DISK ERRORS MAY RESULT!
•
Logout if you are currently logged in as an RI user.
•
Log in as root and give the correct password. If you do not know the password,
contact technical support.
•
Type: sync<enter> to synchronize the disk and remove from memory any unwritten
disk information.
•
Type: shutdown -h now to shut down the system immediately. This will notify other
workstations with beeps combined with a notice appearing in their main console that
shutdown is eminent.
3.
Reboot Instruction
The workstation will automatically be rebooted when the power is restored to the
workstation. However if you do not cycle the power, then you may also enter "boot" at the
05.08.2001
99
Rational Imaging Installation Manual
"OK" prompt, or "b" at the ">" prompt to restart the system. Refer to SUN's administrator
guide for additional information regarding boot procedures.
4.
Halt in the event of system lockup
On occasion it becomes necessary to HALT the system when it becomes locked up. USE
THIS ONLY AS A LAST RESORT. Since this procedure does not synchronize the disks
properly, it is only suggested in the event that the system will respond to any other
commands. First try to wait for 10-15 minutes to see if the system will resume normally
(sometimes it gets confused and takes time to reset and continue operation). Then try to kill
off the programs which may be locking up the system by logging in from a remote
workstation. Contact technical support for information regarding these procedures.
Finally, when all else fails, use the following keystrokes to halt the system <STOP>A.
Press A while the STOP function key, or L1 on some keyboards, is being depressed.
following commands to perform system shutdown. Reboot the system by typing “reboot↵”
5.
Reset the workstation as ‘ACTIVE’
Use the “risetup” script in the /home/ist/admin directory to set the workstation as active(1).
Select the active menu option from the displayed menu.
cd /home/ist/admin
(Solaris 1)
cd /opt/ISTri/admin
(Solaris 2)
./risetup
Make sure that the system responds properly and if it does not, contact our technical
support hotline.
05.08.2001
100
Rational Imaging Installation Manual
XXVII.Database Errors
A.
OVERVIEW
If the unix workstation is terminated improperly, due to a power outage or other failure, the
database tables may become corrupted. The degree of corruption will determine whether
the database should be reloaded from the redundant server. If only the indexing has been
effected and the actual data is intact, refer to this section. If the following suggestions fail
to resolve the database errors, refer to the next section on rebuilding the database.
B.
PREVENTING USE OF THE DATABASE DURING ANALYSIS AND
MAINTENANCE
Stop all archiving, image transfer and other database activities. Then log into the database
server, reboot the server, and then change to the database partition and rename the
database. You may wish to warn others that the PACS system will be down, however it
probably already is down if you are performing these procedures.
reboot
ps –ef | grep sqlexecd
list PID of process sqlexecd
kill –9 PID
kill process using PID
/opt/ISTri/bin/slay sql
kill all sql processes
cd /db
mv radiology.dbs radold.dbs
To backup the database in the event of mistakes, use the following procedure. It is
probably wise to also backup the redundant server at this time as this is a critical resource.
cd /db
tar cvpf /img/radiology.tar *.dbs
This will copy all of the database files into the radiology.tar file.
C.
DETERMINING THE DATABASE ERRORS
Use “bcheck” to determine if any database errors are present.
Log into the database server as “imaging”, and change to the database partition:
cd /db/radold.dbs
Run bcheck, an informix utility, to test the integrity of the files:
bcheck *
bcheck imag*
(example to check only image tables)
If any errors are present, answer “Y” to deleting an index and remaking it. After
completion of this program, run it again to make sure that the problems have been fixed. If
05.08.2001
101
Rational Imaging Installation Manual
successive operations do not reconstruct the indexes, then their may be faulty data, or
duplicate keys to prevent indexes from being created.
D.
REMOVING DUPLICATE KEYS
If the indexing problems result from duplicate keys in a file, then the bcheck program will
show the records that are in error. You can use dbaccess to remove these records from the
database and then run bcheck again to rebuild the indexes.
cd /opt/ISTri/diag
DropIndexes /db/radold
Run the DelDupIndexes script to delete duplicate indexes from the contaminated database.
dbaccess /db/radold DelDupIndexes
Once these duplicate records are deleted, then the indexing should be corrected with
bcheck as described in the previous section. You will first need to reindex the file using
CreateIndexes. If there are any errors indexing the files, then there are most likely some
duplicate indexes still. Use the errors to identify them and ListDupIndexes to verify their
existence.
CreateIndexes /db/radold
cd /db/radold.dbs
bcheck *
If the CreateIndexes reports errors, then use check_integrity to remove any unlinked
exams.
/opt/ISTri/bin/check_integrity /db/radold fix
DropIndexes /db/radold
CreateIndexes /db/radold
If problems persist, it may be necessary to export and re-import the database to flush out
any problems.
cd /db
mkdir /img/db
dbexport -o /img/db radold
mv radold.dbs radold.old
dbimport -i /img/db radold
dbaccess radold - <<EOF
update statistics;
EOF
If this resolves the problems, then remove the “radold.old” directory and its contents.
cd /db
rm -rf /db/radold.old
rm -rf /img/db/*.exp
If the CreateIndexes reports NO errors, and bcheck runs clean, then rename the database
to radiology and reboot the system. DO NOT rename the database until the indexes have
been applied, or “riupdate” may try to load images and will add more non-unique keys.
cd /db
mv radold.dbs radiology.dbs
chown -R imaging *.dbs
05.08.2001
102
Rational Imaging Installation Manual
chgrp -R imaging *.dbs
chmod –R a+rw *.dbs
chmod a+rwx *.dbs
reboot
E.
MISSING DATA POINTERS
In the event that some of the data rows have become corrupted, it may be necessary to
rebuild the database from the redundant copy. However, if only a few rows are affecting
the indexes, then these can be removed successfully and the database regenerated. In order
to do this, you will need to export all of the data into a set of datafiles, import the data into
a new database, delete any duplicate entries or corrupt data, and then reindex the database.
Use the following sections, and the informix technical manuals, to achieve this goal. It will
probably be best to remove all the indexes first, then export and import the database, then
recreate all the indexes.
F.
EXPORTING THE DATA IN A DATABASE
Informix provides a utility called “dbexport” which allows a user to export the database
structure and record data into a set of files. To perform this task, use the following
command:
mkdir /img/db
cd /db
dbexport radold -o /img/db
This creates a directory called /img/db/radiology.exp which contains *.unl files with the
data and a radiologyold.sql file which contains the dbschema for the database.
G.
IMPORTING THE DATA AND CREATING A NEW DATABASE
Informix provides a utility called “dbimport” which allows a user to import the database
structure and record data into a new database. Prior to performing the dbimport, you
should edit the file /img/db/radold.exp/radold.sql to make sure that the owner of each
table and procedure is "imaging" and not "root". Change all values of "root" to "imaging".
To create a new database, use the following command:
cd /img/db
dbimport radold -i /img/db
This creates a directory called /img/db/radold.dbs which contains the new database and
the data from the data files.
If any errors occur which stop dbimport, you probably need to remove all the indexes using
“DropIndexes”. Then do the dbexport, dbimport and CreateIndexes.
cd /img/db
/opt/ISTri/diag/DropIndexes /db/radold
dbexport -o /img/db /db/radold
cd /db
mv radold.dbs radold.old
dbimport -I /img/db radold
/opt/ISTri/diag/CreateIndexes /db/radold
05.08.2001
103
Rational Imaging Installation Manual
dbaccess radold - <<EOF
update statistics;
EOF
cd radold.dbs
bcheck *
Run the previously described tests on the new database to ensure the integrity of the
database. If the database evaluation runs successfully and without error, allow users to
begin using the database again. Remember to rename the database to allow all users to
access it. Also make sure that the permissions are set correctly.
mv radold.dbs radiology.dbs
chmod -R a+rw /db/ radiology.dbs
H.
OPTIMIZING DATABASE QUERIES
When a database is exported, and then imported, the table statistics may be lost. When this
occurs the query time increases. To resolve this, enter dbaccess and run the “update
statistics” command. The following commands will also perform this from the
commandline.
dbaccess radold - <<EOF
update statistics;
EOF
I.
EXAMPLE PROCEDURE FOR MISSING DATABASE LINKS
Relational databases, such as our patient database, rely on primary and foreign keys to
relate information in separate tables. For example, a patient may have multiple exams, so
the exam table is related to the patient table by the “pat_key”. In the patient table, the
pat_key field is called the primary key. In the exam table, the “exam_key” is the primary
key, and the pat_key is a foreign key relating the exam to a patient. Without this link, we
would not be able to determine patient information for an exam. If both exam and patient
information were put in one table, the table would not be flexible enough to allow multiple
exams. Therefore, our entire database is dependent upon these links.
It is very important that we do not delete related records when there is a foreign key
pointing at that data. For example, the exam contains a pointer to the imagedir table so that
we will be able to locate the exam on a particular system and disk. This foreign key is
called “dir_key”. If the record that dir_key points to from exam were deleted from
imagedir, then we could no longer find the exam on a disk. The exam would be rendered
invalid in a relational sense.
The upgrade ver_3.2.3 applies foreign and primary key integrity checks to prevent this
from occurring in the future, but always use caution when deleting items from the database
using risetup or dbaccess.
The following is an example which occurred during an on-site demonstration. I have
itemized the procedure we used to diagnose and fix the problem in an attempt to illustrate
05.08.2001
104
Rational Imaging Installation Manual
the resolution of database problems. Each database problem is slightly different however,
and this should only be used as an example.
To diagnose this problem, I proceeded as follows:
1) run bcheck on the databases and look for errors
cd /db/radiology.dbs
bcheck *
cd /db/rilogin.dbs
bcheck *
2) check database permissions
ls -l /db/radiology.dbs /db/rilogin.dbs | more
chmod -R a+rw /db/radiology.dbs /db/rilogin.dbs
3) check databases and users links to databases in rilogin (current_db should
point to an active database
dbaccess rilogin
select * from databases;
select * from users;
4) Check partition space (especially img and root)
df -ak
5) Check print jobs and scanned images and remove
ls /img/scan
ls /img/print/tmp/printername
6) Check the database integrity (All images are linked to series, all series
are linked to exams, all exams are linked to patients)
cd /opt/ISTri/diag
check_db_integrity
7) Since the symptoms were in loading exams, I suspected that the examlist
may have been incorrect. So I deleted the examlist and tried to rebuild
it.
dbaccess radiology
delete from examlist;
(NOT FROM exam)
execute procedure all_exmlst(0);
(REBUILD EXAMLIST)
ERRORS occurred (Can not insert NULL into examtext). This suggests that
one of the exam links to other tables is bad.
8) Run a script to identify some bad exams
cd /opt/ISTri/diag
check_upgrade
if this is not here, then this script is a tool on the jaz disk. I have
included a copy for you to keep. This is a new script which will be put
on upgraded systems in the future. It was used during the upgrade to
version 3.2.0, however I will probably rename the script chk_exmlist
9) List the exam info for a bad exam (Number 2 was bad at Sinai for example)
dbaccess radiology
select * from exam;
exam_key
pat_key
exam_no
n_series
desc_key
exam_date
hosp_key
host_key
dir_key
05.08.2001
2
2
99999
1
1
08/05/1985
27
1
1
(patient - EXISTS)
(exm_desc - EXISTS)
(hospital - EXISTS)
(host - EXISTS)
(imagedir)
105
Rational Imaging Installation Manual
use_host
31
(host - EXISTS)
use_user
4
(users - EXISTS)
use_program 10
modality
1
archive_uk
0
print_uk
0
(users - 0 OK)
dictate_uk
0
(users - 0 OK)
review_uk
0
(users - 0 OK)
lock_uk
2
(users - EXISTS)
prepare_uk
3
(users - EXISTS)
transfer
0
refer_key
1
(referring - EXISTS)
history
CAMERA
exam_time
10:15:05
import_date 07/10/1997
import_time 17:51:17
age
24
age_mod
lockdate
01/01/1900
10) Then look for links that do not exist by listing the other associated
tables. I have put the table in paren which the key points to.
select * from users
1 riconnec riconnect
2 imaging Imaging
3 simms
Ed Simms
4 amador
Rich Amador
5 telerad tele
select * from imagedir
dir_key
4
host_key 31
dirname
/net/aopdemo1/img
alias
aopdemo1#1
11)
12)
13)
14)
dir_key
3
host_key 9
dirname
/net/aopdemo2/img/data
alias
Demo2
Notice that dir_key of 1 from the exam does not exist in the imagedir
table. This is causing the problem. Check to make sure that these
exams do exist under /img (or /img2,/img3... or on another system)
and assign the correct dir_key to the exams
Update the exams in error
update exam set dir_key=4 where dir_key=1
Rebuild the patient list
delete * from examlist;
execute procedure all_exmlst(0);
If there are errors, repeat steps from step #8.
Set exams so that no exam is in-use (this is probably the case). This
does not need to be done except in this case where the case was marked
in-use and then RIview bombed because it could not locate the patient.
update exam set (use_host,use_user,use_program)=(0,0,0);
Make sure that the problems have disappeared.
It turned out that 25 of the exams had pointers (dir_key) to a directory which did not exist.
The way this occurs, is if someone goes into risetup and deletes an image directory. Then
05.08.2001
106
Rational Imaging Installation Manual
all the exams pointing to this directory are invalid. This causes problems with creating the
patient list among other things.
WORD OF CAUTION: Be VERY careful when deleting items in the database, if there
are links to that item it causes major problems.
J.
DETERMINING THE DATABASE VERSION
Use “dbaccess -v” on the server to determine the current database version.
05.08.2001
107
Rational Imaging Installation Manual
XXVIII.Rebuild Server - Emergency
A.
OVERVIEW
In the event of a system failure or hard disk crash, it may be necessary to rebuild the
archive database and its associated structure. If the database is still accessible, and only
some of the tables are corrupted or are symptomatic of indexing errors, refer to the
previous secion. If you proceed with this section, we will assume that the disk directories
have been completely destroyed and therefore a complete installation will be required. To
prepare a new system disk and reload the Rational Imaging system, start with section B.
To load the current database onto a redundant server which has all the Informix database
applications (SE, SQL, INET), start with section C. Some combination of the two may be
used to quickly set up a redundant server with the informix applications, and then restore
the database files from the archive tapes using section C. The redundant server should
have a tape drive attached to facilitate retrieving the information from the last archive tape.
B.
SYSTEM PREPARATION
1.
Backup whatever is left of the current system
Use the tape backup section of this manual to backup the partitions of the disk which still
may be functioning. If the disk is completely unresponsive and needs to be replaced, then
skip this step, however keep the disk in case data retrieval becomes necessary.
2.
Repartition
Use the instructions in the earlier chapters to reformat the disk and load the UNIX
operating system. How you partition the drive will depend upon whether this will be the
database server or another client workstation.
3.
Retrieve System Backup
Use the system backup performed prior to the disk crash to restore the system parameters
and user directories. The following commands may be used to extract information from the
multiple dump files stored on your system archive tape. This procedure should be
performed by our professional installation staff so as not to contaminate the new operating
system with corrupt or inappropriate files.
Insert the most recent system archive tape into the tape drive attached to the system. If
there is not tape drive attached, relocate one from another workstation for the purposes of
this procedure.
setenv TAPE /dev/nrcht0
mt rew
05.08.2001
set the tape device for all subseqent commands. Make sure to
use the non-rewinding device otherwise the tape drive will not
treat the multiple tape files as separate partition files.
Rewind the system tape to the beginning of the tape
108
Rational Imaging Installation Manual
mt fsf n
restore -I
Skip n number of partition fi les till you get to the one you
desire.
Enter the restore command in interactive mode, you will be
able to select the directories and individual files you want to
restore in this program. Consult with the Administrator's
guide for more information regarding this program.
Use these commands to restore the necessary system files from the archive tape prior to
restoring the database. The following list is a partial list of files which should be restored,
however consult with our technical support hotline as this list may have changed slightly.
/etc/passwd
/etc/group
/etc/hosts
/etc/exports
/etc/printcap
/etc/rc.local
/etc/services
/etc/remote
/etc/ttytab
/etc/gettytab
/usr/openwin/etc/NeWS/paintroot.ps
/opt/ISTri
(entire directory)
/opt/informix
(entire directory)
/export/home/imaging
(entire directory)
/export/home/user (entire directory for each user)
/img/print
(entire directory)
/img/templates
(entire directory)
/img/defaults
(entire directory)
/db
(entire database directory)
Do not restore the image directory, since these patient exams will not be recognized by the
most current database backup which will be retrieved from the last patient archive tape.
When these directories and files have been retrieved, the only remaining step is retrieve
the databases from the archive tape that was initialized last. This tape will have the most
current backup of the database.
C.
RIBUILD - RETRIEVE DATABASE FROM ARCHIVE T APE
Use the following procedure to restore the most current copy of the databases from the
patient archive tape which was most recently initialized. This tape will contain backups of
the following databases: rilogin, radiology.
If you are using a redundant server, make sure that the /db directory exists, and has space
sufficient for the new database information. Also make sure that it has appropriate user
privileges for access by world. Backup and remove any existing databases from this
partition if their names will conflict with the database names being retrieved (rilogin.dbs
and radiology.dbs). Contact your system administrator to perform this operation.
If multiple databases were used, then you may need to insert the last tape from a tape set
which archived those exams to restore and rebuild those patient databases. If multiple
05.08.2001
109
Rational Imaging Installation Manual
databases where used, however they were located on different workstations (this is highly
probable), then these databases were probably not affected by the crash and the restoration
of the rilogin database should fix the problem.
If the rilogin database was on a system which did not crash, then only the patient database
on the faltering workstation has probably been affected. Even so, the following procedure
will restore both the rilogin and patient databases, so the other users should be notified not
to use the system until this process is complete.
•
Make sure that the applications “add_pt_to_arc” and “ribuild” exist in the IST binary
directory “/home/ist/bin” or “/opt/ISTri/bin”. If these files do not exist, retrieve them
from the Solaris installation cd using “pkgadd”.
•
Change to the RI system home directory "cd /home/ist/bin or /opt/ISTri/bin"
•
Insert the most current archive tape into the tape drive.
•
Run the script "ribuild".
When this program finishes, you will be able access all of the archive information and the
exams stored on tape. The new system will still be able to use exams on other systems
which were not affected. However the exams on the database system were probably lost.
Use rimove to delete these exams and make sure to write the exams down so that they can
be imported again from the scanner or retrieved from the primary tape.
If a redundant server was used to load the database information into the /db partition, then
all the accounts on the Rational Imaging workstations must be configured to look at the new
server. Modify the .cshrc file in each account (especially “imaging”) to specify the new
RILOGDB and DBPATH parameters. Also, the database information in rilogin will need
to be changed to alter the location of the patient database(s). Use risetup to modify the
database information to establish the new server location. The /.profile file should also be
updated if it exists on any of the Solaris workstations.
D.
REDUNDANT SERVER
In large networks where the requirement of server uptime is critical, it may be important to
create a redundant server which could be quickly configured as the database server in the
event of a server crash. This system would contain the Rational Imaging and Informix
applications found on the server system. In particular, this system would have the
Informix SE (standard engine) and the SQL (standard query language interface) present
and licensed.
In addition, the partition on the redundant server should include a “/db” partition which is
empty and ready for the database files in the event of an emergency.
It would also be important to have a tape drive attached to this system which could be used
to load the database files from the recent archive tapes.
Keep the RIbuild applications present at all times on this system so that the rebuild
operation would be very quick. These files include the “ribuild” script, and the
“add_pt_to_arc” executable file. These should be located in the /home/ist/bin directory on
the SunOS systems, and in the /opt/ISTri/bin directory of the Solaris systems.
05.08.2001
110
Rational Imaging Installation Manual
Operation of these scripts should be performed on a periodic basis to ensure proper
operation. The testing and operation of these scripts on a redundant server will not affect
the operation of the Rational Imaging system, since the database files are actually being
used from the original server. Remove the files from “/db” after the test is complete.
05.08.2001
111
Rational Imaging Installation Manual
XXIX.Installation Worksheet
A.
SUMMARY
Use the following worksheets to document the installation, and lead you through the setup
and testing. Use the individual chapters to obtain more detail regarding the individual
steps.
In preparation for an installation, make sure that all the checkmarks (√) have been filled in.
Then proceed with the installation and mark each item as it is completed. Make copies of
these pages for each item installed at the facility. This will act not only as a guidance
mechanism, but also as installation documentation.
05.08.2001
112
Rational Imaging Installation Manual
FACILITY:
B.
ü
ü
ü
ü
ü
ü
ü
ü
ü
ü
ü
ü
ü
ü
ü
ü
ü
ü
ü
ü
ü
ü
ü
ü
ü
q
q
q
q
q
q
q
q
q
q
q
q
q
q
q
q
q
q
q
q
05.08.2001
DATE:
INSTALLED BY:
WORKSTATION IS THE MAIN DATABASE SERVER
Location at facility (diagram):
Network cabling and power completed:
Hostname (recommend lowercase):
IP address and SubNet:
MAC Address:
Default Router IP address:
Alias for host (may be upper/lower):
Root password:
Imaging password:
Serial number:
Host ID number:
Hostname of redundant server:
IP address of redundant server:
10 or 100 Mbit Ethernet:
Total RAM required:
Swap space required (> 2x RAM):
Software to install:
SBUS/PCI cards (video/ethernet/scsi):
SCSI IDs of Disk Drives:
UPS recommended to facility:
Computer grade modem line for support – Number:
Informix SE license:
Informix SQL license:
Informix INET license:
Rational Imaging license file/email:
Install Solaris (partitions /db and /img required)
Install ISTdb723 using pkgadd (Informix database)
Install ISTmain using pkgadd (Rational Imaging components)
Install ISTri using pkgadd (Rational Imaging applications)
Execute /opt/ISTri/install/install_informix script
Execute /opt/ISTri/install/install_main script
Add workstation to “/etc/inet/hosts” on ALL workstations
Add workstation to “/etc/hosts.equiv” on ALL workstations
Create /etc/defaultrouter with the correct IP address (if necessary)
Add licenses (/opt/ISTri/bin/add_license < license_file)
Check parameters in expire_locks, reset_modems
Check parameters in /etc/inittab
Specify redundant server (/opt/ISTri/bin/ridundant configure)
Configure /opt/ISTri/bin/backup_radiology (one needed for each database)
Check /etc/services and make sure that sqlexec is at port number 1525 (first server)
Reboot
Login as imaging
Use dmesg to make sure that all monitors have correct resolution
Make sure maintenance menu available and functions (reboot, halt etc).
Check window layout, background color, main menu and rilogin loaded.
113
Rational Imaging Installation Manual
q
q
q
q
q
q
05.08.2001
Save workspace under main workspace menu utilities.
Once the rilogin.dbs database has been configured, copy to /db on redundant server.
Make sure that the “ridundant” server script works correctly.
Make sure that the “backup_radiology” server script works correctly.
Drag SMPTE image into Riport and display in Riview.
Calibrate monitor if required. This should be done under normal lighting at the facility.
114
Rational Imaging Installation Manual
FACILITY:
C.
ü
ü
ü
ü
ü
ü
ü
ü
ü
ü
ü
ü
ü
ü
ü
ü
ü
ü
ü
ü
ü
ü
ü
ü
ü
q
q
q
q
q
q
q
q
q
q
q
q
q
q
q
q
q
q
q
q
q
05.08.2001
DATE:
INSTALLED BY:
WORKSTATION IS THE REDUNDANT DATABASE SERVER
Location at facility (diagram):
Network cabling and power completed:
Hostname of server:
IP address of server:
Hostname (recommend lowercase):
IP address and SubNet:
MAC Address:
Default Router IP address:
Alias for host (may be upper/lower):
Root password:
Imaging password:
Serial number:
Host ID number:
10 or 100 Mbit Ethernet:
Total RAM required:
Swap space required (> 2x RAM):
Software to install:
SBUS/PCI cards (video/ethernet/scsi):
SCSI IDs of Disk Drives:
UPS recommended to facility:
Computer grade modem line for support – Number:
Informix SE license (if purchased):
Informix SQL license (if purchased):
Informix INET license:
Rational Imaging license file/email:
Install Solaris (partitions /db and /img required)
Install ISTdb723 using pkgadd (Informix database)
Install ISTsat using pkgadd (Rational Imaging components)
Install ISTri using pkgadd (Rational Imaging applications)
Execute /opt/ISTri/install/install_informix script
Execute /opt/ISTri/install/install_sat script
Add workstation to “/etc/inet/hosts” on ALL workstations
Add workstation to “/etc/hosts.equiv” on ALL workstations
Create /etc/defaultrouter with the correct IP address (if necessary)
Add host to clinical and rilogin database on master rilogin server (risetup)
Add image directory to database on master rilogin server (risetup)
Add licenses on master rilogin server (/opt/ISTri/bin/add_license < license_file)
Check parameters in expire_locks, reset_modems
Check parameters in /etc/inittab
Configure /opt/ISTri/bin/backup_radiology (one needed for each database)
Check /etc/services and make sure that sqlexec is at port number 1525 (first server)
Add sqlredun at port number 1526 (redundant server) to ALL servers (/etc/services)
Modify /etc/init.d/ri.install to add sqlredun after sqlexecd “sqlexecd sqlredun &”.
If SQL/SE licenses purchased, delete * in /opt/informix and reload SQL/SE/INET
Create /opt/informix/etc/sqlhosts to support the existing and new servers
Copy /opt/informix/etc/sqlhosts to ALL servers (specifying ALL servers)
115
Rational Imaging Installation Manual
q
q
q
q
q
q
q
q
q
q
q
q
05.08.2001
Run scripts to install SQL/SE/INET in that order (scripts in /opt/informix).
Make sure software on this workstation is same version as Main Server.
Reboot
Login as imaging
Use dmesg to make sure that all monitors have correct resolution
Make sure maintenance menu available and functions (reboot, halt etc).
Check window layout, background color, main menu and rilogin loaded.
Save workspace under main workspace menu utilities.
When the server’s rilogin.dbs database is configured, copy to /db on ridundant server.
Make sure that the “backup_radiology” server script works correctly.
Drag SMPTE image into Riport and display in Riview.
Calibrate monitor if required. This should be done under normal lighting at the facility.
116
Rational Imaging Installation Manual
FACILITY:
INSTALLED BY:
D.
WORKSTATION IS MULTIPLE DATABASE SERVER IN A NETWORK
ü
ü
ü
ü
ü
ü
ü
ü
ü
ü
ü
ü
ü
ü
ü
ü
ü
ü
ü
ü
ü
ü
ü
ü
ü
ü
ü
ü
ü
ü
Location at facility (diagram):
Network cabling and power completed:
IP address and SubNet:
MAC Address:
Default Router IP address:
Hostname (recommend lowercase):
Alias for host (may be upper/lower):
Root password:
Imaging password:
Serial number:
Host ID number:
Hostname of redundant server:
IP address of redundant server:
Hostname of other servers:
IP address of other servers:
New Database name:
SQLexec port # of other servers: 1525, 1526,
SQLexec service name of other servers: sqlexec, sqlredun,
10 or 100 Mbit Ethernet:
Total RAM required:
Swap space required (> 2x RAM):
Software to install:
SBUS/PCI cards (video/ethernet/scsi):
SCSI IDs of Disk Drives:
UPS recommended to facility:
Computer grade modem line for support – Number:
Informix SE license:
Informix SQL license:
Informix INET license:
Rational Imaging license file/email:
Install Solaris (partitions /db and /img required)
Install ISTdb723 using pkgadd (Informix database)
Install ISTmain using pkgadd (Rational Imaging components)
Install ISTri using pkgadd (Rational Imaging applications)
Execute /opt/ISTri/install/install_informix script
Execute /opt/ISTri/install/install_main script
Add workstation to “/etc/inet/hosts” on ALL workstations
Add workstation to “/etc/hosts.equiv” on ALL workstations
Create /etc/defaultrouter with the correct IP address (if necessary)
Add host to clinical and rilogin database on master rilogin server (risetup)
Add image directory to database on master rilogin server (risetup)
Add licenses on master rilogin server (/opt/ISTri/bin/add_license < license_file)
Check parameters in expire_locks, reset_modems
Check parameters in /etc/inittab
Specify redundant server (/opt/ISTri/bin/ridundant configure)
Configure /opt/ISTri/bin/backup_radiology (one needed for each database)
Add sqlNAME at port number 152# (unique number) to ALL servers (/etc/services)
Modify /etc/init.d/ri.install to add sqlNAME after sqlexecd “sqlexecd sqlNAME &”.
Create /opt/informix/etc/sqlhosts to support this new server
q
q
q
q
q
q
q
q
q
q
q
q
q
q
q
q
q
q
q
05.08.2001
DATE:
117
Rational Imaging Installation Manual
q
q
q
q
q
q
q
q
q
q
q
q
q
q
q
q
q
q
q
q
05.08.2001
Make sure that /etc/services and /opt/informix/etc/sqlhosts contain ALL servers.
Copy /opt/informix/etc/sqlhosts to ALL workstations (specifying ALL servers)
Copy /etc/services info to ALL workstations (specifying ALL servers)
Make sure that /home/imaging/.cshrc has DBPATH for master rilogin server
Make sure that /.profile has DBPATH for master rilogin server
Login to host of master rilogin database. Add new database (risetup)
Make sure software on this workstation is same version as Main Server.
Reboot
Login as imaging
Use dmesg to make sure that all monitors have correct resolution
Check window layout, background color, main menu and rilogin loaded.
Save workspace under main workspace menu utilities.
Make sure maintenance menu available and functions (reboot, halt etc).
Make sure that the “backup_DBNAME” server script works correctly.
Configure “/etc/inittab” for new database name (other than radiology).
Configure “/opt/ISTri/bin/backup_DBNAME”.
Configure “/opt/ISTri/bin/expire_locks”.
Configure “/opt/ISTri/bin/reset_modems”.
Drag SMPTE image into Riport and display in Riview.
Calibrate monitor if required. This should be done under normal lighting at the facility.
118
Rational Imaging Installation Manual
FACILITY:
E.
ü
ü
ü
ü
ü
ü
ü
ü
ü
ü
ü
ü
ü
ü
ü
ü
ü
ü
ü
ü
q
q
q
q
q
q
q
q
q
q
q
q
q
q
q
q
q
q
q
q
q
q
q
q
q
05.08.2001
DATE:
INSTALLED BY:
WORKSTATION IS THE SATELLITE WORKSTATION
Location at facility (diagram):
Network cabling and power completed:
IP address and SubNet:
MAC Address:
Default Router IP address:
Hostname (recommend lowercase):
Alias for host (may be upper/lower):
Root password:
Imaging password:
Serial number:
Host ID number:
10 or 100 Mbit Ethernet:
Total RAM required:
Swap space required (> 2x RAM):
Software to install:
SBUS/PCI cards (video/ethernet/scsi):
SCSI IDs of Disk Drives:
UPS recommended to facility:
Informix INET license:
Rational Imaging license file/email:
Install Solaris (ONLY /img partition required, DO NOT put /db)
Install ISTdb723 using pkgadd (Informix database)
Install ISTsat using pkgadd (Rational Imaging components)
Install ISTri using pkgadd (Rational Imaging applications)
Execute /opt/ISTri/install/install_informix script
Execute /opt/ISTri/install/install_sat script
Add workstation to “/etc/inet/hosts” on ALL workstations
Add workstation to “/etc/hosts.equiv” on ALL workstations
Create /etc/defaultrouter with the correct IP address (if necessary)
Add host to clinical and rilogin database on master rilogin server (risetup)
Add image directory to database on master rilogin server (risetup)
Add licenses on master rilogin server (/opt/ISTri/bin/add_license < license_file)
Check parameters in load_riconnect, load_dicom, expire_locks, reset_modems
Check parameters in /etc/inittab
Specify redundant server (/opt/ISTri/bin/ridundant configure)
Configure /opt/ISTri/bin/backup_radiology (one needed for each database)
Edit /etc/services file to include all server ports.
Edit /opt/informix/etc/sqlhosts to include multiple servers.
Make sure software on this workstation is same version as Main Server.
Reboot
Login as imaging
Use dmesg to make sure that all monitors have correct resolution
Check window layout, background color, main menu and rilogin loaded.
Save workspace under main workspace menu utilities.
Make sure maintenance menu available and functions (reboot, halt etc).
119
Rational Imaging Installation Manual
q
q
q
05.08.2001
Make sure that the “backup_radiology” server script works correctly.
Drag SMPTE image into RIport and display in RIview.
Calibrate monitor if required. This should be done under normal lighting at the facility.
120
Rational Imaging Installation Manual
FACILITY:
F.
ü
ü
ü
ü
ü
ü
ü
ü
ü
ü
ü
ü
ü
ü
ü
ü
ü
ü
ü
q
q
q
q
q
q
q
q
q
q
q
q
q
q
q
q
q
q
q
q
q
q
q
q
05.08.2001
DATE:
INSTALLED BY:
WORKSTATION IS A STAFF WORKSTATION (RIDISPLAY )
Location at facility (diagram):
Network cabling and power completed:
IP address and SubNet:
MAC Address:
Default Router IP address:
Hostname (recommend lowercase):
Alias for host (may be upper/lower):
Root password:
Imaging password:
Serial number:
Host ID number:
10 or 100 Mbit Ethernet:
Total RAM required:
Swap space required (> 2x RAM):
Software to install: ridisplay
SBUS/PCI cards (video/ethernet/scsi):
SCSI IDs of Disk Drives:
Informix INET license:
Rational Imaging license file/email (ridisplay):
Install Solaris (ONLY /img partition required, DO NOT create /db)
Install ISTdb723 using pkgadd (Informix database)
Install ISTsat using pkgadd (Rational Imaging components)
Install ISTri using pkgadd (Rational Imaging applications)
Execute /opt/ISTri/install/install_informix script
Execute /opt/ISTri/install/install_sat script
Add workstation to “/etc/inet/hosts” on ALL workstations
Add workstation to “/etc/hosts.equiv” on ALL workstations
Create /etc/defaultrouter with the correct IP address (if necessary)
Add host to clinical and rilogin database on master rilogin server (risetup)
Add image directories to database on master rilogin server (risetup)
Add licenses on master rilogin server (/opt/ISTri/bin/add_license < license_file)
Edit /etc/services file to include all server ports. (Copy from main server)
Edit /opt/informix/etc/sqlhosts to include multiple servers. (Copy from main server)
Make sure software on this workstation is same version as Main Server.
Remove “r1, r2, r3” from the /etc/inittab file. This workstation will not be receiving
images.
Make sure that the /home/imaging/.openwin-menu file contains the following:
“Imaging” DEFAULT exec $RIPROGDIR/run_program ridisplay
Reboot
Login as imaging
Check window layout, background color, main menu and ridisplay loaded.
Save workspace under main menu utilities when screen correct
Check that Ridisplay exists in the main workspace menu.
Use dmesg to make sure that all monitors have correct resolution
Make sure maintenance menu available and functions (reboot, halt etc).
121
Rational Imaging Installation Manual
q
05.08.2001
Display SMPTE image in RIdisplay. Calibrate monitor if required.
122
Rational Imaging Installation Manual
FACILITY:
G.
ü
ü
ü
ü
ü
q
q
q
q
q
q
q
q
q
q
q
q
q
q
05.08.2001
DATE:
INSTALLED BY:
EXTRA IMAGE PARTITION/DISK (OTHER THAN /IMG)
Unix name (syntax: /net/hostname/img2):
SCSI chain terminated with ACTIVE terminator (SCSI II, SCSI III):
Power available (plug into UPS if available):
SCSI cable type (scsi II, U/W, conversion required):
SCSI IDs of Disk Drives:
Halt the system, set the SCSI ID and attach the drive.
Reboot using “boot –r” to make sure that the new drive is recognized.
Format and Create Unix filesystem on new disk (make sure to extract defect list)
Fsck new disk to check for errors
Mount the new disk and add to /etc/vfstab
Change ownership and permission on partition (u=imaging g=imaging a+rwx)
Add export partition in /etc/dfs/dfstab
Type “shareall” to make the new dfstab file active
Type “share” to make sure that all the partitions are shared (/db, /img, /img1…)
Reboot and make sure image directory available from other workstations
If multiple databases exist, syntax for directory is “/net/hostname/img/db_name”
If multiple databases exist and will use /img#, create db_name dirs under /img#
If multiple database directory used, make sure a+rwx permission.
Login to server and use risetup to add the new image directory.
123
Rational Imaging Installation Manual
FACILITY:
H.
DATE:
INSTALLED BY:
EXTRA SUN COLOR MONITOR(S)
ü SBUS video card ordered (supports 1280x1024):
q Shutdown system and install the SBUS Turbo GXplus Video card
q Reboot using –r to recognize the new video card and monitor
q Use dmesg to see the device name (cgsix#) and check resolution of video cards
q If CDE, copy /usr/dt/config/Xconfig & /usr/dt/config/Xservers to /etc/dt/config.
q Add device name to .login after openwin (-dev /dev/cgsix#) (or add to
/etc/dt/config/Xservers for Solaris 2.6 CDE)
q LEFT and RIGHT can be added after cgsix# to reposition.
q The first device after openwin will be the console (place console on left).
q Login as imaging and make sure that the Solaris graphic appears on ALL monitors. On
Solaris 2.6, the Solaris banner will only appear on the console, however once the
system is up the background should appear on all the monitors and the mouse should be
able to move to all the monitors in sequence.
q Adjust the brightness and contrast of the monitor. Usually set to max as long as text
distortion is not observed.
q Display SMPTE on new monitor and calibrate monitor if necessary to display b/w
range.
q Use risetup to add the monitor calibration parameters (42).
05.08.2001
124
Rational Imaging Installation Manual
FACILITY:
I.
ü
ü
ü
ü
ü
ü
ü
q
q
q
q
q
q
DATE:
INSTALLED BY:
INSTALL DOME VIDEO ADAPTER WITH DATARAY MONITOR
Hostname:
Video Card:
Monitor and Model:
Version:
DOME card ordered specific for this monitor:
Correct cable available for single/dual monitor(s):
Correct drivers for video card and monitors(s):
Change necessary jumpers on the video card per manufacturers recommendations for
Sun workstations. On a md2pci card, jumper J4 should not be shorted (put over only 1
pin).
Install the video card in any of the pci slots of the workstation. Make sure that the gold
contacts are firmly seated in the socket.
Reboot and reconfigure the workstation “boot -r”
Use dmesg to see the device name (md####) and check resolution of video cards
Change the video mode for the monitor. For the DataRay monitor, the resolution must
be set to 1200x1600 @ 66Hz.
“/opt/DOMEmd2pci/util/video_mode –d
/dev/md2pci0.0 –m F”. Similarly set “/dev/md2pci0.1”. The monitor may not sync
properly until you reboot at the end of this install procedure.
Backup and modify the file “/usr/openwin/server/etc/OWconfig” to contain the
following:
class="XSCREENCONFIG" name="DOMEmd2pci0Config"
device="/dev/md2pci0.0"
res="1200x1600 @ 66Hz"
monitor="domegray.vda"
board="md2pci-2hd.xqa";
class="XSCREENCONFIG" name="DOMEmd2pci1Config"
device="/dev/md2pci0.1"
res="1200x1600 @ 66Hz"
monitor="domegray.vda"
board="md2pci-2hd.xqa";
class="XSCREEN" name="DOMEmd2pci"
ddxHandler="ddxDOMEmd2pci.so.1" ddxInitFunc="domeMd2pSunInit";
q
q
If CDE, copy /usr/dt/config/Xconfig & /usr/dt/config/Xservers to /etc/dt/config.
Backup and modify “/etc/dt/config/Xservers to contain the video drivers so that
OpenWindows will know that multiple monitors exist as follows: (example for 1 Sun
monitor and 2 DataRey monitors on 1 Dome card)
#Sun & 2 greyscale monitors on a single DOME card (Use dmesg to confirm)
:0 Local local_uid@console root /usr/openwin/bin/Xsun :0 -nobanner –dev
/dev/fb0 -dev /dev/md2pci0.0 -dev /dev/md2pci0.1
q
q
05.08.2001
Reboot the workstation “reboot -- -r”. The monitor should sync-up at this point and
display a DOME banner. You should also see a DOME message appear before the Sun
banner during boot. If this message is not shown, try the adapter in another PCI slot
and confirm that it is seated properly.
If the X Server is unable to start, check the Xservers file for accuracy. Check to see
that drivers have been created in /dev (md2pci0.0 and mc2pci0.1). Check that the
spelling and context is correct for these entries in Xservers and OWconfig.
125
Rational Imaging Installation Manual
q
q
q
q
05.08.2001
Login as imaging and make sure that the Solaris graphic appears on ALL monitors. On
Solaris 2.6, the Solaris banner will only appear on the console, however once the
system is up the background should appear on all the monitors and the mouse should be
able to move to all the monitors in sequence.
Adjust the brightness and contrast of the monitor. Usually set to max as long as text
distortion (blurring) is not observed.
Display SMPTE on new monitor and calibrate monitor if necessary to display b/w
range.
Use risetup to add the monitor calibration parameters (42).
126
Rational Imaging Installation Manual
FACILITY:
J.
DATE:
INSTALLED BY:
CANON POSTSCRIPT PRINTER(S)
ü Hostname:
ü Print Queue name (eg: xjprint specific to printer):
Note: CLBP should use xjdirect if < 32MB of Ram on printer
460 requires xjdirect print queue name
ü Printername (if different than hostname):
ü Printer alias (name shown in Menus):
ü IP address:
ü Network cabling and power available:
q Add printer IP address and hostname to the /etc/hosts file on ALL systems.
q Configure printer - press Menu when asked during powerup (Hostname, IP address,
TCP/IP). The hostname of this printer must be unique. The hostname on the printer
must equal the value in the /etc/hosts table and the hostname used in configuring the
printer below.
q Ping the printer to make sure that the system sees it on the network.
q Add printer to all hosts using the following commands (Replace the hostname and
printername parameters with the actual hostname and printername from above):
lpsystem –t bsd hostname
lpadmin -p printername -s hostname!xjprint
(replace the xjprint with print_700-800 if needed)
lpadmin -p printername -T any -I PS (omit “-T any” on Sol 2.5.1)
accept printername
enable printername
q
q
q
Test printer with “lp –d printername /home/imaging/.login”
Make sure that /var/spool/lp/tmp has been redirected to /img/print/tmp for space.
Login to server and add printer to database using risetup (8)
Script to add a Canon printer:
#!/bin/sh
# Little script to setup printers for solaris 2.5.1 and 2.6
echo "Printer host name: \c"
read PRTHOST
echo "Printer queue name (xjprint, print_700-800): \c"
read QUEUE
echo "Printer name in unix: \c"
read PRINTER
lpsystem -t bsd $PRTHOST
lpadmin -p $PRINTER -s $PRTHOST!$QUEUE
lpadmin -p $PRINTER -I any
05.08.2001
127
Rational Imaging Installation Manual
FACILITY:
K.
DATE:
INSTALLED BY:
SEEMOR REFERRING WORKSTATION PRINTER(S)
ü Hostname:
ü Printer alias (name shown in Menus):
ü IP address:
q Add Seemor Workstation IP address to the /etc/hosts file on ALL systems.
q Ping the workstation to make sure that the system sees it on the network.
q Add WarFTP to the SeeMor workstation. Configure to allow a user “imaging” access
to the c:/seemor/images and c:/seemor/print directories. Make sure that “imaging” has
a password assigned, or ftp will not work.
q Test the ftp client by ftping from a Sun into the workstation, cd to “c:/seemor/print”,
and depositing test files. If there are any permission errors, reconfigure the WarFTP
correctly.
q Add the workstation host in risetup as type 6 (Referring SeeMor host).
q Add printer to the database using risetup on the server as follows:
Name: any name (no spaces allowed)
Alias: name to appear in Menus (no spaces allowed)
Type: 3 (SeeMor B/W printer)
HostKey: HostKey of host (Add host first in risetup)
PrintDir: /img/print (default location for temporary print pages)
Width: 850 (8.5” default)
Height: 1100 (11” default)
Resolution: 160 (so the print page will fit on HP printers)
PrintCmd: /opt/ISTri/print/print2seemor riFILE riHOST
JpegQual: 50 (Can be changed to 75 to improve quality)
PtInfo: 1 (This will print the patient information also)
q
05.08.2001
Test printer using RIview
128
Rational Imaging Installation Manual
FACILITY:
L.
ü
ü
ü
ü
q
q
q
q
q
q
q
q
q
q
q
q
q
q
05.08.2001
DATE:
INSTALLED BY:
REMOTE LOW-BANDWIDTH WORKSTATION PRINTER(S)
Hostname:
Unix printer name:
Printer alias (name shown in Menus):
IP address:
Add Remote Workstation IP address to the /etc/hosts file on ALL systems.
Add the host using risetup to rilogin and all databases.
Ping the workstation to make sure that the system sees it on the network.
Add the /opt/ISTri/bin/riprint and /opt/ISTri/print/print_remote applications on the
remote workstation. This will decompress the JPEG print pages and print them using
the standard lp process.
Configure the /opt/ISTri/print/print_remote application for the correct printer.
Create the printpage directory specified in print_remote. Make sure that it has “chmod
777” permissions and the owner and group are imaging.
Add the /opt/ISTri/print/print_jpeg application to the Canon RI workstations.
Add a printer on the remote workstation using admintool.
Test the printer on the remote workstation using lp.
Make sure that the remote workstation allows “imaging” to remote shell into it without
a password. Needs a “.rhosts” file containing “+ +” in the /home/imaging directory of
the remote system.
Add the workstation host in risetup as type 5 (Rational Imaging host).
Add printer to the database using risetup on the server as follows:
Name: any Unique name – (eg: HostPrinter) (no spaces allowed)
Alias: name to appear in Menus (no spaces allowed)
Type: 6 (Color JPEG compressed print pages)
HostKey: HostKey of host (Add host first in risetup)
PrintDir: /img/print (default location for temporary print pages)
Width: 850 (8.5” default)
Height: 1100 (11” default)
Resolution: 80 (so the print page will fit on HP printers)
PrintCmd: /opt/ISTri/print/print_jpeg riHOST riIMGHOST riPATH riPTNAME
JpegQual: 75 (Can be changed to 50 to improve speed)
PtInfo: 1 (This will print the patient information also)
Test printer using RIview.
The resolution can be increased from 80, but this increases network transfer time,
makes it rather large to view on the remote station, and if the printpage is to be
reprinted using imagetool, the image will need to be resized first. A dpi of 80 just fits
on an HP print page. A dpi of 160 can be used, however the image should be reduced
by 50% before printing using imagetool.
129
Rational Imaging Installation Manual
FACILITY:
M.
ü
ü
ü
ü
ü
q
q
q
q
q
q
q
q
q
q
q
q
q
q
q
q
q
q
q
q
q
05.08.2001
DATE:
INSTALLED BY:
FILM (LASERLINK) PRINTER
SparcStation compatible with Card:
Kodak (3M) engineer notified:
Kodak (3M) digital port purchased and installed:
Kodak (3M) digital port configured to Cemax specs:
Cables extending from Sun to Kodak (3M):
Shutdown system
Install LaserLink card in SCSI slot 0 (bottom nearest processors)
Install cables to LaserLink card and to Kodak (3M)
Reboot with –r to have system recognize new hardware
Install ISTfilm package
Change directory to /opt/ISTri/film
Check the README file for any system patches that need to be applied.
Install drivers “/opt/ISTri/film/INSTALL
Run /opt/ISTri/film/addcam in that directory to create camcap file
Edit camcap and change DefFormat=”1 on 1”
Edit camcap and change MaxHSize and MaxVSize = 6000 (under 1 on 1).
Link camcap (“ln -s /opt/ISTri/film/camcap /opt/ISTri/bin/camcap”)
Link filmer (“ln -s /opt/ISTri/film/filmer /opt/ISTri/bin/filmer”)
Test printer with filmer “filmer –c camcap kodak.fjob1”
License rifilm for that workstation (add_license < licfile)
Start rifilm in the background using load_riconnect (it will watch /img/film directory)
Check world r+w permission on /img/film
Create a new printer (film printer) in risetup on server
Use RIview to send some images to the Cemax Laserlink (/net/cemaxhost/img/film).
Make sure the images in /img/film are printed and deleted.
If problems persist, try setting the Cemax card with Odd parity.
130
Rational Imaging Installation Manual
FACILITY:
N.
DATE:
INSTALLED BY:
VIRTUALRAD PRINTER
ü Printer Name (same as Alias):
ü Directory Share Hostname:
ü Shared Directory for temporary reports (/net/host/img/vr):
q Create the new directory /img/vr on the share host. Choose a system which has plenty
of disk space.
q Check to make sure that /net/img/vr is shared. Type “share” to see the current shares.
q Setup Samba on the share host so that VirtualRad can see this shared directory (See
Samba whitepaper).
q Configure
the Dropbox Watcher on VirtualRad to watch this directory
“/net/host/img/vr”.
q Create a new printer in RIsetup with the following parameters.
Name=VirtualRad (This name can be site specific)
Alias=VirtualRad (Same as Name field)
Type: 7 (SeeMor Color PrintPage with Thumbnails)
Host: # (Select host for shared directory)
Print Dir: /net/host/img/vr (Create /img/vr on host;chmod 777)
Width: 850
Height: 1100
DPI: 80
Print Command: (Leave blank)
Jpeg Quality: 50
Pt Info: 1
q Use riview to test the printer.
q To automatically have all print pages sent to VirtualRad, create a default service using
dbaccess as follows. Replace ‘#’ with the prt_key of the VirtualRad printer. Prt_key
can be obtained in risetup by listing the printers:
Echo “Insert into services values (0,1,0,0,0,0,0,1,#,0,0,0,0,0,0,0,0)” | dbaccess radiology
05.08.2001
131
Rational Imaging Installation Manual
FACILITY:
O.
ü
ü
ü
ü
q
q
q
q
q
q
05.08.2001
DATE:
INSTALLED BY:
DICOM PRINTER
Hostname:
Printer Manufacturer (or DICOM PRINT SCP gateway):
Printer configured for Canon PACS:
Printer seen on network (ping):
Enter correct configuration parameters in /opt/ISTri/etc/riprintq_cfg (page 73).
Put riprintq in /etc/inittab.
r5:34:respawn:su – imaging –c “exec riprintq –c /opt/ISTri/etc/riprintq_cfg”
Initialize riprintq “init Q”.
Verify that riprintq is running “ps –ef | grep riprintq”.
Use risetup to enter a DICOM printer. (see page 73)
Use riview to test the printer.
132
Rational Imaging Installation Manual
FACILITY:
P.
ü
ü
ü
ü
ü
ü
q
q
q
q
q
q
q
05.08.2001
DATE:
INSTALLED BY:
GE CT & MR SCANNERS (5X AND ABOVE USING ADVANTAGENET)
Cabling completed:
Tranceiver needed:
Scanner engineer notified:
Ethernet card installed/configured:
Ip address of scanner:
Hostname of scanner:
Add hostname and IP address to /etc/inet/hosts file on ALL workstations
Add host to clinical and rilogin database (risetup)
Ping the scanner from the workstation which will receive the images
Use setAdoption on scanner to establish a Advantagenet Sun client.
Run RIport, change source to scanner, and see if patient’s listed. Try receiving.
Make sure that riconnect and riupdate are running (load_riconnect)
Try sending images from scanner (Network button on console)
133
Rational Imaging Installation Manual
FACILITY:
Q.
ü
ü
ü
ü
ü
ü
q
q
q
q
05.08.2001
DATE:
INSTALLED BY:
GE MR SCANNERS (SIGNA 4X)
Cabling completed:
Tranceiver needed:
Scanner engineer notified:
Ethernet card installed/configured:
Ip address of scanner:
Hostname of scanner:
Add hostname and IP address to /etc/inet/hosts file on ALL workstations
Add host to clinical and rilogin database (risetup)
Ping the scanner from the workstation which will receive the images
Run RIport, change source to scanner, and see if patient’s listed. Try receiving.
134
Rational Imaging Installation Manual
FACILITY:
R.
ü
ü
ü
ü
ü
ü
ü
ü
ü
q
q
q
q
q
q
DATE:
INSTALLED BY:
DICOM SCANNERS
AE_TITLE:
DICOM Port # (default=104 – MUST BE UNIQUE):
Cabling completed:
Tranceiver needed:
Scanner engineer notified:
Ethernet card installed/configured:
Ip address of scanner:
Hostname of scanner:
Give scanner engineer our info: (AE_TITLE=RI_DICOM, default Port=104)
Add hostname and IP address to /etc/inet/hosts file on ALL workstations
Add host to clinical and rilogin database (risetup)
Ping the scanner from the workstation which will receive the images
Add hostname of scanner to /etc/hosts.equiv on receiving workstations.
Remove any “load_dicom” from root’s crontab (no longer used)
Configure /etc/inittab (1 scanner per port) (make sure that r4 is unique)
r4:34:respawn:sh –c “exec /opt/ISTri/bin/ridicomd –f –p 104 –t RI_DICOM /img/incoming > /dev/null”
q
q
q
05.08.2001
Type “init Q” to have init reread the /etc/inittab file
Use “ps –ef | grep rid” to make sure that the ridicomd is running
Use debug mode if problems occur (add -v option after ridicomd in inittab)
135
Rational Imaging Installation Manual
FACILITY:
S.
ü
ü
ü
ü
ü
ü
ü
ü
q
q
q
q
q
q
q
q
q
05.08.2001
DATE:
INSTALLED BY:
NUCLEAR MEDICINE SCANNERS (INTERFILE FORMAT)
Cabling completed:
Tranceiver needed:
Scanner engineer notified:
Ethernet card installed/configured:
Ip address of scanner:
Hostname of scanner:
Does the scanner support interfile format:
Can the scanner export interfile images into a predefined directory:
Add hostname and IP address to /etc/inet/hosts file on ALL workstations
Add host to clinical and rilogin database (risetup)
Ping the scanner from the workstation which will receive the images
Create a directory under “/img” to receive the images. This directory should be unique
to the individual scanner (ie: each scanner MUST have a separate directory).
chmod a+rwx /img/prism (allow all users to access directory)
Configure the scanner to deposit interfile images into this directory (eg: For a Picker
Prism scanner – call the directory /img/prism).
Configure the “/opt/ISTri/bin/move_files_script” script to move (and rename) the
images into the /img/incoming directory. The move_files program needs the input dir,
the output dir, and the image prefix (eg: move_files /img/prism /img/incoming
RIint.prism.). The period at the end of “RIint.prism.” is important. The name between
the periods must be the name of the scanner “prism in this case”.
Add the “move_files_script” routine to the crontab for “imaging”. Use “crontab –e” as
imaging to add the new process and set it for 5 minute intervals as follows:
“0,5,10,15,20,25,30,35,40,45,50,55 * * * * /opt/ISTri/bin/move_files_script >
/dev/null 2>&1”.
Make sure that “riupdate” is running as a process and is configured to check the
/img/incoming directory “/opt/ISTri/bin/load_riconnect”.
136
Rational Imaging Installation Manual
FACILITY:
T.
ü
ü
ü
ü
ü
ü
ü
ü
q
q
q
q
q
q
q
05.08.2001
DATE:
INSTALLED BY:
LUNAR MR SCANNERS
Cabling completed:
Tranceiver needed:
Scanner engineer notified:
Ethernet card installed/configured:
Ip address of scanner:
Hostname of scanner:
Is the scanner dicom 3.0 compliant:
RIlunar license required (license file/email):
Add hostname and IP address to /etc/inet/hosts file on ALL workstations
Add host to clinical and rilogin database (risetup)
Ping the scanner from the workstation which will receive the images
If DICOM 3.0 connection, use DICOM scanner setup.
If not dicom 3.0, install ISTlunar package to retrieve images from the scanner
Configure the /opt/ISTri/bin/.rilunar1 file for source and destination information.
Run RIlunar to test the transfer. Make sure images transferred to /img/incoming.
137
Rational Imaging Installation Manual
FACILITY:
U.
ü
ü
ü
ü
ü
ü
ü
ü
ü
ü
ü
q
q
q
q
q
q
q
DATE:
INSTALLED BY:
GATEW AY W ORKSTATION (LOW BANDW IDTH)
Cabling completed:
Tranceiver needed:
Scanner engineer notified:
Ethernet card installed/configured:
Ip address of gateway workstation:
Hostname of gateway workstation:
Ip address of scanner(s):
Hostname of scanner(s):
RImovedcm license required (license file/email):
RIdicomd license required (license file/email):
RIprint license required if return printing enabled (license file/email):
Install Solaris 7
Install Printer using admintool and test using lp “HP 2100m Postscript”. This will only
be present if remote printing is desired.
Add packages ISTremote and ISTri
cd /opt/ISTri/install and run “install_remote”
mkdir /home/imaging/.solregis; touch /home/imaging/.solregis/disable
Configure /opt/ISTri/etc/rimovedcm_cfg
Add ridicomd to /etc/inittab
r1:34:respawn:/opt/ISTri/bin/ridicomd –f –p 104 –t RI_DICOM /img/incoming > /dev/null
q
Add rimovedcm to /etc/inittab
r2:34:respawn:su – imaging “exec rimovedcm –c /opt/ISTri/etc/rimovedcm_cfg > /dev/null
q
q
q
q
q
q
q
Add hostname and IP address to /etc/inet/hosts file on ALL workstations
Add gateway host to clinical and rilogin database (risetup)
Ping the scanner from the workstation which will receive the images
Add the destination DICOM host to the /etc/hosts file. Ping to make sure it lives.
Send images from the Lunar scanner to make sure that ridicomd is putting them in
/img/incoming.
Make sure that risenddcm is then moving these images over the low-bandwidth network
to the remote destination.
Set up printer per the “Low Bandwidth Printer” worksheet.
Functionality:
1. Receive images from scanners over 100baseT, and retransmit in the background over PPP,
ISDN, or low-bandwidth Frame Relay.
2. Allow JPeg compressed printing to a low-cost HP 2100m Postscript Printer. The doctors can
print to this from RIview. The PrintPage will be compressed, sent to this gateway,
decompressed, and printed. The PrintPages are on the order of 80KBytes for 80dpi printing.
This fits the monitor size and printer output well. For higher quality, use 160dpi and reduce
the image by 50% in imagetool before printing the image. RIview will still print the 160dpi
image correctly.
3. The printpage will also be stored on this system for future printing under /img/PrintPages. The
Solaris “file manager” and “imagetool” can be used to select and print the images.
05.08.2001
138
Rational Imaging Installation Manual
FACILITY:
V.
ü
ü
ü
ü
ü
ü
ü
q
q
q
q
q
q
q
q
q
q
q
q
q
q
05.08.2001
DATE:
INSTALLED BY:
T APE DRIVE (STANDALONE PRIMARY ARCHIVE)
Tape drive host:
Tape drive alias:
ApUnix DAT License #:
Individual/research tape sets required:
Power available for tape drive:
SCSI cables OK (conversion required?):
SCSI ID of Drive:
Shutdown system and install second SCSI card (especially if on server)
Configure Tape Drives SCSI ID’s.
Once installed, run “probe-scsi-all” at boot prompt to check ID’s.
Reboot using –r to recognize new hardware attached.
Install ISTarc tape drive package
Run install_arc to create drivers and licenses
Reboot to load the new drivers
Test the tape drive with a blank tape (write then read using tar)
List tape sets and add new ones if necessary (primary, secondary, research)
Add new tape drive in risetup (9)
Make sure that the “/opt/ISTri/bin/backup_radiology” script works correctly.
Make sure tape drive alias appears in Ristore menu.
Test tape drive initialization on a blank tape.
If having trouble with the SCSI bus on an Ultra 5 or 10, disable the Ultrawide scsi
adapter by putting “scsi-options=0x78;” in /kernal/drv/isp.conf.
139
Rational Imaging Installation Manual
FACILITY:
W.
ü
ü
ü
ü
ü
ü
ü
ü
ü
ü
ü
ü
q
q
q
q
q
q
q
q
q
q
q
q
q
q
q
q
q
q
q
q
q
q
q
05.08.2001
DATE:
INSTALLED BY:
JUKEBOX (SECONDARY ARCHIVE)
Jukebox alias:
Jukebox hostname:
ApUnix DAT License #:
ApUnix Changer License #:
Individual/research tape sets required:
Power sufficient for jukebox:
SCSI cables OK (conversion required?):
SCSI ID of Drive 1:
SCSI ID of Drive 2:
SCSI ID of Drive 3:
SCSI ID of Drive 4:
SCSI ID of Changer (Jukebox):
Confirm that the system has Solaris 2.6 loaded. The changer will not work with 2.7.
Shutdown system and install second SCSI card (especially if on server) Use the
Antares Low Voltage Differential card for AIT Jukeboxes.
Install the Antares drivers for Solaris 2.6 using pkgadd (AIT jukebox only).
For AIT jukeboxes, make sure that the terminator is a “LVD” terminator.
Configure Jukebox SCSI ID #’s and tape drives.
Configure Tape Drives SCSI ID’s.
Once installed, run “probe-scsi-all” at boot prompt to check ID’s.
Reboot using –r to recognize new hardware attached.
Install ISTjuke tape drive package
Run install_juke to create drivers and licenses
Reboot again to load the new drivers
Test ability of jukebox to load tapes and drives (change command)
Test each tape drive with a blank tape (write then read using tar)
List tape sets and add new ones if necessary (primary, secondary, research)
Add new tape drive(s) in risetup (one for each drive in jukebox) (9)
Add new jukebox in risetup (37)
Add new jukebox tape drive associations in risetup (one for each drive) (38)
Add new jukebox slots in risetup (39)
Add new tapesets supported on the jukebox in risetup (51)
Make sure that the “/opt/ISTri/bin/backup_radiology” script works correctly.
Test archive.
Add Ribox, Ristore to Rilogin toolbar.
If having trouble with the SCSI bus on an Ultra 5 or 10, disable the Ultrawide scsi
adapter by putting “scsi-options=0x78;” in /kernal/drv/isp.conf.
140
Rational Imaging Installation Manual
FACILITY:
X.
ü
ü
ü
ü
q
q
q
q
q
q
q
q
q
q
q
05.08.2001
DATE:
INSTALLED BY:
VIDAR FILM DIGITIZER
Hostname of workstation attached to:
Power available for it:
SCSI cable correct (Large SCSI I connector on Vidar):
SCSI ID of Vidar digitizer:
Install vidar with power and scsi cable. Use ACTIVE terminator.
Make sure that film guides are wide open during power-up (or else calibration wrong)
Set the SCSI ID of the Vidar system.
At boot prompt, use “probe-scsi-all” to check the SCSI ID.
Boot with –r to recognize new hardware
Install the ISTvidar package.
Run the script /opt/ISTri/install/install_vidar
Reboot to make sure that the drivers are loaded correctly.
Add RIscan to the rilogin tool bar (config is under the disk icon).
Restart rilogin from the workspace menu after quiting the current version
Use RIscan to make sure that the scanner is working properly
141
Rational Imaging Installation Manual
FACILITY:
Y.
ü
ü
ü
ü
ü
ü
ü
ü
ü
q
q
q
q
q
q
q
q
q
q
q
q
q
q
05.08.2001
DATE:
INSTALLED BY:
CANON CFS300 FILM DIGITIZER
Hostname of scanner:
IP address of scanner:
Hostname of RIscanc SUN:
IP address of Riscanc SUN:
Rational Imaging license file (RIscanc):
Facility cabled and power available:
ftp client on SUN: (cfsscan)
ftp passwd: (cfsscan!)
Hostname of workstation to receive images:
Install the CFS300 scanner on the network and configure its IP parameters.
Add scanner hostname to /etc/inet/hosts on ALL workstations
Ping scanner from SUN workstation
Telnet to the cfs300 to configure the rest of the parameters (see Canon Digitizer section
of this manual for details on these parameters). User=cfs300 Password=canon300.
Type “diag” at the prompt.
Install ISTscanc package on the Sun workstation
Make sure that cfsscan user has been added to /etc/passwd and /etc/shadow.
Create passwd for cfsscan (passwd cfsscan).
If images forwarded to another workstation, complete the following 4 steps
1) Configure /opt/ISTri/bin/ritransmit to send images to remote workstation
2) Put /opt/ISTri/bin/ritransmit in “transmit script” of config popup
3) Copy /opt/ISTri/bin/riceive to remote receive workstation
4) Edit and configure /opt/ISTri/bin/riceive on the REMOTE receive workstation.
Try sending some images from the scanner (should arrive in /img/scan)
Run Riscanc and see if images displayed. Try saving images (save to /img/incoming)
142
Rational Imaging Installation Manual
FACILITY:
Z.
ü
ü
ü
ü
q
q
q
q
q
q
q
q
q
q
q
05.08.2001
DATE:
INSTALLED BY:
MODEM ON W ORKSTATION
Hostname of workstation attached to:
Computer Grade Line (NOT centrix) phone number:
For support only, teleradiology or both:
Modem type (US Robotics recommended):
Configure modem switches and internal registers
Install modem to serial port on workstation
Install ISTmodem package
Execute the script /opt/ISTri/install/install_modem
Set the line speed of the modem using tip (“tip –38400 /dev/cua/a”, quit with ~.)
Setup modem parameters using tip (see modem setup for setup string). Or use new
application “/opt/ISTri/bin/risetmodem”.
If for teleradiography, add user telerad on ALL workstations with same UID.
Set password on “telerad” account.
Try telnetting to “telerad” on this workstation (should be able to login)
Try connecting from a remote workstation to this computer (imaging or telerad)
Download some images to make sure that the modem flow control is functioning.
143
Rational Imaging Installation Manual
FACILITY:
DATE:
INSTALLED BY:
AA. BLAST REQUIRED TO SEND IMAGES TO PC’S/MAC’S.
ü Hostname of workstation to use to send images:
ü Blast license #:
ü Modem currently installed and functioning:
q Run script “install_blast”
q Configure each user’s “.cshrc” file in their home directory (add BLAST vars)
q Use risetup to add a modem
q Configure RIcall to add the phone numbers of the remote modems.
q Make sure riqueued running on host (modem queue application) (load_riconnect)
q Install Hyperterm on the remote PC and configure it for Zmodem and receive dir.
q Load hypterterm and type “AT” to get it connected to the MODEM.
q Try sending some images from RIcall on the Sun to Hyperterm on the PC.
05.08.2001
144
Rational Imaging Installation Manual
FACILITY:
DATE:
INSTALLED BY:
BB. RIS CONNECTIVITY
ü Hostname:
ü Port Number (for HL7 messages from RIS):
q Create temporary HL7 message directory on the server
mkdir /img/hl7msg
chmod 777 /img/hl7msg
q Put rilink in /etc/inittab.
r7:34:respawn:su – imaging –c “exec rilink –d /img/hl7msg –i 5000 –n”
q Copy the RIS config file to /opt/ISTri/etc/rideliverd_cfg (see the available config files
in /opt/ISTri/etc/examples)
q Modify /opt/ISTri/etc/rideliverd_cfg to suite the facility’s needs.
q Put rideliverd in /etc/inittab.
r8:34:respawn:su – imaging –c “exec rideliverd –c /opt/ISTri/etc/rideliverd_cfg”
q Start the processes by reinitializing init “init Q”.
q Verify that rilink is running “ps –ef | grep rilink”.
q Verify that rideliverd is running “ps –ef | grep rideliverd”.
q Try sending messages from the RIS system.
q Test and see that RIdeliver can list reports that did not match an accession number and
medical record number (MRN).
05.08.2001
145
Rational Imaging Installation Manual
FACILITY:
DATE:
INSTALLED BY:
CC. USER SETUP
ü
ü
ü
ü
ü
ü
ü
q
q
q
q
q
q
q
q
q
q
05.08.2001
Username:
Password:
Unique User ID #:
Group: (imaging)
Home directory (/export/home/username):
Defaults directory:
Templates directory:
Modify /etc/auto_home to add new user home directory
Copy system defaults to user’s defaults directory
Copy system templates to user’s templates directory
Check permissions on defaults and templates
Add user to UNIX (admintool) on ALL workstations. You can use the following shell
command to add users also. This is convenient if you have multiple users and many
workstations. Create a shell script with a line for each user. Then simply execute the
shell script on each system as root. (Note: Each user MUST have a unique uid, so
change 102 to a number NOT in the /etc/passwd file)
useradd -c "Imaging" -d "/home/imaging" -g imaging -u 102 -s /bin/csh imaging
If admintool or the shell script did not make the user’s home directory, create it now
and change the owner to “user” and group to “imaging”.
Copy default home files (.login, .cshrc, .select_db) to new user’s directory from
/home/imaging. Make sure they maintain the user’s owner and group permissions.
Make sure that .select_db and .cshrc show correct database and redundant server
Check ownership and permission on user’s home directory (and contents)
Log into main server and add user to patient and rilogin database (risetup)
146
Rational Imaging Installation Manual
FACILITY:
DATE:
INSTALLED BY:
DD. MOVE DATABASE TO NEW SERVER
ü Old Server Name:
ü New Server Name:
ü Workstations to update (All RI workstations):
ü :
ü Users to update .cshrc: (imaging)
ü :
ü Reason for change:
ON THE OLD SERVER
q Notify the facility to stop using the system (especially archiving)
q Stop all RI and SQL processes on the server (slay ri; slay sql)
q Backup the database: tar cpf /img/db.tar /db/*dbs
q Rename the database: cd /db ; mv radiology.dbs radiology.old
q Disable the cronjobs other than “fix_ERR_incoming” by putting a “#” in front of each
line. As imaging, execute the following: “setenv EDITOR vi; crontab –e imaging”
q Copy “/etc/rc3.d/S16ri.install” to the new server.
q Comment out the line in “/etc/init.d/ri.install” that says “/opt/informix/lib/sqlexecd &”
by putting a “#” in front of the line. This will disable sqlexecd.
ON THE NEW SERVER
q Link the S16ri.install to ri.install as follows:
“ln /etc/rc3.d/S16ri.install /etc/init.d/ri.install”
q mv /opt/informix to /opt/informixold
q mkdir /opt/infomix
q Set permissions: chown informix /opt/informix; chgrp imaging /opt/informix
q Copy the SE, SQL, and INET informix files from the CD to the new /opt/informix. Use
the correct version of informix (“dbaccess –v” will give current version)
q License SQL: cd /opt/informix; ./installsql
q License SE: ./installse
q License INET: ./installnet
q Copy the database to the new server: Login to the new server and run “tar xpf
/net/oldserver/img/db.tar”
q If a new informix version has been installed, you will need to perform a dbexport and
dbimport to reconcile the database with the new functionality. Then apply “update
statistics” in dbaccess.
q Modify “/opt/ISTri/bin/ridundant” to point to the new redundant host.
q Modify “/opt/ISTri/bin/backup_radiology” to point to the new redundant host.
q Add the ridundant, expire_locks and other SERVER cronjobs that were in the prior
server to the new server. “setenv EDITOR vi; crontab –e imaging”. These should run
as “imaging”, not “root”.
q Use risetup to edit the new database location “//newserver/db”. This is option 20.
q Rename the database: “cd /db; mv radiology.old radiology.dbs”
q Reboot the new server
ON ALL WORKSTATIONS
q Modify the RILOGDB environment variable in each user’s “.cshrc” file. Point this
variable at the new database server.
05.08.2001
147
Rational Imaging Installation Manual
q
q
05.08.2001
Copy ridundant and backup_radiology from /opt/ISTri/bin on the new server to ALL
hosts. “rcp /opt/ISTri/bin/ridundant rihost:/opt/ISTri/bin”
Reboot each workstation (including the old server as it is now just a workstation).
148
Rational Imaging Installation Manual
FACILITY:
DATE:
EE.
ü
ü
ü
ü
ü
q
q
q
q
q
q
q
q
05.08.2001
INSTALLED BY:
CHANGE HOSTNAME OF RATIONAL IMAGING WORKSTATION
Old Hostname:
New Hostname:
Workstations to update (All RI hosts):
:
Reason for change:
Change the hostname in
/etc/hosts (on ALL workstations)
/etc/hostname.hme0 or /etc/hostname.le0 (100 to 10baseT)
/etc/auto_home
Execute “hostname newhostname” as root
Update licenses by logging into the database server and using dbaccess on the rilogin
database
to
run
the
following
query:
update
sysistauth
set
hostname=”newhostname” where hostname=”oldhostname”.
Update the clinical database hosts table by using dbaccess on the radiology database to
run the following query: update host set hostname=”newhostname” where
hostname=”oldhostname”
Modify the NFS directory name in the imagedir table using risetup and option 22.
Reboot the host which has the new name.
Update NISplus if necessary
If the workstation was the server, then modify all config files associated with the
server including:
/export/home/imaging/.cshrc
All hosts
/opt/informix/etc/sqlhosts
All hosts
/opt/ISTri/admin/risetup
Server
/opt/ISTri/etc/rid_balance
All hosts
/opt/ISTri/etc/rid_archive.dat
All hosts
/opt/ISTri/etc/rid_checkdb
All hosts
/opt/ISTri/etc/rid_move2bb
All hosts
/opt/ISTri/etc/rid_schedrm
All hosts
/opt/ISTri/etc/rid_thresharc
All hosts
/opt/ISTri/etc/rid_threshrm
All hosts
/img/ridistribute_balance
Server
/img/ridistribute_defaults
Server
/img/ridistribute_move2bb
Server
/opt/ISTri/bin/ridundant
Server
/opt/ISTri/bin/auto_archive.dat
Archive system
/opt/ISTri/bin/reset_modems
All hosts
/opt/ISTri/bin/auto_remove
All hosts
/opt/ISTri/etc/riprintq_cfg
DICOM print host (riprintq)
149
Rational Imaging Installation Manual
FACILITY:
DATE:
FF.
INSTALLED BY:
RATIONAL IMAGING UPGRADE (VERSION 4.1 OR LATER)
ü Main Server hostname (printenv RILOGDB):
ü Current RI Version (cat /opt/ISTri/bin/riVERSION):
ü New Version(s) to be added:
q Login as imaging on the server.
q Change user to root “su”
q Check the database space “df –k”. It should have at least 20MB of “avail” space.
q Make sure “/img” is a shared directory. Use the command “share” to verify.
q Untar the latest upgrade (ver_#.#.#) into /img/upgrade (or other NFS shared dir)
mkdir /img/upgrade
cd /img/upgrade
cp /cdrom/ist###/upgrades/sparc/ver_#.#.#.tar.Z /img/upgrade
uncompress ver_#.#.#.tar.Z
tar xpf ver_#.#.#.tar
rm ver_#.#.#.tar
cd ver_#.#.#
q Confirm /opt/ISTri/bin/riset on the INTEL systems is owned by root
q Confirm /opt/ISTri/bin/riset on the INTEL systems is mode 6711
q Run “./riupgrade”
q Review the /img/intall.log file for errors.
q Review the intel_host:/img/install.log for errors.
q See any additional notes in the README file for the upgrades.
Hostname
Errors observed
q
q
q
q
q
q
q
q
USE THE FOLLOWING SPACE FOR UPGRADE NOTES:
05.08.2001
150
Rational Imaging Installation Manual
FACILITY:
DATE:
INSTALLED BY:
GG. RATIONAL IMAGING UPGRADE (PRIOR TO VERSION 4.1)
ü Server hostname:
ü Current RI Version (cat /opt/ISTri/bin/riVERSION):
ü New Version(s):
q Login as root on the server
q Backup the /opt/ISTri and /db directories
cd /opt
tar cpf /img/ist.tar ISTri
cd /db
tar cpf /img/db.tar *.dbs
q Backup the user templates and defaults (found in risetup #11).
echo “select deflt_dir,tmplt_dir from users group by deflt_dir,tmplt_dir” | dbaccess rilogin
tar cpf /img/defaults.tar /net/host/img/defaults /net/host/img/templates …..
q
q
q
q
q
q
q
q
Stop all activity on the network (Tell users not to send images or use the workstations).
Make sure that sqlexecd and riupdate are stopped. Stop all archiving.
/opt/ISTri/bin/slay sqlexec
Put a ‘#’ after the ‘:’ and before the “su – imaging …riupdate” in /etc/inittab
init Q
/opt/ISTri/bin/slay riupdate
Copy the upgrade directories to the /img partition on the server
Apply the upgrade patches to the server IN ORDER (ie: Every patch from the current
version to the new version MUST BE APPLIED to every workstation).
cd /img/ver_3.3.3/patch
./riupgrade
Apply the upgrade patches to EVERY workstation in the network. Be careful to apply
sparc upgrades to the sparc systems, and intel upgrades to the intel systems. Document
which hosts have been upgraded below. Document any errors observed.
telnet ri_host
su
cd /net/db_server/img/ver_3.3.3/patch
./riupgrade
See any additional notes in the README file for the upgrades (ver_3.3.3/README).
Remove the ‘#’ from the /etc/inittab file stopping riupdate, then type “init Q”.
Reboot the server.
Reboot each workstation and then test the system and notify the staff.
Hostname
Errors observed
q
q
q
q
q
q
q
q
05.08.2001
151
Rational Imaging Installation Manual
FACILITY:
DATE:
INSTALLED BY:
HH. UPGRADE INFORMIX SOFTWARE
ü
ü
ü
ü
ü
q
q
q
q
q
q
q
q
q
05.08.2001
Hostname (recommend lowercase):
Server or Redundant Server (Y/N):
Informix SE license:
Informix SQL license:
Informix INET license:
Stop the Imaging Network and kill the SQL processes.
Install ISTdb723 using pkgadd (Informix database)
Execute /opt/ISTri/install/install_informix script
Modify the /opt/informix//etc/sqlhosts file. This has a new format and is required on
each workstation.
pacs1 setlitcp pacs1 sqlexec
Add the following line to each user’s .cshrc file (use correct servername)
setenv INFORMIXSERVER pacs1
Convert any databases to the new format using dbexport/dbimport. This step must be
done on ALL databases (rilogin and radiology …)
Upgrade the system to version 4.2.0 (Informix 7.24 compliant). Make sure to use the
packages for 7.24.
Modify the “/etc/init.d/ri.install” file on the server to start sqlexecd with the name of
the server.
/opt/Informix/lib/sqlexecd pacs1 &
Reboot the server (or start the sqlexecd process manually).
152
Rational Imaging Installation Manual
XXX.Index
AIT, 34
backup system, 93
Blast
installation, 76
PC Setup, 77
Testing, 77
boot procedure, 99
calibration
monitor, 45
printer, 47
SMPTE pattern, 46
Canon digitizer
configuration, 48
installation, 48
database
backup, 101
centralized, 84
Change host, 95
client-server, 84
configuration, 89
copy exams between databases, 25
create patient database, 22
distributed, 84
duplicate keys, 102
errors, 101
export, 103
import, 103, 104
missing data pointers, 103
multiple servers, 23
patient, 10
rebuild, 108
RIbuild, 109
server, 12
software, 3
Version, 107
diagnostics, 87
dicom
scanners, 135
DICOM
Aspect Interpreter, 56
Print Class, 56
Query/Retrieve, 67
RIprintq installation, 71
disk
installation, 54
partitions, 14, 108
Dome Monitor
05.08.2001
calibration, 46
drag-and-drop, 5
EFilm – DICOM Test Client, 69
Expired exam locks, 92, 93
Gateway workstation, 138
hosts, 8
Hyperterm, 77
INFORMIX UPGRADE, 152
inittab, 16
installation, 18
Installation Worksheet, 112
interfile scanners, 136
internet address, 13
Jaz drive, 18
Jukebox
AIT Drive, 34
installation, 33
locked system, 100
lunar mr scanners, 137
memory, 2, 98, 99
Monitor
calibration, 44, 45, 47
installation, 44
mount
Jaz disk, 18
network
reliability, 85
printer
calibration, 47
Rational Imaging, 4
version, 26, 87
redundant server, 109
Redundant Server, 98, 110
requirements
hardware, 2, 7
overview, 1
software, 3
Rideliverd, 58
RIlink, 58
RIprintq
Delete Print Pages from Queue, 74
installation, 71
Reset Queue, 74
RIS
Rilink/Rideliverd, 58
SCSI
ID, 54
153
Rational Imaging Installation Manual
Low Voltage Differential, 35
Single Ended, 35
server
Change host, 95
shutting off the system, 98, 99, 100
SMPTE pattern, 46
supported scanners, 4
system crash, 85
system halt, 100
Tape Drives
AIT, 34
Archive, 10
Device Drivers, 4
technical support, 1
users, 11
version, 26
version, 87
Vidar
installation, 39
Video Cards
Raptor, 43
worksheet, 6
worksheets
Blast, 144
Canon Film Digitizer, 142
Canon printers, 127
CEMAX card, 130
Change Hostname, 149
DICOM
Printer, 132, 145
05.08.2001
DICOM scanners, 135
Gateway workstation, 138
GE 4x Signa MR scanners, 134
GE scanners, 133
Greyscale Monitors, 125
INFORMIX UPGRADE, 152
Interfile Scanners, 136
Jukebox, 140
Low-Bandwidth printer, 129
Lunar MR scanners, 137
main server, 113
Modem, 143
Move Database Server, 147
multiple servers, 117
new image partition, 123
ridundant server, 115
satellite workstation, 119
SeeMor printer, 128
staff workstation, 121
Sun monitor, 124
Tape Drives, 139
Upgrade procedure, 150, 151
User Setup, 146
Vidar film digitizer, 141
VirtualRad Printer, 131
Workstation
main server, 12
satellite, 17
upgrade, 26
2