1
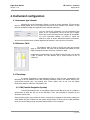
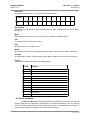
Edgar User Manual
Version 1.1.0
Edgar User Manual
Version 1.1.0
LR Tech inc. - Ionetrics
August 2010
Edgar User Manual
1. Introduction
1.1.
Key features
2. Installation Instructions
2.1. Requirements
2.2. Setup 2.3. Running Edgar for the first time
2.4.
Edgar Software Activation
2.5.
Initial Configuration File
3. Acquisition modes
3.1. Frame Grabber Mode
3.2. Ethernet mode (Anneth)
3.3.
Configuring Anneth on the instrument
3.4.
Configuring Edgar on the remote PC 3.5. No acquisition mode
4. Instrument configuration
4.1. Instrument type chooser
4.2. Detectors Table
4.3. Timestamp 4.4.
INS (Inertial Navigation System)
4.5.
IRIG-B 4.6.
Network Time
4.7.
Manual Time Synchronization
4.8. FTS Configuration
4.9.
Sweep Speed
4.10. Sweep Mode
4.11. Sweep Limits
4.12. Consulting the current Status of the Instrument
4.13. Updating the Instrument to the Latest Firmware
5. Acquisition Instructions
5.1. Spectral Resolution
5.2. Changing the Gain of the Detectors
5.3. Output Control
5.4. Collecting Data
5.5. Naming Schemes
5.6.
Auto by Time
5.7.
Auto Increment
5.8.
Eight-3
5.9.
Manual
5.10. Edgar File Formats
5.11. Grams Format (16-bit fixed, 32-bit fixed or 32-bit float)
5.12. MatLab Mat-File Format
5.13. The Annotation File
6. Processing Tools
6.1.
6.2.
6.3.
6.4.
1
1
3
3
3
3
3
4
5
5
6
6
8
8
9
9
9
9
9
10
10
10
10
10
10
10
10
11
13
13
13
13
14
14
14
15
16
17
17
17
18
18
20
Coad
Compute Spectrum
Basic Operations
Radiation Calculator
20
20
21
21
7. Displaying the Data
22
Edgar User Manual
Version 1.1.0
7.1.
7.2.
7.3.
7.4.
7.5.
7.6.
7.7.
7.8.
7.9.
7.10.
Opening a file
The Data Display Window
Single-File View
Multi-File View
Moving Around the Plot Canvas
Zooming In And Out in the Plot Canvas
Navigating Through the Subfiles
Displaying the file headers
Live Display
Data Point Tracker
8. The Housekeeping Module
8.1.
8.2.
8.3.
Configuring Housekeeping
Consulting the Live Sensor Feed
Consulting the Log Files
9. The Hatch Controller Module
9.1.
9.2.
9.3.
Configuring the Hatch Controller
Consulting and Controlling the Hatch Controller
Selecting which Element to Save
10.Edgar Scripting Abilities
LR Tech inc. - Ionetrics
August 2010
22
22
22
23
23
24
24
24
24
25
26
26
27
27
28
28
28
29
30
Edgar User Manual
Version 1.1.0
LR Tech inc. - Ionetrics
August 2010
1. Introduction
1.1.Key features
Acquire Data from any LR Tech Instrument, Upgrade, or Module
Edgar allows you to acquire data from FTIR spectrometers and radiometers as well as
from standalone instruments (such as a blackbody controller). You can run Edgar in two different
data acquisition modes: Frame Grabber Anneth.
• In frame grabber mode, you run Edgar directly on the instrument. You are directly connected
to the instrument hardware.
• In Anneth mode, you run a server called “Anneth” on the instrument, and run Edgar on a
remote computer. The data is streamed over the network from Anneth to Edgar.
Multiple file output formats are provided: 16-bit fixed point, 32-bit fixed point, 32-bit floating point,
and Matlab MAT file. The 16-bit fixed point, 32-bit fixed point, and 32-bit floating point formats are
fully compatible with Grams software.
In addition to the raw data files, all data scan information is saved in an Excel spreadsheet. This
information includes timestamp data coming from various inputs, resolution, peak locations,
blackbody temperatures, and more.
Configurable naming schemes allow you to automatically generate file names while staying
compatible with your file naming conventions.
Process Grams Compatible Data
Edgar offers various processing tools:
• Basic arithmetic operations (+, -, * or /) between two files, or between files and constants.
• Coad subfiles together.
• Spectrum generation from Igrams
• Radiance data calibration with ambient (or cold) and hot blackbody readings.
• Theoretical blackbody radiance curve calculation from temperature and emissivity
• Data export to an Excel spreadsheet
• All Edgar processing can be scripted to easily repeat manipulations.
Consult Incoming Instrument Data as it Is Acquired
Edgar can dynamically display all data being acquired by the instrument. Live data
(Igrams, uncalibrated spectra or radiance) can be plotted in display windows. You can also consult
the current blackbody temperatures when connected to a blackbody controller, consult the scene
mirror position when connected to a scene mirror controller, consult the live Inertial Navigation
System (INS) feed when connected to an INS, etc...
Page | 1
Edgar User Manual
Version 1.1.0
LR Tech inc. - Ionetrics
August 2010
Synchronize Timestamps from Various Inputs
Edgar can synchronize the instrument timestamp with various inputs:
• System time (connected computer time)
• Manual time (manually entered time value)
• Network time (network time server)
• IRIG-B time (IRIGB source connected to the instrument IRIG-B input)
• INS time (GPS time acquired by an INS system when connected to satellites)
Know What Is Happening, When it Is Happening
Edgar implements a strong housekeeping module to monitor at all time the vital signs of
your instrument. Connect remotely to your instrument housekeeping module by entering its IP
address. You can customize the level of alert for each sensor and log the alerts in a comma
separated value log file (.csv). A new log file can be created with each acquisition in order to be
able to know at all time if a problem is happening and from where it comes.
Additional Features
• Fully integrated GUI with a common look and feel across all modules (Instrument Control, Data
Acquisition, Data Processing)
• Runs on multiple platforms (Microsoft Windows 2000/XP/Vista, Solaris, Linux, Mac)
• Direct stream to disk in Grams/SPC multi-file format
• All Grams/SPC formats are supported for input into Edgar (this includes 16-bit fixed point, 32-bit
fixed point, and 32-bit floating point)
• Acquire data directly into MAT file format (Mathworks Matlab native format).
• Export to Excel spreadsheet or ASCII text files
• Real-time Igram and spectrum display
• Calibration and processing tools for radiometric correction of spectral data
• Visualization tools
• Built-in Python interpreter for custom scripting operations
Page | 2
Edgar User Manual
Version 1.1.0
LR Tech inc. - Ionetrics
August 2010
2. Installation Instructions
2.1.Requirements
In order for Edgar to run smoothly, we recommend using at least:
• Intel Pentium 4 or AMD Athlon 2.0 GHz or equivalent,
• 512 MB RAM,
• Microsoft Windows 2000 or Windows XP Pro,
• Java Runtime Environment (v1.5 or later, needed only for installation).
• A video display with a minimum resolution of 1280×1024.
2.2.Setup
Edgar is a cross-platform application that can run under
Windows, Mac OS, or Linux operating systems. The Edgar
installer is also cross-platform.
rior to executing the Edgar installer, you will need to install
the Java Runtime Environment (version 1.5 or later). You can
obtain this free of charge at www.java.com.
Once Java is correctly installed, you can double click the
Edgar installer «Install Edgar.jar» to make it run.
Follow the instructions provided by the installer. Please note
that you have to accept the terms of the license agreement to be able to finish the installation.
Once the installation is finished, you should have the shortcuts needed to access the software on
your desktop or from the Programs section of the Startup menu.
2.3.Running Edgar for the first time
2.3.1.Edgar Software Activation
When you run Edgar for the first time, you will see this window:
This window appears to let you know that your software needs to be activated. If you are a valid,
licensed customer, this will not be a problem. Simply enter the name under which your copy was
licensed as well as the license key provided with it, and Edgar will be ready to go.
Page | 3
Edgar User Manual
Version 1.1.0
LR Tech inc. - Ionetrics
August 2010
Please note that you will need a valid Internet connection in order to activate your software online.
(We also provide an offline activation that can be sent by e-mail. Call or send us an e-mail and weʼll
take care of this activation for you.)
2.3.2.Initial Configuration File
The first time you start Edgar, a configuration file named edgar.ini is created in the
«config» directory of your Edgar installation folder.
Basic configuration parameters will be added at first startup or if the file cannot be found. These
initial parameters include a valid detector lookup table and a setup with no attached instrument.
Please avoid editing the ini file. Modification of some parameters can damage your Edgar
installation or your instrument. You should use the Edgar software to modify these settings. As a
protective measure, Edgar will prevent the addition of potentially damaging values.
Page | 4
Edgar User Manual
Version 1.1.0
LR Tech inc. - Ionetrics
August 2010
3. Acquisition modes
To assure a maximum of flexibility to control your instrument, Edgar can run in three
different modes: Frame Grabber Mode, Anneth mode (Ethernet), or «No acquisition» mode.
To help you better understand these concepts, the following diagrams express how each mode is
used. These will help you choose the mode best suited to your specific acquisition needs. The next
section gives detailed configuration instructions for each of these modes from the Edgar
Preferences window.
3.1.Frame Grabber Mode
Choose this mode if you are running Edgar directly on the
instrument acquiring the data. Communication to the instrumentʼs electronics
is done by its internal RS232 communication ports.
To configure Edgar to work properly in Frame Grabber mode, you need to
open the Preferences window. The needed settings can be found under the
tab «Acquisition».
To switch modes, select the item «Frame Grabber» from the top «Mode»
drop down list. You will see additional drop down lists under this. They are
used to configure on which port Edgar can communicate with the instrumentʼs
hardware. Check the boxes next to the device you want to talk to and specify their com port
address by selecting from the drop down list.
The items that do not have a check box next to them are
required by Edgar in order to work properly with your
instrument. These are the Annotator Board address, the FTS
controller address, and, in some cases, depending on your
instrument, the Dynamic Alignment controller address.
Once the settings are configured correctly, you need to close
the Preferences window and shut down Edgar. Once you
restart the software, Edgar will begin communication with the
instrumentʼs devices.
To verify that the communication is working
correctly, look at the status panel at the bottom
of Edgar. If the device name is displayed in any
color other than red, the device is working
properly. (See section 4.5.Consulting the
current Status of the Instrument for more details about the
color code of the device name). Also, when you hover your
mouse over a device, you should see a tool tip displaying the
firmware version of that device.
Page | 5
Edgar User Manual
Version 1.1.0
LR Tech inc. - Ionetrics
August 2010
3.2.Ethernet mode (Anneth)
The Ethernet mode lets you connect to an
instrument accessible over a network. In order to make
it work, the instrument must:
•Have a valid IP address and/or a valid computer name
(if you are on the same network)
•Be running the Anneth software.
The Anneth software provided with your instrument acts
as a converter between the instrumentʼs electronics
and its Ethernet port. Anneth is a server running on the
instrument that provides remote access to instrument data when you connect to it with Edgar.
Since this will probably be the mode you will want to use your instrument with, you will want Anneth
to run as soon as Windows starts. In order to automatically run Anneth at startup, we suggest that
you add a shortcut to Anneth in the Windows Programs menu, under the item Programs --»
Startup. This way, every time you power on the instrument, Anneth will launch and wait for
incoming connections.
3.2.1.Configuring Anneth on the instrument
To ensure that Anneth can talk with the instrument electronics and provide a bridge to a
remote PC running Edgar, you want to tell Anneth the assignment between components and
system ports. Since Anneth has no graphical user interface for this, you will need to edit the
anneth.ini file with a simple text editor such as Notepad (provided with Windows). The Anneth.ini
file is located in your Edgar installation «Config» folder.
Anneth has no graphical user interface provided to do that, youʼll have to do this from a simple text
editor such as Notepad (provided with windows). The file is located in your Edgar installation
«Config» folder and is named «Anneth.ini». Go ahead and open it with notepad!
The structure of this file is fixed and will look like this:
# Blackbody Options
blackbody = false
blackbody.comm = COM1
blackbody.tcp = 36000
Be aware that modifying this file could damage your Anneth installation. You should be
cautious when editing it and always do a backup before saving any modifications.
In the .ini file, lines starting with a «#» are comment lines (Anneth ignores them). The previous
example configures the communication with a blackbody controller:
The first line is only a comment. It is ignored by Anneth. The second line specifies if blackbody
communication should be enabled when Anneth starts up. The possible values are «false» and
«true». The third line represents the physical address of the device in your instrument. These
values always starts with «COM», followed by the communication port number. The last line of the
example represents the network port on which Anneth will broadcast the communication with that
device. You should write these numbers down, since you will need them to configure Edgar on the
connecting remote PC.
Page | 6
Edgar User Manual
Version 1.1.0
LR Tech inc. - Ionetrics
August 2010
All configurations in this file are case-sensitive. Here is the list of the configurable keys and what
they do.
Key
Description
annotator.comm
The com port on which the instrument can connect to the Annotator board.
annotator.tcp
The tcp port on which the Annotator board communication is broadcast.
annotator.fgcomm
This parameter is not used when in Ethernet Master mode. In frame grabber Master mode, this
parameter specifies the local RS232 port that is mapped over the fiber connection to the remote Edgar
master for Annotator control.
dft200.comm
The com port on which the instrument can connect to the FTS board.
dft200.tcp
The tcp port on which the Annotator board communication is broadcast.
dft200.fgcomm
This parameter is not used when in Ethernet Master mode. In frame grabber Master mode, this
parameter specifies the local RS232 port that is mapped over the fiber connection to the remote Edgar
master for FTS control.
resolution.lo
The resolution setting for the “Low” switch position when in Local Capture mode.
resolution.h
The resolution setting for the “High” switch position when in Local Capture mode.
sweepSpeed
The sweep speed of the instrument when in local capture mode.
filterA
The filter setting for channel A when in local capture mode.
filterB
The filter setting for channel B when in local capture mode.
aperture
Set to “true” or “false” to indicate whether the aperture control communication should be enabled or not
at Anneth startup.
aperture.comm
aperture.tcp
The com port on which the instrument can connect to the Aperture Control.
The tcp port on which the Aperture Control communication is broadcasted.
blackbody.comm
Set to “true” or “false” to indicate whether the Blackbody Controller communication should be enabled or
not at Anneth startup.
The com port on which the instrument can connect to the Blackbody Controller.
blackbody.tcp
The tcp port on which the Blackbody Controller communication is broadcast.
blackbody
focus.comm
Set to “true” or “false” to indicate whether the Focus Control communication should be enabled or not at
Anneth startup.
The com port on which the instrument can connect to the Focus Control.
focus.tcp
The tcp port on which the Focus Control communication is broadcast.
focus
ins.comm
Set to “true” or “false” to indicate whether the INS communication should be enabled or not at Anneth
startup.
The com port on which the instrument can connect to the INS device.
ins.tcp
The tcp port on which the INS communication is broadcast.
ins
da.comm
Set to “true” or “false” to indicate whether the Dynamic Alignment board communication should be
enabled or not at Anneth startup.
The com port on which the instrument can connect to the Dynamic Alignement board.
da.tcp
The tcp port on which the Dynamic Alignment board communication is broadcast.
da
sceneMirror.comm
Set to “true” or “false” to indicate whether the Scene mirror controller communication should be enabled
or not at Anneth startup.
The com port on which the instrument can connect to the Scene mirror controller.
sceneMirror.tcp
The tcp port on which the Scene mirror controller communication is broadcast.
udp.port
This parameter is not currently used.
control.tcp
This parameter is not currently used.
timestamp.mode
Valid values for timestamp.mode are IRIGB and Auto. In IRIGB mode, the Annotator real time clock
will be synchronized with an external IRIG-B signal. In Auto mode, the Annotator real time clock will be
synchronized with either the embedded system time, or a network time server.
sceneMirror
timestamp.autoSyncToNe Set timestamp.autoSyncToNetTime to “true” to synchronize both Annotator and embedded system time
tTime
to a network time server. Set to “false” to synchronize Annotator time to the embedded system time.
timestamp.netTimeComm
This specifies the system command used to synchronize your system time to your network time server.
and
Page | 7
Edgar User Manual
Version 1.1.0
LR Tech inc. - Ionetrics
August 2010
3.2.2.Configuring Edgar on the remote PC
Anneth should now be fully configured with your instrument, hooked on a network, and
should have its own IP address. You are ready to configure Edgar to function properly with the
instrument as well.
These configurations can me made from the Edgar Preferences window, under the tab
«Acquisition».
To tell Edgar to run in Ethernet mode, go to «Mode» and select
«Ethernet» from the drop down list at the top of the tab. You
will also need to specify the IP address or network name of the
instrument on which Anneth is running in the «Host» text box.
Specifying these settings should allow you to connect to the
instrument through the network.
In order to talk to the actual instrument hardware, you need to
check the boxes next to the device, and specify the port on
which Anneth is broadcasting data. These port numbers have
been specified in the Anneth configuration file. This will be
simple, since you wrote them all down previously when you
configured Anneth!
You will also notice that some of the devices donʼt have check
boxes next to them. These devices are the base devices you
need in order to be able to use the instrument, such as the
Annotator board, the FTS controller, or the Dynamic Alignment
controller for some instruments.
Once these settings are all filled, you need to restart Edgar for
them to take effect. After Edgar is started, you should look at the «Status» panel to
see if you are connected to the instrument correctly. If you have a good connection,
the device names will appear in a font color other than red. (See section
4.5.Consulting the current Status of the Instrument for more details about the color
code of the device name). Additionally, when you hover your mouse over one of the
device names, you should see a tool tip displaying the firmware version of that
device.
3.3.No acquisition mode
This is the mode you want to be running on if you do NOT want to use
Edgar to acquire data from an instrument, but rather to display or process data
acquired previously.
You can switch Edgar to this mode by accessing the Preferences window in
Edgar, under the tab «Acquisition». Select the value «None» from the «Mode»
drop down list at the top, then restart Edgar. Now Edgar will not try to connect to
the instrument.
This mode is the one set by default after the Edgar installation.
Page | 8
Edgar User Manual
Version 1.1.0
LR Tech inc. - Ionetrics
August 2010
4. Instrument configuration
4.1.Instrument type chooser
Selecting the correct instrument in Edgar is crucial for proper operation. This will ensure
that the optimal speed and correct peripheral devices are also selected. The number of data
channels available in Edgar also depends on the selected instrument.
You can choose the instrument from the Instrument Type
panel, in the «Configuration» tab on the left side of Edgar.
Select the correct instrument and its settings will be applied.
For some instrument settings, you have to reboot the
software in order to access instrument specific informations,
such as a third data channel, dynamic alignment parameters or the scene mirror controller.
4.2.Detectors Table
The detectors table is used to specify the name and spectral
range of each detector. This table can be consulted and edited from the
Edgar Preferences window, under the «Detectors» table.
A valid table is created when you start Edgar for the first time. You can edit
it later if needed. The first detector (ID 0) should always be left at
“Unknown”.
4.3.Timestamp
A common timestamp is used throughout Edgar to keep all files synchronized. The
timestamp is the link between all the files. Different timestamp sources are offered: IRIG-B, INS,
synchronized network time, and manual time. These options can be set from the Edgar
Preferences window, under the «Timestamp» tab.
4.3.1.INS (Inertial Navigation System)
In the INS timestamp mode, as soon Edgar knows that the INS has a lock on a satellite, it
synchronizes its time with the one on the Annotator. Then, the timestamp is managed by the
Annotator at each scan.
Since the INS system only provides the time in seconds since midnight of this weekʼs Sunday, the
week number and year is taken from the system running Edgar. So when you are in INS timestamp
mode, you should always verify the system date and time of your computer!
Page | 9
Edgar User Manual
Version 1.1.0
LR Tech inc. - Ionetrics
August 2010
If the time cannot be taken from the INS (because it hasnʼt been able to connect to any satellites
yet), the timestamp of the Annotator is synchronized with the one of the system running Edgar. This
is another good reason to have a valid system time on your computer.
4.3.2.IRIG-B
Annotator time is synchronized automatically to an external IRIG-B input.
4.3.3.Network Time
When in Auto time mode, there is an option available to synchronize the Annotator
timestamp with a network time server rather than using the time of the system running Edgar. You
will need to specify the command for synchronizing to your network time in the field dedicated to
that particular effect (in the Timestamp tab of the Preferences window).
4.3.4.Manual Time Synchronization
Manual timestamp synchronization is done from the Edgar Preferences window, under
the tab «Timestamp». At the top of the tab, select the «Manual» mode.
Once in this mode, the Manual panel becomes enabled. You can then select the year, day, hours,
minutes, seconds and µs. Once done, press the «Set» button to synchronize the Annotator time
with your selection.
All the timestamps in this mode comes from the Annotator. If IRIG-B time is not available, you will
need to synchronize time in Manual mode in order to have a valid timestamp before acquisition.
4.4.FTS Configuration
4.4.1. Sweep Speed
Usually, the Sweep Speed of the instrument is determined by its type. For example,
selecting MR200 will change the speed to 375,000 Hz.
If you need to select a customized speed for your instrument, change the instrument type to
«Other» and change the speed from the «Configuration» tabʼs «Sweep Speed» panel. The Sweep
Speed units are Hz.
Once you are finished modifying the sweep speed, press enter or click anywhere in Edgar. This will
change the speed of the instrument.
4.4.2.Sweep Mode
You can change the Sweep Mode from the «Sweep Mode» panel, under the
«Configuration» tab, on the left side of Edgar.
4.4.3.Sweep Limits
Used for special applications.
4.5.Consulting the current Status of the Instrument
You can verify the status of a connected instrument by looking at the «Status» tab, at the
bottom of Edgar. Here you can see the current communications with hardware, the firmware
versions, the Annotator clock time, the ZPD, and data received from the instrument.
Page | 10
Edgar User Manual
Version 1.1.0
LR Tech inc. - Ionetrics
August 2010
At Edgar startup, provided your acquisition mode is not set to «None»,
communication with the instrument hardware will be initiated. If the connections are
set correctly, the font color of the device names on the left side of the panel should
not be red. Also, when you hover your mouse over one of the device names, you
should see a tool tip displaying the firmware version of that device.
Each device has its own color code for the status bar. If the FTS is connected, but is not scanning,
its name will be shown in yellow. Blue means that it is currently initializing, and green means that it
is scanning. Older versions of the FTS will not be able to report the status. This function needs the
FTS version 1.06 or later in order to work properly. If you have an older version, the FTS label will
be colored magenta to show that the connection is established. Red means that the connection
cannot be established.
For the dynamic alignment, yellow means a connection is established, but that it is not currently
aligned. Green means that it is aligned. Red means that the connection is not established.
As for the annotator (Ann and Acq), green means that the connection is correct while red means
that the connection cannot be established.
When the Annotator receives data from the FTS controller correctly, you should see some scans
arrive in the status bar. The Annotator will detect the ID of the connected detectors and set the
names and spectral ranges specified for each in the Edgar detector table (see section
4.2.Detectors Table).
You can change the gain of each detector from the status panel (See section 5.2.Changing the
Gain of the Detectors).
If an LR Tech Blackbody Controller is connected to the instrument, you can check the temperature
of each thermistor from the Status panel.
Each drop down list of the Status panel lets you modify the units of each reading from the
Annotator. Modifying these will also modify the units used in the annotation file, so donʼt forget to
switch them back to the units you typically use before acquiring new data!
4.6.Updating the Instrument to the Latest Firmware
To update the Annotator firmware to its latest version, use the Annotator Flasher
application. Open Annotator Flasher from the Tools menu at the top of Edgar. Please note that you
cannot launch the Annotator Flasher if the acquisition mode is set to «None».
The microcontroller and FPGA version is displayed at the top of
Annotator Flasher. If you have an update to install, you have to
reprogram the Annotator FPGA.
Before applying the firmware upgrade, we strongly recommend
that you backup your current firmware by using the «Backup
Current Firmware» section. Select a file name and press the
«Backup» button. It should take less than a minute to backup
entirely. This will let you get back to your previous version in case
something goes wrong during the update or if your new version is
corrupted.
After your firmware is backed up, it is time to reprogram it! Enter
your new firmware file in the «Reprogram Firmware» section An
Annotator firmware file has the extension «.rpd». Next, press the
Page | 11
Edgar User Manual
Version 1.1.0
LR Tech inc. - Ionetrics
August 2010
«Reprogram» button. The whole reprogramming process should only take about a minute to
accomplish. After you get a confirmation, exit Edgar and restart your instrument. Restarting your
instrument means not only the computer, but a complete power cycle with the power switch.
When you go back to the Annotator Flasher, you should see your new version number in the top
section. If not, something went wrong during the update or you did not finish a complete
shutdown of the instrument.
Page | 12
Edgar User Manual
Version 1.1.0
LR Tech inc. - Ionetrics
August 2010
5. Acquisition Instructions
5.1.Spectral Resolution
To change the spectral resolution of the instrument for the current acquisition, select the
desired resolution from the drop down list in the «Spectral Resolution» panel, found in the
Acquisition tab at the left side of Edgar.
If you are connected to the instrument, the resolution will change immediately. Now, when you
restart Edgar, it will automatically switch the instrument to the selected resolution at start up.
5.2.Changing the Gain of the Detectors
Changing the gain of each connected detector can be done through the «Status» tab, at
the bottom of Edgar.
Under the label «Gain», there is a drop down list for each channel that you can use to change the
gain to the desired value. Selecting the «Auto» option will let Edgar decide the best gain value to
use without saturating.
5.3.Output Control
The Output Control panel is where you select all the files
you want to acquire, how you want them to be identified, and where
you want them to be saved. This panel is divided into four sections.
Each section controls an aspect of the output: the output directory
chooser, the output file format, the file naming scheme chooser,
and the output file selector.
Choosing the directory for the output file is straightforward, just
select it in its panel. Be sure you have enough disk space to
acquire all your selected data in this directory! You can consult the
space needed for the currently configured acquisition in the
«Collect to Disk» panel of the same tab.
The Channel Files Format panel is used to select the file format
for the output channel data files. This will only affect the data for
channel A, B, C and D files. To learn more about the these different
formats, consult section 5.6. Edgar File Formats of this manual.
The File naming scheme chooser panel is used to select the
naming scheme for the current acquisition. For some schemes, you will have additional
personalization options (such as the manual naming scheme, in which you will be able to specify
manually the middle part of the file name). All the output files selected for this acquisition will be
named following the selected naming scheme from this panel. To learn more about the different
naming schemes available in Edgar, consult the section 5.5. Naming Schemes of this manual.
The last section of Output Control is the File Selection panel. In this section, you can see which
files are available for output and you can select which ones you want to acquire with the current
acquisition. To select a file for output, simply check the box next to it.
Page | 13
Edgar User Manual
Version 1.1.0
LR Tech inc. - Ionetrics
August 2010
5.4.Collecting Data
Once the Acquisition is completely configured, you will want to collect your data. This can
be done from the «Collect to Disk» panel (on the Acquisition tab), or from a properly built Python
script.
In this panel, you can select the number of scans you want to collect during this acquisition.
Pressing the Collect button will lock down the Output Control parameters so that you cannot modify
them. Edgar will then wait for a trigger to launch the acquisition and save the files. This trigger can
come from different inputs, depending on the selected trigger option. You select the trigger source
from the «Trigger» panel of the Acquisition tab.
In GUI trigger mode, the collection trigger will come from the keyboard or the mouse. When in
External trigger mode, a switch closure on the Annotator Remote Start input will trigger the
acquisition. Selecting the External Trigger mode will not prevent you from using the keyboard or
mouse to start an acquisition. Triggering an acquisition from an external closure switch, however, is
impossible unless you are in External trigger mode. In Network mode, the trigger will come from
another computer system on the network.
Once Edgar receives a trigger, the collection of the data will launch. You can see the status of the
collection according to the acquisition parameters next to the trigger button in the «Collect to Disk
panel».
5.5.Naming Schemes
Giving names to your files and keeping them consistent can be a cumbersome task and
one that is difficult to maintain. To help you with this, Edgar can automatically generate file names
for you from the current acquisition resolution, timestamp, file type, and more. In addition to the
generated part of the file names, you can personalize the prefix, suffix, and extensions for each of
the offered naming schemes!
In order to integrate your personalized file naming conventions,
Edgar offers a file naming schemes manager. You can find it in the
Edgar Preferences window, under the tab «Naming Schemes». This
tab lets you personalize all aspects of every naming scheme. Select
the naming scheme to personalize from the top drop down list.
Edgar always creates the file names in this simple form:
prefix - naming scheme generated part - suffix - extension.
This tab lets you customize the prefix, suffix and extension for each
of the naming schemes. What changes from one naming scheme to
another is the generated part of the file name. The following explains
how Edgar generates this part for each of its naming schemes:
5.5.1.Auto by Time
The auto by time naming scheme generates the middle part of the file name by formatting
the resolution, the current timestamp, and the file type. The generated portion of the file name is in
the form RDDMMMYY_HH_mm_ss_X. The timestamp used by this convention is taken from the
Annotator. The specification is as follows:
Page | 14
Edgar User Manual
Version 1.1.0
LR Tech inc. - Ionetrics
August 2010
Resolution
R specifies the resolution in cm-1 according to the following table.
R Code
cm-1
A
B
C
D
E
F
G
H
I
J
K
0,125
0,25
0,5
1
2
4
8
16
32
64
128
Day of Month
DD specifies the day of month. (This will always use two digits. Leading zeros are used for days 1
through 9.)
Month
MMM specifies the month by its first three letters. (For example: November: NOV.)
Year
YY specifies the last two digits of the year.
Hour
HH specifies the hour. (24 hour clock)
Minute
mm specifies the minutes. (This will always use two digits. Leading zeros are used as necessary.)
Seconds
ss specifies the seconds. (This will always use two digits. Leading zeros are used as necessary.)
Channel
X specifies the channel according to the following table:
X Code
Channel
A
Channel A
B
Channel B
C
Channel C
D
Channel D
E
Dynamic Alignment Range X
G
Dynamic Alignment Range Y
H
Housekeeping log file
I
INS
J
Dynamic Alignment Tilt X
K
Dynamic Alignment Tilt Y
N
Annotation file
S
Dynamic Alignment Speed
5.5.2.Auto Increment
The auto by time naming scheme generates the middle portion of the file from a 3 digit
counter. Every time you complete a new acquisition, the counter increments by one. You can also
modify the counter value directly from the Output Control panel, on the Acquisition tab of Edgar, or
from the Naming Schemes manager tab of the Preferences window.
Page | 15
Edgar User Manual
Version 1.1.0
LR Tech inc. - Ionetrics
August 2010
5.5.3.Eight-3
An encoded 8.3 file name convention can be implemented in Edgar in order to define a
unique name for each file. These filenames are in the form RDDMYYHH.mmX.
Since we want to limit the filenames to a specific number of characters, customized suffixes and
prefixes are not allowed for this naming scheme.
Resolution
R specifies the resolution in cm-1 according to the following table.
R Code
cm-1
A
B
C
D
E
F
G
H
I
J
K
0,125
0,25
0,5
1
2
4
8
16
32
64
128
Day of Month
DD specifies the day of month. (This always uses two digits. Leading zeros are used for days 1
through 9.)
Month
M specifies the month according to the following table:
M Code
Month
A
January
B
February
C
March
D
April
E
May
G
June
H
July
J
August
K
September
L
October
M
November
N
December
Year
YY specifies the last two digits of the year.
Hour
HH specifies the hour. (24 hour clock)
Minute
mm specifies the minutes. (This will always use two digits. Leading zeros are used as necessary.)
Seconds
ss specifies the seconds. (This will always use two digits. Leading zeros are used as necessary.)
Page | 16
Edgar User Manual
Version 1.1.0
LR Tech inc. - Ionetrics
August 2010
Channel
X specifies the channel according to the following table:
X Code
Channel
A
Channel A
B
Channel B
C
Channel C
D
Channel D
E
Dynamic Alignment Range X
G
Dynamic Alignment Range Y
H
Housekeeping log file
I
INS
J
Dynamic Alignment Tilt X
K
Dynamic Alignment Tilt Y
N
Annotation file
S
Dynamic Alignment Speed
5.5.4.Manual
Instead of letting Edgar generate the middle part
of your file names, you can manually choose a name
tailored to your needs. This definition is made from the
Output Control panel at the beginning of each acquisition.
Suffix, prefix, and extension customization are still allowed
with this naming scheme. If you select multiple files for a
single capture using this naming scheme, you must specify
different suffixes and prefixes for each selected file.
5.6.Edgar File Formats
Raw output files can be written out in one of three Grams/SPC formats: 16-bit fixed point,
32-bit fixed point, or 32-bit floating point. Edgar can read files stored in any of these formats. Some
versions of Grams have trouble reading 16-bit files if the Igram size is greater than 16384 points,
so data collected at 1 cm-1 may not import correctly into Grams. Also, Acquire can only read 32-bit
floating point files. Edgar can also output Mathworks MatLab Mat-files compatible with MatLab
version 5 and up.
5.6.1.Grams Format (16-bit fixed, 32-bit fixed or 32-bit float)
Raw data files generated by Edgar are Grams/SPC multi-files with the new style header.
The first 512 bytes of all files are the main header block. The next 32 bytes are the first subheader
block. After the subheader is the raw Igram data, which will vary in size based on the spectral
resolution and sampling mode. After the raw Igram data is another subheader block, then the next
Igram, etc. until the end of file.
Regarding the Grams/SPC specification, there is an important functional difference between 16-bit
fixed point mode and 32-bit floating point mode. Since the instrument itself generates 16-bit data
samples, Igrams stored in the 16-bit fixed point format contain the actual data samples as derived
by the ADC. Also in the case of 16-bit data, the subheader exponent field is directly related to the
preamp gain setting. So it is straightforward to recover the raw ADC values and preamp gain used
Page | 17
Edgar User Manual
Version 1.1.0
LR Tech inc. - Ionetrics
August 2010
for the data collection. In the case of 32-bit floating point data, however, the subheader exponent
field contains a “magic number” specified by the Grams/SPC spec to indicate 32-bit IEEE-standard
single precision floating point. So with 32-bit floating point data the preamp gain is factored in prior
to writing to disk. The raw 16-bit sample values are scaled by the appropriate constant (based on
the preamp gain setting) to generate a 32-bit float. It is the scaled floats in this case that are
actually written to disk. Since the Excel annotation file generated by Edgar contains the preamp
gain setting for each scan, it is possible to work backwards and arrive at the raw sample values if
needed.
The default raw data output format is 16-bit fixed point. In this output mode, the subheader
exponent field is set so that data for a preamp gain of 128 is stored with a multiplier of 1 (exponent
field is 16), and data collected at a gain of 64 is stored with a multiplier of 2 (exponent is 17), and
so on. This makes it possible to determine the detector preamp gain setting directly from the
subheader exponent field using the following table:
SubHeader Exponent
Preamp Gain
23
1
22
2
21
4
20
8
19
16
18
32
17
64
16
128
5.6.2.MatLab Mat-File Format
Like other scientific data analysis software, MathWorks Matlab has its own proprietary file
format for storing data. MAT files are Matlabʼs file format for saving and loading any data available
in a Matlab workspace. Once you open such a file in MatLab, any data stored in it will be available
as matrix arrays in your workspace.
Whenever you acquire, process, display, manipulate, or export data from Edgar, you have the
option to output the files as MAT-files. Data saved in these files is fixed and described in this
documentʼs annexes. You need MatLab versions 5 or later in order to open these files.
5.7.The Annotation File
In addition to being stored in the raw data file header, the annotation data collected by
Edgar from the Annotator Board can be saved in a Excel format spreadsheet (.xls).
Page | 18
Edgar User Manual
Version 1.1.0
LR Tech inc. - Ionetrics
August 2010
The exact parameters to include can be set in the Edgar
Preferences window, under the tab «Acquisition». Just check the
boxes next to the items you want to save in the file. Each box you
check represents a new column in the spreadsheet. The default
settings are to record scan number, scan direction, scan size,
ZPD location, year, day of year, time of day, detector A name,
channel A gain, channel A peak-to-peak signal, detector B name,
channel B gain, and channel B peak-to-peak signal.
You can also modify the header of the annotation file by
specifying it in the «Header memo» section of the Acquisition tab.
If an Edgar-controlled blackbody is connected, then the blackbody
settings are also recorded. The blackbody readings are updated
every 2 seconds, but written into the spreadsheet with every scan.
Page | 19
Edgar User Manual
Version 1.1.0
LR Tech inc. - Ionetrics
August 2010
6. Processing Tools
6.1.Coad
The Coad panel provides an interface for coadding subfiles from within a multi-file.
Access the Coad controls by pressing the Coad tab on the right side of the Edgar window.
The Source Selection is used to select the data you want to coad. The Subfiles section is used to
specify which subfiles from the multi-file you want to include in the coad operation. By default, all
subfiles are selected, but you can use the First and Last controls to specify a range. It is assumed
that the first subfile is always in the forward direction, and the second subfile is in the reverse
direction, which is the Edgar convention. The default is to coad forward subfiles into the first subfile
of the output multi-file, and reverse subfiles into the second subfile of the output multi-file.
Currently, you can output coadded scans as Grams 32-bit float files or Matlab MAT-Files.
6.2.Compute Spectrum
The Compute Spectrum panel provides input fields and controls for generating calibrated
or uncalibrated spectra from raw Igram files. The Compute Spectrum panel is accessed by
pressing the Compute Spectrum tab on the right side of the Edgar window. The Compute Spectrum
operation can be performed on raw Igrams with no calibration to generate output in arbitrary units,
or a two-point calibration can be applied to produce calibrated spectra. Computations can be
performed on a single subfile, or on a selected group of subfiles.
To use the Compute Spectrum tool, you must, at a minimum, specify a raw Igram Input File. This
can be a single file or a multi-file. You can also optionally specify a Cold Source file and
Temperature, a Hot Source file and Temperature, the Offset calculation method, the Apodization
method, and the Output File type and filename. Once your input parameters are specified, press
the Compute button and Edgar will generate the output spectral file. The number of subfiles in the
output file will match the number of subfiles in the input file. If a Cold Source and Hot Source are
not specified, the output spectra will be uncorrected raw spectra. The X Units parameter in the
header of the output file will be set to “Wavenumber in cm-1”.
If specified, the Cold Source and Hot Source must have exactly two subfiles, with the first subfile
an Igram for the forward direction, and the second subfile an Igram for the reverse direction. The
Temperature units may be specified in either K or °C. The default is K. If °C is selected, then
273.15 is added when computing the blackbody curve for the source.
The Offset controls are used to control calculation of an offset value that is subtracted from the raw
Igrams before the FFT operation is performed. The default is a Fixed offset of zero. If you select the
Fixed Offset mode, you can enter any value you wish for the offset. If you select Calculated, you
can set the include region and the exclude region to calculate the offset for the each subfile. All
samples inside the include region are included in a sum (unless these samples fall inside the
exclude region). The sum is divided by the number of samples in the region to calculate the offset.
If the Calculated option is set when you press compute, a new offset will be calculated (and
displayed in the offset box) for each scan as it is processed.
The choices for Apodization method are Beer-Norton (weak), Beer-Norton (medium), Beer-Norton
(strong), Blackman-Harris, Boxcar, Cosine, Gaussian, Hamming, and Triangular (also known as
“Bartlet”).
Page | 20
Edgar User Manual
Version 1.1.0
LR Tech inc. - Ionetrics
August 2010
The name will be automatically changed whenever you change the input file name, or whenever
you select the output file type. You can also manually set the output file name to any valid file
name. Currently, you can output spectral files as Grams 32-bit float files or Matlab MAT-Files.
The Header Memo field is used to enter text for the header memo. Text entered here will be
appended to any text present in the memo field of the raw input file and placed in the memo field of
the output file header.
6.3.Basic Operations
To access the Processing tools, click the Processing tab on the right edge of the Edgar
desktop. This panel supports basic operations for +, -, *, and / with 2 operands. The operands may
be either a file or a constant (except that both operands may not be a constant). By default, the file
chooser for each operand is enabled. To use a constant instead, check the box next to the
Constant field.
By default, the output file name is set to one of the input file names plus ".pro”. This can be edited
manually to any desired filename.
When one operand is a file and the other is a constant, the number of subfiles in the output file will
be the same as the number of subfiles in the input file. When both operands are files, the number
of subfiles in the output file will be the smallest of the number of subfiles in the input files. There are
two exceptions. First, if the number of subfiles in one of the files is exactly 2, then these will be
treated as forward/reverse (or even/odd) and used in a loop for the corresponding forward/reverse
subfiles in the other input file. Second, if the number of subfiles in one of the files is exactly 1, then
this subfile will be used in a loop for all of the subfiles in the other input file.
6.4.Radiation Calculator
To run the Radiation Calculator, click the Radiation Calculator button on the right side of the Edgar
window. This will present a panel with controls for blackbody temperature and emissivity, and for
the curve starting point, ending point, and resolution. Once you have these controls set, press the
Generate button and Edgar will generate the blackbody curve. These controls are interactive, so
that you can change the temperature after you have generated the curve, and the curve will
automatically be adjusted.
Page | 21
Edgar User Manual
Version 1.1.0
LR Tech inc. - Ionetrics
August 2010
7. Displaying the Data
Edgar data display is flexible and powerful. It lets you open multiple files in the same
plotting window, zoom in and out globally or on specified axis, move around the data, manage the
axis units, print the plots directly from the software and decide which of them should be displayed
or not, and more! You can even display in real time the data currently being acquired by the
instrument!
7.1.Opening a file
There are two ways of opening a file from Edgar. The first one is from the Edgar top
menu. Under the item «File», select the «Open» item. If no file is currently opened in a file
window in Edgar, the file will open directly in a new file window. Otherwise, a popup window will
appear, asking you where you want to open the selected file. You can select «New window» from
the drop down list if you want to open the selected file in a new, fresh window. You can also select
an existing window to add the selected file to an existing window. This is especially helpful if you
want to compare different plots directly on the same canvas.
You can also add a file to an existing window directly from that window. In the top menu of that
window, select the «File» item, then select the «Add a file to the canvas» item. The files you have
selected will be added to the window without a prompt.
Multiple extensions are available for file opening. You can filter the files present in the file chooser
window by selecting the extension filter in the drop down list at the bottom of the window.
7.2.The Data Display Window
All the files and data you want to see will be displayed in this window. You can open
single or multiple files in the display window. Therefore, there are two view modes available: single
file view mode or multi-file view mode.
7.2.1.Single-File View
When you open a single file in a new
window, the view mode of that window will always
be «Single file view». It provides additional visual
space to the plot canvas by hiding all the file
manipulation related items that are present on the
right side of the window when you are in multi-file
view.
The current subfile displayed and the total number
of subfiles for that file are shown in the Status bar
at the bottom of the file window. You can navigate
through the subfiles of that file by pressing the
navigation buttons just as you would in the multifile view.
You can switch to this view by accessing the top menu of that window, under the item «View»,
«Switch View», «Single File View».
Page | 22
Edgar User Manual
Version 1.1.0
LR Tech inc. - Ionetrics
August 2010
7.2.2.Multi-File View
The multi-file view mode allows you to
display and navigate through different files in the
same plotting window. Opening a file in a window
that already has an open file will automatically
switch that window to this view mode. The multifile view mode adds a panel to the right of the
window containing all the status information for
each file currently displayed. The status panel at
the bottom of the window in the single file view
mode is then replaced by the items in the new
right panel.
In this mode, you can select which plots should be
shown or hidden in the canvas, which plots should
be on top, and what color the plots should be. You can also select multiple plots at a time to
indicate which should update when you navigate through the subfiles.
To hide or show a file plot, simply click on the “eye” icon at the right of the
plot. The plot will automatically disappear from the canvas. Click the icon
again and it will reappear. You can also right click a file item and press Hide
or Show. The Hide Others button can also be used to display only the clicked file and hide all other
files. Bear in mind that files hidden in the plot canvas will not be printed should you print the
canvas!
Some regions of the graph can be visually dense when you add a lot of files. In order to decide
which should be on top, you can re-order the files in the file list. To do this, right click its item in the
right panel and move it up or down. You can also hold the left mouse button on it and drag up or
down. Plots are painted in order, so the last one in the list is always on top of the others.
The colors for each plot are selected randomly when you open a file. If you do not like Edgar's
default color choices, you can double click the color square at the left of the item and select a
different color in the window that opens. Once you press OK, the new color should be applied to
the plot.
If you want to remove one of the items and its plot, right click it and press «Remove this item».
7.2.3.Moving Around the Plot Canvas
Every movement you want to make in the file display windows can be achieved with the
mouse or the keyboard. You can move in any direction you want within the canvas.
Every movement action in the canvas can be achieved with the left mouse button. Simply
click and hold the left mouse button over the canvas and drag the mouse around in the opposite
direction you want to move.
To move with the keyboard, use the arrow keys to move up, down, right or left. Every key press will
make you move one tick farther in the direction pressed. To move by bigger steps, hold down the
shift key at the same time you press the arrow key: this will double the movement and move by two
ticks.
Page | 23
Edgar User Manual
Version 1.1.0
LR Tech inc. - Ionetrics
August 2010
7.2.4.Zooming In And Out in the Plot Canvas
Every zoom action in the canvas can be achieved with the mouse wheel button.
Simply scroll the mouse wheel outward to zoom in toward your cursor. To zoom out, just scroll the
mouse wheel toward you. A zoom-in action goes toward the cursor, while a zoom-out action
operates from the canvas center point. If you want to zoom faster, you can hold down the shift key
on your keyboard at the same time.
You can also zoom in directly to a selected region of the canvas by
dragging the mouse while pressing the mouse wheel button. A
transparent blue rectangle will appear over the region you are dragging.
Release the mouse wheel button to zoom in or out of the selected
region.
To zoom in or out using the keyboard, use the «+» or «-» keys. These
actions will zoom in or out respectively toward or from the center point of
the canvas. To move by bigger steps, you can hold down the shift key on your keyboard.
If you want to zoom only on a specified axis, press and hold the «x» or «y» key (depending on the
desired axis), and zoom as you would with the mouse or keyboard.
7.2.5.Navigating Through the Subfiles
To navigate through the subfiles in single file view mode, just click the first, previous,
next, last, or go to subfile buttons. The plot present in the window will be refreshed according to the
subfile. You can consult the present subfile from the status bar at the bottom of the file window.
Navigating through the subfile in multi-file view mode is a little different. The first, previous, next or
go to subfile buttons change the subfile for only the selected items in
the multi-file item panel at the right of the file window. To select an item,
just click it. You know that an item is selected by looking at its
background color. If it is dark gray, the item has been selected. If it is
light gray, the item is not currently selected.
7.3.Displaying the file headers
Important information is stored in the main header of the files generated from Edgar and
in the subheader portion of the fileʼs subfiles. Amongst them you will find the mean temperature of
the blackbodies used, a customizable memo field, the name of the related annotation spreadsheet,
the gain, the offsets and more. To display this information, open one or more files in a display
window, select the ones for which you wish the header to be displayed, and press «Display
selected file headers». The header information will be displayed in a pop-up window.
7.4.Live Display
It is a good thing to be able to display already acquired raw or processed data, but it is
also advantageous to be able to see live data that the instrument is currently acquiring! Edgar lets
you do this by merely ticking a check box!
At the left side of Edgar in the Acquisition side panel is a section called «Live Display». This is
where you activate the different live displays. The displayed text boxes show you the currently
available live displays, which will vary depending on your instrument.
Page | 24
Edgar User Manual
Version 1.1.0
LR Tech inc. - Ionetrics
August 2010
If you want to start one of them, just check its box. A display window will open, just as it would
when you open a file. You should see a plot for each element related to this live display. The plots
will refresh with every scan of the instrument. Every control available in the file window (zooming,
moving, etc.) is available in this window as well. You can even simultaneously display a file as a
reference plot in a Live Display!
7.5.Data Point Tracker
The data point tracker available for you in Edgar in a useful tool to know exactly the real
coordinates of each data points you are looking at in the display window.
To activate the data point tracing tool, select the «Data Point Tracking» item from the «Tools» menu
at the top of the display window.
When the tool is activated, the view mode of the display window will be changed to «Multi-file View
Mode». A dashed vertical line will be drawn on the canvas over the X axis value of the closest data
point from your mouse cursorʼs X position. A point of a similar color than the plot will also be drawn
over the data point.
To know the exact value of the closest data point, look at the right side of the window in the MultiFile panel. The value of each hovering data point will be displayed for each items presents in the
window.
Page | 25
Edgar User Manual
Version 1.1.0
LR Tech inc. - Ionetrics
August 2010
8. The Housekeeping Module
The Housekeeping module is self-sufficient module and allows easy monitoring of
sensors using 1-Wire technology. With it, you can quickly manage different lists of sensors by
adding, modifying and removing sensors of different types (Humidity, Temperature, Voltage, etc.).
You have a complete overview of the vitals of your instrument at all times.
You can also manage alert levels for each sensor independently and log those alerts in a CSV
(Comma Separated Value) file for further access. You can even go one step further and log in a
separate file all the sensor readings synchronized with an acquisition! This way, you can always
know what is happening with your instrument and be ready to troubleshoot if something goes
wrong.
In order to know at any time the current status of the housekeeping and without having to open the
live sensor feed window, a colored chip is present at the top right corner of the screen when you
open Edgar with the Housekeeping module activated. The color chip displays the current higher
level of alert of the module. If you want to open the live sensor feed quickly, you can double-click
the color chip.
8.1.Configuring Housekeeping
You can access the Housekeeping module configuration from the Edgar Preferences
window, under the tab «Housekeeping».
If you want to activate the module, the «Enable the Housekeeping module» check box must be
checked. Once it is checked, the module will start at each Edgar startup.
One of the strengths of this module is its configuration file. Since all the configurations of the
module are stored in a easy to read and share XML file, you can use it with all your computers. and
change the file when you change the instrument used. Specify the housekeeping configuration file
in the configuration window. Should you need a new one, there is a model available on your Edgar
CD.
To connect to the 1-Wire sensors network, you must use an adapter. These are available in several
forms: USB, serial, and Ethernet. Specify your adapter name and address in the corresponding text
fields. If your adapter is USB or serial, the specified address should be a local USB or serial port
(USB1, COM1, etc). If you specified a NetAdapter as an adapter name, the address must be the IP
address of the adapter.
The refreshing rate text field is used to specify the time between each sensor polling run. Keep in
mind that 1-Wire sensor takes about 1 second to poll. If you have 60 sensors, it will take about 60
seconds to make a whole sensor polling run!
If you want to log sensor alerts as soon as you start Edgar, you can check the «Enable alert
logging» box and specify the log path. This is the path for the folder only. The file name will always
be HouseKeepingLog.csv.
After you finish configuring the module, press the «Apply» button and restart Edgar. The module
will start on the next Edgar start up.
If you get an error at the module initialization, it must be one of two things:
Page | 26
Edgar User Manual
Version 1.1.0
LR Tech inc. - Ionetrics
August 2010
• If you are using a USB or serial adapter, the drivers need to be installed on your computer
before you can use it! You can find the 1-Wire drivers on the Edgar CD.
• If you are using a network adapter (if you are connecting to your Housekeeping module through
an IP address), be sure you are on the same network as the module and that the module is
currently turned on.
8.2.Consulting the Live Sensor Feed
You can consult the live sensor feed window from the Edgar top menu «Tools» item,
under the item «Housekeeping Monitor». This window lets you quickly see an overview of all the
sensors listed in the house keeping module configuration file and their current status.
This window is divided in sections representing a group. Each group can contain several sensors of
any type. If it is the first time you are connecting to the module, you probably want to add a new
sensor group in order to be able to add the sensors you are monitoring!
To do this, press the «Add new sensor group...» button and give the new group a name. Once the
group is created, the window will refresh itself and youʼll see three buttons in it. With these buttons,
you can add, remove, or modify sensors. To add a new sensor, press the «Add sensor...» button. In
the pop up window, select the sensor type and give the new sensor a name representing its
emplacement. You will also want to record the unique sensor address in order to communicate with
it (a 1-Wire device address has 16 characters). Youʼll need to give the sensor threshold limits for
each alert level (critical or warning).
When you finish defining the sensor information, press the «Add sensor» button and it will be
added to the current group. Allow a few seconds for the window to refresh in order for the sensor to
appear.
The window automatically refreshes itself every 10 seconds. The color of the cells in the «Sensor»
column indicates the status of the sensor depending on its latest reading. The status colors are
represented as described below:
Normal
Warning
Critical
No readings yet
To modify an existing sensor, select it by clicking it and press the «Modify sensor...» button its
group.
If you need to delete a group of sensors, press the «Remove a sensor group...» button and write
the name of the group you want to delete. Be careful when removing a sensor group. If it
contains any sensors, they will all be deleted as well!
8.3.Consulting the Log Files
The housekeeping module log file is a csv (Comma separated value) file. This means it
can be opened from any spreadsheet editor. The separator between each item is a semicolon.
Page | 27
Edgar User Manual
Version 1.1.0
LR Tech inc. - Ionetrics
August 2010
9. The Hatch Controller Module
The Hatch Controller module is the module used to monitor and control the LR Tech
Hatch, protecting the scene mirror and front end enclosure from environnemental damage.
From it, your can switch between the different hatch modes, open/close the hatch, and monitor the
different outputs from each sensors.
9.1.Configuring the Hatch Controller
You can access the Hatch Controller module configuration from the Edgar Preferences
window, under the tab «Hatch Controller».
If you want to activate the module, the «Enable the Hatch Controller module» check box must be
checked. Once it is checked, the module will start at each Edgar startup.
Since all the configurations of the module are stored in a easy to read and share XML file, you can
use it with all your computers. and change the file when you change the instrument used. Specify
the Hatch Controller configuration file in the configuration window. This file has been delivered to
you at the shipping of you hatch.
Regardless of the instrument you use to communicate with the hatch, the configuration file stays
the same. In the same way as the Housekeeping module, the Hatch Controller uses 1-Wire
technology to control the hatch and monitor its various sensors. The 1-Wire adapter informations
can be entered in the configuration file.
9.2.Consulting and Controlling the Hatch Controller
To consult the current live status of the Hatch Controller, access the Hatch Controller
Module window from the Edgar top menu «Tools» item, under the item «Hatch Controller». Take
note that this item will only be available if the Hatch Controller module is enabled. This window lets
you quickly see an overview of all the sensors listed in the house keeping module configuration file
and their current status.
As described in the LR Tech Hatch manual, the LR Tech hatch can run under 3 distinct modes:
manual control, automatic control and software control. These modes dictates who has the
empowerment to open or close the hatch.
Automatic mode is probably the mode you want to use to prevent the instrument getting damaged
by the environnement. It closes the hatch as soon as the rain sensor main output says it is raining.
When the hatch is set to run in automatic mode and Edgar runs with the Hatch Controller module
enabled, Edgar will monitor the hatch status. If the sun sensor intensity is alarming, Edgar will
automatically switch the hatch mode to «Software» mode and will close the hatch for a specified
amount of time. This delay can be modified in the hatch controller configuration file.
Software mode is the mode where Edgar can manually close/open the hatch. This would allow
Edgar to run a customized script that would control the hatch as needed with a different scheme
than the automatic mode already included with Edgar. Edgar automatically switch the hatch to this
mode if the hatch controller runs the automatic mode and the sun sensor becomes alarming.
Manual mode can only be set from the hatch controller physical panel. When the hatch is running
in that mode, Edgar will only be able to monitor the hatch status without being able to control it.
Page | 28
Edgar User Manual
Version 1.1.0
LR Tech inc. - Ionetrics
August 2010
9.3.Selecting which Element to Save
You will want to save a few readings of the Hatch Controller module when you acquire
data. This will, for example, allow you to know if a specific scan as been acquired looking at a
closed hatch instead of a real scene!
To select which elements of the Hatch Controller you want to save when you do an acquisition,
simply go to the «Annotation» tab of the «preferences» window, accessed from the «Tools» item of
the Edgar top menu. When the Hatch Controller module is enabled, you will have the possibility to
select the items that will be saved to the annotation file in a new column.
Page | 29
Edgar User Manual
Version 1.1.0
LR Tech inc. - Ionetrics
August 2010
10.Edgar Scripting Abilities
Edgar contains an embedded Python interpreter to facilitate enhancement and rapid
application development for specific end-user requirements using Python. This makes it easy for
individual users to create customized acquisition and processing scripts.
If you are not yet familiar with Python, you can think of it as a macro language embedded into
Edgar, and start by modifying the simple examples provided with your Edgar installation in order to
suit your needs. If you are already familiar with Python, then youʼll quickly be able to use the more
complex examples to learn the Edgar API, and begin developing your own custom applications.
Python scripts are fully interactive within Edgar. You can run a script, edit it, and run it again, all
without having to close and restart Edgar. Current debugging tools within Edgar are limited to
catching errors in the scripts, displaying an error window with the line number within the script
where the error occurs, and providing a description of the error.
Whenever a script is running, the script name is displayed inside brackets in the Edgar window title
bar. This way it is easy to recognize whether or not a particular script is running. It is also possible
to run multiple scripts at the same time, in which case multiple script names will show up in the title
bar. Even with multiple scripts running, you still have normal GUI access with the keyboard and
mouse.
There are three access points for Python from Edgar: as an interactive command line shell, as an
automatically executed program or script launched at startup, and as a program or script launched
after startup.
You can open an interactive shell from the Shell tab at the bottom of the Edgar window. This allows
you to execute commands in an interactive mode, one at a time.
To automatically launch a script when Edgar starts up, specify a startup script under the Acquisition
tab of the Preferences editor. If no script is specified, none is executed. On this same tab is the
Enable Python shell and Python script execution option, which allows the embedded Python
interpreter in Edgar to be turned on and off. The default is to have this turned off. Check the box
and restart Edgar to turn it on.
Under Tools, Execute Script you can open a file chooser that will allow you to open and execute a
script file. Find your file, select it, and it will open and run under Edgar. By default, Edgar looks for
scripts with a .py extension in a Python folder underneath your Edgar installation folder. You can
open and edit the Python script files using the built-in script editor at Tools, Edit Script. You can also
use any ASCII text editor.
There are a few things that you can do from Python that you cannot do directly from Edgar, such
as:
• Set the preamp filter
• Turn non-linearity correction on or off
• Set the Compute Spectrum ZPD mode
Page | 30