1
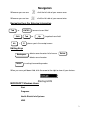
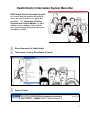
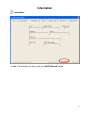
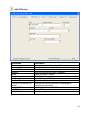
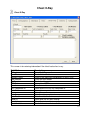
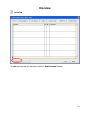
TB Testing User’s Manual TB Testing, Surveillance & Control Health District Information System HDIS (Windows Ver. 4.0 ) Copyright 1998 by CHC Software, Inc All Rights Reserved CHC Software, Inc. Health District Information Systems [email protected] Table of Contents Introduction ................................................................................. 1 About This Manual ...................................................................... 1 Navigation .................................................................................... 2 Finding a Client ........................................................................... 4 Information .................................................................................. 9 Tests ........................................................................................... 11 Chest X-Ray ............................................................................... 14 Interview..................................................................................... 16 Nursing Notes............................................................................ 18 Transferring a Client ................................................................. 19 Print Button ............................................................................... 20 Reports....................................................................................... 22 Maintenance - Add/Delete/Modify Tables ............................... 24 Introduction This program is designed to assist you in organizing a systematic approach to entering tuberculosis clients and provides accurate up-to-date records within your health department. Please review the manual carefully to obtain the maximum benefits. Little or no prior computer experience is necessary to operate this program. About This Manual The TB Testing, Surveillance & Control Module is simple to use. The maximum benefit with the least time spent will be obtained if you start at the first page of this manual and follow the directions exactly as you enter the first record in your computer. Square boxes in this manual surround the key that you are to press on your keyboard. As an example, when you read , press the enter key on your keyboard. ENTER The word TYPE is followed by bracketed [ ] instructions of what to type into a field. Note: For Technical Support, email: [email protected] Navigation Whenever you see one click the left side of your mouse once. Whenever you see two click the left side of your mouse twice. Navigation Keys For Entering Information Tab ENTER or Shift Alt Tab R + to move to next field or Up Arrow to go back one field places you in the receipt screen. Editing Keys Backspace deletes one character left of cursor Delete deletes one character Insert inserting & overwriting modes When you see a pull-down field, click the arrow to the right to view all your choices. Starting HDIS MICROSOFT Windows Users Start Programs Health District Info Systems HDIS 2 Health District Information System Menu Bar HDIS (Health District Information System) has several different modules designed to assist your health district in its day-to-day operations. The Tuberculosis Testing, Surveillance & Control Module is a great addition to these modules and simplifies your record keeping, billing and information management needs. Select Community & Public Health Tuberculosis Testing, Surveillance & Control Patient Testing 3 Finding a Client To find an existing client, enter the name (last, first, middle) and press the “Enter” key. The program will automatically find the name in the database if present. If the client’s name is not in the list, you will then enter it in the database. Radio Button by Name By Date of Birth By Name TB Patients Only Add Name Close Description Click to find a client by name Click to find a client by date of birth Click to only search through the TB patient database Click to add a new client Click to exit 4 Add Name Enter the demographic information for the client. 5 Parent (if applicable) Enter information regarding the parents/guardians. 6 Insurance/HIPAA Enter information regarding the insurance carrier and HIPAA information. * An insurance carrier and insurance # 7 Other Info When you are finished entering the client’s demographic data, click “OK”. 8 Information Information To add a TB record for the client, click the “Add TB Record” button. 9 Add TB Record Field/Button ID # Country of Birth Years in US Employer School Physician Prior Test Prior Test Results Transfer to Surveillance & Control* Delete All TB Records Add TB Record Modify Button Description Program automatically assigns ID # Enter the client’s country of birth Enter how many years the client has lived in the US Enter the name of the client’s employer Select the client’s school Select the client’s physician Enter “Y” for yes, “N” for no Select the prior test results Right click to transfer the client’s information to surveillance and control Click to delete the client’s TB record Adds a TB record Click to modify the record 10 Tests Tests The TB program enables you to add multiple tests for the client. To add a TB test, click the “Add Test” button. 11 Add Test You can now enter information on the test for the client. Field/Button Site Reason Type Pregnant Cortisone MMR Age PR Test Date Lot # Date Read Results Eryth. Indur. Nurse Description Select the test site Select the reason for the test Select the type of test Enter “Y” for yes, “N” for no Enter “Y” for yes, “N” for no Enter “Y” for yes, “N” for no Enter the client’s age Enter “Y” for yes, “N” for no Enter the test date Select the lot number Enter the date the test was read Select the results of the test Enter the value Enter the value Select the nurse who performed the test 12 Print Next Test Previous Test Delete Test* Add Test Modify Click to open the print window Click to navigate to the next test Click to navigate to the previous test Right click to delete the test Click to add a test Click to modify the record 13 Chest X-Ray Chest X-Ray This screen is for entering information if the client had a chest x-ray. Field/Button X-Ray # New Client Previous Client New Reactor Old Reactor PPD Date Results Test Completed At Date Order Nurse Date Comp. Date Read Read By Results Chart Available Description Enter the X-Ray number Check if this client is new Check if this client has had previous a chest x-ray Check for new reactor Check for old reactor Enter date of PPD Enter the results Select where the test was completed at Enter date x-ray ordered Select the nurse Enter the date completed Enter the date the test was read Select who the test was read by Select the test results Check if there is a chart available 14 Dictation Available Print Button Modify Button Check if dictation is available Opens the Print window Click to modify the record 15 Interview Interview To add the interview for the client, click the “Add Interview” button. 16 Add Interview The interview is now added to the client’s record. (You can build the interview under the Maintenance Menu discussed further on.) 17 Nursing Notes Nursing Notes You can enter unlimited notes on the client. 18 Transferring a Client To transfer a client from the Tuberculosis Testing module to the Surveillance and Control module, right click the Transfer to Surveillance & Control* button. All information on the client will be transferred from the TB Testing module. 19 Print Button Print Print: The print button is available on all the window tabs. The print menu is the same, and you may print any of the options no matter what tab you have open at the time. 20 Print Options Field/Button Questionnaire Interview of Symptoms Chest X-Ray Information TB Test 8 ½ X 11 (back) TB Test 8 ½ X 11 (front) Mantoux Skin Test Wallet Card Chest X-Ray Wallet Card Dymo - Mantoux Skin Test Wallet Card Dymo Chest X-Ray Wallet Card Print Preview Description Prints the questionnaire for the client Prints the client’s interview Prints the x-ray information for the client Prints the back of the TB test card for the client on legal paper Prints the front of the TB test card for the client on legal paper Prints a mantoux skin test card for the client Prints chest x-ray card for the client Prints mantoux skin test card for the client on Dymo label printer Prints chest x-ray card for the client on Dymo label printer Prints the report Previews the report 21 Reports Reports The reports menu contains a list of the many reports that you are able to obtain from the program. For each report, an option box will appear similar to the one shown above. It enables you to enter dates for your reports as well as use of filters. 22 Tuberculosis Testing Reports Reports By Employer By Country of Birth By Political Subdivision Cards for Client Cards for Client (Health Dept. Side) Medicaid/HCFA 1500 Billing – Transfer to Clinical Services Medicaid Billing/HCFA 1500 Monthly Board Surveillance & Control – Caseload Surveillance & Control – Discharge Description Prints a list of TB clients by employer Prints a count report of TB clients by country of birth Prints a list of TB clients by political subdivision Prints TB test cards in bulk Prints TB test cards in bulk (health department side) Transfers charges to Clinical Services module Print HCFA 1500 Claim Forms Prints TB monthly board report Prints a caseload of clients in surveillance and control Prints a caseload of discharged clients in surveillance and control 23 Maintenance - Add/Delete/Modify Tables Maintenance The maintenance menu contains a list of tables that you can modify for your program. 24 City Field/Button City Close Button Add Button Delete Button Print Button Description Enter the city name Closes the table Adds a line to the list Deletes a highlighted entry Prints the list 25 County Field/Button County Close Button Add Button Delete Button Print Button Description Enter the county name Closes the table Adds a line to the list Deletes a highlighted entry Prints the list 26 Physicians Field/Button Name Address1 Address2 City State Zip NPI # ^ Legacy # Phone Fax Group Name Type of Practice Add Button Close Button Delete Button Print Button Envelope Description Enter the name of the physician Enter the address of the physician Enter the address of the physician Enter the city of the physician Enter the state of the physician Enter the zip of the physician Enter the NPI/Legacy # Enter the phone number of the physician Enter the fax number of the physician Enter the group name of the physician Enter the type of practice Adds a physician to the table. Closes the table Deletes a highlighted entry Prints the list Prints an envelope addressed to the physician 27 Schools Field/Button Name Close Button Add Button Delete Button Print Button Description Enter the school name Closes the table Adds a line to the list Deletes a highlighted entry Prints the list 28 TB Test X-ray Completed At Field/Button Name Close Button Add Button Delete Button Print Button Description Enter the location of the x-ray test Closes the table Adds a line to the list Deletes a highlighted entry Prints the list 29 TB Test X-ray Read By Field/Button Name Close Button Add Button Delete Button Print Button Description Enter the person who read the x-ray test Closes the table Adds a line to the list Deletes a highlighted entry Prints the list 30 TB Test – X-ray Results Field/Button Name Close Button Add Button Delete Button Print Button Description Enter the x-ray results Closes the table Adds a line to the list Deletes a highlighted entry Prints the list 31 TB Test - Interview Field/Button Number Question Close Button Add Button Delete Button Print Button Description Enter the question number Enter the question Closes the table Adds a line to the list Deletes a highlighted entry Prints the list 32 TB Test – Lot Numbers Field/Button Name Close Button Add Button Delete Button Print Button Description Enter the lot number Closes the table Adds a line to the list Deletes a highlighted entry Prints the list 33 TB Test - Site Field/Button Name Close Button Add Button Delete Button Print Button Description Enter the test site Closes the table Adds a line to the list Deletes a highlighted entry Prints the list 34 TB Test – Test Reason Field/Button Name Close Button Add Button Delete Button Print Button Description Enter the test reason Closes the table Adds a line to the list Deletes a highlighted entry Prints the list 35 TB Test – Test Results Field/Button Name Close Button Add Button Delete Button Print Button Description Enter the test result Closes the table Adds a line to the list Deletes a highlighted entry Prints the list 36 TB Test – Test Type Field/Button Name Close Button Add Button Delete Button Print Button Description Enter the test type Closes the table Adds a line to the list Deletes a highlighted entry Prints the list 37 Field Names The field names listing can be very useful in determining what fields you wish to utilize to capture data for letters and when creating reports for that data. The program will display a list of names that you can print. 38 General Profile The General Profile enables you to enter the basic information for your health department. The TB module information can be found under the “Community & Public Health Services” tab. 39 General Profile – TB Testing Field/Button Do Not Display Re-Test Do Not Display Admit Date, Pending, Pending Date, Ruled Out, Ruled Out Date Print Card on letterhead Print Card with title on top Office Visit CPT Code Office Visit Charge TB Test CPT Code TB Test Charge TB Test ICD9 Code Medicaid PIN # Description Check to suppress the Re-test row (no longer needed) Removes these fields from the window tab. Prints TB test card on health department letterhead Prints Health Department info at top of card/paper Enter the CPT code for an office visit Enter the charge for an office visit Enter the CPT code for a TB test Enter the charge for a TB test Enter the ICD9 Code for the TB test Enter the health department’s Medicaid PIN # 40 Printer Setup The print setup allows you to choose from what printer you would like to print. Select the printer in the name dropdown and click “OK”. 41 Questionnaire The TB module allows you to develop your own testing and surveillance questionnaires to the program. These questionnaires can be printed from the “Print” button. 42 Receipts If your health department has the “Receipts” module, you have the ability to print any receipt through the “Maintenance” tab. You may also print a receipt from the Immunization data entry windows by pressing ALT-R keys. 43 Receipts Pay In Reports If your health department has the “Receipts” module, you have the ability to print your pay in reports through the “Maintenance” tab. 44 Reindex/Pack Clinical Services Data Files This function is only needed should your data be corrupt due to a power failure. Please contact CHC Software if you have any questions or concerns. 45 CHC Software, Inc. Health District Information Systems [email protected]