1
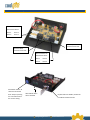
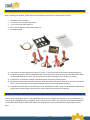
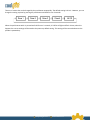
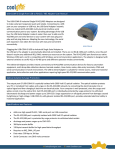
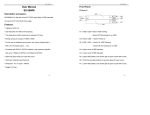
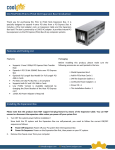
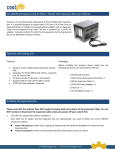
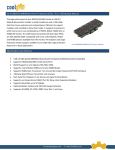
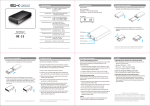
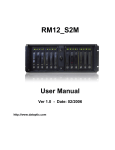
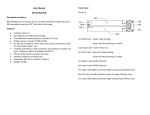
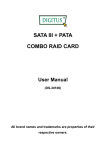
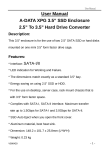
SW-SATA2X4 SATA II 4-Port Switch with Key Lock User Manual
This SATA2/SAS Switch (SW-SATA2X4) is designed to be used as a
SATA (or SAS) hard drive selector. lt provides a high performance
link between a single SATA 2 host port and 4 SATA device ports.
It connects the host upstream port to one of the 4 downstream
SATA devices (one device at the same time. It is done by simply
pressing the push button switch.
With its Power Switching circuits, the SATA switch can switch the
device's power according to the settings of the SATA2 signal
switch. It only allows the selected device to be powered and cuts
off the power of the other unselected devices. This will reduce
the power consumption and make sure those devices are truly off line to prevent from any accidental erasing data by
virus or application software.
Moreover, it provides a key lock switch to prevent from any unauthorized changes to the settings. It helps home and
school users to manage the devices easily.
The adapter can be fit into any standard 3.5-inch bay or 5.25-inch bay (by a 3.5 to 5.25 adapter frame kit), it provides the
immediate upgrade of your PC storage system.
Features
•
•
•
•
•
•
•
•
•
•
•
1 to 4 SATA2 Switch for Selecting among 4 Devices
Provides a SATA host to one of the 4 SATA Device Connectors
Built-in High Speed SATA2 Signal Switch
Select the drive simply by a push button switch
SATA2 compliant at 1.5Gbps and 3.0Gbps
Switch off power of the unused drives to save the power consumption and put them True Off-Line
Save the current settings by Built-in EEPROM
3.5-inch Bay form factor, easy to fit in normal PC Systems
Key lock to prevent from unauthorized changing
Provides LEDs to indicate the active drive
Transparent installation, no added driver required
[email protected]
www.CoolGear.com
Front Panel and Board Layout
Power connectors to
downstream drives:
Drive 1
Drive 2
Drive 3
Drive 4
Power Input
Connector from Host
Upstream SATA
Connector from Host
SATA connectors to
downstream drives:
Drive 1
Drive 2
Push Button Switch: To
select the active hard
drive. Keep on pressing
for 3 seconds will save
the current setting.
Drive 3
Drive 4
LEDs indicate which
drive is selected
[email protected]
Keylock Switch to disable / enable the
Push Button Switch function
www.CoolGear.com
Installation
Before installing this product, please make sure the following accessories are well packed in the box:
•
•
•
•
•
SATA Switch 3.5-inch Bay x 1
3.5-inch to 5.25-inch Converting Frame
7-pin to 7-pin Host SATA Cable x 1
Mini 4-pin to Large 4-pin Host Power Cable x 4
Installation Guide
1. Plan the drive number (which drive is drive 1, drive 2,…) to be connected to SATA switch downstream ports.
2. Install the host power cable and Host SATA cable to the connectors. Leave the other end (to Host) of the cables
unconnected ted at the moment. You will connect them after installing the unit into the 3.5-inch bay.
3. Install each 7+15 pin device cable(s) to the downstream connector(s) of the product.
4. Remove the chassis cover from your computer; install the product into the 3.5-inch bay in your PC. If your drive
bay is 5.25 inch instead, you may need the supplied 3.5-inch to 5.25-inch adapter frame kit,
5. Install the host SATA cable to your SATA port in the motherboard or add-in cards. Install the power cable to your
system power supply’s large 4-pin connector. Put the chassis cover back on the computer.
Selecting the SATA Drive
When you are switching the drives, if the selected SATA drive does not appear automatically, then your SATA host port
may not be hot-pluggable and hot-swappable, in this case you have to reboot your system to let the new selected drive
to take effect. Most of add-in SATA cards support hot-swap features, but the motherboard’s onboard ports usually
don’t.
[email protected]
www.CoolGear.com
There are 5 states that can be changed by the push button sequentially. The default setting is Drive 1. However, you can
change the setting anytime by pressing the push button and hold for over 3 seconds.
When the push button switch is pressed and held for over 3 seconds, all 4 LEDs will light and flash 3 times, when this
happens the current settings will be saved as the power-up default setting. This setting will be restored whenever the
product is powered up.
[email protected]
www.CoolGear.com