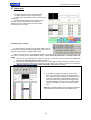
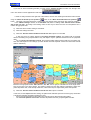
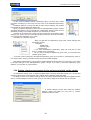
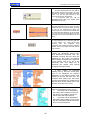
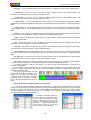
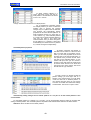
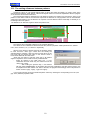
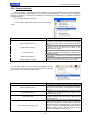
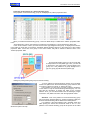
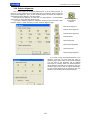
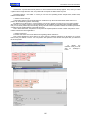
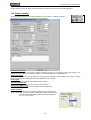
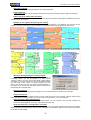
1
User Manual - EuroCAD Automarker
EuroCAD
www.EuroCAD.org
EuroCAD Automarker
User manual
EuroCAD Automarker
Is part of the EuroCAD CAD package
that contains the following applications :
EuroCAD Pattern Designer
EuroCAD Photo Digitizer
EuroCAD Spread&Cut Planner
EuroCAD Automarker
EuroCAD PlotMaster
© 2009 Advanced CAD Technologies ltd. ITN 0061 rev 01.2009
1
User Manual - EuroCAD Automarker
Contents:
3.1
3.2
3.3
3.4
3.5
3.6
3.7
3.8
3.9
3.10
3.11
3.12
3.13
3.14
3.15
3.16
3.17
3.18
3.19
3.20
3.21
3.22
3.23
3.24
3.25
3.26
3.27
3.28
3.29
3.30
3.31
3.32
3.33
EuroCAD Automarker –what it is and what it
does..…………………….
Steps for marker optimization ...............………………………………..
How to launch EuroCAD Automarker
application………………………..
How to load a marker or a cut plan .......................……………………
EuroCAD Automarker
workspace..............................................………..
Toolbar button list and the associated functions……..……………..
Stock area........................................…………………………………….
a) Display pattern in a table…………………………………….............
b) Display patterns as pattern collection ………………………………………...
Marker optimization area........……………………………………….….
Information area.……………………………….………………………....
Marker settings……………………………….…………………………...
Quick nest (draft)……………………………………………...................
Complete automatic nest (time limit)…………………………………....
Automatic optimization for the selected patterns…………………….
Automatic optimization for the placed patterns….............................
Automatic nesting for the selected patterns size by size
Group Bundles....................................................................................
Automatic optimization for the nested patterns (time
limit)………..…..
Manual nesting .......…………………………………………………..…..
Keyboard and mouse shortcuts for manual nesting………..…………
Automatic optimization for multiple markers………………………….
Markers for double sheets and folded / tubular fabric.........................
Markers for plaids and stripes fabric...………………………………….
Edit dependency groups for the patterns on a marker........................
Setting a background texture for the stripes and plaids on the
marker................................................................................................
Automatic patterns nesting for defects fabric......................................
How to use the horizontal and the vertical ruler………………………..
Guiding lines printing……………………………………………………...
Nest / remove pattern on a marker.....................................................
Patterns setting and restrictions……………………………………….
General restrictions…………...…………………………………………..
Setting and restrictions for folded patterns for markers on folded or
tubular fabric .......................……………………………………………
Patterns properties table.....................................................................
The cutting allowance between patterns………………………………..
2
4
5
7
7
9
10
12
12
13
17
18
19
20
20
21
22
22
24
27
28
29
30
31
33
34
36
38
41
43
44
44
45
46
46
51
User Manual - EuroCAD Automarker
3.34
3.35
3.36
3.37
3.38
3.39
3.40
3.41
3.42
3.43
3.44
3.45
3.46
Patterns selection.....…………………………….……………………….
Pattern grouping for thermal bonding....……………………………….
Cut patterns....................................................................................
Pattern update…………………………………………………………….
Using the measure tool..........…………………………………………...
Pattern alignment...………………………….…………………………
Print project picture...............…………………………………………….
Marker report – editing and printing....................................................
Marker printing on plotter or printer.....................................................
Export markers to a DXF R12/2000 or HPGL – PLT..........................
Define the pattern cutting order.........…….……………………………..
Marker export to CUT file for cutter..................................…………….
PAT import file………...........…………………………………………...
52
53
55
57
57
58
59
60
64
68
69
69
71
a) Import a PAT file on a marker in a cut plan
71
b) Markers following repeated import from PAT files
73
73
3.55
DXF import files...................................................................................
Marker import from Assyst Bullmer (LayS) …………………...............
Marker import from Gerber (Order) …………………………....................
Marker import from Lectra (PLX) ……………………………....................
Cut files import…......………………………………………………………….
Plotter settings…………………………………………………………….
Cutter settings…......………………………………………………………
EuroCAD Automarker user settings.........................………………
Keyboard settings ...…………………………………………..
3.56
Gerber nesting server settings ..........………………………………
99
3.57
Useful keyboard shortcuts ............................……………………….
Help - how to use the EuroCAD application.......................
Help……....………………………………..............................................
Index Help ……………………………………………….........................
How to activate the hardware key……………………………………….
File Types…………………………………………………………………..
EuroCAD workstation – Hardware
Specifications.................................
3.47
3.48
3.49
3.50
3.51
3.52
3.53
3.54
3.58
3
74
80
84
89
91
93
96
98
100
101
101
102
103
107
111
User Manual - EuroCAD Automarker
3.1 EuroCAD Automarker – what it is and what it does
EuroCAD Automarker is a software application for automatic marker optimization in garments industry.
EuroCAD Automarker can realize markers and nesting on simple fabric, on fabric with stripes and plaids, on
tubular or folded fabric.
In EuroCAD Automarker the nesting procedure is full automatic and the nesting is optimized in the required
time interval. You can also perform manual nesting or you can combine automatic and manual nesting. For
example, an 8 m length marker with 80 patterns is automatically optimized in 3 minutes.
During the automatic nesting, EuroCAD Automarker respects the placing rules and restrictions for each
pattern. These rules are defined for each pattern from the design program and refer to: rotation freedom and
alignment to the grain axis, minimal distance between patterns, project match to the stripes and plaids on the
fabric, alignment and matching to other patterns. Those rules can be edited and changed from EuroCAD
Automarker too.
EuroCAD Automarker can also import patterns edited by other CAD applications, as DXF and HPGL file
formats, but also in other particular data formats. When importing markers from DXF or HPGL files, the nesting
restrictions and the alignment to the grain axis for the imported patterns must be manually redefined in EuroCAD
Automarker application.
EuroCAD Automarker gives you an optimized marker that can be directly printed on the plotter or can be sent
in special format to the cutter or can be printed as mini-marker on a usual printer. The optimized markers are saved
in the cut plan of the corresponding order.
The efficiency of automatic nesting optimization realized by EuroCAD Automarker surpasses most times the
manual nesting, giving high quality nesting results and considerable time economy.
4
User Manual - EuroCAD Automarker
3.2 Steps for marker optimization
To optimize a marker you must follow 3 steps. The time for automatic marker optimization is around 3-5
minutes. We describe here the usually steps followed by a user for a usual marker.
1) Prepare the marker in EuroCAD Spread&Cut Planner application and launch EuroCAD Automarker
application.
In EuroCAD Spread&Cut Planner application you must prepare the cut plan,
extract the patterns for the marker and distribute the sizes on the markers. Also in
EuroCAD Spread&Cut Planner you must declare the fabric width and the minimal
pattern reserve.
Then select the marker to be optimized and click on “Optimize the marker
with EuroCAD Automarker” (see details in “EuroCAD Spread&Cut Planner” user
manual).
2) Marker optimization in EuroCAD Automarker
When you click the “Optimize the marker with EuroCAD Automarker” button, EuroCAD Automarker will open in
a new window displaying the pattern list in the final form, “ready to cut” , for all sizes
Your only task is to click on “Quick nest (draft)” button or on “Complete automatic nest (time limit)”.
5
User Manual - EuroCAD Automarker
You must click on “Quick
nest (draft)” button or on
“Complete automatic nest (time
limit)”
The computer will complete the required operation, trying to optimize the marker in the time limit specified by
the user and following the nesting rules that have been set in during design in EuroCAD Pattern Designer.
After the quick nesting or after the complete automatic nesting with time limit, EuroCAD Automarker
application will display in the lower part of the screen the final result and will declare it as the best result obtained
by the chosen method.
3. Save marker in the cut plan
After marker optimization, you must click on the SAVE button and close the
EuroCAD Automarker application. On the screen, EuroCAD Spread&Cut Planner
application will be displayed; here you can see and print the optimized marker.
If you want to save the optimized marker in a specific cut plan with a different name, you must click on “Save
as” button. A new window will open and there you will choose the place for the new cut plan to be saved.
Important:
Before optimization or during this process, it is recommended to evaluate the patterns extracted and prepared
for marker in order to insure the correct selection according to the fabric choice.
6
User Manual - EuroCAD Automarker
3.3 How to launch EuroCAD Automarker application
EuroCAD Automarker can be launched in two ways:
From EuroCAD Spread&Cut Planner application
This is the most common way to launch EA is directly from EuroCAD
Spread&Cut Planner. In EuroCAD Spread&Cut Planner you must select the
marker to be optimized and then click on “Optimize the marker with
EuroCAD Automarker” button (see details in “EuroCAD Spread&Cut
Planner” user manual).
EuroCAD Automarker will starts with the marker loaded for optimization.
After marker optimization you will close EuroCAD Automarker application
and you will automatically go back in EuroCAD Spread&Cut Planner
application for plotter printing or for another marker selection regarding
optimization. Launching the EuroCAD Automarker application from EuroCAD
Spread&Cut Planner gives you the advantage of obtaining the result for a single marker very quickly.
Direct launch
This is a rarely used option for automatic optimization of successive markers.
Double-click on the application icon on the screen or simply click on the
application icon down the launch bar to launch EuroCAD Automarker application.
EuroCAD Automarker application will open with no loaded marker. After starting the application, you must
load a cut plan previously designed and saved by EuroCAD Spread&Cut Planner.
The advantage for opening EuroCAD Automarker in this way is the independent functioning; thus, the
application can be used for automatic optimization of multiple markers or cut plans without any user
intervention. At the same time, you will be able to import pattern sets from DXF format in order to optimize
them.
3.4 How to load a marker or a cut plan
If EuroCAD Automarker application was launched directly and not from EuroCAD Spread&Cut Planner you
must open and load a cut plan.
Click on “Open cut plan” button. A new window will open in which you may select the cut plan. Select the cut
plan to be opened and click on “Open” button.
Click on “Open cut plan” button.
A new window will open in
which you may select the cut plan.
Select the cut plan to be opened
and click on “Open” button.
7
User Manual - EuroCAD Automarker
After selecting and opening the cut plan, a list with markers from the corresponding cut plan will appear. For
each marker there will be displayed the included sizes, the marker status (optimized/not optimized), the marker
length (if required), the nesting efficiency and the pattern number.
To choose a maker from the list, you must click to select it and then click on “OK” button. The selected marker
will be loaded and displayed on the screen. If the selected marker has been already optimized, the present
optimization is displayed; if it is not optimized only the pattern list is displayed, in the upper side of the window.
8
User Manual - EuroCAD Automarker
3.5 EuroCAD Automarker workspace
The main window (workspace) has 4 distinct regions:
-
Toolbar - contain the buttons for different program functions
Stock area – contain the list with the patterns prepared for nesting.
Marker area
Status bar – with various information
9
User Manual - EuroCAD Automarker
3.6 Toolbar button list and the associated functions
Open cut plan
Open directory for batch job
Import from DXF
Save cut plan
Save the cut plan with another name (Save as)
Choose a marker from the cut plan
Undo (cancel) last change
Redo (remake) last change
Select all patterns on the marker
Nest selected - add selected patterns to the marker
Remove selected – remove selected patterns from the marker
Quick nest – automatic fast nesting
Complete automatic nest – automatic nesting with time limit
Automatic optimization for the placed patterns.
Remove all patterns from the marker
Zoom to selected region
Zoom in
Zoom out
Zoom to marker length
Zoom to marker width
Display / Hide internal points
Display / Hide pattern name
Display / Hide grain axis
Show / Hide size name
Show / hide notches
Display marker settings
Flip horizontal /vertical
Rotate pattern by 180°
Rotate pattern by 90°
10
User Manual - EuroCAD Automarker
Rotate pattern by 45°
Rotate pattern by a custom angle
Fold selected patterns
Unfold selected patterns
Align selected patterns
Align pattern to grain axis
Lock / unlock selected patterns
Change properties for the selected patterns
Pattern settings and restrictions
Edit dependency groups
Group selected patterns
Measurement tool
Activate Cutting Order working mode
Export to plotter (HPGL – PLT)
Export to CNC cut machine
Show/ hide vertical ruler
Show/ hide horizontal ruler
Rotate pattern by 45°
Show information about the selected pattern.
11
User Manual - EuroCAD Automarker
3.7 Stock area
In the stock area, the patterns can be displayed
- in a table organized on sizes or pattern type
- at normal scale with different colors, according to the
specific size.
The stock area can be resized by a simple mouse
click and drag from the separator. This allows the
enlargement of the marker area or of the stock area,
according to the user needs
a) Display pattern in a table
To display patterns as table you must select “View” menu in
the menu bar of EuroCAD Automarker application; here you must
select the “Show patterns in size/type table” option.
There are two ways that you can display the patterns in case you have many products from the same size. For
this, there is a setting in the “User options” window, called “Group the same size in ‘size/type’ table view
mode”.
A) The user can have displayed all products from all size – in this case you must uncheck the “Group the
same size in ‘size/type’ table view mode” setting or,
B) The user can have displayed only one product for a size together with the information about how many
products are placed in the marker for that size/ from all existing in the marker for that size. In this case the
“Group the same size in ‘size/type’ table view mode” setting must be checked.
A)
In the table are displayed all sizes for each pattern.
Near each pattern size placed on the marker appears
the “*“symbol. To select a pattern for a specific size, you
must click in the table on that specific size. When you
select a specific size for a pattern, the background for
the selected pattern becomes black. To select multiple
patterns in the table, you may use CTRL and SHIFT
keys.
Attention: in the table display mode, the pattern dimensions
are altered and do not respect the ratio between them.
12
User Manual - EuroCAD Automarker
B)
In the table is shown only once the size name and next
to the size name there is the information about how
many products from this size are placed in the marker/
from how many products from this size exists in the
marker.
For ex: if there are 3 products for size 50 and only two of
them are placed in the marker, the information next to size name
(50 in this case) will be 2/3 – meaning there are 2 products
placed from the 3 existing.
To select a pattern for a specific size, you must click in
the table on that specific size. After selecting the size in
this way, the background appears displayed grey. If you
want to select all products from a size, you must keep
Alt key pressed during the selection. In this case, the
size name will appear displayed on a black background.
To select multiple patterns in the table, you may use
CTRL and SHIFT keys.
Attention: in the table display mode, the pattern dimensions
are altered and do not respect the ratio between them.
b) Display patterns as pattern collection
The patterns can be displayed as
pattern collection in two modes: as
pattern collection and as pattern
collection size by size.
To display the pattern collection, in
the “View” menu in the menu bar of
EuroCAD Automarker application you
must select “Show patterns as pattern
collection” option.
To display the pattern collection size by
size, in the “View” menu in the menu bar of
EuroCAD Automarker application you must
select “Show patterns as pattern collection
size by size” option.
Show patterns as pattern collection
Show patterns as pattern collection size by size
In the “Show patterns as pattern collection” view mode, the size ratio between patterns is constant
For each mode mentioned above, the user has other two ways in which he can display the pattern sizes.
There is a setting in the “User options” window, called “Group the same size in ‘pattern collection’ view
mode”.
13
User Manual - EuroCAD Automarker
A)
The user can have displayed all products from all size – in this case you must uncheck the “Group the
same size in ‘pattern collection’ view mode” setting or,
B) The user can have displayed only one product for a size together with the information about how many
products are placed in the marker for that size/ from all existing in the marker for that size. In this case the
“Group the same size in ‘pattern collection’ view mode” setting must be checked.
A)
The user can have displayed all products from all size – in this case you must uncheck the “Group the
same size in ‘pattern collection’ view mode” setting
In the stock area are displayed all sizes for each pattern
and each size is displayed with an individual color. To
select a pattern for a specific size, you must click in the
table on that specific size. When a pattern is selected it
appears with hatchings colored in the size color. To
select multiple patterns in the stock area, you may use
CTRL and SHIFT keys.
Attention: in the pattern collection display mode,
the pattern dimensions respect the ratio between them.
If in the stock area you are selecting a pattern already placed on a marker, it will be simultaneously selected in
the marker area.
Similarly, if you select a pattern in the marker area it will be simultaneously selected in the stock area.
When the user chooses to have the patterns displayed for all products from all sizes, in the stock area, the
patterns prepared for the marker will be displayed as follows:
Color filled
Appears if the pattern it still not placed on the marker and if it is not
selected; each color is associated to a specific size so you can easily follow
all patterns on a size
Contour with crosshatched fill
Appears if the pattern is selected but not placed on the marker
14
User Manual - EuroCAD Automarker
Red contour, no fill
Appears if the contour is placed on the marker and is not selected
Blue contour, no fill
Appears if the contour is placed on the marker and is selected
B) The user can have displayed only one product for a size together with the information about how many
products are placed in the marker for that size/ from all existing in the marker for that size. In this case the
“Group the same size in ‘pattern collection’ view mode” setting must be checked.
In the stock area is shown only once the pattern for a
size. When the cursor is placed on top of the pattern,
appears the information about how many products from
this size are placed in the marker/ from how many
products from this size exists in the marker.
For ex: if there are 3 products for size 50 and only
two of them are placed in the marker, the displayed
information will be 2/3 – meaning there are 2 products
placed from the 3 existing.
To select a pattern for a specific size, you must click in
stock area on that specific pattern size. After selecting
the size in this way, the pattern appears colored grey. If
you want to select all products from a size, you must
keep Alt key pressed during the selection. In this case,
the selected pattern will appear colored black. To select
multiple patterns in the table, you may use CTRL and
SHIFT keys.
Attention: in the pattern collection display mode,
the pattern dimensions respect the ratio between them.
If in the stock area you are selecting a pattern already placed on a marker, it will be simultaneously selected in
the marker area.
Similarly, if you select a pattern in the marker area it will be simultaneously selected in the stock area.
15
User Manual - EuroCAD Automarker
When the user chooses to have only one pattern displayed for a size together with the information about how
many products are placed in the marker for that size/ from all existing in the marker for that size, in the stock area,
the patterns prepared for the marker will be displayed as follows:
No pattern from any product placed in the marker (the displayed pattern will be filled with color in the
stock area):
When the grouped patterns are not
selected in the stock area
When the grouped patters are
partly selected (without Alt key
pressed)
When the grouped patterns are
fully selected (with Alt key
pressed)
the displayed pattern appears
colored with the corresponding color.
the displayed pattern appears
colored gray.
the displayed pattern appears
colored black.
Patterns from one size partly placed in the marker (the displayed pattern will be marked with hatchings
in the stock area):
When the grouped patterns are
not selected in the stock area
When the grouped patterns are
partly selected in the stock area
(without Alt key)
When the grouped patterns are
fully selected in the stock area –
with Alt key pressed
the hatchings have the same
color with the selected size.
the displayed pattern will be
crosshatched in grey.
the displayed pattern will be
crosshatched in black.
16
User Manual - EuroCAD Automarker
All patterns from a size are placed in the marker (the displayed pattern will be empty inside in the stock
are):
When the grouped patterns are
not selected in the stock area
When the grouped patterns are
partly selected in the stock area
(without Alt key)
When the grouped
patterns are fully selected
in the stock area – with
Alt key pressed
the displayed pattern contour is
red.
the displayed pattern contour is
grey.
the displayed pattern
contour is black.
Next to “View” button there is another button called “Projects”. This button is useful when importing more
*.PAT files in the same marker. Using this function you can
choose to see patterns from only one project. For this you will
have to select the project from the “Projects” button menu in
accordance with the project for which you want to display
patterns.
To access this function click on the “Projects” button, and
when the menu opens choose a project from the list. Here you
can see displayed all projects used in the marker in order in
which they were added in the marker. Also in this menu you have the option to display all patterns from all projects
used in the marker called “show the patterns from all projects”.
3.8 Marker optimization area
In the marker optimization area you can see the patterns placed on the maker as follows
Color filled
If the pattern has a valid place and does not overlap with
other patterns; each color is associated to a specific size so you
can easily follow all patterns on a size.
Blue contour, no fill
If the pattern is placed in an invalid position (it overlaps
other patterns that are in valid positions)
17
User Manual - EuroCAD Automarker
Contour with crosshatched fill
When the pattern is selected
With double dotted blue contour
If there is a minimal reserve between patterns.
With a small padlock on the pattern
when the patterns are locked
If one pattern placed on the marker is selected, in the upper right corner on the button bar is displayed information
about the selected pattern. This information is: size pattern, pattern name, rotation angle of the placed pattern and
if the pattern has flip or no.
3.9 Information area
In the status bar located in the lower part of the main window of EuroCAD Automarker application, you can find
information regarding the marker.
LG – near this message the marker length will be displayed in cm
EF – near this message, the marker efficiency will be displayed as percent
LAT – the marker width
P/T – the total number of patterns required for the marker and the number of patterns on the marker
MN – length in cm for the required margin in order to place folded patterns on tubular or folded fabric
MO – length in cm of the margin occupied by placement of the folded patterns for tubular or folded fabric.
D – the distance measured by the measuring tool. If you select two superposed patterns, near this message it
will be displayed the superposition distance.
RH – the distance measurede on horizontally using the vertical ruler
RV – the distance measured on vertically using the horizontal ruler
Index of the next pattern - if Cutting Order working mode is active, the index for the pattern to be selected in
order to define the cutting order is displayed.
18
User Manual - EuroCAD Automarker
3.10 Marker settings
Before starting a marker you must define and verify settings for the marker. Click on „Marker
settings” in the button menu bar or select from the „Marker” menu the option „Marker settings....”
The marker settings window will open containing four tabs. These tabs give you the possibility to
define the repeating ratio of the project on the fabric or if the project will be cut from a plaid and stripes fabric; you
can also define spanning options, fabric general information or the defects on the fabric.
For the projects worked on plaid and stripes fabric, in « Marker settings » window, on the « Marker » tab you
can set the repeating distance of the project on length and the movement on the fabric width. Movement is the
distance from the first stripe on the fabric width.
The settings for the spreading options are defined by the operator in EuroCAD Spread&Cut Planner
application; you can operate changes directly in this « Marker settings » window on « Marker » tab in EuroCAD
Automarker application.
For the spreading options „Double sheet spreading (half of patterns for one symmetrical product)” you may
choose not to load the double patterns for double sheet. To do this, you must check the message „Don’t load the
double patterns for double sheet”. If this message is unchecked, on the marker there will be loaded all patterns
without their symmetrical corresponding doubles.
In « Marker settings » window, on « Fabric fault » you can define the fault type that may appear and their
exact position.
In the « Project picture » tab can be loaded an image of the used project. This image will be printed in mini
marker sheet if the user will check the option “Print project picture” from “Plotter print / print mini-marker” window.
In “Marker report” window is centralized information about loaded projects on the current marker. From here
the marker report can be visualized and printed by pressing “Preview report” button.
19
User Manual - EuroCAD Automarker
3.11 Quick nest (draft)
To perform a quick nest you must click on “Quick nest (draft)” button.
You will be able to perform the following
operations;
- quick nest using of all available patterns,
- quick nest of the selected patterns
- quick nest of the selected patterns, size
by size
To choose one of these options you must
click on the small arrow on the right side of the
“Quick nest (Draft)” button and click on the
corresponding option. For a quick nest using all
available patterns you must click directly on the
“Quick nest (draft)” button. If the general restriction allows, EuroCAD Automarker will rotate part of the patterns to
obtain a maximal nesting efficiency.
If there are some patterns already placed on a valid position on the marker, they will be left on place adding
only the new patterns.
Quick nest function is useful for a fast detection of the fabric amount required per product or to estimate the
number of sizes that fill in the maximal spreading length.
3.12 Complete automatic nest (Time limit)
Complete automatic nest (time limit) is the most important and the most used function in EuroCAD Automarker
application. Its main purpose is to obtain
automatically a high efficiency nesting in a minimal
time period.
For a complete automatic nest you must click
on the “Complete automatic nest (Time limit)”
button. On a marker you can nest all patterns, only
the selected patterns, or you can nest the selected
patterns size by size. To choose one of these
options you must click on the small arrow on the
right side of the “Complete automatic nest” button and click on the corresponding option. For a complete nest using
all available patterns you must click directly on the “Complete automatic nest (Time limit)” button.
After you click on the “Complete automatic nest (Time limit)”
button, before starting nesting, a window will be displayed on the
screen in which you can set the time limit. After setting the time limit,
you must click on “Accept” button. If you want to cancel the time limit
nesting, you must click on “Cancel” button
EuroCAD Automarker will automatically place the patterns on the
marker and proceed first to a fast nesting; then the program will
optimize the marker in the allocated time. Optimization is realized by fast calculation algorithms that allow realizing
and testing a large amount of placements of the patterns on the marker.
During automatic optimization the program will
test the pattern placement either aligned to the grain
axis or rotated to 180°, if allowed.
During the optimization for complete nesting, a
window will be displayed. In the upper part of this
window it is displayed the graphic evolution for
complete nesting with time limit; in the lower part of
the window there are displayed the current values
and the modified values for the marker length
efficiency and the elapsed time.
20
User Manual - EuroCAD Automarker
The patterns placed during automatic optimization together with the patterns already placed on the marker will
be repositioned many times in order to obtain the best nesting. Only locked patterns remain on place during
automatic optimization when you lock part of the patterns on the marker, you realize an automatic optimization just
on the unlocked part. To lock patterns that you want to remain in place, you must hold down SHIFT key and click
on patterns to select them; alternatively you may select patterns by click and drag the mouse while holding down
SHIFT key.
After selecting the patterns to be locked, click on “Lock/unlock
selected patterns” button. Locked patterns will remain on place during
patterns repositioning on the marker.
If some patterns are placed on the open marker and you
want to optimize marker with all project patterns, when you click
on “Complete automatic nest (Time limit)” button, a window will
open displaying the message “Some patterns are placed. What
do you want to do?” If you click on “Keep nested patterns” a
new window will open in which you can set the time limit for this
nesting; then EuroCAD Automarker will start automatic nesting
with time limit without changing the position for the patterns
kept in place. If you want to keep the locked patterns and to
redo the marker for all other patterns you must click on “Keep
only locked patterns” button. If you want to redo marker
completely, you must click on “Redo marker completely” button.
If you want to optimize nesting for patterns that have already
been nested (quick or completely with time limit), you must click
on “Complete automatic nest (Time limit)” button; a window will
open that claims that all patterns are placed and gives you three
options: if you want to keep patterns locked and to redo the
marker for all other patterns you must click on “Keep only locked
patterns”. If you want to redo the marker completely, you must
click on “Redo marker completely”; if you want to quit automatic
time limit nesting, you must click on “Cancel” button.
3.13 Automatic optimization for the selected patterns
You can optimize automatically the selected patterns either for all patterns or for only part of them on a marker.
You must select the patterns to be placed on the marker and then click on “Draft with selected patterns” or
“Complete with selected patterns” button.
If you need a fast nest for the patterns on a marker, you must
first select the patterns and then click on the arrow on the right side
of the “Quick nest (Draft)” button; in the opened menu you must
select the “Draft with selected patterns” option. For a complete
automatic nest of the selected patterns you must click on
“Complete automatic nest (Time limit)” button; in the opened menu
you must select the “Complete with selected patterns” option.
Before starting the automatic optimization, the program displays
a time limit setting window. Here you must enter the time limit in
minutes reserved for optimization computing. Then you must click on
“OK” button to accept the entered value or “Cancel” button to cancel
the procedure.
EuroCAD Automarker application will nest only the selected
patterns by a fast procedure and then it will optimize the nesting result
in the allocated time.
When you nest the selected patterns (draft or complete), they will be placed so as the marker will contain
these patterns only.
If you have selected no pattern and you have chosen
to nest all selected patterns, then the program will nest all
patterns.
Nesting of the selected patterns is very useful if you
want to place some patterns in a specific marker area and
it can be used together with the fabric defects setting
21
User Manual - EuroCAD Automarker
3.14 Automatic optimization for the placed patterns
After bringing patterns in the marker area you can choose for an automatic optimization with the placed
patterns. For this, from the automatic nesting menu you must choose on of the two options: “Complete with
placed pattern” or “Draft with the placed patterns”.
If you want to make a quick draft for the placed
patterns, you must bring first patterns in the marker area,
and then pick the option “Draft with the placed patterns”
from the “Quick nest” function menu.
If you want to make a complete nesting for
the placed pattern, you must bring first patterns in
the marker area and then pick the option
“Complete with the selected patterns” from the
“Complete automatic nest” function menu.
If you chose to make a “Complete nesting with the
placed patterns”, before the program starts to nest patterns, you will have to set the time limit in the displayed
window. After you establish the time limit, click on “Accept” button to start nesting. If you change your mind about
nesting the marker you must click on the “Cancel” button.
The EuroCAD Automarker program will nest only the placed patterns making first a draft and then it will nest
patterns respecting the time limit.
When nesting (by making draft or complete nesting), the program will use only the selected patterns as the
marker would content only the placed patterns.
Obs: The automatic nesting for the selected patterns can be made in tow ways, one way in which each size it
is placed complete separate form the other sizes, in this case the efficiency it will be smaller and the other way in
which patterns from different sizes can be mixed together if it is enough space, in this case the efficiency it will be
better (see cap. « Settings »)
This function can be used for group nesting of the same sizes from different patterns, when you use the .PAT
import and you have more patterns on the marker. For this you can use the function « Bundles » from the window
« Marker settings »
3.15 Automatic nesting for the selected patterns size by size:
The nesting of the selected patterns is realized so that the patterns from a size to be grouped in the same area
of the marker. In order to do that, the user must select first the patterns which will be placed by quick nest or by
complete automatic nest (time limit). After that, the user must select from the menu of those two buttons one of the
following functions: “Draft with selected patterns, size by size” or “Complete nesting with selected patterns, size by
size”.
In order to place quickly the selected patterns into a
marker, first select the patterns, than click on the arrow
from the right side of the “Quick nest” button and select
“Draft with selected patterns size by size”
22
User Manual - EuroCAD Automarker
In order to place the selected pattern on a marker, with
a time limit, first select the patterns and than click on the
arrow from the right side of the “Complete automatic
nest” button and after that select “ Complete nesting
with selected patterns size by size”
After selecting “Complete nesting with selected patterns
size by size”, before starting the nesting, on the screen
will appear a window where the user must write the time
limit for the nesting. After that, it must be pressed the
“Accept” button. If the user do not want to continue the
nesting, he must press the “Cancel” button
EuroCAD Automarker application will place on the marker only the selected patterns. First will be done a
quickly marker and than will the marker will be nested in the time limit introduced by the user. At nesting the
selected patterns (quickly or with time limit), they will be placed as if the marker would contain only those patterns.
Note: Automatic nesting size by size, can be done in two ways: one way, when each size will be placed
completely separate by the others, but in this case the efficiency will be smaller and the other way when the
patterns from different sizes can mix together, if there is enough space. In the last case, the efficiency will be better
(see chapter “Settings”).
This function can be used for nesting the same sizes from different models. For this must be used “Bundle”
function from “Marker settings”
The size by size automat complete nesting can be done in two ways:
- Patterns from different bundles nested completely separate
- Patterns from different bundles may fade in
These two marker ways can be done because of the “Bundles can mix together during size by size
nesting” setting, from “EuroCAD Automarker options” window in the “User options” tab.
If the above mentioned option is checked, the patterns from the same bundle will be placed in the same area
but without marking very precise the area between two different bundles. In this case, patterns from different
bundles will mix together.
If the “Bundles can mix together during size by size nesting” setting is not checked, each bundle will be
nest separate, without mixing together them patterns.
23
User Manual - EuroCAD Automarker
Note: In this case of nesting the patterns size by size, after realizing the marker can be shown the vertical
guiding lines. These lines will be automatically printed on the marker.
3.16 Group Bundles
For the situations when you want to make suits, and the products that you want to use are in different folders,
there are the functions « Bundles » that it is in the window « Marker settings »
To use this function you will activate the tab « Bundles » from the window « Marker settings » . In this tab in
the left size of the window you can see all the existing sizes in the marker – initially, all of this bundles are checked,
that means it are treated individually, each size by it’s own ; and in the right side you have the possibility to group
these sizes.
Next to each size there is a little rectangle colored different for each size. The rectangles color represents the
color with which the size will be represented in the marker and stock area. If the user will select the rectangle by
making a click on it, a new window will be opened and the user can change the color for the selected rectangle
including the color for the assigned size.
When the user wants to go back to the initial colors he must click on the “Default colors” button.
24
User Manual - EuroCAD Automarker
The bundles can be created in two ways:
1. By dragging using the mouse the desired sizes from the left size to the right size or,
2. By selecting the desired sizes in the left side using Ctrl or Shift key pressed and using the “Group the
button.
selected sizes”
When the size arrives in the right size, it will be automatically unchecked by the program from the left side. The
bundle must behave as a single size, it has to be paced on the same row (like the example in the picture: the sizes
40 and G 1. 40 are on the same row)
If you want to extract a size from a bundle, to cancel a bundle or to cancel all bundles you have the possibility
to use the right click menu or the buttons.
To extract a specific size from the bundle you may proceed this way:
You can check the specific size in the left column and it will be automatically removed from the
bundle or,
You can select the size in the left column (you can make a multiple selection using Ctrl or Shift
key) and then make a right click to open the right click menu. From the opened menu choose
“Extract selected sizes”.
If you want to cancel a bundle you may proceed this way:
Select the bundle that you want to destroy from the right side column and then make a right click
to open the right click menu. From the opened menu choose “Extract selected sizes”
-
or,
Select the bundle that you want to destroy from the right side column and then click on the
“Ungroup the selected bundles”
button.
25
User Manual - EuroCAD Automarker
If you want to cancel all existing bundles you must use the “Extract all sizes” function from the right click
menu. This function can be applied from both sides.
If there are many bundles in the right side of the window, the user can rearrange the bundles order in the list
button or the “Move the bundle down one position”
using the “Move the bundle up one position”
button. This order is important because it is respected by the program during the size by size automatic nesting.
In the “Marker settings” window, in the “Bundles” tab, there is a setting called “All sizes from a bundle
will act like one size”. According to this setting, there are two ways in which the user can nest patterns into a
marker using grouped sizes.
a)
b)
When the above mention setting is unchecked.
When the setting is checked.
a)
When the “All sizes from a bundle will act like one size” option is not checked
In this case, there is nothing special for the simple automatic nesting. The patterns will act normally
without considering the grouped bundles. They will respect only the patterns restrictions from the properties
table.
For the size by size automatic nesting, the grouped bundles will be placed together in the marker, but
each size will respect its own settings. (ex: each bundle will rotate separate if there are rotate entire bundle
rotation restrictions).
Because of the grouped bundles: XS, S, M and L, XL, XXL, the two groups of bundles act as two single sizes.
This can be seen in the above picture. The patterns rotation and the other settings regarding the entire size
(select all patterns size, rotate and flip entire size, rotate entire size) are respected by each size separate.
b)
When the “All sizes from a bundle will act like one size” option is checked
In this case, for the simple automatic nesting, the patterns that will make part from the same group will act like
a single size regarding the patterns restrictions. Thus:
If there are general restrictions all bundles from the same group will rotate and flip together
The “Select all patterns from a size” will select all patterns from the grouped together bundles.
26
User Manual - EuroCAD Automarker
Ex: The XS, S and M bundles has the same direction on the
marker against the other sizes.
For the size by size automatic nesting, the grouped bundles will be placed together in the in the marker and
all bundles from the same group will respect the same restrictions in the marker as they would be a single size.
Note: For the size by size automatic nesting, after nesting all bundles, the user has the possibility to display
the vertical guiding lines. In this case, these lines are automatically marked by the program on the marker, by
drawing a red vertical line after each group of bundles placed in the marker.
3.17 Automatic optimization for the nested patterns (time limit)
Automatic optimization of the nested patterns is used to optimize the position for the manually nested patterns
on the marker, without rotation or adding the rest of the patterns.
It can be used if you manually rotate some patterns and you wish to test an automatic nesting with the patterns
in this position avoiding at the same time the automatic pattern rotation by EuroCAD Automarker application. It can
be used for selective pattern optimization. You must first
select the patterns that will remain fixed and you must lock
them by click on the “Lock/unlock selected patterns” button,
in the button bar in EuroCAD Automarker application.
You have to nest manually the patterns on the marker
and then click on “Automatic optimization of the nested
patterns” button. The program will try to reposition the patterns to obtain the best marker without rotating or adding
any other patterns. This function can also be used when you intend to optimize the positioning only for selected
patterns. To do so you must select the patterns to remain fixed and lock them by click on the “Lock/unlock selected
patterns” button.
All nested patterns except those locked will be repositioned. If you have not placed all patterns from the
pattern area on the initial marker, the missing patterns will not appear in the marker area, on the new marker
obtained by automatic optimization for the nested patterns with time limit.
The difference between the „Complete with placed patterns” function and „Automatic optimization for the
selected patterns” function consists in patterns rotation allowance from the marker. In the first case if patterns
contents rotation allowance, it will be applied for patterns in the marker, and for the second one, even if patterns
has rotation allowance it won’t be applied in the marker automatically by the program.
27
User Manual - EuroCAD Automarker
3.18 Manual nesting
In some particular situations, you can manually nest the patterns.
Adding a pattern to the marker
There are three possibilities to add a pattern to a marker:
you can double click on a pattern in the stock area. (see fig 1)
you can make right click on the size table under the pattern and select “Nest pattern” from the
displayed menu (see fig 2) or
You can select a pattern using left mouse click and drag the pattern in the working area. When
(see
the pattern arrives in the nesting area, the cursor shape becomes like in the next image
fig 3).
This operation can also be realized by selecting the pattern to be nested on the marker and by a click on “Nest
selected” button in the button bar (see fig 4).
fig. 1
fig. 4
fig. 2
fig. 3
Remove a pattern from a marker
To remove a pattern from a marker you have three options. (a) Double click on the pattern to remove the
pattern from the marker area (see fig a); (b) right click on the pattern and select “Remove pattern” in the displayed
menu (see fig b). (c) Click to select the pattern to be removed from the marker and click on “Remove selected”
button (see fig c)
fig. c
fig, a
fig. b
In the marker area, the patterns can be moved by mouse drag. When a pattern is dragged to one maker edge,
the marker will scroll to the area where the mouse goes.
EuroCAD Automarker helps you during manual nesting as follows:
If during manual placement, a pattern overlaps a little on other pattern, the program automatically
adjust the overlapping by moving the pattern on a valid position.
If during manual placement a pattern is placed close to another, without direct contact, the
program correct this status by placing the patterns in direct contact one with another (or automatically
place the pattern at the minimal distance defined by the user)
If during manual placement a pattern is largely overlapping another one, it will be marked as
placed in an invalid position and it will be unfilled.
For manual placement, it is recommended to use the keyboard shortcuts in order to fast and easy rotate, move
or align patterns.
28
User Manual - EuroCAD Automarker
3.19 Keyboard and mouse shortcuts for manual nesting
I.
Rotate pattern
Rotate the pattern clockwise at the current
degree of freedom (if there is no restriction, the
rotation will have 180°)
Force the pattern rotation together with all
patterns of the same project, at the current degree
of freedom in clock wise.
+
+
Force the pattern rotation together with all
patterns of the same project, at the current degree
counter clock wise.
+
Rotate clockwise the selected pattern by small
steps (default rotation step = 1°, adjustable)
+
Rotate counterclockwise the selected pattern
by small steps (default rotation step
= 1°,
adjustable)
+
Rotate clockwise/counterclockwise the selected
pattern by small steps (default rotation angle = 1°,
adjustable)
.
+ mouse will
Rotates the selected pattern clock wise or counter
clock wise with the rotation step from settings. The
rotating it is making only when there is a deviation
from the grain axes and the maximum angle of
rotation it is the value of the angle from the box
« Deviation from the grain axes » for the selected
pattern.
Click left mouse + scroll mouse
II.
Flip patterns
Vertical flip the pattern on the grain axis (if allowed)
Horizontal flip the pattern on the grain axis (if allowed)
+
Vertical flip for all patterns in the same project on the
grain axis (if allowed)
+
+
III.
+
Horizontal flip for all patterns in the same project on
the grain axis (if allowed)
Move patterns by the mouse
+
Mouse move
+
Left mouse button
click on the pattern
Block automatic repositioning (SNAP) and leaves the pattern
there where it was manually nested even if it is overlapping other
patterns.
Validate pattern in the actual position even if it is overlapping
other pattern
29
User Manual - EuroCAD Automarker
+
Mouse drag
IV.
Indicates the pattern vector movement up to the first pattern
met from the current mouse position to the place where the
pattern dragging started; if there is no interference with other
patterns, the moving pattern will be dropped in place and will be
nested.
Pattern move by keyboard arrows
Move the selected pattern up/down or left/right by 1 cm on all
directions for simple marker. For grid markers, the movement step
will be the same as the grid step.
Move selected pattern up/down or left/right by 1 mm
+
Move selected pattern up/down or left/right up to the first
obstacle (pattern) met.
+
3.20 Automatic optimization for multiple markers
EuroCAD Automarker gives you the possibility to optimize multiple markers for a large amount of orders. The
program is able to perform a complete automatic optimization or multiple markers, without any user intervention,
from one or more cut plans. The program performs these operations alone or overnight, while you can perform
other operations (design, planning, etc.);
To start a batch job you must first click on “Open directory for batch
job” button
Thus, the « Batch nesting » window is opened.
30
User Manual - EuroCAD Automarker
For a batch job you can use PT, MRK, DXF, LayS Assyst Bullmer and Zip Order Gerber files. After defining the
file types to be used for nesting, in this window you must select the opening path for the plans to be processed.
Click on the « Cut plans folder » icon in the batch nesting
window. A window called « Choose directory » is opening. Here
you can click to choose the directory with the cut plans. After
selecting the directory you must click on « OK » button. If you
want to cancel the directory selection for batch nesting, you
must click on « Cancel » button.
In the « List of cut plans » there will be displayed the cut
plans from the selected folder. If you check the message
« Include subfolder », all cut plans in the selected subfolders
will be displayed. You can select only a part of the cut plans in a
folder. To select/deselect a cut plan, click with the left mouse
button near the cut plan name. To deselect all cut plans click on
«-»; to select all cut plans, click on «+» button. These buttons
are located on the left side of the cut plan list, in the batch
nesting window.
Before starting a batch nesting job, you can make some settings. Thus you must fill carefully the options in the
lower part of « Batch nesting window »
Thus, you can choose that the program will remake the partial optimized markers or if it must, to continue
them. Also, you can choose for the already optimized markers to be optimized
again from the beginning or to leave them unmodified. The time limit for the
batch nesting can be set in the specific « Time limit » field. The time limit
depends on the number of markers. Click on « Settings » near time limit field to
set the time unit: hours or minutes. After you select the time unit, you must click
on « OK » button; to cancel, click on « Cancel » button.
After choosing the cut plan directory, selecting the cut plans to be processed
and setting the needed options click on „OK” din in the batch nesting window to
start nesting for the selected cutting plans.
3.21 Markers for double sheets and folded/tubular fabric
If you work on symmetrical products on which you
look to obtain some symmetries you must spread double
sheets. EuroCAD Automarker will place only half of the
patterns on the marker (patterns obtained by horizontal,
vertical or mix flip); the other half of the patterns will be
obtained on the second sheet in the pair if you choose
“Double sheet spreading (half of patterns for one
symmetrical product)”.
31
User Manual - EuroCAD Automarker
If the patterns in the project allow elimination of
simple doubles, you must check the message “Don’t load
the double patterns for double sheet. Thus, you will
remove from the marker not only the symmetrical
doubles obtained by flipping but also the simple doubles
if they don’t have mirror doubles.
EuroCAD Automarker allows markers for double sheets in which you can place all patterns in a project in order
to obtain 2 projects simultaneously. The user can check the option “Double layer (half of the patterns for a single
project obtained by symmetrization)” if you want to obtain half of a project on a marker. If you need all patterns to
appear on a marker you must check “Double layer (all patterns for two products obtained by symmetrization)” in the
„Marker settings” window.
For folded and tubular fabric (knit), you can realize markers in which symmetrical patterns can be placed only
by half on the fabric folding edge, so as the symmetrical pattern is obtained by unfolding the fabric cut on the edge.
You can obtain more efficient markers for this type of fabric that have usually less than 1 m width, and on which
only large symmetrized patterns could be placed. This method of edge cutting for symmetrical patterns is usually
(always) used for manual nesting on tubular or folded fabric.
To use this facility you must check “Double layer (half of the patterns for a single project obtained by
symmetrization) or “Double layer (all patterns for two products obtained by symmetrization)” in „Marker settings” in
EuroCAD Automarker application, according to the placement mode; you can place a whole project or only half of it
then select the lay edges that can be used to cut symmetrical patterns. If you want to use the upper lay edge you
must click on „Use upper edge” button; if you want to use the lower edge you must check the „Use lower edge”
button. If the marker will be cut from a tubular fabric, you must check both options (for upper and lower edge).
Usually, even for tubular fabric you will use a single edge while the fabric has a slightly variable width and can be
aligned on a single edge.
EuroCAD Automarker allows the folding/unfolding for any symmetrical patterns. When a symmetrical pattern is
folded, instead of the symmetrical pattern it will appear two half patterns. EuroCAD Automarker will force these
patterns to be placed attached to the edge(s) validated for this purpose. After manual unfold of one or more
patterns you can precede to automatic nesting (draft or complete with time limit).
If you want to place a symmetrical pattern on a half marker and on the folded
edge, you must select the pattern and right click to open a submenu; in this submenu,
you must select « Fold selected patterns » or click to select the pattern and then click
on « Fold selected patterns » button in the
upper button bar.
If a pattern is symmetrical but the
grain axis is not parallel with the symmetry
axis and you want to fold the pattern, the
program will warn on this aspect and will ask if you want to align the grain axis to the
symmetry axis. If you want to proceed, you must click on « Yes » button.
Important: If you have chosen to place all patterns on the marker in order to
obtain two products by symmetrization, any pattern that folds will occupy automatically
enough edge length to place these halves; this length is the double of the pattern
symmetry line length. The whole length required to place all folded patterns is displayed in the status bar in the
lower part f the EuroCAD Automarker application window.
The « MN: » field in the status bar will display the length in cm for the required edge length; the « MO: » field in
the status bar displays the length in cm for the occupied edge. After placing all folded patterns, the sizes for
required and occupied edge must be the same.
If you need to remake a
symmetrized pattern when it is
folded to half, you must click to
select the pattern, right click to
open the submenu and choose
« Unfold »;
Alternatively you must select the pattern, then click on « Unfold selected patterns » in the button bar.
32
User Manual - EuroCAD Automarker
Settings for folded patterns
In «Marker settings» window you have two options for the symmetrical patterns.
Thus, when a symmetrical pattern is half folded and placed on the edge of the fabric you can choose to make
it double or not, at folding. If you check the option “when a symmetrical pattern is half folded and placed on the
edge of the fabric, make it double”, on nesting optimization the patterns will be doubled.
The second option regards automatic nesting for folded or tubular fabric when pattern folding is chosen by the
program; it allows you to decide if all symmetrical patterns will be folded or not. The option „Always place the
symmetrical patterns half-folded on the edge of the fabric” is unchecked by default; if you check this option, during
nesting optimization all symmetrical patterns in the project will be folded.
3.22 Markers for plaids and stripes fabric
If the project will be cut from plaids and stripes fabric, EuroCAD Pattern Designer helps you with a more
efficient marker by setting the reference points plus the patterns dependency. Now you will be able to realize an
automatic nesting with alignment restrictions for plaids and stripes fabric.
If you have defined accurately the dependency
groups in EuroCAD Pattern Designer Application, in
EuroCAD Automarker you have only to enter the
values for the project repeating distance on length
and width together with the project displacement
values on length and width. Setting these values
must be done in „Marker settings” window after you
check the options in the „Stripes and plaids” field.
“First stripe/plaid begins at” refers to the fabric
width.
If you need to check or to visualize the
dependency groups for the project patterns that
must be placed on the marker, EuroCAD
Automarker offers two possibilities:
1. You must open „Pattern options” in „Pattern”
menu (see chapter 3.24); in the “Patterns
properties” opened table you must follow the „H
align group” and „V align group”.
2. Or, you must click to select the pattern to display the dependency group (either if it is on the stock area or
placed on the marker area); then right click and in the opened menu you can choose „Select vertically dependent
patterns” or „Select horizontally dependent patterns” options. Thus you can visualize and easily check if the
patterns are correctly placed on the stripes and plaids fabric.
33
User Manual - EuroCAD Automarker
If the pattern selected for the dependency group
display is located in the stock area you must click a
patterns size and then right click to open the submenu; in
the submenu you can choose „Select vertically
dependent patterns” or „Select horizontally dependent
patterns” options
You can follow the same procedure if the pattern
is already placed on the marker. Click to select the
pattern then right click and in the opened submenu you
can choose „Select vertically dependent patterns” or
„Select horizontally dependent patterns” options
3.23 Edit dependency groups for the patterns on a marker
In order to obtain higher efficiency when you work the project on stripes and plaids fabric, beside placing the
reference points you must define the dependency groups between patterns. You can declare the dependency
groups between patterns either during the design step in EuroCAD Pattern Designer or directly in EuroCAD
Automarker application by click on „Edit dependency groups” button.
This supposes to define the pattern placement on the marker by defining the dependency groups between
structured patterns in horizontal or vertical groups (defined in the first step). In both horizontal and vertical
dependency groups the patterns can be grouped as free patterns, patterns
aligned to stripes and plaids or in patterns dependent on each other.
The free patterns can be placed anywhere on the marker.
If the patterns are aligned to stripes and plaids, on the marker they will be
aligned with the reference point on the stripe/plaid line for a horizontal or
vertical group.
If two patterns are set in the same separate group, then they will be
dependent only between them according to the reference point placement; the first pattern on the marker can be
placed in any position while the second pattern will be placed according to the first one. To define the dependency
groups on a marker, you must click on „Edit dependency groups” button in the button bar. A „Edit dependency
groups” window will open; here you can define the dependency groups between patterns.
34
User Manual - EuroCAD Automarker
In the left side of the „Edit dependency groups” window there are displayed the dependency groups and the
patterns allocated to these groups either horizontally or vertically. To display the vertical/horizontal dependency
groups you must click on « Vertical » / « Horizontal » button.
If in the current project there were not defined the dependency groups, only the « Free patterns » and
« Patterns aligned to stripes and plaids » dependency groups will be displayed; all patterns in
the project are attached to the free patterns group.
To display patterns in a dependency group you must click on the « + » symbol near the
dependency group name or click on « Show patterns » button in the left upper side of the „Edit
dependency groups” window.
To hide patterns and to display only the horizontal and vertical dependency groups you
must click on « - » symbol near the dependency group name or you must click on « Hide
patterns » button in the left upper side of the „Edit dependency groups” window.
In EuroCAD Automarker, the „Edit dependency groups” window
differs from EuroCAD Pattern Designer. Here the dependency groups are
defined separately for each size.
First you must select the size to define the dependency groups.
For the projects with more than one fabric layer (fond, lining, insertion) you
can edit dependencies groups for all fabrics or only for one fabric. Thus you
must use the filter in the “Fabric” field. You must click on the right side arrow
and in the opened list you must choose the fabric to display the dependencies
group. When you select the fabric, in “Free patterns” group will be displayed
only the patterns designed from the selected fabric.
Dependency groups between patterns
If you want to nest patterns not necessarily aligned to stripes and plaids but only between
them, you can add one or mode dependency groups, different from the dependency groups on
striped and plaids. Thus, if you need that the draw on the front pocket to be continued on the
front pattern but you don’t need a specific stripes drawing on these patterns then you must
create a horizontal dependency group on which you add the front pattern and the front pocket.
This group will be added to the horizontal dependency groups if you need the drawing on the
patterns to be continued horizontally or on the vertical dependency groups if you want the
drawing to be continued vertically.
To add a new dependency group you must right click in the column in the left side of „Edit
dependency groups” window and right click to select „Add group”
A new window will open; here you must edit the name for the new dependency group.
After entering the name for the new dependency group, you must click on “OK” button to
display it among the other dependency groups. If you want to cancel the addition of a new
dependency group you must click on „Cancel” button.
35
User Manual - EuroCAD Automarker
To add or remove patterns on/from a dependency group, you must click to select
the pattern and drag it by the mouse over the name of the destination dependency
group.
Unselected patterns or groups are filled in yellow. When selected, their symbols
that precede the names will become filled in red.
When you select a dependency group near the „Edit dependency groups” window
will appear the patterns in that group with the corresponding reference points and the
placement according to the stripes and plaids, on horizontal or on vertical.
A pattern can be moved from a group to another by right click on the pattern and by
selecting „Cut” option; then you must select the group where you will move the pattern,
you must right click and select „Copy” option.
Operations on a dependency group
When you right click on a dependency group name, a menu will open with
the following options:
- Add group
- Delete group
- Rename group
- Add subgroup
If you want to add/delete a dependency group, you must click on “Add
group” or “Delete group” respectively.
Dif you want to change a dependency group name you must select the
„Rename group” option
If you want to add a subgroup to the selected dependency group you must click on „Add subgroup” option. A
new window opens; here you can edit the name for the new created subgroup.
After defining the dependency groups and the patterns distribution among them you must click on „OK” button
in the right lower part of the „Edit dependency groups” window. If you want to cancel the dependency group
definition, you must click on „Cancel” button.
3.24 Setting a background texture for the stripes and plaids on the marker
To facilitate the nesting check on stripes and plaids fabric, EuroCAD Automarker allows you to choose and
display the fabric texture on background, with a defined distance between stripes and plaids.
To display a texture, in the „Marker settings” window you set the distance between stripes and plaids and then
click on „Choose background texture” button; then you can load the image for the texture from the computer.
In „Marker settings” window, after setting the distance
between stripes and plaids you must click on „Choose
background texture” button
36
User Manual - EuroCAD Automarker
After you have clicked on „Choose background texture”
button, a new window will open; here you must click on „Load
texture” button.
In the new opened window you must select
the image for the texture and the click on „Open”
button.
After selecting an image, in the „Background texture” you
can preview the texture. Here you can also adjust the contrast
and brightness for the selected texture, by moving the
interactive cursors. Thus you can preview in real-time the
changes on image options.
If the texture corresponds to your needs and it is ready to
be displayed, you must click on „OK” button.
After selecting a background texture, it will be displayed in the marker area.
37
User Manual - EuroCAD Automarker
When you want to remove a background texture from an opened file, click on “Marker” in the menu bar,
choose “Marker settings” and click on “Choose background texture” button. In the “Background texture” opened
window, click on „Remove texture” button.
3.25 Automatic patterns nesting for defective fabric
Usually, the fabric shows different defects (faults) that delays the maker production. These defects are
frequent on fabric with points, lines or other shaped projects. EuroCAD Automarker helps you to solve the marker
and nesting problems for a defective fabric. Thus you will be able to realize manual or automatic markers
bypassing the defects and realizing an optimal marker point placement.
To realize a marker on such a fabric, you must first define the defect (fault) type and how are they placed on
the fabric sheet.
Defining the defect type and placement will be realized by click on „Marker settings” button in the
toolbar menu, followed by selection of „Fabric defects” tab. Alternatively click on “Marker” in the menu
bar, choose “Marker settings” and click on „Fabric defects” tab.
38
User Manual - EuroCAD Automarker
To avoid a fabric defect, you must check to define the defect type: point, line, rectangle, polygon. After defining
the defect type you must define its position and name it, then add it in the defect list.
In the lower part of the window there is a preview area.
Point defects
If the fabric shows one or more point defects you must
check „Point” option
Then you must define the point defect position by
entering the values for the distance from the upper and left
fabric edges.
If this defect is repeating on all fabric sheet length, you
can enter the required value in cm in the box near the
„Width repeating distance of the defect” message.
You can also enter a name for this defect in “Fabric
defect name” field.
For this defect to appear on the marker you must add it
in the defects list on the upper right side of the “Marker
settings” window and „Fabric defects” tab. After setting the
defect position and name, you must click on „Add” button
located under the defect list box.
If you want to modify settings for a specific defect, you
must click on „Modify” button under the defect list box. To
delete a defect from the list, click to select the defect and
then click on „Delete” button.
Line defect
If the fabric shows one or more line defects you must
check „Line” option under „Defect type” option.
Then you must set the line defect position by setting
the distances from the upper and left fabric edge for the
two points that defines the line defect.
If this defect is repeating on all fabric sheet length, you
can enter the required value in cm in the box near the
„Width repeating distance of the defect” message.
You can also enter a name for this defect in “Fabric
defect name” field.
39
User Manual - EuroCAD Automarker
For this defect to appear on the marker you must add it
in the defects list on the upper right side of the “Marker
settings” window and „Fabric defects” tab. After setting the
defect position and name, you must click on „Add” button
located under the defect list box.
If you want to modify settings for a specific defect, you
must click on „Modify” button under the defect list box. To
delete a defect from the list, click to select the defect and
then click on „Delete” button.
Rectangle defects
If the fabric shows one or more defects that are not
line or point type, then you must check „Rectangle” or
“Polygon” options.
To define a position defect that can be located in a
rectangle you must define the upper left corner of the
rectangle from the upper/left fabric edge; then you have to
set the rectangle width and length.
If this defect is repeating on all fabric sheet length, you
can enter the required value in cm in the box near the
„Width repeating distance of the defect” message.
You can also enter a name for this defect in “Fabric
defect name” field.
For this defect to appear on the marker you must add it
in the defects list on the upper right side of the “Marker
settings” window and „Fabric defects” tab. After setting the
defect position and name, you must click on „Add” button
located under the defect list box.
If you want to modify settings for a specific defect, you
must click on „Modify” button under the defect list box. To
delete a defect from the list, click to select the defect and
then click on „Delete” button.
Polygon defects
If the fabric shows one ore more polygon
type defects, you must check “Polygon” in the
“Defect type” field
40
User Manual - EuroCAD Automarker
To define a polygon type defect you must
define each point position from the upper and left
fabric edges. After inserting a point position you
must click on “Add” button to preview it in the
near window. To change the point coordinates
you must first click to select the point, then you
enter the new coordinates and you click on
“Modify” button. To delete a polygon point you
must click to select it and then click on “Delete”
button
If the defect repeats on all fabric length, in
the box near the message „Width repeating
distance of the defect” you must enter the value
for this distance.
You can also associate a name for this
defect. This name must be entered in the: Fabric
defects name” box.
For a defect to be displayed on the maker, it
must be added to the defects list on the right side
of the “Fabric defects” window. After defining the
defect name and position you must click on “Add”
button under the defect list.
If you want to change the parameters for a
preexistent defect, you must select the defect;
you will perform the changes and then click on
„Modify” button located under the defects list. To
delete a defect from the list, you must select the
defect and click on the „Delete” button under the
defects list.
3.26 How to use the horizontal and the vertical ruler:
There are two functions called “Show/Hide the horizontal ruler” and “Show/Hide the vertical ruler” used to
establish a pattern position in the marker by measuring or for making precisely measurements in the marker.
You can use these two functions to decrease the marker area.
To make measurements on the length
of the marker using these functions you
must activate the function „Show/hide
vertical ruler”. You can find this function on
the second tool bar from Automarker.
A vertical blue line will be displayed
at the beginning of the marker when
activating this function.
To make a measurement on the marker
using the vertical ruler you must move the
vertical ruler to the place where you want to
end up the measurement. When the mouse
cursor is on top of the vertical ruler its shape
becomes different. At this moment you can
drag the mouse keeping left click pressed, to
move the vertical ruler on left and right.
The measured value will be displayed
on the information bar in real time right next
to “RH” letters. “RH” short comes from
“horizontal ruler”, the displayed value
represents the measured distance between
left end of the marker and the present ruler
position.
41
User Manual - EuroCAD Automarker
To make measurements on the width of
the marker using these functions you must
activate the function „Show/hide horizontal
ruler”. You can find this function on the
second tool bar from Automarker.
A horizontal blue line will be
displayed bottom side of the marker when
activating this function.
To make a measurement on the marker
usig the horizontal ruler you must move the
horizontal ruler to the place where you want
to end up the measurement. When the
mouse cursor is on top of the horizontal ruler
its shape becomes different. At this moment
you can drag the mouse keeping left click
pressed, to move the horizontal ruler up and
down.
The measured value will be displayed
on the information bar in real time right next
to “RV” letters. “RV” short comes from
“vertical ruler”, the displayed value
represents the measured distance between
bottom side of the marker and the present
ruler position.
If when making an automatic
nesting the “Show/hide vertical ruler”
and „Show/hide horizontal ruler” are
activated, meaning the blue rulers are
displayed on the screen, the patterns
will be always arranged on the right side
of the vertical ruler an on top of the
horizontal ruler. This helps you to
decrease the marker area without
changing the marker width.
If when making an automatic
nesting size by size the vertical blue
ruler is not displayed, the patterns
placement on the marker will be done
related to the red end mark line. For
example after nesting one size when
trying to nest another one, patterns from
this last size will be placed next to the
red line, and never in front of it.
There are two situations when the
blue ruler is displayed on the screen:
1.
If the blue ruler is displayed on
the screen and it position is in front of
the red line, the patterns placement
will be done next to the red line.
2.
If the blue ruler is displayed on
the screen and it position is next to the
red line, the patterns placement will be
done next to the blue line.
42
User Manual - EuroCAD Automarker
3.27 Guiding lines printing
To plot or to print the guiding lines used at a moment on the marker, you have first to mark
them on the marker when you use them.
The display of the guiding lines that have to be printed:
After the vertical and the horizontal
rulers have been placed in the desired
position, they can be marked as a position on
the marker.
To preview the marks of these lines it
is necessary to activate the „Show print
guiding line” function from the second bar
with functions.
When this function is active, if the
position of the lines has been marked on the
marker, it will appear as red horizontal and
vertical bars.
The red lines will be visible after
hiding the blue rulers on the marker or, after
these rulers have been moved in a different
position.
Draw the vertical/horizontal line for printing:
After the vertical and horizontal rulers are put in the desired position, this position can be marked for
plotting when the marker will be plotted, or for printing when the mini marker will be printed using the
„Draw vertical guiding line” and „Draw horizontal guiding line” buttons.
For this, the user will make a click on the „Draw vertical
guiding line” and „Draw horizontal guiding line” buttons
(these two functions must be used according to the situation,
thus, they can be used together or separate) that can be find on
the second tool bar.
When pressing the above mentioned buttons appears
red lines that can be plot to the plotter or printed to the printer in
the mini marker. This will happen if in the plotting window the
„Marker guiding lines” option it is checked.
Attention! The red bars that appear on the marker only mark the ruler position at a certain moment.
They don’t have properties similar to the rulers.
Erase all guiding lines on the marker:
After using the guiding lines, the user has the
possibility to delete them if these are no longer necessary
on the marker. To delete these lines the user must activate
the „ Delete the guiding lines printed on the marker”
function placed on the second tool bar.
43
User Manual - EuroCAD Automarker
3.28 Nest/remove patterns on a marker
In EuroCAD Automarker you can nest some patterns or remove them from the marker from « Pattern » menu
and selection of the required option.
On a marker in EuroCAD Automarker, you can nest all
selected patterns, only large or small patterns in a project.
If you want to remove patterns from a marker you can select all
patterns, only selected patterns, only large or small patterns.
To place multiple patterns on a marker, you must select them in the
stock area and then click “Nest selected” button in the toolbar.
To remove multiple patterns from a marker you must select them in the
marker area and the click on “Remove selected” button.
3.29 Pattern settings and restrictions
For a fast and easy usage EuroCAD Automarker offers three possibilities to visualize and change the Patterns
properties and restrictions:
1) Right click on a pattern to display settings. In the opened menu you must
select „Pattern restrictions”
2) In „Pattern” menu in the EuroCAD Automarker menu bar, you must
select „Pattern restrictions...” option.
3) Click to select the pattern and click on „Pattern settings and restrictions” button in the
EuroCAD Automarker toolbar.
44
User Manual - EuroCAD Automarker
The „Pattern restrictions” is structured in two
tabs. On the first tab, called „Information
&Restrictions” you can find information regarding
the pattern: name, length, area, size, width and
position. Under pattern information, this tab
displays the restrictions regarding rotation and
flip and pattern selection. If the pattern respects
general restrictions then changing these
restrictions cannot be done in this window.
If the pattern respects its own restrictions,
then these restrictions can be changed in this
window, if required. If you have done changes in
flip or rotation restrictions and you want to get
back to the initial settings you must click on
„Initial settings button”
In the same window you can set a value for
the maximal illegal rotation from the grain axis.
The maximal illegal rotation from the grain axis
represents the value in degrees for the allowed pattern rotation beyond the rotation freedom. Thus, if a pattern has
a 180° rotation freedom and a maximal deviation of 1° from the grain axis, then it can be placed on a marker with a
rotation of 1° ,0°, 359° or 179°,180° and 181° respectively.
For fast accessing this page, you must use CTRL+I keyboard shortcut.
In the second tab you can find information regarding the reference point position. The reference point position
on the marker can be modified by entering new values for x or y axis and also for horizontal and vertical movement
(Dx/ Dy). To display the new position for the reference point in the drawing you must click on „Refresh image”
button.
When the selected pattern is already nested you
cannot change the reference point position and the
editing fields become inactive. Changing the
reference point position in this window is used mostly
for important patterns while they are missing some
technical elements.
Attention! The reference point at nesting will be
displayed and printed only if the marker is placed on
stripes and plaids!
To apply changes in pattern restrictions, you
must on „Apply” button. To apply changes and to
close „Pattern restrictions” window you must click on
„OK” button. To cancel changes and to close „Pattern
restrictions” window you must click on „Cancel”
button.
3.30 General restrictions
You cannot change general pattern restrictions in „Pattern restrictions”
window, “Information and pattern restrictions” tab. To change the general
pattern restrictions you must enter the „Pattern” menu in the menu bar of
EuroCAD Automarker application and choose „General restrictions...”
In the new opened
window you can choose the
new general restrictions for
the patterns. Thus you can
set restrictions regarding pattern rotation and flip by checking the
required option. If you want to rotate all patterns in a size, you
must check the “Rotate entire size” option.
After you have realized all required changes for the current
project, you must click on „OK” button to apply the defined general
restrictions. To cancel the application of new general restrictions, you must click on „Cancel” button.
45
User Manual - EuroCAD Automarker
3.31 Settings and restrictions for folded patterns for markers on folded or
tubular fabric
To set or calculate the rotation angle and flip that are allowed for a pattern, you must consider the following:
1) If you deal with a folded pattern on a marker on a tubular or folded fabric – you must consider what edge will
be used.
2) When a pattern respects general restrictions (entire size is rotating) and in the size collection there is a
folded pattern, you must check the way the pattern can be placed on the marker.
ATTENTION! For an accurate nesting procedure you must look for an accurate pattern restrictions and
settings definition while at pattern load on a folded or tubular fabric there is no folded pattern.
Regarding the fact that on a pattern load on folded or tubular fabric there is no folded pattern, you must check
the settings and the way they are calculated, especially for the following situations:
1) When you change marker settings for the tubular spreading (when you change the fabric folding edge or
when you go from the spreading on tubular fabric to normal spreading)
2) When you fold a pattern you must check that the pattern restrictions are compatible with the fabric edges or
with other folded patterns or with other patterns to be folded.
3) When you unfold a pattern, you must check if the pattern restrictions are compatible with the fabric edges or
with other folded patterns or with other patterns to be folded.
4) When you modify pattern restrictions you must check if the pattern will can be folded and if it is compatible
with the folded edges.
5) When you modify general restrictions you must check if there is a half-pattern confined to general
restrictions and that cannot be placed on the edge.
3.32 Patterns properties table
In EuroCAD Automarker you can display and change the properties for one or multiple patterns, in a table
called „Patterns properties”. To open this table, click on „Pattern” menu in the menu bar and choose „Pattern
options table” button. Alternatively you may click on the button “Modify the selected patterns restrictions” in the
button bar.
If there is no selected pattern, then in the „Patterns properties” table will be edited all patterns on the marker. If
there is a selected pattern, then in the table you can find only the properties for the selected pattern. To display the
properties only for some patterns, you have to select them by left mouse click while holding down SHIFT key. In
„Patterns properties” table you can change single or multiple Patterns properties at the same time.
To display „Patterns properties” table
, you must select „Change
pattern options...” in the „Pattern” menu in the menu bar of EuroCAD
Automarker application.
Alternatively you may click on the button “Modify the selected patterns
restrictions” in the button bar.
In this table you can display and change simultaneously information regarding pattern membership to some
restrictions, rotation and flip restrictions, the cut allowance, the cutting priority and the pattern dependency to a
horizontal or vertical align group.
In this table you can save or load pattern properties into or from a file on the hard disk; pattern settings can be
automatically applied to similar patterns in the cut plan or for all similar patterns in the marker.
46
User Manual - EuroCAD Automarker
- No – is the current number of the pattern in « Patterns properties » table
- Name – here are displayed the pattern size and name. This information cannot be changed.
- Size – This column displays the sizes name and an alphanumeric index for the sizes that appear more than
once on the marker
- General restrictions – If the corresponding boxes are checked, then the pattern respect general restrictions;
if the box is unchecked then the pattern respects its own restrictions. This option can be changed by
check/uncheck the corresponding box in general restrictions column.
- Rotation – In this column you can find information regarding the pattern rotation freedom according to the
grain axis on pattern placement on the fabric. This information cannot be changed unless the pattern respects its
own restrictions.
- Flip – in this column you can find information regarding the pattern placement on the fabric, for cut. This
information cannot be changed unless the pattern respects its own restrictions.
- Allowed tilt (*) – in this column it is displayed the value for the allowed tilt – the maximum allowed deviation
from the grain axis. The deviation from the grain axis can be set in this table.
- Seg gap – for patterns imported from Gerber with cut allowance on segment, the corresponding box will be
checked. If you uncheck this box you may a cut allowance similar with the patterns in EuroCAD application.
-Same gap – check the box corresponding to this column to have the same gap value for all pattern edges
meaning that when this column is checked you can complete any column and the other three will be automatically
complete with the same value by the program.
- U gap (cm) – in the corresponding boxes of this column, it is displayed the cut allowance from the upper
pattern edge. It is considered upper from the grain axis. The cut allowance value can be changed in this table.
- D gap (cm) – in the corresponding boxes of this column, it is displayed the cut allowance from the lower
pattern edge. It is considered down from the grain axis. The cut allowance value can be changed in this table.
- L gap (cm) – in the corresponding boxes of this column, it is displayed the cut allowance from the left pattern
edge. It is considered at left from the grain axis. The cut allowance value can be changed in this table.
- R gap (cm) – in the corresponding boxes of this column, it is displayed the cut allowance from the right
pattern edge. It is considered at right from the grain axis. The cut allowance value can be changed in this table.
47
User Manual - EuroCAD Automarker
- Plot gap. – you must check this option if you want to print the cut allowance contour for the selected pattern.
- H shrink (%) – in this box you can enter the horizontal contraction value for the selected pattern. This
information can be modified only in « Patterns properties » table.
- V shrink (%) – in this box you can enter the vertical contraction value for the selected pattern. This
information can be modified only in « Patterns properties » table.
- H align group – in the corresponding boxes in this column you can find information regarding the pattern
membership to a specific horizontal alignment group. This information cannot be modified in « Patterns properties »
table.
- V align group – in the corresponding boxes in this column you can find information regarding the pattern
membership to a specific vertical alignment group. This information cannot be modified in « Patterns properties »
table.
- Placed – in this column, the checked boxes show nested patterns; the unchecked boxes show the patterns
that are not nested. This information cannot be changed in « Pattern properties table ».
- Angle – this box will display the nesting angle for a specific pattern. This information cannot be changed in
« Pattern properties table ».
- Flip – in this column you can see if a pattern was placed as flipped and also the flipping method. This
information cannot be changed in « Pattern properties table ».
- Overlap – if the pattern overlaps with other patterns, the overlapping values are displayed in this column.
This information cannot be changed in « Pattern properties table ».
- Thermal bonding – the corresponding box will be colored if the pattern is part of a thermal bonding group.
The color is specific for each thermal bonding group. This information cannot be changed in « Pattern properties
table ».
- Th. Bd. cont. – in this box you may set the contour type to be used for the selected group. These settings
can be realized for a group only. A group contour can be simple or complex.
- Cut. order – When you are using an automatic cutter you can set the cutting order for the selected patterns
in order to increase the efficiency of the cutting procedure so as the knife t follow shorter traces.
In « Pattern properties » table you can display only a part of these columns/information, according to the
workspace organization.
For fast access to required information, the columns in the table are organized in 6 information groups. The
columns in a group have the same color and can be cu shown/hidden by clicking on a display button on the top of
the “Pattern properties” table.
Thus you may choose which info will
be displayed in the table according to your
needs. You can select the groups that
contain the useful information. To display
a specific group in the table, you must
click on the corresponding button for each
group.
Change properties for multiple patterns in the same time
To change properties for multiple patterns at the same time you must first select the patterns; To select all
patterns in a range, hold down SHIFT key and click on the first and the last pattern on the range. To select random
patterns in a range, hold down CTRL and click on each pattern to be selected in the boxes on the « No » column.
To select all patterns in a table use CTRL+A key combination. The changes for one pattern settings will be
automatically applied to all selected patterns.
To select consecutive patterns in
the table, click on the first pattern box in
« No » column, hold down SHIFT key
and then click on the last box for the
pattern to be selected. If you click on
the box no. 1, you hold down SHIFT key
and you click on box no. 4, then also
boxes no2 and 3 will be selected.
48
User Manual - EuroCAD Automarker
To select random patterns in a
range, hold down CTRL and click on
each pattern to be selected in the boxes
on the « No » column.
Change simultaneous restriction for multiple patterns.
For a simultaneous restriction change
for multiple patterns you have to select the
patterns than to perform the required
changes only for a pattern from the selected.
The program will automatically change
properties for all other selected patterns. To
apply properties change you must click on
« OK » button. E.g., if the selected patterns
2,3,4 and 5 has a rotation freedom degree of
180° and you want to give them total
rotation freedom then you must change the
box for pattern 2 in « Rotation » column and
automatically the rotation boxes for patterns
3,4,5 will be changed correspondently.
Save/load pattern properties
All pattern properties that appear in
this table can be saved on a file on a hard
disk. You must click on the pattern row for
which you want the properties to be saved
and then click on the right mouse button. In
the opened menu you must choose “Save
the rules for the selected pattern”. A new
window will open; here you can choose a
location on the disk where the settings will
be saved. Name the file to be saved and
then click on the “Save” button. The saved
file will have the “pp” extension.
To load a saved *.pp file that contain all
pattern settings you must right click on a
pattern; in the opened menu you must select
“Load the rules set of selected pattern”. A
new window will open; here you can choose
a location on the disk from where the settings
will be loaded. Then click on “Open” button.
Automatically setting changes for the similar patterns in a cut plan or for the similar patterns in the
current marker
For the similar patterns in a marker or in a cut plan, you can automatically change a setting by changing that
setting on similar patterns. We call similar patterns the patterns with different sizes that have the same names.
Attention! Mirror doubles are not similar patterns.
49
User Manual - EuroCAD Automarker
For an automatic change on the similar
patterns you must first select the setting. Thus,
you must click the corresponding box for one of
the similar patterns. You must change the
setting and then right click in order to open the
options menu. Here you must select “Apply this
setting to all similar patterns from the entire cut
plan”
If you want that the change will be applied
to all patterns on the current cut plan. If you
want the changes to be applied to all patterns in
the current marker then you must choose the
”Apply this setting to all similar patterns from
the current marker” option in the opened menu.
You can automatically change all settings
for all similar patterns in a marker or in a cut
plan.
Proceed as described above. You must
select a pattern on which you perform the
setting changes; then right click on the setting
and in the opened menu you can choose “Apply
all pattern settings to all similar patterns from
the entire cut plan” or “Apply all pattern settings to all similar patterns from the current marker”.
To order patterns by column, you must click on the column header in “Patterns properties” table.
The information in this table can be printed as a file called « Patterns properties ». To print this information you
must click on « Print » button. To preview the file to be printed you must click on « Preview » button located in the
status bar of the « Patterns properties » table. The printed document will include also the printing date.
50
User Manual - EuroCAD Automarker
3.33 The cutting allowance between patterns
Sometimes, (when you use special featured fabric or fabric with stripes and plaids) you need to leave some
spaces between patterns; these spaces, called technological distance in EuroCAD Spread&Cut Planner program
or cut allowance in EuroCAD Automarker.
The technological distance represents the total distance between two patterns and remains the same for all
patterns on the marker while the cut allowance represents the distance for a single pattern and can have different
values from other patterns. The cut allowance for a pattern can have different values horizontally or vertically or on
the left/right side of the pattern.
The allowance can take also negative values and positive ones.
Up Gap (Ugap)
Right Gap (Rgap)
Left Gap (Lgap)
Down Gap (Dgap)
The notches will not translate at plotting on the negative allowance.
The values for the cut allowance will be entered in the „Patterns properties” table opened from the „Pattern”
menu, in the columns „U, D, L, R reserve” respectively.
When the user wants to add the same gap to all pattern edges
he must check the “Same gap” column from the “Modify the
selected patterns restriction” table, and then he must fill one of the
four boxes with the desired gap value. In this case the other 3
boxes will be filled with the same value.
When the user wants to add the same gap to all patterns
edges for all patterns in the marker he must proceed like this:
Select all patterns in the table using Ctrl + A key
combination and then check only one check box from the
“Same gap” column.
After making the previous step, a new window
will open called “Uniform gap”. In this window the user must complete the gap value that he wants to use
for all patterns and then click on “Ok” button. After this, the program will set this gap value to all patterns in
all four columns “Ugap”, “Dgap”, “Lgap” and “Rgap”.
You may also print the contour that marks the pattern reserve by checking the corresponding box in the „Plot
gap” in the „Patterns properties” table.
51
User Manual - EuroCAD Automarker
3.34 Pattern selections
Beside the SHIFT + click selection method available in the stock and marker areas, EuroCAD Automarker
gives you the possibility to select all patterns, the entire size, all similar patterns. To check if there are overlapping
between the patterns or to check if the overlapping are between the accepted limits it is possible to select the
overlapping patterns.
You can do the selection in two ways:
1. In the „Pattern” menu in the menu bar choose the selection
mode.
The name of the function
Select all patterns Ctrl +A
„Select similar patterns”
„Select entire size”
Select placed patterns
„Select all patterns with flip"
The way to use the function
This function it is enable always and allows selecting all
the patterns on the marker or of all patterns from display
zone. This function can be used by pressing the keys
Ctrl +A.
This function becomes enable when is selected at least
a pattern, and it will select all the sizes of the
pattern/selected patterns.
This function becomes enable when is selected at least
a pattern, and it will select all the patterns that belong to
the selected sizes.
This function is enable always, and allows the selection
of all patterns.
This function it enable all the time and it allows the
selecting of the patterns that have flip on the marker.
2) In the toolbar where you can find the buttons for different functions
you must click on the arrow near the „Select all” button. A submenu
opens; here you can choose the selection type.
The name of the function
Select all patterns Ctrl+ A
„Select similar patterns”
„Select entire size”
„Select the thermal bonding group”
The way to use the function
This function is always enable and allows selecting all
the patterns on the marker or of all patterns from display
zone. This function can be used by pressing the keys
Ctrl + A.
This function becomes enable when is selected at least
a pattern, and it will select all the sizes of the
pattern/selected patterns.
This function becomes enable when is selected at least
a pattern, and it will select all the patterns that belong to
the selected sizes.
This function it is enable when it is selected at least one
pattern from the thermal bonding group. It allows the
selection of all patterns from the bonding group from
which belongs to the selected pattern or the (selected
patterns). In case if are selected patterns that belong to
different bonding groups, will be selected all the
patterns that create the bonding groups.
52
User Manual - EuroCAD Automarker
Select placed patterns
This function it is active always, and when you run this
function, it there are overlapped patterns on the marker
these will appear selected on the marker.
Overlapping distance between two patterns can be
visualized on the status bar of the EuroCAD Automarker
application if the overlapping patterns are selected. The
value appears near „D:” index.
This function is always enable and allows the selection
of all patterns.
„Select all patterns with flip"
This function is enable all the time and it allows the
selecting of the patterns that have flip on the marker.
„Select overlapped patterns”
3.35 Pattern grouping for thermal bonding
Part of the patterns on a marker can be grouped specifically to facilitate the thermal bonding. Thus, you must
select all patterns for thermal bonding then you must click on „Group the selected patterns for thermal bonding”
button.
Patterns that must be grouped for thermal bonding must obey the same rules: to be valid placed on a marker,
to have the same shrink and to be tangent altogether.
The contour that limits this pattern group from the other patterns on the marker can be of two types: complex
or simple. The simple contour is rectangle-like and contains all patterns in the group. The complex contour follows
with high accuracy the contour for the patterns placed at the group edge. A group contour can be set in the
« Pattern properties » table in the « Th. Bd. contour. » column, on the row that corresponds to the group.
When you print this kind of patterns group on a plotter, they will be separated or not with a contour from the
other patterns. When you export this group for a cutter, the patterns in the group can be cut as group or
individually, following each pattern contour, according the settings defined by the user in the cutter export window.
To group part of the patterns you must select
them by click and drag a rectangle or by hold down
SHIFT key and click on each pattern; then click on
„Group the selected patterns for thermal bonding”
button
The grouped patterns are encircled by a red line.
To ungroup or remove patterns from a group you
must select the patterns and then click on „Remove
the selected patterns from the thermal bonding
group” button.
After you click on this button, the selected
patterns will be located out of the red bonds.
You can set more than one group for thermal bonding on a marker. Patterns in a thermal bonding group will
behave as a single pattern during nesting optimization. Thus, a thermal bonding group will respect the restrictions,
the contraction and the cut allowances for the patterns in the group.
Attention! During automatic nesting, the groups will not rotate nor flip except the situation when the patterns
have their own restrictions. Otherwise, the nesting process can be impaired.
53
User Manual - EuroCAD Automarker
Properties for the patterns in a thermal bonding group
The properties of a thermal bonding group can be displayed in „Pattern properties” table.
When you create a thermal bonding group, a new row called “Group” is added in the “Pattern properties” table.
In the
“Thermal bonding” column, the boxes that correspond to the patterns in a group will have the same color.
In the “Th.Bd. Contour” column you must set the contour type assigned to the group. To display these columns
in the table you must click on the button “Show/hide thermal bonding columns” in the button bar of the “Pattern
properties” table. If there are more groups on the same marker, they will be marked in different colors in the
“Pattern properties” table.
On a thermal bonding group you can set a gap that
is independent from the pattern gap. Thus you must fill
in the boxes in the Ugap, Dgap, Lgap and Rgap in the
group row. If the patterns in a group already have a
gap, the group gap will extend the pattern gap.
Settings for printing/cutting the groups for thermal bonding
To open „Settings for thermal bonding” window you must select
at least one pattern from the thermal bonding group and then click
on „Export in HPGL-PLT format” or „Export ISO-CUT”.
In this window you must set if you want to print/cut all patterns
on the marker or only the thermal bonding selected group. You can
also add the contraction on length and width for the grouped
patterns. Thus, you must fill the boxes near the messages „Length
contraction” and „Width contraction” with the appropriate values.
Attention! Even if the patterns in the thermal bonding group
had a previously declared shrink (in „Pattern properties” table) the
shrink for thermal bonding will be added on the initial patterns.
For example, if the initial patterns had a declared shrink and
while printing the vertical and horizontal shrink is set to 0, the
patterns in the thermal bonding group will be printed at the initial
dimensions (with no shrink).
54
User Manual - EuroCAD Automarker
If the patterns for the thermal bonding
group have different shrink parameters, a
warning message will be displayed. Now,
you must check and modify the shrink for
the patterns that will be submitted to
thermal bonding. These settings will be
changed in the „Pattern properties” table.
If you change a pattern shrink value in the „Pattern properties” table, you will be warned about the thermal
bonding group dismantling. The same warning message will appear at any change that will induce the thermal
bonding group dismantling.
3.36 Cut patterns
For the situations when it is necessary a simple modification of the patterns of a certain size, it is the function
„Cut pattern” which is displayed in a menu when you make right click on a pattern which can be in the marker area
or in stock area.
Or:
If you want to cut the pattern, you will select first
the pattern in one of these zones and then you
will access the menu by right clicking, the
function „Cut pattern”.
When you activate this function it will open a
window in which you can cut the pattern.
Create dependent
line
Undo initial Undo Redo
Create translated
contour
Create
parallel
Zoom
55
The cutting of the pattern can be realized after a
straight line using the function „Dependent line”
or using the form of a certain zone of the pattern
using one of these functions „Create parallel” or
„Create translated contour”. These functions
are in the upper side of the window „Modify
patterns” together with the functions „Undo”,
„Redo” and „Zoom”.
User Manual - EuroCAD Automarker
After the window was opened on the screen, you
will choose one of the cutting functions and then
you will apply the function, following the steps
which appear at the bottom of the window. After
you choose the function with you want to cut the
pattern, the mouse cursor it will convert in to
arrow and all the points on the pattern will
become active. The selection of the zone on
which you want to make the cut it can be make in
tow wais; you can make click on the segment on
which you want to make the cut or you can select
clockwise tow points that mark the zone after it
will be make the cutting.
The selection of a segment
The selection of a zone by
selecting at a time the tow
points that define it.
After selecting the zone or the segment, in the
right side of the window appears a new window
which contains the proprieties of the used as
cutting tool element (dependent line, translated
contour or parallel contour) where you will realize
the necessary settings to eliminate the zone
which you don’t need on the pattern.
In the field distance you will set the distance
between the pattern contour and the line, the
angle represent the inclination of the line and the
percentage indicates the zone of the line on
which it will be realized the rotation. After making
all the settings, you will press the button „Apply”
to save all the settings. In similar way you will
make for the other cutting functions.
Before to realize the cutting of the pattern, you
can choose that this modification to be made
only for the selected pattern, for the double
patterns on the same size(for the pear patterns)
or for all the identical patterns from the same
size. This it can be done by checking one of the
options:”Apply only to the selected pattern”,
„Apply to the doubles in the same bundle” or
„Apply to all the identical patterns from the
same size”. These options are on the right side
of the window „Modify patterns”.
After you placed the cutting tool in the right
position, you will have to press the button „Cut”.
In this moment you have tow patterns, select the
pattern that you want to keep by making left
mouse click on it.
56
User Manual - EuroCAD Automarker
3.37 Pattern update
In EuroCAD Automarker the user has the possibility to update patterns shape
on the marker.
This facility is useful for those cases when the marker is already nest and there
was made some changes in EuroCAD Pattern Designer for the used in the marker
projects. This function must be applied only if the changes are required in the
opened marker also. The changes that can be updated in the marker are: the
internal technical elements adding, pattern shape modification attaching new
auxiliary patterns. Thus, to update the patterns, when the marker is opened, the
user must access the “Pattern update” function that can be find in the menu that
opens when making click on the “Add patterns to marker from an external file”
extension function. Changes like adding or removing a pattern in or from the
project won’t be updated in the marker.
After activating this function a new window opens where the user can choose
the projects that he wants to use for update. In the new opened window the user must select the project that
requires to be updated, and then click on the “Update” button. When the project is updated a message list will
appear in the lower part of the window. The user must check all messages to know how to proceed further.
The “Unnest overlapped patterns” option will be used for all patterns for which the pattern contour was
changed.
If the above mentioned message is unchecked, the patterns which overlap with other patterns in the marker
after the update won’t be removed from the marker. The “Quit” button helps the user to abort the pattern update.
Note: This option helps only to update the existing patterns not to add or remove patterns from the marker.
3.38 Using the measure tool
To check or to measure some dimensions on a marker you can use the measure tool in EuroCAD Automarker.
To call this function you must click on the „Measure tool” button in the toolbar.
To make some measurements in the marker area, you must click on
„Measure tool” button in the toolbar.
After you click on „Measure tool” button, the cursor changes to a
cross with a small ruler.
To measure a pattern, click on the start point for the measurement,
hold down the left mouse button and drag up to the end point for the
measurement; then release the mouse button.
The value for the measured distance is displayed in real-time in the
program status bar, near „D:” letter.
To exit this working mode, you must click again on „Measure tool” button.
57
User Manual - EuroCAD Automarker
3.39 Pattern alignment
Two or more pattern can be aligned between them or on the reference point. To
align two or more patterns you must first select them. The selection order is important
for the further alignment. Thus, the last selected pattern will remain fixed while the
other patterns will be aligned to this fixed pattern.
After selecting the patterns, you must click on « Align patterns ». A small window
opens; here you must select the alignment type.
If you want to align the patterns on the pattern shape you must check the « Align
to pattern shapes » option and then you must check the alignment type.
Click on
button to align two or
more selected
patterns
Vertical top alignment
Vertical center alignment
Vertical bottom alignment
Vertical spread
Horizontal spread
Horizontal left alignment
Horizontal center
Horizontal right alignment
If you want to align the selected patterns to the
reference point then you must check the „Align to
reference point” option. After you check this message
you can select if the alignment will be realized
horizontally or vertically. When the selected patterns
will be aligned horizontally to the reference point, the
reference point anchors will be aligned horizontally.
For the vertical alignment to the reference point, the
reference point anchors will be aligned vertically.
58
User Manual - EuroCAD Automarker
3.40 Print project picture
In the „Marker settings” window, there is an window called „Project picture”.
Here you can load the product image used in the marker. This picture will be printed in the mini-marker only if
you will check the option “Print project picture” in the “Plotter print/ Print mini marker” window.
To insert a picture click on the “Load picture” button and then choose in the opened window the path for the
picture that you want to load.
If you want to delete the picture from this window you will have to click on the “Delete” button.
To save the picture in the widow, after loading it, click on the “Ok” button, if you don’t want to save it click on
“Cancel” button.
59
User Manual - EuroCAD Automarker
3.41 Marker report – editing and printing
After nesting a marker, you can edit and print a marker report that will contain useful information for the cutting
room (consumption in lm or in g/m2, the cutting perimeter, spreading type, etc…)
Unlike the Cut Plan report from EuroCAD Spread&Cut Planner which also give information about
consumptions, spreading type, etc,.. the marker report can generate a consumption, even for markers which
contain many projects or don’t have all the patterns nested.
This report can be comprised in single or multiple A4 sheet, according to the cut plan complexity (markers and
lay number)
To see and to edit the information that will appear on the Marker report you must select the tab “Marker report”
from “Marker settings” window.
Company name. This field is editable. In this field, you must introduce the company name, which will appear on
the top left of the report.
Automarker Operator. This field is editable. Here you must introduce the operator name that is using the
Automarker application.
Fabric type. This field automatically will take over the fabric type used to filter the loaded patterns in EuroCAD
Spread&Cut Planner or on Import PAT from EuroCAD Automarker. If the patterns from marker are from different
fabric types, or the user want to change the name of the fabric, than he can edit this.
Order. In this field, you must introduce the order number.
Below you will see a table with information about used projects. This table contains information like product name,
Product type, Client name, designer name. All this are took over from EuroCAD Spread&Cut Planner corresponded
fields or from EuroCAD Pattern Designer – Product technical Sheet. If this information wasn’t edited in EuroCAD
Spread&Cut Planner or EuroCAD Pattern Designer the user can edit them in this table.
In the bottom of „Marker report” tab, the user can see the values of marker total weight, the used weight and
the wasted weight. All this information are automatically computed and displayed if the user has already introduced
a value for „Fabric’s specific weight” in EuroCAD Spread&Cut Planner application and the marker is optimized. If in
EuroCAD Spread&Cut Planner there is no value for „Fabric’s specific weight” the total weight of the marker, used
weight and the wasted weight will be computed if the user will introduce a value on „Weight per unit” in EuroCAD
Automarker.
To have a preview and to print the Marker report you must press “Preview report” button.
60
User Manual - EuroCAD Automarker
A preview window will open and the user can
choose to preview, save or print the report
before printing. In order to preview the report,
the user must check the “Preview” box.
In the “Marker report” window, you will be able to execute the following operations, by click on the specific buttons:
•
change preview zoom level
•
scroll the pages report, if multiple
•
printer setup
•
print the report on an active printer
•
to convert the marker report into PDF file
•
quit printing
61
User Manual - EuroCAD Automarker
In the upper side of the window are displayed information from the edited fields in the “Marker report”
window. These information are: the company name that appears in the upper left side, the order name, the fabric
type, Automarker operator and another information that can not be edited like: date and time, last save and page
number. In this zone appear the name of the cutting plan and the name of the marker.
This information is on each page of the marker report like general information.
First table from marker report has information about the projects from the marker; this information is from the table
with projects information from the „Marker report” window in the „Marker Settings”.
Next table has marker information: length and width of marker, efficiency, cutting perimeter, total weight, used
weight and wasted weight. There are also information about spreading type, if is used folded or tubular fabric, the
number of projects and number of products from the current marker. This information is complete only when you
have patterns placed on the marker.
When you have only some patterns placed on the marker, if you press the „Preview report” button a warning
message appears. This message announces you that some of the projects do not have all the patterns nested and
the consumption computed will not be relevant.
In marker report, you will find also information about each loaded project on the marker. The project information
appears in two tables: in first table are information about the sizes and quantities for each size loaded on the
marker and in the second table it will be displayed the consumptions in g/cm2 and lm.
The fabric consumption for each project is calculate as average of all sizes area, used for that project plus the
product wastage computed proportionally with the other projects from the marker.
To send in electronic format the marker reports made by EuroCAD Automarker, these must be converted
in PDF files. For this you must install one of the conversion programs (for e.g. PDF Creator). After installing the
PDF conversion program, in the printer setup window, you must choose on the Printer Name the name of the
conversion program. When pressing the “Print” button to print the technical sheet, a window will be displayed. In
62
User Manual - EuroCAD Automarker
this window you must write the PDF file name and than press the “Save” button. After this another window will be
displayed where you can set the path for the PDF file.
To convert the marker report from EuroCAD
Automarker in PDF file, press “Print report”
button from technical sheet preview
window.
In the new opened window called “Output
Options”, the “File” box must be checked.
Click the button that shows a disk. In the
new window that appears will be set the
saving path for the PDF file. Its name will be
edit in the “File name” field and then press
the “Save” button.
In the “File” field will be shown the saving
path and file name that will be saved.
Click the arrow from the “Format” field in
order to choose the file that the user wants
to save. From the opened list the user must
choose the “Adobe Acrobat (PDF)” option
and then press the “ok” button from
“Output Options” window.
At the end, the “OK” button must be
pressed.
63
User Manual - EuroCAD Automarker
3.42 Marker printing on plotter or printer
Plotter printing
If the markers were optimized and you want to print them on a plotter you must
select „Print mini-marker” option in the „File” menu in the EuroCAD Automarker menu
bar; alternatively you can click on „Export in HPGL-PLT”
button in the toolbar.
The « Plotter print / Print mini-marker» window is
opening.
The notches will not translate at plotting on the negative allowance.
In the opened window you can set the plotter or printer options.
To print a marker directly on a plotter you must click on « Direct plotter output » button, in the « Plotter print /
Print mini-marker» window. The marker will be added to the printing queue. Plotter printing is realized by EuroCAD
Plotter Spooler program, described separately. If the maker to be printed is larger than the maximum spreading
length (invalid marker) the program will notice you with a message on the screen.
In the left side of the « Plotter print / Print mini-marker» window you can set the elements to be printed on the
marker. These elements to be printed can be: text, pattern size only, notches, internal lines, technical points,
stripes and plaids, the cut allowance between patterns, the contour that lines the thermal bonding group and the
printing mode – o a single, double or triple sheet.
Text – if you check « Text », the name, comments and size will be printed on the patterns
Just the size – if you check this message, only the size will be printed on the patterns
Pattern name – you must check this option if you want to add the pattern name to the pattern name for all
patterns on the marker.
Text comments added to pattern name – The text inserted in this field will be displayed and printed together
with the pattern name only if the option „Just pattern size” is not checked.
Notches – If you check this option, the notches will be printed
64
User Manual - EuroCAD Automarker
If you want to print the notches, you can choose to print them as in the project or as V,I or U. If you choose
printing the notches as V, I or U you will be able to define the depth and width for the notches, by filling the
corresponding boxes with the preferred value.
Internal lines – if you check this option, all axes on the patterns will be printed. (Grain axes, text axes)
Only text for text axis – If you check the box near this message, during the preview and for printing steps the
text axes will not be visible while the corresponding text will be displayed/ printed. If the box is not checked, both
text axes and text will be printed if the message Internal lines is also checked.
Stripes and plaids – This option is active for the markers on plaids and stripes fabric. If you check this option
the plaids/stripes will be printed according to the settings in « Plotter/cutter » settings.
Cut line (Assyst Bullmer) – For the markers with patterns imported from Assyst Bullmer you may print the cut
line on the patterns. This option in inactive if the marker to be printed does not include patterns imported from
Assyst,.
Auxiliary patterns – if you want to print the auxiliary patterns you must check the box near the message.
Gap – if you check the “Gap” options confirmed by a click on the “Apply settings” button, you may plot on the
external contour and also on the internal contour for the pattern with allowance; this is available for the patterns on
which you have selected the Gap plot option in “Pattern properties” table. This option is activated if there is at least
a pattern which will have the Gap plot option checked in “Pattern properties” table. Thus, it is possible that some
patterns will be plotted on the gap contour and other patterns to be plotted on the gap contour, pattern contour or
both.
Matching points – To print matching points during plotting, you must check the specific message in “Export
settings” field.
Defects – To print the defects declared in EuroCAD Automarker application you must check this message. In
order to print the defects from EuroCAD Spread&Cut Planner, the cut plan must be saved.
Marker length
You can print a marker on all width or only a part of it. To print all
marker width you must check both messages: « left end » and « right
end ».
If you want to print only a part of the marker you must uncheck
the « left end » and « right end » messages and you must insert the
distances in mm for the printing limits.
Text printing
On a marker beginning and end, a text will be printed. This text contains information regarding the marker
width, height, efficiency, the gap, pattern contraction, fabric type, date, etc.
Marker resize for plotter printing:
Here are displayed the marker printing width and
length. Marker width is the width set by user as fabric
width and the length is the marker length after the
complete nest.
This information is plotted also on the marker edges
(this only if you have set it to be plotted on both marker edges).
Together with all these data, you can print only the
project name and sizes. You can choose what to print in
the right side menu near the « Text to print : » box.
After defining the text to be printed, you must set if the text will appear at the beginning, at the end or on both
marker edges. Thus, you must check « left end » and/or « right end » edges according to your needs.
65
User Manual - EuroCAD Automarker
Select plotter
For the users with more than one plotter, you can save a list in
plotter settings. Before printing, you must choose from the list the
plotter on which you will print the marker.
This option will be saved. When you will export again a PLT or
RS274D file, in” Select plotter” edit will appear the last used plotter.
Print settings
Before printing the marker you must enter the number of copies
to be printed in the « Number of copies » field.
Then you must choose what will be included in the PLT file.
The PLT file name can be identical with the project name, may
include the sizes name on the current marker, or may be composed
by the project name and the sizes on the marker. To define the file
name you must choose an option from the menu that opens when
you click on the arrow near the « File name: » box.
Print on bands
If you have a reduced width plotter, you may choose to print
the marker on bands. According to marker width it can be divided
in two or three bands. To recompose accurately the marker, you
must check the message “Draw splice marks” in order to print also
the splice markers.
To preview the marker you must click on « Apply settings»
button after you have performed any setting change.
In preview area you can zoom in or out the image, by using the ZOOM buttons on the left side bar.
Print mini-marker
To print a mini-marker, you must click on « Print mini-marker » in the Mini-marker settings area of the « Plotter
print / Print mini-marker» window.
Before printing a mini-marker you must adjust the mini-marker printing settings. Near « Printer name » you
must choose the printer.
When you click on « Properties » button, you must set the printer properties.
You can also set the mini-marker to fit the length or width by checking the specific options.
You can se how the mini-marker should be
printed, to fit on length or on width. For this you will
have to check the right message.
On the mini-marker you can print also some annotations if you check the specific box and you fill the specific
« Annotations » field.
At least but not the last you can check on “File name” or on “Marker definition” to print also these options on
mini-marker.
After all settings are done and before printing, you can preview the mini-marker by click on « Preview minimarker ».
After you have checked that the marker will be printed correctly, you must click on « Print mini-marker »
button.
The mini- marker can be printed black and white or colored. If you want to print color you will check the option
“Print colored mini-marker”.
The user can print the delimitations on the mini-marker, by checking the message “Print marker splices” from the
window “Plot marker/Print mini-marker”. The knowledge of the zones in which can be spliced a marker it is useful
in case if the markers are made on fabrics with defects.
66
User Manual - EuroCAD Automarker
After the all the settings have been made, before printing the marker the user can preview the mini-marker by
pressing the button “Preview mini-marker”. Besides the mini marker in Automarker, you can print the image of
the used product for the marker. For this you have to check the setting “Print project”. But this setting it is active
only if at “Marker settings” the tab “Project image” has been loaded.
After that you will press the button “Print mini-marker”.
3.43 Export markers to a DXF R12/2000 or HPGL – PLT file
To export a marker from EuroCAD Automarker to DXF or
PLT format you must open the „File” menu in the menu bar
and choose the „Export” option. In the submenu you may
choose the export format as DXF or PLT.
If you want to export the marker as DXF,
choose the desired format and the correct
pathway in the new opened window.
If you choose to export the file as HPGL-PLT format, then the « Plotter print / Print mini-marker» window
opens. In this window you an export files in DXF-R12 or RS274D formats.
HPGL-PLT files can have *.plt, *.hpgl extension or they may have no extension. These file can be used only to
print markers and patterns.
In such a file you cannot change the pattern shape.
When you print a HPGL / PLT file, you must check the pattern dimensions, length and width.
If you click on « Direct plotter output », you will obtain a PLT file that will be saved in the ACTIVE folder, from
which it is automatically read by the EuroCAD PlotMaster printing application.
If you click on « Export in HPGL- PLT file » you can also obtain a PLT file that can be saved anywhere on a
disk and that can be printed later on a printer or on a plotter.
67
User Manual - EuroCAD Automarker
Before export you can adjust some settings. You can set the marker length as values expressed in cm by
checking “left end” and “right end” options. After settings adjustment, you must click on “Apply settings” button to
apply changes.
To export a marker in HPGL- PLT format, you must click on “Export HPGL-PLT” button. A new window opens
it is identical to the DXF export window; here you can choose the file saving path and name and then click on
“Save” button to apply changes.
3.44 Define the pattern cutting order
If you are using a CNC cutting machine you can define the cutting
order for the patterns on the marker automatically or manually. To
declare manually or automatically the cutting order you must click on the
« Activate cutting order working mode » button, located on the second
button bar in EuroCAD Automarker application.
In Cutting order working mode, the patterns are displayed numbered and linked by a red line that gives the
cutter trace. On each pattern appears a black arrow that indicates the starting point and the pattern cutting
direction.
When you activate this working mode, another 4 buttons appear on the button bar if you export on bands; for a
normal cut, only two new buttons will appear. You can define the export on bands and the band size in the « Plotter
settings » window.
When you define the cutting order manually or automatically, you must consider the end from which starts the
automatic cut. You have to set this option in « EuroCAD Automarker Settings/ Plotter settings / CNC staring
corner» where you have to check the « Bottom left» or « Top left » under the message « CNC cutting corner »
If you want to declare the cutting order manually, after you activate the Cutting Order working mode, you must
select the patterns on the marker in the order to be cut. On the status bar this working mode is displayed « Next
pattern index: » in order to display the number of the following pattern to be cut.
If you hold down the SHIFT key and you click on a pattern, the pattern will be selected without changing the
cutting order; its index becomes the new index for current cutting.
If you press on SPACE key, the selection Hill get from the current pattern on the next pattern to be cut.
If you press on SHIFT and SPACE keys simultaneously, the current pattern to be cut will be added to a
selected group, without deselecting the group.
For an active display the pattern cutting order, you must
click on the « Display order in which patterns will be cut »
button or the CTRL+P key combination. When you click on this
button, the patterns will be selected one by one automatically,
following the cutting order.
68
User Manual - EuroCAD Automarker
When you click the button « Reset the
cutting order of the nested patterns and
recalculate it automatically according to the
selected options» the cutting order is completely
reset and a new order is automatically
recalculated.
The same action can be obtained by a CTRL+R key combination.
If you use the band cut, you can display the cutting order for each band on the current marker. The band size
can be set in the « EuroCAD Automarker Settings / Plotter settings / cutter » in the « Export on bands » field, where
you will set the size. The minimal band size is of 50 cm. If you enter a value under 50 c, you will be warned by a
message. If you click on the « Activate Cutting order working mode » button, the cutting order will be displayed only
for the patterns on the current band. To display another band you
must click on « Previous band » or « Next band » buttons. To
navigate between bands you can also use left and right arrow
keys on the keyboard.
If you change a pattern position, if you add/remove patterns, you will be warned by a message that the cutting
order must be reset. If you want to reset the cutting order automatically, then you must click on « Yes » button in
the warning window.
If you click on « No » button, then you must define the cutting order manually for the patterns on the marker.
If you have removed a pattern from the marker, when you click the « No » button, the cutting order does not
change. If you have added a pattern from the marker, when you click the « No » button, the added pattern will have
the highest cutting index.
The cutting order either if it is defined manually or automatically, is displayed in the « Pattern properties »
table in the « Cut. Ord » column. In this table you cannot change the cutting order. The cutting order can be
changed only if the « Cutting Order » working mode is active.
3.45 Marker export to CUT file for cutter
RS274D files
CUT files can have the *.cut, *.gbr, *.dat, *.cmd, *.nc or *.iso extensions.
These files can be used only for automatic cutting machines (cutter) or for printing.
CUT files for cutter will include only the cut lines and the notches.
In such a file you cannot change a pattern shape. If the file includes a marker, you will not be able to optimize
it.
When you cut or print a CUT file, you must check the pattern dimensions, width and height.
To export the marker for the cutter, you must click on the specific button located in the toolbar of the EuroCAD
Automarker application, as shown.
69
User Manual - EuroCAD Automarker
A dialog window opens; here you can see the displayed marker, you can define the export with notches
included or not. If you want to include notches in the export, you must check the « Notches » option in « Export
settings » area. If you don’t want to include notches into the export file, don’t
check or uncheck this option.
Regarding the notches, you must choose the way they will be cut, if they
will be similar as in the project or if they will be replaced by special shape
notches (V, I or U). Click on the arrow in the right part of the specific field and
choose the desired notch type from the menu. If you respect the initial project,
you must choose if the notches will be cut on the contour of after the contour
cutting.
You can also adjust notches larger than a defined value by checking the box
near the message « Adjust notches longer than»
If you have chosen to replace normal notches with V, I or U shaped notches,
then you must set their length and width by filling n the values in the corresponding
fields. Beside settings regarding the notches you must decide if the reserve patterns
will be cut on the external contour, if the patterns in the thermal bonding group will be
cut on the group contour or if you will drill holes for internal points as: dart end, hook hole, fastener hole.
If you check the “Patterns with gap will be plotted /cut on the external contour” option then the patterns for
which you have selected the cut on the reserve will be cut on the external contour of the reserve. According to the
settings in this window the contours will be displayed as follows:
- in black for the cutting contour
- in green for the rest
Thus you may cut some patterns on the reserve contour, other patterns can be cut on the pattern contour; the
difference from plotting is that the two options are exclusive.
If you check “Rotate 180” option, the marker will be rotated by 180 degrees.
After any setting adjustment, you have to click on “Apply settings” button to apply changes. After you have
applied settings adjustment you can click on «Export in RS274D file » button. A new window will open; here you
can set the saving path for the file; then click on « Save » button.
The export for the cutter can be done also from the « Plotter print / Print mini-marker» window by a click on
« Export in RS274D file » button. After you click on this button a new dialog window will open; here you can enter
the CUT file name and the saving path on the computer.
In the status bar of the export for automatic cutter window the “Perimeter length for cutting”, is displayed; this
length depends on the application settings.
70
User Manual - EuroCAD Automarker
3.46 PAT file import
PAT file can be imported in EuroCAD Automarker application. This facility helps you to set combined markers
between two different projects regarding a higher cutting efficiency and reduced fabric waste. When you import a
PAT file you will obtain a MRK file that represents a marker on which the patterns in two or more projects (in *.PAT
format) are placed.
You can import a PAT file either into a marker in a cut plan or into a marker obtained by importing another
*.PAT file.
Attention! After you import a PAT file, you must check and redefine the pattern restrictions. This is an
important procedure especially when important patterns follow general or special restriction rules that differ from
those of the patterns already on the marker.
a) Import a PAT file on a marker in a cut plan
Beside the patterns in a project, on a marker you can add also patterns from another project(s). This is
necessary especially for the markers with a very low efficiency. Thus, to reduce fabric waste by low efficiency
markers, you can place here new patterns from other project(s). The
placement of new patterns on the marker will
increase the nesting efficiency and the fabric
waste will be reduced.
After choosing a marker from a cut plan,
in the menu bar of EuroCAD Automarker
application you must click on „File” and then
select „Import” and in the opened submenu
you must choose „PAT” option.
The „PAT import” window will open; here you can choose the
project, the patterns and the sizes to be imported.
To choose a project saved as PAT file, you must click on the „PAT file” button. After you click on this button a
new window opens; here you can choose the *.PAT file by selecting the file name and path. These will be
displayed in the field near „PAT file name”. To add patterns from the opened PAT file on the current opened marker
in the marker, you must check the box near the „Add patterns at the current marker” message. After you check this
box, the field near the message „Marker width” becomes inactive and the marker width in the chosen cut plan will
be displayed. After selecting the PAT file, the patterns names in the project are displayed together with the specific
size set.
71
User Manual - EuroCAD Automarker
To display in a list only the working patterns in a project, you
must use the „Fabric type” filter. When you click on the arrow on the
right side of the „Fabric type” message, the working fabric for the
selected project will be displayed. You must choose the fabric and
thus, in the pattern list of the project, only the patterns from that fabric
will be displayed.
To choose a pattern that will be displayed on the new marker, you must select its name in the „List of all
patterns in the project” and click on
selected patterns from project”
button located between the „List all patterns in the project” and “List the
If you want all patterns in the project to be displayed on the marker you must click on
button.
To delete a pattern from the selected patterns from project list you must click to select it then click on
button.
button. To delete all patterns from the selected patterns from project list you must click on
After you choose the patterns to be placed on the marker, you must also select the pattern sizes by checking
the corresponding boxes in the „Used” row, located on top of the “Sizes” row.
The user can make the following settings in the import window:
Patterns restrictions
Stripe and plaids settings
Spreading type
At least but not the last you must choose the name for the new marker and the saving path. After you import a
PAT file you must always save a file in MRK format. To choose the saving path for the MRK file you must click on
„MRK file” button.
After you select the project, choose the patterns and sizes to be imported and the name and save path for the
new marker, you must click on „OK” button.
If the project to be loaded contains patterns
with errors you will be warned. When a project is
loaded in EuroCAD Automarker application, a
pattern check is performed; if there are errors, a
new „Assistance” window opens; here you can find
the error list and the steps to be performed to find
and repair these errors.
A project with defective patterns cannot be
imported into EuroCAD Automarker application.
In the pattern display window, beside the
patterns of the project in the cut plan there will be
displayed the patterns imported from the PAT file
chosen in the „PAT import” window, with the
corresponding sizes. Near the important patterns, a
G2 will be also imported.
If you want to add patterns form another PAT
file, the procedure is the same. Near the important
patterns imported from the second PAT file, a G3
will also appear.
A warning message appears when the user
wants to save the marker, with a name that is
already used for another existing marker. The
message asks the user to confirm if he wants to
over overwrite the already existing one with the
new one. The user must click on the “OK” button
to confirm this or on “Cancel” to aboard the
operation and then the user must rename the file using a new name and save it.
There is also a warning message for the number of sizes that can
be imported when importing a PAT file. Thus, if the user is trying to
import more than 500 sizes, the message comes on the screen and it
tells that “More than 500 sizes cannot be imported”. In this case,
the user must reconsider the number of sizes that will be used further
in the marker.
72
User Manual - EuroCAD Automarker
Also, there is a warning message that appears when the user is trying to import a project which is not graded
on the indicated sizes. In this case appears the “Assistance” window with the “There are no patterns selected
on the graded size” message inside.
The user must use the “+” and “-” buttons to increment or to decrement with 1 all quantities for the existing
sizes. These two buttons can be find next to the “List of sizes from project” window.
b) Markers following repeated import from PAT files
If you don’t want to import patterns from a PAT file in a cut plan, you can set the marker only by successive
pattern import from single or multiple PAT files.
Thus in the “File” menu in the EuroCAD Automarker application menu bar you must select „Import” option and
choose „PAT” from the opened submenu. In the opened window you may choose the imported project, the
corresponding patterns and sizes together with the new marker name, as described for the PAT file import onto a
marker in a cut plan.
This time you must not check the box near the „Add patterns to the current marker” message.
Now you will be able to edit the field near the message „Marker width” and you must define the new marker
width; then you must click on „OK” button. In the pattern display area, there will be displayed the patterns selected
on import; their size is preceded by G1.
To import patterns from another PAT file on this marker you must proceed as for importing patterns from a
PAT file onto a marker in a cut plan.
To open a MRK file marker, you must choose the „Open cut plan” option in the opened “File” menu in the in
EuroCAD Automarker menu bar. In the opened window, at file type, you must select „Marker (*.mrk)” option. After
choosing the MRK file, the marker selection window will open; here only a single marker is displayed. Click to
select this marker and then click on „OK” button.
To save a MRK file with another name, you must click on „Save as” button and in the opened window you will
enter another name for the new MRK file.
How to display patterns only for one project
Next to “View” there is another button called “Projects”. This button is useful when importing more *.PAT
files in the same marker. Using this function you can choose to
see patterns from only one project. For this you will have to
select the project from the “Projects” button menu in
accordance with the project for which you want to display
patterns.
To access this function click on the “Projects” button, and
when the menu opens choose a project from the list. Here you can see displayed all projects used in the marker in
order in which they were added in the marker. Also in this menu you have the option to display all patterns from all
projects used in the marker called “show the patterns from all projects”.
3.47 DXF file import
EuroCAD Automarker application is able to import files saved in DXF format.
To perform this operation, you
must click on « Import from
DXF format»
in
the
toolbar;
alternately you can select « File »
menu in the menu bar, then the
« Import » option in the opened
menu and finally the « DXF »
option.
73
User Manual - EuroCAD Automarker
A new window opens. Here you can select DXF file to be imported and you can adjust the import settings and
the settings for the new marker.
When you click the button near the „DXF file name box” a window opens; here you can navigate to select the
file to be imported. After you have selected the file to be imported you must define the scaling factors and the
specific measurement unit.
If you want to add the project name to the patterns name, you must check the option „Add project information
to the pattern name”
After importing a DXF file, the saved file will have the *.MRK extension. You must create a new name for the
new marker in the „MRK file name” field.
If you check the “Auto width” option, the new marker can be realized on the DXF width; you can also set you
own marker width by entering the value in the „Marker width” box after you have unchecked „Autowidth” option.
You can also set the distance between patterns that will be entered in the specific box „Distance between
patterns”. All values are expressed in cm.
3.48 Marker import from Assyst Bullmer (LayS)
In EuroCAD Automarker you can import native Assyst Bullmer files that include markers.
In Assyst Bullmer there are three type of Lay files: LayS, LayL and Lay; EuroCAD Automarker will allow only
the import for LayS files.
LayS- are files generated by CadAssyst application
- These files contain patterns ready for cut: on the cut line, unfolded, symmetrized.
- Patterns on the marker are not nested, and the nesting optimization will be realized by
EuroCAD Automarker application.
There are some differences between Assyst Bullmer and EuroCAD applications; however, information
conversion from Assyst to EuroCAD will result in a similar marker.
Duet o these differences, if you intend to perform some changes we recommend to perform them in Assyst
and then to re-import the marker (for example, when you change the allowance on a segment or when you change
pattern properties).
Differences between the applications:
when you declare pattern properties
when you declare pattern amount
in Assyst you can declare separate allowance on each pattern segment
pattern type (double, mirror doubled)
How to convert Assyst files in EuroCAD files
1. Marker parameters
Useful marker width – is declared similarly in both applications
74
User Manual - EuroCAD Automarker
Shrink/expansion – LayS files include patterns on which shrink/expansion was already applied. Thus, when
you rotate a pattern with less than 180°, the pattern will not respect the fabric shrink anymore.
Spreading options – are similar for both applications and can be imported according to the following table:
Assyst Bullmer
EuroCAD Automarker
Undefined
Simple sheet
Fold top
Double sheet (all patterns for two products obtained by symmetrization)
uses the top edge
Fold bottom
Tubular
* none of the doubling options or holding for the symmetrical patterns is
checked
Double sheet (all patterns for two products obtained by symmetrization)
uses the lower edge
* none of the doubling options or holding for the symmetrical patterns is
checked
Double sheet (all patterns for two products obtained by symmetrization)
uses the top edge
uses the lower edge
* none of the doubling options or holding for the symmetrical patterns is
checked
2. Pattern number and type
In EuroCAD the patterns can be simple, double or mirror double (in EuroCAD Automarker the mirror double for
a pattern is designed by vertical flip).
By difference with EuroCAD, in Assyst a pattern can be set to appear more than once in the original position.
Also, in Assyst the patterns can be symmetrized also vertically (you can obtain patterns by horizontal flip).
Due to these differences, the patterns are imported as separate patterns but their position and number on the
marker is identical for both applications.
3. Pattern restrictions
Between EuroCAD and Assyst there are some differences regarding the pattern restrictions.
Due to these differences, during import step, you must choose to redefine restrictions for all patterns or to
import them as defined in Assyst. You can make a choice in the window that opens after you have selected the file
to be imported.
To define the area
in which you can define
how the restrictions will
be imported, you must
click on „Settings>>”
button.
75
User Manual - EuroCAD Automarker
A)
Redefine restrictions
To redefine pattern restrictions on he loaded marker, you must check the message „All patterns will be set”;
then you can define the rotation and flip freedom.
In this situation, the patterns on the imported marker will respect general restrictions (in this window you must
define the rotation and flip degree).
If you want the patterns to rotate together with all size, you must check the option „Rotate entire bundle”.
B) Import restrictions set in Assyst and restriction options for stripes and plaids
To import restrictions those were set in Assyst for the patterns on a marker you must check the message
„According to LayS settings”.
Stripe and Plaids settings option used for matching
In EuroCAD Automarker the matching to stripes and plaids are made with the help of the
matching points for the nesting and the dependence groups.
In Assyst the matching at the stripes and lines it is made with the help of matching lines
called “stripe line” that have a certain index.
Stripe and Plaids settings option used for matching
Off-if you choose this option it will be ignored the settings made in Assyst referring at the matching and the
patterns will be placed free on the marker even if in this program are defined restrictions for stripes and plaids. It
will be imported only the information referring at the distance between the markings. For example the next figure.
To fabric – with this option the patterns will be put in line on the
marker at the stripes and lines, according to the matching settings from
76
User Manual - EuroCAD Automarker
Assyst. The patterns will be placed on the marker being dependent at the marks according to the valid matching
lines from Assyst. Example the next figures:
To pattern: By checking this option the patterns will be put in line between them, by realizing dependence
groups between them, according to the settings taken from Assyst. The first pattern, from a size of a product, put
down on the marker it will decide the position of the other patterns that belong to the same size of the product. The
second pattern put down on the marker and belong to same dependence group, it contains at least one “strip line”
that appears on the first pattern as well, will be aligned after it. Id a pattern from this size doesn’t contain any strip
line, will be able to be placed free on the marker and will not have a reference point at marker. Example in the
following figures:
Rotation
Conversion of the rotation restrictions from Assyst to EuroCAD is described in the nest table
Assyst settings
EuroCAD Automarker
Nap rotation
Nap in the
Nap in the
angle in the
Define Marker
Define Styleb
Define Marker
window
window
window
no nap
X
Yes or No
- all patterns will be imported with
individual restrictions
- all patterns will have rotation freedom less
than equal with the value set in Assyst at nap
rotation angle
nap up
Yes or No
- all patterns will be rotated with 180° at
import
- all patterns will be imported with general
restrictions
- at general restrictions the Rotation will be
set on “none”
nap down
Yes or No
- no imported pattern will be rotated
- all patterns will be imported with general
restrictions
- at general restrictions the Rotation will be
set on “none”
nap two ways
Yes
- all patterns will be imported with general
restrictions
- at general restrictions Rotation will be set
on “180” and you must check the “All patterns in
a size are rotated simultaneously” option
nap two ways
X
No
- all patterns will be imported with
individual restrictions
- the rotation freedom will be defined by the
value set in Assyst at nap rotation angle
Flip
In Assyst you cannot set the patterns to be flipped on all size.
Flip restriction conversion in EuroCAD is realized after defining the rotation freedom and the dependencies to
general or individual restrictions according to nap settings in Assyst.
Patterns with individual restrictions
For the patterns with individual restrictions, the flip restriction conversion will be realized as described in the
next table:
77
User Manual - EuroCAD Automarker
Flip in
Define Style
Yes
Assyst Bullmer
Flip in
Define Marker
Yes
No
Yes
Yes
No
No
No
EuroCAD Automarker
Individual restrictions
Flip: none
Individual restrictions
Flip: both
Individual restrictions
Flip: both
Individual restrictions
Flip: both
Patterns with general restrictions:
If all patterns has general restrictions and flip freedom (according to the individual restrictions table), after
import, at “Flip” in general restrictions you will have the “Both” option checked. If there is a single pattern set
without flip in Assyst, then all the patterns on the marker will be imported in EuroCAD as patterns „without” flip
freedom.
When you import Assyst files, the patterns will never have horizontal or vertical flip freedom.
4. Pattern allowance (Block and Gap)
In EuroCAD you can set the allowance on the top, bottom, left side or right side of the pattern.
In Assyst, beside this allowance, a pattern may have an allowance for each segment (gap).
Even then, EuroCAD can import correctly all information regarding block and gap. Thus, for the markers in
Assyst you can import and print (cut) all pattern contours.
According to marker settings, you will meet three situations:
I. On the marker there are all three contour types: cut line, addition (block) and segment addition (gap). This
supposes that there is at least a pattern with addition (block) and at least a pattern with segment addition (gap) but
not necessarily with both additions declared on the same pattern.
In this situation the conversion of the three contours will be performed according to the next table:
Assyst Bulmer
Cut line
Block
Gap
EuroCAD Automarker
As auxiliary pattern inside the pattern
Cut line
Gap
II. Patterns in Assyst has set the addition as up, down, left, right (block)
In this situation, the contour conversion will be performed according to the next table:
Assyst Bulmer
Cut line
Block
EuroCAD Automarker
Cut line
Addition (up, down, left, right)
III. Patterns in Assyst has set only the segment addition (gap)
In this situation, the contour conversion will be performed according to the next table:
Assyst Bulmer
Cut line
Gap
EuroCAD Automarker
Cut line
Gap
LayS file import for EuroCAD Automarker
To import markers from Assyst Bullmer
(LayS files) you must click on „Add patterns to
marker from an external file” button located in
the button bar; then you must choose AssystLayS option. Alternatively, from the « File »
option in the menu bar, you must select
« Import » option and then « Assyst-LayS»
option.
A dialog window will open; here you must select the path on a disk
where you can find the file to be imported. After selecting the file, you
78
User Manual - EuroCAD Automarker
must click on „Open”. In the « Import Assyst LayS » window it will be displayed a single marker in the table. You
must select the marker and you must click on « Accept » button. After you load all patterns you must check their
number, restrictions, allowances and if the marker parameters are accurately imported; then you must perform the
complete automatic nest (time limit).
Save
In « Import Assyst LayS » window, you must check the box near the message “Save in open folder” in order to
save the marker in the same folder from which you are importing the LayS file. Thus, if you click on the „Save the
cut plan” you will automatically obtain a MRK file in the same folder with the imported file. The new MRK file has
the same name with the imported LayS file.
You may also choose any other save path for the resulted MRK file, also in the « Import Assyst LayS » window
or if you save the cut plan by choosing the option „Save cut plan as…” in the “File” menu. To define another saving
path directly from the import window, you must click the button on the right side of the “Save path” box. A new
window is opening. Here you can find the folder structure on the hard disk. You must click to select the folder in
which you will save the MRK files resulted after the import and then click on „Accept” button.
Display, plot and cut the patterns with addition
Due to the differences between EuroCAD and Assyst regarding the addition you can have three situations:
I. On a marker you have 3 contours: the cut line, the addition (block) and the segment addition (gap)
Display in „Pattern properties” table
if a pattern has a segment addition (GAP in Assyst), on the marker, it will be displayed with
dotted line and in the „Pattern properties” table the corresponding box in „Seg gap” will be checked.
if the pattern has a segment addition (GAP in Assyst) but with the same value on all segments,
on the marker it will be displayed with dotted line while in the „Pattern properties” table the box that
corresponds to the „Seg. gap” column will remain unchecked; the addition will be imported as up, down,
left or right gap.
If the pattern has only up, down, left or right addition (Block in Assyst), on the marker the addition
will appear as cut line while in „Pattern properties” table, no value will be displayed in the gap columns.
Plotting
As in Assyst, in EuroCAD you can plot all the three contours on a marker.
To perform this operation you can use the following options in the printing window:
- For the patterns on which Assyst declared a side addition (Block) you can print the original pattern cut line if
you check Cut line (Assyst Bullmer) option in „Plotter print/Print mini-marker”
- For the pattern with segment addition (Gap in Assyst), you can print the addition if you check the Gap option.
This option is active only if the „Plot gap” option in the „Pattern properties” table is checked.
Export for the cutter
Contour export into CUT files is realized according to the next table:
Assyst Bulmer
Cut line
Block
Gap
EuroCAD Automarker
Cut line
Gap
- not exported into CUT file
II. Patterns in Assyst has only up, down, left, right addition (block)Display in „Pattern properties” table
- if the pattern has up, down, left, right addition (Block in Assyst), on the marker it will appear as dotted line
while in „Pattern properties” table the values defined in Assyst will be displayed in Gap columns.
79
User Manual - EuroCAD Automarker
Plotting
- you can print the addition if you check the Gap option. This option is active only if the corresponding boxes in
the „Plot gap” column are checked in „Pattern properties” tables.
Export for the cutter
- If you check the “Patterns with gap that will be plotted/cut will be cut on the external contour” then the
patterns with addition will be cut on the outer contour.
III. Patterns in Assyst are set only with segment addition (gap)
Display in „Pattern properties” table
If a pattern has only segment addition (GAP in Assyst), on the marker it will be displayed with
dotted line while in „Pattern properties” table the corresponding box in the „Seg. gap” column will be
checked.
If the pattern has a segment addition (GAP in Assyst) but with the same value for all segments,
on the marker it will appear with dotted line while in „Pattern properties” table the corresponding box in the
„Seg. gap” column; the addition will be imported as up, down, left or right gap.
Plotting
- You can print the addition if you check the Gap option. This option is active only if the boxes in „Plot gap”
column are checked in the „Pattern properties” table.
Export for the cutter
- If you check the “Patterns with gap that will be plotted/cut will be cut on the external contour” then the
patterns with addition will be cut on the outer contour.
Problems that may appear during LayS (Assyst Bullmer) file import
1. Pattern amount
Pattern amount will be accurately imported but the patterns will be considered as separately. Thus, if you need
to change some pattern restrictions or gaps, you have to do this for each pattern apart.
2. Pattern restrictions
Rotation restrictions are similar in both application but flip restrictions differs. Thus, following the import
procedure, it is possible that pattern properties regarding the flip to be more restrictive. It is important to mention
however that EuroCAD restrictions purpose is to avoid pattern misplacement.
3. Segment addition (gap/block)
Because in EuroCAD you cannot make an addition on a pattern segment, you must change the segment
addition in Assyst and then to import again the marker.
3.49 Gerber marker import (Order)
In EuroCAD Automarker you can import native Gerber files that include markers. These are called Order files
and include information and connections with other files (patterns, projects, etc) in order to realize a marker.
After you define a Order in Gerber you can export all info in a .*zip archive file that will include the Order and
the dependent files.
A .*zip archive may include many archives.
When you import an Order file in EuroCAD Automarker all patterns will be unplaced. The marker parameters
are loaded into EuroCAD as they were set in Gerber.
In some particular situations, when you need to perform some changes on marker parameters, it is not
recommended to perform this operation in EuroCAD. The changes must be performed in Gerber and the new files
will be imported again.
Even if there are some major differences between the two applications regarding pattern options settings,
following the import into EuroCAD the conversion will be accurate and the restrictions will be respected.
Gerber file conversion to EuroCAD
1. Marker parameters
Marker width – is similarly declared for both applications
80
User Manual - EuroCAD Automarker
Shrink/swell – the shrink/swell values that are already set in Gerber will be converted for each pattern in
EuroCAD. After import, shrink values will be displayed in „Pattern properties” table for each pattern apart.
Spreading settings – are similar for both applications and imported according to the next table:
Gerber
Single ply
Face to face
Book fold
EuroCAD Automarker
Simple sheet
Double sheet (all patterns for two products obtained by symmetrization)
Double sheet (all patterns for two products obtained by symmetrization)
You must decide which edge will be folded
Tubular
Double sheet (all patterns for two products obtained by symmetrization)
Use top edge
Use bottom edge
2. Pattern number and type
By difference from EuroCAD, in Gerber you can set a pattern to appear more than once aligned to the grain
axis. Also, in Gerber the patterns can be symmetrized horizontally, vertically or in both directions.
Due to these differences, the patterns are imported as separate patterns but their position and number on the
marker is the same for both applications.
3. Pattern restrictions
Regarding pattern restrictions, there is a major difference between EuroCAD and Gerber.
In Gerber, the settings regarding the grain axis rotation and flip are used to define the original position of the
pattern on the marker. You can define some restrictions in Gerber, but they are overlapping for the same pattern or
they overwrite the original pattern position; thus, restrictions in Gerber are not so useful for automatic nesting.
In contrast with Gerber, in EuroCAD the flip and rotation will define the placement freedom for the selected
patterns.
Due to these differences, on import you must choose between redefining all restrictions for all patterns or to
import them as defined in Gerber. You can set these options in the window that opens after selecting the import
file.
To display the restriction area you must click on „Settings>>” button
81
User Manual - EuroCAD Automarker
A)
Import restrictions defined in Gerber
To import restrictions defined in Gerber for the imported marker, you must check near the message “According
to documentation rules”.
If you check the message ignore „pattern option”, the patterns will be imported with a rotated or flipped grain
axis so as they will respect the initial position set in Gerber.
All patterns will follow general restrictions that will be set on rotation or flip on „none”.
If you check the message set „pattern option”, the patterns will be imported with the grain axis rotated or
flipped so as it will follow the original position defined in Gerber.
All patterns that are not displayed in Pattern option table will follow the general restrictions; the general
restrictions will be set according to the restrictions of the „Default” category in Gerber.
Patterns displayed in Pattern option table will follow individual restrictions; these individual restrictions will
follow the Gerber settings.
B)
Redefine restrictions
82
User Manual - EuroCAD Automarker
To redefine pattern restrictions on the imported marker you must check the message „All patterns will be set
with” and then you can define rotation and flip freedom.
In this situation, patterns on the imported marker will follow general restrictions (rotation and flip being user
defined in this window).
If you want to rotate the patterns together with all bundles you must check the „Rotate entire bundle” option.
If the imported Order file contains patterns from various projects, you can group the sizes. Thus, you must
check „Group bundles from different projects” option.
The grouped sizes will behave as a single size during nesting.
Restrictions conversion from Pattern option in Gerber to EuroCAD will perform according to the next table:
GERBER
Pattern
options
W
S
9
4
WS or
W9 or
W4
S9
S4
EUROCAD AUTOMARKER
Rotation
Flip X
Flip Y
180
None
180
90
45
allowed
allowed
not allowed
allowed
allowed
allowed
Not allowed
Not allowed
allowed
allowed
none
Not allowed
Not allowed
90
45
Not allowed
Not allowed
Not allowed
Not allowed
Pattern option in Gerber is usually not filled. Thus, the pattern may have total freedom for rotation or flip. You
can also define a total restriction for this kind of patterns; thus you must check „set maximal restrictions” when
„pattern option” field is empty.
4. Pattern addition (Block Buffer)
In Gerber a pattern may have a segment addition or side addition (up, down, left, right).
In EuroCAD, the segment addition of a pattern will be imported following the shape in Gerber. If an imported
pattern has a segment addition, in „Pattern properties” table the corresponding box in the „Plot ad” column will be
checked.
If an imported pattern has a side addition this information will be similarly in EuroCAD.
How to import an Order file in EuroCAD Automarker
To import markers from Gerber (Order
files) you must click on „Add patterns to
marker from an external file” button located in
the button bar; then you must choose GerberOrder. Alternatively, from the « File » option
in the menu bar, you must select « Import »
option and then « Gerber Order» option.
A dialog window will open; here you must
select the path on a disk where you can find the file to be imported.
After selecting the file, you must click on „Open”. In the « Marker
selection » window it will be displayed a single marker in the table.
You must select the marker and you must click on „Restrictions”
button to define the pattern restrictions import mode. After you have
defined the restrictions you must click on „Accept”.
After you load all patterns you must check their number, restrictions, allowances and if the marker parameters
are accurately imported; then you must perform the complete automatic nest (time limit).
83
User Manual - EuroCAD Automarker
In « Marker selection » window, you must check the box near the message “Save in open folder” in order to
save the marker in the same folder from which you are importing the Order file. Thus, if you click on the „Save the
cut plan” you will automatically obtain a MRK file in the same folder with the imported file. The new MRK file has
the same name with the imported Order file.
You may also choose any other save path for the resulted MRK file, also in the « Select marker » window or if
you save the cut plan by choosing the option „Save cut plan as…” in the “File” menu. To define another saving path
directly from the import window, you must click the button on the right side of the “Save path” box. A new window is
opening. Here you can find the folder structure on the hard disk. You must click to select the folder in which you will
save the MRK files resulted after the import and then click on „Accept” button.
Problems that may appear during Order (Gerber) file import
1. Pattern amount
Pattern amount will be accurately imported but the patterns will be considered as separately. Thus, if you need
to change some pattern restrictions or gaps, you have to do this for each pattern apart.
2. Pattern restrictions
In Gerber, pattern restrictions can be set to be used for manual nesting. Thus, the original position for a pattern
can be set in many ways but the settings are not useful for automatic nesting in EuroCAD.
3. Segment addition (gap/block)
Because in EuroCAD you cannot make an addition on a pattern segment, you must change the segment
addition in Assyst and then to import again the marker.
4. Sizes defined by alteration
For the moment, the information regarding the sizes defined by alteration are not imported.
3.50 Marker import from Lectra (PLX)
In Lectra there are two file types that include markers: PLX şi PLA. EuroCAD Automarker can import only PLX
files.
PLX and PLA files contain information required to define a marker and are generated by Diamino or Marker
Creation from Lectra. The files include information about general settings and also about pattern placement;
however they does not include the patterns; the patterns are included in mdl (*.mdl) or Iba/Vet(*.iba/*.vet) files. PLA
and PLX files des not include information regarding pattern restrictions.
Due to the fact that EuroCAD can import only patterns or projects included in IBA and VET files from Lectra,
EuroCAD Automarker can import only markers from PLX files if they are associated by iba and vet files.
Pattern restrictions are saved separately in <variant acd>.con files and they include pattern restrictions and
properties as flip/rotation freedom, gap between patterns.
General type restrictions (on the whole marker) can be found in a <fabric name>.tis file type and include
flip/rotation restrictions.
File conversion from Lectra to EuroCAD
1. Marker parameters
Useful marker width – in Lectra you can insert values for „Selvage” or „Fabric edges”; these can be subtracted
from the fabric width inserted in „Width” field.
„Selvage” represents an edge left to prevent fraying. This value must be doubled and subtracted from the
marker width.
On „Fabric edges” you must insert the fabric width left free at the lay edge. In EuroCAD there are imported
only the dimensions for the lay top and bottom.
84
User Manual - EuroCAD Automarker
Shrink/swell – imported files include patterns on which shrink/swell was already applied. Thus, when you rotate
a pattern with an angle less than 180°, the pattern will not respect the fabric shrink anymore.
Spreading settings – are similar. In Lectra you can use four spreading modes: simple sheet, double sheet,
folded or tubular fabric
2. Pattern number and type
In EuroCAD, patterns can be simple double or double mirror (in EuroCAD Automarker double mirror for a
pattern can be obtained by pattern vertical flip).
By difference from EuroCAD, in Lectra a pattern can be set to appear more than once in the original position.
Also, even if in a „Variant” project in Lectra the patterns can be declared as symmetrical also vertically (meaning
that you can obtain patterns by horizontal flip), during VET file creation the patterns defined as double symmetrized
vertically become double patterns, horizontally mirrored.
Due to these differences, the patterns are imported as separate patterns but their number and position on the
marker is identical for both applications.
3. Pattern restrictions
EuroCAD and Lectra show some differences regarding pattern restrictions.
Due to these differences, during import you must choose to redefine restrictions for all patterns or to import
them as they are defined in Lectra. You can perform this operation in the window that opens after you select the
file to be imported.
To
display
the
restriction area you must
click on „Settings>>”
button
85
User Manual - EuroCAD Automarker
A) Redefine restrictions
To redefine restrictions on the imported marker you must check near the message „All patterns will be set”;
then you can define the rotation and flip.
In this particular situation, the patterns in the imported marker will follow general restrictions (rotation and flip
being user defined in this window).
If you want the patterns to be rotated together with all bundles you must check also the „Rotate entire bundle”
option.
B)Import restrictions that have been set in Lectra
In Lectra the restrictions are saved in TIS or CON files.
CON extension files include pattern restrictions and properties as flip/rotation freedom, allowance between
patterns.
TIS files will include flip and rotation restrictions for all markers.
If you have both file types (tis and con) the information in the CON file will overwrite the information in the TIS
file.
To import restrictions that have been set in Lectra for the main patterns on the marker you must check the
message „According to PLX settings”. These settings will be imported only if aside PLX, IBA and VET files there
are TIS or CON files.
Rotation
Conversion of the rotation restrictions from Assyst to EuroCAD will be performed according to the next table:
Lectra settings
Not allowed rotation
EuroCAD Automarker
In EuroCAD, patterns will be imported without rotation
Free
In EuroCAD patterns will have rotation freedom of 90 and 180
degrees
Inversion
In EuroCAD,
degrees
patterns will have rotation freedom of 180
Flip
If the flip restriction is active in Lectra, then the patterns will have flip freedom either horizontally or vertically.
If you have chosen to load restrictions as set in Lectra during PLX file import, but the CON and TIS files are
missing, when you click the „Accept” button in the import window, a warning message will be displayed.
4. Pattern addition (Block and Spacing)
In EuroCAD you can set an addition (gap) on the top, bottom left or right side.
In Lectra, except this addition, you can supplementary space the patterns (spacing).
Even though, EuroCAD can accurately import all information regarding block and spacing. Thus, for Lectra
markers you can import and print (cut) all patterns contours.
86
User Manual - EuroCAD Automarker
According to the marker settings you may have three situations:
I. On the marker you can find all three contours: the cut line, addition (block) and the distance between
patterns (spacing). This supposes that there is at least a pattern with addition (block) and distance between
patterns (spacing).
Here, the conversion of the three contours can be realized according to the following table:
Lectra
Cut line
Block
Spacing
EuroCAD Automarker
As auxiliary pattern inside the pattern
Cut line
Pattern gap
II. Patterns in Lectra has set only up, down, left, right addition (block)
In this situation the contour conversion will be performed as described in the next table:
Lectra
Cut line
Block
EuroCAD Automarker
Cut line
Gap (up, down, left, right)
III. Patterns in Lectra has set au only the distance between patterns (spacing)
In this situation the contour conversion will be performed as described in the next table:
Lectra
Cut line
Spacing
EuroCAD Automarker
Cut line
Gap
How to import a PLX file in EuroCAD Automarker
To import markers from Lectra files (PLX files)
you must click on „Add patterns to marker from an
external file” button located in the button bar; then
you must choose Lectra-PLX option. Alternatively,
from the « File » option in the menu bar, you must
select « Import » option and then « Lectra-PLX »
option.
A dialog window will open; here you must select the path on a disk where
you can find the file to be imported. After selecting the file, you must click
on „Open”. In the « Import Lectra-PLX » window it will be displayed a
single marker in the table. You must select the marker and you must click on « Accept » button. After you load all
patterns you must check their number, restrictions, allowances and if the marker parameters are accurately
imported; then you must perform the complete automatic nest (time limit).
Save
In « Import Lectra PLX » window, you must check the box near the message “Save in open folder” in order to
save the marker in the same folder from which you are importing the PLX file. Thus, if you click on the „Save the
cut plan” you will automatically obtain a MRK file in the same folder with the imported file. The new MRK file has
the same name with the imported PLX file.
You may also choose any other save path for the resulted MRK file, also in the « Select marker » window or if
you save the cut plan by choosing the option „Save cut plan as…” in the “File” menu. To define another saving path
directly from the import window, you must click the button on the right side of the “Save path” box. A new window is
87
User Manual - EuroCAD Automarker
opening. Here you can find the folder structure on the hard disk. You must click to select the folder in which you will
save the MRK files resulted after the import and then click on „Accept” button.
Problems that may appear during PLX (Lectra) file import
1. Pattern amount
Pattern amount will be accurately imported but the patterns will be considered as separately. Thus, if you need
to change some pattern restrictions or gaps, you have to do this for each pattern apart.
2. Restrictions
Pattern and fabric restrictions (marker) are saved in separate files from the file that includes the marker. If you
want to import the marker and to respect all restrictions that has been set in Lectra, you must check the *.tis or
*.con exist.
3. Plaids and stripes
In EuroCAD you cannot set a segment addition for a specific pattern. If you want to change the segment
addition you must perform this change in Assyst and then to import again the marker.
4. Shrink
The imported files include patterns on which the shrink/swell was already applied. Thus, when you rotate a
pattern with an angle less than 180 degrees, the pattern will not follow the fabric shrink. It is recommended to
import patterns with no shrink and to declare the shrink directly in EuroCAD Automarker.
5. Tubular / Folded
In Lectra it is allowed to translate a pattern over the folded edge without considering a symmetry axis while in
EuroCAD a symmetrical pattern is placed on the fabric edge by folding it along the symmetry axis. Due to these
differences for the moment, you cannot import markers for folded or tubular fabric.
88
User Manual - EuroCAD Automarker
3.51Cut files import:
The .cut files are those files that can be written by the CNC machines and can have one of the following
extensions: .cut, .gbr, .dat, .cmd, .nc, or .iso. This type of files contents only the cut line and the notches shape
and position on the patterns contour.
These files can be imported in
EuroCAD Automarker to recreate the
patterns nesting.
To import this type of files, the user
must click on the “Add patterns to marker
from an external file” button extension and
then choose from the opened list the
“Import cut” option.
The Cut file import can be done using
the written menu from the up side of the
screen: File/ Import/ Import cut.
When this function becomes active, the import Cut files window will be opened:
After opening the import
window, the user must set the path
from where he needs to import the
cut file. For this, the user must click
” button that can be find
on the „
on next to the “CUT file name”
field.
After selecting the cut file from
the list, the user must click on the
„Open” button from the right down
corner, to open it in the import
window. In this moment, the
window will be closed and the file
together with it path will be
displayed in the “CUT file name”
field.
89
User Manual - EuroCAD Automarker
a. Import settings:
Measure unit:
- automatic
- manual
Automatic:
If the user will choose the automatic mode, the measure unit will be
automatically detected by the EuroCAD Automarker program. This can be
done automatically, because in the .cut file, there is some information
according to which the measure unit is detected automatically.
There are some situations when the measure unit cannot be detected
automatically from the file. In this case, the program will consider as
measure unit, the default measure unit from EuroCAD Automarker
application which is 0,01 inch.
Manual:
For those cases when the measure unit is not written directly form the
cut file, but set by default to be the measure unit from the default
EuroCAD Automarker settings, the marker might not have the right
dimensions. This is why the user must always check the marker
dimensions: marker length and marker width. In this case, the measure
unit for the cut file must be changed manually. By checking the “Manual”
measure unit, he can set one of the following measure units: 0.01inch,
0.001 inch or 0.1 mm.
b.
Marker:
The .mrk file obtained by
importing the cut file will have by
default the same saving path with
the imported cut file path. This path
can be changed if necessary. For
this, the user must click on the
” button that can be find next to
„
the “MRK file name” filed. When
this button becomes active, a new
window will be opened where the
user can set the new path for the
.mrk file. After setting this path, the
user must click on the “Save”
button. In this moment the window
will close and the new path will
become displayed in the “MRK file
name” field.
Marker settings:
- Auto width
- Marker width
Auto width:
By checking this option, the marker width will be automatically
imported from the cut file. In this caser the marker width is given by the
biggest “Y” coordinate from the .cut file.
Marker width:
The user has the possibility to set the marker width right from
the import cut file window for the new mrk file. This thing becomes
possible when the “Auto width” option is unchecked.
The manually set marker width can only be bigger or
at list equal with the marker width set in the cut file. A
warning message will appear on the screen, if it happens
to set this marker width smaller than the value set in the
cut file. This message informs the user that the marker
width is smaller than the marker width from the cut file.
Note: After importing the cut file, the result will be a
new .mrk file, having a single size, generally named MB.
90
User Manual - EuroCAD Automarker
On this marker the user can apply all nesting functions existing in the EuroCAD Automarker application.
3.52 Plotter settings
To change plotter settings in EuroCAD Automarker you must click on « Settings » button; a
dialog window opens; here you must select « Plotter settings ».
Plot stripes and plaids
*you can print all lines or no more than one line, defined by the user. If you check “no more than one line..” the
printed segments will be represented by segments or a defined length and a settable distance.
Plotter scale factor
*scale factor settings are used especially for fine plotter/cutter calibration. These settings can be done on paper
length and/or width. This calibration can be also realized directly on plotter.
Print margins
* You can set (in mm) the bottom and lateral printing margins.
Text font maximum size
* You can define the maximum size for the text on the patterns
Split text on multiple rows
* For long text lines you may choose to split the text on multiple rows
Plotter resolution
*resolution – in this field you can enter the plotter/cutter required resolution.
*scale – if you click on the arrow near the scale field, a menu opens here you
can choose the plotter printing scale. The presets values are
1/1, 1/10, 1/100, 1/1000
91
User Manual - EuroCAD Automarker
HPGL extra initialization string
*The user can edit and modify the extra initialization string from the plt file, generated by the EuroCAD Automarker
application. In order to do this, the user must press the “Edit” button. A new window will open, where can be typed
the text used as extra initialization string. The text will be valid only if at the end of it will be typed “;” character.
*To come back at the original extra initialization string settings , the user must press “Default” button, which can
be found in the Setting window, or it can be used the button from “Extra initialization string” window.
Export marker’s dimensions
If the setting “Export marker’s dimensions” is checked, in the .plt file generated by EuroCAD Automarker
application will be saved the real dimension of the marker as well. This dimension is displayed forward by EuroCAD
PlotMaster when the marker will be ploted.
If this setting is not checked, in EuroCAD PlotMaster application, near the message “Marker size” will appear the “.”
character.
Export HPGL with PEN specification according to drawing
* If your system is connected to a plotter combo that can cut and plot in the same time, you can set the PEN type to
be used for each line type. Such a plotter will be able to cut on the contour and in the same time will be able to
draw the grain axis, notches, sewing line and internal technical points.
You can choose the way you will plot or cut. These options can be set by pressing the „PEN Option” button”; there
are two sections:
- in the right side of the window with PEN settings is a „PEN
Option” button; when you press this button in the displayed
window can change the command that export the information
from the file.
- to change the PEN between sessions you set SP1 or SP2.
Check the setting „Export corresponding PEN1 drawing for all
patterns first” when you want to draw all patterns first and then
to cut all patterns at the same time; and check the setting
„Export corresponding PEN1 drawing for each pattern
separately” when you want to draw and cut each pattern separately.
Plotter list
* You can create a plotter list for those who have more than one plotter. In this list it will appear the available
plotters and the path to save files for a direct print.
To add a plotter in the list you must click on “+” sign in Add/delete plotter field. To change a plotter save path you
must right click in the opened menu and you must choose „Modify”. After you click „Modify” you must select a new
path in the opened window.
To delete a plotter from the list you must select the plotter to be deleted and then click on “-“„
The user can change also the save path for Default plotter. But he can not delete this plotter from the list.
92
User Manual - EuroCAD Automarker
Splicing settings
* To find out where you can make section on the maker, choose to plot the splices on the mini-marker. For this
check “print marker splices” from the window “Plot marker/ print mini-marker”.
The splicing signs of the marker will be set in accordance with the minimum band width on splicing and with the
maximum band overlap set by the user in the “Settings plotter” window in the “Splicing settings” fields.
You can use to splicing on the marker when you have a marker with a bigger length made on the fabric with
randomly placed defects.
3.53 Cutter settings
CNC starting corner
* In order to set from where the cutting machine should start the cutting in the “EuroCAD Nest Experet Options”
window in the “Cutter settings” tab are two options: bottom left and top left. First option will be checked if the user
wants to start the cutting from the left bottom edge of the marker, second option will be checked when the user
wants to start the cutting from the top left edge of the marker.
Cutter scale factor
*scale factor settings are used especially for fine cutter calibration. These settings can be done on paper length
and/or width. This calibration can be also realized directly on cutter.
93
User Manual - EuroCAD Automarker
Export on bands
If the cutting machine doesn’t have the possibility to
transport automatically the fabric, there is the
possibility to export the .cut file to the cutting
machine on bands, only if the option “Export on
bands” it is checked. The minimal dimension of one
band it is of 50 cm. If the value written in the band
size it is smaller than 50 cm than a warning
message will appear and the user must put a value
higher than 50 cm.
Measurement unit
There are three types of measurement unit in which you can make the export to the automatic cutting machine.
The tree types of measurements units are:
•
0.01 inch
•
0.001 inch
•
0.1 millimeters
The message „Export command for measurement unit in the file” must be checked to show in the file, information
about measurement unit used to the export.
G70 and G71 are the commands applied in the file for the afferent measurement unit.
Export label for patterns:
This option can be used only by the machines that have the possibility to label the patterns. On these labels is
possible to print the following information: size, project name, pattern name, fabric. In order to print this information
on the labels, the box from each category field must be checked.
The user has the possibility to decide what text will be shown before the information. When the user check the
desired box, the field next to it becomes editable and the user can type any text he wants. This fields are field as
following: S – for sizes, M – for project, N – for name and F – for fabric, but can be changed when the field
becomes editable.
Internal points
* Only four types of internal points can be cut on the automatic cutting machine. These points are: „Dart edge”,
„Hook hole” , „Fastener hole” and “ Internal points”. In this file this points are read under the command M43.
* To see or cut these points at the cutting machine you must check the checkbox near the point type.
If the field is not checked, even if on the marker these technical points exist, they won’t be cut on the cutting
machine.
Export internal point in ISO CUT format
* This message must be checked to export the internal technical points in ISO CUT format.
Tubular cutting options:
When the marker is made on tubular fabric, the user has the possibility to choose if the edges that fit with the fabric
edges, from the patterns that are placed tangential, will be cut or not. In the field of Tolerance will be introduced
the maximum distance from the fabric edge and the edge that will be cut. Initially this tolerance is of 0.5 cm.
After the Tolerance is set, the user must check the option “Do not cut straight lines near fabric folding edge” in
order not to be cut those edges.
94
User Manual - EuroCAD Automarker
List of cutters
When are multiple cutters, the user has the
possibility to create a list of cutters and later the
export can be done only to one of the cutters from
the list. Initial, the list contains only one cutter, the
default cutter. After pressing the button „ List of
cutters” a new window will open „ Modify cutter
list”. To add a new cutter into the list the user must
press „Add” button and than in the field „ Cutter
name” the word UNNAMED can be replaced with
the name of of the cutter. These will appear in the
left side of the window. The user can set the cutter
speed as well. In the field „Cutter speed” must be
introduced the value of the speed in cm/sec.
The user can modify the name and the speed of a
cutter that already exists in the cutter list. In order
to do that, the cutter must be selected in the left
side of the window and after the changes are done
to save them the user must press „Modify” button.
The user can delete cutters from the list. After the
cutter was selected the user must press „Delete”
button.
To save the information from this window, the user
must press Ok button and if the user don’t want to
save the information than the Cancel button should
be pressed.
Alternate patterns cutting direction:
This option will be checked if the user wants to cut the patterns alternative: one pattern in clock wise direction
and the next pattern in counter wise clock direction, in the order that was set on the patterns.
Use ISO CUT initialization string
This option must be checked so that the information from the file heading to be according to the ISO CUT.
The cut machine is of cutter/plotter type:
In case the cutter has a writing head the user has the possibility to set for the technical element the instrument that
you want to use: pen if the user wants to have drawing ore cut if the user wants to cut the element.
The two written/drawing heads can have two positions: pen UP and pen DOWN. The default commands for the first
pen are the following:
for pen 1, UP position the command is P2
for pen 1, DOWN position the command is P1
for pen 2, UP position the command is P4
for pen 2, DOWN position the command is P3
The commands for Kuris cutters must be dome as the following:
for pen 1, UP position the command is D2
for pen 1, DOWN position the command is D1
for pen 2, UP position the command is D4
for pen 2, DOWN position the command is D3
Draw elements for each pattern
If this setting is checked, for each pattern from the marker will be draw first all the elements for drawing and than
will be cut all the elements for cutting.
If this setting is unchecked, first will be exported all the elements from the marker that will be drawn and then will be
exported the elements for cutting.
This setting is unchecked by default.
Drill holes are cut before all the patterns
If this setting is checked, first will be cut all the holes from the marker and after that will be cut/plotted the other
elements from the marker.
If this setting is unchecked the holes will be exported for each pattern.
This setting is unchecked by default.
Alternate cutting for symmetrical patterns:
Check this option in order to be cut alternative the patterns half that were defined as symmetrical, half in clock wise
and half in counter clock wise direction.
95
User Manual - EuroCAD Automarker
Flip
You can export the marker to the cutting machine as it is displayed on the screen, flipped on x, flipped on y or
flipped on x and y. If the user wants to make a flip on x than the option “Flip x” must be checked, if the user wants
to have a flip on y than the box ”Flip y” must be checked and if the marker flip must be done on both direction,
than both boxes must be checked.
3.54 EuroCAD Automarker user settings
To change EuroCAD Automarker user settings, you must choose « User options » tab in the settings window.
Measurement unit
* In the field near this message you can choose the measurement working units in
EuroCAD Automarker application. You can choose from cm, mm or inch.
INCH.
Snap distance
* If you get close a pattern to another then they will collate. Here you can set the minimal magnetization
distance for this effect to take place; the pattern placed on the marker will be attracted by the pattern that is already
placed there.
Free rotation step
* When you manually rotate a pattern on a marker you can set the specific rotation step. The rotation step can
be set with a decimal precision from “User options” settings.
96
User Manual - EuroCAD Automarker
Application language
* here you can set the current language for the running application
Nesting algorithm
* Here you can choose from the standard and advanced versions. The latter requires a high-end computer.
Pattern folding for tubular fabric decided by
* For the markers on folded or tubular fabric you can choose if the pattern folding will be realized by the user or
automatically by the program.
Bundles can mix together during size by size nesting
*If this message is checked, at size by size nesting, small patterns of the different size garment will mix
together, only if the space allows it, but the majority of the patterns will remain grouped in the same zone.
If the message is not checked and it will be realized an automatic nesting size by size small patterns of the different
size garment will not mix together, and the space between sizes is clearly delimitated and the sizes will not overlap
at all.
Warning at printing/cutting for incomplete marker
* If this option is checked, when you want to print/cut an
incomplete marker you will be warned in a new opened
“Warning” window; here you can find the pattern number placed
on marker. If you want to continue to print an incomplete marker
you must click on”Yes” button. To cancel operation you must
click on „No” button; then you must add the missing patterns on
the marker. If you check „Don’t ask again” option in this window,
this warning will not appear again.
Reactivate warnings
If you have deactivated the warning messages, you can reactivate them by checking this message.
Compact format save
* If you want to save in compact format you must check the box near the message. Compact format saving
takes more time for nesting procedure. If you don’t want to use this option, you must uncheck it.
Show information about selected pattern
* If you want to view information about selected pattern you must check the box near the message; the
information will be displayed on the top - right side of the button bar.
Group the same size in “size/type table” view mode
*Here the user can set to display in the stock area only once a size which appears many times in the marker.
When this setting is checked next to the size name will appear the information about how many sizes are placed in
the marker from all existing.
97
User Manual - EuroCAD Automarker
Group the same size in “pattern collection” view mode
*When this option is checked, in the “pattern collection” view mode the patterns will be displayed only once in
the stock area, for a size that appears many times in the marker. In this case, when the cursor will be placed on
top of one pattern in the stock area, will appear a hint next to the cursor which displays how many sizes are placed
from all existing in the marker.
Add unique bundle index
*To do not mix together (for those fabrics that requires the same direction for all patterns) patterns from
products that has the same size name, the user can choose to add a unique index for each size. Thus, when this
option will be checked each size from the marker will have also a numerical index next to the size name.
Assign similar colors to sizes with same name
*When this option will be checked all sizes having the same name will have the same color but with different
strength.
Sheet nesting working mode
* If you want that the markers optimization to be done on sheets, meaning delimitated areas simulated by fabric
defects than you must check the option „Activate sheet nesting working mode”. Under this option you will find an
edit in which you must introduce the width of the sheet meaning the distance between vertical defects.
Fabric consumption measuring units
*The user can choose the measure unit in the field next to the “Fabric consumption
measuring units” message. Thus, he can choose: M, FT or YD.
Color settings
The user can change the color for the buttons, for the editable fields, for panels and labels. Also he can define and
save some color profiles for the Spread&Cut Planner Application.
To activate the initial colors use the button „Default colors”.
3.55 Keyboard settings
98
User Manual - EuroCAD Automarker
Most of the frequently used commands can be easily accessed by the so-called shortcuts. You can use some
keyboard combinations to perform EuroCAD functions faster and easier than from the pull-down menus. Beside
preset shortcuts that can be changed, you can define your own key commands or key combinations, to facilitate
your work.
In the window for keyboard settings you have a command list for which you can define specific keyboard
combinations. When you select a command on the list, on “Description” field the corresponding function will be
displayed. If the selected command has already a defined keyboard combination, this will be displayed in the field
under the message “Current key combination”. If you want to change the key combination you must click on the
“Delete” button and then you must click in the field under the message “New key combination” and choose your
new key combination. After the new key combination is displayed you must click on “Assign” button.
For a command that has no keyboard combination set, you must perform the following steps:
- select the command in “Commands” list.
- click on the field under the “New key combination” message
- click on the key or combination key (if the key or the key combination has already been set to other command
this will be mentioned in “Assigned to command” field). After choosing the key or the key combination, these will be
displayed in the field under the message “New key combination”
- click on “Assign” button. After you click on this button, the chosen key combination will be displayed in the
field under the message “Current key combination”
- before closing the settings window, in order to keep settings you must click on “OK” button. If you want to quit
the chosen settings you must click on “Cancel” button.
If you want to go back to the original settings, you must click on “Reset” button.
3.56 Gerber nesting server settings
99
User Manual - EuroCAD Automarker
In this window you can set the computer with EuroCAD Automarker as nesting server compatible with the
server in Gerber system. Gerber file import is realized by EuroCAD Import Server application. This application
generates MRK files that will be saved in a folder that will be found in „Settings nesting server” window in EuroCAD
Automarker as „Entry folder”.
Thus, in „Nesting server settings” in EuroCAD Automarker application you must define the paths for „Entry
folder” and „Exit folder”. The path „Entry folder represents the location from which you will load the files that will be
nested in EuroCAD Automarker while „Exit folder” shows the location on the harddisk where you will save the
nested files. EuroCAD Automarker application will survey permanently the entries in the entry folder and when
EuroCAD Import Server application saved a file in this folder you can go directly to marker optimization.
On „Export settings” you must check the file types that will result after nesting optimization. After nesting
optimization you can create automatically PLT, RS274D files for plotter or cutter or ISO CUT files. For the markers
that include patterns with allowance you may choose to force pattern printing or cutting on the allowance contour.
For nesting optimized this way, you must choose a processing time limit. This processing time must be entered
in „Nesting time” field. To stop the nesting procedure in a program defined moment, you must check the box near
the message „the software manages the nesting end”.
3.57 Useful keyboard shortcuts
Open a cut plan from the computer disk
+
Choose a marker from the opened cut plan
+
Choose a directory with cut plans for batch nesting
+
Quick nest (draft)
+
Complete automatic nest (time limit)
+
Automatic optimization for the nested patterns
+
Remove all patterns from the marker
+
Save current changes in the cut plan
+
UNDO – cancel last change
+
REDO – remake the last change
+
+
Select all patterns
+
Information and restrictions for the selected pattern
+
+ left click on a pattern
Left click of the mouse + scroll
mouse
Allow row pattern selection for various operations
Rotate the selected pattern clockwise or counter clockwise with
the rotation step from settings. The rotation is made only when
are deviation from the grain axes, and the maximum rotation
angle it is given by the ungle from the box « Deviation from the
grain axes » for the selected pattern.
100
User Manual - EuroCAD Automarker
Zoom keyboard shortcuts
Zoom in
Zoom out
Display full marker length
Display full marker width
3.58 Help – How to use EuroCAD applications
To obtain information about EuroCAD applications usage, you must click on « Help » in the menu bar. A pull
down menu will open: it includes:
1) Help
2) Index help
3) What is this?
4) About...
5) Register product
1) Help
101
User Manual - EuroCAD Automarker
Help window is composed by two fields.
In the left field you can display: Contents, Index, Search and Favorites; In the right field you have displayed the
help text and pictures.
Contents – represents a page that contain the summary in a tree organization, with chapters and subchapters,
for the information in EuroCAD Pattern Designer
A chapter or subchapter has a book icon and eventually a square with the «+ » sign. Only if a chapter includes
subchapters, this sign appears in front of the book icon. To display the subchapters, you must click on the «+ »
sign. To roll back subchapters, you must click on the «–» sign that replaces the «+ ». sign when rolling down
subchapters.
2) Index help
« Index Help » it is shown in the left
side of the Help window. It contains
all the pages of the user manual, in
alphabetical order of the chapter. It
can be opened from the upper main
menu Help by pressing « Index
help » button. In order to find faster a
certain page, in the blank field the
user should write a help word and
automatically will be found all wards
from the text. To see a page shown
in index, the user must do double
click on its name and the user will be
able to read the page in the right side
of the window.
Search
« Search » it is shown in the left side of the Help window. It allows the fast search of certain information after a key
word. The key word will be searched not only in the page name but in the page context as well.
Favorites
« Favorites » it is shown in the left part of the Help window. It allows to create a favorite list page or most used , in
order to be easier for the user to access it.
3) What is this?
Pressing this button allows to open the help files for the current work step. Same result can be obtained if the user
presses the button « What is this » from the Help menu. After pressing the button near the mouse will always
appear a question mark. If the « What is this » button is pressed and than the user click on an element from the
application, the help window will open offering information about the selected element.
4) About
If the user press « About » button from Help menu, than a new window will open that will display information about
application version and the last update.
102
User Manual - EuroCAD Automarker
How to activate the hardware key:
EuroCAD Hardware Protection Keys are small electronic devices who are designed to control the use of
EuroCAD CAD programs.
Hard ware key Installation
EuroCAD Hardware Protection Keys must be connected to the serial port of the PC (Com1, Com2,…).
You don’t have to install additional software is necessary.
Demo version:
EuroCAD CAD software is working in DEMO mode when EuroCAD Hardware Protections Keys is not present,
or when it is not registered.
Programs are fully functional, except for some limitations:
Projects saved in DEMO mode cannot be opened in licensed mode
Export in DXF/AAMA, HPGL and ISO are prohibited.
The “Save” function is disable for all EuroCAD Applications
Licensed version:
EuroCAD CAD software is working in Licensed Mode when EuroCAD Hardware Protections Keys is present
and active.
Usually the dangle is activated before delivery. If it is not activated, it can be activate by the trainer or by the
EuroCAD technician that installs the system.
For those cases when the key is not activated, the activating procedure is described below.
Rule for proper dongle functionality:
Just set the correct date on your computer.
3.Hardware Protection Key activation procedure
Usually the Hardware Protection Key is delivered already activated for a time period. If the key was delivered
without activation or the activation period was expired the user must activate the key.
The activation can be done in two ways:
- Automatically - Registration online
- Manually – by introducing an activation code
Online registration
The main condition to realize online registration is to have internet connection on the computer on which
EuroCAD applications are running.
103
User Manual - EuroCAD Automarker
The online registration can be done completely automatically or by making click on one button in activation
window.
The activation window will be displayed:
1. when you start a EuroCAD application if your key was never activated or there are only 3 days
left till next activation
2. if you make click on “Help” from the written menu, and choose from the opened list the option
“Register product”.
The activation is done completely automatically with 3 days before key deactivation if the option
“Automatically registers online “is checked.
If the program can not register automatically online this message become unchecked and you must try to
activate by clicking on “Register online button”
Manual activation
It is recommended to use manual activation only when you can not register online (For example: you don’t
have internet access on the computer with EuroCAD applications installed or the internet connection is off).
For manual activation the user need the activation code, which can be received automatically on email or directly
from one of the EuroCAD CAD Systems technicians. To obtain this code you must contact the EuroCAD Office by
phone or by e-mail.
After getting the code, you must follow next steps:
a. First open one of the applications: EuroCAD Pattern Designer, EuroCAD Automarker or EuroCAD Photo
Digitizer.
On the computer screen will be displayed a window like in the next figure:
b. On this window you have three buttons “DEMO” , “Register online” and „Input activation code”. To
activate manually the key you must press the “Input activation code” button. After this the “EUROCAD
Registration” window will be displayed:
104
User Manual - EuroCAD Automarker
c. This is the window where you must insert the register code.
Press on “Register” button after typing the code to register the product or on “Cancel” button if you want to quit
on product register.
After you register the applications, the program will run in the full version.
Manual registration of the key before the present activation code was expired
First open one of the applications: EuroCAD Pattern Designer, EuroCAD Auto Marker or EuroCAD Photo
Digitizer.
Click on the “Help” function from the written menu, and then choose from the opened list the option “Register
product”.
A window will be displayed on the screen, and here you must press „Input activation code” button.
In „EuroCAD Registration” window you will have to type (to paste) the register code received from the EuroCAD
technician.
105
User Manual - EuroCAD Automarker
Press on “Register” button after typing the code to register the product or on “Cancel” button if you want to
quit on product register.
If the registration succeeds after closing the window the program will run in full version (licensed version) and
the user can use the programs in full version.
Possible error messages showed after you enter the activation code
If the registration doesn’t succeeded there are two waning messages that can appear “Registration process
failed!” or “Registration code is wrong!”.
This is a warning message for those cases when a technical malfunction appears and the product register
cannot be done: “Registration process failed!”
Malfunctions that can generate this message:
the serial port(COM) where the key was inserted doesn’t work properly;
the hardware key is broken;
the register code is not a valid code.
Check all this things and if they are ok contact one EuroCAD technician.
When the register cod is typed wrong, there is another message that warns you about this: “Registration code is
wrong!”
This message appears when a letter or a number is missing from the code.
To avoid this, it would be better to use the Copy and Paste functions from Windows!
Check if the activation code it was typed correctly and if you receive again the message contact one EuroCAD
technician.
Some messages which can appear when you open the EuroCAD programs:
Displayed message
Explanation
If you don’t have a hardware key installed
on your computer, when opening the EuroCAD
applications, a warning message will be
displayed on the screen: “Hardware key couldn’t
be found. DEMO version!”
Click on “OK” button to close the window.
After closing this window, the program will run in
demo version, and the projects saved in demo
version cannot be used in a full version.
106
User Manual - EuroCAD Automarker
If when saving a project made in demo
version a warning message will be displayed on
the screen. This message warns you about the
fact that you are in a demo version and if you
save it you won’t be able to use the project in a
full version. “Warning! The file is saved in
DEMO version and will not be opened in full
version”.
When saving a project in a demo version
the save window will be displayed on the screen
even if the project is an older one. In the name
field appears automatically a prefix “demo_”
after which you can type the product name.
If you don’t want to have this prefix in front
of the product name you can delete it.
If you have worked before in the demo
version when opening the program, a window
with a warning message with two options
appears on the screen. The message warns
you about the fact that you have worked in a
demo version and you can choose to work
further in the demo version or in full version. To
work in full version press the “Check key”
button.
If you insert a not registered hardware key
in the computer, when opening the EuroCAD
application, a new window containing two
options will be displayed. One option is “Demo”
for working in the demo version, and “Register”
to register the key at the moment.
File types:
The file type defines the storage method for information in a folder.
For using a file created in another program you will have to use the import functions. In EuroCAD you can
import native files from other Cad Applications as Gerber, Assist or Lectra and DXF or DXF AAMA files from all
others Cad Applications.
For using a *.PAT file in other applications you will have to convert it. To convert a *. PAT file you must use the
export function.
1. EuroCAD native files:
File type
The application
used to generate the
file
File
content
PAT
EuroCAD Pattern
Designer
-a
project
(contents all
product
information)
PT
EuroCAD
Spread&Cut Planner
EuroCAD
Automarker
EuroCAD
Automarker
- many
markers
MRK
sm
EuroCAD Pattern
- one
marker
- load a
Applications
where you can load
this file type
EuroCAD Pattern
Designer
EuroCAD
Spread&Cut Planner
EuroCAD
Automarker
EuroCAD
Spread&Cut Planner
EuroCAD
Automarker
EuroCAD
Spread&Cut Planner
EuroCAD
Automarker
EuroCAD Pattern
107
How to open/load
EPD- Project \ Open project
ESCP – Load a pattern file
EA – Import PAT
ESCP – Open cut plan
EA – Open cut plan
ESCP – Open cut plan
EA – Open cut plan
To use the function « Load a size set
User Manual - EuroCAD Automarker
Designer
size set from
a file
Designer
from file” open the « Edit size set » function in
GRADING work tool mode.
rul
EuroCAD Pattern
Designer
EuroCAD Pattern
Designer
Click on “Load and apply the grading rule
file” in GRADING work tool mode.
PDF
EuroCAD Pattern
Designer
EuroCAD Spread&Cut
Planner
EuroCAD Automarker
- one or
many grading
rules
- information
technical
sheets
EuroCAD Pattern
Designer
EuroCAD Spread&Cut
Planner
EuroCAD Automarker
EPD
-
Product technical sheet
- All patterns technical
sheets
- Certain patterns technical
sheets
- Pattern properties table
ESCP
- Cut Plan report
- Mini marker
EA
- Mini marker
- Pattern properties table
- Marker report
All these files can be opened with Adobe
Reader, this program must be downloaded in
the computer.
All these files can be loaded in the
corresponding preview window, by making a
click on the “Load report” button.
NDR
PRN
EuroCAD Pattern
Designer
EuroCAD
Spread&Cut Planner
EuroCAD
Automarker
information
technical
sheets
EuroCAD Pattern
Designer
EuroCAD
Spread&Cut Planner
EuroCAD
Automarker
EPD
ESCP
-
Product technical sheet
- All patterns technical
sheets
- Certain patterns technical
sheets
- Pattern properties table
-
Cut Plan report
- Mini marker
EA
- Mini marker
- Pattern properties table
- Marker report
All these files can be loaded in the
corresponding preview window, by making a
click on the “Load report” button.
2. Files that can be loaded in EuroCAD:
File
type
DXF
DXF AAMA
(dxf+rul)
DXF-TetraCad
The application
used to generate
the file
Any Cad
Application
Any Cad
Application
TetraCad
File content
Applications
where you can
load this file
type
Observations
-contents patterns
EuroCAD
for each size
Pattern
-use them to
Designer
create projects and
EuroCAD
markers
Spread&Cut
Planner
-this kind of file doesn’t contents
information about pattern number and fabric
type.
- you must check pattern number
-you can import pattern on internal
seam line or on external cut line, but never
on both of them. In some cases, the internal
seam line might be imported as an auxiliary
pattern attached to the main pattern.
-in EuroCAD we have a special
function that can recreate grading for
imported patterns.
- base size and
grading table as grade
rules called RUL or
TXT.
- use them to
create projects and
markers
EuroCAD
Pattern
Designer
EuroCAD
Spread&Cut
Planner
-it doesn’t contents information about
the patterns number and fabric type
- you must check pattern number
- you can import pattern on internal
seam line or on external cut line, but never
on both of them. In some cases, the internal
seam line might be imported as an auxiliary
pattern attached to the main pattern.
-in EuroCAD we have a special
function that can recreate grading for
imported patterns.
-contents a
marker
-it can be used
EuroCAD
Automarker
-the marker contents unplaced
patterns
108
User Manual - EuroCAD Automarker
TMP (zip)-Piece
TMP (zip)-Model
and Pieces
ZIP Archive
containing Patterns
files
ZIP Archive
containing Design
files
ZIP Archive
containing Style and
Pattern or Design
files
IBA
VET and IBA
only for nesting
-one pattern with
size set, grading,
internal lines and
auxiliary patterns
- it can be used to
create projects and
markers
EuroCAD
Pattern
Designer
EuroCAD
Spread&Cut
Planner
-to import all information, when
creating in Gerber the *.zip file, in the export
window the user must check the option
“include all components”
- Usually these files don’t contents
information about notches dimension and
notch type.
- patterns are created only on the
external cut line
-contents all
information about
project (the number of
patterns, pattern type,
fabric type)
- you can use
them to create projects
and markers
EuroCAD
Pattern
Designer
EuroCAD
Spread&Cut
Planner
-it can be loaded in Pattern Designer
only if it comes together with the pattern
files.
- to import all information, when
creating in Gerber the *.zip file, in the export
window the user must check the option
“include all components”
- usually this files doesn’t contents
information about notches dimension and
notch type.
- patterns are created only on the
external cut line
EuroCAD
Pattern
Designer
Assyst
-one pattern with
size set, grading,
internal lines and
auxiliary patterns
- it can be used to
create projects and
markers
-only the *.ZIP archive exported from
Assyst Bullmer for Windows can be loaded
in Pattern Designer
-to import graded patterns you must
have and the grading rule files in the *.ZIP
archive
- if the *.ZIP archive contents patterns
having “free” seam allowance, these
patterns will be imported in Pattern
Designer as one pattern for each size on
the external cut line. These patterns will
have also and different grading groups.
EuroCAD
Pattern
Designer
Assyst
-one pattern with
size set, grading rules,
internal lines and
auxiliary patterns
- this files are
used to create projects
and markers
-only the *.ZIP archive exported from
Assyst Bullmer for Windows can be loaded
in Pattern Designer
-to import graded patterns you must
have and the grading rule files in the *.ZIP
archive
- if the *.ZIP archive contents patterns
having “free” seam allowance, these
patterns will be imported in Pattern
Designer as one pattern for each size on
the external cut line. These patterns will
have also and different grading groups.
EuroCAD
Pattern
Designer
Assyst
-contents all
information about
project (pattern
number, pattern type,
fabric type)
- this files are
used to create projects
and markers
-only the *.ZIP archive exported from
Assyst Bullmer for Windows can be loaded
in Pattern Designer
-it can be loaded only if it comes
together with Pattern files and Design files
-to import graded patterns you must
have and the grading rule files in the *.ZIP
archive
- if the *.ZIP archive contents patterns
having “free” seam allowance, these
patterns will be imported in Pattern
Designer as one pattern for each size on
the external cut line. These patterns will
have also and different grading groups.
-one pattern with
size set, grading rules,
internal lines and
auxiliary patterns
- this files are
used to create projects
and markers
-contents all
information about
project (pattern
number, pattern type,
fabric type)
- this files are
used to create projects
EuroCAD
Pattern
Designer
EuroCAD
Spread&Cut
Planner
-Lectra users that works with *.MDL
files, can obtain IBA and VET files using the
“Export BI Garment” function from “File”
menu, in Modaris application.
- You will have to check the size set.
EuroCAD
Pattern
Designer
EuroCAD
Spread&Cut
Planner
-Lectra users that works with *.MDL
files, can obtain IBA and VET files using the
“Export BI Garment” function from “File”
menu, in Modaris application.
-VET files can be loaded in Pattern
Designer only if they comes together with
IBA files
Gerber
Gerber
Lectra
Lectra
109
User Manual - EuroCAD Automarker
and markers
EXP
LayS
Order (piece
and model)
PLX (IBA si
VET)
HPGL PLT
CUT
GBR
DAT
Investronica
- You will have to check the size set.
-it can content
only patterns or all
information about the
project (pattern
number, pattern type,
fabric type)
- this files are
used to create projects
and markers
-contents one
marker
-it can be used
only for nesting
EuroCAD
Pattern
Designer
-if the exp file contents a project, it
must come together with patterns.
- a project from Investronica contents
patterns for only one fabric type. To import
a complete project containing all fabric
types you must import all styles in the same
*.PAT file.
EuroCAD
Automarker
-the marker contents unplaced
patterns
-even if there are many differences
between Assyst and EuroCAD files, all
information will be well imported and the
restrictions will be exactly as in Assyst
-if it is necessary to make changes, we
recommend you to make them in Assyst
and then to import the files in EuroCAD (for
ex if you need to change the seam
allowance on a segment or if you need to
change some pattern properties)
-contents one or
many markers
-can be used only
for nesting
EuroCAD
Automarker
-contents one
marker
-it can be used
only for nesting
EuroCAD
Automarker
-Order files can be loaded in EuroCAD
Automarker only if they comes together with
Pattern and Project files
-the marker contents unplaced
patterns
-even if there are many differences
between Assyst and EuroCAD files, all
information will be well imported and the
restrictions will be exactly as in Assyst
-if it is necessary to make changes, we
recommend you to make them in Gerber
and then to import the files in EuroCAD
-the
marker
contents
unplaced
patterns
-only the PLX files created with IBA
and VET files can be imported in EuroCAD
Automarker program
-contents a
drawing
-can be used for
printing
EuroCAD
PlotMaster
- contents a set of
commands for cutting
machine
-it can be used
only for plotting or
cutting
contents a set of
commands for cutting
machine
-can be used only
for cutting or plotting
-contents a set of
commands for cutting
machine
-can be used only
for cutting or plotting
EuroCAD
PlotMaster
-you can convert it in CUT file using
EuroCAD PlotMaster
Attention!! The CUT file resulted from
conversion can be used only for plotting.
This is recommended because after
conversion technical elements like notches,
axis, texts…etc will appear in Cut file as
auxiliary drawings.
Use this conversion for plotter who can
print only CUT files (for example Lectra
plotters)
-you can convert it in HPGL PLT file
using EuroCAD PlotMaster
EuroCAD
PlotMaster
-you can convert it in HPGL PLT file
using EuroCAD PlotMaster
EuroCAD
PlotMaster
-you can convert it in HPGL PLT or
CUT file using EuroCAD PlotMaster
Assyst
Gerber
Lectra
Others Cad
Applications
Others Cad
Applications
Others Cad
Applications
Other CAD
application
110
Attention!! The CUT file resulted from
conversion can be used only for plotting.
This is recommended because after
conversion technical elements like notches,
axis, texts…etc will appear in Cut file as
auxiliary drawings.
Use this conversion for plotter who can
print only CUT files (for example Lectra
plotters)
User Manual - EuroCAD Automarker
3. Files that can be exported from EuroCAD
The
application used
to generate the file
File type
HPGL PLT
CUTRS274D
ISO CUT
Applications
where you can
load this file type
Observations
EuroCAD Pattern
Designer
-contents patterns
for each size
-use them to
create projects and
markers
Any CAD
application
- In EuroCAD you can set
profiles for DXF files. To import
correctly the DXF files you must
choose the right profile
according the application in
which will be used.
EuroCAD Pattern
Designer
- base size and
grading table as grade
rules called RUL or
TXT.
- use them to
create projects and
markers
-contents a draw
-can be used only
for plotting
Any CAD
application
- In EuroCAD you can set
profiles for DXF files. To import
correctly the DXF files you must
choose the right profile
according the application in
which will be used.
Applications for
printing
- The user can set elements
that must be printed (texts, axes,
notches, internal points, etc)
-contents a set of
commands for cutting
machine
-can be used only
for cutting or plotting
Applications for
automatic cutting
machines
- The user can set elements
that must be cut (axes, notches,
internal points, etc)
-contents a set of
commands for cutting
machine and some
special commands for
ISO cut standard
-can be used only
for cutting or plotting
Applications for
automatic cutting
machines
- The user can set elements
that must be cut (axes, notches,
internal points, etc)
- The user can set to export the
internal points in ISO cut format
and also has the possibility to set
a ISO cut initialization string
DXF
DXF
AAMA
(dxf+rul)
File content
and how can be
used
EuroCAD Pattern
Designer
EuroCAD
Spread&Cut Planner
EuroCAD
Automarker
EuroCAD Pattern
Designer
EuroCAD
Spread&Cut Planner
EuroCAD
Automarker
EuroCAD
Spread&Cut Planner
EuroCAD
Automarker
EuroCAD workstation - Hardware Specifications
To run EuroCAD programs your computer should have the minimum hardware configuration described
below. The EuroCAD programs can run on computer with less performance hardware configuration than the
minimum configurations, in this case the performance (speed) will be slower. For computers where the files made
in EuroCAD programs are complex (projects with many patterns, cutting plans with many and long markers), we
recommend a computer with higher hardware configuration than the minimum.
Minimum hardware configuration.
Application
Hardware
description
Processor
EuroCAD Pattern
Designer
EuroCAD
EuroCAD
Spread&Cut
Automarker
Planner
P IV 1500 MHZ
1 GB
Free Disk Space
RAM memory
Sound Card
512 MB
Recommended
For digitizing
512 MB
1 GB
1 GB
not required
not required
not required
Onboard COM port or PCMCIA adaptor
Ports for dongle –
or USB to serial adaptor – USB to RS232 Converter
hardware protection key
Other ports
COM port
(for digitizer)
not required
not required
not required
For software installation
CD- ROM
Operating system
EuroCAD Photo
Digitizer
Windows XP
Windows XP
Windows XP
Windows XP
Windows 2000
Windows 2000
Windows 2000
Windows 2000
111
User Manual - EuroCAD Automarker
Windows Vista*
Windows Vista*
Windows Vista*
* To run EuroCAD programs under Windows Vista you have to follow the steps below.
1. Install all desired EuroCAD programs.
1. Install all desired EuroCAD programs.
2. If you have icons on the desktop for the
installed programs, make a right click on the
corresponding icon, and then choose the “Properties”
option from the opened menu.
If you don’t have an icon on the desktop, you must enter
the installing folder (ex: C/Program
files/EuroCAD/Application name), and make a right click
on the exe file (ex. for „Application name”:
EuroCADPatternDesigner.exe).
3. A new window will open on the screen,
when the “Properties” options are active. This window
contents many tabs. You must activate the
“Compatibility” one, by making a click on it. Here you
will have to select the compatibility mode that matches
to our program.
For this, check the “Run this program in compatibility
mode for:” option from “Compatibility mode” section.
After this, select the Windows XP operating system
from the list below.
4. Check the “Run as administrator” setting
after settings the operating system where it is
necessary.
3. A new window will open on the screen, when the “Properties” options are active. This window contents
many tabs. You must activate the “Compatibility” one, by making a click on it. Here you will have to select the
compatibility mode that matches to our program.
For this, check the “Run this program in compatibility mode for:” option from “Compatibility mode” section. After
this, select the Windows XP operating system from the list below.
112
User Manual - EuroCAD Automarker
Warning! The compatibility between the operating system and program must be set for each program
separately!
113