1
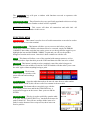
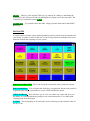
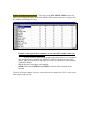
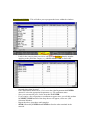
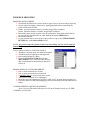
LOG IN SCREEN The main LOG IN screen has been developed to increase the speed of a transaction ENTER DINE IN – this will automatically bring up the table map of your business. Upon selecting a table you will notice the different colors for different scenarios. To select a table just hit the relevant table. If it is a new table, it will then ask you to select the number of covers, now you can proceed with entering in your order. Once completed hit LOG ON/OFF to exit or a particular PAYMENT to finish the table. ENTER TAKE AWAY – this is automatically bringing you to the main screen, select items to be sold and pay them off. This will now change price levels and the formats on the receipts to have the order prepared to be taken away. It will also print a receipt for the customer with a matching order number to distinguish the order. MAIN SCREEN This main screen has been developed over the years to be a quick and efficient way to enter in an order as it is being given or taken of a notepad. The screen consists of many different layouts and functions: SELECTION SCREEN RECEIPT SCREEN MODIFIERS AND MESSAGES PLU SELECTIONS2ND LEVEL PLU SELECTION FUNCTION KEYS NUMERIC PAD MANAGER BUTTON PAYMENT SELECTION SCREEN – This screen is where you select the items to be sold from the PLU SELECTIONS which are situated below 1ST & 2ND LEVEL, PLU SELECTIONS– These buttons contain your menu items, they are programmed in conjunction with the type items that are sold in the department they belong to e.g. By hitting SALAD, the screen will then display all the salad items along with the instructions that go with the coffee. They also contain all the MODIFIER buttons to be able to modify your product NUMERIC PAD- This pad is where all the numbers are to enter in a value or perform a multiplication. This pad also contains the CLEAR & ESC Keys that are also used for basic numeric corrections. The PAYMENT key is also here. This payment key will expand into a selection of payments & quick Cash options. Touch your preferred option. The MANAGER key will open a window with functions reserved to operators with specific authorization. FUNCTION KEYS – These Function keys are specifically appointed to this area to help assist with the transaction. Further on these will be explained RECEIPT SCREEN – This screen will show all transactions and table info. All corrections will also be made via this screen. FUNCTION KEYS LOG ON/OFF – This button is used to close off a table transaction or can also be used to enter in a cashier to use the terminal ITEM CORRECT – This button will allow you to correct a sale before you have finished the transaction. Within a sale that needs to be corrected, simply hit ERROR CORRECT then either touch the item on the screen or use the up & down toggle keys to highlight the item and hit ERROR CORRECT again and you will see the product disappear from the main screen. Once this is done continue on with the sale. VOID – This button will allow a user of the terminal with manager status to void or refund a product. Open the table press the VOID and then select the item to be voided CANCEL– This button is mainly used to completely cancel the order being put in. Basically when in the middle of a sale hit CANCEL and this will then allow you to start the order again without anything having to print. DISCOUNTS – The discount button opens up a window with preset discount and surcharge options. MOVE TABLE – Open the table that needs to be moved, enter the new table number and hit MOVE TABLE, this will move all of its contents to the new table ITEM INFO This button allows extra info to go with the item, simply sell the item and hit the ITEM INFO key, a keyboard will appear on the screen. Enter your text and hit ENTER TABLE SPLIT – This key is used to split bills, open the table to be split, Hit the TABLE SPLIT key, touch all the items to be paid for then ESC. This will now arrange all the items to be paid for on the bottom of the receipt screen, these items can now be paid for. TABLE – This key is the original Table key, by entering in a table no. and hitting the TABLE key, this will open an order by hitting this key again it will close the order. The TABLE key is sometimes named SEND. PRINT BILL – To print the bill for the table, simply open the table and hit the PRINT BILL Key MANAGER Vectron consists of many reports and programming options which can be programmed to your liking. To make it easier for the user we have setup within our manager menu some shortcuts to make the reporting on your system PRINT LAST RECEIPT– This is the last paid receipts that can be printed at anytime. PRINT JOURNAL – This will print the whole day’s transactions. Because the journal is in general quite long it is preferable to use the VIEW JOURNAL option VIEW JOURNAL – This will allow you to view you whole day’s sales and gives you the ability to scroll through the day and pick out certain transaction. You cannot print certain periods from this report X VIEW – This will display an X read on the screen, showing you the financial sales of the day so far VIEW OPEN TABLES – This will give a list of the tables in your system that remain open X PRINT– This is an X read printed, that will give you the financial sales of the day so far END OF DAY – Select this option and it will print you out a selection of reports specifically designed for you business. The report batch consists of – 1. Transactions: Days Financial Records 2. Departments: What categories have sold for the day 3. PLU: What items have been sold 4. Hourly: The hours and sales with the hours END OF WEEK – Select this option and it will print you out a selection of reports specifically designed for you business on a weekly basis. This can also be done monthly if you wish. The report batch consists of – 1. Transactions: Days Financial Records 2. Departments: What categories have sold for the day 3. PLU: What items have been sold 4. Hourly: The hours and sales with the hours DAY PRINT CASHIERS – This will give you a daily printout on the performance of your staff using the terminals DAY PRINT ITEMS – This will give you a printout on the individual sales of your items on a daily basis PROGRAM DEPARTMENTS – All products sold are linked to departments. The departments are reported on and also control the direction the items take when sold. Below are a few programming changes that can be made. - Highlight the department you wish to edit by changing the name Main Group 1 & 2 – this will allow you to change the group that this department reports to. - Printer 1 & 2 – This will direct all of the items that belong to this department to print at a certain location. - Repeat the above procedure until complete SEND followed by ENTER then ENTER to Send to other terminals in the network. If you have been trained to program the departments you may do as you please, but if not then CALL US FIRST (9716 8660) as some changes can upset the normal functions of your terminal. MENU WINDOW PROGRAM – This refers to the PLU SELECTIONS and it will allow you to change the name of the PLU SELECTION on the main screen, simply find the window and change the name - Further to the right of these columns you can enter PLU numbers that you wish to be displayed in the windows. To keep windows open that are being used in Select link 1 or 2 columns in PLU Program enter a number into SELECT COUNT column (2-99) for multi choice, (then press the tick on top right of screen to accept choices when using in registration mode). Repeat the above procedure until complete SEND followed by ENTER then ENTER to Send to other terminals in the network The new selection window you have created can now be attached to a PLU via the select link coloum in the plu file PROGRAM ITEMS – This will allow you to program the items within the windows - Look for the category that you wish to edit then hit GOTO # then the number applying to the particular category e.g. GOTO 150 ENTER for SALADS - Look for the next available spot and put the name in or edit the name that is currently there then hit enter. Enter Department number here, if it is set to the right Department hit ENTER otherwise select the appropriate department e.g. For condiment status Now you can enter the price for the item then hit ENTER If you require a forced question or condiment to appear once you sell this product hit SELECT LINK and all of the drop downs will appear, select one. (Plu Selection Window). Repeat the above procedure until complete SEND followed by ENTER then ENTER to Send to other terminals in the network. - Once finished programming all items press ESC and you will be returned to the main screen PROGRAM CASHIERS – Will allow you to change the Cashier & Manager names - Find the next available or record to edit and type in the name, the number to the left of the name is the number then used unless specified otherwise. Do not change number 10, as this number is reserved to TRAINEE To enter code for Dallas key reader highlight the touch code and press the key into the reader. A code will then appear in the box SEND followed by ENTER then ENTER to Send to other terminals in the network. - Once finished press ESC to finish RECEIPT MESSAGE PROGRAM Here you can edit the name, address and message that are going to be printed on the invoices. The %= in the business address indicates a new line. GROUP PROGRAM This key allows you to program the Main Groups that appear on your MAIN GROUP 1 REPORT at the end of the day. PREPROGRAMMED GUEST CHECKS This function is only active if you use preprogrammed GC (Accounts/Deliveries) in order to track guest names and phone numbers. It displays the entire list of guest numbers, together with their names. PROGRAM TIME You can change the time of your VECTRON here. Use 24h format, use the decimal key and confirm by pushing TROUBLE SHOOTING PRINTERS DO NOT PRINT Check that all printers have power with no paper jams or error messages showing Check cables are tightly connected by unplugging them and reconnecting the leads at both ends of cable. Printer 1(receipt/reports printer) is usually plugged into comport 1 Printer 2(kitchen printer) is usually plugged into comport 2 Reload the paper and do a printer-test on each printer. Switch the printer off for 10 seconds the switch it back on while holding down the FEED button Restart the terminal If your terminal shows an error message you have to press the CLEAR HOLD BUFFER key in the MANAGER screen NOTE: If a printer runs out of paper it will carry on printing if a new roll is replaced immediately YOU CANNOT OPEN A CERTAIN TABLE The table is already open at a different terminal The table has been opened in training mode One terminal might be offline Press the UN-LOCK TABLE key in the MANAGER screen, select the table number that is locked and set the number in the ECR field to 0. ERROR MESSAGE: NETWORK ERROR One or more terminals are off-line One or more terminals are switched off A MOBILE PRO is out of reach of the router The router is switched off or unplugged Reset the router by unplugging its power cable wait 5 seconds, then plug back in Check the network cables by unplugging and reconnecting (do this at both ends of cable). CASHIER MISSING/ OPERATOR MISSING Press 1(or your ID number) then press LOG on/off button (it may say CLERK, CASHIER, or LOG ON).