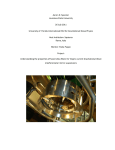
1
Drug Chemistry Section
Drug Chemistry Procedure Manual
Effective Date: March 15, 2003
Modification of J-3
Prepared by R. W. Waggoner, Jr.
Approved by D. J. Koontz
Supercedes: September 1, 1996
Name of Procedure:
Toxicology
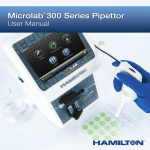
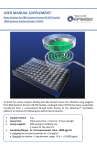
Use of the Hamilton - Microlab 1000 plus and Microlab 500 Liquid Handling Systems to
Prepare Samples
Suggested Uses:
This procedure is designed to prepare most liquid samples for the analysis of some
volatile substances (specifically low boiling point alcohols) by gas chromatography with
headspace sampling. The Hamilton Microlab instruments may also be used for other
sampling when necessary.
The use of an internal standard in gas chromatography can be done by delivering
accurate amounts of the sample to be analyzed and of an internal standard. The use of
an automated system for measuring and delivering liquids is comparable, if not better,
in precision and accuracy to manual methods. The Hamilton - Microlab 1000 plus and
Microlab 500 liquid handling systems improve speed and accuracy of preparing
samples for analysis of volatile substances using headspace-gas chromatography
methods.
Apparatus Needed to Perform Procedure:
Hamilton Microlab 1000 plus or Microlab 500 liquid handling system
Headspace sample vials
Magnetic seals
Hand crimper
Liquid waste container (suggested 250 mL beaker)
Kimwipes or equivalent
Volumetric flask
Reservoir for the diluent solution
Deionized water
Quality Control:
The Quality Control of the system is verified by use of known standards each time the
system is utilized.
SECTION J
Instrument Set Up (for blood alcohol analyses):
A. Hamilton Microlab 1000 Plus
1. Start up:
a. Turn power on. Switch is on the back of the unit at the bottom right. Selections
on the display screen can be entered by pressing the "ENT/JA/YES" key.
Different selections can be displayed or highlighted by pressing the "NEIN/NO"
key. Values can be entered via the numeric keyboard.
2. Microlab 1000 plus program (If program has been entered skip this step):
note - entries to be selected are in bold face type:
a. Method? - {enter method #}
b. *Function: - Dil
- Diluter
c. *Vol:
Air gap? - 10 ul
Asp Automatic Air? - yes
Sample Vol? - 200 ul
Diluent? - ul
Diluent? - 1800 ul
Wash Vol? - 0 ul
Wash Step? - 1
d. *Syr:
A - Syringe AD 2.5 ml
B - Syringe DAD 250 ul
Standard tubing - yes
e. *Speed: (these are only suggested values)
Asp sample 2 sec.
Disp sample 2 sec.
Asp diluent 4 sec.
Disp diluent 3 sec.
3. Running the method:
a.
b.
c.
d.
Select and enter "RUN".
Choose method containing program.
Press enter to "zero" the syringes.
Place the diluent tubing, on the left of the Microlab 1000 plus, into the diluent
solution.
e. Prime the system by pressing the "ENT" key at the prompt, "PRIME?". The
system should be primed five times before use to clear the tubing of air and any
residue. Once priming is done, press the "NO" key to continue.
J-3
B. Hamilton Microlab 500
1. Start up:
a. Turn power on. Switch is on the front of the unit at the bottom right. Selections
on the display screen can be entered by pressing the "Run/Stop" key. The arrow
keys can be used to move from one data entry field to another. Values can be
entered via the numeric keypad.
2. Microlab 500 program (If program has been entered skip this step):
note - entries to be selected are in bold face type:
a. Main Menu - Create a new Method or Edit an existing Method
Select
{Select Method Name}
Select
b. Method Title
Ratio
1: 9.0
Dilution
1: 10.0
Left Diluent Volume (uL):
1800.0
Right Air gap volume (uL):
10.0
Right Sample volume (uL): 200.0
Final Volume (uL):
2000.0
ACCEPT when complete
Syringe Fill speed:
Left - 3
Syringe Aspirate speed: Right - 1
Syringe dispense speed: Left - 3 Right - 2
Syringe Fill mode:
AUTO
Air gap mode:
AUTO
air gap delay:
0.0
ACCEPT when complete
Wash volume (uL)
0.0
Left syringe fill speed
4
Left syringe dispense speed 4
ACCEPT when complete
CONFIRM to Save Method, ESCAPE to cancel
3. Running the Method:
a.
b.
c.
d.
e.
f.
From the main menu select Run an existing method.
Highlight the appropriate method and press SELECT.
Left syringe size (uL): 2500.0
Right syringe size (uL): 250.0
CONFIRM
The system will purge.
J-3
g. Place the left diluent tube in the diluent solution and prime the system.
Application of Procedure on Evidence:
1. Sample preparation using the Microlab 1000 plus:
a. The following steps can be activated by two ways - press the "ENT" key or press
the button on the wand.
b. The sample to be analyzed is collected by placing the tubing, on the right side of
the system, into the sample, and aspirating the sample by pressing the button.
c. The outside of the tubing is wiped with a clean Kimwipe or equivalent to remove
excess sample residue.
d. The sample/diluent are dispensed into the proper vial by pressing the button
again.
e. The tubing is washed between each sample by aspirating an air sample and then
dispensing the air/diluent into a waste container. (The washing procedure
flushes the sample tubing with 1.8 mL of diluent).
f. The sample tube is then wiped again, and the next sample is ready to be
collected.
g. Seal the vials, place the seal on top of the headspace vial, and crimp the seal
with the hand crimper. The seal should not be loose enough to remove by hand.
2. Sample preparation using the Microlab 500:
a. The following steps can be activated by two ways - press the “Run/Stop” key or
press the button on the wand.
b. Allow the left syringe to fill and the air gap on the right syringe to fill. The sample
to be analyzed is collected by placing the tubing, on the right side of the system,
into the sample, and aspirating the sample by pressing the button.
c. The outside of the tubing is wiped with a clean Kimwipe or equivalent to remove
excess sample residue.
d. The sample/diluent are dispensed into the proper vial by pressing the button
again.
e. Seal the vials, place the seal on top of the headspace vial, and crimp the seal
with the hand crimper. The seal should not be loose enough to remove by hand.
f. Allow the left syringe to fill and the air gap on the right syringe to fill before
proceeding to the next sample.
g. The tubing is washed between each sample by aspirating an air sample and then
dispensing the air/n-propanol into a waste container. (The washing procedure
flushes the sample tubing with 1.8 ml of diluent).
J-3
Maintenance:
1. The tubing should be flushed with a Clorox solution, or equivalent, about once every
few months to remove protein build-up and prevent bacterial growth in the tubing.
Comments:
1. The liquids being sampled should be warmed to room temperature before use.
2. Any liquids containing volatile substances should be covered or sealed to prevent
evaporation of the volatiles. The reservoir containing the diluent solution should be
closed, but not sealed, to prevent a vacuum from forming in the reservoir.
Safety Concerns:
When working with biohazardous samples use protective measures, such as gloves,
laboratory coat, eye protection, and work with the samples in a biosafety hood.
Literature References:
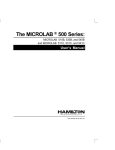
Hamilton Microlab 1000 plus User Manual; part number 610 370 / 01.
Hamilton User’s Manual Microlab 500 B/C Series; part number 69176 (Rev. B).
J-3