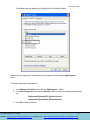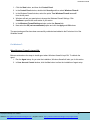
1
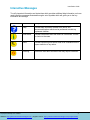
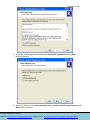
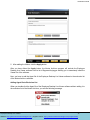
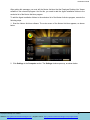
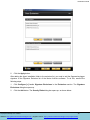
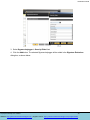
Installation Guide Copyright © 2013 Lepide Software Private Limited. All rights reserved. Lepide Software Private Limited, Kernel, accompanied user manual and documentation are copyright of Lepide Software Private Limited, with all rights reserved under the copyright laws. This user manual cannot be reproduced in any form without the prior written permission of Lepide Software Private Limited. No Patent Liability is assumed, however, with respect to the use of the information contained herein. © Lepide Software Private Limited. All rights reserved. Lepide Software Private Limited B-57, Sector 57, Noida, Uttar Pradesh – 201301 India http://www.nucleustechnologies.com For Sales and Technical Support Tel: +91-9818725861 Fax: +0120-4282353 Toll Free Number: 1-866-348-7872 (for USA and Canada) Online Purchase: http://www.nucleustechnologies.com/Buy-Data-Recovery-Software.html Sales email: [email protected] Support email: [email protected] Support Desk http://www.nucleustechnologies.com/supportdesk/ Employee Desktop Live Viewer 2 Website: http://www.nucleustechnologies.com | Support Center: http://www.nucleustechnologies.com/supportdesk/ Installation Guide Introduction Congratulations, you have just downloaded Employee Desktop Live Viewer, the best tool to monitor activities of many computers from one central location. Employee Desktop Live Viewer software is very easy to use and is a complete solution to track activities of computers remotely. It becomes the perfect solution for System Administrators, Managers, Companies of large-medium-and small scale to track activities which could be harmful to any organization. This powerful tool helps you to track any computer on Network and provides complete information of the activities performed by users. It provides two setup files, first the Viewer setup and second, the Agent setup. Viewer setup is installed on the Server computer which will monitor the computer activities and the Agent setup will be installed on the remote target computer(s) for which monitoring has to be performed. The Agent can be installed remotely (with administrative rights only) and manually to the computer systems. Employee Desktop Live Viewer also provides options to create Online and Offline recordings where the activities can be recorded and saved to AVI files for future references. To promote stealth or the invisible monitoring of target computer(s), we facilitate you with the options whether or not to inform the users about the monitoring of their activities. With Employee Desktop Live Viewer, you can be assured to have the most advanced, quick and accurate, and reliable monitoring of user activities. Employee Desktop Live Viewer 3 Website: http://www.nucleustechnologies.com | Support Center: http://www.nucleustechnologies.com/supportdesk/ Installation Guide Interactive Messages To notify important information and instructions which provides additional help information, we have used interactive messages illustrated through a set of symbols which will guide you to the key information and settings: Symbol Employee Desktop Live Viewer Name Description Help Provides help information related to the action and recommends options which can be performed to avoid any unpleasant situation. Information Provides information about the results of a command. It offers no choice to the users. Note Provides important points which need to be considered for the proper execution of any action. Warning Informs the user about a situation that may require a decision. 4 Website: http://www.nucleustechnologies.com | Support Center: http://www.nucleustechnologies.com/supportdesk/ Installation Guide Minimum System Requirements Employee Desktop Live Viewer software requires minimum system requirements to run which are as follows: Operating System: Windows7, Windows8, Windows Vista, Windows XP 64-bit/XP 32-bit, Windows NT/2000, Windows 98/ME. RAM: 128 (256 recommended) Disk Space: 100MB free disk space Disk Space to Save the Recordings: Both the Server and Client computer(s) should have 500MB of free disk space to save the Online and Offline Recordings. Employee Desktop Live Viewer will face difficulties in performing and saving the Online and Offline recordings which are scheduled by the administrator, if the Server and Client computer(s) do not meet the minimum disk space requirements. It is recommended that administrators should use a spare hard disk of 50 GB to 60 GB to save the recordings performed with Employee Desktop Live Viewer. Software utilizes more disk space to save the captured images. Network Speed: Network Cable and Network Speed should be in very good condition. Employee Desktop Live Viewer gathers entire information through Network. For this it needs good configuration and working of the Network. If the Network requirements for the software prove insufficient then the administrator can face the instances of disconnected mode, and freeze screen. Employee Desktop Live Viewer 5 Website: http://www.nucleustechnologies.com | Support Center: http://www.nucleustechnologies.com/supportdesk/ Installation Guide Section 1: Installation of Viewer Employee Desktop Live Viewer 6 Website: http://www.nucleustechnologies.com | Support Center: http://www.nucleustechnologies.com/supportdesk/ Installation Guide Install Viewer of Employee Desktop Live Viewer This section covers the step to install Viewer on the Server computer. It is as simple to install, as you install any other software setup on your computer. Here you need to install the Employee Desktop Live Viewer Software Setup on the Server computer which will be used to monitor target computer(s). When you download Employee Desktop Live Viewer software setup file from our website, it consists of two executable files: EmployeeDesktopLiveVieweAgentSetup.exe and EmployeeDesktopLiveViewerSetup.exe. The EmployeeDesktopLiveViewerSetup.exe is installed on Server computer and EmployeeDesktopLiveVieweAgentSetup.exe is installed on remote target computer(s). Install the Viewer of Employee Desktop Live Viewer 1. Double click the EmployeeDesktopLiveViewerSetup.exe icon. 2. Setup – Employee Desktop Live Viewer window will appear. Click the Next button to continue with the installation. Employee Desktop Live Viewer 7 Website: http://www.nucleustechnologies.com | Support Center: http://www.nucleustechnologies.com/supportdesk/ Installation Guide 3. Accept the License Agreement by selecting I accept the agreement and click Next button to continue. 4. Select the Shortcut icons: Create a desktop icon or Create a Quick Launch icon and click Next button to continue. Employee Desktop Live Viewer 8 Website: http://www.nucleustechnologies.com | Support Center: http://www.nucleustechnologies.com/supportdesk/ Installation Guide 5. Click the Install button to start the process of installing the Viewer. After successfully installing the setup, the Setup wizard will display the following screen: Employee Desktop Live Viewer 9 Website: http://www.nucleustechnologies.com | Support Center: http://www.nucleustechnologies.com/supportdesk/ Installation Guide 6. Select Launch Employee Desktop Live Viewer to launch the Viewer. If you want to launch the Viewer later then do not select this option. 7. Click Finish to complete the installation process. The main window of Employee Desktop Live Viewer will get launched. You need to start with Registration of Computer(s) from Network to start the process of monitoring. Employee Desktop Live Viewer 10 Website: http://www.nucleustechnologies.com | Support Center: http://www.nucleustechnologies.com/supportdesk/ Installation Guide Section 2: Installation of Agent Employee Desktop Live Viewer 11 Website: http://www.nucleustechnologies.com | Support Center: http://www.nucleustechnologies.com/supportdesk/ Installation Guide Introduction The agent of Employee Desktop Live Viewer software is the medium between Server computer and Target computer(s) that are selected for the monitoring of their activities. The agent transfers required information to the Viewer which then displays those activities on its screen. Employee Desktop Live Viewer provides two ways to install the Agent on target computer(s): Remote Installation and Manual Installation. Steps to install Agent with both options are discussed below. Employee Desktop Live Viewer 12 Website: http://www.nucleustechnologies.com | Support Center: http://www.nucleustechnologies.com/supportdesk/ Installation Guide Install Agent Remotely This section covers the steps to install agent from Viewer on the remote target computer(s). Before starting to install the agent of Employee Desktop Live Viewer remotely to the target computers, the administrator must ensure that the Windows firewall and installed anti-virus are turned Off. (View the section to configure the antivirus settings) 1. Launch Viewer of Employee Desktop Live Viewer on Server computer. 2. Register computers for monitoring. (it is mandatory) 3. On the Options menu, click Install Agent or click the Install Agent button from the Getting Started Section of main window. The Install agent on registered computer(s) dialog box will appear: 4. The dialog box displays the list of Computer(s) from Network where Agent is not installed with their IP address and Domain name. Select the Computer Name where you want to install the Agent and click Install button. The Server computer should have administrative privileges to access the remote computer(s). Complete administrative rights are required to install the Agent remotely to target computer(s) on Network. Employee Desktop Live Viewer 13 Website: http://www.nucleustechnologies.com | Support Center: http://www.nucleustechnologies.com/supportdesk/ Installation Guide The information box will appear: 5. Click Yes to continue with the agent installation and No to cancel. When you click Yes, software displays the Login window: Type the User name and password of target computer that has been selected for remote agent installation and click the OK button. If the login details are correct then the software will display the success message for agent installation. If software faces difficulties in installing the agent setup, then the following message will be displayed: Employee Desktop Live Viewer 14 Website: http://www.nucleustechnologies.com | Support Center: http://www.nucleustechnologies.com/supportdesk/ Installation Guide This message requires check of the following: Login details of the target computer. Network connectivity Working of the target computer (Closed, Restarting) The agent will successfully get installed to the remote target computer with the remote method of agent installation. Employee Desktop Live Viewer 15 Website: http://www.nucleustechnologies.com | Support Center: http://www.nucleustechnologies.com/supportdesk/ Installation Guide Install Agent Manually Agent of Employee Desktop Live Viewer software can be installed to the target computers by copying the agent setup file to the system drive and install the application by executing it manually. 1. Copy the agent setup to a drive location on target computer: 2. Double-click the setup file. Setup installation screen will appear: 3. Click the Next button to continue. Employee Desktop Live Viewer 16 Website: http://www.nucleustechnologies.com | Support Center: http://www.nucleustechnologies.com/supportdesk/ Installation Guide 4. Click the Install button to continue. Software will start installing the agent. 5. Click the Finish button. The process of installing the agent is complete. Employee Desktop Live Viewer 17 Website: http://www.nucleustechnologies.com | Support Center: http://www.nucleustechnologies.com/supportdesk/ Installation Guide Activate Agent Employee Desktop Live Viewer provides two EXE files for Agent that run in Task Manager of the target computer: services.exe and svchost.exe. Both the EXE's should be in running state on the target computer for successful monitoring. To activate Agent 1. Double-click My Computer icon from the desktop. 2. Select the drive where Windows operating system is installed. (here we will select the drive C) 3. Double-click the C drive and select the Windows folder. Double-click the selected folder to view the folder contents. 4. Select and double-click the System32 folder to view its contents. 5. Find the folders: ZX_Ag and ZX_Wh. 6. Select and double-click the ZX_Ag folder to view the folder contents. It will contain two items: KernelSettings folder and services.exe 7. Select and double-click services.exe. The Agent will get activated on the target computer. 8. Similarly the svchost.exe can be activated from the ZX_Wh folder. Employee Desktop Live Viewer 18 Website: http://www.nucleustechnologies.com | Support Center: http://www.nucleustechnologies.com/supportdesk/ Installation Guide Section 3: Antivirus Configuration Employee Desktop Live Viewer 19 Website: http://www.nucleustechnologies.com | Support Center: http://www.nucleustechnologies.com/supportdesk/ Installation Guide Introduction The agent of Employee Desktop Live Viewer needs to be included in the Exclusion list of the Antivirus program being used in your Organization. Some of the antivirus programs might conclude the agent as a spy ware or ad ware. This section explains the steps to unblock the agent where antivirus programs Symantec Norton and Kaspersky Internet Security are used. The steps to unblock agent on Windows firewall are also illustrated. Employee Desktop Live Viewer 20 Website: http://www.nucleustechnologies.com | Support Center: http://www.nucleustechnologies.com/supportdesk/ Installation Guide Windows Firewall Windows firewall needs to be turned OFF or ON for the proper installation of the agent files on target computer(s). If you select to enable the firewall then you need to include the agent files to Exclusion list of Windows Firewall. If the Windows Firewall is turned OFF /disabled then it is not required to include the agent files to Exclusions list. Agent of Employee Desktop Live Viewer can be installed to the target computer(s) with turned ON Windows firewall. Windows firewall if turned OFF may affect the computer from other viruses and attacks. Below mentioned are the steps to turn ON and OFF the Windows firewall and include the agent files to Exclusions list for Windows operating systems: Windows XP Windows Vista Windows 7 Windows 8 For Windows XP: When Windows Firewall is turned ON: To unblock the agent 1. Run the Agent setup. As you start the installation, Windows firewall will alert you for this action. 2. In Windows Security Alert window, click the Unblock button. Employee Desktop Live Viewer 21 Website: http://www.nucleustechnologies.com | Support Center: http://www.nucleustechnologies.com/supportdesk/ Installation Guide The NUAgent will get added to the Exceptions list of Windows Firewall: Alternatively, the Agent files can be added to the Exceptions list through the Add Program… button. To add the agent files to exclusion list 1. In the Windows Firewall window, click the Add Program… button. 2. In the Add a Program window click the Browse button and select the following paths one by one: %Windows%\System32\Zx_Ag\Services.exe %Windows%\System32\Zx_Wh\Svchost.exe 3. Click OK to close the window. Employee Desktop Live Viewer 22 Website: http://www.nucleustechnologies.com | Support Center: http://www.nucleustechnologies.com/supportdesk/ Installation Guide Turn OFF Windows Firewall: To turn off Windows firewall 1. Click the Start button, and then click Control Panel. 2. In the Control Panel window, double-click Windows Firewall. 3. In the Windows Firewall window, select the option Off (not recommended) and click the OK button to close the window. The agent and agent files have been successfully unblocked and added to the Exclusions list of the Windows firewall. For Windows Vista: When Windows Firewall is turned ON: Below mentioned are the steps to install agent where Windows firewall is kept ON: To unblock the agent 1. Run the Agent setup. As you start the installation, Windows firewall will alert you for this action. 2. In User Account Control window, click the Allow option to allow the installation of agent setup. After this the agent setup will get installed to the target computer system. You need to include the Agent files to exceptions list of the Windows firewall so that it will not block the agent from functioning. To add the agent files to exclusion list Employee Desktop Live Viewer 23 Website: http://www.nucleustechnologies.com | Support Center: http://www.nucleustechnologies.com/supportdesk/ Installation Guide 1. In Control Panel, click the Security option. To open Security window, click Start, click Control Panel and then double-click the Security option. In Security window, double-click Windows Firewall. 2. In the Windows Firewall window, click the option Allow a program through Windows Firewall from the left panel. 3. Windows will ask your permission to change the Windows Firewall Settings. Click Continue to provide the confirmation of your action. 4. In the Windows Firewall Settings window, select the Exceptions tab. 5. Click Add program… button to add the agent files for exclusion. In the Add a Program window browse and list the files from the following location: %Windows%\System32\Zx_Ag\Services.exe %Windows%\System32\Zx_Wh\Svchost.exe The agent files will get added to the list. Click OK to close the window. When Windows Firewall is turned OFF: To turn off Windows firewall Employee Desktop Live Viewer 24 Website: http://www.nucleustechnologies.com | Support Center: http://www.nucleustechnologies.com/supportdesk/ Installation Guide 1. Click the Start button, and then click Control Panel. 2. In the Control Panel window, double-click Security and then select Windows Firewall. 3. In the Windows Firewall window, select the option Turn Windows Firewall on or off from the left panel. 4. Windows will ask your permission to change the Windows Firewall Settings. Click Continue to provide the confirmation of your action. 5. In the Windows Firewall Settings window, select the General tab. 6. Now select the Off (not recommended) option and click the Apply and OK buttons. The agent and agent files have been successfully unblocked and added to the Exclusions list of the Windows firewall. For Windows 7: When Windows Firewall is turned ON: Below mentioned are the steps to install agent where Windows firewall is kept ON: To unblock the agent: 1. Run the Agent setup. As you start the installation, Windows firewall will alert you for this action. 2. In User Account Control window, click the Yes button to allow the installation of agent setup. Employee Desktop Live Viewer 25 Website: http://www.nucleustechnologies.com | Support Center: http://www.nucleustechnologies.com/supportdesk/ Installation Guide After this the agent setup will get installed to the target computer system. You need to include the Agent files to exceptions list of the Windows firewall so that it will not block the agent from functioning. To add the agent files to exclusion list 1. In Control Panel, open System and Security or Windows Firewall. To open System and Security, click Start, click Control Panel and then double-click the System and Security option. In System and Security window, double-click Windows Firewall. 2. In the Windows Firewall window, click the option Allow a program or feature through Windows Firewall from the left panel. 3. In the Allowed Programs window, click Change Settings button to enable the Allow another program… button. 4. Click Allow another program… and then browse and list the agent files from following location: %Windows%\System32\Zx_Ag\Services.exe %Windows%\System32\Zx_Wh\Svchost.exe The agent files will get added to the list. Click OK to close the window. Employee Desktop Live Viewer 26 Website: http://www.nucleustechnologies.com | Support Center: http://www.nucleustechnologies.com/supportdesk/ Installation Guide When Windows Firewall is turned OFF: To turn off Windows firewall 1. Click the Start button, and then click Control Panel. 2. In the Control Panel window, double-click System and Security or Windows Firewall. 3. In the Windows Firewall window, select the option Turn Windows Firewall on or off from the left panel. 4. In the Customize Settings window, select the option Turn off Windows Firewall (not recommended). Employee Desktop Live Viewer 27 Website: http://www.nucleustechnologies.com | Support Center: http://www.nucleustechnologies.com/supportdesk/ Installation Guide 5. Click OK to close the window. The agent and agent files have been successfully unblocked and added to the Exclusions list of the Windows firewall. For Windows 8: When Windows Firewall is turned ON: Below mentioned are the steps to install agent where Windows firewall is kept ON: To unblock the agent 1. Run the Agent setup. As you start the installation, Windows firewall will alert you for this action. 2. In User Account Control window, click the Yes button to allow the installation of agent setup. Employee Desktop Live Viewer 28 Website: http://www.nucleustechnologies.com | Support Center: http://www.nucleustechnologies.com/supportdesk/ Installation Guide After this the agent will get installed to the target computer system provided that you give permission to access features of svchost on all public or private networks. After this, you would also require to give permission to access features of services on all public or private networks. Employee Desktop Live Viewer 29 Website: http://www.nucleustechnologies.com | Support Center: http://www.nucleustechnologies.com/supportdesk/ Installation Guide After this the agent setup will get installed to the target computer system. Mentioned below are the steps to include the Agent files to exceptions list of the Windows firewall so that it does not block the agent from functioning. 1. In Control Panel, open System and Security or Windows Firewall. To open System and Security, click Start, click Control Panel and then double-click the System and Security option. In System and Security window, double-click Windows Firewall. 2. In the Windows Firewall window, click the option Allow apps or feature through Windows Firewall from the left panel. 3. In the Allowed Apps window, click Change Settings button to enable the Allow another app… button. 4. Click Allow another app… and then browse and list the agent files from following location: %Windows%\Syswow4\zx_ag\Services.exe %Windows%\Syswow64\zx_wh\Svchost.exe The agent files will get added to the list. Click OK to close the window. Employee Desktop Live Viewer 30 Website: http://www.nucleustechnologies.com | Support Center: http://www.nucleustechnologies.com/supportdesk/ Installation Guide When Windows Firewall is turned OFF: To turn off Windows firewall 1. Click the Start button, and then click Control Panel. 2. In the Control Panel window, double-click System and Security or Windows Firewall. 3. In the Windows Firewall window, select the option Turn Windows Firewall on or off from the left panel. 4. In the Customize Settings window, select the option Turn off Windows Firewall (not recommended). 5. Click OK to close the window. The agent and agent files have been successfully unblocked and added to the Exclusions list of the Windows firewall. Employee Desktop Live Viewer 31 Website: http://www.nucleustechnologies.com | Support Center: http://www.nucleustechnologies.com/supportdesk/ Installation Guide Other Antivirus Applications Antivirus software installed in the computer may block the Employee Desktop Live Viewer program. Antivirus software may recognize the Employee Desktop Live Viewer as Spyware.keylogger, which is considered possible threat to the computer and data stored within. To successfully install and use the software, some configurations need to be done in the Antivirus program. Norton Antivirus Here, we tell you the process of configuring Norton Antivirus 2011 for seamless installation of viewer and agent files of the Employee Desktop Live Viewer. After downloading the setup files of the Employee Desktop Live Viewer, when you extract them, the Norton Antivirus displays the following message: The message clearly indicates that the Norton Antivirus has recognized the Employee Desktop Live Viewer software as Spyware.Keylogger; therefore, it has been blocked from extraction. To seamlessly extract the setup files, you need to add the software folder in the exclusion list of the Norton Antivirus program. To add the software folder having setup files, to the exclusion list of the Norton Antivirus program, execute the following steps: 1. Start the Norton Antivirus program. The main page of Norton Antivirus 2011 appears, as shown below: Employee Desktop Live Viewer 32 Website: http://www.nucleustechnologies.com | Support Center: http://www.nucleustechnologies.com/supportdesk/ Installation Guide 2. In the Computer section, click Settings. The Settings window appears, as shown below: 3. Click Configure [+] beside Scan Exclusions in the Exclusions section. The Scan Exclusions dialog box appears, as shown below: Employee Desktop Live Viewer 33 Website: http://www.nucleustechnologies.com | Support Center: http://www.nucleustechnologies.com/supportdesk/ Installation Guide In the “Scan Exclusions” dialog box, you see two sections- Scan Exclusions and Real Time Protection Exclusions. In both sections, you have to add the folder in which you are extracting the setup files of the Employee Desktop Live Viewer software. You also need to add the software installation folder in both sections. Software installation path depends on the logical drive. For example, if the operating system is installed in C: then the software installation path will be: C:\Program Files\Employee Desktop Live Viewer 4. To add the folders, click the Add button in each section one by one and browse the folders. <meta name="author" content="Lepide Software Private Limited, New Delhi, India" /> Employee Desktop Live Viewer 34 Website: http://www.nucleustechnologies.com | Support Center: http://www.nucleustechnologies.com/supportdesk/ Installation Guide 5. After adding the folders, click the Apply button. After you have clicked the Apply button, the Norton Antivirus program will exclude the Employee Desktop Live Viewer software from its list of Spyware.Keylogger allowing you to seamlessly install the Viewer file of the software. Now, you have to add the Agent file of the Employee Desktop Live Viewer software in the exclusion list of the Norton Antivirus software. Adding Agent file to Exclusion List When you double-click the Agent file of the Employee Desktop Live Viewer software without adding it to the exclusion list of the Norton Antivirus, you see the following message: Employee Desktop Live Viewer 35 Website: http://www.nucleustechnologies.com | Support Center: http://www.nucleustechnologies.com/supportdesk/ Installation Guide After getting this message, you must tell the Norton Antivirus that the Employee Desktop Live Viewer software is not a harmful program. And for this, you need to add the Agent Installation folders to the exclusion list of the Norton Antivirus program. To add the Agent Installation folders to the exclusion list of the Norton Antivirus program, execute the following steps: 1. Start the Norton Antivirus software. The main screen of the Norton Antivirus appears, as shown below: 2. Click Settings in the Computer section. The Settings window opens up, as shown below: Employee Desktop Live Viewer 36 Website: http://www.nucleustechnologies.com | Support Center: http://www.nucleustechnologies.com/supportdesk/ Installation Guide 3. Click Configure [+] beside Scan Exclusions in the Exclusions section. The Scan Exclusions dialog box appears where you need to add the Agent installation folder. The dialog box comprises two sections- Scan Exclusions and Real Time Protection Exclusions. 4. You need to add the Agent installation folder to both sections. To do this, click the Add button one by one in both sections and browse to the following locations: C:\Windows\system 32\Zx_Ag C:\Windows\system 32\Zx_Wh Note: Drive letter in the above path shall be changed with the drive letter where Windows operating system in installed. For example, if the Windows is installed in D drive then the path will be: D:\Windows\system 32\Zx_Ag D:\Windows\system 32\Zx_Wh 5. Once the locations are added, they appear in the “Scan Exclusions” dialog box, as shown below: Employee Desktop Live Viewer 37 Website: http://www.nucleustechnologies.com | Support Center: http://www.nucleustechnologies.com/supportdesk/ Installation Guide 6. Click the Apply button. After adding the Agent installation folder to the exclusion list, you need to add the Spyware.keylogger signature to the Signature Exclusion list of the Norton Antivirus software. To do this, execute the following steps: 1. Click Configure [+] beside Signature Exclusions in the Exclusions section. The Signature Exclusions dialog box opens up. 2. Click the Add button. The Security Risks dialog box opens up, as shown below: Employee Desktop Live Viewer 38 Website: http://www.nucleustechnologies.com | Support Center: http://www.nucleustechnologies.com/supportdesk/ Installation Guide 3. Select Spyware.keylogger in Security Risks List. 4. Click the Add button. The selected Spyware.keylogger will be added in the Signature Exclusions dialog box, as shown below: Employee Desktop Live Viewer 39 Website: http://www.nucleustechnologies.com | Support Center: http://www.nucleustechnologies.com/supportdesk/ Installation Guide 5. Now, click the Apply button. This way Norton Antivirus is completely configured for seamless installation and use of the Employee Desktop Live Viewer software. EDLV Agent add to exceptions (Symantec Endpoint Protection) If we install the Agent setup file remotely to the computer where “Symantec Endpoint Protection” is installed then it detects it Spyware.Keylogger and displays the following message: Employee Desktop Live Viewer 40 Website: http://www.nucleustechnologies.com | Support Center: http://www.nucleustechnologies.com/supportdesk/ Installation Guide In order to successfully install the Agent file in the computer, the file has to be excluded from the blocked list of Symantec Endpoint Protection program. The following steps illustrate the process: 1. 2. Select the detected file form the Symantec Endpoint Protection Detection Results dialog box and click Other Actions. Then click Exclude followed by Close to exit the window Employee Desktop Live Viewer 41 Website: http://www.nucleustechnologies.com | Support Center: http://www.nucleustechnologies.com/supportdesk/ Installation Guide 3. The Agent setup file is added to the exception list of Symantec Endpoint Protection antivirus software as displayed in the Exception dialog box of the Change Settings-Symantec Endpoint Protection window. Note: The agent file must be included to the exclusion list as soon as the Symantec Endpoint Protection Detection Results message is displayed, because otherwise the antivirus will delete the agent software. 4. Now, in the Exceptions dialog box, click Add… 5. Select Security Risk Exception and then click File. Employee Desktop Live Viewer 42 Website: http://www.nucleustechnologies.com | Support Center: http://www.nucleustechnologies.com/supportdesk/ Installation Guide 6. Now, add the Agent files (both services.exe and svchost.exe) so that they appear in the Exception Items list of User-defined Exceptions. 7. To include the Agent files in both SONAR Exception and Application Exception type list select them one by one and follow steps 5 and 6 as above. Both the services.exe and svchost.exe Employee Desktop Live Viewer 43 Website: http://www.nucleustechnologies.com | Support Center: http://www.nucleustechnologies.com/supportdesk/ Installation Guide executables get added to the list of Security Risk Scans, SONAR and All Scans Exception type as displayed below: Symantec Endpoint Protection also treats the EDLV Viewer setup file as Spyware.Keylogger and displays a security risk warning message. To add the Viewer setup file in the Exception list of Symantec Endpoint Protection, follow the steps mentioned below: 1. Select the detected file form the Symantec Endpoint Protection Detection Results dialog box and click Other Actions. 2. Then click Exclude followed by Close to exit the window. Employee Desktop Live Viewer 44 Website: http://www.nucleustechnologies.com | Support Center: http://www.nucleustechnologies.com/supportdesk/ Installation Guide 3. The Viewer file gets added as an Exception Item under User-defined Exceptions tab. 4. Now, click Add and one by one select Security Risk Exception, SONAR Exception and Application Exception respectively, followed by File. 5. Follow the same procedures as in case of Agent setup files. The viewer setup files get included in all three Exception Type: Employee Desktop Live Viewer 45 Website: http://www.nucleustechnologies.com | Support Center: http://www.nucleustechnologies.com/supportdesk/ Installation Guide 6. Finally, Close the antivirus software window & restart your computer. After the computer restarts, the Agent setup file successfully connects to the Viewer. Note: All the above steps must be performed to connect Agent software to the Viewer successfully and for uninterrupted connection in future. AVG Internet Security Mentioned below are the steps to install EDLV Agent setup files by adding them to the Allowed List of AVG Antivirus: 1. Launch AVG Internet Security antivirus program, click on Tools and then select Advanced Settings option. 2. In the Advanced AVG Settings dialog box, expand Identity Protection node. 3. Select Allowed List. The Identity Protection Allowed List will get displayed in the right pane. 4. Now, click Add and select the Agent installation folder from the respective drive location: %Windows%\System32\Zx_Ag\Services.exe %Windows%\System32\Zx_Wh\Svchost.exe 5. Once the folders are added, they will get displayed in the Identity Protection Allowed List. Employee Desktop Live Viewer 46 Website: http://www.nucleustechnologies.com | Support Center: http://www.nucleustechnologies.com/supportdesk/ Installation Guide 6. Click OK to exit the AVG Advanced Settings window. This way, Agent setup files will get included in the Resident Shield - Excluded Items list of AVG antivirus software and the software will not generate any alert, as shown below: Employee Desktop Live Viewer 47 Website: http://www.nucleustechnologies.com | Support Center: http://www.nucleustechnologies.com/supportdesk/ Installation Guide Kaspersky Internet Security The steps to install EDLV Agent setup files where Kaspersky Internet Security firewall is enabled are illustrated below. 1. Launch the Kaspersky Internet Security antivirus program. 2. Click the Settings link from the right-most corner of the application. The Settings dialog box will appear. Employee Desktop Live Viewer 48 Website: http://www.nucleustechnologies.com | Support Center: http://www.nucleustechnologies.com/supportdesk/ Installation Guide 3. From the Protection Center option, select Firewall. The Firewall settings will be displayed in the right pane of the dialog box. 4. Under Network rules section, click Settings. The Firewall settings dialog box will appear. Employee Desktop Live Viewer 49 Website: http://www.nucleustechnologies.com | Support Center: http://www.nucleustechnologies.com/supportdesk/ Installation Guide 5. Under the Application rules tab select All applications from the drop-down list box. 6. Now, select the installation folder which contains the Agent setup files (NUWatch and NUAgent). 7. Right-click on NUWatch. Select Move to group from the list and then select Trusted. 8. Click OK. 9. Repeat step 6 with NUAgent file as well. This way NuWatch and NUAgent programs get added as trusted applications and are not blocked by Kaspersky firewall settings. Note: In case of Kaspersky antivirus, please turn off protection before installing Agent files to the computer where it is installed. Otherwise it will delete the Agent & Viewer setup files quickly from their locations. Employee Desktop Live Viewer 50 Website: http://www.nucleustechnologies.com | Support Center: http://www.nucleustechnologies.com/supportdesk/ Installation Guide VIPRE Antivirus Premium To add Agent files in the Exclusion list of VIPRE Antivirus Premium software, the following steps are to be followed: 1. Launch VIPRE Antivirus Premium program and click on the Firewall tab. 2. In the firewall options select View Settings link to enter the firewall settings. 3. The Settings dialog box will appear. 4. Select Firewall tab from the settings dialog box. 5. Under the Firewall section, click on the Exceptions button. 6. In the Firewall Exceptions dialog box, select Applications tab to see the list of firewall exceptions. 7. Check for the existing entries of services.exe and svchost.exe applications. a. If the entry already exists, select the entry and click Edit. Employee Desktop Live Viewer 51 Website: http://www.nucleustechnologies.com | Support Center: http://www.nucleustechnologies.com/supportdesk/ Installation Guide b. If the entry does not exist, click Add… to search and add the application executables from the respective drive locations. 8. The Add an Application Rule dialog box will appear. 9. The NUAgent application rule should be as follows: Path: %Windows%\System32\Zx_Ag\Services.exe Trusted Inbound: Allow Trusted Outbound: Allow Non-trusted Inbound: Allow Non-trusted Outbound: Allow 10. The NUWatch application rule should be as follows: Path: %Windows%\System32\Zx_Wh\Svchost.exe Trusted Inbound: Allow Employee Desktop Live Viewer 52 Website: http://www.nucleustechnologies.com | Support Center: http://www.nucleustechnologies.com/supportdesk/ Installation Guide Trusted Outbound: Allow Non-trusted Inbound: Allow Non-trusted Outbound: Allow 11. Click OK. This way, the Agent setup files of the EDLV software can be set as an Exception Application in VIPRE Antivirus Premium software. Contact us: If you face difficulties in downloading and extracting files with any other antivirus program of your Organization then contact us at the below mentioned email address and phone numbers. Our Support executive will guide you with complete downloading and installation of the software. Email contact: [email protected] Employee Desktop Live Viewer 53 Website: http://www.nucleustechnologies.com | Support Center: http://www.nucleustechnologies.com/supportdesk/ Installation Guide Phone contact: +91-9818725861 and 1-866-348-7872 (Toll free for USA and Canada users) Employee Desktop Live Viewer 54 Website: http://www.nucleustechnologies.com | Support Center: http://www.nucleustechnologies.com/supportdesk/ Installation Guide Section 4: Troubleshooting and Uninstalling Employee Desktop Live Viewer 55 Website: http://www.nucleustechnologies.com | Support Center: http://www.nucleustechnologies.com/supportdesk/ Installation Guide Appendix A: Troubleshooting Problem: Agent is installed on the target computer but the Viewer is facing problems in getting connected to the target computer. Solution: This happens mainly because of the slow Network connectivity. Other reasons could be due to installed Anti-virus. 1. Check the network connection and its speed. 2. Enable Exclusion settings in the installed Anti-virus of the system and add the following to the exclusion list: a) %Windows%\System32\Zx_Ag\Services.exe b) %Windows%\System32\Zx_Wh\Svchost.exe Problem: I am unable to install Agent remotely to the target computer(s). Why is this happening? Solution: To install the agent remotely on target computer(s), the target computer should be registered with Employee Desktop Live Viewer software. After successful registration, select the option Install Agent from the Options menu in Viewer. The remote installation of agent can fail in the cases of computer(s). Incorrect login details of the target Slow network connectivity and network speed. Inaccessible target computer(s) due to reasons like, turned off, or being restarted. Problem: I am monitoring 10 computers, all was fine but after some time Viewer started displaying disconnected message on the thumbnail of some computers. Why is this happening? Solution: The disconnected message is displayed in four cases by the Viewer: Computer being monitored is closed. Computer being monitored is getting restarted. Network speed has decreased or there is some problem in Network connection. You have executed Refresh Agent or Refresh Viewer command. Problem: Viewer is displaying disconnected message on the thumbnail of the computer being monitored, whereas in real that computer is working absolutely fine. Is there any problem with the Viewer or Agent? Solution: This can happen due to slow network speed or the Viewer is not receiving proper signals from the Agent of target computer(s). Either could be the case, please check your network connections or refresh the Viewer and Agent. Problem: I have uninstalled the Viewer and cannot find the registered computer(s) any more when I reinstall it. Have I lost all the recordings for the computer(s)? Solution: As you uninstall the Viewer of Employee Desktop Live Viewer, all the registered computer(s) get unregistered and you are required to register them again. While uninstalling the Employee Desktop Live Viewer 56 Website: http://www.nucleustechnologies.com | Support Center: http://www.nucleustechnologies.com/supportdesk/ Installation Guide Viewer, setup asks you to whether you want to keep the settings of Online and Offline recordings? You need to select Yes and the recording information will remain intact when the Viewer is reinstalled. Problem: What is the meaning of colors displayed in the tabs of computer(s) being monitored through the Viewer. Solution: Viewer displays one main tab of All Computers and individual tabs of each computer that has been added to the Viewer to be monitored. The Red color signifies that the Viewer is not connected to the Agent of computer being monitored i.e. Disconnected The Yellow color signifies that the Viewer is establishing the connectivity with Agent of the target computer. It also appears when the network connection is slow and the Viewer is unable to receive signals from the Agent i.e. Connecting… The Green color signifies that the Viewer is connected with the Agent of the target computer i.e. Connected Problem: After installing the Agent, is it necessary to register the computers with the Viewer? Solution: Registration of computer(s) that have to be monitored is an important step to initiate the monitoring with Employee Desktop Live Viewer. Following are the steps to get started with Employee Desktop Live Viewer: 1. Install Viewer 2. Register Computers in Viewer 3. Install Agent (Remotely or Manually) 4. Add Computer(s) to Viewer (only the registered ones) After following these steps, you can start the monitoring of Network computer(s) with Employee Desktop Live Viewer. Employee Desktop Live Viewer 57 Website: http://www.nucleustechnologies.com | Support Center: http://www.nucleustechnologies.com/supportdesk/ Installation Guide Appendix B: Uninstalling Un Install the Viewer Viewer of Employee Desktop Live Viewer can be uninstalled in two ways from the computer system: 1. From Windows Start menu 2. From Control Panel To uninstall from the Windows start menu 1. Click the Start button and then point to All Programs. Point to Employee Desktop Live Viewer and then click Uninstall Employee Desktop Live Viewer. 2. Software will perform the Agent check on all the computers and will display the following information box: Click Skip to stop the Agent check process. 3. A warning message will be displayed on the screen. Employee Desktop Live Viewer will confirm your action to uninstall the software without uninstalling agents from network. Click Yes to continue and click NO if you first want to remove agents from the network computers. 4. If you click "Yes" button, a warning message will be displayed. This message warns you that if you have scheduled or created any recording; Online or Offline will get deleted with its complete information. 5. Click "Yes" if you are sure for the action and a warning message will be displayed. This message informs you that information about the locked and unlocked folders for Offline recording(s) will also get removed. 6. Click Yes to finish the un installation process. Employee Desktop Live Viewer 58 Website: http://www.nucleustechnologies.com | Support Center: http://www.nucleustechnologies.com/supportdesk/ Installation Guide The success message "Employee Desktop Live Viewer uninstalled successfully" will be displayed. To uninstall from control panel 1. Click the Start button and then point to Control Panel and then select and double-click the Add or Remove Programs icon. 2. Select Employee Desktop Live Viewer from the generated list of programs installed on the computer and click the Remove button. 3. Repeat the steps 2 to 6 (from uninstall from Windows start menu) and complete the un installation process of the Viewer. All the registered computer(s) get unregistered / removed from the Viewer, once the Viewer is uninstalled. You are required to register the computer(s) again for continued monitoring. Employee Desktop Live Viewer 59 Website: http://www.nucleustechnologies.com | Support Center: http://www.nucleustechnologies.com/supportdesk/ Installation Guide Un Install the Agent The agent of Employee Desktop Live Viewer can be un-installed from the target computer(s) in two ways: 1. From Viewer 2. Manually To uninstall agent from viewer 1. On the Options menu, click Uninstall Agent or click Uninstall Agent button from the Toolbar. The Uninstall Agent dialog box will appear. Software will list the Computer Name(s) where the Agent is installed with their IP Address. 2. Select the Computer Name(s) and click Uninstall to get the Agent uninstalled. Following message box will be displayed: Employee Desktop Live Viewer 60 Website: http://www.nucleustechnologies.com | Support Center: http://www.nucleustechnologies.com/supportdesk/ Installation Guide 3. Click Yes to continue and No to close the message box. To uninstall agent manually 1. Double-click My Computer icon from the desktop. 2. Select the drive where Windows operating system is installed. (here we will select the drive C) 3. Double-click the C drive and select the Windows folder. Double-click the selected folder to view the folder contents. 4. Select and double-click the System32 folder to view its contents. 5. Find and double-click NU_SR_Uninstall.exe 6. After the setup gets executed, files services.exe and svchost.exe will get removed from the ZX_Ag and ZX_Wh folders within the System32 folder. 7. This will ensure that the Agent has been successfully uninstalled from the target computer. Employee Desktop Live Viewer 61 Website: http://www.nucleustechnologies.com | Support Center: http://www.nucleustechnologies.com/supportdesk/