1
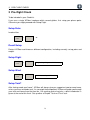
XCSoar in a flash
How To
get your personal
Tactical Soaring
Assistant
ready for boarding
XCSoar Checklist
Flash On
Bring XCSoar into play
•
•
•
•
•
•
•
•
•
get hardware and install XCSoar
get appropriate data files of your flight district
tell XCSoar which data files to use
tell XCSoar about the glider’s polar & weight
possibly connect to instruments
finish setup and familiarize
mount hardware
add items listed underneath to your checklists
make “home”
Conduct preflight check, including
• setup polar and weight
• setup wind and flight parameters (MC, bugs, QNH)
• possibly setup a task
Conduct start check, including
• Check wind and flight setup once more
Fly, enjoy
Conduct after flight check
• Download flight logs from logger, upload to skylines and OLC
• Gather statistical data of flight.
Flash Off
Flashing time too short?
Just a second...
flashing time set up to match,
now proceed:
2
1. XCSOAR INSTALLATION
1 XCSoar Installation
Identify the appropriate distribution of XCSoar for your hardware and operating system (Android, PC, Windows Mobile, PPC2000, PPC2003, Linux) on http://www.xcsoar.org. In
case you choose an install directory other than standard, make sure access rights are set to
full/all. Create subdirectory XCSoarData and put all data files there, which are configuration,
airspace, waypoints, and the XCM terrain files.
Using the default from installers for Android, Windows Mobile, PC will do the job smoothly.
In order to keep things easy, stay with the defaults. Installation on SD-card is possible.
1. Download latest XCSoar version released from homepage http://www.xcsoar.org or
via Google Play app for Android.
2. Download terrain file name.xcm from http://www.xcsoar.org/download/maps/ corresponding to your flight district. If .xcm-file appears to be corrupt, use another browser.
(This is an issue with several versions of internet explorer, disintegrating .xcm-files.)
3. Download waypoints with XCSoar supporting several file formats .dat, .cup, .wpz,
.wpt. However, follow the roads starting with http://www.xcsoar.org/download/data.
html.
4. Download an airspace file .txt and/or .sua. Again, follow the link last mentioned.
Run XCSoar for the first time
Run XCSoar. With startup, XCSoar asks you to enter either a real life (Fly) or a simulation
(Sim) mode. In Sim mode, you can input speed, heading, and height manually in order to do
some exercising on the ground. In Fly mode, instrument input of already connected devices
are fed to XCSoar. Remember this when attempting to connect to instruments. In Sim mode,
all connections are cut off.
Start fly mode. Tell XCSoar which files to use. Invoke system setup via main menu button
Config.
Config
2/3
⊲
System
⊲ Site Files ⊲ Site files
Choose appropriate files in dialogue. If no files show up, again make sure files reside in
subdirectory /XCSoarData.
File Manager
please note: XCSoar’s File Manager on Android requires Android 2.2 and up!!!
If the platform you choose supports direct access to the internet, you can easily download
and maintain data files directly. Touch
3
1. XCSOAR INSTALLATION
Config
2/3
⊲
File
Manager
A list of already downloaded files appears. Doing this for the very first time might result in
displaying an empty list. Proceed with ⊲Add.
A huge list of files shows up. If not, check internet connection. The XCSoar team maintains
this list of files and corresponding url, read in after touching ⊲Add in order to give you a plain
list of possible downloads worldwide. (Take notice, that file names of equal files might differ
to names, downloaded via other ways.) Selecting files will start downloading immediately.
To add more files, repeat ⊲Add. Updating files is done via ⊲Download on the same menu
screen. As a quick start, download terrain, airspace and waypoint files apiece only. With
some maps, e.g. depicting thermal spots and areas it might take some time to understand
setups. For further info please refer to the main manual or http://www.glidinghotspots.
eu/
Language ( Fonts, Sounds)
Typically, XCSoar follows the operation system’s language setting. If you do prefer another,
there are 28 languages available as is with Dec. 2013 (sorry Bavarian, Boston and other
people, dialects are not to be included ever):
Config
2/3
⊲
System
⊲ Look ⊲ Language, Input
This menu page also allows for changing fonts, and, after having prepared a special data
file do much more by defining events. However, it is not supposed to be the scope of a quick
start manual, just an outlook.
4
2. FINISH CONFIGURATION SETUP
2 Finish Configuration Setup
Setup Polar
XCSoar comes with a comprehensive list of predefined polars. To choose, edit, or store your
customized polar, invoke the plane configuration by
Config
2/3
⊲
Plane
The planes’ indexes in this compilation are taken from the official DAEC list of 2012.
Connect Logger, Flarm, Vario etc. . . NMEA setup
To run, XCSoar needs live data from a GPS receiver at least. You have to tell XCSoar, which
one to use, even built-in hardware. To connect to, use
Config
2/3
⊲
Devices
⊲ edit
Many portable devices are equipped with such hardware. However, it is always a good idea
to connect to one or more external devices:
• A specialized GPS receiver gains much better reception providing much better data for
measures and calculations.
• An airspeed indicator allows quick and exact wind estimates without circling.
• A vario improves the thermal assistant.
• A task can be declared to an IGC logger, and after landing, the flight log can be downloaded.
• Some varios allow synchronising the MacCready setting with XCSoar.
• Flarm (and even ADS-B input) provide status information of others around you - whereas
XCSoar does NOT provide collision detection.
NMEA
Wondering? NMEA stands for ‘National Marine Electronics Association’, having reached
a status of a worldwide standard. The standard defines electrical interfaces as well as
protocols used for transmitting navigational data and much more. As is with nautical mile,
aviators adopted maritime things once more. So do their instruments...
5
2. FINISH CONFIGURATION SETUP
Internal GPS
The GPS receiver of your particular mobile device might be a really good one. For several
reasons carefully check, whether this holds true in-flight:
• The three-dimensional orientation of your device and in-built GPS antenna respectively
may cause poor reception. When loosing GPS-fix, many mobile devices are heavily
dependent on aGPS - assisted GPS. You have to wait minutes for a new fix in the air.
• aGPS is based on information transmitted from a cellular network operator. Reception
might get worse in the air and so does precision of the GPS fix.
• Cheap or badly setup hardware ‘invents’ GPS fixes. So-called ‘interpolated’ and possibly bad values might screw up XCSoar’s algorithms.
If your hardware’s GPS reception turns out to be stable: congratulations! You acquired a
good piece of hardware. No need for extra hardware, you already own an XCSoar ‘basic’
system. If not, the method of choice is to connect an extra GPS receiver. Better you connect
an IGC logger, best, you connect to a Flarm. With an IGC Logger, you can declare tasks
and download IGC-certified flight logs needed to participate in the OLC league. Connecting
Flarm will give you status information of your team mates, traffic info and a barometric height
reading - and IGC-certified flight logs if hardware is enabled. With a Flarm connected you
own an XCSoar ‘classic’ system. Integrating even more hardware is a task of its own and
not within scope of a quick start guide.
Glueing things together
Up to date, there are three ways to connect to other instruments. Use either a serial wired,
a wired serial-over-USB or radio connection via bluetooth. The latter being the matter of
choice with Android mobiles, still a so-called bluetooth serial port profile (spp) is needed.
With version Android 4 up, Google introduced serious problems stemming from the serial
bluetooth profile involved. With XCSoar coming for free, it is almost no risk to just test your
hardware’s capabilities. If everything is fine ;-)
please note: Before connecting instruments via bluetooth you have to pair bluetooth devices. Needed steps differ depending on the hardware you use. Use your operating system’s
tools.
For using USB-equipped hardware, you need a serial-to-USB converter. Consult XCSoar’s
website for further details: http://www.xcsoar.org/hardware/
If using a serial connection, with PDAs expected to be equipped with, be aware, there are
three physically differing serial types of connection commonly used. It is about using different
physical signal levels:
• RS232 uses full-swing plus minus 12 Volt level
• TTL uses 5 Volt signal swing
• Low level logic uses 3 Volt signal swing
Always, logically speaking these connections do all the same, exactly the same.
6
2. FINISH CONFIGURATION SETUP
Make sure, serial ports signal swing match. Otherwise you need a level converter. Again,
consult XCSoar’s website for more details.
Things go easy by using approved hardware setups. A widely used Android hardware for
running XCSoar is Dell’s Streak 5. On the hardware page of XCSoar’s website you find
several bluetooth adapters listed, known of as gaining stable radio connections.
Pilot’s Name
Config
2/3
⊲
System
⊲ Setup ⊲ Logger
Time settings
Config
2/3
⊲
System
⊲ Setup ⊲ Time
Moving the (Moving) Map manually
Time to engage the map. Navigate through by entering the pan mode.
Display
1/2
⊲
Pan
On
Depending on your hardware use buttons, dials, rockers of your hardware to navigate, or
even use your fingertip for dragging the map.
Make “home”
Whenever XCSoar starts up, the map display is centred on your “home” waypoint. Unless
you set up your first “true” task, XCSoar’s route function will show you the way home. If you
do not even define home, XCSoar will create a waypoint automatically on location where it
detects the takeoff condition - and show you the way back.
•
•
•
•
•
•
•
Navigate to desired waypoint
Klick/tap on (touch) screen in close proximity of desired waypoint.
Dialogue “Map Elements at this location” appears.
Choose waypoint.
Push Details .
Turn one page further by touching: ⊲
Push Set As New Home .
7
2. FINISH CONFIGURATION SETUP
With finishing the basic setup, you are almost ready to take one step further by proceeding
with the preflight check. Otherwise, all of a sudden you might face a deep interest in getting
familiar with all of the knobs and buttons XCSoar provides, or...
Possibly all of XCSoar’s features start maxing xou see Xs everywheird? There are two
strategies to cope with:
• Change to XCSoar’s main manual and take your time.
• Do the last steps underneath and replay a flight log, just watching XCSoar’s screen to
familiarize with readings and things happening - or invoke XCSoar’s simulation mode.
...with the best strategy ever going through both.
Action - watch XCSoar replay a flight
Pick a flight log and let XCSoar step back in time. Place the file in subdirectory/XCSoarData
/logs and start replay.
Config
2/3
⊲
Replay
⊲ File. . . Start
Now you are able to study XCSoar’s behaviour on the ground. Whilst examining, you possibly develop a request for changing screen layout and InfoBox’ content respectively. You are
kindly requested to go through following steps only, if you have developed a deep demand
to do so. XCSoar comes with a pre-configuration quite useful.
Screen Layout (portrait, landscape, etc.. . . )
To change basic Screen Layouts:
Config
2/3
⊲
System
⊲ Look ⊲ Screen Layout
Change InfoBox’ Content
To change Infobox sets and boxes’ content:
Config
2/3
⊲
System
⊲ Look ⊲ InfoBox Sets
8
2. FINISH CONFIGURATION SETUP
Configuration Files / Backup
For using XCSoar in different situations, environments, and gliders, you are invited to use
profiles. If XCSoar finds more than one on startup, it will ask you which one to use. Here we
are, recalling your profile is just a button to touch. Thus, once happy with having configured
almost everything, do a backup of your profile file. Other reasons are briefly depicted as
follows.
• You do not own a glider, flying with all the toys of your club. Not to get tired of changing polar and weight every time you change glider but XCSoar hardware via setup
dialogues, set up different configuration files.
• You got engaged in a contest. With difference in location and glider and having setup
numerous screen pages for content purposes you want go back to your all day configuration quickly.
• You are a flight instructor, handing out your glide computer once in a while in order to
show your students what it is all about. Therefore you might need a much less complex
configuration than using normally.
To backup configurations, make two copies of your profile. One keeping extension .prf,
another one, changing the extension to .bak. Relating to the last example you might end up
with
•
•
•
•
educationinASK13.prf
educationinASK13.bak
humphreyinLS8atwonderland.prf
humphreyinLS8atwonderland.bak
Whenever XCSoar loads a specific profile .prf, that file will include all configuration setups
you will perform, with this file active. That is why a backup-file .bak is needed to preserve a
standard, you judged being worth it.
Mount Hardware
Mounting the hardware of your choice might turn out to reach some level of effort. In any
case, mount the hardware to even resist very rough conditions, no matter, whether you use
special holders and a suction mount or a screwedtosomewhatever. In case, you just want to
give it a try, holding your phone in hands is a very bad idea. For this case, you might follow
the hook-and-loop fastener way. A quick and dirty approach might be:
• Get a silicone-type phone case, apply hook tape to the back.
• Get a Velcro strap for wrapping around your leg, slightly above knee.
• Put phone case including phone on your leg just after boarding, in order to achieve a
knee board like operation.
Never hold complex machines in hand whilst flying.
9
3. PRE-FLIGHT CHECK
3 Pre-flight Check
To be included in your Checklist.
If you use a single XCSoar hardware within several gliders, first setup your planes polar.
Otherwise you might proceed with Setup Flight.
Setup Polar
Invoke either
Config
2/3
⊲
Plane
or
Recall Setup
Restart XCSoar and choose a different configuration, including correctly set up polar and
weight.
Setup Flight
Config
1/3
⊲
Flight
⊲
Wind
⊲ Wing loading / Bugs / QNH / Max temp
Setup Wind
Config
1/3
⊲ Auto wind. . . / Speed / Direction
Setup Task?
After having made your“home”, XCSoar will always give you support on how to come home,
unless you have created a task. As you might have expected, XCSoar will guide you through
your task and home from that time on. For creating and using tasks, a brief introduction is
given at the end of this flash. Set up either a“Simple” Task or a“True” task.
10
4. START CHECK
4 Start Check
To be included in your Checklist.
Check Flight
Config
1/3
⊲
Flight
⊲
Wind
Check Wind
Config
1/3
Fly
During flight, there are two particular sets of info screens you might gather data from.
Flight Status
Info
2/3
⊲
Status
⊲ Times. . .
Flight Analysis
Info
1/3
⊲
Analysis
⊲
...
11
5. AFTER FLIGHT CHECK
5 After Flight Check
Download Flight Log
Download flight logs from your preferred connected logger.
Config
2/3
•
•
•
•
•
•
•
⊲
Devices
select port
push Flight download
A listing of flightlogs stored on your external logger appears. Choose one
push Select
wait.... this is an old fashioned serial line working
choose another or push No to resume
depending on logger, wait once more patiently. Logger possibly will reset and take its
time to resume to normal operation.
Please note: In case you are facing difficulties, make sure, the driver you are using supports
downloads from logger. In case, you are using a cascaded system e.g. Flarm-Vario-XCsoar,
it might be necessary to enable direct link or similar on vario and choose another driver in
XCSoar in order to gain access to downloads from Flarm to Xcsoar.
Flight Analysis
Info
1/3
⊲
Analysis
Use ⊲ to go through several screens showing statistical data gained during flight as are
estimated OLC result, a barograph of your flight... ...and even a glide polar analysis if you
had connected an instrument providing true airspeed measurement.
Flight Status
Info
2/3
⊲
Status
⊲ Times. . .
to gain more statistical information.
12
6. TASKS
Upload Flight
There are two portals waiting for your flight logs. Skylines http://www.skylines-project.
org and OLC http://www.onlinecontest.org If you want to upload, presumably do it immediately after flight. The OLC gives you a 24 hours time frame for uploading logs. Using
Skylines is somehow more relaxed and is your portal to online tracking and... log files are in
subdirectory logs.
Turn off Everything
Saving some current. Make sure, you have included everything.
6 Tasks
Retrieve “home”-function, Goto-task
Since having defined a “true” task for the first time, the very basic navigate- home-function is
shut down permanently. Use Goto function instead, providing the most “simple” task. Please
note: There are several functions as is InfoBoxes relating to the “home” waypoint. They do
operate unaffected still. The only function shut down is just the surrogate XCSoar uses with
finding no user defined “true” task - or: until the user actively defines his very first task.
Simple Task: Goto-task
There are several ways to create a simple task. In either case, choose a waypoint and push
Goto .
Most common cases:
Nav
1/2
⊲
Waypoint
List
• Use filtering menu screen to identify waypoint. Be aware, you can set multiple filtering.
In case, no waypoint shows up, multiple filtering conditions might prevent from finding
a target.
• Push OK .
• (select one) push Select , then Goto .
Or use pan function of map, then proceed similar to case of “making” home.
• Navigate to desired waypoint
• Klick/tap on (touch) screen in close proximity of desired waypoint.
13
6. TASKS
• Dialogue ”Map Elements at this location” appears.
• Choose waypoint.
• Push Goto .
Task: create, save, load, declare
Creating a new task:
Nav
1/2
⊲
Task
⊲ Manage ⊲ New Task
• On the same menu screen you’ll find Browse , Save , or Declare (to logger).
After pushing New Task you are asked to acknowledge, then menu screen for Rules
comes up. Do your job, with defining the Task type first.
• By touching Turnpoint and Add Turnpoint a filtering screen Select Waypoint comes
up. Edit your wayponts. Touching Edit Point lets you alter things.
• Do not close dialogue! Finally, use Manage and Save consecutively, then Close .
Task: Start open time and close time
Right now, the flashing time initially set up is supposed to end. Close time hit. Time to
change to XCSoar’s main manual.
Thank you for your time and
always happy landings
14
Contents
1
2
3
4
5
6
Bring XCSoar into play . . . . . . . . . . . . . . .
XCSoar Installation . . . . . . . . . . . . . . . . .
Run XCSoar for the first time . . . . . . . . . . .
File Manager . . . . . . . . . . . . . . . . . . . .
Language ( Fonts, Sounds) . . . . . . . . . . . .
Finish Configuration Setup . . . . . . . . . . . .
Setup Polar . . . . . . . . . . . . . . . . . . . . .
Connect Logger, Flarm, Vario etc. . . NMEA setup
NMEA . . . . . . . . . . . . . . . . . . . . . . . .
Internal GPS . . . . . . . . . . . . . . . . . . . .
Glueing things together . . . . . . . . . . . . . .
Pilot’s Name . . . . . . . . . . . . . . . . . . . .
Time settings . . . . . . . . . . . . . . . . . . . .
Moving the (Moving) Map manually . . . . . . . .
Make “home” . . . . . . . . . . . . . . . . . . . .
Action - watch XCSoar replay a flight . . . . . . .
Configuration Files / Backup . . . . . . . . . . . .
Mount Hardware . . . . . . . . . . . . . . . . . .
Pre-flight Check . . . . . . . . . . . . . . . . . .
Start Check . . . . . . . . . . . . . . . . . . . . .
Check Flight . . . . . . . . . . . . . . . . . . . .
Check Wind . . . . . . . . . . . . . . . . . . . . .
After Flight Check . . . . . . . . . . . . . . . . .
Download Flight Log . . . . . . . . . . . . . . . .
Flight Analysis . . . . . . . . . . . . . . . . . . .
Flight Status . . . . . . . . . . . . . . . . . . . .
Upload Flight . . . . . . . . . . . . . . . . . . . .
Tasks . . . . . . . . . . . . . . . . . . . . . . . .
Retrieve “home”-function, Goto-task . . . . . . .
Simple Task: Goto-task . . . . . . . . . . . . . .
Task: create, save, load, declare . . . . . . . . .
15
.
.
.
.
.
.
.
.
.
.
.
.
.
.
.
.
.
.
.
.
.
.
.
.
.
.
.
.
.
.
.
.
.
.
.
.
.
.
.
.
.
.
.
.
.
.
.
.
.
.
.
.
.
.
.
.
.
.
.
.
.
.
.
.
.
.
.
.
.
.
.
.
.
.
.
.
.
.
.
.
.
.
.
.
.
.
.
.
.
.
.
.
.
.
.
.
.
.
.
.
.
.
.
.
.
.
.
.
.
.
.
.
.
.
.
.
.
.
.
.
.
.
.
.
.
.
.
.
.
.
.
.
.
.
.
.
.
.
.
.
.
.
.
.
.
.
.
.
.
.
.
.
.
.
.
.
.
.
.
.
.
.
.
.
.
.
.
.
.
.
.
.
.
.
.
.
.
.
.
.
.
.
.
.
.
.
.
.
.
.
.
.
.
.
.
.
.
.
.
.
.
.
.
.
.
.
.
.
.
.
.
.
.
.
.
.
.
.
.
.
.
.
.
.
.
.
.
.
.
.
.
.
.
.
.
.
.
.
.
.
.
.
.
.
.
.
.
.
.
.
.
.
.
.
.
.
.
.
.
.
.
.
.
.
.
.
.
.
.
.
.
.
.
.
.
.
.
.
.
.
.
.
.
.
.
.
.
.
.
.
.
.
.
.
.
.
.
.
.
.
.
.
.
.
.
.
.
.
.
.
.
.
.
.
.
.
.
.
.
.
.
.
.
.
.
.
.
.
.
.
.
.
.
.
.
.
.
.
.
.
.
.
.
.
.
.
.
.
.
.
.
.
.
.
.
.
.
.
.
.
.
.
.
.
.
.
.
.
.
.
.
.
.
.
.
.
.
.
.
.
.
.
.
.
.
.
.
.
.
.
.
.
.
.
.
.
.
.
.
.
.
.
.
.
.
.
.
.
.
.
.
.
.
.
.
.
.
.
.
.
.
.
.
.
.
.
.
.
.
.
.
.
.
.
.
.
.
.
.
.
.
.
.
.
.
.
.
.
.
.
.
.
.
.
.
.
.
.
.
.
.
.
.
.
.
.
.
.
.
.
.
.
.
.
.
.
.
.
.
.
.
.
.
.
.
.
.
.
.
.
.
.
.
.
.
.
2
3
3
3
4
5
5
5
5
6
6
7
7
7
7
8
9
9
10
11
11
11
12
12
12
12
13
13
13
13
14
for further information see:
XCSoar
the open-source glide computer
User Manual
available at: http://www.xcsoar.org/discover/manual.html