Download Please Click here to the Instructions PDF File
Transcript
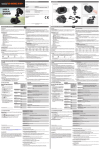
#9464, #9462 and #9458 IP DashCam Manual Instant Proof is a division of 636 Distributing Inc. 5794 Wellington Road 86 Ariss, ON N0B 1B0 519-‐822-‐8400 www.instantproof.ca Table of Contents Introduction Warnings Dash Camera Spec Comparison IP Dashcam #9458 – Product Quick Guide IP Dashcam #9462 – Product Quick Guide IP Dashcam #9464 – Product Quick Guide Buttons and Menu Instructions Special Function Instructions Video / Photo Operation Battery Instructions Operational Settings IP Dashcam Menus Frequently Asked Questions 1 1 2 3 4 5 6 7 7-‐8 9 9 10-‐12 13 Thank you for purchasing one of our IP Dashcams. This in-‐vehicle digital video recorder is the best way to provide objective information in the event of a vehicular incident. The IP Dashcams take up minimal space, are easy to use and install quickly in any vehicle. The IP Dashcams help to document driving/parking accidents, protect you from insurance fraud and capture those unexpected moments we call INSTANT PROOF – all hands free! Warnings This user manual details “how to use” our IP Dashcams, functions, technical specifications and precautions. Please read this manual in its entirety so you fully understand how to use our products. Do not use the IP Dashcam in damp conditions – they are not waterproof and are not designed to function if they are exposed to rain or other wet conditions. Do not tamper with the internal components of the IP Dashcam or try to repair it yourself. This will void your warranty. Please contact us if the camera is not working or if you think you have a warranty issue. Do not use any harsh solvents or chemical cleaners on your IP Dashcam. Clean only with a slightly damp soft cloth. Make sure that the lens surface is free of dust and debris or this may affect video quality 636 Distributing Inc. is not responsible for any vehicle collisions, damage or personal injuries resulting from the use of any of our IP Dashcams 636 Distributing is not responsible for any legal repercussions from use of any IP Dashcam or from the sharing of footage 636 Distributing is not responsible for any property damage caused by theft of any IP Dashcam from your vehicle or for replacing your IP Dashcam if lost or stolen 1 Dash Camera Spec Comparison #9458 #9462 #9464 Video Resolution: WFHD: 2560*1080P/30fps Super HD: 2304*1296/30fps FHD: 1920*1080P/30fps .MOV H.264, Audio: AAC 1920*1080P/30fps 1920*1080P/25fps .MOV H.264, Audio: AAC .AVI N/A 16MP JPEG 170° Ultra Wide Angle 12MP / 8MP / 5MP / 3MP JPEG 170° View Angle 12MP / 8MP / 5MP / 3MP JPEG 140° View Angle Yes Yes Yes Yes Yes Yes Yes Yes Yes Yes Yes Yes No Yes Yes Yes Yes Yes Yes No Yes 2.7” LCD Screen English, Russian, Simplified Chinese, Korean, Japanese, Traditional Chinese, ect. MicroSD Card (up to 64GB) PAL/NTSC USB/HDMI/TV-‐OUT AV IN 50HZ/60HZ 5V 1.5A/1+5-‐ Built-‐in Polymer Battery 2.7” LCD Screen English, Russian, Simplified Chinese, Korean, Japanese, Traditional Chinese, ect. MicroSD Card (up to 32GB) PAL/NTSC USB/HDMI 50HZ/60HZ 5V 1A Built-‐in, 260mAh 1.5” LCD Screen English, Russian, Simplified Chinese, Korean, Japanese, Traditional Chinese, ect. MicroSD Card (up to 32GB) PAL/NTSC USB/HDMI 50HZ/60HZ 5V 1A Built-‐in, 100mAh Video Format: Video Codec: Image Resolution: Photo Format: Lens: Features G-‐Sensor: Loop Recording: Motion Detection: Built-‐in Speaker Built-‐in MIC GPS Tracking: Auto Power On/Off Usability LCD Screen: Languages: Memory Card: TV Output: Interface: Frequency: Power Port: Battery: 2 IP Dashcam #9458 -‐ Product Quick Guide 1) AV OUT or GPS 4) HDMI Interface 7) SOS Emergency 10) Power 13) OK Button 16) Reset 19) High Definition Lens 2) USB Interface 3) Mount Connector 5) Power Indication Light 6) Screen 8) MicroSD Slot 9) Mic 11) Up Button 12) Menu Button 14) Mode Button 15) Down Button 17) Speaker 18) IR Lights 3 IP Dashcam #9462 -‐ Product Quick Guide 1) Menu Button 4) Down Button 7) MicroSD Slot 10) Power Button 2) Up Button 5) Mode Button 8) USB 11) Mic 3) OK Button 6) HDMI-‐OUT 9) Reset 12) AV Out 4 IP Dashcam #9464 -‐ Product Quick Guide 1) Up Button 4) USB Port 7) OK Button 10) Screen 3) Microphone 2) Menu Button 5) Lens 8) Mode Button / SOS 11) MicroSD Slot Mic 14) Reset 3) Down Button 6) Speaker 9) Power Button 12) Mount Connection 5 Button and Menu Instructions Button Name Power Reset OK Button Menu Up Down Mode SOS Emergency Button MicroSD Slot HDMI Interface AV Slot / GPS Mount Connection USB Output Button Function Instructions 1. Power on: Short press to turn on and the red/blue indicator light is on 2. Power off: Long press to turn off and the red/blue indicator light is off Reset Short press to turn the dashcam on again when the machine is in standby mode Video Start/Stop, 1. Video mode: Short press to start recording, short press again to stop recording Photos, Menu 2. Photograph mode: Short press to take a photo confirmation 3. Menu mode: Set and confirm chosen option 1. In the video mode: short press once to switch video setting; short press twice to switch system setting. Photograph/record/ 2. In the photograph mode: short press once to switch photograph setting; short press playback, all functions twice to switch system setting; setting 3.In the video/photo playback mode: short press once to switch playback setting; short press twice to switch system setting; Navigate up in menu 1. Menu mode: Navigate Up through the options Turn on/off the audio 2. Video mode: Short press to turn on/off audio recording recording function Navigate Down in Menu mode: Navigate Down through the options menu Switch between Video mode: Switch between photographs / recording / playback photos / recording / In the video mode press the mode button quickly for screenshot playback Power on/off Locks the file Press to lock the file while in video mode N/A Insert the MicroSD Card into this slot to be able to record video 1. Connect to HD television with HDMI cable, put video mode and you can view High definition output video/photos, in photograph mode, you can make photos, and view video and photos 1. If you have GPS on this model then the AV output is not active AV or GPS Output 2. If you don’t have GPS then the AV slot will be active This is where you connect your IP Dashcam to the windshield mount Recording/Storage 1. Connect USB cable for auto recording, and to view the videos/photos 2. Connect USB cable for auto charging 6 Special Function Instructions G-‐sensor Function When gravitational acceleration reaches (1g=9.80Meter/Second^2), the IP Dashcam DVR will save the accident video and you will be unable to delete the file. G-‐sensor sensitivity can be adjusted in the menu (Off/High/Middle/Low), the factory default is the middle level. SOS Function During video recording, press MODE button to save the current video so the file cannot be deleted. GPS Function (#9458 IP Dashcam Only): The video that is recorded with the GPS module can be played with a DVR player and it will show the detailed location of where the video was taken Video/Photo Operation Video Mode Press the Mode button to switch to video mode, there will be a video recorder icon shown on the top left corner of LCD screen Press the ok button to start recording, the icon will start to flash, and the indicator light will also start to flash which means that the device is working. 7 Photo Mode Press the Mode button to switch to photo mode, there will be a camera icon shown on the top left corner of LCD. Press ok button to take a picture, when the photo is finished, the LCD indicator ligh twill flash once Video/Photo Playback Press the Mode button to switch to playback mode, the playback icon will be shown on the LCD screen’s top left corner Press the UP button to go up in file selection Press the DOWN button Press the OK button to go down in file selection to play the selected video 8 Battery Instructions Please see below illustration for battery capacity indication Full Power Lower Power Lowest Power No Power Charging Methods 1. Charge by connecting the IP Dashcam to a computer via the USB data cable – the indicator light will be on while your IP Dashcam is charging. 2. Charge by connecting the IP Dashcam to the cigarette lighter charger 3. Connect the IP Dashcam to the USB data cable and connect the USB cable to any wall charger All IP Dashcams require 120 mins to fully charge the battery and when charging is complete, the indicator light will turn off **Please note: When the power is low, the device will turn off automatically after a low battery warning Operational Settings Operating guide -‐ Auto power on/off: All IP Dashcams will start recording automatically once you start your vehicle and it will save the video and power off when you turn the vehicle off Menu Setting Press menu button to enter the menu, to view each setting, press the up button or the down button , select the option that needs to be changed, and press the OK button to confirm the change, thenPress menu button to exit the menu Time Setting Press and hold the menu button to get into settings then press the down button to choose the date setting, press the OK button and the change the Year/ Month/ Day/ Hour/ Minute /Second by using the up or down buttons, then press the OK button to confirm USB Mode Connecting the USB cable to the computer and power on your IP Dashcam -‐ the following message will pop up USB-‐Disk. You can save and copy the videos / pictures while in this mode 9 10 11 12 Frequently Asked Questions Under normal operating conditions, if there is a problem with your IP Dashcam – please refer to the following troubleshooting ideas Cannot take pictures or record videos Please check whether there is enough space left on the MicroSD card, or if it is in the locked position Stops while recording Due to the large amount of HD video data, please use a high-‐speed Class 10 MicroSD card that is SDHC compatible “Wrong file” shows on LCD screen while you are replaying photos/videos This is an incomplete file due to a MicroSD card storage error -‐ please re-‐format your SD card Fuzzy image Please check the lens for dirt and fingerprints, if it is dirty then please clean the lens with a soft dust free cloth before you record any video Dark image when taking video of the sky or water Exposure in different environments impacts the video image -‐ please adjust the “EV” in the menu setting Poor color in cloudy weather or indoor video Please check if the “white balance” option is set to Auto or not in the menu Horizontal stripes in the image This is due to the wrong setting of light frequency -‐ please set the frequency to 60HZ or 50HZ according to the local power supply Camera is frozen Please press the reset to restart the camera if it becomes unresponsive 13 IP Dash Cameras THEIR WORD – YOUR INSTANT PROOF Copyright © Copyright 2015. All rights reserved. No part of this publication may be reproduced, transmitted, transcribed, stored in a retrieval system or translated into any language or computer language, in any form or by any means, electronic, mechanical, magnetic, optical, manual or otherwise, without the prior written permission of the manufacturer Instant Proof is a Division of 636 Distributing Inc. 519-‐822-‐8400 www.instantproof.ca 14


