Download Outdoor Patio Heater
Transcript
Operating Instructions
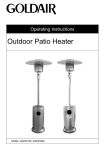
Outdoor Patio Heater
Model: GGOH300
Read Me First
Page 1
Outdoor Patio Heater
Please read these instructions & user manual carefully.
o Take extra care when unpacking and assembling your Goldair Patio Heater.
Some edges may be sharp from the manufacturing process and may result in
cuts if not handled with care.
o Before attempting to assemble your Goldair Patio Heater, ensure all parts are
correct and contained within the box as per the components list.
o Goldair suggests laying out all components on a large flat surface and
removing any plastic or protective material before assembling your Patio
Heater.
o It is vital for optimum use of the Patio Heater that you Purge the gas line prior
to attempting to ignite the Patio Heater.
o Do not dispose of packaging until completely satisfied with assembly of your
Patio Heater
Please refer to your user manual for operating instructions, further information or
trouble shooting before you call the Customer Service number listed within the
user manual.
If your Patio Heater has any Stainless Steel please note the following:
Note: Stainless Steel will rust.
Failure to store, clean & maintain your Patio Heater regularly will result in
Stainless Steel ‘tea staining’ & rusting. Consequently it will not be covered by
the warranty.
Goldair recommends the use of stainless steel protectors & cleaners to also prolong the life of your Patio Heater.
Please refer to your user manual.
Read Me First
Page 2
Gas Leak Testing
It is important that you leak test the Patio Heater before first use and every time
the gas cylinder is refilled and reconnected to the Patio Heater.
To complete a Leak Test:
• Make sure all the control knobs are OFF.
• In a small container, mix up a solution of water and detergent/soap.
Mix the solution well (about the same concentration as washing up water).
• Turn the cylinder ON by rotating the knob to the open position.
• Using a brush or spray bottle apply the soap solution to the gas line and each
join in the gas line including:
• The gas connection at the inlet of the Patio Heater
• The gas hose
• The gas connection at the gas cylinder
• If bubbles appear, there is a gas leak.
• If the leak is at the connection, re-tighten and re-seal.
• If the leak is anywhere else or you cannot resolve the leak by tightening the
connection DO NOT PROCEED.
• Replace gas hose and regulator.
• Replacement hose and regulators can be purchased from your local BBQ
retail specialist.
Read Me First
Page 3
Purging The Gas Line
It is very important to purge the line free from air to get the LPG to the head unit.
o
o
o
o
o
o
o
Turn off LPG Cylinder.
Disconnect LPG Cylinder.
Turn the gas burner knob on for a minute or so releasing air from the line.
Turn off burner knob.
Reconnect the LPG Cylinder.
Turn the dial on the LPG Cylinder SLOWLY to the on position.
Press the control knob in allowing gas to come up the line and bleed it
(pressing control knob in) for not more than 1 - 2 minutes or until you smell
gas.
o A five minute complete shut off period is necessary before lighting.
If a new tank has just been connected, please allow at least one minute for the
air in the gas pipeline to purge out at the High position.
A five minute complete shut off period is necessary before lighting.
Safety Guide
Page 4
•
Do not operate this Patio Heater before reading the instruction booklet
•
Do not place articles on or against this Patio Heater
•
Do not use or store flammable or combustible materials, chemicals or spray
aerosols near your Patio Heater
•
Do not operate this Patio Heater indoors; the Patio Heater is for outdoor use
only
•
Do not obstruct any ventilation of the Patio Heater
•
Do not light or operate with cover on
•
Never store a spare LPG cylinder near your Patio Heater. This could cause
excess pressure to be expelled through the relief valve resulting in fire,
explosion, or severe personal injury including death
•
LPG gas is heavier than air and will collect in low areas, proper ventilation is
extremely important
•
Keep the ventilation opening of the LPG cylinder enclosure free and clear from
obstruction and debris
•
Do not insert any foreign objects into the valve outlet. Damage may result,
causing a leak, possible explosion, fire, severe bodily harm or death
•
Children and adults should be alerted to the hazards of high surface
temperature, burns and clothing ignition
•
Never leave children unattended in the area where the Patio Heater is being
used.
•
Do not store items of interest to children around, below or in the shelf of the
Patio Heater
•
Never allow children to sit or stand on any part of the Patio Heater
Safety Guide
Page 5
Always choose a safe location for the Patio Heater, keeping in mind the
safety precautions outlined. Ensure all packaging has been removed from
the unit before use.
NOTE
This Patio Heater shall only be used in an
above ground open air situation with natural
ventilation, without stagnant areas, where
gas leakage and products of combustion are
rapidly dispersed by wind and natural
convection.
Any enclosure in which the Patio Heater is
used shall comply with one of the following:
An enclosure with walls on all sides, but at
least one permanent opening at ground level
and no overhead cover. (Refer to Figure 1).
Within a partial enclosure that includes an
overhead cover and no more than two walls.
(Refer to Figure 2 and Figure 3).
Within a partial enclosure that includes an
overhead cover and more than two walls, the
following shall apply:
• At least 25% of the total wall area is
completely open, (refer to Figure 4), and
• At least 30% of the remaining wall area is
open and unrestricted, (refer to Figure 5)
In the case of balconies, at least 20% of the
total wall area shall be and remain open and
unrestricted.
Figure 1 - Enclosure with walls on all sides but
no overhead cover
Figure 2 - Partial Enclosure with overhead cover
and no more than two walls
Figure 3 - Partial Enclosure with overhead cover
and no more than two walls
Figure 4 - Open side at least 25% of total wall
area.
30% or more in total of the remaining wall area is
open and unrestricted.
Figure 5 - Open side at least 25% of total wall
area. 30% or more in total of the remaining wall
area is open and unrestricted.
Safety Guide
Page 6
A strong gas smell or hissing sound of escaping gas indicates a serious problem with the
Patio Heater or LPG cylinder. Failure to immediately follow the steps listed below could
result in a fire or explosion that could cause serious injury, death or property damage.
•
•
•
•
•
•
Shut off gas supply at cylinder
Turn the control knob of the Patio Heater to the off position
Extinguish any open flame
Get away from the LPG cylinder
Do not try and fix the problem yourself
If gas odour continues or you cannot extinguish fire, call fire brigade.
To prevent fire and smoke damage, remove all packaging material before operating
Patio Heater.
HOSE ASSEMBLY AND SAFETY
A leak test (Procedure located on Page 2 of this manual) must be carried out prior to
using the Patio Heater for the first time and each time the gas cylinder is refilled, or each
time the gas hose and gas regulator have been disconnected. Check all gas hose and
line connections for damage, cuts or cracks each time you use the Patio Heater.
If the hose shows signs of deterioration or damage, complete a leak test to identify any
leaks and if required replace the hose.
The hose must remain free of kinks and sharp bends. Never puncture or put stress on
the hose or fittings. Hose connection is located at the lower front area on the right side
wall of the main body of the Patio Heater.
Replacement hose and regulators can be purchased from your local BBQ retail
specialist. Leak Test procedure is located on Page 2 of this manual.
BURNERS
The location of the tube burner to the jet is vital for safe operation. Check to assure the
jet is inside the burner tube before using the gas Patio Heater
SPIDER AND INSECT WEBS
Some times spiders, ants and other insects
climb into the tube burners, gas lines and
other areas of the Patio Heater. The insects
can spin webs, build nests and lay eggs. The
webs or nests can be very small, but they are
very strong and can block the flow of gas.
To avoid this occurring, clean burners prior to use, after storing, at the beginning of
your Patio Heater season or after a period of one month with out use. Guards are on
the air intakes in an effort to reduce this problem, but it will not eliminate it. An
obstruction can result in a “flashback” (a fire in the burner tubes). The burner may still
light, but the obstruction does not allow full gas flow to the burners.
NOTE: Complications arising from spider and insect webs built up inside gas
lines are expressly excluded from Warranty
Safety Guide
Page 7
GAS CYLINDER INFORMATION
1. This Patio Heater is designed to be used with a gas cylinder not exceeding 9KG.
2. The gas cylinder supply valve must be turned off when the Patio Heater is not in use.
3. Gas cylinders must be stored outdoors, out of reach of children and must not be
stored in a building, garage or any other enclosed area.
4. The gas cylinder used must incorporate a safety collar to protect the valve assembly.
5. Any LPG cylinder not attached to the Patio Heater for use should be stored outdoors
and well away from the Patio Heater.
IMPORTANT
1. When disconnecting and removing the gas cylinder for the purpose of refilling, always
follow these procedures.
2. Ensure that all gas control valve on the Patio Heater and the gas cylinder are turned
off before disconnecting the regulator from the cylinder.
3. Do not smoke or use a naked flame near the Patio Heater or gas cylinder while
disconnecting the gas line between the Patio Heater and gas cylinder.
4. Remove the gas cylinder from the enclosure before disconnecting the regulator from
the Patio Heater.
5. Tighten all connections before placing the gas cylinder back in its enclosure.
6. The gas leak testing procedure should be conducted every time the gas cylinder is
refilled and reconnected to the Patio Heater prior to using the Patio Heater
(Procedure located on Page 2 of this manual).
Warning
For safe use of your Patio Heater and to avoid serious injury:
DO NOT let children operate or play near the Patio Heater.
KEEP Patio Heater area clear and free from materials that burn.
DO NOT block holes in bottom or back of Patio Heater.
Check burner flames regularly.
Use Patio Heater in well-ventilated space. NEVER use in enclosed spaces such as a
carport, garage, porch, covered patio, etc.
DO NOT use charcoal or ceramic briquettes in a gas Patio Heater.
Safety Guide
Page 8
REGULATOR CONNECTION
1. Check that the control knob is in the ‘Off’ position.
2. Make sure the cylinder valve is off.
3. Remove the protective cap from the cylinder, if present.
4. Leak test the connection with a soapy water solution (Procedure located on Page 2
of this manual)
NOTE
1. Never use a rusty or dented gas cylinder with a damaged gas valve
2. Never fill the gas cylinder beyond 80% capacity
3. Always have the gas cylinder filled by an authorized LPG supplier
4. If you have any questions concerning assembly or operation, consult your dealer or
LPG Gas Company.
5. When used always place the Patio Heater and cylinder on flat level ground.
6. You will need to have the LPG cylinder serviced or replaced every ten years. The date
of the last service should be stamped on the neck of the bottle.
7. Always use a spanner to tighten all gas fittings.
Safety Guide
Page 9
•
Proper clearance from combustible materials must be maintained at all times. The
minimum clearances is as follows: Perpetual: 700mm Ceiling: 1500mm
•
Turn off all gas valves including cylinder after use.
•
Do not allow build up of unburned gas.
•
Accessible parts maybe very hot.
•
Always wear protective gloves when handling hot components
•
Never dismantle control valves
•
Never modify the construction of the Patio Heater or the size of any burner, injector
orifice or any other components. This will void your Warranty.
•
Never move the Patio Heater during use
•
The use of unauthorised parts will void your Warranty and can create an unsafe
environment and conditions of use.
•
Never disconnect any gas fittings while the Patio Heater is in use.
•
In the event that a burner goes out and gas escapes, turn off the burner knob, Wait 5
minutes before attempting to relight the Patio Heater.
•
Certain materials or items, when stored under or near the Patio Heater, will be
subjected to radiant heat and could be seriously damaged. Clothing or other
combustible materials should not be hung from the Patio Heater, or placed on or near
the Patio Heater. Combustible materials are considered to be wood, compressed
paper, plant fibres, plastic or other materials capable of being ignited and burned
Parts Diagram
Page 10
Assembly Procedure
Page 11
Note: Tools required for assembly - 2 x adjustable spanners, Medium Philips
screwdriver.
Assembly Procedure
Page 12
Step 6.
The Patio Heater is intended to be used with a standard 9kg LPG cylinder. This is the type
of cylinder that can be refilled at petrol station or swapped for similar cylinder.
Place the cylinder in position into the stand, ensuring that the cylinder sits flush on the
ground inside the unit.
Take the hose that came with the Patio Heater, check that it has a rubber seal on the
regulator end of the hose and connect this end to the gas cylinder, ensuring that the hose
is not twisted. You won’t need a spanner here. Just turn the fitting in an anti clockwise
direction and hand tighten as much as you can. This should seal it sufficiently.
It is important to conduct a leak test prior to use.
(Procedure located on Page 2 of this manual)
Important: The hose must not be kinked or twisted.
Follow leak test procedure.
Operating your Patio Heater
Page 13
•
If the burner makes hissing sounds when lit, it may be burning inside. Turn burner off,
allow it to cool and try again.
•
Close the gas cylinder valve after each use.
•
Never use the Patio Heater in strong winds
•
Never lay the gas cylinder down (always keep upright)
•
Never allow the flexible gas supply hose or any electrical cord to come in contact with
any heated surface of the Patio Heater.
Operating your Patio Heater
Page 14
Lighting the Patio Heater
Lighting the Patio Heater is easy, but must be done with due care.
NOTE: White smoke may appear around the radiant head during the first minutes of the
initial firing.
Make sure that the gas is turned on at the cylinder.
Purging the Gas Line
If a new tank has just been connected, please allow at least one minute for the air in the
gas pipeline to purge out at the High position. A five minute complete shut off period is
necessary before lighting.
Spark Ignition
Ensure that the control knob is off.
Slowly open the gas cylinder valve.
Press and turn the control knob to ‘LIGHT’ position, keep control knob in pressed
position.
Check for pilot flame through pilot lighting hole. If pilot does not light, turn control knob to
‘OFF’ position and try again from the start. Several attempts may be necessary.
With the pilot alight keep control knob depressed for 15 seconds then turn the control
knob to ‘LOW’.
For maximum heat turn control knob to ‘HIGH’.
Note: It is recommended that after the Pilot flame lights that the knob control is
positioned to low for the first 5 minutes prior to adjusting it to a higher heat setting if
desired.
Turning Off
To turn the Patio Heater off, it is best to turn the cylinder off first, and allow the gas left in
the hose to burn off. This will only take a couple of seconds. Then press in knob control
and turn to the OFF position. If your Patio Heater is connected to piped LPG, you can
simply turn the burner controls off. It’s okay to leave the cylinder connected to your Patio
Heater while it’s not in use.
Note: Failure to follow these shutdown procedures correctly can lead to a hazardous
condition.
Operating your Patio Heater
Page 15
Difficulty lighting
If the burner doesn’t light first go, check the gas controls and try a couple more times. If
the burner still does not light, wait a few minutes to allow the gas to disperse before
trying again. If satisfactory operation cannot be achieved, consult your retailer before
proceeding.
Note: Failure to follow the lighting procedures correctly can lead to a hazardous
condition.
Controlling the flames
The knobs have four basic positions: Off, Pilot, High and Low. You can achieve any
flame height between low and high by rotating the Patio Heater control knob between
these positions.
Checking the flame
The Pilot flame can be watched and checked from the small round window with sliding
lid located at the bottom of the flame screen (to the left of right side of the controller).
Look through the Patio Heater mesh so that you can see the flames. They should be a
soft blue colour with yellow tips. If the flames are too yellow, there is too much gas and
not enough air. The flame will be inefficient and will give off too much smoke. If the flame
is too pale, there is too much air and not enough gas. If either of these situations occur
you may need to clean the burners
Note: ‘Blowback’ is a situation where the flame burns inside the burner, towards the top.
It can be recognised by a sharp roaring sound coming from the burner. It is not
dangerous unless it is allowed to persist. If this occurs, simply turn the burner off, wait a
few seconds then relight.
Maintenance
Page 16
•
Do not perform any servicing on the Patio Heater yourself. This includes internal
adjustment of the regulator and gas valves. Servicing can only be carried out by
authorised technicians. Your Patio Heater should be serviced annually by a certified
gas service agent.
•
The pressure regulator and hose assembly supplied with the Patio Heater must be
used. Replacement pressure regulator and hose assembly must be those specified
by the manufacturer. Replacement parts may be obtained from the manufacturer or
your local Patio Heater retail specialist.
•
Storage of this Patio Heater indoors is permissible only if the cylinder is disconnected
and removed from the Patio Heater.
•
The Patio Heater is for portable outdoor use and is not intended for permanent
installation or installation in vehicles or boats.
Maintenance
Page 17
Storing your Patio Heater
Your Patio Heater is designed to be used outdoors. However, just like a car, you will
prolong the life of the Patio Heater if you store it out of direct exposure to the elements
when not in use.
This can be done in many ways:
•
Move the Patio Heater to a covered location. If you are storing it in a closed room (eg
shed or garage) you should keep the cylinder away from any other cylinders or any
cars, boats, motorcycles or any other petrol engines.
•
If you don’t intend to use it for a few months, lightly spray all the surfaces with canola
oil or rust protectant. This will help protect against corrosion.
Rust on your Patio Heater from misuse or lack of protective agents are expressly
excluded from Warranty.
Maintenance
Page 18
On-going Maintenance
Your Patio Heater requires regular maintenance (interior and exterior). The use on a
Patio Heater cover in conjunction with the instructions below will help to ensure it remains
in proper working order and maintains its appearance.
Exterior:
Stainless Steel Patio Heater’s
Overtime dirt and salt may build up on your heater. To clean, wash with warm/hot soapy
water. Wash off soapy water with warm/hot clean water, leave to air dry. Apply a
stainless steel BBQ protector to stainless steel surfaces. This will apply a protective
coating on the exterior of the heater and assist in repelling the elements.
Stainless steel will rust if you do not look after it properly.
From time to time spotting may occur on the exterior of your Patio Heater. This is normal
and is due to moisture and/or other elements building up (it is highly recommended that
all Patio Heater’s are stored under an eve with a cover to protect against the harsh New
Zealand elements – any Patio Heater not stored and covered correctly will not be covered
under Warranty). To ensure that spotting and discoloration does not become worse and
more visible resulting in permanent damage to your Patio Heater, it should be cleaned
and removed straight away. This is best done with a stainless steel cleaner/cutback
solution, or if the spotting is larger and harder to remove, use a stainless steel/metal
polish and then a cleaner/solution. Always use a soft cloth to clean your Patio Heater.
Never use abrasive heavy duty sponges or scouring pads on the exterior of your Patio
Heater, these products will begin to remove the stainless steel finish resulting in an
uneven surface and faster rusting in the future.
Powder Coated Patio Heater’s
Overtime dirt and salt may build up on your heater. To clean, wash with warm/hot soapy
water. Wash off soapy water with warm/hot clean water, leave to air dry. Once dry, apply
a BBQ protector to stainless steel surfaces, this will apply a protective coating on the
exterior of the patio heater and assist in repelling the elements. Always you use a soft
cloth to clean your Patio Heater.
Never use abrasive heavy duty sponges or scouring pads on the exterior of your Patio
Heater, these products will begin to remove the powder coated finish resulting in an
uneven surface and may result in rusting in the future.
Troubleshooting
Page 19
One Year Warranty
Your Goldair product has been inspected,
tested and is guaranteed subject to the
following for a period to one year from the
date of purchase against defects in
workmanship and materials. During this
period, such defects will be rectified by repair
or replacement of the product purchased.
Your Warranty becomes invalid if in our
opinion the product has been misused,
incorrectly
assembled,
tampered
with,
connected to a gas supply not corresponding
with the name plate specification, or not
regularly maintained as per the “Maintenance”
notes at the end of this user manual. The
Warranty does not include any labour or other
associated expense that may be involved in
removal or installation of the product. Normal
wear & tear and any issues involving
spider/insect web build up’s inside gas lines
are expressly excluded.
If the product is to be replaced (cannot be
repaired) then that replacement will be of the
same or similar product or accessory
excluding packaging, instruction card etc.
Where a replacement product is supplied, this
shall be guaranteed for the balance of the
original Warranty period.
If your Goldair product fails to operate
satisfactorily, please contact Goldair via phone
in the first instance. To obtain a repair or
replacement product under this Warranty, you
will need to produce satisfactory evidence of
date of purchase. The completed Warranty
and purchase receipt must be presented with
the product. The Warranty should be filled out
at the time of purchase. It is in your interest to
make sure this is done.
Consumers Guarantee Act (1993).
In accordance with the above act, consumers
are advised that: The manufacturer does not
undertake that repair facilities and parts are
necessarily available for this product.
If any of the provisions of the foregoing are
contrary to any relevant legislation, then that
provision shall be deemed to be excluded from
the Warranty and the rest of the provisions will
continue to apply.
Any model that is no longer available will be
replaced by a model of a value and with such
features as we consider appropriate in the
circumstances. Goldair Ltd is not responsible
for freight forwarding charges, losses or
damage in transit.
If service is required after the Warranty period
has expired, the product should be inspected
by a qualified gas service technician. Service
outside of the Warranty period will be at your
cost.
IMPORTANT: Please retain this Warranty card
Name ……………………………………………… Purchased from …………………………………
Address …………………………………………… Date of purchase …………………………………
………………………………………………………. Name of product …………………………………
Suburb …………………………………………… Model no ……………………………………………
TECHNICAL SPECIFICATION
Model No: GGOH300
Gas Type: LPG
Injector Size: 1.6mm for Main
Total Gas Consumption: 10.9 kW
Gas Pressure: 2.75kPa
SUPPORT AND TECHNICAL ADVICE
PO Box 100707, NSMC, Auckland, New Zealand
Monday – Friday 8am-5pm
Phone: 0800 232 633
Website: www.goldair.co.nz


