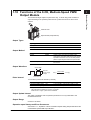
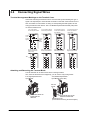
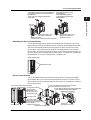
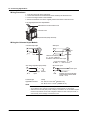
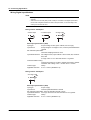
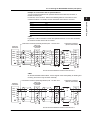
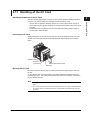
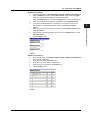
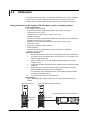
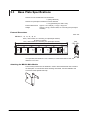
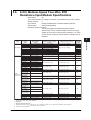
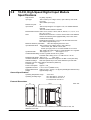
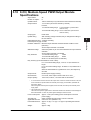
1
User’s Manual MW100 Data Acquisition Unit IM MW100-01E Yokogawa Electric Corporation 1st Edition Foreword Thank you for purchasing the MW100 Data Acquisition Unit. This user’s manual contains useful information about the instrument’s functions, installation and wiring procedures, operating procedures, and handling precautions. To ensure correct use, please read this manual thoroughly before beginning operation. The five manuals below are also provided in addition to this manual. Read them along with this manual. As with this manual, the MW100 Viewer Software User’s Manual (IM MW180-01E) and the MW100 Communication Command Manual (IM MW180-01E) are included in the accompanying CD-ROM. Manual Title Manual No. MW100 Data Acquisition Unit Operation Guide IM MW100-02E Describes concisely the handling of the MW100 Data Acquisition Unit and the basic operations of the MW100 Viewer Software. Description Precautions on the Use of the MX100/MW100 Data Acquisition Unit IM MX100-71E Summarizes the precautions regarding the use of the MW100 Data Acquisition Unit. MX100/MW100 Data Acquisition Unit Installation and Connection Guide IM MX100-72E Describes concisely the installation procedures and wiring procedures of the MW100 Data Acquisition Unit. MW100 Viewer Software User’s Manual IM MW180-01E Describes the functions and operations of the MW100 Viewer Software that comes standard with the MW100 main module. MW100 Communication Command Manual IM MW100-17E Describes the communication command of the MW100 main module. Notes This manual describes the MW100 Data Acquisition Unit, style number “S2.” Check the style number on the name plate of the main module (see page iv for the location of the name plate). • The contents of this manual are subject to change without prior notice as a result of continuing improvements to the instrument’s performance and functions. • Every effort has been made in the preparation of this manual to ensure the accuracy of its contents. However, should you have any questions or find any errors, please contact your nearest YOKOGAWA representative, dealer, or sales office. • Copying or reproducing all or any part of the contents of this manual without the permission of Yokogawa Electric Corporation is strictly prohibited. • The TCP/IP software of this product and the document concerning the TCP/IP software have been developed/created by YOKOGAWA based on the BSD Networking Software, Release 1 that has been licensed from the University of California at Berkeley. Trademarks • Microsoft and Windows are either registered trademarks or trademarks of Microsoft Corporation in the United States and/or other countries. • Adobe and Acrobat are trademarks of Adobe Systems incorporated. • Java and logomark are are either registered trademarks or trademarks of Sun Microsystems Inc. in the United States and/or other countries. • CompactFlash is a registered trademark of Sundisk Corporation in the USA, and licensed from the CFA (Compact Flash Association). • For purposes of this manual, the and symbols do not accompany their respective trademark names or registered trademark names • Company and product names that appear in this manual are trademarks or registered trademarks of their respective holders. Revisions 1st Edition: June, 2005 1st Edition : June 2005 (YK) All Rights Reserved, Copyright © 2005 Yokogawa Electric Corporation IM MW100-01E i Safety Precautions About This Manual • Please pass this manual to the end user. • Read this manual thoroughly and have a clear understanding of the product before operation. • This manual explains the functions of the product. It does not guarantee that the product will suit a particular purpose of the user. • Under absolutely no circumstances may the contents of this manual be transcribed or copied, in part or in whole, without permission. • The contents of this manual are subject to change without prior notice. • Every effort has been made in the preparation of this manual to ensure the accuracy of its contents. However, should you have any questions or find any errors or omissions, please contact your nearest YOKOGAWA dealer. Precautions Related to the Protection, Safety, and Alteration of the Product • The following safety symbols are used on the product and in this manual. Danger. Refer to the user’s manual.This symbol appears on dangerous locations on the instrument which require special instructions for proper handling or use. The same symbol appears in the corresponding place in the manual to identify those instructions.) Functional ground terminal (do not use this terminal as a protective ground terminal.) Protective grounding terminal Alternating current • For the protection and safe use of the product and the system controlled by it, be sure to follow the instructions and precautions on safety that are stated in this manual whenever you handle the product. Take special note that if you handle the product in a manner that violates these instructions, the protection functionality of the product may be damaged or impaired. In such cases, YOKOGAWA does not guarantee the quality, performance, function, and safety of product. • When installing protection and/or safety circuits such as lightning protection devices and equipment for the product and control system or designing or installing separate protection and/or safety circuits for fool-proof design and fail-safe design of the processes and lines that use the product and the control system, the user should implement these using additional devices and equipment. • If you are replacing parts or consumable items of the product, make sure to use parts specified by YOKOGAWA. • This product is not designed or manufactured to be used in critical applications that directly affect or threaten human lives. Such applications include nuclear power equipment, devices using radioactivity, railway facilities, aviation equipment, air navigation facilities, aviation facilities, and medical equipment. If so used, it is the user’s responsibility to include in the system additional equipment and devices that ensure personnel safety. • Do not modify this product. ii IM MW100-01E Safety Precautions Warn WARNING Use the Correct Power Supply Ensure that the source voltage matches the voltage of the power supply before turning ON the power. Connect the Protective Grounding Terminal Make sure to connect the protective grounding to prevent electric shock before turning ON the power. Do Not Impair the Protective Grounding Never cut off the internal or external protective earth wire or disconnect the wiring of the protective earth terminal. Doing so invalidates the protective functions of the instrument and poses a potential shock hazard. Do Not Operate with Defective Protective Grounding or Fuse Do not operate the instrument if the protective earth or fuse might be defective. Make sure to check them before operation. Do Not Use in the Presence of Flammable Liquids, Vapors, and Dust Do not use the instrument in the presence of flammable liquids, vapors, and dust. Operation in such environments constitutes a safety hazard. Do Not Remove Covers The cover should be removed by YOKOGAWA’s qualified personnel only. Opening the cover is dangerous, because some areas inside the instrument have high voltages. Ground the Instrument before Making External Connections Connect the protective grounding before connecting to the item under measurement or to an external control unit. Avoid Damage to the Protective Structure Operating the instrument in a manner not described in this manual may damage its protective structure. Exemption from Responsibility • YOKOGAWA makes no warranties regarding the product except those stated in the WARRANTY that is provided separately. • YOKOGAWA assumes no liability to any party for any loss or damage, direct or indirect, caused by the user or any unpredictable defect of the product. Handling Precautions of the Software • YOKOGAWA makes no warranties regarding the software accompanying this product except those stated in the WARRANTY that is provided separately. • Use the software on a single PC. • You must purchase another copy of the software if you are to use the software on another PC. • Copying the software for any purposes other than backup is strictly prohibited. • Please store the original media containing the software in a safe place. • Reverse engineering, such as decompiling of the software, is strictly prohibited. • No portion of the software supplied by YOKOGAWA may be transferred, exchanged, sublet, or leased for use by any third party without prior permission by YOKOGAWA. IM MW100-01E iii Checking the Contents of the Package Unpack the box and check the contents before operating the instrument. If some of the contents are not correct, or if any items are missing or damaged, contact the dealer from whom you purchased them. Checking the Model and Suffix Code Check the model and suffix code on the name plate indicated in the figure below. Input/Output module Style number MODEL MODEL STYLE SUFFIX NO. STYLE SUFFIX NO. MODEL SUFFIX MAC NO. MODEL SUFFIX MAC NO. S Made in Japan S Made in Japan Main module Model Style number Suffix code Instrument number Instrument number MAC address Suffix code Model MODEL NO. Made in Japan Base plate Instrument number Model Note When contacting the dealer from which you purchased the instrument, please give them the NO. (instrument number) on the name plate. Main Module Model Suffix Code Description MW100 Manual language Main module English (comes with an English manual)1 -E Supply voltage Power supply and power cord -1 -2 -3 100 VAC-240 VAC 12 VDC-28VDC, with AC adapter2 12 VDC-28VDC, without AC adapter3 -D AC power: 3-pin inlet, UL/CSA Standard power cord DC power: Screw terminal, UL/CSA cable for AC adapter AC power: 3-pin inlet, VDE Standard power cord DC power: Screw terminal, VDE cable for AC adapter AC power: 3-pin inlet, SAA Standard power cord DC power: Screw terminal, SAA cable for AC adapter AC power: 3-pin inlet, BS Standard power cord DC power: Screw terminal, BS cable for AC adapter AC power: 3-pin inlet, GB (CCC) Standard power cord DC power: Screw terminal, GB (CCC) cable for AC adapter Screw terminal, power supply cord not included2, 3 -F -R -Q -H -W Options 1 2 3 4 5 6 iv /C2 /C3 /M1 RS-232 communications interface4, 5 RS-422A/485 communications interface4, 5 MATH function5, 6 Displays Celsius or Fahrenheit, Daylight savig time can be set. “W” cannot be selected with “-2.” “-3” can only be selected with “W” “/C2” and “/C3” may not be selected together. “/C2” or “/C3” must be selected to use the Modbus/RTU slave function. Also, “/M1” must be selected for use of the Modbus/RTU master function. “/M1” must be selected to use the Modbus/TCP client function. IM MW100-01E Checking the Contents of the Package Universal Input Module Model Suffix Code Option Code MX110 Input type -UNV -V4R Number of channels and measurement interval For DCV/TC/DI/3-wire RTD input For DCV/DI/4-wire RTD/4-wire resistance input -H04 4-CH, high-speed measurement (minimum measurement Interval: 10 ms) 6-CH, medium-speed measurement (minimum measurement interval: 100 ms) 10-CH, medium-speed measurement (minimum measurement interval: 100 ms) -M06* -M10 Options * ** Description MX100/MW100 universal input module /NC** Without the clamp terminal plate “-M06” must be selected if “-V4R” is selected. Also, “-M06” cannot be selected if “-UNV” is selected. The “/NC” option can be specified only when “-M10” is specified. Strain Input Module Model Suffix Code Option Code MX112 Input type Description MX100/MW100 strain input module -B12 Internal bridge resistance: 120 Ω -B35 -NDI Internal bridge resistance: 350 Ω NDIS connector for connections to an external bridge head Number of channels and measurement interval -M04 4-CH, medium-speed measurement (minimum measurement and measurement interval: 100 ms) Digital Input Module Model Suffix Code Option Code MX115 Input type Description MX100/MW100 digital input module -D05 -D24 Number of channels and measurement interval Non-voltage contact, 5-V logic, open collector input 24 V logic -H10 Options 10-CH, high-speed measurement (minimum measurement and measurement interval: 10 ms) /NC Without the plate with the clamp terminals Analog Output Module Model Suffix Code Description MX120 Output type MX100/MW100 analog output module -VAO -PWM Number of channels and output update interval Voltage/current output Pulse width modulation output -M08 8-CH, minimum output update interval: 100 ms Digital Output Module Model Suffix Code Description MX125 Output type Number of channels and output update interval MX100/MW100 digital output module -MKC A contact output -M10 10-CH, minimum output update interval: 100 ms Base Plate Model Suffix Code Description -1 to -6 The value of the suffix code corresponds to the maximum number of input/ output modules that can be installed. MX150-6 is for one main module, and six input/output modules. MX150 Base type IM MW100-01E MX100/MW100 base plate (includes two brackets for DIN rail mount) v Checking the Contents of the Package Standard Accessories The following standard accessories are supplied with the main module. Check that all contents are present and that they are undamaged. Power Cord (one of the following power cords is supplied according to the instrument’s suffix codes) UL/CSA Standard A1006WD VDE Standard A1009WD F D SAA Standard A1024WD BS Standard A1054WD Q R GB Standard (complies with CCC) A1064WD H Note: Not included when screw terminals are specified for the power section (Suffix code: W). AC adapter and Power cord* Model: 772075 * Power Cord for AC adapter(one of the following power cords is supplied according to the instrument’s suffix codes) UL/CSA Standard VDE Standard D F SAA Standard BS Standard Q R GB Standard (complies with CCC) H Note: Not included when screw terminals are specified for the power section (Suffix code: W). MW100 Viewer Software Model: MW180 MW100 Manual CD-ROM** Part number: B8724XA ** Contains this manual (IM MW100-01E), the MW100 Viewer Software User’s Manual (IM MW180-01E) and MW100 Communication comand Manual (IM MW100-17E). Paper Manuals • MW100 Data Acquisition Unit Operation Guide (IM MW100-02E) • Precautions on the Use of the MX100/MW100 Data Acquisition Unit (IM MX100-71E) • MX100/MW100 Data Acquisition Unit Installation and Connection Guide (IM MX100-72E) Bracket for base plate Part number: B8724EF vi Screw for bracket Part number: B9988DL IM MW100-01E Checking the Contents of the Package Optional Accessories (Sold Separately) AC adapter No. Name Model 1 772075 AC adapter Power supply code Basic Suffix Code Minimum Q’ty Note -D -F -R -Q -H 1 1 1 1 1 Cable for UL/CSA Cable for VDE Cable for SAA Cable for BS Cable for GB(CCC) Terminals No. Name Model Minimum Q’ty Note 2 10-CH screw terminal block (with RJC) 772061 1 Dedicated to the MX110-UNV-M10/ MX115-D05-H10/MX115-D24-H10 3 Connection cable between the input module and screw terminal block 772062-050 1 Cable length: 50 cm* 4 Connection cable between the input module and screw terminal block 772062-100 1 Cable length: 100cm* 5 Plate with clamp terminals (with RJC) 772063 1 Dedicated to the MX110-UNV-M10/ MX115-D05-H10/MX115-D24-H10 6 Screw terminal plate 772080 1 Dedicated to the MX110-UNV-M10/ MX115-D05-H10/MX115-D24-H10 7 Clamp terminal 772064 1 Dedicated to the MX110-UNV-H04 8 Clamp terminal 772065 1 Dedicated to the MX120-VAO-M08/ MX120-PWM-M08/MX125-MKC-M10 9 Connector cover 772066 1 For empty slots with no module installed 10 Plate with clamp terminals 772067 1 Dedicated to the MX110-V4R-M06 11 Plate with clamp terminals 772068 (Built in bridge: 120 Ω) 1 Dedicated to the MX112-B12-M04** 12 Plate with clamp terminals 772069 1 Dedicated to the MX112-B35-M04** (Built in bridge: 350 Ω) * 772062 is only applicable between the MX110-UNV-M10 and the screw terminal (772061), the MX115-D05-H10 and the screw terminal (772061), and the MX115-D24-H10 and the screw terminal (772061). ** 772068 is only applicable to MX112-B35-M04. 772069 is only applicable to MX112-B12M04. 2 10 IM MW100-01E 3, 4 11 5 6 7 8 9 12 vii Checking the Contents of the Package Shunt resistor No. Name Model Minimum Q’ty Note 13 Shunt resistor (for the clamp terminal) 438920 1 Resistance: 250 Ω±0.1% 14 Shunt resistor (for the clamp terminal) 438921 1 Resistance: 100 Ω±0.1% 15 Shunt resistor 438922 1 Resistance: 10 Ω±0.1% 16 Shunt resistor 415920 1 Resistance: 250 Ω±0.1% 17 Shunt resistor 415921 1 Resistance: 100 Ω±0.1% 18 Shunt resistor 415922 1 Resistance: 10 Ω±0.1% No. Name Model Minimum Q’ty Note 19 Adapter for CompactFlash card 772090 1 20 CompactFlash card 772091 1 128MB* 21 CompactFlash card 772092 1 256MB* 22 CompactFlash card 772093 1 512MB* 23 CompactFlash card 772094 1 1GB* Memory card * Operating temperature range: -40 to 85 °C viii IM MW100-01E Conventions Used in This Manual Unit k K M G Denotes 1000. Denotes 1024. Examlple: 5 KB (file size) Denotes 1024 K. Example: 5 MB Denotes 1024 M. Example: 2 GB Safety Markings The following markings are used in this manual. Refer to corresponding location on the instrument. This symbol appears on dangerous locations on the instrument which require special instructions for proper handling or use. The same symbol appears in the corresponding place in the manual to identify those instructions. WARNING Calls attention to actions or conditions that could cause serious injury or death to the user, and precautions that can be taken to prevent such occurrences. CAUTION Calls attentions to actions or conditions that could cause light injury to the user or damage to the instrument or user’s data, and precautions that can be taken to prevent such occurrences. Note Calls attention to information that is important for proper operation of the instrument. IM MW100-01E ix Contents Safety Precautions .......................................................................................................................... ii Checking the Contents of the Package .......................................................................................... iv Conventions Used in This Manual .................................................................................................. ix Chapter 1 Explanation of Functions 1.1 1.2 1.3 1.4 1.5 x System Overview ............................................................................................................. 1-1 MW100 Data Acquisition Unit .......................................................................................... 1-1 System Configuration ....................................................................................................... 1-1 Main Module .................................................................................................................... 1-4 Input/Output Modules ....................................................................................................... 1-4 Base Plate ........................................................................................................................ 1-6 PC Software ..................................................................................................................... 1-7 MW100 Operation Guide ................................................................................................. 1-8 Functions of the Main Module .......................................................................................... 1-9 Names and Functions of Parts ......................................................................................... 1-9 Switches and Keys ......................................................................................................... 1-10 Connectors ..................................................................................................................... 1-10 Displays ......................................................................................................................... 1-11 Measurement ................................................................................................................. 1-12 Multi interval ................................................................................................................... 1-12 Filters ............................................................................................................................. 1-12 Math ............................................................................................................................... 1-12 MATH (/M1 Option) ........................................................................................................ 1-12 Remote RJC (RRJC) ..................................................................................................... 1-13 Burnout .......................................................................................................................... 1-13 Alarms ............................................................................................................................ 1-13 Operation Modes and Statuses ..................................................................................... 1-14 Tag Strings ..................................................................................................................... 1-15 Communication Specifications ....................................................................................... 1-15 Saving Data to the CF Card ........................................................................................... 1-17 Daylight saving time ....................................................................................................... 1-18 Timer .............................................................................................................................. 1-18 Match Time .................................................................................................................... 1-18 Event/Action Function .................................................................................................... 1-19 Log Information .............................................................................................................. 1-20 E-Mail Function .............................................................................................................. 1-21 Functions of the 4-CH, High-Speed Universal Input Module ........................................ 1-23 Measurement Input Types ............................................................................................. 1-23 Measuring Range ........................................................................................................... 1-23 Measurement Interval, Integration Time, and Filter ....................................................... 1-25 Measurement Synchronization ...................................................................................... 1-25 Functions of the 10-CH, Medium-Speed Universal Input Module ................................. 1-26 Measurement Input Types ............................................................................................. 1-26 Measuring Range ........................................................................................................... 1-26 Measurement Interval, Integration Time, and Filter ...................................................... 1-28 Measurement Synchronization ...................................................................................... 1-28 IM MW100-01E Contents 1.6 1.7 1.8 1.9 1.10 1.11 1.12 IM MW100-01E Functions of the 6-CH, Medium-Speed Four-Wire RTD Resistance Input Module ...................................................................... 1-29 Measurement Input Types ............................................................................................. 1-29 Measuring Range ........................................................................................................... 1-29 Measurement Interval, Integration Time, and Filter ...................................................... 1-30 Measurement Synchronization ...................................................................................... 1-30 Functions of the 4-CH, Medium-Speed Strain Input Module ......................................... 1-31 Measurement Input Types ............................................................................................. 1-31 Measuring Range ........................................................................................................... 1-31 Measurement Interval, Integration Time, and Filter ...................................................... 1-31 Measurement Synchronization ...................................................................................... 1-31 Initial Balancing (Unbalance Adjustment) ...................................................................... 1-32 Scaling Settings of the Strain Gauge Type Sensor ........................................................ 1-33 Functions of the 10-CH, High-Speed Digital Input Module ............................................ 1-35 Measurement Input Types ............................................................................................. 1-35 Measuring Range ........................................................................................................... 1-35 Measurement Interval .................................................................................................... 1-35 Filters ............................................................................................................................. 1-35 Functions of the 8-CH, Medium-Speed Analog Output Module ..................................... 1-36 Output Types .................................................................................................................. 1-36 Output Method ............................................................................................................... 1-36 Output Range ................................................................................................................. 1-36 Output Update Interval ................................................................................................... 1-36 Operation upon Startup and Errors ................................................................................ 1-36 Output Operation during Calibration .............................................................................. 1-36 Functions of the 8-CH, Medium-Speed PWM Output Module ....................................... 1-37 Output Types .................................................................................................................. 1-37 Output Method ............................................................................................................... 1-37 Output Waveform ........................................................................................................... 1-37 Pulse Interval ................................................................................................................. 1-37 Output Update Interval ................................................................................................... 1-37 Output Range ................................................................................................................. 1-37 Operation upon Startup and Error Occurrence .............................................................. 1-37 Operation of the 8-CH Medium-Speed Analog Output Module and the 8-CH Medium Speed PWM Output Module ........ 1-38 Output upon Startup and Error Occurrence ................................................................... 1-38 Output Format ................................................................................................................ 1-38 Output on Disabled Channels ........................................................................................ 1-38 Output Operation per Settings and Setting Changes ..................................................... 1-38 Steady Output Operation ............................................................................................... 1-40 Output Operation during an Abnormality and after Recovery from the Abnormality ...... 1-40 Functions of the 10-CH, Medium-Speed Digital Output Module .................................... 1-42 Output Types .................................................................................................................. 1-42 Output Update Interval ................................................................................................... 1-42 Relay Excitation State / Hold Operation ......................................................................... 1-42 Relay Operation ............................................................................................................. 1-43 Reflash Function ............................................................................................................ 1-43 xi Contents 1.13 MATH Function (/M1 Option) ......................................................................................... 1-44 Overview of the MATH Function .................................................................................... 1-44 Number of MATH Channels ........................................................................................... 1-44 MATH Types ................................................................................................................... 1-44 MATH Reference Channels ........................................................................................... 1-46 Computation Operation .................................................................................................. 1-47 Math Interval .................................................................................................................. 1-48 Math Span ...................................................................................................................... 1-48 Handling Units in Computations ..................................................................................... 1-48 TLOG.PSUM Settings .................................................................................................... 1-48 Alarm Level .................................................................................................................... 1-48 Math Error Data Processing ........................................................................................... 1-49 Chapter 2 Installation and Wiring 2.1 2.2 2.3 2.4 2.5 2.6 2.7 xii Handling Precautions ....................................................................................................... 2-1 Installation ........................................................................................................................ 2-2 Installation Location ......................................................................................................... 2-2 Installation Procedures .................................................................................................... 2-2 Attaching the Modules ..................................................................................................... 2-4 Preparing the Base Plate ................................................................................................. 2-4 Attachment Procedure ..................................................................................................... 2-4 Attachment Positions and Channel Numbers .................................................................. 2-5 Connecting Signal Wires .................................................................................................. 2-6 Terminal Arrangement Markings on the Terminal Cover .................................................. 2-6 Attaching and Removing the Terminal Block ................................................................... 2-6 Attaching the Screw Terminal Plate ................................................................................. 2-7 Screw Terminal Block ....................................................................................................... 2-7 General Precautions When Wiring the Input/Output Signal Wires ................................... 2-8 Wiring Procedures ......................................................................................................... 2-10 Wiring the Universal Input Module ................................................................................. 2-10 Wiring the 4-Wire RTD Resistance Input Module .......................................................... 2-11 Wiring the Strain Input Module ....................................................................................... 2-11 Wiring Digital Input Modules .......................................................................................... 2-14 Wiring with the Analog Output Module ........................................................................... 2-15 Wiring with the PWM Output Module ............................................................................. 2-15 Wiring with the Digital Output Module ............................................................................ 2-16 Connecting the Power Supply and Turning the Power Switch ON and OFF ................. 2-17 Connections with the Power Cord (Power Supply/Cord Basic Specification Code -1M) ....... 2-17 Wiring the Power Supply Terminal (Power Supply/Cord Basic Specification Code -1W) ...... 2-18 Wiring the Power Supply Terminal (Power Supply/Cord Basic Specification -2M or -3W) ..... 2-19 Turning the Power Switch ON and OFF ......................................................................... 2-20 Connecting the Ethernet Cable ...................................................................................... 2-21 Connection Procedure ................................................................................................... 2-21 Checking the Communication Status ............................................................................. 2-21 Initializing Settings ......................................................................................................... 2-21 Connecting the RS-422A/485 Interface (/C3 Option) ..................................................... 2-22 Terminal Wiring and Signal Names ................................................................................ 2-22 Connection Procedure ................................................................................................... 2-22 IM MW100-01E Contents 2.8 2.9 2.10 2.11 Connecting the RS-232 Interface (/C2 Option) .............................................................. 2-25 Connector Pin Assignments and Signal Names ............................................................ 2-25 Handshaking .................................................................................................................. 2-25 Serial Interface Settings ................................................................................................. 2-27 Measures Against Noise on the MW100 Data Acquisition Unit ...................................... 2-28 Integrating A/D Converter .............................................................................................. 2-28 First-Order Lag Filter ...................................................................................................... 2-30 Handling of the CF Card ................................................................................................ 2-31 Handling Precautions of the CF Card ............................................................................ 2-31 Inserting the CF Card ..................................................................................................... 2-31 Ejecting the CF Card ...................................................................................................... 2-31 Chapter 3 Setting and Data Acquisition 3.1 3.2 3.3 3.4 3.5 3.6 IM MW100-01E Connection Environment .................................................................................................. 3-1 PC System Requirements ................................................................................................ 3-1 Browser ............................................................................................................................ 3-1 Installing Java .................................................................................................................. 3-1 MW100 Operation Screens .............................................................................................. 3-1 Switching Modes .............................................................................................................. 3-3 Connection to the MW100 ............................................................................................... 3-4 Ethernet Connection ........................................................................................................ 3-4 Connecting with Serial Communication (Optional) .......................................................... 3-5 Modbus Settings .............................................................................................................. 3-6 Login Function and User Settings .................................................................................... 3-8 System Settings ............................................................................................................... 3-9 System Reconstruction .................................................................................................... 3-9 Setting the Date and Time ............................................................................................... 3-9 Formatting the CF Card, Checking the Free Space and System Information , and Initialization ........ 3-10 Daylight saving Time Setting .......................................................................................... 3-10 Other Settings ................................................................................................................ 3-11 Status Information and Processing ................................................................................ 3-11 Setting Acquisition Conditions for Measured/Computed Data ....................................... 3-13 Measurement Operation Settings .................................................................................. 3-13 Computation Operation Settings .................................................................................... 3-13 Recording Operation Settings ........................................................................................ 3-14 Thinning Operation Settings .......................................................................................... 3-15 Recording Channel Settings .......................................................................................... 3-15 Setting Measurement Conditions (Measurement Channel Settings) ............................. 3-16 Measurement Channel Settings ..................................................................................... 3-16 Filter and Thermocouple Settings .................................................................................. 3-17 Setting Up and Executing Strain Input Initial Balancing ................................................. 3-17 MATH Settings (MATH Channel Settings and the /M1 Option) ...................................... 3-18 Entering Expressions ..................................................................................................... 3-18 Setting MATH Constants ................................................................................................ 3-19 Setting MATH Groups .................................................................................................... 3-19 Program Channel Settings ............................................................................................. 3-20 Communication Input Data Settings .............................................................................. 3-20 xiii Contents 3.7 3.8 3.9 3.10 3.11 3.12 3.13 3.14 3.15 3.16 Setting Alarms ................................................................................................................ 3-21 Alarm Setting (AI/DI) ...................................................................................................... 3-21 Alarm Setting (MATH) .................................................................................................... 3-21 Digital Output Settings ................................................................................................... 3-22 Relay Settings ................................................................................................................ 3-22 Analog/PWM Output Settings ........................................................................................ 3-23 Output Range Settings (Analog Output) ........................................................................ 3-23 Output Range Settings (PWM Output) ........................................................................... 3-24 Output Operation Settings ............................................................................................. 3-25 Transmission Output Control ......................................................................................... 3-26 Event/Action Settings ..................................................................................................... 3-27 Timer and Match Time Settings ..................................................................................... 3-28 Timer Settings ................................................................................................................ 3-28 Setting the Match Time .................................................................................................. 3-28 Scale Input Methods ...................................................................................................... 3-29 Scale Values .................................................................................................................. 3-29 Starting and Stopping Measurement, Computation, and Recording .............................. 3-30 Starting and Stopping Measurement ............................................................................. 3-30 Starting and Stopping Computation ............................................................................... 3-30 Starting and Stopping Recording ................................................................................... 3-31 Computation and Recording According to Status .......................................................... 3-31 Checking the Operating Status of the MW100 Using the Status Indicators ................... 3-31 Network Utility Settings .................................................................................................. 3-32 DNS Client Settings ....................................................................................................... 3-32 FTP Client Settings ........................................................................................................ 3-32 Mail Client Settings ........................................................................................................ 3-33 Time Synchronization Client Settings ............................................................................ 3-34 Server Settings .............................................................................................................. 3-35 Saving and Loading Setup Data .................................................................................... 3-36 Saving and Loading Setup Data .................................................................................... 3-36 Setup Data Save Conditions .......................................................................................... 3-36 Measured Data Monitor Display/Settings ....................................................................... 3-37 Monitor-Display of Measured Data ................................................................................ 3-37 Explanation of Display Items .......................................................................................... 3-38 Display Settings ............................................................................................................. 3-41 Log Information .............................................................................................................. 3-44 Chapter 4 Troubleshooting and Maintenance 4.1 xiv Error Display on the 7-Segment LED and Corrective Actions .......................................... 4-1 Errors upon Startup .......................................................................................................... 4-1 System Errors .................................................................................................................. 4-1 Module Errors .................................................................................................................. 4-1 Communication Errors ..................................................................................................... 4-2 Settings Errors ................................................................................................................. 4-2 Execution Error ................................................................................................................ 4-5 Execution Errors .............................................................................................................. 4-5 Communication Command Error ..................................................................................... 4-6 Communication Error ....................................................................................................... 4-7 System Errors .................................................................................................................. 4-7 IM MW100-01E Contents 4.2 4.3 4.4 4.5 4.6 Error Display in the Monitor Screen and Corrective Actions ............................................ 4-8 Troubleshooting ............................................................................................................... 4-9 Calibration ...................................................................................................................... 4-12 Range Calibration for DC Voltage, RTD, Resistance, Strain, and Analog Output ......... 4-12 Calibration of Temperature Measurements using Thermocouples ................................. 4-16 Parts and Maintenance .................................................................................................. 4-17 System Initialization ....................................................................................................... 4-18 Initialization Type ........................................................................................................... 4-18 Initialization Procedure ................................................................................................... 4-18 Chapter 5 Specification 5.1 5.2 5.3 5.4 5.5 5.6 5.7 5.8 5.9 5.10 5.11 5.12 Common Specifications ................................................................................................... 5-1 Main Module Specifications ............................................................................................. 5-2 Base Plate Specifications .............................................................................................. 5-24 4-CH, High-Speed Universal Input Module Specifications ............................................. 5-25 10-CH, Medium-Speed Universal Input Module Specifications ..................................... 5-29 6-CH, Medium-Speed Four-Wire RTD Resistance Input Module Specifications ........... 5-33 4-CH, Medium-Speed Strain Input Module Specifications ............................................. 5-37 10-CH, High-Speed Digital Input Module Specifications ................................................ 5-40 8-CH, Medium-Speed Analog Output Module Specifications ........................................ 5-41 8-CH, Medium-Speed PWM Output Module Specifications ........................................... 5-43 Operations Common to the 8-CH Medium-Speed Analog Output Module and the 8-CH Medium Speed PWM Output Module ........ 5-45 10-CH, Medium-Speed Digital Output Module Specifications ....................................... 5-46 Appendix Appendix 1 Supported Characters ........................................................................................ App-1 Index IM MW100-01E xv Chapter 1 Explanation of Functions 1.1 1 System Overview The MW100 Data Acquisition Unit consists of a main module equipped with an Ethernet port, I/O modules for input and output of signals (these are the same as those for the MX100 Data Acquisition Unit), and a base plate on which the first two items are mounted. The main module comes with a Web server function, allowing users to easily enter settings and monitor measured data from a PC using a browser. The MW100 can be used for data acquisition on site as a standalone, enabling data acquisition on up to 360 channels using the Modbus/TCP function. System Configuration The MW100 Data Acquisition Unit can be flexibly configured for a variety of measuring environments. One-to-one Connection with a PC This is an example of a system for small scale logging, setting the IP address, and other tasks. Using a Web browser: • Easy setting entry • Monitoring of measured data Using PC software: • IP address setting • Calibration PC Hub MW100 Data Acauisition Unit MW100 Ethernet port Input/Output module Main module Standalone Configuration This is an example of configuration for an on-site standalone data acquisition system. PC MW100 Data Acauisition Unit MW100 CF card IM MW100-01E 1-1 Explanation of Functions MW100 Data Acquisition Unit 1.1 System Overview One-to-N Connection with a PC This is an example of a configuration suitable for relatively large scale data acquisition tasks. Connections can be made via Ethernet or RS-422A/485. PC Hub MW100 MW100 MW100 MW100 Data Acauisition Unit PC RS-422A/485 MW100 MW100 MW100 MW100 Data Acauisition Unit 1-2 IM MW100-01E 1.1 System Overview 1 Explanation of Functions One-to-N Connection with the PC This is an example in which multiple PCs are connected to the MW100 for performing data monitoring. PC PC PC Hub MW100 MW100 Data Acquisition Unit Connecting to Modbus Devices This is an example of configuration of a system with connections to Modbus devices. MW100 Data Acquisition Unit (client) MW100 Hub MW100 Modbus machine (server) MW100 Modbus machine (server) Note Using the Web monitor or other communciation functions while using the Modbus function may affect the Modbus communication response. IM MW100-01E 1-3 1.1 System Overview Main Module The main module is equipped with power supply connectors, a power switch, Ethernet ports, and other devices facilitating supply of power to and control of the input/output modules, and connection to networks. It also has Start and Stop keys, meaning that since data can be saved to a CF card, data can be acquired offline. Data acquisition via serial communication is also possible by adding the RS-232 or RS-422A/485 serial communication option. Input/Output Modules The following eleven types of modules are available. A screw terminal plate and separately installed screw terminal block (both sold separately) are available as accessories for the 10-CH Medium Speed Universal Input Module and the 10-CH High Speed Digital Input Module. 4-CH, High-Speed Universal Input Module (MX110-UNV-H04) • Minimum measurement interval: 10 ms (except 50 ms for temperature measurement • Maximum number of inputs: 4 inputs • Input types: DC voltage, TC, 3-wire RTD, and DI (LEVEL, contact) 10-CH, Medium-Speed Universal Input Module (MX110-UNV-M10) • Minimum measurement interval: 100 ms • Maximum number of inputs: 10 inputs • Input types: DC voltage, TC, 3-wire RTD, and DI (LEVEL, contact) 6-CH, Medium-Speed, Four-Wire RTD Resistance Input Module (MX110-V4R-M06) • Minimum measurement interval: 100 ms • Maximum number of inputs: 6 inputs • Input types: DC voltage, 4-wire RTD, 4-wire resistance, and DI (LEVEL, contact) 1-4 IM MW100-01E 1.1 System Overview 4-CH, Medium-Speed Strain Input Module (MX112-B12-M04 and MX112-B35-M04) Explanation of Functions • Minimum measurement interval: 100 ms • Maximum number of inputs: 4 inputs • Input system: floating balanced input (isolation between channels) 4-CH, Medium-Speed Strain Input Module (MX112-NDI-M04) • Minimum measurement interval: 100 ms • Maximum number of inputs: 4 inputs • Input system: floating balanced input (non-isolation between channels) 10-CH, High-Speed Digital Input Module (MX115-D05-H10) • Minimum measurement interval: 100 ms • Maximum number of inputs: 10 inputs • Input types: DI (non-voltage contact, open collector, 5-V logic) 10-CH, High-Speed Digital Input Module (MX115-D24-H10) • Minimum measurement interval: 10 ms • Maximum number of inputs: 10 inputs • Input types: DI (24-V logic) IM MW100-01E 1 1-5 1.1 System Overview 8-CH, Medium-Speed Analog Output Module (MX120-VAO-M08) • Output update interval: 100 ms (shortest) • Maximum number of inputs: 8 outputs • Output type: DC voltage, DC current 8-CH, Medium-Speed PWM Output Module (MX120-PWM-M08) • Output update interval: 100 ms (shortest) • Maximum number of inputs: 8 outputs • Output type: PWM 10-CH, Medium-Speed Digital Output Module (MX125-MKC-M10) • Output update interval: 100 ms (shortest) • Maximum number of outputs: 10 outputs • Output type: A contact (SPST) Base Plate The base plate is equipped with connectors for connecting the main module and input/ output modules. There are six types of base plates available (connecting from one to six input/output modules ). By attaching DIN rail mounting brackets to the base plate, you can rack-mount or panel-mount the MW100 main unit. Base plate DIN rail mount bracket DIN rail 1-6 IM MW100-01E 1.1 System Overview 1 PC Software Address Setting Software Sets the IP address on the MW100. This software is used when setting an IP address for the first time, or if the current IP address needs to be changed. Viewer Software Enables you to (1) display measured and computed data that has been stored, (2) read values and perform computation over an area using cursors, and (3) convert the measured and computed data into various file formats such as Excel. Calibration Software This software is used to calibrate the input/output modules connected to the MW100. IM MW100-01E 1-7 Explanation of Functions The MW100 Data Acquisition Unit comes with the MW100 Viewer software program that allows users to view measured data acquired by the MW100. MW100 Viewer consists of the three software components described below. For a detailed description of the functions of these software components, see the MW100 Viewer software user’s manual (IM MW180-01E). 1.2 MW100 Operation Guide The figure below shows the general flow of operation when the MW100 is installed initially. Operations on the MW100 Operations on the PC Section X.X indicates the referred sections in this manual. Section 2.2 and 2.3 Instal the MW100 and attaching the main module Section 2.4 Wire the input/ output modules See the Installation and Connection Guide (IM MX100-72E). Section 2.6 to 2.8 Connect to the network Section 2.5 Connect the power cord Section 3.2 Connect to the MW100 Search for all connected MW100s and configure network parameters such as the MW100s’ IP addresses. Section 3.3 Configure the system MW100 system configuration, date setting, CF card setup Section 3.4 Select the acquisition interval to be Enter data acquisition used, select the recording interval, conditions set recording start/stop conditions, etc. Section 3.5 Input channel settings, input type, Set measurement measuring range, measurement span, conditions etc. Section 3.6 MATH settings MATH channel settings, entry of expressions, etc. Section 3.8 Alarm output, manual DO, Fail output, Digital output and error output settings settings Section 3.7 Alarm settings Alarm level and type settings Section 3.9 Transmission Analog/PWM output settings output settings Section 3.10 and 3.11 Event settings Event/action settings Section 3.14 Settings for the FTP server, mail server, FTP and e-mail and other network utilities settings Section 3.13 Start and stop measurement, computation, and recording Starting and stopping data measurement, computation, and recording While online you can start and stop data measurement, computation, and recording from a PC Section 3.16 Monitor data and alarms Display and check data 1-8 Measured data and alarm display settings while online Display data using the Viewer software. See the MW100 Viewer Software User’s Manual (IM MW180-01E). IM MW100-01E 1.3 1 Functions of the Main Module Names and Functions of Parts Communication status LED Ethernet port Check the communication status Top: LINK LED Illuminates orange when ready for communication Bottom: ACT LED Illuminates green when packets are sent/received Used for main unit settings and network connections (see 2.6, “Connecting an Ethernet Cable,” or 3.2, “Connecting to the MW100.”) 7-segment LED Status indicator* Displays the operational status of the MW100 (see “Displays” in this section, or section 4.1, “7-Segment LED Error Display”). The operational status of the instrument is indicated by the illumination of the LED. CF card slot Insert the CF card to save data and perform other tasks (see section 2.11, “Handling of the CF Card,” or 3.3, “System Settings”). MEASURE ALARM RECORD MATH DATA ACQUISITION UNIT ETHERNET SW ON 1 2 3 4 5 6 7 8 10BASE - T Start/Stop keys Start and stop measurement, computation, and recording (seesection 3.13, “Starting and Stopping Measurement, Computation, and Recording”). User function key START STOP USER 1 USER 2 POWER Dip switch 2 Not used. 100 - 240V AC TERMN ON OFF Power switch Turns the power to the MW100 main unit ON and OFF FG SG SDB SDA RDB RDA Assign functions to the keys (see, “Switches and Keys” in this section) Dip switch 1 Used to initialize settings, and for other purposes (see, “Switches and Keys” in this section) SERIAL RD SERIAL COMM 70VA MAX 50 / 60Hz Functional ground terminal Power supply inlet Connect the accessory power supply cord This is listed as a screw terminal in the power supply specifications. RS-422A/485 connector (/C3 option) Depending on installed options, the connector may or may not be available, or it may be an RS-232 connector (/C2 option, see “Communication Specifications” in this section) Terminator switch (/C3 option) Turns the terminator ON and OFF *Status indicators Illuminate in the following situations MEASURE ALARM RECORD MATH Alarm activation or alarm hold Computing (illuminates), computing processing (blinking) SERIAL SD Receiving serial communications data Recording (illuminates), recording processing (blinking) Measuring IM MW100-01E 1-9 Explanation of Functions The main module is the central component of the MW100 Data Acquisition Unit. 1.3 Functions of the Main Module Switches and Keys The MW100 has the following switches and keys. Some are included with options. • Start and Stop keys • User function key 1 • User function key 2 • Dip switch 1 • Dip switch 2 • Terminator switch (/C3 option) • Power switch User Function Keys Actions set up using the Event/Action function can be executed by pressing the user function keys on the front panel of the MW100. The keys are assigned as follows by default. Key Display Action User function key 1 USER1 Write to setting values file User function key 2 USER2 Load setting values file Dip Switch 1 Used to initialize the MW100 settings and for other functions. • Normal operation ON 1 2 3 4 5 6 7 8 • Initialization of IP addresses and other settings ON 1 2 3 4 5 6 7 8 • Fixed IP address (192.168.0.10) ON 1 2 3 4 5 6 7 8 ON Dip Switch 2 Turn all switches ON for normal operation. If the switches are set differently, the instrument may not function correctly. 1 2 Key Lock Function You can apply a lock to the functions of the Start, Stop, and user function keys. The lock prevents inadvertent execution of functions. Connectors The MW100 can come with the following connectors. The actually-installed connectors depend on the power supply input section specifications and options. • Ethernet • RS-422A/485 connector (/C3 option) • RS-232 connector (/C2 option) • CF card slot • Power supply inlet (power supply input section specification: -1M) • Power supply screw terminals (power supply input section specification: -1W, -2M, -3W) 1-10 IM MW100-01E 1.3 Functions of the Main Module 1 Displays Explanation of Functions The MW100 indicates its operating conditions with the following displays. • 7-segment LED • Status indicators • Communication status LED 7-Segment LED Displays the MW100 Data Acquisition Unit’s unit number, operation status, end of operation, and errors. • Unit Number Display Unit numbers can be set from 00 to 89. - is displayed. • Display of the Self-Test Operation on Startup When the power is turned ON the setting of dip switch 1 is displayed the operation preparation status followed by , and then a self check is performed. While the self check is in progress, the following displays are repeated. • Key Lock Status A key lock function is included for preventing accidental manipulation of the MW100 front panel keys. The key lock status is indicated by a dot at the bottom of the unit number. The example shown is for a unit of number 00. • Keylock release Unit number • Keylock Unit number and dot • In-Progress Display The following displays cycle while the CF card is being accessed or while calibration is being performed. • Operation Error Display In error Exxx (where xxx is a three-digit number), the code is divided into two parts which are displayed alternately. In the first part, the letter E appears in the left digit with the hundreds digit of the error code to the right, and the second part consists of the last two digits of the error code. Example: Error code E234 Up to three error codes are saved. For the contents of error codes and their meanings, see section 4.1, “Errors Displayed on the 7-Segment LED and Corrective Actions.” You can clear one error that is displayed by pressing the Stop key. IM MW100-01E 1-11 1.3 Functions of the Main Module Measurement Measured data sampled at certain intervals is acquired by the various input modules. Acquired data is saved to the CF card. In addition, the main module receives output commands sent from the PC as necessary and generates signal output instructions to the output modules. Measurement Intervals • Synchronization between modules If set to the same measurement interval, measurements made by input modules in the same acquisition unit are synchronized. • Synchronization between channels On the 4-CH, High-Speed Universal Input Module and 10-CH High-Speed Digital Input Module, measurement is synchronized between channels. On the 10-CH, Medium-Speed Universal Input Module, Six-Channel Medium-Speed Four-Wire RTD Resistance Input Module, and 4-CH, High-Speed Digital Input Module, since measurement occurs sequentially by channel, it is not synchronized between channels (it can be said to be synchronized within measurement intervals). Multi interval Measurement Groups Three measurement intervals can be set, and measurement channels can be assigned to each interval. There is a particular order in which measurement intervals can be set to measurement groups. For more information, see section 3.4, “Setting Acquisition Conditions for Measured and Computed Data.” Filters A first-order lag filter is available. You can select a time constant (time until 63.2% of the output value is reached) corresponding to the measurement interval indicated in the equation below. Time constant = measurement interval × N (where N = 5, 10, 20, 25, 40, 50, or 100) For details, see section 2.10, “Measures against Noise on the MW100 Data Acquisition Unit.” MATH Differential computation between channels and linear scaling are possible. Linear scaling converts the measured values for a specific purpose (scaled values) using the following equation. Scale value = (X – SPmin) × (SCmax – SCmin) SPmax – SPmin MATH Types + SCmin X: Measured value SPmax: Specified span maximum SPmin: Specified span minimum SCmax: Specified scale maximum SCmin: Specified scale minimum Notation Differential computation between channels DELTA Linear scaling SCALE MATH (/M1 Option) Expressions using measured and computed data as variables can be entered and executed on channels dedicated for computation, and the results can be displayed and saved. Computations are executed every measurement interval (shortest interval is 100 ms). For details, see section 1.13, “MATH Functions (/M1 Option).” 1-12 IM MW100-01E 1.3 Functions of the Main Module 1 Remote RJC (RRJC) Input terminal MW100 Relay terminal (to be furnished by the user) Thermocouple* Reference channel Copper wire Thermocouple* Copper wire Thermocouple* * Use the same type of thermocouples. Burnout When the input mode is set to thermocouple (TC), you can set the burnout detection behavior. Measured values become “range over” during detection. Detection Behavior Notation No detection OFF Measured values fixed at +range over UP Measured values fixed at –range over DOWN Alarms The main module compares the measured values against preset alarm values and outputs alarm signals based on the result from the digital output module. The following four types of alarms can be output. Type Notation Actions Upper limit alarm H Generates an alarm when the measured value exceeds the alarm value. Lower limit alarm L Generates an alarm when the measured value falls below the alarm value. Differential upper limit alarm DH (during differential computation) Generates an alarm when the difference between the measured values of two alarms exceeds the alarm value. Differential lower limit alarm DL (during differential computation) Generates an alarm when the difference between the measured values of two alarms falls below the alarm value. High limit on rate-of-change alarm RH Generates and alarm when the rate of change in rising measured values exceeds the alarm value. Low limit on rate-of-change alarm RL Generates and alarm when the rate of change in falling measured values falls below the alarm xvalue. Alarm Value Hysteresis You can set a width (hysteresis) to the values used to activate and release alarms. Alarm hysteresis can prevent frequent activation and release of alarms when the measured value is unstable around the alarm value. Lower limit alarm Upper limit alarm Alarm activated Alarm setting Measured value Alarm release Hysteresis Measured vale IM MW100-01E Alarm release Alarm setting Alarm activated 1-13 Explanation of Functions When the item to be measured is located at a great distance, you can setup relay terminals near the item, measure between the relay terminal and the input terminal of the universal input module (reference channel) using thermocouples, and use the resultant value as the reference junction compensation of the temperature measurement. By connecting the relay terminal and the input terminal of the universal input module using copper wires and connecting the item to be measured and the relay terminal using thermocouples, you can make temperature measurements without having to use large quantities of high-cost thermocouples. 1.3 Functions of the Main Module Alarm Output Timing The output interval is 100 ms. Therefore, when the measurement interval is 10 ms or 50 ms, the alarm output data is accumulated over 100-ms intervals and output at 100-ms intervals based on the accumulated data. Rate of Change Upper Limit / Lower Limit Alarm The rate of change of the measured values is checked over the rate-of-change detection interval. An alarm occurs if the rate of change of the measured value in the rising direction exceeds the specified value. High limit on rate-of-change alarm Low limit on rate-of-change alarm Computed value Computed value Change in the measured value T2 Amount of change in the setting T2–T1 T1 t1 t2 T1 Amount of change in the setting T1–T2 T2 t1 Time t2 Change in the computed value Time Interval t2 –t1 Interval t 2 –t 1 Alarm Hold/Non-Hold You can select whether, when factors resulting in output cease to exist, alarms are cleared when the output factors are cleared, or alarms are held for their full duration (alarm ACK*). • When set to non-hold • When set to hold Output cause occurrence Alarm ACK Alarm ACK Output cause occurrence ON ON Alarm Alarm OFF OFF Status lamp ALARM Status lamp ALARM Monitor screen alarm view Monitor screen alarm view * By clicking the Alarm ACK button in the browser’s monitoring screen or by sending an equivalent communication command. Operation Modes and Statuses The MW100 has a Setting mode in which input ranges and other settings can be entered, and a Measurement mode in which data acquisition is performed. The mode switches depending on the measurement item of the status information. Mode Status Info Measurement Description Setting mode STOP For entering range, system, communication, and display settings Measurement mode START For data monitoring, computation, and recording * 1-14 The instrument must be in measurement mode in order for the status of computation and recording to be START. IM MW100-01E 1.3 Functions of the Main Module 1 Tag Strings Explanation of Functions You can select whether to display tags or channel numbers on all channels. Communication Specifications The MW100 can communicate with external devices using its Ethernet or serial communication port. Login Function This function ensures that only previously registered users can obtain access when communicating with the MW100. For instructions, see section 3.2, “Connecting to the MW100.” There are two levels of user access rights as follows: Level Notation Description Administrator privileges ADMIN All functions are available. User privileges USER Measured/computed data, settings, log information, alarm summaries, and status information can be obtained. Administrator privileges required to switch operation modes, start/stop computation and recording, or change settings such as the measuring range. Ethernet Communication Using 10Base-T media, the MW100 supports the FTP, SNTP, DHCP, DNS, HTTP, Modbus/TCP, SMTP, and MW-specific protocols. • Web Server Function MW100 settings and data can be monitored from a PC using a browser. • DHCP Client Function The IP address can be automatically obtained from the DHCP server. • SNTP Function Acting as a client, the MW can obtain time information from the specified SNTP server when the power is turned ON. When acting as the server, the unit can provide time information to other MW100s connected to the network. • FTP Function As a client, the MW can send acquired data files to an FTP server. Two recipient locations can be specified. When acting as the server, the MW can transfer or delete files according to commands from a PC. • E-Mail Function Alarm occurrences and creation of data files can be notified via e-mail. Two recipients locations can be specified. • Modbus Client Function(/M1 option) The MW100 can connect to a Modbus server device and load measured data. Using Modbus commands, the MW100 can load data from the Modbus server at regular intervals. Loaded data are assigned to the communication input channels (C001C300) of the MATH function (/M1 option). Up to ten Modbus servers can be registered. Ethernet MW100 MW100 MW100(Client) IM MW100-01E MW100(server) 1-15 1.3 Functions of the Main Module • Modbus Server Function (See Figure on Previous Page) Modbus clients connect to an MW100 acting as the Modbus Server, and read from or write to its internal registers. Measured data and alarm statuses from measurement channels, measured data and alarm statuses from MATH channels, data from communication input channels, and time information are stored in the MW100’s registers. Up to four clients can be connected simultaneously. RS-422A/485 Communication (/C3 Option) In a multi-drop, four-wire configuration, up to thirty-two units can be connected. A dedicated protocol and the ModbusRTU protocol are supported. • Using communication commands, you can send and receive settings, and measured and computed values. • Modbus Master Function The MW100 can connect to a Modbus slave device and load measured data. The operation is the same as the Modbus client function. Target devices (Modbus slaves) are identified with addresses. MW100(master) MW100 Data from slave device Serial communication Data to slave device Modbus slave device • Modbus Slave Function Modbus master devices can connect to other MW100s acting as Modbus slaves and read from or write to their internal registers. The MW100 registers are the same as those for the Modbus server function. Modbus master device Data to master device Data from master device Serial communication MW100 MW100(slave) Modbus slave device For instructions on connections, see section 2.7, “Connections Using the RS-422A/485 Interface (/C3 Option).” RS-232 Communication (/C2 Option) This is a point-to-point system. A dedicated protocol and the Modbus/RTU protocol are supported. • Using communication commands, you can send and receive settings, and measured and computed values. • The MW100 operates as the Modbus master or slave. For information about the operation, see “RS-422A/485 Communications (/C3 Option).” For instructions on connections, see section 2.8, “Interface Connections (/C2 Option).” 1-16 IM MW100-01E 1.3 Functions of the Main Module 1 Saving Data to the CF Card Settings folder Save folders for measured, computed, and thinned data The DATA folder includes all folders up to DATAxxxx Folders are created each time recording starts from DATA0000 to DATAxxxx. "xxxx" is automatically generated from 0000 to 9999 Saving Measured Data and Computed Data Files can be created for every measurement group. An individual file is created for computed data. For each measurement group, you can select whether or not to perform the save operation. The table below shows the approximate interval over which data can be saved to the CF card when one measurement interval is used. Save Channel Measurement Interval Capacity of the CF Card 128 MB 512 MB 10 ch 10 ms 100 ms 1s 8.8 hours 3.7 days 37 days 35.3 hours 14.8 days 148 days Saving Thinned Data Data is saved at a specified thinning interval. Thinning time: 4, 5, 10, 20, or 30 seconds, or 1, 2, 3, 4, 5, 10, 20, or 30 minutes, or 1 hour. Select a thinning time from the above choices. Recording Operation The following three recording operations are available for measured, computed, and thinned data. IM MW100-01E Mode Display Operation Single SINGLE One file of a specified size is created on the CF card, then recording stops. Full stop FULLSTOP Files of the specified size are created until the capacity of the card is reached, then writing to the card stops. Rotate ROTATE Files of the specified size are created until the capacity of the card is reached, then if the capacity is exceeded, new data is written over the oldest data, and the process continues. 1-17 Explanation of Functions Save Location Measured/computed data, thinned data, data acquisition logs, alarm summaries, and settings can be saved on the CF card. These files are saved in the folder structure shown in the figure. 1.3 Functions of the Main Module Recording Start Operation The following three operations for starting of recording to the CF card are available. Type Notation Operation None OFF Does not record. Direct DIRECT Starts recording at the same time as recording to the internal memory starts Trigger TRIGGER Enters trigger wait mode when recording starts. Recording is started after an event occurs. * There are no triggers for recording of thinned data. Pretrigger Function When selecting Trigger, a pre-trigger can be set in units of ten percent of the data length. Writing starts simultaneously with recording, and after a trigger event occurs, the data remaining after removal of the pretrigger data is written. Saving Settings MW100 setting values can be saved. The contents that are saved are as follows: • Range, alarm, and MATH related settings • Media related settings • Communication related settings • Other settings However, when settings are loaded onto the MW100, the IP address, subnet mask, default gateway, host name, and domain name are not loaded. Format Initializes the CF Card. Daylight saving time The internal clock is updated every specified month, week, day, and time. Timer The Event/Action function can be started according to timer settings. The following two timers are available. Type Notation Description Relative Time Timer RELATIVE Time up occurs at the specified time interval Absolute Time Timer ABSOLUTE Time up occurs at a time interval after a specified reference time** * Operation upon power failure differs. For details, see chapter 5, “Specifications.” ** Also valid prior to the reference time. Match Time The Event/Action function can be started according to the match time setting. The following three match times are available. Type Notation Monthly MONTH Description Time up occurs every month on specified date and time (hr and min) Weekly WEEK Time up occurs every every week on the specified day of the week and time (hr and min) Daily DAY Time up occurs every day at the specified time (hr and min) * Conditions can be set for no operation. For details, see chapter 5, “Specifications.” ** For information about operation during power failures and time changes, see chapter 5, “Specifications.” 1-18 IM MW100-01E 1.3 Functions of the Main Module 1 Event/Action Function Event Type Notation Start Specification Contact input DI Channel number Alarm occurrence ALARM Alarm on specified channel ALARM_CH Recording start MEMORY Channel number, alarm level number Relay action RELAY Relay number Timer event occurrence TIMER Timer number Match time event occurrence MATCH_TIME Match time number User function key USER_KEY Keys number The following Actions are available. The items that can be set differ according to the events and event detection method. Action Notation Recording start* MEMORY_START Recording stop* MEMORY_STOP Computation start MATH_START Computation stop MATH_STOP Clear computed values MATH_CLEAR Reset computed values MATH_RESET Reset MATH on specified MATH group number (Gr.1-7) MATH_RST_GR1 MATH_RST_GR2 MATH_RST_GR3 MATH_RST_GR4 MATH_RST_GR5 MATH_RST_GR6 MATH_RST_GR7 Trigger occurrence on specified number TRIGGER1 TRIGGER2 TRIGGER3 Alarm ACK ALARM_ACK Flag FLAG Reset timer of specified number (1-6) TIMER1_RESET TIMER2_RESET TIMER3_RESET TIMER4_RESET TIMER5_RESET TIMER6_RESET Write message on specified number MESSAGE1 MESSAGE2 MESSAGE3 MESSAGE4 MESSAGE5 Save specified file** FILE_SAVE Load specified file** FILE_LOAD Detection Method Edge Level * Cannot be selected when the event is Recording start. ** Cannot be selected when the event is User function key. Event detection methods IM MW100-01E Method Notation Description Edge EDGE Edge event Level LEVEL State event 1-19 Explanation of Functions By linking the Event function and Action function, you can control the operations of the main unit. The following types of events are available. Some items may not be available depending on the options installed. 1.3 Functions of the Main Module Log Information Saving the Data Acquisition Log File While recording is stopped, information related to operation of the CF card and power ON/OFF status is saved in text format to a log file with the name RECORDLG.TXT. For information about log statuses and messages, see the MW100 Communication Command manual (IM MW100-17E). Information Saved to the Log File • When power is turned OFF or ON • When CF card is inserted or ejected • When CF card is formatted • Upon recording stop or start, etc. • File creation or deletion • Triggers • Time synchronization • Errors • Log saving Example of a Log File Yokogawa Date 05/01/01 05/03/25 05/03/25 05/03/25 05/03/25 05/03/25 05/03/25 05/03/25 05/03/25 05/03/25 05/03/25 05/03/25 05/03/25 >> DAQMASTER MW100 <Record Info> Time Status Message 00:00:01 Power on 09:58:13 Format ok 10:00:03 Create DATA0033 10:00:00 Record start 1 10:00:05 Mode rotate -T10:00:05 (100ms) 1H / 12cells 10:00:05 10CHs 1409KB 10:00:06 Create 32510100 11:00:15 Create 32510101 12:00:15 Create 32510102 12:40:35 Record stop 1 12:41:25 Create ALARMLG 12:14:26 Create RECORDLG Time indicating when settings were initialized* Time after internal clock is reset* Recording starts Data file creation Recording stops Newest information Termination mark * When settings are initialized, the MW100 initial time value of 2005/01/01 00:00:00 is set. After than, if the time is reset, the time after the change is recorded. Saving Alarm Summaries During the recording stop operation, alarm summary information is saved in text format to a log file named ALARMLG.TXT. Example of an Alarm Summary Date EA 05/03/25 05/03/25 05/03/25 05/03/25 05/03/25 05/03/25 05/03/25 05/03/25 05/03/25 05/03/25 05/03/25 EN Time Channel Alarm status* 10:12:13.000 11:14:12.000 11:14:12.000 11:14:13.000 11:14:21.000 11:14:36.000 11:14:36.000 11:14:54.000 11:15:18.000 11:15:22.000 11:15:25.000 001 001 002 001 001 002 001 001 002 005 005 1H 1H 3L 1H 2H 3L 1H 2H 3L 4L 4L off on off off off on on on off off on * The following are the alarm statuses. Alarm number Alarm type ON/OFF 1H off Newest information Termination mark Note While recording is paused during measurement, if the Stop key is held down, the data acquisition log and alarm summary log are created in the root directory of the CF card. 1-20 IM MW100-01E 1.3 Functions of the Main Module Item Notation Request Type Operation error log ERROR No. saved Alarm summary ALARM No. saved Strain input initial balance result BALANCE No. displayed Data acquisition log RECORD No. saved Recording status RECSTATUS No. saved Message summary MESSAGE No. saved Communication log COM No. saved Operation log CMD No. saved Computation status MATH No. saved Mail client log SMTP No. saved Time synchronization client log SNTP No. saved HTTP server log HTTP No. saved DHCP client log DHCP No. saved FTP client log FTP_C No. saved FTP server log FTP_S No. saved Modbus client log Modbus_C No. saved Modbus client command status Modbus_CC No. displayed Modbus client connection status Modbus_CS No. displayed Modbus master log Modbus_M No. saved Modbus master command status Modbus_MC No. displayed Modbus master connection status Modbus_MS No. displayed E-Mail Function Notification can be made of alarm occurrences and creation of data files by e-mail. Two recipient locations can be specified. Multiple addresses can be specified for each recipient location. For details about e-mail contents, see chapter 5, “Specifications.” E-Mail Types The following types of e-mail can be generated. IM MW100-01E E-Mail Type Operation and Contents of E-Mail Alarm notification E-mail is sent when measurement or MATH alarms are activated or cleared. Contents: Channels, levels, and types of alarms that were activated or cleared, instantaneous values of measurement and MATH channels (when selected) File creation notification E-mail is sent when a measured, computed, or thinned data file is created. Contents: Created file name and time of send request Notification of remaining space on media E-mail is sent when the remaining time on the CF card is determined to be less than the specified time. Contents: Total and remaining space on CF card, and the time of send request Notification of power ON E-mail is sent when the power is turned ON. Contents: Time power was cut and turned ON Error notification E-mail is sent when an operation error occurs. Contents: Error number and message, and time of send request Fixed time report E-mail is sent every specified time interval. Contents: Instantaneous values of the measurement and MATH channels (when selected) and the time of send request Reference time setting: Set in units of one-minute between 00:00 and 23:59 Time interval: Select 1, 2, 3, 4, 6, 8, 12, or 24 h Test E-mail is sent when test is executed. If a mail send request occurs during sending of another message, the request is ignored. 1-21 1 Explanation of Functions Log Output The following logs can be output using communication commands. For information about log statuses and messages, see the MW100 Communication Command manual (IM MW100-17E). 1.3 Functions of the Main Module Subject The e-mail transmission type is added to the subject. A user-specified string can be added to the transmission type in the subject. The following subject topics are available. E-Mail Type Subject Alarm notification [Alarm Summary] + user specified string File creation notification [File End] + user specified string Notification of remaining space on media [Media Remain] + user specified string Notification of power ON [Power Failure] + user specified string Error notification [ERROR] + user specified string Fixed time report [Periodic Data] + user specified string Test [Test] + user specified string E-mail Retransmission If e-mail transmission fails, it will be retried two more times at about thirty to sixty second intervals. If retransmission fails twice, the e-mail is deleted without being sent. Retransmission is not performed if the e-mail type is Test. Example of an E-Mail Transmission • Alarm notification e-mail From: [email protected] Date: Fri,25 Mar 2005 19:57:00 +0900 Subject: [Alarm Summary] To: [email protected], [email protected] Alarm Summary <Time> DATE 05/03/25 TIME 19:56:32 <Alarm Summary> 01 2h on 04 4H off 33 2r on : A005 2H off Mail header Date and time when alarm occurs Alarm contents <CH Data> N 01 mV N 04 mV N 05 mV +12345E-1 +12345E-1 +12345E-1 : N A001 +12345678E-1 N A002 +12345678E-1 : Instantaneous measured and computed values • Power supply ON notification e-mail From: [email protected] Date: Fri,25 Mar 2005 19:57:00 +0900 Subject: [Power Faliure] To: [email protected], [email protected] Power Faliure <Power Off> DATE 05/03/24 TIME 19:58:28 <Power On> DATE 05/03/25 TIME 19:56:40 1-22 Mail header Date/time power failed Date/time power restored IM MW100-01E 1.4 1 This module allows up to four inputs of DC voltage, thermocouple, 3-wire RTD, or digital input (DI) at a minimum measurement interval of 10 ms. Terminal cover Input terminal (clamp terminal) Measurement Input Types Measurement Input Type Notation Do not measure SKIP DC voltage VOLT Thermocouple TC Resistance temperature detector RTD DI DI Remote RJC RRJC Measuring Range DC Voltage Measuring Range Notation 20 mV 20 mV Rated Measurement Range –20.000 to 20.000 mV 60 mV 60 mV –60.00 to 60.00 mV 200 mV 200 mV –200.00 to 200.00 mV 2V 2V –2.0000 to 2.0000 V 6V 6V –6.000 to 6.000 V 20 V 20 V –20.000 to 20.000 V 100 V 100 V –100.00 to 100.00 V 60 mV (high resolution) 60 mVH 0.000 to 60.000 mV 1V 1V –1.0000 to 1.0000 V 6 V (high resolution) 6 VH 0.0000 to 6.0000 V Measuring Range Notation Rated Measuring Range Type-R R 0.0 to 1760.0°C Type-S S 0.0 to 1760.0°C Type-B B 0.0 to 1820.0°C Type-K K –200.0 to 1370.0°C Type-E E –200.0 to 800.0°C Type-J J –200.0 to 1100.0°C Type-T T –200.0 to 400.0°C Type-N N 0.0 to 1300.0°C Type-W W 0.0 to 2315.0°C Type-L L –200.0 to 900.0°C Thermocouple IM MW100-01E 1-23 Explanation of Functions Functions of the 4-CH, High-Speed Universal Input Module 1.4 Functions of the 4-CH, High-Speed Universal Input Module Thermocouple (cont.) Measuring Range Notation Rated Measuring Range Type-U U –200.0 to 400.0°C KPvsAu7Fe KPvsAu7Fe 0.0 to 300.0K PLATINEL PLATINEL 0.0 to 1400.0°C PR40-20 PR40-20 0.0 to 1900.0°C NiNiMo NiNiMo 0.0 to 1310.0°C WRe3-25 WRe3-25 0.0 to 2400.0°C W/WRe26 WWRe26 0.0 to 2400.0°C Type-N (AWG14) N14 0.0 to 1300.0°C TXK GOST XK –200.0 to 600.0°C Resistance Temperature Detector (1 mA) Measuring Range Notation Rated Measuring Range Pt100 Pt100-1 –200.0 to 600.0°C JPt100 JPt100-1 –200.0 to 550.0°C Pt100 (high resolution) Pt100-1H –140.00 to 150.00°C JPt100 (high resolution) JPt100-1H –140.00 to 150.00°C Ni100 SAMA Ni100SAMA –200.0 to 250.0°C Ni100 DIN Ni100DIN –60.0 to 180.0°C Ni120 Ni120 –70.0 to 200.0°C Pt100 (high noise resistance) Pt100-1R –200.0 to 600.0°C JPt100 (high noise resistance) JPt100-1R –200.0 to 550.0°C Pt100 GOST Pt100G –200.0 to 600.0°C Resistance Temperature Detector (2 mA) 1-24 Measuring Range Notation Pt100 Pt100-2 Rated Measuring Range –200.0 to 250.0°C JPt100 JPt100-2 –200.0 to 250.0°C Pt100 (high resolution) Pt100-2H –140.00 to 150.00°C JPt100 (high resolution) JPt100-2H –140.00 to 150.00°C Pt50 Pt50 –200.0 to 550.0°C Cu10 GE Cu10GE –200.0 to 300.0°C Cu10 L&N Cu10LN –200.0 to 300.0°C Cu10 WEED Cu10WEED –200.0 to 300.0°C Cu10 BAILEY Cu10BAILEY –200.0 to 300.0°C J263B J263B 0.0 to 300.0K Cu10 at 20°C alpha=0.00392 Cu10a392 –200.0 to 300.0°C Cu10 at 20°C alpha=0.00393 Cu10a393 –200.0 to 300.0°C Cu25 at 0°C alpha=0.00425 Cu25 –200.0 to 300.0°C Cu53 at 0°C alpha=0.00426035 Cu53 –50.0 to 150.0°C Cu100 at 0°C alpha=0.00425 Cu100 –50.0 to 150.0°C Pt25 (JPt100 × 1/4) Pt25 –200.0 to 550.0°C Cu10 GE (high resolution) Cu10GEH –200.0 to 300.0°C Cu10 L&N (high resolution) Cu10LNH –200.0 to 300.0°C Cu10 WEED (high resolution) Cu10WEEDH –200.0 to 300.0°C Cu10 BAILEY (high resolution) Cu10BAILEYH –200.0 to 300.0°C IM MW100-01E 1.4 Functions of the 4-CH, High-Speed Universal Input Module 1 Resistance Temperature Detector (2 mA, cont.) Notation Rated Measuring Range Pt100 (high noise resistance) Pt100-2R –200.0 to 250.0°C JPt100 (high noise resistance) JPt100-2R –200.0 to 250.0°C Cu100 GOST Cu100G –200.0 to 200.0°C Cu50 GOST Cu50G –200.0 to 200.0°C Cu10 GOST Cu10G –200.0 to 200.0°C Measuring Range Notation Rated Measuring Range LEVEL LEVEL Vth=2.4V Contact input CONTACT 100 Ω or less, ON, 10 kΩ or less, OFF Explanation of Functions Measuring Range DI Measurement Interval, Integration Time, and Filter You can select from the following measurement intervals for this module. 10 ms, 50 ms, 100 ms, 200 ms, 500 ms, 1 s, 2 s, 5 s, 10 s, 20 s, 30 s, 60 s The integral time and types of filters applied vary depending on the measurement interval. For details, see section 2.10, “Measures against Noise on the MW100 Data Acquisition Unit.” Measurement Synchronization Measurement is synchronized on each channel. IM MW100-01E 1-25 1.5 Functions of the 10-CH, Medium-Speed Universal Input Module This module allows up to ten inputs of DC voltage, thermocouple, 3-wire RTD, and digital input (DI) at a minimum measurement interval of 100 ms. Terminal cover Input terminal (clamp terminal) Measurement Input Types Measurement Input Type Notation No measurement SKIP DC voltage VOLT Thermocouple TC Resistance temperature detector RTD DI DI Remote RJC RRJC Measuring Range DC Voltage Measuring Range Notation 20 mV 20 mV Rated Measuring Range –20.000 to 20.000 mV 60 mV 60 mV –60.00 to 60.00 mV 200 mV 200 mV –200.00 to 200.00 mV 2V 2V –2.0000 to 2.0000 V 6V 6V –6.000 to 6.000 V 20 V 20 V –20.000 to 20.000 V 100 V 100 V –100.00 to 100.00 V 60 mV (high resolution) 60 mVH 0.000 to 60.000 mV 1V 1V –1.0000 to 1.0000 V 6 V (high resolution) 6 VH 0.0000 to 6.0000 V Measuring Range Notation Rated Measuring Range Type-R R 0.0 to 1760.0°C Type-S S 0.0 to 1760.0°C Type-B B 0.0 to 1820.0°C Type-K K –200.0 to 1370.0°C Type-E E –200.0 to 800.0°C Type-J J –200.0 to 1100.0°C Type-T T –200.0 to 400.0°C Type-N N 0.0 to 1300.0°C Type-W W 0.0 to 2315.0°C Thermocouple 1-26 IM MW100-01E 1.5 Functions of the 10-CH, Medium-Speed Universal Input Module 1 Thermocouple (cont.) Notation Rated Measuring Range Type-L L –200.0 to 900.0°C Type-U U –200.0 to 400.0°C KPvsAu7Fe KPvsAu7Fe 0.0 to 300.0 K PLATINEL PLATINEL 0.0 to 1400.0°C PR40-20 PR40-20 0.0 to 1900.0°C NiNiMo NiNiMo 0.0 to 1310.0°C WRe3-25 WRe3-25 0.0 to 2400.0°C W/WRe26 WWRe26 0.0 to 2400.0°C Type-N (AWG14) N14 0.0 to 1300.0°C TXK GOST XK –200.0 to 600.0°C Explanation of Functions Measuring Range Resistance Temperature Detector (1 mA) IM MW100-01E Measuring Range Notation Pt100 Pt100-1 Rated Measuring Range –200.0 to 600.0°C JPt100 JPt100-1 –200.0 to 550.0°C Pt100 (high resolution) Pt100-1H –140.00 to 150.00°C JPt100 (high resolution) JPt100-1H –140.00 to 150.00°C Ni100 SAMA Ni100SAMA –200.0 to 250.0°C Ni100 DIN Ni100DIN –60.0 to 180.0°C Ni120 Ni120 –70.0 to 200.0°C Pt50 Pt50 –200.0 to 550.0°C Cu10 GE Cu10GE –200.0 to 300.0°C Cu10 L&N Cu10LN –200.0 to 300.0°C Cu10 WEED Cu10WEED –200.0 to 300.0°C Cu10 BAILEY Cu10BAILEY –200.0 to 300.0°C J263B J263B 0.0 to 300.0 K Cu10 at 20°C alpha=0.00392 Cu10a392 –200.0 to 300.0°C Cu10 at 20°C alpha=0.00393 Cu10a393 –200.0 to 300.0°C Cu25 at 0°C alpha=0.00425 Cu25 –200.0 to 300.0°C Cu53 at 0°C alpha=0.00426035 Cu53 –50.0 to 150.0°C Cu100 at 0°C alpha=0.00425 Cu100 –50.0 to 150.0°C Pt25 (JPt100 × 1/4) Pt25 –200.0 to 550.0°C Cu10 GE (high resolution) Cu10GEH –200.0 to 300.0°C Cu10 L&N (high resolution) Cu10LNH –200.0 to 300.0°C Cu10 WEED (high resolution) Cu10WEEDH –200.0 to 300.0°C Cu10 BAILEY (high resolution) Cu10BAILEYH –200.0 to 300.0°C Pt100 GOST Pt100G –200.0 to 600.0°C Cu100 GOST Cu100G –200.0 to 200.0°C Cu50 GOST Cu50G –200.0 to 200.0°C Cu10 GOST Cu10G –200.0 to 200.0°C 1-27 1.5 Functions of the 10-CH, Medium-Speed Universal Input Module DI Measuring Range Notation Rated Measuring Range LEVEL LEVEL Vth=2.4 V Contact input CONTACT 1 kΩ or less, ON, 100 kΩ or less, OFF (shunt capacitance: 0.01 µF or less) Measurement Interval, Integration Time, and Filter You can select from the following measurement intervals for this module. 100 ms, 200 ms, 500 ms, 1 s, 2 s, 5 s, 10 s, 20 s, 30 s, 60 s The integral time and types of filters applied vary depending on the measurement interval. For details, see section 2.10, “Measures against Noise on the MW100 Data Acquisition Unit.” If the measurement interval is 100 ms, burnout detection is performed on one channel during one measurement interval. After measurement starts when in the burnout condition, or after the burnout, burnout detection is disabled for up to ten measurements (approximately one second). Measurement Synchronization Since measurement is sequential, measurement on each channel is not synchronized. 1-28 IM MW100-01E 1.6 1 Explanation of Functions Functions of the 6-CH, Medium-Speed Four-Wire RTD Resistance Input Module This module allows up to six inputs of DC voltage, thermocouple, 4-wire RTD, 4-wire resistance, and digital input (DI) at a minimum measurement interval of 100 ms. Terminal cover Input terminal (clamp terminal) Measurement Input Types Measurement Input Type Notation No measurement SKIP DC voltage VOLT Resistance temperature detector RTD Resistance OHM DI DI Measuring Range DC Voltage Measuring Range Notation 20 mV 20 mV Rated Measuring Range –20.000 to 20.000 mV 60 mV 60 mV –60.00 to 60.00 mV 200 mV 200 mV –200.00 to 200.00 mV 2V 2V –2.0000 to 2.0000 V 6V 6V –6.000 to 6.000 V 20 V 20 V –20.000 to 20.000 V 100 V 100 V –100.00 to 100.00 V 60 mV (high resolution) 60 mVH 0.000 to 60.000 mV 1V 1V –1.0000 to 1.0000 V 6 V (high resolution) 6 VH 0.0000 to 6.0000 V Resistance Temperature Detector (1 mA) Measuring Range IM MW100-01E Notation Rated Measuring Range Pt100 Pt100-1 –200.0 to 600.0°C JPt100 JPt100-1 –200.0 to 550.0°C Pt100 (high resolution) Pt100-1H –140.00 to 150.00°C JPt100 (high resolution) JPt100-1H –140.00 to 150.00°C Ni100 SAMA Ni100SAMA –200.0 to 250.0°C Ni100 DIN Ni100DIN –60.0 to 180.0°C Ni120 Ni120 –70.0 to 200.0°C Pt50 Pt50 –200.0 to 550.0°C Cu10 GE Cu10GE –200.0 to 300.0°C Cu10 L&N Cu10LN –200.0 to 300.0°C Cu10 WEED Cu10WEED –200.0 to 300.0°C Cu10 BAILEY Cu10BAILEY –200.0 to 300.0°C 1-29 1.6 Functions of the 6-CH, Medium-Speed Four-Wire RTD Resistance Input Module Resistance Temperature Detector (1 mA, cont.) Measuring Range Notation Rated Measuring Range J263B J263B 0.0 to 300.0K Cu10 at 20°C alpha=0.00392 Cu10a392 –200.0 to 300.0°C Cu10 at 20°C alpha=0.00393 Cu10a393 –200.0 to 300.0°C Cu25 at 0°C alpha=0.00425 Cu25 –200.0 to 300.0°C Cu53 at 0°C alpha=0.00426035 Cu53 –50.0 to 150.0°C Cu100 at 0°C alpha=0.00425 Cu100 –50.0 to 150.0°C Pt25 (JPt100 × 1/4) Pt25 –200.0 to 550.0°C Cu10 GE (high resolution) Cu10GEH –200.0 to 300.0°C Cu10 L&N (high resolution) Cu10LNH –200.0 to 300.0°C Cu10 WEED (high resolution) Cu10WEEDH –200.0 to 300.0°C Cu10 BAILEY (high resolution) Cu10BAILEYH –200.0 to 300.0°C Pt100 GOST Pt100G –200.0 to 600.0°C Cu100 GOST Cu100G –200.0 to 200.0°C Cu50 GOST Cu50G –200.0 to 200.0°C Cu10 GOST Cu10G –200.0 to 200.0°C Resistance Temperature Detector (0.25 mA) Measuring Range Notation Rated Measuring Range Pt500 Pt500 –200.0 to 600.0°C Pt1000 Pt1000 –200.0 to 600.0°C Resistance Measuring Range Notation Rated Measuring Range 20 Ω (measured current 1 mA) 20 ohm 0.000 to 20.000 Ω 200 Ω (measured current 1 mA) 200 ohm 0.00 to 200.00 Ω 2 kΩ (measured current 0.25 mA) 2000 ohm 0.0 to 2000.0 Ω Measuring Range Notation Rated Measuring Range LEVEL LEVEL Vth=2.4V Contact input CONTACT 1 kΩ or less, ON, 100 kΩ or less, OFF (shunt capacitance: 0.01 µF or less) DI Measurement Interval, Integration Time, and Filter You can select from the following measurement intervals for this module. 100 ms, 200 ms, 500 ms, 1 s, 2 s, 5 s, 10 s, 20 s, 30 s, 60 s The integral time and types of filters applied vary depending on the measurement interval. For details, see section 2.10, “Measures against Noise on the MW100 Data Acquisition Unit.” Measurement Synchronization Since measurement is sequential, measurement on each channel is not synchronized. 1-30 IM MW100-01E 1.7 1 Explanation of Functions Functions of the 4-CH, Medium-Speed Strain Input Module This module allows up to four inputs of measurement from strain gauges and strain gauge type sensors at a minimum measurement interval of 100 ms. -B12, -B35 -NDI Terminal cover NDIS terminal Input terminal (clamp terminal) Measurement Input Types Measurement Input Type Notation No measurement SKIP Strain STR Measuring Range Strain Input Measurement Range Type Notation Rated Measuring Range 2000 µSTR 2000 uSTR –2000.0 to 2000.0 µSTR 20000 µSTR 20000 uSTR –20000 to 20000 µSTR 200000 µSTR 200000 uSTR –200000 to 200000 µSTR Measurement Interval, Integration Time, and Filter You can select from the following measurement intervals for this module. 100 ms, 200 ms, 500 ms, 1 s, 2 s, 5 s, 10 s, 20 s, 30 s, 60 s The integral time and types of filters applied vary depending on the measurement interval. For details, see section 2.10, “Measures against Noise on the MW100 Data Acquisition Unit.” Measurement Synchronization Since measurement is sequential, measurement on each channel is not synchronized. IM MW100-01E 1-31 1.7 Functions of the 4-CH, Medium-Speed Strain Input Module Initial Balancing (Unbalance Adjustment) When configuring a bridge circuit with a strain gauge, due to the slight deviation in resistance of the strain gauge, the bridge circuit will not necessarily be balanced even if the strain of the circuit under test is zero, and the measured value may not be zero (the value in such cases is called the initial unbalanced value). Therefore, when taking measurements you must first balance the bridge and if the strain is zero, obtain a measured value of zero. This is called initial balancing (setting the initial unbalanced value to zero). Measured value Initial balance Initial unbalanced value 0 Strain Reset With the MW100, initial balancing is performed in the ±10000 µstrain range. Initial balance: The value when the command is executed is taken as the initial unbalanced value, and the measured value is set to zero. Reset: The value set during initial balancing is reset to zero. The initial unbalanced value is used for the measured value as-is. Note If the measuring range is changed, the initial balancing is reset. After a range change, you must redo initial balancing. Initial Balance Selection Items 1-32 Type Notation Description Reset RESET Resets the initial balance values. Execute EXECUTE Executes initial balancing. IM MW100-01E 1.7 Functions of the 4-CH, Medium-Speed Strain Input Module 1 Scaling Settings of the Strain Gauge Type Sensor The basic relational equation is as follows. 1 mV/V = 2000 µSTR (equation 1) The following gives two examples, one when the rated input and output are known, and one when the calibration coefficient is known. (Hereinafter, µ-strain will be expressed as µSTR). When the Rated Input and Output Are Known The following specific example provides an explanation. • Rated input 200N (set to Y) • Rated output 0.985 mV/V (set to K) In this case, if a 200 N load is introduced, an output of 0.985 mV/V results. From the relationship in equation 1, if 200 N is applied, it means that an output of: 0.985 mV/V = 0.985*2000 = 1970 µSTR is obtained. In other words, for each 1N, 1970 µSTR/200N = 9.85 µSTR/N of output results. Therefore, the scaling settings are entered as follows. When Measuring at 50 to 150 N Scale minimum: 50 (set to Smin) Scale maximum: 150 (units: N) (set to Smax) therefore, Span minimum: 50 × 9.85 µSTR/N = 492.5 µSTR Span maximum: 150 × 9.85 = 1477.5 µSTR would be appropriate settings. Hence, the measuring range is 2000 µSTR. Generally, the range is as follows. Using the symbols explained up to now, after setting the minimum and maximum scale, we can describe the minimum and maximum values of span as: Min. value of span = [(K(mV/V) × 2000) / Y(unit)] × Smin (µSTR) Max. value of span = [(K(mV/V) × 2000) / Y(unit)] × Smax (µSTR) IM MW100-01E 1-33 Explanation of Functions This is an explanation of scaling settings used to measure physical quantities such as load and length using a strain gauge type sensor. 1.7 Functions of the 4-CH, Medium-Speed Strain Input Module When the Calibration Coefficient is Known An example using a displacement gauge provides an explanation. • Rated input 20 mm • Calibration coefficient 0.003998 mm / (1 µV/V) Basically, if you can convert the calibration coefficient to the rated output mentioned in “When Rated Input and Rated Output Are Known,” the previous equation can be used. Using equation 1, 1 µV/V = 0.001 mV/V = 0.001 × 2000 µSTR = 2 µSTR therefore the rated output with this sensor when 20 mm is input would be 20 mm ÷ [0.003998 mm/2 µSTR] = 10005 µSTR in other words, for 1 mm, an output of: 10005 µSTR / 20 mm = 500.25 µSTR/mm can be obtained. Thereafter in the same manner, if you wish to measure with a scale of 2 mm to 15 mm, the settings are Scale minimum: 2 Scale maximum: 15 (Units: mm) therefore, Span minimum: 2 × 500.25 µSTR/mm = 1000.5 µSTR Span maximum: 15 × 500.25 µSTR = 7503.75 µSTR would be appropriate settings. Since the measurement range is the 20000 µSTR range, the resolution on the MW100 comes to 1 µSTR, so we round to the following: Span minimum: 1001 µSTR Span maximum: 7504 µSTR 1-34 IM MW100-01E 1.8 1 The “-D05” module is equipped with ten inputs for measurement of no-voltage contact, open collector, and 5 V logic inputs at a minimum measurement interval of 10 ms. The “-D24” module is equipped with ten inputs and measures 24-V logic inputs at a minimum measurement interval of 10 ms. Terminal cover Input terminal (clamp terminal) Measurement Input Types Measurement Input Type Notation No measurement SKIP Digital DI Measuring Range DI (MX115-D05) Measurement Range Type Notation LEVEL LEVEL Rated Measuring Range OFF at 1 V or less and ON at 3 V or more Contact input CONTACT 100 Ω or less, ON, 100 kΩ or less, OFF Measurement Range Type Notation Rated Measuring Range LEVEL LEVEL OFF at 6 V or less and ON at 16 V or more DI (MX115-D24) Measurement Interval Select 10 ms, 50 ms, 100 ms, 200 ms, 500 ms, 1 s, 2 s, 5 s, 10 s, 20 s, 30 s, or 60 s. Filters The module detects ON/OFF as shown below to prevent the effects of chattering. If the measurement interval is set a value greater than four times the chattering period, measurement is possible by avoiding chattering effects. • Measurement interval of 5 s or less: Use the wider of the ON/OFF width of the detection period (approximately 75% to 90% of the measurement interval) Measurement Measurement Measurement interval interval interval Detection interval Detection interval Detection interval Detection interval = Measurement interval × 75% to 90% Chattering • Measurement interval of 5 s or more: Use the wider of the ON/OFF width of approximately 4.5 s IM MW100-01E 1-35 Explanation of Functions Functions of the 10-CH, High-Speed Digital Input Module 1.9 Functions of the 8-CH, Medium-Speed Analog Output Module The module has eight outputs for voltage or current. An external power source (24 V) is required for current output. For voltage output only, an external power source is not required. Terminal cover Input terminal (clamp terminal) Output Types Output Type Notation No output SKIP Analog output AO Output Method Notation Actions Transmission Output TRANS Outputs a voltage or current according to the measured results of the input channel specified on the same unit. You can also produce pattern output using the broken line input function. Command Output COM Outputs specified values based on values sent from the PC. Output Range Notation Output range Voltage 10 V –10.000 V to 10.000 V Current 20 mA 0.000 mA to 20.000 mA Output Method Output Range Output Update Interval The output is updated at 100-ms (minimum) intervals. It is not synchronized to the measurement interval. Operation upon Startup and Errors See section 1.11, “Operation of the Eight-Channel Medium-Speed Analog Output Module and the Eight-Channel Medium Speed PWM Output Module.” Output Operation during Calibration 1-36 Calibration Condition Output Operation Channels being calibrated Command output (output of calibration value) Non-calibrated channels Holds the output value (holds the value last output during steady operation (see section 1.11)) IM MW100-01E 1 This module has eight outputs for pulse wave duty. A certain duty pulse waveform is output according to the specified pulse interval. A pulse interval can be set for each channel. Terminal cover Input terminal (clamp terminal) Output Types Output Type Notation No output SKIP PWM Output PWM Output Method Notation Actions Transmit TRANS Outputs a duty pulse wave according to the measured or computed results of the input channel specified on the same unit. You can also produce pattern output using the broken line input function. Command output COM Outputs specified data based on the values sent from the PC. Output Method Output Waveform Output width External power supply voltage Duty= Output width ×100 [%] Pulse interval Pulse interval Pulse Interval 1 ms to 300 s (can be set channel by channel) Range Notation Setting Range 1 ms interval setting range 1 ms 1 ms to 30.000 s (can be set in units of 1 ms) 10 ms interval setting range 10 ms * 10 ms to 300.00 s (can be set in units of 10 ms) The pulse interval can be set by determining the pulse interval coefficient. The pulse interval coefficient is set from 1 to 30000. Pulse interval = range × pulse interval coefficient Output Update Interval The output is updated at 100-ms (minimum) intervals. It is not synchronized to the measurement interval. Output Range 0.000% to 100.000% Operation upon Startup and Error Occurrence See section 1.11, “Operation of the 8-CH Medium-Speed Analog Output Module and the 8-CH Medium Speed PWM Output Module.” IM MW100-01E 1-37 Explanation of Functions 1.10 Functions of the 8-CH, Medium-Speed PWM Output Module 1.11 Operation of the 8-CH Medium-Speed Analog Output Module and the 8-CH Medium Speed PWM Output Module The following describes the output operation of the analog and PWM output modules. Output upon Startup and Error Occurrence Output Selection Notation Actions Hold previous value LAST Holds the last value output. Output preset value PRESET Outputs an arbitrarily specified output value. Output Format In the output format below, current (analog output module) or pulse wave duty (PWM output module) is output. • Transmission output: Analog or PWM output occurs according to the measured or computed values from the specified channel of the same unit. All input modules can be specified (but not output modules). • Command output: When commands are received from the PC, the instrument outputs analog or PWM signals accordingly. Once the power is turned ON and the unit is able to perform communication, command output becomes possible. For transmission output within a unit, after measurement or computation starts, the output values are updated upon transmission output. Output on Disabled Channels Type of Disabled Channel Output Channels changed from enabled to disabled through setting changes Holds the last output value when channel was active Channels invalid upon startup Output according to settings upon startup The timing at which changes applied to the output module take effect is according to the events below. (Ex. When changing settings from transmission output within a unit to command output, the last value of transmission output within a unit is held until the command output request is generated.) Output Operation per Settings and Setting Changes Condition upon Power ON and Output Operation Condition When Power Is Turned ON Output Operation When Output Settings are Disabled Operation when power is turned ON With transmission output within a unit, and reference channels disabled Before meas. start Transmission output within a unit Before meas start Operation when power is turned ON Start measurement Output upon error occurrences Operation when power is turned ON Start measurement Transmission output Command output 1-38 No output request Operation when power is turned ON Output requested Command output IM MW100-01E 1.11 Operation of the 8-CH Medium-Speed Analog Output Module and the 8-CH Medium Speed PWM Output Module 1 Output Operation through Setting Changes (Common) Output Operation Setting changes for operation Prev. value held → preset value Outputs the preset value the on startup next time the power is turned ON Preset value → hold prev. value The last output value from the previous operation is held for the next time the power is turned ON (outputs the output value active when the power was last turned OFF during the previous session) Setting changes for operation Prev. value held → preset value Outputs the preset value the upon error occurrence next time an error occurs Preset value → hold prev. value Holds the last output value active before the error occurs for the next time an error occurs. Preset value setting changes* No changes (as above) Change setting of output ch from Enabled → Disabled Holds the output value (last output value) * Changes are also applied to inactive channels. Output Operation through Setting Changes (Individually by Output Setting) Output Setting Setting Changes (Contents) Output Operation Transmission output Within units Output value held (until the next output event) Range setting changes AO: V ⇔ mA PWM: 1 ms ⇔10 ms or interval Operation Transmission within units → setting changes command output Span setting changes Command output Range setting changes AO: V ⇔ mA PWM: 1 ms ⇔10 ms or interval Output value held (until the next output event) Operation Command output → setting changes transmission within a unit When the range settings of a PWM output module are changed, the output value is not held. IM MW100-01E 1-39 Explanation of Functions Setting Changes (Contents) 1.11 Operation of the 8-CH Medium-Speed Analog Output Module and the 8-CH Medium Speed PWM Output Module Steady Output Operation Output Operation When Connected for Communication Communication Connection Status Output Operation Normal connection (initial connection after power ON) Operation when power is turned ON Communications opened successfully Holds the output value (last output value) (when communications were cut and restored for the 2nd or more time) Communication disconnected successfully Holds the output value (last output value) Output Operation during Measurement and When Performing Transmission Output “Transmission output execution ON” in the table is when the transmission output control is ON. “Transmission output execution OFF” in the table is when the transmission output control is OFF. Output Setup Status Output Operation Transmission output within unit Meas. stop → Measurement start Transmission output start or output value hold (depending on the transmission output execution on/off status) on: transmission output starts off: output value held Measuring → Measurement stop Holds the output value (last output value) Measuring Transmission output execution off → on Transmission start Transmission output execution on → off Holds output value (last output value) Command output Meas. stop → Measurement start No effect Measuring → Measurement stop No effect Measuring Transmission output execution off → on No effect Transmission output execution on → off No effect Output Operation during an Abnormality and after Recovery from the Abnormality Output Operation during an Abnormality (by Module) Abnormal Module Display Status Main module Output modules b * Dip switches F0 ROM error F1 SRAM error EEPROM error F3 Battery error F4 Ethernet error U0 Range information error Operation when power is turned ON or Calibration value error when output value uncertain U2 U3 Unusable modules U0 Range information error Operation when errors occur (transmission Calibration value error between units output only, since the transmission source input channel is illegal) Unusable modules U4 1-40 Error during calibration Internal communication error occurred, resulting in an error recovery event. If the error recovery time is 10 s or more, output is performed per the operation for error occurrence, and then output is Error in writing the executed per the operation for power ON. calibration value. U4 U1 * Operation when power is turned ON F2 U1 Input modules System errors bF Output Operation Operation when power is turned ON or when output value uncertain The number corresponding to the error is shown in the . IM MW100-01E 1.11 Operation of the 8-CH Medium-Speed Analog Output Module and the 8-CH Medium Speed PWM Output Module 1 Output Operation during an Abnormality (by Output Setting) Abnormal Status Output Operation Transmission Referenced input channels are +Over Outputs a value +5% of the specified output within units span of the output channel* Referenced input channels are –Over Outputs a value –5% of the specified span of the output channel Referenced input channel is illegal (input module removed) Operation upon errors Referenced input channel is set to Skip Referenced input channel is Invalid (math error in Differential computation) Internal communication error CPU abnormality Command output Internal communication error CPU abnormality Output value held (occurs immediately after an internal communication error, but there is a recovery action**) Operation upon errors Output value held (occurs upon an internal communication error, but there is a recovery action**) Operation upon errors * PWM output may not always reach +5%. ** See “Output Operation after Recovery from an Abnormality.” Output Operation after Recovery from an Abnormality (by Output Setting) Output Setting Abnormality Recovery Output Operation Transmission Referenced input module recovers Operation upon errors → transmission output within units (removed input modules are inserted) output Referenced input channel changed from Skip to Measurement range Referenced input channel is restored from Invalid (math error in Differential computation) to normal Recover after internal communication If the error recovery time is 10 s or error more; operation upon error → operation upon power ON→ Transmission output If the error recovery time is within 10 s; operation upon startup → transmission output CPU abnormality (does not recover) Operation upon errors Command output Recover after internal communication If the error recovery time is 10 s or error more; operation upon error → operation upon power ON→ command output* If the error recovery time is within 10 s; operation upon startup → command output* CPU abnormality (does not recover) * IM MW100-01E Operation upon errors Executed by command output from the PC after recovering from the error. 1-41 Explanation of Functions Output Setting 1.12 Functions of the 10-CH, Medium-Speed Digital Output Module This module has ten contact signal outputs that are based on alarm output settings and output settings from the PC. Terminal cover Output terminal (clamp terminal) Output Types The following types (output factors) are available. Type Notation Description Alarm ALARM Measurement and computation channels Command COM Command DO operation Media MEDIA When the remaining space on the CF card reaches the specified time Fail FAIL When an abnormality occurs on the CPU of the MW100 main module Error ERROR When an error is detected on the MW100 Output Update Interval The output is updated at 100-ms intervals. It is not synchronized to the measurement interval. Relay Excitation State / Hold Operation You can select whether or not to energize the output relays upon output. The excitation status selection differs depending on the output type. Excitation Status Notation Description Available Output Types Energize ENERG ALARM/COM/ERROR/MEDIA De-energize DE_EN Energize when relay output is ON Do not energize when relay output is ON ALARM/COM/FAIL Also, when a condition in which alarm output must be cleared arises, you can select whether to turn output relays OFF (Non-hold), or leave them ON until an output clear command (alarm ACK) appears (Hold). Hold operation Notation Description Hold ON Maintains relay output even after relay output is cancelled. Non-Hold OFF Does not maintain relay output when relay output is cancelled (normal operation). • When set to non-hold • When set to hold Output cause occurrencd Output cause occurrencd ON Relay output OFF ON Relay output OFF Alarm ACK Alarm ACK 100ms 1-42 IM MW100-01E 1.12 Functions of the 10-CH, Medium-Speed Digital Output Module 1 Relay Operation Operation Description AND Output ON when all alarms assigned to each alarm output relay activate. OR Output ON when at least one alarm assigned to each alarm output relay activates. Reflash Function The relay operates after the first alarm. If a second alarm activates, the relay restarts after briefly stopping operation. • The non-operation period is 200 ms. • Even if a new alarm occurs during the non-operation, the non-operation time is not extended. • The number of output relays that can be specified for the reflash function is unlimited. • When selecting relay output other than alarm output relays, the reflash function specification is disabled. • You can specify the reflash function when OR is selected for the AND/OR function and Non-Hold is selected for the Hold/Non-Hold function. Alarm1 status Alarm2 status Alarm3 status Reflash function relay status 200ms IM MW100-01E 200ms 1-43 Explanation of Functions The following types of relay operation are available. 1.13 MATH Function (/M1 Option) Overview of the MATH Function You can enter expressions using constants, operators, and functions described below. The computed results can be displayed and recorded (saved). MATH allows you to determine the average/maximum/minimum of a specified channel on a specified date/ time, or output events (start/stop record, reset time, etc.) under specified conditions. Number of MATH Channels Computation can be performed on sixty channels, and 240 channels can be used for communication input. The maximum number of characters that can be used in an expression is 120 for MATH channels and 8 for communication input channels. MATH Types The following types of computations can be performed. • Basic math • Logical operations • Relational operations • Arithmetic functions • TLOG functions • CLOG functions • Conditional expressions Basic Math Type Operator Example Explanation Addition + 001+002 Finds the sum of measured values on channels 001 and 002 Subtraction - 002-001 Finds the difference in the measured values of channels 001 and 002. Multiplication ∗ 003∗K01 Multiplies the measured data on channel 003 by constant K01 Division / 004/K02 Divides the measured data on channel 004 by constant K02 Exponentiation ∗∗ 005∗∗006 Raises the measured data of channel 005 to the power of the measured data of channel 006. Logical Operations Type Operator Example Logical product AND 001AND002 When channel 001 = 0 and channel 002 = 0, 0 When channel 001 ≠ 0 and channel 002 = 0, 0 When channel 001 = 0 and channel 002 ≠ 0, 0 When channels 001 and 002 ≠ 0, 1 Logical sum OR 001OR002 Exclusive OR XOR 001XOR002 When channel 001 = 0 and channel 002 = 0, 0 When channel 001 ≠ 0 and channel 002 = 0, 1 When channel 001 = 0 and channel 002 ≠ 0, 1 When channels 001 and 002 ≠ 0, 0 Logical negation NOT 1-44 NOT001 Explanation When channel 001 = 0 and channel 002 = 0, 0 When channel 001 ≠ 0 and channel 002 = 0, 1 When channel 001 = 0 and channel 002 ≠ 0, 1 When channels 001 and 002 ≠ 0, 1 When channel 001 = 0, 1 When channel 001 ≠ 0, 0 IM MW100-01E 1.13 MATH Function (/M1 Option) 1 Relational Operations Operators Example Explanation Equal .EQ. 001.EQ.002 When channel 001 = channel 002, 1 When channel 001 ≠ channel 002, 0 Not equal .NE. 002.NE.001 When channel 001 ≠ channel 002, 1 When channel 001 = channel 002, 0 Greater than .GT. 003.GT.K01 When channel 003 > constant K01, 1 When channel 003 ≤ constant K01, 0 Less than .LT. 004.LT.K10 When channel 004 < constant K10, 1 When channel 004 ≥ constant K10, 0 Greater than or equal to .GE. 003.GE.K01 When channel 003 ≥ constant K01, 1 When channel 003 < constant K01, 0 Less than or equal to .LE. 004.LE.K10 When channel 004 ≤ constant K10, 1 When channel 004 > constant K10, 0 Explanation of Functions Type Arithmetic Functions Type Operators Example Absolute value ABS() Square root SQR() Explanation ABS(001) Finds abs val of measured values on ch 001. SQR(002) Finds sqr rt of measured values on ch 002. Common logarithm LOG() LOG(003) Finds common log of measured data on ch 003. Exponent EXP(005) Finds ex where x is the measured data on ch 005. EXP() TLOG Functions* The TLOG computation computes the maximum, minimum, maximum-minimum, integral, average, and pulse integral of the specified channel. One function can be used per expression. Type Operators Maximum value TLOG.MAX() TLOG.MAX(001) Example Finds max value of measured values on ch 001. Explanation Minimum value TLOG.MIN() TLOG.MIN(002) Finds min value of measured values on ch 002. Maximum value TLOG.P-P() to minimum value TLOG.P-P(003) Finds P-P of the measured data on ch 003. Integral value TLOG.SUM() TLOG.SUM(004) Finds integral val of measured values on ch 004. Mean value TLOG.AVE() TLOG.AVE(005) Finds the avg value of measured values on ch 005. Pulse Integration** TLOG.PSUM() TLOG.PSUM(011) Finds the pulse integral of measured values on ch 011. * The channels that can be specified in TLOG functions are the measurement and MATH channels excluding TLOG.PSUM. ** The channels that can be specified for a TLOG.PSUM computation are the digital input channels. CLOG Functions* The CLOG computation computes the maximum, minimum, maximum-minimum, integral, and average values of the specified channel group. One function can be used per expression. Type Operators Maximum value CLOG.MAX() CLOG.MAX(001-010) Finds max of measured data on ch 001 to 010. Minimum value CLOG.MIN() CLOG.MIN(001.003) Finds min of measured data on ch 001 and 003. Maximum value CLOG.P-P() CLOG.P-P(002-009) to minimum value Finds P-P of the measured data on ch 002 to 009. Mean. value * IM MW100-01E Example Explanation CLOG.AVE() CLOG.AVE(011-020) Finds avg of measured data on ch 011 to 020. The channels that can be specified in CLOG functions are the measurement and MATH channels. (The number of channels which can be specified is to ten channels.) 1-45 1.13 MATH Function (/M1 Option) Conditional Expressions Type Operators Explanation Conditional expressions [EXPR1?EXPR2:EXPR3] Execute expression 2 when expression 1 is true, or expression 3 when it is false Other Type Operator Explanation Parentheses () Specifies the order of operations Order of Operations in Expressions Expressions are hierarchical according to the table below. The operations are listed in the table from top to bottom in order of precedence. These precedences must be taken into account when writing expressions. Type Operators (High precedence) Arithmetic, TLOG, and CLOG functions ABS(), SQR(), LOG(), EXP(), TLOG.MAX(), TLOG.MIN(), TLOG.P-P(), TLOG.SUM(), TLOG.AVE(), TLOG.PSUM() CLOG.MAX(), CLOG.MIN(), CLOG.P-P(), CLOG.AVE() Conditional expressions [EXPR1?EXPR2:EXPR3] Exponentiation ∗∗ Logical negation NOT Multiplication and division ∗, / Addition and subtraction +, – Relational operation .GT., .LT., .GE., .LE. Equivalence .EQ., .NE. Logical product AND Logical sum, exclusive OR OR, XOR (Low precedence) MATH Reference Channels The following channels can be referenced for data used in computations. Type Channel number Description Measurement Channel 001 to 060 Data from measurement channels Computation channels A001 to A300 Data from MATH channels (Channels A061 to A300 are used for communication input only.) Communication input channels C001 to C300 Numerical values in expressions substituted with communication input Flag input channels F01 to F60 Set in expressions as the constant 1 or 0 Calculation constant K01 to K60 Represented as a fixed constant in expressions Program channels P01 to P03 Inputs broken line data into expressions Flag Input Channels Can be set in expressions as the constant 1 or 0. Normally 0, but turns to 1 upon occurrence of certain events of the Event/Action function. For example, given the expression: NOTF01 ∗ TLOG.SUM(001) if the Event action’s Edge action is set to FLAG:F01, when the event occurs, F01 becomes 1 and NOTF01 becomes 0, therefore the total of channel 001 is 0. 1-46 IM MW100-01E 1.13 MATH Function (/M1 Option) Y : Output (30.800) (40.800) (10.500) (20.500) (50.0) (0.0) X : Elapsed time(s) • Entry Example Input of broken line data in the example is as follows. (0.0), (10.500), (20.500), (30.800), (40.800), (50.0), (-1.0) If there are fewer than thirty-two setting points, a (-1.0) is required to show the end of the points. • Operation of program channels for the computation operation Computation Operation Program channel operation Computation start Starts broken line computation from the held elapsed time Computation stop Holds the broken line computed value Computation clear 0-clear the elapsed time and start the broken line computation from the beginning Computation reset During self-computation, 0-clear the elapsed time and start the broken line computation • Operation after Elapsed Time Mode Notation Program channel operation Single SINGLE Holds the broken line computed value of the last point Repeat REPEAT Returns to the start point then repeats broken line Computation Operation Starting and Stopping Computation Execution of computation starts and stops according to user commands (Start/Stop key, Event/Action function, or monitor screen settings). Computed Values Clear Clears all MATH channel data (including MATH alarms) per the Event/Action function, communication commands, or requests from the monitor setting screen. Computed Value Reset Clears all MATH channel data (including MATH alarms) per the Event/Action function, communication commands, or requests from the monitor setting screen. If this request occurs during a computation, it is executed on the next computation interval and computation starts. Also, if the request occurs while the computation operation is stopped, it is cleared when computation starts. IM MW100-01E 1-47 1 Explanation of Functions Program Channels Up to thirty-two inputs of broken line data can be included in expressions. Multiple points can be set for the time from the start point and the output value at that point. Specified points are linked with a straight line, the value of Y at the elapsed time X is output. There is SINGLE, in which one cycle is executed, and REPEAT in which execution repeats. By specifying a MATH channel to which broken line input is assigned to the reference channel of an analog output channel, you can output arbitrary patterns. • Example 1.13 MATH Function (/M1 Option) Group Reset Clears all MATH channel data (including MATH alarms) per the Event/Action function or requests from communication commands. If this request occurs during a computation, it is executed on the next computation interval and computation starts. Also, if the request occurs while computation is stopped, it is cleared when computation starts. Math Groups Specifies multiple channels from among Math channels 1 through 60. Up to seven groups can be set. Math groups are used with group reset. Math Interval Specify one from among the measurement group numbers, and perform computation. Select a group having a measurement interval of 100 ms or higher. The following conditions apply to the specified measurement group. • In the selected measurement group, all measurement channels must include an input module with no SKIP channels. • If there is no input module, or if all channels of the input module are SKIP, you can specify measurement group arbitrarily. • When multiple measurement groups specify the same measurement interval, specify the measurement group with the largest number. Math Span The upper and lower limits for the display of the monitor screen and other items. The specifiable range of numbers is as follows according to the decimal place. If the computed results fall outside of the allowable numerical value setting range, they are displayed on screen as plus over or minus over data. Decimal Place Computation span setting range 0 –9999999 to 99999999 1 –999999.9 to 9999999.9 2 –99999.99 to 999999.99 3 –9999.999 to 99999.999 4 –999.9999 to 9999.9999 Handling Units in Computations In computations, computed values (measured and computed data) are handled as numbers without units. Also, they are unrelated to the math channel units. Example: Expression = 001 + 002 + K01 001 (measurement ch 1) = 20 mV, 002 (measurement ch 2) = 30 V, K01 (math constant) = 10 Given the above, the computed result is 60. TLOG.PSUM Settings When performing pulse integration at an interval of 10 ms or 50 ms, an input module of 100 ms interval or higher is required in addition to a module enabled for DI input for TLOG.PSUM computation. Also, set the MATH interval to 100 ms or higher. Alarm Level You can implement alarm actions based on the computed result. Four levels can be set per channel. Available alarm types are upper limit and lower limit. There is no hysteresis function. 1-48 IM MW100-01E 1.13 MATH Function (/M1 Option) 1 Math Error Data Processing Processing upon Math Error When the computation results in an error, the following choices are available. Choice for the Computed Result Notation Set to plus over +OVER Set to minus over –OVER Special Math Processing You can select from the following special math processes for the MATH operation when the reference channel results in an error. Reference channel Choice for the Computed Result Notation Channel referenced in Set to computation error ERROR expression is error data Ignored and continue computation SKIP Channel referenced in Set to computation error ERROR expression is overflow data Ignored and continue computation SKIP Replace data with upper or lower limit and continue computation LIMIT TLOG.MAX, TLOG.MIN, Plus over +OVER Channel referenced in the TLOG.P-P expression is overflow data Minus over –OVER CLOG.MAX, CLOG.MIN, Channel referenced in the CLOG.P-P expression is overflow data Calculation Error ERROR The upper and lower limits are as follows: • Measurement channels: Range upper and lower limit • Linear-scaled measurement channels: Upper and lower limit of scaling • Computation channels: Upper/lower limit of span Overflow Processing upon TLOG.PSUM Computation Overflow You can select an integral value process for when the TLOG.PSUM integral value overflows from the following items. Choice for the Computed Result Notation When 99999999 is exceeded, computation stops as an overflow OVER When 99999999 is exceeded, the next count is 0, and computation continues. ROTATE TLOG.SUM Computation Integration Units The units of integration are as follows: IIntegration Units Notation Explanation No time scale OFF Σ (data)* Every second SEC Σ (data)/(Number of times of computing per second.) Every minute MIN Σ (data)/(Number of times of computing per minute.) Every hour HOUR Σ (data)/(Number of times of computing per hour.) * IM MW100-01E Integration of data every MATH integral number of times 1-49 Explanation of Functions Processing of measurement channels referenced in expressions and data referenced in math channels is as follows. Note that error data, plus over data, and minus over data can be processed using special MATH items. Chapter 2 Installation and Wiring 2.1 Handling Precautions This section describes the precautions to be taken when using the MW100. Please read before using this product. IM MW100-01E 2-1 Installation and Wiring • If you are using this instrument for the first time, make sure to thoroughly read the safety precautions given on pages ii and iii. • Do not remove the case. For internal inspection or adjustment, contact your nearest YOKOGAWA dealer. • Do not place objects on top of the instrument. Never place other instruments or objects containing water on top of the instrument. Doing so can lead to malfunction. • Take proper care when carrying the instrument. First, turn off the DUT and the MW100 and remove all cables including measurement wires and communication cables. Then, remove the power cord from the outlet. • To prevent internal overheating, do not obstruct the vent holes of the modules. • This instrument uses many plastic parts. When cleaning, wipe using a dry soft cloth. Do not use volatile chemicals since this might cause discoloring and deformation. Doing so can cause discoloring or deformation. • Do not bring charged objects near the signal terminals. Doing so can lead to malfunction. • Do not pour volatile agents on the MW100 or leave it in contact with rubber or PVC products for an extended time. Doing so can lead to malfunction. • Do not apply shock to the instrument. • When not in use, make sure to turn OFF the power. • If there are any symptoms of trouble such as smoke, strange orders, or strange sounds coming from the instrument, immediately turn OFF the power and shut off the power supply. Contact your dealer immediately. • Handle the power cord correctly. Nothing should be placed on top of the power cord. The power cord should also be kept away from any heat sources. When unplugging the power cord from the outlet, never pull by the cord itself. Always hold and pull by the plug. If the cord is damaged, contact your dealer for replacement. When ordering, see page vi for the power cord part number. 2 2.2 Installation Installation Location Install the instrument indoors in the following locations. • In temperatures of –20 to 60°C If the ambient temperature is –20 to 40°C, place the instrument in a location where the humidity is 20 to 80% RH. For 40 to 50°C, the humidity should be 10 to 50%. For 50 to 60°C, the humidity should be 5 to 30%. However, no condensation should be present. Also note that the temperature range of certain modules is –20 to 50°C. Note Condensation may occur if the instrument is moved to another place where the ambient temperature is higher, or if the temperature changes rapidly. Measurement errors can occur when using thermocouple input. In this case, let the instrument adjust to the new environment for at least one hour before using the instrument. • Locations where the operating altitude is 2,000 m or less • Well-ventilated locations Install the instrument in a well-ventilated location to prevent the temperature inside the instrument from rising. • Location where mechanical vibration is small Select a location with small mechanical vibration for installation. • Horizontal location Install the instrument on a flat, even surface. Do not install the instrument in the following places. • Dangerous locations where flammable liquids, vapors, or dust is present • In direct sunlight or near heat appliances Select a location with the smallest fluctuation from room temperature (23°C) as possible. Placing the instrument in direct sunlight or near heat appliances can cause adverse effects. • Where an excessive amount of soot, steam, humidity, dust, or corrosive gas is present Soot, steam, humidity, dust, and corrosive gas can cause adverse effects on the instrument. Avoid installing the instrument in an environment with a high level of such substances. • Near magnetic field sources Install the instrument in a location where the magnetic field is 400 A/m or less. Avoid bringing instruments that produce magnetic fields or magnets near this instrument. Using the instrument near a strong magnetic field source can cause measurement errors. Installation Procedures CAUTION When attaching the instrument to DIN rails, use metal plates at least 2 mm thick in three places to secure the unit and prevent it from falling. The MW100 Data Acquisition Unit can be used on the desktop, placed on a floor, rack mounted, or panel mounted. In all cases, be sure to install the instrument in a vertical position. 2-2 IM MW100-01E 2.2 Installation Placing on a Desktop or on the Floor Since each module has feet you can attach the necessary modules to the base plate allowing the unit to be placed vertically. For the procedure for attaching the modules, see the next page. 2 Installation and Wiring Feet Functional ground terminal screw Attaching to DIN Rails By attaching DIN rail mounting brackets to the base plate as in the figure below, you can rack-mount or panel-mount the MW100 Data Acquisition Unit. • Attachment of the DIN rail mount bracket to the base plate • Attachment of the base plate to the DIN rail Base plate Base plate Latch lever (press to release from the DIN rail) Screw holes Attachment screws (M3) DIN rail mount bracket DIN rail mount bracket DIN rail mount bracket * To prevent slacks in the DIN rail, fix at least three locations of the DIN rail. • Dimensions when mounted on a DIN rail 455 (1 main module, for connecting six input/output modules) 105 DIN rail* Unit: mm DIN rail 158.6 131 (31) DATA ACQUISITION UNIT 151.1 163 IM MW100-01E 2-3 2.3 Attaching the Modules WARNING To prevent electric shock and instrument breakdown, do not connect the power supply to the main module when attaching modules. Preparing the Base Plate The accessory brackets are attached in order to attach the MW100 main module to the base plate. Remove the base block blacket Attach the bracket that came with the MW100 Attachment Procedure 1. Check that the power supply is not connected to the main module. 2. Align the connector on the rear panel of the module to the connector at the desired position of the base plate and insert the connector. When the connectors are correctly connected, the guide pin on the rear panel of the module is inserted into the guide hole on the base plate. In addition, the module is secured to the base plate with the latch lever locking in place at the bottom section of the base plate. 3. Fasten with two screws (M3) at the top of the main module, and one screw at the top of the input/output modules. The main module can only be attached to the right side of the base plate. To remove the module, loosen the attachment screw, pull down on the latch lever on the rear panel of the module, and pull the module straight from the base plate. Base plate connector cover* (accessory sold separately) * Can be attached by hooking the top section of the cover to the top edge of the base plate and pressing down on the lower section of the cover. Base plate Module connector Guide holes Screw holes Guide pins Main module Module attachment screw Latch lever (pull up to remove the module from the base plate) Base plate Input/Output module 2-4 IM MW100-01E 2.3 Attaching the Modules Attachment Positions and Channel Numbers Channel numbers are recognized as follows: • Browser monitor and commands Channel numbers within units. Example: CH001 • Data Viewer software Unit number + Channel number within units. Example: CH01001 2 Installation and Wiring Representation of channel numbers: Channel numbers in a unit (001-060) Unit number (00-89) 5 4 3 2 1 0 Slot number MW100 041-050 021-030 001-010 051-060 031-040 011-020 IM MW100-01E Channel number in the unit** ** The last one digit on a 4-channel module is 1 to 4. The last one digit on a 6-channel module is 1 to 6. The last one digit on a 8-channel module is 1 to 8. 2-5 2.4 Connecting Signal Wires Terminal Arrangement Markings on the Terminal Cover Characters indicating the terminal function and a terminal symbol indicating the type of signal to be input/output to each terminal are written on the back of the terminal cover of each I/O module. For information on wiring of corresponding terminal signals, see the wiring procedures in this section. The 4-CH Medium-Speed Strain Module (-NDI) does not have a terminal cover. 4-CH, High-Speed Universal Input Module Terminal cover 100Vpk MAX TO 250V MAX CH TO CH 600V MAX TO 6-CH, Medium-Speed 4-wire RTD Resistance Input Module 4-CH, Medium-Speed Strain Input Module (-B12, -B35) 100Vpk MAX TO 120V MAX CH TO CH 600V MAX TO Channel number within module Terminal symbol 10-CH, High-Speed Digital Input Module (-D05, -D24) -D05 10-CH, Medium-Speed Universal Input Module 10Vpk MAX 250V 8-CH, Medium-Speed Analog Output Module 8-CH, Medium-Speed PWM Output Module 10-CH, Medium-Speed Digital Output Module 250V MAX NO TO C 250V MAX CH TO CH 250V MAX TO TO MAX TO Attaching and Removing the Terminal Block The I/O terminals can be removed as shown in the figure below. Also, when the terminal cover is flipped up, you can remove it by forcing it back. 4-CH, High-Speed Universal Input Module 4-CH, Medium-Speed Strain Input Module (-B12, -B35) Pull-out handle The terminal block can be attached and detached. 2-6 The terminal plate can be attached and detached. Attachment screw (Loosen before removing the terminal plate.) IM MW100-01E 2.4 Connecting Signal Wires 10-CH, Medium-Speed Universal Input Module/ 6-CH, Medium-Speed 4-wire RTD Resistance Input Module/ 10-CH, High-Speed Digital Input Module (-D05, -D24) 8-CH, Medium-Speed Analog Output Module/ 8-CH, PWM Output Module/ 10-CH, Medium-Speed Digital Output Module 2 Installation and Wiring Pull-out handle The terminal plate can be attached and detached. Attachment screw (Loosen before removing the terminal plate.) The terminal block can be attached and detached (fixed with screws). Attaching the Screw Terminal Plate A screw terminal plate (model 772080, sold separately) can be attached to the 10-CH Medium Speed Universal Input Module and the 10-CH High Speed Digital Input Module. The screw terminal plate is attached and removed in the same manner as the screw terminal block. Note that the terminal arrangement is different than that of the clamp terminal plate. The proper arrangement is shown on the back of the terminal covers, so be sure to replace the cover along with the terminal plate. For details, see “Handling the MX100/MW100 10-CH Screw Terminal Plate” in IM MX100-77E. Screw terminal plate Attachment screw Screw Terminal Block The 10-CH, Medium-Speed Universal Input modules and 10-CH, High-Speed Digital Input modules allow you to remove the terminal plate and connect a 10-channel screw terminal block (accessory sold separately, M4 screws) that can be attached to a DIN rail (see the figure below). 10-CH screw terminal block (772061) b B A CH 1 CH 2 CH 3 10-CH screw terminal block (772061) Attachment screw for connector cover Loosen the attachment screw for the connector cover and open the connector cover. 10-CH, Medium-Speed Universal Input Module/ 10-CH, High-Speed Digital Input Module Attachment to a DIN Rail CH 4 CH 5 Attachment screw CH 6 CH 7 Connector cover CH 8 CH 9 CH 10 +/A b Terminal cover -/B IM MW100-01E Connection cable between the input module and screw terminal block (772062-0XXX*) * Length: 050 or 100 cm. Attachment screw DIN rail Latch lever (Pull down to detach.) 2-7 2.4 Connecting Signal Wires General Precautions When Wiring the Input/Output Signal Wires WARNING • To prevent the possibility of electric shock when wiring, confirm that the power supply source and signal source are turned OFF. After making the connections, secure the terminal cover and do not touch the terminals with your hands. • For signal wires on which voltage exceeding 30 VAC / 60 VDC is applied relative to the ground potential or between signals, use reinforced (double) insulation wires. For all other signal wires, use basic insulation wires. For the withstand voltage of insulation wires, see the table below. Applied Voltage (Vrms or VDC) Basic Insulation Double (reinforced) insulation 30(60VDC) to 100 620 Vrms 1000 Vrms 101 to 150 840 Vrms 1400 Vrms 151 to 300 1390 Vrms 2300 Vrms 301 to 600 2210 Vrms 3700 Vrms • To avoid electric shock when removing the terminal plate or block and wiring the terminals, attach the terminal block or plate to the input output module before inputting or outputting signals. Electric shock or fire can result if signals are applied to the terminals if the terminal block is removed from the input/output modules. • When wiring to the screw terminal plate or screw terminal block, use round, insulation coated crimp-on lugs on the terminals (for 4-mm screws on the screw terminal block, or 3-mm screws on the screw terminal plate) that do not come out when loose. • To prevent fire, use signal wires of the following temperature ratings. Module Type Temp. Rating Screw terminal 75°C Analog output module, PWM output module signal wires 85°C Universal input module, digital input module, digital output module, 4-wire RTD resistance input/output module, strain input module 80°C CAUTION • If a large pulling force is applied to the input/output signal wires connected to the MW100, the terminal or signal wire may break. To prevent this from happening, secure all the wiring cables to the installation panel. • Wiring of the Strain Input Module (-NDI) When connecting a bridge head, in order that the empty weight of the cable does not exceed 5 kg, ensure that the cable does not hang down more than 1.5 m (the distance to the floor). If the cable hangs longer than 1.5 m, secure the cable to the installation panel or some other location. • Do not apply a voltage exceeding the value indicated below to the input terminals of the universal input modules. Doing so can damage the modules. • Maximum input voltage Voltage range less than or equal to 1 VDC, TC, RTD, and DI: ±10 VDC Other voltage ranges: ±120 VDC • Maximum common mode voltage: 600 VACrms (50 / 60 Hz) 2-8 IM MW100-01E 2.4 Connecting Signal Wires IM MW100-01E Consider the points indicated below to prevent noise from entering the measurement circuit. For information about measures against noise, see section 2.10, “Measures against Noise on the MW100 Data Acquisition Unit.” • Keep the measurement circuit away from the power supply cable (power supply circuit) and ground circuit. • It is desirable that the object under measurement is not a noise source. However, if this is not avoidable, insulate the object under measurement and the measurement circuit. In addition, ground the object under measurement. • Shielded wires are effective against noise caused by electrostatic induction. As necessary, connect the shield to the ground terminal of the MW100 (make sure this does not lead to grounding at two points). • Twisting the measurement circuit wires at short intervals is relatively effective against noise caused by electromagnetic induction. • The protective earth ground must be connected to low ground resistance (100 Ω or less). When using the reference junction compensation of the MW100 through thermocouple input, take measures to stabilize the temperature at the terminal section. • Always close and secure the terminal cover. • Do not use thick wires with high heat radiation effect (cross-sectional area of 0.5 mm2 or smaller recommended). • Keep the ambient temperature consistent. Large temperature fluctuation occurs such as when a fan nearby is turned ON/OFF. Connecting the input wires in parallel with other instruments may mutually affect the measured values. If you need to make a parallel connection: • Turn OFF burnout. • Ground each instrument at a single common point. • Do not turn ON/OFF the instrument while measurement is in progress. It may cause adverse affects on the other instrument. Note that RTDs and resistors cannot be connected in parallel. 2-9 2 Installation and Wiring • Do not apply a voltage exceeding the value indicated below to the input terminals of the 10-CH High-Speed Digital Input Module and the output terminals of the 10-CH Medium-Speed Digital Output Module. Doing so can damage the modules. • Maximum input voltage 10-CH, High-Speed Digital Input module: ±10 VDC (-D05), ±50 VDC (-D24) 10-CH, Medium-Speed Digital Output module: 250 VAC or 250 VDC • Maximum common mode voltage: 250 VACrms (50/60 Hz) • Do not apply a voltage exceeding the value indicated below to the input terminals of the 4-Wire RTD resistance input module. Doing so can damage the modules. • Maximum input voltage Voltage range less than or equal to 1 VDC, RTD, resistance, and DI (contact): ±10 VDC Other measuring ranges: ±120 VDC • Maximum common mode voltage: 600 VACrms (50/60 Hz) • Do not apply a voltage exceeding the value indicated below to the input terminals of the strain input modules. Doing so can damage the modules. • Maximum input voltage: ±10 VDC (between H-L) continuous • Maximum common-mode voltage Between input and ground: 250 VACrms (-B12, -B35), 30 VACrms (-NDI) • Do not apply a voltage exceeding the value indicated below to the input terminals of the analog output modules or the PWM output modules. Doing so can damage the modules. • Maximum common-mode voltage Between output terminals and earth terminal: 250 VACrms (50/60 Hz) • This is a measurement category II (IEC61010-1) and overvoltage category II (CSA1N.61010-1) instrument. 2.4 Connecting Signal Wires Wiring Procedures 1. 2. 3. 4. Turn OFF the power to the instrument. Loosen the terminal cover attachment screw and lift up the terminal cover. Connect the signal wires to the terminals. Return the terminal cover to the original position and secure it with the screw. 4-CH, High-Speed Universal Input Module Attachment screw for terminal cover Terminal cover Input terminal (clamp terminal) Wiring the Universal Input Module • RTD input • Thermocouple input A A B B Compensation lead b B A b b Lead wire resistance per wire of 10 Ω or less*. Make the resistance of the three wires equal. * In the case of Pt100Ω. 5 Ω max for Pt50Ω. 1 Ω max. for Cu10 Ω. • DC voltage input/DI input (contact) + A A or – DC voltage Contact input B b Terminal type: Applicable wire size: • DC current input B b + DC current input – Shunt resistor Example: For 4 to 20 mA input, shut resistance values should be 250 Ω±0.1%. Clamp For -H04, 0.2 to2.5 mm2 (AWG24 to12) For -M10, 0.14 to 1.5 mm2 (AWG26 to 16) Note • • 2-10 With the 10-CH Medium-Speed Universal Input module, the A and B RTD input terminals are insulated on each channel, but terminal b is shorted internally on all channels. When the screw terminal plate (model 772080) is connected to the 10-CH Medium-Speed Universal Input Module, the terminal arrangement differs from that of clamp terminals, so wire according to the markings on the terminal cover. IM MW100-01E 2.4 Connecting Signal Wires Wiring the 4-Wire RTD Resistance Input Module • DC voltage input/DI (contact) input • RTD input, resistance input Votage I + A Resistance, RTD I 2 A DC voltage Input C Contact C Nothing connected to the I or C terminal Resistance per lead wire of 10 Ω or less • DC current input I + DC current input – Shunt resistor Example: For 4 to 20 mA input, shut resistance values should be 250 Ω±0.1%. A B C Terminal type: Clamp Applicable wire size: 0.14 to 1.5 mm2 (AWG26 to 16) Wiring the Strain Input Module • 1 Gauge Method R R: fixed resistance r: resistance value of lead wire Rg: resistance value of strain gauge e: output voltage from bridge E: voltage applied to bridge R e R Rg Rg E -NDI -B12, -B35 Jumper setting switch A(+V) No.1 No.2 No.3 No.4 No.5 Rg 1 2 3 4 5 6 7 8 B( L) C(-V) D( H) Bridge head (319300) ON OFF No.1 No.2 No.3 No.4 No.5 ON ON ON OFF OFF • 1 Gauge 3 Wire Method R r R R Rg r e r E R: fixed resistance r: resistance value of lead wire Rg: resistance value of strain gauge e: output voltage from bridge E: voltage applied to bridge IM MW100-01E 2-11 Installation and Wiring B B 2.4 Connecting Signal Wires -B12, -B35 -NDI Jumper setting switch A(+V) No.1 No.2 No.3 No.4 No.5 Rg 1 2 3 4 5 6 7 8 B(L) C(-V) Bridge head (319300) D( H) ON OFF No.1 No.2 No.3 No.4 No.5 ON ON OFF ON OFF • Adjacent 2 Gauge Method R R: fixed resistance r: resistance value of lead wire Rg: resistance value of strain gauge e: output voltage from bridge E: voltage applied to bridge Rg2 R Rg1 e Rg2 Rg1 E -B12, -B35 -NDI Jumper setting switch Rg1A(+V) No.1 No.2 No.3 No.4 No.5 1 2 3 4 5 6 7 8 B(L) Rg2C(-V) D( H) OFF Rg1 Rg2 ON Bridge head (319300) No.1 No.2 No.3 No.4 No.5 ON ON OFF OFF ON • Opposing 2 Gauge Method R Rg1 Rg2 e R Rg1 Rg2 R: fixed resistance r: resistance value of lead wire Rg: resistance value of strain gauge e: output voltage from bridge E: voltage applied to bridge E -B12, -B35 -NDI Jumper setting switch Rg1 A(+V) No.1 No.2 No.3 No.4 No.5 319300 dose not support the opposing 2-gauge method. B( L) C(-V) Rg2 D( H) OFF ON No.1 No.2 No.3 No.4 No.5 ON OFF ON OFF ON 2-12 IM MW100-01E 2.4 Connecting Signal Wires • Opposing 2 Gauge 3 Wire Method r r r Rg2 R r r 2 e Installation and Wiring Rg1 Rg1 R Rg2 r E R: fixed resistance r: resistance value of lead wire Rg: resistance value of strain gauge e: output voltage from bridge E: voltage applied to bridge -B12, -B35 Cannot be connected. Use -NDI. -NDI Rg2 1 2 3 4 5 6 7 8 Bridge head (319300) Rg1 • 4 Gauge Method Rg4 Rg3 e Rg2 Rg1 R: fixed resistance r: resistance value of lead wire Rg: resistance value of strain gauge e: output voltage from bridge E: voltage applied to bridge E Rg1, Rg3 Rg1 Rg2, Rg4 Rg2 Rg1 Rg3 Rg3 -B12, -B35 No.1 No.2 No.3 No.4 No.5 Rg4 Rg3, Rg4 Rg3 Rg4 A(+V) Rg1 B( L) Rg2 C(-V) Rg3 D( H) 1 2 3 4 5 6 7 8 Rg1 Rg2 ON No.1 No.2 No.3 No.4 No.5 OFF OFF OFF OFF ON IM MW100-01E Rg1, Rg2 -NDI Jumper setting switch OFF Rg4 Bridge head (319300) 2-13 2.4 Connecting Signal Wires Wiring Digital Input Modules Note • • With digital input modules, the (–) terminal and open terminals on all channels are shorted internally. When the screw terminal plate (model 772080) is connected to the Digital Input Module, the terminal arrangement differs from that of clamp terminals, so wire according to the markings on the terminal cover. Wiring with the -D05 Option • Contact input • Transistor input • 5V logic input 5V Main Input Specifications (-D05) Input type: DI (non-voltage contact, open collector, and 5-V logic) Input format: Pull up at approx. 5 V/approx. 5 kΩ, common potential between channel Min. detection pulse width: Twice the sampling interval or more Input threshold level: No-voltage contact, open collector: 100 Ω or less, ON, 100 kΩ or less, OFF 5-V logic: OFF at 1 V or less and ON at 3 V or greater Contact/Transistor rating: Contact with a rating of 15 VDC or greater and 30 mA or greater Transistor with a rating of Vce > 15 VDC and Ic > 30 mA Terminal type: Clamp Applicable wire size: 0.14 to 1.5 mm2 (AWG26 to 16) Wiring with the -D24 Option • 24 V logic input 24V Main Input Specifications (-D24) Input type: DI (24-V logic) Input format: Common potential between channel Min. detection pulse width: Twice the sampling interval or more Input threshold level: 24-V logic: OFF at 6 V or less and ON at 16 V or greater Terminal type: Clamp Applicable wire size: 0.14 to 1.5 mm2 (AWG26 to 16) 2-14 IM MW100-01E 2.4 Connecting Signal Wires Wiring with the Analog Output Module External power supply + 24 V power supply Vext Voltage Current V+ Load I+ CAUTION Two power supply terminals are connected internally. Therefore, do not connect a separate external power supply to them. Fire can result. Main Output Specifications Terminal type: Clamp, attached and removed in units of 4 channels Load impedance: Voltage 5 kΩ or more Current 600 Ω or less. Applicable wire size: 0.08 to 2.5 mm2 (AWG28 to 12) Wiring with the PWM Output Module External power supply Pulse width output V+ + 4 to 28 V power supply Load CAUTION Two power supply terminals are connected internally. Therefore, do not connect a separate external power supply to them. Fire can result. Main Output Specifications Output capacity: 1A/ch max, however, 4 A or less total for all modules*, ** Terminal type: Clamp, attached and removed in units of 4 channels Applicable wire size: 0.08 to 2.5 mm2 (AWG28 to 12) * ** IM MW100-01E A 1A current limit circuit is built in to the output circuit. Once the current limit circuit is ON, the circuit continues to operate unless the external power supply is turned OFF. This module has a built-in fuse. The built-in fuse protects against fires or abnormal emissions of heat due to load shortages or other abnormalities. It does not protect against damage to internal circuits. 2-15 2 Installation and Wiring (when using current output) Load Direction of current 2.4 Connecting Signal Wires Wiring with the Digital Output Module NO C 250 VDC/0.1 A, 250 VAC/2 A, or 30 VDC/2 A (resistance load) Main Output Specifications Contact mode: A contact (SPST) Contact capacity: 250 VDC/0.1 A, 250 VAC/2 A, or 30 VDC/2 A (resistance load) Terminal type: Clamp, attached and removed in units of 5 channels Applicable wire size: 0.08 to 2.5 mm2 (AWG28 to 12) Note Do not connect anything to the empty terminals of the digital output module. 2-16 IM MW100-01E 2.5 Connecting the Power Supply and Turning the Power Switch ON and OFF Connections with the Power Cord (Power Supply/Cord Basic Specification Code -1M) • To prevent the possibility of electric shock when wiring, confirm that the power supply source is turned OFF. • To prevent shock or fires, only use the power cord supplied by Yokogawa together with the MW100 Data Acquisition Unit. • Make sure to perform protective earth grounding to prevent electric shock. Connect the MW100 Data Acquisition Unit power cord into a three-prong electrical outlet with a protective grounding terminal. The AC outlet must be of a three-prong type with a protective earth ground terminal. Also, do not use the functional ground terminal (see 2.2, “Installation” as a protective ground terminal. • Do not use an extension cord without protective earth ground. Otherwise, the protection function will be compromised. Use a power supply that meets the conditions indicated below. Item Specifications Rated supply voltage Supply voltage range used Rated supply voltage frequency Allowable line frequency range Maximum power consumption 100 to 240 VACrms AC power supply, 90 to 250 VACrms 50/60 Hz 50/60 Hz ±2% Up to approximately 70 VA maximum when six modules are used Note Do not use a supply voltage in the range 132 to 180 VAC, as this may have adverse effects on the measurement accuracy. 1. Check that the power switch of the main module is OFF. 2. Connect the accessory power cord plug to the power connector of the MW100 Data Acquisition Unit. 3. (Use the power cord that came with the package.) Connect the plug on the other end of the power cord to the outlet that meets the conditions above. The AC outlet must be of a three-prong type with a protective earth ground terminal. Power connector 3-prong outlet Power switch Power cord (included in the package) IM MW100-01E 2-17 Installation and Wiring WARNING 2 2.5 Connecting the Power Supply and Turning the Power Switch ON and OFF Wiring the Power Supply Terminal (Power Supply/Cord Basic Specification Code -1W) WARNING • Furnish a switch (double-pole type) to separate the unit from the main power supply in the power supply line. Also, include an ON/OFF indicator with the switch as well as a display that acts as a power supply shut down for the instrument. Switch specifications Steady state current rating: 3 A or more Inrush current rating: 100 A or more Conforms with IEC60947-1 and -3 • Connect a fuse of 2 A to 15 A to the power supply line. • Do not insert a switch or fuse on the ground line. Use a power supply that meets the conditions indicated below. Item Specifications Rated supply voltage Supply voltage range used Rated supply voltage frequency Allowable line frequency range Maximum power consumption 100-240 VACrms AC power supply, 90 to 250 VACrms 50/60 Hz 50/60 Hz ±2% Up to approximately 70 VA maximum when six modules are used Note Do not use a supply voltage in the range 132 to 180 VAC, as this may have adverse effects on the measurement accuracy. 1. Check that the power supply and the power switch of the main module is OFF. 2. Loosen the screw fixing the power supply terminal cover of the main module in place and open the power supply terminal cover. 3. Connect the power cord and the protective ground cord to the power supply terminals according to the figure below. Use round crimp-on lugs with isolation sleeves (for 4 mm screws) for the power cord and protective ground cord terminals. 4. Close the power supply terminal cover and secure it with the screw. DATA ACQUISITION UNIT 10 0- 24 0V AC 100 - 240V AC L N Power cord Power cord Protective grounding cord 2-18 Power supply terminal cover Protective grounding cord IM MW100-01E 2.5 Connecting the Power Supply and Turning the Power Switch ON and OFF Wiring the Power Supply Terminal (Power Supply/Cord Basic Specification -2M or -3W) When using an AC adapter for the power supply WARNING 2 Use a power supply that meets the conditions indicated below. Item Specifications Rated supply voltage Supply voltage range used Rated supply voltage frequency Allowable line frequency range Maximum power consumption 100 to 240 VACrms AC power supply, 90 to 250 VACrms 50/60 Hz 50/60 Hz ±2% Up to approximately 70 VA maximum when six modules are used 1. Check that the power supply and the power switch of the main module is OFF. 2. Loosen the screw fixing the power supply terminal cover of the main module in place and open the power supply terminal cover. 3. Connect the plus (red) and minus (black) wires from the AC adapter and the protective ground wire to the power supply terminal as in the figure below. 4. Close the power supply terminal cover and secure it with the screw. DATA ACQUISITION UNIT 12 -2 8V DC 12 - 28V DC Plus wiring Minus wiring Protective grounding line Plus wiring Power supply terminal cover Protective grounding line Minus wiring IM MW100-01E 2-19 Installation and Wiring • To prevent the possibility of electric shock when wiring, confirm that the power supply source is turned OFF. • Use the power cord supplied by Yokogawa with the instrument. • Check that the supply voltage matches the rated voltage of the AC adapter before connecting the power cord. • During periods of extended non-use, remove the AC adapter’s power cord from the AC outlet. • Do not use an AC adapter (model:772075) other than the one supplied by YOKOGAWA. • Nothing should be placed on top of the AC adapter power cord. The power cord should also be kept away from any heat sources. • When unplugging the power cord from the outlet, never pull by the cord itself. Always hold and pull by the plug. If the power cord is damaged, contact your dealer for replacement. 2.5 Connecting the Power Supply and Turning the Power Switch ON and OFF When Using a DC Power Supply WARNING • To prevent the possibility of electric shock when wiring, confirm that the power supply source is turned OFF. • To avoid electric shock or fire, use electric wires having a cross sectional area of 0.3 mm2 (AWG 22) or more. 1. Check that the power supply and the power switch of the main module is OFF. 2. Loosen the screw fixing the power supply terminal cover of the main module in place and open the power supply terminal cover. 3. Following the wiring diagram (see “When Using an AC Adapter” in this section), wire the plus/minus wires from the DC power supply and the protective grounding wire to the power supply terminal. 4. Close the power supply terminal cover and secure it with the screw. Use a power supply that meets the conditions indicated below. Item Specifications Rated supply voltage Supply voltage range used Maximum power consumption 12 to 28 VDC DC power supply: 10 to 32 VDC Up to approximately 35 VA maximum when six modules are used Turning the Power Switch ON and OFF Pressing the “I” side of the power switch turns the instrument ON. Pressing the “O” side turns the instrument OFF. When turned ON, the 7-segment LED (see section 1.3, “Functions of the Main Module” illuminates. When the self check and other processes are complete, the unit number is displayed. Note • • • 2-20 Before turning the power ON, check that the modules are attached correctly and that the power cord is connected correctly. If the 7-segment LED does not illuminate even if the power switch is turned ON, turn OFF the power switch, then check the items below. If the condition does not change when turning ON the power even after checking those items, it is probably a malfunction. Contact your nearest YOKOGAWA dealer for repairs. • That the power cord is plugged in properly. • That the power supply voltage is within the allowable voltage range specified in this section If the 7-segment LED displays something other than a unit number when the power switch is turned ON, see section 4.1, “Error Display on the 7-Segment LED and Corrective Actions” and carry out the specified corrective action. If the displayed information does not change even when you carry out the corrective action, it is probably a malfunction. Contact your nearest YOKOGAWA dealer for repairs. IM MW100-01E 2.6 Connecting the Ethernet Cable Connection Procedure 2 Connection to the PC Make the connection via a hub. For a one-to-one connection with a PC, make the connection as shown in the figure below. In the same manner, you can connect multiple MW100 Data Acquisition Units to a single PC. PC Hub LAN cable MW100 Data Acquisition Unit MW100 Ethernet port Checking the Communication Status You can check the status on the two LEDs at the upper-right and lower-right of the Ethernet port. For the LED indications, see section 1.3, “Functions of the Main Module.” Initializing Settings Use dip switch 1 on the main module to initialize settings including the IP address assigned to the MW100. 1. Turn OFF the power to the MW100. 2. Check that the switch 5 of dip switch 1 on the main module is OFF. 3. Turn OFF the power to the MW100. After the 7-segment LED indicates the power ON self check, “bF” is displayed. 4. Check the status of step 3, then turn the power OFF. 5. Turn switch 5 of dip switch 1 back ON. Check that the settings were initialized by using the IP setting software (accessory). For information on the indications of the dip switches and the power ON self check, see section 1.3, “Functions of the Main Module.” IM MW100-01E 2-21 Installation and Wiring Connector Connect the Ethernet cable to the Ethernet port on the main module. 2.7 Connecting the RS-422A/485 Interface (/C3 Option) Terminal Wiring and Signal Names FG SG SDB SDA RDB RDA SERIAL COMM FG (Frame Ground) Case grounding for the main unit. SG (Signal Ground) The signal ground. SDB (Send Data B) Send data B(+). SDA (Send Data A) Send data A(–). RDB (Received Data B) Received data B(+). RDA (Received Data A) Received data A(–). Connection Procedure Cables Used There are two types of cable, a 4-wire and 2-wire cable. Choose a cable depending on the following conditions. Cable Used Twisted pair shielded cable 3 × 24 AWG or more (4-wire), 2 × 24 AWG or more (2-wire) Characteristic impedance 100 Ω Capacitance 50 pF/m Cable length Max 1.2 km* * The transmission distance of the RS-422A/485 interface is not the direct distance, but rather the total cable length (shielded, twisted pair). WARNING To prevent electric shock, confirm that the power supply is turned OFF before making connections. Connections with Upstream Devices The following figure shows a connection with an upstream device. If the upstream devices use an RS-232 port, connect through a converter. Host computer or connected upstream instrument Main unit RS-422A/485 terminals Connected upstream instrument MW100 RS-422A/485 Host computer Connected upstream instrument Main unit RS-422A/485 terminals MW100 Converter RS-232 2-22 RS-422A/485 IM MW100-01E 2.7 Connecting the RS-422A/485 Interface (/C3 Option) Example of a Connection with an Upstream Device You can connect the MW100 to an upstream device with an RS-232, RS-422A, or RS485 connection port. For RS-232, use a converter. Refer to the following table for connections to most converter terminals. For details, see the manual that came with the converter. Converter SDA(–) TD(–) SDB(+) TD(+) RDA(–) RD(–) RDB(+) RD(+) SG SHIELD FG EARTH Installation and Wiring RS-422A/485 Port 2 4-Wire In general, a 4-wire connection is used with upstream devices. For a 4-wire connection, the send and receive wires must be crossed. Termination resistance (externally attached) 120 Ω 1/2 W or more Main unit RS-422A/485 terminals Upstream instrument SD A SDA( - ) (SDA) SDB( + ) (SDB) RDA( - ) Termination resistance (built-in: with switch) SD A SD B SD B (SDB) RD A (RD A) (RD B) SG (SG) SD B (SDB) RD A (RD A) RD B RDB( + ) SD A (SDA) (SDA) RD A (RD A) RD B (RD B) SG RD B (RD B) SG (SG) FG SG (SG) FG FG #2 #1 #n (#n≤32) Do not connect termination resistance from #1 to #n-1. 2-Wire On the RS-422A/485 terminal block, connect signals of the same polarity for sending and receiving, and connect only two wires externally. Termination resistance (externally attached) 120 Ω 1/2 W or more Main unit RS-422A/485 terminals Upstream instrument SD A SDA( - ) (A) SDB( + ) (B) SD A (A) SD B RDA( - ) RDB( + ) SG Termination resistance (built-in: with switch) SD A (A) SD B (B) SD B (B) RD A RD A RD A RD B RD B RD B SG (SG) SG (SG) FG #1 SG (SG) FG #2 FG #n (#n≤31) Do not connect termination resistance from #1 to #n-1. IM MW100-01E 2-23 2.7 Connecting the RS-422A/485 Interface (/C3 Option) Note • • The noise rejection method differs depending on the conditions of use. In the connection example, the cable shielding is only connected to the ground of the main unit (one-sided grounding). This method is effective for noise rejection during long distance communications and other processes when there is a difference of potential between the grounding of the computer and that of the main unit. If there is no difference in potential between the PC ground and the main unit ground, it may also be effective to connect to the PC ground as well (two-sided ground). There are also cases where it is effective to use two sided grounding with a capacitor connected in series on one side. Consider the above options when taking measures against noise. With the 2-wire configuration (Modbus protocol), after the last data is output from the upstream PC, the 485 driver must be set to high impedance before 3.5 characters. Serial Interface Converter The following are recommended models of converters. RA SYSTEMS CORP./MODEL RC-77, LINE EYE/SI-30FA, YOKOGAWA/ML2 CAUTION Some converters not recommended here have non-insulated FG and SG terminals. When using such converters, do not connect them as shown on the previous page (do not connect anything to the converter’s FG ad SG terminals). Especially for long-distance situations, potential differences can arise causing damage to instruments or communication abnormalities. Also, if the converter has no SG terminal, use the converter as-is without connecting signal ground. For details, see the user’s manual for the converter. Some converters not recommended here have reversed signal polarity (A/B or +/– markings). When using such converters, be sure to reverse the connections. For 2-wire configurations, to avoid data collision during sending and receiving, the ON/ OFF state of the converters send driver must be controlled by the connected upstream device. When using a recommended converter, use RS-232 (RTS) to control ON/OFF of the send driver. When Using Instruments That Only Support RS-422A For 4-wire configurations, up to thirty-two MW100s can be connected to a single upstream device. However, if at least one of the devices in the system only supports RS-422A, it may not be possible to connect up to thirty-two units. When Using Recorders That Only Support Yokogawa RS-422A The maximum number of units that can be connected in this case is sixteen. Drivers for some conventional Yokogawa recorders (the HR2400, µR series, and other recorders) only support RS-422A. When such recorders are used, only a maximum of sixteen units can be connected. Note In the RS-422A standard, up to ten units can be connected to a single port (in 4-wire configurations). Termination Resistance This module has built-in termination resistance. When using multi-drop connections (including point-to-point connections), for the outermost unit, turn terminator switch ON. Turn it OFF for units in the middle. Also, turn ON termination resistance for the connected upstream device (see the manual of the upstream device). When using a converter, turn ON its termination resistance. The recommended converters have built-in termination resistance. 2-24 IM MW100-01E 2.8 Connecting the RS-232 Interface (/C2 Option) Connector Pin Assignments and Signal Names 2 Connector Pin Assignments 6 3 7 4 8 Installation and Wiring 2 1 5 9 Signal Names Corresponding to Connector Pins The following table shows signal names for the RS-232, JIS, and ITU-T standards. Pin Signal Name JIS ITU-T RS-232 Notation Meaning 2 RD 104 BB (RXD) Receive data 3 SD 103 BA (TXD) 5 SG 102 AB (GND) Signal ground The signal ground. 7 RS 105 CA (RTS) Request to send The handshaking signal when receiving data from the computer, and output signal from the instrument. 8 CS 106 CB (CTS) Clear to send The handshaking signal when receiving data from the computer, and input signal to the instrument. * Input signal to the instrument Transmitted data Output signal from the instrument Pins 1, 4, 6, and 9 are not used. Handshaking One of the following four methods in the table below can be selected for the instrument. Table of Handshaking Methods ( Data Transmission Control (Control used to send data to a PC) Hardware Software handshaking handshaking Handshaking method Stops transmission when X-OFF is received. Resume when X-ON is received. Stops transmission No when CB (CTS) handshaking is false. Resume when it is true. indicates that it is supported) Data Reception Control (Control used to receive data from a PC) Hardware Software handshaking handshaking Send X-OFF when the received data buffer is 3/4th filled. Send X-ON when the received data buffer becomes 1/4th filled. Set CA (RTS) to No False when the received data buffer handshaking is 3/4th filled. Set to True when the received data buffer becomes 1/4th filled. OFF-OFF XON-XON XON-RS CS-RS OFF-OFF • Send Data Control Handshaking is not performed between the instrument and the computer. “X-OFF” and “X-ON” from the computer are treated as data, and CS is ignored. • Receive Data Control Handshaking is not performed between the instrument and the computer. When the receive buffer of the instrument becomes full, data thereafter is discarded. RS = True (fixed) IM MW100-01E 2-25 2.8 Connecting the RS-232 Interface (/C2 Option) XON-XON • Send Data Control Software handshaking is not performed between the instrument and the computer. If X-OFF is received from the computer while the instrument is sending data, data sending stops, and restarts when the next X-ON code is received. CS from the computer is ignored. • Receive Data Control Software handshaking is not performed between the instrument and the computer. When the used capacity of the instrument’s receive buffer reaches 1537 bytes, an XOFF code is sent to the computer, and when the buffer reaches 511 byte, the X-ON code is sent. RS = True (fixed) XON-RS • Send Data Control Software handshaking is not performed between the instrument and the computer. If X-OFF is received from the personal computer while the instrument is sending data, data sending stops, and restarts when the next X-ON code is received. CS from the computer is ignored. • Receive Data Control Hardware handshaking is not performed between the instrument and the computer. When the used capacity of the instrument’s receive buffer reaches 1537 bytes, RS is set to False, and when the buffer reaches 511 byte, RS is set to True. CS-RS • Send Data Control Hardware handshaking is not performed between the instrument and the computer. If CS becomes False while the instrument is sending data, transmission stops and restarts when CS becomes True. X-OFF and X-ON from the computer are treated as data. • Receive Data Control Hardware handshaking is not performed between the instrument and the computer. When the used capacity of the instrument’s receive buffer reaches 1537 bytes, RS is set to False, and when the buffer reaches 511 byte, RS is set to True. Connection Examples • OFF-OFF/XON-XON • CS-RS(CTS-RTS) PC MW PC MW SD RD RS CS SG 3 2 7 8 5 SD RD RS CS SG 3 2 7 8 5 SD RD RS CS SG • XON-RS(XON-RTS) PC SD RD RS CS SG MW 3 2 7 8 5 SD RD RS CS SG SD RD RS CS SG The RS on the PC side and the CS on the instrument side do not need to be connected for control. However, we recommend that they be connected so that the cable can be connected in either direction. Note • • 2-26 A computer program must be created such that the receive buffers of the instrument and computer do not become FULL. When selecting XON-XON, output data in ASCII format. IM MW100-01E 2.9 Serial Interface Settings Selecting the Baud Rate Select a baud rate from the list below. 1200, 2400, 4800, 9600, 19200, 38400, 57600, 115200 2 Selecting the Parity Check Select a parity check from the list below. ODD, EVEN, NONE Selecting the Stop Bit Select a bit length from the list below. 1, 2 Selecting the Handshaking Method Select a handshaking method from the list below. This setting is only valid when using the RS-232 interface. OFF:OFF, XON:XON, XON:RS, CS:RS Selecting an Address Select an address from the list below. This is valid for the RS-422A/485 interface and Modbus protocol. 1 to 32 (for dedicated protocol) 1 to 247 (for Modbus protocol) Selecting the Standard Protocol Select NORMAL when performing communications using the “Standard” RS-232 or RS422A/485 protocol. IM MW100-01E 2-27 Installation and Wiring Setting the Data Length Select a data length from the list below. When outputting data in binary format, you must use 8 bits. 7, 8 2.10 Measures Against Noise on the MW100 Data Acquisition Unit The technical Information described below is available as reference material on measures against noise. For information on obtaining a copy, contact your nearest YOKOGAWA dealer. • Noise Interference on Recorder (TI 4D5B1-80E) Describes the fundamentals concerning noise and its countermeasures in two parts: basic edition and application edition. • MX100 Performance Specifications (TI 04M08B01-00E) This describes in detail the noise rejection characteristics and functions that are unique to the MW100 Data Acquisition Unit. This section briefly describes the integrating A/D converter and the first-order lag filter that the MW100 Data Acquisition Unit employs as measures against noise. Integrating A/D Converter MW100 input modules employ integrating A/D converters for converting the measured analog signals into digital signals. The integrating A/D converter integrates the measured values at the specified time width. If the specified time spacing matches the period of the signal you wish to reject, the signal is rejected. Cancelled out Input voltage (instantaneous value) DC voltage (average value) Integration time For example, if the integration time is 20 ms, signals having frequencies of 50 Hz and integer multiples of 50 Hz can be rejected. Likewise, if the integration time is 16.67 ms, signals having frequencies of 60 Hz and integer multiples of 60 Hz can be rejected. If the integration time is 100 ms, signals having 10 Hz and integer multiples of 10 Hz can be rejected. The commercial power supply is one of the noise sources. By setting these integration times, commercial power noise of 50 Hz or 60 Hz can be eliminated. On the MW100, the integration time is set as shown below. 4-CH, High-Speed Universal Input Module Measurement Interval 10 ms 50 ms 100 ms 200 ms 500 ms 1s 2, 5,10, 20, 30, 60 s Integration Time 1.67 ms 16.67 ms 20 ms Auto Rejected Frequencies and Notes 600 Hz and its integer multiples 60 Hz and its integer multiples 50 Hz and its integer multiples Automatically detects the power supply frequency and set 16.67 or 20 ms 36.67 ms 50 Hz and 60 Hz and their integer multiples 100 ms 10 Hz and its integer multiples 200 ms Low-pass filter with Fc = 5 Hz 6-CH, Medium-Speed 4-wire RTD Resistance Input Module/10-CH, Middle-Speed Universal Input Module Measurement Interval 100 ms 200 ms 500 ms 1s 2s 5, 10, 20, 30, 60 s Integration Time Rejected Frequencies and Notes 1.67 ms 600 Hz and its integer multiples* 16.67 ms 20 ms Auto 36.67 ms 100 ms 200 ms 60 Hz and its integer multiples 50 Hz and its integer multiples Automatically detects the power supply frequency and set 16.6 or 20 ms 50 Hz and 60 Hz and their integer multiples 10 Hz and its integer multiples Low-pass filter with Fc = 5 Hz * Because the power supply frequency noise is not rejected, measured values may fluctuate particularly for temperature measurements using thermocouples. If this happens, make the measurement interval longer, or use the 4-CH High-Speed Universal Input Module. 2-28 IM MW100-01E 2.10 Measures Against Noise on the MW100 Data Acquisition Unit 4-CH, Medium-Speed Strain Input Module Measurement Interval 100 ms 200ms 600 Hz and its integer multiples* 60 Hz and its integer multiples 50 Hz and its integer multiples Automatically detects the power supply frequency and set 16.67 or 20 ms 50 Hz and 60 Hz and their integer multiples 10 Hz and its integer multiples 200 ms Low-pass filter with Fc = 5 Hz Rejected Frequencies and Notes 2 * When the measurement interval is 100 ms, measured values may fluctuate since power supply frequency noise is not rejected. In such cases, set the measurement interval to 200 ms or more. However, when using the SNTP time synchronization function, the integral times below are used. 6-CH, Medium-Speed 4-wire RTD Resistance Input Module/ 10-CH, Middle-Speed Universal Input Module Measurement Interval Integration Time Rejected Frequencies and Notes 100 ms 200 ms 1.67 ms 600 Hz and its integer multiples* 500 ms 16.67 ms 20 ms Auto 60 Hz and its integer multiples 50 Hz and its integer multiples Automatically detects the power supply frequency and set 16.6 or 20 ms 1s 36.67 ms 50 Hz and 60 Hz and their integer multiples 2s 100 ms 10 Hz and its integer multiples 5s 200 ms Low-pass filter with Fc = 5 Hz 10, 20, 30, 60 s * Because the power supply frequency noise is not rejected, measured values may fluctuate particularly for temperature measurements using thermocouples. If this happens, make the measurement interval longer, or use the 4-CH High-Speed Universal Input Module. 4-CH, Medium-Speed Strain Input Module Measurement Interval 100 ms 200 ms Integration Time Rejected Frequencies and Notes 1.67 ms 16.67 ms 20 ms Auto 36.67 ms 600 Hz and its integer multiples* 60 Hz and its integer multiples 50 Hz and its integer multiples Automatically detects the power supply frequency and set 16.6 or 20 ms 50 Hz and 60 Hz and their integer multiples 500 ms 1s 10 Hz and its integer multiples 100 ms 2s 5, 10, 20, 30, 60 s Low-pass filter with Fc = 5 Hz 200 ms * When the measurement interval is 100 ms, measured values may fluctuate since power supply frequency noise is not rejected. In such cases, set the measurement interval to 200 ms or more. IM MW100-01E 2-29 Installation and Wiring 500 ms 1s 2s 5, 10, 20, 30,60 s Integration Time 1.67 ms 16.67 ms 20 ms Auto 36.67 ms 100 ms 2.10 Measures Against Noise on the MW100 Data Acquisition Unit First-Order Lag Filter For noise sources other than power supply noise, the MW100 Data Acquisition Unit is equipped with a first-order lag filter having output characteristics indicated in the figure below against step input. For the filter setting, the time constant is determined by selecting filter coefficient N for the measurement interval. Step input 100% Output characteristics 63.2% of the output value 0% Time constant Filter coefficient = measurement interval x filter coefficient N Measurement Interval (s) Selectable Time Constants (s) N=5 N=10 N=20 N=25 N=40 N=50 0.01 0.05 0.1 0.2 0.25 0.4 0.5 N=100 1 0.05 0.25 0.5 1 1.25 2 2.5 5 0.1 0.5 1 2 2.5 4 5 10 0.2 1 2 4 5 8 10 20 0.5 2.5 5 10 12.5 20 25 50 1 5 10 20 25 40 50 100 2 10 20 40 50 80 100 200 5 25 50 100 125 200 250 500 10 50 100 200 250 400 500 1000 20 100 200 400 500 800 1000 2000 30 150 300 600 750 1200 1500 3000 60 300 600 1200 1500 2400 3000 6000 If the first-order lag filter is applied to the input signal, low-pass filter frequency characteristics shown in the figure below are attained. Cutoff frequency Attenuation Pass band Cutoff band 0dB –3dB Frequency If the time constant of the first-order lag filter is set long, the cutoff frequency is lowered, and frequency bandwidth that can be rejected is widened. Set an appropriate time constant according to the frequency of the noise you wish to reject. 2-30 IM MW100-01E 2.11 Handling of the CF Card Handling Precautions of the CF Card Inserting the CF Card When inserting the CF card into the card slot, first touch the antistatic metal, then open the slot cover, and finally insert the card with the back side facing left as in the figure below. Antistatic metal Card slot Eject lever Reverse side of the CF card Slot cover Ejecting the CF Card Be sure to check that the CF card is not being accessed before ejecting the card from the slot. To eject the CF card, first open the slot cover while touching the antistatic metal, then push the eject lever. Then, press the eject lever that came out once again, and remove the CF card from the slot. Note • • IM MW100-01E If the eject lever is difficult to push with your finger, use the tip of a pen or other pointed object. Do not close the slot cover by force when the eject lever is out. Doing so can damage the CF card slot. When not using the eject lever, push the lever in so that the slot cover can be closed. 2-31 2 Installation and Wiring Note the following points when using the CF card. For the general handling precautions of the CF card, see the instruction manual that came with the CF card. • The CF card is a precision electronic device. Do not use or store the CF card in an environment with strong static electricity or an environment where electric noise tends to appear. • Do not remove the CF card from the card slot while data is being written. Doing so can damage or erase the data. Chapter 3 Setting and Data Acquisition 3.1 Connection Environment This section explains the environment in which the MW100 is connected, including requirements for the PC system, browser and plug-in software, and setting screens. This chapter focuses on settings entered with the browser. For information about communication commands, see the Communication Command manual (IM MW10017E). 3 • PC Hardware Intel Pentium II, 400-MHz CPU or higher (Pentium III, 1-GHz or higher recommended) and at least 256 MB of memory (512 MB or more recommended). • OS (Operating System) Windows 2000 or Windows XP (recommended) required. • Display XGA (1024 × 768 resolution) or better and capable of displaying 65535 or more colors. • Ethernet Port An Ethernet port compatible with the OS (requires 10BASE-T or 100BASE-TX). Browser The following browser is required for entry of settings on the MW100. • Internet Explorer 5.0 or later (recommended) Installing Java Java is required for entering settings using a browser. • JRE (Java runtime environment) version 1.4 or later. (Version 1.4 recommended) Java might not be installed on the following operating systems. • Windows 2000 SP4 or later • Windows XP SP2 or later If not installed, you can install it from the MW100 User’s Manual CD. MW100 Operation Screens The operation screens of the MW100 main module consist of Monitor screens enabling operations in Measurement mode, Setting screens that are mainly used in Setting mode, and Status screens for mode changes. Top Screen • Monitor Single Screen, Dual Screen • Setting Channel Setting, System Setting, Display Setting, Communication Setting • Status Measurement, Recording, and MATH status changes When entering settings, the pages for all setting items are displayed, but there may be settings or items that cannot be entered depending on the installed modules and options. IM MW100-01E 3-1 Setting and Data acquisiton PC System Requirements 3.1 Connection Environment Single Screen and Dual Screens Monitor-displays the data from the MW100. For details on the operation, see section 3.16, “Measured Data Monitor Display/ Settings.” Channel Setting You can set the measuring range, expressions, and other items. System Setting You can set the measurement interval, measurement groups, and other items. 3-2 IM MW100-01E 3.1 Connection Environment Display Setting You can set tags, display groups, and other items. 3 Setting and Data acquisiton Communication Setting You can perform user registration and enter FTP/e-mail settings, and other items. Switching Modes The MW100 has a Measurement mode and a Setting mode, and the mode must be changed depending on the operation to be performed. For operating procedures, see section 3.3, “System Settings.” Meas. Mode To Single Screen or Dual Screens for the monitor, switch to Measurement mode. The items to set after switching to Measurement mode are shown in the figure below. Setting Mode To modify channel settings, system settings, display settings, or communication settings, switch to Setting mode. The items to set after switching to Setting mode are shown in the figure below. IM MW100-01E 3-3 3.2 Connection to the MW100 Connection to the MW100 can be made using Ethernet or serial communications (optional). Also, when performing communication using the Modbus protocol, Modbus settings are required. When the login function is enabled, connection is made after entering a user name and password. Setting Mode Ethernet Connection Setting Up Ethernet for the First Time, IP Address Unclear Ethernet connections are not possible under the factory default settings. You must enter an IP address. 1. After opening an Ethernet connection between the MW100 and PC, run the MW100 Viewer software CD-ROM or the IP address setting software installed on the PC. 2. You can select to enter a fixed IP address, or have the address automatically obtained by DHCP. If you select a fixed IP address, enter the IP address, subnet mask, default gateway, and DNS. 3. Skip to the procedures under Connecting to an MW100 with a Specified IP Address (Including DHCP). For the setting procedure, see the MW100 Viewer Software User’s Manual (IM MW18001E). You can also start up and connect using a fixed IP address. When Connecting to an MW100 with a Specified IP Address (Including DHCP). 1. Open an Ethernet connection between the MW100 and PC, then start the browser. 2. Enter the host name or IP address of the MW100 in the browser’s URL/Address box. The MW100 top page appears. If the login function is set, step 3 is required. Ex. 1) IP address is 192.168.1.100 http://192.168.1.100/ Ex. 2) Host name is mw100user http://mw100user/ 3. Before the top page appears, the network password entry screen is displayed. Enter a user name and password and click the OK button. Changing the IP Address and Connecting This is used when an IP address has already been set, and the IP address will be changed by browser or DHCP before connecting. To change the IP address, follow steps 1-6 and 10-11. For changes by DHCP, follow steps 1-3 and 7-11. 1. From the Top screen, click Communication Setting > IP Address Setting. 2. Enter a host name in the Host Name box under DNS Information. 3. Enter a domain name in the Domain Name box under DNS Information. 4. Enter a fixed IP address in the IP Address box under IP Address Information. 5. Enter a subnet address in the Subnet Mask box under IP Address Information. 6. Enter a default gateway address in the Default Gateway box under IP Address Information. 7. To enable the DHCP client function, select the DHCP Client Function check box. 3-4 IM MW100-01E 3.2 Connection to the MW100 8. 9. 10. 11. To obtain DNS information from the server, select the DNS Information check box. To register a host name on the server, select the Host Name check box. Click the Apply button. Power cycle the MW100. The setting changes are applied. 3 You can enter settings using a browser, or with communication commands. The following explains setting entry using a browser. For information about communication commands, see the Communication Command manual (IM MW100-17E). From the top page, click Communication Setting > Serial Communication Setting. Receiver Settings 1. In the Function list, select NORMAL (general communications), MODBUS_M (Modbus master), or MODBUS_S (Modbus slave). Modbus settings consist of master and slave settings. 2. Enter an address number in the Address box. Data Transfer Settings 1. Select a baud rate in the Baud Rate list. 2. Select a parity check method in the Parity Bit list. 3. Select a number of bits from the Stop Bit list. 4. Select a communication data length from the Data Length list. 5. Select a handshaking method in the Handshake list. Click the Apply button. IM MW100-01E 3-5 Setting and Data acquisiton Connecting with Serial Communication (Optional) 3.2 Connection to the MW100 Modbus Settings Set when using the Modbus function. For Modbus/TCP, set “Modbus client settings 1, 2, and 3.” For Modbus/RTU, set “Modbus master settings 1 and 2,” and “Receiver settings.” Modbus Master Setting 1 1. From the Top screen, click Communication Setting > Modbus Master Setting 1. 2. Select the Enable check box under Master Function. 3. Select a communication interval from the Cycle list under Communication. 4. Select a timeout time from the Communication Timeout list under Communication. 5. In the Gap between Messages list under Communication, select a gap time from receiving of the response until the sending of the next command. 6. Select a number of times in the Retransmission list under Recovery Action. 7. Enter a recovery wait time in the Wait Time box under Recover Action. 8. Click the Apply button. Modbus Master Setting 2 1. From the Top screen, click Communication Setting > Modbus Master Setting 2. 2. Select the command number group to be set from the Command List list. 3. Select READ/WRITE in the Function box. 4. Enter the address of the slave device in the Slave box. 5. Enter the numbers of the used registers in the Register box. When specifying multiple registers, enter the first register number. 6. Select a data type in the Data Type list. 7. Enter the channel numbers used in the Channel boxes. 8. Click the Apply button. 3-6 IM MW100-01E 3.2 Connection to the MW100 Modbus Client Setting 2 1. From the Top screen, click Communication Setting > Modbus Client Setting 2. The server list is displayed. 2. Enter the server name in the Server box. 3. Enter the server port number in the Port box. 4. Enter the server unit number in the Unit No. box. 5. Click the Apply button. IM MW100-01E 3-7 3 Setting and Data acquisiton Modbus Client Setting 1 1. From the Top screen, click Communication Setting > Modbus Client Setting 1. 2. Select the Enable check box under Client Function. After clicking the Apply button, the settings are enabled and communication begins. Clear the Enable check box and click the Apply button to stop communications. 3. Select a communication interval from the Cycle list under Communication. 4. If you select the Close check box and there is no response from the server, communication is closed after the time entered in Connection Timeout elapses. 5. Enter the time until communication is closed in the Connection Timeout to box under Connection. 6. Enter the time until communications are recovered in the Wait Time box under Recovery Action. 7. Click the Apply button. 3.2 Connection to the MW100 Modbus Client Setting 3 1. From the Top screen, click Communication Setting > Modbus Client Setting 3. 2. Enter settings in the same manner as for Modbus Master Setting 2. Enter the server number of the server list in the Server box. Login Function and User Settings Using this function, you can restrict access to previously registered users. From the Top screen, click Communication Setting > User Setting. Login Function Select the Enable check box. This enables the login function. User Settings 1. Select ADMIN or USER in the Level list under User List. Only ADMIN can be selected for list number 01. 2. Enter the user name to set in the User Name box under User List. 3. Enter the password to assign to the user in the Password box under User List. Click the Apply button. 3-8 IM MW100-01E 3.3 System Settings Setting Mode System Reconstruction Note Always turn the power to the MW100 OFF before attaching or removing input/output modules. Setting Module Information 1. From the top page, click System Setting > Module Information. 2. If the Configured Module and Attached Module boxes are different, click the Reconstruct button to reconfigure the system. Setting the Date and Time Sets the date and time on the MW100. 1. From the top page, click System Setting > Date and Time. 2. Enter the year, month, and date in the Date box. Use the last two digits of the Western calendar for the year. 3. Enter the hour, minute, and second in the Time box. Time is specified in 24hour format. 4. Enter the hour and minutes in the Time Zone box. 5. Click the Apply button. IM MW100-01E 3-9 3 Setting and Data acquisiton When connecting the MW100 for the first time, or when changing the position of an installed input/output module on the connected MW100, system reconfiguration is performed (to match up with the actual modules). Before reconfiguration, connect to the MW100 to be reconfigured. 3.3 System Settings Formatting the CF Card, Checking the Free Space and System Information , and Initialization You can format the CF card and check the amount of available space on the card. Also, you can check system information and initialize settings in the same screen. From the top screen, click System Setting > System Information. Checking the Free Disk Space The amount of used and total space is displayed in the Capacity box under Media Information. Formatting 1. Select the Format check box under Media Information. 2. Click the Initialize button to initialize the CF card. Checking System Information and Initializing You can view the model name, serial number, installed options, firmware version, and WEB software version in the corresponding display boxes. Also, you can initialize system settings. For details, see section 4.6, “Initializing the System.” 1. Select the initialization level from the Initialization Level list. 2. Click the Initialize button to initialize the system settings. Daylight saving Time Setting 1. 2. 3. 4. 5. 3-10 From the top screen, click System Setting > Daylight Saving Time Setting. Select the Daylight Saving Time check box. The Summer time and Winter time function is enabled. Select a starting month, week, and day of the week for the start of Summer time in the Start Time box. Enter a start time in the box. Select an ending month, week, and day of the week for the end of Summer time in the End Time box. Enter an end time in the box. Click the Apply button. The Summer time and Winter time start times are enabled. IM MW100-01E 3.3 System Settings Other Settings You can set the MW100 unit number, units of temperature, key lock for preventing inadvertent operations, alarm hold, and rate of change interval. From the top screen, click System Setting > Other Settings. Unit Number Enter a number from 0 to 89 for identifying the unit in the Unit No. box. Temperature Unit Select Celsius DEG_C or Fahrenheit DEG_F in the Temperature Unit list. 3 Setting and Data acquisiton Main Unit Key Lock If the Key Lock check box is selected, the key lock becomes active. Alarm Status Hold If the Hold check box is selected, alarms are held. Rate of Change Interval 1. Enter the measurement count that determines the interval in the Increase Interval box under Rate-of-Change Alarm. 2. Enter the measurement count that determines the interval in the Decrease Interval box under Rate-of-Change Alarm. Click the Apply button. The settings for each item are enabled. Status Information and Processing You can change the MW100 operation mode, operate the main unit keys, and check alarm statuses. Changing Status Information (Mode) From the top screen, click System Setting > Status Information. You can perform the same procedure in the Status table in the top screen. • Switching between Measurement Mode and Setting Mode 1 In the Operation box under Measurement, you can select START to switch to Measurement mode, or STOP to switch to Setting mode. 2. Click the Apply button. The changed status is displayed in the Status display box. • Computation Start/Stop 1 In the Operation box under the MATH item, you can select START to start computation, or STOP to stop computation. 2. Click the Apply button. The changed status is displayed in the Status display box. You can also start and stop computation from the Monitor screen. • Recording Start/Stop 1 In the Operation box under the Recording item, you can select START to start recording, or STOP to stop recording. 2. Click the Apply button. The changed status is displayed in the Status display box. You can also start and stop recording from the Monitor screen. IM MW100-01E 3-11 3.3 System Settings Checking Status Information When an alarm occurs, Waiting Alarm ACK is displayed in each display box. Processing and Operation • Operating Main Unit Keys 1. Select the main unit key you wish to operate from the Key Operation list. 2. Click the Apply button. The same operation takes place as if you had pressed the main unit key. • Checking the Alarm Status 1. Select the Alarm Acknowledge check box. 2. Click the Apply button. Held alarms are cleared. • Clearing the Error Display 1. Select the Error Display check box. 2. Click the Apply button. Clears the error number displayed in the 7-segment LED. • Executing Strain Initial Balancing 1. Select the initial balance execution method from the Strain Initial Balancing list. 2. Click the Apply button. Initial balancing is executed on the channel selected in the strain input settings in the channel settings. • Execute Communication Test 1. Select the item you wish to test from the Communication Test list. 2. Click the Apply button. The test is executed. 3-12 IM MW100-01E 3.4 Setting Acquisition Conditions for Measured/ Computed Data This is an explanation of measurement settings, MATH settings, recording settings, and thinning settings. Setting Mode Measurement Operation Settings 3 From the top screen, click System Setting > Measurement Setting. Measurement Module Settings Sets the integral time and measurement group assignments for each module. See each modulels specifications for the measurement interval and integral times that can be set on them. 1. Select the group you wish to assign in the Interval Group list. 2. Select an integral time of AUTO, 50 Hz, or 60 Hz in the A/D Integration Time list. This setting is enabled from the measurement interval. Click the Apply button. This enables the settings changes. Note The measurement interval that is assigned to the measurement group number is, (interval is short) < meas. group1 ≤ meas. group2 ≤ meas. group 3 < (interval is long) Computation Operation Settings From the top screen, click System Setting > MATH Setting. MATH Interval Settings Select the measurement group number in the Interval Group list. This becomes the interval that is assigned to the selected group number. Set a value that is the same as the measurement interval of at least one of the installed input modules. MATH Settings In step 1, set the operation upon computation error, and in steps 2 and 3, set the measurement input other than for TLOG/CLOG computation. 1. Select +OVER or –OVER in the Computation Error Data list. 2. Select ERROR (computation error) or SKIP in the Abnormal Input Data list. 3. Select ERROR (Overflow value), SKIP, or LIMIT in the Overflowed Data list. IM MW100-01E 3-13 Setting and Data acquisiton Measurement Group Settings Select the measurement interval from the Interval list. Set a measurement interval for each group number. 3.4 Setting Acquisition Conditions for Measured/Computed Data TLOG and CLOG Computation Sets the operation for TLOG and CLOG computation. 1. Select the units of integration in the TLOG Time Scale list. 2. Select ERROR (computation error) or SKIP in the Abnormal Input Data list. 3. Select ERROR (computation error), SKIP, or LIMIT in the Overflowed Data list. 4. Select OVER (computation stop) or ROTATE in the PSUM Overflowed Data list. Click the Apply button. This enables the settings changes. Recording Operation Settings From the top screen, click System Setting > Recording Setting. Set the recording operation for each measurement group. 1. Select the recording start timing in the Mode list under Interval Group. If you select DIRECT, steps 2 and 3 are required, and if you select TRIGGER, steps 2 to 5 are required. 2. Select the recording operation in the Action list under Interval Group. 3. Select the recording interval in the Recording Interval list under Interval Group. 4. Select a recording data length from the Data Length list under Interval Group. 5. Select a pretrigger length (%) from the Pre-trigger list under Interval Group. Recording Operation Settings 1. Select a recording data length from the DIRECT Data Length list. Measurement groups for which the recording start timing is DIRECT are all set to this. 2. Select the remaining space time in the Limit for Media Alarm list. When the specified remaining amount is reached, you can have output such as relay output occur. Click the Apply button. This enables the settings changes. 3-14 IM MW100-01E 3.4 Setting Acquisition Conditions for Measured/Computed Data Thinning Operation Settings From the top screen, click System Setting > Thinning Recording Setting. Thinning Settings Select the Enable check box. Thinning recording is enabled, and you can enter thinning recording settings. Click the Apply button. This enables the settings changes. Recording Channel Settings You can set the channels to which data is recorded or thinned. 1. From the top screen, click Channel Setting > Recording Channel Setting. 2. Select the channel group you wish to set from the Channel List list. Recording and Thinning Settings 1. Turn ON recording in the Recording list when recording data. 2. Turn ON data thinning in the Thinning Recording list when thinning data. Click the Apply button. This enables the settings changes. IM MW100-01E 3-15 3 Setting and Data acquisiton Setting the Thinning Interval, Recording Operation, and Recording Data Length 1. Select the thinning time in the Recording Interval list. A time shorter than the measurement interval specified for the measurement group cannot be set. 2. Select a recording operation in the Recording Action list. 3. Select a recording data length from the Data Length list. 3.5 Setting Measurement Conditions (Measurement Channel Settings) Setting Mode Measurement Channel Settings You can set the input type, range, span, computations, scale and differential input. The selectable input type, range, and other settings can differ depending on the module. For details, see the explanation of the functions of individual modules in chapter 1, “Explanation of Functions,” or chapter 5, “Specifications.” For information on the scale value of the measuring range, see section 3.12, “Scale Value Settings.” Setting the Input Range 1. From the top screen, click Channel Setting > AI/DI Channel Setting. 2. Select the channel group you wish to set from the Channel List list. Setting the Input Mode Select the input type from the Mode list. Setting the Measuring Range Select the measurement range from the Range list. Setting the Measurement Span Determines the actual measuring range from the measurable range. Enter the lower and upper limit of Span in the Lower or Upper boxes under Span. Setting the Scale Set this item when linearly scaling the measured values. 1. Select SCALE in the Calc list. 2. Enter the lower or upper limit of scale in the Lower or Upper box under Scale. 3. Select the decimal place from the D.P. list under Scale. 4. Enter the scale conversion value in the Unit box. Differential Input Settings 1. Select DELTA in the Computation box. 2. Enter the reference channel number in the Reference box. Remote RJC (RRJC) Reference Channel Setting Enter the remote RJC reference channel number in the Ref. Ch. box. This is required when RRJC is selected for the input type. Click the Apply button. This enables the settings changes. 3-16 IM MW100-01E 3.5 Setting Measurement Conditions indstop (indstart Measurement Channel Settings) Filter and Thermocouple Settings You can set filters for measurement channels. Also, when the input type is set to thermocouple (TC), you can set the burnout/RJC behavior. This setting is allowed even if the input type of the measurement channel is something other than thermocouple (TC), but has no effect in that case. From the top screen, click Channel Setting > Filter, Burnout, RJC Setting. Setting the Filter Coefficient Select a coefficient in the Filter list. For information about filter coefficients, see section 2.10, “Measures against Noise on the MW100 Data Acquisition Unit.” Reference Junction Compensation 1. Select the type of reference junction compensation in the Type box under RJC. 2. Enter a reference junction compensation voltage in the Voltage[uV] box. Set when reference junction compensation is set to external (EXT). Click the Apply button. This enables the settings changes. Setting Up and Executing Strain Input Initial Balancing If the measurement channel is strain input, you can enter settings for executing initial balancing. This setting is allowed even if the measurement channel is something other than strain input, but has no effect in that case. 1. From the top screen, click Channel Settings > Strain Input Setting. 2. Select the channel group you wish to set from the Channel List list. 3. Turn ON the channel on which you wish to perform initial balancing in the Initial Balancing list. 4. Click the Apply button to finalize. 5. IM MW100-01E Execute the Initial balance items in the Status information of the system settings. For details, see section 3.3, “System Settings.” 3-17 Setting and Data acquisiton Setting the Burnout Select the direction in which the measured value is set off the range when a burnout detection occurs from the Burnout list. 3 3.6 MATH Settings (MATH Channel Settings and the /M1 Option) You can set the MATH operation, expressions, scales, MATH coefficients, and MATH groups. This section also explains settings for program channels and communication input data. For information on entering the MATH span in expressions, see section 3.12, “Scale Input Methods.” Setting Mode Entering Expressions 1. 2. From the top screen, click Channel Setting > MATH Channel Setting. Select the channel group you wish to set from the Channel List list. Setting the MATH Operation Turn ON the MATH channels to be used in the Action list. Entering Expressions Enter an expression in the Formula box. For information about expressions, see section 1.13, “MATH Functions (/M1 Option).” Setting the MATH Span 1. Enter the lower or upper limit of the MATH span in the Lower or Upper box under Span. 2. Select the decimal place from the D.P. list under Span. 3. Enter the scale conversion value in the Unit box. Click the Apply button. This enables the settings changes. 3-18 IM MW100-01E 3.6 MATH Settings (MATH Channel Settings and the /M1 Option) Setting MATH Constants 1. 2. From the top screen, click Channel Setting > MATH Constant Setting. Select the constant group you wish to set from the Constant List list. Entering Math Constants Enter a constant in the Constant List list. Click the Apply button. This enables the settings changes. 3 Setting and Data acquisiton Setting MATH Groups 1. 2. 3. IM MW100-01E From the top screen, click Channel Setting > MATH Group Settings. Enter the channel numbers to be grouped in the Channel Set box. Specify channel numbers by delimiting them with dots as in A001.A003.A006, or specify a range as in A004-A008. Click the Apply button. This enables the settings changes. 3-19 3.6 MATH Settings (MATH Channel Settings and the /M1 Option) Program Channel Settings 1. 2. 3. 4. From the top screen, click Channel Setting > Program Channel Setting. Select SINGLE or REPEAT in the Action box for the program channel number you wish to use. Enter the elapsed time and setting value in the Point Set box. For information about formats, see section 1.13, “MATH Functions (/M1 Option).” Click the Apply button. This enables the settings changes. Setting Mode Meas. Mode Communication Input Data Settings 1. 2. 3. 4. 3-20 From the top screen, click Channel Settings > COM Input Channel Setting. Select the channel group you wish to set from the Channel List list. Enter the communication input data value in the Input Value box. For the range of available communication input values, see chapter 5, “Specifications.” Click the Apply button. This enables the settings changes. IM MW100-01E 3.7 Setting Alarms You can set the alarm type, alarm value, hysteresis, and output operation. For information about alarm types and other parameters, see section 1.3, “Functions of the Main Module.”During recording, only values can be changed. Setting Mode 3 Meas. Mode Setting and Data acquisiton Alarm Setting (AI/DI) You can set measurement channel alarms. 1. From the top screen, click Channel Setting > Alarm Setting (AI/DI). 2. Select the channel group you wish to set from the Channel List list. Alarm Settings 1. Select the alarm type from the Level list. 2. Enter an alarm value in the Value box. 3. Enter a hysteresis value in the Hysteresis box. Output Settings 1. Turn output ON/OFF in the Action box. 2. Enter an alarm output channel in the Relay box. Click the Apply button. This enables the settings changes. Alarm Setting (MATH) You can set MATH channel alarms. 1. From the top screen, click Channel Setting > Alarm Setting (MATH). 2. Below, enter settings in the same manner as with measurement alarms. With MATH alarms, there is no hysteresis setting. IM MW100-01E 3-21 3.8 Digital Output Settings Setting Mode Relay Settings You can set the operation type, excitation status, hold, operation, and reflash. 1. From the top screen, click Channel Setting > DO Channel Setting. 2. Select the channel group you wish to set from the Channel List list. Relay Output Factor Settings Select Relay output factor from the Type box. If you select ALARM, you must set Energize/De-energize, hold, operation, and re-alarm. If you select CommandDO(COM), you must set Energize/De-energize. Energize Setting Select to energize (ENERG) or de-energize (DE_EN) the relay in the Energize list. Hold, Action, and Reflash Settings 1. To set the relay status to Hold in the Hold list, select ON. 2. Select a relay operation condition in the Action list. 3. Select ON in the Reflash list to perform the reflash function. Click the Apply button. This enables the settings changes. 3-22 IM MW100-01E 3.9 Analog/PWM Output Settings Setting Mode You can enter analog and PWM output settings. 1. 2. From the top screen, click Channel Setting > AO/PWM Channel Settings. Select the channel group you wish to set from the Channel List list. 3 You can set the output type, action, range, span, preset value, and reference channel. Output Types In the Mode box, select AO to output or SKIP to not output. Output Action Setting Select TRANS (transmission output) or COM (arbitrary output) in the Action box. Output Range Settings Select 10 V (voltage output) or 20 mA (current output) in the Range box. Span Setting Select the actual output range from the allowed output range. Enter the lower limit of span in the Lower box under Span. Also, enter the upper limit value in the Upper box. Preset Value In the Preset Value box, enter a preset value for the output operation when turning on the power or when an error occurs. When a preset value is selected in the output operation settings, the specified value is output. Reference Channel Settings Enter an input channel or MATH channel for transmission output in the Reference Channel box. This is set if TRANS is selected for the output action. IM MW100-01E 3-23 Setting and Data acquisiton Output Range Settings (Analog Output) 3.9 Analog/PWM Output Settings Output Range Settings (PWM Output) You can set the output type, action, range, span, pulse interval, preset value, and reference channel. Output Type In the Mode box, select PWM to output or SKIP to not output. Output Action Settings Select TRANS (transmission output) or COM (arbitrary output) in the Action box. Setting the Pulse Resolution Select the pulse resolution in the Range box. Span Setting Select the actual output range from the allowed output range. Enter the lower limit of span in the Lower box under Span. Also, enter the upper limit value in the Upper box. Pulse Interval In the Pulse Interval box, enter a coefficient that determines the pulse interval. Preset Value In the Preset Value box, enter a preset value for the output operation when turning on the power or when an error occurs. When a preset value is selected in the output operation settings, the specified value is output. Reference Channel Settings Enter an input channel or MATH channel for transmission output in the Ref. Channel box. This is set if TRANS is selected for the output method. Click the Apply button. This enables the settings changes. 3-24 IM MW100-01E 3.9 Analog/PWM Output Settings Output Operation Settings You can set the operation upon power ON and when an error occurs. 1. From the top screen, click System Setting > AO/PWM Preset Setting. 2. Select the channel group you wish to set from the Channel List list. Setting the Power ON Operation Select LAST or PRESET in the Power ON list under Preset Value. When PRESET is selected, the specified value is output in the output range setting screen. 3 Setting and Data acquisiton Setting the Operation upon Error Occurrence Select LAST or PRESET in the Error list under Preset Value. When PRESET is selected, the specified value is output in the output range setting screen. IM MW100-01E 3-25 3.9 Analog/PWM Output Settings Meas. Mode Transmission Output Control Turning Transmission Output ON and OFF for Analog Output/PWM Output This is set if TRANS is selected for the output action in the output range settings. 1. From the top screen, click Channel Setting > Transmission Output Control. 2. Select the channel group you wish to set from the Channel List list. 3. Select ON or OFF in the Output list of the channel number you wish to set. 4. Click the Apply button. Starts transmission output on channels set to ON. 3-26 IM MW100-01E 3.10 Event/Action Settings By linking the Event function and Action function, you can control the operations of the MW100. Setting Mode 3 From the top screen, click System Setting > Event/Action Setting. Select the number group of the Event / Action you wish to set from the list. Selecting the Event Type 1. Select the event (event function) type in the Event list of the number you wish to set. Depending on this setting, the Channel box may become enabled, meaning that the settings in steps 2 and 3 are required. 2. In the Channel box, enter the number (channel number, relay number, etc.) for the event selected in the event type selection in step 1. 3. If the event type is ALARM_CH, select the alarm level number for the event in the Channel box. Selecting the Event Detection Method Select the event detection method from the Detection list. The action (action function) that can be selected varies depending on the item selected for the detection method. Selecting the Action Type 1. Select the action (Action function) type from the Action list. If Flag is selected for the action, the Flag box is enabled, meaning that the setting in step 2 is required. 2. Enter a flag number in the Flag box. Click the Apply button. This enables the settings changes. IM MW100-01E 3-27 Setting and Data acquisiton 1. 2. 3.11 Timer and Match Time Settings The time up action function can be controlled through the specified time interval and time. Setting Mode Timer Settings From the top screen, click System Setting > Timer Setting. Relative Time Timer 1. Select RELATIVE in the Mode list. 2. Enter the desired time interval in the Relative Time boxes. The day, hour, and minute are arranged in order from the left. Absolute Time Timer 1. Select ABSOLUTE in the Mode list. 2. Enter the desired reference time in the Ref. Time boxes under Absolute Time. The hour and minute are in order from the left in the box. 3. Select the time interval you wish to set in the Interval list under Absolute Time. M and H indicate the minute and hour respectively. Click the Apply button. This enables the settings changes. Setting the Match Time From the top screen, click System Setting > Match Time Setting. Monthly Timeup 1. Select MONTH in the Mode list. 2. Enter the desired date and time in the Time list. The day, hour, and minute are arranged in order from the left. Weekly Timeup 1. Select WEEK in the Mode list. 2. Select a day of the week from the Time list, and enter the desired time in the Time box. Enter the hour and minute in the second and third box from the left, respectively. Weekly Timeup 1. Select DAY in the Mode list. 2. Enter the desired time in the Time box. Enter the hour and minute in the second and third box from the left, respectively. Click the Apply button. This enables the settings changes. 3-28 IM MW100-01E 3.12 Scale Input Methods The following explains the methods for inputting scale values. Scale Values Enter only the desired number of digits in the box for the upper and lower limit values of scale. Select the number of digits after the decimal point from the list. Number Input Decimal Point Position 0.00 to 100.00 Lower limit: 0 Upper limit: 10000 2 10.0 to 500.0 Lower limit: 100 Upper limit: 5000 1 –6.000 to 4.500 Lower limit: –6000 Upper limit: 4500 3 3 Setting and Data acquisiton Desired Scale Example of a filled in screen. IM MW100-01E 3-29 3.13 Starting and Stopping Measurement, Computation, and Recording This is an explanation of the procedure for starting and stopping measurement, computation, and recording. These operations can be performed by pressing keys on the MW100 main module, or from a browser. Starting and stopping of measurement, computation, and recording must be performed one at a time. Starting and Stopping Measurement Using Main Module Keys • Starting Measurement While measurement is stopped, briefly press the START key. Measurement starts and the unit switches to Measurement mode. • Stopping Measurement While recording and computation are stopped, briefly press the STOP key. Measurement stops and the unit switches to Setting mode. Using a Browser • Starting Measurement In the Status table in the top screen, select START from the Operation list under the Measurement item. Measurement starts and the unit switches to Measurement mode. • Stopping Measurement In the Status table in the top screen, select STOP from the Operation list under the Measurement item. Measurement stops and the unit switches to Setting mode. Starting and Stopping Computation This function is enabled when the MATH function (/M1) option is installed. You can use the function when MATH channels are set. Using Main Module Keys • Computation Start While recording is stopped, and during measurement, briefly press the START key. Computation starts. • Computation Stop During computation, and while recording is stopped, briefly press the STOP key. Computation stops. Using a Browser The main module can be switched to Measurement mode. This is done while recording is stopped. • Starting Computation 1. From the top screen, click Single Screen or Dual Screen under the Monitor item. 2. Click the Start computation icon. Computation starts. • Stopping Computation 1. From the top screen, click Single Screen or Dual Screen under the Monitor item. 2. Click the Stop computation icon. Computation stops. For information about the operation screen, see section 3.16, “Measured Data Monitor Display/Settings.” 3-30 IM MW100-01E 3.13 Starting and Stopping Measurement, Computation, and Recording Starting and Stopping Recording Using Main Module Keys • Starting Recording During measurement, hold down the START key for two or more seconds. Recording starts. • Stopping Recording During recording, hold down the STOP key for two or more seconds. Recording stops. 3 Computation and Recording According to Status You can control the status of measurement, recording, and computation on the main module according to changes in status. For details, see section 3.3, “System Settings.” Checking the Operating Status of the MW100 Using the Status Indicators You can confirm the operational status of the MW100 by viewing the status indicators on the front panel. MEASURE Behavior Color Off -- Indication Setting mode On Green Measurement mode Behavior Color Indication Turning Off -- Recording stopped On Green Recording Blinking Green Transitioning from recording to recording stop Color Indication RECORD ALARM Behavior Turning Off -- No alarm On Red Alarm active or alarm hold Color Indication MATH Behavior IM MW100-01E Turning Off -- Computation stopped On Green Computing Blinking stopped Green Transitioning from computing to computing 3-31 Setting and Data acquisiton Using a Browser The main module can be switched to Measurement mode. • Starting Recording 1. From the top screen, click Single Screen or Dual Screen under the Monitor item. 2. Click the Start Recording icon. Recording starts. • Stopping Recording 1. From the top screen, click Single Screen or Dual Screen under the Monitor item. 2. Click the Stop Recording icon. Recording stops. For information about the operation screen, see section 3.16, “Measured Data Monitor Display/Settings.” 3.14 Network Utility Settings Setting Mode DNS Client Settings 1. 2. 3. 4. From the top screen, click Communication Setting > DNS Client Setting. In the Primary and Secondary boxes under DNS Server, enter the IP addresses of the respective DNS servers. In the Primary and Secondary boxes under Domain Suffix, enter the domain name. Click the Apply button. FTP Client Settings 1. 2. 3. 4. 5. 6. 7. 8. 9. 10. 11. 3-32 From the top screen, click Communication Setting > FTP Client Setting. Select the Client function check box to enable the function. Enter the shift amount (in minutes) in the Transfer time shift box. Select the number of the destination to be set in the Destination list. You can set up to two destinations. Enter the server name in the Server Name box. Enter the server port number in the Port Number box. Enter the user name in the User Name box. Enter the password in the Password box. Enter the folder to be accessed when opening a connection in the Directory box. You can select the PASV Mode check box to use FTP passive mode. Click the Apply button. IM MW100-01E 3.14 Network Utility Settings Mail Client Settings These settings configure the e-mail function. The setting screen contains mail client setting 1 and mail client setting 2. Mail Client Setting 2 1. From the top screen, click Communication Setting > Mail Client Setting 2. 2. Enter the subject of the e-mail in the Subject box under Mail Header. Up to thirty-two alphanumeric characters can be input. 3. Enter the sender mail address in the Sender box. 4. Enter the recipient address in the Recipient 1 box. Enter the address for Recipient 2 in the same manner. You can specify multiple addresses for each recipient. Separate each address with a space. You do not have to set both recipients. Use up to 150 alphanumeric characters. 5. To set up alarm notification, select an address for alarm notification in the Alarm Notification list. 1_2 sends notification to both recipient 1 and 2. 6. Enter an alarm notification channel in the Alarm Channel Set box under Alarm Notification. To add instantaneous values, select the Instantaneous Data check box. Specify channel numbers by delimiting them with dots as in 001.003.005, or specify a range as in 004-008. IM MW100-01E 3-33 3 Setting and Data acquisiton Mail Client Setting 1 1. From the top screen, click Communication Setting > Mail Client Setting 1. 2. Select the SMTP Client Function check box. This enables e-mail transmission. 3. Enter the name of the SMTP server in the Server Name box under SMTP Server. 4. Enter the SMTP server port number in the Port box under SMTP Server. 5. Enter the name of the POP3 server in the Server box under POP3 Server. 6. Enter the POP3 server port number in the Port box under POP3 Server. 7. To require authorization (POP before SMTP) when sending e-mail, select POP3 in the User Authorization list. This enables entry of the User Authorization items. 8. Enter the name for logging into the POP3 server in the User box under User Authorization. 9. Enter the password for logging into the POP3 server in the Password box under User Authorization. 10. Click the Apply button. 3.14 Network Utility Settings 7. 8. 9. 10. 11. 12. 13. To set up notification of data file creation, select a notification address in the File Creation Notification list. In the same manner as in step 7, set Media Alarm Notification , Power Failure Notification , and System Error Notification. To set up Periodic Report notification, select an address for notification in the Periodic Report list. Select transmission interval time from the Interval box under Periodic Report. Enter a reference time for the send interval in the Time box under Periodic Report. To add instantaneous values, select the Instantaneous Data check box under Periodic Report. Click the Apply button. Time Synchronization Client Settings Enter these settings to automatically synchronize the time. 1. From the top screen, click Communication Setting > SNTP Client Setting. 2. Select the SNTP Client Function check box to enable the function. 3. Enter the name of the NTP server in the Server box under SNTP Server. 4. Enter the SNTP server port number in the Port box. 5. Enter a reference time to be queried Time box under Query Action. Next, select a query time interval in the Interval list. 6. Click the Apply button. 3-34 IM MW100-01E 3.14 Network Utility Settings Server Settings These settings enable the various server functions. Keep Alive Function Select the TCP Keep Alive check box to enable the function. Communication Timeout Function 1. Select the Application Timeout check box to enable the function. 2. Enter the time in minutes until the timeout in the Timeout box. 3 Click the Apply button. IM MW100-01E 3-35 Setting and Data acquisiton Server List Settings 1. To use a server, turn it ON in the Action box of the corresponding server name. 2. Enter the port number used by the server in the Port box. Normally, you can use the default setting. 3.15 Saving and Loading Setup Data You can save and load MW100 main unit settings. Saving and Loading Setup Data From the top screen, click System Setting > Save/Load Setup Data. Saving Settings 1. Select SAVE in the Operation list. 2. Enter a file name in the File Name box, then click the Save/Load button.The extension cannot be input (it is fixed at PNL). If you enter an existing file name, the existing file is overwritten. Loading Settings 1. Select LOAD in the Operation list. 2. Enter a file name in the File box, then click the Save/Load button. Setup Data Save Conditions 1. 2. 3. 4. 5. 6. 3-36 From the top screen, click System Setting > Save Option Setting. Select the Channel Setting check box to save. Select the Recording Setting check box to save. Select the Communication Setting check box to save. Select the Other Setting check box to save. Click the Apply button. IM MW100-01E 3.16 Measured Data Monitor Display/Settings You can monitor-display data measured on the MW100. The screen consists of Screen display 1 and Screen display 2, and for each you can select trend display, numerical display, meter display, or bar graph display. 3 Meas. Mode Setting and Data acquisiton Monitor-Display of Measured Data Single Screen Use this when the monitor contains a single screen. You can display one group. From the top screen, click Single Screen. Dual Screen Use this when the monitor contains two screens. You can display two groups. From the top screen, click Dual Screen. IM MW100-01E 3-37 3.16 Measured Data Monitor Display/Settings Explanation of Display Items This is an explanation of the icons and measured data display items used in the monitor screen. Record Start/Stop, Computation Start/Stop Used to start and stop data acquisition. The icons of all functions are shown in the figure for the sake of explanation, but normally buttons are dimmed when disabled. • Operation Icons Computation start/stop button Starts and stops computation (/M1 Option) Recording Start/Stop button Starts and stops data acquisition. Pause button Pauses monitor display updating. Data acquisition does not stop. Output channel operation icons (When output modules installed) Area for displaying manual DO and operation icons for arbitrary output. Displays one channel’s worth. Operational status Illuminates during alarms, recording, and computation. Alarm ACK button Clears an alarm status hold Timer reset button Resets the timer. Message button Select a message with the UP/DOWN buttons, then click to write. Messages are set in advance. Computation reset/clear button Resets/clears computation. (/M1 Option) Transmission output start/stop button (When output modules installed) Collectively starts or stops output on output channels set for transmission output. If both ON and OFF are mixed in the transmission output control settings, the operation stops. • Output Channel Operation Icons Manual DO channel: Arbitrary output channel: Channel number switching Channel number switching Click to switch the channel number Click to switch the Channel channel number number display Channel number display Changes output value Relay ON/OFF button Click to turn relays ON and OFF Output value display bar Displays output values in a bar graph. Also, you can click to change the output values. Click to change the output value. Output value display Analog output: V or mA display PWM Output: % display Monitor Display Switching and Group Selection Select a monitor display Select the display group Select the display group you wish to display. Select a monitor display type. • Meter • Bar graph • Numeric value • Trend Select background color Switch background color between white and gray 3-38 IM MW100-01E 3.16 Measured Data Monitor Display/Settings Contents of the Status Bar MW100 serial number MW100 firmware version Measurement group recording operation (1 to 3)/ thinning recording operation status (T) Recording: Yellow Trigger wait state: Green Stop state: Gray 3 Memory capacity of the CF card Setting and Data acquisiton Used space (%) displayed with a green bar. When the CF card is not installed, the not-installed display appears. MATH processing performance (/M1 Option) When computation processing reaches 100%, data loss occurs. Monitor Display Screen • Trend Display Select the waveform display zone • Auto zone • Slide zone • Full zone • User zone Zoom in or out of the time axis Measurement interval Alarm display ON/OFF Switch waveform thickness Select Y-axis display Alarm indication ON/OFF Channel ON/OFF Zone display section ON/OFF Time axis zoom factor Selecting the Display Zone of Waveforms • User Zone Displays each waveform at the position of the Zone specified in the Display Scale. The Y-axis displays active channels. • Full Zone Each waveform is displayed in the full zone of the waveform display area. The Yaxis displays active channels. • Slide Zone Each waveform is displayed slightly staggered across the waveform display area. The Y-axis displays active channels. • Auto Zone The waveform display area is divided up according to the number of displayed waveforms. IM MW100-01E 3-39 3.16 Measured Data Monitor Display/Settings • Numerical Display Displays measured data as numerical values. When alarms are set, the alarm status is displayed to the left of the numerical value. Alarm status Alarm not set up Illuminated: No alarm occurring Blinking: Alarm hold clear wait after alarm factor cleared Illuminated: Alarm occurring (symbol in circle is alarm type: H/L/rH/rL/dH/dL) Blinking: Alarm hold clear wait after alarm factor occurrence • Bar Graph Displays measured values in a bar graph. When alarms are set, the alarm status is displayed to the left of the bar graph. For information on alarm statuses, see Numerical Display in this section. • Meters Displays measured values in a meter. When alarms are set, the alarm status is displayed to the left of the meter. For information on alarm statuses, see Numerical Display in this section. 3-40 IM MW100-01E 3.16 Measured Data Monitor Display/Settings Setting Mode Display Settings Tag Settings Enter Tag names to assign to measurement and MATH channels. 1. From the top screen, click Display Setting > Channel Tag Setting. 2. Select the tag number group you wish to set from the Channel List list. 3. Enter a tag name in the Tag box of each tag number. You can use fifteen alphanumeric characters. 4. Click the Apply button. 3 Setting and Data acquisiton Message Settings You can specify a message to be written along with data saving during recording. 1. From the top screen, click Display Setting > Message Setting. 2. Enter the message in the Message box in the Message List. You can use fifteen alphanumeric characters. 3. Click the Apply button. IM MW100-01E 3-41 3.16 Measured Data Monitor Display/Settings Setting Display Colors 1. From the top screen, click Display Setting > Channel Color Setting. 2. Select the channel group you wish to set from the Channel List list. 3. Select the color you wish to assign in the Color list of each channel. Color samples are shown towards the bottom of the screen 4. Click the Apply button. Display Scale Settings 1. From the top screen, click Display Setting > Group Scale Setting. 2. Select the channel group you wish to set from the Channel List list. 3. Select LINEAR or LOG in the Scale list. 4. Select the number of divisions in the Div list. It can only be selected when set to LINEAR display. If you select AUTO, the number of divisions is determined automatically from the scale or span of the specified channel. 5. Select a display position of NORMAL or CENTER in the Bar Graph Type list. The numerical or bar graph display is updated accordingly. 6. Specify a percentage from the top or bottom in the Zone boxes. Enter a Lower value of 0 to 95 (%), and an upper value from 5 to 100 (%). 7. Click the Apply button. 3-42 IM MW100-01E 3.16 Measured Data Monitor Display/Settings Display Groups Settings 1. From the top screen, click Display Setting > Group Setting. 2. Select the group you wish to set from the Display Group list. 3. Enter the group name in the Group Name box (using up to fifteen characters). 4. Enter the channel numbers you wish to assign to the group in the Channel Set box. Specify channel numbers by delimiting them with dots as in 001.003.005, or specify a range as in 004-008. Up to twenty channels (one hundred characters) can be specified. 5. Click the Apply button. 3 Setting and Data acquisiton Trip Line Setting 1. From the top screen, click Display Setting > Trip Line Setting. 2. Select the group number you wish to set from the Display Group list. 3. Turn ON the line you wish to display in the Display list. 4. Select the color you wish to display in the Color list. Color samples are shown toward the bottom of the screen. 5. Specify a percentage for the position of the trip line in the Trip Point box. 100% is the scale maximum in the trend display, and 0% is the minimum. 6. Click the Apply button. IM MW100-01E 3-43 3.16 Measured Data Monitor Display/Settings Other Settings 1. From the top screen, click Display Setting > Other Settings. 2. Select whether to display channel numbers or tag names in the Channel/No. Tag Display list. 3. Click the Apply button. Setting Mode Meas. Mode Log Information You can display information from the data acquisition log, alarm summaries, and other sources. For information about display contents, see the MW100 Communication Command manual (IM MW100-17E). Log Information 1. From the top screen, click System Setting > Log Information. 2. Select the type of log you wish to display in the Log Information list. Enter the number of lines to display in the box to the right of the list. 3. Click the Update button. The updated time is displayed in the display box aligned with the Log Information list, and the updated time current log information is displayed in the log display area. Log output request time No. displayed No. saved 3-44 IM MW100-01E Chapter 4 Troubleshooting and Maintenance 4.1 Error Display on the 7-Segment LED and Corrective Actions The main module has a two-digit 7-segment LED. The 7-segment LED displays the system status. This section describes the displays on the 7-segment LED when errors occur on the system and their corrective actions. For information about normal displays other than for errors, see section 1.3, “Functions of the Main Module.” If servicing is necessary, or if the instrument is not operating correctly after performing the corrective actions below, contact your nearest YOKOGAWA dealer. Errors upon Startup Display Probable Cause Corrective Action Ref. section b* (where * is any character other than F). The dip switch settings are not correct. Turn OFF the power, remove the CF card, turn ON all dip switches, and power up again. If the situation does not change servicing is required. 1.3 bF. The dip switch settings are not correct. Powering up in setup reset mode. Turn OFF the power, turn ON all dip switches, and power up again. Since all settings such as the IP address are initialized, reconfiguration is necessary. 1.3 System Errors The left and right digits of the 7-segment LED display “F” and an error code, respectively. The LED illuminates. Display Possible Problem Corrective Action F0 System ROM error. Servicing required. Ref. section - F1 SRAM error Servicing required. - F2 EEPROM error Servicing required. - F3 Error in the internal battery of the main module. Servicing required. However, this error is also displayed immediately after the battery is replaced. If this happens, power-cycle the MW100. - F4 Ethernet controller error Servicing required. - F6 Web file load error Servicing required. - FF Error in writing unit information Servicing required. - Module Errors The left and right digits of the 7-segment LED display are U and an error code, respectively. The LED illuminates. In the case of module errors, the error number and the corresponding module number are displayed alternately as shown in the figure below. Error number Module number Display Possible Problem Corrective Action Ref. section U0 Range information error. Servicing required. - U1 Calibration value error. Check the module’s installation status, then recalibrate the module. If the error occurs even after recalibrating, servicing is required. - U2 Calibration reference voltage value is not correct. (during calibration) Check whether the correct calibration reference voltage is being applied or whether the channel to which the voltage is applied is correct. - U3 Error in writing the calibration value. Servicing required. - U4 The installed module cannot be used. Replace the module with one that can be used. - IM MW100-01E 4-1 4 Troubleshooting and Maintenance The left and right digits of the 7-segment LED display “b” and an error code, respectively. The LED illuminates. 4.1 Error Display on the 7-Segment LED and Corrective Actions Communication Errors The left and right digits of the 7-segment LED display “C” and an error code, respectively. The LED blinks. Display Possible Problem Corrective Action Ref. section C0 DHCP address acquisition error Check network connections. Use a Fixed IP address Check with your network administrator whether your environment supports acquisition of addresses by DHCP. 2.6, 3.2 * C1 DNS name error Check network connections. Check with your network manager to determine whether your environment supports host name registration. 2.6 * * See the MW100 Viewer Software User’s Manual (IM MW180-01E). Settings Errors The code is divided into two parts which are displayed alternately on the 7-segment LED; in the first part, the letter E appears in the left digit with the hundreds digit of the error code to the right, and the second part consists of the last two digits of the error code. 4-2 Display Possible Problem Corrective Action E001 Invalid function parameter. Enter the correct parameter. E002 Value exceeds the setting range. Set a value within the allowable range. E003 Incorrect real number format. Use the correct real number format. E004 Real number value exceeds the setting range. Set a real number within the allowable range. E005 Incorrect character string. Set an allowable character string. E006 Character string too long. Set a character string within the allowable length. E007 Incorrect display color format. Specify a display color using the correct format. E008 Incorrect date format. Enter the date using the correct format. E009 Data value exceeds the setting range. Set a date within the allowable range. E010 Incorrect time format. Enter the time using the correct format. E011 Time value exceeds the setting range. Set a time within the allowable range. E012 Incorrect time zone format. Specify a time zone using the correct format. E013 Time zone value exceeds the setting range. Set a time zone within the allowable range. E014 Incorrect IP address format. Enter an IP address using the correct format. E020 Invalid channel number. Enter the correct channel number. E021 Invalid sequence of first and last channel. Set a value for the last channel that is greater than the first channel. E022 Invalid alarm number. Enter the correct alarm number. E023 Invalid relay number. Enter a correct relay number. E024 Invalid sequence of first and last relay. Set a value for the last relay that is greater than the first relay. E025 Invalid MATH group number. Enter a correct MATH group number. E026 Invalid box number. Enter the correct box number. E027 Invalid timer number. Enter the correct timer number. E028 Invalid match time number. Enter the correct match time number. E029 Invalid measurement group number. Enter a correct measurement group number. E030 Invalid module number. Enter a correct module number. E031 Invalid start and end time of DST. Enter a correct start and end time. E032 Invalid display group number. Enter a correct display group number. E033 Invalid tripline number. Enter a correct tripline number. E034 Invalid message number. Enter a correct message number. E035 Invalid user number. Enter a correct user number. E036 Invalid server type. Enter a correct destination type. E037 Invalid e-mail contents. Enter a correct send destination. E038 Invalid server number. Enter a correct server number. E039 Invalid command number. Enter a correct command number. IM MW100-01E 4.1 Error Display on the 7-Segment LED and Corrective Actions Display Possible Problem E040 Invalid client type. Corrective Action Enter a correct client type. E041 Invalid server type. Enter a correct server type. E050 Invalid input type. Enter an input type that can be selected for the module specified by the channel number. E051 Module of an invalid input type found in the range of specified channels. Enter an input type that can be selected for all modules specified by the channel range. E052 Invalid measuring range. Enter a measuring range that can be selected for the module specified by the channel number. E053 Module of an invalid measuring range found in the range of specified channels. Enter a measuring range that can be selected for all modules specified by the channel range. E054 Upper and lower limits of span cannot be equal. Set a different value for the upper and lower limits of span. E055 Upper and lower limits of scale cannot be equal. Set a different value for the upper and lower limits of scale. E056 Invalid reference channel number. Set channels other than the input module’s own channel. E060 Cannot set an alarm for a skipped channel. Set a type for the channel number setting other than SKIP. E061 Cannot set an alarm for a channel on which MATH function is turned OFF. Set the Use/Do not Use setting for expressions on the channel number to Use. 4 Troubleshooting and Maintenance E062 Invalid alarm type. Enter an allowed alarm type. E063 Invalid alarm relay number. Set a relay number for alarm output relays. E065 Cannot set hysteresis for a channel on which alarm are turned OFF. Set the channel number alarm type to something other than OFF. E070 Nonexistent channel specified in MATH expression. Check whether a channel number outside of the allowable range was specified in the expression. E071 Nonexistent constant specified in MATH expression. Check whether a MATH constant outside of the allowable range was specified in the expression. E072 Invalid syntax found in MATH expression. Check whether the syntax of the expression is correct. E073 Too many operators for MATH expression. Reduce the number of operators. E074 Invalid order of operators. Check whether the relationship between the operators used in the expression satisfies proper syntax. E075 Upper and lower limits of MATH span cannot be equal. Set a different value for the upper and lower limits of the MATH span. E080 Incorrect MATH group format. Check whether the MATH group format is correct. E081 Incorrect channels for MATH group. Check whether there are any channels outside the allowable range specified in the MATH group. E082 Too many channels for MATH group. Reduce the number of channels specified in the MATH group. E090 Incorrect break point format. Use the correct break point format. E091 Time value of break point exceeds the setting range. Set a time within the allowable range. E092 Output value of break point exceeds the setting range. Set an output value within the allowable range. E093 No break point found. Set one or more break points. E094 Invalid time value of first break point. Set the time of break point 1 to zero. E095 Invalid time sequence found in break points. Set the times of break points in ascending order. E100 Invalid output type. Enter an output type that can be selected for the module specified by the channel number. E101 Module of an invalid output type found in the range of specified channels. Enter an output type that can be selected for all modules specified by the channel range. E102 Invalid output range. Enter an output range that can be selected for the module specified by the channel number. E103 Module of an invalid output range found in the range of specified channels. Enter an output range that can be selected for all modules specified by the channel range. E104 Upper and lower limits of output span cannot be equal. Set a different value for the upper and lower limits of output span. E105 Invalid transmission reference channel. Set the channel for the input module. E110 Invalid channel number for contact input event. Set the channel number for the universal input module or DI module. IM MW100-01E 4-3 4.1 Error Display on the 7-Segment LED and Corrective Actions 4-4 Display Possible Problem Corrective Action E111 Invalid channel number for alarm event. Set an input module or MATH channel number. E112 Invalid relay number for relay event. Set the channel number for the DO module. E113 Invalid action type. Enter a correct action type. E114 Invalid combination of edge and level detection actions. Set the edge and level detection types to something different. E115 Invalid combination of level detection actions. Set events of different types to different actions in level detection. E116 Invalid flag number. Enter a correct flag number. E120 Invalid measurement group number. Set the measurement interval so that meas. gr 1 ≤ meas. gr 2 ≤ meas. gr 3. The maximum allowable ch for 10 ms measurement is 10, and for 50 ms, 30. E121 Invalid measurement group number for MATH interval. Set math interval to a measurement group of 100 ms or longer. When performing measurement by input module, set the measurement group number for executing measurement. E130 Size of data file for measurement group 1 exceeds the upper limit. Set the number of saved channels, recording interval, and recording data length so that the data file of measurement group 1 does not exceed 10 MB. E131 Size of data file for measurement group 2 exceeds the upper limit. Set the number of saved channels, recording interval, and recording data length so that the data file of measurement group 2 does not exceed 10 MB. E132 Size of data file for measurement group 3 exceeds the upper limit. Set the number of saved channels, recording interval, and recording data length so that the data file of measurement group 3 does not exceed 10 MB. E133 Size of MATH data file exceeds the upper limit. Set the number of saved channels, recording interval, and recording data length so that the MATH data file does not exceed 10 MB. E134 Size of thinned data file exceeds the upper limit. Set the number of saved channels, recording interval, and recording data length so that the thinned data file does not exceed 10 MB. E135 Cannot set smaller value for thinning recording interval than measuring or MATH interval. Set a value for the thinning recording interval higher than the measurement and MATH interval. E136 Invalid combination of thinning recording, measuring and MATH interval. Set a value for the thinning recording interval than is a common multiple of the measurement and MATH intervals. E137 Cannot set smaller value for thinning recording data length than thinning recording interval. Set a value for the thinning recording data length that is larger than the thinning recording interval. E138 Cannot set recording operation for measurement group with no measuring interval. Set the measurement interval of the measurement group number to something other than OFF. E139 Invalid recording interval. Set a recording interval which can be set to the measurement interval of the measurement group. E140 Upper and lower limits of the display zone cannot be equal. Set the upper and lower limits of display zone to a different value. E141 Cannot set smaller value than lower limit of display zone for upper limit. Set a larger value for the upper limit than that of the lower limit. E142 Width of display zone must be 5% of that of the entire display or more. Set the upper and lower limits so that the difference between them is 5% or more. E145 Incorrect display group format. Enter a display group of the correct format. E146 Too many channels for display group. Set 20 or fewer channels for a single group. E150 IP address must belong to class A, B, or C. Set an IP address belonging to class A, B, or C. E151 Net or host part of IP address is all 0’s or 1’s. Set a valid combination of IP address and subnet mask. E152 Invalid subnet mask. Enter a setting according to your network. E153 Invalid gateway address. Make sure that the net part of the IP address and default gateway match. E160 Incorrect alarm e-mail channel format. Specify a channel using the correct format. E165 Invalid channel number for Modbus command. Enter a correct channel. E166 Invalid combination of start and end channel for Modbus command. Set the first and last channel to the same type. IM MW100-01E 4.1 Error Display on the 7-Segment LED and Corrective Actions Display Possible Problem Corrective Action E167 Invalid sequence of start and end channel for Modbus command. Set the last channel equal or greater than the first channel. E168 Too many channels for command number. Set a valid number of channels for the data type. Execution Error The code is divided into two parts which are displayed alternately on the 7-segment LED; in the first part, the letter E appears in the left digit with the hundreds digit of the error code to the right, and the second part consists of the last two digits of the error code. Display Possible Problem Corrective Action E201 Cannot execute due to different operation mode. Confirm the operation mode. E202 Cannot execute when in setting mode. Change the mode before execution. E203 Cannot execute when in measurement mode. Change the mode before execution. E204 Cannot change or execute while saving to memory. Stop the save operation before executing. E205 Cannot execute during MATH operation. E206 Cannot change or execute during MATH operation. Stop the MATH operation before executing. E207 Cannot change or execute while saving/loading settings. Execute after the settings are saved or loaded. E211 No relays for communication input found. Check installation of relays and the relay output types. E212 Initial balance failed. Check the wiring. E213 No channels for initial balance found. Check the target channels. E214 No channels for transmission output found. Specify channels for transmission output. E215 No channels for arbitrary output found. Specify channels for arbitrary output. E221 No measurement channels found. Check the measurement module, measurement group number, measurement interval, and other settings. E222 Invalid measurement interval. Set the measurement interval so that: Meas. gr 1 ≤ meas. gr 2 ≤ meas. gr 3 E223 Too many measurement channels. The number of measurable channels during 10 ms measurement is 10, and for 50 ms measurement, 30. E224 No MATH channels found. Check the MATH channel settings. E225 Invalid MATH interval. Set the MATH interval to measurement groups of 100 ms or more. When measuring with measurement modules, set the measurement group numbers on which to perform measurement. E226 Cannot start/stop MATH operation. Cannot execute because MATH start is set for the level detection action. E227 Cannot start/stop recording. Cannot execute because MATH start is set for the level detection action. 4 Execution Errors The code is divided into two parts which are displayed alternately on the 7-segment LED; in the first part, the letter E appears in the left digit with the hundreds digit of the error code to the right, and the second part consists of the last two digits of the error code. Display Possible Problem Corrective Action E301 CF card error detected. Do not eject or otherwise disturb the card while being accessed. E302 No enough free space on CF card. Delete unneeded files to free up space. Replace the CF card. E303 CF card is write-protected. Check write permissions. E311 CF card not inserted. Insert the CF card. E312 Cannot format CF card. Check the CF card. E313 CF card damaged or not formatted. Reinsert the CF card or format it. E314 File is write-protected. Check write permissions. E315 No such file or directory. Check the files and folders. * * May occur in the MW100 internal processing (during an abnormality) IM MW100-01E 4-5 Troubleshooting and Maintenance Stop the MATH operation before executing. 4.1 Error Display on the 7-Segment LED and Corrective Actions Display Possible Problem Corrective Action E316 Number of files exceeds the upper limit. Delete unneeded files to reduce the number of files. E317 Invalid file or directory name. Check the files and folders. * E318 Unknown file type. Check the files. E319 Same name of file or directory already exists. Check the files and folders. * E320 Invalid file or directory operation. Check the files and folders. * E321 File is in use. Wait until access is finished. E331 Setting file not found. Check the name of the setting file. E332 Setting file is broken. Could not load setting file because it is corrupted. E341 FIFO buffer overflow. You must reduce the time required to store files. Delete unneeded files to free up space. E342 Data to be saved to file not found. Check the settings. E343 Power failed while opening file. Files may have been damaged. Take appropriate action for power failure. E344 Some or all data prior to power outage could not be recovered. Do not change the CF card during a power failure. E345 Could not restart recording after recovery from power outage. Perform the record start operation. E346 Recording could not be started due to power outage. Perform the re-recording start operation. Take appropriate action for power failure. * May occur in the MW100 internal processing (during an abnormality) Communication Command Error The code is divided into two parts which are displayed alternately on the 7-segment LED; in the first part, the letter E appears in the left digit with the hundreds digit of the error code to the right, and the second part consists of the last two digits of the error code. 4-6 Display Possible Problem Corrective Action E401 Command string too long. Keep the command within 2047 Bytes from first character to terminator. E402 Too many commands enumerated. Set the number of enumerated commands within 99. E403 Invalid type of commands enumerated. Send the commands without enumerating them. E404 Invalid command. Confirm the command name. E405 Not allowed to execute this command. Login at a level that allows execution of this command. E406 Cannot execute due to different operation mode. Switch to a mode that allows execution of this command. E407 Invalid number of parameters. Check the number of parameters. E408 Parameter string too long. Keep the length of individual parameters within 512 Bytes. E411 Daylight saving time function not available. Not available with the current model. E412 Temperature unit selection not available. Not available with the current model. E413 MATH option not available. Not available with the current model. E414 Serial communication interface option not available. Not available with the current model. IM MW100-01E 4.1 Error Display on the 7-Segment LED and Corrective Actions Communication Error The code is divided into two parts which are displayed alternately on the 7-segment LED; in the first part, the letter E appears in the left digit with the hundreds digit of the error code to the right, and the second part consists of the last two digits of the error code. Possible Problem Corrective Action E501 Login first. First, finish logging in. E502 Login failed, try again. Enter the correct user name and password. E503 Connection count exceeded the upper limit. Close unneeded connections and reconnect. E504 Connection has been lost. Try to make a new connection. E505 Connection has time out. Try to make a new connection. E520 FTP function not available. Enable the function. E521 FTP control connection failed. Check the FTP server address and the main unit address setting. Also check the Ethernet cable cannection. E530 SMTP function not available. Enable the function. E531 SMTP connection failed. Check the SMTP server address and the main unit address setting. Also check the Ethernet cable cannection. E532 POP3 connection failed. Check the POP3 server address and the main unit address setting. Also check the Ethernet cable cannection. E550 SNTP function not available. Enable the function. E551 SNTP command/response failed. Check the SNTP server address and the main unit address setting. Also check the Ethernet cable cannection. 4 System Errors The code is divided into two parts which are displayed alternately on the 7-segment LED; in the first part, the letter E appears in the left digit with the hundreds digit of the error code to the right, and the second part consists of the last two digits of the error code. Display Possible Problem Corrective Action E999 System error. Servicing required. IM MW100-01E 4-7 Troubleshooting and Maintenance Display 4.2 4-8 Error Display in the Monitor Screen and Corrective Actions Error Message Corrective Action Could not connect to the instrument. Check cables and other connections. Check Ethernet cable connections and the IP addresses of devices. Communication error occurred. Check cables and other connections. Check Ethernet cable connections and the IP addresses of devices. The actually installed modules differ from the modules recognized by the system. Reconstruct the module configuration. The size of the data files exceeds the allowable upper limit. Set the number of save channels, recording interval, and recording data length so that the data files of measurement groups 1, 2, and 3, and the computed and thinned data files are all within 10 MB. Value smaller than measuring interval or MATH interval cannot be set for the thinning recording interval. Set a value higher than the measurement and MATH interval. Combination of thinning recording interval, measurement interval, MATH interval incorrect. Set the thinning recording interval so that it is a common multiple of the measurement and MATH intervals. The recording data length cannot be set equal to or less than the recording interval. Set a recording data length larger than the recording interval. Insufficient space on the CF card. Delete unneeded files on the CF card to free up some space. Replace the CF card. The CF card is not inserted. Insert the CF card. The CF card is damaged or not formatted. Reinsert the CF card or format it. No data found in file. Check the recording settings. Remove MATH start/stop action from the Event/Action settings. Remove MATH start/stop action from the Event/Action settings. Remove recording start/stop action from the Event/Action settings. Remove recording start/stop action from the Event/Action settings. IM MW100-01E 4.3 Troubleshooting If servicing is necessary, or if the instrument is not operating correctly after performing the corrective actions below, contact your nearest YOKOGAWA dealer. The 7-segment LED does not illuminate. Possible Problem Corrective Action Ref. section The power switch is not ON. Turn ON the power switch. 2.5 The supply voltage is too low. Check whether the voltage is within the supply voltage rating range. 2.5 The fuse is blown. Servicing required. - The power supply is broken. Servicing required. - 4 Troubleshooting and Maintenance The 7-segment LED blinks repeatedly. Possible Problem Corrective Action Ref. section The power supply is shorted inside the input/output module. Remove the input/output module one by one and determine thebroken module (servicing required). 2.3 The power supply is shorted inside the main module. Replace the main module. (Servicing required.) 2.3 The MW100 cannot be detected from the PC or cannot be detected with the Search button. Possible Problem Corrective Action Ref. section The LINK LED does not turn ON. The cable is broken. Replace the Ethernet cable. 1.3 The LINK LED does not turn ON. There is a problem with the hub. Check the hub’s power supply. If it still does not work, replace the hub and check the hub’s operation. 1.3 The LINK LED does not turn ON. There is a problem with the PC. Check whether the PC can connect to the network. Replace the PC’s NIC. 1.3 The ACT LED does not turn ON. There is a problem in the connection between the hub and the MW100. Check the hub’s power supply. If it still does not work, Replace the hub and check the hub’s operation. 1.3 The ACT LED does not turn ON. There is a problem with the PC. Check whether the PC can connect to the network. Replace the PC’s NIC. 1.3 There is a problem in the network configuration. The settings are not correct. Check that the IP address, subnet mask, and default gateway settings on the MW100 are correct. * There is a problem in the network configuration. The setting changes have not taken effect. Turn OFF the power to the PC and the MW100, and carry out reconnection. * The PC and the MW100 are not in the same segment. Connect the PC and the MW100 in the same network segment. If the PC and the MW100 are connected as shown in the following figure, the Search button cannot be used to detect the MW100. You can make the connection by manually specifying the IP address of the MW100. * MW Network A Router Network B PC The firewall is enabled (when using Windows XP). Disable the function. * See the MW100 Viewer Software User’s Manual. IM MW100-01E 4-9 4.3 Troubleshooting The MW100 can be detected using the Search button, but browser connection fails. Possible Problem Corrective Action Ref. section The IP address is set to the default value. The default value cannot be used to make the connection. Enter the correct IP address. * There is a problem in the network configuration. Check that the IP address, subnet mask, and default gateway settings on the MW100 are correct. * Possible Problem Corrective Action Ref. section Attempting to make multiple connections. Exit all other software programs. 4.3,* * See the MW100 Viewer Software User’s Manual. The Calibrator cannot connect to the MW100. * See the MW100 Viewer Software User’s Manual. The connected input/output module is not detected. Possible Problem Corrective Action Ref. section Module connection or module startup error. Attached the module while the power was ON. Turn OFF the power. Detach the input/output module once and attach it again. 2.5 Carried out an incorrect calibration. Recalibrate. 4.3,* * See the MW100 Viewer Software User’s Manual. 4-10 IM MW100-01E 4.3 Troubleshooting The measured value is not correct Possible Problem Corrective Action Ref. section The input wiring is not correct. Check the input wiring. 2.4 The measured value is at +Over or –Over. The measurement range setting and input range do not match. Change to an appropriate setting. 3.5 The temperature error is large or is unstable. The TC type setting and the type actually connected are different. Change to the correct setting. 3.5 The temperature error is large or is unstable. The RJC setting is not correct. Change to the correct setting. 3.5 The temperature error is large or is unstable. The wind is hitting the terminals. Block the wind from hitting the terminals. - The temperature error is large or is unstable. The ambient temperature change is drastic. Suppress changes in the ambient temperature such as by inserting it into a box. - The temperature error is large or is unstable. There is an error in the wiring resistance (in the case of a 3-wire RTD). Match the thickness and length of the three wires. 2.4 The measurement error is large or is unstable. Noise effects. Take measures against noise. 2.10 The measurement error is large or is unstable. Effects from the signal source resistance. Reduce the signal source resistance such as by inserting a converter. - The temperature error is large or is unstable. Effects from parallel connections. Stop parallel connections. Do not use the burnout setting. - Measured value from strain gauge type sensor not correct. When using a sensor without a remote sensing wire, use the DV450-001 (conversion cable). - On the strain module (-B12, -B35), the gauge method and dip switch settings are not correct. Enter the correct settings. 2.4 On the strain module (-B12, -B35), the gauge resistance and internal bridge resistance values are different Use a module that supports the resistance value of the strain gauge (120 Ω, -B12; for 350 Ω, -B35). 2.4 On the strain module, scaling corresponding to the gauge method is not set (for 2 gauge and 4 gauge methods, the amount of strain is doubled or quadrupled.) Displayed with 1 gauge method conversion. Set scaling appropriately depending on the gauge method. 1.7 On the strain module (-NDI), a strain gauge type sensor without a remote sensing wire is being used. When using a sensor without a remote sensing wire, use the DV450-001 (conversion cable). 2.4 Possible Problem Corrective Action Ref. section There is a problem in the alarm setting. Both the alarm and output relay must be set appropriately. Make the alarm and output relay settings appropriate. 3.7, 3.8 4 Troubleshooting and Maintenance Alarms are not output. The CF card is not detected. Possible Problem Corrective Action Ref. section There is a problem with the CF card. Replace the CF card. Eject and format the CF card, then insert it again. 2.11 IM MW100-01E 4-11 4.4 Calibration To maintain measuring accuracy, we recommend calibration once per year. Calibration of the instrument requires a calibration instrument of the necessary accuracy and resolution. Please consult with the dealer from whom you purchased the instrument. Range Calibration for DC Voltage, RTD, Resistance, Strain, and Analog Output Required Instruments • DC Voltage/Current Standard Must meet the following specifications (M/9100 by FLUKE or equivalent) Output range: 20 mV to 100 V Output accuracy of output range: ±(0.01%+1µV) or less • Resistance standard Must meet the following specifications (ADR3204 by Alpha Electronics or equivalent) Resistance setting range: 0.1 to 3000 Ω Resistance accuracy of resistance setting range: ±(0.01%+2mΩ) or less Resolution: 0.001 Ω • Bridge head (Yokogawa Electric 319300) • Digital multimeter Must meet the following specifications (7562 by Yokogawa or equivalent) Accuracy: ±0.01% or less Calibration Procedure 1. Wire the standard and instrument to be calibrated as shown in the figure below. 2. Turn ON the power while holding down user function key 1 on the MW100. The unit enters Calibration mode. 3. Allow a sufficient warm-up time for the MW100 Data Acquisition Unit (thirty minutes or more). 4. Confirm that the ambient temperature and humidity meet the standard operating conditions. 5. After setting up communications between the PC and the MW100, start the MW100 Calibration software and perform calibration. For instructions on the calibration software, see the MW100 Viewer Software User’s Manual (IM MW180-01E). 6. To exit Calibration mode, turn the power OFF. Wiring Diagram • When calibrating the DC voltage range of the 4-CH, High-Speed Universal Input module When calibrating 0 V 100Vpk MAX TO 250V MAX CH TO CH 600V MAX TO When calibrating a range other than 0 V 100Vpk MAX TO 250V MAX CH TO CH 600V MAX TO * Carry out calibration for each input terminal. Input terminal + Short – Input terminal + Hi – Lo DC voltage/current standard 4-12 IM MW100-01E 4.4 Calibration • When calibrating the RTD range of the 4-CH, High-Speed Universal Input module When calibrating 0 Ω When calibrating a range other than 0 Ω 100Vpk MAX TO 250V MAX CH TO CH 600V MAX TO 100Vpk MAX TO 250V MAX CH TO CH 600V MAX TO * Carry out calibration for each input terminal. Input terminal A B Make the resistance of three lead wires equal. Input terminal A B Short 4 b b G Resistance standard • When calibrating the DC voltage range of the 10-CH, Medium-Speed Universal Input module 100Vpk MAX TO 120V MAX CH TO CH 600V MAX TO Short the input terminal of CH1 (apply 0 V) + + – – Hi Lo Input terminal of CH2 DC voltage/current standard • When calibrating the RTD range of the 10-CH, Medium-Speed Universal Input module 100Vpk MAX TO 120V MAX CH TO CH 600V MAX TO Short the input terminal of CH3 (connect 0 Ω) A B b A B b Make the resistance of three lead wires equal. When calibrating the RTD (1 mA) 600 mV range, connect 300 Ω to the input terminal of CH5.* * When calibrating the RTD (1 mA) 60 mV range, connect 60 Ω to the input terminal of CH6. When calibrating the RTD (1 mA) 200 mV range, connect 200 Ω to the input terminal of CH4. H L G Resistance standard IM MW100-01E 4-13 Troubleshooting and Maintenance H L 4.4 Calibration • When calibrating the DC voltage range of the 6-CH, Medium-Speed Four-Wire RTD Input module 100Vpk MAX + TO 120V MAX CH TO CH(DCV-DI) 50V MAX CH TO CH(RTD-OHM) 600V MAX TO CAT II 1 2 3 CH4 4 5 6 7 B 8 CH5 C 9 10 I 11 + A 12 - 13 CH6 B C 14 15 I +A - B C I +A - 1 2 3 CH1 4 5 6 7 B 8 CH2 C 9 10 I 11 + A 12 - 13 CH3 B C 14 15 I +A - B C I +A - Short the input terminal of CH1 (apply 0 V) + – + – Hi Lo Input terminal of CH2 DC voltage/current standard • When calibrating the RTD or resistance range of the 6-CH, Medium-Speed Four-Wire RTD Resistance Input module I A B C Resistance standard Short the input terminal of CH3 (connect 0 Ω) I A B C When calibrating the RTD (1 mA) 20 mV range, connect 20 Ω to the input terminal of CH4.* * When calibrating the RTD (1 mA) 60 mV range, connect 60 Ω to the input terminal of CH5. When calibrating the RTD (1 mA) 200 mV range, connect 200 Ω to the input terminal of CH6. When calibrating the RTD (1 mA) 600 mV range, connect 300 Ω to the input terminal of CH4. When calibrating the RTD (0.25 mA) 600 mV range, connect 2400 Ω to the input terminal of CH5. When calibrating the RTD (0.25 mA) 1 V range, connect 3000 Ω to the input terminal of CH6. • When calibrating the range of the 4-CH, Medium-Speed Strain Module (-B12, -B35, and -NDI) The clamp terminal (-B12, -B35) and NDIS terminal (-NDI) are connected with the 4gauge method (see next page). Use a resistance of 120 Ω for resistors R1 through R3, and connect a resistance to R4 equivalent to the Zero or Full value. To correctly calibrate the range, do so in the order Zero, then Full. Calibration range ZERO Resistors R4 FULL Resistor R4 Resistance value accuracy ZERO 120.000 Ω 120.000 Ω ±0.005%, ±0.3 ppm/°C 2000 µSTR 120.000 Ω 117.154 Ω ±0.005%, ±0.3 ppm/°C 20000 µSTR 120.000 Ω 113.010 Ω ±0.005%, ±0.3 ppm/°C 200000 µSTR 120.000 Ω 80.000 Ω ±0.005%, ±0.3 ppm/°C * 4-14 The Full calibration value of the 2000 µStrain range is equivalent to 12000 µStrain The Full calibration value of the 20000 µStrain range is equivalent to 30000 µStrain The Full calibration value of the 200000 µStrain range is equivalent to 200000 µStrain IM MW100-01E 4.4 Calibration For -B12, -B35 1 2 Jumper setting switch (CH1 to CH4) 3 4 No.1 No.2 No.3 No.4 No.5 OFF A(+) 5 R2 R1 B(L) 6 C(-V) 7 D(H) 8 Connect CH2 only R4 R3 9 10 ON 11 No.1 No.2 No.3 No.4 No.5 OFF OFF OFF OFF ON 4 Troubleshooting and Maintenance 12 13 14 15 16 For -NDI R3 R1 Connect CH2 only 1 2 3 4 5 6 7 8 R2 R4 Bridge head (319300) • When calibrating the output range of the 8-CH, Medium-Speed Analog Output module All eight channels are calibrated at Zero (0 V) and Full (10 V). 1 2 H L 3 4 5 6 Digital multimeter 7 8 9 10 11 12 13 14 15 IM MW100-01E 4-15 4.4 Calibration Calibration of Temperature Measurements using Thermocouples Required Instruments • DC Voltage/Current Standard Must meet the following specifications (5520A by FLUKE or equivalent): Output accuracy: ±(0.005%+1µV) or less • 0 °C reference temperature device Must meet the following specifications (ZC-114/ZA-10 by Coper Electronics or equivalent) Standard temperature stability accuracy: ±0.05 °C or less Reference Junction Compensation of Thermocouple Input Normally, the input terminal of the universal input module is nearly at room temperature, so the actual thermocouple output differs from the value in the table for the thermoelectromotive force of the 0°C standard. The universal input module measures the temperature of the input terminal and compensates by applying a corresponding thermoelectromotive force to the actual thermocouple output. Therefore, when the measurement terminal is shorted (equivalent to the case when the detector tip is 0°C), the measured value indicates the temperature of the input terminal. When calibrating the universal input module, this compensation voltage (thermoelectromotive force of the 0°C standard corresponding to the input terminal temperature) must be subtracted from the output of the standard generator before application. As shown in the figure, by using the 0°C standard temperature device to compensate the reference junction at 0°C, you can input the 0°C thermoelectromotive force from the DC voltage standard and perform the calibration. Wiring Diagram Thermocouple wires or 4-CH, High-Speed Universal Copper wires TC extension wires Input Module* 100Vpk MAX TO 250V MAX CH TO CH 600V MAX TO Input terminal + – + - Copper wires DC voltage standard * Make a similar connection in the case of a 10-CH, Medium-Speed Universal Input Module. Thermocouple wires Cold junction 0°C standard temperature device Note • • 4-16 Calibration of temperature measurements of the MW100 Data Acquisition Unit using thermocouples differs from calibration of DC voltage and RTD ranges in that the input cannot be adjusted. If the temperature measurement calibration using thermocouples does not meet the accuracy specifications, check thoroughly for input error and other problems, then contact your Yokogawa dealer or representative. If errors exist in the thermocouple wires and TC extension wires, correct calibration is not possible. Be sure to use a calibrated thermocouple. IM MW100-01E 4.5 Parts and Maintenance This instrument does not have parts that need periodic replacement. However the main module (model: MW100) has wearable parts listed below. Also, the aluminum electrolytic capacitors below are included with each input/output module. There is no replacement service for the parts listed. If you are to use the MW100 for an extended time, repair or replace the main module according to the service life of the parts and taking into consideration the actual usage conditions. 4 Lifespan Remarks Lithium battery Approx. 10 years When used under standard operating conditions. One battery is used. Aluminum electrolytic capacitor Approx. 10 years When used under standard operating conditions. The main module and PWM output module have fuses. These fuses cannot be replaced by the user. If the fuse blows, contact your nearest YOKOGAWA dealer for repairs. IM MW100-01E Installed Module Rating Main module AC power supply Maximum rated voltage: 250 V; maximum rated current: 3.15 A Type: Timelag (T) Main module DC power supply Maximum rated voltage: 250 V; maximum rated current: 6.3 A Type: Timelag (T) PWM module Maximum rated voltage: 250 V; maximum rated current: 3.15 A Type: Timelag (T) 4-17 Troubleshooting and Maintenance Part Name 4.6 System Initialization Perform this procedure to initialize the settings on the MW100. The following types of initialization are available. Initialization Type Type Level Items Initialized Initialization using dip switches ---- All settings Initialization using communication commands 0 Setting other than configurated module information 1 Setting other than the following item; IP address, host name, subnet mask, default gateway, baud rate, parity bit, stop bit, data length, handshake and configurated module infomation. Initialization Procedure Using Dip Switches 1. Turn OFF the power to the MW100. 2. Check that the switch 5 of dip switch 1 on the main module is OFF. 3. Turn OFF the power to the MW100. After the 7-segment LED indicates the power ON self check, bF is displayed. 4. Check the status of step 3, then turn the power OFF. 5. Turn switch 5 of dip switch 1 ON. Initialization using communication commands Using a Browser For information about initialization using communication command, see the MW100 Communication Command manual (IM MW100-17E). 1. From the top screen, click System Settings > Module Information under the Top item. 2. Select the initialization level from the Initialization Level box under System information. 3. Click the Initialize button. Initialization is performed. For information on the initialization operating screens, see section 3.3, “System Settings.” 4-18 IM MW100-01E Chapter 5 Specification 5.1 Common Specifications Normal Operating Conditions Transport and Storage Conditions Environmental conditions during transport and storage: Ambient storage temperature : –25 to 70°C Ambient storage humidity: 5% to 95% RH (no condensation) Vibration: 10 to 60 Hz 4.9m/s2 or less Shock: 392 m/s2 or less (packaged condition) Mechanical Specifications (Excluding AC Adapter) External dimensions: Weight: Installation method: Material: Approx. 455 × 131 × 159 mm (when six slots are attached) Approx. 4.3 kg (maximum total weight) Desktop or floor, panel mount, or attached to a DIN rail Steel plate, aluminum die-cast, molded plastic resin Standards Compliance CSA: CSA22.2 No 61010-1, overvoltage category II, measurement category II, pollution degree 2 UL: Conforms to UL61010B-1 (CSA NRTL/C) CE: EMC directive; EN61326 EN61000-3-2 EN61000-3-3 Low voltage directive; EN61010-1; overvoltage category II, measurement category II, pollution degree 2 C-Tick: Conforms with AS/NZS CISPR11 Class A Group1 Overvoltage category II: An index for defining transient overvoltages (includes the rated impulse withstand voltage, and applies to electrical equipment supplied with power from fixed installations such as a distribution board). Pollution degree 2: The degree of adherence by a solid, liquid, or vapor that reduces the withstand voltage or surface resistance factor (applies only to normal indoor atmospheres (with nonconductive pollution). Measurement category II: For measurements performed on circuits directly connected to the electrical distribution system such as provided by a wall outlet. IM MW100-01E 5-1 5 Specification Rated power supply voltage: AC power supply (with or without AC adapter): 100 to 240 VAC DC power supply: 12 to 28 VDC Supply voltage range used: AC power supply (with or without AC adapter): 100 to 250 VAC DC power supply: 10 to 32 VDC Power supply frequency: 50 Hz ±2%, 60 Hz ±2% Power consumption: AC power, or DC power with AC adapter: Approx. 70 VA max. DC power supply: Approx. 35 VA max. * When any six I/O modules are installed Vibration: 10 to 60 Hz 0.2m/s2 or less Shock: Not allowed Magnetic field: 400 A/m or less (50/60 Hz) Position: Position horizontally with feet down Structure: Not explosion-proof Usage location: Indoors Operating altitude: 2,000 m or less Overvoltage category: II (per IEC61010-1 CSA22.2 No. 61010-1) Measurement category: II (per IEC61010-1 CSA22.2 No. 61010-1) Pollution degree: 2 (per IEC61010-1 CSA22.2 No. 61010-1) 5.2 Main Module Specifications Measurement Style number: S2 Measurement range and accuracy: See the measurement range and accuracy given in the specifications of each input module. Maximum number of inputs: 60 inputs (however, only up to six modules can be controlled) Measurement interval: Select from 10, 50, 100, 200, 500 ms, 1, 2, 5, 10, 20, 30, or 60 s. Up to three intervals defined for the input modules can be set (multi-interval) Also, the following limitations apply to the measurement interval and number of measurement channels. Measurement Interval Number of measurable channels 10 ms 10 ms and 50 ms mixed. 50 ms 10 10 30 Synchronization between modules: Synchronized within the same sampling interval (in the same unit) Synchronization between channels: 4-CH, High-Speed Universal Module and Digital Input Module: Synchronized between channels 10-CH, Medium-Speed Universal Input Module, Six-Channel Medium-Speed Four-Wire RTD Resistance Input Module, and the 4-CH, High-Speed Digital Input Module: Due to the scanner type, not synchronized between channels Filter function: First-Order Lag Filter Applicable measurement types: For each channel of DC voltage, thermocouple, RTD, strain, and resistance, you can select a time constant (time until 63.2% of the output value is reached) corresponding to the sampling interval indicated in the table below. Time constant = measurement interval × N (where N = 5, 10, 20, 25, 40, 50, or 100) Measurement Interval (s) Selectable Time Constants (s) N=5 5-2 N=10 N=20 N=25 N=40 N=50 N=100 0.01 0.05 0.1 0.2 0.25 0.4 0.5 1 0.05 0.25 0.5 1 1.25 2 2.5 5 0.1 0.5 1 2 2.5 4 5 10 0.2 1 2 4 5 8 10 20 0.5 2.5 5 10 12.5 20 25 50 1 5 10 20 25 40 50 100 2 10 20 40 50 80 100 200 5 25 50 100 125 200 250 500 10 50 100 200 250 400 500 1000 20 100 200 400 500 800 1000 2000 30 150 300 600 750 1200 1500 3000 60 300 600 1200 1500 2400 3000 6000 IM MW100-01E 5.2 Main Module Specifications MATH Differential computation between channels: Differential computation between arbitrary channels (DCV, TC, RTD, DI, strain, resistance) Linear scaling: Scalable ranges: DCV, TC, RTD, DI, strain, resistance Scaling range: –30000 to 30000 Scaling display range: –32000 to 32000 Decimal point position: Arbitrary Units: Can be arbitrarily set using up to six characters MATH Function Specifications (/M1 Option) IM MW100-01E 5-3 5 Specification The following MATH functions can be added with options. Number of MATH channels: 60 (can also be used for communication input) Number of channels for communication input: 240 Computation start/stop: Execution of computation starts and stops according to user commands (Start/Stop key, Event/Action function, or communication commands). Reset/clear computed values: Executes resetting/clearing of the computed values according to the Event/Action function, or requests via communication commands or monitor settings. Group reset: Only the MATH channels set by group, up to seven groups, are reset by the Event/Action function. Can be executed using the Event/Action function. Calculations: Basic math (+, –, ×, ÷, exponentiation) Relational operators (>, ≥, =, ≤, <, ≠) Logical operators (AND, OR, XOR, NOT) Arithmetic operators (SQR, ABS, LOG, EXP) TLOG computations (max, min, max-min, average, integration, pulse integration) CLOG computations (max, min, max-min, average) Conditional expressions ([EXPR1?EXPR2:EXPR3]) MATH reference channels: Measurement channel MATH channels* Communication input channels Flag input channels MATH constant Program channels * If an expression refers to its own channel or a channel of a larger number than its own channel, the data from the previous MATH interval is used. MATH interval: Specify one from among the measurement group numbers, and perform computation. However, measurement intervals of 10 ms or 50 ms cannot be specified. Characters used in expressions: Up to 120 per channel For communication input channels only, a maximum of 8 characters can be used per channel. Number of stacks: 35 or fewer per expression Conditional expression: Other expressions can be nested in conditional expressions. Conditional expressions can be nested together. Operators cannot be used to combine conditional expressions. MATH span: When displaying waveforms on the Web, set the upper and lower limit values. The setting range is –9,999,999 to 99,999,999. Decimal place setting: 0 to 4 Computation range: A given result during computation must be within ± 3.4 × 1038. 5.2 Main Module Specifications Math output value: Data output by the computation (for binary output) Data Type Description –9,999,999-99,999,999 Normal output range 2,147,450,879 (7FFF7FFFh) Plus over –2,147,385,343 (80018001h) Minus over –2,147,319,806 (80028002h) Skip * If the computation fails, the previous value is output. MATH constants: 60 Precision: Mantissa, 5 digits; exponent, 2 digits Range: –9.9999E+29 to –1.0000E-30,0,1.0000E-30 to 9.9999E+29 Communication input channels: 300 Numerical values in expressions can be substituted using communication input. Precision: Mantissa, 5 digits; exponent, 2 digits Range: –9.9999E+29 to –1.0000E-30,0,1.0000E-30 to 9.9999E+29 Flag input channels: 60 Flag value can be substituted in computational expressions. Range: 0, 1 Varies according to the operation of the Event/Action function. Program channels: 3 Broken line data can be input into expressions. Setting is possible of up to 32 points of the time from the start point and the output value at that point. Straight lines can link those specified points, and the values at each elapsed time are output. No. of set points: 32 Elapsed time from start point: 0 to 86400 sec. Start point time: Fixed at 0 Limitation on specification of elapsed time: Only 1 output value per specified time allowed Output values: –30000 to 30000 MATH alarm function: Four levels per channel Type: Upper limit and lower limit only. No hysteresis function available. Loss of computed data: In the monitor screen, when the MATH performance meter exceeds 100%, some computations at each MATH interval cannot be completed, and loss of computed data occurs. When this happens, the previous computed value is held. If computation loss occurs frequently, lengthen the MATH interval to reduce the load. To stop computation promptly, press the Stop key on the main module. When the volume of computations is high: Display updating on the monitor screen, response to computation stop operations, and other behavior may be slow. To stop computation promptly, press the Stop key on the main module. 5-4 IM MW100-01E 5.2 Main Module Specifications Operation after power failure: If a power failure occurs during a computation, the value computed just before the power failure is recalled after recovery, and computation starts using that value. Type Value after power failure recovery MATH channel data Holds previous value Communication input channel data Holds previous value Flag input channel data Holds previous value Program channel data Holds elapsed time and previous value Remote RJC Alarms Alarm types: Upper limit, lower limit, differential upper limit, differential lower limit, high limit on rate of change, low limit on rate of change Number of settings: Four levels per channel ON/OFF can be set for each channel and level Alarm setting range: DCV, TC, RTD, DI, strain, resistance, scaling and remote RJC Hysteresis: Alarm OFF value arbitrarily set Number of alarm outputs: 10 to 60 outputs (10 points per DO module) Output mode: Energize/De-energize, AND/OR, Hold/Non-hold Alarm ACK: If set to hold using the alarm status or relay output Hold/Non-hold, the hold status is cleared. Alarm update interval: 100 ms (not synchronized with the measurement interval) Recorder Structure Measured values, computed values, thinned values, setting values, data acquisition logs, and alarm summaries can be saved to CF card as a recording action. Folders for each file type are created on the CF card, and files are saved in them. CONFIG: Folder for storing the setting value file DATA: DATAnnnn storage folder The folder management file MWFOLDER.INF is created in the DATA folder. The file contains the latest folder numbers, and should not be deleted. If a DATA folder is deleted, a new folder is created starting with DATA0000. DATAnnnn: Folder for storing measured values, computed values, thinned values, data acquisition logs, and alarm summaries. “nnnn” is automatically generated from 0000 to 9999 Recording of Measured/Computed Values Measured and computed values can be saved by measurement group to the CF card. Supported external media: CF card Type II × 1 slot (Type I can be used) Max. card size: 2 GB IM MW100-01E 5-5 5 Specification When the item to be measured is located at a great distance, you can setup relay terminals near the item, measure between the relay terminal and the input terminal of the universal input module (reference channel) using thermocouples, and use the resultant value as the reference junction compensation of the temperature measurement. However, the same thermocouple type is used for reference channels and measured channels. 5.2 Main Module Specifications Record start/stop: Starts and stops recording to CF card per the START and STOP keys, Event/Action function, or communication commands. Recording operation: Separate files created for each measurement group, and measured and computed data is saved to CF card. For each measurement group, you can select whether or not to perform the save operation. Measurement groups: Measurement channels can be divided into up to 3 groups by module. The measurement interval must be the same for all channels in the group. Write mode: Single, Full Stop, Rotate You can set the recording stop operation by measurement group. If free space cannot be secured or when securing of free space takes extended time, an error is indicated on the 7-segment LED. For details, see chapter 4.1, “Media Related Errors.” Triggers: Direct, Trigger You can set the recording start action by measurement group. Pretrigger function: The pretrigger when write start is triggered can be set for each measurement group from 0 to 100% in 10% intervals. Pretrigger length: When there are fewer than ten data, the pretrigger length is rounded up. When there are ten or more data, the pretrigger length is rounded down. Ex.) Recording interval 600 second, data length 1 hour, pritrigger 30 % Number of data in a file: 1 hour / 600 sec = 6 Pritrigger length = 6 × 30 / 100 = 1.8 about 2 files Posttriger length = 6 - 2 = 4 Recording channels: You can specify, common to all measurement groups, whether to record on each channel. However, the number of recording channels is limited by the measurement interval as follows: 1500 ch/sec. or less Ex.) Measurement group 1 Recording interval 10 ms, 10 ch Measurement group 2 Recording interval 100 ms, 50 ch (1s / 0.01s) × 10ch + (1s / 0.1s) × 50ch = 1500 ch/sec. Recording interval: Set the recording interval for each measurement group as a multiple of the measurement interval. For a measurement interval of 50 ms, 500 ms, or 5 s, set a multiple of 1, 2, 4, or 10. Otherwise, set a multiple of 1, 2, 5, or 10. File size: Within approximately 10 MB per file File name: Automatically generated using the date, time, and serial number MDDIXXXX.MXD M: Month file created (local time), 1-9, X (October), Y (November), Z (December) DD: Date when file created (local time), 1-31 I: Files in measurement groups 1 to 3 are 1 to 3 Computed data file is M Thinned values, T XXXX: Sequence number 0000-9999 MXD: MW100 file extension (uppercase) 5-6 IM MW100-01E 5.2 Main Module Specifications Data length: Measurement groups for which TRIGGER was selected can be set individually. For the measurement groups on which Direct mode was selected, all groups have the same length. Trigger Type Selectable data length Target Direct 30 min. 1, 2, 3, 4, 6, 8, or 12 hours 1, 2, 3, 5, 7, 10, 14, or 31 days All groups Trigger 10, 20, or 30 min. 1, 2, 3, 4, 6, 8, or 12 hours 1, 2, 3, 5, 7, 10, 14, or 31 days Individual groups File size calculation: File size (bytes) = header size* + data size ** Guideline of the sample time for the different CF card sizes (when one type of measurement interval is used): Number of Measurement Saved CHs Interval 10 ms 100 ms 10 CHs 500 ms 1s 2s 100 ms 500 ms 24 CHs 1s 2s 100 ms 500 ms 1s 2s 60 CHs 5s Capacity of the CF card 128MB 512MB 1GB 35.3 hours 2.8 days 8.8 hours 14.8 days 28.9 days 3.7 days 74 days 144 days 18.5 days 148 days 289 days 37 days 296 days 578 days 74 days 6.1 days 12.0 days 36.8 hours 30 days 60 days 7.7 days 61 days 119 days 15.3 days 122 days 239 days 30 days 2.4 days 4.8 days 14.8 hours 12.3 days 24.1 days 3.0 days 24.6 days 48 days 6.1 days 49 days 96 days 12.3 days 123 days 241 days 31 days Write message: During execution of the recording action, a message that corresponds to the recorded data can be included in the file. No. of characters in message: Up to 15 Messages: 5 No. of write operations: Up to 10 per file Operation upon failure recovery: If a power failure occurs during recording, the data up to the failure is restored upon recovery from the failure. The data after recovery is recorded continuously to newly created files. Operation when synchronizing time: If time synchronization to SNTP is carried out during recording, the time is saved to the data acquisition log file. IM MW100-01E 5-7 5 Specification * Header size (bytes) = 904 + no. of recording channels × 232 ** Measurement data size (bytes) = no. of recording measurement channels × 4 × no. of samples Math data size (bytes) = no. of recording math channels × 6 × no. of samples No. of samples = Save interval (s)/measurement interval (s) Ex.) Measurement interval: 100 ms; no. of measurement channels, 24; save interval, 10 min.: Header size = 904 (bytes) + 24 × 232 (bytes) = 6472 (bytes) Data size = 24 (bytes) × (600 (s)/0.1 (s)) = 576,000 (bytes) 5.2 Main Module Specifications Thinning Recording Function Apart from the measured and computed values file, a set of thinned values from the measured and computed values are saved to CF card. Record start/stop: Executed simultaneously upon recording of the measured values and computed values. No trigger functions are available. Recording operation: User can select Thinning record or Do not record Record mode: Select a record stop action of Single, Full stop, or Rotate. Thinning time: Data saving is set for 1 per thinning time. Set a thinning time of: 4, 5, 10, 20, or 30 sec; 1, 2, 3, 4, 5, 10, 20, or 30 min.; or 1 hour. However, the thinning time cannot be set shorter than the measurement interval. File name: Generated automatically in sequence using the date and time (cannot be specified by the user). Data length: Select 30 minutes, or 1, 2, 3, 4, 6, 8, or 12 hours, or 1, 2, 3, 5, 7, 10, 14, or 31 days. However, it cannot be set so that the file size could exceed 10 MB. Also, the data length cannot be set shorter than the thinning time. Recording channels: Can be specified for each channel (settings for recording of measured and computed values is set separately) File size: The file size equation is the same as that for the computed value files. Writing message: During execution of the recording action, a message that corresponds to the recorded data can be included in the file. Five messages of up to 15 characters each are available for including in a single file, up to 10 messages per file. Operation upon failure recovery: If a power failure occurs during recording, the data up to the failure is restored after appended during recovery from the failure. The data after recovery is recorded continuously to newly created files. Internal Backup Memory Function overview: Using the main unit’s internal backup memory (SRAM) even upon a power failure, data before the failure is saved to CF card without loss. Backup memory capacity: For measured and computed values 1.25 MB For thinned values 256 KB Saving Settings Saves settings to CF card. Saving/loading: Set by user function key on the main unit or by communication input. From the function keys, only the SETTING.PNL file can be loaded. Saved settings: All settings are saved File creation location: CONFIG folder on the CF card Created file name: From the user function keys, SETTING.PNL. From communication commands or the browser, a name can be set with the PNL extension. 5-8 IM MW100-01E 5.2 Main Module Specifications Display Status LED Illuminated:Indicates measuring, recording, alarm occurrence, computing, and receiving data by serial communications Blinking: Recording or computation in progress Two-digit 7-segment LED: MW100 Data Acquisition Unit status display Unit number, error occurrence time, power ON self-check in progress, key lock ON, processing. Ethernet port LED: Ethernet communication status (LINK, ACT) Communication Ethernet Port Interface: Connector type: Main protocols: IM MW100-01E 5-9 5 Specification Ethernet (10BASE-T) RJ-45 FTP, SMTP, SNTP, DHCP, DNS, HTTP, Modbus/TCP, and MW100 dedicated protocol. Communication services: Send/receive measured and computed values, send/receive setting values, maintenance/diagnostic services, and others. Login function: Use when accessing a setting/measurement server, maintenance/diagnostic server, FTP server, or Web server. Up to 10 can be registered. List of services: Modbus server Uses Modbus protocol FTP server File transfer services HTTP server Web services SNTP server Time synchronization GENE server For communication commands only for MW100 DIAG server For maintenance diagnostics Timeout function: Connection to server from which no communication is made over a specified period is forcibly dropped. Keep alive function: If no response is made to periodically sent test packets on the TCP level, the connection is forcibly closed. DHCP function: The IP address is automatically obtained from the DHCP server SNTP function: As the client, this function can acquire time information from the apecified SNTP server when the power is turned on, upon start of measurement, when the SNTP client is turned ON, at a userspecified time, and at a specified time interval. When time information is acquired upon startup, measurement start, and when the SNTP client is turned ON, the time is not applied if the difference between the time of the MW100 and the server is 1 hour or more. When the time is acquired at specified time intervals, the MW100 time is corrected by 1 second at 10 second intervals. This is effective when the shortest measurement interval within a unit is two seconds or more. However, if the time between the server and MW100 is different by 10 minutes or more, the time is not applied. E-Mail function: Sends e-mail according to alarm activation/release, specified time intervals, file creation time, time at which free memory space drops below specified amount, time power turned ON, times errors occur, and other times. Two mail recipient locations can be set (multiple addresses using up to 150 characters). 5.2 Main Module Specifications FTP function: HTTP function: Acting as a client, measured values, computed values, thinned value files, data acquisition logs, and alarm summaries in the CF card can be transferred. Up to two recipients, a primary and secondary recipient, can be specified (using up to 64 characters). The file is sent upon creation of the file. The files are sent to the primary recipient first, and if transmission fails, they are sent to the secondary recipient. If transmission to the secondary recipient also fails, the file is held in memory (up to eighteen files that failed to be sent are held) and transmission is retried after the next file is created or when the power is turned on (assuming there are files in the CF card). If transmission fails more than eighteen times, old files are overwritten with new ones. When acting as the server, the MW can transfer or delete files according to commands from a PC. Enables entry of settings on the MW100, starting and stopping of measurement, computation, and recording, and real time monitoring of measured and computed values using a Web browser, as well as acquisition of CF card files using WebDAV. RS-232 Interface (/C2 Option) Connection method: Point-to-point Communications: Half-duplex Synchronization: Start-stop synchronization Baud rate: 1200, 2400, 4800, 9600, 19200, 38400, 57600, or 115200 bits Start bit: 1 bit, fixed Data length: Select either 7 or 8 bits Parity: Select Odd, Even, or None Stop bit: Select either 1 or 2 bits Hardware handshaking: RS-CS can be used Software handshaking: X-ON, X-OFF can be used Receive buffer length: 2047Byte Protocol: Dedicated protocol and Modbus/RTU Communication services: Send/receive setting values, send/receive measured and computed values. RS-422A/485 Interface (/C3 Option) Connection method: Multi-drop: 4-wire 1: 32, 2-wire 1: 31 Communications: Half-duplex Synchronization: Start-stop synchronization Baud rate: Select 1200, 2400, 4800, 9600, 19200, 38400, 57600, or 115200 bps Start bit: 1 bit, fixed Data length: Select either 7 or 8 bits Parity: Select Odd, Even, or None Stop bit: Select either 1 or 2 bits Receive buffer length: 2047Byte Protocol: Dedicated protocol and Modbus/RTU Communication services: Send/receive setting values, send/receive measured and computed values. 5-10 IM MW100-01E 5.2 Main Module Specifications Communication Input Function All settings on the main unit other than dip switch operation can be performed with communication commands. For information about communication commands, see the MW100 Communication Command manual (IM MW100-17E). Communication Output Function The following information about the main unit can be output using communication commands. For information about communication commands, see the MW100 Communication Command manual (IM MW100-17E). Item Description Measured value Outputs most recent measured value Computed value Outputs most recent computed value Outputs most recent output value Units, decimal place Outputs the units and decimal place for measured and computed values Measured and computed value FIFO data Outputs the measured and computed values from the FIFO buffer Thinned values FIFO data Outputs the thinned values from the FIFO buffer Alarm summary Outputs the alarm summary Message summary Outputs the message summary Data acquisition log Outputs the data acquisition log Computation status Outputs the MATH status Recording status Outputs the recording status Operation log Outputs the key operation log Communication log Outputs the communication log FTP log Outputs the FTP operation log SMTP client log Outputs the mail transmission log DHCP log Outputs the DHCP log HTTP log Outputs the HTTP log Modbus client log Outputs the Modbus client log Modbus client command Outputs the Modbus client status Modbus client connection status Outputs the Modbus client connection status Modbus master log Outputs the Modbus master log Modbus master command Outputs the Modbus client status Modbus master connection status Outputs the Modbus master connection status Status Status byte information User information User settings Relay information Relay action information System information Outputs the module recognition status Analog output information Outputs the analog output value information Initial balancing information Outputs initial balance information for the strain input module Common to Modbus Master Function and Modbus Slave Function Communication possible with Modbus/RTU protocol Communication media:RS-232, RS-422A/485 Control method: No flow control (None only) Baud rate: Select 1200, 2400, 4800, 9600, 19200, 38400, 57600, or 115200 bps Start bit: 1 bit, fixed Data length: 8 bit, fixed Parity: Select Odd, Even, or None Stop bit: Select either 1 or 2 bits Transmission mode: RTU (remote terminal unit) mode only Slave address: 1 to 247 IM MW100-01E 5 Specification Output value 5-11 5.2 Main Module Specifications Modbus Master Function (/M1 option) Communication interval:The interval for data loading from other instruments is selected from the following. 100, 200, 250, 500 ms, or 1, 2, 5, or 10 s Timeout time: From the following, select a timeout time for no response from the specified slave after sending commands from the main unit. 100, 200, 250, 500 ms, or 1 s Number of retries: The number of transmissions attempted if no response to commands from the main unit are received from the slaves. Select from the following: OFF, 1, 2, 3, 4, or 5 Communication recovery time:You can select from the following the send interval for the command sent after the point at which there is no response from the slaves after sending commands the specified number of retry times. Soon (communication interval), 1 to 120 s Wait between commands: Select a time to wait between receiving of the response to a command until the next command is sent. 0, 10, 20, 50, 100 ms Supported function: The functions that the MW100 supports are as follows. Function Code Function Operation 3 Read hold registers (4XXXX, 4XXXXX) MW100 loads data from the hold registers of another instrument to its communication input channel data. 4 Read input registers (3XXXX, 3XXXXX) MW100 writes data from the input register of another instrument to its communication input channel data. 6 Simple write to hold registers (4XXXX, 4XXXXX) MW100 writes to the hold register of another instrument. 16 Write to hold registers (4XXXX ,4XXXXX) MW100 writes to the hold register of another instrument Command settings: Command items: Type 5-12 Up to 100 commands can be set. Loading channels: C001 toC300 Writing channels: 001 to 060, A001 to A300, C001 to C300 Address: 1 to 247 Input registers: 30001 to 39999, 300001 to 365535 Hold registers: 40001 to 49999, 400001 to 465535 Type: Description INT16 Signed 16-bit integer UINT16 Unsigned 16-bit integer INT32_B Signed 32-bit integer (from upper to lower. ) INT32_L Signed 32-bit integer (from lower to upper. ) UINT32_B Unsigned 32-bit integer (from upper to lower. ) UINT32_L Unsigned 32-bit integer (from lower to upper) FLOAT_B 32-bit floating decimal (from upper to lower. ) FLOAT_L 32-bit floating decimal (from lower to upper) IM MW100-01E 5.2 Main Module Specifications Modbus Slave Function Supported function: The functions that the MW100 supports are as follows. Function Code Function Operation 3 Read hold registers (4XXXX) MW100 read communication input data 16 written by function code 6 or 16 4 Read Input registers (3XXXX) MW100 reads the main instrument’s measured, computed, and time data. 6 Simple write to hold registers (4XXXX) MW100 writes to the main instrumentls communication input data. 8 Loop back test MW100 performs the loop back test on the main instrument. Main instrument only support message return (diagnostic code (0x00). 16 Write to hold registers MW100 writes to the main instrument’s (4XXXX) communication input data. Register Assign (Modbus Server Functions and Sharing) Input Registers Data Data Type Int 32 31001 Lower byte of measured data from measurement channel 001 31002 Upper byte of measured data from measurement channel 001 | | 31119 Lower byte of measured data from measurement channel 060 31120 Upper byte of measured data from measurement channel 060 • Includes decimal place information. Float 32001 Alarm status of measured data of measurement channel 001 | | 32060 Alarm status of measured data of measurement channel 060 • Register structure and alarm status values Alarm 2 1 4 3 Bit string 4 bits 4 bits 4 bits 4 bits 0: No alarms 2: Lower limit alarm occurs 4: Differential lower limit alarm occurs 6: Rate of change lower limit alarm occurs 1: Upper limit alarm occurs 3: Differential upper limit alarm occurs 5: Rate of change upper limit alarm occurs 33001 Lower byte of computed data of computation channel A001 33002 Upper byte of computed data of computation channel A001 | | 33599 Lower byte of computed data of computation channel A300 33600 Upper byte of computed data of computation channel A300 • No decimal place information. Int 32 34001 Lower byte of computed data of computation channel A001 34002 Upper byte of computed data of computation channel A001 | | 34599 Lower byte of computed data of computation channel A300 34600 Upper byte of computed data of computation channel A300 • Includes decimal place information. Float 35001 Alarm status of computed data of computation channel A001 Bit string | | 35300 Alarm status of computed data of computation channel A300 • Register structure and alarm status value: Same as alarm status of measured data. IM MW100-01E 5 Specification 30001 Lower byte of measured data of measurement channel 001 30002 Upper byte of measured data of measurement channel 001 | | 30119 Lower byte of measured data from measurement channel 060 30120 Upper byte of measured data from measurement channel 060 • No decimal place information. 5-13 5.2 Main Module Specifications Input Registers Data Data Type 39001 39002 39003 39004 39005 39006 39007 39008 Year Month Day Hours Minute Second Milliseconds DST(0, 1) Int 16 Hold Registers Data Data Type 40001 40002 | 40599 40600 Lower byte of communication input channel C001 Upper byte of communication input channel C001 | Lower byte of communication input channel C300 Upper byte of communication input channel C300 Float Modbus error response: The main unit returns the following error codes to the master instrument. Code Function Operation 1 Function code invalid Requested non-supported function 2 Invalid register number Attempted to read/write registers for which no corresponding channels could be found. 3 Invalid number of registers The specified number of registers was zero. 7 Could not be executed Attempted to read MATH registers from an instrument without the MATH function option. However, there is no response in the following cases. • CRC Error • Errors other than in above table. 5-14 IM MW100-01E 5.2 Main Module Specifications IM MW100-01E 5-15 5 Specification Modbus Client Function (/M1 option) Communication possible with Modbus/TCP protocol Communication media: Ethernet 10Base-T Communication interval: You can select the following: 100, 200, 250, or 500 ms, or 1, 2, 5, or 10 s Depending on the performance of the main unit, data reading and writing may not be able to be performed at the set communication interval resulting in data loss. If this occurs, the communication input channel holds the previous value. In this case, you must lengthen the communication interval, or reduce the load on the main unit. Connection wait time: The connection can be dropped if there is no response from the server after sending commands. You can select the connection wait time from the following. Forever (do not drop connection), 0 to 10 s Communication recovery wait:The time after which commands are sent following disconnection after the connection wait time. Selected from the following: Soon (communication interval), 1-60 s Connection destination (server): Up to 10 can be set. Supported function: Same as Modbus master function Command settings: Up to 100 commands can be set. Command items: Loading channels: C001 to C300 Writing channels: 001 to 060, A001 to A300, C001 to C300 Server (specified by registered number): 1 to 10 Input registers: Same as Modbus master function Hold registers: Same as Modbus master function Type: Same as Modbus master function Modbus Server Function Communication possible with Modbus/TCP protocol Communication media: Ethernet 10Base-T Port: 502/tcp Communication interval: 100, 200, 250, or 500 ms, or 1, 2, 5, or 10 s Maximum no. of simultaneous connections: 4 Receive timeout: Drops communication connection if packets not received for 30 s (fixed) or more Supported function: Same as Modbus slave function. However, there is no function code 8. Register assignments: Same as Modbus slave function Modbus error response: Same as Modbus slave function 5.2 Main Module Specifications E-Mail Format In the explanations that follow, CRLF means “carriage return/line feed.” Alarm Notification E-mail Format • Subject Subject: [Alarm Summary] • Syntax CRLF Alarm_SummaryCRLF DATE_yy/mo/ddCRLF TIME_hh:mi:ssCRLF CRLF <Alarm Summary>CRLF cc____lq_aaaCRLF ••••••••••••••••••••••••••• mmmm_lq_aaaCRLF ••••••••••••••••••••••••••• CRLF s_cc_uuuuuufdddddEfpCRLF ••••••••••••••••••••••••••• s_mmmm_feeeeeeeeEfpCRLF ••••••••••••••••••••••••••• CRLF Year (00 to 99) Month (01 to 12) Day (01 to 31) Hour (00 to 23) Minute (00 to 59) Seconds (00 to 59) Measurement ch no. (01 to 60, SKIP channels not output) MATH ch no. (A001 to A300) Alarm level (1 to 4) Alarm type (H, L, h, l, R, r) H (upper limit alarm), L (lower limit alarm), h (differential upper limit alarm), l (differential lower limit alarm), R (high limit on rate of change alarm), r (low limit on rate of change alarm) aaa Alarm status (off, on) s Data status (N, D, O, E) N (normal), D (differential input), O (over), E (error) uuuuuu Unit information (output using 6 chars., left justified) mV____: mV V_____: V ^C____: °C XXXXXX: (user specified char. string) f Data symbols (+, –) ddddd Data mantissa (measurement channel, 00000 to 99999) –32767 to +65535: Normally allowed output range +99999: +OVER, ERROR (measurement error occurs), or indefinite –99999: –OVER eeeeeeeeData mantissa (measurement channel, 00000000 to 99999999) –99999999 to +99999999: Normally allowed output range +99999999: +OVER –99999999: –OVER p Exponent (0 to 4) _ Blank yy mo dd hh mi ss cc mmmm l q 5-16 IM MW100-01E 5.2 Main Module Specifications File Creation Notification E-mail Format • Subject Subject: [File End] • Syntax CRLF File_EndCRLF <Time>CRLF DATE_yy/mo/ddCRLF TIME_hh:mi:ssCRLF CRLF <File_Name>CRLF fl/fnCRLF CRLF Year (00 to 99) Month (01 to 12) Day (01 to 31) Hour (00 to 23) Minute (00 to 59) Seconds (00 to 59) Folder name File name Blank 5 Specification yy mo dd hh mi ss fl fn _ Media Remaining Space Notification E-mail Format • Subject Subject: [Media Remain] • Syntax CRLF Media_RemainCRLF <Time>CRLF DATE_yy/mo/ddCRLF TIME_hh:mi:ssCRLF CRLF <Media_Info> aaaaaaa_K_byte_totalCRLF bbbbbbb_K_byte_freeCRLF CRLF yy mo dd hh mi ss aaaaaaa bbbbbbb _ IM MW100-01E Year (00 to 99) Month (01 to 12) Day (01 to 31) Hour (00 to 23) Minute (00 to 59) Seconds (00 to 59) Media capacity [KB] (0000000 to 9999999) Media total capacity [KB] (0000000 to 9999999) Blank 5-17 5.2 Main Module Specifications Power ON Notification E-mail Format • Subject Subject: [Power Failure] • Syntax CRLF Power_FailureCRLF <Power_Off>CRLF DATE_yy/mo/ddCRLF TIME_hh:mi:ssCRLF CRLF <Power_On>CRLF DATE_yy/mo/ddCRLF TIME_hh:mi:ssCRLF CRLF yy mo dd hh mi ss _ Year (00 to 99) Month (01 to 12) Day (01 to 31) Hour (00 to 23) Minute (00 to 59) Seconds (00 to 59) Blank Error Notification E-mail Format • Subject Subject: [ERROR] • Syntax CRLF ERRORCRLF <Time>CRLF DATE_yy/mo/ddCRLF TIME_hh:mi:ssCRLF CRLF <ERROR_Message>CRLF nnn_mmmmmmmCRLF CRLF yy mo dd hh mi ss nnn mm••mm _ 5-18 Year (00 to 99) Month (01 to 12) Day (01 to 31) Hour (00 to 23) Minute (00 to 59) Seconds (00 to 59) Error number Error message Blank IM MW100-01E 5.2 Main Module Specifications Periodic Report Notification E-mail Format • Subject Subject: [Periodic Data] • Syntax CRLF Periodic_DataCRLF <Time>CRLF DATE_yy/mo/ddCRLF TIME_hh:mi:ssCRLF CRLF <CH_Data>CRLF s_cc_uuuuuufdddddEfpCRLF ••••••••••••••••••••••••••• s_mmmm_feeeeeeeEfpCRLF ••••••••••••••••••••••••••• CRLF 5 Year (00 to 99) Month (01 to 12) Day (01 to 31) Hour (00 to 23) Minute (00 to 59) Seconds (00 to 59) Data status (N, D, O, E) N (normal), D (differential input), O (over), E (error) cc Measurement ch no. (01 to 60, SKIP channels not output) mmmm MATH ch no. (A001 to A300, SKIP channels not output) uuuuuu Unit information (output using 6 chars.) mV____: mV V_____: V ^C____: °C xxxxxx: (user specified char. string) f Symbols (+, –) ddddd Data mantissa (measurement channel, 00000 to 99999) eeeeeeeeData mantissa (measurement channel, 00000000 to 99999999) p Data exponent (0 to 4) _ Blank Specification yy mo dd hh mi ss s Test E-mail Format • Subject Subject: [Test] • Syntax CRLF TestCRLF <Time>CRLF DATE_yy/mo/ddCRLF TIME_hh:mi:ssCRLF CRLF yy mo dd hh mi ss _ IM MW100-01E Year (00 to 99) Month (01 to 12) Day (01 to 31) Hour (00 to 23) Minute (00 to 59) Seconds (00 to 59) Blank 5-19 5.2 Main Module Specifications Communication Test: This function checks whether the FTP and mail transmission settings are entered correctly. Notation Description FTP1 Transfers a test file to recipient 1. FTP2 Transfers a test file to recipient 2. SMTP1 Transfers a test mail to recipient 1. SMTP2 Transfers a test mail to recipient 2. User Interface Number of keys: Key action: User function keys: Key lock function: Dip switch 1: 4: Start key (START) and Stop key (STOP), User function key 1 (USER1), User function key 2 (USER2), START: Measurement, computation, and recording start STOP: Measurement, computation, and recording stop, and saving of data acquisition logs and alarm summaries USER1: Write setting values file (default) USER2: Load setting file (default) Keys can be assigned arbitrarily by the user with the Event/Action function. All keys can be enabled or disabled at once. Operation upon power ON determined by dip switch settings. All switches ON: Normal operation Switch 5 (only) OFF: All settings initialized Switch 8 (only) OFF: Fixed IP address (192.168.0.10) Other Functions Time Time function: Time settings consist of date, time, and time zone. Backup function included. Year designation: Last two digits of Western calendar 80 to 99 (1980-1999), 00 to 35(2000-2035) Internal time accuracy: ±100ppm Daylight saving time: The time on the internal clock is updated on the specified month, week, weekday, and time. Summer: On the month, week, weekday, and hour set as Summer time, the time on the internal clock is moved one hour ahead. Winter: On the month, week, weekday, and hour set as Winter time, the time on the internal clock is moved one hour behind. Unlike the internal clock, which is changed on the main unit, the dates of the measured and computed values are not adjusted. Tag Strings During recording: During displaying: Tag string settings: No. of characters: 5-20 Tags can be added to measured values that are recorded and saved. You can select whether to display tags or channel numbers on all channels. Can be set channel by channel. Up to 15 IM MW100-01E 5.2 Main Module Specifications Item Maximum no. saved Operation log 256 Error log 50 Message summary 50 Communication log 200 FTP client log 50 SNTP client log 50 SNTP client log 50 DHCP client log 50 FTP server log 50 HTTP server log 50 Modbus master log 50 Modbus client log 50 Computation status 1 Recording status 1 Maximum no. displayed Item Maximum no. displayed Modbus client connection command 100 Modbus client connection status 10 Modbus master command 100 Modbus master connection status 247 Strain initial balance result 60 Event/Action Function By linking the Event function and Action function, you can control the operations of the main unit. Number of settings: 30 IM MW100-01E 5-21 5 Specification Log Information • Data acquisition logs When recording is stopped, data acquisition logs saved on the main unit are all saved to the CF card. Maximum no. of saved logs: 1021 (if this number exceeded, old files are overwritten by new ones) File name: RECORDLG.TXT Save location: During recording, in the DATAnnnn folder on the CF card When recording stopped, on the root folder of the CF card • Alarm summaries When recording is stopped, alarm summaries saved on the main unit are all saved to the CF card. Maximum no. of saved summaries: 256 (if this number exceeded, old files are overwritten by new ones) File name: ALARMLG.TXT Save location: During recording, in the DATAnnnn folder on the CF card • Communication related log information can be saved in the main unit. Communication log, FTP client operation log, e-mail operation log, DHCP operation log. These can only be referenced through communication output, and when the power is cut, they are initialized and not saved. Maximum no. saved: Shown in the table below. If the number is exceeded, old logs are overwritten 5.2 Main Module Specifications Event operation: Edge: Execute an operation once according to changes in events Level: Continue operation as long as the condition continues. MATH operation start, recording operation start, flag input enabled The same start function cannot be set to edge start or multiple settings simultaneously. When setting the start operation to time up on the timer, match time, or user function key, then computation start/stop, recording start/stop, and flag input 0/1 repeat alternately. Event function: Digital input information, alarm occurrence, relay output, internal timer time up, match time, user function key, recording start, and others. Action function: Recording start/stop, activate trigger, computation start/stop/ reset/clear, reset timer, alarm ACK, flag input, write message, read/write settings. Read/write setting value file can be performed with user function key. Execution sequence: Execute from Event/Action setting number 1. The action that is performed is of the last event that is executed. Internal Timer No. of timers: 6 Types of timers: Two; Relative timer and Absolute timer Relative time timer: Repeats time up every specified time interval. Time interval can be set in 1-minute intervals. Setting range is 00 days 00 hours 00 min. to 31 days 23 hours 59 minutes. If the setting of the relative timer is changed or in the event of a power failure, the timer is reset to 0 and starts again. If the clock is changed, the timer time is not adjusted. Absolute time timer: Using the specified reference time as a standard, repeats the time up every specified time interval. Reference time set in one-minute intervals in the range of 00 hours 00 min. to 23 hours 59 minutes. Time intervals: 1, 2, 3, 4, 5, 6, 10, 12, 15, 20, 30 min, 1, 2, 3, 4, 6, 8, 12, 24 h. When the power fails or the clock is changed and the timeup time is exceeded, the time up is not acknowledged. Match Time No. of match times: 3 Match time function: Time up occurs: every month on the specified day, every week on the specified time; or every day at the specified time. The setting is set in 1-minute intervals. When the power fails or the clock is changed and the timeup time is exceeded, the time up is not acknowledged. Initializing Settings Two types of settings initialization are available. Initialization of all settings: Initializes all setting values and measured values on the main unit. You can perform initialization through communication commands or by resetting the dip switch positions and turning ON the unit. When initialized using communication commands, module recognition information is not initialized. Initialization of all settings excluding communication parameters: All settings and measured values except for communication parameters and module recognition information are initialized. Executed using communication commands. 5-22 IM MW100-01E 5.2 Main Module Specifications Initialization of the CF Card Formats the CF card. Format type: Supports FAT16, logical format only CF card size: 2 GB maximum General Specifications External Dimensions Units: mm 105 MEASURE 137 ALARM RECORD DATA ACQUISITION UNIT MATH SERIAL RD ETHERNET SW ON 1 2 3 4 5 6 7 8 10BASE - T START POWER USER 1 131 STOP USER 2 100-240V AC TERMN ON OFF FG SG SDB SDA RDB RDA 70VA MAX 50/60Hz SERIAL COMM MEASURE RECORD ALARM DATA ACQUISITION UNIT MATH SERIAL RD ETHERNET SW ON 1 2 3 4 5 6 7 8 10BASE - T START USER 1 POWER STOP USER 2 12-28V DC - - - + SERIAL COMM 35VA MAX 144.4 If not specified, the tolerance is ±3%. However, in cases of less than 10 mm, the tolerance is ±0.3 mm. IM MW100-01E 5-23 5 Specification Operating temperature: –20 to 60°C Operating humidity: 20 to 80% RH for –20 to 40 °C 10 to 50% RH for 40 to 50 °C 5 to 30% RH for 50 to 60 °C Power consumption: Approx. 8 W Insulation resistance: Between power supply terminal and earth terminal: 20 MΩ or more (500 VDC) Withstand Voltage AC power Between AC power supply terminal and earth terminal: 1500 VAC (50/60 Hz) for one minute DC power Between DC power supply terminal and earth terminal: 1000 VAC (50/60 Hz) for one minute External dimensions: Approx. 105 (W) × 131 (H) × 137 (D) mm Weight: Approx. 1kg. 5.3 Base Plate Specifications Number of main modules that can be attached: 1 (always attached) Number of input/output modules that can be attached: 1 to 6 (specified by the suffix code) External dimensions: Approx. 118 to 408 (W) × 75 (H) × 35 (D) mm Weight: Approx. 0.37 kg (1 main module, for connecting six input/output modules) External Dimensions Units: mm MX150-1, -2, -3, -4, -5, -6 407.5 (1 main module, for connecting six input/output modules) 58 pitches in between 117.5 (1 main module, for connecting one input/output module) 22.5 34.6 If not specified, the tolerance is ±3%. However, in cases of less than 10 mm, the tolerance is ±0.3 mm. Attaching the MW100 Main Module The accessory bracket must be attached in order to attach the MW100 main module to the base plate. For information about attaching the bracket, see the Installation and Connection Guide (IM MW100-72E). 5-24 IM MW100-01E 5.4 4-CH, High-Speed Universal Input Module Specifications Style number: S1 Type of measurement: DC voltage, thermocouple, 3-wire RTD, DI (contact, LEVEL) Number of inputs: 4 Input method: Floating unbalanced input, insulation between channels A/D resolution: 16 bits (±20000/±6000) Measuring range and accuracy: The accuracy applies to standard operating conditions: Ambient temp: 23±2°C, ambient humidity: 55±10% RH, supply voltage: 90 to 250 VAC, power frequency: 50/60 Hz ± 1%, warmup time: at least 30 minutes, without adverse conditions such as vibrations. Thermocouple (excludes RJC accuracy, when burnout is OFF) 1 2 3 4 Rated Measurement Range –20.000 to 20.000 mV –60.00 to 60.00 mV –200.00 to 200.00 mV –2.0000 to 2.0000 V –6.000 to 6.000 V –20.000 to 20.000 V –100.00 to 100.00 V 0.000 to 60.000 mV –1.0000 to 1.0000 V 0.0000 to 6.0000 V 0.0 to 1760.0°C B1 0.0 to 1820.0°C K1 –200.0 to 1370.0°C E1 J1 T1 L2 U N3 W4 KPvsAu7Fe –200.0 to 800.0°C –200.0 to 1100.0°C –200.0 to 400.0°C –200.0 to 900.0°C –200.0 to 400.0°C 0.0 to 1300.0°C 0.0 to 2315.0°C 0.0 to 300.0K PR40-20 0.0 to 1900.0°C NiNiMo 0.0 to 1310.0°C WRe3-25 0.0 to 2400.0°C W/WRe26 0.0 to 2400.0°C Type-N(AWG14) 0.0 to 1300.0°C TXK GOST –200.0 to 600.0°C Measurement Accuracy Integration Time: 16.67 ms or More ±(0.05% of rdg + 5 digits) ±(0.05% of rdg + 2 digits) ±(0.05% of rdg + 2 digits) ±(0.05% of rdg + 5 digits) ±(0.05% of rdg + 2 digits) ±(0.05% of rdg + 2 digits) ±(0.05% of rdg + 2 digits) ±(0.05% of rdg + 20 digits) ±(0.05% of rdg + 2 digits) ±(0.05% of rdg + 20 digits) ±(0.05% of rdg + 1°C) Except 0 to 100°C: ±3.7°C, 100 to 300°C: ±1.5°C for R and S; 400 to 600°C: ±2°C, less than 400°C: not guaranteed for B ±(0.05% of rdg + 0.7°C) Except –200°C to –100°C: ±(0.05% of rdg + 1°C) Measurement Accuracy Integration Time: 1.67 ms ±(0.1% of rdg + 25digits) ±(0.1% of rdg + 10digits) ±(0.1% of rdg + 100 digits) ±(0.1% of rdg + 10 digits) ±(0.1% of rdg + 100 digits) ±(0.1% of rdg + 4°C) Except 0 to 100°C: ±10°C, 100 to 300°C: ±5°C for R and S; 400 to 600°C: ±7°C, less than 400°C: not guaranteed for B ±(0.1% of rdg + 3.5°C) Except –200°C to –100°C: ±(0.1% of rdg + 6°C) Highest Resolution (1 Digit) 1 µV 10 µV 10 µV 100 µV 1 mV 1 mV 10 mV 1µV 100µV 100µV 0.1°C ±(0.1% of rdg + 2.5°C) ±(0.05% of rdg + 0.5°C) Except –200°C to –100°C: Except –200°C to –100°C: ±(0.05% of rdg + 0.7°C) for J and L ±(0.1% of rdg + 5°C) for J and L ±(0.05% of rdg + 0.7°C) ±(0.05% of rdg + 1°C) ±(0.05% of rdg + 0.7K) ±(0.05% of rdg + 2.5°C) Except 300 to 700°C: ±6°C, less than 300°C: not guaranteed ±(0.05% of rdg + 0.7°C) ±(0.05% of rdg + 2°C) Except 0 to 200°C: ±2.5°C, more than 2000°C: ±(0.05% of rdg + 4°C) ±(0.05% of rdg + 2°C) Except 100 to 300°C: ±4°C, less than 100°C: not guaranteed ±(0.05% of rdg + 0.7°C) ±(0.05% of rdg + 0.5°C) Except –200 to 0°C: ±(0.2% of rdg + 0.7°C) ±(0.1% of rdg + 3.5°C) ±(0.1% of rdg + 7°C) ±(0.1% of rdg + 3.5K) ±(0.1% of rdg + 12°C) Except 300 to 700°C: ±25°C, less than 300°C: not guaranteed ±(0.1% of rdg + 2.7°C) ±(0.1% of rdg + 7°C) Except 0 to 200°C: ±12°C, more than 2000°C: ±(0.1% of rdg + 11°C) ±(0.1% of rdg + 8.5°C) Except 100 to 300°C: ±12°C, less than 100°C: not guaranteed ±(0.1% of rdg + 3.5°C) ±(0.1% of rdg + 2.5°C) Except –200 to 0°C: ±(1% of rdg + 2.5°C) 0.1K 0.1°C R, S, B, K, E, J, T: ANSI, IEC 584, DIN IEC 584, JIS C 1602-1981 L: Fe-CuNi, DIN43710/U: Cu-CuNi, DIN 43710 N: Nicrosil-Nisil, IEC 584, DIN IEC 584 W: W•5%RE-W•26%Re (Hoskins Mfg Co) IM MW100-01E 5-25 5 Specification Measurement Range Type 20 mV 60 mV 200 mV DC voltage 2 V 6V 20 V 100 V 60mV (high res.) 1V 6V (high res.) R1 S1 Input 5.4 4-CH, High-Speed Universal Input Module Specifications Measurement Accuracy Measurement Rated Measurement Accuracy Integration Time: 16.67 ms Range Measurement Integration Time: 1.67 ms or More Type Range Pt1001 –200.0 to 600.0°C ±(0.1% of rdg + 1.5°C) ±(0.05% of rdg + 0.3°C) JPt1001 –200.0 to 550.0°C Pt100 (high res.) –140.00 to 150.00°C ±(0.05% of rdg + 0.3°C) ±(0.1% of rdg + 1.5°C) RTD JPt100 (high res.) –140.00 to 150.00°C (Measurement Ni100 SAMA2 –200.0 to 250.0°C ±(0.1% of rdg + 1.5°C) ±(0.05% of rdg + 0.3°C) current: 1 mA) Ni100 DIN2 –60.0 to 180.0°C 3 Ni120 –70.0 to 200.0°C Pt100 (high noise resistance) –200.0 to 600.0°C ±(0.1% of rdg + 2.5°C) ±(0.05% of rdg + 0.3°C) JPt100 (high noise resistance) –200.0 to 550.0°C ±(0.05% of rdg + 0.3°C) ±(0.05% of rdg + 0.3°C) Pt100 GOST –200.0 to 600.0°C Pt1001 –200.0 to 600.0°C ±(0.05% of rdg + 0.3°C) ±(0.1% of rdg + 1.5°C) JPt1001 –200.0 to 550.0°C Pt100 (high res.) –140.00 to 150.00°C ±(0.05% of rdg + 0.3°C) ±(0.1% of rdg + 1.5°C) JPt100 (high res.) –140.00 to 150.00°C ±(0.1% of rdg + 1.5°C) ±(0.05% of rdg + 0.3°C) Pt501 –200.0 to 550.0°C Cu10 GE4 –200.0 to 300.0°C Cu10 L&N4 –200.0 to 300.0°C ±(0.2% of rdg + 2.5°C) ±(0.1% of rdg + 0.7°C) Cu10 WEED4 –200.0 to 300.0°C 4 Cu10 BAILEY –200.0 to 300.0°C ±(0.1% of rdg + 1.5K) ±(0.05% of rdg + 0.3K) J263B 0.0 to 300.0K Cu10 at 20°C –200.0 to 300.0°C alpha=0.00392 ±(0.2% of rdg + 2.5°C) ±(0.1% of rdg + 0.7°C) Cu10 at 20°C –200.0 to 300.0°C alpha=0.00393 Cu25 at 0°C ±(0.1% of rdg + 0.5°C) –200.0 to 300.0°C ±(0.2% of rdg + 2°C) alpha=0.00425 RTD Cu53 at 0°C –50.0 to 150.0°C (Measurement ±(0.05% of rdg + 0.3°C) ±(0.1% of rdg + 1.5°C) current: 2 mA) alpha=0.00426035 Cu100 at 0°C –50.0 to 150.0°C alpha=0.00425 ±(0.1% of rdg + 0.5°C) –200.0 to 550.0°C Pt25(JPt100/4) ±(0.2% of rdg + 2°C) Cu10 GE –200.0 to 300.0°C (high resolution) Cu10 L&N –200.0 to 300.0°C (high resolution) ±(0.1% of rdg + 0.7°C) ±(0.2% of rdg + 2.5°C) Cu10 WEED –200.0 to 300.0°C (high resolution) Cu10 BAILEY –200.0 to 300.0°C (high resolution) Pt100 (high noise resistance) –200.0 to 250.0°C ±(0.05% of rdg + 0.3°C) ±(0.1% of rdg + 1.5°C) JPt100 (high noise resistance) –200.0 to 250.0°C ±(0.05% of rdg + 0.3°C) –200.0 to 200.0°C ±(0.1% of rdg + 1.5°C) Cu100 GOST ±(0.05% of rdg + 0.3°C) –200.0 to 200.0°C Cu50 GOST ±(0.1% of rdg + 1.5°C) ±(0.1% of rdg + 0.7°C) –200.0 to 200.0°C Cu10 GOST ±(0.2% of rdg + 0.5°C) Threshold level accuracy: ±0.1 V Level Vth = 2.4 V DI ON for 100 Ω or less, OFF for 10 kΩ or more5 Contact input 1 Pt50: JIS C 1604-1981, JIS C 1606-1986/Pt100: JIS C 1604-1989, JIS C 1606-1989, IEC 751, DIN IEC 751/ JPt100: JIS C 1604-1981, JIS C 1606-1989 2 SAMA/DIN 3 McGRAW EDISON COMPANY 4 Guaranteed accuracy range Cu10 GE: –84.4 to 170.0°C/Cu10 L&N: –75.0 to 150.0°C/Cu10 WEED: –20.0 to 250.0°C/ Cu10 BAILEY: –20.0 to 250.0°C 5 Measured using a measurement current of approximately 10 µA at 200 mV range. Threshold level is approximately 0.1 V. Input Highest Resolution (1 digit) 0.1°C 0.01°C 0.1°C 0.1°C 0.1°C 0.1°C 0.01°C 0.1°C 0.1K 0.1°C 0.1°C 0.1°C 0.1°C 0.1°C 0.1°C 0.1°C 0.1°C 0.1°C Measurement interval, integration time, and filter: Measurement Interval 10 ms 50 ms Integration Time 1.67 ms* 16.67 ms 20 ms Auto** 100 ms 36.67 ms 200 ms 100 ms 500 ms 1s 200 ms 2, 5,10, 20, 30, 60 s Filter Rectangular Rejected Noise and Notes 600 Hz and its integer multiples 60 Hz and its integer multiples 50 Hz and its integer multiples Automatically detects the power supply frequency and set 16.67 or 20 ms Trapezoidal 50 Hz or 60 Hz and their integer multiples Rectangular 10 Hz and its integer multiples Cos Fc = 5-Hz low-pass filter * When the measurement interval is 10 ms, measured values may fluctuate since power supply frequency noise is not rejected. In such cases, set the measurement interval to 50 ms or more. ** For DC power, set to 20 ms. Reference junction compensation: Switch external/internal by channel, includes remote RJC function 5-26 IM MW100-01E 5.4 4-CH, High-Speed Universal Input Module Specifications IM MW100-01E 5-27 5 Specification Reference junction compensation accuracy: When measuring temperature greater than or equal to 0°C and when the temperature of the input terminal is balanced Type R, S, W: ±1°C Type K, J, E, T, N, L, U, TXK: ±0.5°C Type N(AWG14), PLATINEL, NiNiMo, WRe3-25, W/WRe26: ±1°C Note: The internal reference junction compensation is fixed to 0°C for type B and PR40-20 Maximum input voltage: DC voltage at 1-V range or less, TC, RTC, and DI (contact): ±10 VDC (continuous) Other measurement ranges: ±120 VDC (continuous) Normal mode voltage: DC voltage, TC, DI (LEVEL): 1.2 times the range rating or less (50/60 Hz, peak value including the signal component) RTD 100 Ω: 50 mVpeak RTD 10 Ω, 25 Ω, 50 Ω: 10 mVpeak Normal mode rejection ratio: For integration time of 16.67 ms or more: 40 dB or more (50/60 Hz ± 0.1%) For integration time of 1.67 ms: 50/60 Hz is not rejected The RTD and resistance ranges indicates the voltage conversion value when current flows. Common-mode voltage: 600 VACrms (50/60 Hz), reinforced (double) insulation Common mode rejection ratio (50/60 Hz ±0.1%, 500 Ω unbalanced between minus measurement terminal and ground) The RTD and resistance ranges indicates the voltage conversion value when current flows. When the integration time is 16.67 ms or more: 120 dB or more When the integration time is 1.67 ms or more: 80 dB or more Common-mode voltage between channels: 250 VACrms (50/60 Hz), reinforced (double) insulation Noise rejection: Rejection by the integrating A/D converter and the use of low pass filters Input resistance: For DC voltage 1 V range or less and thermocouple range: 10 MΩ or less For DC voltage 2 V range or higher: Approx. 1 MΩ While measurement stopped: Approx. 1 MΩ Insulation resistance: Between input terminal and earth terminal: 20 MΩ or more (500 VDC) Input bias current: 10 nA or less (except for burnout setting) Withstand voltage: 2300 VAC (50/60 Hz) for one minute between input terminals 3700 VAC (50/60 Hz) for one minute between the input terminal and earth terminal Input signal source resistance: DC voltage, thermocouple: 2 kΩ or less RTD 50 Ω, 100 Ω types: 10 Ω per line or less RTD10 Ω, 25 Ω types: 1 Ω per line or less Thermocouple burnout: Superposed electric current system, detection within the thermocouple range (detection ON/OFF possible) Up/Down setting is possible, current approximately 100 nA 2 kΩ or less normal, 10 MΩ or more disconnected Effect on measurement accuracy: ±15µV or less (not including effect of signal source resistance) Parallel capacity during RTD: 0.01µF or less Power consumption: Approx. 3 W External dimensions: Approx. 57 (W) × 131 (H) × 151 (D) mm (including the terminal cover) Weight: Approx. 0.5 kg. Terminal type: Clamp, detachable per channel Applicable wire size: 0.2 to 2.5 mm2 (AWG24 to 12) 5.4 4-CH, High-Speed Universal Input Module Specifications Effects of Operating Conditions The specifications below apply when the integration time is 16.67 ms or more. Warm-up time: At least 30 minutes after power-up Effects of ambient temperature: The effect received by changes in 10°C increments of the ambient temperature is ±(0.05% of rdg. + 0.05% of range) or less However, for Cu10 Ω: ±(0.2% of range + 1 digit) Effects of power fluctuation: Meets the accuracy specifications for AC power supply in the range 90 to 132 V and 180 to 250 V Effects of magnetic field: The fluctuation in external magnetic fields for AC (50/60 Hz) 400 A/m is ±(0.1% of rdg. + 10 digits) or less Effects from the signal source resistance: Effect from fluctuation in DC voltage and thermocouple signal source resistance of 1 kΩ DC voltage: 1 V range or less ±10 µV or less 2 V range or higher ±0.15% of rdg. or less Thermocouple: ±10 µV or less However, when burnout is set, ±150 µV or less RTD: Fluctuation per 10 Ω change per line (3 lines all same resistance) for 100Ω types: ±0.1°C or less; other than 100 Ω types: ±1.0°C or less; fluctuation resulting from difference in resistance between lead wires of 40 mΩ (max. difference among three wires): approximately 0.1 °C (for Pt100) Effect of position: Horizontal with the feet at the bottom is the rule. Effects of vibration: The fluctuation that results by applying a sinusoidal vibration along all three axes at a frequency between 10 to 60 Hz and an acceleration of 0.2 m/s2 is ±(0.1% of rdg. + 1 digit) or less General Specifications Operating temperature range: Operating humidity range: –20 to 60°C 20 to 80% RH for –20 to 40 °C 10 to 50% RH for 40 to 50°C 5 to 30% RH for 50 to 60 °C External Dimensions Units: mm 150.8 131 57 If not specified, the tolerance is ±3%. However, in cases of less than 10 mm, the tolerance is ±0.3 mm. 5-28 IM MW100-01E 5.5 10-CH, Medium-Speed Universal Input Module Specifications Style number: S1 Type of measurement: DC voltage, thermocouple, 3-wire RTD, DI (contact, LEVEL) Number of inputs: 10 Input method: Floating unbalanced input, insulation between channels (b terminal common for RTD) A/D resolution: 16 bits (±20000/±6000) Measuring range and accuracy: The accuracy applies to standard operating conditions: Ambient temp: 23±2°C, ambient humidity: 55±10% RH, supply voltage: 90 to 250 VAC, power frequency: 50/60 Hz ± 1%, warmup time: at least 30 minutes, without adverse conditions such as vibrations. Thermocouple (excludes RJC accuracy) 1 2 3 4 Rated Measurement Range –20.000 to 20.000 mV –60.00 to 60.00 mV –200.00 to 200.00 mV –2.0000 to 2.0000 V –6.000 to 6.000 V –20.000 to 20.000 V –100.00 to 100.00 V 0.000 to 60.000 mV –1.0000 to 1.0000 V 0.0000 to 6.0000 V 0.0 to 1760.0°C B1 0.0 to 1820.0°C K1 –200.0 to 1370.0°C E1 J1 T1 L2 U N3 W4 KPvsAu7Fe –200.0 to 800.0°C –200.0 to 1100.0°C –200.0 to 400.0°C –200.0 to 900.0°C –200.0 to 400.0°C 0.0 to 1300.0°C 0.0 to 2315.0°C 0.0 to 300.0K PR40-20 0.0 to 1900.0°C NiNiMo 0.0 to1310.0°C WRe3-25 0.0 to 2400.0°C W/WRe26 0.0 to 2400.0°C Type-N(AWG14) 0.0 to 1300.0°C TXK GOST –200.0 to 600.0°C Measurement Accuracy Integration Time: 16.67 ms or More ±(0.05% of rdg + 5 digits) ±(0.05% of rdg + 2 digits) ±(0.05% of rdg + 2 digits) ±(0.05% of rdg + 5 digits) ±(0.05% of rdg + 2 digits) ±(0.05% of rdg + 2 digits) ±(0.05% of rdg + 2 digits) ±(0.05% of rdg + 20 digits) ±(0.05% of rdg + 2 digits) ±(0.05% of rdg + 20 digits) ±(0.05% of rdg + 1°C) Except 0 to 100°C: ±3.7°C, 100 to 300°C: ±1.5°C for R and S; 400 to 600°C: ±2°C, less than 400°C: not guaranteed for B ±(0.05% of rdg + 0.7°C) Except –200°C to –100°C: ±(0.05% of rdg + 1°C) Measurement Accuracy Integration Time: 16.67 ms ±(0.1% of rdg + 25digits) ±(0.1% of rdg + 10digits) ±(0.1% of rdg + 100 digits) ±(0.1% of rdg + 10 digits) ±(0.1% of rdg + 100 digits) ±(0.1% of rdg + 4°C) Except 0 to 100°C: ±10°C, 100 to 300°C: ±5°C for R and S; 400 to 600°C: ±7°C, less than 400°C: not guaranteed for B ±(0.1% of rdg + 3.5°C) Except –200°C to –100°C: ±(0.1% of rdg + 6°C) Highest Resolution (1 digit) 1 µV 10 µV 10 µV 100 µV 1 mV 1 mV 10 mV 1µV 100µV 100µV 0.1°C ±(0.1% of rdg + 2.5°C) ±(0.05% of rdg + 0.5°C) Except –200°C to –100°C: Except –200°C to –100°C: ±(0.05% of rdg + 0.7°C) for J and L ±(0.1% of rdg + 5°C) for J and L ±(0.05% of rdg + 0.7°C) ±(0.05% of rdg + 1°C) ±(0.05% of rdg + 0.7K) ±(0.05% of rdg + 2.5°C) Except 300 to 700°C: ±6°C, less than 300°C: not guaranteed ±(0.05% of rdg + 0.7°C) ±(0.05% of rdg + 2°C) Except 0 to 200°C: ±2.5°C, more than 2000°C: ±(0.05% of rdg + 4°C) ±(0.05% of rdg + 2°C) Except 100 to 300°C: ±4°C, less than 100°C: not guaranteed ±(0.05% of rdg + 0.7°C) ±(0.05% of rdg + 0.5°C) Except –200 to 0°C: ±(0.2% of rdg + 0.7°C) ±(0.1% of rdg + 3.5°C) ±(0.1% of rdg + 7°C) ±(0.1% of rdg + 3.5K) ±(0.1% of rdg + 12°C) Except 300 to 700°C: ±25°C, less than 300°C: not guaranteed ±(0.1% of rdg + 2.7°C) ±(0.1% of rdg + 7°C) Except 0 to 200°C: ±12°C, more than 2000°C: ±(0.1% of rdg + 11°C) ±(0.1% of rdg + 8.5°C) Except 100 to 300°C: ±12°C, less than 100°C: not guaranteed ±(0.1% of rdg + 3.5°C) ±(0.1% of rdg + 2.5°C) Except –200 to 0°C: ±(1% of rdg + 2.5°C) 0.1K 0.1°C R, S, B, K, E, J, T: ANSI, IEC 584, DIN IEC 584, JIS C 1602-1981 L: Fe-CuNi, DIN43710/U: Cu-CuNi, DIN 43710 N: Nicrosil-Nisil, IEC 584, DIN IEC 584 W: W•5%RE-W•26%Re (Hoskins Mfg Co) IM MW100-01E 5-29 5 Specification Measurement Range Input Type 20 mV 60 mV 200 mV 2V 6V DC voltage 20 V 100 V 60mV (high res.) 1V 6V (high res.) R1 S1 5.5 10-CH, Medium-Speed Universal Input Module Specifications Input Measurement Range Type Pt1001 JPt1001 Pt100 (high res.) JPt100 (high res.) Ni100 SAMA2 Ni100 DIN2 Ni1203 Pt50 Cu10 GE4 Cu10 L&N4 Cu10 WEED4 Cu10 BAILEY4 J263B Cu10 at 20°C alpha=0.00392 RTD Cu10 at 20°C (Measurement alpha=0.00393 current: 1 mA) Cu25 at 0°C alpha=0.00425 Cu53 at 0°C alpha=0.00426035 Cu100 at 0°C alpha=0.00425 Pt25(JPt100/4) Cu10 GE (high resolution) Cu10 L&N (high resolution) Cu10 WEED (high resolution) Cu10 BAILEY (high resolution) DI 1 2 3 4 5 –200.0 to 600.0°C –200.0 to 550.0°C –140.00 to 150.00°C –140.00 to 150.00°C –200.0 to 250.0°C –60.0 to 180.0°C –70.0 to 200.0°C –200.0 to 550.0°C –200.0 to 300.0°C –200.0 to 300.0°C –200.0 to 300.0°C –200.0 to 300.0°C 0.0 to 300.0K Measurement Accuracy Integration Time: 1.67 ms Highest Resolution (1 Digit) ±(0.05% of rdg + 0.3°C) ±(0.1% of rdg + 1.5°C) 0.1°C ±(0.05% of rdg + 0.3°C) ±(0.1% of rdg + 1.5°C) 0.01°C ±(0.05% of rdg + 0.3°C) ±(0.1% of rdg + 1.5°C) 0.1°C ±(0.1% of rdg + 2°C) ±(0.2% of rdg + 5°C) 0.1°C ±(0.05% of rdg + 0.3K) ±(0.1% of rdg + 1.5K) 0.1K ±(0.1% of rdg + 2°C) ±(0.2% of rdg + 5°C) 0.1°C ±(0.1% of rdg + 0.5°C) ±(0.2% of rdg + 2°C) 0.1°C ±(0.05% of rdg + 0.3°C) ±(0.1% of rdg + 1.5°C) 0.1°C ±(0.1% of rdg + 0.5°C) ±(0.2% of rdg + 2°C) 0.1°C ±(0.1% of rdg + 2°C) ±(0.2% of rdg + 5°C) 0.1°C –200.0 to 300.0°C –200.0 to 300.0°C –200.0 to 300.0°C –50.0 to 150.0°C –50.0 to 150.0°C –200.0 to 550.0°C –200.0 to 300.0°C –200.0 to 300.0°C –200.0 to 300.0°C –200.0 to 300.0°C –200.0 to 600.0°C –200.0 to 200.0°C –200.0 to 200.0°C –200.0 to 200.0°C Vth = 2.4 V PT100GOST Cu100GOST Cu50GOST Cu10GOST Level Contact input Measurement Accuracy Integration Time: 16.67 ms or More Rated Measurement Range ±(0.05% of rdg + 0.3°C) ±(0.1% of rdg + 1.5°C) ±(0.05% of rdg + 0.3°C) ±(0.1% of rdg + 1.5°C) ±(0.05% of rdg + 0.3°C) ±(0.1% of rdg + 1.5°C) ±(0.1% of rdg + 2°C) ±(0.2% of rdg + 5°C) Threshold level accuracy: ±0.1 V ON for 100 Ω or less, OFF for 10 kΩ or more5 0.1°C 0.1°C 0.1°C 0.1°C Pt50: JIS C 1604-1981, JIS C 1606-1986/Pt100: JIS C 1604-1989, JIS C 1606-1989, IEC 751, DIN IEC 751/ JPt100: JIS C 1604-1981, JIS C 1606-1989 SAMA/DIN McGRAW EDISON COMPANY Guaranteed accuracy range Cu10 GE: –84.4 to 170.0°C/Cu10 L&N: –75.0 to 150.0°C/Cu10 WEED: –20.0 to 250.0°C/ Cu10 BAILEY: –20.0 to 250.0°C Measured using a measurement current of approximately 10 µA at 200 mV range. Threshold level is approximately 0.1 V. Measurement interval, integration time, and filter: Measurement Integration Interval Time 100 ms 200 ms 1.67 ms 500 ms 16.67 ms 20 ms Auto3 Burnout Detection Cycle 1 s1 Filter Rejected Noise and Notes 600 Hz and its integer multiples2 Rectangular 60 Hz and its integer multiples 50 Hz and its integer multiples Automatically detects the power supply frequency andset Measurement 16.67 or 20 ms interval Trapezoidal 50 Hz or 60 Hz and their integer multiples Rectangular 10 Hz and its integer multiples 36.67 ms 1s 100 ms4 2s 200 ms5 5s Fc = 5-Hz low-pass filter Cos 10, 20, 30, 60 s 200 ms 1 When the measurement interval is 100 ms, burnout is detected in one channel per measurement interval. Therefore, if measurement is started in a burnout condition or after a burnout occurs, burnout cannot be detected for up to 10 measurements (approximately 1 second). 2 Because the power supply frequency noise is not rejected, measured values may fluctuate particularly for temperature measurements using thermocouples. If this happens, make the measurement interval longer, or use the 4-CH High-Speed Universal Input Module. 3 For DC power, set to 20 ms. 4 When synchronizing time by SNTP, the integral time is set to 36.67 ms. Also in this case, noise of 50 Hz, 60 Hz, and their integer multiples is rejected. 5 When synchronizing time by SNTP, the integral time is set to 100 ms. Also in this case, noise of 10 Hz and its integer multiples is rejected. Reference junction compensation: Switch external/internal by channel, includes remote RJC function 5-30 IM MW100-01E 5.5 10-CH, Medium-Speed Universal Input Module Specifications IM MW100-01E 5-31 5 Specification Reference junction compensation accuracy: When measuring temperature greater than or equal to 0 °C and when the temperature of the input terminal is balanced Type R, S, W: ±1°C Type K, J, E, T, N, L, U, TXK: ±0.5°C Type N (AWG14), PLATINEL, NiNiMo, WRe3-25, W/WRe26: ±1°C Note: Type B and PR40-20 internal RJC is fixed at 0°C Maximum input voltage: DC voltage at 1-V range or less, TC, RTC, and DI (contact): ±10 VDC (continuous) Other measurement ranges: ±120 VDC (continuous) Normal-mode voltage: DC voltage, TC, DI (LEVEL): 1.2 times the range rating or less (50/60 Hz, peak value including the signal component) RTD 100 Ω: 50 mVpeak RTD 10 Ω, 25 Ω, 50 Ω: 10 mVpeak Normal-mode rejection ratio: For integration time of 16.67 ms or more: 40 dB or more (50/60 Hz ± 0.1%) For integration time of 1.67 ms: 50/60 Hz is not rejected. The RTD and resistance ranges indicate the voltage conversion value when current flows. Common-mode voltage:600 VACrms (50/60 Hz), reinforced (double) insulation Common mode rejection ratio (50/60 Hz ±0.1%, 500 Ω unbalanced between minus measurement terminal and ground) The RTD and resistance ranges indicate the voltage conversion value when current flows. When the integration time is 16.67 ms or more: 120 dB or more When the integration time is 1.67 ms: 80 dB or more Common-mode voltage between channels: 120 VACrms (50/60 Hz) Noise rejection: Rejection by the integrating A/D converter and the use of low pass filters Input resistance: For DC voltage 1 V range or less and thermocouple range: 10 MΩ or less For DC voltage 2 V range or higher: Approx. 1 MΩ Insulation resistance: Between input and ground: 20 MΩ or more (500 VDC) Input bias current: 10 nA or less (except for burnout setting) Withstand Voltage 1000 VAC (50/60 Hz) for one minute between input terminals 3700 VAC (50/60 Hz) for one minute between the input terminal and earth terminal Input signal source resistance: DC voltage, thermocouple: 2 kΩ or less RTD 50 Ω, 100 Ω types: 10 Ω per line or less RTD 10 Ω, 25 Ω types: 1 Ω per line or less Thermocouple burnout: Detection at a specified detection interval per measurement interval and detection within the thermocouple range (detection ON/OFF possible) Up/Down setting is possible 2 kΩ or less normal, 200 kΩ or more disconnected (shunt capacitance: 0.01 µF or less), detection current approx. 10 µA, detection time approx. 2 ms Parallel capacity during RTD: 0.01µF or less Power consumption: Approx. 1.2 W External dimensions: Approx. 57 (W) × 131 (H) × 151 (D) mm (including the terminal cover) Weight: Approx. 0.5 kg. Terminal type: Clamp, terminal board is detachable Applicable wire size: 0.14 to 1.5 mm2 (AWG26 to 16) 5.5 10-CH, Medium-Speed Universal Input Module Specifications Effects of Operating Conditions The specifications below apply when the integration time is 16.67 ms or more. Warm-up time: At least 30 minutes after power-up Effects of ambient temperature: The effect received by changes in 10°C increments of the ambient temperature is ±(0.05% of rdg. + 0.05% of range) or less However, for Cu10 Ω: ±(0.2% of range + 1 digit) Effects of power fluctuation: Meets the accuracy specifications for AC power supply in the range 90 to 132 V and 180 to 250 V Effects of magnetic field:The fluctuation in external magnetic fields for AC (50/60 Hz) 400 A/m is ±(0.1% of rdg. + 10 digits) or less Effects from the signal source resistance: Effect from fluctuation in DC voltage and thermocouple signal source resistance of 1 kΩ DC voltage: 1 V range or less ±10 µV or less 2 V range or higher ±0.15% of rdg. or less Thermocouple: ±10 µV or less RTD: Fluctuation per 10 Ω change per line (3 lines all same resistance) for 100 Ω types: ±0.1°C or less; other than 100 Ω types: ±1.0°C or less; fluctuation resulting from difference in resistance between lead wires of 40 mΩ (max. difference among three wires): approximately 0.1 °C (for Pt100) Effect of position: Horizontal with the feet at the bottom is the rule. Effects of vibration: The fluctuation that results by applying a sinusoidal vibration along all three axes at a frequency between 10 to 60 Hz and an acceleration of 0.2 m/s2 is ±(0.1% of rdg. + 1 digit) or less General Specifications Operating temperature range: Operating humidity range: –20 to 60°C 20 to 80% RH for –20 to 40 °C 10 to 50% RH for 40 to 50°C 5 to 30% RH for 50 to 60 °C External Dimensions Units: mm 57 131 150.8 If not specified, the tolerance is ±3%. However, in cases of less than 10 mm, the tolerance is ±0.3 mm. 5-32 IM MW100-01E 5.6 6-CH, Medium-Speed Four-Wire RTD Resistance Input Module Specifications Style number: S2 Type of measurement: DC voltage, 4-wire RTD, 4-wire resistance, DI (contact, LEVEL) Number of inputs: 6 Input method: Floating unbalanced input, insulation between channels A/D resolution: 16 bits (±20000/±6000) Measuring range and accuracy: The accuracy applies to standard operating conditions: Ambient temp: 23±2°C, ambient humidity: 55±10% RH, supply voltage: 90 to 250 VAC, power frequency: 50/60 Hz ± 1%, warmup time: at least 30 minutes, without adverse conditions such as vibrations. Rated Measurement Range ±(0.1% of rdg + 100 digits) ±(0.1% of rdg + 10 digits) ±(0.1% of rdg + 100 digits) Highest Resolution (1 Digit) 1 µV 10 µV 10 µV 100 µV 1 mV 1 mV 10 mV 1µV 100µV 100µV ±(0.1% of rdg + 1.5°C) 0.1°C ±(0.1% of rdg + 1.5°C) 0.01°C ±(0.1% of rdg + 1.5°C) 0.1°C ±(0.2% of rdg + 5°C) 0.1°C ±(0.1% of rdg + 1.5K) 0.1K ±(0.2% of rdg + 5°C) 0.1°C ±(0.2% of rdg + 2°C) 0.1°C ±(0.1% of rdg + 1.5°C) 0.1°C ±(0.2% of rdg + 2°C) 0.1°C ±(0.2% of rdg + 5°C) 0.1°C ±(0.1% of rdg + 1.5°C) ±(0.1% of rdg + 1.5°C) ±(0.1% of rdg + 1.5°C) ±(0.2% of rdg + 5°C) 0.1°C 0.1°C 0.1°C 0.1°C Measurement Accuracy Integration Time: 1.67 ms ±(0.1% of rdg + 25digits) ±(0.1% of rdg + 10digits) 1 Pt50: JIS C 1604-1981, JIS C 1606-1986/Pt100: JIS C 1604-1989, JIS C 1606-1989, IEC 751, DIN IEC 751/ JPt100: JIS C 1604-1981, JIS C 1606-1989 2 SAMA/DIN 3 McGRAW EDISON COMPANY 4 Guaranteed accuracy range Cu10 GE: –84.4 to 170.0°C/Cu10 L&N: –75.0 to 150.0°C/Cu10 WEED: –20.0 to 250.0°C/ Cu10 BAILEY: –20.0 to 250.0°C 5. 4-wire RTD, 4-wire resistance IM MW100-01E 5-33 5 Specification Measurement Range Type Measurement Accuracy Integration Time: 16.67 ms or More 20 mV –20.000 to 20.000 mV ±(0.05% of rdg + 5 digits) 60 mV ±(0.05% of rdg + 2 digits) –60.00 to 60.00 mV 200 mV –200.00 to 200.00 mV ±(0.05% of rdg + 2 digits) ±(0.05% of rdg + 5 digits) –2.0000 to 2.0000 V DC voltage 2 V 6V ±(0.05% of rdg + 2 digits) –6.000 to 6.000 V 20 V ±(0.05% of rdg + 2 digits) –20.000 to 20.000 V 100 V ±(0.05% of rdg + 2 digits) –100.00 to 100.00 V 60mV (high res.) 0.000 to 60.000 mV ±(0.05% of rdg + 20 digits) 1V ±(0.05% of rdg + 2 digits) –1.0000 to 1.0000 V 6V (high res.) ±(0.05% of rdg + 20 digits) 0.0000 to 6.0000 V 1 Pt100 –200.0 to 600.0°C ±(0.05% of rdg + 0.3°C) JPt1001 –200.0 to 550.0°C Pt100 (high res.) –140.00 to 150.00°C ±(0.05% of rdg + 0.3°C) JPt100 (high res.) –140.00 to 150.00°C Ni100 SAMA2 –200.0 to 250.0°C Ni100 DIN2 –60.0 to 180.0°C ±(0.05% of rdg + 0.3°C) Ni1203 –70.0 to 200.0°C Pt50 –200.0 to 550.0°C Cu10 GE4 –200.0 to 300.0°C 4 Cu10 L&N –200.0 to 300.0°C ±(0.1% of rdg + 2°C) 4 Cu10 WEED –200.0 to 300.0°C 4 Cu10 BAILEY –200.0 to 300.0°C ±(0.05% of rdg + 0.3K) J263B 0.0 to 300.0K Cu10 at 20°C –200.0 to 300.0°C alpha=0.00392 ±(0.1% of rdg + 2°C) RTD5 Cu10 at 20°C –200.0 to 300.0°C (Measurement alpha=0.00393 current: 1 mA) Cu25 at 0°C ±(0.1% of rdg + 0.5°C) –200.0 to 300.0°C alpha=0.00425 Cu53 at 0°C –50.0 to 150.0°C alpha=0.00426035 ±(0.05% of rdg + 0.3°C) Cu100 at 0°C –50.0 to 150.0°C alpha=0.00425 –200.0 to 550.0°C ±(0.1% of rdg + 0.5°C) Pt25(JPt100/4) Cu10 GE –200.0 to 300.0°C (high resolution) Cu10 L&N –200.0 to 300.0°C (high resolution) ±(0.1% of rdg + 2°C) Cu10 WEED –200.0 to 300.0°C (high resolution) Cu10 BAILEY –200.0 to 300.0°C (high resolution) ±(0.05% of rdg + 0.3°C) –200.0 to 600.0°C Pt100 GOST ±(0.05% of rdg + 0.3°C) –200.0 to 200.0°C Cu100 GOST ±(0.05% of rdg + 0.3°C) –200.0 to 200.0°C Cu50 GOST ±(0.1% of rdg + 2°C) –200.0 to 200.0°C Cu10 GOST Input 5.6 6-CH, Medium-Speed Four-Wire RTD Resistance Input Module Specifications Input Measurement Range Type Pt5002 RTD3 (Measurement current: 0.25 Pt10002 mA) 20 Ω (Measurement current 1 mA) 200 Ω Resistance (Measurement current 1 mA) 2 kΩ (Measurement current 0.25 mA) Level DI Contact input 1 2 3 Measurement Accuracy Integration Time: 16.67 ms or More Rated Measurement Range –200.0 to 600.0°C Measurement Accuracy Integration Time: 1.67 ms Highest Resolution (1 Digit) ±(0.05% of rdg + 3digits) ±(0.1% of rdg + 1.5digits) 0.1°C 0.000 to 20.000 Ω ±(0.05% of rdg + 7digits) ±(0.1% of rdg + 25digits) 0.001Ω 0.00 to 200.00 Ω ±(0.05% of rdg + 3digits) ±(0.1% of rdg + 15digits) 0.01Ω 0.0 to 2000.0 Ω ±(0.05% of rdg + 3digits) ±(0.1% of rdg + 10digits) 0.1Ω Vth = 2.4 V Threshold level accuracy: ±0.1 V ON for 100 Ω or less, OFF for 10 kΩ or more1 –200.0 to 600.0°C Measured using a measurement current of approximately 10 µA at 200 mV range. Threshold level is approximately 0.1 V. The Pt500 resistance table is Pt100 × 5, and the resistance table for Pt1000 is Pt100 × 10 4-wire RTD, 4-wire resistance. Measurement interval, integration time, and filter: Measurement Interval 100 ms 200 ms 1s 2s 5s 10, 20, 30, 60 s 2 3 4 Filter 16.67 ms 20 ms Auto2 36.67 ms 100 ms3 200 ms4 200 ms Rejected Noise and Notes 600 Hz and its integer multiples1 1.67 ms 500 ms 1 Integration Time Rectangular 60 Hz and its integer multiples 50 Hz and its integer multiples Automatically detects the power supply frequency and set 16.67 or 20 ms Trapezoidal 50 Hz, 60 Hz and their integer multiples Rectangular 10 Hz and its integer multiples Cos Fc = 5-Hz low-pass filter When the measurement interval is 100 ms and 200 ms, measured values may fluctuate since power supply frequency noise is not rejected. In such cases, set the measurement interval to 500 ms or more. For DC power, set to 20 ms. When synchronizing time by SNTP, the integral time is set to 36.67 ms. Also in this case, noise of 50 Hz, 60 Hz, and their integer multiples is rejected. When synchronizing time by SNTP, the integral time is set to 100 ms. Also in this case, noise of 10 Hz and its integer multiples is rejected. Maximum input voltage: DC voltage at 1-V range or less, RTD, resistance, and DI (contact): ±10 VDC (continuous) Other measurement ranges: ±120 VDC (continuous) Normal-mode voltage DC voltage, DI (LEVEL): 1.2 times the range rating or less (50/60 Hz, peak value including the signal component) Resistance 2 kΩ, RTD 100 Ω, 500 Ω: 1000 Ω types: 50 mVpeak Resistance 200 Ω, RTD 10 Ω, 25 Ω: 50 Ω types: 10 mVpeak Resistance 20 Ω: 4 mVpeak Normal-mode rejection ratio: For integration time of 16.67 ms or more: 40 dB or more (50/60 Hz ± 0.1%) For integration time of 1.67 ms: 50/60 Hz is not rejected Common-mode voltage:600 VACrms (50/60 Hz), reinforced (double) insulation Common mode rejection ratio (50/60 Hz ±0.1%, 500 Ω unbalanced between minus measurement terminal and ground. The RTD and resistance ranges indicate the voltage conversion value when current flows) When the integration time is 16.67 ms or more: 120 dB or more When the integration time is 1.67 ms: 80 dB or more Common-mode voltage between channels: DC voltage, DI: 120 VACrms (50/60 Hz) RTD, resistance: 50 VACrms (50/60 Hz) 5-34 IM MW100-01E 5.6 6-CH, Medium-Speed Four-Wire RTD Resistance Input Module Specifications Noise rejection: Effects of Operating Conditions The specifications below apply when the integration time is 16.67 ms or more. Warm-up time: At least 30 minutes after power-up Effects of ambient temperature: The effect received by changes in 10 degree increments of the ambient temperature is ±(0.05% of rdg. + 0.05% of range) or less. However, for Cu10 Ω: ±(0.2% of range + 1 digit) Effects of power fluctuation: Meets the accuracy specifications for AC power supply in the range 90 to 132 V and 180 to 250 V Effects of magnetic field: The fluctuation in external magnetic fields for AC (50/60 Hz) 400 A/m is ±(0.1% of rdg. + 10 digits) or less Effects from the signal source resistance: Effect from fluctuation in DC voltage signal source resistance of 1 kΩ 1 V range or less ±10 µV or less 2 V range or higher ±0.15% of rdg. or less RTD: Fluctuation from 10 Ω change per line 1000 Ω, 100 Ω types: ± 0.1°C or less Other than 1000 Ω, 100 Ω types: ± 1.0°C or less Resistance: Fluctuation from 10 Ω change per line: ±1 digit or less Effect of position: Horizontal with the feet at the bottom is the rule. Effects of vibration: The fluctuation that results by applying a sinusoidal vibration along all three axes at a frequency between 10 to 60 Hz and an acceleration of 0.2 m/s2 is ±(0.1% of rdg. + 1 digit) or less IM MW100-01E 5-35 5 Specification Rejection by the integrating A/D converter and the use of low pass filters Input resistance: For DC voltage 1 V range or less: 10 MΩ or less For DC voltage 2 V range or higher: Approx. 1 MΩ Insulation resistance: Between input terminal and earth terminal: 20 MΩ or more (500 VDC) Input bias current: 10 nA or less Withstand voltage: 1000 VACrms (50/60 Hz) for one minute between input terminals (DC voltage and DI) 620 VACrms (50/60 Hz) for one minute between input terminals (RTD and resistance) 3700 VACrms (50/60 Hz) for one minute between the input terminal and earth terminal Input signal source resistance: DC voltage: 2 kΩ or less Resistance and RTD ranges: 10 Ω or less per line (same for all ranges) Shunt capacity: 0.01 µF or less (when using RTD and resistance ranges) Power consumption: Approx. 1.2 W External dimensions: Approx. 57 (W) × 131 (H) × 151 (D) mm (including the terminal cover) Weight: Approx. 0.5kg. Terminal type: Clamp, terminal board is detachable Applicable wire size: 0.14 to 1.5 mm2 (AWG26 to 16) 5.6 6-CH, Medium-Speed Four-Wire RTD Resistance Input Module Specifications General Specifications Operating temperature range: Operating humidity range: –20 to 60°C 20 to 80% RH for –20 to 40 °C 10 to 50% RH for 40 to 50°C 5 to 30% RH for 50 to 60 °C External Dimensions Units: mm 57 131 150.8 If not specified, the tolerance is ±3%. However, in cases of less than 10 mm, the tolerance is ±0.3 mm. 5-36 IM MW100-01E 5.7 4-CH, Medium-Speed Strain Input Module Specifications Style number: Number of inputs: Input type: Input method: S2 4 Strain gauge or strain gauge type sensors (static strain) Floating balanced input isolated between channels (NDIS is nonisolated) Measurement range and accuracy: The accuracy applies to standard operating conditions: Ambient temp: 23±2°C, ambient humidity: 55±10% RH, supply voltage: 90 to 250 VAC, power frequency: 50/60 Hz ± 1%, warmup time: at least 30 minutes, without adverse conditions such as vibrations. One-Gauge Method Conversion Input Rated Measurement Range Integration time: 16.67 ms or more Measurement Accuracy Resolution 2000 µStrain 20000 µStrain 200000 µStrain ±2000.0 µStrain ±20000 µStrain ±200000 µStrain ±0.5% of range ±0.3% of range ±0.3% of range 0.1 µStrain 1 µStrain 10 µStrain Integration time: 1.67 ms or more Measurement Accuracy Resolution 2% of range 1% of range 1% of range 1 µStrain *1 2 µStrain *2 10 µStrain *1 Display resolution is 0.1 µStrain *2 Display resolution is 1 µStrain AD resolution: Equivalent to ± 20000 FS display However, excludes 1.67 ms integration time AD integration time: Measurement Interval Integration Time Filter Rejected Noise and Notes 600 Hz and its integer multiples1 1.67 ms 16.67 ms Rectangular 60 Hz and its integer multiples 200 ms 50 Hz and its integer multiples 20 ms Automatically detects the power supply frequency and set 16.67 or 20 ms Auto2 500 ms 36.67 ms Trapezoidal 50 Hz, 60 Hz and their integer multiples 1s Rectangular 10 Hz and its integer multiples 100 ms 2s 200 ms3 Cos Fc = 5-Hz low-pass filter 5, 10, 20, 30, 60 s 200 ms 1 When the measurement interval is 100 ms, measured values may fluctuate since power supply frequency noise is not rejected. In such cases, set the measurement interval to 200 ms or more. 2 For DC power, set to 20 ms. 3 When synchronizing time by SNTP, the integral time is set to 100 ms. Also in this case, noise of 10 Hz and its integer multiples is rejected. 100 ms Gauge connection method: 1-gauge (2 or 3 wire systems), opposing 2 gauge, adjacent 2- or 4-gauge With clamp terminals, set on a channel basis with switches Applicable gauge resistance: 100 to 1000 Ω 120 Ω for -B12; 350 Ω, built-in resistance for -B35 Bridge voltage: Fixed at 2 VDC. Accuracy ±5% compensated with internal Cal Applicable gauge factor: Fixed at 2.0. Gauge factor can be compensated with the scaling function Balance adjustment: Automatic, digital calculation methods Balance adjustment range: ±10000 µstrain (1 gauge method conversion) Balance adjustment accuracy: The measurement accuracy or less Resistance accuracy for bridge: ±0.01% ±5ppm/°C Input resistance: 1 MΩ or more. IM MW100-01E 5-37 5 Specification Strain Measurement Range Type 5.7 4-CH, Medium-Speed Strain Input Module Specifications Allowable wiring resistance: 100 Ω or less Effect of wiring resistance: NDIS 50 ppm of rdg. / Ω (when using remote sensing wire) Does not compensate for clamp wiring resistance. Depends on the gauge resistance. Allowable input voltage: ±10 VDC (between H-L) continuous Allowable common-mode voltage: Channel-to-channel: 30 VACrms Between input and ground: 250 VACrms (-B12, -B35), 30 VACrms (-NDI) However, NDIS connector shell is connected to earth potential. Common-mode rejection ratio*: When the integration time is 16.67 ms or more: 120 dB or more. When the integration time is 1.67 ms: 80 dB or more (voltage conversion value at 50/60 Hz ±0.1%, bridge voltage of 2 V) Normal mode rejection ratio: For integral time of 16.67 ms or more: 40 dB or more (50/60 Hz ± 0.1%) For integral time of 1.67: 50/60 Hz is not rejected. (voltage conversion value given a bridge voltage of 2 V) * Insulation resistance : Between input and earth 20 MΩ or more (500 VDC) Withstand voltage*: Between input and earth 2300 VAC for one minute Channel-to-channel: 30 VACrms or less Power consumption: Approx. 3 W (one module) Weight: Approx. 0.5kg. External dimensions: Approx. 57 (W) × 131 (H) × 151 (D) mm (including the terminal cover) Terminal type: -B12, -B35: Clamp, terminal board is detachable -NDI: NDIS, detachable by channel Applicable wire size: 0.14 to 1.5 mm2 (AWG26 to 16) (excluding -NDI) * Does not apply to the NDIS terminal. Effects of Operating Conditions The specifications below apply when the integration time is 16.67 ms or more. Warm-up time: At least 30 minutes after power-up Effects of ambient temperature: The effect received by changes in 10°C increments of the ambient temperature is ±(0.1% of range) or less Effects of power fluctuation: Meets the accuracy specifications for AC power supply in the range 90 to 132 V and 180 to 250 V Effects of magnetic field: The fluctuation in external magnetic fields for AC (50/60 Hz) 400 A/m is ±2% of range or less Effect of position: Horizontal with the feet at the bottom is the rule. 5-38 IM MW100-01E 5.7 4-CH, Medium-Speed Strain Input Module Specifications General Specifications Operating temperature range: Operating humidity range: –20 to 60°C 20 to 80% RH for –20 to 40 °C 10 to 50% RH for 40 to 50 °C 5 to 30% RH for 50 to 60 °C External Dimensions Units: mm -B12, -B35 -NDI 57 150.8 133.8 57 5 131 131 4.8 Specification If not specified, the tolerance is ±3%. However, in cases of less than 10 mm, the tolerance is ±0.3 mm. IM MW100-01E 5-39 5.8 10-CH, High-Speed Digital Input Module Specifications Style number: Input type: S1(-D05), S2(-D24) -D05: Contact (non-voltage contact, open collector) and LEVEL (5-V logic) -D24: LEVEL (24-V logic) Number of inputs: 10 Input format: -D05: Pull up at approx. 5 V/approx. 5 kΩ, non-isolated between channels -D24: No isolation between channels Measurement interval: Select 10 ms, 50 ms, 100 ms, 200 ms, 500 ms, 1 s, 2 s, 5 s, 10 s, 20 s, 30 s, or 60 s Filter Measurement interval of 5 s or less: Use the wider of the ON/OFF width of the detection period (approximately 75% to 90% of the measurement interval) Measurement interval of 5 s or more: Use the wider of the ON/ OFF width of approximately 4.5 s Minimum detection pulse width: Twice the sampling interval or more Input threshold level: -D05: Contact (non-voltage contact, open collector): 100 Ω or less, ON, 100 kΩ or more, OFF LEVEL (5-V logic): OFF at 1 V or less and ON at 3 V or more -D24: LEVEL (24-V logic): OFF at 6 V or less and ON at 16 V or greater Hysteresis width: -D05: Approx. 0.1 V -D24: Approx. 1.5 V Contact transistor rating: 15 VDC or greater and 30 mA or greater Transistor with a rating of Vce > 15 VDC and Ic > 30 mA Maximum input voltage: -D05: ±10 V -D24: ±50 V Insulation resistance: Between input terminals and ground: 20 MΩ or more (500 VDC) Withstand Voltage 2300 VAC (50/60 Hz) for one minute between input and earth Maximum common mode voltage: 250 VACrms (50/60 Hz) Terminal type: Clamp Power consumption: Approx. 1.5 W Applicable wire size: 0.14 to 1.5 mm2 (AWG26 to 16) External dimensions: Approx. 57 (W) × 131 (H) × 151 (D) mm (including the terminal cover) Weight: Approximately 0.5kg. General Specifications Operating temperature range: Operating humidity range: –20 to 60°C 20 to 80% RH for –20 to 40 °C 10 to 50% RH for 40 to 50 °C 5 to 30% RH for 50 to 60 °C External Dimensions 57 Units: mm 131 150.8 If not specified, the tolerance is ±3%. However, in cases of less than 10 mm, the tolerance is ±0.3 mm. 5-40 IM MW100-01E 5.9 8-CH, Medium-Speed Analog Output Module Specifications Style number: Number of outputs: Update interval: Output types: General Specifications Operating temperature range: Operating humidity range: IM MW100-01E –20 to 50°C 20 to 80% RH for –20 to 40 °C 10 to 50% RH for 40 to 50°C 5-41 5 Specification S2 8 100 ms minimum (not synchronized to the measurement interval) DC voltage, DC current (external 24-V power supply required when using current output) Rated output range: Voltage: –10 to 10 V Current: 0 to 20 mA sourcing (for 1 to 5 V output, 4 to 20 mA is output) Maximum allowable output range: Voltage: –11 to 11 V Current: 0 to 22 mA Load impedance: Voltage: 5 kΩ or more Current: 600 Ω or less. Accuracy: ±0.2% of F.S. at the rated output range or less (F.S. = 10 V or 20 mA). However, for current output, accuracy is met at 1 mA or more. The accuracy applies to standard operating conditions: Ambient temp: 23±2°C, ambient humidity: 55±10% RH, supply voltage: 90 to 250 VAC, power frequency: 50/60 Hz ±1%, warmup time: at least 30 minutes, without adverse conditions such as vibrations. Output resolution: 12 bits of F.S. or more Resolution –10.000 V to 10.000 V (1 mV resolution) 0.000 mA to 20.000 mA (1µA resolution) Effects of ambient temperature: ±(50 ppm of Setting + 50 ppm of F.S.) per degree 1°C or less (F.S. = 10 V or 20 mA) External power supply: 24 V ±10% (required when using current output) Connect a device with capacity of 250 mA or more. Insulation resistance: Between output terminals and earth terminal: 20 MΩ or more (500 VDC) Across output terminals: non-isolated (- terminal common potential) Withstand voltage: 2300 VAC (50/60 Hz) for one minute between the output terminal and earth. Across output terminals: non-isolated (-terminal common potential). Power consumption: Approx. 2.5 W (not including power consumption of external power supply). Terminal type: Clamp, attached and removed in units of 4 channels Applicable wire size: 0.08 to 2.5 mm2 (AWG28 to 12) External dimensions: Approx. 57 (W) × 131 (H) × 151 (D) mm (including the terminal cover) Weight: Approx. 0.5 kg. 5.9 8-CH, Medium-Speed Analog Output Module Specifications External Dimensions Units: mm 57 131 150.8 If not specified, the tolerance is ±3%. However, in cases of less than 10 mm, the tolerance is ±0.3 mm. Output Span Setting Limit value of V mode and mA mode Modes Output lower limit* Setting span lower limit Setting span upper limit Output upper limit ** V mode –11[V] –10[V] +10[V] +11[V] mA mode 0[mA] 0[mA] 20[mA] 22[mA] * –OVER, preset value ** + OVER, preset value Handling Abnormal Data Abnormal Data Types Output value Data upon startup Preset value or previously held value can be selected Data upon error occurrence Preset value or previously held value can be selected +OVER 5% of output Full Span –OVER –5% of output Full Span ±OVER conditions • When the input channel is ±OVER in the case of transmission output • When outside the range of voltage –11 V to +11 V, or current 0 mA to 22 mA (accuracy assured at 1 mA or more) 5-42 IM MW100-01E 5.10 8-CH, Medium-Speed PWM Output Module Specifications Style number: Number of outputs: Update interval: Output interval: * A 1A current limit circuit is built in to the output circuit. Once the current limit circuit is ON, the circuit continues to operate unless the external power supply is turned OFF (maintains the output OFF status) After turning OFF external power supplies, check the load, then start up the external power supply again. ** This module has a built-in fuse. The built-in fuse protects against fires or abnormal emissions of heat due to load shortages or other abnormalities. It does not protect against damage to internal circuits. Power consumption: Approx. 2.5 W (not including power consumption of external power supply) Terminal type: Clamp, attached and removed in units of 4 channels Applicable wire size: 0.08 to 2.5 mm2 (AWG28 to 12) External dimensions: Approx. 57 (W) × 131 (H) × 151 (D) mm (including the terminal cover) Weight: Approx. 0.5kg. IM MW100-01E 5-43 5 Specification S2 8 100 ms minimum (not synchronized to the measurement interval) 1 ms to 300 s (can be set channel by channel) However, 1 ms interval setting range: 1 ms to 30.000 s (can be set in units of 1 ms) 10 ms interval setting range: 10 ms to 300.00 s (can be set in units of 10 ms) Output types: Pulse width: Update timing: After receiving change command, duty is changed from falling of the next interval Pulse interval accuracy: ±100ppm of Setting External power supply: 4 to 28V Insulation resistance: Between output terminals and earth terminal: 20 MΩ or more (500 VDC) Across output terminals: non-isolated Withstand voltage 2300 VAC (50/60 Hz) for one minute between the output terminal and earth Across output terminals: non-isolated Duty resolution: 1 ms interval setting range: 12000 10 ms interval setting range: 60000 Set at 0 to 100.000% (0.001% resolution) Duty accuracy (at a load resistance 100 Ω or less): For 1 ms interval setting range, ±0.017% or ±2µs whichever is longer For 10 ms interval setting range, ±0.0035% or ±2µs whichever is longer When the load resistance is greater than 100 Ω, the output duty can shift. Output format: External power supply sourcing ON resistance: 2 Ω or less, when output current is 200 mA or more. Output capacity: 1A/ch max, however, 4 A or less total for all modules*, ** 5.10 8-CH, Medium-Speed PWM Output Module Specifications General Specifications Operating temperature range: Operating humidity range: –20 to 50°C 20 to 80% RH for –20 to 40 °C 10 to 50% RH for 40 to 50°C External Dimensions Units: mm 57 131 150.8 If not specified, the tolerance is ±3%. However, in cases of less than 10 mm, the tolerance is ±0.3 mm. Handling Abnormal Data Abnormal Data Types Output value Data upon startup Preset value or previously held value can be selected Data upon error occurrence Preset value or previously held value can be selected +OVER Duty: +5% of the output Full Span –OVER Duty: –5% of the output Full Span ±OVER conditions • When duty exceeds 0.000 to 100.000% • When the input channel is ±OVER in the case of transmission output 5-44 IM MW100-01E 5.11 Operations Common to the 8-CH MediumSpeed Analog Output Module and the 8-CH Medium Speed PWM Output Module Settings Related Specifications (by Module) Setting channel (Module) Setting Contents Output Channel (AO, PWM) Span AO(V) –10.000 to 10.000V — Setting range AO(mA) 0.000 to -20.000 mA PWM Settings — 0.000 to 100.000% Preset value AO(V) –11.000 to 11.000V — Setting range AO(mA) 0.000 to 22.000 mA PWM Remarks Command output specification Max value also same as range on left 0.000 to 100.000% Yes — Setting span (minimum, maximum) same value specification No — 5 Specification Setting span (minimum and maximum) specified in reverse Overview of Output Operation When Setting Holding of Previous Value of Transmission Output Previous value Previous value (held) Value held Output value Power ON IM MW100-01E Measurement start Measurement stop (or Transmission output execute disabled) Measurement restarts (or Transmission output execute enabled) 5-45 5.12 10-CH, Medium-Speed Digital Output Module Specifications Style number: Number of outputs: Contact mode: Update interval: Contact capacity: Contact life*: S1 10 A contact (SPST) 100 ms minimum (not synchronized to the measurement interval) 250 VDC/0.1 A, 250 VAC/2 A, or 30 VDC/2A (resistance load) 100,000 times at rated load (typical) 20,000,000 times at no load (typical) * The contact life varies depending on the load conditions and the environment in which it is used. Insulation resistance: Between output terminals and earth terminal: 20 MΩ or more (500 VDC) Between output terminals: 20 MΩ or more (500 VDC) Withstand Voltage 2300 VAC (50/60 Hz) for one minute between the output terminal and earth 2300 VAC (50/60 Hz) for one minute between output terminals Maximum common-mode voltage: 250 VACrms (50/60 Hz) Power consumption: Approx. 2 W (when all relays are turned ON) Terminal type: Clamp, attached and removed in units of 5 channels Applicable wire size: 0.08 to 2.5 mm2 (AWG28 to 12) External dimensions: Approx. 57 (W) × 131 (H) × 151 (D) mm (including the terminal cover) Weight: Approx. 0.5kg. General Specifications Operating temperature range: Operating humidity range: –20 to 50°C 20 to 80% RH for –20 to 40 °C 10 to 50% RH for 40 to 50 °C External Dimensions Units: mm 57 131 150.8 If not specified, the tolerance is ±3%. However, in cases of less than 10 mm, the tolerance is ±0.3 mm. 5-46 IM MW100-01E Appendix Appendix 1 Supported Characters When entering characters on the MW100 from a browser, the following characters can be used. There are limits to which characters can be used depending on the type of entry item. For information on the characters can that can be used in communication commands, see the MW100 Communication Command manual (IM MW100-17E). Upper 4 bits 7 3 4 5 0 SP 0 @ P 1 ! 1 A Q a q 2 B R b r 3 C S c s 4 D T d t 1 2 3 # 4 % 5 E U e u 6 & 6 F V f v 7 G W g w 8 ( 8 H X h x 9 ) 9 I Y i y A ∗ J Z j z B + K [ k { l | C D - E . F / < L = M > ] 9 A B C D E F p 5 7 8 m N ^ n O _ o App Appendix Lower 4 bits 6 2 0 } ~ User Specified Strings Alphanumeric English characters can be entered. Passwords Alphanumeric English characters can be entered. However, the following characters may not be used. Space “blank”, and asterisk “ ∗” Host Name, Domain Name, and Server Name Alphanumeric English characters and hyphens “ -”, periods “ .”, and underscores “ _” can be used. File Name Alphanumeric English characters and “#”, “%”, “(”, “)”, “-”, “@”, and “_” can be used. However, the following character combinations may not be used. “AUX”, “CON”, “PRN”, “NUL”, and “CLOCK” IM MW100-01E Appendix-1 Index Index Symbols Page 1 Gauge 3 Wire Method .................................................... 2-11 1 Gauge Method ............................................................... 2-11 10-CH, High-Speed Digital Input Module ........ 1-5, 1-35, 5-40 10-CH, Medium-Speed Digital Output Module ......................................... 1-6, 1-42, 5-46 10-CH, Medium-Speed Universal Input Module ............................................ 1-4, 1-26, 5-29 4 Gauge Method ............................................................... 2-13 4-CH, High-Speed Universal Input Module ..... 1-4, 1-23, 5-25 4-CH, Medium-Speed Strain Input Module ............... 1-5, 5-37 6-CH, Medium-Speed, 4-Wire RTD Resistance Input Module ...................................................... 1-4, 5-33 7-Segment LED ........................................................ 1-11, 4-1 8-CH, Medium-Speed Analog Output Module ......................................... 1-6, 1-36, 5-41 8-CH, Medium-Speed PWM Output Module ... 1-6, 1-37, 5-43 A Page B Page bar graph ........................................................................... 3-40 base plate ................................................................. 1-6, 5-24 basic math ......................................................................... 1-44 baud rate ........................................................................... 2-27 browser ............................................................................... 3-1 burnout .................................................................... 1-13, 3-17 C Page calibration of temperature measurements ........................ 4-16 IM MW100-01E D Page data acquisition logs ......................................................... 5-21 data length ........................................................................ 2-27 data transfer settings .......................................................... 3-5 date and time ...................................................................... 3-9 DC voltage .................................................... 1-23, 1-26, 1-29 DC voltage/current standard ................................... 4-12, 4-16 DE_EN .............................................................................. 3-22 dedicated protocol ............................................................... 5-9 desktop ............................................................................... 2-3 DHCP .................................................................................. 5-9 DHCP client function ......................................................... 1-15 DI ............................................................................ 1-30, 1-35 differential computation between channels ....................... 1-12 differential input settings ................................................... 3-16 differential lower limit alarm .............................................. 1-13 differential upper limit alarm .............................................. 1-13 DIN rail ................................................................................ 2-3 dip switch ................................................................ 1-10, 2-21 direct data length .............................................................. 3-14 display ............................................................... 1-11, 3-1, 5-9 display colors .................................................................... 3-42 display groups settings ..................................................... 3-43 display scale settings ........................................................ 3-42 display setting ..................................................................... 3-3 DNS .................................................................................... 5-9 DNS client settings ............................................................ 3-32 dual screen ....................................................................... 3-37 Index-1 Index Index A/D Integration Time list .................................................... 3-13 absolute time timer ........................................ 1-18, 3-28, 5-22 AC adapter ........................................................................ 2-19 acquisition conditions ........................................................ 3-13 action function ......................................................... 1-19, 5-22 action setting ..................................................................... 3-22 action type ......................................................................... 3-27 address ............................................................................. 2-27 address setting software ..................................................... 1-7 adjacent 2 gauge method ................................................. 2-12 administrator privileges ..................................................... 1-15 alarm ack ................................................................ 3-12, 3-38 alarm channel set .............................................................. 3-33 alarm hold/non-hold .......................................................... 1-14 alarm notification ............................................................... 3-33 alarm output timing ........................................................... 1-14 alarm setting (AI/DI) .......................................................... 3-21 alarm setting (MATH) ........................................................ 3-21 alarm status hold ............................................................... 3-11 alarm summaries .............................................................. 5-21 alarms ............................................................................... 1-13 allowable input voltage ...................................................... 5-38 ambient storage humidity .................................................... 5-1 ambient storage temperature .............................................. 5-1 antistatic metal .................................................................. 2-31 arithmetic functions ........................................................... 1-45 attaching the modules ......................................................... 2-4 attachment procedure ......................................................... 2-4 auto zone .......................................................................... 3-39 calibration procedure ........................................................ 4-12 calibration software ............................................................. 1-7 capacity of the CF card ..................................................... 1-17 CF card ............................................................................. 1-17 channel numbers ................................................................ 2-5 channel setting .................................................................... 3-2 chattering .......................................................................... 1-35 CLOG computation ........................................................... 3-14 CLOG functions ................................................................ 1-45 command output ............................................................... 1-36 commercial power supply ................................................. 2-28 common specifications ........................................................ 5-1 communication .................................................................... 5-9 communication command error .......................................... 4-6 communication error ........................................................... 4-7 communication errors ......................................................... 4-2 communication input channels ............................................ 5-4 communication input data ................................................. 3-20 communication input function ........................................... 5-11 communication output function ......................................... 5-11 communication setting ........................................................ 3-3 communication specifications ........................................... 1-15 communication test ........................................................... 3-12 communication timeout function ....................................... 3-35 computed data .................................................................. 1-17 computed value reset ........................................................ 1-47 computed values clear ...................................................... 1-47 conditional expressions ..................................................... 1-46 connecting signal wires ....................................................... 2-6 connector .................................................................. 1-10, 2-4 converter ........................................................................... 2-24 cutoff frequency ................................................................ 2-30 Index E Page E-mail format ..................................................................... 5-16 E-mail function ........................................................ 1-15, 1-21 E-mail retransmission ....................................................... 1-22 ENERG ............................................................................. 3-22 energize ............................................................................ 1-42 energize setting ................................................................. 3-22 entering expressions ......................................................... 3-18 error display ...................................................... 3-12, 4-1, 4-8 errors upon startup .............................................................. 4-1 ethernet cable ................................................................... 2-21 ethernet communication .................................................... 1-15 ethernet port ...................................................... 2-21, 3-1, 5-9 event detection method ........................................... 1-19, 3-27 event function .......................................................... 1-19, 5-22 event operation ................................................................. 5-22 event type ......................................................................... 3-27 event/action function ......................................................... 5-21 event/action setting ........................................................... 3-27 execution error .................................................................... 4-5 execution errors .................................................................. 4-5 execution sequence .......................................................... 5-22 external dimensions ................. 5-1, 5-23, 5-24, 5-28, 5-32, 5-36, 5-39, 5-40, 5-42, 5-44, 5-46 F Page file creation notification ..................................................... 3-34 file name ............................................................................. 5-6 file size calculation .............................................................. 5-7 filter settings ...................................................................... 3-17 filters ....................................................................... 1-12, 1-35 first-order lag filter ................................................... 1-12, 2-30 flag .................................................................................... 3-27 flag input channels .................................................... 1-46, 5-4 floor ..................................................................................... 2-3 flow of operation .................................................................. 1-8 format ...................................................................... 1-18, 3-10 format type ........................................................................ 5-23 FTP ..................................................................................... 5-9 FTP client settings ............................................................ 3-32 FTP function ...................................................................... 1-15 full zone ............................................................................. 3-39 G Page general specifications ...................... 5-23, 5-28, 5-32, 5-36, 5-39, 5-40, 5-41, 5-44, 5-46 group reset ........................................................................ 1-48 H Page handshaking ............................................................ 2-25, 2-27 high limit on rate-of-change alarm .................................... 1-13 hold operation ................................................................... 1-42 hold setting ........................................................................ 3-22 HTTP ................................................................................... 5-9 hysteresis ................................................................ 1-13, 3-21 I Page in-progress display ............................................................ 1-11 initial balancing ............................................. 1-32, 3-12, 3-17 initialization of the CF card ................................................ 5-23 initialization procedure ...................................................... 4-18 initialization type ................................................................ 4-18 initializing settings ................................................... 2-21, 5-22 Index-2 input mode ........................................................................ 3-16 input/output modules ........................................................... 1-4 installation ........................................................................... 2-2 installation location .............................................................. 2-2 installation procedures ........................................................ 2-2 instrument number ................................................................ iv integrating A/D converter .................................................. 2-28 integration time ................................... 1-28, 1-30, 1-31, 2-28 internet explorer 5.5 ............................................................ 3-1 IP address ........................................................................... 3-4 ITU-T ................................................................................. 2-25 J Page java ..................................................................................... 3-1 JRE ..................................................................................... 3-1 K Page keep alive function ............................................................ 3-35 key lock function ..................................................... 1-10, 5-20 key lock status .................................................................. 1-11 key operation .................................................................... 3-12 L Page lifespan .............................................................................. 4-17 limit for media alarm .......................................................... 3-14 list of services ..................................................................... 5-9 loading settings ................................................................. 3-36 log information .............................................. 1-20, 3-44, 5-21 logical operations .............................................................. 1-44 login function ............................................................. 1-15, 3-8 loss of computed data ......................................................... 5-4 low limit on rate-of-change alarm ...................................... 1-13 low-pass filter .................................................................... 2-30 lower limit alarm ................................................................ 1-13 M Page mail client settings ............................................................. 3-33 Main Module ............................................................... 1-4, 1-9 Main Module Specifications ................................................ 5-2 main protocols ..................................................................... 5-9 match time .................................................... 1-18, 3-28, 5-22 MATH ................................................................................ 1-12 math channel settings ....................................................... 3-18 math clear ......................................................................... 3-38 math constants .................................................................. 3-19 math error data processing ............................................... 1-49 math function .................................................................... 1-44 math function specifications ................................................ 5-3 math groups ............................................................ 1-48, 3-19 math interval ..................................................................... 1-48 math interval settings ........................................................ 3-13 math operation .................................................................. 3-18 math output value ............................................................... 5-4 math reference channels .................................................. 1-46 math reset ......................................................................... 3-38 math settings ..................................................................... 3-13 math span ......................................................................... 1-48 math start ................................................................ 3-30, 3-38 math stop ................................................................ 3-30, 3-38 math types ........................................................................ 1-44 maximum allowable output range ..................................... 5-41 maximum input voltage ....................... 5-27, 5-31, 5-34, 5-40 measured data .................................................................. 1-17 IM MW100-01E Index measurement .................................................................... 1-12 measurement channel settings ......................................... 3-16 measurement conditions ................................................... 3-16 measurement group settings ............................................ 3-13 measurement groups ........................................................ 1-12 measurement input types .......... 1-23, 1-26, 1-29, 1-31, 1-35 measurement interval ......................... 1-12, 1-28, 1-30, 1-31 measurement mode .................................................. 1-14, 3-3 measurement module settings .......................................... 3-13 measurement synchronization ............ 1-25, 1-28, 1-30, 1-31 measures against noise .................................................... 2-28 measuring range ....................... 1-23, 1-26, 1-29, 1-31, 1-35 mechanical specifications ................................................... 5-1 media alarm notification .................................................... 3-34 message ........................................................................... 3-38 message settings .............................................................. 3-41 meter ................................................................................. 3-40 modbus client function ............................................ 1-15, 5-15 modbus client setting .................................................. 3-7, 3-8 modbus master function .......................................... 1-16, 5-11 modbus master setting ........................................................ 3-6 modbus server function ........................................... 1-16, 5-15 modbus settings .................................................................. 3-6 modbus slave function ............................................ 1-16, 5-13 modbus/RTU ................................................... 1-16, 3-6, 5-10 modbus/TCP ............................................................... 3-6, 5-9 model .................................................................................... iv module errors ...................................................................... 4-1 module information ............................................................. 3-9 modus slave function ........................................................ 5-11 monitor-display .................................................................. 3-37 output update interval ................................... 1-36, 1-37, 1-42 output upon startup and error occurrence ......................... 1-38 output waveform ............................................................... 1-37 P parity check ....................................................................... 2-27 PASV mode ...................................................................... 3-32 pause ................................................................................ 3-38 PC hardware ....................................................................... 3-1 PC software ........................................................................ 1-7 periodic report ................................................................... 3-34 pin assignments ................................................................ 2-25 POP3 server ..................................................................... 3-33 power consumption ........................................................... 5-23 power cord ........................................................................ 2-17 power failure notification ................................................... 3-34 power ON operation .......................................................... 3-25 power supply ..................................................................... 2-17 power supply terminal ............................................. 2-18, 2-19 pre-trigger ......................................................................... 3-14 preset value ............................................................ 3-23, 3-24 pretrigger function ............................................................. 1-18 primary and secondary boxes ........................................... 3-32 processing and operation .................................................. 3-12 program channel ............................................................... 3-20 program channels ............................................................. 1-47 pulse interval ........................................................... 1-37, 3-24 pulse resolution ................................................................. 3-24 R Page NO. (instrument number) ...................................................... iv non-hold ............................................................................ 1-42 normal operating conditions ................................................ 5-1 numerical display .............................................................. 3-40 O Page OFF-OFF .......................................................................... 2-25 operating humidity ............................................................. 5-23 operating temperature ....................................................... 5-23 operation error display ...................................................... 1-11 operation modes ............................................................... 1-14 operation upon error occurrence ....................................... 3-25 operation upon startup and error occurrence .................... 1-37 opposing 2 gauge 3 wire method ...................................... 2-13 opposing 2 gauge method ................................................ 2-12 optional accessories ............................................................. vii order of operations in expressions .................................... 1-46 OS (operating system) ........................................................ 3-1 output action setting .......................................................... 3-23 output channel .................................................................. 3-38 output format ..................................................................... 1-38 output method ......................................................... 1-36, 1-37 output on disabled channels ............................................. 1-38 output operation during calibration .................................... 1-36 output operation per settings and setting changes ........... 1-38 output operation settings ................................................... 3-25 output range ............................................................ 1-36, 1-37 output range settings (analog output) ............................... 3-23 output range settings (PWM output) ................................. 3-24 output relays ..................................................................... 1-42 output types .................... 1-36, 1-37, 1-42, 3-23, 5-41, 5-43 IM MW100-01E Page range calibration ............................................................... 4-12 rate of change interval ...................................................... 3-11 rate of change lower limit alarm ........................................ 1-14 rate of change upper limit alarm ....................................... 1-14 rated power supply voltage ................................................. 5-1 rec start ................................................................... 3-31, 3-38 rec stop ................................................................... 3-31, 3-38 receive data control ........................................................... 2-25 receiver settings .................................................................. 3-5 recipient ............................................................................ 3-33 recorder structure ................................................................ 5-5 recording channel settings ................................................ 3-15 recording channels .............................................................. 5-6 recording operation ........................................................... 1-17 recording operation settings .............................................. 3-14 recording start operation ................................................... 1-18 reference junction compensation ............................ 3-17, 4-16 reflash function .................................................................. 1-43 reflash setting .................................................................... 3-22 relational operations .......................................................... 1-45 relative time timer .......................................... 1-18, 3-28, 5-22 relay excitation state ......................................................... 1-42 relay output factor settings ................................................ 3-22 relay settings ..................................................................... 3-22 remote RJC ....................................................................... 1-13 remote RJC (RRJC) reference channel ............................ 3-16 resistance .......................................................................... 1-30 resistance temperature detector ......... 1-24, 1-27, 1-29, 1-30 RRJC ................................................................................ 1-13 RS-232 communication ..................................................... 1-16 RS-232 interface ..................................................... 2-25, 5-10 RS-422A/485 communication ........................................... 1-16 RS-422A/485 interface ...................................................... 2-22 Index-3 Index Index N Page Index S Page saving alarm summaries ................................................... 1-20 saving and loading setup data .......................................... 3-36 saving settings ........................................................ 1-18, 3-36 saving the data acquisition log file .................................... 1-20 saving thinned data ........................................................... 1-17 scale values ...................................................................... 3-29 screw terminal block ........................................................... 2-7 screw terminal plate ............................................................ 2-7 self-test operation ............................................................. 1-11 send data control .............................................................. 2-25 sender ............................................................................... 3-33 server list settings ............................................................. 3-35 server settings ................................................................... 3-35 setting mode ............................................................. 1-14, 3-3 setting the filter coefficient ................................................ 3-17 setting the input range ...................................................... 3-16 setting the match time ....................................................... 3-28 setting the math span ........................................................ 3-18 setting the measurement span .......................................... 3-16 setting the measuring range ............................................. 3-16 setting the scale ................................................................ 3-16 settings errors ..................................................................... 4-2 signal names ........................................................... 2-22, 2-25 single screen ..................................................................... 3-37 slide zone .......................................................................... 3-39 slot cover ........................................................................... 2-31 SMTP .................................................................................. 5-9 SMTP client function ......................................................... 3-33 SNTP ........................................................................ 2-29, 5-9 SNTP function ................................................................... 1-15 standard accessories ............................................................ vi standard protocol .............................................................. 2-27 standards compliance ......................................................... 5-1 starting computation ................................................ 1-47, 3-30 starting measurement ....................................................... 3-30 starting recording .............................................................. 3-31 status ................................................................................ 1-14 status bar .......................................................................... 3-39 status indicators ................................................................ 3-31 status information .............................................................. 3-11 steady output operation .................................................... 1-40 stop bit .............................................................................. 2-27 stopping computation .............................................. 1-47, 3-30 stopping measurement ..................................................... 3-30 stopping recording ............................................................ 3-31 strain input ........................................................................ 1-31 style number ...................................... 5-2, 5-25, 5-29, 5-33, 5-37, 5-40, 5-41, 5-43, 5-46 suffix code ............................................................................. iv supply voltage range used .................................................. 5-1 supported external media ................................................... 5-5 switches and keys ............................................................. 1-10 synchronization between channels ................................... 1-12 synchronization between modules .................................... 1-12 system configuration ........................................................... 1-1 system error notification .................................................... 3-34 system errors .............................................................. 4-1, 4-7 system information ............................................................ 3-10 system initialization ........................................................... 4-18 system reconstruction ......................................................... 3-9 system setting ..................................................................... 3-2 Index-4 T Page tag display ......................................................................... 3-44 tag settings ........................................................................ 3-41 tag strings ............................................................... 1-15, 5-20 terminal arrangement markings .......................................... 2-6 terminal block ...................................................................... 2-6 terminal cover ..................................................................... 2-6 termination resistance ....................................................... 2-24 thermocouple ................................................ 1-23, 1-24, 1-26 thermocouple settings ....................................................... 3-17 thinning operation settings ................................................ 3-15 thinning recording function .................................................. 5-8 thinning settings ................................................................ 3-15 time ......................................................................... 3-34, 5-20 time accuracy .................................................................... 5-20 time synchronization client Settings .................................. 3-34 timer .................................................................................. 3-28 timer reset ......................................................................... 3-38 timer settings ..................................................................... 3-28 TLOG computation ............................................................ 3-14 TLOG functions ................................................................. 1-45 transfer time shift .............................................................. 3-32 transmission output ........................................................... 1-36 transmission output control ............................................... 3-26 transmit start ..................................................................... 3-38 transport and storage conditions ......................................... 5-1 trend display ...................................................................... 3-39 trip line setting ................................................................... 3-43 troubleshooting ................................................................... 4-9 U Page unbalance adjustment ....................................................... 1-32 unit number ....................................................................... 3-11 unit number display ........................................................... 1-11 upper limit alarm ............................................................... 1-13 user function keys ................................................... 1-10, 5-20 user interface .................................................................... 5-20 user privileges ................................................................... 1-15 user settings ........................................................................ 3-8 user zone .......................................................................... 3-39 V Page value ................................................................................. 3-21 viewer software ................................................................... 1-7 voltage .............................................................................. 3-17 W Page web server function ........................................................... 1-15 weight ........................................................................ 5-1, 5-24 wiring digital input modules ............................................... 2-14 wiring procedures .............................................................. 2-10 wiring with the analog output module ................................ 2-15 wiring with the digital output module ................................. 2-16 wiring with the PWM output module .................................. 2-15 X Page XON-XON ......................................................................... 2-26 IM MW100-01E