1
Tablet PC
User Manual
I
Intdudion................
MID Accesdes
.. ... ...... ..
m
.............................................................
2
I
lndudon.
Pwlion
Rdn&
2.1
2.2
Opemdm md
I MD sEtu
md
QuickStuGuide..........
J.l Kqs
J.2
FuctroD................
Sffip
J.J Open
tud Shudom....
dd
Close he
S(G
1.4 LsageofTouh Scrcft..
.,4
,,5
..6
_.6
_.6
..6
..7
3.5
mhhdace.
..1
3.6
VsitApplicadon Prcctues
-.9
,,9
3.7 USB Comecdon.....-......-.....
10
4
3.9 Applicaio! Techque
Bdic Setu8....................
4. I Wtrless ed hbmEt .
11
4.2 Display...-.....-......-...-..
t2
5.5
Clmecdonof
5 6 FM Radio
mM
11
ll
..20
10
I Introduction
1.1 Acknowledgement
pdd is desEnd frfr vd@s tudotrs, iftldiq 2 G 3q WIFI, BT, GPSJM, voie dl md s oD.
b eheve trless comdcdm d inh4 you bve ace$ to sdte bhd etrime ud
mryhft; it b also hilt wi6 hsh &()Wry GPS modde, so ftd it @ h ud fd Bvisatus tuu8h tudiry
@ $Me. fterc m ,my sensoB wHch ofrs you hd-new @don ud m@tut; hsi&, it hs
mobile dq
tr, mm tudry, whch ld elebnic conwdon b aEr hb a ffi Fh hMd
fr€
It h €sy
fre Imul sF@idy htdoes 6e tuotims" w bchnis€s ed dou(m66, pleN rcd 6is
mual refrIly hf& you opBdor
1-2 Announcements
m&dtrme
dwF kq fre MD dry. To avoid &e tuie $on tu61q cmsim fadt ed eh;c s@
plee pBilt Se ddce, batery md chqer tun wEr d mis@, d fur't q# 6e dwice G
Preverdve
.
Plee
chsgs by wd hmd
.
To avoid fr
ilw
of
ddce bdry
md
6hqu, plee
pffit
fre &dce,
baE&
chry tu frolmt
$ock or sffie.
.
Toavoidhilueof
.
.
tuat'ry o. bo @ld tutmhce
Nevcshock, tuw,rdtum,
ordry, dtu€,
Nevs &NeEble 68 ddce md a@sdes did,
h ou 6mpmy walffi, eope.
1.3 Safety
ddce,batbrydcksqpl€eFent6eddce,batry,chqsof
allovs
hdSeMID.
dtrhe
fre
dflie d acesodes m mt
lnstruction
[e opemdoo of t€ MID, pl6se rcd fris chryla md @h you h& tuut 6e* info@dm. F6 futrs
dehib, plee refer b tu dety iNhdm md ammcemnt
BefoE
.
.
Nwsuseftemwhfiviqcil,
dtug.
indsbflsEsft
h & mdcd @4 plw abid€ by rebd oles &d rcslatioB. Plffi
it is near to 6e medical
To avoid 6e
.
.
.
shd
tum 6€
rc
wheD
r@
sipl b hbryt 66 pb onhld sigd, pl€* Sd
dMfreMIDoruiryaLphemod€whdymmhffigaAigh!
tuless
elehnic qdpmnt totw, pt*e shut dom 6e MD h fre frcinage ofhigh-ecwy
el€tunic qdpmts.
Plse &n't disssdl€ fre MID md a$dsods. my autmLd agot hs @s b wice ft e
To avoid
MID.
.
Plff 6 keQ fr e MD ftr
away
tum mapdc
-t-
ryirmb,
fr€ ndiad@ of
MD my
ms tu &h
$orcd
h
fte mapetic equipoents.
i. Aplly tle power adptor
MD in ffe vicbage of hgh
MID ad &ce$odes fion kie
Neve! use fte
temperatue
Prolect 60
reach scope.
Plede comp,y
frth
related
oles md regdariom,
,
idamable gas ( gas shtion).
ed avoid &e ki& to use fte MrD
and iespecr
ofteB, pdvscy
and le8al
without
dghb while
ushg fte MID.
Pl6e sdcfly aderc
to relabd
saferyoffteMID orPC.
Never $e 6e MID in batuod
inshctions in fte
or other
hdd
mnul
when using USB cable to
etrvnomor, md
please prctect fte
eNue
to
chdie foi MlD.
2. Red LED hdicates it's being charged. P1€de waii
while
chghg. men
2.3
it is ftlly-chaiged. the LED will
MD fton
donl pull
our the adalor
in you reninder window, plese click @lrlm ud ilip the screo to
co!tu fte bfimalion. ften you ca, close fie remider
colum to sLde xp- Please refq to below status icons:
E
I
r
t
I
MID Introduction
I
Cunent electric
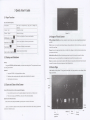
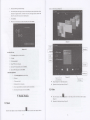
2.1 MID Accessories lntroduction
Reftinder icotr win work while
r
reeiling emih,
adiushent connected
I JSB
wlFl
W]FI is open, yo!
connected,
cd opo
the
intemel
rminds
bodd to view the
dehiled hfomation.
Open the remlnder board
metr fte rcmin&r colum
rednder todd is opend
the
of
pducr
2.2 MID Operation and Preparation
hfrery Charghg
If this navigator
chdged md
Choose the menn you nee4 md
&
E
E
lleae confiml
frlly
some remiDd messrye apleaB
window througl clic*ing the
a MD conplete dflice.
a power adaptor
. USB cable
a Leatler c6e
a User's maDud
a Wal@tycd
. Quliqcarion cerificate
is
to Green-
MID Status and Reminder
fficn
1.4 Abbreviation/Terminology
Below iteEs de hclnded h your MID package,
ulil it
the
open th€ rcminde.]isl.
2
tu
is first used, please use AV adaptor to
tully cha€e it
shows new reminder icoD, please hold
fte cohm
ud
slip down you finser thm
3 Quick Start Guide
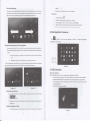
3.1 Keys Function
(eys Funcctror Descdpfi otr,
Shon
p.es ro deep/w*e up, long pres to *atup
and
Hcture
HOMEbutor
Click iti. anv intedace will rctom to main inbrface
,0.-, I
*,.Un.t", ,a,.0,
I
click it in my
,*r'rn". I
dbDhy
intda.e will retu b previou
MID operating mdhods:heE
menu
your
to touch it by
Pre$ or:f
display receDtly browsed hisbry
rDot.ado'I
you cm
b
view the main screen. msu and amlicadon procdue
ir
you
res
ro use
ffe
screen
kryboad typhg
or choose applicadon in fre main interhce, you only
red
you finger.
wad to open
tus i€m.
Bome
iten( textbox
or
6e
li* i,
fre webpage), or shotuut md
Mb
procedre move
on
Qulckly slide or sude:xicHy dide
3.2 Startup and Shutdown
de below meftods
MD.
Clck :hd yo! wmt
Thb bnton win display iD meN hted&€.
reenly{ed
3l
3,4 Usage of Touch Screen
or slide hdicates
de
Pun :efore you pull, you need !o hold fre it Mth shmghft
qdck ved6l
util
you
pll
or honzoncial
movemflt
by
frger.
it hto fre position you wmt.
t€:or most pictues. you only ned b rebb ffe MID sidefrse b chmge tre sclt4 direcfioo Aom hodmrcial
vetical. For hstuce, whe you ee Ephg wo&, md watching oovi6.
Ot
St!rtup
to
Long press
POWR
key for three secords, you
cd
enter into
sffip
pictue. fre systm ente6 into scree
3.5 Home Page
lock sBtus, please mlock it.
Min htdce
1.
2.
3.
Long press POWER. it will popoup shudom window.
Shutdowmwi.&w€ontains
mute mode,
dQhe modedd shutdomtueoptioDJ
Click Shutdow b fte ldtstep.
3.3 Open and Close of the Screen
SmeeD
d be clos€d or ib owtr wheD no operatlon happens.
1. Sclto will be closed on its oM if tro operadotr happens for some tue to sav. batery
2. when soeen is opm, pre$ POWER key, the scred will b closed imediately.
Oper the scre! when it
If
the
s@o b
ops it,
i1
unlock icon to
ciosed,
will
is closed.
Sod pres POmR
show the
dock
power
lictue
fte screo.
to
opa 6e
screen.
fte $e, will
as below picture, left dide to
ulock md
be
l@kd
eDter into camera. dght slide
6e
as
klow piture
3.2, long
pr*s Se bla* dd il will plup whdows to sd
wallpaper, folder
The ext€nded home page
wallpaper.
of screeD to provide more slace, which you cil lul
new-added shoncuts and widgets. Click fte bld spee h home page thil slide right or left to extend to th€
dght or left of fte screeD. h fte home !age, fierc ee tuo exlenH pictus, as PicMe 3'2. 1.
The
hone
paee can be exbnded beyond
fte
wideness
2
.
Click fte gallery or wallpaler gallery to selecr the wallpaper.
1.
2.
3.
4.
Touch microphone
Choose in
il
rconll
fte Google
selection according to your
oM
rced.
fte langtage you need in voice search window. and click coDfirm
tle micro you need to search. the browscr will open fte sea(h result ltsi.
L.Iir. ro!.. eed.inng. tl'r.e (,le {,e r.xlnr.Iici k;.ll .nr.e.lea.
Set
Speak to
\nr.:
Application Procedures
3.6 Visit
E,n
Pictue 3.2, entq into mam interfhce as picturc 3.3, choose
","u
procedue
you wmt to visit,
the application
The shotrcut icons mansgement in desktop application.
The sy$em below
A!tuid
flodeB.
hdrcid
2.3 have the tuction of mating folder
4.0 sy$em makes
fte tuction of fiealing
h
desktop, ften pul fte icons hro fte
new folder becone much easier.
Opemiios ee
asbelow:
1.
D€g fte
tors ned b
be pnt
bgefter on
oDe
ico!(cil
abo oveilay sevoEl icons)as Pictue
ruru
2.
Then click the oveilayed iens, &e alplications can be folded,
Click the unnamed folder in fte black box. il
.
PlctuE
frll
as
Picture 3-2.3.
popup se hidden keyboild, fte folder name cm be renmed
3-2.2
PiduE 3-2.3
fte icons in desktop
Remove
1.
Long prcss
fte
icons need to be remove, then oa &e dght
ahve of fte
screen,
it will
appear
&&xm,"".,
2. Dragfteicotrtofteabovooffreremoveicon.dllfteiconbecomered,ftenmoveyoufingerlo
dele@ fre icon.
Change the wallpiper of desktop
I
.
In home page, long lress any blanl space in maln screo. it will popup a window to change the
'
pictor€3.3
3.7 USB Connection
MID *orage
Befo.e
coDfi
tansdfth8
guration
docmenls. you
hvc
to condxct sbruge
confisration for your MID:
L Comeci the MlD and computer by USB cable, fte rdinder colDn will show fte remind infomation.
2. Ope! the remhder boardt please view fte MD sbtos ed rednde. to leam how to olen fte board.
3. Intherednddboard.click6e"USBConnected',twiUasbelowPicturc3.4,fienclick.bpenUSB
sbrage
4.
Now
codgmtion".
te
USB b con eted s@esstully
Copy the docunent inlo nemory card
l.
2.
34.
5.
click to bset fte space
Comeci the MID
10 computer wift USB cable.
MID $orage confisranon, it is comecbd with coEluEr succestully
OpeD fte "My computei' h you computer check fte items in 'temovable dbc"Copy fre docm.nb you n.ed ilb 'hmovablo dkc".
As
After copying finishes,
click
shutdom fre USB stomge
fte chdacter h fte left ofcu or, click od hold io
chmctoB h fte left og fte cuso..
delete
confismtiot''to uinstil.
N.Li.!: l. $h.n il]c iliD * c{D}eclei \!ilt USB 0abl.. aril }o..p., lh. trSB *okg. corfrpur.jr! : rl
ear'l !i\t tn. il.ilor ntril !n.o!qi thc i{jD.ory niltf ru! dc$.h thc US! ..b1., yln car virly ia.
conlir!. iier.
:. BeLE cofnrg, fl..r.
i$
SD...d i, MID $d
rt
!a b!
f,Dter frdgeb in&t'ace
rcad.
h fte
screeD
When you
the
or choose fte wods or
nde6
edidon, it
frll
In Se
show fte smen keyboad. The
Use
nethod you
Lan$se
ily
press
tie
screen, it
wiu sdch into
widget to crcaE iE shortcnt, then yox cm enter inro ffe applicano!
icon.
icoDs
ir
fhe d€sktop
or widgets intdace, long pre$ any ico! to switch into
fte ico!, you cm Eove b dy postion in the deskop.
application ht€dace
sutomtically,
dmg and hold
Remind: System
will reqde
you to
m*e
more choice and ften you can acdve
target posilion has no space, fte widget won'r be add in
walt
Click Settuglocedw
Click
Sortc*
Crer& lpplicadon shofrcrt
prccdE
1. tudroidkeybd
2. GoogtePinyin
1.
2.
3.
4.
ildrce. hng
tuough th€
keyboard conbins below tlping qtions:
Choose the typitrg
application intedace,click widgets otr fte above of screen, or slide
widges
keyborrd
sbd
all fte
3.9 Operation Technique
3.8 Typing words
Usetle
delete
fte main
fiis
desklop
widget-
If fte
s*m.
4 Basic Setting
apllication.
ard Keyboard.
In fte text s.dng area wil) reveal
dl fte hsdled wordsq?hg oefrods h you MD.
4.1 Wireless and lnternet
Tickfte E?ingmeftodyouwant.
dd sdtch
of irput method
L ID 6e main menu or totedace, choose stug applicadon procednre2. Clik WLAN. olm wifi, MID will aubmatically search fte avaihbie
:lEi
3.
Ch@se the
WiFi
ener Dasswor(
switch th€ capitd
dd smdl leta
swilch the mode ofwords inpxt
intemet you
cli*
comect.
wilt
to comect,
if
i
has
Wifi wireless lnlemet. As Pictue
pssword, it will popup fte password windoa
4.2 Display
4.4 Management of Application Procedure
Adjust the bighiDe$ ofscree!
l.
2.
1. ClickSefrDgapplicarionprocedlre.
2. CUckdisphy.choosebnghhe$.
3. wheD 6ebrighmes setinS boardpopups. rgfte po(lio
4. ClickOK
Choose Sefting proccduc in
fte alplicalion
procedure
lht.
Choose application, after entering, you can nanage and delele in$alled applicaiions
to adju$fte bdghhe$ vohme
Pictur.4.5
Picture4.2
Pi.ture4.3
4.5 SD Card and MID Storage
Adju$ the screen *andby time
L
2.
3.
4,
Click Seting alplication lroccdure.
ClickDtplay.
Click Sl€ep.
Scree! smdby time seting popups, choose the iime yotr panl lo set.
4.3 FM Transmission
Checkthe
L
2.
3.
4.
SD card and
MID avaitrbl€
space
Click S€tfrE alplication procedure.
Click Storag€.
Check lhe available spsceof SD ca.d.
Check
fte MID intemal
storage spaco.
SafelyremoYe SD card
L Click seting apllication
2. ClickFMtnrsmitrei
3. Operateasbelowpicture.
p.ocedurc.
Safely remove SD card can protect SD ca.d and extend wo.klng life of SD card
L
2.
3.
4.
Click Setting applicadon procedue.
Clicksto.age.
ClickRemoveSDcard.
Now it h sale to remove SD card.
Picluer4.6
Rlrr'lis
sD card
rxtll.a, p.rl..rSD !|,!ientl! *id.rl.nd
SD.n.d
li&iinr-
System updafe
4.6 Date and Time
L ClickSetfiDgapp,icaio!procdue.
2. ClickAbouttrblet
3- Click Sy*eD updfie, uldaic as s+s.
Acording to &e pleset, sy$en will voluntorily apply the date, zone, md time provided by intmet.
Manud set date, llhe and zone
Click Seting applicadon lrocedxre.
7.
Click Time setlng. thon click upper or down buton b adju$ hour and mhute, click AM or pM to
change moming or aftemoon ( there is no sucl selection when you se 24-hou folmt). Click SetbDg to
Yiew sFtem version
Slidedow fte scree4 &enclickdate and dne.
Tum off "auIo
1.
2.
3.
setingol&te atrdtimd'.
Tumotr"autosethg zone'.
Ciick
hne
(PleNe nake sure therE is D.w version TF card in devtce
before instantadoD)
.
2.
3.
4.
5 .
6.
I
Selecthg, ftetr choose the zono lhh. Stide down the lht to view more anes.
ClickDstese6Dg,ftenclickupperordownbutontoadjust&re,month,andyearclicksetrDgwhen
you fin,,h s.le(fro-.
Click Setingapplicatiorprccedure.
ClickAboutTabletYou can view model NO., elechic vohme and intemal lesion.
4.9 Fixed-time Startup and Shutdown
Click SeSDg applicafio,
procdue
Click fixedllne startup .nd shutdowD.
8.
Click24-hourformat,switchbetweenl2-houror24houfomay.rhetuefomalyouchoosewiltbe
used o! the alam clock.
9.
Click date
fomt setbg, 6e,
choose the time
fomat you
waDt ro show on
Operab
as
below Picture 4.9
MtD.
Picm4.7
\rr.:
11
!.r
r$. rIe
rn..;I.m.r t..rdcf- y.r
r!11
r(jr.b[: ri
!t1 ihc
l.itr. 1ri.
irl rim.7or.
4.7 Language Setting
1.
2.
3.
4.10 Safety Setting
Click Sefing apllication procedu.e.
Cllck Lanssge and keyboard.
Click Lanssge S€lecdon, thetr choose fte
Set locked screen
lusage
you want, dide
dom to view nore
lanSuas€s
Lock the toxch screen by unlock icon or password
b
protect you MID
Note: You Sould enter &e lascode afier setring screen lockcd.
4.8 About Tablet
Vi€w the MID Status
.
2.
I
Click Setirg applicalion lrocedure.
Click About Tablet, you can view the olectric status mesages and vesior No.so on.
1.
2.
3.
1.
Click sei6ns application in main interface.
ClicLsafe.
Cli.k lock€d thescr..n
Choose
picture in text scring
area.
Click nexl following fte remid message.
Tho
ulocked pattem
board pop up. there
horizoDtal o. diagonal dteclion. As
de ilne touch
Picm
spoB, comect 4 points
4.10, move your fingcr
iom
finish.
fte
men
you see the remindei enler &e udock patern, ftetr click confirm.
sy$em will record yous new nnlock
tom vefiical,
the scree, when
latem.
Picturc4.10
Set unlock
l.
2.
3.
4.
5.
6.
PN
code
Cl'ct rrtrngapplisrion
n
mbtnretrace
Click Brfe.
Click screenlock€d.
Chooso PIN in texl sefting
Enter new
Ener new
ea
PN code(nmbm) dd ciick corfinre.
PN
code again and click
corfirm.
Set unlock password
1.
2.
34.
5.
6.
Click s€tting spplicafion in minintet'ace.
Click sare.
Click screen locked.
Drag Se progess bar to adju$ play
proge$.
Setp6.$otd
Opection ofmusic playerbu(on
Piciure 5.2
Set new
rn re\r :erinBarea.
p4swod(l€ters &d number,
Enlet the pasword again
5
ad
the cllck
ild
ften click continue
5.2 Video
confirn.
Multi-Media
5.1 Music
Enter inio music player: in meru or desktop click mu.a
as
iX
"* "
**. t"
ftusic Player cllck fte
.
Entor video player
a
Opcrafionof video playerbutonasPictore
"n**
E"no,nuto" - .aln mou,
5.4
choose
he
video you wmt to
llax
as
ffi{
tull
check the pictures.in
cloose the selecdon you need
.
1o
screen mode,
click mou key to dbplay menu seledion, you 6D
edit and setting pictures.
Slide Show
1.
Oper
2.
Click ilide sho*, it will auto loop play(or choose
a
picturc, use vitual key to click menu ley. dhplay menu selection.
Dl
I ounoo
tn
,,"*"
,o,0".1
a Crop
1. Click nenu key lodisplaymenu seleclion.
2. Then cijck crop, click and drag relaEd dea to ad.ju* fte cropper.
3. Click crolper ild d.ag it inside and ouhide b adju$ fte imge.
4. After adiut tle lize you wmt, click crop.
5. If you wth to give up to cro!, click cancel to reM to picture brcwse.
a Edit
123.
4.
5.
Click menu key, display fte menn selectionClick edit.
Adjust
1eh
bdghhess, style, color, aDtialias seting in selection.
ClicksaYe.
lf you wmt
to give up
edil click return key, click not
to
reM
to picture browse.
5.4 Camera
In fte
a
min
tuedace or deskbp, crict
Operation olcmera bnton
"".".u
as
uppl"utio,
Pictue
prcceaur,
5.5
Switch cmera: choose Meru ke, click switch froD6ack ciDera, d Pictule 5.5
5.3 Photo Gallery
Photo
grll.ry alplicadon
can axto semh photos
ad
video files
h
SD card, and phob gallery wiu
chssiry ftese photos md videos in folder. You caD apply photo gallery to view
photos
as
ud
Swibh
edit lhotos, set fte
wallpaper md wabh the video.
C,ick
view picht€s
L. Cltk gallery applicadon in main inletrce.
2. Ente! hto gallcry, click the folder you want 1o view.
3. Clickthepictureyouwanttoview,ftesystemwillplaytlntuUscreenmodeautohatically.
4. The pictures can be zoom in md zoom out, put tuo fingeG on the sfieen, the separete
the
firgers(ga$er u! fte fingeB, fte pictue will be zoom in) or double click fte screen.
Nore: $hen
Edit Dd
Io!
set
brcwse dEpi.tures. slide leli orLighttoriew more fi.tures.
pidures
Pidure
5.5
t
to
.
5.5 Connection of HDMI (Optional)
Use HDMI comecnoq
frll smm
set HDMI ouhut meftod;
MID couection ad high defidtion TV play
&
.
kdo
brtoD
1l,gh
d.inti.: fv
olmtion
instucdoD
as
Pictue 5.6:
Click (Menu" in fre Min toEdace, click sqrch buson, it will sbd to auto sedch
clmeh frlI be saved in fte chmels lkt
searched
save chann€is:
chmel will
cli"k E
be savedin
buson in the main htdace to
Tv (Optional)
II
Picfirre 5 8
and
setug: click Menu key in intedace, click
choos 6e seiecdon you want to dd
fre channel, mat the
1. Click Analog TV application in main menu interface to enter into mobile TV,
2. Select location- as Picture 5.9
3. Sedch
PS
save
chmels list.
EI
5.7 Mobile
in the main intaface or desktop to enter into FM raalio interface:
ctuel:
in
.
5.6 FM Radio
a,"*
the video
Dodq th€ resoludon cm reach 720P
l{.!!8k: 1l}Ml .onne.1t$ I rtcui.d to. !&i..d liDyt .orh..rion tu corn.cr.
Jnnld b. nriititrdai llDMl.rtplr
Seaich
chmeb. 6e
proe@s,
as
Pictu
5. 10-5.1 1
Pictur€ 5.10
as
Pictue
5.8
picture 5.13
6 Communication Function
6.1 Phone (Optional)
I Click Phone
2 Operate
applicadotr
NPictu
procedue
6.1
Pictore 6.3
6.3 Contact List
Picture 6.1
Fql
6.2 Text Message
r
Erter itrto mah
mm* chms"
crtr c.ru*L rtt EH
W
uppri"utroo
p.o"a,..
in
Lhe
main inrcdace enh.nLo.heconLacL
hsLac p,cture b 4
:t
:::::::::ir:i:ita:i::,t::l
l@"y
3ry1
:
l
'La.a :,alali.: iuiilial:i::a:
a
1:
abwraqou
::. l:. -_
Plctur€ 6.4
a
conhci: click
Search
A dd
conbctr click
l.s
&*
butun-
iil# buton.
Pictore7.2
enter into search tunctiotr
7.2Email
enter into add conact interface
7
tnlil
Internet
applicatiotr procedure conhins
acconnlofnoruiwcb
errait
6ail
setting gujde. you crn add the e\tenal POPI OR
sed.etroliderlForjnftnce,
Yahoo. ClDil-
lloh.il
IMff
emall
and 161).as Picil.e 7.1
7.1 Browser
ln
case of
WiFi or
setingl. clict
rr
mobile htemct
browser
B
h
fte
h
connected weu (?lease rcfer to Chalter 4.1 for
mtu meN
or desktop to enter
fte IE inreface,
as
wteles ed
intemel
Picture 7.1
Hcture
a.
7.3
Emlil Setrng
1
.
After you click the sending email rcon .,
ii.
,
you ca. sce th. email sefting Side, which
you to set.
. Inpui you! email addres md pasword.
. Click "Next stq" buton, choose your email Se h POP3 or IMAP.
4. Click NertStep"buhontocheckwhethcrlheemailboxseNice.cureceiveorsendemih
5. Input the eDail accout atrd dhplay the enail subjject, ud click fitrhh.
6. Iftleenailboxisavailable,yonwillenterinloyoxrmaiiboxaulomatically.
2
3
r]]itt:
b. Delete the emall account
Picltrre 7.1
Click add.es bar to input the websiE, click staft.
infomation. as Pictue 7.2
etrter
irto rclatcd wcbpage. then you
can browse
tle
aebsile
You can delete setod POPI or
f7
clickl-J.
IMA eMil
account from your
MD.
cil
help
1.
2.
EnErinloyourmailbox.
PressMenxkey.
9 System Upgrade
4.
5.
Setrd
lresstheaccou.tyou wanttodelole.
Click confim to reftove.
E-mail
l.
2 .
l.
Chck
9.1 Preparation for System upgrade
lc:t
l-J
ro drspla, your
mnl
box.
Click the jnbox. it will refiesh the ncw emaik automatically; click it to read new enall.
Press Menu
Download th€ upgrade procedure
kel MeNs will?o!up.
You can domload the soflware upgade pack from wcbsie, lhen use the upgade pack to upgrade the
systemveBion
4. Click f, dit . :. 1., to cDtcr itrto new email edtilg intcdbce.
5. lnput rheftceivefs email ad&e$.
6. Inpui lhe subjeci and email content.
7. If you want to add altachhenl, click nenu key! the nenu popup.
8. Click Addatuchmenf'(pictures,video).
9. Click \end tosendtheemailout.
ofMlD.
Preapration for system upgradel
1. Domloadfte sy*emup8rdepacklo youcomputer ftomreiatedwebsit.
2. PreparefteloolfforsyslemupFdqoneTcard,filesrtenFATorFAT23fomatbo6ok.
..:.]]]'&:,::,::::::.r,: r,i,llr.,:,-ill:lir::llr::a:l:,,iia:::::::::::r!:*.r:i:lral,,:1.
9.2 Restore Factory Setting
:
r)@fre 6r..,
lAdd
ilDdlmr
_,_l
tt
When yoxr
I
MID
factory setting to
I
apDlicalion procedures
L
Dis*e or unlocted passwords are forgoten. you can apply re$ore
to faciory sbtus. Restore the factory sedng will delete all fte &h such as exhitin8
and user\ seflin8, so do remember to bachp you dab-
occures some sedous
reM
When the device is
npgde pictue
Tum otrfte device andplug
up key by one
han(
and pftss ?owe. key into
hd.
2. EnterintouDFadeni.tue.thepicmisahanslewithaexclamtionma.k(AsPictuell{)
J. ' licl Potrer le\ when )ou see ihe ddele.
4. fte system eDter into anolhe. picture. .ecovery status, there se eiSht items lor option (As Picture I I _2)
5. The fist option: Reshft the system. Th€ second opiion: Sy$em uppde from SD2. fte ftid optionl
Sysen upgade from extemal SD card. fre fodh oplio!: Ripe caching &h. fte sixff opion: Ripe
&t, Factory reset. fte svenfr optio!: Backup user\ data. fte eighth option: Recover xseis data.
6. Now you pre$ volume dom ke} fte option bar will slide down, prcs Menu key to exedle.
7. Choose wipe &t/factory reset to execute.
8. Enrer into confimtion htedace, click Yos to restore facbry sethg, click No to exit the confimation
7.3 3G lnternet
1.
in shutdom skte, hold the volune
by mother
h3G ced.
Urlockto enierinlo sy$em. make su.elhe MID can search signal.
lN!1.: lij r.r.,n.1 .r,,'1 1,. lsii ni! ,*ili iil1.r:.1 rI ri,t srnte ti,!.. ilI..|sre6
ll!,u\!$bur. la iil.nl.i.ri.6.rtnroll wirl r1.ir.1.)
3.
8
i \l!j!!li.d (, us: {r1l
x-1,.!r
GPS Function
fttd
paties b requled for MID
device can accurately inplement
Nolc: B.lhr. $gradlng. llcase confinn dr. cl.caic lolunl. of yolr MiD ifiol( LIan 309i b .nrrc ,r.
up$adc.arb. nnth.d. B.sidcs. you Dced 10 ba.knp youriftpodel dan. suchas rpplicdion ptu.edlr.s..nalls,
Upgrade $epsr
8.I GPS Navigation
Map ofthe
9.3 System Upgrade
inhal
tamcftallime
d
GPS satelllte
si$al.eceivetposidoning, aft€r hsallatioD fte
navisation, meeltheneeds ofoutdoornavisation.
pur
riis
)&k.s.
L
(fi,d i6eil llre-l!.i.d Nil! nldai. z,f ,!)9..C. F.kxgr itt
th.r,!r dnldolr oilhelllD.)
!111.
in'lin'ndtd rfd.E
r:,1,
in
Fi6t click volume up ke} fien pre$ Pow.r key to enEr into recovery node.
9.1:
as Picture
Click Power key to enter into main menu intedace,
e
as
Piclu.e 9.2
Ue cusorby volume doatr. choose apply updrte from SD crrd,
as
Pictue 9.3
7. Shonpressvolune
4.
Ckyolume up keyenterinto thhhenu, click up&te.zip, asPicture9.4
5. Click volume up key to
ul8odq
as
Picfure 9-5
up tey ro exn Dpgade node, MID will cnterinto ren8rt rhe syslem automatically