1
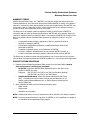
ETS80X10.5C Photovoltaic Simulator Operation and Maintenance Manual Programmable Power Solutions M551066-04 Rev A www.programmablepower.com About AMETEK AMETEK Programmable Power, Inc., a Division of AMETEK, Inc., is a global leader in the design and manufacture of precision, programmable power supplies for R&D, test and measurement, process control, power bus simulation and power conditioning applications across diverse industrial segments. From bench top supplies to rack-mounted industrial power subsystems, AMETEK Programmable Power is the proud manufacturer of Elgar, Sorensen, California Instruments and Power Ten brand power supplies. AMETEK, Inc. is a leading global manufacturer of electronic instruments and electromechanical devices with annualized sales of $2.5 billion. The Company has over 11,000 colleagues working at more than 80 manufacturing facilities and more than 80 sales and service centers in the United States and around the world. Trademarks AMETEK is a registered trademark of AMETEK, Inc. Other trademarks, registered trademarks, and product names are the property of their respective owners and are used herein for identification purposes only. Notice of Copyright Terrestrial Solar Array Simulator, Operation and Maintenance Manual © 2010 AMETEK Programmable Power, Inc. All rights reserved. Exclusion for Documentation UNLESS SPECIFICALLY AGREED TO IN WRITING, AMETEK PROGRAMMABLE POWER, INC. (“AMETEK”): (a) MAKES NO WARRANTY AS TO THE ACCURACY, SUFFICIENCY OR SUITABILITY OF ANY TECHNICAL OR OTHER INFORMATION PROVIDED IN ITS MANUALS OR OTHER DOCUMENTATION. (b) ASSUMES NO RESPONSIBILITY OR LIABILITY FOR LOSSES, DAMAGES, COSTS OR EXPENSES, WHETHER SPECIAL, DIRECT, INDIRECT, CONSEQUENTIAL OR INCIDENTAL, WHICH MIGHT ARISE OUT OF THE USE OF SUCH INFORMATION. THE USE OF ANY SUCH INFORMATION WILL BE ENTIRELY AT THE USER’S RISK, AND (c) REMINDS YOU THAT IF THIS MANUAL IS IN ANY LANGUAGE OTHER THAN ENGLISH, ALTHOUGH STEPS HAVE BEEN TAKEN TO MAINTAIN THE ACCURACY OF THE TRANSLATION, THE ACCURACY CANNOT BE GUARANTEED. APPROVED AMETEK CONTENT IS CONTAINED WITH THE ENGLISH LANGUAGE VERSION, WHICH IS POSTED AT WWW.PROGRAMMABLEPOWER.COM. Date and Revision Apr 2013 Revision A Part Number M551066-04 Contact Information Telephone: Fax: Email: Web: 800 733 5427 (toll free in North America) 858 450 0085 (direct) 858 458 0267 [email protected] [email protected] www.programmablepower.com i This page intentionally left blank. ii Important Safety Instructions Before applying power to the system, verify that your product is configured properly for your particular application. WARNING Hazardous voltages may be present when covers are removed. Qualified personnel must use extreme caution when servicing this equipment. Circuit boards, test points, and output voltages also may be floating above (below) chassis ground. WARNING The equipment used contains ESD sensitive ports. When installing equipment, follow ESD Safety Procedures. Electrostatic discharges might cause damage to the equipment. Only qualified personnel who deal with attendant hazards in power supplies, are allowed to perform installation and servicing. Ensure that the AC power line ground is connected properly to the Power Rack input connector or chassis. Similarly, other power ground lines including those to application and maintenance equipment must be grounded properly for both personnel and equipment safety. Always ensure that facility AC input power is de-energized prior to connecting or disconnecting any cable. In normal operation, the operator does not have access to hazardous voltages within the chassis. However, depending on the user’s application configuration, HIGH VOLTAGES HAZARDOUS TO HUMAN SAFETY may be normally generated on the output terminals. The customer/user must ensure that the output power lines are labeled properly as to the safety hazards and that any inadvertent contact with hazardous voltages is eliminated. Guard against risks of electrical shock during open cover checks by not touching any portion of the electrical circuits. Even when power is off, capacitors may retain an electrical charge. Use safety glasses during open cover checks to avoid personal injury by any sudden component failure. Neither AMETEK Programmable Power Inc., San Diego, California, USA, nor any of the subsidiary sales organizations can accept any responsibility for personnel, material or inconsequential injury, loss or damage that results from improper use of the equipment and accessories. SAFETY SYMBOLS iii This page intentionally left blank. iv Product Family: Photovoltaic Simulator Warranty Period: One Year WARRANTY TERMS AMETEK Programmable Power, Inc. (“AMETEK”), provides this written warranty covering the Product stated above, and if the Buyer discovers and notifies AMETEK in writing of any defect in material or workmanship within the applicable warranty period stated above, then AMETEK may, at its option: repair or replace the Product; or issue a credit note for the defective Product; or provide the Buyer with replacement parts for the Product. The Buyer will, at its expense, return the defective Product or parts thereof to AMETEK in accordance with the return procedure specified below. AMETEK will, at its expense, deliver the repaired or replaced Product or parts to the Buyer. Any warranty of AMETEK will not apply if the Buyer is in default under the Purchase Order Agreement or where the Product or any part thereof: is damaged by misuse, accident, negligence or failure to maintain the same as specified or required by AMETEK; is damaged by modifications, alterations or attachments thereto which are not authorized by AMETEK; is installed or operated contrary to the instructions of AMETEK; is opened, modified or disassembled in any way without AMETEK’s consent; or is used in combination with items, articles or materials not authorized by AMETEK. The Buyer may not assert any claim that the Products are not in conformity with any warranty until the Buyer has made all payments to AMETEK provided for in the Purchase Order Agreement. PRODUCT RETURN PROCEDURE 1. Request a Return Material Authorization (RMA) number from the repair facility (must be done in the country in which it was purchased): In the USA, contact the AMETEK Repair Department prior to the return of the product to AMETEK for repair: Telephone: 800-733-5427, ext. 2295 or ext. 2463 (toll free North America) 858-450-0085, ext. 2295 or ext. 2463 (direct) Outside the United States, contact the nearest Authorized Service Center (ASC). A full listing can be found either through your local distributor or our website, www.programmablepower.com, by clicking Support and going to the Service Centers tab. 2. When requesting an RMA, have the following information ready: Model number Serial number Description of the problem NOTE: Unauthorized returns will not be accepted and will be returned at the shipper’s expense. NOTE: A returned product found upon inspection by AMETEK, to be in specification is subject to an evaluation fee and applicable freight charges. v This page intentionally left blank. vi TABLE OF CONTENTS SECTION 1 PRODUCT OVERVIEW ....................................................... 5 1.1 1.2 1.3 1.4 1.5 1.6 Introduction .............................................................................................. 5 User Interface .......................................................................................... 5 Applicable Elgar Part Numbers................................................................ 5 PV Simulator Block Diagram ................................................................... 6 ETS80X10.5C Specifications.................................................................. 7 Mechanical drawings ............................................................................... 9 SECTION 2 INSTALLATION ............................................................... 11 2.1 2.2 2.3 2.4 2.5 Unpacking and Inspection ..................................................................... 11 Electrical Connections ........................................................................... 12 2.2.1 AC Input.................................................................................... 12 2.2.2 DC Output................................................................................. 12 2.2.3 Ethernet .................................................................................... 12 2.2.4 USB .......................................................................................... 13 2.2.5 AUX I/O .................................................................................... 13 Rear panel switches and indicators ....................................................... 14 Front Panel status indicator ................................................................... 14 System assembly recommendations ..................................................... 15 SECTION 3 OPERATION..................................................................... 17 3.1 3.2 Connecting to a Computer ..................................................................... 17 3.1.1 Network configuration ............................................................... 17 3.1.2 System configuration ................................................................ 19 Protections and Fault indicators ............................................................ 20 3.2.1 Over Temperature Protection (OTP)......................................... 20 3.2.2 3.2.3 Over Power Protection (OPP) ................................................... 20 Over Current Protection (OCP) ................................................. 21 1 3.3 Test Setup and Application details......................................................... 22 3.3.1 Microinverter test setup ............................................................. 22 3.3.2 Power optimizer test setup ........................................................ 23 3.3.3 Power optimizers feeding a solar inverter ................................. 24 3.3.4 Parallel connections .................................................................. 25 3.3.5 Series connections .................................................................... 26 SECTION 4 COMPUTER MANAGEMENT ............................................ 27 4.1 4.2 Performing TerraSAS software updates ................................................ 27 4.1.1 Step 1: Uninstall TerraSAS ....................................................... 27 4.1.2 Step 2: Install a new TerraSAS software release ...................... 28 Performing firmware updates ................................................................. 30 SECTION 5 CALIBRATION ................................................................. 33 5.1 5.2 5.3 Required equipment............................................................................... 33 Operation ............................................................................................... 33 Calibration interval ................................................................................. 33 LIST OF FIGURES Figure 1-1 PV Simulator block diagram ............................................................ 6 Figure 1-2 Front, side and top views ................................................................ 9 Figure 1-3 Front panel .................................................................................... 10 Figure 1-4 Rear view ...................................................................................... 10 Figure 1-5 Rear I/O panel ............................................................................... 10 Figure 3-1 Direct cable connection ................................................................. 17 Figure 3-2 Private network connection ........................................................... 18 Figure 3-3 Local area network connection...................................................... 18 Figure 3-4 Dual network connection ............................................................... 19 Figure 3-5 Microinverter test setup ................................................................ 22 Figure 3-6 Test setup for a single power optimizer ........................................ 23 Figure 3-7 Power optimizers feeding a solar inverter .................................... 24 Figure 3-8 PV Simulators connected in parallel ............................................. 25 Figure 3-9 PV Simulators connected in series............................................... 26 LIST OF TABLES Table 1 AC line cord wire colors .................................................................... 12 Table 2 DC output connections. .................................................................... 12 2 Table 3 Auxiliary I/O connections .................................................................. 13 Table 4 Linear regulator temperature events ................................................ 20 3 This page intentionally left blank. 4 SECTION 1 PRODUCT OVERVIEW 1.1 INTRODUCTION The Elgar PV Simulator is a programmable digital power source designed to simulate the electrical behavior of terrestrial photovoltaic arrays. The simulator provides a turn-key hardware and software solution to deliver all the functionality required to test the maximum peak power tracking (MPPT) characteristics of solar inverters and charge controllers. The ability to simulate any fill factor and material technology allows the simulator to characterize the inverter’s MPPT algorithm performance quickly and efficiently. It also allows to perform conversion efficiency, thermal analysis and dynamic performance tests by supplying a highly stable and repeatable stimulus to the inverter under test. 1.2 USER INTERFACE The simulator front panel only features an on/off switch and a status indicator. The user interacts with the simulator through a remote Ethernet connection. A single desktop or laptop computer running TerraSAS software can control up to 48 simulators. Due to the high transmission speed and data integrity provided by the Ethernet architecture, operating parameters are displayed in real time on the computer screen at refresh rates comparable to standard instrumentation. The software allows modeling a PV panel from data normally found in the manufacturer data sheet. These parameters are Voc (open circuit voltage), Isc (short circuit current), Vmp (voltage at the maximum power point), Imp (current at the maximum power point), βv (voltage temperature coefficient) and βp (power temperature coefficient). In addition to static tests, the software allows to execute irradiance/temperature profiles that can closely duplicate real life conditions or predefined test sequences. 1.3 APPLICABLE ELGAR PART NUMBERS ETS80X10.5C-PVF ETS80X10.5C-PVE 80V, 10.5A, 100-240VAC 80V, 10.5A, 100-240VAC 5 1.4 PV SIMULATOR BLOCK DIAGRAM Figure 1-1 PV Simulator block diagram At the heart of the PV simulator are two 80 MIPS RISC microcontrollers. One processor interfaces with a 16-bit measurement and control system that monitors the output voltage and current at 5 µs intervals. At each interval, the processor sends computed data to its 16-bit D/A control system that adjusts the dc source and linear regulator to follow the programmed IV curve. The other processor supports the Ethernet interface, analog and digital I/O. While in static simulation mode, the simulator executes a single IV curve. In the PV Simulator memory, an IV curve is represented by 1,024 data pairs or points. Each pair of values represents a single voltage / current point on the IV curve. The PV simulator interpolates the 1,024 points in its curve memory with 16-bit accuracy, delivering an actual curve resolution of 65,536 points. When irradiance / temperature profiles are executed, dynamically updated IV curves are downloaded at fixed 1-second intervals. The PV simulator linearly interpolates between consecutive curves 128 times per second (7.8 ms intervals), delivering smooth voltage and current waveforms to the unit under test. 6 1.5 ETS80X10.5C SPECIFICATIONS DC Output Open Circuit Voltage, Voc: Short Circuit Current, Isc: 80 V 10.5 A Maximum output power at fill factor 0.85 714 W Output isolation ±1000 Vpk, positive or negative output to chassis ground, continuous Output leakage Output to chassis ground, DC : > 100 MΩ Output to chassis ground, AC : 0.045 µF typical Tracking speed Compatible with micro-inverters sweeping the MPP at up to 250 Hz and power optimizers. Accuracy Voltage programming and readback: ±0.2% of full scale voltage Current programming and readback: ±0.5% of full scale current Sampling resolution Voltage and current are synchronously sampled by two independent 16-bit A/D converters at 200 kS/s. Curve Resolution 1,024 points. Each point represents a single voltage / current point on the IV curve. The PV simulator interpolates the 1,024 points in its curve memory with 16-bit resolution, delivering an actual curve resolution of 65,536 points. Profiles resolution There is no limit to the profile length. One-second profiles for a full day of simulation are typically 50k points. The simulator interpolates between points 128 times per second, delivering smooth voltage and current waveforms that closely resemble real solar arrays under cloudy conditions (requires TerraSAS software) Curve equations Equations used to calculate and translate the IV curves are found in Appendix A1 and A2 of the publication “Performance test Protocol for Evaluating Inverters Used in Grid-Connected Photovoltaic System”, October 2004, Sandia National Labs. PV Array Parameters Irradiance level: 0 to 1999 W/m 2 Temperature value: -100°C to +100°C Voltage level: 0 to 80 VDC Current level: 0 to 10.5 A Voltage and power temperature coefficients: ±1.99%/°C Expansion Up to 48 units can be controlled by a single PC running TerraSAS Software Available I/O Ethernet 10/100 Mb/s: TerraSAS software proprietary high-speed link. Analog Irradiance/Temperature inputs: allow to adjust the IV curve in real time based on two external analog signals. Trigger input: allows to start executing an irradiance/temperature profile in sync with external equipment. Useful for accurate energy measurements using external power analyzers. SCPI interface: through TerraSAS software Remote sense Maximum line drop 1V per line Input Nominal Voltage Single phase + ground 100-240 VAC nominal (operating range 85 - 264 VAC) 7 Input Frequency 47 – 63 Hz Power Factor >0.99 typical OVP Accuracy 0.2% of full scale voltage OVP Resolution 0.002% of full scale voltage Output noise < 0.35 Vpp measured across a 1µF capacitor at the end of a 1.8m (6ft) line at full load, 20 MHz bandwidth Current noise < 60 mAp-p at maximum output current, 650 kHz bandwidth Efficiency @ MPP 66% typical with Voc=80V, Isc=10.5A, Vmp=68.9V, Imp=9.95A, 100 VAC input 69% typical with Voc=80V, Isc=10.5A, Vmp=68.9V, Imp=9.95A, 200 VAC input Stability ±0.05% of set point after 30 minute warm-up and over 8 hours at fixed line, load and temperature, typical Temperature Coefficient 0.02%/ °C of maximum output voltage rating for voltage set point, typical 0.03%/ °C of maximum output current rating for current set point, typical Operating Temperature 0 to 40 ºC Storage Temperature -25 ºC to 65 ºC Humidity Range Relative humidity up to 95% non-condensing, 0º C – 40º C Altitude Operating full power available up to 5,000 ft. (~1,500 m), derate 10% of full power for every 1,000 feet higher; non-operating to 40,000 ft. (~12,000 m) Cooling Front air inlet, rear exhaust. Temperature controlled variable speed fans. Units may be stacked without spacing. Regulatory CSA 22.2 No. 61010-1, 60950-1-07 and UL61010-1, UL60950-1-(2nd Ed) 12 . Marked with cCSAus, CE for EMC & low voltage directive Pollution degree 2 (IEC 1010-1) EMC Directive EN 61326-1:2006 Accessories Rack Slides, Elgar part number 105-375-08, qty 2 required Physical Width 19.00 in (48.3 cm) Depth 22.60 in (57.4 cm) Height 1.75 in (44.4 cm) Weight 21 lbs (9.5 kg) 8 1.6 MECHANICAL DRAWINGS Figure 1-2 Front, side and top views 9 Figure 1-3 Front panel Figure 1-4 Rear view Figure 1-5 Rear I/O panel 10 SECTION 2 INSTALLATION 2.1 UNPACKING AND INSPECTION After unpacking the unit, inspect the contents for any obvious physical damage. If damage has occurred, contact the shipper of the hardware. If replacement parts are required, contact Ametek Customer Service at 1-800-733-5427, ext. 2295 or 858-450-0085, ext. 2295. The following items should be included: ELGAR P/N DESCRIPTION QTY 5609520-01 890-890-72 890-006-05 856-017-06 856-008-0Y 856-247-15 856-DA1-5P 110-032-01 110-M5F-08 M551066-04 5609155-06 CABLE ASSY,DC OUTPUT -ETS CORD SET,15A,125V,USA/CANADA CABLE,8P,RJ45,SHIELD,CAT5e,5FT CONN,6P,HOUSING,MALE PLUG CONN,CONT,14-16AWG,CRP,PIN CONN,BACKSHELL,15P,D-SUB,2 PC CONN,15P,D-SUB,SOLDER CUP,PIN SCREW,10-32 X .500,BLACK 27038 SCREW,M5 X 8MM,PFH,CS,ZN PLATE MANUAL,PVSIM,ETS80 –TSAS S/W,TERRASAS,V1.7.3.0 –TSAS 1 1 1 1 6 1 1 4 10 1 1 Extra items can be supplied on request. Customized AC and DC cable assemblies can also be ordered. Please contact the factory for details. 11 2.2 ELECTRICAL CONNECTIONS 2.2.1 AC Input See figure 1-4 to locate the AC input receptacle. The supplied AC cord allows to power the unit from domestic wall outlets rated for 120V 13A. For rack mounted and international installations, remove the Nema (US style) plug. Strip the insulation jacket and connect the wires to a suitable terminal block or localized AC plug. Connections are as follows: Wire color Black White Green AC line (100-240VAC, 50/60 Hz) Line 1 Line 2 or Neutral Earth ground Table 1 AC line cord wire colors 2.2.2 DC Output See figure 1-4 to locate the DC output receptacle. The supplied DC output cable allows to quickly connect the simulator to the device under test for bench-top operation. Remote sense lines are terminated at the alligator clips. For rack mount installations, use the supplied mating connector and crimp contacts. Connections are listed below: Terminal 1 2 3 4 5 6 Description Positive output Positive remote sense Negative output Positive output Negative remote sense Negative output 3 2 1 6 5 4 Table 2 DC output connections. Terminal numbers are stamped on the body of the connectors. Contacts p/n 856-008-0Y (Positronic p/n MC114N) can be crimped using tool AF-8 with positioner TH4. These are industry standard part numbers available from many electrical tooling distributors. To maximize measurement accuracy, always connect the sense lines as close as possible to the device under test input terminals. 2.2.3 Ethernet Use the supplied CAT-5e shielded patch cord or equivalent. Shielded patch cords are required to meet EMC regulations and recommended to avoid data corruption due to interference from the device(s) under test. 12 2.2.4 USB USB is not supported in the current firmware release and is intended for future use. 2.2.5 AUX I/O This is a standard 15-pin female D-SUB connector. The mating connector is provided with the unit. Electrical signals are listed below: AUX I/O CONNECTIONS MATING CONNECTOR TYPE: D-SUB 15 PIN MALE PIN # DESCRIPTION 1 CAN BUS H 2 CAN BUS L 3 RS-485 D+ 4 RS-485 D- 5 VOLTAGE CURRENT COMMENTS CAN standard Not supported by current firmware revision. RS-485 standard Not supported by current firmware revision. IRRADIANCE INPUT 0 to 2.5V <10 µA 0 to 1999 W/m 6 TEMPERATURE INPUT 0 to 2.5V <10 µA -100°C to 100°C (1) 7 INTERLOCK + 24V ±20% <3 mA 2 (1) Output turns off if interlock signal is not present, unless interlock override is active (DIP switch F3). (2) 8 INTERLOCK - 9 FAULT OUTPUT + 10 FAULT OUTPUT - 11 CAL RELAY + 12 CAL RELAY - 13 14 15 SIGNALS GROUND Analog and digital return BODY CHASSIS GROUND Connect to cable shield 30V max 1A max Not supported by current firmware revision. 30V max 1A max Used by calibration fixture and software. TRIGGER INPUT 0 to 5V < 2mA Active low. (3) REFERENCE VOLTAGE 2.5V 5 mA max Precision voltage reference Table 3 Auxiliary I/O connections NOTES: 1) See software user manual for details about monitoring these signals or allowing them to control an IV curve in real time. 2) The interlock input is isolated from ground and can tolerate up to ±100V from each input to chassis ground. This input is handled by the microcontrollers and is therefore not intended for safety-critical applications. Electromechanical relays or circuit breakers that remove the AC input to the simulator are required to meet safety regulations when failure to operate could harm human operators or otherwise represent a safety hazard. 3) This input accepts standard TTL/CMOS logic levels. It also accepts an isolated relay contact due to the internal pull-up resistor to +5V. When active, this signal starts executing a profile. See software user manual for details about loading and executing irradiance/temperature profiles. 13 2.3 REAR PANEL SWITCHES AND INDICATORS 8-POSITION SWITCH (see figure 1-5) SWITCH DEFAULT POSITION FUNCTION T-485 OFF RS-485 line termination (120 Ω) T-CAN OFF CAN line termination (120 Ω) F1 OFF Not used F2 OFF Not used F3 OFF Interlock input override (desktop mode) F4 OFF Not used F5 OFF Firmware update mode ITEM LAN SEL 2.4 LAN FEATURES (see figure 1-5) TYPE FUNCTION INDICATOR LAN status PUSHBUTTON Select (used during system configuration) FRONT PANEL STATUS INDICATOR The front panel STATUS indicator (blue LED) visually reports one of five possible operating conditions. Blinking patterns are repeated every 2 seconds. LIGHT PATTERN Steady OFF 14 FRONT PANEL STATUS INDICATOR STATUS DESCRIPTION OFF Long pulse IDLE Steady ON ON One short pulse OVP Two short pulses FAULT The simulator is turned off (front panel power switch off or no power) The simulator is turned on but not communicating with the system controller (PC). Output power is automatically turned off. The simulator is turned on and communicating with the system controller (PC). Overvoltage protection tripped. Reduce the output voltage; turn the output off, then on to clear (see TerraSAS software manual) Power module overheat or fault. Turn the front panel power switch off, then on to clear. Contact the factory if this condition becomes permanent and cannot be cleared. 2.5 SYSTEM ASSEMBLY RECOMMENDATIONS When using a number of simulators to build a multi-channel rack system, the following information can be helpful. Use rack slides (Elgar p/n 105-375-08, qty 2 required) or steel brackets to properly support the weight of the simulators. Use the supplied M5x8mm screws to install the rack slides. Longer screws will damage the unit. Ensure adequate ventilation is provided to avoid excessive temperatures. Elevated temperatures reduce the life of the unit and can cause over-temperature protections to trip. Solar inverters can produce EMI fields, both radiated and conducted. On the control computer, it is advisable to avoid using touch-pads as this technology is very sensitive to RF fields and will likely malfunction. Optical trackballs or mice provide the best results. Optical isolation on USB keyboards is recommended to avoid possible lock-ups and erratic operation. Suitable USB isolators can be purchased from Ametek (isolator p/n 881-004-06 and short A-B cable p/n 890504-03). USB isolators need to support the USB 1.1 low speed protocol (1.5 Mbits/s) in order to work properly with most keyboards. Keep data and control lines wiring as far as possible from AC and DC power and sense lines. Always use shielded Ethernet cables. Use shielded cable for all signals connecting to the AUX I/O connector. Connect the shield to the connector body. When connecting to transformer-less inverters, use wire, terminal blocks and connectors rated for 1000V operation on all output and sense wiring. 15 This page intentionally left blank. 16 SECTION 3 OPERATION 3.1 CONNECTING TO A COMPUTER The TerraSAS software can control one or more PV simulators over a single Ethernet link. The CD that comes with the unit contains the installation files and the software user manual in Adobe PDF format. Detailed installation instructions are included in the manual. After installing the software, follow the instructions below to establish communication with one or more PV simulators. 3.1.1 Network configuration The easiest way to connect to a single PV simulator is outlined below: Figure 3-1 Direct cable connection Simply access the Ethernet adapter Properties page and set as indicated. With this topology, a static IP address is manually assigned to the computer. When the PV simulator is turned on, it defaults to IP address 10.0.0.1 and communication is immediately established. This method cannot be used to control two or more simulators. 17 IP address 10.0.0.1 Subnet Mask 255.255.0.0 PV Simulator IP address 10.0.0.2 more than one PV simulator, an Ethernet switch is required: When controlling Subnet Mask 255.255.0.0 PV Simulator Ethernet Switch IP address 1.1.1.1 Subnet Mask 255.255.0.0 TerraSAS DHCP Server ACTIVE TerraSAS DHCP assigned IP address and Subnet Mask PV Simulator TerraSAS DHCP assigned IP address and Subnet Mask Figure 3-2 Private network connection When setting the computer’s IP address to 1.1.1.1, the TerraSAS DHCP server is automatically enabled. In this topology, always make sure that the computer is turned on and a user is logged in before turning on the PV simulators. Within a few seconds, all PV simulators are assigned an IP address. When this happens, the LAN LED on the rear panel (see figure 1-5) starts blinking faster. This confirms that the Ethernet network is active and working properly. If desired, the Ethernet switch can be connected to the Local Area Network: DHCP enabled LAN PV Simulator Ethernet Switch DHCP assigned IP address and Subnet Mask DHCP assigned IP address and Subnet Mask PV Simulator DHCP assigned IP address and Subnet Mask Figure 3-3 Local area network connection In this topology, the Ethernet adapter must be configured for DHCP (“Obtain an IP address automatically” and “Obtain DNS server address automatically”, see screenshot on previous page.) 18 The advantage of this method is that PV simulators and computers can be located anywhere on the LAN, as long as they share the same subnet (network segment behind a router). The disadvantage is that PV simulators are accessible to any computer on the LAN, which could lead to unauthorized access and safety hazards. Never set the computer IP address to 1.1.1.1 in this topology, as the TerraSAS DHCP server will interfere with the LAN’s DHCP server and cause serious service disruptions. When it is desirable to control the TerraSAS computer from a remote location, a computer featuring two Ethernet adapters is recommended: DHCP enabled LAN PV Simulator Adapter #1 DHCP assigned IP address and Subnet Mask TerraSAS DHCP assigned IP address and Subnet Mask Ethernet Switch Adapter #2 IP address 1.1.1.1 Subnet Mask 255.255.0.0 PV Simulator TerraSAS DHCP assigned IP address and Subnet Mask Figure 3-4 Dual network connection See the software user manual for software configuration details and one-time DHCP server startup procedures. 3.1.2 System configuration Once the desired network has been wired and configured, launch TerraSAS. The software will inform that a system configuration table needs to be created and automatically opens the appropriate form. The purpose of the configuration table is to establish which PV simulators are to be controlled and what channel number should be assigned to each one. Once the system configuration table has been created and stored, TerraSAS will only communicate with the specified simulators, in the order that has been selected. Up to four configuration tables can be stored and retrieved, allowing additional flexibility. Detailed system configuration instructions are described in the software user manual and are also shown on the configuration form that opens in the software. Do not begin configuring a system until all simulators have acquired an IP address. Network communication must be healthy before the PC can discover and connect to the simulators. 19 3.2 PROTECTIONS AND FAULT INDICATORS The ETS80 features several protections that are designed to prevent damage to the unit when operating limits are exceeded. When one or more fault conditions occur, the FLT indicator turns red (TerraSAS software) and the unit’s front panel status LED shows the two-pulse sequence (see section 2.4). 3.2.1 Over Temperature Protection (OTP) The temperature of the linear regulator module is monitored by a precision sensor. The reading is always displayed when placing the cursor on the FLT indicator. If the temperature exceeds 70 °C, operation continues but the FLT indicator turns yellow, warning that the over-temperature protection will soon trip. When the temperature reaches 75 °C the FLT indicator turns red and the power module is turned off. Operation resumes as soon as the temperature drops below 75 °C. The table below summarizes all temperature-related events: Temperature range Below 25 °C Between 25 °C and 65 °C Between 70 °C and 75 °C Above 75 °C Above 90 °C Event description Fans speed is 40% of maximum Fans speed linearly increases to 100% of maximum Warning, the FLT indicator turns yellow Over temperature, the FLT indicator turns red and the output is turned off Safety thermostat trips and protects the unit in case of temperature sensor malfunction Table 4 Linear regulator temperature events 3.2.2 Over Power Protection (OPP) The linear regulator is rated for continuous operation when its power dissipation is below 230W, which is the worst case condition when the load operates at the maximum power point. The linear regulator is not designed to handle the full rated power of the unit and might shut down if the output is shorted. Therefore this product cannot be used with shunt-switching solar regulators and any load that does not operate near the maximum power point. 20 The power dissipated on the linear regulator depends on IV curve parameters and output load. It can be calculated as follows: P = (Voc + 3 - Vmp) * Imp when the load operates at the maximum power point. This is because the dc source feeding the linear regulator is always operated 3V above Voc, see block diagram in section 1.4. The table below shows the amount of time the unit will operate under overload conditions: Linear regulator power dissipation (Watts) 231 300 400 840 Protection trip time (seconds) 61.0 0.90 0.40 0.10 When the protection trips, the FLT indicator turns red and the power module is turned off. When placing the cursor over the FLT indicator, the type of fault (OPP) is shown. To clear the fault, turn off the unit and then turn it back on. 3.2.3 Over Current Protection (OCP) Instantaneous current transients above 150% of the maximum rated current will trip the over-current protection. When the protection trips, the FLT indicator turns red and the power module is turned off. When placing the cursor over the FLT indicator, the type of fault (OCP) is shown. To clear the fault, turn off the unit and then turn it back on. 21 3.3 TEST SETUP AND APPLICATION DETAILS Carefully read the installation manual of the solar inverter, micro-inverter or battery charger before connecting it to the PV simulator. In particular, make sure the maximum V oc is never exceeded to avoid damaging the device under test. It is strongly recommended to set the overvoltage protection at or below the maximum input voltage of the DUT to avoid accidentally damaging it. OVP settings and indicators are covered in the TerraSAS software user manual, p/n M609155-01, which is included in PDF format in the software disk that comes with the unit. The ETS80 has isolated DC outputs and supports negative and positive PV array grounding schemes. Its low output leakage and high isolation also allows testing non-isolated (transformer-less) type inverters and micro-inverters. The maximum output to ground voltage is ±1000V. Exceeding this limit will damage the unit. This type of damage is not covered by the warranty. Always connect the sense lines as close as possible to the unit under test to maximize measurement accuracy. 3.3.1 Microinverter test setup S+ PV Simulator S- + - + Micro inverter - Figure 3-5 Microinverter test setup Typical voltage and current waveforms observed across the input of the microinverter are shown in this oscilloscope capture, which was taken while the unit under test was tracking the maximum power point. 22 3.3.2 Power optimizer test setup This setup allows testing a single power optimizer while fully controlling and monitoring its operating parameters, including output voltage and current. PV SIM S+ S+ - + + DC-DC + - - Electronic Load CV mode Figure 3-6 Test setup for a single power optimizer Typical voltage and current waveforms observed across the input of the optimizer are shown in this oscilloscope capture, which was taken while the unit under test was tracking the maximum power point. 23 3.3.3 Power optimizers feeding a solar inverter Several ETS80 simulators can be connected as shown below to accurately evaluate their operation and performance while feeding a solar inverter. PV SIM S+ S+ - + DC-DC + - PV SIM S+ S+ - + DC-DC + - PV SIM S+ S+ - + DC-DC + - PV SIM S+ S+ - + DC-DC + - PV SIM S+ S+ - + DC-DC + - PV SIM S+ S+ - + DC-DC + - PV SIM S+ S+ - + DC-DC + - + Inverter - Figure 3-7 Power optimizers feeding a solar inverter The maximum number of simulators and optimizers is limited by the following factors: The sum of all Voc settings must be equal to or less than the maximum input voltage of the inverter. The maximum voltage-to-ground of either inverter input terminal (+ or - ) cannot exceed ±1,000 V peak or the maximum string voltage of the optimizers, whichever is lower. For transformerless inverters, the AC leakage current must not exceed the threshold of the inverter’s RCMU protection (residual current monitoring unit), usually 30 mArms. The actual current level depends on the amplitude, frequency and harmonics content of the AC component present at the inverter input terminals which ultimately depends on the inverter design. The AC leakage current can be estimated using the equation below: I=C * 6.28 * f * V * N With the setup example shown above, the AC leakage current I would be approximately 12 mArms when there is no harmonics content, f=60 Hz and V=100 Vrms, since N=7 and the output-to-ground leakage capacitance of each ETS80 is 45 nF. 24 3.3.4 Parallel connections The outputs of two or more ETS80 simulators can be paralleled to increase the available output current. All sense lines must be connected and terminated as close as possible to the inverter under test to achieve the best possible measurement accuracy. S+ PV Simulator S- + - + Inverter - S+ PV Simulator S- + - Figure 3-8 PV Simulators connected in parallel Once the electrical connections are made, select System > Channels grouping setup to configure the software for the desired wiring. See the software user manual for full details. The output wiring must be sized to minimize voltage drops at the maximum rated current of the inverter. The voltage difference between the simulator output and the inverter input must not exceed 2 V. 25 3.3.5 Series connections Up to three ETS80 simulators can be connected in series to achieve output voltages of up to 240 V. See electrical connections below. S+ PV Simulator S- + - + Inverter - S+ PV Simulator PV Simulator S- + S+ S- + - Figure 3-9 PV Simulators connected in series Once the electrical connections are made, select System > Channels grouping setup to configure the software for the desired wiring. See the software user manual for full details. Series connections are not recommended and should only be used as a last resort when PV simulators with the appropriate output voltage cannot be procured. Main areas of concern are: 26 Measurement accuracy and response speed are negatively affected. Overvoltage protection levels under transient conditions can be inaccurate and can deviate from the programmed values. Since one simulator in the string executes a slice of the programmed IV curve while the others are set to a fixed voltage to deliver the desired total Voc, operation at fill factors below 0.7 can lead to noticeable IV curve distortions below Voc/N where N is the number of series-connected simulators. SECTION 4 COMPUTER MANAGEMENT 4.1 PERFORMING TERRASAS SOFTWARE UPDATES 4.1.1 Step 1: Uninstall TerraSAS Click on the Windows 7 logo and select Control Panel: Click on Uninstall a program 27 Right click on TerraSAS and click Uninstall/Change Click OK to remove TerraSAS. This only removes the software. System configuration, curves, profiles, data log and any other user files are not affected. 4.1.2 Step 2: Install a new TerraSAS software release A new TerraSAS install set is usually e-mailed as a download link through Ametek’s file transfer service Amefex. The file size is less than 10 Mbytes. Download the file to your desktop, then right click on it and select Extract All. 28 Click Browse… Insert a USB drive and navigate to it. Click OK and then click Extract on the previous dialog to store the install set on the USB drive. Insert the USB drive into any available USB port on the computer running TerraSAS. Navigate to the TerraSAS x.x.x.x Web Install folder. Open the READ ME file and, if instructed to do so, execute section 4.2 to update the PV simulator firmware. Open the folder named TerraSAS Install and double click on the setup.exe file. 29 Follow the instructions and then accept the security warning by clicking on the Install button. The updated TerraSAS software will launch as soon as the above dialog will complete. To complete the process, copy the updated software user manual (M609155-01 Rev X.pdf) and Example scripts vX.X to your My Documents folder. 4.2 PERFORMING FIRMWARE UPDATES This procedure updates the computer code running on the two embedded processors within the PV simulator: Refer to the screenshots in section 4.1.2 to download and install the PV Updater software on the TerraSAS control computer. If a previous version of the PV Updater is present, refer to the screenshots in section 4.1.1 to remove it. All PV simulators connected to the computer will be updated. In case it is not desired to update some of the simulators that are present on the network, turn them off before starting the process. Turn off all PV simulators. Locate the 8-position switch on the rear side of the PV simulators (see figure 1-5) On all PV simulators, slide the F5 switch to the ON position Turn on all PV simulators. Note that the front panel STATUS LED does not blink as usual, as PV simulators entered firmware update mode. Wait 10 seconds to allow all simulators to acquire an IP address. Double click on the PV updater icon to start the firmware update utility. Click on the DISCOVER button to connect. Verify that all PV simulators are detected Click on the START button to begin. 30 The process takes about one minute for each simulator, during which activity details are displayed. When all PV simulators are successfully updated, a green COMPLETED sign is shown. If any step fails on one or more units, a red FAILED sign is displayed. In this case, scroll the activity window to locate which unit failed to update and then contact the factory for assistance. Turn off all PV simulators. On all PV simulators, slide the F5 switch back to the OFF position Turn on all PV simulators. Confirm the STATUS LED blinks as usual on all PV simulator front panels. Continue to section 4.1.2 to update the TerraSAS software and complete the process. Note: the firmware update process can be repeated as many times as desired in the unlikely case that something goes wrong. However, after one or two failed attempts, it is strongly suggested to contact the factory for assistance. IMPORTANT: avoid shutting down power, turning off the computer or the PV simulators while a firmware update is in progress. While these events have been extensively tested and caused no harm during software verification, it is advisable to refrain from intentionally causing them. 31 This page intentionally left blank. 32 SECTION 5 CALIBRATION 5.1 REQUIRED EQUIPMENT The Elgar PV simulator supports fully automated calibration, which requires the following equipment, software and associated documentation: Agilent model 34401A or Keithley 2000 Digital Multimeter TerraSAS Calibration Suitcase, Elgar p/n 5609175-01 TerraSAS Calibration software v2.0.0.1 or above, Elgar p/n 5609174-XX TerraSAS Calibration User Manual, Elgar p/n M609174-01 5.2 OPERATION The calibration suitcase has an internal, calibrated precision shunt. It connects to the simulator output, the digital multimeter and the AUX I/O connector on the rear panel. All cables and accessories are included in the suitcase. After installing and running the software, the user is guided through a simple procedure, which takes about five minutes to complete. 5.3 CALIBRATION INTERVAL The recommended calibration interval for all Elgar PV Simulators is one year. 33