1
Oracle® VM
Administrator's Guide for Release 3.3
E50251-05
July 2015
Oracle Legal Notices
Copyright © 2014, 2015 Oracle and/or its affiliates. All rights reserved.
This software and related documentation are provided under a license agreement containing restrictions on use and disclosure and are protected
by intellectual property laws. Except as expressly permitted in your license agreement or allowed by law, you may not use, copy, reproduce,
translate, broadcast, modify, license, transmit, distribute, exhibit, perform, publish, or display any part, in any form, or by any means. Reverse
engineering, disassembly, or decompilation of this software, unless required by law for interoperability, is prohibited.
The information contained herein is subject to change without notice and is not warranted to be error-free. If you find any errors, please report them
to us in writing.
If this is software or related documentation that is delivered to the U.S. Government or anyone licensing it on behalf of the U.S. Government, then
the following notice is applicable:
U.S. GOVERNMENT END USERS: Oracle programs, including any operating system, integrated software, any programs installed on the hardware,
and/or documentation, delivered to U.S. Government end users are "commercial computer software" pursuant to the applicable Federal Acquisition
Regulation and agency-specific supplemental regulations. As such, use, duplication, disclosure, modification, and adaptation of the programs,
including any operating system, integrated software, any programs installed on the hardware, and/or documentation, shall be subject to license
terms and license restrictions applicable to the programs. No other rights are granted to the U.S. Government.
This software or hardware is developed for general use in a variety of information management applications. It is not developed or intended for
use in any inherently dangerous applications, including applications that may create a risk of personal injury. If you use this software or hardware
in dangerous applications, then you shall be responsible to take all appropriate fail-safe, backup, redundancy, and other measures to ensure its
safe use. Oracle Corporation and its affiliates disclaim any liability for any damages caused by use of this software or hardware in dangerous
applications.
Oracle and Java are registered trademarks of Oracle and/or its affiliates. Other names may be trademarks of their respective owners.
Intel and Intel Xeon are trademarks or registered trademarks of Intel Corporation. All SPARC trademarks are used under license and are
trademarks or registered trademarks of SPARC International, Inc. AMD, Opteron, the AMD logo, and the AMD Opteron logo are trademarks or
registered trademarks of Advanced Micro Devices. UNIX is a registered trademark of The Open Group.
This software or hardware and documentation may provide access to or information about content, products, and services from third parties.
Oracle Corporation and its affiliates are not responsible for and expressly disclaim all warranties of any kind with respect to third-party content,
products, and services unless otherwise set forth in an applicable agreement between you and Oracle. Oracle Corporation and its affiliates will not
be responsible for any loss, costs, or damages incurred due to your access to or use of third-party content, products, or services, except as set
forth in an applicable agreement between you and Oracle.
Documentation Accessibility
For information about Oracle's commitment to accessibility, visit the Oracle Accessibility Program website at
http://www.oracle.com/pls/topic/lookup?ctx=acc&id=docacc.
Access to Oracle Support
Oracle customers that have purchased support have access to electronic support through My Oracle Support. For information, visit
http://www.oracle.com/pls/topic/lookup?ctx=acc&id=info or visit http://www.oracle.com/pls/topic/lookup?ctx=acc&id=trs if you are hearing impaired.
Abstract
Document generated on: 2015-07-20 (revision: 4803)
Table of Contents
Preface .............................................................................................................................................. v
1 Audience ................................................................................................................................ v
2 Related Documents ................................................................................................................ v
3 Command Syntax ................................................................................................................... v
4 Conventions ........................................................................................................................... vi
1 Oracle VM Configuration ................................................................................................................. 1
1.1 Oracle VM Server Configuration ........................................................................................... 1
1.1.1 Installing Oracle VM Storage Connect plug-ins ........................................................... 1
1.1.2 Creating ZFS Volumes on SPARC ............................................................................. 1
1.1.3 Configuring a Secondary Service Domain on SPARC .................................................. 2
1.1.4 Enabling Multipath I/O Support ................................................................................. 16
1.1.5 Installing Oracle VM Server Diagnostic Tools ............................................................ 17
1.1.6 Changing the Oracle VM Server (Dom0) Memory Size .............................................. 17
1.1.7 Oracle VM Server SNMP Monitoring Tools ............................................................... 18
1.2 Oracle VM Manager Configuration ...................................................................................... 19
1.2.1 Oracle VM Manager Utilities .................................................................................... 19
1.2.2 Changing the Oracle VM Manager admin User Password .......................................... 27
1.2.3 Setting up SSL on Oracle VM Manager .................................................................... 27
1.2.4 Configuring Oracle VM Manager UI Session Timeout ................................................ 32
1.3 MySQL Configuration ......................................................................................................... 33
1.4 ISO Provisioning for PVM Guest Installations ...................................................................... 34
2 Oracle VM Utilities ........................................................................................................................ 35
2.1 Introduction to the Oracle VM Utilities ................................................................................. 35
2.2 Oracle VM Utilities Prerequisites ......................................................................................... 36
2.3 Installing the Oracle VM Utilities ......................................................................................... 36
2.3.1 Installing the Oracle VM Utilities on Oracle VM Manager ............................................ 37
2.3.2 Installing the Oracle VM Utilities on Oracle Linux ...................................................... 37
2.3.3 Oracle VM Utilities Scripts ....................................................................................... 38
2.4 Using the Oracle VM Utilities .............................................................................................. 39
2.4.1 Oracle VM Virtual Machine Control (ovm_vmcontrol) ................................................. 39
2.4.2 Oracle VM Retrieve Disk (ovm_vmdisks) .................................................................. 41
2.4.3 Oracle VM Virtual Machine Messaging (ovm_vmmessage) ......................................... 42
2.4.4 Oracle VM Repository Restore (ovm_reporestore) ..................................................... 44
2.4.5 Oracle VM Hostd For Metrics Messaging (ovm_vmhostd and vm-dump-metrics) .......... 46
3 Oracle VM Guest Additions ........................................................................................................... 49
3.1 Introduction to the Oracle VM Guest Additions ..................................................................... 49
3.2 Installing the Oracle VM Guest Additions ............................................................................. 49
3.3 Upgrading the Oracle VM Guest Additions .......................................................................... 50
3.4 Using the Oracle VM Guest Additions (ovmd) ...................................................................... 51
3.4.1 Using the Oracle VM Guest Additions Daemon to Enable First-Boot Configuration ........ 53
3.4.2 Using the Messaging Channel ................................................................................. 53
3.4.3 Configuring the Oracle VM Guest Additions Daemon to Run as a Service .................... 54
3.5 Displaying the Virtual Machine's IP Address ........................................................................ 54
3.6 The Oracle VM Template Configuration Script and Modules ................................................. 54
3.6.1 Overview of the Template Configuration Script (ovm-template-config) .................. 55
3.6.2 Enabling and Disabling Configuration Modules (ovm-chkconfig) .................................. 56
3.6.3 Key-Value Pairs Used By Available Configuration Modules ........................................ 57
3.6.4 Triggering Configuration Changes ............................................................................ 58
3.6.5 Developing Oracle VM Template Configuration Modules ............................................ 59
4 Converting Hosts .......................................................................................................................... 63
4.1 Converting a Host .............................................................................................................. 63
iii
Oracle® VM
4.2 Using the P2V Utility ..........................................................................................................
4.3 Using the P2V Utility with a Kickstart File ............................................................................
4.4 P2V Parameters ................................................................................................................
5 Backing up and Restoring Oracle VM Components .........................................................................
5.1 Backing up and Restoring Oracle VM Manager ....................................................................
5.1.1 Backing Up The Oracle VM Manager Configuration File .............................................
5.1.2 Backing up the MySQL Database Repository ............................................................
5.1.3 Restoring Oracle VM Manager .................................................................................
5.1.4 How to Restore Oracle VM Manager If You Have No Database Backup ......................
5.2 Oracle WebLogic Server Backup and Restore .....................................................................
5.3 Backing up Virtual Machines ..............................................................................................
6 Troubleshooting Oracle VM ...........................................................................................................
6.1 Troubleshooting Oracle VM Installation ...............................................................................
6.1.1 libaio Not Installed ...................................................................................................
6.1.2 Cannot Install MySQL ..............................................................................................
6.1.3 Cannot Create OVS Database Schema ....................................................................
6.1.4 Installation Fails on Non-English Character Set .........................................................
6.1.5 Installation Fails When Using an NIS-based Oracle User Account ...............................
6.2 Troubleshooting Oracle VM Server .....................................................................................
6.2.1 Oracle VM Server Debugging Tools .........................................................................
6.2.2 Using DHCP on Oracle VM Servers .........................................................................
6.2.3 Oracle VM Server Firewall Blocks NFS Access .........................................................
6.2.4 Unable to Use Certain Key Combinations When Connecting to Dom0 Console ............
6.2.5 Storage Array LUN Remapping on Oracle VM Servers ..............................................
6.2.6 Tuning ISCSI Settings on Oracle VM Servers ...........................................................
6.3 Troubleshooting Oracle VM Manager ..................................................................................
6.3.1 Oracle VM Manager Log Files .................................................................................
6.3.2 Oracle VM Manager Command Line Tool .................................................................
6.3.3 No File Systems Found When Searching a Storage Server ........................................
6.3.4 Unable to Discover Servers to Oracle VM Manager Due To Time Differences ..............
6.3.5 Unable to Create a Clustered Server Pool on a Disk that already has an OCFS2 File
System ............................................................................................................................
6.3.6 Unable to Create a Repository on a Device that has Partitions ...................................
6.4 Troubleshooting Virtual Machines ........................................................................................
6.4.1 Setting the Guest's Clock ........................................................................................
6.4.2 Wallclock Time Skew Problems ...............................................................................
6.4.3 Mouse Pointer Tracking Problems ............................................................................
6.4.4 Cloning Virtual Machine from Oracle VM 2.x Template Stuck in Pending .....................
6.4.5 Hardware Virtualized Guest Stops ............................................................................
6.4.6 Migrating Virtual Machines .......................................................................................
6.4.7 Migrating Large Hardware Virtualized Guest Results in CPU Soft Lock ........................
6.4.8 Hardware Virtualized Guest Devices Not Working as Expected ..................................
6.4.9 Paravirtualized Guest Disk Devices are Not Recognized ............................................
6.4.10 Cannot Start Virtual Machine Console ....................................................................
6.4.11 Cannot Create a Virtual Machine from Installation Media ..........................................
6.4.12 Cannot Change CD in the Virtual Machine ..............................................................
Glossary ..........................................................................................................................................
Index ...............................................................................................................................................
iv
63
68
68
73
73
73
74
75
77
78
79
81
81
81
81
81
82
82
83
83
84
84
84
85
85
86
86
87
87
87
88
88
89
89
89
90
90
90
90
90
91
91
91
92
92
93
99
Preface
1 Audience
This document is intended for Oracle VM administrators with privileged access to the physical and virtual
resources of the Oracle VM environment. This guide assumes that you have an in depth knowledge of
Oracle VM (see the Oracle VM Manager User's Guide), and that you are familiar with Oracle Linux system
administration and Linux command line operation.
This Guide contains information previously contained in other parts of the Oracle VM documentation set,
especially the now deprecated Oracle VM Utilities Guide.
2 Related Documents
For more information, see the following documents in the Oracle VM documentation set:
• Oracle VM Release Notes
• Oracle VM Installation and Upgrade Guide
• Oracle VM Concepts Guide
• Oracle VM Manager Getting Started Guide
• Oracle VM Manager User's Guide
• Oracle VM Manager Command Line Interface User's Guide
• Oracle VM Administrator's Guide
• Oracle VM Windows Paravirtual Drivers Installation Guide
• Oracle VM Web Services API Developer's Guide
• Oracle VM Security Guide
• Oracle VM Licensing Information User Manual
You can also get the latest information on Oracle VM by going to the Oracle VM Web site:
http://www.oracle.com/us/technologies/virtualization/oraclevm
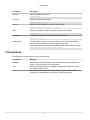
3 Command Syntax
Oracle Linux command syntax appears in monospace font. The dollar character ($), number sign (#), or
percent character (%) are Oracle Linux command prompts. Do not enter them as part of the command.
The following command syntax conventions are used in this guide:
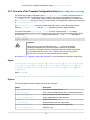
Convention
Description
backslash \
A backslash is the Oracle Linux command continuation character. It is used in
command examples that are too long to fit on a single line. Enter the command
as displayed (with a backslash) or enter it on a single line without a backslash:
dd if=/dev/rdsk/c0t1d0s6 of=/dev/rst0 bs=10b \
count=10000
v
Conventions
Convention
Description
braces { }
Braces indicate required items:
.DEFINE {macro1}
brackets [ ]
Brackets indicate optional items:
cvtcrt termname [outfile]
ellipses ...
Ellipses indicate an arbitrary number of similar items:
CHKVAL fieldname value1 value2 ... valueN
italics
Italic type indicates a variable. Substitute a value for the variable:
library_name
vertical line |
A vertical line indicates a choice within braces or brackets:
FILE filesize [K|M]
forward slash /
A forward slash is used as an escape character in the Oracle VM Manager
Command Line Interface to escape the special characters ", ', ?, \, /, <, >.
Special characters need only be escaped when within single or double quotes:
create Tag name=MyTag description="HR/'s VMs"
4 Conventions
The following text conventions are used in this document:
Convention
Meaning
boldface
Boldface type indicates graphical user interface elements associated with an
action, or terms defined in text or the glossary.
italic
Italic type indicates book titles, emphasis, or placeholder variables for which
you supply particular values.
monospace
Monospace type indicates commands within a paragraph, URLs, code in
examples, text that appears on the screen, or text that you enter.
vi
Chapter 1 Oracle VM Configuration
This chapter gives you information on the configuration options outside the standard Oracle VM product
installation. These configuration options are performed using tools other than the Oracle VM Server or
Oracle VM Manager installers, or the Oracle VM Manager UI.
1.1 Oracle VM Server Configuration
This section gives you detail on the configuration options for Oracle VM Server.
1.1.1 Installing Oracle VM Storage Connect plug-ins
Vendor-specific (non-generic) Oracle VM Storage Connect plug-ins are available directly from your storage
vendor. Generic Oracle VM Storage Connect plug-ins are already installed by default during the installation
of Oracle VM Server and no further action is required if you select to only use the generic plug-ins. Vendorspecific Oracle VM Storage Connect plug-ins usually facilitate additional management functionality that you
can take advantage of from within Oracle VM Manager.
A complete list of vendor-specific Oracle VM Storage Connect plug-ins is available at:
https://wikis.oracle.com/display/oraclevm/Oracle+VM+Storage+Connect+Plugins
Oracle VM Storage Connect plug-ins are delivered as an RPM, usually a single RPM, but your storage
vendor may provide multiple RPMs. When you have the Oracle VM Storage Connect plug-in RPM from
your storage vendor, install the RPM on your Oracle VM Servers. You must install the RPM on all the
Oracle VM Servers that will use the particular storage.
To install the Oracle VM Storage Connect plug-in RPM, on the command line of the Oracle VM Server,
enter
# rpm -ivh filename.rpm
If you are upgrading an existing Oracle VM Storage Connect plug-in, use the RPM upgrade parameter:
# rpm -Uvh filename.rpm
If you are installing or upgrading an Oracle VM Storage Connect plug-in on an Oracle VM Server already
managed by Oracle VM Manager, rediscover the Oracle VM Server to update the database repository with
the latest configuration information about the Oracle VM Server.
Read the install and configuration documentation for the Oracle VM Storage Connect plug-in from
your storage vendor before you install and use it. There may be extra configuration required that is not
documented here.
1.1.2 Creating ZFS Volumes on SPARC
Local ZFS volumes are supported as local physical disks on Oracle VM Server for SPARC. While Oracle
VM Manager does not provide tools to create or manage ZFS volumes, it does detect ZFS volumes as
local physical disks that can either be used for virtual disks by the virtual machines hosted on the Oracle
VM Server where the volume resides, or for use as a local repository to store virtual machine resources. In
this section, we describe the steps required to manually create ZFS volumes on a SPARC-based Oracle
VM Server and how to detect these within Oracle VM Manager.
In the control domain for the Oracle VM Server where you wish to create the ZFS volumes that you intend
to use, use the zfs create command to create a new ZFS volume:
1
Configuring a Secondary Service Domain on SPARC
# zfs create -p -V XG pool/OVS/volume
The size of the volume, represented by XG can be any size that you require as long as your hardware
supports it. The pool, that the volume belongs to can be any ZFS pool. Equally, the volume name can
be of your choosing. The only requirement is that the volume resides under OVS within the pool, so that
Oracle VM Manager is capable of detecting it. The following example shows the creation of two ZFS
volumes of 20 GB in size:
# zfs create -V 20G rpool/OVS/DATASET0
# zfs create -V 20G rpool/OVS/DATASET1
Once you have created the ZFS volumes that you wish to use, you must rediscover your server within
Oracle VM Manager. See Discover Servers in the Oracle VM Manager User's Guide for more information
on how to do this. Once the server has been rediscovered, the ZFS volumes appear as physical disks
attached to the server in the Physical Disks perspective within the Oracle VM Manager Web Interface.
See Physical Disks Perspective in the Oracle VM Manager User's Guide for more information on this
perspective.
As long as a ZFS volume is unused and Oracle VM Manager is able to detect it as a local physical disk
attached to the server, you are able to create a repository on the ZFS volume by selecting to use this disk
when you create the repository. See Create New Repository in the Oracle VM Manager User's Guide for
more information on creating repositories.
Using this feature, you can use a single SPARC server to create virtual machines without any requirement
to use an NFS repository or any additional physical disks.
1.1.3 Configuring a Secondary Service Domain on SPARC
The default configuration of the Oracle VM Agent uses a single service domain, the primary domain, which
provides virtual disk and virtual network services to guest virtual machines. To increase the availability of
guest virtual machines, you can configure a secondary service domain to provide virtual disk and virtual
network services through both the primary and the secondary service domains. With such a configuration,
guest virtual machines can use virtual disk and virtual network multipathing and continue to be fully
functional even if one of the service domains is unavailable.
The primary domain is always the first service domain and this is the domain that is discovered by Oracle
VM Manager. The second service domain, the secondary domain, is a root domain, that is a domain
configured with a PCIe root complex, and it should be configured similarly to the primary domain. The
secondary domain must use the same operating system version, same number of CPUs and same
memory allocation. Unlike the primary domain, the secondary service domain is not visible to Oracle
VM Manager. The secondary domain mimics the configuration of the primary service domain and is
transparently managed by the Oracle VM Agent. In the case where the primary service domain becomes
unavailable, the secondary service domain ensures that guest virtual machines continue to have access
to virtualized resources such as disks and networks. When the primary service domain becomes available
again, it resumes the role of managing these resources.
The following tasks should be performed in order to configure the Oracle VM Agent to use a secondary
service domain:
• Install the Oracle VM Agent as described in Installing Oracle VM Server on SPARC Hardware in the
Oracle VM Installation and Upgrade Guide.
• Create the secondary service domain.
• Install the secondary service domain.
• Configure the Oracle VM Agent to use the secondary service domain.
2
Configuring a Secondary Service Domain on SPARC
1.1.3.1 Requirements
To configure the Oracle VM Agent with a secondary service domain, your SPARC server must meet the
minimum requirements listed in this section, in addition to the standard installation requirements described
in Preinstallation Tasks and Requirements in the Oracle VM Installation and Upgrade Guide.
Hardware
You need a SPARC Server that has at least two PCIe buses, so that it can be configured with two LDoms
root domains. One root domain is configured as the primary domain, and the second root domain is
configured as the secondary domain. For more information about LDoms root domains, refer to I/O Domain
Overview in the Oracle VM Server for SPARC Administration Guide available at:
http://docs.oracle.com/cd/E38405_01/html/E38406/index.html
Both domains must be configured with at least one PCIe bus. The PCIe buses that you assign to each
domain must be unique. You cannot assign the same PCIe bus to two different domains.
By default, after a fresh installation, all PCIe buses are assigned to the primary domain. When adding
a new service domain, some of these PCIe buses must be released from the primary domain and then
assigned to the secondary domain.
For example, a SPARC T5-2 server with two SPARC T5 processors has 4 PCIe buses. This server can be
configured with a primary domain and a secondary domain. You can assign two PCIe buses to the primary
domain, and two PCIe buses to the secondary domain.
Network
The network ports used by the primary domain must all be connected to the PCIe buses that are assigned
to the primary domain.
Similarly the network ports used by the secondary domain must all be connected to the PCIe buses that
are assigned to the secondary domain.
In addition, the primary and secondary domains must have the same number of network ports. Each
network port in the primary domain must have a corresponding network port in the secondary domain, and
they must be connected to the same physical network.
For example, a SPARC T5-2 server with two SPARC T5 processors has 4 PCIe buses (pci_0, pci_1, pci_2,
and pci_3). The server also has 4 onboard network ports. Two network ports are connected to pci_0,
and the other two are connected to pci_3. You can assign 2 PCIe buses (pci_0 and pci_1) to the primary
domain, and 2 PCIe buses (pci_2 and pci_3) to the secondary domain. That way, both domains have two
ports configured. You must ensure that each port is connected to the same physical network as one of the
ports in the corresponding domain.
Storage
Physical disks or LUNs used by the primary domain must all be accessible through one or several host
bus adapters (HBAs) connected to the PCIe buses that are assigned to the primary domain. The primary
domain needs at least one disk for booting and hosting the operating system. The primary domain usually
has access to all, or a subset of, local SAS disks present on the server through an onboard SAS HBA
connected to one of the PCIe buses of the server.
Similarly, physical disks or LUNs used by the secondary domain must all be accessible through one or
several HBAs connected to the PCIe buses assigned to the secondary domain. The secondary domain
3
Configuring a Secondary Service Domain on SPARC
needs at least one disk for booting and hosting the operating system. Depending on the server used,
the secondary domain might not have access to any local SAS disks present on the server, or it might
have access to a subset of the local SAS disks. If the secondary domain does not have access to any of
the local SAS disks then it must have an HBA card on one of its PCIe buses and access a LUN from an
external storage array that it can use for booting.
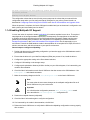
Warning
If the boot disk of the secondary domain is on a storage array shared between
multiple servers or multiple domains, make sure that this disk is only accessible by
the secondary domain. Otherwise the disk might be used by mistake by another
server or domain, and you can corrupt the boot disk of the secondary domain.
Depending on the storage array and the storage area network, this can usually be
achieved using zoning or LUN masking.
In addition, if a Fibre Channel (FC) storage area network (SAN) is used, then the primary and the
secondary domains must have access to the same FC disks. So one or more FC HBAs must be connected
to the FC SAN and to the PCIe buses that are assigned to the primary domain. And, one or more FC HBAs
must be connected to the FC SAN and to the PCIe buses that are assigned to the secondary domain.
Note
The primary and the secondary domain do not need to have access to same SAS
or iSCSI disks. Only the SAS or iSCSI disks accessible from the primary domain are
visible to Oracle VM Manager. Oracle VM Manager does not have visibility of any
SAS or iSCSI disks accessible only from the secondary domain. If a virtual machine
is configured with SAS or iSCSI disks, then the corresponding virtual disks in the
virtual machine have a single access path, through the primary domain. If a virtual
machine is configured with FC disks, then the corresponding virtual disks in the
virtual machine have two access paths: one through the primary domain; and one
through the secondary domain.
For example, a SPARC T5-2 server with two SPARC T5 processors has 4 PCIe buses (pci_0, pci_1, pci_2,
pci_3). The server also has 2 onboard SAS HBAs to access the 6 internal SAS disks. One SAS HBA is
connected to PCIe bus pci_0 and accesses 4 internal disks. The other SAS HBA is connected to PCIe bus
pci_4 and accesses the 2 other internal SAS disks. You can assign 2 PCIe buses (pci_0 and pci_1) to the
primary domain, and 2 PCIe buses (pci_2 and pci_3) to the secondary domain. That way, both domains
have access to internal SAS disks that can be used for booting. The primary domain has access to four
SAS disks, and the secondary domain has access to two SAS disks.
If you want to connect the server to an FC SAN, then you can add an FC HBA to the primary domain (for
example on PCIe bus pci_1) and an FC HBA to the secondary domain (for example, on PCIe bus pci_2).
Then you should connect both FC HBAs to the same SAN.
1.1.3.2 Limitations
While using secondary service domains help to ensure better availability of guest virtual machines, there
are some limitations to using them within an Oracle VM context. The following list outlines each of these
limitations that you should be aware of if you decide to configure a secondary service domain:
• Clustering: Clustering cannot be used with a secondary service domain. If a server is configured with a
secondary service domain then that server cannot be part of a clustered server pool.
• Network Configuration: Network bonds/aggregation and VLANs are not automatically configured
on the secondary domain. If you configure bonds/aggregation or VLANs on the primary domain using
Oracle VM Manager, then corresponding bonds/aggregation or VLANs won't be automatically configured
4
Configuring a Secondary Service Domain on SPARC
on the secondary domain. If you want to use any such bond/aggregation or VLANs with virtual machines
then the corresponding bonds/aggregation or VLANs must be manually configured on the secondary
domain.
• Storage: SAS, iSCSI and ZFS volumes accessible only from the secondary domain cannot be used or
managed using Oracle VM Manager.
• Virtual Machine Disk Multipathing: When assigning a disk to a virtual machine, only FC disks are
configured with disk multipathing through the primary and the secondary domains. SAS, iSCSI or ZFS
disks assigned to a virtual machine are configured with a single path through the primary domain.
• Virtual Machine Network Port: When assigning a network port to a virtual machine, two network
ports are effectively configured on the virtual machine: one connected to the primary domain, and one
connected to the secondary domain. The network port connected to the primary domain is configured
with a MAC address that can be defined from within Oracle VM Manager. The MAC address must be
selected in the range [00:21:f6:00:00:00, 00:21:f6:0f:ff:ff]. The network port connected to the secondary
domain is configured with a MAC address derived from the MAC address of the network port connected
to the primary domain. This MAC address starts with 00:21:f6:8.
For example, if the MAC address defined in Oracle VM Manager is 00:21:f6:00:12:34 then this MAC
address is used on the network port connected to the primary domain. The derived MAC address is then
00:21:f6:80:12:34 and should be used on the network port connected to the secondary domain. Oracle
VM Manager uses a default dynamic MAC address range of [00:21:f6:00:00:00, 00:21:f6:ff:ff:ff]. When
using a secondary service domain, this range must be reduced to [00:21:f6:00:00:00, 00:21:f6:0f:ff:ff].
See Virtual NICs in the Oracle VM Manager User's Guide for more information on changing the default
range of MAC addresses within the Oracle VM Manager Web Interface.
• Live Migration: A virtual machine cannot be live migrated to a server configured with a different number
of service domains. That is you cannot migrate a virtual machine running on a server with a secondary
service domain to a server without a secondary service domain; and you cannot migrate a virtual
machine running on a server without a secondary service domain to a server with a secondary service
domain.
1.1.3.3 Creating a Secondary Service Domain
There are particular requirements that must be met for the secondary service domain to be usable within
an Oracle VM context. These requirements are set out below:
• No domain (other than the primary domain) must exist before you start to set up a secondary domain.
You can see all existing domains in the output of the ldm ls command.
• No virtual switch must exist before you start to set up a secondary domain. You can see all virtual
switches in the VSW section in the output of the ldm ls-services command.
• The name of the secondary service domain must be "secondary."
• The secondary service domain should be a root domain.
• The secondary service domain should be configured with 1 cpu core.
• The secondary service domain should be configured with 8 GB of memory.
• The secondary service domain should have virtual disk service (vds) with the name "secondary-vds0" .
• The secondary service domain should be totally independent of any other domain (in particular of the
primary domain), so it should have no virtual disk and no virtual network interface, and only use physical
disk and physical network interface.
5
Configuring a Secondary Service Domain on SPARC
For more information about creating a root domain, refer to Creating a Root Domain by Assigning PCIe
Buses in the Oracle VM Server for SPARC Administration Guide available at:
http://docs.oracle.com/cd/E38405_01/html/E38406/configurepciexpressbusesacrossmultipleldoms.html
To make sure that these requirements are met and to simplify the process of setting up and configuring
the secondary service domain, you can use the ovs-agent-secondary command to assist you, see
Section 1.1.3.6, “Using the ovs-agent-secondary Command To Setup A Secondary Domain”.
The following instructions describe how to create a secondary service domain manually.
Manually Creating a Secondary Service Domain
1. Create the service domain and set the core CPU and memory requirements using the following
commands:
# ldm create secondary
# ldm set-core 1 secondary
# ldm set-memory 8g secondary
2. Assign the PCI buses that you wish the secondary service domain to use. For each bus, issue the
following command, substituting pci_2 with the correct bus identifier:
ldm add-io pci_2 secondary
3. Add the secondary virtual disk service to the secondary domain, using the following command:
ldm add-vds secondary-vds0 secondary
4. Remove any PCI buses that you added to the secondary service domain from the primary domain. To
begin reconfiguring the primary domain, you must enter the following command:
# ldm start-reconf primary
Now, for each bus that you added to the secondary domain, enter the following command to remove it
from the primary domain, substituting pci_2 with the correct bus identifier:
# ldm rm-io pci_2 primary
5. When you have finished reconfiguring the primary domain, you must reboot it:
# reboot
1.1.3.4 Installing the Secondary Service Domain
After the secondary service domain has been created and the primary domain has finished rebooting, start
the secondary service domain using the following commands in the control domain:
# ldm bind secondary
# ldm start secondary
Once the secondary service domain has been started, you can access its console by obtaining the console
port using the following command:
# ldm ls secondary
NAME
STATE
secondary
active
FLAGS
-t--v-
CONS
5000
VCPU
8
MEMORY
8G
UTIL
0.0%
NORM
0.0%
UPTIME
0s
Note that the console port is listed in the CONS column. You can open a telnet connection to this port as
follows:
# telnet 0 5000
6
Configuring a Secondary Service Domain on SPARC
Trying 0.0.0.0...
Connected to 0.
Escape character is '^]'.
Connecting to console "secondary" in group "secondary" ....
Press ~? for control options ..
{0} ok
Now you must install the Oracle Solaris 11 operating system into the secondary domain. This can be
achieved by following the instructions provided in Installing Oracle Solaris 11.1 Systems in the Oracle
Solaris 11.1 documentation available at:
http://docs.oracle.com/cd/E26502_01/html/E28980/index.html
Do not attempt to install either the Oracle VM Agent or the LDoms Manager into the secondary service
domain. Only the Oracle Solaris 11 operating system is required.
Make sure that the secondary service domain is properly configured so that it can boot automatically. In
particular, the OpenBoot PROM (OBP) variables of the domain must be correctly set. For instance, the
auto-boot? parameter should be set to true, and boot-device parameter should contain the device
path of the boot disk that is configured for the secondary domain.
1.1.3.5 Manually Configuring the Oracle VM Agent to Support the Secondary Domain
You can use the ovs-agent-secondary command to assist you with the process of setting the Oracle
VM Agent to support the secondary domain, see Section 1.1.3.6, “Using the ovs-agent-secondary
Command To Setup A Secondary Domain”. The instructions that follow describe how to configure the
Oracle VM Agent manually.
1. Create a configuration file in /etc/ovs-agent/shadow.conf on the primary domain. This
configuration file is in JSON format and at absolute minimum should contain the following content to
enable support for the secondary domain:
{
"enabled": true
}
a. Each network link in the primary domain should have a corresponding network link in the secondary
domain connected to the same physical network. By default, a network link in the primary domain
is associated with the network link with the same name in the secondary domain. If a network link
in the primary domain should be associated with a network link in the secondary domain with a
different name, then you need to define a network link mapping. To define a network mapping, you
need to add a 'nic-mapping' entry in /etc/ovs-agent/shadow.conf. Typically, entries of this
sort look similar to the following:
{
enabled": true,
nic-mapping": [
["^net4$", "net2" ],
["^net5$", "net3" ]
]
}
In the above example, net4 is a network interface in the primary domain and is connected to the
same physical network as the network interface named net2 in the secondary domain. Equally,
net5 is a network interface in the primary domain and is connected to the same physical network
as the network interface named net3 in the secondary domain. Note that network interface names
in the primary domain are encapsulated with the regular expression characters caret (^) and dollar
7
Configuring a Secondary Service Domain on SPARC
($) to ensure an exact match for the network interface name in the primary domain. Ensure that the
JSON file is properly formatted as defined at http://json.org/.
b. Each Fibre Channel (FC) disk accessible from the primary domain domain should also be
accessible from the secondary domain. By default, a FC disk is accessed using the same device
path in the primary domain and in the secondary domain. In particular, each disk is accessed using
the same disk controller name. If a disk controller in the primary domain should be associated with
a disk controller in the secondary domain with a different name, then you need to define a disk
controller mapping.
It is recommended that Solaris I/O multipathing is enabled in the primary and in the secondary
domain on all multipath-capable controller ports, in particular on all FC ports. In that case, all FC
disks appear under a single disk controller (usually c0), and disk controller mapping is usually not
needed in that case.
To define a disk controller mapping, add a 'disk-mapping' entry in the /etc/ovs-agent/
shadow.conf file. For example:
{
"enabled": true,
"disk-mapping": [
[ "c0t", "c1t" ]
]
}
In the above example, c0t is a disk controller in the primary domain that is connected to the same
FC disk as the disk controller named c1t in the secondary domain. Ensure that the JSON file is
properly formatted as defined at http://json.org/.
c. An example of an /etc/ovs-agent/shadow.conf file that requires both network interface and
disk controller mapping follows:
{
"enabled": true,
"nic-mapping": [
[ "^net4$", "net2" ],
[ "^net5$", "net3" ]
],
"disk-mapping": [
[ "c0t", "c1t" ]
]
}
2. Save the LDoms configuration with the secondary service domain to the service processor.
Warning
Before saving the configuration, ensure that the secondary service domain
is active. If the configuration is saved while the secondary service domain is
not active, then the secondary service domain won't start automatically after a
power-cycle of the server
# ldm add-spconfig ovm-shadow
3. To complete the configuration, reconfigure the Oracle VM Agent by running the following command:
# ovs-agent-setup configure
The configuration values that are used for this process map onto the values that you entered for the
configuration steps when you first configured Oracle VM Agent for your primary control domain, as
8
Configuring a Secondary Service Domain on SPARC
described in Configuring Oracle VM Agent for SPARC in the Oracle VM Installation and Upgrade
Guide.
When the Oracle VM Agent configuration has completed, the secondary domain is running and Oracle VM
Agent is able to use it in the case that the primary domain becomes unavailable.
1.1.3.6 Using the ovs-agent-secondary Command To Setup A Secondary Domain
The ovs-agent-secondary command can be used to automatically create and setup a secondary
domain. In particular, the command indicates whether the server is suitable for creating a secondary
service domain, and which PCIe buses are available for the secondary service domain.
To create a secondary service domain, run the following command on the control domain:
# ovs-agent-secondary create secondary
Important
The ovs-agent-secondary command is a helper script that is provided as is.
This command might not work with some servers or configurations. If the command
does not work, create the secondary service domain manually, as described in
Section 1.1.3.3, “Creating a Secondary Service Domain”.
Disabling the Oracle VM Agent
If the Oracle VM Agent is enabled then a menu is displayed for disabling the Oracle VM Agent. The Oracle
VM Agent must be disabled when creating a secondary service domain. Example output from the ovsagent-secondary command, for this scenario, is displayed below:
This command can not be run while the ovs-agent is online.
Do you want to disable the ovs-agent service?
1) Yes, disable the ovs-agent service
2) No, exit the ovs-agent-secondary tool
Choice (1-2): 1
Listing PCIe Buses Present on the Server
The list of all PCIe buses present on the server is displayed, with information indicating whether or not they
are available for creating a secondary service domain. Example output from the ovs-agent-secondary
command, for this step, is displayed below:
Gathering information about the server...
The server has 4 PCIe buses.
---------------------------------------------------------------------This is the list of PCIe buses present on the server, and whether
or not they are available for creating a secondary service domain
Bus
--pci_0
pci_1
pci_2
pci_3
Available
--------no
yes
yes
yes
Reason
-----Bus is
Bus is
Bus is
Bus is
assigned
assigned
assigned
assigned
and used by the primary domain
to the primary domain but it is not used
to the primary domain but it is not used
to the primary domain but it is not used
Enter + or - to show or hide details about PCIe buses.
9
Configuring a Secondary Service Domain on SPARC
+) Show devices in use
Or select one of the following options.
0) Exit and do not create a secondary service domain
1) Continue and select PCIe buses to create a secondary service domain
Choice (0-1): 1
Use this information to figure out which PCIe buses are available, and which buses you want to use for the
secondary service domain. You can display more or less information about the PCIe buses by entering "+"
or "-".
A PCIe bus is not available for creating a secondary service in the following cases:
• The PCIe bus is assigned to a domain other than the primary domain.
If you want to use such a PCIe bus for the secondary service domain then you must first remove it from
the domain it is currently assigned to.
• The PCIe bus is assigned to the primary domain and devices on that bus are used by the primary
domain.
If you want to use such a PCIe bus for the secondary service domain then you must reconfigure the
primary domain so that it stops using devices from that bus.
Warning
When a PCIe bus is assigned to the primary domain, the tool may not always
be able to figure out if devices from the bus are used by the primary domain.
Furthermore, the tool only identifies common devices (such as network interfaces
and disks) and the common usage of these devices (including link aggregation, IP
configuration or ZFS pool). If you want to create a secondary domain with a PCIe
bus that is currently assigned to the primary domain, make sure that this bus is
effectively not used by the primary domain at all.
Selecting PCIe Buses for the Secondary Service Domain
The next step provided by the ovs-agent-secondary command allows you to actually select the PCIe
buses that are to be used for the secondary service domain. Typically, this step may appear as follows:
The following PCIe buses can be selected for creating a secondary
service domain.
Bus
--pci_1
pci_2
pci_3
Selected
-------no
no
no
Devices Count
------------ETH(2) FC(2) IB(2)
ETH(2) FC(2) IB(2)
DSK(2) ETH(2)
Enter + or - to show or hide details about PCIe buses.
+) Show PCIe slots
Or enter the name of one or more buses that you want to add to the
selection of PCIe buses to create a secondary service domain.
Or select one of the following options.
10
Configuring a Secondary Service Domain on SPARC
0) Exit and do not create a secondary service domain
1) Add all PCIe buses to the selection
2) Remove all PCIe buses from the selection
Choice (0-2): pci_2 pci_3
Note that in addition to the menu options, which allow you to add all available PCIe buses to the secondary
service domain, you can also manually specify a space separated list of PCIe buses by bus name to
individually add particular buses to the secondary service domain.
As soon as at least one PCIe bus is marked as selected, the menu options change to allow you to create
the secondary service domain with the selected PCIe buses:
The following PCIe buses can be selected for creating a secondary
service domain.
Bus
--pci_1
pci_2
pci_3
Selected
-------no
yes
yes
Devices Count
------------ETH(2) FC(2) IB(2)
ETH(2) FC(2) IB(2)
DSK(2) ETH(2)
Enter + or - to show or hide details about PCIe buses.
+) Show PCIe slots
Or enter the name of one or more buses that you want to add to the
selection of PCIe buses to create a secondary service domain.
Or select one of the following options.
0)
1)
2)
3)
Exit and do not create a secondary service domain
Add all PCIe buses to the selection
Remove all PCIe buses from the selection
Create a secondary services domain with the selected buses
Choice (0-3): 3
Confirming the Selection of PCIe Buses for the Secondary Service Domain
A final confirmation screen displays the buses selected for the secondary service domain, before you can
proceed to create the secondary service domain. This confirmation screen looks as follows:
You have selected the following buses and devices for the secondary
domain.
Bus
--pci_2
pci_3
Current Domain
-------------primary
Slot
----
Devices Count
-------------
/SYS/MB/PCIE2
/SYS/MB/PCIE3
/SYS/MB/PCIE4
IB(2)
FC(2)
ETH(2)
/SYS/MB/PCIE8
/SYS/MB/SASHBA1
/SYS/MB/NET2
DSK(2)
ETH(2)
primary
Verify that the selection is correct.
0) Exit and do not create a secondary service domain
1) The selection is correct, create a secondary domain with pci_2 pci_3
2) Go back to selection menu and change the selection
Choice (0-2): 1
11
Configuring a Secondary Service Domain on SPARC
Creating the Secondary Service Domain
After the selection of PCIe buses for the secondary service domain has been confirmed, the secondary
domain is created and instructions for configuring the secondary service domain are displayed. The output
from the tool looks similar to the following:
ldm
ldm
ldm
ldm
ldm
ldm
ldm
ldm
create secondary
set-core 1 secondary
set-memory 8G secondary
add-io pci_2 secondary
add-io pci_3 secondary
start-reconf primary
rm-io pci_2 primary
rm-io pci_3 primary
---------------------------------------------------------------------The secondary service domain has been created. Next, you need to
install Solaris on that domain. Then you can configure the Oracle
VM Agent to run with the secondary domain.
Once the secondary service domain is up and running with Solaris,
run the following command to configure the Oracle VM Agent to run
with the secondary domain:
# ovs-agent-secondary configure secondary
If a reboot is required to complete the creation of the secondary service domain then a corresponding
menu is displayed, otherwise the tool terminates and the creation of secondary service domain is already
finished. The following menu is displayed if a reboot is required:
You need to reboot the system in order to complete the
creation of the secondary domain.
Do you want to reboot the system now?
1) Yes, reboot the system now
2) No, I will reboot the system later
Choice (1-2): 1
Install the Service Domain
When you have finished creating the new service domain, you need to install it. Simply follow the
instructions already provided in Section 1.1.3.4, “Installing the Secondary Service Domain”.
Configure the Oracle VM Agent for the Secondary Domain
Once the secondary service domain is properly installed, it is necessary to configure the Oracle VM Agent
to be able to use it. This process is achieved by running the ovs-agent-secondary command on the
control domain, in the following way:
# ovs-agent-setup configure secondary
The ovs-agent-setup command guides you through a number of configuration steps before the
configuration changes are made to the Oracle VM Agent.
Checking the Installation of the Secondary Service Domain
The first step in the configuration process requires you to confirm that the secondary domain is installed
and running. This step is displayed as follows:
12
Configuring a Secondary Service Domain on SPARC
The secondary service domain exists and is active. It should be up
and running Solaris 11.1.
Confirm that the secondary service domain is up and running Solaris 11.1
1) Yes, the secondary service domain is up and running Solaris 11.1.
2) No, the secondary service domain is not running Solaris 11.1
Choice (1-2): 1
Mapping Network Interfaces Between the Primary and the Secondary Domain
Each network link in the primary domain should have a corresponding network link in the secondary
domain connected to the same physical network. By default, a network link in the primary domain is
associated with the network link with the same name in the secondary domain. If a network link in the
primary domain should be associated with a network link in the secondary domain with a different name,
then you need to define a network link mapping. This is achieved in the next step of the configuration
process, which is displayed as follows:
Each network link in the primary domain should have a corresponding
network link in the secondary domain connected to the same physical
network. By default, a network link in the primary domain will be
associated with the network link with the same name in the secondary
domain.
Network links in the primary domain and corresponding link in the
secondary domain:
Primary
------net0
net1
net4
net5
net6
net7
Secondary
--------net0
net1
net4
net5
net6
net7
If a network link in the primary domain should be associated with
a network link in the secondary domain with a different name, then
you need to define a network link mapping.
Do you need to define a network link mapping?
1) Yes, I need to map a network link in the primary domain to
a network link in the secondary domain with a different name.
2) No, each network link in the primary domain has a corresponding
network link in the secondary domain with the same name.
Choice (1-2): 1
Ideally, you should be able to select option 2 here to continue. However, it is possible that network link
names may not correspond correctly. In this case, you should select option 1 and redefine the mapping as
follows:
Enter
Enter
Enter
Enter
Enter
Enter
the
the
the
the
the
the
mapping
mapping
mapping
mapping
mapping
mapping
for
for
for
for
for
for
net0
net1
net4
net5
net6
net7
[net0]:
[net1]:
[net4]: net2
[net5]: net3
[net6]:
[net7]:
Network links in the primary domain and corresponding link in the
secondary domain:
13
Configuring a Secondary Service Domain on SPARC
Primary
------net0
net1
net4
net5
net6
net7
Secondary
--------net0
net1
net2
net3
net6
net7
Is the mapping correct?
1) Yes, the mapping is correct.
2) No, the mapping is not correct, redo the mapping.
Choice (1-2): 1
Note that you are prompted for the mapping for each network link in the primary domain. If you enter a
blank line, the existing default mapping is used. If you need to change a mapping, you must specify the
network link name in the secondary domain that is connected to the same physical network as the network
link listed in the primary domain.
When you have finished redefining the mappings, you should select option 1 to continue to the next step in
the configuration process.
Mapping Fibre Channel Disk Controllers Between the Primary and the Secondary Domain
Each Fibre Channel (FC) disk accessible from the primary domain domain should also be accessible
from the secondary domain. By default, a FC disk is accessed using the same device path in the
primary domain and in the secondary domain. In particular, each disk is accessed using the same disk
controller name. If a disk controller in the primary domain should be associated with a disk controller in the
secondary domain with a different name, then you must define a disk controller mapping.
It is recommended that Solaris I/O multipathing is enabled in the primary and in the secondary domain on
all multipath-capable controller ports, in particular on all FC ports. In this case, all FC disks appear under a
single disk controller (usually c0), and disk controller mapping is usually not needed.
The following screen is displayed for this step in the configuration process:
Each Fibre Channel (FC) disk accessible from the primary domain
domain should also be accessible from the secondary domain. By
default, a FC disk will be access using the same device path in
the primary domain and in the secondary domain. In particular,
each disk will be accessed using the same disk controller name.
FC disk controllers in the primary domain and corresponding
controller in the secondary domain:
Primary
------c0
Secondary
--------c0
If a disk controller in the primary domain should be associated with
a disk controller in the secondary domain with a different name, then
you need to define a disk controller mapping.
Do you need to define a disk controller mapping?
1) Yes, I need to map a disk controller in the primary domain to
a disk controller in the secondary domain with a different name.
2) No, each disk controller in the primary domain has a corresponding
disk controller in the secondary domain with the same name.
Choice (1-2): 1
14
Configuring a Secondary Service Domain on SPARC
Ideally, you should be able to select option 2 here to continue. However, it is possible that disk controller
names may not correspond correctly. In this case, you should select option 1 and redefine the mapping as
follows:
Enter the mapping for c0 [c0]: c1
FC disk controllers in the primary domain and corresponding
controller in the secondary domain:
Primary
------c0
Secondary
--------c1
Is the mapping correct?
1) Yes, the mapping is correct.
2) No, the mapping is not correct, redo the mapping.
Choice (1-2): 1
Note that you are prompted for the mapping for each FC disk controller in the primary domain. If you enter
a blank line, the existing default mapping is used. If you need to change a mapping, you must specify
the FC disk controller name in the secondary domain that is connected to the same FC disk listed in the
primary domain.
When you have finished redefining the mappings, you should select option 1 to continue to the next step in
the configuration process.
Saving the Oracle VM Agent Configuration for the Secondary Service Domain
The Oracle VM Agent uses a configuration file to be able to access and configure itself for resources in the
secondary service domain. In this step of the configuration process, the configuration file is created and
saved to disk within the primary control domain:
Creating configuration file
Saving configuration ovm-shadow on the service processor
The secondary service domain is configured. Continuing with
the configuration of the Oracle VM Agent.
Reconfiguring the Oracle VM Agent
Finally, the Oracle VM Agent is automatically reconfigured to use the secondary service domain and the
Oracle VM Agent is enabled:
Network Configuration
Network Configuration OK
Storage Configuration
Storage Configuration OK
OVS Agent Configuration
OVS Agent Configuration OK
Cluster Configuration
Cluster Configuration OK
LDoms Manager Configuration
LDoms Manager Configuration OK
Virtual I/O Services Configuration
Virtual I/O Services Configuration OK
LDoms Configuration
*** ERROR: The vds service is not configured on the secondary domain.
Configuring the vds service
Saving configuration ovm-shadow on the service processor
LDoms Configuration OK
15
Enabling Multipath I/O Support
The LDoms configuration has been dynamically updated and stored on
the service processor.
Enabling Oracle VM Agent Services
The configuration values that are used for this process map onto the values that you entered for the
configuration steps when you first configured Oracle VM Agent for your primary control domain, as
described in Configuring Oracle VM Agent for SPARC in the Oracle VM Installation and Upgrade Guide.
When the process is complete, the Oracle VM Agent is enabled and your environment is configured to use
both a primary and a secondary service domain.
1.1.4 Enabling Multipath I/O Support
In case user action is required to enable multipathing, this sections explains how to do so. The required
steps depend on the storage hardware implemented. Consequently, the steps below are intended as
a guideline and priority should be given to the SAN hardware documentation. Please note that some
guidelines have already been provided for the configuration of multipathing on SPARC hardware in
Storage Requirements in the Oracle VM Installation and Upgrade Guide. Not all steps apply to your
environment. Consult the SAN hardware vendor's documentation for a complete list of steps, the order in
which to execute them, and their relevance to your specific environment.
General steps to configure multipathing:
1. Design and document the multipathing configuration you intend to apply to the SAN hardware used in
your Oracle VM environment.
2. Ensure that the drivers for your Host Bus Adapters (HBAs) are present. If not, install the drivers.
3. Configure the appropriate zoning on the fibre channel switches.
4. Configure LUN masking on the storage arrays.
5. Configure path optimization features (ALUA or similar) on your disk subsystem, if so instructed by your
vendor's documentation.
6. Check the fabric information on each Oracle VM Server that has access to the SAN hardware. Use
multipath -ll and related commands.
7. Make the necessary changes to the file /etc/multipath.conf on the Oracle VM Servers.
Note
You must make the exact same changes to the multipath configuration file on all
Oracle VM Servers in your environment.
Important
It is critical that the configuration parameter user_friendly_names remain
set to no within the /etc/multipath.conf configuration file.
8. Restart the multipath daemon (multipathd).
9. Check the fabric information again to verify the configuration.
10. If so instructed by the vendor's documentation, rebuild initrd.
11. Reboot the Oracle VM Servers to verify that the SAN and multipathing configuration come up properly
after a restart.
16
Installing Oracle VM Server Diagnostic Tools
For detailed information and instructions, consult the SAN hardware vendor's documentation.
Note
Booting from a multipath SAN is supported.
1.1.5 Installing Oracle VM Server Diagnostic Tools
As an optional post-installation step, Oracle recommends that you also install and configure diagnostics
tools on all Oracle VM Servers. These tools can be used to help debug and diagnose issues such as
system crashes, hanging, unscheduled reboots, and OCFS2 cluster errors. The output from these tools
can be used by Oracle Support and can significantly improve resolution and response times.
Obtaining a system memory dump (vmcore) can be very useful when attempting to diagnose and resolve
the root cause of an issue. To be able to get a useful vmcore dump, a proper kdump service configuration
is required. See the Oracle Support Document 1520837.1, How to Configure 'kdump' for Oracle VM 3.2.1,
for information on how to install kdump.
https://support.oracle.com/epmos/faces/DocumentDisplay?id=1520837.1
At the time of writing, the kdump article mentioned is the latest version of this document. There may be a
more recent version published after the release of this Guide, so check the My Oracle Support web site for
a more recent version that is specifically related to this release.
In addition, you can install netconsole, a utility allowing system console messages to be redirected
across the network to another server. See the Oracle Support Document 1351524.1, How to Configure
"netconsole" for Oracle VM Server 3.0, for information on how to install netconsole.
https://support.oracle.com/epmos/faces/DocumentDisplay?id=1351524.1
The OSWatcher Black Box (OSWbb) utility may also be useful as it collects and archives operating system
and network metrics that you can use to diagnose performance issues. OSWbb operates as a set of
background processes on the server and gathers data on a regular basis, invoking utilities like vmstat,
netstat, iostat, and top. See the Oracle Support Document 580513.1, How To Start OSWatcher Black Box
Every System Boot, for information on how to install OSWbb.
https://support.oracle.com/epmos/faces/DocumentDisplay?id=580513.1
Additional information on using diagnostic tools is provided in the Oracle Linux documentation. See the
chapter titled Support Diagnostic Tools in the Oracle Linux Administrator's Solutions Guide.
http://docs.oracle.com/cd/E37670_01/E37355/html/ol_diag.html
1.1.6 Changing the Oracle VM Server (Dom0) Memory Size
When you install Oracle VM Server, the installer sets a default memory size for dom0. The algorithm used
is:
dom0_mem = 502 + int(physical_mem * 0.0205)
Example sizes are set out in table Table 1.1.
Table 1.1 Default Dom0 Memory Size
Physical Memory
Dom0 Memory
2 GB
560 MB
17
Oracle VM Server SNMP Monitoring Tools
Physical Memory
Dom0 Memory
4 GB
600 MB
8 GB
680 MB
16 GB
848 MB
32 GB
1184 MB
64 GB
1856 MB
128 GB
4000 MB
256 GB
5888 MB
512 GB
11264 MB
1024 GB
22008 MB
2048 GB
43504 MB
You may encounter performance issues if the dom0 memory size is not set appropriately for your needs on
the Oracle VM Server.
To change the dom0 memory allocation, edit the /boot/grub/grub.conf file on the Oracle VM Server
and change the dom0_mem parameter, for example, to change the memory allocation to 1024 MB, edit the
file to be:
kernel /xen.gz console=com1,vga com1=38400,8n1 dom0_mem=1024M
1.1.7 Oracle VM Server SNMP Monitoring Tools
Oracle VM Server includes support for SNMP (Simple Network Management Protocol) monitoring, allowing
you to take advantage of SNMP monitoring tools like Nagios. By default, the appropriate SNMP packages
are installed on Oracle VM Server. Availability of these packages can be checked in the following way:
# rpm -qa | grep snmp
net-snmp-utils-5.3.2.2-17.0.1.el5_8.1
net-snmp-libs-5.3.2.2-17.0.1.el5_8.1
net-snmp-5.3.2.2-17.0.1.el5_8.1
The SNMP daemons are disabled by default, and should be enabled if you intend to use SNMP to monitor
an Oracle VM Server. You can check your configuration to determine whether the service has been
enabled in the following way:
# chkconfig --list |grep snmp
snmpd
0:off
1:off
snmptrapd
0:off
1:off
2:off
2:off
3:off
3:off
4:off
4:off
5:off
5:off
6:off
6:off
To enable the SNMP service, you can start it manually by issuing the following command:
# service snmpd start
To enable the SNMP service permanently, you can issue the following command:
# chkconfig --level 2345 snmpd on
When the service is running, you can use the snmpwalk command line utility to view the available MIBs.
The following output shows usage of the snmpwalk command to view the MIBs that are enabled by
default:
# snmpwalk -v2c -c public localhost
SNMPv2-MIB::sysDescr.0 = STRING: Linux test.us.oracle.com 2.6.39-300.12.0.el5uek #1 SMP
Thu Oct 4 14:13:28 PDT 2012 x86_64
18
Oracle VM Manager Configuration
SNMPv2-MIB::sysObjectID.0 = OID: NET-SNMP-MIB::netSnmpAgentOIDs.10
DISMAN-EVENT-MIB::sysUpTimeInstance = Timeticks: (64612) 0:10:46.12
SNMPv2-MIB::sysContact.0 = STRING: Root >root@localhost> (configure /etc/snmp/snmp.local.conf)
SNMPv2-MIB::sysName.0 = STRING: test.us.oracle.com
SNMPv2-MIB::sysLocation.0 = STRING: Unknown (edit /etc/snmp/snmpd.conf)
SNMPv2-MIB::sysORLastChange.0 = Timeticks: (1) 0:00:00.01
SNMPv2-MIB::sysORID.1 = OID: SNMPv2-MIB::snmpMIB
SNMPv2-MIB::sysORID.2 = OID: TCP-MIB::tcpMIB
SNMPv2-MIB::sysORID.3 = OID: IP-MIB::ip
SNMPv2-MIB::sysORID.4 = OID: UDP-MIB::udpMIB
SNMPv2-MIB::sysORID.5 = OID: SNMP-VIEW-BASED-ACM-MIB::vacmBasicGroup
SNMPv2-MIB::sysORID.6 = OID: SNMP-FRAMEWORK-MIB::snmpFrameworkMIBCompliance
SNMPv2-MIB::sysORID.7 = OID: SNMP-MPD-MIB::snmpMPDCompliance
SNMPv2-MIB::sysORID.8 = OID: SNMP-USER-BASED-SM-MIB::usmMIBCompliance
SNMPv2-MIB::sysORDescr.1 = STRING: The MIB module for SNMPv2 entities
SNMPv2-MIB::sysORDescr.2 = STRING: The MIB module for managing TCP implementations
SNMPv2-MIB::sysORDescr.3 = STRING: The MIB module for managing IP and ICMP implementations
SNMPv2-MIB::sysORDescr.4 = STRING: The MIB module for managing UDP implementations
SNMPv2-MIB::sysORDescr.5 = STRING: View-based Access Control Model for SNMP.
SNMPv2-MIB::sysORDescr.6 = STRING: The SNMP Management Architecture MIB.
SNMPv2-MIB::sysORDescr.7 = STRING: The MIB for Message Processing and Dispatching.
SNMPv2-MIB::sysORDescr.8 = STRING: The management information definitions for the SNMP
User-based Security Model.
SNMPv2-MIB::sysORUpTime.1 = Timeticks: (0) 0:00:00.00
SNMPv2-MIB::sysORUpTime.2 = Timeticks: (0) 0:00:00.00
SNMPv2-MIB::sysORUpTime.3 = Timeticks: (0) 0:00:00.00
SNMPv2-MIB::sysORUpTime.4 = Timeticks: (0) 0:00:00.00
SNMPv2-MIB::sysORUpTime.5 = Timeticks: (0) 0:00:00.00
SNMPv2-MIB::sysORUpTime.6 = Timeticks: (1) 0:00:00.01
SNMPv2-MIB::sysORUpTime.7 = Timeticks: (1) 0:00:00.01
SNMPv2-MIB::sysORUpTime.8 = Timeticks: (1) 0:00:00.01
HOST-RESOURCES-MIB::hrSystemUptime.0 = Timeticks: (105614) 0:17:36.14
HOST-RESOURCES-MIB::hrSystemUptime.0 = No more variables left in this MIB View (It is past the
end of the MIB tree)
To edit the configuration of the SNMP daemon on your Oracle VM Server you can either edit the
configuration file at /etc/snmp/snmpd.conf directly, or you can use the snmpconf command line utility
to assist you with any further configuration that you may require.
1.2 Oracle VM Manager Configuration
This section gives you details on the configuration and management options for Oracle VM Manager.
1.2.1 Oracle VM Manager Utilities
This section discusses command line tools that are available with Oracle VM Manager. These tools
are installed with Oracle VM Manager and provide facilities to quickly perform certain configuration and
diagnostic tasks directly from the command line.
1.2.1.1 Oracle VM Manager Administrator Tool (ovm_admin)
The Oracle VM Manager Administrator Tool, which can be invoked on the command line using the
ovm_admin command, is used to perform typical administrative actions specific to Oracle VM Manager.
These actions allow you to manage users that have access to Oracle VM Manager's data store, and
control log rotation for the AdminServer.log file. To perform any action using the Oracle VM Manager
Administrator Tool, you must use the password that is configured for the weblogic user.
The Oracle VM Manager Administrator Tool is installed as part of the default Oracle VM Manager
installation process. The full path to the Oracle VM Manager Administrator Tool is:
/u01/app/oracle/ovm-manager-3/bin/ovm_admin
19
Oracle VM Manager Utilities
Syntax
ovm_admin [ --help ] [ --createuser ] [ --deleteuser ] [ --listusers ] [ --modifyuser
] [ --modifyds ] [ --lockusers tries ] [ --unlockuser admin ] [ --listconfig ] [ -rotatelogsdaily HH:MM ] [ --rotatelogsbysize KB ]
Options
The following table shows the available options for this command.
Option
Description
--help
Display the ovm_admin command parameters and options.
--createuser
Create new Oracle VM Manager admin user.
--deleteuser
Delete an Oracle VM Manager admin user.
--listusers
List the Oracle VM Manager users.
--modifyuser
Modify an Oracle VM Manager user password.
--modifyds
Modify an Oracle VM Manager database schema. Typically
used if the password for the MySQL database has been
changed directly within MySQL.
--lockusers tries
Set the maximum login tries before locking accounts. This
setting is global.
--unlockuser admin
Unlock a user account.
--listconfig
List configuration information about Oracle VM Manager.
--rotatelogsdaily HH:MM
Rotate the Oracle VM Manager application logs daily (HH:MM).
--rotatelogsbysize KB
Rotate the Oracle VM Manager application logs by size (KB).
Examples
Example 1.1 Managing users with the Oracle VM Manager Administrator Tool
The Oracle VM Manager Administrator Tool provides you with the ability to perform various user
management functions directly from the command line. By default, the Oracle VM Manager installation
process only creates and configures a single Oracle VM Manager administrative user. While this is often
sufficient for many customers, creating separate administrative user accounts may be useful for security
and auditing purposes.
Example 1.2 Creating a new Oracle VM Manager user
A new user can be created for the Oracle VM Manager application using the Oracle VM Manager
Administrator Tool by running the following command:
# ./ovm_admin --createuser
The tool returns the following output:
Oracle VM Manager Release version Admin tool
Please enter the username : [ovmuser]
Please enter the password for [ovmuser] (minimum 8 chars. with one numeric/special char.) :
Please re-enter the password :
20
Oracle VM Manager Utilities
Note
Your password must conform to the password requirements suggested by the
Oracle VM Manager Administrator Tool, or the creation of your user fails in the final
step.
Please enter the password for weblogic :
At this point you must enter the password for the Oracle WebLogic Server. If you have not changed the
Oracle VM Manager admin user's password, this password is usually the same as your default Oracle VM
Manager admin user's password.
Initializing WebLogic Scripting Tool (WLST) ...
Welcome to Oracle WebLogic Server Administration Scripting Shell
Type help() for help on available commands
Connecting to Oracle WebLogic Server ...
Connected ...
Creating user '[ovmuser]' ...
Created user '[ovmuser]' successfully ...
Exiting...
Example 1.3 Deleting an Oracle VM Manager user
Removing an Oracle VM Manager administrative user can be achieved using the Oracle VM Manager
Administrator Tool by running the following command:
# ./ovm_admin --deleteuser ovmuser
You are prompted for the Oracle WebLogic Server password. This is the password for the Oracle
WebLogic Server as it was set up during installation. If you have not changed the Oracle VM Manager
admin user's password, this password is usually the same as your default Oracle VM Manager admin
user's password. Typical output is presented below:
Oracle VM Manager Release version Admin tool
Please enter the password for weblogic :
Initializing WebLogic Scripting Tool (WLST) ...
Welcome to Oracle WebLogic Server Administration Scripting Shell
Type help() for help on available commands
Connecting to Oracle WebLogic Server ...
Connected ...
Deleting user 'ovmuser' ...
Deleted user 'ovmuser' successfully ...
Exiting...
Important
There are some users stored within Oracle WebLogic Server that are critical to the
healthy functioning of your Oracle VM Manager environment. Do not attempt to
delete either of these accounts:
• OracleSystemUser
21
Oracle VM Manager Utilities
• weblogic
It is also generally advisable to keep the default admin user account, so that there
is always at least one administrative account that is able to access the Oracle
VM Manager application. Attempting to delete the Oracle WebLogic Server user
account using the Oracle VM Manager Administrator Tool fails with the message:
Cannot delete the admin user account 'weblogic' ...
Example 1.4 Changing an Oracle VM Manager user's password
It is possible to change any Oracle VM Manager administrative user's password using the Oracle VM
Manager Administrator Tool by running the following command:
# ./ovm_admin --modifyuser
The tool returns the following output:
Oracle VM Manager Release version Admin tool
Please enter the username : [ovmuser]
Please enter the current password :
Note
You must be able to provide the user's current password in order to modify the user
account.
If you need to reset an account due to a lost password, you should delete the user
account and create a new account.
Please enter a new password for [ovmuser] (minimum 8 chars. with one numeric/special char.) :
Please re-enter the password :
Note
Your password must conform to the password requirements suggested by the
Oracle VM Manager Administrator Tool, or the creation of your user fails in the final
step.
Please enter the password for weblogic :
At this point you must enter the password for the Oracle WebLogic Server. If you have not changed the
Oracle VM Manager admin user's password, this password is usually the same as your default Oracle VM
Manager admin user's password.
Initializing WebLogic Scripting Tool (WLST) ...
Welcome to Oracle WebLogic Server Administration Scripting Shell
Type help() for help on available commands
Connecting to Oracle WebLogic Server ...
Connected ...
Modifying user '[ovmuser]' ...
Modified user '[ovmuser]' successfully ...
Exiting...
22
Oracle VM Manager Utilities
Example 1.5 Modifying the Oracle VM Manager database schema
You can use the Oracle VM Manager Administrator Tool to handle database schema changes within
MySQL. The most typical use case for this is where the password for the Oracle VM Manager database
has been changed directly within MySQL, without using any of the tools provided with Oracle VM. An
alternative use case would be where the Oracle VM Manager database has been renamed within MySQL.
The --modifyds option is used to update Oracle VM Manager for changes made directly to the MySQL
database:
# ./ovm_admin --modifyds
The tool prompts you for the Oracle VM Manager database schema, password and the Oracle WebLogic
Server password, and returns output similar to the following:
Oracle VM Manager Release version Admin tool
Please enter the Oracle VM Manager database schema (ovs or appfw): ovs
Please enter the schema password for ovs (minimum 8 chars. with one numeric/special char.) :
Please re-enter the password :
Please enter the password for weblogic :
Initializing WebLogic Scripting Tool (WLST) ...
......
Modified Data Source successfully ...
Disconnected from Oracle WebLogic Server: AdminServer
Exiting...
Note that there is a second database schema, usually named appfw, that is also used by Oracle VM
Manager. If the password for this database has also been changed, then the same command must be run
again, as follows:
Oracle VM Manager Release version Admin tool
Please enter the Oracle VM Manager database schema (ovs or appfw): appfw
Please enter the schema password for appfw (minimum 8 chars. with one numeric/special char.) :
Please re-enter the password :
Please enter the password for weblogic :
Initializing WebLogic Scripting Tool (WLST) ...
......
Modified Data Source successfully ...
Disconnected from Oracle WebLogic Server: AdminServer
Exiting...
When you have finished running this command, you must restart Oracle VM Manager:
# service ovmm restart
# service ovmcli restart
Example 1.6 Listing Oracle VM Manager users
You can use the Oracle VM Manager Administrator Tool to obtain a list of users that have access to the
Oracle VM Manager application by running the following command:
# ./ovm_admin --listusers
The tool prompts you for the Oracle WebLogic Server password and returns output similar to the following:
Oracle VM Manager Release version Admin tool
23
Oracle VM Manager Utilities
Please enter the password for weblogic :
Initializing WebLogic Scripting Tool (WLST) ...
Welcome to Oracle WebLogic Server Administration Scripting Shell
Type help() for help on available commands
Connecting to Oracle WebLogic Server ...
Connected ...
Listing Oracle VM users ...
User : OracleSystemUser
User : weblogic
User : admin
User : [ovmuser]
Listed users successfully ...
Exiting...
Some of the users stored within Oracle WebLogic Server and listed are critical to the healthy functioning of
your Oracle VM Manager environment. These include:
• OracleSystemUser: Used by Oracle Web Services Manager (OWSM). OWSM is part of the standard
Oracle Fusion Middleware (FMW) Infrastructure, that includes ADF.
• weblogic: The default Oracle WebLogic Server administrative user.
The default admin user account is also typically listed. Any other user accounts listed, such as the
[ovmuser] account, have been added to the system after installation.
Example 1.7 Locking Oracle VM Manager user accounts
In order to protect unauthorized access to Oracle VM Manager it is possible to configure an account
locking facility that is triggered after a number of failed attempts to log in. This is achieved using the Oracle
VM Manager Administrator Tool in the following way:
# ./ovm_admin --lockusers [3]
Note
Account locking is enabled by default according to the base Oracle WebLogic
Server configuration. The default settings allow for 5 invalid login attempts before
the account is locked. The lock period is set to 30 minutes. The only way to change
the lock period is to edit the underlying Oracle WebLogic Server configuration
directly. For more information on configuring the Oracle WebLogic Server lockout
parameters, please refer to the Oracle WebLogic Server documentation on this at:
http://docs.oracle.com/cd/E13222_01/wls/docs81/ConsoleHelp/
security_realm_userlockout.html
Important
This is a global parameter that applies to all users. Setting this parameter on an
instance of Oracle VM Manager that makes use of a single administrator account
can result in this account being locked for 30 minutes before anybody is able
to use it again. To recover from this is it is possible to unlock the account. See
Example 1.8, “Unlocking Oracle VM Manager user accounts”.
You are prompted to enter the Oracle WebLogic Server password in order to apply this setting. Typical
output from the command follows:
24
Oracle VM Manager Utilities
Oracle VM Manager Release version Admin tool
Please enter the password for weblogic :
Initializing WebLogic Scripting Tool (WLST) ...
Welcome to Oracle WebLogic Server Administration Scripting Shell
Type help() for help on available commands
Connecting to Oracle WebLogic Server ...
Connected ...
Setting Invalid Login attempts to '[3]' ...
Exiting...
Restart of Oracle VM Manager is required for Data Store change to take effect ...
Restart Oracle VM Manager in order for the setting to take effect.
An account is locked for 30 minutes before it is automatically unlocked again.
Example 1.8 Unlocking Oracle VM Manager user accounts
When account locking is enabled (see Example 1.7, “Locking Oracle VM Manager user accounts”), it is
possible for Oracle VM Manager user accounts to become locked for up to 30 minutes if a user fails to
authenticate after the number of attempts that has been configured for this facility. When a user's account
has become locked and the user enters the correct username and password combination, an error appears
when the user attempts to authenticate:
Unexpected error during login (javax.security.auth.login.LoginException),
please consult logs for details.
An investigation of the AdminServer.log reveals:
000000000183> >1358953290200< >BEA-090078< >User ovmuser in security realm myrealm
has had 3 invalid login attempts, locking account for 30 minutes.<
It is possible to override the 30 minute lock on an account by using the Oracle VM Manager Administrator
Tool in the following way:
# ./ovm_admin --unlockuser [ovmuser]
You are prompted for the Oracle WebLogic Server account password in order to complete the operation.
Example 1.9 Rotating Oracle VM Manager logs
The Oracle VM Manager Administrator Tool allows you to control how and when log files are rotated. There
are two options available:
• --rotatelogsdaily: Set the logs to be rotated on a daily basis at an allocated time.
• --rotatelogsbysize: Set the logs to be rotated when they reach a specified size.
In both cases, you are prompted for the Oracle WebLogic Server password in order to update the
configuration.
Example 1.10 Rotating Oracle VM Manager logs daily
To set the logs to rotate daily at an allocated time, run the Oracle VM Manager Administrator Tool in the
following way:
25
Oracle VM Manager Utilities
# ./ovm_admin --rotatelogsdaily [00:30]
The time provided is specified in the format HH:MM.
Typical output from the command follows:
Oracle VM Manager Release version Admin tool
Please enter the password for weblogic :
Initializing WebLogic Scripting Tool (WLST) ...
Welcome to Oracle WebLogic Server Administration Scripting Shell
Type help() for help on available commands
Connecting to Oracle WebLogic Server ...
Connected ...
Configure log rotation setting to rotate daily at [00:30] ...
Modified log rotation setting successfully ...
Exiting...
Example 1.11 Rotating Oracle VM Manager logs by size
To set the logs to rotate when they reach a specified size, run the Oracle VM Manager Administrator Tool
in the following way:
# ./ovm_admin --rotatelogsbysize [1024]
The size provided is specified according to the number of kilobytes before rotation.
Typical output from the command follows:
Oracle VM Manager Release version Admin tool
Please enter the password for weblogic :
Initializing WebLogic Scripting Tool (WLST) ...
Welcome to Oracle WebLogic Server Administration Scripting Shell
Type help() for help on available commands
Connecting to Oracle WebLogic Server ...
Connected ...
Configure log rotation setting to rotate the logs based on size ([1024] KB) ...
Modified log rotation setting successfully ...
Exiting...
1.2.1.2 Oracle VM Diagnostic Capture (VMPInfo3)
For diagnostic purposes, Oracle Support Services use a script called VMPInfo3 that automatically collects
vital troubleshooting information from your Oracle VM environment. This script is installed when you install
Oracle VM Manager and is located at:
/u01/app/oracle/ovm-manager-3/ovm_tools/support/vmpinfo3.sh
The script is usually run with a minimum of two parameters, as follows:
./vmpinfo3.sh --username=admin
26
Changing the Oracle VM Manager admin User Password
The script creates a tarball in the /tmp directory. When the script has finished running, it notifies you of the
filename for the tarball that it has created and instructs you to send the file to Oracle Support. An example
of the output follows:
=======================================================================================
Please send /tmp/vmpinfo3-3.x.y.z-20130123-163252.tar.gz to Oracle OVM support
=======================================================================================
The script can be run to list all servers that it is able to report on with the listservers argument:
./vmpinfo3.sh --username=admin listservers
It is also possible to limit the amount of data that the script collects to a specified set of servers. This can
be done using the servers argument and providing a comma-separated list of the servers that you would
like to collect data for:
./vmpinfo3.sh --username=admin servers=myserver1.example.com,myserver2.example.com
For detailed information about the script, its purpose and usage, please consult the support note with Doc
ID 1521931.1. You can also find this document by logging on to My Oracle Support and searching the
knowledge base for "vmpinfo3".
1.2.2 Changing the Oracle VM Manager admin User Password
The Oracle VM Manager admin user is used to log in to the Oracle VM Manager user interface. To change
the password for the Oracle VM Manager admin user account, log in to the Oracle VM Manager host
computer as the root user and perform the following:
# cd /u01/app/oracle/ovm-manager-3/bin
#./ovm_admin --modifyuser
Follow the prompts to change the admin user password. A full example of using this command to change a
user password is shown in Example 1.4, “Changing an Oracle VM Manager user's password”.
1.2.3 Setting up SSL on Oracle VM Manager
By default, Oracle VM Manager provides its own SSL certificates stored within a custom keystore. The
certificates that are provided are signed using an internal Certificate Authority (CA). As of version 3.3.1 of
Oracle VM, SSL certificates are used extensively throughout the product:
• For the authentication of Oracle VM Manager to each Oracle VM Server that it has discovered and for
the encryption of communications between Oracle VM Manager and the Oracle VM Agent running on
each Oracle VM Server.
• For the authentication and encryption of some tools that make use of the Oracle VM Manager webservices API.
• For the encryption of communications between a web-browser and the Oracle VM Manager web-based
user interface .
Certificates are generated automatically during the installation of Oracle VM Manager. To avoid SSL
validation issues in client web-browsers, you can obtain the internal CA certificate used by Oracle VM
Manager and install it into each web-browser that is used to access the Oracle VM Manager web user
interface. This is discussed in Exporting the CA certificate. Alternatively, if you have obtained an SSL
certificate signed by an external CA that is already trusted by your users' web-browsers, you can change
the SSL certificate that is used for the encryption of communications between the web-browser and the
Oracle VM Manager web-based user interface. This is discussed in more detail in Changing the SSL
27
Setting up SSL on Oracle VM Manager
Key. Finally, if you need to generate a new SSL key that is signed by the internal CA, you can follow the
instructions provided in Generating a New SSL Key.
Warning
Once you have started configuring your environment using Oracle VM Manager you
must avoid changing the CA certificate under any circumstances. This certificate is
used for a variety of purposes, such as the authentication of Oracle VM Manager
to each Oracle VM Server instance. Changing the CA certificate breaks all
previously configured certificate-based authentication and can result in an unusable
environment.
Oracle VM Manager does not use the default keystore and certification provided by Oracle WebLogic
Server. Instead, it makes use of its own 2048-bit keystores. These are located at:
• /u01/app/oracle/ovm-manager-3/domains/ovm_domain/security/ovmssl.jks
• /u01/app/oracle/ovm-manager-3/domains/ovm_domain/security/ovmca.jks
The passwords for these keystores are randomized at installation. If you need to update a keystore, such
as the CA keystore, to add mutually trusted CAs to the keystore, you may need to change the keystore
password using the Oracle VM Key Tool. Changing the keystore password is described in Changing the
Keystore Password.
1.2.3.1 The Oracle VM Key Tool
Oracle VM Manager also includes its own key management tool to help manage SSL certificates in
conjunction with the keytool provided in the Java Development Kit (JDK) that is installed on the Oracle VM
Manager host. This tool is located on the Oracle VM Manager host at:
/u01/app/oracle/ovm-manager-3/ovm_upgrade/bin/ovmkeytool.sh
Before using this tool, you must set the MW_HOME environment variable to point to the location of the
Oracle WebLogic Server Middleware directory for your current installation of Oracle VM Manager:
# export MW_HOME=/u01/app/oracle/Middleware
Important
The Oracle VM Key Tool is intended for use by advanced administrators. Incorrect
usage can cause authentication issues that have wide-reaching repercussions.
Ensure that you understand what you are doing before you use this tool.
Syntax
ovmkeytool.sh [ --help ] [ --overwrite ] [ --quiet ] [ --verbose ] [ --propertyFile
filename ] [ -D property=value ] [ --noWebLogic ] { [{ show } | { check } | { setup } | {
setupWebLogic } | { gencakey } | { setcakey } | { gensslkey } | { setsslkey } | { changepass } | {
exportca }] }
Options
The following table shows the available options for this tool.
Option
Description
--help
Display the ovmkeytool.sh command parameters and
options.
28
Setting up SSL on Oracle VM Manager
Option
Description
--overwrite
Allow existing keystores to be overwritten if user interaction is
disabled.
--quiet
Run with no user interaction using property values exclusively.
--verbose
Output extra information while running.
--propertyFile filename
The specified file can be used to provide properties to the tool.
-D property=value
Sets a property to a given value.
--noWebLogic
Do not attempt to configure Oracle WebLogic Server or verify
Oracle WebLogic Server settings.
Commands
The following table shows the available commands for this tool. Only one command can be run at once.
Option
Description
show
Show the current values being used, including details about
the current contents of the keystores.
check
Checks the current set-up and outputs details about any errors
that are found.
setup
Sets up all of the keystore files and configures Oracle
WebLogic Server.
setupWebLogic
Configures existing keystore settings in Oracle WebLogic
Server.
gencakey
Generates a new certificate authority (CA) key. Also puts
this key into the trust-store. Avoid running this command on
an instance of Oracle VM Manager that has already been
configured.
setcakey
Sets the certificate authority (CA) key to use an existing key
from an existing keystore file. Avoid running this command
on an instance of Oracle VM Manager that has already been
configured.
gensslkey
Generates a new SSL key.
setsslkey
Sets the SSL key to use an existing key from an existing
keystore file.
changepass
Allows the passwords for existing keystore files and keys to be
configured or changed.
exportca
Exports the CA certificate (in PEM format).
Note
Many of the commands provided with this tool prompt for the Oracle WebLogic
Server username and password. The default weblogic user should be used, and the
password must match the one-time password that is set during Oracle VM Manager
installation.
Checking Certificate Validity
At any time the show and check commands can be used to output details about the Oracle VM Manager
and Oracle WebLogic Server SSL configuration and to verify the configuration appears valid. The check
29
Setting up SSL on Oracle VM Manager
is by no means exhaustive, but it does verify that the keystore files exist, contain the expected keys, and
are configured the same way in Oracle WebLogic Server as in the Oracle VM Manager. An example of the
check command is presented below:
# ./ovmkeytool.sh check
Oracle MiddleWare Home (MW_HOME): [/u01/app/oracle/Middleware]
WebLogic domain directory: [/u01/app/oracle/ovm-manager-3/domains/ovm_domain]
Oracle WebLogic Server name: [AdminServer]
WebLogic username: [weblogic]
WebLogic password: [********]
WLST session logged at: /tmp/wlst-session2891919577425803475.log
The Oracle VM Manager CA and SSL configuration appears to be valid.
Exporting the CA certificate
Oracle VM Manager contains it's own internal Certificate Authority (CA) which it uses for performing
certificate-based authentication and to sign the SSL certificate that is used for the web-based user
interface. To avoid certificate errors in web browsers connecting to the Oracle VM Manager web user
interface, this CA certificate may be added as a trusted CA into the user's browser. The internal CA
certificate can be retrieved, in PEM format, using the exportca command:
# ./ovmkeytool.sh exportca
----BEGIN CERTIFICATE----MIID+zCCAuOgAwIBAgIUamdPKrCAl4O1yD8QlywkYhmh0l8wDQYJKoZIhvcNAQEL
BQAwgaQxCzAJBgNVBAYTAlVTMRMwEQYDVQQIEwpDYWxpZm9ybmlhMRUwEwYDVQQH
EwxSZWR3b29kIENpdHkxGzAZBgNVBAoTEk9yYWNsZSBDb3Jwb3JhdGlvbjEaMBgG
A1UECxMRT3JhY2xlIFZNIE1hbmFnZXIxMDAuBgNVBAMTJ09WTSBDQSAwMDA0ZmIw
MDAwMDEwMDAwN2RiZmM3M2UyYTFkNjY3ZTAeFw0xMzExMDYxNDU5MjBaFw0yMzEx
MDcxNDU5MjBaMIGkMQswCQYDVQQGEwJVUzETMBEGA1UECBMKQ2FsaWZvcm5pYTEV
MBMGA1UEBxMMUmVkd29vZCBDaXR5MRswGQYDVQQKExJPcmFjbGUgQ29ycG9yYXRp
b24xGjAYBgNVBAsTEU9yYWNsZSBWTSBNYW5hZ2VyMTAwLgYDVQQDEydPVk0gQ0Eg
MDAwNGZiMDAwMDAxMDAwMDdkYmZjNzNlMmExZDY2N2UwggEiMA0GCSqGSIb3DQEB
AQUAA4IBDwAwggEKAoIBAQCKEekWsegMBt6aAPLAq+riDX8TS6ssr6NNjdDNy0mQ
32NZRyoR8K85T0O0KoFJ9lkgJOH8Ll4Q4219S2xey0obnqMqt5byW/XhXjiDLgpF
ESg/p2IGic8MubElhOQI3V71SeIcMHGk2b6sdS12T583uZD+FxvzCZoSTod4l4Pw
KvmAWV0FJQHaeOlGxj2tUaAWyVGbw66IzXZM4WlmNFH/2SNdx7XK4lXtPD/QiMVB
7bXaP/wCTc1vQlXgP550idwRQi5ol2ly7IO2fbflfX5wdnkuJWFOKzJfnkclsMHo
DW1FX5FEj34dEd/97wXvfAfYXRtC1DIq91mrF4vxD3lzAgMBAAGjIzAhMA8GA1Ud
EwEB/wQFMAMBAf8wDgYDVR0PAQH/BAQDAgAFMA0GCSqGSIb3DQEBCwUAA4IBAQAe
JK82gdNA/7tftEAgON7GlzJ0BSgu/3e1Luali+xOt2FFGAvrDtTdLxJjEEWM0OU4
Bhoc/6kjQ71nFs9Q/xxP9qC3YQPXa447Q1i9RZql5g2S5aQBr18ZHqeXp6HannLo
iwLBfSpbACgAhZwpzo7ZS38yENir6u1LKAnFAP/6D55Jgx7/UnbHNcFTSXc2u4cI
N3MHJ+0p8umz4+HrqqhFChNYZF2XhmuPawgL8TmRB2FNlQUcbmH19Nwb4UeOxEuD
isAf90p/GlTdtwzbNbm6Mv3rPEK2GtIL5YcIwLyKYKZ07P5VW6tGuzJTMipN0cLo
ij8FtceX5tmLGxlGQoKN
-----END CERTIFICATE-----
Refer to your web-browser documentation to determine how to add CA certificates to your list of trusted
CAs within your browser.
Generating a New SSL Key
The default SSL certificates generated during the installation of Oracle VM Manager are valid for ten
years from the date of installation. Nonetheless, there may be a requirement to update the SSL certificate
served by Oracle VM Manager at any point. This can be achieved using the genssl command, which
generates a new SSL certificate signed by the Oracle VM Manager internal CA. This is essentially the
same configuration as is achieved after a fresh installation, but the certificate is generated afresh. The
example below shows the typical output of this command:
# ./ovmkeytool.sh gensslkey
Path for SSL keystore: [/u01/app/oracle/ovm-manager-3/domains/ovm_domain/security/ovmssl.jks]
30
Setting up SSL on Oracle VM Manager
The hostname should be the fully qualified hostname of the system
(this is the hostname you'd use to access this system from outside the
local domain). Depending on your machine setup the value below may not be
correct.
Fully qualified hostname: [myserver.example.com]
Key distinguished name is "CN=myserver.example.com, OU=Oracle VM Manager, O=Oracle Corporation,
L=Redwood City, ST=California, C=US". Use these values? [yes]
Alternate hostnames (separated by commas): [myserver.example.com,myserver]
You may either specify passwords or use random passwords.
If you choose to use a random password, only WebLogic, the Oracle VM Manager,
and this application will have access to the information stored in this
keystore.
Use random passwords? [yes]
Generating SSL key and certificate and persisting them to the keystore...
Updating keystore information in WebLogic
Oracle MiddleWare Home (MW_HOME): [/u01/app/oracle/Middleware]
WebLogic domain directory: [/u01/app/oracle/ovm-manager-3/domains/ovm_domain]
Oracle WebLogic Server name: [AdminServer]
WebLogic username: [weblogic]
WebLogic password: [********]
WLST session logged at: /tmp/wlst-session178461015146984067.log
Note that the command prompts you to provide the values for various steps through the procedure as
the new SSL certificate is generated. Notably, you must enter a valid fully qualified domain name for the
server. This value is used for the hostname in the SSL certificate and must match the hostname that is
used to access the Oracle VM Manager web-based user interface.
Changing the SSL Key
If you have already obtained an SSL certificate that has been signed by a third-party CA, you may wish to
use this instead of the default SSL certificate used for Oracle VM Manager. To do this, you must first create
your own Java keystore and import your certificate into this. This is achieved using the keytool command
provided with the JDK. To create a new keystore:
# keytool -genkey -alias mydomain -keyalg RSA -keystore /home/oracle/keystore.jks -keysize 2048
To import a PEM format certificate file into the new keystore:
# keytool -import -trustcacerts -alias mydomain -file mydomain.crt -keystore \
/home/oracle/keystore.jks
Once you have an existing keystore containing your SSL certificate, use the setsslkey command in the
ovmkeytool.sh command to use this instead of the default keystore:
# ./ovmkeytool.sh setsslkey
Path for SSL keystore: [/u01/app/oracle/ovm-manager-3/domains/ovm_domain/security/ovmssl.jks]
/home/oracle/keystore.jks
Keystore password:
Alias of key to use as SSL key: mydomain
Key password:
Updating keystore information in WebLogic
Oracle MiddleWare Home (MW_HOME): [/u01/app/oracle/Middleware]
WebLogic domain directory: [/u01/app/oracle/ovm-manager-3/domains/ovm_domain]
Oracle WebLogic Server name: [AdminServer]
WebLogic username: [weblogic]
WebLogic password: [********]
WLST session logged at: /tmp/wlst-session5820685079094897641.log
Changing the Keystore Password
In some scenarios, you may also want to configure Oracle WebLogic Server's SSL truststore to provide
additional trusted CAs. To do this you may use the changepass command to change the truststore
password, since the default password for the keystore is randomized and it would not be possible to
31
Configuring Oracle VM Manager UI Session Timeout
modify the keystore without the correct password. Once you have reset the password, you can modify
the keystore using the Java keytool, as required. It is imperative that the existing internal Oracle VM
Manager CA certificate is not removed from the keystore.
An example of setting the keystore password and then accessing trust information using the Java keytool
command is shown below:
# ./ovmkeytool.sh changepass
You may either specify passwords or use random passwords.
If you choose to use a random password, only WebLogic, the Oracle VM Manager,
and this application will have access to the information stored in this
keystore.
Use random passwords? [yes] no
Change CA Keystore and Key passwords? [yes] no
Change SSL Keystore and Key passwords? [yes] no
Change SSL Trustore password? [yes]
SSL Trust Keystore password:
Verify SSL Trust Keystore password:
Updating trust-store information in WebLogic
Oracle MiddleWare Home (MW_HOME): [/u01/app/oracle/Middleware]
WebLogic domain directory: [/u01/app/oracle/ovm-manager-3/domains/ovm_domain]
Oracle WebLogic Server name: [WLS1] AdminServer
WebLogic username: [weblogic]
WebLogic password: [********]
WLST session logged at: /tmp/wlst-session6297528751781822860.log
# keytool -list -keystore /u01/app/oracle/ovm-manager-3/domains/ovm_domain/security/ovmtrust.jks
Enter keystore password:
Keystore type: JKS
Keystore provider: SUN
Your keystore contains 1 entry
ovmmgr_ca_key_entry, Nov 7, 2013, trustedCertEntry,
Certificate fingerprint (MD5): 65:31:9C:17:35:59:6C:A7:A3:93:C8:93:F0:A7:81:6A
1.2.4 Configuring Oracle VM Manager UI Session Timeout
You can change the amount of time that an Oracle VM Manager session can remain inactive before it is
invalidated. Oracle VM Manager runs on Oracle WebLogic Server , and to configure Oracle VM Manager
timeout settings you need to access the Oracle WebLogic Server console.
To configure Oracle VM Manager session timeout:
1. Access the Oracle WebLogic Server console by entering:
https://hostname:7002/console
Log in with the user weblogic and the password you set during the Oracle VM Manager installation.
2. Click Deployments in the left pane of the Administration Console.
3. Click Next to change the page until ovm_console is listed in the Deployments table.
4. Click the "+" next to ovm_console to expand the view for the ovm_console deployment.
5. Click ovm/console in the Modules list. The settings for ovm_console is displayed.
6. Click on the Configuration tab.
32
MySQL Configuration
7. Click Lock and Edit in the Change Center pane to modify the settings.
8. Click the Configuration tab and then click the General subtab. Edit the Session Timeout (in seconds)
field in the table. The default setting is half an hour (1800 seconds). Click Save.
If you receive a permissions related error, you may need to change the permissions or ownership on
the file located at /u01/app/oracle/ovm-manager-3/weblogic/deploy/ovm_console/plan/
plan.xml. You can do this by running the following command:
chown oracle:dba /u01/app/oracle/ovm-manager-3/weblogic/deploy/ovm_console/plan/plan.xml
You will need to resave your changes in order for them to take effect.
9. Go back to the Deployments page by clicking Deployments in the left pane. In the Deployments table,
select the ovm_console check box. Click Update to redeploy the application.
10. Change the source and deployment plan paths as desired. Click Finish.
11. To activate the changes, click Activate Changes in the Change Center of the Administration Console.
Important
Due to the nature of some pages served within Oracle VM Manager, the client
browser auto-refreshes regularly to poll for changes. This is particularly apparent
on the Health page. Since the client is constantly refreshing, UI timeout may not
behave as expected. Therefore, a configuration parameter for ADF has been set to
timeout automatic polling after a default period of 20 minutes where there has been
no mouse or keyboard interaction within Oracle VM Manager. This means that for
these pages, the UI timeout value only becomes effective after the polling timeout
has been effected.
Changes to the polling timeout are not directly configurable. If you require this
facility to be modified contact Oracle Support.
For more information on updating a Web application, see the Oracle WebLogic Server documentation:
http://docs.oracle.com/cd/E23549_01/apirefs.1111/e13952/taskhelp/web_applications/
UpdateWebApplication.html
1.3 MySQL Configuration
The Oracle VM Manager installer performs an installation of the MySQL database. Database files are
located at /u01/app/oracle/mysql/data. A standard init script is created at: /etc/init.d/
ovmm_mysql. This script can be used to start, stop, restart and obtain the status of the MySQL server, for
example:
# /etc/init.d/ovmm_mysql restart
Configuration for the Oracle VM Manager MySQL instance is contained in /u01/app/oracle/mysql/
data/my.cnf.
Warning
Editing this configuration file may break your Oracle VM Manager installation. Do
not edit it without instruction from an Oracle Support representative.
MySQL events are logged in a log file located at /u01/app/oracle/mysql/data/mysqld.err.
33
ISO Provisioning for PVM Guest Installations
1.4 ISO Provisioning for PVM Guest Installations
When you create a PVM guest from an ISO file, you cannot use an ISO file from a repository to install the
operating system. Oracle VM requires that the ISO file is mounted so that its internal file system contents
are available during the installation of the operating system for a PVM guest. The mounted ISO file can
be made available via an NFS, HTTP or FTP server. The following examples show how to create and use
mounted ISO files on an NFS share, and on an HTTP server.
Example 1.12 Creating an installation tree on an NFS share
This example creates an installation tree for paravirtualized guest by mounting an ISO file. The installation
tree is made available via an NFS share. On the NFS server, enter
# mkdir -p /isos/EL5u6-x86_64
# mount -o ro,loop /path/Enterprise-R5-U6-Server-x86_64-dvd.iso /isos/EL5u6-x86_64
# exportfs *:/isos/EL5u6-x86_64/
When you create the virtual machine using the Oracle VM Manager Web Interface, enter the installation
location in the Network Boot Path field in the Create Virtual Machine wizard as:
nfs:example.com:/isos/EL5u6-x86_64
Example 1.13 Creating an installation tree on an HTTP server
This example creates an installation tree from an ISO file that can be accessed via HTTP. On the HTTP
server, enter
# cd /var/www/html
# mkdir EL5u6-x86_64
# mount -o ro,loop /path/Enterprise-R5-U6-Server-x86_64-dvd.iso EL5u6-x86_64
When you create the virtual machine using the Oracle VM Manager Web Interface, enter the installation
location in the Network Boot Path field in the Create Virtual Machine wizard as:
http://example.com/Enterprise-R5-U6-Server-x86_64-dvd.iso/
Tip
If you have multiple ISO files, you can mount each ISO file and copy the contents
into a single directory. All the ISO files are then available from the same location.
34
Chapter 2 Oracle VM Utilities
The Oracle VM Utilities are a collection of command line scripts that allow you to perform a set of basic
management tasks on Oracle VM Servers, storage repositories and virtual machines in an Oracle VM
environment.
While many of the command line tools provided by Oracle VM Utilities are useful, as of Oracle VM
Release 3.2 many of the actions they allow you to perform can be achieved using the Oracle VM Manager
Command Line Interface, which provides a wider range of control over objects within Oracle VM Manager.
The Oracle VM Manager Command Line Interface provides better information about objects and affords
more flexibility when dealing with particular object types. See the Oracle VM Manager Command Line
Interface User's Guide for more information.
The Oracle VM Utilities described in this chapter are at release 2.0. The Oracle VM Utilities Release 2.0
are only able to be used with Oracle VM Release 3.3 or higher. If you attempt to execute any of the scripts
on an earlier version, a warning message is displayed to inform you that the script is not supported. If you
attempt to use an earlier version of the Oracle VM Utilities on Oracle VM Release 3.3 or higher, they will
not work due to the changes in the Oracle VM API.
Only the ovm_vmhostd and vm_dump_metrics scripts are supported by Oracle Support. All other
command line scripts in the Oracle VM Utilities are provided as-is, for your convenience. They are not
officially or formally supported by Oracle. However, the use of these scripts is officially supported when
performing the steps to set up hard partitioning as described in Setting Hard Partitioning for Virtual
Machine CPUs in the Oracle VM Concepts Guide, and in the white paper Hard Partitioning With Oracle VM
Server for x86 located at:
http://www.oracle.com/technetwork/server-storage/vm/ovm-hardpart-168217.pdf
2.1 Introduction to the Oracle VM Utilities
The Oracle VM Utilities are command line scripts used to execute certain basic operations on your Oracle
VM environment. These utilities make a connection to the Oracle VM Manager host, using the server
host name and an Oracle VM Manager administrative user name and password. After authentication,
commands can be submitted to Oracle VM Manager from the command line.
The Oracle VM Utilities are:
• ovm_vmcontrol: Command line script to perform administrative operations on a virtual machine.
• ovm_vmdisks: Command line script to list virtual and raw physical disks attached to a virtual machine
in order to facilitate a back up.
• ovm_vmmessage: Command line script to send and retrieve messages in the form of key/value pairs to
and from a running virtual machine that has Oracle VM Guest Additions installed.
• ovm_vmhostd: Command line script to facilitate the communication of host-based statistics about the
Oracle VM Server hosting a virtual machine. Enables SAP applications to be fully supported and certified
to run on an Oracle Linux guest.
• vm_dump_metrics: Command line script that can output the Oracle VM Server host information in
XML format. This XML can be consumed by a SAP application running within the virtual machine.
See Section 2.4, “Using the Oracle VM Utilities” for information on the command line parameters and
options, and examples for these scripts.
35
Oracle VM Utilities Prerequisites
2.2 Oracle VM Utilities Prerequisites
Before you install and use the Oracle VM Utilities, you must first enable secure TCP (TCPS) on the Oracle
VM Manager host. To do this, you must first create an SSL certificate keystore, then enable TCPS using
the keystore.
To create a certificate keystore:
1. Enter the following commands on the Oracle VM Manager host to create the keystore:
# cd /u01/app/oracle/ovm-manager-3/bin
# ./secureOvmmTcpGenKeyStore.sh
You are prompted to enter the following information:
Generate OVMM TCP over SSL key store by following steps:
Enter keystore password: password
Re-enter new password: password
What is your first and last name?
[Unknown]: name
What is the name of your organizational unit?
[Unknown]: unit
What is the name of your organization?
[Unknown]: organization
What is the name of your City or Locality?
[Unknown]: City
What is the name of your State or Province?
[Unknown]: State
What is the two-letter country code for this unit?
[Unknown]: country_code
Is CN=name, OU=unit, O=organization, L=City, ST=State, C=country_code correct?
[no]: yes
Enter key password for <ovmm>
(RETURN if same as keystore password): password
Re-enter new password: password
2. Use the keystore to enable the TCPS service using the secureOvmmTcp.sh script, which is in the
same directory as the keystore script above. On the Oracle VM Manager host, enter:
# ./secureOvmmTcp.sh
You are prompted to enter the following information:
Enabling OVMM TCP over SSL service
Please enter the OVM manager user name: username
Please enter the OVM manager user password: password
Please enter the password for TCPS key store : password
The keystore password created in the previous script
The job of enabling OVMM TCPS service is committed, please restart OVMM to take effect.
3. Restart the local Oracle VM Manager instance:
# /sbin/service ovmm restart
2.3 Installing the Oracle VM Utilities
The Oracle VM Utilities are available for download as a .zip file from the Oracle VM downloads page:
http://www.oracle.com/technetwork/server-storage/vm/downloads/index.html
36
Installing the Oracle VM Utilities on Oracle VM Manager
The Oracle VM Utilities can be installed on directly on the system running Oracle VM Manager or,
alternately, on any server or desktop system running Oracle Linux. The sections below describe how and
where to install these utilities. An overview of the installation directory structure and files is also provided.
2.3.1 Installing the Oracle VM Utilities on Oracle VM Manager
When installing Oracle VM Utilities on the same server as Oracle VM Manager, it is recommended that
you put them in the software directory of the Oracle VM Manager application. The Oracle VM Utilities are
bundled in a .zip archive. To install, simply download the archive and extract in the appropriate directory.
In the example below, we have already downloaded the .zip file and show how to copy the .zip file into
the installation directory, where it is unzipped.
# cp ovm_utils_archive.zip /u01/app/oracle/ovm-manager-3/
# cd /u01/app/oracle/ovm-manager-3
# unzip ovm_utils_archive.zip
At this point, the command line scripts are ready to use. Note that these scripts execute a Java program
and use the default Java VM on the host computer. On the Oracle VM Manager host, the appropriate Java
VM is installed as part of the Oracle VM Manager application in /u01/app/oracle/java. No further
configuration is required.
2.3.2 Installing the Oracle VM Utilities on Oracle Linux
When installing Oracle VM Utilities on an Oracle Linux server or desktop computer, you may put them
in the installation directory of your choice, for example: /usr/local/bin. The Oracle VM Utilities are
bundled in a .zip archive. To install, simply download the archive, copy and extract in the appropriate
directory.
# cp ovm_utils_archive.zip /usr/local/bin/oracle/
# cd /usr/local/bin/oracle
# unzip ovm_utils_archive.zip
Caution
Oracle VM Utilities do not work with the Open JDK or GNU Compiler for Java
(GCJ). You must install a standard Java VM, version 1.6 or above, and make sure
it is defined as the default Java VM by the JAVA_HOME environment variable or
included in the PATH variable on your system.
The command line scripts in Oracle VM Utilities execute a Java program and use the default Java VM on
the host computer. To verify the exact path to the Java executable and the active Java version, use the
following commands:
# which java
/usr/java
# java -version
java version "1.6.0_26"
Java(TM) SE Runtime Environment (build 1.6.0_26-b03)
Java(TM) Server VM (build 20.1-b02, mixed mode)
If a standard Java VM version 1.6 or above is not available on your system, download and install the
version suited for your platform from:
http://java.com/en/download/
To make sure the correct Java VM version is used, set the JAVA_HOME and PATH variables as follows:
1. Edit the Oracle Linux shell profile.
37
Oracle VM Utilities Scripts
# vi /etc/profile
or
# vi /etc/bashrc
2. Add the lines below to the profile. If your Java path does not match /usr/java, replace with the actual
path on your system.
JAVA_HOME=/usr/java
export JAVA_HOME
PATH=$PATH:$JAVA_HOME/bin
export PATH
3. Save the file. Log out and log back in to activate your changes.
4. Verify the Java path and version again, to make sure that the correct Java VM is used.
# which java
/usr/java
# java -version
java version "1.6.0_26"
Java(TM) SE Runtime Environment (build 1.6.0_26-b03)
Java(TM) Server VM (build 20.1-b02, mixed mode)
The command line scripts are now ready to use.
2.3.3 Oracle VM Utilities Scripts
When you unzip the Oracle VM Utilities archive, a subdirectory named ovm_utils is created, containing
these utility scripts:
• ovm_vmcontrol
• ovm_vmdisks
• ovm_vmhostd
• ovm_vmmessage
• ovm_reporestore
• vm-dump-metrics
To get help on each command, execute the command without any options, for example:
# /u01/app/oracle/ovm-manager-3/ovm_utils/ovm_vmcontrol
For each of these utility scripts, a man page is also included. These help files can be found in /u01/app/
oracle/ovm-manager-3/ovm_utils/man/man8/.
# ls -1 /u01/app/oracle/ovm-manager-3/ovm_utils/man/man8/
ovm_reporestore.8
ovm_vmcontrol.8
ovm_vmdisks.8
ovm_vmhostd.8
ovm_vmmessage.8
Use the man command to display the help, for example:
# man man/man8/ovm_vmcontrol.8
38
Using the Oracle VM Utilities
2.4 Using the Oracle VM Utilities
This section gives you more detail on using the Oracle VM Utilities, including command line examples.
The Oracle VM Utilities make a connection to the Oracle VM Manager host server, using the server host
name and an Oracle VM Manager administrative user name and password. Oracle VM Manager listens on
port 54322 (secure TCP).
2.4.1 Oracle VM Virtual Machine Control (ovm_vmcontrol)
The ovm_vmcontrol utility operates on a virtual machine. It passes basic virtual machine control
commands from the command line to Oracle VM Manager. This utility allows you to lock a virtual machine,
send and receive messages from a virtual machine, or set CPU pinning (hard partitioning).
Syntax
ovm_vmcontrol { -u username } { -p password | -E } { -h hostname } { -c command } [ -v
vm_name ] [ -s cpu_thread ... ] [ -T tag ... ] { -C { preserve | restart | coredump-restart |
coredump-destroy | none } }
Where command is:
{ lock | vcpuset | vcpuget | settags | gettags | setoncrash | getoncrash | setsuperpage |
unsetsuperpage }
Options
The following table shows the available options for this command.
Option
Description
-u username
The username of an Oracle VM Manager admin user. This
option is required.
{ -p password | -E }
The -p option is the password corresponding with the admin
username. Alternatively, you can use the -E option to set the
password in an environment variable named OVMUTIL_PASS,
and securely submit the password. To set this variable for a
single session on Oracle Linux, use:
# export OVMUTIL_PASS=password
This option is required.
-h hostname
The hostname of the server running Oracle VM Manager. This
option is required.
-c { lock | vcpuset | vcpuget |
settags | gettags | setoncrash
| getoncrash | setsuperpage |
unsetsuperpage }
The command to execute. This option is required.
The lock command allows you to lock a virtual machine for
a certain period of time. When a virtual machine is locked by
the utility, it is not possible for other tools or users to perform
operations on that specific virtual machine. This is particularly
useful if you are an administrator and need to make a virtual
machine back up while the virtual machine is stopped: you
want to prevent anyone starting the virtual machine before the
back up finishes.
39
Oracle VM Virtual Machine Control (ovm_vmcontrol)
Option
Description
The lock command sleeps until you press Ctrl+C to release
the lock. If the ovm_control utility is killed, the virtual
machine is unlocked as well.
The vcpuset command hard-binds or pins virtual CPUs to
threads. For example, -c vcpuset -s 0,1,2 physically
binds vcpu0 to thread0, vcpu1 to thread1, vcpu2 to thread2.
Use the vcpuget command to retrieve information about
pinned virtual CPUs for the selected virtual machine. CPU
binding immediately takes effect, and will continue on
subsequent start ups of the virtual machine.
The settags and gettags commands are used to manage
tag metadata for a given virtual machine.
-v vm_name
The virtual machine name.
-s cpu_thread ...
A comma separated list of physical thread numbers with which
to bind virtual CPUs.
The list of thread numbers can be a range, or a specific list
of physical CPU threads. For example, -s 0-3 means any
virtual CPU can be running anywhere on the physical CPU
(threads) 0,1,2, or 3; and -s 0,3 means the specific physical
CPU (threads) 0 and 3.
This command must be used in combination with:
-c vcpuset
-T tag ...
A comma separated list of strings to be associated with a
virtual machine as metadata
This command must be used in combination with:
-c settags
-C { preserve | restart |
coredump-restart | coredumpdestroy | none }
Change a virtual machine's on_crash setting.
This command must be used in combination with:
-c setoncrash
Examples
Example 2.1 Locking a virtual machine
# ./ovm_vmcontrol -u admin -E -h localhost -v MyVM01 -c lock
Oracle VM VM Control utility version.
Connected.
Command : lock
Locking VM 'MyVM01'
Press Ctrl-C to unlock.
Example 2.2 Checking CPU pinning for a virtual machine
This example shows the virtual CPUs of the virtual machine are bound to threads 0 and 1.
40
Oracle VM Retrieve Disk (ovm_vmdisks)
# ./ovm_vmcontrol -u admin -E -h localhost -v MyVM01 -c vcpuget
Oracle VM VM Control utility version.
Connecting with a secure connection.
Connected.
Command : vcpuget
Current pinning of virtual CPUs to physical threads : 0-1
Example 2.3 Setting CPU pinning for a virtual machine
This example binds the virtual CPUs of the virtual machine to thread 0.
# ./ovm_vmcontrol -u admin -E -h localhost -v MyVM01 -c vcpuset -s 0
Oracle VM VM Control utility version.
Connecting with a secure connection.
Connected.
Command : vcpuset
Pinning virtual CPUs
Pinning of virtual CPUs to physical threads
'0' 'vm1' completed.
2.4.2 Oracle VM Retrieve Disk (ovm_vmdisks)
The ovm_vmdisks utility is designed to help the administrator make back ups of virtual machines,
particularly when the virtual machine's virtual disks are files in a storage repository on a remote NFS
storage server. The ovm_vmdisks utility takes a virtual machine name and lists out every virtual disk file
for that virtual machine, as well as the virtual machine configuration (vm.cfg) file. This allows you to take
the file listings from the output of the utility and back them up to a server or tape. If the virtual disks are
actual physical devices directly attached to the virtual machine, the utility lists the device mapper entry on
the Oracle VM Server to which the virtual machine is assigned. In case the virtual disks are files on an NFS
server, the utility lists the NFS server name, mount point, and file name/location.
Syntax
ovm_vmdisks { -u username } { -p password | -E } { -h hostname } [ -v vm_name ]
Options
The following table shows the available options for this command.
Option
Description
-u username
The username of an Oracle VM Manager admin user. This
option is required.
{ -p password | -E }
The -p option is the password corresponding with the admin
username. Alternatively, you can use the -E option to set the
password in an environment variable named OVMUTIL_PASS,
and securely submit the password. To set this variable for a
single session on Oracle Linux, use:
# export OVMUTIL_PASS=password
This option is required.
-h hostname
The hostname of the server running Oracle VM Manager. This
option is required.
-v vm_name
The virtual machine name.
41
Oracle VM Virtual Machine Messaging (ovm_vmmessage)
Examples
Example 2.4 Listing virtual disks for a virtual machine
This example shows a virtual machine with three disks, each attached in a different way.
# ./ovm_vmdisks -u admin -E -h localhost -v MyVM01
Oracle VM Retrieve Disk Control utility version.
Connected.
Virtual Machine : 'MyVM01' status : 'Running'.
Assigned Server : OVS_01
Virtual Disk : 'MyVM01_bootdisk' size : 20GB
file=/OVS/Repositories/0004fb0000030000b0272c74e714ab12/VirtualDisks/ \
0004fb00001200006e548a28cb886f42.img
mountpoint=/dev/mapper/3300000006160a212/VirtualDisks/ \
0004fb00001200006e548a28cb886f42.img
Virtual Disk : 'MyVM01_datadisk' size : 250GB
file=/OVS/Repositories/0004fb00000300005b06362f2d866a98/VirtualDisks/ \
0004fb0000120000f217eb8c0fa70eef.img
mountpoint=nfs01:/mnt/vol2/repo03/VirtualDisks/ \
0004fb0000120000f217eb8c0fa70eef.img
Physical Disk : 'pd003'
device=/dev/mapper/3300000009b7b2cc4
Config File :
file=/OVS/Repositories/0004fb00000300005b06362f2d866a98/ \
VirtualMachines/0004fb00000600008757e38248a544e6/vm.cfg
mountpoint=nfs01:/mnt/vol2/repo03/VirtualMachines/ \
0004fb00000600008757e38248a544e6/vm.cfg
As you can see in the console output, the virtual machine MyVM01 is currently running. Backing up a
running virtual machine would be inconsistent, therefore it is highly recommended that you shut down the
virtual machine prior to making any back ups. The console output shows that the virtual machine contains
three disks, two virtual and one physical, and also provides the location of the virtual machine configuration
file:
• MyVM01_bootdisk: A virtual disk on an OCFS2 storage repository. The OCFS2 repository is on the
device /dev/mapper/3300000006160a212.
• MyVM01_datadisk: A virtual disk on an NFS storage server named nfs01.
The full path to the virtual disk file on the NFS server is /mnt/vol2/repo03/
VirtualDisks/0004fb0000120000f217eb8c0fa70eef.img.
• pd003: A raw disk device at /dev/mapper/3300000009b7b2cc4.
• vm.cfg: The virtual machine configuration file on NFS server nfs01. The full path to the configuration
file is nfs01:/mnt/vol2/repo03/VirtualMachines/0004fb00000600008757e38248a544e6/
vm.cfg.
2.4.3 Oracle VM Virtual Machine Messaging (ovm_vmmessage)
The ovm_vmmessage utility lets you send a message to a running virtual machine, or to query the value of
a message sent from within a virtual machine to Oracle VM Manager using the Oracle VM API messaging
interface. These values are basic key/value pairs such as foo=bar.
New Oracle VM templates released by Oracle contain a configuration utility called ovmd. This utility is used
to perform first-boot installation configuration either locally from the virtual machine console or remotely
through the messaging interface provided by this utility. The ovmd utility also allows the owner of the virtual
machine to send messages back to Oracle VM Manager. For more information about ovmd, and the Oracle
VM Guest Additions in general, see Chapter 3, Oracle VM Guest Additions.
42
Oracle VM Virtual Machine Messaging (ovm_vmmessage)
To send messages you combine -k key and -V value. To retrieve messages, use -q key.
Syntax
ovm_vmmessage { -u username } { -p password | -E } { -h hostname } [ -v vm_name ] [ -k key ]
[ -V value ] [ -q key ]
Options
The following table shows the available options for this command.
Option
Description
-u username
The username of an Oracle VM Manager admin user. This
option is required.
{ -p password | -E }
The -p option is the password corresponding with the admin
username. Alternatively, you can use the -E option to set the
password in an environment variable named OVMUTIL_PASS,
and securely submit the password. To set this variable for a
single session on Oracle Linux, use:
# export OVMUTIL_PASS=password
This option is required.
-h hostname
The hostname of the server running Oracle VM Manager. This
option is required.
-v vm_name
The virtual machine name. The virtual machine name is the
name you assign during the creation of the virtual machine.
-k key
The key to send.
-V value
The value to send with the key.
This command must be used in combination with:
-k key
-q key
The key to query.
Examples
Example 2.5 Sending a message to a virtual machine
# ./ovm_vmmessage -u admin -p password -h localhost -v MyVM02 -k foo -V bar
Oracle VM VM Message utility version.
Connected.
VM : 'MyVM02' has status : Running.
Sending message.
Message sent successfully.
Example 2.6 Retrieving a message from a virtual machine
# ./ovm_vmmessage -u admin -p password -h localhost -v MyVM02 -q foo
Oracle VM VM Message utility version.
Connected.
VM : 'MyVM02' has status : Running.
Querying for key 'foo'.
Query successful.
Query for Key : 'foo' returned value 'bar'.
Key set 27 minutes ago.
43
Oracle VM Repository Restore (ovm_reporestore)
2.4.4 Oracle VM Repository Restore (ovm_reporestore)
The ovm_reporestore utility allows the administrator to easily back up metadata about assemblies,
ISO files and virtual disks that are stored in a given storage repository. The resulting XML file can then be
used to restore this data to an Oracle VM Manager instance in the case that the repository imported into
the Oracle VM Manager afresh. Typical use cases would be for back up and restore or disaster recovery,
or alternately where the storage for the repository is moved to an alternate location or to a clone of the
environment. The utility works in two modes:
• A back up mode, where the metadata is dumped to an XML file. Ideally, this should be run as a regular
cronjob, so that the data is consistently backed up.
• A restore mode, where the metadata stored in the XML file is imported into an Oracle VM Manager
instance to update the information stored for assemblies, ISO files and virtual disks with matching
UUIDs.
Syntax
ovm_reporestore { -u username } { -p password | -E } { -h hostname } { -r repository | -a }
[ -f filename.xml ] [ -F OVMModelDump.xml ] [ -y ] [ -D ] [ -R ] [ -N ]
Options
The following table shows the available options for this command.
Option
Description
-u username
The username of an Oracle VM Manager admin user. This
option is required.
{ -p password | -E }
The -p option is the password corresponding with the admin
username. Alternatively, you can use the -E option to set the
password in an environment variable named OVMUTIL_PASS,
and securely submit the password. To set this variable for a
single session on Oracle Linux, use:
# export OVMUTIL_PASS=password
This option is required.
-h hostname
The hostname of the server running Oracle VM Manager. This
option is required.
{ -r repository | -a }
The -r option is the name of the storage repository.
Alternatively, you can run the command against all repositories
using the -a option. This option is required.
-f filename.xml
The XML file to read or write to.
-F OVMModelDump.xml
Use an Oracle VM Manager model dump XML file as input
-y
Assume yes on restoring a filename and description without
prompting.
-D
Dump metadata to a file.
This command is intended to be used in combination with:
-f -r -a
-R
Restore metadata from file.
44
Oracle VM Repository Restore (ovm_reporestore)
Option
Description
This command is intended to be used in combination with:
-f -r -a -y
-N
Fix metadata after a refresh without an XML file.
This command is intended to be used in combination with:
-R -r -a
Examples
Example 2.7 Backing up metadata for all repositories to an XML file
This example shows how to dump all of the metadata stored across all repositories to an XML file.
# ./ovm_reporestore -u admin -E -h localhost -D -f /tmp/dump2.xml -a
Oracle VM Repository Repair utility version.
Connected.
Export mode.
Processing repository 'iscsirepo'
->Processing assemblies.
->Processing Virtual ISOs.
->Processing Virtual Disks.
Processing repository 'MyRepository'
->Processing assemblies.
->Processing Virtual ISOs.
->Processing Virtual Disks.
Processing repository 'nfs1'
->Processing assemblies.
->Processing Virtual ISOs.
->Processing Virtual Disks.
Wrote to '/tmp/dump2.xml'
Finished...
Example 2.8 Restoring metadata from data in an XML file
This example shows how to restore the names and descriptions for assemblies, ISOs and virtual disks that
have the same UUIDs as those stored in the provided XML file across all repositories. As it is used without
the -y option, the user is prompted with the option to update the name and description of each matching
item in a repository.
# ./ovm_reporestore -u admin -E -h localhost -R -f /tmp/dump2.xml -a
Oracle VM Repository Repair utility version.
Connected.
Repair mode.
Reading from '/tmp/dump2.xml'
Processing repository 'iscsirepo'
->Processing assemblies.
->Processing Virtual ISOs.
->Processing Virtual Disks.
Processing repository 'MyRepository'
->Processing assemblies.
->Processing Virtual ISOs.
->Processing Virtual Disks.
Processing repository 'nfs1'
->Processing assemblies.
->Processing Virtual ISOs.
->Processing Virtual Disks.
The following element has no name: '0004fb0000120000ea4a4a161bdf8de7.img'
Element found. Name : '0004fb0000120000ea4a4a161bdf8de7.img' Description :
Are you sure you want to modify this entry? [y/N] n
45
''
Oracle VM Hostd For Metrics Messaging (ovm_vmhostd and vm-dump-metrics)
Skipping element.
Finished...
2.4.5 Oracle VM Hostd For Metrics Messaging (ovm_vmhostd and vm-dumpmetrics)
The Oracle VM Utilities include tools that ensure that SAP applications are fully supported and certified
to run on Oracle Linux guests running within a Oracle VM environment. These tools facilitate the
communication of host-based statistics about the Oracle VM Server hosting a particular virtual machine,
using the virtual machine messaging facility provided by Oracle VM Manager, to the virtual machine itself.
For this functionality to succeed, the guest virtual machine should be running Oracle Linux with the Oracle
VM Guest Additions installed. See Chapter 3, Oracle VM Guest Additions for more information.
These are the only tools within the Oracle VM Utilities that are officially supported by Oracle.
The ovm_vmhostd utility runs with daemon-like behavior. It initially checks that the virtual machine is
running, and then sends the Oracle VM Server metrics as a message. It sleeps for 60 seconds and then
sends a message updating the values for the original message. This behavior continues until the process
is killed.
Syntax
ovm_vmhostd { -u username } { -p password | -E } { -h hostname } [ -v vm_name ]
Options
The following table shows the available options for this command.
Option
Description
-u username
The username of an Oracle VM Manager admin user. This
option is required.
{ -p password | -E }
The -p option is the password corresponding with the admin
username. Alternatively, you can use the -E option to set the
password in an environment variable named OVMUTIL_PASS,
and securely submit the password. To set this variable for a
single session on Oracle Linux, use:
# export OVMUTIL_PASS=password
This option is required.
-h hostname
The hostname of the server running Oracle VM Manager. This
option is required.
-v vm_name
The virtual machine name. The virtual machine name is the
name you assign during the creation of the virtual machine.
Examples
Example 2.9 Sending Oracle VM Server details to a virtual machine
# ./ovm_vmhostd -u admin -E -h localhost -v myvm
Oracle VM Hostd version.
Connected.
VM : 'pvm1' has status : Running.
VM: 'pvm1' is online, sending metrics.
46
Oracle VM Hostd For Metrics Messaging (ovm_vmhostd and vm-dump-metrics)
.Sleeping 60 seconds.
.Sleeping 60 seconds.
.Sleeping 60 seconds.
2.4.5.1 Retrieve Host Statistics Within a Virtual Machine (vm-dump-metrics)
The vm-dump-metrics script can be copied to the guest virtual machine where the message from the
ovm_vmhostd script is received. This script is a simple shell script that can output the Oracle VM Server
host information in XML format. This XML can be consumed by a SAP application running within the virtual
machine.
By default, the vm-dump-metrics script outputs data to STDOUT, but can be changed to output data to
file by editing the OUTFILE variable at the beginning of the script.
The vm-dump-metrics script queries ovmd to obtain the message with the key vmhost. If no message
is obtained, it exits with status 1. If a message is found, the script parses this message to populate the
resulting XML. Typical XML output generated by the vm-dump-metrics script follows:
<metrics>
<metric type='real64' context='host'>
<name>TotalCPUTime</name>
<value>2694.3596</value>
</metric>
<metric type='uint64' context='host'>
<name>PagedOutMemory</name>
<value>0</value>
</metric>
<metric type='uint64' context='host'>
<name>PagedInMemory</name>
<value>0</value>
</metric>
<metric type='uint64' context='host'>
<name>UsedVirtualMemory</name>
<value>6747</value>
</metric>
<metric type='uint64' context='host'>
<name>FreeVirtualMemory</name>
<value>9817</value>
</metric>
<metric type='uint64' context='host'>
<name>FreePhysicalMemory</name>
<value>9817</value>
</metric>
<metric type='uint64' context='host'>
<name>MemoryAllocatedToVirtualServers</name>
<value>6747</value>
</metric>
<metric type='uint32' context='host'>
<name>NumberOfPhysicalCPUs</name>
<value>4</value>
</metric>
<metric type='string' context='host'>
<name>HostSystemInfo</name>
<value>ovm3</value>
</metric>
<metric type='string' context='host'>
<name>VirtProductInfo</name>
<value>Oracle VM 3</value>
</metric>
<metric type='string' context='host'>
<name>VirtualizationVendor</name>
<value>Oracle Corporation</value>
</metric>
<metric type='uint64' context='host'>
<name>Time</name>
47
Oracle VM Hostd For Metrics Messaging (ovm_vmhostd and vm-dump-metrics)
<value>1360606566774</value>
</metric>
<metric type='string' context='host'>
<name>HostName</name>
<value>ovm3</value>
</metric>
<metric type='uint64' context='vm' id='0' uuid='0004fb00-0006-0000-d72b-647e20a85939'>
<name>PhysicalMemoryAllocatedToVirtualSystem</name>
<value>1024</value>
</metric>
<metric type='uint64' context='vm' id='0' uuid='0004fb00-0006-0000-d72b-647e20a85939'>
<name>ResourceMemoryLimit</name>
<value>1024</value>
</metric>
<metric type='uint32' context='vm' id='0' uuid='0004fb00-0006-0000-d72b-647e20a85939'>
<name>ResourceProcessorLimit</name>
<value>1</value>
</metric>
<metric type='real64' context='vm' id='0' uuid='0004fb00-0006-0000-d72b-647e20a85939'>
<name>TotalCPUTime</name>
<value>2694.3596</value>
</metric>
</metrics>
If you do not want to use the vm-dump-metrics script on your virtual machine, you can query ovmd
directly and parse the output yourself:
# ovmd -g vmhost
com.sap.host.VirtualizationVendor=Oracle Corporation;com.sap.host.VirtProductInfo=Oracle VM 3;
com.sap.host.PagedInMemory=0;com.sap.host.PagedOutMemory=0;com.sap.host.PageRates=0;
com.sap.vm.uuid=0004fb0000060000d72b647e20a85939;com.sap.host.HostName=ovm3;
com.sap.host.HostSystemInfo=ovm3;com.sap.host.NumberOfPhysicalCPUs=4;com.sap.host.NumCPUs=4;
com.sap.host.TotalPhyMem=16383;com.sap.host.UsedVirtualMemory=6747;
com.sap.host.MemoryAllocatedToVirtualServers=6747;com.sap.host.FreeVirtualMemory=9817;
com.sap.host.FreePhysicalMemory=9817;com.sap.host.TotalCPUTime=381175.97;
com.sap.host.Time=1360606887997;com.sap.vm.PhysicalMemoryAllocatedToVirtualSystem=1024;
com.sap.vm.ResourceMemoryLimit=1024;com.sap.vm.TotalCPUTime=2696.2214;
com.sap.vm.ResourceProcessorLimit=1;
48
Chapter 3 Oracle VM Guest Additions
The Oracle VM Guest Additions are a set of packages that can be installed on the guest operating system
of a virtual machine running in the Oracle VM environment. These packages provide the tools to allow bidirectional communication directly between the Oracle VM Manager and the operating system running
within the virtual machine. This is a powerful tool that provides administrators fine-grained control over
the configuration and behavior of components running within the virtual machine directly from Oracle VM
Manager.
This chapter gives you detail on the installation, configuration and use of the Oracle VM Guest Additions.
3.1 Introduction to the Oracle VM Guest Additions
The Oracle VM Utilities include a messaging tool, which allows sending of key-value pairs to a virtual
machine, or guest, and to retrieve messages from the guest. The ovm_vmmessage utility requires the
Oracle VM Guest Additions to be installed on the guest virtual machine. The current edition of Oracle VM
Guest Additions includes message channel and guest IP information.
The Oracle VM Guest Additions allows direct integration between guest software and the virtualization
layer, to assist in orchestration and automation of complex, multi-virtual machine deployments. Features of
the Oracle VM Guest Additions include:
• Improved information about virtual machines within Oracle VM Manager, such as reporting on IP
addressing.
• Ability to use the template configuration facility to automatically configure virtual machines as they are
first started.
• Ability to send messages directly to a virtual machine from Oracle VM Manager to trigger programmed
events.
• Ability to query a virtual machine to obtain information pertaining to previous messages.
• Ability to interact with the Oracle VM Utilities ovm_vmmessage command.
3.2 Installing the Oracle VM Guest Additions
If the virtual machine is derived from an Oracle VM template that does not have the Oracle VM Guest
Additions installed, you can install the Oracle VM Guest Additions by downloading them from the Oracle
Unbreakable Linux Network (ULN).
http://linux.oracle.com
Log into ULN, and select the appropriate Add ons channel for the guest operating system, for example:
• Enterprise Linux 5 Add ons (i386)
• Enterprise Linux 5 Add ons (x86_64)
• Oracle Linux 6 Add ons (i386)
• Oracle Linux 6 Add ons (x86_64)
In addition to the ULN downloads, the required packages are available from Oracle's public YUM
repository:
• http://public-yum.oracle.com/repo/EnterpriseLinux/EL5/addons/
49
Upgrading the Oracle VM Guest Additions
• http://public-yum.oracle.com/repo/OracleLinux/OL6/addons/
Download and install the Oracle Unbreakable Enterprise Kernel (UEK) and other guest addition utilities to
the guest virtual machine. The packages you need are:
• kmod-ovmapi-uek
• libovmapi
• libovmapi-devel
• ovmd
• python-simplejson
• xenstoreprovider
• ovm-template-config
• ovm-template-config-authentication
• ovm-template-config-datetime
• ovm-template-config-firewall
• ovm-template-config-network
• ovm-template-config-selinux
• ovm-template-config-ssh
• ovm-template-config-system
• ovm-template-config-user
To install these packages, make sure that your virtual machine has public Internet access and is connected
to the appropriate ULN channel or YUM repository. Then use the following command syntax in your Oracle
Linux guest, separating the package names by spaces:
# yum install libovmapi xenstoreprovider ovmd python-simplejson xenstoreprovider
Caution
When manually installing the downloaded packages, make sure that the kmodovmapi-uek version matches the UEK version of the virtual machine:
• UEK 2.36.32-100 requires kmod-ovmapi-uek-1.0.0-27.100
• UEK 2.36.32-200 requires kmod-ovmapi-uek-1.0.0-27.200
• UEK 2.36.32-300 requires kmod-ovmapi-uek-1.0.0-27.300
3.3 Upgrading the Oracle VM Guest Additions
If the virtual machine is derived from an Oracle VM template that does have the Oracle VM Guest
Additions installed, you may need to update the packages in order for the Oracle VM Guest Additions
to function correctly. Using the Oracle Unbreakable Linux Network (ULN) (http://linux.oracle.com) YUM
repository you can run the following command to update the packages:
50
Using the Oracle VM Guest Additions (ovmd)
# yum update ovmd libovmapi xenstoreprovider \
ovm-template-config \
ovm-template-config-authentication \
ovm-template-config-datetime \
ovm-template-config-firewall \
ovm-template-config-network \
ovm-template-config-selinux \
ovm-template-config-ssh \
ovm-template-config-system \
ovm-template-config-user
If you are using a kernel version lower than UEK 2.6.39-300, and you want to continue to use the current
kernel, you must also run the following command to update the ovmapi.ko module:
# yum update kmod-ovmapi-uek
Alternatively, you can update your kernel to the latest UEK version by running the following command:
# yum update kernel-uek
If you are using Oracle Linux 5, you need to enable ol5_UEK_latest within /etc/yum.repos.d/ULNBase.repo, before you attempt to update your kernel version. For example, the file should contain the
following lines:
[ol5_UEK_latest]
name=Latest Unbreakable Enterprise Kernel for Oracle Linux $releasever ($basearch)
baseurl=http://public-yum.oracle.com/repo/OracleLinux/OL5/UEK/latest/$basearch/
gpgkey=http://public-yum.oracle.com/RPM-GPG-KEY-oracle-el5
gpgcheck=1
enabled=1
3.4 Using the Oracle VM Guest Additions (ovmd)
The Oracle VM Guest Additions daemon, ovmd, facilitates a bi-directional messaging channel between
Oracle VM Manager and the guest. It allows first-boot installation configuration, and is capable of sending
and receiving messages consisting of key-value pairs.
It is possible to send messages via Oracle VM Manager to the Oracle VM Guest Additions daemon running
on any guest, using the ovm_vmmessage utility that can be installed on any Linux system with access
to Oracle VM Manager or on the Oracle VM Manager host itself. See Section 2.4.3, “Oracle VM Virtual
Machine Messaging (ovm_vmmessage)” for more information on using this tool.
In previous releases you could use the ovmd utility to send key/value messages to a virtual machine.
This feature is now included directly in Oracle VM Manager. Although this section mentions the options
available to send messages to a virtual machine using ovmd, you should instead use the Oracle VM
Manager Web Interface or Oracle VM Manager Command Line Interface to send key/value messages. The
virtual machine must have the Oracle VM Guest Additions daemon installed and running. See Send VM
Messages in the Oracle VM Manager User's Guide, or the Oracle VM Manager Command Line Interface
User's Guide for more information.
Used in conjunction with the ovm-template-config script, the ovmd utility can be used to remotely
configure system and application configuration parameters within a virtual machine as it boots. See
Section 3.6, “The Oracle VM Template Configuration Script and Modules” for more information on this
facility.
Oracle VM Manager makes use of ovmd in order to obtain IP addressing information from the guest to
include in the Oracle VM Manager Web Interface when displaying detailed virtual machine information. See
Section 3.5, “Displaying the Virtual Machine's IP Address”.
51
Syntax
You can run ovmd directly from the command line to perform actions outside of ovmd's function as a
daemon or system service. Running ovmd using the --help parameter provides you with a breakdown of
the options supported when run directly from the command line.
Syntax
ovmd [ { -p | --set-param= } param ] [ { -g | --get-param= } key ] [ { -r | --delete-param= } key ]
[ { -x | --delete-params } ] [ { -l | --list-params } ] [ { -e | --event= } event ] [ { -s | --script=
} script ] [ { -d | --debug= } { 0 | 1 | 2 } ] [ { -f | --pid-file= } filename ] [ { -t | --time-period=
} seconds ] [ { -v | --version } ] [ { -h | --help } ]
Options
The following table shows the available options for this command.
Option
Description
{ -p | --set-param= } param
Set a parameter in the format of key=value.
{ -g | --get-param= } key
Get the value of the parameter by key name.
{ -r | --delete-param= } key
Delete the parameter by key name.
{ -x | --delete-params }
Delete all parameters.
{ -l | --list-params }
List all parameters.
{ -e | --event= } event
Inject an event.
{ -s | --script= } script
Run a script on the virtual machine.
{ -d | --debug= } { 0 | 1 | 2 }
Set the debug level. 0 is DEBUG_OFF, 1 is DEBUG_STDERR,
and 2 is DEBUG_SYSLOG. The default is 2.
{ -f | --pid-file= } filename
Set the path name of the process ID (PID) file.
{ -t | --time-period= } seconds
Set the period for daemon mode. The default is 10 seconds.
{ -v | --version }
Show the ovmd script version number and exit.
{ -h | --help }
Show help on the ovmd command options.
Examples
Example 3.1 Showing the ovmd script version
# ovmd -v
Example 3.2 Running a script on a virtual machine
# ovmd --script=/scripts/cleanup
Example 3.3 Sending a message from a virtual machine to Oracle VM Manager
# ovmd -p key1=value1
See Section 3.4.2, “Using the Messaging Channel” for more information on sending and receiving
messages using the ovmd script.
Example 3.4 Listing messages sent from Oracle VM Manager on a virtual machine
# ovmd -\-list
52
Using the Oracle VM Guest Additions Daemon to Enable First-Boot Configuration
{"key1":"value1"}
{"key2":"value2"}
Example 3.5 Deleting a message on a virtual machine
# ovmd -r key1
3.4.1 Using the Oracle VM Guest Additions Daemon to Enable First-Boot
Configuration
If you are configuring a virtual machine to act as a template or if you intend to clone it, you may want to set
it up so that at next boot it behaves as if it is booting for the first time, thereby prompting for configuration
input either by the VM API or on the virtual machine console. This can be achieved by running the following
commands as root within the virtual machine:
# ovmd -s cleanup
# service ovmd enable-initial-config
# shutdown -h now
On next boot, the virtual machine acts as if it is performing a first-time boot.
If you have configured ovmd to run as a service, you are able to configure it remotely using the messaging
facility and the ovm-template-config script.
See the example Section 3.4.2, “Using the Messaging Channel” for more information on using the
messaging channel. Also see Section 3.6, “The Oracle VM Template Configuration Script and Modules” for
information about the ovm-template-config script.
3.4.2 Using the Messaging Channel
This section gives an example of a message exchange between Oracle VM Manager and a running
Oracle Linux virtual machine with Oracle VM Guest Additions installed. The ovm_vmmessage tool that is
included with Oracle VM Utilities is used to communicate with the Oracle Linux guest. More information
about the messaging utility can be found in Section 2.4.3, “Oracle VM Virtual Machine Messaging
(ovm_vmmessage)”.
Example 3.6 Sending a message from the guest to Oracle VM Manager
Using ovmd, you send information from within the virtual machine to your Oracle VM Manager using the
following syntax:
# ovmd -p key1=value1
The message appears in the Oracle VM Manager user interface, as a Virtual Machine API Incoming
Message event for the virtual machine in question. When you expand the event, the description shows the
key-value pair and the date and time when the information exchange took place.
The message from the guest can also be retrieved via the ovm_vmmessage utility. To do so, you query the
key and the value is returned in the response:
# ./ovm_vmmessage -u admin -p password -h localhost -v MyVM02 -q key1
Oracle VM VM Message utility version.
Connected.
VM : 'MyVM02' has status : Running.
Querying for key 'key1.
Query successful.
Query for Key : 'key1' returned value 'value1'.
Key set 7 minutes ago.
53
Configuring the Oracle VM Guest Additions Daemon to Run as a Service
Example 3.7 Sending a message from Oracle VM Manager to a virtual machine
Using ovm_vmmessage, you send information to a virtual machine using the following syntax:
# ./ovm_vmmessage -u admin -p password -h localhost -v MyVM02 -k key2 -V value2
Oracle VM VM Message utility version.
Connected.
VM : 'MyVM02' has status : Running.
Sending message.
Message sent successfully.
Using ovmd from within the guest, you can retrieve the message sent from Oracle VM Manager using the
following syntax:
# ovmd -\-list
{"key1":"value1"}
{"key2":"value2"}
The ovmd -\-list command retrieves all messages, both sent and received. You can identify the
specific message you are looking for by its key. To remove obsolete messages, use the following syntax:
# ovmd -r key1
# ovmd -\-list
{"key2":"value2"}
3.4.3 Configuring the Oracle VM Guest Additions Daemon to Run as a Service
To enable ovmd to run as a service on Oracle Linux, run the chkconfig command as root:
# chkconfig ovmd on
To start the ovmd service, run the following as root:
# /etc/init.d/ovmd start
When configured as a service, ovmd listens for message requests sent from Oracle VM Manager.
3.5 Displaying the Virtual Machine's IP Address
When the Oracle VM Guest Additions are installed, the virtual machine IP address becomes visible in the
Oracle VM Manager user interface, as part of the detailed virtual machine information.
3.6 The Oracle VM Template Configuration Script and Modules
The Oracle VM Guest Additions include a set of packages that can help with the automatic configuration
of virtual machine as they are created from a template and booted for the first time. The master package
for this facility is known as ovm-template-config. The Oracle VM template configuration script can be
used to configure a virtual machine remotely using the Oracle VM messaging facility via ovmd.
54
Overview of the Template Configuration Script (ovm-template-config)
3.6.1 Overview of the Template Configuration Script (ovm-template-config)
The Oracle VM Template Configuration Script, ovm-template-config works in conjunction with a set
of modular configuration scripts that function in a manner very similar to the standard Linux System V,
init.d and chkconfig, script model. Control over how configuration modules are run is handled within
the /etc/template.d directory on the guest virtual machine. The configuration module scripts are stored
in /etc/template.d/scripts.
The ovm-template-config script is the master script that is used to control all enabled modules.
Running ovm-template-config with the --help parameter provides a usage breakdown.
For remote configuration, ovm-template-config is used in conjunction with ovmd to capture
configuration parameters that have been sent to the guest using the Oracle VM messaging facility. When
this is the case, ovm-template-config targets are presented to ovmd as --script parameters:
# ovmd -s cleanup
# ovmd -s configure
Important
When performing remote configuration, using ovmd to process messages
containing configuration keys, the authentication module must be enabled.
Processing of messages can only be completed if the final message contains the
root user password. See Section 3.6.2, “Enabling and Disabling Configuration
Modules (ovm-chkconfig)” for more information on this module.
See Section 3.6.4, “Triggering Configuration Changes” for more information on calling this script directly.
Syntax
ovm-template-config [ -e | --enumerate ] [ --human-readable ] [ { -i | --input= } input ] [ {
-o | --output= } output ] [ --stdin ] [ --console-input ] [ --ovf-transport-iso ] [ { -s | -script= } script ] [ --logfile= logfile ] [ --loglevel= loglevel ] [ --version ] [ { -h | -help } ] target
Where target is:
{ configure | unconfigure | reconfigure | cleanup | suspend | resume | migrate | shutdown }
Options
The following table shows the available options for this command.
Option
Description
[ -e | --enumerate ]
Enumerate the parameters for target.
--human-readable
Print in human readable format when enumerate parameters.
{ -i | --input= } input
Input parameters from this file descriptor.
{ -o | --output= } output
Output parameters to this file descriptor.
--stdin
Build parameters from stdin.
--console-input
Build parameters from the console input.
--ovf-transport-iso
Build parameters from the OVF transport ISO.
{ -s | --script= } script
Specify a script.
55
Enabling and Disabling Configuration Modules (ovm-chkconfig)
Option
Description
--logfile= logfile
Set the name of the log file.
--loglevel= loglevel
Set the logging level.
--version
Show the ovm-template-config script version number and
exit.
{ -h | --help }
Show help on the ovm-template-config command options.
Examples
Example 3.8 Listing the key pairs in configuration modules
# ovm-template-config --enumerate configure
Example 3.9 Listing the key pairs specific to the network configuration module
# ovm-template-config --enumerate --script network configure
Example 3.10 Passing configuration information to the script from STDIN
# ovm-template-config --stdin configure
Example 3.11 Passing configuration information from the command line prompt (prompting for
values)
# ovm-template-config --console-input configure
Example 3.12 Passing configuration information from an OVF transport mounted on a CDROM
device
# ovm-template-config --ovf-transport-iso configure
3.6.2 Enabling and Disabling Configuration Modules (ovm-chkconfig)
When a module is enabled, symlinks to the module script are made to other subdirectories within /etc/
template.d based on the type of target the module provides, in much the same way that the System
V init process works. When a module gets added, the header of the module script is read to verify the
name, priority and targets and then a symlink is made to the corresponding subdirectories under /etc/
template.d.
Enabling and disabling targets for any module is handled using the ovm-chkconfig script. Usage of this
command is outlined using the --help parameter.
Syntax
ovm-chkconfig [ --list [ name ] ] [ --add name ] [ --del name ] [ --target= target ... name { on |
off } ] [ --version ] [ { -h | --help } ]
Where target is:
{ configure | unconfigure | reconfigure | cleanup | suspend | resume | migrate | shutdown }
Options
The following table shows the available options for this command.
56
Key-Value Pairs Used By Available Configuration Modules
Option
Description
[ --list [ name ] ]
Lists the status of the script name.
[ --add name ]
Add a new script name.
[ --del name ]
Delete a script name.
[ --target= target ... name { on | off Specify the targets in a comma separated list, for example:
}]
--target="configure,unconfigure"
--version
Show the ovm-chkconfig script version number and exit.
{ -h | --help }
Show help on the ovm-chkconfig command options.
Examples
Example 3.13 Listing available modules and their target runtime status
# ovm-chkconfig
name
authentication
datetime
firewall
network
selinux
ssh
system
user
--list
configure
on:90
on:50
on:41
off
off
off
off
off
unconfigure
off
off
off
off
off
off
off
off
reconfigure
off
off
off
off
off
off
off
off
cleanup
off
off
off
off
off
off
off
off
suspend
off
off
off
off
off
off
off
off
resume
off
off
off
off
off
off
off
off
migrate
off
off
off
off
off
off
off
off
shutdown
off
off
off
off
off
off
off
off
Example 3.14 Enabling all targets supported by a module
# ovm-chkconfig --add authentication
Example 3.15 Disabling all targets supported by a module
# ovm-chkconfig --del datetime
Example 3.16 Disabling particular targets for a module
# ovm-chkconfig --target=cleanup user off
3.6.3 Key-Value Pairs Used By Available Configuration Modules
To obtain a full listing of all of the key pairs that are used to trigger configuration changes through the ovmtemplate-config configuration modules, run the following command on the guest system where ovmtemplate-config is installed:
# ovm-template-config --human-readable --enumerate configure
The output from this command is printed as a Python data structure, that is easy to parse and understand.
Content can be limited to the information specific to a configuration module by using the --script
parameter as presented below:
# ovm-template-config --human-readable --enumerate configure --script datetime
[('50',
'datetime',
[{u'description': u'System date and time in format year-month-day-hour-minute-second, e.g.,
"2011-4-7-9-2-42".',
u'hidden': True,
57
Triggering Configuration Changes
u'key': u'com.oracle.linux.datetime.datetime'},
{u'description': u'System time zone, e.g., "America/New_York".',
u'hidden': True,
u'key': u'com.oracle.linux.datetime.timezone'},
{u'description': u'Whether to keep hardware clock in UTC: True or False.',
u'hidden': True,
u'key': u'com.oracle.linux.datetime.utc'},
{u'description': u'Whether to enable NTP service: True or False.',
u'hidden': True,
u'key': u'com.oracle.linux.datetime.ntp'},
{u'description': u'NTP servers separated by comma, e.g.,
"time.example.com,0.example.pool.ntp.org".',
u'hidden': True,
u'key': u'com.oracle.linux.datetime.ntp-servers'},
{u'description': u'Whether to enable NTP local time source: True or False.',
u'hidden': True,
u'key': u'com.oracle.linux.datetime.ntp-local-time-source'}])]
From the output, it becomes clear as to which configuration modules are triggered at which runlevel and
what keys and values they accept. Note that all key names are structured so that they are prefixed with
com.oracle, to avoid conflicts with any custom modules that you may intend to develop for your own
purposes.
Key value pairs are actually passed to ovm-template-config in JSON format:
{"com.oracle.linux.datetime.ntp":"True"}
{"com.oracle.linux.datetime.ntp-servers":"0.pool.ntp.org,1.pool.ntp.org,2.pool.ntp.org"}
{"com.oracle.linux.root-password":"mysecret"}
3.6.4 Triggering Configuration Changes
There are a variety of approaches that can be used to trigger a configuration change using ovmtemplate-config. Most commonly, this is done by setting the ovmd service to run using in enable-initialconfig mode. This causes the virtual machine to wait to be provided with configuration parameters either
on via the console, or via the ovmd messaging facility, after the next boot. This is the usual approach when
configuring a virtual machine to act as a template.
To manually force ovmd to pass messages to the ovm-template-config script, simply run ovmd with
the --script parameter set to point to one of the ovm-template-config targets:
# ovmd --list
{"com.oracle.linux.datetime.ntp":"True"}
{"com.oracle.linux.datetime.ntp-servers":"0.pool.ntp.org,1.pool.ntp.org,2.pool.ntp.org"}
{"com.oracle.linux.root-password":"password"}
# ovmd -s configure
Note
To perform an action using messaging parameters and ovm-template-config,
the authentication module must be enabled and your final message should include
an authentication request in the form of a key-value message:
{"com.oracle.linux.root-password":"password"}
When running ovmd like this, ovmd prepares two pipes (infd and outfd) and calls the ovm-templateconfig script transparently in the background in the following way:
# ovm-template-config --input <infd> --output <outfd> configure
During testing, it may be useful to simply pass configuration information directly to the script from STDIN
on the command line. This can be achieved by calling the script directly with the --stdin parameter:
58
Developing Oracle VM Template Configuration Modules
#
>
>
>
ovm-template-config --stdin configure <<EOF
{"com.oracle.linux.selinux.mode": "disabled"}
{"com.oracle.linux.root-password": "ovsroot"}
EOF
Configuration can also be achieved directly from the console by running the script using the --consoleinput option. Doing this will prompt you for values for each of the keys that need to be defined for any
enabled modules:
# ovm-template-config --console-input configure
3.6.5 Developing Oracle VM Template Configuration Modules
The provided module scripts are developed in Python. Theoretically, it is possible to develop module
scripts in a different language, as long as the input, output and argument handling remains the same. The
example provided in this section makes use of the Python programming language.
Each module script consists of 2 main parts:
1. The script header, which contains information like script name, targets, priorities and description.
2. The actual script, which handles a small set of parameters.
For examples of functional module scripts, refer to the existing modules in the /etc/template.d/
scripts directory.
Module Script Header
Module script headers require a very specific comment block in order for ovm-chkconfig to handle
enabling and disabling your script functionality. The format for the script header is as follows:
### BEGIN PLUGIN INFO
# name: [script name]
# [target]: [priority]
# [target]: [priority]
# description: a description that can
#
cross multiple lines.
### END PLUGIN INFO
When developing your own module script, you must include a header following the exact same format.
Provide your own script name, which will be used when calling ovm-chkconfig, the targets that your
script will support, and the priority for your script. The priority will specify in what order the script gets
executed. You do not have to implement all targets. If you have a configure target but no cleanup target,
this is still acceptable. The configure target gets called when a first boot/initial start of the virtual machine
happens. The cleanup target happens when you manually initiate a cleanup in your virtual machine or
when you want to restore the virtual machine to its original state. An example of the network module script
header is provided below:
### BEGIN PLUGIN INFO
# name: network
# configure: 50
# cleanup: 50
# description: Script to configure template network.
### END PLUGIN INFO
Module Script Body
The main requirement for the module script body is that it accepts at least one target parameter. Target
parameters that might get presented by the ovm-template-configure script include:
59
Developing Oracle VM Template Configuration Modules
• configure
• unconfigure
• reconfigure
• cleanup
• suspend
• resume
• migrate
• shutdown
Your script can handle any other arguments that you require. There is one optional parameter which is
useful to implement and this is -e or --enumerate. ovm-template-config uses this to be able to
enumerate or list the parameters for a target supported by your script.
A very basic template to use for your script body follows:
try:
import json
except ImportError:
import simplejson as json
from templateconfig.cli import main
def do_enumerate(target):
param = []
if target == 'configure':
param += []
elif target == 'cleanup':
param += []
return json.dumps(param)
def do_configure(param):
param = json.loads(param)
return json.dumps(param)
def do_cleanup(param):
param = json.loads(param)
return json.dumps(param)
if __name__ == '__main__':
main(do_enumerate, {'configure': do_configure, 'cleanup': do_cleanup})
This script supports the configure and cleanup targets.
You can fill out the script with your own code. For instance, for the do_enumerate function, you would
populate the parameters that are supported for each target in the script. An example from the firewall
module is presented below:
def do_enumerate(target):
param = []
if target == 'configure':
param += [{'key': 'com.oracle.linux.network.firewall',
'description': 'Whether to enable network firewall: True or False.',
'hidden': True}]
60
Developing Oracle VM Template Configuration Modules
return json.dumps(param)
Each target function begins by reading the JSON parameters passed to the script, using the param =
json.loads(param) statement. From this point, code can be written to perform actions based on the
values of the keys that the script expects to receive. Once again, the example provided below is from the
firewall module:
def do_configure(param):
param = json.loads(param)
firewall = param.get('com.oracle.linux.network.firewall')
if firewall == 'True':
shell_cmd('service iptables start')
shell_cmd('service ip6tables start')
shell_cmd('chkconfig --level 2345 iptables on')
shell_cmd('chkconfig --level 2345 ip6tables on')
elif firewall == 'False':
shell_cmd('service iptables stop')
shell_cmd('service ip6tables stop')
shell_cmd('chkconfig --level 2345 iptables off')
shell_cmd('chkconfig --level 2345 ip6tables off')
return json.dumps(param)
Module Script Packaging
Once you have written one or more configuration module scripts, you may want to package them as
RPMs that can be deployed on other systems. In order to install and configure template configure scripts,
they have to be packaged in an RPM, with a specific naming convention. Package the script as ovmtemplate-config-[scriptname]. Ideally in the post install of the RPM you should add the script
automatically by executing # /usr/sbin/ovm-chkconfig --add scriptname. When de-installing a
script/RPM, remove it at uninstall time using # /usr/sbin/ovm-chkconfig --del scriptname. This
is illustrated in the following example of an RPM spec file that can be used:
Name: ovm-template-config-example
Version: 3.0
Release: 1%{?dist}
Summary: Oracle VM template example configuration script.
Group: Applications/System
License: GPL
URL: http://www.oracle.com/virtualization
Source0: %{name}-%{version}.tar.gz
BuildRoot: %(mktemp -ud %{_tmppath}/%{name}-%{version}-%{release}-XXXXXX)
BuildArch: noarch
Requires: ovm-template-config
%description
Oracle VM template example configuration script.
%prep
%setup -q
%install
rm -rf $RPM_BUILD_ROOT
make install DESTDIR=$RPM_BUILD_ROOT
%clean
rm -rf $RPM_BUILD_ROOT
%post
if [ $1 = 1 ]; then
/usr/sbin/ovm-chkconfig --add example
fi
%preun
if [ $1 = 0 ]; then
61
Developing Oracle VM Template Configuration Modules
/usr/sbin/ovm-chkconfig --del example
fi
%files
%defattr(-,root,root,-)
%{_sysconfdir}/template.d/scripts/example
%changelog
* Tue Mar 22 2011 John Smith
- Initial build.
- 3.0-1
Edit the example spec file to reference your own script name.
In order to create RPMs, you must install rpmbuild:
# yum install rpm-build
The following example Makefile may help to automate the build process:
DESTDIR=
PACKAGE=ovm-template-config-example
VERSION=3.0
help:
@echo
@echo
@echo
@echo
@echo
'Commonly used make targets:'
' install
- install program'
' dist
- create a source tarball'
' rpm
- build RPM packages'
' clean
- remove files created by other targets'
dist: clean
mkdir $(PACKAGE)-$(VERSION)
tar -cSp --to-stdout --exclude .svn --exclude .hg --exclude .hgignore \
--exclude $(PACKAGE)-$(VERSION) * | tar -x -C $(PACKAGE)-$(VERSION)
tar -czSpf $(PACKAGE)-$(VERSION).tar.gz $(PACKAGE)-$(VERSION)
rm -rf $(PACKAGE)-$(VERSION)
install:
install -D example $(DESTDIR)/etc/template.d/scripts/example
rpm: dist
rpmbuild -ta $(PACKAGE)-$(VERSION).tar.gz
clean:
rm -fr $(PACKAGE)-$(VERSION)
find . -name '*.py[cdo]' -exec rm -f '{}' ';'
rm -f *.tar.gz
.PHONY: dist install rpm clean
Edit this Makefile to reference your own script.
Create a working directory, copy over your script, the spec file and the Makefile. Run:
# make dist
to create a src tarball of your code and then run:
# make rpm
This will generate an RPM in the RPMS/noarch directory within your working directory. For example:
RPMS/noarch/ovm-template-config-test-3.0-1.el6.noarch.rpm.
62
Chapter 4 Converting Hosts
This chapter discusses creating hardware virtualized guest images from existing physical computers
running any of the operating systems supported by Oracle VM.
4.1 Converting a Host
You can convert the operating system and application software on a computer to an Oracle VM hardware
virtualized guest image using the Physical to Virtual (P2V) conversion utility. The P2V utility is included
on Oracle VM Server CDs prior to the 3.3 release. The operating system must be one of the Oracle VM
supported guest operating systems. See the Oracle VM Release Notes for a list of the supported guest
operating systems. To perform a P2V conversion, the host computer must have a CPU that supports PAE
(Physical Address Extension).
The P2V conversion process creates a virtual machine configuration file (vm.cfg), allows you to make
some modifications in terms of sizing of the virtual machine hardware, and then replicates the physical
image and transfers it over the network to a storage repository using Oracle VM Manager. The image on
your physical computer is not changed in any way.
The P2V utility converts disks on the computer to virtual disk images. The first four virtual disk images are
created as IDE disks (hda, hdb, hdc, and hdd) on the guest, using the original disk names. Up to seven
additional disks are created as SCSI devices (sda, sdb, sdc, and so on). The disk entries in the vm.cfg file
look similar to:
disk = ['file:System-sda.img,hda,w',
'file:System-sdb.img,hdb,w',
'file:System-sdc.img,hdc,w',
'file:System-sdd.img,hdd,w',
'file:System-sde.img,sda,w',
'file:System-sdf.img,sdb,w',
'file:System-sdg.img,sdc,w',
'file:System-sdh.img,sdd,w',
'file:System-sdi.img,sde,w',
'file:System-sdj.img,sdf,w',
'file:System-sdk.img,sdg,w',
]
The hardware virtualized guest created by the P2V utility must have its own network configuration. If you
use the same network configuration as the original computer, a network clash may occur as two computers
on the network may have the same IP and MAC address. When the guest is started, make sure the
network device is detected and a new network device is configured.
You can run the P2V utility interactively, or as an automated process using a kickstart configuration file.
When you use the P2V utility with a kickstart file, no user intervention is required.
4.2 Using the P2V Utility
Note
The P2V utility is not available on the Oracle VM Server 3.3 Installation ISO
or CDROM. If you intend to use it, you must download the Oracle VM Server
Installation ISO for the 3.2 release. You can download this ISO from:
https://edelivery.oracle.com/oraclevm
When you use the P2V utility, you are prompted for all required information.
63
Using the P2V Utility
To create a virtual machine image of a computer:
1. Insert the Oracle VM Server 3.2 CDROM into the CDROM drive of the computer you want to image.
Note
This procedure is for 64-bit computers. If you want to convert a 32-bit host
computer to a virtual machine template, you must use the Oracle VM 2.x CD.
2. Start the computer with the Oracle VM Server CDROM.
3. The Oracle VM Server screen is displayed.
At the boot: prompt, enter:
p2v
Press Enter.
4. The CD Found screen is displayed.
64
Using the P2V Utility
If you want to make sure the CDROM is error free, you can have the installer test it for errors. To test
the CDROM, select OK and press Enter. The CDROM is tested and any errors are reported.
To skip media testing and continue with the installation, select Skip and press Enter.
5. The P2V Network Configuration screen is displayed.
Select your Ethernet driver from the list displayed.
If your computer uses DHCP to assign its IP address, select Automatically obtain via DHCP.
If your computer uses a static IP address, select Manually configure, and enter the IP address and
netmask, gateway, domain and name server for your computer.
Select OK and press Enter.
6. The disk selection screen is displayed.
Select the disk partition(s) on the computer to include in the guest image. Select OK and press Enter.
7. The Other parameters for VM screen is displayed.
65
Using the P2V Utility
Enter information about the guest image for:
• VM (guest) name.
• VM (guest) memory.
• Number of virtual CPUs.
• Console password. This is no longer required, but you must enter a value.
Select OK and press Enter.
8. A secure web server (HTTPS) is started. The IP address of the computer, and port number the web
server is available on is displayed.
Open a web browser on another computer and enter the URL created using the information displayed
on the computer running the P2V utility, for example
https://192.168.2.6/
66
Using the P2V Utility
Important
The Web server uses port 443. You must ensure that this port is open between
the Web server and the Oracle VM Server into which you plan to import the
template.
A directory listing is displayed which contains the files created by the P2V utility. Take a note of the
URLs for the vm.cfg and *.img files as you use them in the next step when importing the virtual
machine into Oracle VM Manager.
Log in to Oracle VM Manager and import the guest using the import template feature. When you import
the guest, you should add the URLs for each virtual disk image and the virtual machine configuration
file on a new line in the Template URLs field in the Import Template dialog, for example:
https://192.168.2.6/System-sda.img
https://192.168.2.6/vm.cfg
9. When the virtual machine template is added to the repository, you should terminate the P2V utility on
the host computer. Press Control+C to terminate the P2V utility on the computer. Remove the Oracle
VM Server CDROM from your CDROM drive. Restart the computer.
The guest image is created and available in the repository as a hardware virtualized virtual machine
template.
67
Using the P2V Utility with a Kickstart File
4.3 Using the P2V Utility with a Kickstart File
You can use a kickstart file to automate the creation of a guest image of a physical computer using the
P2V utility. When you use the P2V utility with a kickstart file, no user intervention is required. If there are
any missing parameters in the kickstart file, you are prompted to enter them.
To use a P2V kickstart file, you must create a file with the P2V configuration options and parameters and
place it on a kickstart server. The kickstart server can be made available using NFS, FTP, or HTTP. The
kickstart server is set up in the same way as a standard Oracle Linux or Red Hat kickstart server and is
beyond the scope of this book.
The following example P2V kickstart file starts sends the guest image to an instance of Oracle VM
Manager via network device eth0, which obtained an IP address via DHCP:
p2v
cdrom
lang en_US.UTF-8
keyboard us
target --ovmmanager
network --device eth0 --bootproto dhcp
diskimage --device /dev/sda --type IDE
vm_options --name myVM --mem 2048 --vcpus 2 --consolepasswd password
See Section 4.4, “P2V Parameters” for detailed information on the P2V kickstart file options and
parameters.
To create an Oracle VM virtual machine image of a computer using the P2V utility with a kickstart
file:
1. Create a P2V kickstart file and copy it to your kickstart server.
2. Insert the Oracle VM Server CDROM into your CDROM drive of the computer you want to image.
3. Restart the computer with the Oracle VM Server CDROM.
4. The Oracle VM Server screen is displayed. At the boot: prompt, enter p2v and the protocol and
location for the kickstart file. For example, to use a kickstart file called ks.cfg on an HTTP server
named http://example.com, enter:
p2v ks=http://example.com/mypath/ks.cfg
Press Enter.
5. If there are any missing parameters in the kickstart file, you are prompted to enter them.
6. If the kickstart file includes the directive to import the guest image to Oracle VM Manager, a secure
web server (HTTPS) is started. A screen is displayed giving the IP address of the computer, and port
number the web server is available on. Log in to Oracle VM Manager and import the guest using the
import template feature as described in Section 4.2, “Using the P2V Utility”.
7. When the virtual machine template is added to the repository, you should terminate the P2V utility on
the host computer. Press Control+C to terminate the P2V utility on the computer. Remove the Oracle
VM Server CDROM from your CDROM drive. Restart the computer.
The guest image is created and available in the repository as a hardware virtualized virtual machine
template.
4.4 P2V Parameters
68
Syntax
This section contains information about the Physical to Virtual (P2V) conversion utility and details the
usage, syntax and parameters on the command line and in a kickstart file.
The P2V conversion utility enables you to convert a computer's operating system (Linux and Microsoft
Windows™) and applications to an Oracle VM hardware virtualized guest image. The P2V utility is included
on the Oracle VM Server CD. You can access the P2V utility by restarting a computer with the Oracle
VM Server CD. The Oracle VM Server start-up screen is displayed. At the boot: prompt, enter p2v, for
example:
boot: p2v
You can use a P2V kickstart file to automate creation of hardware virtualized guest images from physical
computers. This section discusses the options and parameters of the P2V kickstart file.
The P2V utility converts disks on the computer to virtual disk images. The virtual disk images are created
as IDE disks (hda, hdb, hdc, hdd, and so on) on the guest, using the original disk names. When you
use a P2V kickstart file, up to four disks are automatically deployed in the guest. Any extra disks are
converted and added to the guest configuration file (vm.cfg), although they are not deployed. To deploy
the additional disks in the guest, edit the guest configuration file, remove the comments from the disk
entries, and map the additional disks to SCSI device names, for example, sda, sdb, and sdc. The boot disk
must always be mapped to device hda. Any files on the guest which contain references to these devices
must also be changed, for example, the /etc/fstab file may contain references to /dev/hda1, /dev/
sda1, and so on.
When you use a P2V kickstart file, at least one network interface must use DHCP. This is required for the
computer running the P2V utility to read the kickstart file over the network. The network configuration for
this network interface cannot be modified from the kickstart file.
If you want the P2V utility's web server to listen using a network interface other than the one used to initiate
the kickstart session, the network configuration (DHCP or static IP address) for that network interface can
be specified in the kickstart file.
A number of screens may be displayed prior to the P2V utility starting with a kickstart file. You can
suppress these screens to fully automate the P2V utility. Prior to the P2V utility starting, you may see up to
four screens:
• P2V Network Configuration screen.
• Language selection screen.
• Keyboard selection screen.
• Installation source screen.
Syntax
p2v [ ks=ksfile ] [ ksdevice=device ]
Options
The following table shows the options for this command. These options can also be used in a kickstart file.
Option
Description
ks=ksfile
The name and location of a P2V kickstart file. This should be
used on the command line, not in a kickstart file.
ksdevice=device
Suppresses the P2V Network Configuration screen. The
device parameter is the name of an Ethernet device, for
69
Options
Option
Description
example eth0. This should be used on the command line, not
in a kickstart file.
p2v
Indicates the kickstart file is intended to automate a P2V
conversion. This parameter is required in order to perform
an automated P2V conversion and should be supplied at
the Oracle VM Server boot: prompt instead of install,
update, or rescue. It accepts no parameters.
lang language
Suppresses the P2V Language selection screen. The
language parameter is the name of the operating system
language, for example, en_US.UTF-8.
keyboard keyboard
Suppresses the P2V Keyboard selection screen. The keyboard
parameter is the name of the keyboard type, for example, us.
cdrom
Suppress the Installation source screen.
target --ovmmanager
Sets the end destination for the guest image. Sets the P2V
utility to operate in HTTPS server mode to transfer the guest
image to a running instance of Oracle VM Manager.
diskimage option ...
Denotes a disk to be included in the guest image. The P2V
utility uses device mapper-based snapshotting to copy the disk
as a system-*.img file on the target computer. There may
be multiple diskimage directives in a P2V kickstart file, each
resulting in a disk image in the guest image. The --device
parameter must always be used with the diskimage directive
to indicate which device should be imaged.
The option parameter is one or more of the following:
--device path
The device to image. path must be the full path to the device.
For example:
diskimage --device /dev/sda
--type { IDE | SCSI | LVM | MDRAID }
Sets the type of disk. Must be one of IDE, SCSI, LVM, or
MDRAID. Devices /dev/hda, /dev/hdb, /dev/hdc, and /dev/
hdd should be IDE. Devices /dev/sd[a-zz] should be SCSI. A
logical volume should be LVM. Devices /dev/md[a-zz] should
be MDRAID. For example:
diskimage --device /dev/hda --type IDE
network option ...
Configures network information for the computer.
The option parameter is one or more of the following:
--bootproto { dhcp | bootp | static }
Sets the method by which the network configuration is
determined. Must be dhcp, bootp, or static. The default is
dhcp. bootp and dhcp are treated as the same.
70
Options
Option
Description
dhcp uses a DHCP server to obtain the networking
configuration, for example:
network --bootproto dhcp
static requires all the necessary networking information. As
the name implies, this information is static and is used during
and after the installation. The entry for static networking is
more complex, as you must include all network configuration
information on one line. You must specify the IP address,
netmask, gateway, and nameserver, for example:
network --bootproto static --ip 10.0.2.15
--netmask 255.255.255.0 --gateway 10.0.2.254
--nameserver 10.0.2.1
The static method has the following restrictions:
• All static networking configuration information must be
specified on one line; you cannot wrap lines using a
backslash.
• You can only specify one nameserver.
--ip ipaddress
The IP address for the computer.
--gateway ipaddress
The IP address for the default gateway.
--nameserver ipaddress
The IP address for the primary nameserver.
--netmask netmask
The netmask for the computer.
vm_options option ...
Sets the configuration options for the guest.
The option parameter is one or more of the following:
--name name
The name of the guest.
--mem size
The memory allocation for the guest in Mb.
--vcpus number
The number of VCPUs for the guest.
--consolepasswd password
71
Examples
Option
Description
The console password for the guest. This option is ignored by
Oracle VM Manager when the guest is imported.
For example:
vm_options --name MyVM --mem 2048 --vcpus 2
--consolepasswd mypassword
Examples
Example 4.1 P2V Kickstart File
An example P2V kickstart file follows:
p2v
cdrom
lang en_US.UTF-8
keyboard us
target --ovmmanager
network --device eth0 --bootproto dhcp
diskimage --device /dev/sda --type IDE
vm_options --name myVM --mem 2048 --vcpus 2 --consolepasswd password
Example 4.2 Suppressing the P2V Network Configuration Screen
To suppress the P2V Network Configuration screen, supply the Ethernet device on the command line, for
example:
boot: p2v ks=http://example.com/ks.cfg ksdevice=eth0
Example 4.3 Suppressing the Language Selection Screen
To suppress the Language selection screen, supply the language parameter in the kickstart file, for
example:
lang en_US.UTF-8
Example 4.4 Suppressing the Keyboard Selection Screen
To suppress the Keyboard selection screen, supply the keyboard parameter in the kickstart file, for
example:
keyboard us
Example 4.5 Suppressing the Installation Source Screen
To suppress the Installation source screen, supply the source parameter in the kickstart file, for example:
cdrom
72
Chapter 5 Backing up and Restoring Oracle VM Components
This chapter gives you the basic information required to back up and restore Oracle VM Manager, the
database repository, and virtual machines.
Oracle does not recommend backing up Oracle VM Servers as no critical data is contained on them.
Instead of backing up and recovering an Oracle VM Server, in the event of a failure, simply delete it from
Oracle VM Manager, reinstall the Oracle VM Server software if required, and rediscover it.
For a more thorough discussion on backing up and restoring the various entities that comprise Oracle VM,
see the Oracle VM 3: Backup and Recovery Best Practices Guide at:
http://www.oracle.com/technetwork/server-storage/vm/overview/index.html
5.1 Backing up and Restoring Oracle VM Manager
This section contains information about how to back up and restore Oracle VM Manager, including the
database repository. Note that the MySQL database repository is automatically backed up every day. It
is possible to manually backup the database and these steps are discussed in Section 5.1.2, “Backing up
the MySQL Database Repository”. The following outline describes the steps required to perform a manual
backup of Oracle VM Manager.
To back up Oracle VM Manager:
1. Back up/copy the Oracle VM Manager configuration file located at:
/u01/app/oracle/ovm-manager-3/.config
2. Back up the Oracle VM Manager database. The Oracle VM Manager database is backed up
automatically every 24 hours using the MySQL Enterprise Backup utility, but it is also possible to
perform a manual backup. See Section 5.1.2, “Backing up the MySQL Database Repository” for more
information on Oracle VM Manager MySQL database backup and restore facilities.
5.1.1 Backing Up The Oracle VM Manager Configuration File
To back up Oracle VM Manager, you should back up the Oracle VM Manager configuration file. This file
contains info
The Oracle VM Manager configuration file is located at:
/u01/app/oracle/ovm-manager-3/.config
This configuration file contains database connection information, ports and the UUID used by Oracle VM
Manager. The structure of this configuration file follows:
Example 5.1 Oracle VM Manager configuration file
DBTYPE=Database type, legacy: always 'MySQL' for Oracle VM Manager 3.3.1 and above
DBHOST=Hostname of database server, legacy: always 'localhost' for Oracle VM Manager 3.3.1 and above
SID=Oracle SID: default value of 'ovs'
LSNR=Database listener port number: default value of '49500'
OVSSCHEMA=Oracle VM Manager database name: default value of 'ovs'
APEX=Legacy option: always None for Oracle VM Manager 3.3.1 and above
WLSADMIN=Oracle WebLogic Server administrator: default value of weblogic
OVSADMIN=Oracle VM Manager administrator: default value of admin
COREPORT=Oracle VM Manager core port: default value of 54321
UUID=Oracle VM Manager UUID
BUILDID=Oracle VM Manager version and build number
To backup this configuration file, copy it to a safe alternative location.
73
Backing up the MySQL Database Repository
5.1.2 Backing up the MySQL Database Repository
This section contains information about the Oracle VM Manager MySQL backup facility.
As of Oracle VM Manager Release 3.2.1, backups of the local MySQL database are performed
automatically every 24 hours. Backups are stored within /u01/app/oracle/mysql/dbbackup by
default, and are rotated regularly so that only the 21 most recent backups are stored at any point in time.
Backups make use of the MySQL Enterprise Backup utility. See http://www.mysql.com/products/enterprise/
backup.html for more information on the MySQL Enterprise Backup utility.
The MySQL Enterprise Backup package is installed as a dependency during the installation of Oracle
VM Manager. On Oracle Linux systems this is handled by installing meb-3.8.0-el6.x86_64.rpm. On
SPARC Solaris systems, this is handled by installing meb-3.8.0-solaris11-sparc-64bit.pkg.gz.
On x86 systems, backup configuration options are defined in /etc/sysconfig/ovmm on the Oracle VM
Manager host. On SPARC systems, backup configuration options are defined in /etc/opt/ovmm on the
Oracle VM Manager.
To configure the default path used to store MySQL database backup files, locate the following line:
DBBACKUP=/u01/app/oracle/mysql/dbbackup
Note
This path can be changed to an alternate location if you need to cater to disk space
requirements.
The default path for the mysqlbackup binary is specified in the following line:
DBBACKUP_CMD=/opt/mysql/meb-3.8/bin/mysqlbackup
Warning
This path is made explicit for the purposes of handling future updates to the MySQL
Enterprise Backup package. It should not be changed.
5.1.2.1 Backing up Directories and Logs
Each backup is stored in a directory within the path defined by DBBACKUP. The backup directory is
named AutoFullBackup-MMDDYYYY_hhmmss. Within the backup directory is a log file, named
AutoBackup.log, containing information about the events that took place during the backup process.
The backup directory contains a backup of the MySQL configuration file, a datadir directory containing
the binary log for the database, a meta directory containing files specific to the MySQL Enterprise Backup
process that was run at the time, and the actual MBI image file for the database that is backed up.
Only the 21 most recent backups are maintained within the DBBACKUP path. Manual backups, where the
backup directory name is not prepended with AutoFullBackup, are ignored by the rotation.
Currently, it is not possible to change the frequency of automatic backups, or the number of automatic
backups that are retained during a rotation.
5.1.2.2 Performing a Backup Manually
It is possible to initiate a backup manually. This is usually done when performing an upgrade of Oracle VM
Manager. While it is possible to invoke the mysqlbackup utility directly, it is recommended that you initiate
a backup directly from the Oracle VM Manager core. This can be achieved using the provided backup
script at /u01/app/oracle/ovm-manager-3/ovm_tools/bin/BackupDatabase script:
74
Restoring Oracle VM Manager
# /u01/app/oracle/ovm-manager-3/ovm_tools/bin/BackupDatabase -w
Enter your OVM Manager username: admin
Enter your OVM Manager password:
INFO:
Backup started to:
/u01/app/oracle/mysql/dbbackup/ManualBackup-20140324_102412
Job: 'Start Backup to: ManualBackup'
By default, the backup script stores the backup as a manual backup, to avoid the rotation that takes place
for other automatic backups. The backup script prompts you for your Oracle VM Manager username and
password.
In the example above, we used the -w command-line switch to force the backup script to wait until the
backup job is complete. This option is useful if you need to capture potential error messages, but you
should be aware that using it also causes the script to wait indefinitely, until the job either completes or
exits due to an error. If you choose not to use the -w command-line switch, you should check the status
of the backup job within the Oracle VM Manager Web Interface or Oracle VM Manager Command Line
Interface to determine whether or not the job completed successfully. A full list of supported options for this
command can be obtained using the -h command-line switch. These are not fully documented here as
most of the options provided are not supported for customer use.
Note
The backup script assumes that you are using a properly signed SSL certificate
within a production environment. Using a self-signed certificate is not recommended
and may result in an error when you run the script. It is possible to override SSL
verification by using the --insecure command-line parameter, however this
may compromise the security of the operation and is not recommended. A better
approach to resolving any SSL verification error, is to install an SSL certificate
signed by a recognized CA, as described in Changing the SSL Key.
For more information on using MySQL Enterprise Backup, see http://dev.mysql.com/doc/mysql-enterprisebackup/en.
5.1.3 Restoring Oracle VM Manager
To restore Oracle VM Manager, and the Oracle VM Manager database schema from a backup, you must
have performed the steps to back up Oracle VM Manager in Section 5.1.1, “Backing Up The Oracle VM
Manager Configuration File”.
To restore Oracle VM Manager from a backup:
1. First, if you need to reinstall or upgrade Oracle VM Manager, use the Oracle VM Manager installation
media to perform an install or upgrade of the software on your server. See Installing Oracle VM
Manager for information on how to perform the installation. See Upgrading Oracle VM Manager for
information on how to perform the upgrade.
You should perform the install using the runInstaller.sh --uuid uuid command and provide
the UUID from the previous manager installation you created a backup from. The UUID can be found in
the Oracle VM Manager configuration file.
Note
The Oracle VM Manager UUID is also persisted in the /etc/sysconfig/ovmm
file on Linux, and in the /etc/opt/ovmm file on Solaris. If the system disk of
75
Restoring Oracle VM Manager
the server on which you are installing or restoring Oracle VM Manager was
not wiped entirely, the existing UUID is still present and will be detected when
running the installer.
• The --uuid option on Linux overrides this existing UUID. Solaris users must
use the shortened form of this option: -u.
• If no UUID is present in /etc/sysconfig/ovmm, the --uuid option adds
the UUID to the file on Linux. On Solaris, the -u option adds the UUID to /
etc/opt/ovmm if the UUID is not present in this file.
An example install command syntax for Linux is as shown in this example:
# ./runInstaller.sh --uuid 0004FB000000100002CB7F2DFFA8D8
When the Oracle VM Manager installer prompts for installation information other than passwords, reuse
the same usernames for the database schema, Oracle WebLogic Server and Oracle VM Manager
administration user, as set out in the backup of the Oracle VM Manager configuration file. You must set
the passwords again as the passwords are not backed up and cannot be restored.
2. After installation, reinstallation or upgrade, stop the Oracle VM Manager Command Line Interface,
Oracle VM Manager, and the database before you restore the backup. On Linux:
# /sbin/service ovmcli stop
# /sbin/service ovmm stop
# /sbin/service ovmm_mysql stop
3. Before you restore the database, ensure that no database files already exist on the Oracle VM
Manager host:
# cd /u01/app/oracle/mysql/data/
# rm -rf appfw ibdata1 ib_logfile0 ib_logfile1 mysql ovs performance_schema
Important
Do not remove any of the following files from /u01/app/oracle/mysql/
data/:
• auto.cnf
• my.cnf
• .mysqlconfig
• mysql_upgrade_info
This file may only exist if there was an upgrade to the current version. It does
not exist on systems where a fresh installation was performed.
4. To initiate the database restore, as the oracle user, use the RestoreDatabase command located in /
u01/app/oracle/ovm-manager-3/ovm_tools/bin, for example:
# su - oracle
$ bash /u01/app/oracle/ovm-manager-3/ovm_tools/bin/RestoreDatabase.sh \
ManualBackup-20140324_102412
INFO: Expanding the backup image...
INFO: Applying logs to the backup snapshot...
INFO: Restoring the backup...
INFO: Restoring OVM keystores and certificates
INFO: Success - Done!
76
How to Restore Oracle VM Manager If You Have No Database Backup
INFO: Log of operations performed is available at:
/u01/app/oracle/mysql/dbbackup/ManualBackup-20140324_102412/Restore.log
IMPORTANT:
As 'root', please start the OVM Manager database and application using:
service ovmm_mysql start; service ovmm start
The RestoreDatabase script expects the name of the directory for a particular backup directory as
described in Section 5.1.2.1, “Backing up Directories and Logs”. You do not need to specify the full
path to the backup directory as this is already specified in the DBBACKUP variable.
5. Restart the database and Oracle VM Manager, and the Oracle VM Manager Command Line Interface.
On Linux:
# /sbin/service ovmm_mysql start
# /sbin/service ovmm start
# /sbin/service ovmcli start
6. Since the certificates required to authenticate various components, such as the Oracle VM Manager
Web Interface and Oracle VM Manager Command Line Interface, are regenerated during the new
installation and the mappings for these are overwritten by the database restore, it is necessary to
reconfigure the certificates used to authenticate these components. This is achieved by running the
following script to reconfigure the Oracle WebLogic Server:
# export MW_HOME=/u01/app/oracle/Middleware
# /u01/app/oracle/ovm-manager-3/ovm_upgrade/bin/ovmkeytool.sh setupWebLogic
For more information on the ovmkeytool.sh script, please see Section 1.2.3, “Setting up SSL on
Oracle VM Manager”.
Once you have run this command, you must restart Oracle VM Manager and then run the client
certificate configuration script. On Linux:
# /sbin/service ovmm restart
# /u01/app/oracle/ovm-manager-3/bin/configure_client_cert_login.sh
The script requires that Oracle VM Manager is running, and prompts you for the administrator
username and password that should be used to access Oracle VM Manager. The script makes
changes that may require Oracle VM Manager to be restarted:
# /sbin/service ovmm restart
7. Within Oracle VM Manager go to the Servers and VMs tab and perform a Refresh All on your existing
server pools. See Refresh All in the Oracle VM Manager User's Guide for more information on these
options.
5.1.4 How to Restore Oracle VM Manager If You Have No Database Backup
Important
The instructions provided here should be used as a last resort. You really must
ensure that your backup strategy is adequate and that the database backups are
available on storage that is suitable for this purpose. Typically, these backups
should be stored on some form of network attached storage, preferably with a RAID
that provides some form of mirroring. To change the backup path to a suitable
location, see Section 5.1.2, “Backing up the MySQL Database Repository”.
77
Oracle WebLogic Server Backup and Restore
If you have reinstalled Oracle VM Manager from scratch, using the runInstaller.sh --uuid uuid
command and have provided the UUID from the previous manager installation, but you do not have a
database backup, a certain level of recovery is possible based on the information stored on the Oracle VM
Servers and in your attached storage. It is important that you follow a set order of actions to ensure that the
server pools that your Oracle VM Servers are members of are able to be properly recovered. These steps
are outlined as follows:
1. Discover one Oracle VM Server from each server pool.
2. Discover the storage that contains the server pool file system. Present it to the newly discovered Oracle
VM Server. Refresh the storage.
3. Refresh the file system or physical disks that contain the server pool file system.
4. Refresh the file systems or physical disks that contain the repositories used by server pool. If you get
an error, when refreshing a physical disk, similar to the following:
OVMAPI_7281E Cannot perform operation on file system...
then take ownership of the repositories and try to perform the physical disk refresh again.
5. Present the repositories to the Oracle VM Server.
6. Refresh the repositories.
7. Discover the remaining Oracle VM Servers in the server pool.
8. Refresh all Oracle VM Servers in the server pool to discover the virtual machines.
Note
When you perform a restore in this manner, the names and descriptions of all
objects in Oracle VM Manager are lost. You need to manually rename each object
in your environment.
5.2 Oracle WebLogic Server Backup and Restore
In general, it is not necessary to perform a separate backup of the Oracle WebLogic Server component
used by Oracle VM Manager, however in the instance that you have created separate Oracle WebLogic
Server users to facilitate a number of different login credentials that can be used to access Oracle VM
Manager you may need to perform your own backup of the Oracle WebLogic Server LDAP directory used
for authentication. This is particularly important if you intend to upgrade Oracle VM Manager, as there is
a possibility that any user credentials that have been manually configured within Oracle WebLogic Server
may be lost during an update process.
Full documentation describing the Oracle WebLogic Server LDAP backup process and how to configure
Oracle WebLogic Server LDAP backups can be found at:
http://docs.oracle.com/cd/E24329_01/web.1211/e21048/failures.htm
In the Oracle VM context, LDAP data for Oracle WebLogic Server is stored in:
/u01/app/oracle/ovm-manager-3/domains/ovm_domain/servers/AdminServer/data/ldap
Based on the information provided in the Oracle WebLogic Server documentation, you can perform a full
backup of this directory on your own schedule, or you can rely on Oracle WebLogic Server's automated
backups located in:
78
Backing up Virtual Machines
/u01/app/oracle/ovm-manager-3/domains/ovm_domain/servers/AdminServer/data/ldap/
backup
If you opt to use the Oracle WebLogic Server backup service, you may wish to change some of the default
backup parameters as described in:
http://docs.oracle.com/cd/E24329_01/apirefs.1211/e24401/taskhelp/security/
ConfigureBackupsForEmbeddedLDAPServers.html
Note that in the instructions presented in the link provided, the domain for the Oracle VM Manager
application is ovm_domain.
5.3 Backing up Virtual Machines
There are a number of options you can use to take a back up of a virtual machine. This section discusses
some of them and the pros and cons for each.
One of the main points that should be considered when backing up a virtual machine, is whether you
can shut down the virtual machine during the back up. Backing up a running virtual machine allows the
machine to be available for use, but does not allow for a back up that is consistent or easy to restore.
Creating a back up of a running virtual machine is similar to taking a back up of a running database without
putting the tablespaces in back up or read-only mode. The first couple of blocks you back up from a the
virtual machine are likely to be out of sync with the last blocks of your back up. If and when you try to
restore a back up taken from a running virtual machine, you may not be able to rebuild the machine due to
disk errors.
You can install back up software in the virtual machine, for example Oracle Secure Backup. This allows
you to safely back up a running virtual machine. The ease by which you can restore the virtual machine
from the back up depends on the software used.
The following table discusses some virtual machine back up options, with some high level benefits and
disadvantages of each method. This is not an exhaustive list of all the options that may be available.
Table 5.1 Virtual Machine Backup Options
Backup Option
Benefits
Install back up software in the virtual machine and
back up to an external source.
Virtual machine can be
running.
Disadvantages
Fine grained control of
files backed up.
Create a back up of the virtual machine from
the storage repository (see Repository Exports
Perspective).
Consistent virtual disk
status.
Virtual machine must be
stopped.
Create a cold clone of the (stopped) virtual machine Consistent virtual disk
(see Clone a Virtual Machine or Template, then
status.
back up the clone from the storage repository (see
Repository Exports Perspective).
Virtual machine must be
stopped.
Create a hot clone of the (running) virtual machine
(see Clone a Virtual Machine or Template, then
back up the clone from the storage repository (see
Repository Exports Perspective).
Inconsistent virtual disk
status. Virtual disks may
need to be recovered
using a disk repair utility.
Virtual machine can be
running.
May cause data loss or
corruption.
79
Backing up Virtual Machines
Backup Option
Benefits
Disadvantages
Only available on
OCFS2-based file
systems (iSCSI or fibre
channel-based storage).
Should not be used for
virtual machines running
an Oracle Database
(instead use the rman
utility or similar).
Create a back up of the entire storage repository
(see Repository Exports Perspective).
Back up all virtual
machines at once.
Virtual machines must be
stopped.
Consistent virtual disk
status.
The two recommended strategies for backing up a virtual machine are to:
• Shut down the virtual machine and create a cold clone, then back up the clone files from the storage
repository.
• Shut down the virtual machine and back up the virtual machine files from the storage repository.
These two options create a safe back up, with the virtual disks in a stable and consistent state. To restore
the virtual machine, import the virtual machine into the storage repository (see Import Virtual Machine).
80
Chapter 6 Troubleshooting Oracle VM
This chapter gives you details on troubleshooting problems with installing and using all components of
Oracle VM.
For additional information, see the Oracle support-oriented Web sites:
• My Oracle Support, http://support.oracle.com
• Oracle Virtualization Community, https://community.oracle.com/community/server_
%26_storage_systems/virtualization
6.1 Troubleshooting Oracle VM Installation
The section contains information on known issues you may encounter when installing Oracle VM, and
explains how to resolve them. If you contact Oracle Support for assistance with an Oracle VM Manager
installation, please include the installation logs. See Installation Logs in the Oracle VM Installation and
Upgrade Guide for information on log file names and locations.
6.1.1 libaio Not Installed
The following error is displayed during installation of Oracle VM Manager if the prerequisite libaio package
is not installed:
libaio is not installed...
To fix this error, install the libaio package. For information on how to install libaio, see Prerequisite
Packages in the Oracle VM Installation and Upgrade Guide.
6.1.2 Cannot Install MySQL
The Oracle VM Manager installer may fail to install MySQL and displays the message:
Failed: The database instance is not available.
You can check the log file at /tmp/ovmm-installer.selfextract_id/ovm-manager-3install-date.log for more detailed information.
There are two workarounds to this issue.
1. Make sure that MySQL is not installed, or has installed correctly. Use the following command to check
the status:
$ /etc/init.d/ovmm_mysql status
If MySQL is running, run the Oracle VM Manager installation script to uninstall it, and reinstall Oracle
VM Manager.
2. Make sure the computer's host name matches the host name in the /etc/hosts file. See Network in
the Oracle VM Installation and Upgrade Guide to configure the host name.
6.1.3 Cannot Create OVS Database Schema
The Oracle VM Manager install may fail and display the following message:
Creating the Oracle VM Manager database schema ... Failed.
81
Installation Fails on Non-English Character Set
You can check the log file at /tmp/ovmm-installer.selfextract_id/ovm-manager-3install-date.log for more detailed information.
Possible workarounds for this issue are:
1. Make sure that MySQL has installed correctly. Use the following command to check the status:
$ /etc/init.d/ovmm_mysql status
If MySQL is running, run the Oracle VM Manager installation script to uninstall it, and reinstall Oracle
VM Manager.
2. Reinstall Oracle VM Manager.
6.1.4 Installation Fails on Non-English Character Set
If the operating system is a non-English character set or language, the Oracle VM Manager installer may
display the following error:
Update default password failed.
Oracle VM Manager only supports the English language and character set.
You can check the log file at /tmp/ovmm-installer.selfextract_id/ovm-manager-3install-date.log for more detailed information.
To workaround this issue, set the character set to en_US.UTF-8:
1. Run the following command to check if the value of LANG is en_US.UTF-8:
# env|grep LANG
2. If the character set is not en_US.UTF-8, change it to en_US.UTF-8:
# export LC_CTYPE="en_US.UTF-8"
3. Reinstall Oracle VM Manager.
6.1.5 Installation Fails When Using an NIS-based Oracle User Account
If the oracle user account is created using NIS-based authentication (Network Information Services), the
Oracle VM Manager installation fails during the prerequisite check, and the following error is displayed:
Verifying installation prerequisites ...
hardnofiles should be set to 8192 but was 0
Configuration verification failed ...
Or the installation may pass prerequisite check, but may fail later during the installation of the Application
Development Framework:
Retrieving Oracle Application Development Framework (ADF) ...
Unzipping Oracle ADF ...
Installing Oracle ADF ...
Installing Oracle ADF Patch...
To workaround this issue, disable ypbind service and create a non-NIS-based oracle user account using
createOracle.sh on the host computer and rerun the installer:
# /sbin/service ypbind stop
# service ypbind status
82
Troubleshooting Oracle VM Server
ypbind is stopped
# ./createOracle.sh
# ./runInstaller.sh
6.2 Troubleshooting Oracle VM Server
This section describes some problems you may encounter when using Oracle VM Server, and explains
how to resolve them.
If you need to contact Oracle Support Services, you will be asked to supply the log files mentioned in this
section. You may also be required to provide the exact version of each Oracle VM component. To find the
version of Oracle VM Manager, click the Help menu, then About. To find the version of Oracle VM Server
and Oracle VM Agent, see Control Domains Perspective in the Oracle VM Manager User's Guide.
6.2.1 Oracle VM Server Debugging Tools
If virtual machine creation fails, check the Oracle VM Server log files and use the command-line tools
to help you find the cause of a problem. There are a number of useful command-line tools, important
directories, and log files that you should check when troubleshooting problems with Oracle VM Server. This
section discusses these tools and log files.
6.2.1.1 Oracle VM Server Directories
The important Oracle VM Server directories you should check when troubleshooting problems with Oracle
VM Server are listed in Table 6.1, “Oracle VM Server directories”.
Table 6.1 Oracle VM Server directories
Directory
Purpose
/etc/xen
Contains Oracle VM Server configuration files for the Oracle VM Server
daemon and virtualized guests.
/etc/xen/scripts
Contains networking related scripts.
/var/log
Contains the Oracle VM Agent log file, ovs-agent.log.
Contains the ovmwatch.log, which logs virtual machine life cycle events.
Contains the ovm-consoled.log, which logs remote VNC console access,
and all communication with Oracle VM Manager.
/var/log/xen
Contains Oracle VM Server log files.
/var/log/messages
Contains Oracle VM Server messages.
6.2.1.2 Oracle VM Server Log Files
The Oracle VM Serverlog files you should check when troubleshooting problems with Oracle VM Server
are listed in Table 6.2, “Oracle VM Server log files”.
Table 6.2 Oracle VM Server log files
Log File
Purpose
xend.log
Contains a log of all the actions of the Oracle VM Server daemon. Actions
are normal or error conditions. This log contains the same information as
output using the xm log command. This file is located in the /var/log/xen
directory.
83
Using DHCP on Oracle VM Servers
Log File
Purpose
xend-debug.log
Contains more detailed logs of the actions of the Oracle VM Server daemon.
This file is located in the /var/log/xen directory.
xen-hotplug.log
Contains a log of hotplug events. Hotplug events are logged if a device or
network script does not start up or become available. This file is located in the
/var/log/xen directory.
qemu-dm.pid.log
Contains a log for each hardware virtualized guest. This log is created by the
quemu-dm process. Use the ps command to find the pid (process identifier)
and replace this in the file name. This file is located in the /var/log/xen
directory.
ovs-agent.log
Contains a log for Oracle VM Agent. This file is located in the /var/log/
directory.
osc.log
Contains a log for Oracle VM Storage Connect plug-ins. This file is located in
the /var/log/ directory.
ovm-consoled.log
Contains a log for the Oracle VM virtual machine console. This file is located in
the /var/log/ directory.
ovmwatch.log
Contains a log for the Oracle VM watch daemon. This file is located in the /
var/log/ directory.
6.2.1.3 Oracle VM Server Command Line Tools
The Oracle VM Server command line tools you should use when troubleshooting problems with Oracle VM
Server are listed in Table 6.3, “Oracle VM Server command line tools”.
Table 6.3 Oracle VM Server command line tools
Command-Line Tool
Purpose
xentop
Displays real-time information about Oracle VM Server and domains.
xm dmesg
Displays log information on the hypervisor.
xm log
Displays log information of the Oracle VM Server daemon.
6.2.2 Using DHCP on Oracle VM Servers
It is recommended that you install Oracle VM Server on a computer with a static IP address. If your
computers uses DHCP you should configure your DHCP server to assign static DHCP addresses. This
makes sure your host always receives the same IP address. The behavior of the Oracle VM Server host is
undefined if used in an environment where your IP address may change due to DHCP lease expiry.
6.2.3 Oracle VM Server Firewall Blocks NFS Access
Oracle VM Server blocks NFS access from any external computer (or guest) by default. This may cause
problems when trying to create a guest using an NFS connection. To resolve this, disable the firewall with
the following command:
# service iptables stop
6.2.4 Unable to Use Certain Key Combinations When Connecting to Dom0
Console
Some server models and some client terminals are not ideally compatible with regard to special key
combinations. For instance, on some HP servers, such as the HP DL380G4 (BIOS P51) server, the Alt-F2
84
Storage Array LUN Remapping on Oracle VM Servers
key combination required to toggle to the login screen does not work for all terminal clients. Some terminal
clients provide alternate key mappings, so it is worth checking the documentation of your selected terminal
client to determine whether an alternative mapping is available.
If you are using the Windows PuTTY SSH client, then you can press Alt-rightARROW and Alt-leftARROW
to toggle the login screen, instead of the printed Alt-F2.
6.2.5 Storage Array LUN Remapping on Oracle VM Servers
Storage array LUN remapping is not supported by Oracle VM Servers. An Oracle VM Server must maintain
the connections to a storage array's logical drive using the same LUN IDs. If a LUN is remapped, the
following error may be printed in the Oracle VM Server's messages log:
Warning! Received an indication that the LUN assignments on this target have changed.
The Linux SCSI layer does not automatically remap LUN assignments.
To work around this issue:
• For Fibre Channel storage, reboot the Oracle VM Server. The new storage array LUN IDs are used.
• For iSCSI storage, restart the iscsi daemon on the Oracle VM Server to delete and restore all iSCSI
target connections, for example:
# service iscsi restart
Alternatively, on the Oracle VM Server, log out and log in again to the target for which the LUN IDs have
changed, for example:
# iscsiadm --mode node --logout 10.196.211.136 iqn.xyz:1535.600a0b800036e48a0000000047b30d8d
# iscsiadm --mode node --login 10.196.211.136 iqn.xyz:1535.600a0b800036e48a0000000047b30d8d
6.2.6 Tuning ISCSI Settings on Oracle VM Servers
In some cases, it is possible to run into limitations or bugs within a particular ISCSI implementation that
may require you to tune your ISCSI settings for storage initiators on each of your Oracle VM Servers.
Typically this is required when you experience an IO lock on a LUN and an unexpected change in the
kernel workload on the Oracle VM Server. You may also notice a dramatic increase in network traffic
between the Oracle VM Server and the storage array. This particular case has been noted to occur on
some ZFS appliances running Oracle Solaris 11 and is related to the Sun iSCSI COMSTAR port provider.
The problem can usually be resolved by updating package versions, however if this is not an option you
may tune your ISCSI settings on each Oracle VM Server that communicates with a SUN.COMSTAR target
to enable flow control.
To tune ISCSI, on each Oracle VM Server, perform the following steps:
• Open /etc/iscsi/iscsid.conf in a text editor.
• Locate the section titled iSCSI settings.
• Change the value of the entry node.session.iscsi.InitialR2T to yes, and the value of the entry
node.session.iscsi.ImmediateData to no.
• Save the file.
• Restart the ISCSI daemon by issuing the following command:
# service iscsid restart
85
Troubleshooting Oracle VM Manager
Note
The preferred resolution to this issue is to update your software. Manual
configuration of Oracle VM Server settings is not generally advisable, as changes
may be lost during future updates.
6.3 Troubleshooting Oracle VM Manager
This section describes some problems you may encounter when using Oracle VM Manager, and explains
how to resolve them.
6.3.1 Oracle VM Manager Log Files
Oracle VM Manager error messages are displayed in the user interface, in the Jobs tab, in the object's
Events list and are also available in log files. Log files are stored in the following directory on the Oracle
VM Manager host computer:
/u01/app/oracle/ovm-manager-3/domains/ovm_domain/servers/AdminServer/logs
There a few files of interest here:
• access.log: Used to track HTTP access to the Web interface of the Oracle VM Manager and to the
underlying Oracle WebLogic Server HTTP interface. This log can be used to track access and HTTP
operations within Oracle VM Manager to help debug access issues and to audit access to the Oracle VM
Manager.
• AdminServer.log: Used to track events within the underlying Oracle WebLogic Server framework,
including events triggered by Oracle VM Manager. This log can be used to track a variety of issues
within Oracle VM Manager including TLS/SSL certificate issues, server availability issues, and any
actions performed within Oracle VM Manager which are usually identifiable by searching for items
containing the string com.oracle.ovm.mgr. Log in failures resulting from locked accounts (as opposed
to incorrect credentials) are also in this file.
• AdminServer-diagnostic.log: Used to track exceptions within the underlying Oracle WebLogic
Server framework, including particular events triggered by Oracle VM Manager such as log in failures
due to incorrect credentials. This log can be used to track Oracle VM Manager behavior that results
in an exception or for log in failure, which can be tracked by searching for the string An incorrect
username or password was specified.
Since log file format is determined by Oracle WebLogic Server, many of these files may be difficult to read.
A log parsing tool is included with Oracle VM Manager to help extract useful information from the actual log
files. The log parsing tool is named OvmLogTool.py and is located at:
/u01/app/oracle/ovm-manager-3/ovm_tools/bin
OvmLogTool.py can do three useful things:
• Convert and combine all the AdminServer log files into one easier-to-read file.
• Create a filtered summary log file that only lists errors.
• Tail the AdminServer log, applying the filtering on the fly.
Usually analysis of the logs starts by generating an error summary log. The summary file can act as an
index into the filtered file to investigate and analyze errors, providing you with time stamps an a shortened
summary of each error that may need further investigation. To generate a summary log file, do the
following:
86
Oracle VM Manager Command Line Tool
# python OvmLogTool.py -s -o summary
processing input file: /u01/app/oracle/ovm-manager-3/domains/ovm_domain/servers/
AdminServer/logs/AdminServer.log00001
processing input file: /u01/app/oracle/ovm-manager-3/domains/ovm_domain/servers/
AdminServer/logs/AdminServer.log
This generates a file named summary in the local directory. You can use this to look for errors that
occurred within Oracle VM Manager.
To get a full log of all events and errors within Oracle VM Manager you can do the following:
# python OvmLogTool.py -o filteredlog
processing input file: /u01/app/oracle/ovm-manager-3/domains/ovm_domain/servers/
AdminServer/logs/AdminServer.log00001
processing input file: /u01/app/oracle/ovm-manager-3/domains/ovm_domain/servers/
AdminServer/logs/AdminServer.log
This generates a file named filteredlog in the local directory. You can use this to look for all events
that occurred within Oracle VM Manager.
Finally, you can use OvmLogTool.py to filter results on the fly while tailing the log:
# python OvmLogTool.py -t
tailing log file: /u01/app/oracle/ovm-manager-3/domains/ovm_domain/servers/
AdminServer/logs/AdminServer.log
Use Ctrl+C to exit the program when you have finished tailing the log file.
6.3.2 Oracle VM Manager Command Line Tool
A set of Oracle VM command line utilities are available for download. These Oracle VM Utilities are a
collection of command line scripts that allow you to perform a set of basic management tasks on virtual
machines in an Oracle VM environment. These utilities are particularly useful to administrators who need
to execute certain operations quickly and/or repeatedly. Using the command line scripts makes these tasks
quicker and easier to perform. See Chapter 2, Oracle VM Utilities for more information on these utilities.
A command line interface to Oracle VM Manager is available which mirrors the user interface in
functionality to enable ad hoc, scripted, and programmatic access to the Oracle VM environment. See the
Oracle VM Manager Command Line Interface User's Guide for more information on the command line
interface.
6.3.3 No File Systems Found When Searching a Storage Server
On storage servers that have a very large number of file systems available, the UI may time out while
refreshing the list of available file systems, resulting in a No File Systems Available message. This
usually means that the time out value is set too low for the number of file systems that the UI needs to
refresh. To resolve this, change the settings for the Refresh Timeout Value in the Preferences Pane on
the Tools and Resources tab in the Oracle VM Manager Web Interface to increase the timeout value.
See Preferences in the Oracle VM Manager User's Guide for more information on Oracle VM Manager UI
preferences.
6.3.4 Unable to Discover Servers to Oracle VM Manager Due To Time
Differences
Oracle VM Manager uses certificate-based authentication to maintain secure communication with the
Oracle VM Agent that runs on each Oracle VM Server instance. This means that the system time on
87
Unable to Create a Clustered Server Pool on a Disk that already has an OCFS2 File System
each Oracle VM Server must be within the bounds of the certificate valid from and valid to timestamps, or
certificate validity is challenged and Oracle VM Manager is unable to authenticate to the Oracle VM Agent.
In most instances, this is not a problem, since servers are automatically configured to use the Oracle
VM Manager as an NTP server as soon as ownership is taken. However, during server discovery the
Oracle VM Manager uses a password to perform its initial authentication against a server and to provide its
certificate for ongoing communication. During this phase of discovery, a check is performed to ensure that
the system time on the Oracle VM Server is within the bounds required for certificate authentication to take
place. If this is not the case, discovery fails and an error message is returned:
OVMAPI_4024E: Cannot take ownership of
and time on the server are outside the
The certificate is valid from 10/24/13
is 9/28/13 8:14 PM. Please verify the
server myserver5.virtlab.info because the date
valid range for the manager's SSL certificate.
7:37 PM to 10/25/23 7:37 PM, but server's timestamp
server's NTP and time settings.
In this situation, it is necessary that you access the affected Oracle VM Server directly and update its
system time manually before attempting to rediscover the server using Oracle VM Manager. Once Oracle
VM Manager has completed discovery and is able to take ownership of the server, its NTP configuration is
updated automatically and it remains synchronized with the Oracle VM Manager host.
6.3.5 Unable to Create a Clustered Server Pool on a Disk that already has an
OCFS2 File System
If you attempt to create a clustered server pool using a disk located on a storage device that already
contains an OCFS2 file system, the Oracle VM Agent on the server detects the file system and refuses to
overwrite it. This is normal behavior and protects you from accidentally setting up two OCFS2 file systems
with matching UUIDs on the same disk, leading to instability and unexpected behavior.
If you are certain that the existing OCFS2 file system that is already present on the disk is no longer in use
by any other server pool or repository, you can clean the disk by connecting to the Oracle VM Server and
issuing the following command:
dd if=/dev/zero of=/dev/mapper/360a98000433468704234786f36394763 bs=1M count=256
Replace /dev/mapper/360a98000433468704234786f36394763 with the correct path to the disk
device where you are creating the new server pool cluster.
Warning
Using dd is data destructive. Make sure you are certain about the disk device
name and that the OCFS2 file system that you are deleting is no longer in use.
It is advisable to make backups of any data that exists on the disk that you are
editing before proceeding. This operation should be performed by a skilled systems
administrator.
6.3.6 Unable to Create a Repository on a Device that has Partitions
A repository cannot be hosted on a physical disk that has pre-existing partitions. If you attempt to create a
repository on a disk that already has a partition, an error is generated notifying you that the backing device
is not allowed to contain partitions. If you are intent on creating a repository on the selected disk, you must
delete any pre-existing partitions. This may require you to directly access the Oracle VM Server where the
disk is mounted and to manually remove the partition objects on the disk using the fdisk command. For
example:
# fdisk /dev/sdb
WARNING: DOS-compatible mode is deprecated. It's strongly recommended to
88
Troubleshooting Virtual Machines
switch off the mode (command 'c') and change display units to
sectors (command 'u').
Command (m for help): p
Disk /dev/sdb: 500.1 GB, 500107862016 bytes
255 heads, 63 sectors/track, 60801 cylinders
Units = cylinders of 16065 * 512 = 8225280 bytes
Sector size (logical/physical): 512 bytes / 512 bytes
I/O size (minimum/optimal): 512 bytes / 512 bytes
Disk identifier: 0x0001e791
Device Boot
/dev/sdb1
Start
1
End
6528
Blocks
52428800
Id
83
System
Linux
Command (m for help): d
Partition number (1): 1
Command (m for help): w
Warning
Using fdisk is data destructive. Make sure you are certain about the disk device
name and partitions that you are deleting. It is advisable to make backups of any
data that exists on the disk that you are editing before proceeding. This operation
should be performed by a skilled systems administrator.
Usually, restarting the affected Oracle VM Server after performing these operations is advisable. In the
case of an iSCSI disk, connections to targets need to be re-initiated. In all cases, the storage needs to be
refreshed. Simply restarting the Oracle VM Server ensures that all necessary actions are performed.
Once the Oracle VM Server has restarted, you may attempt to recreate the repository.
6.4 Troubleshooting Virtual Machines
The section contains information on known issues you may encounter when creating or using virtual
machine, and explains how to resolve them.
6.4.1 Setting the Guest's Clock
PVM guests may perform their own system clock management, for example, using the NTPD (Network
Time Protocol daemon), or the hypervisor may perform system clock management for all guests.
You can set paravirtualized guests to manage their own system clocks by setting the
xen.independent_wallclock parameter to 1 in the /etc/sysctl.conf file. For example:
"xen.independent_wallclock = 1"
If you want to set the hypervisor to manage paravirtualized guest system clocks, set
xen.independent_wallclock to 0. Any attempts to set or modify the time in a guest will fail.
You can temporarily override the setting in the /proc file. For example:
"echo 1 > /proc/sys/xen/independent_wallclock"
Note
This setting does not apply to hardware virtualized guests.
6.4.2 Wallclock Time Skew Problems
89
Mouse Pointer Tracking Problems
Additional parameters may be needed in the boot loader (grub.conf) configuration file for certain
operating system variants after the guest is installed. Specifically, for optimal clock accuracy, Linux guest
boot parameters should be specified to ensure that the pit clock source is utilized. Adding clock=pit
nohpet nopmtimer for most guest will result in the selection of pit as the clock source for the guest.
Published templates for Oracle VM include these additional parameters.
Proper maintenance of virtual time can be tricky. The various parameters provide tuning for virtual time
management and supplement, but do not replace, the need for an ntp time service running within guest.
Ensure that the ntpd service is running and that the /etc/ntp.conf configuration file is pointing to valid
time servers.
6.4.3 Mouse Pointer Tracking Problems
If your mouse pointer fails to track your cursor in a VNC Viewer session in a hardware virtualized guest,
add the following to the Oracle VM Server configuration file located at /etc/xen/xend-config.sxp to
force the device model to use absolute (tablet) coordinates:
usbdevice='tablet'
Restart the Oracle VM Server for the changes to take effect. You may need to do this for each Oracle VM
Server in the server pool.
6.4.4 Cloning Virtual Machine from Oracle VM 2.x Template Stuck in Pending
When creating a virtual machine from an Oracle VM 2.x template, the clone job fails with the error:
OVMAPI_9039E Cannot place clone VM: template_name.tgz, in Server Pool: server-pool-uuid.
That server pool has no servers that can run the VM.
This is caused by a network configuration inconsistency with the vif = ['bridge=xenbr0'] entry in
the virtual machine's configuration file.
To resolve this issue, remove any existing networks in the virtual machine template, and replace them with
valid networks which have the Virtual Machine role. Start the clone job again and the virtual machine clone
is created. Alternatively, remove any existing networks in the template, restart the clone job, and add in any
networks after the clone job is complete.
6.4.5 Hardware Virtualized Guest Stops
When running hardware virtualized guests, the QEMU process (qemu-dm) may have its memory usage
grow substantially, especially under heavy I/O loads. This may cause the hardware virtualized guest
to stop as it runs out of memory. If the guest is stopped, increase the memory allocation for dom0, for
example from 512 MB to 768 MB. See Section 1.1.6, “Changing the Oracle VM Server (Dom0) Memory
Size” for information on changing the dom0 memory allocation.
6.4.6 Migrating Virtual Machines
You cannot migrate virtual machines on computers with hardware that is not identical. To migrate virtual
machines, you must have hardware that is the same make and model and the CPU must be in the same
CPU family. You must also have the same Oracle VM Server release number.
6.4.7 Migrating Large Hardware Virtualized Guest Results in CPU Soft Lock
On some hardware, such as the SUN FIRE X4170 M2 Server, migration of very large virtual machines
using hardware virtualization can result in a soft lockup causing the virtual machine to become
90
Hardware Virtualized Guest Devices Not Working as Expected
unresponsive. This lock is caused when the migration causes the virtual machine kernel to lose the clock
source. Access to the console for the virtual machine shows a series of error messages similar to the
following:
BUG: soft lockup - CPU#0 stuck for 315s! [kstop/0:2131]
To resolve this, the virtual machine must be restarted and the clocksource=jiffies option should be
added to the HVM guest kernel command line, before rebooting the virtual machine again.
Important
This option should only be used on HVM guest systems that have actually resulted
in a CPU soft lock.
6.4.8 Hardware Virtualized Guest Devices Not Working as Expected
Some devices, such as sound cards, may not work as expected in hardware virtualized guests. In a
hardware virtualized guest, a device that requires physical memory addresses instead uses virtualized
memory addresses, so incorrect memory location values may be set. This is because DMA (Direct Memory
Access) is virtualized in hardware virtualized guest.
Hardware virtualized guest operating systems expect to be loaded in memory starting somewhere around
address 0 and upwards. This is only possible for the first hardware virtualized guest loaded. Oracle VM
Server virtualizes the memory address to be 0 to the size of allocated memory, but the guest operating
system is actually loaded at another memory location. The difference is fixed up in the shadow page table,
but the operating system is unaware of this.
For example, a sound is loaded into memory in a hardware virtualized guest running Microsoft Windows™
at an address of 100 MB may produce garbage through the sound card, instead of the intended audio. This
is because the sound is actually loaded at 100 MB plus 256 MB. The sound card receives the address of
100 MB, but it is actually at 256 MB.
An IOMMU (Input/Output Memory Management Unit) in the computer's memory management unit would
remove this problem as it would take care of mapping virtual addresses to physical addresses, and enable
hardware virtualized guests direct access to the hardware.
6.4.9 Paravirtualized Guest Disk Devices are Not Recognized
If you opt to create a PVHVM or PVM, you must ensure that all disks that the virtual machine is configured
to use are configured as paravirtual devices, or they may not be recognized by the virtual machine. If
you discover that a disk or virtual cdrom device is not being recognized by your virtual machine, you may
need to edit the vm.cfg file for the virtual machine directly. To do this, determine the UUID of the virtual
machine, and then locate the configuration file in the repository, for example on an Oracle VM Server:
# vi /OVS/Repositories/UUID/vm.cfg
Locate each disk entry that contains a hardware device such as hda, hdb, or hdc and replace with an
xvd mapping, such as xvda, xvdb, xvdc etc.
Restart the virtual machine with the new configuration, to check that it is able to discover the disk or virtual
cdrom device.
6.4.10 Cannot Start Virtual Machine Console
If you launch the virtual machine console in Oracle VM Manager and an error is displayed, you may not
have installed the VNC viewer on the Oracle VM Manager host computer. To resolve this problem, install
91
Cannot Create a Virtual Machine from Installation Media
a VNC viewer on the Oracle VM Manager host. You can also install a VNC viewer on the client accessing
the Oracle VM Manager Web Interface. Oracle recommends you also install a VNC viewer on the Oracle
VM Manager host computer so that if a client does not have a VNC viewer, this problem does not occur.
See Installing and Upgrading Packages Required For The VNC and Serial Console in the Oracle VM
Installation and Upgrade Guide for more information on installing the VNC viewer.
6.4.11 Cannot Create a Virtual Machine from Installation Media
When creating a virtual machine, the following message may be displayed:
Error: There is no server supporting hardware virtualization in the selected server pool.
To resolve this issue, make sure the Oracle VM Server supports hardware virtualization. Follow these
steps to check:
a. Run the following command to check if hardware virtualization is supported by the CPU:
# cat /proc/cpuinfo |grep -E 'vmx|smx'
If any information that contains vmx or smx is displayed, it means that the CPU supports hardware
virtualization. Here is an example of the returned message:
flags : fpu tsc msr pae mce cx8 apic mtrr mca cmov pat pse36 clflush dts acpi mmx fxsr
sse sse2 ss ht tm pbe nx lm constant_tsc pni monitor ds_cpl vmx est tm2 cx16 xtpr lahf_lm
Note
The /proc/cpuinfo command only shows virtualization capabilities starting
with Linux 2.6.15 (Intel®) and Linux 2.6.16 (AMD). Use the uname -r
command to query your kernel version.
b. Make sure you have enabled hardware virtualization in the BIOS.
c. Run the following command to check if the operating system supports hardware virtualization:
# xm info |grep hvm
The following is an example of the returned message:
xen_caps : xen-3.0-x86_64 xen-3.0-x86_32p hvm-3.0-x86_32 hvm-3.0-x
If the CPU does not support hardware virtualization, use the paravirtualized method to create the virtual
machine. See Create Virtual Machine in the Oracle VM Manager User's Guide for information on creating a
paravirtualized virtual machine.
6.4.12 Cannot Change CD in the Virtual Machine
To change the CD in a virtual machine:
a. Unmount the first CD:
# umount mount-point
b. Select the second ISO file, and click Change CD.
c. Mount the second CD:
# mount /dev/cdrom mount-point
92
Glossary
C
clone
The action or result of making an exact copy of an object. The object may be a virtual machine, virtual machine
template, ISO file, or virtual disk. Cloning is analogous to copying and maintains the integrity of the original object,
while creating a new object based on the original. A clone customizer may be used to define cloning options to
specify details of where the object components may reside when cloned, such as in a different storage repository.
D
dom0
An abbreviation for domain zero. The management domain with privileged access to the hardware and device
drivers. Dom0 is the first domain started at boot time. Dom0 has more privileges than domU. It can access the
hardware directly and can manage the device drivers for other domains. It can also start new domains.
domain
A configurable set of resources, including memory, virtual CPUs, network devices and disk devices, in
which virtual machines run. A domain is granted virtual resources and can be started, stopped and rebooted
independently.
See Also: dom0
See Also: domU
E
events
Events are used to register status information of "objects" within Oracle VM Manager for future reference or to
make problems easier to trace back. Events are often, though not always, related to jobs that are initiated within
Oracle VM Manager. For instance, when a job fails, an event is generated. Events can also be triggered through
changes in the environment such as server crashes or storage disconnects. Therefore, events are used to alert
you to potential problems that may need your attention.
Events are categorized by severity. Most events will be informational, but they can also be warnings or errors. If
an event has an error level severity, you need to acknowledge the error event to clear the error and to perform
further operations on the object that generated the error.
See Also: jobs
G
guest
A guest operating system that runs within a domain in Oracle VM Server. A guest may be paravirtualized or
hardware virtualized. Multiple guests can run on the same Oracle VM Server.
H
hard partitioning
Hard partition, or CPU pinning, is the act of binding a virtual machine to one or more physical CPUs or cores.
This prevents software within the virtual machine from running on any cores other than those specified for the
93
virtual machine. By default, Oracle VM takes advantage of distributed resource scheduling, which allows a virtual
machine to use all cores on an Oracle VM Server as required. In some situations, such as the requirement
to conform with Oracle licensing policies for partitioned environments, it may be desirable to implement hard
partitioning.
Hard partitioning can result in restrictions on live migration, DRS and DPM.
host computer
The physical computer on which the software is installed. Typically used to refer to either the computer on which
Oracle VM Server or Oracle VM Manager is running.
hypervisor
A hypervisor, also called a monitor or Virtual Machine Manager (VMM), is a layer which abstracts the virtual
hardware from the real hardware. As such it is the only privileged entity in the system which has full access to real
hardware resources. It controls only the most basic resources of the system, including CPU and memory usage,
privilege checks, and hardware interrupts.
Hosted hypervisors are designed to run within a traditional operating system. In other words, a hosted hypervisor
adds a distinct software layer to the host operating system, and the guest operating system becomes a third
software level above the hardware and the host-based hypervisor. A well-known example of a hosted hypervisor
is Oracle VM VirtualBox. Others include VMware Server and Workstation, Microsoft Virtual PC, KVM, QEMU, and
Parallels.
Native hypervisors are software systems that run directly on the host's hardware to control the hardware, and to
monitor the guest operating systems. The guest operating system runs on a separate level above the hypervisor.
Examples of this type of virtualization architecture are Oracle VM, Microsoft Hyper-V, VMware ESX, and Xen.
M
messaging
Oracle VM supports a messaging system that enables communication between the Oracle VM Manager and a
guest running within a virtual machine on any Oracle VM Server, as long as the guest has the Oracle VM Guest
Additions installed. This messaging system works by sending key/value pairs between the guest and Oracle VM
Manager via a secured connection. Messaging allows greater administrative control over virtual machines and
facilitates remote and automated configuration of virtual machines as they are started.
migrate
The act of moving a virtual machine from one Oracle VM Server to another, or to the Unassigned Virtual
Machines folder. Migration can be performed on either a running or a stopped virtual machine.
multipath
The technique of creating more than one physical path between the server CPU and its storage devices. It results
in better fault tolerance and performance enhancement. Oracle VM supports multipath I/O out of the box. Oracle
VM Servers are installed with multipathing enabled because it is a requirement for SAN disks to be discovered by
Oracle VM Manager
O
OCFS2
OCFS2 is a general-purpose shared-disk cluster file system for Linux capable of providing both high performance
and high availability. OCFS2 is developed by Oracle and is integrated within the mainstream Linux kernel.
OCFS2 is used within Oracle VM to facilitate clustered server pools, storage of virtual machine images and for the
purpose of allowing guests to share the same file system.
94
A clustered server pool always uses an OCFS2 file system to store the cluster configuration and to take
advantage of OCFS2's heartbeat facility. There are two types of heartbeats used in OCFS2 to ensure high
availability:
• The disk heartbeat: all Oracle VM Servers in the cluster write a time stamp to the server pool file system device.
• The network heartbeat: all Oracle VM Servers communicate through the network to signal to each other that
every cluster member is alive.
These heartbeat functions exist directly within the kernel and are fundamental to the clustering functionality that
Oracle VM offers for server pools. The server pool file system should be stored on a separate NFS server or on a
small LUN if possible, as OCFS2's heartbeat facility can be disturbed by intensive I/O operations taking place on
the same physical storage.
A storage repository configured on a LUN-based repository must be linked to a clustered server pool due to the
nature of the OCFS2 file system. As a result, LUN-based repositories cannot be shared between multiple server
pools, although it is possible to move an OCFS2 repository from one server pool to another.
For more information on OCFS2, please refer to https://oss.oracle.com/projects/ocfs2/.
Oracle VM Agent
An application installed with Oracle VM Server. The Oracle VM Agent receives and processes management
requests, and provides event notifications and configuration data to the Oracle VM Manager. Oracle VM Manager
manages the virtual machines running on Oracle VM Server by communicating with Oracle VM Agent. It contains
three components: master Oracle VM Server, Utility Server, and Virtual Machine Server.
Oracle VM Manager
The Oracle VM Manager is the management platform, which offers an easy-to-use, web-browser interface as
well as a command-line interface (CLI). The Oracle VM Manager tracks and manages the resources available
in your virtual environment. The user interface, which is an Application Development Framework (ADF) web
application, allow you to easily manage Oracle VM Server pools. Manages virtual machine life cycle, including
creating virtual machines from templates or from installation media, deleting, powering off, uploading, deployment
and live migration of virtual machines. Manages resources including ISO files, templates and shared virtual disks.
Oracle VM Server
A self-contained virtualization environment designed to provide a lightweight, secure, server-based platform
for running virtual machines. The Oracle VM Server comprises a hypervisor and a privileged domain (called
dom0) that allow multiple domains or virtual machines (that is, Linux, Solaris, Windows, and so on) to run on one
physical machine. Includes Oracle VM Agent to enable communication with Oracle VM Manager.
The Oracle VM Server for x86 incorporates an open source Xen hypervisor component, which has been
customized and optimized to integrate into the larger, Oracle - developed virtualization server. The Oracle
VM Server for x86 is also responsible for access and security management and generally acts as the server
administrative entity, because the hypervisor’s role is limited.
On Oracle VM Server for SPARC systems, the SPARC hypervisor is built into the SPARC firmware and is
generally referred to as the Logical Domains Manager (LDOM). As with the Xen hypervisor, each virtual machine
is securely executed on a single computer and runs its own guest Oracle Solaris operating system
P
paravirtualized machine (PVM)
A virtual machine with a kernel that is recompiled to be made aware of the virtual environment. Runs at near
native speed, with memory, disk and network access optimized for maximum performance.
95
Paravirtualized guests use generic, idealized device drivers, which are part of the guest’s OS. The I/O operations
using these generic device drivers are mapped to the real device drivers in dom0. The generic, abstracted drivers
in the guest seldom change and provide excellent guest stability. The dom0 domain, alternatively, can use the
native hardware vendor drivers, and the guests can safely migrate to another dom0 with slightly different drivers.
For other resources such as CPU and memory, paravirtualized kernels make special “hypercalls” to the Xen
hypervisor. These hypercalls provide better performance by reducing the number of instructions and context
switches required to handle an incoming request. By contrast, on an emulated (hardware virtualized) guest, driver
requests engage the guest’s interrupt handler, increasing the I/O operation overhead.
Q
QEMU
Also referred to as qemu-dm, which is the process name. The virtualization process which allows full virtualization
of a PC system within another PC system.
S
server pool
Logically an autonomous region that contains one or more physical Oracle VM Servers. Presents a unified view
of the storage where the virtual machines reside, and groups the users of these virtual machines into a single
community called a group, in which each user is a server pool member.
Each server pool can have up to 32 physical servers. Each Oracle VM Server can be a member of only one
server pool. The server pool is the operational unit of Oracle VM. Policies are configured and enforced at the
server pool level.
V
virtual disk
A file or set of files, usually on the host file system although it may also be a remote file system, that appears as a
physical disk drive to the guest operating system.
virtual machine (VM)
A guest operating system and the associated application software that runs within Oracle VM Server. May be
paravirtualized or hardware virtualized machines. Multiple virtual machines can run on the same Oracle VM
Server.
virtual machine template
A template of a virtual machine. Contains basic configuration information such as the number of CPUs, memory
size, hard disk size, and network interface card (NIC). Create virtual machines based on a virtual machine
template using Oracle VM Manager.
W
WebLogic
Oracle WebLogic Server is a platform that includes an application server that can run java applications within
a web-based framework. Oracle VM Manager runs as an application within Oracle WebLogic Server, taking
advantage of many of Oracle WebLogic Server's many features to deliver a robust web UI through which Oracle
VM can be fully managed.
The installation process behind Oracle VM Manager automatically installs and configures Oracle WebLogic
Server on the system where Oracle VM Manager is installed. During this process, a weblogic user is set up within
96
Oracle WebLogic Server to manage Oracle WebLogic Server configuration and to administer the underlying
system. An admin user is also set up within Oracle WebLogic Server and is given permission to access the
Oracle VM Manager application. A typical setup uses the same password for both of these users, although
this is not always the case and it is possible to configure a different password for each user depending on your
requirements.
In general, users of the Oracle VM Manager application should avoid attempting to access the underlying Oracle
WebLogic Server, or to change any configuration parameters here without guidance from Oracle Support.
97
98
Oracle VM Manager, 87
firewall
stop, 84
Index
A
G
admin
delete user, 21
lock Oracle VM Manager account, 24
Oracle VM Manager administration tool, 19
unlock Oracle VM Manager account, 25
admin user
change password, 27
guest clock
set, 89
H
hardware virtualization
setting in BIOS, 92
B
I
backup
MySQL, 74
Oracle VM Manager, 73
Oracle WebLogic Server LDAP, 78
BIOS
setting hardware virtualization, 92
installation source screen, 68
installing
Oracle VM Utilities, 36
ISCSI
tuning, 85
C
K
CA certificate, 27
CD
change in virtual machine, 92
certificate installation, 27
clock, 89
set, 89
command line tools
Oracle VM Server, 84
configuration
MySQL, 33
Oracle VM, 1
Oracle VM Manager, 19
Oracle VM Server, 1
configuration file
Oracle VM Manager, 73
console
virtual machine, 91
convert
host to virtual machine, 68
Linux hosts, 63
VMWare virtual machine, 63
kdump, 17
keyboard selection screen, 68
keystore, 27
kickstart file, 68
L
language selection screen, 68
Linux host
convert, 63
list
Oracle VM Manager users, 23
lock
Oracle VM Manager user account, 24
log
Oracle VM Agent, 83
Oracle VM Manager, 86
Oracle VM Server, 83
Oracle WebLogic Server, 86
logs
MySQL, 33
Oracle VM Manager, 25
rotate, 25
LUN remapping, 85
D
delete
Oracle VM Manager user, 21
DHCP, 84
diagnostic tools, 17
dom0
memory, 17
M
memory
dom0, 17
monitoring tools
SNMP, 18
mouse
tracking problems, 90
multipath, 16
F
file systems unavailable (timeout)
99
MySQL
backup, 74
configuration, 33
logs, 33
password, 23
start, 33
stop, 33
N
netconsole, 17
NFS
access blocked, 84
NTP
Oracle VM Manager, 87
O
Oracle VM
configuration, 1
Oracle VM Agent
log, 83
Oracle VM Guest Additions, 49
installing, 49
ovmd, 51
upgrading, 50
Oracle VM Manager
administration tool ovm_admin, 19
backup, 73
change user password, 22
configuration, 19
configuration file, 73
create user, 20
database schema, 23
file systems unavailable (timeout), 87
list users, 23
lock user, 24
log, 86
logs, 25
restore, 75
server discovery failed, 87
unlock user, 25
utilities, 19
Oracle VM Manager database
password, 23
Oracle VM Server
command line tools, 84
configuration, 1
log, 83
SNMP monitoring tools, 18
Oracle VM Utilities, 35
installing, 36
using, 39
Oracle WebLogic Server
change admin password, 27
change password, 22
change user password, 20
create user, 20
delete user, 21
list users, 23
lock user, 24
log, 86
unlock user, 25
Oracle WebLogic Server LDAP
backup, 78
OS Watcher Black Box, 17
osc.log, 83
OSWbb, 17
ovm-consoled.log, 83
ovmd
Oracle VM Guest Additions, 51
syntax, 51
ovmwatch.log, 83
ovm_admin
Oracle VM Manager administration tool, 19
syntax, 19
ovm_hostd, 35
ovm_reporestore
syntax, 44
ovm_vmcontrol, 35
syntax, 39
ovm_vmdisks, 35
syntax, 41
ovm_vmhostd, 46
ovm_vmmessage, 35
syntax, 42
ovs-agent.log, 83
P
P2V, 63, 68
suppress screens, 68
P2V kickstart file, 68
P2V network configuration screen, 68
password
change admin password, 27
change Oracle VM Manager user password, 22
change user password, 20
password reset
Oracle VM Manager database, 23
Q
QEMU, 90
qemu-dm.pid.log, 83
R
restore
Oracle VM Manager, 75
rotate
100
logs, 25
S
SAP support, 46
security, 27
service domains
SPARC, 2
session
timeout, 32
shadow domain
SPARC, 2
Simple Network Management Protocol
monitoring tools, 18
SNMP
monitoring tools, 18
SPARC
service domains, 2
SSL encryption, 27
start
MySQL, 33
stop
MySQL, 33
Storage Connect
plug-in installation, 1
syntax
ovmd, 51
ovm_admin, 19
ovm_reporeporestore, 44
ovm_vmcontrol, 39
ovm_vmdisks, 41
ovm_vmmessage, 42
system clock
set, 89
using
Oracle VM Utilities, 39
utilities
Oracle VM Manager, 19
V
virtual machine
change CD, 92
console, 91
vm-dump-metrics, 46
vmcore, 17
VMware virtual machine
convert, 63
vm_dump_metrics, 35
VNC viewer, 91
W
Wallclock Time Skew, 89
X
xen-hotplug.log, 83
xen.independent_wallclock
set, 89
xend-debug.log, 83
xend.log, 83
Z
ZFS, 1
T
timeout
UI session, 32
troubleshooting
ISCSI, 85
U
UI
timeout, 32
unlock
Oracle VM Manager user account, 25
user
change Oracle VM Manager user password, 22
change password, 20
create Oracle VM Manager user, 20
delete, 21
list Oracle VM Manager users, 23
lock Oracle VM Manager account, 24
unlock Oracle VM Manager account, 25
101
102