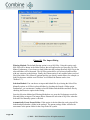
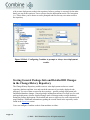
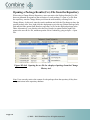
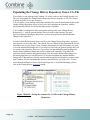
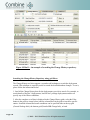
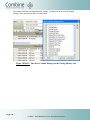
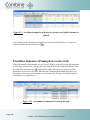
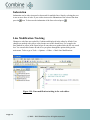
1
JNetDirect Combine™ User Manual © 2005 - 2015 JNetDirect, Inc. All rights reserved. JNetDirect CombineTM Copyright and Disclaimer ................................................................... 8 Key Features of JNetDirect Combine™ ................................................................................... 9 Hardware and Operating Systems ........................................................................................... 11 New Features and Enhancements ........................................................................................... 12 Combine 6.1 ........................................................................................................................ 12 Combine 6.0 ........................................................................................................................ 13 Combine 5.1 ........................................................................................................................ 14 Combine 5.0 ........................................................................................................................ 14 Combine 4.2 ........................................................................................................................ 16 Combine 4.0 ........................................................................................................................ 17 Combine 3.0 ........................................................................................................................ 17 Combine 2.1 ........................................................................................................................ 19 Combine 2.0 ........................................................................................................................ 20 Containers and Environments ................................................................................................. 21 Introduction to Containers and Environments .................................................................... 21 Containers ........................................................................................................................... 21 Static Vs. Dynamic Containers ........................................................................................... 23 Environments ...................................................................................................................... 27 The Dev-QA-Production Release Process .......................................................................... 31 Best Practices - Sharing Environments and Containers by using a Combine Repository .. 37 Container Manager.................................................................................................................. 38 Introduction ......................................................................................................................... 38 Creating Environments ....................................................................................................... 39 Environment Wizard ........................................................................................................... 41 Editing Environments Using the Wizard ............................................................................ 42 Editing Environments Using the Properties Window ......................................................... 43 Copy-Paste an Environment ............................................................................................... 43 Creating Folders in the Container Manager ........................................................................ 44 Folder Wizard ..................................................................................................................... 45 Editing Folders Using the Properties Window ................................................................... 47 Editing Folders Using the Wizard....................................................................................... 47 Copy-Paste a Folder ............................................................................................................ 47 Moving Folders ................................................................................................................... 48 Creating Static Containers .................................................................................................. 48 Static Container Wizard ...................................................................................................... 50 Removing Databases from a Static Container .................................................................... 58 Creating Dynamic Containers ............................................................................................. 59 Dynamic Container Wizard ................................................................................................ 60 Query Used by a Dynamic Container ................................................................................. 68 Reference in the Dynamic Container .................................................................................. 68 Editing Containers Using the Wizard ................................................................................. 69 Editing Containers Using the Properties Window .............................................................. 69 Copy-Pasting Containers .................................................................................................... 70 Moving Containers Between Folders and Environments ................................................... 70 Adding Databases to a Static Container.............................................................................. 70 Page 2 © 2005 - 2015 JNetDirect, Inc. All rights reserved. Add Databases Wizard ........................................................................................................ 71 Copy-Pasting Databases Between Static Containers .......................................................... 74 Moving Databases Between Static Containers ................................................................... 75 Active Environment ............................................................................................................ 75 Export and Import Environment Configuration ...................................................................... 78 Exporting Environments ..................................................................................................... 78 Importing Environments ..................................................................................................... 80 Combine Repository - Sharing Environments and Containers Settings ................................. 84 Installing a Combine Repository to Share Environments and Containers .......................... 84 Executing Scripts and Queries on One or More Databases .................................................... 86 Executing Scripts and Queries on a Single Database ......................................................... 86 Executing Scripts and Queries on Multiple Databases in Parallel ...................................... 88 Limiting the Number of Connections for Parallel Deployment.......................................... 95 Executing Code Packages ................................................................................................... 97 Saving Deployment Results ................................................................................................ 97 Showing or Suppressing Script Output During Execution ................................................. 98 Command Line Execution .................................................................................................. 98 Package Explorer and Package Execution .............................................................................. 99 Code Packages - Introduction ............................................................................................. 99 Wrapped Vs. Unwrapped Packages .................................................................................. 100 Creating Packages ............................................................................................................. 102 AutoNumber Package Property ........................................................................................ 103 Adding a Script to a Package ............................................................................................ 103 Adding and Linking Existing Scripts to a Package .......................................................... 104 Adding Files to a Package from Source Control .............................................................. 105 Asterisk in the Code Package ........................................................................................... 106 Importing Scripts and Folders to a Package ..................................................................... 107 Copy-Paste Package Items ................................................................................................ 110 Editing SQL Code of Package Scripts .............................................................................. 111 Removing Scripts and Folders from a Package ................................................................ 111 Drag-Drop Package Items ................................................................................................. 112 Associating a Container with Package Scripts and Folders .............................................. 112 Exporting Scripts from a Package..................................................................................... 113 Configuring Code Packages .............................................................................................. 114 Executing Code Packages ................................................................................................. 118 Deployment Errors ............................................................................................................ 125 Execution Modes .............................................................................................................. 127 Package Execution State ................................................................................................... 129 Showing or Suppressing Package Output During Execution ........................................... 132 Saving Package Deployment Results................................................................................ 133 Executing Code Packages from the Command Line ........................................................ 134 Find in Package - Search Text in Package Scripts ............................................................ 134 Source Code Control in Code Packages ........................................................................... 134 Change History Repository - Tracking and Auditing Deployments and Changes ............... 136 Overview ........................................................................................................................... 136 Installing the Change History Repository ......................................................................... 140 Page 3 © 2005 - 2015 JNetDirect, Inc. All rights reserved. Configuring Client Machines to Use the Change History Repository .............................. 143 Storing Only General Package Info in the Change History Repository ........................... 144 Storing General Package Info and Detailed DB Changes in the Change History Repository ........................................................................................................................................... 147 Opening a Previously Deployed Package (Cpa) File from the Repository ...................... 151 Opening a Package Results (Cre) File from the Repository ............................................. 152 Populating the Change History Repository from a Cre File ............................................. 153 Recovering Detailed DB Change Info from General Package Info .................................. 154 Change History Tool - Viewing Deployment Results ...................................................... 155 Change History Tool - Searching the Repository ............................................................. 155 Change History Tool - Managing Columns in Grids ........................................................ 157 Environment & System Variables - Embedding Parameters in SQL Code .......................... 159 Combine Variables - Environment and System Variables ............................................... 159 Introduction to Environment Variables ............................................................................ 159 Creating New Environment Variables .............................................................................. 160 Changing the Value of Environment Variables in the Container Manager ...................... 163 Changing the Value of Environment Variables in Run-Time .......................................... 164 Copy Environment Variables from Another Environment ............................................... 167 Using Environment Variables in SQL Code ..................................................................... 169 Preview Code That Uses Variables................................................................................... 170 System Variables .............................................................................................................. 171 Using System Variables in SQL Code .............................................................................. 174 Command Line Utilities ........................................................................................................ 175 Cpaexec - Execute Project Packages from the Command Line ........................................ 175 CpaBuild - Create Code Packages from the Command Line ........................................... 177 Collecting Data from Many Databases or Distributing Data to Many Databases ................ 181 Introduction ....................................................................................................................... 181 Save Script Results ........................................................................................................... 184 Save Script Results - Advanced Options .......................................................................... 187 Save Script Results - Advanced Options .......................................................................... 188 Save Script Results - Package and Folder Nodes ............................................................. 190 Data Aggregation Types and Modes................................................................................. 190 Notifications .......................................................................................................................... 193 Email Notification for Package Execution ....................................................................... 193 Scheduled Packages and Deployments ................................................................................. 194 Introduction ....................................................................................................................... 194 Creating a New Scheduled Package ................................................................................. 195 Editing Scheduled Packages and Settings......................................................................... 196 Deleting Scheduled Packages ........................................................................................... 196 Viewing Scheduled Packages ........................................................................................... 197 Viewing the Windows Scheduled Task Settings for a Scheduled Package ...................... 198 Enable and Disable Scheduled Packages and Tasks ......................................................... 198 Scheduled Task Wizard .................................................................................................... 200 Add Scheduled Task Wizard ............................................................................................ 206 Edit Scheduled Task Wizard ............................................................................................. 206 Data Auto Save ..................................................................................................................... 207 Page 4 © 2005 - 2015 JNetDirect, Inc. All rights reserved. Introduction ....................................................................................................................... 207 Auto Save Data - Export functionality.............................................................................. 207 Auto Save Data - Data Import .......................................................................................... 208 Auto Save Settings ............................................................................................................ 209 Source Code Control ............................................................................................................. 210 Introduction to Source Code Control in Combine ............................................................ 210 Selecting the Source Code Control Provider .................................................................... 210 Folder Mapping ................................................................................................................. 211 Adding Individual (non-Package) Scripts to Source Control ........................................... 212 Check-In Individual (non-Package) Scripts from the Editor ............................................ 213 Check-Out Individual (non-Package) Scripts from the Editor ......................................... 213 Open Script from Source Control in the Editor ................................................................ 214 SCC Status of Scripts in the Editor ................................................................................... 215 Binding Packages to Source Code Control ....................................................................... 216 Check-In Project Package Scripts ..................................................................................... 217 Check-Out Project Package Scripts .................................................................................. 218 Open Project Package from Source Control ..................................................................... 219 Get Latest Version of Project Package Scripts ................................................................. 221 Compare a Package Script with the One in SCC .............................................................. 222 Icons and Script Status in Source Code Control ............................................................... 222 Results Window .................................................................................................................... 223 Viewing Results as a Grid................................................................................................. 223 Viewing Results in Text Format ....................................................................................... 223 Viewing as Diagram ......................................................................................................... 223 Group By Box ................................................................................................................... 224 Ungroup Results in the Grid ............................................................................................. 226 Changing Column Order in the Results Grid .................................................................... 226 Selection Mode - Selecting Columns in the Grid ............................................................. 226 Sort Mode - Sorting Columns in the Grid ......................................................................... 227 Sorting Column Values in the Grid .................................................................................. 227 Copy-Pasting Grid Columns and Rows ............................................................................ 228 Fixed Column Indicators (Pinning Columns in the Grid) ................................................. 228 Fixed Row Indicators (Pinning Rows in the Grid) ........................................................... 229 Filtering Rows ................................................................................................................... 230 Exporting Grid Results ..................................................................................................... 230 Execution Plans - Displaying Actual or Estimated Plans ................................................. 232 Editor Window Features and Functionality .......................................................................... 234 Main Editor Window ........................................................................................................ 234 Bookmarking..................................................................................................................... 234 Commenting Code Lines .................................................................................................. 235 Connecting to a Database to Write SQL Code ................................................................. 235 Connecting to Another Database Using the Same SQL Editor Window.......................... 236 Disconnecting the SQL Editor Window Database Connection ........................................ 236 Find and Replace............................................................................................................... 236 Indentation ........................................................................................................................ 237 Line Modification Tracking .............................................................................................. 237 Page 5 © 2005 - 2015 JNetDirect, Inc. All rights reserved. Line Numbering ................................................................................................................ 238 Line Separators ................................................................................................................. 238 Make Lowercase ............................................................................................................... 238 Make Uppercase................................................................................................................ 239 Outlining ........................................................................................................................... 239 Splitting the Screen ........................................................................................................... 241 Uncommenting Code Lines .............................................................................................. 243 Tabbed Documents ........................................................................................................... 244 Word Wrapping and Line Wrapping ................................................................................ 245 Source Code Control When Working With Individual Files in the Editor ....................... 245 Intelli-prompt and Intellisense .............................................................................................. 247 Introduction to Intelli-prompt in the SQL Editor .............................................................. 247 Intellisense Shortcuts and Hotkeys ................................................................................... 248 Disable or Enable Intelliprompt ........................................................................................ 248 Advanced Scripting ............................................................................................................... 250 Advanced Scripting Dialog ............................................................................................... 250 Code Snippets and Templates ............................................................................................... 251 How to Use Code Snippets and Templates ....................................................................... 251 Creating Custom Code Snippets ....................................................................................... 252 Adding a New Code Snippet to the User Interface ........................................................... 254 Adding a New Code Snippets Folder................................................................................ 255 Removing (Un-mapping) a Code Snippets Folder............................................................ 256 Sharing Code Snippets with Other Users.......................................................................... 257 Create Menu - Creating Database Objects ............................................................................ 258 How to Use and Customize the Create Menu ................................................................... 258 Mapping Options in the Create Menu to Code Snippets .................................................. 258 SQL Help and Language Reference ..................................................................................... 261 How to Use SQL Help and Online Language Reference ................................................. 261 Customizing the Graphical User-Interface ........................................................................... 262 Main GUI Components ..................................................................................................... 262 Floating Windows ............................................................................................................. 262 Docking Windows ............................................................................................................ 265 Auto-Hiding and Pinning Windows.................................................................................. 266 Moving and Placing Windows .......................................................................................... 267 Object Browser ..................................................................................................................... 270 Viewing the Object Browser ............................................................................................. 270 Combine Servers, Registered Servers and Network Servers ............................................ 270 Server Groups for Combine Servers ................................................................................. 272 Moving Server Between Server Groups ........................................................................... 273 Registering Combine Servers ........................................................................................... 273 Adding Combine Servers without Registration ................................................................ 275 Services in the Object Browser ......................................................................................... 277 Starting SQL Services on One or More Servers ............................................................... 278 Stopping SQL Services on One or More Servers ............................................................. 279 Licenses................................................................................................................................. 280 Tracked Servers List ......................................................................................................... 280 Page 6 © 2005 - 2015 JNetDirect, Inc. All rights reserved. Appendix A. Authentication Types ...................................................................................... 281 SQL Authentication .......................................................................................................... 281 Windows Authentication .................................................................................................. 281 Prompt for Authentication ................................................................................................ 281 Use Parent Settings for Authentication ............................................................................. 282 Use Encryption.................................................................................................................. 282 Page 7 © 2005 - 2015 JNetDirect, Inc. All rights reserved. JNetDirect CombineTM Copyright and Disclaimer This document and all sample applications therein, are provided as guidelines and for informational purposes to JNetDirect CombineTM users only. JNetDirect, Inc. makes no warranties, either expressed or implied, in this document. Information in this document, including samples, URL and other Internet Web site references, is subject to change without notice. The risks of using this document or the results of the use of this document are the sole responsibility of the user. The primary purpose of this document, as well as the samples, diagrams, concepts, and all other content provided in this document, is to demonstrate reasonable use of particular features of CombineTM. Most samples, diagrams, and other examples provided in this document do not include all of the code and operational scenarios that would normally be found in a full production system, as this document is only focused on concepts and fundamental associated with the basic operation of CombineTM Technical support is not available for the samples demonstrated in this document. Unless otherwise noted, the example companies, environments, organizations, databases, people, and events depicted throughout this document are fictitious and are not associated with any real company, environment, organization, database, person, or event is intended or should be inferred. Complying with all applicable copyright laws is the responsibility of the user. Without limiting the rights under copyright, no part of this document may be reproduced, stored in or introduced into a retrieval system, or transmitted in any form or by any means (electronic, mechanical, photocopying, recording, or otherwise), or for any purpose, without the express written permission of JNetDirect, Inc. JNetDirect, Inc. may have patents, patent applications, trademarks, copyrights, or other intellectual property rights covering subject matter in this document. Except as expressly provided in any written license agreement from JNetDirect, Inc., the furnishing of this document does not give you any license to these patents, trademarks, copyrights, or other intellectual property. Page 8 © 2005 - 2015 JNetDirect, Inc. All rights reserved. Key Features of JNetDirect Combine™ Combine™ is the first development, change management, and code deployment tool designed to automate the lifecycle of database projects and provide agile code deployment solutions from Development, to Quality Assurance (QA), and to Production. Combine™ is designed to scale as it allows developers to collaborate and work on DB project releases together, and then deploy the entire database code release by a click of a button on any number of databases and servers in parallel. Combine™ is therefore extremely useful for small, mid-size, and up to very large SQL server environments. Additional features in Combine™ include the ability to run queries and execute scripts on any number of databases and servers in parallel (patent-pending technology). Some of these novel features are highlighted below and are discussed throughout this document (for a complete list of features, please visit our Web site at http://www.jnetdirect.com): 1. Collaborative code development, code packaging, one-click package deployment on all databases and servers - Using Combine™ (much like Visual Studio® for .Net developers), database developers can use source control and change management systems to collaborate and compose project releases together. When done, developers package all SQL scripts, queries, and any other SQL code components for their release into a single code package file. Each script in the package is associated with a group of target databases. The entire code package is then deployed by a click of a button onto any number of databases and servers, as the tool will automatically connect and execute each script on all the appropriate target databases in the group. 2. Easy transfer and agile package deployment between Dev, QA, and Production Combine™ allows users to map groups of target databases in Development to a corresponding group of target databases in QA and in Production. Each group of target databases is identified by a user-configured name. When developers compose a code package, the name of the desired target database group is assigned to each script. Packages are composed and configured once by the developers. When the code package is ready, developers send the package file to QA. QA engineers can open the package using Combine™, review the content and settings of the package, and deploy the package on the target databases and servers in the QA environment without modifying the package settings. In addition, QA engineers can choose to deploy only parts of the package, or deploy code only on selected databases and servers. The same concept applies when sending packages to Production. Furthermore, deployment results from each environment can be saved into a single file, stored for auditing purposes, or sent back to the developers. 3. Run queries on multiple databases and servers in parallel - Users can run scripts and queries against a group of target databases on any number of servers in parallel, or against a single database. When running queries against multiple databases, Combine™ automatically connects and executes the queries on all target databases. Results returned from all databases are then formatted and displayed together, and can be automatically saved to central database, for monitoring and reporting applications. Page 9 © 2005 - 2015 JNetDirect, Inc. All rights reserved. 4. Easy configuration and maintenance - Combine™ does not require a designated repository database. To make best use of the tool, users can configure the groups of target databases in Dev, QA, and Production by using a rich set of built-in configuration options and features. If users already maintain a repository database with information about their databases, the tool can be easily configured to retrieve the group settings by querying the repository (to find out more about the repository database, or to implement such a repository, please mail to JNetDirect support at [email protected]). In addition, once a single person configures the target groups, these settings can be exported and imported by other users. 5. With security in mind - Combine is designed to be secure. Developers, QA engineers, and Production DBAs only need to configure the sets of target databases in their own environment. Moreover, users can choose whether to store user-credentials using strong encryption techniques or to require credentials to be entered at each use. Page 10 © 2005 - 2015 JNetDirect, Inc. All rights reserved. Hardware and Operating Systems JNetDirect Combine 6.1 can be installed on x86 and x64 processors running the following operation systems: Windows XP SP3 Windows XP x64 Edition SP2 Windows Vista Windows 7 Windows 8.0 & 8.1 Windows Server 2003 SP1 Windows Server 2008 & 2008 R2 Windows Server 2012 & 2012 R2 Page 11 © 2005 - 2015 JNetDirect, Inc. All rights reserved. New Features and Enhancements Combine 6.1 JNetDirect Combine 6.1 is a minor release focused on enhancements and bug fixes. A detailed list of changes is given below.. 1. A new installer Combine installer is completely updated. Now it has user friendly interface, installs all components and dependencies in one click, automatically upgrades from previous versions. 2. Bug fixes Fixed several minor incompatibilities with MS SQL Server 2014. Fixed several bugs related to Async mode. Improved memory using, error handling. 3. New features Added confirmation dialog for 'Cancel' operations. Improved 'Cancel Execution' option (please see Deployment Errors for more details). Page 12 © 2005 - 2015 JNetDirect, Inc. All rights reserved. Combine 6.0 JNetDirect Combine 6.0 is a large release introduces two major features -- a new 'Async' execution algorithm and a new SQL Server 2014 support. A detailed list of changes is given below.. 1. MS SQL Server 2014 Combine 6.0 is now compatible with MS SQL Server 2014. 2. New execution mode Implemented a new 'Async' execution algorithm. In this mode scripts on each server are executed independently without waiting each other so it allows faster completion of certain server updates (please see Execution Algorithms for more details). Added a new execution state window which allows to a cancel script execution on a certain server (please see Execution State Window for more details). 3. New features Implemented SSL encryption feature (please see Use Encryption for more details). Implemented x86 Combine version which can be run on x64 platform. 4. Bug fixing Fixed several bugs on x64 platform related to Source Code Control support. Fixed a bug with incorrect constraint name generation for a script to save results. Fixed a bug with the Help window focus. Fixed several minor bugs with window layout and behavior. Page 13 © 2005 - 2015 JNetDirect, Inc. All rights reserved. Combine 5.1 Combine 5.1 is a minor new release that focuses on new platforms availability. A detailed list of changes is given below. 1. SQL Azure Combine 5.1 is now compatible with MS SQL Azure. 2. New features Implemented autosave cleanup routine. 3. Bug fixing Query parsing bug with strings in comments. Query parsing bugs with "GO" statement. Memory leak bug related to autosave feature. Combine 5.0 JNetDirect Combine 5.0 is a large release aimed to support new SQL Server 2012, code named Denali. A number of introduced opportunities considerably improved usability of the application. A detailed list of changes is given below. 1. SQL Server 2012(Denali) Examine new SQL Server 2012 together with Combine 5.0! 2. Code Snippets and Templates Combine 5.0 contains many new built-in SQL and T-SQL code templates (also known as snippets) that cover features of SQL Server 2012. 3. Help All wizards are provided with help buttons with corresponding articles. Some new functional was introduced which made the document search and help by Transact SQL easier. Now you only have to choose the necessary instruction in the script and press ALT+F1 for Combine to find the necessary article that you were looking for on MSDN website. 4. Online activation We introduced an on-line activation server. Now there is no need for you to address the Page 14 © 2005 - 2015 JNetDirect, Inc. All rights reserved. helpdesk to activate the license! On-line activation works only with licenses issued after this release. 5. Installation mechanism You already have Combine and a new version has been released? You don’t need to remove the previous version. The installer will perfectly cope with it itself! All the necessary components install automatically. 6. Components of server management Now you don’t have to try to manage SQL server services to find out that you don’t have the access to them. Combine defines itself whether you can start/stop services, depending on that it turns management components on or off. 7. User Account Control and Services Management Service Management is improved on systems with UAC. Combine will itself ask you to give the permission in case of need. 8. Toolbar Drag'n'Drop Enlarge the working area of Combine using drag'n'drop for toolbar components. And to return the panels you only have to click on Tools->Dock Toolbars. 9. Viewing the content of the collapsed paragraph Once an outlined paragraph is collapsed in the text editor, you can still view the content of the paragraph by using the mouse and hovering over the collapsed area. 10. Customizing the GUI Docking windows has been implemented. Docking refers to an action of placing a window in a dock. Undocking means that a docked window will be moved to the main editor part. Auto hiding windows has been updated - you can hide any window. Previously it worked only for a group of windows. 11. Mistakes correction Licenses check Panels disappearance Comments and apostrophes processing Line numbers with errors in scripts Page 15 © 2005 - 2015 JNetDirect, Inc. All rights reserved. Combine 4.2 JNetDirect Combine 4.2 is a minor new release that focuses on recoverability of the user data such as servers and environments lists. It adds new functionality to export import data and the autosave mechanism. It also contains fixes and changes that are requested by users since the last release. Key features and enhancements in Combine 4.2 are now summarized below. 1. The Autosave functionality The new feature is Data Autosave functionality. Added functionality of environments data, combine and registered servers export and import. The data is encrypted with the user defined password to the specified folder. The data can be automatically imported by the application launch/stop events or periodically since the application start by the user defined time interval. - Export and Import functionality has been added. You can call Export/Import data dialog by clicking on the appropriate menu item. - Autosave Options have been added to the application options dialog (Tools ? Options). You can specify the password encryption (password confirmation is needed), the path to default export folder (the data exported automatically will be saved there) and auto export events by selecting checkboxes. 2. Changes to script processing Script processing has been changed to enlarge the flexibility of scripts processing and script statements detection. Script parsing error has been fixed that identified the text "GO" inside multi-string commentaries or text variables content as server execution package start statement and split it to parts. 3. Changes to servers data Altered servers and folder containers life cycle and saved content additionally added saving of description to combine and registere folders at object browser panel. Page 16 © 2005 - 2015 JNetDirect, Inc. All rights reserved. Combine 4.0 Combine 4.0 is a major new release that focuses on new platforms availability. This release introduces Combine 4.0 optimized for x64 platform. Key features and enhancements in Combine 4.0 are now summarized below. new platforms availability Combine 4.0 builds on the power of previous versions by adding support for SQL Server 2008 and x64 platforms. Combine 3.0 Combine 3.0 is a major new release that focuses on recording database changes for auditing and tracking purposes. This release introduces the Change History repository database and the Change History tool that enable users to view past deployment results and search the repository content. Key features and enhancements in Combine 3.0 are summarized below. 1. The Change History Repository Users can install a central repository database to store package execution results, and then configure their client machines to read from, or write to, the Change History repository: Users can configure Combine to save general deployment results in the repository, or to also save detailed database changes info to track all changes made to target database during the execution of code packages. Furthermore, the content of the Package Results (Cre) file and the deployed code package (Cpa) file can be extracted from the repository. These features and many others can be invoked from the new user-interface and tool under Tools → Change History. For additional information regarding the Change History repository and tool, please refer to the Change History Overview section in the help files. 2. Changes to CpaExec The CpaExec command line utility includes a new flag (ch) that instructs Combine whether to write to the Change History repository database. The same changes are also included in the Scheduled Packages Wizard, so that scheduled packages can be configured to store deployment results to the repository. 3. Change to the Package Results (Cre) File The following new features are available in cre files that are created using Combine 3.0: - The content of the Cre file can be manually loaded to the Change History repository. - Users can extract the code package directly from the cre file, to view the content of the package that was executed and generated the cre file. Page 17 © 2005 - 2015 JNetDirect, Inc. All rights reserved. - Environment Variables: Script nodes in the cre file now display the original scripts (i.e., before Environment Variables replacements). Scripts under individual database nodes in the cre are shown after variable replacements. Note: Cre files that were created using Combine 2.1 or earlier cannot be manually loaded to the Change History repository. However, these cre files can still be opened and viewed in the main editor window. 4. Changes to the Options dialog for Packages Users can instruct Combine to prompt or to automatically save package deployment results, either to a cre file or to the Change History repository, by settings the appropriate options under Tools → Options → Packages → Auto-Save Results. A new section under the Options dialog is also available, namely Packages → Change History, and holds the location and credentials for the Change History repository database. Page 18 © 2005 - 2015 JNetDirect, Inc. All rights reserved. Combine 2.1 Combine 2.1 is a relatively small release that includes features that were urgently requested by customers. The new version introduces System Variables that allow users to embed system-parameters in SQL scripts and code, as well as minor updates to the CpaBuild command-line utility and the information shown in package Results, script Results, and the cre output files. 1. System Variables System Variables are system-parameters that can be embedded in SQL scripts and code, both in packages as well as in individual (i.e., non-package) scripts that are executed directly from the editor. System Variables enable users to embed the name of each target database, the name of the target server, as well as the SQL Server instance name. When used in SQL code, the format of System Variables is <%VariableName%> (for example, <%MyVar%>). Unlike Environment Variables that utilize the format <$VariableName$>, System Variables are built-in to the application and are not defined or created by users. In addition, the value of System Variables is automatically replaced by Combine when executing packages and scripts - users are not prompted to validate or update their value before code is deployed, as in the case of Environment Variables. For additional information please refer to the section titled System Variables in the help files. 2. CpaBuild changes The CpaBuild command-line utility now supports a new method, namely /UpdatePackage /rm, which allows users to update a code package and remove missing references - files and folders that do not exist on the file system however are included in the package. A brief description of the CpaBuild command-line utility is available here. A detailed description of the utility can be found in the CpaBuild.txt file, which is located in the installation directory of JNetDirect Combine. 3. Results and Cre changes A new node that shows the content of each script as it was executed against each target database is now available in the Results pane and in the cre file, and can be found under individual database nodes. This change applies to Package Results, Results in the editor, and cre files. If Environment Variables or System Variables are embedded in the original script, then the new node displays the script content after all variable replacements. Note: The new version is fully backward compatible: Cre files that are created with older versions of Combine can be opened and viewed in the new version. Page 19 © 2005 - 2015 JNetDirect, Inc. All rights reserved. Combine 2.0 Key new features in Combine 2.0 include scheduled execution of one or more code packages, support for Aldon Lifecycle Manager (LM) as a source code control (SCC) provider, performance optimizations in the Container Manager, as well as advanced detection of duplicate databases in Containers before package execution. Details regarding the new features are available below. 1. Scheduled Packages and Deployments The main new feature in Combine 2.0 is the ability to schedule the execution of one or more code packages. Scheduled Tasks and Packages can now be defined and managed using the new tool under Tools → Scheduled Packages, which allows users to create, edit, delete, and manage scheduled packages and deployments. The new scheduling features use the Windows Scheduled Tasks together with the CpaExec command line utility to schedule and execute packages, respectively. 2. License Tracking Enhancements Combine 2.0 tracks SQL Server instances for licensing purposes using the physical server name and instance name, instead of IP address and instance name as before. 3. Advanced Detection and Warning of Duplicate Databases in Containers In previous versions of Combine a single database could (theoretically) be defined twice in the same Container, for both Static and Dynamic Containers. For example, the same server could be referenced multiple times – once through the server name, another through the server IP, another time using aliases, and so on. Combine 2.0 introduces new mechanisms to detect duplicates to make sure that one database (on the same server) is not referenced multiple times in a single Container. Duplicate databases are detected before scripts and packages are executed against Containers. If any duplicates are detected then the duplicate databases are marked with warning icons. 4. Container Manager - Performance Optimizations Combine 2.0 contains several performance improvements for working with repositories in the Container Manager (i.e., to share Environments and Containers between users). 5. Source Control Support for Aldon Lifecycle Manager Combine 2.0 supports Aldon Lifecycle Manager (LM) as an SCC provider. In addition, several custom options that are available for Aldon LM and are not available for other SCC systems were added in the Options dialog. Page 20 © 2005 - 2015 JNetDirect, Inc. All rights reserved. Containers and Environments Introduction to Containers and Environments Containers are used in Combine to deploy SQL code and execute queries against multiple databases in parallel, and retrieve unified results from all queried databases. Containers and Environments are extremely useful for passing SQL code packages between the Development (Dev), Quality Assurance (QA), and Production SQL server environments, and easily deploying release packages on any number of databases and servers in those environments. The use of Containers and Environments in the Dev-QA-Production change management and code release process is described below, and continued in the section titled The Dev-QAProduction Release Process. General Note: Be sure to register all servers that you will be working with in the Object Browser in Combine before defining Containers or executing code in the editor. Combine servers are used throughout the application and hold the connection information for all databases and servers. Containers A Container is a group of one or more databases, either on the same server or on different servers. Each database in the group is identified by the database name and its SQL server instance name (or IP address). A single database can belong to several Containers. In other words, a database that belongs to one Container can belong to other Containers as well. Containers allow users to group multiple databases into a single entity so that scripts and queries could be run against all databases in the Container in parallel. Throughout this document, the term script is used to denote all types of SQL and T-SQL statements, such as table and user creation statements, stored procedure and SQL job execution commands, queries, or any other data definition or data manipulation statements. Think of the group of databases in a Container as the set of target databases on which SQL scripts will be executed. To deploy code and scripts on several databases simultaneously, the user is only required to create a Container that consists of all desired target databases, and then execute the script against the Container (see samples and figures below). Combine will then automatically connect to all databases defined in the Container and execute the script on those databases. In addition, if any result sets (e.g., data sets, data tables) are returned from one or more target databases in response to the deployment of the script, Combine will automatically format and aggregate the results returned from all servers, and will then display the unified results to the user. As an example, consider the following diagram that describes three different Containers: Container1 consists of all user-defined databases on the DevSvr1 and DevSvr2 servers. The Page 21 © 2005 - 2015 JNetDirect, Inc. All rights reserved. target databases of Container2 are the DBA databases named DBAMaint on the two servers, and Container3 holds the set of Web databases, namely Web1Dev and Web2Dev. With these mappings, the user can now run scripts and queries against several databases in parallel. For instance, if we execute the SQL statement SELECT * FROM sysindexes against Container1, then the content of sysindexes will be returned from all six databases in the container. Similarly, running a script that creates a stored procedure against Container3 will create the stored procedure on the Web1Dev and Web2Dev databases at the same time. Additional examples are provided in the images below. By running scripts and queries against Containers, database administrators can easily collect information about indexes, jobs, and all other database objects by a click of a button. Figure 1: An example of mapping databases to Containers. Page 22 © 2005 - 2015 JNetDirect, Inc. All rights reserved. Figure 2: The results displayed by Combine after selecting top 5 rows from sysindexes and running EXEC msdb..sp_help_job against the DBA Databases container. Static Vs. Dynamic Containers Two types of Containers are supported, Static Containers and Dynamic Containers. Each type uses a different technique to store and identify the set of target databases. A Static Container consists of a fixed group of databases. Databases are added to the Static Container by specifying the typical connection information, such as the database name and SQL server name (or IP address). To add or remove databases from the Static Container, the user must open the Container Manager and manually edit the Container configuration. When scripts and queries are run against a Static Container, Combine will retrieve the identifiers (i.e., database and server names) of the target databases from the Container configuration, and then run the scripts on all those databases using the authentication type and credentials entered for the Container. Static Containers are therefore useful to store Page 23 © 2005 - 2015 JNetDirect, Inc. All rights reserved. groups of databases that are relatively "static" (i.e., when databases that belong to the group are not created, dropped, or moved between servers frequently). To demonstrate this fact, consider the following counter example where Static Containers should not be used: A Static Container named "MSDB Databases" consists of all msdb databases over all servers in the production environment, and assume that a new instance of SQL server is installed every day. In order to ensure that the "MSDB Databases" Static Container indeed holds all msdb databases, the user must manually add the msdb database to the Container for each new server, daily. This maintenance overhead can be overcome by using Dynamic Containers. Note: The main advantage of Dynamic Container is that they allow users to share Environment and Container information from a single data repository. Using Dynamic Containers, developers only need to configure the Environments and Containers in their userinterface once, and a single person can maintain the data repository from that point on. Dynamic Containers assume that a list of servers and databases is already available in some tables. Throughout, we use the term Repository, or Reference, to denote the database in which the server-to-database mappings reside. When a script is run against a Dynamic Container, Combine first connects to the Reference database and runs a user-provided query that returns the identifiers of all target databases. Then, as in the case of Static Containers, Combine connects and deploys the script on all target databases. The following steps are required to create a Dynamic Container: 1. Locate the Reference database and table(s) that holds the server and database information. 2. Write a query that returns the database and server names for all target databases. 3. Create a Static Container and add the Reference database to it. The Reference database should be the only database in this Container. 4. Use the Dynamic Container Wizard to create the Dynamic Container. When prompted, associate the Static Container in (3) and the query in (2) with the Dynamic Container. The example below illustrated the concept of Dynamic Containers. Here, we create a Dynamic Container with five DBAMaint target databases on five different servers, and call this Container "DBA Databases". First, a Reference database is required. Assume that the ServerRepository database on ProdSvr5 has the server-database mappings, and that the data is stored in a table named DBServers (the content of the DBServers table is given in Figure 4). Page 24 © 2005 - 2015 JNetDirect, Inc. All rights reserved. Figure 3: Using the ServerRepository Reference database to build the "DBA Databases" Dynamic Container. Figure 4: The server-database mappings in table DBServers on the Reference database. Page 25 © 2005 - 2015 JNetDirect, Inc. All rights reserved. Now, either one of the following queries (or many other queries) will return the set of DBAMaint target databases: SELECT NameOfServer AS ServerName, NameOfDatabase AS DatabaseName FROM DBServers WHERE IsDBA = 1 SELECT DISTINCT NameOfServer AS ServerName, 'DBAMaint' AS DatabaseName FROM DBServers Next, we create a Static Container (named DBServerMap in Figure 3) that holds the ServerRepository target database. Finally, we create the Dynamic Container using the Dynamic Container Wizard, and when prompted, assign the DBServerMap Container and the query as part of the Dynamic Container configuration. Once the "DBA Databases" Container is created, every time scripts are run against this Container, Combine performs the steps in Figure 5 to deploy code on all DBAMaint target databases. Figure 5: The steps taken by Combine to execute a script against the "DBA Databases" Dynamic Container. Page 26 © 2005 - 2015 JNetDirect, Inc. All rights reserved. Environments Each Environment consists of any number of Static and Dynamic Containers, with the restriction that Container names in a single Environment must be unique. However, Containers that belong to different Environments can (and in many cases should) have the same name. Environments are introduced in Combine to relate groups of databases (i.e., Containers) between separate physical SQL server environments. The primary benefit of Environments is that they allow developers, software testers, and DB administrators to pass SQL scripts and code packages between Development, QA, and Production, respectively, while guaranteeing fast deployment on each environment. For now, consider three Environments, namely the Development (Dev) environment, the Quality Assurance (QA) environment, and the Production environment. In most companies, databases and servers used by developers to write SQL code are separate from the databases and servers used by software engineers in QA, which are also distinct from the databases and servers in production. By using Combine Environments it is now possible to map groups of databases between these physical environments on the basis of their functionality. The Development environment - Assume that developers write code and test scripts on two SQL servers, namely the DevSvr1 and DevSvr2 servers (see Figure 6). The DevSvr1 server contains the FinanceDev, Web1Dev, and DBAMaint user-databases, whereas the DevSvr2 server contains the Billing, Web2Dev, and DBAMaint user-databases. For the purpose of this example, assume that the schema in the Web1Dev and Web2Dev databases is similar, so that scripts developed for Web1Dev must also be deployed on the Web2Dev database. Figure 6: Containers and their target databases in the Development environment. Page 27 © 2005 - 2015 JNetDirect, Inc. All rights reserved. The QA environment - In the QA environment, assume that three SQL servers are available, namely QASvr1, QASvr2, and QASvr3, as illustrated in Figure 7. When scripts written by developers for the Billing database (in Development) are passed to QA, these scripts must then be deployed on the Billing database on the QASvr2 server. Similarly, scripts composed for the FinanceDev database on the DevSvr1 server are later deployed on the FinanceQA database in the QA environment. In the same manner, code developed on the Web1Dev and Web2Dev databases is then deployed on the Web1QA, Web2QA, Web3QA and Web4QA databases in QA, and the same concept applies to the DBAMaint databases as well. Figure 7: Containers and their target databases in the QA environment. The Production environment - Releases that pass all quality assurance tests are forwarded to production for final deployment. Here, assume that there are four SQL servers: ProdSvr1, ProdSvr2, ProdSvr3, and ProdSvr4 (see Figure 8). In production, scripts developed for the Billing database are deployed on the Billing database on the ProdSvr4 server; scripts written for the FinanceDev database are now executed on the Finance1Prod and Finance2Prod databases, whereas all Web scripts are now run on five production databases, namely Web1Prod, Web2Prod, Web3Prod, Web4Prod, and Web5Prod. The same idea is followed by the DBAMaint databases. Page 28 © 2005 - 2015 JNetDirect, Inc. All rights reserved. Figure 8: Containers and their target databases in the Production environment. To summarize, the following figure describes the flow of code deployment between Dev, QA, and Production, where each color denotes the appropriate group of target databases (i.e., Containers) across all Environments. Page 29 © 2005 - 2015 JNetDirect, Inc. All rights reserved. Figure 9: Database groups and the flow of code releases between the Dev, QA, and Production environments. Page 30 © 2005 - 2015 JNetDirect, Inc. All rights reserved. The Dev-QA-Production Release Process Change management and code release processes are supported in Combine through several key features: 1. Code packages: A code package consists of scripts. Each script in the package is assigned to a Container. When running a code package, each script will be deployed on all target databases in the associated Container (more information about code packages can be found in the Code Packages section). 2. Passing code packages between Dev, QA, and Production: Scripts are packaged into a single .cpa file. This file contains the text of the scripts and the name of the Container assigned to each script. Entire releases can therefore be saved as a single file that can be passed, viewed, edited, and deployed by individuals running Combine. More importantly, once all Containers are configured properly in the Dev, QA, and Production environments in the Combine Container Manager, each Container in Dev has a corresponding Container (i.e., Container with the same name) in QA and a matching Container in Production. This fact ensures fast release deployment for the following reasons: After developers write the release code and build a code package, software engineers in QA can easily open the package and deploy the entire package on the servers in QA by a click of a button, without altering the package content. Since each script in the package is already associated with a Container name, code deployed on target databases of Containers in Development is now deployed on the target databases of the corresponding Containers in QA. This principle also applies when passing packages from QA to Production. Examples that demonstrate the transfer and fast deployment of code packages between Dev, QA, and Production are provided below. 3. Importing and Exporting Environment and Container configuration: Environments and Containers only need to be configured and maintained by one person who is familiar with the groups of target databases in Dev, QA, and Production. Once Environments and Containers are defined, their configuration settings can be exported and then imported by other Combine client machines. Also, note that the three Environments need not be defined on each machine running Combine: Developers only need the Dev Environment with the correct Containers settings, QA engineers need only have the QA Environment with Containers having the same name as in Dev, and Production DBAs only need the Production Environment, again, with same Containers names as in Dev and QA. As an example, below is a snapshot of the Container Manager that stores the configuration of all three Environments and Containers for the physical Dev, QA, and Production environments previously described in Figure 9 when all Containers are Static Containers. Page 31 © 2005 - 2015 JNetDirect, Inc. All rights reserved. Figure 10: Environments and Containers in the Container Manager where the settings of all three Environments are defined in Combine. Note that the folders names and Container names must be the same in the Dev, QA, and Production Environments. Page 32 © 2005 - 2015 JNetDirect, Inc. All rights reserved. As stated earlier, it is sufficient for developers to maintain the Dev Containers, for QA engineers to maintain the Containers that belong to the QA Environment, and for DBAs to keep the Production Environment Container settings. In this case, the following figure shows the Container Manager viewed by developers, QA engineers, and DBAs, respectively, when all the Containers are Static Containers. Keep in mind that Containers in different Environments need not be of the same type - Static Containers in one Environment could correspond to Dynamic Containers in another Environment as long as they have the same Container name (and they are placed under folders with same names in the Container Manager). Figure 11: Environments and Containers in the Container Manager seen by developers, QA engineers, and Production DBAs, when users only configure their own Environment. Passing packaged between Dev, QA, and Production using Combine guarantees fast deployment in each environment as now demonstrated (see the section titled Code Packages to learn more about packages): Consider the code package in Figure 12. Each script in the package is associated with a Container name. In this sample package, scripts 01 to 04 are associated with the Web Databases Container, scripts under the Finance Databases folders are associated with the Finance Databases Container, scripts under DBA Databases as well as the script 08 are mapped to the DBA Databases Container, and script 07 is associated with the Billing Databases Container. Page 33 © 2005 - 2015 JNetDirect, Inc. All rights reserved. Figure 12: A sample package that deploys scripts to all databases and servers in the Web Databases, Billing Databases, Finance Databases, and DBA Databases Containers. Page 34 © 2005 - 2015 JNetDirect, Inc. All rights reserved. Notice that each script in the sample package of Figure 12 includes a SQL statement that verifies that changes and objects created in the script are indeed deployed successfully. For example, once a table is created the script verifies that a valid OBJECT_ID is available for the new table (i.e., OBJECT_ID(TableName) IS NOT NULL) and returns a single row to inform the user of the rollout results. Scripts in the package are executed according to their order in the package tree (see Configuring Code Packages for complete details). When developers run the package, scripts will be deployed on databases in the Containers of the Development Environment listed in Figure 11, and the deployment results are given in Figure 13. When the package is passed to QA engineers, the package is deployed by a click of a button on all the target databases in the QA Environment shown in Figure 11 without making any modification to the package configuration or package content. Execution results in the QA Environment are presented in Figure 14. In the same manner, after the package is sent to Production, DBAs need not make any package changes and can deploy the entire package on all target databases in the Production Environment by a click of a button as shown in Figure 16 below. Notice that the ContainerServer and ContainerDatabase columns in the grids result in the images below are added automatically by Combine to reflect the target database from which each row in the grid is returned). Results returned from the package execution are displayed as aggregated results from all target databases and also include the execution plan and results for each individual database. Notes: 1. Once a package is executed, Combine performs a set of tests and verifications to ensure that scripts in the package will be executed successfully. For example, database and server connectivity as well as proper authentication and credentials are verified for all databases involved in the package execution before Combine deploys any of the scripts in the package. If any tests and checks are not successful, Combine will notify you of all issues and will not execute any portions of the package. In addition, several screens are displayed before the package scripts are deployed to provide users with better control and visibility to the execution. These screens and many other details involving the package execution can be found in the section titled Executing Code Packages. 2. If multiple Environments are used to deploy code from one client machine as in the example of Figure 10, then using the Container Manager the user must set the Active Environment against which the package will be deployed. At any given time, only a single Environment can be active and the active Environment is the one displayed in bold letters in the Container Manager (for example, in Figure 10 the Development Environment is the active Environment). By setting the appropriate active Environment in the Container Manager, the Dev-QA-Production release process can also be followed from a single client machine that has access to all databases and servers. Page 35 © 2005 - 2015 JNetDirect, Inc. All rights reserved. Figure 13: Execution results of the code package in Figure 12 against the Development Environment. Figure 14: Non-sorted execution results of the code package in Figure 12 against the QA Environment. Results can be sorted using tools in the grid. Page 36 © 2005 - 2015 JNetDirect, Inc. All rights reserved. Figure 15: Non-sorted execution results of the code package in Figure 12 against the Production Environment. Results can be sorted using tools in the grid. Best Practices - Sharing Environments and Containers by using a Combine Repository Environments and Containers configuration under the MyEnvironments node in the Container Manager are stored on the local user machine. This includes Environment names, Container names, databases in Static Containers, as well as the Reference (Repository) Static Container and the Queries used by Dynamic Containers. If you wish to pass other users your Container configuration, you must Export you Environment and Container settings, and then ask other users to Import them. However, in order to overcome this overhead and easily share Environment and Container configuration, you can install a Combine Repository database that holds the settings of Environments and Containers, and then have multiple users point to the Combine Repository to share those settings and definitions. A detailed user-manual that explains the Combine Repository database is available at the download section on JNetDirect' website. Instructions for installing and using a repository are also available in this document in the section titled Combine Repository - Sharing Environments and Containers. Page 37 © 2005 - 2015 JNetDirect, Inc. All rights reserved. Container Manager Introduction The Container Manager includes a rich set of features that allow users to easily manage Environments and Containers. Each Environment consists of Containers and folders. Folders allow you to organize your containers as you see fit. When deploying code and queries against a Container, the Container name is identified by the name of its parent folder in the Container Manager together with the Container name, for example "Folder1\Container1". In order to transfer packages between Dev, QA, and Production, the folder names and Container names in each Environment must be identical. For more details please refer to the section titled Executing Code Packages. The Container Manager can be viewed by selecting • View → Container Manager. Key features of the Container Manager are listed below in the context of Environments, folders, Containers, and target databases in Static Containers. Environments: 1. Create Environments 2. Edit Environments 3. Copy-paste an Environment and all its folders and Containers 3. Setting the Active Environment Folders: 1. Create folders 2. Edit folders 3. Copy and paste folders between Environments or within the same Environment 4. Move folders Containers: 1. Create Static Containers 2. Create Dynamic Containers 3. Edit Container settings 4. Copy-paste Containers 5. Move Containers to another Environment or folder 6. Add target databases to a Static Container Target database in Static Containers: 1. Copy-paste databases between Static Containers 2. Move database between Static Containers Page 38 © 2005 - 2015 JNetDirect, Inc. All rights reserved. Creating Environments Environments contain Containers that can be placed directly under the Environment or under folders and sub-folders. Folders are provided to help users organize their Containers. Each Environment has a name, description, and authentication type. For more details regarding these parameters please refer to the Environment Wizard section. Environments can be created by either using the Environment Wizard or by copying an existing Environment and pasting it under the root node in the Container Manager. To add an Environment using the wizard, follow one of the options below: Right-click the root node in the Container Manager, choose Add, and then Add Environment. Figure 16: Creating a new Environment from the Container Manager. Page 39 © 2005 - 2015 JNetDirect, Inc. All rights reserved. Left-click the root node in the Container Manager. In the main menu go to Container and press Add Environment. Figure 17: Creating a new Environment from the main menu. Page 40 © 2005 - 2015 JNetDirect, Inc. All rights reserved. Environment Wizard The welcome page is the first page in the wizard. If you do not wish to see this page again, mark the "Do not show welcome page next time" checkbox and press next. Figure 18: The welcome page of the Environment Wizard. Next you will be asked to enter the name, description, and authentication type for the Environment. The Environment name will be displayed in the Container Manager. The description is optional and can be used to associate comments with the Environment. The authentication type will be the default authentication type for the Containers, folders, and target databases in the Environment. You can later specify the authentication type and credentials for each Container and folder, which will override the Environment settings. The authentication type for each Container will later be used to connect and deploy code on all the databases in the Container. The available authentication types are SQL authentication, Windows authentication, and Prompt, which is also the default. Also you can use check box Use Encryption to turn on SSL encryption for a connection to DB server. Note that when either Windows authentication or Prompt is selected, Combine will not store your user name and password anywhere. Finally, after you press the Next button you will reach the last page in the wizard, which will ask you to press Finish to complete the Environment creation. Page 41 © 2005 - 2015 JNetDirect, Inc. All rights reserved. Figure 19: Entering the name, description, and authentication type for the Environment. Editing Environments Using the Wizard If you wish to change the settings for your environment, such as the Environment name, authentication type, or configuration, you can do so by right-clicking the Environment and selecting the Wizard option. The pages in the Edit Environment Wizard are identical to the ones described in the Add Environment Wizard. Please refer to the section Environment Wizard for more information regarding the wizard. Page 42 © 2005 - 2015 JNetDirect, Inc. All rights reserved. Editing Environments Using the Properties Window The Environment name, description, and authentication type can be manually altered through the Properties window. To view the Properties window you can either press F4, or right-click the Environment icon and choose Properties in the menu, or press the Properties icon . You can then view and modify the Properties shown below. Figure 20: The Environment properties. Copy-Paste an Environment You can copy and paste an existing Environment to create a new Environment. Once an Environment is copied it can only be pasted under the root node in the Container Manager tree display. When an Environment is copied, the folders, Containers, target databases and all other configuration settings under the Environment are copied over to the new Environment. Choose one of the following options to copy-paste an Environment: Right-click the Environment you wish to copy and press Copy in the menu. Then leftclick the root node in the Container Manager to select it. Right-click again and select Paste in the menu. Use CTRL+C and CTRL+V to copy and paste the Environment. Hold the CTRL button. Using the mouse, drag and drop the Environment under the root node of the Container Manager. Press the Copy icon in the main toolbar, select the root node, and then press the Paste toolbar icon. Page 43 © 2005 - 2015 JNetDirect, Inc. All rights reserved. Creating Folders in the Container Manager Folders are provided as an optional feature to help you organize the Containers in the Environment in any way that you see fit. Folders can be created through the Folder Wizard or by copy-pasting an existing folder. When creating a folder you will be asked for the folder name, description, and authentication type. The authentication type will be the default authentication type for Containers and their target databases that are placed under the folder, as well as any subfolders. The Container authentication type and credentials are used to connect and deploy code on all the Container databases. You can later set the authentication type for each Container and subfolder and these settings will override the authentication type of the parent folder. To start the wizard, use one of the options below: In the Container Manager, right-click the Environment (or folder) under which the new folder (or subfolder) will be placed and choose Add, and then New Folder. Figure 21: Starting the Folder Wizard from the Container Manager to create a folder under an Environment or under an existing folder. Left-click the Environment (or folder) under which the new folder (or subfolder) will be placed. Go to the main menu and then select Container and New Folder. Page 44 © 2005 - 2015 JNetDirect, Inc. All rights reserved. Figure 22: Starting the Folder Wizard from the main menu. Folder Wizard The first page in the wizard is the Welcome page. If you do not wish to view the welcome page from now on then check the “Do not show welcome page next time” checkbox and press next. Figure 23: The welcome page of the folder wizard. Page 45 © 2005 - 2015 JNetDirect, Inc. All rights reserved. In the next page of the wizard you will be asked to enter the name, description, and authentication type for the folder. The name will be displayed next to the folder under its parent Environment or parent folder. The description is optional and lets you enter comments for the folder. The authentication type will be the default authentication type for the Containers placed under the folder and their target databases. You can later specify the authentication type and credentials for each Container that will override the folder settings. Available authentication types are SQL authentication, Windows authentication, Prompt, and Use Parent Settings which is also the default. Also you can use check box Use Encryption to turn on SSL encryption for a connection to DB server. The parent of the folder is the first node above the folder in the Container Manager tree hierarchy, which is either an Environment or a parent folder. If you do not wish to allow Combine to store your login name and password then you should use either Windows Authentication or Prompt. When you are done entering the needed information press Next. In the last wizard page, press Finish to create the folder. Figure 24: Entering the name, description, and authentication type for the folder. Page 46 © 2005 - 2015 JNetDirect, Inc. All rights reserved. Editing Folders Using the Properties Window The folder name, description, and authentication type for a folder, which is used as the default authentication type for the underlying Containers, can be updated directly from the Properties Window. To start the Properties window you can select the folder of interest and hit the F4 key. You can also right-click the folder icon and select Properties, or press the Properties icon on the main toolbar . Figure 25: The folder Properties. Editing Folders Using the Wizard You can edit the folder Properties by invoking the Folder Wizard. To start the wizard, rightclick the folder you wish to edit and either select the Wizard option or press SHIFT+F4. Copy-Paste a Folder Folders can be copied and pasted either in the same Environment or from one Environment to another. Folders can be pasted directly under the Environment node of the Container Manager tree or under other folders. When copying folders, all subfolders and Containers under the copied folder will be copied as well. To copy and paste folders you may follow one of these options: Page 47 © 2005 - 2015 JNetDirect, Inc. All rights reserved. Right-click the folder you wish to copy and press Copy in the menu. Left-click the Environment or folder in which the new pasted folder will be placed. Right-click again and select the Paste option in the menu. Use CTRL+C and CTRL+V to copy and paste the folder. Hold the CTRL button. Using the mouse, select and drag one or more folders and drop them under a desired Environment or folder. Press the Copy icon on the main toolbar, select the Environment or folder where the new folder will be pasted, and then press the Paste icon on the toolbar. Moving Folders Folders can be moved within the same Environment or to other Environments. When folders are moved, all their underlying subfolders and Containers will be moved as well. Several options can be used to move folders: Drag and drop - Using the mouse, drag and drop a folder from one location to another. Cut and paste - Cut the folder from its current location using either CTRL+X or the toolbar icon and then paste the folder to its target location using either CTRL+V or the paste icon. Creating Static Containers In the Container Manager, new Static Containers can be created by using the Static Container Wizard or by copy-pasting an existing Container into an Environment or under a folder. Before creating a Static Container, be sure that all the servers that contain the databases that you wish to assign to the Static Container are registered as Combine Servers in the Object Browser. In the Static Container Wizard you will be asked to provide the name, description, authentication type and target databases for the Static Container. When deploying scripts and queries against the Container, the authentication type and credentials will be used to connect and deploy code on all the databases in the Container. Please select one of the options below to open the wizard: Page 48 © 2005 - 2015 JNetDirect, Inc. All rights reserved. Right-click the Environment (or folder) under which the Container will reside. Then, select Add and choose Add Static Container. Figure 26: Creating a new Static Container from the Container Manager directly under an Environment or under a folder. Left-click the Environment (or folder) that will hold the Container and on the main menu go to Container and then Add Static Container. Figure 27: Creating a new Static Container from the main menu. Page 49 © 2005 - 2015 JNetDirect, Inc. All rights reserved. Static Container Wizard Before creating a Static Container, make sure that all the servers that contain the databases that you wish to assign to the Static Container are registered as Combine Servers in the Object Browser. When the Static Container wizard is started, the following welcome page will appear. If you do not want to see this welcome page every time you start the wizard then click the checkbox "Do not show welcome page next time" and press Next. Figure 28: The welcome page of the Static Container Wizard. After you press the Next button, you must enter the name of the Container. Two Container names in the same Environment should not have the same name in general, to avoid confusion. However, for code deployment purposes, Combine identifies the Container name through the name of the folder under which the Container resides (if any) together with the Container name, so that Containers can have the same name under different folders (this is not recommended). The Container description is optional and allows you to put comments in the Container for your own reference. The authentication type and credentials of the Container will be used as Page 50 © 2005 - 2015 JNetDirect, Inc. All rights reserved. the authentication type and credentials to connect and deploy code on all the target databases in the Container. Available authentication types are SQL Authentication, Windows Authentication, Prompt, or Use Parent Settings, where the latter is the default and uses the settings provided for the Container parent in the Container Manager tree. The parent node can be either a folder or an Environment. Also you can use check box Use Encryption to turn on SSL encryption for a connection to DB server. Figure 29: Entering the Container name, description, and authentication type. After pressing Next, databases can be added to the Static Container by pressing the Add Databases button. You can also press Next to complete the Container creation and then add target databases to the Container at a later time. Page 51 © 2005 - 2015 JNetDirect, Inc. All rights reserved. Figure 30: The list of databases in the Container. When creating a new Container the list is initially empty. To demonstrate all the features available in the wizard please refer to the example of the Development Environment given in Figure 31, and assume that we wish to create the Web Databases Static Container. Furthermore, assume that all other Containers in the diagram were already created before, and that the DevSvr1 and DevSvr2 SQL servers were previously registered as Combine Servers in the Object Browser (please refer to the section Registering Combine Servers to learn more about server registration). In other words, assume that the Object Browser and the Container Manager already have the Combine Servers and Containers displayed in Figure 32. Page 52 © 2005 - 2015 JNetDirect, Inc. All rights reserved. Figure 31: Containers and target databases in the Development SQL server Environment. Figure 32: The Container Manager and Object Browser for the Environment in Figure 31, when all Containers are Static and the Web Databases Container has not yet been created. Page 53 © 2005 - 2015 JNetDirect, Inc. All rights reserved. There are two convenient ways to add target databases to the Static Container: Adding databases from Combine Servers or Registered Servers of the Object Browser, or copying databases that were already defined in other Static Containers. The second option will be disabled if you have not yet defined any Static Containers. In this example we will add the Web1Dev and Web2Dev databases to the Web Databases Static Container twice, to demonstrate each technique. Figure 33: Choosing the method to add databases to the Static Container. Adding databases from servers in the Object Browser. The first option of selecting the Static Container databases allows you to choose databases from either Combine Servers or Registered Servers in the Object Browser. To use this method, click the Select Databases option as shown in the last figure and press Next. A new wizard window shown in the next figure will appear, and it allows you to choose the Container databases. Here, the two Web databases are selected on the DevSvr1 and DevSvr2 servers. Page 54 © 2005 - 2015 JNetDirect, Inc. All rights reserved. Figure 34: Selecting the databases to add to the Static Container. A single database can only be defined in the Container once. If you are adding databases that already exist in the Container then you will be prompted with a warning message. After selecting the databases press the Next button. The next wizard window will then display the Container databases. If you wish to remove databases from the Container you may do so as shown in the figure below, by right-clicking the grid and choosing the Remove option. Figure 35: Viewing the databases in the Static Container. Page 55 © 2005 - 2015 JNetDirect, Inc. All rights reserved. When done adding databases, press Next to confirm the changes and create the Static Container. Adding databases from other Static Containers. The second method of adding databases to the Static Container is by selecting databases that already belong to other Static Containers. In this example, the Static Container named All User Databases was previously created and holds all user databases on the two SQL servers. This Static Container will be used to add the two Web databases to the new Static Container. In order to copy databases from other Containers, after pressing the Add Databases button, select the option "Copy databases from another Static Container" in the wizard as displayed in the following figure. Figure 36: Adding target databases from other Static Containers. After hitting the Next button, the window presented below will let you select the databases from other Static Containers. In this example, the two Web databases are selected. Page 56 © 2005 - 2015 JNetDirect, Inc. All rights reserved. Figure 37: Selecting databases from another Static Container. When done, press the next button. You will then be presented with the list of databases in the Container. Press the Next button in the window that lists all Container databases and then Finish to complete the Static Container creation wizard. Note: Additional databases can be added or removed from the Static Container at a later time by either activating the Static Container Wizard again, or by using the right-click menu options in the Container Manager. Page 57 © 2005 - 2015 JNetDirect, Inc. All rights reserved. Removing Databases from a Static Container Once a Static Container is created, if you wish to remove databases from the Static Container you can do so in one of two ways: In the Container Manager, right-click the icon of the Static Container and select the Wizard option from the menu. The Static Container Wizard will then start. Press next until you reach the window that lists all the databases in the Container. Select the databases you wish to remove and then right-click and press Remove. Figure 38: Removing databases from a Static Container using the Static Container Wizard. An easier way of removing databases from a Static Container is by right-clicking the databases to remove under the Static Container in the Container Manager, and then pressing the Delete option. Page 58 © 2005 - 2015 JNetDirect, Inc. All rights reserved. Figure 39: Removing databases from a Static Container using the Static Container Wizard. Creating Dynamic Containers Dynamic Containers consist of a Reference Static Container and a query that will be run against the Reference database in the Static Container. The Static Container that holds the Reference database must be created prior to creating the Dynamic Container. Please refer to the section Static vs. Dynamic Containers for complete details. If a Static Container has not yet been created in the same Environment where the new Dynamic Container will reside, then you will not be able to create the Dynamic Container. In the Container Manager, Dynamic Containers can be placed directly under an Environment or under a folder by using the Dynamic Container Wizard. The wizard can be started directly from the Container Manager by right-clicking the parent Environment or folder of the Dynamic Container, or from the main menu by pressing Container → Add Dynamic Container. Page 59 © 2005 - 2015 JNetDirect, Inc. All rights reserved. Figure 40: Starting the Dynamic Container Wizard from the Container Manager or from the main menu. Dynamic Container Wizard Make sure that the Static Container that holds the Reference database is created prior to starting the Dynamic Container Wizard. For more information regarding the Reference database and Dynamic Containers please refer to the section titled Static vs. Dynamic Containers. The Dynamic Container Wizard will walk you through the steps required to create a Dynamic Container. In the wizard you will be asked to choose the Reference Static Container, and a query that returns the database and server names from the Reference Static Container. When the wizard is started you will first receive a welcome page. You can choose to not display this welcome page in the future by checking the "Do not show welcome page next time" checkbox. Press Next to move on to the next window. Page 60 © 2005 - 2015 JNetDirect, Inc. All rights reserved. Figure 41: The welcome window of the Dynamic Container Wizard. The next window in the wizard will ask you for the name, description, and authentication type. The name will be used to identify the Container. The description field is optional and lets you associate comments with the Container. The authentication type can be set to one of SQL Authentication, Windows Authentication, Prompt, or Use Parent Settings which is also the default. The authentication type is used to connect and deploy code against all databases defined in the Container. Also you can use check box Use Encryption to turn on SSL encryption for a connection to DB server. Page 61 © 2005 - 2015 JNetDirect, Inc. All rights reserved. Figure 42: Entering the name, description, and authentication type for the Container. To demonstrate the creation of Dynamic Containers, consider the example of the Production environment in the following diagram. Using the wizard, the Dynamic Container named DBA Databases will be created below. Page 62 © 2005 - 2015 JNetDirect, Inc. All rights reserved. Figure 43: Containers and target databases in the Production SQL server Environment. Assume that the Static Container named DBServerMap is already available in the Container Manager under the Production Environment as illustrated in the image below. Figure 44: The DBServerMap Static Container that holds the Reference database. Page 63 © 2005 - 2015 JNetDirect, Inc. All rights reserved. Furthermore, assume that the Reference database ServerRepository contains a table called DBServers with the entries listed in the figure below. Figure 45: The content of DBServers table in the Reference database ServerRepository. In order to create the Dynamic Container you will need to write a query that returns a single result set where each row entry corresponds to a single target database. The following fields should be returned by the query: ServerName (string, possibly Unicode): The name or IP address of the SQL server that holds the target database. If you are running multiple instances of SQL server on the same physical machine and wish to include a target database on one of the instances, the ServerName returned from the query should be of the format MachineName\InstanceName. For example, ProdSvr21\Instance1. DatabaseName (string, possibly Unicode): The name of the target database. ServerPort (integer, optional, should only be used if server port is not 1433): The ServerPort holds the communication port for the SQL server. This option should only be used by advanced users who are running multiple instances of SQL server on the same machine, or in any other cases whereby the SQL server port is other than 1433 (which is default SQL server port). If the ServerPort column is not returned by the query then Combine will use port 1433 to establish a connection to all target databases. Page 64 © 2005 - 2015 JNetDirect, Inc. All rights reserved. Notes: 1. Keep in mind that Combine thoroughly examines the values returned by the query and will validate that all settings were entered correctly. If any values are invalid or if Combine cannot successfully establish a connection to all target databases before running the script or any portion of a code package, then code will not be deployed on any target database and the user will be prompted with the list of issues found. 2. If the query returns the same ServerName and DatabaseName twice (regardless of the value for all other fields) only the first entry that has the duplicate ServerName and DatabaseName pair value will be considered. All other entries with the same ServerName and DatabaseName will be ignored. 3. If the query returns more than a single result set then only the first result set will be considered and processed. All other result sets will be ignored. Returning to the example of the Production Environment above, the query that returns the database and server names for all Container databases is: SELECT NameOfServer AS ServerName, NameOfDatabase AS DatabaseName FROM DBServers WHERE IsDBA = 1 Going back to the wizard, you will now be asked to select the Static Container for the Reference database. Figure 46: Selecting the Static Container that contains the Reference database. Page 65 © 2005 - 2015 JNetDirect, Inc. All rights reserved. After pressing the Next button, you will be prompted to enter the query for the Dynamic Container. You can also press the Test button to check whether the query results are correctly interpreted by Combine. Press the Next button when you are done. In the last wizard page click Finish to complete the Dynamic Container creation. Figure 47: Selecting the Static Container that contains the Reference database. After the DBA Databases Dynamic Container has been created, the Container Manager displays this Container as in the image below. The Reference denotes the Static Container of the Reference database and can be changed through the properties window, or by invoking the Dynamic Container Wizard from the right-click menu of the Dynamic Container. Page 66 © 2005 - 2015 JNetDirect, Inc. All rights reserved. Figure 48: The Container Manager interface for the DBA Databases Dynamic Container. You can also edit the query by right-clicking the query icon and pressing Open. If for some reason the Static Container used to store the Reference database is dropped, the icon of the Reference databases will be changed to alert you of that fact. The new icon is presented in the figure below. In addition, you can search for the Static Container of the Reference database by right-clicking the Dynamic Container Reference icon and pressing the Locate menu option. Figure 49: The icon shown after the Reference database of a Dynamic Container is deleted. Page 67 © 2005 - 2015 JNetDirect, Inc. All rights reserved. Query Used by a Dynamic Container Dynamic Containers use a Query and a Static Container that holds a Reference data repository to determine the target databases of the Container. When you execute code or deploy packages against a Dynamic Container, the query specified in the Dynamic Container is executed against the target databases of the Reference Static Container. The query returns the server name and database name for each target database for the Dynamic Container, and code and packages will be deployed on all target databases returned in the query results. To learn more about Dynamic Containers, please refer to Static vs. Dynamic Containers, or the Dynamic Container Wizard documentation. The Query used by a Dynamic Container can contain parameters and variables (see Environment Variables for more information). You can edit the query for an existing Dynamic Container by right-clicking the query icon and selecting the Open option from the menu. The main editor will then open a window with the query code and let you modify and save the changes. Reference in the Dynamic Container The Reference is a Static Container used by Dynamic Containers to store the location of a data repository. With Dynamic Containers, the set of target databases on which code and queries are executed is determined in execution time right before the deployment. To determine the target databases, Combine runs the Dynamic Container user-provided query against the Static Container defined in the Reference, to return the database and server names of all target databases. For more information about Dynamic Containers please refer to the section Static vs. Dynamic Containers. Once a Dynamic Container has been created you can view the properties of the Reference Static Container by selecting the Reference icon and pressing F4. In the Properties window you can also select a different Static Container that will be used as the Reference. You can also choose to use another Static Container as the Reference by right-clicking the Dynamic Container icon and selecting the Wizard option. To learn more about creating Dynamic Containers please refer to the Dynamic Container Wizard. Page 68 © 2005 - 2015 JNetDirect, Inc. All rights reserved. Editing Containers Using the Wizard The Container Manager allows you to edit the settings of previously created containers. To edit a Container you can right-click the Container that you wish to edit and select the Wizard option. If you are editing a Static Container, then the Edit Static Container Wizard will show. This wizard contains the same pages described earlier in the section Static Container Wizard. Similarly, if you are editing a Dynamic Container then the Edit Dynamic Container Wizard will be displayed. Please refer to the section titled Dynamic Container Wizard to learn more about how to use this wizard. Editing Containers Using the Properties Window In order to change the name, description, or authentication type and credentials for either a Static or Dynamic Container, all you need to do is refer to the Properties window. To view the Properties window you can either press F4, or right-click the desired Container icon and choose Properties in the menu, or click the Properties icon . Once the Properties window appears you can change the settings displayed below. Figure 50: Properties of the Static and Dynamic Containers. Page 69 © 2005 - 2015 JNetDirect, Inc. All rights reserved. Copy-Pasting Containers You can copy and paste Containers in the same Environment or folder, or onto different Environments and folders. The following options are available to copy and paste Containers: Right-click the Container you wish to copy and press Copy in the menu. Then leftclick the Environment or folder under which the new Container will be placed. Rightclick again and select the Paste option in the menu. Use CTRL+C and CTRL+V to copy and paste the Container. Hold the CTRL button. Using the mouse, drag and drop the Container under the desired Environment or folder. Press the Copy icon on the main toolbar, select the Environment or folder where the new Container will be pasted, and then press the Paste icon on the toolbar. Moving Containers Between Folders and Environments In the Container Manager you can drag Containers and drop them under another Environment or folder. Moving the Container will maintain all its original properties and all associated target databases. Adding Databases to a Static Container After a Static Container is created, you can add more database to the Container from the Container Manager by using the Add Databases Wizard. In addition, you can also add databases to the Static Container by right-clicking the Static Container icon and selecting the Wizard option to invoke the Static Container Wizard. A third option of adding databases that are already defined in existing Static Containers is by copy-pasting databases between Static Containers. To start the Add Database Wizard follow these instructions: Right-click the Static Container icon and select Add → Add Databases. You can also invoke the wizard from the main menu by selecting Container → Add Databases. Page 70 © 2005 - 2015 JNetDirect, Inc. All rights reserved. Figure 51: Invoking the Add Databases Wizard to add databases to a Static Container. Add Databases Wizard The Add Databases Wizard is useful for adding one or more databases to an existing Static Container. Before starting the wizard, make sure that the servers that contain the databases you wish to add are registered as Combine Servers in the Object Browser. After you start the Add Databases Wizard, the first page after the welcome page will ask you how to select the database to be added. Two options are available as described in the figure below. To explain the Add Databases Wizard, both options will now be presented. Adding databases from servers in the Object Browser. The Select Databases option allows you to add databases from either Combine Servers or Registered Servers in the Object Browser. To use this method, click the Select Databases option as shown in the figure below and press Next. Page 71 © 2005 - 2015 JNetDirect, Inc. All rights reserved. Figure 52: Choosing the method to add databases to the Static Container. A new wizard window shown in the next figure will appear, and it allows you to choose the Container databases. In this example two databases named Web1Dev and Web2Dev on the servers DevSvr1 and DevSvr2 will be added to the Static Container. Figure 53: Selecting the databases to add to the Static Container. Page 72 © 2005 - 2015 JNetDirect, Inc. All rights reserved. Each database can only be defined in the Container once. If you are adding databases that already exist in the Container then you will be prompted with a warning message. After selecting the databases press the Next button to finalize the changes to the Static Container, and press Finish in the last wizard window. Adding databases from other Static Containers. The second method of adding databases to the Static Container is by selecting databases that already belong to other Static Containers. In this example, assume that a Static Container named All User Databases was previously created and holds all user databases on the DevSvr1 and DevSvr2 SQL servers. The All User Databases will be used to add the desired databases. In order to copy databases from other Containers, select the option "Copy databases from another Static Container" as displayed in the following figure. Figure 54: Adding target databases from other Static Containers. After hitting the Next button, the window presented below will let you select the databases from other Static Containers. In this example, the two Web databases are selected. Page 73 © 2005 - 2015 JNetDirect, Inc. All rights reserved. Figure 55: Selecting databases from another Static Container. When done, press the Next button and then Finish in the last wizard window. Copy-Pasting Databases Between Static Containers The Container Manager allows you to copy databases from one Static Container and paste them under a different Static Container. This technique is useful to add databases that are already defined in one Static Container to another. If you paste the target database in the same Static Container you will be asked to either override or discard the paste action, since each database can only be defined once for each Container. To copy a target database, please use one of the options below: Right-click the database you wish to copy and press Copy in the menu. Then leftclick the Static Container under which the new database will be placed. Right-click again and select the Paste option in the menu. Page 74 © 2005 - 2015 JNetDirect, Inc. All rights reserved. Use CTRL+C and CTRL+V to copy and paste the Container. To use CTRL+V be sure to select the Static Container in which the new target database will be placed. Hold the CTRL button. Using the mouse, drag one or more databases and drop them on the icon of the desired Static Container. Press the Copy icon on the main toolbar, select the Static Container where the new Container will be pasted, and then press the Paste icon on the toolbar. Moving Databases Between Static Containers Combine allows you to move databases from one Static Container to another, under any Environment or Folder. First select the database to move. Then, drag and drop the database on the icon of the Static Container in which the database will reside. In the same manner you can drag and drop multiple databases. Active Environment In the Container Manager you can define multiple Environments, and place both Static and Dynamic Containers under each Environment. Moreover, Container names in different Environments can have the same name. When running scripts, queries, and code packages against Containers, Combine will run the scripts against Containers in the currently active Environment. Furthermore, only a single Environment can be active at any given time and the active Environment is the one with bold letters in the Container Manager. To demonstrate the functionality of the active Environment, consider the images below. When running scripts against the Container named All User Databases when the Development Environment is active, each script will be run against all databases in that Container. If you set the Production Environment to be active instead of Development, running the same script against the Container with the same name will execute the code on the databases defined in the All User Databases Container under the Production Environment. As stated above, the active Environment is the one having bold letters in the Container Manager. For example, the Development Environment is the active Environment in the figure below. Page 75 © 2005 - 2015 JNetDirect, Inc. All rights reserved. Figure 56: The Container Manager when Development is the active Environment. You can set other Environments to be active by right-clicking the desired Environment icon and selecting Set As Active Environment from the options menu. Doing so will "deactivate" the previously active environment and will set the new Environment as active. Page 76 © 2005 - 2015 JNetDirect, Inc. All rights reserved. Figure 57: Setting Production as the new active Environment. Page 77 © 2005 - 2015 JNetDirect, Inc. All rights reserved. Export and Import Environment Configuration Exporting Environments Environment configuration and settings can be exported and then imported again into Combine. When an Environment is exported, all the settings of all Static and Dynamic Containers in the Environment are exported as well, including the target databases of the Static Containers, the Reference and Query under all Dynamic Containers, and their associated authentication types and credentials. To export your Environments click any item in the Container Manager and select Container → Export from the main menu. The first welcome page of the Export Environment Wizard will then be displayed. If you do not wish to see the welcome page in the future then check the "Do not show welcome page next time" checkbox and press the Next button. Figure 58: The welcome page of the Export Environment Wizard. Page 78 © 2005 - 2015 JNetDirect, Inc. All rights reserved. In the next window you will be asked to select the Environments to be exported. Figure 59: Selecting the Environments to export. Next you must choose the output file name. The output file name will have the extension "environment". You may also instruct Combine to encrypt the export file by using the password protection option. If you do not use password protection then SQL user names previously entered in the Container settings will be stored in clear text and could be visible to others. SQL passwords will never be displayed in clear text and will always be encrypted. When encryption and password protection is used, you must also provide a password. Page 79 © 2005 - 2015 JNetDirect, Inc. All rights reserved. Figure 60: Choosing the output file name and password. Press Next to get to the last page of the wizard. Then press the Finish button to complete the export process. Once the file has been exported you can view it. Do not edit it. If you edit the file then it will not be imported successfully later. Finally, you can either place the file on a network drive or send the file to other users, so that the Environments and all their settings could be imported to other client machines. Importing Environments Before you begin the Environment import process, first locate the file you wish to import. This file must have the extension "environment" (for example, c:\AllEnvironments.environment). If this file was exported using password-protection then you must also have the password handy. In order to start importing please select Containers → Import from the main menu to launch the Import Environment Wizard. The welcome page will appear first and you can instruct the wizard to not display this page again in the future. Press Next to advance to the next page. Page 80 © 2005 - 2015 JNetDirect, Inc. All rights reserved. Figure 61: The welcome page of the Import Environment Wizard. The next window will ask you to select the file to import. Enter the file name and press the Next button. Figure 62: Enter the file name to import. Page 81 © 2005 - 2015 JNetDirect, Inc. All rights reserved. If the file you are trying to import is password-protected, for example when you receive an exported environment file from another user via insecure email, you will be asked to enter the same password used when the environment file was originally exported. Figure 63: Entering the password when importing a password-protected file. You will then be presented with the list of Environments included in the file. You do not have to import all Environments. Select the Environments you wish to import and press the Next button. Note: If you already have an Environment with the same name as the one that will be imported then Combine will not override your existing Environment. Instead, Combine will import the Environment under a different name. For example, if you have an Environment named Production and you are importing another Environment with the same name, the new Environment will be imported under the name Production2. Page 82 © 2005 - 2015 JNetDirect, Inc. All rights reserved. Figure 64: Selecting the Environments to import. Press the Next button and then Finish in the last page of the wizard to complete the import process. Page 83 © 2005 - 2015 JNetDirect, Inc. All rights reserved. Combine Repository - Sharing Environments and Containers Settings Installing a Combine Repository to Share Environments and Containers Combine enables users to share the settings of Environments and Containers by using a repository. This repository is referred to as a "Combine Repository" throughout this document (to distinguish it from other repositories that can be used in the application). To install the repository, please follow the instructions below: 1. Locate the SQL script that installs the repository. The SQL script is named "Create Combine Repository.sql" and it can be found at the download section on JNetDirect' website and is also available under the Combine installation directory (for example, under the folder: C:\Program Files\JNetDirect\Combine\Repository\CombineRepository\). 2. Create the repository database on a SQL Server: Locate the SQL Server that will hold the repository database. This SQL Server can reside anywhere on the network where it can be accessed by users, and it can be SQL Server 2000 or any later version. Log on to the server and to the Master database as an administrator (either as the sa user or as a domain administrator) and run the script "Create Combine Repository.sql". This SQL script creates a database called CombineRepository (see notes below), the schema (tables and stored procedures) for the database, as well as three SQL roles: RepositoryReaders, RepositoryChangeManager, and RepositoryAdmins. Users that belong to the RepositoryReaders user group will be able to read and use the Environments and Containers settings that are stored in the repository, however will not be able to make any changes to the settings or repository data. On the other hand, RepositoryChangeManagers and RepositoryAdmins can make changes (e.g., create or delete Environments and Containers). 3. Define users for the Combine Repository - make sure that all users that will be using the Combine repository have access to the repository database. At this point you can also set the permissions and access restriction to the repository users by adding them to the designated SQL roles described in the earlier paragraph. For example, some users can be granted access to the CombineRepository database and then be added to the RepositoryReaders group; other users can be added to the RepositoryAdmins group. For your convenience, a SQL script called "Examples - Adding users to Repository roles.sql" contains examples of how to add users to the different SQL roles and is available on JNetDirect' website as well as under the Combine installation directory (e.g., C:\Program Files\JNetDirect\Combine\Repository\CombineRepository\). 4. Instruct users to add the Combine Repository to their Combine client application. To do so, each user will open the Container Manager, right-click the MyEnvironments node, select the Add → Add Repository menu option (see image) and start the Wizard. In the Wizard, each Page 84 © 2005 - 2015 JNetDirect, Inc. All rights reserved. user will be required to specify the database and SQL Server that holds the repository, as well as provide the authentication type and login to connect to the database. Then, Combine checks that each user indeed has permissions to access the repository and then adds the repository to the Container Manager on the client user-interface. Figure 64.1: Adding a repository in the Container Manager. Notes: a) Name of the repository database - By default, the name of the repository database is CombineRepository. However, you can open the SQL script and change the repository name to use any other database name as you so desire. b) Comments on security - Combine is designed to be secure: Credentials, passwords, authentication type, and any other permissions or security information that relates to Containers and Environments is not stored in the repository. Each user will have to define his or her own access permissions to the Environments and Containers in their user-interface. Once provided, those settings are stored securely on the client machine, and are not stored in the repository. c) Installing multiple repositories - By following the steps 1-4 above you can install as many repositories as you wish, so that different groups of users in your organization can see different Environments and Containers. For example, some organizations only allow production DBAs to view the Environments and Containers settings in Production, while allowing developers and test-engineers to view all settings in Development and Quality Assurance (QA). To accommodate this scenario, one repository can be used by developers and test engineers and a second repository will be installed by DBAs in Production, which will also have access to the first repository. Developers and test-engineers will add the repository containing the Dev and QA settings to their Combine user-interface, while production DBAs will add the two repositories to see all Environments and Containers across Dev, QA and Production. Page 85 © 2005 - 2015 JNetDirect, Inc. All rights reserved. Executing Scripts and Queries on One or More Databases Executing Scripts and Queries on a Single Database The main editor window can be used to either execute scripts and queries on a single database, or deploy scripts and queries against all or some databases defined in a Container in parallel and get aggregated results from all those databases. In order to execute code on a single database, a new script can be started in the main editor window by selecting File → New → New Connection from the main menu, or alternatively by press the Connect icon in the toolbar . You can also open an existing SQL file by selecting File → Open → File from the main menu. When you press the Connect icon, a database connection dialog will appear and will ask you to specify the server name, credentials, and database name (see the section titled Connecting to a database to write SQL code for more information). Combine will then connect to the database you selected until the script window is closed or until you press the Disconnect icon . Note that you can also select File → New → File from the main menu. This operation will create a new editor window that will not be connected to a database. You can connect later at any time by pressing the Connect icon and provide the needed connection details. You can tell that the editor window is connected to a database by examining the tab of the script window: If you are connected then the database icon in the tab is displayed in yellow otherwise it will be grey. The image below illustrates the main editor when one window is connected to a database and another window is not. Figure 65: The editor interface when one window is connected to a database and another window is not. Once you write SQL code in the connected window, you can instruct Combine to return the estimated execution plan for your SQL statements by either pressing the CTRL+L shortcut or Page 86 © 2005 - 2015 JNetDirect, Inc. All rights reserved. selecting Query → Display Estimated Execution Plan from the main menu. In addition, you can return the actual execution plan by selecting that option from the same menu, or by pressing the CTRL+M shortcut. Furthermore, you can change the connection to another database on the same server by using the database dropdown in the main toolbar. To demonstrate these features, below is an example of executing code against a single database. Notice that the actual execution plan is also returned in this example and is available next to the results grid. If any messages and SQL errors are returned from the server then these messages will be displayed in the messages window (see the messages icon on the left hand side of the results grid). Figure 66: Executing code against a single database and using the database dropdown to switch between server databases. Page 87 © 2005 - 2015 JNetDirect, Inc. All rights reserved. Executing Scripts and Queries on Multiple Databases in Parallel The main editor window can be used to either execute scripts and queries on a single database, or deploy scripts and queries against all or some databases defined in a Container in parallel and get aggregated results from all those databases. To start a new script and execute it against multiple databases, a new script can be started in the main editor window by selecting File → New → File from the main menu. If you already have a script window open, in order to run the script against multiple databases you must first ensure that the script window is not already connected to a single database. You can tell that the window is connected to a database by examining the window tab: If the database icon in the tab is yellow as in the following image then the window is connected and you must first disconnect the connection by pressing the Disconnect icon . The window will then be disconnected and the database icon will turn grey. Grey database icon indicates that the script window is not connected to a database. Figure 67: An example of a script window connected to a database. You must disconnect the script window to enable the Containers drop down. To run code against the databases defined in a Container and return unified results in response to all commands and queries, first make sure to load or type the SQL commands you wish to run in the SQL editor window. Next, refer to the toolbar and use the Container drop down to select the Container against which the code will be run, as demonstrated in the following image. If this drop down is disabled then you must first disconnect the script window from its current database connection. Keep in mind that once you instruct Combine to execute the code, Combine will connect and deploy the code on multiple databases and servers simultaneously. If you wish to limit the number of connections that will be initiated from the Combine machine against all servers or limit the total number of connection that will be used for each target server (applicable when multiple target databases reside on the same server), you can do so by using the options menu. Please refer to the section titled Limiting the Number of Connections for more information. Page 88 © 2005 - 2015 JNetDirect, Inc. All rights reserved. Figure 68: Selecting the Container - code will be deployed against target databases in the Container in parallel. At this point you can either choose to run the code or only retrieve estimated execution plans from target databases in the Container without executing the code. To return the estimated execution plans, select Query → Display Estimated Execution Plan from the main menu, or hit the CTRL+L shortcut instead. On the other hand if you wish to execute the code against all Container databases then press the Execute icon (or the F5 shortcut). If you click the arrow in the Execute icon then you can also choose to return the actual execution plan from all databases. You can also direct Combine to return the actual execution plan by pressing the CTRL+M shortcut or selecting Query → Include Actual Execution Plan from the main menu before pressing the Execute icon. After you instruct Combine to start executing the code (or once you request an estimated execution plan) Combine performs a set of tests and verifications to ensure that code will be deployed correctly on all Container databases. The steps taken by Combine are now explained in detail below. Page 89 © 2005 - 2015 JNetDirect, Inc. All rights reserved. Check that the authentication type and credentials are available for all databases: Recall that Containers can be configured to use several authentication types, namely SQL authentication, Windows authentication or Prompt (see the Static Container Wizard and Dynamic Container Wizard sections for more information). Also you can use check box Use Encryption to turn on SSL encryption for a connection to DB server. If any Containers are defined to use the Prompt authentication type then you will be prompted to enter the authentication type to use to connect to all Container databases. If you choose SQL authentication type you will also be asked to provide a login name and password. These credentials will not be stored by Combine and are only used in run-time to connect and deploy the code on all databases. On the other hand, if the Container is configured in the Container Manager to use SQL authentication or Windows authentication then Combine will not prompt you for the authentication type and credentials and will continue to perform the next test. The image below illustrated the credentials window displayed by Combine when the Prompt authentication type is used. After you enter the credentials in this dialog you must hit the Apply button and then OK to continue. Figure 69: The authentication and credentials dialog that appears before executing code against all Container databases when the Container uses the Prompt authentication type. Resolve all target databases, verify connection and authentication to all target databases and allow the user to deselect databases: At this point Combine has the authentication type and all connection attributes needed to resolve the target databases on Page 90 © 2005 - 2015 JNetDirect, Inc. All rights reserved. which code will be deployed. First, Combine resolves all target databases: For Static Containers, Combine will retrieve the database and server names from the Container Manager. For Dynamic Containers, Combine will run the Dynamic Container query dialog the Reference Static Container to retrieve the database and server names for all target databases (please refer to Static vs. Dynamic Containers to learn more about Container types). After all database and server names are resolved, Combine will attempt to connect to all databases to verify that they indeed exist and that the authentication type provided for the Container in the Container Manager (or in the dialog in the last image) can be used successfully. The results of the connectivity test are then presented in another dialog, which also allows you to deselect Container databases. Code will not be deployed on deselected databases and will only be executed against all selected databases. Also note that databases that cannot be connected successfully (due to timeouts or wrong credentials provided in Combine) will be marked in grey and deselected automatically. You can reselect these databases to try to deploy code against them however this is highly not recommended. To demonstrate the connectivity test dialog, below are two examples of the dialog when the connectivity to all Container databases is successfully verified, and when one database cannot be contacted. Figure 70: Database connectivity and authentication validation dialog when Combine connected to all databases successfully. You can deselect databases in this dialog to not run code against the deselected databases. Page 91 © 2005 - 2015 JNetDirect, Inc. All rights reserved. Figure 71: Database connectivity and authentication validation dialog when one database cannot be contacted using the provided authentication type and credentials. Please be aware that this dialog is the last one displayed prior to code execution. If for any reason you wish to abort the code deployment then press cancel in this dialog. If you press OK then code will be executed against all databases marked in the last dialog. The image below demonstrated the case where Cancel is pressed after the connectivity test. Notice that the connectivity results are displayed in the output window. Page 92 © 2005 - 2015 JNetDirect, Inc. All rights reserved. Figure 72: The Output window and connectivity test results after execution is aborted. Deploy code on all selected databases and return execution plans and results: At this point, Combine will deploy the code against all target databases marked in the last dialog. Result sets with matching schema returned from the target databases will be aggregated and displayed in the Results window, where results for each individual database are available as well. If you also requested to return the actual execution plans then the execution plans will be available for each individual target database. If any execution errors occur due to incorrect SQL code or if any messages (such as row counts) are returned from the server, these messages and errors can be found in both the aggregated messages window and the messages window for each database. The output window can also be viewed during code execution to monitor the execution status. Below is an example of the aggregated results and individual results for each database when Combine was instructed to return the actual execution plans. Page 93 © 2005 - 2015 JNetDirect, Inc. All rights reserved. Figure 73: Viewing the aggregated results returned from all target databases. Figure 74: Viewing the execution plans returned from each target database. Page 94 © 2005 - 2015 JNetDirect, Inc. All rights reserved. Figure 75: Viewing the output window to check the execution status. Limiting the Number of Connections for Parallel Deployment When deploying code on target databases in a Container or when executing code packages, Combine connects and deploys code on all target databases in parallel. The number of connections initiated from the Combine machine can therefore be potentially high. In addition, if multiple target databases reside on the same server then Combine will connect to those databases simultaneously. To help you control the number of connections and code execution, you can set two thresholds to limit the maximum number of parallel connections in the options dialog. This dialog can be activated by selecting Tools → Options from the main menu, and the connection limit options are displayed in the Execution Engine section. Page 95 © 2005 - 2015 JNetDirect, Inc. All rights reserved. 1. Overall Connection Limit: The connection limit reflects the maximum number of parallel connections that Combine will handle over all databases and servers. The default value for this limit is set to 25. 2. Server Connection Limit: This limit denotes the maximum number of connections that will be launched against a single server. This limit is only useful when multiple target databases reside on the same server. The default value of this limit is set to 2 to ensure that not more than 2 simultaneous connections are opened against any server during code or package execution. Figure 76: The Execution Engine options dialog. Page 96 © 2005 - 2015 JNetDirect, Inc. All rights reserved. Executing Code Packages Please refer the section title Executing Code Packages in the Package Explorer for help. Saving Deployment Results After running a script, a query, or a code package, against either a single database or multiple databases, all results returned from the target databases and servers can be saved into a single proprietary file with the extension .cre (Combine results). This includes all messages, warnings, errors, result sets and grids, as well as execution plans. To save the deployment results, simply click the Save icon illustrated in the image below, to save all returned results in the .cre file. Later, you can double-click the .cre file, or go to File → Open → Open File in order to view the content of the saved results in Combine. Figure 77: Saving script, query, or package execution deployment results into a single file. Page 97 © 2005 - 2015 JNetDirect, Inc. All rights reserved. Showing or Suppressing Script Output During Execution When scripts are executed then by default Combine will prompt the Output results in runtime. However, you can suppress the Output and hide it during execution. In order to configure Combine to suppress or show the Output, go to Tools → Options → Execution Engine → Output and set the value of the property Show Output During Execution (Script). Similarly, you can configure Combine to show or suppress the Package Output window during the execution of packages by setting the property Show Output During Execution (Package). Command Line Execution See Cpaexec. Page 98 © 2005 - 2015 JNetDirect, Inc. All rights reserved. Package Explorer and Package Execution Code Packages - Introduction A code package consists of any number of scripts, where each script is associated with a group of target databases (i.e., Container) on which the script will be deployed. When creating a code package you will be asked to provide the Container name for each script. Code packages may also include folders that will help you organize scripts in the package. You can also associate a Container with a folder and then configure each script under the folder to inherit the Container from its parent (i.e., the folder that contains the script). If you choose to do so then scripts under the folder will be deployed on the target databases defined in the Container that is associated with the folder. Similarly, you can associate a Container with the root node of the package in the Package Explorer, so that folders and scripts placed directly under the root node can inherit the Container of the root node. After you compose a package you can save it as a cpa (code package) file. The cpa file will include the package folders, the content of all scripts, as well as the Container names associated with each folder and each script. The cpa file does not include the actual target databases defined in the Container since target databases are configured on each Combine client machine to allow easy transfer of code packages between different server environments. The set of target databases and database identifiers (database and server names) for Containers referenced in the package is retrieved from the Container Manager settings prior to package execution. Scripts and folders can be imported into the code package by using the Import Dialog. Package scripts and folder can also be exported to the file system or to a shared network drive. Once a package is composed, the package can be executed by a click of a button and each script will be run on all databases in the Containers associated with the script (under the currently active Environment). Please refer to the sections Configuring Code Packages and Executing Code Packages for complete details. Code packages can be easily passed between Development, QA, and Production and deployed on all target databases in each environment, by ensuring that developers, QA engineers, and database administrators have the same Container and folder names in the Container Manager, as explained in the section titled The Dev-QA-Production Release Process. Before deployment, Combine will thoroughly ensure that the all Containers indeed exist, that all databases in all Containers exist, and that the connectivity and authentication to all target databases is valid using the credentials provided for each Container in the Container Manager. Page 99 © 2005 - 2015 JNetDirect, Inc. All rights reserved. Figure 77: A sample package and the Properties window of a script in the package. Wrapped Vs. Unwrapped Packages Wrapped packages are marked with the package icon , whereas unwrapped packages appear with the package icon . An unwrapped code package consists of a .cpa file that serves as the root node of the package, as well as folders and SQL files that are stored separately on the file system, under the same folder of the .cpa file. In other words, an unwrapped package is very similar to a Solution in a Visual Studio® .Net project. Using unwrapped package, developers can checkin and check-out different SQL files and folders in the code package, and work in collaboration on their database code releases. The root node of an unwrapped code package is stored as a .cpa file. This file holds all the properties of the code package, such as the name and location of folders and SQL scripts in the package, the Container mapped to each script, and so on. To visualize an example of an unwrapped package, please refer to the image below. Note: A new code package is always created as an unwrapped package. Page 100 © 2005 - 2015 JNetDirect, Inc. All rights reserved. Figure 78: An unwrapped package (left) and the way it is stored on the file system (right). A wrapped package, unlike an unwrapped package, is a single .cpa file that contains the content of all SQL scripts included in the package. In other words, a wrapped code package is stored in the file system as a single .cpa file. When developers complete composing their release, they can wrap the unwrapped code package by right-clicking the package node and selecting the Wrap option in the context menu. Similarly, wrapped packages can be unwrapped by right-clicking the Wrapped package node and selecting the unwrap option from the context menu. In order to find out whether a package is wrapped or unwrapped, click on the package node and press F4 to bring up the properties window. Figure 79: Examining the Wrapped package property. Page 101 © 2005 - 2015 JNetDirect, Inc. All rights reserved. Creating Packages You can create a new code package using one of the following ways: Click the New Package icon in the toolbar . Select File → New → Package from the main menu. Press CRTL+SHIFT+N. When creating a new package you will be asked to select a file name for the package, as well as the folder in which it will be placed. The new file name will have the extension cpa (for code package). Once the package is created, the Package Explorer will display the root node of the package, which will have the properties displayed in the figure below. To view the Properties window you can press the F4 button or right-click the package icon and choose Properties from the menu. Figure 78: The Package Explorer and Properties Window view for a new package. Keep in mind that every script in the package must be associated with a Container to allow Combine to determine the set of target databases for script deployment. Containers can also be set for the root node of the package, which will later allow scripts to inherit the Container from the root node, instead of associating each script with a Container manually. For more information about associating Containers with package scripts and package configuration, please refer to the section titled Configuring Code Packages. Page 102 © 2005 - 2015 JNetDirect, Inc. All rights reserved. AutoNumber Package Property The AutoNumber appended to scripts and folders inside a code package is only used for visualization purposes. For example, when working with Unwrapped Packages the SQL scripts are stored on the file system without the automatically pre-pended number. The AutoNumberItems package Property can be viewed in the Properties window by selecting the package icon in the Package Explorer and pressing F4. When this property is set to True then scripts loaded into the code package will automatically be assigned sequence numbers in the package, to ease the readability of the package. If this property is set to False then the numbers will not be assigned. Below is an example of a package when the AutoNumberItems is set to True and then False. When saving package scripts, you can choose whether to save the number assigned by Combine as part of the script name or to omit the number from script name and only display the number in the user-interface of Combine. Figure 79: A code package with auto numbering (left) and without auto numbering (right). Adding a Script to a Package Scripts can be added to a package in several ways. To create a new script, choose a node in the package tree (the root node of the package or a folder) under which the new script will be placed, and then right-click and select Add SQL Script → New from the menu as demonstrated below. You can also add a new script by selecting the appropriate parent node and then clicking the Add SQL Script toolbar icon . Page 103 © 2005 - 2015 JNetDirect, Inc. All rights reserved. Figure 80: Adding a new script to a package. Scripts can also be added to the package by importing them from the file system. Using the Import Dialog, multiple scripts and folders will be automatically loaded into the package. Once a new script is placed in the package you can view and edit its SQL code in the main editor window by right-clicking the script and selecting the Open menu option (see the section titled Editing SQL Code of Package Scripts for more information). Adding and Linking Existing Scripts to a Package If you have existing scripts on your local file system that reside under the package folder, you can add those scripts and their parent folder to the project package. To do so, right-click the root node of the package, browse for files that reside in the same package folder or under subfolders of the package folder, and select your files. If the selected files indeed reside under the package folder, you will be prompted with the dialog in the figure below. Page 104 © 2005 - 2015 JNetDirect, Inc. All rights reserved. Figure 80a: Adding existing files that reside under the package folder to a package. Select the Link to existing files option to load the existing files into the package. On the other hand, if you wish to make copies of the selected files instead of using the existing ones, then select the Create a copy option. Linking to existing files is useful for working with Source Controlled package: If the linked files are source-controlled, you can work and update the source control files within the code package and Combine. Note: You can also add existing files under package folders by right-clicking the folder node in the package and selecting Add SQL Script → From File. The selected files must reside either under the same folder or its subfolders. Adding Files to a Package from Source Control Files can be added to a package directly from a source control system. First, you must check in the package into the source control system. Then, files that reside under source control projects that are mapped to the package folder or its subfolders can be added directly from source control. To do so, right-click the package and select Add SQL Script → From Source Control, as demonstrated in the image below. Page 105 © 2005 - 2015 JNetDirect, Inc. All rights reserved. Figure 80b: Adding files to a package from source control. Next, you will be prompted with the dialog Add SQL Script from Source Control dialog. Here, click the Browse button (i.e., "...") and select the source control project. The workspace or workarea for the selected folder must either be the package folder or its subfolder (or subsubfolder, and so on). After selecting the project from source control, select the files you wish to add to the package and press OK to close the dialog. In turn, JNetDirect Combine will get the latest version of the selected files to the local folder and then add the files to the package. Note: Some source control providers allow you to specify the local folder for the project while selecting the project. Make sure that the local folder is the package folder or one that resides under the package folder. Asterisk in the Code Package After a change is made to a code package, an asterisk will appear next to the package node that has changed. To better understand which nodes change in response to various code package actions, please refer to the description below: Wrapped packages - recall that a wrapped package is a single-file package that contains all SQL scripts (names and content) as well as package folder information inside the single .cpa file. For this reason, every change to any property, node, folder, or script will prompt an asterisk next to the root node of the wrapped package. If you change the content of a SQL script in a wrapped package, an asterisk will also appear next to the icon of the script. Unwrapped Packages - the .cpa file of the unwrapped package holds the file names, folder names, and all file and folder attributes Each time a new file or folder is added, or the properties of files or folders are updated, an asterisk will appear next to the root node of the package that reflects the change to the .cpa file. In other cases, e.g., when the content of a SQL script is updated, this does not require a change to the .cpa file and the asterisk will appear next to the SQL script node. Page 106 © 2005 - 2015 JNetDirect, Inc. All rights reserved. Importing Scripts and Folders to a Package SQL files, folders, and other file types can be loaded into a code package from the Import Dialog. You can start the dialog by following one of the options below: Click the package root node or a folder under which the imported files and folders will be placed and then press the Import icon in the toolbar. Right-click the parent node (package root node or folder) and select Import Files from the menu as demonstrated in the figure below. Figure 81: Starting the Import Dialog from the right-click menu of a folder. The Import Dialog allows you to load individual files or folders and all their files into the package. The dialog is now described in details below. Page 107 © 2005 - 2015 JNetDirect, Inc. All rights reserved. Figure 82: The Import Dialog. Filtering Method: The default filtering option is set to SQL files. Using this option, only SQL files will be shown in the folder browser that will appear after you press the Get Files button. Furthermore, if you choose to load folders into the package then only SQL files in the selected folders will be imported. The All Files option allows you to browse and load files with any extension to the package. Finally, the Pattern option is only enabled when you load files from folders. This feature is optional and lets you specify custom filters (for example, to load files that start with the word "Rollout" in all folders the Pattern can be set to "Rollout*.*"). Selection Method: You can choose to import individual files by selecting the Select Files Manually option, or all files in selected folders by checking the Search a Folder option. Furthermore, you can instruct Combine to load all folders and subfolders and their files by checking the Recursive option in the Dialog. Once the Selection Method and Filtering Method are set, press the Get button to search for files and folders to import. The images below illustrate the selection of SQL files when the Selected Files Manually option is checked. Automatically Create Parent Folder: If this option is checked then the each script will be loaded and placed under a folder in the package. The parent package folder will have the same name as the parent folder for the script in the file system. Page 108 © 2005 - 2015 JNetDirect, Inc. All rights reserved. Figure 83: Selecting files to import. After selecting the files and folders, the Import Dialog will display all files that will be imported. Using the dialog you can add more files by pressing the Get Files button again. Similarly, you can choose to remove files from the import list by choosing the desired files and clicking the Remove Selected button. Figure 84: The Import Dialog after selecting files and folders. Page 109 © 2005 - 2015 JNetDirect, Inc. All rights reserved. Press the OK button to complete the import process. Files and folders will then be loaded into the package and placed under the initially selected parent node in the package tree hierarchy. After files and folders are loaded you can use the drag and drop feature to place them in different locations in the package. You can also copy and paste files and folders to move them around the package. Also note that loaded files will be marked with an asterisk (*) to denote that the new files have not yet been saved as part of the package. You can select individual files and press CTRL+S to save them in the package or use the save all option to save all changes to the package. Copy-Paste Package Items Scripts and folders can be copied and then pasted to place them under different nodes in the package. When copying a script, all properties of the script (including the Container assigned to the script) will be copied as well. Copy-pasting folders will include all the underlying folder scripts and all properties associated with the scripts and the folder. Choose one of the following options below to copy-paste folders or scripts: Right-click the script or folder you wish to copy and press Copy in the menu. Then, left-click the desired node in the Package Explorer under which the copied item will be placed. Right-click the selected node and choose Paste from the menu. Use CTRL+C and CTRL+V to copy the objects and place them under a selected node. Hold the CTRL button. Using the mouse, drag and drop the object to the new target location in the Package Explorer. Press the Copy icon in the main toolbar, select the target node for the copied objects and then press the Paste toolbar icon. After changes have been made to the package, the package icon will be marked with an asterisk (*) to denote the change. Package changes will take effect only after pressing CTRL+S to save the package. Page 110 © 2005 - 2015 JNetDirect, Inc. All rights reserved. Editing SQL Code of Package Scripts After you create a new script in the code package or import scripts to the package, you can view and make changes to the code in the main editor window. The content of the script can be opened by either double-clicking the script icon, or right clicking the script icon and choosing Open from the menu. Changes made to the script are only saved in the context of the package. If scripts were imported to the package from the file system then changes will not be made to those files. You can write the changes to the files in the file system by exporting the package and all the package content. After a script is edited it will be marked with an asterisk (*) to denote the change. Changes will be saved in the package only after you press CTRL+S to save the package. Figure 85: Opening a package script for viewing and editing. Removing Scripts and Folders from a Package Scripts and folders can be removed from a package by selecting the objects to remove and then right-clicking and choosing the Delete option from the menu. Another way to remove items from the package is to select them and then press the Cut icon in the toolbar. After changes have been made to the package, the package icon will be marked with an asterisk (*) to denote the change. Package changes will take effect only after pressing CTRL+S to save the package. Page 111 © 2005 - 2015 JNetDirect, Inc. All rights reserved. Drag-Drop Package Items Scripts and folders can be dragged and then dropped under a desired parent node to change the script order in the package (recall that the script order is important when executing the code packages). When scripts are dragged and later dropped, all the properties associated with the script will be moved together with the script. If you drag and drop folders then all underlying scripts will be moved alongside with the parent folder. After changes have been made to the package, the package icon will be marked with an asterisk (*) to denote the change. Package changes will take effect only after pressing CTRL+S to save the package. Associating a Container with Package Scripts and Folders Each script in the package will be deployed on all databases defined in the Container associated with the script. You can either associate a Container directly with a script or you can set the Container property in the Properties Windows to "Use Parent Settings" for each script. When "Use Parent Settings" is used then the Container associated with the script will be the same Container associated with the parent node for the script in the package tree hierarchy, which is either the root node of the package or a folder. See Configuring Code Packages for additional information. Tip: If you already assigned a Container to a script and you wish to reset the Container property to the default value "Use Parent Settings", right-click the mouse on the Container property and select the Reset option from the menu. Figure 86: Resetting a Container associated with a script to the value “Use Parent Settings”. Page 112 © 2005 - 2015 JNetDirect, Inc. All rights reserved. Exporting Scripts from a Package Once a package is composed, you can export the files and folders in the package to the file system or to a shared network drive by right-clicking the package icon and selecting the Export Package option from the menu. When files and folders are exported you will be asked to specify the drive and folder in which all files and folders will be saved. If your package contains folders then those folders will be created in the same hierarchical order as in the package and all package scripts that reside under each folder will be placed under the exported folders. If any files in the file system have the same names as the exported files then those files will be overwritten unless they are marked as read only. The first step required to export the package content is to start the Export Dialog as demonstrated in the image below. Figure 87: Starting the Export Dialog to export files and folders. Next, the Export Dialog will appear and ask you whether to include the Auto-Numbers appended to the scripts by Combine. Checking this option will save the script and folder numbers as part of their names. Figure 88: The Export Package dialog. Page 113 © 2005 - 2015 JNetDirect, Inc. All rights reserved. Finally, select the target drive and folder and press the OK button to export the content of the package. The result of exporting the package demonstrated in the figure above is presented below. Figure 89: Exploring the exported package folders and scripts. Configuring Code Packages Several key points must be considered when preparing a code package for deployment: 1. Order of package scripts: Upon package execution, scripts are deployed against all target databases defined in their associated Container in the order they are placed in the package. This rule applies to scripts that are either placed under folders in the package or directly under the root node of the package. For example, the order of script execution is listed in the figure below next to each package script. When the package is executed, the first script will be deployed on all its associated target databases. Once completed, the second script will be deployed on its databases, then the third script, and so on. Page 114 © 2005 - 2015 JNetDirect, Inc. All rights reserved. Figure 90: Order of script execution in the package. 2. Mapping scripts to Containers: Each script in the package must be mapped to a Container. First, recall that a Container consists of a group of target databases (see Static vs. Dynamic Containers for detailed information). Moreover, remember that each Container holds the authentication type and credentials that will be used to connect and deploy code against all databases defined in the Container. The script-to-Container mapping is most important as it is used by Combine to identify the set of one or more target databases on which each script in the package will be deployed. Each script can be associated with a Container directly or scripts can inherit the Container from their parent node (either the root node of the package or the folder above the script icon in the package tree hierarchy). The default Container assigned to each script is "Use Parent Container" and can be changed in the Properties Window. To bring up the Properties Window, select the script you wish to edit and press F4. The Package Explorer and Properties Window for a demo package are presented in the figure below. Page 115 © 2005 - 2015 JNetDirect, Inc. All rights reserved. Figure 91: Associating a Container with a script. You can change "Use Parent Container" to explicitly assign a Container to the script by clicking the Container property. After you click the property, a window with all Containers in the currently active Environment will be displayed and will let you select the desired Container. The dialog is presented in the following image together with the Container Manager (observe that the Development Environment is the currently active Environment since it is displayed in bold letters). Figure 92: Selecting a Container to associate with the script. Page 116 © 2005 - 2015 JNetDirect, Inc. All rights reserved. Important Tip: You can simplify your packages by using folders and associating a Container with the folder. Then, only place scripts under the folder if you wish to deploy them on the databases of the Container associated with the folder and set the Container associated with each script to "Use Parent Settings" (which is also the default; See Associating a Container with Package Scripts and Folders). The code package will then become more structured and readable and will be easier to manage, and remember that you can use any number of folders in the package. Figure 93: Using folders to well-organize and easily configure the package. 3. Container authentication type and credential settings: Each script associated with a Container will be deployed on the Container databases using the authentication type and credentials provided for the Container in the Container Manager. It is therefore important to verify that all Containers in the Container Manager are configured to use the correct authentication with the appropriate credentials. Note that Combine will not execute the package immediately after you hit the Execute button but will first verify that all settings are indeed correct and walk you through several dialogs before the actual execution. Furthermore, if any Containers are configured to use the Prompt authentication type then Combine will also ask you to provide the authentication type and credentials for each such Container that is referenced in the package before execution begins. The entered credentials are only collected for execution purposes and are not store by Combine. Please refer to the section titled Executing Code Packages to examine the process of code execution and the associated dialogs. Page 117 © 2005 - 2015 JNetDirect, Inc. All rights reserved. 4. Check / uncheck scripts and folders in the package: A checkbox is available next to each package node (scripts, folders). If the checkbox next to a given script is checked then Combine will execute the script as part of the package execution. If you wish to exclude one or more scripts from the execution of the package you can uncheck the checkbox next to the script. You can also uncheck the checkbox of a folder to exclude all the scripts in the folder. 5. Configuration verification: When a package is executed, Combine will collect the database and server names for all target databases of all Static and Dynamic Containers referenced in the code package. Database and server names will be collected from all Static Container configurations and if Dynamic Containers are used then Combine will connect to the Reference Static Container and execute the Dynamic Container query to return all database and server names. Combine will also perform several verifications to ensure that the package can be executed correctly, such as ensuring that all Containers have at least a single target database. Furthermore, Combine will use the authentication type and credentials defined for each Container in the Container Manager to ensure that all target databases could in fact be connected using the provided authentication settings. If any Containers are configured to use the Prompt authentication type then you will be asked to provide the authentication type and credentials for each Container before verifying the connectivity to the target databases. The authentication types and credentials that you enter for each Container will also be used to deploy the package code against all databases in each Container. More information about the tests and verifications can be found in the section titled Executing Code Packages. Executing Code Packages Before executing a code package, please ensure that all scripts and their associated Containers are configured properly in the package. Also, if you have more than a single Environment in the Container Manager, make sure that the active Environment is set properly and that it is the Environment against which you wish to deploy the code package. Please refer to the section Configuring Code Packages for more information. The following list contains a summary of key items that should be verified prior to package deployment: 1. Check the order of scripts in the package: Since scripts are executed according to their order in the package, make sure that all SQL object dependencies (if any) are followed throughout the package and reorder the package scripts as needed. 2. Make sure that scripts are mapped to the correct Containers. 3. Check the authentication type and credentials of Containers referenced in the package for your Environment in the Container Manager. The Container authentication type and Page 118 © 2005 - 2015 JNetDirect, Inc. All rights reserved. credentials will be used to connect and deploy code on all target databases in the Container. 4. Make sure that checkboxes next to all scripts that you wish to deploy are check and uncheck unwanted scripts. Important Tip: You can simplify your packages by using folders and associating a Container with the folder. Then, only place scripts under the folder if you wish to deploy them on the databases of the Container associated with the folder and set the Container associated with each script to "Use Parent Settings" (which is also the default; See Associating a Container with Package Scripts and Folders). The code package will then become more structured and readable and will be easier to manage, and remember that you can use any number of folders in the package. Figure 94: Using folders to well-organize and easily configure the package. The entire code package is executed by pressing CTRL+F5, or by selecting Package → Execute from the main menu. You can also direct Combine to return the actual execution plan for the package by selection Package → Include Actual Execution Plan from the main menu or pressing CTRL+SHIFT+M. Also note that you can return the estimated execution plan from all databases and servers in which case the steps below will still be followed however code will not be deployed on target databases and only estimated execution plans will be returned. Page 119 © 2005 - 2015 JNetDirect, Inc. All rights reserved. Figure 95: Executing a code package. When a package is executed, Combine performs the following actions and verifications. If any of the checks listed below are not successful, Combine will alert you and will not deploy the package. Check that the authentication type and credentials are available for all databases. Recall that Containers can be configured to use several authentication types, namely SQL authentication, Windows authentication or Prompt (see the Static Container Wizard and Dynamic Container Wizard sections for more information). Also you can use check box Use Encryption to turn on SSL encryption for a connection to DB server. If any Containers referenced in the package are set to use the Prompt authentication type then you will be prompted to enter the authentication type to use to connect to all Container databases, for each such Container. If you choose SQL authentication type you will also be asked to provide a login name and password. These credentials will not be stored by Combine and are only used in run-time to connect and deploy the code on all databases. On the other hand, you will not be asked to provide the authentication and credentials for all referenced Containers that use SQL authentication or Windows authentication since the authentication and credentials entered in the Container Manager will be used. The image below illustrated the credentials window displayed by Combine when the Prompt authentication type is used for all Containers referenced in the package. You can choose different credentials for each Container or use the same credentials for all Containers. After you enter the credentials in this dialog you must hit the Apply button and then OK to continue. Page 120 © 2005 - 2015 JNetDirect, Inc. All rights reserved. Figure 96: Providing the authentication type and credentials for all Containers referenced in the package that use Prompt authentication type. Resolve all target databases, verify connection and authentication to all target databases and allow the user to deselect databases. At this point Combine has the authentication type and all connection attributes needed to resolve the target databases for all package scripts. First, Combine resolves all target databases: For Static Containers, Combine will retrieve the database and server names from the Container Manager. If Dynamic Containers are referenced in the package then Combine will run the Dynamic Container query against the Reference Static Container for each Dynamic Container to retrieve the database and server names for all target databases (please refer to Static vs. Dynamic Containers to learn more about Container types). After all database and server names are resolved, Combine will attempt to connect to all databases to verify that they indeed exist and that the authentication type provided for the Container in the Container Manager (or in the dialog in the last image) can be used successfully. The results of the connectivity test are then presented in another dialog, which also allows you to deselect Container databases. If a database is deselected for a given Container then Combine will not run the script associated with that Container on the deselected database, and will still run code on all other Container databases. Also note that databases that cannot be connected successfully (due to timeouts or wrong credentials provided in Combine) will be marked in grey and deselected automatically. You can reselect these databases to try to deploy code against them however this is highly not recommended. To demonstrate the connectivity test dialog, below are two examples of the dialog when the connectivity to all Container databases is successfully verified, and when one server is down so that its databases cannot be contacted. Page 121 © 2005 - 2015 JNetDirect, Inc. All rights reserved. Figure 97: Database connectivity and authentication validation dialog when Combine connected to all databases in all Containers referenced in the package successfully. You can deselect databases in this dialog to not run code against the deselected databases. Figure 98: Database connectivity and authentication validation dialog when ProdSvr3 server is down so that not all databases of Containers referenced in the package can be contacted. Page 122 © 2005 - 2015 JNetDirect, Inc. All rights reserved. Please be aware that this Validate Databases dialog is the last dialog displayed prior to the execution of all the code in the package. If for any reason you wish to abort the code deployment then press Cancel in this dialog. If you press OK then package scripts will be executed according to their order in the package and each script will be run on all the checked databases in its associated Container. The image below demonstrated the case where Cancel is pressed after the connectivity test. Notice that the connectivity results are displayed in the Package Output window. Figure 99: The Package Output window and connectivity test results after execution is aborted. The Start and Finish entries in the image refer to the connectivity verification and no code is deployed after the package execution is aborted. Page 123 © 2005 - 2015 JNetDirect, Inc. All rights reserved. Deploy code on all selected databases and return execution plans and results. At this point, Combine will deploy all scripts against all target databases that were not unchecked in the last dialog. Result sets with matching schema returned from the target databases will be aggregated and displayed in the Package Results window, where results for each individual database are available as well. If you also requested to return the actual execution plans then the execution plans will be available for each individual target database. If any execution errors occur due to incorrect SQL code then package execution will pause and ask you whether you wish to continue, and you can view all steps that were taken by Combine in the Package Output window. Furthermore, error details and messages (such as row counts) returned from all servers can be found in both the aggregated messages window and the messages window for each database. The Package Output window can also be viewed during code execution to monitor the execution status. Below is an example of the aggregated results and individual results for each database when Combine was instructed to return the actual execution plans. Figure 100: Viewing the aggregated results returned from all target databases for each package script. Page 124 © 2005 - 2015 JNetDirect, Inc. All rights reserved. Figure 101: Viewing the execution plans returned from each target database. Deployment Errors In some cases, for example, when scripts contain incorrect SQL syntax or code, deployment errors can occur. When this happens, Combine will complete the execution of the script that caused errors on all the target databases in the Container associated with the script, and then will behave according to "Promt On Error" option. If it is set to 'False' then Combine will use "Cancel Execution" option to handle the occurred errors. If it is set to 'True' then Combine will pause. In other words, Combine will not continue to deploy additional scripts until you instruct it to continue. The dialog below will appear after Combine has completed the deployment of the script on all the associated Container Page 125 © 2005 - 2015 JNetDirect, Inc. All rights reserved. databases. In this dialog you can view the messages returned from each database that encountered an error for the script, by selecting the icon of each errored database on the left hand side of the dialog. To proceed, you can then choose one of three options: 1. Stop the deployment: If you press the Cancel button, Combine will stop the deployment and will not deploy any more package scripts on any databases. 2. Continue to deploy the remaining package scripts on all but errored databases: If you press the 'Non errored' button, Combine will exclude the errored databases and will deploy the remaining scripts on all other (i.e., non-errored) databases. Example: Once errors occur, you can stop deploying on all errored databases, and later deploy only the needed scripts on some or all errored databases, by using the checkboxes in the Package Explorer and in the Validate Databases dialog (see Executing Code Packages for details). 3. Continue to deploy on all (including errored) databases: If you press the Continue button, Combine will continue to deploy the remaining scripts on all databases, including those databases that encountered errors. Example: Once deployment errors occur, you can open another instance of Combine (or any other editor), perform manual operations to correct any issues, and then proceed to deploy the rest of the scripts in the package to all (including previously errored) databases. Figure 101a: The deployment error dialog. Using this dialog, the user can select how to proceed with package execution, as well as view all execution errors for each errored database. Page 126 © 2005 - 2015 JNetDirect, Inc. All rights reserved. Execution Modes Combine 6.0 introduces two package execution modes: Traditional 'Sync' mode. A new 'Async' mode. 'Sync' mode In this mode scripts are executed synchronously and simultaneously on all databases. I.e. each script execution is started on all databases at the same time, Combine waits until it is completed on all of them, and only then starts to execute the next script. Figure 142: Timeline diagram for the 'Sync' mode. 'Async' mode In this mode scripts are executed on each database without any waiting for other databases. Combine starts the next script execution on each database immediately after the previous script is completed. This mode allows Combine to minimize wait time for small databases when the corresponding container consists of several databases of very different sizes (and hence very different script execution times). Figure 143: Timeline diagram for the 'Async' mode. Page 127 © 2005 - 2015 JNetDirect, Inc. All rights reserved. Set execution mode 'Sync'/'Async' modes are set for a package or any folder inside package. Figure 144: Selecting execution mode for a package. 'Mixed' mode If 'Async' mode is set for some folder (or for the entire package) then all sub-folders are executed in 'Async' mode too despite of their settings. So it is possible to create a series of synchronization points during package execution. To do so an user should create a corresponding number of folders and sets their modes to 'Async' (the entire package should be in 'Sync' mode). In that case Combine will execute scripts inside each folder asynchronously, but when all scripts inside the folder are completed for one database – Combine will wait for the other databases before switching to the next folder execution. For example, package has the next structure: Figure 145: Package structure example. Page 128 © 2005 - 2015 JNetDirect, Inc. All rights reserved. Package has 'Sync' mode set, while the folder -- 'Async'. In that case execution diagram will be the next: Figure 146: Timeline diagram for a 'Mixed' mode. In 'Async' mode Combine does not use "Prompt On Errors" option and always works like it is set to 'false'. I.e. option "Cancel Execution" determines how Combine will handle execution errors. Package Execution State There are two ways to see package execution process: Execution Log. Execution State Window. Execution Log Package Output window contains execution log -- a list of all events occurred during package execution. Page 129 © 2005 - 2015 JNetDirect, Inc. All rights reserved. Figure 147: Example of package execution log. Execution State Window To open this window user should choose the corresponding main menu item. Figure 148: Opening package execution state window. Page 130 © 2005 - 2015 JNetDirect, Inc. All rights reserved. Execution state window contains a list of all databases and information about currently executing scripts. Such information includes script name (with a path inside the package) and current execution state. Figure 149: Package execution state window. Possible states are: Waiting Executing ERROR! Cancelled Finished Waiting The script is waiting in queue before the execution (for example, if the limit of server connections has been reached). Executing The script is currently executing. ERROR! There was an error during the corresponding script execution. Detailed error information can be found in the Execution Log or in 'Messages' items in the 'Package Result' window. Page 131 © 2005 - 2015 JNetDirect, Inc. All rights reserved. Cancelled The script execution was cancelled by the user. The last window column contains a Cancel button. The user can cancel package execution on any particular database by pressing on the corresponding button. In that case currently executing script is aborted, and all subsequent scripts are cancelled too (i.e. are not executed). This operation cannot be undone! Finished The current script execution is finished. If the entire package execution is not yet finished such state means that corresponding database waits for the next script to be executed (due to 'Sync' mode or server connection limits). Showing or Suppressing Package Output During Execution When code packages are executed then by default Combine will prompt the Package Output results in runtime. However, you can suppress the Package Output and hide it during execution. In order to configure Combine to suppress or show the Package Output, go to Tools → Options → Execution Engine → Output and set the value of the property Show Output During Execution (Package). Similarly, you can configure Combine to show or suppress the script output window during the execution of scripts in the editor by setting the property Show Output During Execution (Script). Page 132 © 2005 - 2015 JNetDirect, Inc. All rights reserved. Saving Package Deployment Results After running a script, a query, or a code package, against either a single database or multiple databases, all results returned from the target databases and servers can be saved into a single proprietary file with the extension .cre (Combine results). This includes all messages, warnings, errors, result sets and grids, as well as execution plans. To save the deployment results, simply click the Save icon illustrated in the image below, to save all returned results in the .cre file. Later, you can double-click the .cre file, or go to File → Open → Open File in order to view the content of the saved results in Combine. In addition to saving deployment results to a cre file, JNetDirect Combine can be configured to save package deployment results to the Change History Repository database. Additional information can be found in the Change History Overview section. Figure 102: Saving all package scripts and deployment results into a single file. Page 133 © 2005 - 2015 JNetDirect, Inc. All rights reserved. Executing Code Packages from the Command Line See Cpaexec. Find in Package - Search Text in Package Scripts Using the Find in Package feature users can search for text in all package scripts. This feature is useful when looking for object code in a package, or when performing code reviews on projects and packages. Find in Package can be invoked by pressing CTRL+SHIFT+F or through the main menu option Edit → Find and Replace → Find in Package. Using the tool, you can enter regex (regular expressions) or use wildcards to find strings and patterns in package scripts. All search results are displayed in the Find Results window. The Find Results window allows you to double-click on each found entry to bring it up in the editor. Press F8 to go to the next result, or SHIFT+F8 to move to the previous result. Source Code Control in Code Packages Developers can use a wide range of source code control systems with Combine to version their code and collaborate while developing database releases. With unwrapped packages, each SQL script in the package can be checked in and out independently of the root node, so that developers could work on different scripts at the same time. However, since the root node of the unwrapped package (that reflects the .cpa package file) contains the mappings (names, paths) of all folders and scripts in the package, the user that checks out the root node is the only person that can add, remove, rename, or change the properties of items in the code package. On the other hand, since wrapped packages consist of a single file, only one user can work on a wrapped package at a time. In order to work with source code control in code packages, all you need to do is to make sure that your source control provider is set up: Go to Tools → Options, and select your source code control plug-in under Plug-in Selection. Then, when working on a code package in the Package Explorer, you can right-click and select various source-control features and actions from the menu. Page 134 © 2005 - 2015 JNetDirect, Inc. All rights reserved. When working in source-controlled package, several things need to be considered: 1. File → Source Control → Change Source Control - this option prompts the source-control binding dialog that maps between a folder in your source-control server and the local file system. 2. Get Latest - will retrieve the latest version of all code package items that are available on the local file system. For example, if other users check out a package and add new scripts to it (without checking the root node back to source control), when working on unwrapped packages, you will not see the new package items until you check out the latest version of the package. However, you can still get the latest version of all files that are locally available on your file system. This is common practice in many editors and IDEs. 3. Combine source-control icons - when working in the editor, you can see the status of your script in the lower pane in the editor window. Available icons and statuses are: Item added to package and not yet available in source control Package item is checked out to me Package item is checked out to another user Package item is checked in Package item is missing from the source control server (after item is deleted from SCS) The exclamation mark is added to any of the above icons when the package item is missing from the local file system, for example: Item added to package but then deleted from local file system Package item is checked in but is not found on my local file system Page 135 © 2005 - 2015 JNetDirect, Inc. All rights reserved. Change History Repository - Tracking and Auditing Deployments and Changes Overview Combine enables users to install a repository database that records all package deployments and database changes in a central location. On top, the Change History tool under Tools → Change History enables users to easily view and search the repository content, for tracking and auditing purposes. The Change History Repository database (also referred to as the Combine Change History database) contains two tables that store two sets of data to track all code package deployments and outcome. The first table is called dbo.utbPackageDeployments and contains general package info. The second table is called dbo.utbPackageDeploymentDetails and holds extended database change info for each package execution. A detailed description of these tables and their columns is available later in this section. The definitions and the location of the Change History Repository (i.e., the names of the SQL Server and the database where the repository is installed, as well as the authentication type and credentials to connect to the repository DB) are stored on each client machine. After the repository location is provided to Combine, the application can be configured to only store general package information in response to each package deployment, or to store both the general package info and detailed database change information. If a client machine is configured to only write general package info to the Change History repository, then every time a code package is deployed from that client machine, a single row (per deployment) will be stored in the dbo.utbPackageDeployments table. However, if the client machine is configured to write detailed database change information to the repository, then Combine will populate both the general package info as well as extended deployment details. In this case, Combine will write one row for each script and target-database pair to the repository table dbo.utbPackageDeploymentDetails, where each row describes the execution of a script against that target database. Example: A code package contains two scripts. The first script is mapped to a Container with four target databases and the second script is mapped to a Container with five databases. If Combine is configured to only save general package deployment information then each time the package is executed, a single row will be stored in the repository in the table dbo.utbPackageDeployments. However, if the application is configured to also store extended package deployment details, then each time the package is deployed Combine will write a single row to the table dbo.utbPackageDeployments and also populate nine entries that describe the detailed database changes for each script and each target database in the table dbo.utbPackageDeploymentDetails. Note: If you choose to only store general package info in the Change History Repository, you can later recover the detailed database change information. This recovery process is manual and is further explained in the section titled Recovering Detailed DB Change Info from the Page 136 © 2005 - 2015 JNetDirect, Inc. All rights reserved. General Package Info. GUI vs. CpaExec: When using the application, code packages can be deployed by using the Combine user-interface or through the CpaExec command line utility. If a client machine is configured to write to the Change History Repository, then all deployments that initiate either from the user-interface of from the CpaExec utility will be recorded in the repository. On top, the CpaExec utility offers the "ch" flag with which users can instruct the utility to discard the saving of deployment results to the repository. Security: In regards to security, the Change History Repository contains four built-in SQL roles. These roles are described below, and different users can be added to one or more roles as dictated by the security policies in your organization (additional information can be found in the section called Change History - Installing the Repository Database): (i) ChangeHistoryReadOnly - Users that belong to this SQL role can only read the repository content using the Change History tool. If these users deploy code packages, then Combine will not allow them to write to the Change History Repository and will alert them of that fact. This role is useful for non-developer or non-DBA users that need to audit database changes and work with auditors. (ii) ChangeHistoryInsertOnly - Users in this group can populate the Change History Repository but cannot read, view, or search the repository. When users in this group deploy code packages, then Combine will write the change details to the repository however will not allow them to view the repository content in the Change History tool. (iii) ChangeHistoryManagers - Users in this group have all the permissions of ChangeHistoryReadOnly and ChangeHistoryInsertOnly users (i.e., they can both populate and read the repository content), and also have direct SELECT and INSERT privileges on the database tables. (iv) ChangeHistoryAdmins - Users in this group have all the privileges of ChangeHistoryManagers users and also have UPDATE and DELETE permissions on the repository tables. Repository Tables: The Change History Repository tracks database changes and stores various details as described below. The table dbo.utbPackageDeployments that holds one row for each package deployment contains the following columns: [ID] - Identity column. Used for internal purposes. [DeploymentID] - Holds a unique identifier for each package deployment. This column is also used to map between general package information entries in dbo.utbPackageDeployments and the corresponding detailed DB change records in dbo.utbPackageDeploymentDetails. Page 137 © 2005 - 2015 JNetDirect, Inc. All rights reserved. [PackageName] - The name of the code package as it appears in the Package Explorer. [PackageVer] - The version of the code package, as it appears in the properties of the root node of the code package. [PackageFileName] - The path and name of the code package (cpa) file. [EnvironmentName] - The name of the Environment against which the package was deployed. [DeployedByWinUserName] - The name of the Windows (NT) user name that was logged onto the machine from which deployment was initiated. [DeployedByWinDomainName] - The name of the domain that hosts the machine from which a package deployment was initiated. If the machine is part of a workgroup and is not a member in a domain, then this field holds the machine name. [DeployedFromMachineName] - Machine name from which a package was deployed. [DeployedFromIPAddress] - IP address of the machine from which a package was deployed. [DeploymentStartTime] - The start time of package deployment, as it was recorded on the client machine. [DeploymentEndTime] - The end time of package deployment, as it was recorded on the client machine. [HadErrors] - A bit field that indicates whether any errors occurred during the execution of a package. If [HadErrors] is one, then the package encountered one or more execution errors. [DeployedByCpaExec] - A bit field that indicates whether the package was deployed by the CpaExec command line utility. [EnvironmentVariables] - If any Environment Variables are used during the execution of a code package (either in package scripts or in the Reference Query of Dynamic Containers), then this string stores the names of all Environment Variables and their replaced value. [TimeZoneName] - The name of the time zone on the client machine from which a deployment was initiated. [TimeZoneOffset] - The offset in minutes from GMT time, on the machine that initiated the package deployment. [CombineResultsStream] - Holds the Package Results (Cre) file content. [CombinePackageStream] - Holds the content of the Wrapped Package (Cpa) file. Page 138 © 2005 - 2015 JNetDirect, Inc. All rights reserved. [InsertTime], [LastUpdateTime], [LastChangeLogin], [LastChangeHost] - System columns for internal usage purposes. The table dbo.utbPackageDeploymentDetails holds extended database change info. Each row in this table describes a database change, i.e., all details that pertain to the execution of a single script on a single database. This table contains the following columns: [ID] - Identity column. Used for internal purposes. [DeploymentID] - Holds a unique identifier for each package deployment. This column is also used to map between general package information entries in dbo.utbPackageDeployments and the corresponding detailed DB change records in dbo.utbPackageDeploymentDetails. [ServerName] - The name of the server that holds the database against which a package script was executed. [DatabaseName] - The name of the database against which a package script was executed. [AuthenticationType] - The authentication type (SQL or Windows) used to connect and execute the package script on the target database. [UserOrLoginName] - If a package script is executed by using SQL authentication, then this field holds the SQL login name that was used to execute the script on the target database. If Active Directory or Windows authentication is used, then this field holds the NT user name used to connect and execute the script on the target DB. [ScriptName] - The name of the script executed. [ScriptRelativePath] - The relative path of the script as it appears in the code package. [ObjectName], [ObjectType], [ObjectVer] - System columns for internal usage purposes. [DeploymentStartTime] - The time (on the client machine) at which the deployment of a script against the target database has started. [DeploymentEndTime] - The time (on the client machine) at which the deployment of a script against the target database has completed. [HadErrors] - A bit indicating whether the execution of a script against a target DB encountered errors. When [HadErrors] is equal to one, then the script had execution errors. [ScriptText] – The text of the script. If the script contains Environment Variables or System Variables, then this field holds the original script text as it appeared in the package before any variable replacements. Page 139 © 2005 - 2015 JNetDirect, Inc. All rights reserved. [ScriptTextAfterVariableReplacement] - The content of the script as it was executed on the target database, after all Environment Variables and System Variables were replaced. If a script does not include any variables then the value of this field is empty and the deployed script can be found in the column [ScriptText]. [VariableReplacements] - If either Environment Variables or System Variables are used in the script, then this field holds the names of all variables and their corresponding replaced values. [OutputMessages] - The output messages returned from the target DB in response to the execution of the script. [InsertTime], [LastUpdateTime], [LastChangeLogin], [LastChangeHost] - System columns for internal usage purposes. Related Topics:The Change History Repository supports many features and functionality for developers, DBAs, and auditors. These topics are discussed in the corresponding sections below: 1. How to install the Change History Repository database 2. Configuring client machines to use the Change History Repository 3. Configuring Combine to only store general package info in the repository 4. Configuring Combine to store general package and detailed change info in the repository 5. Opening a deployed package (cpa) file from the Change History Repository 6. Opening package results (cre) file from the Change History Repository 7. Populating the Change History Repository from a Cre file 8. Recovering detailed DB change info from the general package info 9. Change History Tool - Viewing Past Deployment Results 10. Change History - How to Search the Change History Repository 11. Change History Tool - Managing Grid Columns Installing the Change History Repository Combine enables users to maintain a Change History database that records all details and actions in response to the deployment of code packages (see the Overview section for detailed information regarding the Change History Repository). To install the repository database, please follow the instructions below: 1. Locate the SQL script that installs the repository. Two SQL scripts are available, one for installing a repository DB on SQL Server 2000 or earlier versions, and another for installing the DB on SQL Server 2005 and later versions. The two SQL scripts are called "Create Change History Repository on SQL 2000 or earlier.sql" and "Create Change History Page 140 © 2005 - 2015 JNetDirect, Inc. All rights reserved. Repository on SQL 2005 or later.sql". The scripts can be found at the download section on JNetDirect' website and are also available under the Combine installation directory (for example, under the folder: C:\Program Files\JNetDirect\Combine\Repository\CombineChangeHistory\). 2. Create the repository database on a SQL Server: Locate the SQL Server that will hold the repository database (this SQL Server can reside anywhere on the network where it can be accessed by machines and users running Combine). Log on to the SQL server and to the Master database as an administrator (either as the sa user or as a domain administrator). If the SQL Server is a SQL Server 2000 or earlier, you should run the script "Create Change History Repository on SQL 2000 or earlier.sql". For SQL Server 2005 or later, run the script "Create Change History Repository on SQL 2005 or later.sql". The executed SQL script creates a database called CombineChangeHistory, the schema (i.e., tables and stored procedures) for the database, as well as four SQL roles: ChangeHistoryReadOnly, ChangeHistoryInsertOnly, ChangeHistoryManagers, and ChangeHistoryAdmins. Users that belong to the ChangeHistoryReadOnly user group will be able to read and search the repository content however will not be able to write and track deployment results. Users in the ChangeHistoryInsertOnly group are only permitted to populate the repository to record package execution details, yet are not allowed to read or search the repository. The other two roles, namely ChangeHistoryManagers and ChangeHistoryAdmins can populate the repository and view the recorded content. Additional information regarding these SQL roles is available in the Overview section. Note: By default, the name of the Change History Repository database is CombineChangeHistory. You can change this name and use any other database by opening and editing the SQL script that installs the repository DB. 3. Define users for the Change History Repository - make sure that all users that will be using the Change History Repository have access to the repository database. At this point you should also set the permissions and access restriction to the repository: It is recommended that all users that deploy code packages will be added to the ChangeHistoryInsertOnly group and that users that need to search and view the deployment data will be members of the ChangeHistoryReadOnly group. Advanced users (e.g., production DBAs) should be added to the ChangeHistoryManagers role, and non-developers or DBA users that work with auditors should be added to the group called ChangeHistoryReadOnly. For your convenience, a SQL script called "Examples - Adding users to Repository roles.sql" contains examples of how to add users to the different SQL roles and is available on JNetDirect' website as well as under the Combine installation directory (e.g., C:\Program Files\JNetDirect\Combine\Repository\CombineChangeHistory\). 4. Instruct users to define the Change History Repository in the client user-interface in Combine. To do so, each user should go to Tools → Options → Packages → Change History, and provide the connection information for the SQL Server and database that hold the repository (see image below). If any of the settings are incorrect and Combine is configured to write to the Change History Repository to track deployments, then Combine will alert Page 141 © 2005 - 2015 JNetDirect, Inc. All rights reserved. users of this fact. In addition, the following configuration options are available to users working with a Change History repository: - Store Extended Package Deployment Details: If this option is turned off then each time a user deploys a code package, only general package information (i.e., one row per package deployment) will be recorded in the Change History repository. However, when this option is checked, then Combine will store detailed DB change info (i.e., one row per each script and target DB pair) as well as the general package info in the repository. Additional information regarding general vs. detailed change info is available in the Repository Overview section. - Test Connectivity to Change History Repository database: This option instructs Combine to test that a connection can be established to the Change History Repository database before the execution of a code package, when packages are deployed either from the user-interface or from the CpaExec command line utility. The authentication type and credentials used to connect to the database are those provided in the Options section shown in the image below. Additional settings are also available under Tools → Options → Packages → Auto-Save Results and allow users to configure when and how Combine should write the deployment results to the Change History repository. For example, by setting the Auto-Save Package Results to Change History Repository, users can instruct Combine to always write to the repository, prompt and ask whether to track deployments, or never write to the change history database. When set to Prompt, each time users deploy packages from the userinterface they will be prompted to select whether to track execution results. For the CpaExec command line utility, users can activate the "ch" flag to write to the Change History repository. Figure 102.0a1: Defining the Change History Repository in the client application. Page 142 © 2005 - 2015 JNetDirect, Inc. All rights reserved. Configuring Client Machines to Use the Change History Repository After installing a Change History Repository database, all users and machines that wish to write to the repository and track package deployment results, should configure Combine with the location and credentials of the repository. Specifically, each user should go to Tools → Options → Packages → Change History, and provide the connection information for the SQL Server and database that hold the repository (see image below). You can either select a server from the drop-down list, or alternatively enter a server name manually. If you need to specify a server port, you can enter it after the server name separating by comma. You should then enter the authentication type that will be used to register all the selected servers. Available authentication types are Windows Authentication and SQL Authentication, and Login name and password will be required if you are registering the servers using SQL Authentication. These credentials will be stored using strong encryption techniques to prevent others from viewing your credentials. Also you can use check box Use Encryption to turn on SSL encryption for a connection to DB server. If any of the settings are incorrect and Combine is configured to write to the Change History Repository to track deployments, then Combine will alert users of this fact. In addition, the following configuration options are available to users working with a Change History repository: - Store Extended Package Deployment Details: If this option is turned off then each time a user deploys a code package, only general package information (i.e., one row per package deployment) will be recorded in the Change History repository. However, when this option is checked, then Combine will store detailed DB change info (i.e., one row per each script and target DB pair) as well as the general package info in the repository. Additional information regarding general vs. detailed change info is available in the Repository Overview section. - Test Connectivity to Change History Repository database: This option instructs Combine to test that a connection can be established to the Change History Repository database before the execution of a code package, when packages are deployed either from the user-interface or from the CpaExec command line utility. The authentication type and credentials used to connect to the database are those provided in the Options section shown in the image below. Additional settings are also available under Tools → Options → Packages → Auto-Save Results and allow users to configure when and how Combine should write the deployment results to the Change History repository. For example, by setting the Auto-Save Package Results to Change History Repository, users can instruct Combine to always write to the repository, prompt and ask whether to track deployments, or never write to the change history database. When set to Prompt, each time users deploy packages from the userinterface they will be prompted to select whether to track execution results. For the CpaExec command line utility, users can activate the "ch" flag to write to the Change History repository. Page 143 © 2005 - 2015 JNetDirect, Inc. All rights reserved. Figure 102.0a1: Defining the Change History Repository in the client application. Storing Only General Package Info in the Change History Repository The Change History Repository enables users to write deployment results to a central repository database and then view and search the outcome of previously deployed code packages. Two sets of data are stored in the repository - general package deployment info and detailed database changes. General package information consists of a single row for each package deployment, whereas detailed changes track all changes made to target databases during the package deployment. The detailed info stores a single row for each script and each target database. Additional information regarding the records stored in the repository can be found in the Overview section. Page 144 © 2005 - 2015 JNetDirect, Inc. All rights reserved. Users can configure Combine on their client machines to either: - Write only general package info to the Change History Repository - Write both general package info and detailed database changes to the repository To instruct Combine to write only general package info to the Change History Repository, users should go to Tools → Option → Packages → Change History. First, users must enter the location of the Change History Repository database and provide the credentials that will be used to connect and use (i.e., read from or write to) the repository. Then, users should uncheck the checkbox Store Extended Package Deployment Details and click the Apply button in the Options dialog. Figure 102.0a2: Instructing Combine to not save the detailed DB change info. If you choose to only store general deployment results, then Combine only writes a single row to the repository for each package deployment (you can still manually recover and populate the details from the general package info; for more info see the section titled Recovering Detailed DB Change Info from the General Package Info). In practice, this means that under the Change History tool (under Tools in the main menu) you will only see the general information relating to the execution of code packages. For example, if a code package contains 10 scripts and each script is executed against a Container with 5 target databases, then one row will be written to the repository. When viewing the deployment results as in the image below, all users that can read and search the repository will only see one row in the general info top grid for this deployment. This row contains the deployment start and end times, the name of the Environment on which the package was deployed, Page 145 © 2005 - 2015 JNetDirect, Inc. All rights reserved. description of Environment Variable replacements (when applicable), the content of the Cre and the (wrapped) Cpa file, and other relevant fields (see the Overview section for complete details). Figure 102.0a3: Viewing deployment results after only saving the general package info. Advantages and Disadvantages. When choosing whether to only store general package info or to also record the detailed database changes, users should consider the following two factors: 1. After a package is executed, if Combine is configured to only store the general package deployment results, then only one row is written to the repository. On the other hand, if Combine also stores the detailed database changes, then one row will be written to the repository for each script and target database pair. For example, when Combine stores detailed info and a package contains 100 scripts and each script is executed on 10 target databases, then Combine will write the one row containing the general info plus 1000 rows containing details of DB changes. Therefore, writing database change details will take longer than only writing the general deployment info. 2. When using the Change History tool to view past deployment results, users can search the repository to find exact deployment details (e.g., all scripts that were deployed on a certain database, scripts that were executed using a certain SQL login, and so on). However, if you choose to only store the general deployment info, then searches are limited in accuracy and capabilities. Related Topics. Combine can also be configured to prompt and ask users whether deployment results should be written to the repository before a package is executed. Alternatively, users can instruct Combine to always write the deployment results. To set these options, go to Tools → Options → Packages → Auto Save Results and select the desired option from the drop-down menu next to the Change History Repository entry (see image below). If you select Prompt, then Combine will prompt and ask you whether you Page 146 © 2005 - 2015 JNetDirect, Inc. All rights reserved. wish to store deployment results in the repository before a package is executed. On the other hand, you can set this option to True to always store the deployment results. The last option (i.e., False) allows you to choose to not be prompted and not store any execution results to the repository. Figure 102.0a4: Configuring Combine to prompt or always store deployment results. Storing General Package Info and Detailed DB Changes in the Change History Repository The Change History Repository enables users to write deployment results to a central repository database and then view and search the outcome of previously deployed code packages. Two sets of data are stored in the repository - general package deployment info and detailed database changes. General package information consists of a single row for each package deployment, whereas detailed changes track all changes made to target databases during the package deployment. The detailed info stores a single row for each script and each target database. Additional information regarding the records stored in the repository can be found in the Overview section. Users can configure Combine on their client machines to either: Page 147 © 2005 - 2015 JNetDirect, Inc. All rights reserved. - Write only general package info to the Change History Repository - Write both general package info and detailed database changes to the repository To instruct Combine to write both general package info and detailed database changes, users should go to Tools → Option → Packages → Change History. First, users must enter the location of the Change History Repository database and provide the credentials that will be used to connect and use (i.e., read from or write to) the repository. Then, users should check the checkbox Store Extended Package Deployment Details and click the Apply button in the Options dialog. Figure 102.0a5: Instructing Combine to store general package and detailed DB change info. If you choose to store both general package and detailed DB change info, then Combine writes one row to the repository database with the general information and an additional one row for each script and target database pair. For example, if a code package contains 10 scripts and each script is executed against a Container with 5 target databases, then Combine will write a total of 51 rows to the repository. When viewing the deployment results as in the image below, all users that can read and search the repository will only see one row in the general info top grid and 50 rows in the bottom (detailed) grid. The top grid shows the package deployment start and end times, the name of the Environment on which the package was deployed, description of Environment Variable replacements (when applicable), the content of the Cre and the (wrapped) Cpa file, and other relevant fields (see the Overview section for complete details). The bottom grid lists the script execution start and end times, Page 148 © 2005 - 2015 JNetDirect, Inc. All rights reserved. the name and content of the script that was executed, the name of the target database and server, the login and authentication type used during execution, and more (see image below). Figure 102.0a6: Viewing the general and detailed deployment info. Advantages and Disadvantages. When choosing whether to only store general package info or to also record the detailed database changes, users should consider the following two factors: 1. After a package is executed, if Combine is configured to only store the general package deployment results, then only one row is written to the repository. On the other hand, if Combine also stores the detailed database changes, then one row will be written to the repository for each script and target database pair. For example, when Combine stores detailed info and a package contains 100 scripts and each script is executed on 10 target databases, then Combine will write the one row containing the general info plus 1000 rows containing details of DB changes. Therefore, writing database change details will take longer than only writing the general deployment info. 2. When using the Change History tool to view past deployment results, users can search the repository to find exact deployment details (e.g., all scripts that were deployed on a certain database, scripts that were executed using a certain SQL login, and so on). However, if you choose to only store the general deployment info, then searches are limited in accuracy and capabilities. Related Topics. Combine can also be configured to prompt and ask users whether deployment results should be written to the repository before a package is executed. Alternatively, users can instruct Combine to always write the deployment results. To set these options, go to Tools → Options → Packages → Auto Save Results and select the Page 149 © 2005 - 2015 JNetDirect, Inc. All rights reserved. desired option from the drop-down menu next to the Change History Repository entry (see image below). If you select Prompt, then Combine will prompt and ask you whether you wish to store deployment results in the repository before a package is executed. On the other hand, you can set this option to True to always store the deployment results. The last option (i.e., False) allows you to choose to not be prompted and not store any execution results to the repository. Figure 102.0a7: Configuring Combine to prompt or always store deployment results. Page 150 © 2005 - 2015 JNetDirect, Inc. All rights reserved. Opening a Previously Deployed Package (Cpa) File from the Repository When using a Change History Repository, users can retrieve the content of previously deployed code packages from the repository database. To do so, start the Change History tool from the main menu by selecting Tools → Change History. In this tool, enter the search conditions and click the Play button to show the general package info. Next, right-click the deployment row in the top (General Package Info) grid and select the option Open Package to open the content of the deployed package in the Package Explorer. Alternatively, you can also select the Save Package As option from the right-click menu to the save the (wrapped) code package to a cpa file, and then open the file in Combine by going to Open → Open Package. Figure 102.0a8: Opening the content of a deployed package from the Change History tool. Note: Users can only retrieve the content of code packages from the repository if they have read permissions in the repository database. Page 151 © 2005 - 2015 JNetDirect, Inc. All rights reserved. Opening a Package Results (Cre) File from the Repository When using a Change History Repository, users can retrieve the Package Results (Cre) file that was generated in response to the execution of a code package. To open a Cre file from the repository, start the Change History tool from the main menu by selecting Tools → Change History. In this tool, enter the search conditions and click the Play button to show the general package info. Next, right-click the deployment row in the top (General Package Info) grid and select the option Open Results to open the Cre file for the deployed package in the editor. Alternatively, you can also select the Save Results As option from the right-click menu to the save the cre file, and then open the file in Combine by going to Open → Open File. Figure 102.0a9: Opening the cre file for a deployed package from the Change History tool. Note: Users can only retrieve the content of code packages from the repository if they have read permissions in the repository database. Page 152 © 2005 - 2015 JNetDirect, Inc. All rights reserved. Populating the Change History Repository from a Cre File If you deploy a code package with Combine 3.0 or later, and save the Package Results (Cre) file, you can populate the Change History Repository directly from the cre file. This feature is extremely useful in two key scenarios: 1. If you deploy a code package and did not automatically write the deployment results to the Change History Repository, however now you wish to populate the repository with the deployment info and the cre file for that deployment is available. 2. If Combine is configured to only store general package info in the Change History Repository (i.e., only the general package info was stored in the repository for some previously deployed packages) and you now wish to also populate the detailed database changes in the repository. In order to load the information from a cre file to the Change History Repository, you must first open the cre file in the editor. Then, hit the Save to Change History button on the top left hand side of the cre (see image). Next, Combine will prompt you and ask whether you wish to save the detailed DB change info. If you select No, then only the general package info will be written to the repository. However, if you select Yes then both the general package info and the detailed database change info will be written to the repository. Note that if the repository already contains the general package info (but not the detailed DB changes) for this deployment, then you can still select Yes in order to populate the detailed database change info. If the repository already contains both the general and detailed execution results, then Combine will not re-populate the repository and will notify you of this fact. To learn more about the differences between general package info vs. detailed DB changes, please refer to the Change History Overview section. Figure 102.0a10: Saving the content of a Cre file to the Change History Repository. Page 153 © 2005 - 2015 JNetDirect, Inc. All rights reserved. Recovering Detailed DB Change Info from General Package Info Users that utilize a Change History Repository to store the execution results of code packages can configure Combine to only store general package and deployment information in the repository database. Alternatively, users can configure the application to store general info as well as details regarding all database changes. In addition, users can choose to store general info for some package deployments and detailed DB changes for other package executions (for additional information regarding the content of the repository, please refer to the Change History Overview section). Assume that for some deployments, Combine stored the general package information in the Change History Repository and that a user now wishes to also populate the detailed database changes. This functionality is supported in Combine and can be achieved as follows: 1. Open the Change History tool from the main menu by selecting Tools → Change History. 2. Enter the search criteria for the package deployment and click the Play button to retrieve the deployment information in the General Package Details (top) grid. 3. In the top grid, right-click the row that contains the deployment information and select Open Results from the context menu. 4. A new window that displays the package results is now opened in the editor. In this window, refer to the top left hand side and click the option Save to Change History (see the section titled Populating the Change History Repository from a Cre File for more information). 5. When prompted, click Yes to instruct Combine to populate the detailed database changes section in the repository. 6. Close the editor window that contains the (cre) package results. After performing steps 1-6 you can go back to the Change History tool and reload the data for the previously searched deployment, and then view the detailed database changes in the bottom grid. Note: In order to perform the operations discussed above, a user must have sufficient permissions to read from and write to the Change History Repository. Page 154 © 2005 - 2015 JNetDirect, Inc. All rights reserved. Change History Tool - Viewing Deployment Results The Change History tool enables users to view and search deployment results that were recorded in the Change History Repository database. In order to use the tool, a user must have sufficient permissions to read the content of the repository DB. For example, a user that is a member of the ChangeHistoryReadOnly SQL role will be able to view and search the Change History content, and this user-role is built-into the repository DB. The Change History tool offers several search techniques to allow users to search the repository. The various search techniques are explained in the detail in the section titled How to Search the Change History Repository. Change History Tool - Searching the Repository The Change History tool offers several features that enable users to search deployment results of previously executed code packages. The two main search methodologies are now described below. Searching the Change History Repository using built-in conditions 1. When starting the Change History tool, users can instruct Combine to retrieve the top-most X package deployments (where X is some number) or all package deployment results that meet the searched criteria. For example, the image below demonstrates how to retrieve the latest 3 deployment results that meet certain search criteria. 2. The date-range conditions enable users to only load deployments that started between given dates. For example, if a user searches for deployments between Jan 1st 2007 and Jan 1st 2008, then the Change History tool will only show general package information (in the top grid) for packages that their deployment-start-time is between these dates. Moreover, in the bottom grid that displays the detailed database changes, Combine will only show the database changes that their deployment-start-time is within the given date range. 3. Additional (up to three) search conditions can also be specified to enable more detailed searches. With these features, users can narrow their searches to only return package or detailed database changes information that meet the specified conditions. Explicitly, users can instruct Combine to only return information about packages that were deployment on a certain Environment or that contain a certain Environment Variable. On top, users can choose to only load detailed DB change info that meets certain conditions, such as scripts that contain a given SQL string, scripts that were executed by a given user name, change info that pertains to specific databases or servers, and so on. Page 155 © 2005 - 2015 JNetDirect, Inc. All rights reserved. Figure 102.0a11: An example of searching the Change History repository. Searching the Change History Repository using grid filters The Change History tool also supports a second useful technique to search the deployment records. This technique is especially useful to search the detailed database changes. To use it, please follow the instructions below: 1. Load all the Change History data for the deployments you wish to search. For example, to search details of the last 3 deployments, load all last 3 package deployments and do not specify any of the Where conditions. 2. After the complete set of data is displayed in the Change History grids, select the Filter button in the grid (see image below) and set column filters in the grid to search for specific entries. Searched columns and search conditions can be specified either at the top grid (General Package Info), the bottom grid (Detailed DB Change Info), or both. Page 156 © 2005 - 2015 JNetDirect, Inc. All rights reserved. Tip: If you use the Filter functionality in the grids and later wish to remove all filters, simply click the Reset Layout button. Figure 102.0a12: Searching the Change History records using grid filters. Change History Tool - Managing Columns in Grids The Change History tool consists of two grids: The upper grid contains general package deployment information (i.e., one row for each package executed), whereas the lower grid displays detailed database change information (i.e., one row for each script and target database that were executed during the deployment of a code package). Each grids contain many different columns (see the Overview section for detailed column description) and the Change History tool provide simple means that enable users to hide or organize columns in accordance with user preferences. Reordering columns in the grids - Columns in each grid can be reordered as you see fit. To do so, simply drag the header of the column that you wish to move and then drop it in the desired location. After reordering columns, Combine will remember the last grid order and will continue to display the grids in the newly selected order. Hiding grid columns - A tool called Show Column Manager enables user to choose which columns should be displayed or hidden in the grids. In order to hide columns from the top grid, click anywhere in the top grid and then select the Show Column Manager, select the columns that you wish to hide, and then close the Show Column Manager tool by pressing the X at the top right corner of the tool. Similarly, to manage the columns of the bottom grid, click anywhere in the lower grid and then activate the Show Column Manager tool to configure the column-display settings for that grid. The Show Column Manager tool is shown in the image below. After hiding columns in either grid, Combine will remember the Page 157 © 2005 - 2015 JNetDirect, Inc. All rights reserved. last settings used and will maintain those settings. To restore the grids to their original settings, users can click the Reset Layout button. Figure 102.0a13: The Show Column Manager in the Change History tool. Page 158 © 2005 - 2015 JNetDirect, Inc. All rights reserved. Environment & System Variables - Embedding Parameters in SQL Code Combine Variables - Environment and System Variables Combine Variables is a collective name for Environment Variables and System Variables, which are two types of variables that can be embedded inside your SQL code. Variables can be embedded in scripts that are part of a code package, or in scripts that are executed directly from the editor, against a single DB from a connected window or against a Container. Environment Variables are also supported in the Query used by a Dynamic Container. When Combine executes code that includes Environment or System Variables, Combine replaces the value of the variables in run-time before code is deployed. Environment Variables are user-defined parameters and are supported in package scripts, individual scripts in the editor, as well as Queries used by Dynamic Containers. If Environment Variables are found in your SQL code, then Combine will prompt you to validate and update the value of these parameters before code is executed. The syntax for Environment Variables is <$VariableName$> (for example, <$MyTableName$>). For additional information please refer to Introduction to Environment Variables. System Variables are fixed and built-in (i.e., non-user-defined) variables that can be embedded in code. System Variables are supported in package scripts and individual scripts, however are not supported in the Query used by Dynamic Containers. When the SQL code contains System Variables, Combine will not prompt you to enter their value since the value of these parameters is automatically replaced by the application in run-time. The syntax for System Variables is <%VariableName%> (for example, <%Execution_DatabaseName%>). For additional information please refer to the System Variables section. Introduction to Environment Variables Environment Variables are user-defined parameters that can be embedded in SQL code. These variables are specific to each environment (and can vary between different environments). When code that uses environment variables is executed, Combine will prompt you to validate or update the value of each variable. Then, Combine will replace each Environment Variable with the appropriate value in the code and proceed to execute the code against the appropriate target databases. Environment Variables are supported in SQL scripts in code packages, in individual (i.e., non-package) scripts in the editor, and in the Query used by Dynamic Containers. Page 159 © 2005 - 2015 JNetDirect, Inc. All rights reserved. Example: A stored procedure is created in the Development environment and selects from a table called "utbMyTable". In the Development environment, the owner of the table is "dbo", however the table owner in the Production environment is "User1". Using Environment Variables, you can write a single script to create the stored procedure in Development and in Production, without modifying the code before it is executed: First, define <$TableOwner$> as an Environment Variable in the Development and Production environments in the Container Manager. Then, assign the value "dbo" to this variable under the Development environment and "User1" under the Production Environment. Next, replace the reference to the table owner in your SQL script, for example: -- Replace the code SELECT Column1, Column2 FROM dbo.utbMyTable -- With this code SELECT Column1, Column2 FROM <$TableOwner$>.utbMyTable Finally, when the code is executed against the Development environment, Combine will automatically replace the Environment Variable <$TableOwner$> with "dbo". Similarly, when the code is executed against the Production environment, this value will be replaced with "User1" before it is deployed. Environment variables can be used when running a script against a single database (in which case the assigned values are those under the Active Environment), when running a script against multiple databases, or when running a code package. In the last two cases, variable values are those defined under each environment, and Combine also allows you to validate and update the values of all Environment Variables before any code is executed against target databases (see Changing the Value of Variables in Run-Time for more information). Note: Although the example above shows the use of a single Environment Variable in a script, each script can contain several variables. Furthermore, for code packages, you can use Environment Variables is all package scripts as needed for your code release. Creating New Environment Variables Environment Variables can be created in the Edit Environment Variables dialog. To do so, choose one of the following options as illustrated in the image below. After variables are created, they can be referenced in SQL code using the format <$VariableName$>, as demonstrated later in this section. 1. In the Container Manager, select your environment and choose Edit Environment Variables in the right-click menu. Page 160 © 2005 - 2015 JNetDirect, Inc. All rights reserved. 2. Select your environment in the Container Manager and press F4 to view the Properties window. Then, in the Properties window, expand the Variables node and click the Browse button. Figure 102.1: Starting the Edit Environment Variables dialog. In order to create a new Environment Variable, under Add/Update Variable, first enter the name of the new variable. Then, enter the variable value and click the Add button, as demonstrated in Fig. 102.2. Figure 102.2: Creating a new Environment Variable. Page 161 © 2005 - 2015 JNetDirect, Inc. All rights reserved. After you press the Add button, the new variable will appear in the list of variables with a pencil icon next to it, as in Fig. 102.3. Once you are done adding variables, press OK to complete the dialog. The new variables will then be available in the Properties window for the environment you selected earlier. Figure 102.3: Viewing the Environment Variables after a new variable is created. After the variables are created, they can now be referenced in the code. To use them, the format <$VariableName$> must be used. For example, Fig. 102.4 shows SQL code that uses the LinkedServerName and TableOwner environment variables. Figure 102.4: Using Environment Variables in SQL Code. Page 162 © 2005 - 2015 JNetDirect, Inc. All rights reserved. Another way to create Environment Variables is by copying variables that were previously defined for other environments. Please refer to the section Copying Environment Variables from Another Environment for additional information. Changing the Value of Environment Variables in the Container Manager The value of Environment Variables can be updated in the Container Manager, or immediately before code that contains variables is executed in run-time: Changes made in the Container Manager are saved in the Properties of each Environment, whereas changes made before execution are not saved and are only used for execution (see Changing the Value of Variables in Run-Time to learn more about updating values before execution). To change the value of Environment Variables in the Container Manager, choose one of the following options as illustrated in Fig. 102.5 below: 1. In the Container Manager, select your environment and choose Edit Environment Variables in the right-click menu. 2. Select your environment in the Container Manager and press F4 to view the Properties window. In the Properties window, expand the Variables node and click Browse. Figure 102.5: Starting the Edit Environment Variables dialog. Page 163 © 2005 - 2015 JNetDirect, Inc. All rights reserved. In the Edit Environment Variables dialog, either double-click a variable you wish to change, or right-click it and select the Modify option from the context menu. Figure 102.6: Updating a variable value. Then, under Add/Update Variable, type the new value and press the Update button. When done, press OK to complete the dialog. Changing the Value of Environment Variables in RunTime The value of Environment Variables can be changed and updated in the Container Manager, or immediately before code that contains variables is executed in run-time: Changes made in the Container Manager are saved in the Properties of each Environment (see Changing the Value of Variables in the Container Manager for info), whereas changes made before code is executed are not saved and are only used for execution. Page 164 © 2005 - 2015 JNetDirect, Inc. All rights reserved. Note: The value of variables can be changed in run-time when running a script (or query) against a Container in the editor, or when deploying code packages. In other words, if you are running code in a connected editor window (i.e., against a single database), you cannot assign values to variables in run-time yet you can still change values after previewing the script code. The following examples demonstrate how to change variables value in run-time. Here, assume that two Environment Variables are defined for the Development environment in the Container Manager, namely TableOwner and LinkedServerName. These variables are used in the following script, which will be executed against the Web Databases container (under the Development environment). Figure 102.7: Sample script that uses Environment Variables. After pressing F5 to run the script against the Web Databases container, Combine prompts the following dialog, which allows you to set the value of your variables. To update a value, select the variable in the drop-down or double-click the variable entry in the dialog, enter the new value, and then press the Update button. When done, press OK to continue with the execution. Page 165 © 2005 - 2015 JNetDirect, Inc. All rights reserved. Figure 102.8: Updating variable values in run-time when all variables are valid. The status of all the variables in the example above (see Fig. 102.8) is Valid. In other words, all variables were previously defined for the Environment against which the code is executed. However, in some cases, the status of variables may be invalid due to one of two reasons: (i) The variable is not defined for the Environment; (ii) No value is associated with the variable in the Container Manager. The following example demonstrates invalid Environment Variables. As before, assume that two variables are defined under the Development environment, namely TableOwner and LinkedServerName. Next, the following code that contains an undefined variable called MyUndefinedVariable is executed. Figure 102.9: SQL script that contains an undefined variable. Page 166 © 2005 - 2015 JNetDirect, Inc. All rights reserved. When the code is executed against a Container or as part of a code package, Combine prompts the following dialog. Here, the undefined variable is marked as Invalid. In this dialog, you can update the value of the invalid (and other valid) variables, and then continue with the execution. Figure 102.10: Updating variable values in run-time when some variables are invalid. Copy Environment Variables from Another Environment After you define Environment Variables for one environment, you can create those variables for different environments by copying variables. To so do, select the Environment that does not yet contain the desired variables and start the Edit Environment Variables dialog using one of the two techniques below: 1. In the Container Manager, select your environment and choose Edit Environment Variables in the right-click menu. 2. Select your environment in the Container Manager and press F4 to view the Properties window. Then, in the Properties window, expand the Variables node and click the Browse button. Page 167 © 2005 - 2015 JNetDirect, Inc. All rights reserved. Figure 102.11: Starting the Edit Environment Variables dialog. In the Edit Environment Variables dialog, click More and select Copy Variables, or alternatively right-click the grid and select the Copy Variables option. Figure 102.12: Copying Environment Variables from another environment. Next, Combine will prompt the dialog below. Here, select the environment that contains the variables you wish to copy and edit their values as needed. When done, press OK in the Edit Environment Variables dialog to save your changes. Page 168 © 2005 - 2015 JNetDirect, Inc. All rights reserved. Figure 102.13: Selecting the environment that contains the desired variables. Using Environment Variables in SQL Code After Environment Variables are created, they can be referenced in SQL code. To use them, you must follow the format <$VariableName$> in the SQL code. For example, the figure below shows code that uses the LinkedServerName and TableOwner variables. Please refer to the section Introduction to Environment Variables for more information. Figure 102.14: Using Environment Variables in SQL Code. Page 169 © 2005 - 2015 JNetDirect, Inc. All rights reserved. Preview Code That Uses Variables After a SQL script that uses Environment Variables or System Variables is opened in the editor, you can preview the script with all variable values. To do so, open the script in the editor, right-click in the editor window, and select the option Combine Variables → Preview Script. A new window will then be opened where all variables in the script are replaced with the appropriate values. Figure 102.15: Selecting the Preview option to view the code. Notes for Environment Variables: 1. If an editor window is connected to a database, Combine replaces the values of Environment Variables with the values specified for the Active Environment. 2. If an editor window is not connected to a database and no Container is selected for code execution in the Container drop-down (above the editor window), then as before, Combine replaces the value of Environment Variables with the values specified for the Active Environment. 3. If an editor window is not connected and a Container is selected for script execution, then Combine replaces the variables with the values specified for the Environment that contains the selected Container in the Container Manager. Example: The following script contains two Environment Variables that are defined for the environment, namely LinkedServerName and TableOwner. This script also includes a variable called MyUndefinedVariable that is not defined for the environment. After selecting the Preview option (as demonstrated in the image above), the following window is opened in Combine. Here, Combine replaced <$LinkedServerName$> and <$TableOwner$> with the values specified for the environment, MyLinkedServer and dbo, respectively. Since the variable MyUndefinedVariable does not exist for this environment, it is therefore not replaced with a variable value. Page 170 © 2005 - 2015 JNetDirect, Inc. All rights reserved. Figure 102.16: The previewed script where all variables are replaced with their values. Notes for System Variables: System Variables are replaced with their values in runtime, therefore the Preview functionality is only supported when working with connected windows in the editor. In other words, using the Preview feature with windows that are not connected to a single database will not show the values of System Variables. System Variables System Variables allow you to embed a set of fixed (i.e., non-user defined) parameters and values in SQL scripts and code. System Variables can be embedded in SQL scripts that are part of a code package, or in individual (i.e., non-package scripts) that are executed directly from the editor, either against a single database through a connected window or against a Container. The following System Variables are currently supported in Combine (note that the syntax of System Variables is <%VariableName%>): <%Execution_DatabaseName%> - The name of the target database as it was obtained by running SELECT DB_NAME(). If this variable is included in the SQL code, then Combine executes SELECT DB_NAME() before code is deployed on each target database and then replaces the variable name with the result of this SELECT statement. For example, if code is Page 171 © 2005 - 2015 JNetDirect, Inc. All rights reserved. executed against a database called MyDB, then the value of this System Variable will be replaced with the string MyDB in runtime. Note: The <%Execution_DatabaseName%> is the name of the target database for the entire script. If a SQL script uses the USE clause to change databases in runtime, then the value of <%Execution_DatabaseName%> is the name of the original target database and not the one used after the USE clause. For example, if the following script is run against the master database USE msdb GO SELECT '<%Execution_DatabaseName%>' GO then Combine will replace the variable value with the string master, since master is the target database for the script. <%Execution_InstanceName%> - The name of the SQL Server instance that holds the target database where code is executed, as it was obtained by running SELECT SERVERPROPERTY('ServerName') and by parsing the string after the forward slash if it exists (e.g., when the server name is MyServer\Instance1 then the instance name is Instance1). If this variable is included in the SQL code, then Combine executes SELECT SERVERPROPERTY('ServerName') before the code is deployed and then replaces the variable name with the parsed instance name. For default (i.e., non-named) SQL Server instances, the value of this variable is an empty string. <%Execution_ServerName%> - The name of the SQL Server that contains the target database where the code is executed, as it was obtained by running SELECT SERVERPROPERTY('ServerName') and by parsing the string before the slash if it exists (e.g., when the result of the SELECT statement is either MyServer\Instance1 or MyServer, then the server name is MyServer). If this variable is included in the SQL code, then Combine executes SELECT SERVERPROPERTY('ServerName') before the code is deployed and then replaces the variable name with the server name in runtime. <%Execution_ServerAndInstanceName%> - The name of the SQL Server together with the instance name. For example, if code is executed against a database that belongs to a SQL Server instance called MyServer\Inst1 then the System Variable will be replaced with MyServer\Inst1 in runtime. For default (i.e., non-named) instances, the value of this System Variable is identical to the value of the System Variable <%Execution_ServerName%>. <%Container_DatabaseName%> - The name of the database where SQL code is executed, as it was defined in the Container Manager. For example, if code is executed against a Container that points to three databases (on any number of servers) named DB1, DB2 and DB3, then the value of the System Variable will be replaced in runtime with the appropriate Page 172 © 2005 - 2015 JNetDirect, Inc. All rights reserved. database name for each database. Note that this value may be different than the value of the corresponding System Variable described above <%Execution_DatabaseName%> since the latter is retrieved in run-time by running SELECT DB_NAME() against each target database whereas the System Variable <%Container_DatabaseName%> is the database name as it was defined in the Container Manager. <%Container_InstanceName%> - The name of the SQL Server instance that contains a target database as it was defined in the Container Manager. For example, if you deploy code that embeds this System Variable against a Container, and the Container has a database that resides on a named instance and the instance name is defined in the Container Manager, then the value of this System Variable will be replaced with the instance name you defined in the Container Manager. However, if you define a Container that points to a database on a named instance using aliases or by specifying the port of the target instance (e.g., by using Dynamic Containers), then the value of this System Variables will be replaced with an empty string. Note that the difference between this System Variable and <%Execution_InstanceName%> is that the latter is resolved in runtime by querying the target database for the instance name on which it resides, whereas <%Container_InstanceName%> is simply taken from the settings in the Container Manager without resolving the actual instance name. <%Container_ServerName%> - The name of the server that contains the target database on which code is executed, as it is defined in the Container Manager. The value of this System Variable does not include the instance name. Furthermore, if you define servers in the Container Manager using aliases, then the value of the System Variable will be replaced with the alias name and not the actual server name, as is the case with <%Execution_ServerName%>, since the latter is resolved in runtime by querying the target database whereas the value of <%Container_ServerName%> is taken from the Container Manager settings. <%Container_ServerAndInstanceName%> - The name of the server and instance that contains a target database, as it was defined in the Container Manager. The value of this variable is synonymous to the value of the combined string <%Container_ServerName%>\<%Container_InstanceName%>. Note: Invalid System Variables are ones that are not supported by the application. If you embed invalid System Variables in your code (for example, <%MyVar%>), then Combine will alert you of that fact and will not execute the code. This is the case when executing packages from the application or from the CpaExec command line utility, or when executing scripts in the editor. Page 173 © 2005 - 2015 JNetDirect, Inc. All rights reserved. Using System Variables in SQL Code The following example (see figure below) illustrates the use of System Variables in SQL code. The first System Variable in this example is surrounded by single upper quotes to be returned as a string from a SELECT statement. The second System Variable is used to call a stored procedure using a fully qualified object name. Figure 102.16a: Example of using System Variables in SQL code. Page 174 © 2005 - 2015 JNetDirect, Inc. All rights reserved. Command Line Utilities Cpaexec - Execute Project Packages from the Command Line Combine allows you to deploy code packages from the command line using the cpaexec.exe command line utility. All features and options that are available in the Combine userinterface are also included in this utility. The cpaexec.exe utility is available in the Combine installation directory. To bring up the menu in the image below, change the directory to the Combine installation directory in the command prompt, type "cpaexec" and hit Enter. Figure 102a: Figure 102a: The cpaexec command line utility options. The cpaexec accepts three mandatory flags. All other flags are optional and allow you to control the package execution. The following parameters are mandatory: /p - package file path and name. For example, /p:"c:\MyPackage\Package1.cpa" /o - file path and name for the package execution results (cre) output file, e.g., /o:"c:\MyOutput.cre". /e - the name of the environment against which the package will be executed. Tip: The environment can be taken from a Combine Repository or from MyEnvironments in the Container Manager. To make sure that you enter the environment name correctly, simply copy and paste the environment name as follows: Select the environment in the Container Manager in Combine, press F4 to bring up the Properties Window, select and copy the "Relative Path" property for the environment and use it in the cpaexec. Page 175 © 2005 - 2015 JNetDirect, Inc. All rights reserved. The rest of the flags in the cpaexec are options and are explained below: /a - tells Combine to bring back the actual execution plan from all databases and servers and include then in the package results (cre) output file. To enable this option, include the /a flag; otherwise do not include it. /ch - if CpaExec is running on a machine where Combine is configured to write deployment results to a Change History Repository, then users should specify the /ch flag if they wish to store the package execution results in the repository database. When the /ch flag is not indicated, then Combine will not write the execution outcome to the Change History Repository. /ev - used to specify the name and value for Environment Variables used in the code package. This flag is used for Environment Variables that appear both in code or are referenced in the Query for Dynamic Containers. This flag can be used multiple times to specify values for multiple Environment Variables. For example, to enter two Environment Variable names and values, use: /ev:"MyVarName=MyValue" /ev:"MyVar1=MyVal1" /ie - before Combine executes code packages it validates that you do not have any empty scripts (i.e., ones that have no code) in the code package. If there are empty scripts and /ie is not specified, then Combine will abort the package execution. Include this flag to skip the empty files check. /if - Combine will make sure that all package files are found on the file system before deploying a code package. If any files are missing and this flag is not included, then Combine will abort the deployment. Use this flag to skip the check for missing files. /oa - using this option you can tell Combine to append a string to the package results (cre) output file name. For example, if /oa:DateTime is specified, Combine will append the string "_YYYYMMDD_HHNNSS" to the output file name. Date will result in appending YYYYMMDD, and Time is for HHNNSS. /r - this flag tells Combine how to proceed with execution in case any errors occur on one or more databases. The possible values are: ContinueNonErroredOnly - if Combine detects that the execution of a script resulted in errors on same databases after the script was run, Combine will continue to run the rest of the package scripts on all databases except those that encountered errors. StopAll - tells Combine to abort execution after the first error is reported. Combine will finish running the errored script on all its associated databases and then abort the deployment and will not continue to any other scripts. ContinueAll - instructs Combine to continue and deploy the rest of the package after an error occurs, on all target databases (including the errored databases). /t and /d - before a package is executed, Combine tests that all databases are up and running, to ensure proper connectivity. If any databases cannot be connected when this option is set to On (which is the default), then Combine will use the instruction in the /d flag to figure out how to continue: If /d is set to Alive then Combine will only deploy package scripts to Page 176 © 2005 - 2015 JNetDirect, Inc. All rights reserved. databases that passed the connectivity test. However, when /d is set to CancelIfAnyFailed, then Combine will not start the deployment and will abort. If you want Combine to deploy the code package on all databases regardless of the connectivity test results, set /t to Off so that Combine will skip the connectivity test altogether. /v - enable verbose and detailed logging in the command line window. /w - overwrite the package results (cre) output file if a file with the same name and path already exists. Example for using the cpaexec: cpaexec /v /p:"c:\Documents and Settings\Package1.cpa" /o:"c:\Documents and Settings\Package1.cre" /w /e:"MyEnvironments\Development" /t:Off /r:StopAll /a /ie /if /v /oa:DateTime /w CpaBuild - Create Code Packages from the Command Line The CpaBuild command line utility is extremely useful for automating build and deployment processes and is available in the Combine installation directory. Detailed description of this command line utility is available in the file cpabuild.txt in the same directory. Using this command line utility, after getting the latest scripts version from source control (or any other sources) you can build a code package in run-time, assign each package script and folder with their properties (e.g., map a Container to each script, configure script results options, and so on) and then continue to execute the code package using the CpaExec command line utility. Page 177 © 2005 - 2015 JNetDirect, Inc. All rights reserved. Figure 102a.1: Figure 102a: The cpaexec command line utility options. To get help for CpaBuild in the command prompt, type cpabuild and hit enter. Several options are supported in this command line utility and each option has additional help content. For example, to read the help about the method /AddScript, type cpabuild /AddScript and hit enter in the command line. Note: It is strongly recommended to use the /v option with all calls to this utility to enable the verbose logging in the command prompt. The following methods are supported in theCpaBuild utility: /Create - creates a code package. The /t flag indicates whether the package is wrapped (i.e., a single-file package) or unwrapped (multi-file package). Use the /w flag to overwrite an existing code package, and the /s flag (optional) to set each of the package properties and values. If /s is not used and properties are not set, then Combine uses the default property values which are listed in the command line utility. /AddScript (for wrapped packages) - the /AddScript method is used to load code into a wrapped package. When this method is called, Combine will create a new script instance in the code package. The flag /l tell Combine where to grab the script to insert it into the package. Also, the /n command can be used to name the script entry in the package (if /n is not specified then the script name will be used). If you wish to place scripts under package folders, use the /r option to specify the relative path of the folder in the package. If you are not sure how to use the relative path, open Combine, select a folder, press F4 to bring up the properties window and search for the value of the relative path property. /AddScript (for unwrapped packages) - when scripts are added to an unwrapped (i.e., multi- Page 178 © 2005 - 2015 JNetDirect, Inc. All rights reserved. file) package, a new file is created on the file system with the content of the loaded file. The flags used here are the same as in the case for wrapped packages - /l tells Combine where to take the content of the script, /n allows you to specify a name for the script entry in the package, and /r lets you indicate the parent folder name in the package where the script will reside. Note: A new file will be created on the file system every time you use /AddScript with unwrapped packages. If you wish to use existing files and embed them in the project package then you should use the /LinkScript option which maps between the package script to the file on the local file system. This /LinkScript feature can only be used if the script or scripts reside on or under the package folder in the file system. /AddFolder (for wrapped packages) - the /AddFolder method creates a new folder or subfolder in the code package. The /n flag is used to denote the name of the folder and the /r flag can be used to create subfolders under existing package folders. /AddFolder (for unwrapped packages) - the /AddFolder creates a new folder or subfolder in the package and also creates the folder on the local file system. The options /n and /r allow you to specify the folder name and relative location in the package and on the file system. /LinkScript (only applies to unwrapped packages) - the /LinkScript method allows you to reference an existing file on the file system and make the existing file part of the package (in contrast to using /AddScript in which case a new file is created on the file system). This option is extremely useful to reference scripts that were loaded from source control (for example) and placed on the local file system and are getting ready for deployment - you can create a new code package at the parent folder for all scripts and the link all folders and scripts to be included in the code package. /LinkFolder (only applies to unwrapped packages) - the /LinkFolder, much like /LinkScript, allows you to reference existing folders and scripts under those folders in a code package. If you link a folder to a code package then a folder will be created (if not already there) in the package and will point to the local folder. The /c flag will abort the loading of the folder (and its subfolder and scripts) to the package if scripts with the same name already exist. The flag /r is useful to load subfolders and all their scripts under a given folder into the code package. If /r is not specified then only scripts that reside directly under the folder indicated in the /l flag will be references and included in the package. Note: As mentioned earlier, in order to reference existing files and folders in a code package using the /LinkScript and /LinkFolder methods, the folders and scripts must reside under the folder where the package is stored. /DeleteScript and /DeleteFolder (in wrapped packages) - these methods are used to remove scripts and folders (and all scripts under the removed folders) from the code package. The /f flag does not apply and is ignored for wrapped packages. The flag /i denotes the relative path of the removed script of folder. If you are not sure where to find this value, open the code package in Combine, select the script (or folder), press F4 to bring up the properties window Page 179 © 2005 - 2015 JNetDirect, Inc. All rights reserved. and look for the Relative Path property. /DeleteScript and /DeleteFolder (in unwrapped packages) - these methods are useful to remove scripts and folders from a code package. In unwrapped package, the folders and scripts in the package are actual folders and scripts on the file system. The /i flag denotes the location of each script (or folder) in the package. If you also include the /f flag, then the scripts and folders removed from the package will also be deleted from the local file system. /UpdatePackage, /UpdateFolder, /UpdateScript - these methods allow you to update the properties values for each item in the code package. Recommendations and best-practices: 1. Use wrapped packages when possible - they are more intuitive and easier to understand. Wrapped packages are used by many but require some basic understanding of Combine and are recommended for advanced users. 2. If the scripts you wish to deploy are already available on the file system (e.g., after performing Get Latest from your source control client interface), create a code package at (or above) the root folder of all scripts and then use /LinkFolder to recursively include all scripts and folders in the code package. Make sure to set the Container property for the folders and (or) scripts. Then, after loading all the scripts and folders to the package you can easily and immediately deploy it against all the appropriate target databases and servers. Page 180 © 2005 - 2015 JNetDirect, Inc. All rights reserved. Collecting Data from Many Databases or Distributing Data to Many Databases Introduction Combine™ allows you to get data from multiple databases and servers in parallel and then automatically write all the collected data to one or more databases and servers. Using this feature you can retrieve data from many databases and servers and write them to a central database for monitoring and reporting purposes. Alternatively, this feature is also useful to distribute (or replicate and publish) data from one or more databases to many other databases and servers, as in the case of data replication. Data collection and distribution is done through code packages. If scripts inside the code package contain SELECT statements (or EXEC or any other statements that return data), then Combine will return the aggregated data from all the databases against which the script is executed. The aggregated data can then be automatically written to all databases that belong to an output Container (also called Save Results Container in Combine). The following steps summarize the basic process of collecting and auto-saving data: 1. Create a code package with a sql script that contains a SELECT statement for the data you wish to collect. 2. Map the script to a Container. When Combine executes the package, the script will be run against all Container databases in parallel and automatically aggregate all the results collected from all databases. 3. In the script properties, set Save Results Enabled to True and select the Save Results Container. The aggregated results collected in Step 2 will be written to all the databases in the Save Results Container in parallel. 4. Refer to the various Script Results properties associated with the script. Set these properties to instruct Combine how to save and write the results. 5. Execute the package to automatically collect, aggregate, and save the data. This is the simplest example of collecting and auto-saving data. In actuality, a code package can contain many scripts that return many result sets (in response to one or more SELECT statements in each scripts), and those result sets are then written to their designated target databases. In addition, you can have Combine auto-create the schema for the target tables (the table into which Combine will write the aggregated results) or you can write the schema yourself and instruct Combine to use the existing schema. Two typical applications of data collection and distribution are: Collect data for monitoring and reporting purposes: Set the data source Container (i.e., the one associated with the script) to be all databases you wish to monitor. Then, set the Output Container to be a central database where you will store all monitoring data. Then, you can build your data collection package and run it on a scheduled basis (e.g., using Scheduled Page 181 © 2005 - 2015 JNetDirect, Inc. All rights reserved. Packages or the cpaexec command line utility). Distribute data from a central DB to subscribers: Set the data source Container to be a single database that stores the data you wish to publish, and set the output Container to be the collection of your subscribers databases. Build a package that contains the SELECT statement to get the source data and include other scripts in the package to manipulate the data. Then, run the package manually or in a scheduled fashion (using Scheduled Packages or the cpaexec utility). The process of data collection and publishing (or auto-saving) is demonstrated in the image below. Various configuration options allow you to instruct Combine how to create the table schema or use existing tables to save the collected data. These options are discussed in the sections Save Script Results, Save Script Results - Advanced Options, and Save Script Results - Table Creation. Page 182 © 2005 - 2015 JNetDirect, Inc. All rights reserved. Figure 102.17: Using Combine to collect data from multiple databases and then save it to one or more databases. Page 183 © 2005 - 2015 JNetDirect, Inc. All rights reserved. Save Script Results If a script inside a code package contains one or more SELECT statements, when the package is executed, the script will run against all the databases in the Container associated with this script. The results returned from all the target databases will be automatically aggregated by Combine. If you wish to write the aggregated results to one or more databases, you can do so by setting the Save Script Result properties that are associated with the script. Keep in mind that you will also have to configure all the result-saving options to make sure that Combine writes the results to the appropriate databases and tables. Once the result saving is enabled, you have to provide Combine with the table names to use for saving results. You can create the table schema yourself and tell Combine to use existing tables, or have Combine automatically create new tables. If the table names you gave Combine do not exist in the output database, then Combine will automatically create the tables and then save the results in the new tables. Moreover, if the tables already exist in the output database you can instruct Combine to delete or truncate the rows in the table before writing the aggregated results, or drop and auto-recreate the table. Furthermore, keep in mind that you can include other scripts in the package that will be run before or after the script that saves result, so you can write custom code to manipulate schema and data throughout the code package (i.e., before or after saving the results). Important! If you are saving large volumes of data, set the property Include Tables under Script Result to false to not show it in the Package Results and omit it from the cre file. The properties related to saving script results are listed and explained below. Save Script Results - By default, Combine will not save the aggregated results. To enable results saving you must first select the script in the Package Explorer and set the Save Script Results Enabled property to True, as demonstrated in the figure below. After this property is set to True you will see all the different options that can be set for the results saving. Figure 102.18: Configuring the script to save results. Save Results Container - This property tells Combine where to save results. The aggregated results will be written to all databases in this Container. This Container be either a Dynamic or Static Container. Page 184 © 2005 - 2015 JNetDirect, Inc. All rights reserved. Explicit vs. Implicit table names - When results are saved, they will be written to tables in all databases that belong to the Save Results Container. The table names that will be used (whether these are existing tables in the underlying databases or new tables) are determined by the Table Names Mode which can be either Explicit Table Names or Implicit Table Names. Table Names Mode - Set the Table Names Modes to either Explicit or Implicit, to tell Combine to save results to user-provided table names (Explicit) or to use the script name as the output table name (Implicit). These modes are explained in details below. Implicit Table Names - The name of the output table(s) is the script name. For example, if the name of the script in the package is [dbo].[MyResults], then Combine will write the aggregated results to the table [dbo].[MyResults]. Implicit Names are useful if a single result set is returned and saved for the script: If multiple result sets are returned then the second set of aggregated result will be written to a table called [dbo].[MyResults_2], the third set will be saved to [dbo].[MyResults_3], and so on. Note that with Implicit Table Names, if more than one set of aggregated results is returned for the script, then all the aggregated sets will be saved. When using Implicit names, make sure that the script name is a valid table name in the format [owner or schema].[table name]. Explicit Table Names - In this mode you can accurately specify the table name for each aggregated result set returned for the script. For example, assume that a script returns 3 aggregated result sets in response to three different SELECT statements. Using Explicit Table Names you can tell Combine to use (say) a table called [MyLogin].[utbMyOutputTable1] for the first result set (i.e., the one with Result ID = 1), skip the saving of the second result set (by not specifying a table name for Result ID = 2), and save the third set of aggregated results to a table called [MySchema].[utbTable3] by assigning this explicit table name to Result ID = 3. This example is demonstrated in the image below. To use Explicit table names, set the Table Names Mode property to Explicit, click the property Explicit Table Names, and set the table names and their corresponding Result ID values in the dialog. Note: If a script is configured to use explicit table names and the explicit table name (or names) are not provided, then Combine will not save the results. For example, if a script is configured with Save Script Results Enabled and uses Explicit Names, yet no names are configured, then the results will not be saved. Page 185 © 2005 - 2015 JNetDirect, Inc. All rights reserved. Figure 102.19: Example of using Explicit Table Names and saving only the first and third aggregated result sets. Default Table Owner - This field is only used if the table owner is not specified as part of the explicit or implicit table names. For advanced options and other table creation attributes and settings, please refer to the sections Save Script Results - Advanced Options and Save Script Results - Table Creation sections, respectively. Page 186 © 2005 - 2015 JNetDirect, Inc. All rights reserved. Save Script Results - Advanced Options This section assumes that you have read and understood the general process of saving aggregated results, as explained in the Introduction section and the section titled Saving Script Results. After Combine collects and aggregates the data from all databases, it saves the results to the databases that belong to the Save Results Container. In order to save data, Combine uses BULK COPY operations (for additional information, please refer to BULK INSERT in books online and on the MSDN website). The advanced properties section allow you to configure the BULK INSERT options that will be used by Combine to write the data to databases. Batch Size - Data is written to a database table in one chunk (i.e., a single batch) or in batches. When the Batch Size property is set to zero, Combine will attempt to insert all the aggregated rows to the table in a single batch. If an error occurs for any reason (for example due to check constraint violation), the entire batch will not be inserted and no rows will be populated in the table. If there is a risk that data inserts will not be successful (e.g., due to table constraints), it is recommended to set the Batch Size to the number of rows that should be processed each time. Furthermore, keep in mind that if any rows are not populated successfully, then all the rows in the batch will not be inserted to the table. Tip: For best results, make sure that the target table into which Combine is saving results does not have unnecessary constraints that will cause data population errors, and keep the Batch Size at zero. Check Constraints - If this option is set to true then Combine (or more correctly, the BULK COPY operation) will validate that the rows populated are not violating any check constraints prior to inserting them. Rows that violate the check constraints will not be inserted to the table whereas all other rows will be inserted. Fire Triggers - If Combine writes results to a table that has triggers, then table triggers (e.g., an AFTER INSERT trigger) will not fire during the BULK INSERT. If you still want triggers to fire then you should set this option to True. Keep Identity - If Combine writes results to a table that has an identity column (say a column called ColIdent), but the aggregated result sets that will be written also contain values for this column, you can instruct Combine whether to let the identity column (e.g., ColIdent) generate the identity values or to overwrite the values with the ones in the aggregated results. Set this option to True to have the underlying identity column generate identity values. To overwrite the identity values set this property to False. Keep Nulls - This option is used if Combine writes null values to a nullable column that has a default constraint. Set this option to True to save the null values in the target table. If you wish to replace the null value with the value specified in the column default, then set this Page 187 © 2005 - 2015 JNetDirect, Inc. All rights reserved. property to False. Pre-Save Action - If Combine writes results to an existing table (e.g., if the schema was previously created either by you or automatically by Combine), you can instruct Combine to perform various actions that will take place before data is written into the table. These actions include: Drop the existing table and let Combine recreate a new table; Delete all values in the table before inserting the new aggregated records; or truncate the table values before populating the aggregated results. Save On Cancel - Assume that you have a script that is configured to retrieve data and then save it, and further assume that the script resulted in errors when it was executed against the databases in the Container associated with the script (i.e., the databases from which data was collected). When this is the case, Combine prompts you with the execution error dialog and allows you to choose how to proceed: Cancel execution completely, continue execution on all but the errored databases, or continue execution on all databases. The Save On Cancel property determines whether aggregated results will be saved if you choose to cancel the execution. Save On Error - Assume that you have a script that is configured to retrieve data and then save it, and further assume that the script resulted in errors when it was executed against the databases in the Container associated with the script (i.e., the databases from which data was collected). Using the Save On Error property you can instruct Combine to save the aggregated results in spite of the errors. Table Lock - When this option is set to true, then Combine will use a table lock when saving results to an underlying table. BCP Time Out - The Bulk Copy timeout parameter is configurable in Tools → Options → Connections. The default value for the timeout is zero (for infinite time). Save Script Results - Advanced Options This section assumes that you have read and understood the general process of saving aggregated results, as explained in the Introduction section and the section titled Saving Script Results. When Combine saves results to a table (subject to all the Save Results properties and configuration), if the target table does not exist in the target database then Combine will try to create it. In order to create the target table (or tables, if multiple aggregated results are returned from a single script), then Combine runs a SQL script that contains the table creation statement. This script is available in the package results (cre) output - click the Save Page 188 © 2005 - 2015 JNetDirect, Inc. All rights reserved. Results node in the Package Results tab to view the script content. Collation - If you let Combine auto-create the table schema for saving results, this collation will be used for all the string columns in the table. Minimum Size (NVARCHAR) - If you let Combine auto-create the table schema for saving results, then Combine uses ADO.NET to auto-detect the table column schema. However, you can provide Combine with a minimum size for NVARCHAR and VARBINARY columns. In other words, if Combine detects that a column is NVARCHAR(10), if the value of Minimum Size (NVARCHAR) is 128, then the column will be created as a NVARCHAR(128). Similarly, all columns that are detected as NVARCHAR(X) where X < 128 will be created as NVARCHAR(128). Acceptable values for the minimum size are integers between 1 to 4000, or max (in which case Combine uses NVARCHAR(MAX) when saving results to SQL 2005 or later, or NTEXT when saving to SQL 7 or 2000, for all string columns). Note: When creating a table schema Combine will use NVARCHAR for all string columns (i.e., VARCHAR, NVARCHAR, CHAR, NCHAR, etc.) except for NTEXT or TEXT columns; TEXT is automatically converted to NVARCHAR(MAX) in SQL 2K5 or NTEXT in SQL 7 and 2000. Minimum Size (VARBINARY) - If you let Combine auto-create the table schema for saving results, then Combine uses ADO.NET to auto-detect the table column schema. However, you can provide Combine with a minimum size for NVARCHAR and VARBINARY columns. In other words, if Combine detects that a column is BINARY(10), if the value of Minimum Size (VARBINARY) is 128, then the column will be created as a VARBINARY(128). Similarly, all columns that are detected as BINARY(X) where X < 128 will be created as VARBINARY(128). Acceptable values for the minimum size are integers between 1 to 8000, or max (in which case Combine uses VARBINARY(MAX) when saving results to SQL 2005 or later, or IMAGE when saving to SQL 7 or 2000, for all binary columns). Note: When creating a table schema Combine will use VARBINARY for all string columns (i.e., BINARY, VARBINARY, etc.) except for IMAGE columns; IMAGE remains as is when saving results to SQL 2000 or converted to VARBINARY(MAX) when saving results to SQL 2005. Threshold Size (NVARCHAR) - If you let Combine create the table schema for saving results, if a string column contains more than X characters then Combine can automatically convert this column type to be NVARCHAR(MAX) for SQL 2005 or later, or NTEXT for SQL 7 and 2000. This threshold value X is the value of the property Threshold Size (NVARCHAR). Threshold Size (VARBINARY) - If you let Combine create the table schema for saving results, if a binary column contains more than X characters then Combine can automatically convert this column type to be VARBINARY(MAX) for SQL 2005 or later, or IMAGE for SQL 7 and 2000. This threshold value X is the value of the property Threshold Size (VARBINARY). Page 189 © 2005 - 2015 JNetDirect, Inc. All rights reserved. Save Script Results - Package and Folder Nodes Some basic properties of the Save Script Results functionality are available at the Package node and Folder nodes in the Package Explorer. These values are provided for the sole purpose of allowing the user to set configuration options and values at the parent nodes and then let scripts under those nodes inherit those values and settings. Data Aggregation Types and Modes Combine™ supports two types (or modes) of aggregating data that returns in response to the execution of queries and scripts against a Container, namely aggregating data with identical column schema and aggregating data according to table position even if the table schema returned from different database is not identical. Aggregate identical schema: Under this type of aggregation, data returned from multiple databases is aggregated only for result sets that have identical column schema. For example, if a query is run against 9 databases and returns data with 3 different column schemas, then Combine will provide 3 aggregated result sets (one for each schema). Aggregate by table position: With this aggregation mode, all the (say) N-th result sets returned from all databases are aggregated into a single result set, regardless of whether the column schema is identical for all results. For example, if a script contains 2 queries and the first query returns 9 result sets from 9 databases with 3 different column schemas then Combine will provide a single aggregated result set with data from all 9 databases in response to the first query in the script. The data aggregation mode can be specified in numerous locations throughout the application, depending on the user needs. To set the default aggregation type, both for code packages and SQL scripts or queries that are executed in the editor, go to Tools → Options → Packages → Aggregation, and set the property Default Aggregation Type (see Fig. 102.19). By default, this value is set to Aggregate Identical Schema. Page 190 © 2005 - 2015 JNetDirect, Inc. All rights reserved. Figure 102.19: Configuring the default data aggregation type. When running a SQL script or query against a Container in the editor you can set the data aggregation mode after selecting the Container, by choosing the aggregation type under Query → Aggregation Type, as illustrated in Fig. 102.20. Figure 102.20: Selecting the data aggregation type when running scripts in the editor. Page 191 © 2005 - 2015 JNetDirect, Inc. All rights reserved. The type of data aggregation can also be specified for code packages, in which case all the scripts in the code package will use the aggregation mode that is set for the package. To specify the data aggregation type for a package, open the package in the Package Explorer, select the root node of the package, press F4 to bring up the Properties Window, and then set the Aggregation Type property under the Misc category (see Fig. 102.21). Figure 102.21: Selecting the aggregation type for a code package. Page 192 © 2005 - 2015 JNetDirect, Inc. All rights reserved. Notifications Email Notification for Package Execution Combine™ allows you to configure an SMTP server and get notified whenever a package execution completes, either successfully or after package errors occur. Email recipients are divided into two groups: Users that always receive emails are configured in Tools → Options. Additional users can be notified for each package. How to configure email notifications: Step 1 - configure the SMTP server. Go to Tools → Options → General → Outgoing Email Server. In this dialog you should configure all the relevant email settings, including your SMTP server, authentication, and so on. In addition, you can test your email settings by sending emails using the Send Test Email feature. Step 2 - set the conditions to send emails and configure users that will receive notifications in response to all package executions (under the specified conditions). Go to Tools → Options → Packages, and set the properties in the Notification (E-Mail) category. Attach All Aggregated Messages allows you to receive all aggregated messages (in a single file) as they appears in the Package Results window in the email. Similarly, Attach Package Output allows you to attach the output log to the email (the output log is not the cre file; it is the content of the Package Output window). Then, add the email addresses for all users that will receive notification in response to the execution of any package using this instance of Combine. Furthermore, the Send E-Mail option allows you to instruct Combine to send emails only upon package deployment errors or after every execution. Finally, the Send On Cancel lets you choose whether an email should be sent if the package execution was cancelled. Step 3 - Package specific notifications. When you create a new package, click the package node in the Package Explorer and press F4 to bring up the Properties window. In the Notifications (E-Mail) category you can specify additional email addresses that will be notified when the package execution completes, subject to the notification conditions you specified in Step 2. Page 193 © 2005 - 2015 JNetDirect, Inc. All rights reserved. Scheduled Packages and Deployments Introduction Combine™ allows users to schedule the execution of one or more code packages as well as manage scheduled packages. These and other scheduling features are available under Tools → Scheduled Packages, as shown in the figure below. Figure 102.22: Starting the Scheduled Packages tool. Package scheduling uses the Windows Scheduled Tasks to schedule and execute code packages. In order to work with scheduled packages, the Windows service called Task Scheduled must be running. By using the Scheduled Packages tool, users can perform the actions listed below: • Create a new schedule to run one or more packages • Edit the settings of scheduled packages • Delete scheduled packages • View all scheduled packages • View the Scheduled Task settings for scheduled packages • Enable or disable scheduled packages Page 194 © 2005 - 2015 JNetDirect, Inc. All rights reserved. Creating a New Scheduled Package Users can create a new scheduled task to run one or more code packages by invoking the Scheduled Packages tool under the Tools menu. To create a new scheduled task, click the New Scheduled Task in the Scheduled Packages window as illustrated in the image below. Then, follow the instructions in the Scheduled Task Wizard. Figure 102.23: Creating a new scheduled package. Scheduled Packages use the Windows Scheduled Tasks to schedule and execute code packages. When a new Scheduled Package is created, Combine automatically creates a batch file (i.e., a file with the extension .bat) in the folder called Scheduled Packages under the Combine installation directory. You can instruct Combine to save the bat file in other directories by setting the Scheduling options in the Tools → Options dialog. The bat file contains instructions that call the CpaExec command line utility, which is responsible for executing the package and saving deployment results and outputs. The schedule assigned to the scheduled package is saved as a Windows Scheduled Task and can be viewed and edited either in Combine or under Scheduled Tasks in the Control Panel in Windows. To summarize, Scheduled Packages contain the following components: 1. A bat file that calls the CpaExec command line utility to execute the scheduled packages. The bat file is stored under the Scheduled Packages folder. The name of the batch file starts with the string "SQL Farm Combine". 2. A Scheduled Task that calls the bat file according to the schedule specified in the Scheduled Packages tool in Combine. The Scheduled Task Wizard is explained in detail in the section titled Scheduled Task Wizard. Please refer to that section for additional information regarding how to create or edit scheduled packages and tasks. Page 195 © 2005 - 2015 JNetDirect, Inc. All rights reserved. Editing Scheduled Packages and Settings Using the Scheduled Packages tool, users can edit the schedule and other settings of existing scheduled packages. To do so, start the Scheduled Packages tool from the main menu under Tools → Scheduled Packages, select the scheduled task you wish to edit and select Edit Scheduled Task as shown in the image below. Figure 102.24: Editing scheduled tasks and packages. After selecting the Edit Scheduled Task you will be prompted with the Scheduled Task Wizard. The wizard and settings are explained in detail in the section titled Scheduled Task Wizard. Deleting Scheduled Packages Users can delete scheduled packages and tasks using the Scheduled Packages tool in Combine. To invoke the tool, select Tools → Scheduled Packages in the main menu, which will bring up a list of all scheduled packages. In order to delete scheduled packages, select the entries you wish to remove and then right-click and select the Delete option from the menu as shown in the image below. Page 196 © 2005 - 2015 JNetDirect, Inc. All rights reserved. Figure 102.25: Deleting scheduled packages and tasks. When a scheduled package is deleted, the .bat file that is called by the Windows Scheduled Task as well as the Windows Scheduled Task itself are removed from the file system. Viewing Scheduled Packages In order to view all scheduled packages in Combine, start the Scheduled Packages tool by selecting Tools → Scheduled Packages from the main menu. The tool will then display all the Scheduled Tasks that were created in Combine to execute code packages. Using this tool you can also create new scheduled tasks, edit existing scheduled tasks, as well as delete scheduled packages. Page 197 © 2005 - 2015 JNetDirect, Inc. All rights reserved. Viewing the Windows Scheduled Task Settings for a Scheduled Package Every scheduled package consists of a Windows Scheduled Task and a batch file (i.e., a file with the extension .bat). The batch file is called from the Scheduled Task according to the schedule specified in the Windows Scheduled Task settings. In turn, the batch file calls the CpaExec command line utility that executes the one or more code packages as scheduled by the user. Users can view the properties and settings of the Windows Scheduled Task associated with the scheduled package by invoking the Scheduled Packages tool. To do so, select Tools → Scheduled Packages from the main menu to view all scheduled packages. Then, select the desired scheduled package, right-click it, and select Windows Task Properties from the rightclick menu. If you make changes to the Windows Scheduled Task, Combine will pick up those changes and display the updated settings in the Scheduled Packages window. Figure 102.26: Viewing the Windows Scheduled Task for a scheduled package. Enable and Disable Scheduled Packages and Tasks You can enable or disable the execution of scheduled packages by enabling or disabling the Windows Scheduled Task associated with the scheduled package. When using the Scheduled Packages tool, it is important to note that enabled tasks are ones that appear with the icon . Tasks that are disabled will appear with the icon . In order to enable or disable scheduled packages, first start the Scheduled Packages tool by selecting Tools → Scheduled Packages from the main menu. Then, in the Scheduled Packages window, select the package or task you wish to enable or disable, right-click the Page 198 © 2005 - 2015 JNetDirect, Inc. All rights reserved. scheduled package node and choose Windows Task Properties from the menu as shown in the image below. Figure 102.27: Viewing the Windows Scheduled Task. Next, the Windows Scheduled Task dialog appears and shows the settings and properties of the selected task. In this window you can enable or disable the task by checking or unchecking the Enabled checkbox, respectively. The checkbox is shown in the figure below. After you check or uncheck the checkbox, press the OK button in the Windows Scheduled Task dialog to apply the settings. Figure 102.28: Enabling or disabling the Scheduled Task for a scheduled package. Page 199 © 2005 - 2015 JNetDirect, Inc. All rights reserved. Scheduled Task Wizard The Scheduled Task Wizard allows you to create new scheduled packages or edit existing scheduled packages and tasks. Using the wizard, you can configure the local machine running Combine™ to execute one or more code packages according to a user-defined schedule. The schedule is stored in a Windows Scheduled Task, which calls a batch file that executes the CpaExec command line utility to deploy the scheduled code package(s). The wizard and the different package scheduling options are explained in detail below. The first window in the wizard contains the name of the Windows Scheduled Task, as well as the user name and credentials that will be used when executing the scheduled package. The following fields are available in this window: Task Name: Name of the Windows Scheduled Task. After creating scheduled packages, note that Combine™ will automatically insert the string "JNetDirect Combine" before the name of the task. When editing an existing scheduled package then the Task Name field cannot be edited. User name and password: The scheduled packages will be deployed and executed using the Windows credentials of the user entered in these boxes. Run only if logged: This checkbox indicates that the scheduled package will only be executed if the user is logged on to the computer at the scheduled time of execution. Figure 102.29: Entering the Scheduled Task name and user credentials. Page 200 © 2005 - 2015 JNetDirect, Inc. All rights reserved. Next, the Add Packages dialog (see image below) shows the list of code packages that will be executed. Here you can specify and view the one or more code packages that you wish to schedule. The code packages specified in this dialog will be executed in the order they appear in this window. Adding a new package to the Scheduled Task To add a new package to the Scheduled Task, click the Add Package button and follow the instructions below. Figure 102.30: Viewing the list of packages that will be executed. After clicking the Add Package button, the following wizard window appears and allows you to select the following entries: Package File: The package file to be executed. Output file: The name of the .cre output package file that contains the deployment results. Using the option Append to Output Filename you can instruct Combine to automatically append the execution date, time or datetime string to the name of the output file. In addition, you can instruct Combine to overwrite an existing output file by checking the Overwrite Output File if Exists option. Page 201 © 2005 - 2015 JNetDirect, Inc. All rights reserved. Environment: The Environment from the Container Manager against which the package will be executed. Figure 102.31: Selecting the package to add to the scheduled deployment. After clicking the Next button you will be prompted to enter the execution options. The following options are available (additional information can be found in the help files for the CpaExec command line utility): Verbose Logging: This option enables detailed logging outputs during package execution. The Verbose Logging option corresponds to the /v flag in CpaExec. Include Actual Execution Plan: Check this option to return the execution plan for all package scripts from all databases involved in the deployment. This option corresponds to the /a flag in CpaExec. Test Database Connectivity Before Package Execution: When this option is checked then CpaExec will attempt to connect to all databases that are involved in the deployment before executing any portions of the package code. This option is equivalent to the /t flag in CpaExec. Cancel Execution if Any Databases Could Not Be Connected: When the Test Database Connectivity feature is checked - this option instructs Combine what do to in case one or more databases have not passed the connectivity test. If this option is checked and some databases did not pass the connectivity test then Combine will not deploy any portion of the Page 202 © 2005 - 2015 JNetDirect, Inc. All rights reserved. code package on any databases. If this option is not checked, then Combine will deploy the code package only on the databases that passed the connectivity test. In CpaExec this option is denoted by the /d flag. Important note: It is strongly recommended to check the Test Database Connectivity and Cancel Execution if Any Databases Could Not Be Connected. Recovery Type: This option instructs Combine how to continue with package deployment in case one or more scripts encounter errors during execution. When this option is set to Continue on Non-Errored DBs Only then after an error occurs, Combine will continue to deploy all package scripts after the error occurs on all databases except for those databases that encountered execution errors. When the option is set to Stop All, then after a script that encountered execution errors has completed running on all the databases in the Container associated with the script, Combine will abort the deployment and will not execute the remaining package scripts. Last, the Continue All instructs Combine to continue and execute all the remaining package scripts on all the target databases associated with each script even after a script execution error occurs. This option is available in CpaExec as the /r flag. Ignore Empty Scripts: If some of the scripts in the package do not contain any code, then by default Combine will not begin and will abort the package deployment. If you wish Combine to ignore the fact that one or more of the package scripts are empty then you can check this checkbox. When checked, Combine will continue to deploy the code package in spite of the fact that some scripts are empty. This option corresponds to the /ie flag in CpaExec. Ignore Missing Scripts: When working with unwrapped (i.e., multi-file) code packages, then it is possible that some scripts are missing from the file system. By default, if some scripts are missing then Combine will not begin and will abort the package deployment. However, if you wish Combine to ignore the fact that one or more scripts are missing then you can check this checkbox. When checked, Combine will continue to deploy the code package in spite of the fact that some scripts are missing. This option corresponds to the /if flag in CpaExec. Cancel Execution of Next Package(s) if Any Errors Occur for This Package: If you are scheduling multiple packages then this option determines whether Combine will continue to deploy the next package in the order, in case any errors occur during the execution of the current package. The order of packages is shown in the window in Fig. 102.30. Note that any and all errors are taken into consideration, including script execution error, inability to save the output file, inability to connect to target databases when the connectivity test is enabled, and so on. Page 203 © 2005 - 2015 JNetDirect, Inc. All rights reserved. Figure 102.32: Setting the package execution options. If the scheduled code package contains Environment Variables or if the package references Dynamic Containers that contains Environment Variables, then you will be prompted to enter the values for all Environment Variables in the scheduling wizard. The following figure illustrated the case where Environment Variables are found both in the code package and in the Dynamic Container Query. Note: If one Environment Variable is used in the code package and in the Query of a Dynamic Container that is referenced by the package, the Environment Variable will be replaced in run-time with the same value for both. In other words, the value you enter for the Environment Variable will be used to resolve the databases in the Dynamic Container as well as in the package code. Page 204 © 2005 - 2015 JNetDirect, Inc. All rights reserved. Figure 102.33: Entering the value of Environment Variables for the scheduled deployment. After adding a package to the Scheduled Task, you can continue to add additional packages. Packages will be deployed in the order they appear in the window in Fig. 102.30. Once you are done adding packages to the Scheduled Task you will be prompted to configure the execution schedule, as shown in the image below. The features in the Execution Schedule dialog (see image below) are identical to the scheduling features in Windows Scheduled Tasks under Windows Control Panel. For additional information regarding scheduling, please refer to Scheduled Tasks in Windows Help and Support. Page 205 © 2005 - 2015 JNetDirect, Inc. All rights reserved. Figure 102.34: Creating the schedule for execution. Add Scheduled Task Wizard See Scheduled Task Wizard. Edit Scheduled Task Wizard See Scheduled Task Wizard. Page 206 © 2005 - 2015 JNetDirect, Inc. All rights reserved. Data Auto Save Introduction Data Auto Save is a functionality that allows the user to save and load his/her servers and environments configuration. A user can keep needed configurations and restore them at any time. Saved data includes full environments configuration from containers, combine and registered servers from object browser. All data is secured with a password. A user can export or import data manually, also automatically save the available. A user can choose in which cases the saving should be performed. The data saves to the specified at autosave options default path. Manual data export/import performed by press on export/import menu item at File menu: • File → Export Data. • File → Import Data. Autosave files have .cas extension. Auto Save Data - Export functionality A user can manually export data with the help of export dialog. To reach dialog click: File → Export Data. By clicking this menu item data export dialog opens: 141.1: File export dialog Page 207 © 2005 - 2015 JNetDirect, Inc. All rights reserved. A user should specify the name of the file to export and password for data protection to export data. If save folder is not specified and only filename is entered, the application exports this file to a default export folder. The default export folder is specified at autosave options. Auto Save Data - Data Import A user can manually import data with the help of import dialog. To reach the dialog click: File → Import Data. By clicking on this menu item data import dialog opens: 141.2: File import dialog A user should specify the filename to import and password for previously exported data decryption. A user can also choose to save current data before import by checkbox below password textbox. The data will be saved to file with a shown name at default saves directory. Page 208 © 2005 - 2015 JNetDirect, Inc. All rights reserved. Auto Save Settings To reach options click: Tools → Options Autosave options are included into General options item. A user can specify password for autosaved files. The entered password must be confirmed at textbox below. Entered password is stored in encrypted state. Next specified default is autosave folder. All files with automatically exported data will be written there. At Save Events group a user can specify events on which data exports automatically. A user can choose export at application start, exit or periodically with defined interval in minutes or hours from the application start. 141.3: Auto Save Options Item Page 209 © 2005 - 2015 JNetDirect, Inc. All rights reserved. Source Code Control Introduction to Source Code Control in Combine Combine supports a wide range of source code control system, including Virtual Source Safe (VSS), IBM Rational ClearCase, Perforce, Serena ChangeMan Version Manager (also known as Merant PVCS), Vault, SubVersion, and others. User guides and documentation are available for each supported system on the JNetDirect web site. Source code control (SCC) features can be used in Combine when working on project package scripts, or when working with individual (non-package related) files in the SQL editor. In order to work with individual (non-package) scripts and files under source control, you must first select your source control provider and set the Folder Mapping option. To work with source controlled pack ages and package scripts, you must also bind the package to a project (or folder) in your source control system. These configuration settings are explained in detail in separate documents that are available on the JNetDirect web site. Selecting the Source Code Control Provider Before you begin to work with source code control (SCC), you must first select your provider in the Options dialog. To do so, go to Tools → Options → Source Control and select the source control plug-in available on your machine. Press OK to close the Options dialog when you are done. Note: If you do not see your SCC system in the drop down (see Fig. 102A), you will have to install the SCC option and components for your source control provider. These components are available as part of the SCC client tool installation. Please refer to your source control provider or contact JNetDirect support for assistance. Figure 102A: Selecting the source code control provider. Page 210 © 2005 - 2015 JNetDirect, Inc. All rights reserved. Folder Mapping In order to work with individual (non-package related) scripts in the editor, you must first select your source code control (SCC) provider and then set the Folder Mapping option. With some SCC providers (e.g., Perforce, ClearCase), the Folder Mapping settings are also required in order to work with project packages. For detailed information regarding SCC features, please refer to the source code control documentation on the JNetDirect web site. Folder Mapping allows you to set a work area on your local computer and map it to a project (or folder) in the SCC provider. Files can be checked in to source control if they reside under the work area in your local file system. Similarly, files checked out from source control are placed in the appropriate location in your folder-mapped work area. Example: Assume that Folder Mapping maps between the local folder "c:\MyWorkspace" and the project (or folder) "$/Root/SoftwareProjects/" in source control. When the SQL file "c:\MyWorkspace\MyProjects\Project1\File1.sql" is checked in, it will be placed under the project "$/Root/SoftwareProjects/MyProjects/Project1/" with the name "File1.sql". Folder Mapping can be set through the Options dialog: Go to Tools → Options → Source Control → Folder Mapping. Click the Browse (i.e., "...") button under the Local Folder and select the root folder of your local work area. Then, select the Browse button under Source Control and select the project (or folder) in the SCC provider that will be mapped to the local work area. Press OK to close the Options dialog when you are done. Figure 102B: Setting the Folder Mapping option. Page 211 © 2005 - 2015 JNetDirect, Inc. All rights reserved. Adding Individual (non-Package) Scripts to Source Control Please follow the instructions below to add a file to Source Control: 1) Set the focus in the editor to the file you wish to add (e.g., by clicking anywhere in the script editor window). If this is a new script that has not yet been saved to a local file, you must first save it. 2) Select the Check In button on the main toolbar (or alternatively, go to File → Source Control → Check In). A file can be checked in only if its path is under the local root as configured in the Folder Mapping. If the file is not saved under the local root folder, then Combine will prompt you to save the file under the local root. 3) Combine then displays the Check In dialog that lists the file to be added. Press OK to finish and add the file to source code control. After a project package is created, in order to add the package and project scripts to source code control (SCC), you must first bind the package to a project (or folder) in source control. This configuration settings informs Combine of the SCC project (or folder) where the package and scripts will be stored. Figure 102C: Source control Check In dialog. Important note: After a file is added to SCC, the source control status icon in Combine will indicate that the file is checked out (see source control icons and editor file SCC status): SCC requires a two-step check-in, therefore another Check In operation is required to submit the changes to the SCC repository. The check-in process is described in the following section of this document. Example: In the example of Fig. 102C, the Folder Mapping is set so that “C:\depot\” is mapped to the “depot” root project in Perforce. When the file “C:\depot\VSProjects\File1.sql” is added to SCC it will be added to “depot/VSProjects/File1.sql”. Page 212 © 2005 - 2015 JNetDirect, Inc. All rights reserved. Check-In Individual (non-Package) Scripts from the Editor To check a file in, press the Check In button on the main toolbar, or go to File → Source Control → Check In. If the script file resides under the local root folder (as set in the Folder Mapping), Combine displays the Check In dialog (see Fig. 102C). After you press OK in this dialog, you will be prompted with the Perforce dialog in Fig. 102D to submit your changes. The files will be checked in and submitted to Perforce after you click the Submit button. Figure 102D: The Perforce “Submit Changes” dialog. Check-Out Individual (non-Package) Scripts from the Editor When working on a file in the editor, if the file is checked in, you can check it out by pressing the Check Out option in the main toolbar, or by selecting File → Source Control → Check Out from the main menu. Combine will then display the Check Out dialog, and will automatically check-out the file once you press the after OK in this dialog. Page 213 © 2005 - 2015 JNetDirect, Inc. All rights reserved. Open Script from Source Control in the Editor In order to retrieve and create a local copy of a script file from SCC and open it in the editor, go to File → Open → Open File from Source Control. You will then be prompted with the Combine dialog shown in Fig. 102E. Figure 102E: The “Open File from SCC” dialog. In this dialog, click the Browse (i.e., “…”) button under “Select a Source Control project to browse”, to choose the SCC project that holds the script file. Following the ongoing example, assume that the Folder Mapping is set so that the Perforce root “depot” is mapped to the folder “C:\depot\”. After you hit the Browse button, the Perforce interface in Fig. 8 will come up (note: depending on your Perforce client configuration, you may be asked to provide your connection information and credentials). In the dialog of Fig. 102F, select the file you wish to open and press OK to return to the dialog in Fig. 102E. Figure 102F: Selecting the project folder in SCC that contains the sql script. Page 214 © 2005 - 2015 JNetDirect, Inc. All rights reserved. Next, Combine displays all the files under the SCC project you selected, as demonstrated in Fig. 102G. Select the file you wish to open and press OK to open the file in the editor. Figure 102G: Selecting the file to open in the editor. SCC Status of Scripts in the Editor When working on scripts (either scripts that are part of a package or individual non-package related scripts), the script SCC status is displayed at the bottom of the editor. For a complete list of SCC status icons, please refer to the source control icons section above. For packages, the SCC status icon of each package item is displayed in the Package Explorer. Figure 102H: Viewing the SCC status of a script in the editor. Page 215 © 2005 - 2015 JNetDirect, Inc. All rights reserved. Binding Packages to Source Code Control After a project package is created, in order to add the package and project scripts to source code control (SCC), you must first bind the package to a project (or folder) in source control. This configuration settings informs Combine of the SCC project (or folder) where the package and scripts will be stored. For detailed information regarding SCC features, please refer to the source code control documentation on the JNetDirect web site. In order to set the binding information, you can either right-click the package node in the Package Explorer and select the Check In option from the right-click menu or the main toolbar. Alternatively, you can select the root node of the package and go to File → Source Control → Change Source Control to bring up the Change Source Control Binding dialog in Fig. 102I. The package information appears in the dialog under Package Information. To bind the package to source control, click the Browse (i.e., "...") button under Source Control Binding and select the project (or folder) in your source control system where the package and scripts will be stored. Press OK in the dialog when you are done. The package will now be added to source control: Combine will prompt the dialog in Fig. 102J that lists all the package items that will be added. Once you press OK, all package items that are marked with a checkmark will be added to source control. Once the package is bound, the package and script files can be checked in, checked out, compared, or overwritten (by using the Get Latest option) from the source control system. Figure 102I: Binding the package to a project in source control. Page 216 © 2005 - 2015 JNetDirect, Inc. All rights reserved. Figure 102J: Adding package items to source control. Check-In Project Package Scripts To check in scripts in the project package, select the script you wish to check in, right-click the mouse, and then select the Check In option in the menu. Alternatively, after you select the scripts, you can press the Check In icon in the toolbar. Note: To check in all scripts under one or more package folders, select your folder(s), and then select the Check In option from the right-click menu or the toolbar. Similarly, to check in all package scripts, select the package node and then choose Check In. Next, Combine will display the “Source Control Checkin” dialog (see Fig. 102J). In this dialog, the items listed with a checkmark will be checked into source control. Notice that Combine will only consider and display the files that are available for Check In (e.g., files already checked in will not be considered). At this point, you can uncheck the checkbox next to each script that you wish to exclude from the check in action. When done, press OK to complete the check-in process. Page 217 © 2005 - 2015 JNetDirect, Inc. All rights reserved. Figure 102K: Checking in project package scripts. Check-Out Project Package Scripts In the Package Explorer, select the files that you wish to check out. If you want to check out all scripts under one or more folders, then select the folder(s) nodes. Similarly, you can select the package node to check out all package scripts. Once you have selected the nodes in the Package Explorer, right-click the mouse and select the Check Out menu option, or press the Check Out icon in the main toolbar. Figure 102L: Checking out package scripts. Page 218 © 2005 - 2015 JNetDirect, Inc. All rights reserved. Once you select the Check Out option, Combine will display the “Source Control Checkout” dialog in Fig. 102M. Note that only scripts that can be checked out are displayed in this dialog (e.g., if some scripts are already checked out, then they will not be included). In the dialog, you can remove the checkmark next to each scripts that you do not wish to check out. Finally, press the OK button to complete the check-out process. Figure 102M: Checking out package scripts for two selected package folders. Open Project Package from Source Control If another user has created a new project package and checked it in to SCC, and you do not yet have the package on your local file system, you can get the package by going to File → Open → Open Package from Source Control. This operation should only be performed once for each project package: After package files have been created locally, you can open the local copy using File → Open → Open Package, and then right-click the package node and use the Get Latest feature to get all changes and latest version from SCC. To open a project from source control, please follow the steps below: 1) Go to File → Open → Open Package from Source Control. The dialog shown in Fig. 102N will then be displayed. Page 219 © 2005 - 2015 JNetDirect, Inc. All rights reserved. Figure 102N: Opening a package from source control. 2) In the dialog of Fig. 102N, click the Browse (i.e., “…”) button under “Select a source control project to browse”. The Perforce interface in Fig. 102O will then show up (in some cases you may be required to enter the Perforce connection information and credentials). In this Open Project interface, first select the SCC project folder that contains the .cpa file of the package. Figure 102O: Selecting the SCC project folder containing the .cpa file and the local folder. 3) The Combine dialog in Fig. 102N is now refreshed and includes: (i) The package (.cpa) files under the selected SCC project folder; (ii) The local folder where the package file will be created (see arrow in Fig. 102P). Finally, choose the .cpa file and press OK to retrieve all package files. Page 220 © 2005 - 2015 JNetDirect, Inc. All rights reserved. Figure 102P: Selecting the package to retrieve. Get Latest Version of Project Package Scripts The Get Latest feature allows you to get the latest version of files in a project package, or to get the latest package version including all recent changes made by other users. In order to get the latest version of package scripts, select the scripts or folder(s) in the Package Explorer, and then select the Get Latest option from the right-click menu or from the main toolbar. Combine will then display the “Source Control Get” dialog, which lists the scripts to retrieve from SCC. In this dialog you can also uncheck scripts that you do not wish to retrieve. When done, press OK to get the latest version of all selected scripts. Note: Selecting one or more folder(s) and choosing the Get Latest option is equivalent to performing the Get Latest action on all the scripts in those folder(s). If other users have changed the package (e.g., added or removed scripts and folders), you can get the latest version of the entire package by selecting the package node in the Package Explorer and then pressing Get Latest in the right-click menu or in the main toolbar. If the content of the .cpa file has indeed changed, Combine will automatically reload the entire package from source control with all the latest updates. Page 221 © 2005 - 2015 JNetDirect, Inc. All rights reserved. Compare a Package Script with the One in SCC In order to compare the local copy of a script with the version stored at the SCC server, select the script you want to compare in the Package Explorer and choose the Compare option from the right-click menu or from the main toolbar. This action will bring up the interface for file comparison. For additional information about file comparison in Perforce, please refer to the Perforce web site and documentation. Icons and Script Status in Source Code Control When editing scripts in the SQL editor, the source control status (e.g., checked in, checked out) is available in the lower pane of the editor window. Similarly, when working with source controlled project packages, the status of each package script is displayed in the Package Explorer next to each script. Available icons and statuses are: Item added to package and not yet available in source control Package item is checked out to me Package item is checked out to another user Package item is checked in Package item is missing from the source control server (after item is deleted from SCS) The exclamation mark is added to any of the above icons when the package item is missing from the local file system, for example: Item added to package but then deleted from local file system Package item is checked in but is not found on my local file system Page 222 © 2005 - 2015 JNetDirect, Inc. All rights reserved. Results Window Viewing Results as a Grid Results returned from query execution are displayed in a grid format by default. Results can also be displayed as text, or saved to xml, xls (excel), csv, or written to a database table. You can also display the execution plans (or estimated execution plans) for your SQL scripts as a grid, by pressing the grid icon in the results window. Please refer to the Execution Plans section to find out more about displaying the SQL server execution plans. Viewing Results in Text Format Result sets and execution plans can be viewed in the results window of the editor as text by pressing the View as Text icon . When viewing query results as text, columns and rows can be copies and later pasted by selecting the text in the results window. Viewing as Diagram The View as Diagram button is provided in the results window to allow you to return to the diagram-display of execution plans after you switch the view to either a grid view or a text view. Please refer to the execution plans documentation for additional information regarding executiom plan display options. Page 223 © 2005 - 2015 JNetDirect, Inc. All rights reserved. Group By Box Grids displayed in the results window can be grouped by values of one or more columns. To demonstrate the Group By feature consider the results presented in the following grid. Figure 102: Data grid display in the results window. To invoke the Group By feature you must first click the Group By Box icon . Next, a header will appear above the data grid asking you to drag and drop the columns that will be used to group all row entries. Figure 103: The results window when the Group By feature is activated. In this example, assume that we wish to group the results by the values of the [id] column, and then by the values of the [status] column. To do so, we must first drag and drop the [id] column header and drop it on the "Drag a column header here" statement. Page 224 © 2005 - 2015 JNetDirect, Inc. All rights reserved. Figure 104: Dragging and dropping the [id] column header. The outcome of the drag and drop is the grouping of the grid based on the values in the [id] column, as shown below. Note that for each group, the value of the [id] column is displayed at the top of the group. Figure 105: Grouping the grid entries by the values of the [id] column. If you wish to group the results by values of other columns then the same drag and drop operation should be repeated. You can drag additional column headers and drop them on the right hand side of the [id] column to ensure that results are first grouped by the [id] column and then by the additional columns selected. Page 225 © 2005 - 2015 JNetDirect, Inc. All rights reserved. Ungroup Results in the Grid If you previously grouped the results presented in the grid, you can return to the original ungrouped display by clicking the Group By Box icon . Another way of returning to the ungrouped view is by dragging and dropping the column headers above the grid back into the grid. For more information about grouping grid results please refer to the Group By Box documentation. Changing Column Order in the Results Grid You can change the order of columns displayed in the results grid by dragging and dropping the column header to the new desired location. For example, dragging the [id] column in the figure below will make it the third column from the left in the grid display. Figure 106: Changing the column order of the grid display by dragging and dropping the column header. Selection Mode - Selecting Columns in the Grid When you click a column header in the results grid, one of two actions can take place: (i) The entire grid will be sorted based on the values in the selected column; or (ii) All the cells under the selected column header will be selected. In order to select all the cells under the clicked column, the grid must be in Selection Mode. In other words, the Sort icon should not be highlighted/selected. Selection mode then allows you to select the column rows and copy-paste them into other files (excel or text files, for example). Page 226 © 2005 - 2015 JNetDirect, Inc. All rights reserved. Sort Mode - Sorting Columns in the Grid When you click a column header in the results grid, one of two actions can take place: (i) The entire grid will be sorted based on the values in the selected column; or (ii) All the cells under the selected column header will be selected. Sort Mode allows you to sort the grid according to the values of one or more columns. To turn it on, click the Sort icon and make sure that it is highlighted/selected. In this mode, columns cannot be copied and then pasted into other files (excel or text files, for example). To enable copy-paste features the grid must operate under Selection Mode. To learn how to sort the grid, please refer to the section titled Sorting Column Values in the Grid. Sorting Column Values in the Grid You can sort the results in the grid according to the values of one or more grid columns. Before sorting, make sure that the grid operates in Sort Mode. Once in Sort Mode, pressing the column header will sort the grid in an ascending order of its values. Pressing the same column header again will reorder the grid in a descending order. You can also order the grid entries according to values of additional columns by clicking the SHIFT key and pressing other column headers. Figure 109: Sorting the grid by three columns in either ascending or descending order. Page 227 © 2005 - 2015 JNetDirect, Inc. All rights reserved. Copy-Pasting Grid Columns and Rows You can copy paste columns and rows from the grid to excel, text, or any other file types. To copy-paste rows, simply select the one or more rows you wish to copy and paste them directly in the target file. If you wish to copy and paste columns you must first make sure that the grid operates under Selection Mode, by right-clicking the grid and choosing Selection Mode from the menu. Once this mode is verified you can select one or more columns and copy them into the desired file. Finally, keep in mind that you can also export the grid results into an excel file or a csv file instead of copy-pasting the grid entries. Fixed Column Indicators (Pinning Columns in the Grid) You can pin one or more columns in the grid to fix their position while browsing other columns in the result set. To use this feature, first enable the column pinning by pressing the Fixed Column Indicators icon . A pin icon will then appear in all column headers. When the column header pin is displayed horizontally then the column is not yet pinned. You can pin a column by pressing the pin icon on the column header. Pinned columns will then be moved automatically to the left of the grid display and you can use the scroll bar to navigate and view the entire grid content while maintaining the position of the pinned columns. For example, consider the grid display in the image below. Figure 110: The initial grid display (before pinning). Invoking the pinning feature by clicking the icon and pinning the [status] and the [indid] columns is demonstrated in the image below. The location of the two pinned columns will remain fixed even when scrolling to the right to view additional grid columns. Page 228 © 2005 - 2015 JNetDirect, Inc. All rights reserved. Figure 111: Scrolling through the grid after the [status] and [indid] columns are pinned. You can unpin each column by pressing the pin icon at the column header. You can also unpin all columns by pressing the icon . Fixed Row Indicators (Pinning Rows in the Grid) If the grid contains a large number of rows and you wish to scroll down while still being able to view some selected rows, you may do so by using the Fixed Row Indicators feature. Press the Fixed Row Indicators icon to activate this feature. Once pressed, a pin icon will be placed next to each row in the grid. When the pin is displayed horizontally then the row is not pinned. Click the pin icon for each row you wish to pin. The pin icon will be displayed vertically for every pinned row. Figure 112: An example of pinning four rows in the grid. Page 229 © 2005 - 2015 JNetDirect, Inc. All rights reserved. Filtering Rows If you only wish to view rows that meet some search criteria, you can activate the rowfiltering feature by pressing the icon . Once pressed, under each column header you will see the filtering features. If you hover over the newly added filtering symbols, you can press the checkmark icon to view all the column values in the grid and apply a desired filter. Selecting a single column value will update the grid to only show rows with the selected value for that column. In addition you can select the Custom option to compose a custom filter that may use regular expressions and other advanced filtering techniques. Figure 113: Filtering rows in the grid display to only show rows that meet requested criteria. Exporting Grid Results Results displayed in a grid can be exported to a database table, a xls excel file, a csv file, or an xml file. Press the Export To icon to view these options in Combine. While exporting the content of the grid to a file is simple and self-explanatory, the process of exporting the grid results to a database table is explained below. After selecting the Export to Table option, the following dialog will appear and will ask you for the database and server name in which the table should be created. You can either select a server from drop-down list, or alternatively enter a server name manually. If you need to specify a server port, you can enter it after the server name separating by comma. You should then enter the authentication type that will be used to register all the selected servers. Available authentication types are Windows Authentication Page 230 © 2005 - 2015 JNetDirect, Inc. All rights reserved. and SQL Authentication, and Login name and password will be required if you are registering the servers using SQL Authentication. These credentials will be stored using strong encryption techniques to prevent others from viewing your credentials. Also you can use check box Use Encryption to turn on SSL encryption for a connection to DB server. In this dialog you must also enter the table name. If a table with the same name already exists on the target database then you can direct Combine to drop the existing database table so that a new table with the grid results will be created instead. Figure 114: The Export to Table dialog. Press the Next button when you are done. The requested table will the be created on the target database. Page 231 © 2005 - 2015 JNetDirect, Inc. All rights reserved. Execution Plans - Displaying Actual or Estimated Plans Combine allows you to retrieve the estimated execution plan for a given script. In addition, you can also view the execution plan used by the server after a script has been run. Execution plans can be viewed as a flow diagram, as grids, or in text format. Once a script is available in the editor window you can view the estimated execution plan from the main menu by selecting Query → Display Estimated Execution Plan, or by pressing the CTRL+L shortcut. Then, the estimated execution plan will be displayed in the results window, as demonstrated in the figure below. Figure 115: Displaying an estimated execution plan. Execution plan actions with cost between 50% and 100% are displayed with a red frame. Yellow frames are used to denote action cost between 25% and 50%. Furthermore, you can hover over each action in the execution plan to view all the details regarding each task. These features also apply when viewing the actual (i.e., not estimated) execution plans. If you wish to view the actual execution plan when running a script or queries, you may do so by select Query → Include Actual Execution Plan from the main menu, or you may press the shortcut keys CTRL+L instead. The actual execution plan will be displayed once the results are returned from the server. Execution plans can also be produced when running a single script Page 232 © 2005 - 2015 JNetDirect, Inc. All rights reserved. against multiple databases, in which case multiple execution plans will be displayed. You can display execution plans in a grid or text format as well. Press the View as Grid icon to show the execution plan in a grid, as demonstrated in the image below. Figure 116: Viewing the execution plan in a grid format. To view the execution plan as text press the View as Text icon . This option is illustrated in the image below. If you wish to go back to the diagram-view of the execution plan then you should press the View as Diagram icon . Figure 117: Displaying the execution plan in text format. Page 233 © 2005 - 2015 JNetDirect, Inc. All rights reserved. Editor Window Features and Functionality Main Editor Window The main editor is used to compose SQL code, scripts, and queries, and to allow users to run and deploy code either against a single database or against all target databases in a Container. Objects and items in the Object Browser can also be automatically scripted into the Editor window. Text features and editing functions in the editor include (in alphabetical order): Bookmarks Commenting code lines Connecting to a database to write SQL code Connecting to another database using the same SQL editor window Disconnecting the SQL editor window database connection Find and replace dialog Indentation functions Line modifications tracking Line numbering Line separators Make lowercase Make uppercase Outlining Splitting the screen to work on a single script Tabbed vs. non-tabbed document organization Uncommenting code lines Word and line wrapping Bookmarking Bookmarks can be used throughout your SQL script to mark lines of code of interest, and to allow you to jump to a bookmarked line. Bookmark related features include the Next Bookmark and Previous Bookmark commands that will take you to the next and previous marked lines, respectively, as explained below. Create and clear a bookmark - select the line you wish to mark and then enter the bookmark icon to mark it. You can also mark the line by pressing CTRL+F2. If the line was previously marked then pressing this icon will unmark it. Clear all bookmarks - press this icon to clear all bookmarks in the code. Page 234 © 2005 - 2015 JNetDirect, Inc. All rights reserved. Jump to next bookmark - if your code contains multiple bookmarks then you can click this icon to jump to the next marked line. If you are currently working on the last marked line in the code then this button will take you to the first bookmark in the script. Jump to previous bookmark - clicking this button will take you to the last bookmarked line. If you are working on the line that has the first bookmark then pressing this icon will take you to the last marked line in the code. Commenting Code Lines The editor allows you to comment multiple lines of code. First select and highlight the text in the lines you wish to comment. Then press the icon to append two dash characters to each comment line. Similarly, the editor also allows you to uncomment multiple lines together. Connecting to a Database to Write SQL Code You can press the Connect icon to login and connect to a database or select File → New → New Connection from the main menu. When this button is clicked you will be prompted with the connection dialog. The servers listed in the connection dialog are the Combine servers in the Object Browser. Once you complete the dialog, a new script editor window will appear. This script window is now connected to the database and you can run scripts, queries, or any SQL and T-SQL code and execute it against the database. The connection to the database is persistent. In other words, if you wish to disconnect from the database you either have to press the disconnect icon , or simply close the script window. You can also change the connection to log to another database while maintaining the same window. To do so you must click the Change Connection icon . You will then be prompted to enter the authentication type and credentials for the new database and server. Page 235 © 2005 - 2015 JNetDirect, Inc. All rights reserved. Connecting to Another Database Using the Same SQL Editor Window When you are writing a script in the editor window, you may or may not be connected to a database, depending on how you started the script window. If you wish to connect to a database you may press the Connect icon . However, if you are already connected to a database you can keep your current window and connect to a different database by pressing the Change Connection icon . Disconnecting the SQL Editor Window Database Connection When you write a SQL script and your script editor window is connected to a database, you can press the disconnect icon to close the connection. Pressing this button will not close the script window, and you can continue to work on your script and later connect to the database again by pressing the Connect icon . Find and Replace You can look for string and string patterns within your code by using the Find and Replace features of Combine. On top of standard features, Combine allows you to search for strings using regular expressions. The Find and Replace dialog is self-explanatory. You can start the dialog by pressing the icon or using the CTRL+F shortcut. Page 236 © 2005 - 2015 JNetDirect, Inc. All rights reserved. Indentation Indentation can be either increased or decreased for multiple lines. Start by selecting the text in one or more lines of code. If you wish to increase the indentation of the selected line then press the icon. To decrease the indentation of the lines selected press . Line Modification Tracking Changes to code lines are tracked by Combine and displayed in the editor by default. Line changes are marked with yellow vertical stripe next to the altered lines. For example, the lines marked in yellow in the figure below are ones that were updated after the file was saved last. You can turn this feature on and off as you please through the options dialog on the main menu. To do so go to Tools → Options → Editor → Mark Line Modifications. Figure 118: Line modification tacking in the code editor. Page 237 © 2005 - 2015 JNetDirect, Inc. All rights reserved. Line Numbering Line numbers are displayed in the editor by default. Line numbers can be turned on and off by changing the editor settings in Tools → Options → Editor → Show Line Numbers. Line Separators Combine can be configured to present a line separator under every GO statement in your SQL and T-SQL code. To turn this option on or off go to Tools → Options → Editor Settings and set the value of Show Content Dividers option as desired. Figure 119: An example of line separation. Make Lowercase To make text entries use lowercase letters, select the text entries and the press CTRL+U. You can also select this option from the main menu under Edit → Advanced → Make Lowercase. Page 238 © 2005 - 2015 JNetDirect, Inc. All rights reserved. Make Uppercase You can capitalize text entries in your code by selecting the desired text and pressing CTRL+SHIFT+U. The same option is also available in the main menu under Edit → Advanced → Make Uppercase. Outlining Outlining allows you to build paragraphs inside your SQL code. Each paragraph starts and ends with an outline. You can hide paragraphs and all SQL statements within each paragraph by collapsing the outlines. You can also view hidden paragraphs by expanding the outlines. Paragraphs can also be nested, as demonstrated in the image below. Figure 120: An example of using and collapsing outlines. Note that once an outlined paragraph is collapsed, you can still view the content of the paragraph by using the mouse and hovering over the collapsed region. Page 239 © 2005 - 2015 JNetDirect, Inc. All rights reserved. Figure 121: Viewing the content of a collapsed paragraph by hovering over it. In order to start an outlined paragraph you must type the syntax -- Region ParagraphName To end the outlined paragraph use the syntax -- End Region If outlined paragraphs are defined inside stored procedures, functions, or triggers, the " -Region ParagraphName" and "-- End Region" comment lines will be part of the body of the store procedure. Others using Combine can script the stored procedure from the server and will be able to use the built-in outlined paragraphs. If you do not wish to include the outlining comment lines inside your stored procedures, an additional outlining-equivalent technique is available as well. In order to use this alternative technique, first stop the automatic outlining by selecting Edit → Outlining → Stop Outlining from the main menu, and observe that the entries in the Edit → Outlining option menu have changed. Next, select one or more lines of code that you wish to turn into a collapsible paragraph in the editor and choose Edit → Outlining → Hide Selection from the main menu. Using this outlining method does not add any comment lines to the body of stored procedures, functions, or any other SQL code script. Page 240 © 2005 - 2015 JNetDirect, Inc. All rights reserved. Figure 122: Using an outlining technique that does not add comment lines in the code. The editor provides a rich set of features that let you collapse on or more paragraphs, expand paragraphs, and enable or disable the outlining feature. Please refer to the Edit → Outlining option in the main menu to view all outlining related features. Splitting the Screen Splitting the screen allows you to view different sections of the same code script in two separate windows. You can make changes to the script on either one of the split screens and changes will be automatically updated in the script body as well as in all other screens. Splitting options are available under the Window main menu item, as well as on the rightclick menu of the script window tab. Three types of splitting are support: Horizontal Splitting. This feature is useful to view separate sections of a single long script. For example, the following figure demonstrates a single script with hundreds of lines of code when the screen is split. Changes can then be made simultaneously on with screen and will be updated in both. Page 241 © 2005 - 2015 JNetDirect, Inc. All rights reserved. Figure 123: Horizontal splitting of a long script allows to make changes to several portions of the script at the same time. Vertical splitting. Vertical splitting is useful in rare cases where long lines of code are used. For example, you can then split the screen and make changes to two sections of a single long line. Splitting the screen vertically for a long line of code is demonstrated in the following figure. Figure 124: Vertical splitting of a single script. Page 242 © 2005 - 2015 JNetDirect, Inc. All rights reserved. Four Way Split. The editor window can be split a single script screen into four different sections. This allows you to work on different portions of the code in four different working sections. Splitting the screen into four sections is demonstrated in the figure below. Figure 125: Splitting a single script into four different workable screens. Uncommenting Code Lines Select the text of the one or more lines you wish to uncomment and then press the icon to remove the first set of comment characters (first two dashes) from each line. To undo your changes you can either press CTRL+Z or the undo icon, or comment those line again. Page 243 © 2005 - 2015 JNetDirect, Inc. All rights reserved. Tabbed Documents You can set the editor to work with tabbed documents where each script window can be accessed by pressing the window tab. You can also disable this option which will allow you to access each script and switch between windows by pressing the title bar as demonstrated in the following figure. Working with the editor when the window tabbing options is disabled. Figure 126: Working with the editor when the window tabbing options is disabled. Page 244 © 2005 - 2015 JNetDirect, Inc. All rights reserved. Word Wrapping and Line Wrapping Long script lines can be wrapped to span multiple code lines in the editor window. Line wrapping has no effect on the content of the script, and is only provided to ease the viewing of long lines. Combine can be configured to wrap each long line at the beginning of new word, a new character, or not at all. To turn line wrapping on and off or configure the word wrapping feature please go to Tools → Options → Editor Settings and update the WordWrap option. Figure 127: The main editor window before and after wrapping is enabled. Source Code Control When Working With Individual Files in the Editor Source code control (SCC) features are available when working on package scripts as explained in the section titled With Source Code Control in Code Packages, or when working with individual files that are not related to packages. In order to work with individual files under SCC, you must first make sure that a parent folder in the local file system is mapped to another parent folder in the SCC provider. This will allow you to check in and check out files from anywhere under those parent folders. To map a folder in the local file system to a folder in the SCC server, go to Tools → Options, and enter the folders information in the Folder Mapping dialog. Then, you should be able to use the source control buttons and features to check in all local files that are saved anywhere under your local folder. Similarly, you can now check out files from anywhere under the SCC parent folder. Page 245 © 2005 - 2015 JNetDirect, Inc. All rights reserved. Note: The SCC status of each script in the SQL editor window is presented at the bottom of each window. For your reference, below are the icons used in Combine to indicate the source control status of each script: Item added to package and not yet available in source control Package item is checked out to me Package item is checked out to another user Package item is checked in Package item is missing from the source control server (after item is deleted from SCS) The exclamation mark is added to any of the above icons when the package item is missing from the local file system, for example: Item added to package but then deleted from local file system Package item is checked in but is not found on my local file system Page 246 © 2005 - 2015 JNetDirect, Inc. All rights reserved. Intelli-prompt and Intellisense Introduction to Intelli-prompt in the SQL Editor Intelliprompt and intellisense in the SQL editor allow users to easily compose SQL scripts, auto-complete SQL statements, and show tips and other useful information relating to SQL code statements. Two types of intelliprompt features are available in Combine: 1. DB-object based prompts - lists all applicable database objects for each SQL statement (e.g., list of tables, views, and table functions after a SELECT statement). 2. InfoTips and members list - provides static lists for each SQL statement that do not include database objects. For example, the list of available locking hints and modes in a SELECT statement "SELECT * FROM sysobjects WITH (". See the image below for an example. Figure: Example of DB-object based and members list intelliprompt features. In order to utilize the DB-Object based intelliprompt, the SQL editor window must be connected to a database. This is required so that Combine could retrieve the database objects Page 247 © 2005 - 2015 JNetDirect, Inc. All rights reserved. that apply to each SQL statement. On the other hand, member lists and InfoTips do not require a connection to a database. In addition, Combine allows you to enable or disable each type of the intelliprompt features for each editor window or for all editor windows. Please refer to Disable or Enable Intelliprompt for more information. Additional configuration settings in the Options dialog allow users to tune some intelliprompt features, such as the ability to include system objects (e.g., system tables, views, databases) in the auto-prompts, auto-correct the letter case of intelliprompt SQL statements, include square brackets around DB object names, and so on. For additional information regarding these settings, please refer to the options dialog: 1. Tools → Options → Editor → Common - allows users to enable or disable intelliprompt features across the application. 2. Tools → Options → Editor → SQL Server - allows users to instruct Combine whether system objects should be considered, configure square bracket support, auto-letter case correction, and more. Intellisense Shortcuts and Hotkeys Intellisense and InfoTips will automatically appear in the editor after pressing the Space key or other characters, such as comma or parenthesis where appropriate. You can also bring up the Intellisense list by using CTRL+SPACE or use CTRL+SHIFT+SPACE to bring up InfoTips in the editor. Disable or Enable Intelliprompt Users can disable or enable some or all of the intelliprompt features, either for individual editor windows or for the entire applications (i.e., for all editor windows). Intelliprompt DB connectivity (and thus the DB object based intelliprompt features) can be disabled for each SQL editor window as follows: Right-click anywhere in the editor window, go to Intelliprompt, and un-select the DB Connection Enabled option in the menu, as illustrated in Fig. 127A1. To disable all inteliprompt features for a single editor window, right-click the editor window, go to Intelliprompt, and un-select the Enabled menu option in Fig. 127A1. Page 248 © 2005 - 2015 JNetDirect, Inc. All rights reserved. Figure 127A1: Disabling or enabling the intelliprompt features for an editor window. Users can also enable or disable the intelliprompt DB connectivity or all intelliprompt features for the entire application and across all editor windows. To do so, go to Tools → Options → Editor → Common. Then, to disable the intelliprompt DB connectivity throughout the application, set the Intelli-Prompt DB Connection Enabled option to False. Similarly, you can disable all intellisense features by setting the Intelli-Prompt enabled option to False (see Fig. 127A2). Figure 127A2: Disabling or enabling intelliprompt features for the entire application. Page 249 © 2005 - 2015 JNetDirect, Inc. All rights reserved. Advanced Scripting Advanced Scripting Dialog Advanced Scripting exposes all the new scripting techniques introduced by recent SQL server client tools components and can be used to automatically generate drop and create scripts in the appropriate dependency order from underlying databases and servers, for all database and server objects. The Advanced Scripting dialog can be used in two ways: 1. When working on code packages, you can right-click the package node and then select Add SQL Script → From Advanced Scripting. Using this option will allow you to generate SQL scripts using the dialog, and when you are done, the scripts will be automatically placed in the code package in the appropriate dependency order. 2. You can also invoke the Advanced Scripting dialog independently of a code package, to generate one or more scripts for your database objects. To do so, go to Tools → Advanced Scripting. After you select the objects that you wish to script and press OK in the dialog, scripts will be created in the SQL editor. If you select the Export option, scripts will be exported to the local file system. The Advanced Scripting dialog allows you to generate scripts easily. Moreover, you can also see the content of the scripts refresh and change in real-time as you select different scripting options or database objects in the dialog (please refer to the progress bar at the bottom left corner of the dialog when selecting objects or scripting options). Furthermore, special attention should be given to the following scripting options in the dialog: Script to a Single File (default = false) - when this option is set to true, a single file will be generated for all scripted objects, for all CREATE and DROP statements. Transaction/Error Handling (default = false) - this option mandates scripting to a single file. When this option is selected, all SQL statements in the script are placed under a single transaction, which in turn provides auto-rollback capabilities when deployed against a target database. In other words, when you set the value of this option to true and place the generated script in a code package (for example), if any errors occur during package deployment, all changes performed in the script will be automatically rolled back by the SQL server. Similarly, if you run the produced script against a single database from the editor, errors that occur during execution will prompt a rollback of all script changes. Group Drops Before Creates (under the Advanced tab) - when this option is set to true (which is the default), all DROP statements will be grouped together before any CREATE statements, to allow you to run your scripts repeatedly and in the correct order. Page 250 © 2005 - 2015 JNetDirect, Inc. All rights reserved. Code Snippets and Templates How to Use Code Snippets and Templates Combine contains many built-in SQL and T-SQL code templates (also known as snippets). These snippets are provided in order to simplify the code-writing process of common tasks and procedures, such as table creation, database backups, addition of users and roles, and other popular actions. Furthermore, Combine allows users to customize the code snippets interface: create new code snippets, add new snippets to the interface, add snippet folders, as well as share snippets with other users. To use a code snippet, find the desired snippet in the Code Snippets window, and then double-click it to open the snippet in the SQL editor window. The highlighted (selected) text represents a variable in the snippet. To replace the value of the variable, type the desired value and then press Tab to jump to the next variable. Once you hit Tab, the value of all instances of the variable in the script will be automatically replaced with the newly entered value. To complete your work in the code snippet, hit the Enter key to abort the automated snippet edit mode and to be directed to the end of the snippet script. In addition, you may hit the Esc key at any time to stop editing the snippet code. Code snippets can be customized to fit your needs: Code snippets are stored as xml files and have the extension .snippet. When Combine is installed, default application snippets are installed as well and can be found under the Snippets folder (under the main application installation folder). These snippets can be customized in many ways, as now explained: Creating new code snippets - by following the xml format of existing code snippets, users can create new custom code snippets. Adding individual snippets to the user interface - after composing new custom snippets, these snippets can be places in existing snippet folders and then loaded into the user interface. Adding new snippet folders - users can create new snippets, place them in custom folders, and then load the entire folder with all the snippets and templates into the user interface. Once loaded, Combine will remember the new settings and the new snippets will be part of the application until they are manually removed. Sharing snippets with other users - users can share snippets by placing them under a shared network drive and folder, and then adding that folder as a snippets folder. Page 251 © 2005 - 2015 JNetDirect, Inc. All rights reserved. Creating Custom Code Snippets A code snippet must be composed using the xml schema and format illustrated below (for additional examples please refer to the snippet files located in the Snippets folder, under the application installation folder). In order to create a new custom code snippet, the following steps must be followed: First, create a new file with the extension .snippet, enter the xml content with all custom entries, and save it. The name of the file will be displayed in the Combine user interface. Then, in order to make use of the snippet in Combine, you must load it into Combine. To create a custom code snippet, the following xml entries should be considered: 1. Title - not used in Combine 1.0, but will be used in future versions. It is recommended that the Title field will be identical to the snippet file name. 2. Shortcut, Description, Author - not used in Combine 1.0, but will be used in future versions. 3. Snippet Type - must be Expansion, as in the example below. 4. Literal - each Literal represents a snippet variable. Once the code snippet is opened in Combine, users can automatically replace the value of the variable throughout the snippet script using built-in Combine features. 5. ID (under Literal) - the name of the snippet variable as it appears in the script. When composing the snippet script, the variables must appear in the format $VariableName$. In the example below, one variable name is Database_Name, and the string $Database_Name$ is used to instantiate it in the script. 6. ToolTip - not used in Combine 1.0. This feature will be used in future versions, and the content of the ToolTip will be displayed whenever the user hovers over the snippet variable with the mouse. 7. Code - the SQL and T-SQL content of the code snippet should be placed under the Code xml element, after the CDATA (the CDATA clause is used to include text that will not be parsed as xml and will appear in Combine as entered). Note: If the xml schema or content you entered is incorrect, either Combine will not load the snippet to the user interface properly, or the snippet will be loaded but will not behave as expected. To test your xml format, simply load the snippet into Combine and verify that it is added and can be used correctly. <?xml version="1.0" encoding="utf-8" ?> <CodeSnippets xmlns="http://schemas.microsoft.com/VisualStudio/2005/CodeSnippet"> <CodeSnippet Format="1.0.0"> <Header> <Title>Create Database (Basic)</Title> <Shortcut>CrDBB</Shortcut> <Description></Description> <Author></Author> Page 252 © 2005 - 2015 JNetDirect, Inc. All rights reserved. <SnippetTypes> <SnippetType>Expansion</SnippetType> </SnippetTypes> </Header> <Snippet> <Declarations> <Literal> <ID>Database_Name</ID> <ToolTip>Name of the new database</ToolTip> <Default>DatabaseName</Default> </Literal> <Literal> <ID>Database_To_Use</ID> <ToolTip>Database to use in the USE clause</ToolTip> <Default>Master</Default> </Literal> </Declarations> <Code Language="sql"><![CDATA[ /* ===================================================== Create Database (Basic) Template ======================================================= */ USE $Database_To_Use$ GO -- Drop the database if it already exists IF EXISTS ( SELECT * FROM sys.databases WHERE [name] = N'$Database_Name$') DROP DATABASE [$Database_Name$] GO CREATE DATABASE [$Database_Name$] GO ]]> </Code> </Snippet> </CodeSnippet> </CodeSnippets> Page 253 © 2005 - 2015 JNetDirect, Inc. All rights reserved. Adding a New Code Snippet to the User Interface After you create a new code snippet, in order to use it, the new snippet file must be loaded into Combine. To do so, you can either load the individual file to the collection of Combine snippets (as described below), or add the folder that includes the new file as a new snippets folder. To add the new individual file, find an existing Combine snippets folder where the new file will be placed: Locate and select the folder in the Code Snippets window, and then get the physical path of the folder from the Properties window, as illustrated in the first figure below. Then, copy the new file into that physical path, select the main "My Snippets" node in the Code Snippets window, right-click to bring up the context menu, and select the Refresh option (see image below). The new snippet file will now be loaded into the application. Figure X127A: Selecting the folder and path where the new snippet will be placed. Figure 127B: Loading the new snippet file by selecting Refresh under the "My Snippets" node. Page 254 © 2005 - 2015 JNetDirect, Inc. All rights reserved. Adding a New Code Snippets Folder Adding a new code snippets folder allows you to upload a folder, all its subfolders, and all code snippet files in them to the user interface. These folders can reside on the local machine, or on shared network drives. When a folder is added, Combine will automatically identify the .snippet files and their path in the added folder, and will display them in the Code Snippets window according to the folder and subfolder(s) hierarchy. To demonstrate the addition of a new folder, please refer to the example below: The folder named "Sample Snippets Folder" contains two code snippets and a subfolder named "Snippet Subfolder" that also has two snippet files. To add the folder "Sample Snippets Folder" (and the subfolder and all code snippets), go to the Code Snippets window, right-click the "My Snippets" node in the snippets tree, and select Add Snippet Folder. Then, in the dialog titled Browse for Folder, select "Sample Snippets Folder" and press OK. The folder, subfolder, and all code snippets will be loaded to the Code Snippets window, as illustrated in the figure below. Note: The name of root folders in the Code Snippets tree must be unique. It is therefore not allowed to add two folders with the same name. Figure 127C: The folder structure and files under the folder named Sample Snippets Folder. Page 255 © 2005 - 2015 JNetDirect, Inc. All rights reserved. Figure 127D: Steps to add the Sample Snippets Folder to the Code Snippets window. Removing (Un-mapping) a Code Snippets Folder Root folders (and only root folders) can be removed from the Code Snippets window. To remove a snippets folder, right-click the folder you wish to remove and then select the Remove option from the menu, as illustrated in the image below. Please note that once a folder is removed from the Code Snippets window, the folder is not deleted from the file system, yet it is simply remove from the Combine user-interface. Figure 127E: Removing a folder from the Code Snippets window. Page 256 © 2005 - 2015 JNetDirect, Inc. All rights reserved. Sharing Code Snippets with Other Users Code snippets can be easily shared with other users. To do so, please follow the steps outlined below: 1. Create your custom code snippets. 2. Create a shared network drive and create a snippets folder under that drive. 3. Place your code snippets under the folder in a shared network drive. 4. Instruct all Combine users that have permissions to access the shared network drive to map this network drive to their local file system. 5. Instruct all users to add the shared network drive folder as a snippets folder in Combine. Page 257 © 2005 - 2015 JNetDirect, Inc. All rights reserved. Create Menu - Creating Database Objects How to Use and Customize the Create Menu The Create menu is extremely useful in creating new database objects by using either built-in or custom SQL scripts. When Combine is initially installed, each option under the Create menu is mapped to a built-in code snippet. Once a menu option is selected, a new SQL window is opened with the content of the code snippet that is mapped to the selected menu entry. For example, the Create → Table → Create Table entry is initially mapped to the Create Table code snippet (under My Snippets → Snippets → Table in the Code Snippets window). Similarly, each other menu entry is initially mapped to a built-in snippet. Once the code snippet is displayed in the SQL editor it behaves as a standard code snippet; instructions and additional information regarding code snippets can be found in the section titled How to Use Code Snippets and Templates. In general, the entries under the Create menu can be mapped to custom code snippets that may or may not be visible in the Code Snippets window. In other words, users can compose custom code snippets and then map them to the entries under the Create menu: By doing so, once a menu option is selected, the content of the custom snippet will now appear in the SQL editor instead of the initial built-in snippet. To learn more about custom code snippets and how to associate them with the Create menu entries, please refer to the following help sections: Creating Custom Code Snippets Mapping Options in the Create Menu to Code Snippets Mapping Options in the Create Menu to Code Snippets Under the Create menu, whenever an option is selected, the content of the code snippet associated with that option is displayed in the SQL editor (please refer to the section titled How to Use and Customize the Create Menu for additional information). The association between menu options and the code snippets are stored in the Advanced Options dialog. To invoke the dialog and view the mappings, go to Tools → Options → Create Menu. When Combine is installed, the Create menu options are mapped to built-in code snippet and these mappings are not visible in the Advanced Options dialog. However, after a menu option is mapped to a custom code snippet (as illustrated in the images below), the path of the custom code snippet is available in the dialog. Page 258 © 2005 - 2015 JNetDirect, Inc. All rights reserved. Figure 127H: Mapping a custom code snippet to the Create Table menu option. Figure 127I: Selecting a custom code snippet to be assocaited with the menu entry. Page 259 © 2005 - 2015 JNetDirect, Inc. All rights reserved. Figure 127J: The outcome of mapping the custom code snippet to the Create Table option. Page 260 © 2005 - 2015 JNetDirect, Inc. All rights reserved. SQL Help and Language Reference How to Use SQL Help and Online Language Reference Combine allows you to easily obtain SQL and T-SQL help directly from Microsoft’s Books Online website. Two help modes are supported, namely General SQL Help and Context Sensitive SQL Help, which are now described below: General SQL Help - When you press ALT+F1 (or go to Help → SQL and T-SQL Help), a new default browser window will open and display the main Transact SQL Reference web page. You can then browse and find additional SQL and T-SQL online help by navigating the Books Online (BOL). If you are looking for help regarding specific SQL or T-SQL commands, this can be accomplished easily by using context sensitive help as described below. Context Sensitive SQL Help - To use the context sensitive SQL help, you must first open a SQL editor window. In the window, enter (or find) the desired SQL command, select and highlight it, and then press ALT+F1 (or go to Help → SQL and T-SQL Help). By doing so, Combine will search this SQL command for MSDN site using "Bing System" and a new default browser window will open with first search result. For example, please refer to the images below: By selecting the DBCC SHOWCONTIG string and pressing ALT+F1, Combine will open a new Internet Explorer window with help for the requested T-SQL command. Comments: 1. If the requested command cannot be found, after you press ALT+F1 you will be redirected to the main MSDN search page. Figure 128: Using the context sensitive SQL and T-SQL help and language reference. Page 261 © 2005 - 2015 JNetDirect, Inc. All rights reserved. Customizing the Graphical User-Interface Main GUI Components The windows of the Graphical User Interface (GUI) in Combine include: 1. Object Browser 2. Container Manager 3. Package Explorer 4. Properties window 5. Results window 6. Package Results window 7. Package Output window In order to increase the usability of Combine, the graphical interface and all windows included in it can be customized, moved around, docked and undocked, pinned, hidden, and so on. Floating Windows A window is referred to as a Floating Window if it can be moved around freely without depending on other windows in the application. For example, in the figure below, the Object Browser window is floating. Page 262 © 2005 - 2015 JNetDirect, Inc. All rights reserved. Figure 128: An example of a floating window. To make window float, right-click the title bar of the window or the window tab and select the Floating option from the menu, as demonstrated in the figure below. Page 263 © 2005 - 2015 JNetDirect, Inc. All rights reserved. Figure 129: Floating windows. Once a window is floating you can return it to its original location by right-clicking the title bar of the floating window and un-checking the Floating checkmark. You can also place the floating window in other frames of the application. Please refer to the section Moving and Placing Windows for additional information. Page 264 © 2005 - 2015 JNetDirect, Inc. All rights reserved. Docking Windows The term Dock reflects the frame in which the window is placed. The main editor portion where SQL code can be entered is not considered a Dock. Docking refers to the action of placing a window in a dock. Undocking means that a docked window will be moved to the main editor portion. If you wish to undock a window, right-click the main toolbar of the and uncheck the Dockable checkmark. Once is window is undocked, it will be placed in the main editor portion, as demonstrated in this figure. Figure 130: Undocking the Object Browser window. Windows can be docked and returned to their original location by right-clicking the undocked window tab and selecting the Dockable menu option. You can also place an undocked window in another dock by moving and placing the window in another location. Page 265 © 2005 - 2015 JNetDirect, Inc. All rights reserved. Auto-Hiding and Pinning Windows A pinned window will be viewable at all times, in contrast to a auto-hidden window that will automatically appear when it is being used. When you click outside of the auto-hidden window it will disappear, and you can view it again by pressing the icon for that window. Consider the following example that illustrates tabbing and auto-hiding. Pinned windows are those in which the pin icon is drawn vertically . In the first figure, the Properties window is pinned. The Object Browser, Package Explorer, and Container Manager are tabbed windows and are pinned as well. Figure 131: Pinned interface windows. You can pin a window by pressing the pin icon in the main window toolbar (see the arrows in the last figure). Another way to pin a window it to right-click the toolbar and uncheck the Auto-hide option. On the other hand, if you wish to view a window only when it is being used then you can auto-hide it by pressing the pin icon again, or through the auto-hide menu option. When a form is auto-hidden you will notice that the pin icon at the window toolbar is displayed horizontally . Page 266 © 2005 - 2015 JNetDirect, Inc. All rights reserved. An icon will be created for each auto-hidden form, allowing you to access the form as needed. The form will appear each time you press the icon and will disappear once you click outside of the form. The figure below illustrates the case where the Properties window, Object Browser, Container Manager, and Packages Explorer windows are all auto-hidden. Figure 132: Icons of auto-hidden windows. Clicking on each icon will display the form. Moving and Placing Windows Windows can be moved throughout the interface and docked in different places. To move a window from its current location, drag the main window toolbar. Combine will then provide you with automated placement controls that will help you to place the window. For example, when you move the Properties window to the center of the interface you will receive the control images as in the figure below. Page 267 © 2005 - 2015 JNetDirect, Inc. All rights reserved. Figure 133: Automated placement controls for moving windows. To use the automated controls, move the mouse over one of the arrowed icons, while still dragging the window toolbar. You will then be prompted with a blue background that reflects the new location of the form. Figure 134: The new suggested location for the moved form. Page 268 © 2005 - 2015 JNetDirect, Inc. All rights reserved. If you are satisfied with this location then drop the form; otherwise you can keep dragging it until you find the desired location. Following the example above, when dropping the Properties window in the location suggested in the last figure will yield the following display. Figure 135: The Combine interface after moving the Properties window. Page 269 © 2005 - 2015 JNetDirect, Inc. All rights reserved. Object Browser Viewing the Object Browser The Object Browser contains a list of SQL servers. Under each server you will find the server databases, SQL jobs, security settings, and all other database and server objects and properties such as tables, views, indexes, logins, users, and so on. To view the Object Browser please refer to the main menu and press View → Object Browser, as illustrated in the attached figure. Figure 136: Viewing the Object Browser. Combine Servers, Registered Servers and Network Servers Database servers presented in the Object Browser are divided into three different groups: Combine Servers, Detected Network Servers, and Registered Servers, as demonstrated in the figure below. Registered Servers contain all SQL servers that were previously registered in Server Management Studio on the client machine and Detected Network Servers are all SQL servers on your network that were automatically detected by Combine. Note that SQL server machines that are behind a firewall may not be detected automatically since the standard SQL server auto-detection requires port 1434 to be open for UDP traffic from Combine to the servers. When expanding a network server for the first time the server icon will be grey Page 270 © 2005 - 2015 JNetDirect, Inc. All rights reserved. since Combine has not yet established a connection to the server. Combine will attempt to connect to the server using Windows Authentication. If Windows Authentication does not work then the user will be prompted to enter the authentication type and credentials to use in order to communicate with the server. Once the connection is successful, the server icons will no longer be grey. Combine Servers are the servers that you register inside Combine. You can register a server by pressing the New Server button and filling up all the required information (see Registering Combine Server for details). Combine Servers are used throughout the application to select and add databases for Static Containers in several dialogs and wizards. It is therefore recommended to register all servers that you plan to use with Containers, in order to later deploy code against those server databases. Figure 137: The top-level view of the Object Browser. Additional buttons in the Object Browser allow you to: View the properties of an item selected in the Object Browser. The object properties will appear in a separate properties windows. Refresh the list of servers. When this button is pressed for an item, the child nodes under the item will be collapsed, and Combine will refresh the settings for the child nodes. Register new Combine servers. Page 271 © 2005 - 2015 JNetDirect, Inc. All rights reserved. Server Groups for Combine Servers Server groups are provided to help you organize your Combine servers in any way that you see fit. Using the Object Browser, you can create groups and sub-groups of SQL servers by placing them under a folder, or dragging server nodes and dropping them under different folders. To create a new folder, right-click the Object Browser tree node under which the new folder will reside, and select New Folder. Such nodes can be either the Combine Servers root node, or an existing folder. Figure 138: Creating a new Combine server group by creating a new folder. Once you press the New Folder menu option, the New Folder dialog will show up and ask you to enter the folder name. When done, press the OK button to complete the folder creation. You can then drag server nodes and drop them on the new folder icon to move previously registered servers. Figure 139: Add folder dialog. Page 272 © 2005 - 2015 JNetDirect, Inc. All rights reserved. Moving Server Between Server Groups If you are using server groups/folders to organize your Combine servers, you can move servers from one group to another by selecting the icons of the servers you wish to move, and then dragging them and dropping them on the target folder icon. Registering Combine Servers To register one or more Combine Servers, press the button in the Object Browser to start the dialog shown below. Another way to bring up this dialog is by right-clicking the Combine Servers icon and selecting the option New Server. Figure 140: The Combine servers registration dialog. Page 273 © 2005 - 2015 JNetDirect, Inc. All rights reserved. On the left side of the dialog there is a list of servers which were automatically detected on the network by Combine. You can either select one or more of those servers, or alternatively enter the server name and press the right-arrows button. If you need to specify a server port, you can enter it after the server name separating by comma. You should then enter the authentication type that will be used to register all the selected servers. Available authentication types are Windows Authentication and SQL Authentication, and Login name and password will be required if you are registering the servers using SQL Authentication. These credentials will be stored using strong encryption techniques to prevent others from viewing your credentials. Also you can use check box Use Encryption to turn on SSL encryption for a connection to DB server. When done, press the OK button. Combine will not try to connect to the registered servers. If you wish to test the connectivity to the server(s), press the Test Connection button, and Combine will attempt to connect to all the servers listed on the righthand side of the dialog. Page 274 © 2005 - 2015 JNetDirect, Inc. All rights reserved. Adding Combine Servers without Registration Combine Servers can be added from Network Servers or from Registered Servers directly, without registration. To do so, users can copy or drag servers that are listed under Network Servers or Registered Servers and then paste or drop the selected server nodes on the Combine Servers node in the Object Browser. Then, to set the authentication type and credentials that will be used to access those servers, users can select the new servers and set the authentication type and permissions in the Properties window. The following example demonstrates how to create Combine Servers without registration. Step 1: Expand the Network Servers node and copy (or drag) the servers to the Combine Servers node. Figure 140a: Copying or dragging Network Servers and then pasting or dropping them as Combine Servers. Step 2: Paste (or drop) the selected servers to the Combine Servers node or onto folders under the Combine Servers node. Figure 140b: Pasting the copied servers to the Combine Servers node (or to subfolders under Combine Servers). Page 275 © 2005 - 2015 JNetDirect, Inc. All rights reserved. Step 3: Update the credentials for selected Combine Servers - select the servers under Combine Servers, press F4 to bring up the Properties windows, and the set the authentication type and credentials to connect to all the selected servers. Figure 140c: Updating the access permissions for the selected Combine Servers. Page 276 © 2005 - 2015 JNetDirect, Inc. All rights reserved. Services in the Object Browser The Object Browser allows users to view the status of several SQL server services. The status of the SQL Server service is marked in the server icon as illustrated in the image below. The status of other services, such as the SQL Server Agent and the Full Text Search are available after the SQL Server node is expanded in the Object Browser, and can be found under the Management folder. Using the Object Browser users can stop, start or pause services on one or more SQL Server instances in parallel, by selecting the servers and then right-clicking and choosing the appropriate commands. If users do not have sufficient permissions to access the remote machines, then Combine will not display the status of the SQL services. Similarly, when attempting to start or stop services, Combine will display the errors associated with insufficient permissions. Such cases can arise in workgroups when users are not defined on remote machines, in domains where users have less than Power User privileges, when older operating systems that are known to have network or permission related issues are used on remote machines (e.g., Windows 2000 RTM), and so on. Figure 140d: Viewing the status of SQL services in the Object Browser. Page 277 © 2005 - 2015 JNetDirect, Inc. All rights reserved. Starting SQL Services on One or More Servers The Object Browser allows users to stop, start, or pause SQL services on one or more SQL Servers in parallel. To start SQL services, select the servers you wish to start under Combine Servers, right-click and select Start and then choose the service. When starting dependent services such as the Full Text Search or the SQL Agent, if the SQL Server service is not running then Combine will start it before starting the requested service. Figure 140e: Starting services on one or multiple SQL Servers in parallel. After selecting the service to start, Combine will prompt you with several dialogs that are required to collect information from the remote servers (such as the current service status, dependency information and permission verification). These dialogs are self-explanatory and allow you to view the services and the results from all servers. Comments: 1. Combine checks access to services on selected machines and disable start controls if has no access. Page 278 © 2005 - 2015 JNetDirect, Inc. All rights reserved. Stopping SQL Services on One or More Servers The Object Browser allows users to stop, start, or pause SQL services on one or more SQL Servers in parallel. To stop SQL services, select the servers you wish to stop under Combine Servers, right-click and select Stop and then choose the service. When stopping a service with dependencies such as the SQL Server service, if any dependent services are running then Combine will stop them before stopping the requested service. Figure 140f: Stopping services on one or multiple SQL Servers in parallel. After selecting the service to stop, Combine will prompt you with several dialogs that are required to collect information from the remote servers (such as the current service status, dependency information and permission verification). These dialogs are self-explanatory and allow you to view the services and the results from all servers. Comments: 1. Combine checks access to services on selected machines and disable stop controls if has no access. Page 279 © 2005 - 2015 JNetDirect, Inc. All rights reserved. Licenses Tracked Servers List Some licenses for Combine have a restriction to the number of simultaneously used servers. The restrictions are agreed at the moment of purchasing a license. Each server involved when a package of scripts is being performed, appears in Tracked Severs List. You can get acquainted with Tracked Servers List at a click on Help->License. Figure 141: Getting information about license. If your Tracked Servers List is full and your list of constantly used servers changes, you can clear the list. For that follow Help->License->Clear Tracked List. Figure 142: Clear Tracked Servers List. Page 280 © 2005 - 2015 JNetDirect, Inc. All rights reserved. Appendix A. Authentication Types SQL Authentication When Combine uses SQL authentication to access the MS-SQL server, the SQL login name and password specified by the user in Combine will be used to connect and execute code on the target databases. This is the only authentication type where the user name and password are required. The SQL login name and password will then be stored by Combine using strong encryption technique so that others will not have access to this information. Windows Authentication When windows authentication is used to connect to MS-SQL servers, Combine will use the credentials of the user logged into the Combine client machine and forward those credentials to the SQL server. In order to connect to a SQL server using this authentication mode, the user must be a member of a group on the domain that is permitted to log into the SQL server, or alternatively be defined as a domain user on the SQL server. Prompt for Authentication When configuring Environments, folders, and Containers in the Container Manager, you can choose "Prompt" as the authentication type. If "Prompt" is chosen, you will be prompted to enter the authentication type and credentials to connect to databases and servers defined in your Containers at run-time, before code is deployed against all Container databases. Upon executing scripts and queries against a Container (and thus against all databases defined in the Container), you will be asked to select either SQL Authentication or Windows Authentication. If you use SQL Authentication then you must also provide the login name and password to connect to all databases and servers. Note that when you use "Prompt" authentication type then Combine will not store your user name and password and will only use those credentials in run-time to execute code. Page 281 © 2005 - 2015 JNetDirect, Inc. All rights reserved. Use Parent Settings for Authentication In the Container Manager, when you create folders and Containers, you can choose to use the authentication type settings that were indicated for the parent node in the Container Manager display tree to inherit the authentication settings of the parent. For example, say that you configure an Environment (or folder) to use SQL authentication and you give it a SQL login name and password. When you create a Container directly under the Environment node you can instruct the Container to use the SQL authentication settings defined for the Environment by selecting the Use Parent Settings authentication type. In turn, when executing code against the Container, this authentication type and credentials will be used to connect and deploy the code against all databases defined in the Container. Use Encryption Combine supports SSL encryption for SQL Server DB Instances. Using SSL, you can encrypt connections between Combine and your SQL Server DB Instances. To use a SQL Server DB Instance over SSL, follow these general steps: 1. Download the public key for the server where SQL Server DB is installed. 2. Import the certificate into your Windows operating system. For more information on importing a certificate, see How to Import a Trusted Root Certification Authority in Windows 7/Vista/XP (http://www.sqlservermart.com/HowTo/Windows_Import_Certificate.aspx) 3. Turn ON "Use Encryption" check box in Combine for that server. To display the encrypted status of your connection, run the following SQL query: SELECT encrypt_option FROM sys.dm_exec_connections WHERE session_id = @@SPID To use SSL with Amazon servers please read "Using SSL with a SQL Server DB Instance" section on Amazon: http://docs.aws.amazon.com/AmazonRDS/latest/UserGuide/CHAP_SQLServer.html Page 282 © 2005 - 2015 JNetDirect, Inc. All rights reserved.