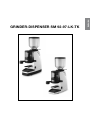
1
macinadosatore SM92-SM97 - SMLK - SMTK La San Marco S.p.A. Via Padre e Figlio Venuti, 10 34072 Gradisca d’Isonzo - Gorizia - Italy Tel. +39.0481.967111 Fax +39.0481.960166 http://www.lasanmarco.com E-mail: [email protected] It macinadosatore sm 92-97-LK-TK EN grinder-dispenser sm 92-97-LK-TK Fr moulin doseur sm 92-97-LK-TK de dosiermühle sm 92-97-LK-TK es molinillo-dosificator sm 92-97-LK-TK pt moinho-doseador sm 92-97-LK-TK EL ¢o™Imetpiko™ my§o™ kaºe sm 92-97-LK-TK english grinder-dispenser sm 92-97-LK-TK General Notes english 1. general notes . . . . . . . . . . . . . . . . . . . . . . . . . . . . . . . . . . . pag. 15 1.1 1.2 1.3 1.4 1.5 1.6 The espresso coffee . . . . . . . . . . . . . . . . . . . . . . . . . . . . . . . . . . . . . . . . . . . . . Storing the coffee beans . . . . . . . . . . . . . . . . . . . . . . . . . . . . . . . . . . . . . . . . . . The grinder-dispenser and the grinding process . . . . . . . . . . . . . . . . . . . . . . . Storing the ground coffee . . . . . . . . . . . . . . . . . . . . . . . . . . . . . . . . . . . . . . . . . The espresso coffee machine . . . . . . . . . . . . . . . . . . . . . . . . . . . . . . . . . . . . . . Climatic conditions - operator . . . . . . . . . . . . . . . . . . . . . . . . . . . . . . . . . . . . . . pag. pag. pag. pag. pag. pag. 15 15 15 15 15 15 2. Introduction . . . . . . . . . . . . . . . . . . . . . . . . . . . . . . . . . . . . . pag. 16 2.1 Using the manual . . . . . . . . . . . . . . . . . . . . . . . . . . . . . . . . . . . . . . . . . . . . . . . . pag. 16 2.2 Warnings . . . . . . . . . . . . . . . . . . . . . . . . . . . . . . . . . . . . . . . . . . . . . . . . . . . . . . pag. 16 3. Technical characteristics. . . . . . . . . . . . . . . . . . . . . . . . . . . pag. 17 3.1 General characteristics of the different models . . . . . . . . . . . . . . . . . . . . . . . . pag. 17 3.2 Technical characteristics . . . . . . . . . . . . . . . . . . . . . . . . . . . . . . . . . . . . . . . . . . pag. 17 3.3 Machine assembly . . . . . . . . . . . . . . . . . . . . . . . . . . . . . . . . . . . . . . . . . . . . . . . pag. 18 4.1 4.2 4.3 4.4 4.5 4.6 4. installation . . . . . . . . . . . . . . . . . . . . . . . . . . . . . . . . . . . . . . pag. 19 Warnings . . . . . . . . . . . . . . . . . . . . . . . . . . . . . . . . . . . . . . . . . . . . . . . . . . . . . . Electrical connections . . . . . . . . . . . . . . . . . . . . . . . . . . . . . . . . . . . . . . . . . . . . Programming the grinding time . . . . . . . . . . . . . . . . . . . . . . . . . . . . . . . . . . . . . Grinding adjustment . . . . . . . . . . . . . . . . . . . . . . . . . . . . . . . . . . . . . . . . . . . . . Changing the coffee grinders . . . . . . . . . . . . . . . . . . . . . . . . . . . . . . . . . . . . . . Adjusting the quantity of ground coffee . . . . . . . . . . . . . . . . . . . . . . . . . . . . . . pag. pag. pag. pag. pag. pag. 19 19 20 20 20 21 5. operating instructions. . . . . . . . . . . . . . . . . . . . . . . . . . . . . pag. 21 5.1 Using the grinder-dispenser . . . . . . . . . . . . . . . . . . . . . . . . . . . . . . . . . . . . . . . pag. 21 5.2 Practical suggestions for the operator . . . . . . . . . . . . . . . . . . . . . . . . . . . . . . . pag. 21 6. Information for users in the European community . . . . . . . pag. 22 7. Warranty. . . . . . . . . . . . . . . . . . . . . . . . . . . . . . . . . . . . . . . . pag. 22 8. Declaration of conformity. . . . . . . . . . . . . . . . . . . . . . . . . . . pag. 22 9. Problem solving. . . . . . . . . . . . . . . . . . . . . . . . . . . . . . . . . . pag. 23 MANUALE CODICE 7770.037 Rev. 02.09 14 1. General notes • The first part of this user's manual briefly explains the method of making espresso coffee, the modern equipment used and the function of the grinder-dispenser in this delicate process. Espresso is a coffee prepared with a particular brewing process, which makes it possible to make a very concentrated, syrupy beverage of intense taste and aroma. The method of preparation of espresso consists of extracting the substances contained in ground coffee by passing through it a flow of hot water under pressure (about 9 bar) for 25 to 35 seconds. In this manner, the soluble substances (sugars and proteins) and the insoluble materials (fats and colloids) in the coffee are "drawn out" into the cup, forming the characteristic cream of real espresso. The preparation of espresso is a very delicate process; various factors affect the success of this operation: the preservation of the coffee beans, the grinder-dispenser and the grinding process, the preservation of the ground coffee, the espresso coffee machine itself, the changeable weather conditions, and the care and attention of the operator in making the espresso coffee. 1.2 Storing the coffee beans There are two varieties of coffee found in nature: the "arabica" variety and the "robusta" strain. Normally, the roasted coffee used to make espresso contains a mixture of the two varieties, suitably blended in varying percentages, taking into account the organoleptic characteristics of the individual components. The blend of roasted coffee must be kept hermetically sealed inside its package. The roasted coffee beans contain within them all the principles and characteristic aromas of the variety or the blend; these aromas fade rapidly when the coffee beans come into contact with air, light and humidity. 1.3 The grinder-dispenser and the grinding process The grinder-dispenser is a device designed to grind and dispense the coffee. To make a good espresso, the coffee should be ground to particle sizes ranging from about 1 mm to a powder finer than 150 µm. Powdered coffee offers a greater contact surface to water, allowing a greater extraction of soluble and insoluble substances. By varying the particle sizes of ground coffee, it is thus possible to modify the resistance offered against the passage of water. If the ground coffee is made up of excessively coarse particles, the serving time is too short, the water does not manage to extract all the qualities of the ground coffee, and the resulting espresso is light in colour, thin, bland and lacking the characteristic coffee aroma. When the ground coffee is too fine, the espresso brewed is dark, burnt and cold; the serving time is too long and the water passage is too sluggish since the fine powder offers an excessive resistance to the water flow. The resulting espresso is too strong. 1.4 Storing the ground coffee Ground coffee is much more sensitive than coffee beans: the dispersion of aromatic substances takes place very rapidly if it is kept in open containers and in moist environments. The coffee beans should be ground in small quantities and the ground coffee should be used in the shortest time possible. 1.5 The espresso coffee machine The espresso machine is a device that consists essentially of a boiler and a series of heat exchangers, in which water is heated by an electric heating element or a gas burner. Water heated to a high temperature is made to flow through the ground coffee placed in the filter cup and extracts its aromas. When this manual talks about espresso coffee machines, this refers to all "continuous serving" models with hydraulic unit, and to the manual piston type (known as lever operated). La San Marco S.p.A. grinder-dispensers are professional devices designed and built to be used with this type of espresso coffee machine. 1.6 Climatic conditions - Operator As already mentioned, to make a good espresso it is essential that the coffee be ground to a proper particle size. Ground coffee is very hygroscopic; in other words, it "senses" the moisture in the air and grinding should therefore be modified to suit varying climatic conditions; a ground coffee with a high moisture content increases the resistance to the passage of water. Other important factors in the making of espresso are the quantity and compactness of the ground coffee inside the filter cup. These factors (moisture, quantity and coarseness of the ground coffee, compactness) must be considered and weighed by the operator making the espresso. For these reasons, the operator has a very important role in the espresso coffee-making process. 15 english 1.1 The espresso coffee 2. Introduction 2.1 Using the manual english • This manual provides all the necessary information for the installation, start-up, use and maintenance of the grinder-dispenser. • The persons in charge of normal use and maintenance and the technical personnel authorized to carry out extraordinary maintenance and repairs are expected to have read and adopted the contents of this manual. • This manual is an integral part of the machine. It should be kept for the life of the machine and transferred to any other user or subsequent owner. • The manual or a copy of the same should always be kept near the machine where the operator can readily look it up; it should be kept with care, in a place away from heat, moisture, dust and corrosive agents. • The La San Marco S.p.A. grinder-dispenser must be used in the manners described in this manual; all other improper or inappropriate uses of this device void the warranty conditions and the liability of the manufacturer. 2.2 Warnings • The grinder-dispenser is designed and built for metering and grinding the coffee beans in the desired amounts. All other uses outside those specified in this manual must be considered inappropriate and therefore not authorized. The manufacturer declines any liability for damage resulting from the improper use of the device. • The user must be a responsible adult, who is expected to comply with the safety procedures that apply in the country where the machine is installed, in addition to the rules of common sense. For a proper and safe use of the machine, the operator must comply with the rules of accident prevention and with all other requirements of health and hygiene in the workplace. • The use of the machine and the routine maintenance and cleaning operations are reserved exclusively for personnel authorized by the customer and under his own responsibility. • The machine must not be operated with the fixed and/or mobile guards removed or with the safety devices cut off; the safety devices must absolutely not be removed or tampered with. • While the grinder-dispenser is in operation, do not introduce any objects (screwdrivers, spoons, etc.) into the hopper or the dispenser. • Before carrying out any routine maintenance or cleaning of the machine, switch off the machine and pull out the plug from the power socket, if possible, or disconnect the omnipolar switch upstream of the machine. • Avoid using products such as alcohol, petroleum products or solvents in general to clean the machine; use water or neutral solvents. • A moist cloth or sponge is sufficient to clean the machine housing; never use jets of water. Use a brush to clean the internal parts of the dispenser, the grinding unit and the hopper. • Any extraordinary maintenance or repairs must be carried out exclusively by specialized personnel at La San Marco S.p.A. service centres. • If the power cord is damaged, it must be replaced by the manufacturer, the manufacturer’s service centre or a similarly qualified organization. • In case of malfunctions or breakdown of any grinder-dispenser components, contact the authorized service centre and request the use of original La San Marco S.p.A. spare parts. The use of any but original spare parts voids the warranty certificates provided with the machine. • The user must not carry out any unauthorized operations or any work without understanding the exact procedures; contact the manufacturer for any information, spare parts or accessories. • If the machine is to be discarded or disposed of, contact the supplier or the public utilities in charge of municipal waste disposal. Do not discard the machine in the environment! 16 3. Technical characteristics The La San Marco grinders-dispensers are professional equipment designed for grinding and metering coffee beans. La San Marco S.p.A. manufactures four basic grinder-dispenser models: SM 91; SM 96; SM MK; SM FK. They are essentially made up of: • A painted aluminium housing 1. The size, shape and volume are identical for all models, except models SM MK and SM FK, in which the standard housing is provided with a base 2 that contains the electrical and electronic components. • A hopper 4, made of transparent plastic material, positioned on top of the grinder-dispenser. The hopper 4,6 litre is fixed to the grinder-dispenser by a special screw 8. The hopper can only be removed with the help of an appropriate tool. Inside the hopper there is a safety grid 7 that prevents the upper limbs from accidentally coming into contact with the grinders. • An electric motor on which the grinding unit is connected. On the grinder-dispenser unit, model SM MK, an epicycloid reduction is connected between the motor and the grinding unit. • A grinding unit. Model SM 91 and model SM 96 are equipped with a grinding unit with flat grinders of 64 mm and 84 mm diameter, respectively. Model SM MK has a grinding unit with one conical and two flat grinders, while model SM FK has a grinding unit with conical grinders. • A grind adjustment ring 12 with a release button 11. The top of the ring shows the grinding adjustments possible. The ring is turned clockwise or counterclockwise to change the fineness of the ground coffee. • A dispenser 13 designed to measure and dispense the ground coffee; it has an adjustment range from 5 to 9 grams or, in the increased dose configuration, from 6 to 10 grams. The amount of ground coffee dispensed can be adjusted by operating on the control knob 15, located inside the dispenser.The ground coffee is dispensed by pulling on the coffee dispensing lever 17. The presser 16, available on cylindrical and conical versions, enables the ground coffee to be pressed down inside the filter cup. • A support fork 18 for the filter cup. • An electronic control unit that controls the coffee grinder start and stop. The grinding time can be programmed on the electronic control unit and the grinder-dispenser can be made to restart after a desired number of ground coffee servings. • An on/off main switch 3 with green LED. 3.2 technical characteristics model motor speed (rpm) MOTOR input (W) power input (W) type of grinder s grinding capacity (kg/h) grinder size Ø (mm) grinders noise level speed dB(A) (rpm) SM 92 1350 220 350 Flat 8,5 64 1350 72 13,8 SM 92A 1350 220 350 Flat 8,5 64 1350 72 13,8 SM 92T 1350 220 350 Flat 8,5 64 1350 72 13,8 SM 97 880 245 460 Flat 13 84 880 69 13,8 SM 97A 880 245 460 Flat 13 84 880 69 13,8 SM LK 660 200 440 Mixed 13 / 660 73 18,6 SM TK 1350 373 650 Conical 18 / 400 68 17 weight (Kg) The La San Marco S.p.A. grinder-dispensers are prearranged for the following voltages: • 110 V-1~ 60 Hz (available only for SM 92 / SM 97 models) • 230 V-1~ 50 Hz • 230 / 400 V-3N~ 50 Hz • 240 V-1 ~ 50 Hz The external dimensions of the pack are: 641 x 467 x 293 mm. 17 english 3.1 General characteristics of the different models 3.3 Machine assembly english 5 7 4 9 10 12 6 8 13 11 1 15 14 3 16 17 2 18 3.4 Legend 1 ALUMINIUM HOUSING 2 BASE FOR GRINDER HOUSING 3 MAIN SWITCH 4 HOPPER 5 GROUND-COFFEE HOPPER LID 6 HOPPER GATE 7 GRINDER SAFETY GRID 8 SPECIAL HOPPER LOCKING SCREW 9 GRIND ADJUSTMENT RING RELEASE BUTTON 10 GRIND ADJUSTMENT RING 11 DISPENSER 12 DISPENSER LID 13 QUANTITY CONTROL KNOB 14 PRESS 15 COFFEE DISPENSING LEVER 16 FORK FOR FILTER CUP 17 COFFEE COLLECTING TRAY 18 RUBBER FOOT 18 4. installation The machine must be installed by qualified technical personnel authorized by La San Marco S.p.A. The grinder-dispenser is delivered to the customers in a suitable cardboard and styrofoam package. The package contains the grinder-dispenser, its accessories, the user manual and the compliance declaration. After having opened the package, check the integrity of the grinder-dispenser and its components; in case of doubt, do not use the appliance and contact the qualified personnel of the La San Marco S.p.A. service centres. The package should be disposed of through the proper waste collection centres, in compliance with the laws of the country where it is installed. Do not discard it in the environment. The packing elements (carton, styrofoam, metal staples, etc.) can be hazardous. Keep away from children! Place the grinder-dispenser on a perfectly horizontal surface that is sufficiently sturdy to support it, stable and dry. 4.2 electrical connection Instructions for a proper electrical connection of the grinder-dispenser: • Before connecting the appliance to the power supply, make sure that the tag data of the grinder-dispenser are the same as the network power supply; the rating tag is located under the grounds collecting tray. • The connection must be made in accordance with the provisions of the country where the machine is in-stalled. • The electrical system prearranged by the customer must be in compliance with applicable standards. The power socket must be provided with a suitable ground conductor. La San Marco S.p.A. declines any liability if the prescriptions of the law are not complied with. An improper installation can cause damage or personal in-jury, for which the manufacturer cannot be considered liable. • If it is necessary to use adapters, multiple sockets and extensions, use only products in compliance with the safety standards in force. • Unwind the power cable completely to avoid overheating it. • The single-phase grinder-dispensers are provided with a three-conductor power cable and a plug for connec-tion to the power socket. • For the electrical connection of the three-phase models, install an omnipolar main switch upstream of the power supply; the main switch must have the same electrical characteristics (power and voltage) as shown on the machine rating tag. The main switch must be able to break the power supply with a contact gap of at least 3 mm. • The three-phase grinder-dispensers are equipped with a five-conductor power cable. The connection of the three-phase models must be carried out as follows: (star connection for the models with 400V-3N~ power supply and delta connection for the models with 230V-3~ power supply). Connection to the power socket Voltage L3 400V-3N~ Connection to the electronic control unit inside the machine 2 4 6 legend: L2 1 L1 3 L3 = brown L2 = black GI BL BI NE VE MA 5 N L1 = black GI/VE N = neutral (blue) GI/VE = ground 1 2 3 4 5 6 L3 1 = yellow L2 230V-3~ 2 = blue L1 3 = white GI BL BI NE VE MA 4 = black N 5 = green GI/VE 6 = brown • At the completion of the electrical connection, check that the motor turns in a clockwise direction (looking at the appliance from above); if it turns counterclockwise, reverse two power phases. • If the power is transformed from 400V-3N~ to 230V-3N~ or vice versa, use the adhesive labels provided with the machine to update the data shown on the label glued at the end of the power cable. 19 english 4.1 warnings english 4.3 Programming the grinding time The electronic control unit controls the grinding time and restarts the grinder-dispenser after a certain number of batches of ground coffee are dispensed. The unit is programmed by the manufacturer according to preset values (see table). The grinder-dispenser, started with the push button 3, remains active and stops at the end of the preset grinding time or is stopped by the action of the batches of grinding overflow limit switch, which resets the timer. The grinder-dispenser model ground time coffee starts again after a certain number of batches of ground coffee, based on the impulses given by the lever 15, and stops at the end of sm 92-92A 80 s 12 the preset grinding time or, as already mentioned, it is stopped by the action of the overflow limit switch. The installer can modify the setSM 97-97A 80 s 12 tings on the electronic control unit if the user of the appliance requests different parameters from those preset by the manufacturer. SM LK 80 s 12 Instructions for a proper adjustment of the grinding time: • Disconnect the power supply. SM TK 50 s 18 • Lean the grinder-dispenser on one side and remove the bottom; the electronic control unit, which controls the grinding time, is located inside the grinder-dispenser. • Set, in agreement with the user of the appliance, the grinding time and the number of impulses to start/ stop grinding. • To set the agreed parameters, adjust the dip switches located inside the electronic control unit (see figure). Dip switches 1 and 2 control the grinding time; it is possible to set a grinding time from 30 to 120 seconds. Dip switches 3 and 4 control the impulses given by the coffee dispensing lever; it is possible to restart the grinder-dispenser after 6, 12, 18 or 24 batches dispensed. dip sw configuration dip sw1 dip sw2 time ON OF Off Off 30 s On Off 50 s batches OF Off Off 6 OF On Off 12 Off On 18 On On 24 ON Off On 80 s On On 120 s ON OF dip sw4 ON ON OF dip sw3 ON ON OF dip sw configuration OF ON OF 4.4 Grinding Adjustment Instructions for a proper adjustment: • Fill the hopper 4 with the coffee beans and open the gate 6. • Start the grinder-dispenser by pressing the push button 3. Grind a small amount of coffee and switch off the unit by pushing the stop button 3. • Check the fineness of the ground coffee. Make one or more cups of espresso coffee and check the coffee served into the cup (the “ideal” quantity for brewing a cup of espresso is 6 to 8 grams of ground coffee, with a time of 25 to 30 seconds). There may be three different cases: a) The coffee brews too slowly: the coffee is ground too fine (it should be coarser). To make a coarser grind, press the release button 9 and turn the adjustment ring 10 clockwise. b) The coffee brews too fast: the coffee is ground too coarse (it should be finer). To make a finer grind, press the release button 9 and turn the adjustment ring 10 counterclockwise. c) The coffee brews at the proper speed. 4.5 Changing the coffee grinders When changing the coffee grinders, the adjusting ring nut must be inserted so that the hopper locking screw (1) does not interfere with the grinders stop pin (2). The proper grinder change procedure is as follows: Loosen the hopper locking screw completely and pull out the hopper. Loosen the three M5x12 grub screws located on the grinder support ring nut and remove the adjusting ring nut. 20 english Unscrew the upper grinder support and remove it from its seat. Replace the grinders and align the lower grinder with the three scraping teeth (the distance from these teeth is 0,9 mm; to center the machine we suggest using a thickness gauge). Clean the grinder seats and the thread of the upper grinder support accurately. Screw the upper grinder support down to where the upper grinder grazes the lower one; this operation 1 2 2 Fig. 1 - Proper installation. 1 Fig. 2 - Faulty installation should be carried out with the coffee grinder-dispenser in rotation in order to determine the exact point at which the two grinders come into contact with each other. Finally, insert the adjusting ring nut, making sure that the hopper locking screw is slightly ahead of the grinder stop pin, in a counterclockwise direction, as shown in figure 1. Figure 2 shows a faulty installation of the adjusting ring nut: the hopper locking screw (1) is after the grinder stop pin (2). It is important to remember that in this case the hopper locking screw will not allow the grinder stop pin to be passed in the grinder opening phase, which, since the grinders are already in contact with each other, would make it impossible to grind the coffee to the proper degree of fineness, and the brewed coffee would not flow out of the spout or would just drip out. 4.6 Adjusting the quantity of ground coffee Instructions for properly adjusting the quantity (grams) of ground coffee: • The batch of ground coffee is controlled by means of the adjusting knob 13 located inside the dispenser 11. • To decrease the amount, remove the lid from the dispenser and turn the knob clockwise; to increase the amount, turn the knob counterclockwise. • We suggest dispensing ten batches of ground coffee and weighing them with an electronic balance. The average batch should be about 7 grams (suggested quantity). 5. Operating instructions 5.1 Using the grinder-dispenser Instructions for a proper use of the appliance: • Fill the hopper 4 with coffee beans and open the gate 6. • Timer model SM92T: start the coffee grinding by turning the manual timer clockwise; grinding stops when the set time has elapsed. Turn the timer back to "zero" if you wish to stop grinding before the set time. • Manual model with the automatic timer SM92A - SM97A - SMLK - SMTK: start the grinder-dispenser by pressing the main switch 3; the green LED lights up in the push button (showing that the unit is connected). The electronic control unit stops grinding at the end of the set time; grinding can be stopped at any time by turning the main switch 3 to position "zero". Motor restart based on the number of ground coffee servings is programmable and may take place after 6, 12, 18, or 24 servings. • Manual model SM92 - SM97: same characteristics as the automatic version, except for the “overflow” grinding shutdown function and motor restart based on the number of ground coffee servings. • The ground coffee is dispensed from the dispenser 11 by operating the lever 15. • Place the filter cup on the support fork 16 and pull the lever (toward the operator) to dispense a batch of ground coffee. Every complete movement of the lever corresponds to one batch. • Press the ground coffee using the press 14; insert the filter cup in the machine serving unit and start the coffee serving. 21 english 5.2 Practical suggestions for the operator • Keep the coffee beans in sealed containers in a dry environment at room temperature. • Never leave large quantities of ground coffee inside the dispenser for long periods (for example: during the off day). • Check from time to time the fineness of the ground coffee and the quantities dispensed, bearing in mind that weather conditions (ambient humidity) have a considerable effect on the preparation of espresso coffee. Increase the coarseness of the ground coffee when ambient humidity increases and decrease it when the humidity decreases. • Have the state of wear of the grinders checked from time to time by authorised technical service personnel, bearing in mind that the flat grinding wheels cannot grind more than 300-600 kg of coffee beans before becoming useless, while the limit for conical ones is 600-1200 kg. Remember that both grinders must be replaced, i.e. both the fixed and the moving grinder, since replacement of one only would inevitably cause malfunctioning of the grinder-dispenser. Replacement must be carried out by authorised technical service personnel. • Clean the grinder-dispenser and its components from time to time, particularly the hopper and the dispenser. • In case of prolonged idle periods (holidays, seasonal shutdowns, etc.), empty the hopper and the dispenser completely and carefully clean every part of the grinder-dispenser. 6. Information for users in the European community. Pursuant to European Directive 2002/96/EC on electrical waste (WEEE), users in the European community are advised of the following. The symbol with the crossed-out dustbin on the appliance or its packaging indicates that at the end of the product’s life cycle, it must be collected separately from other waste. Suitable separate collection of the equipment for subsequent recycling, treatment and disposal contributes to preventing possible negative consequences for the environment and health, and favours the recycling of materials that the unit is made of. In accordance with European Directive 2002/96/EC, abusive disposal of the product by the user will result in application of penalties as set forth by local law. 7. Warranty The warranty becomes void if: • The instructions in this manual are not complied with. • The extraordinary maintenance and repair operations are carried out by unauthorized personnel. • The machine is used in manners not provided for in this user manual. • The original components are replaced with parts from different manufacturers. • The warranty does not cover damage caused by carelessness, improper use and installation, rough handling, lightning and weather agents, overvoltage and overcurrents, insufficient or irregular electrical power supply. 22 The manufacturer: La San Marco S.p.A. 34072 Gradisca d’Isonzo (GO) Italy – Via Padre e Figlio Venuti, 10 phone (+39) 0481 967111 – fax (+39) 0481 960166 – http://www.lasanmarco.com declares under its own responsibility that the espresso coffee machine described in this manual and identified by the data on the tag located on the machine, is compliant with directives 98/37/EC, 2006/95/EC, 2004/108/EC, Regulation (EC) No 1935/2004. For verification of compliance with said directives, the following harmonized standards have been applied: EN 12100-1, EN 12100-2, EN 60335-1, EN 60335-2-64 Gradisca d’Isonzo, February 2009 Managing director Mr Roberto Marri 9. Problem solving Before requesting the technical assistance of the service centre, carry out the following checks: problem cause solution 1) The coffee flows out of the serving nozzle fast; the cream of the coffee in the cup is light. a) coffee ground too coarse. b) weak pressing. c) insufficient batch. a) grind coffee finer. b) increase the pressing force. c) increase the batch amount. 2) The coffee flows out of the nozzle slowly (drop by drop); the cream of the coffee in the cup is dark. a) coffee ground too fine. b) excessive pressing. c) batch too large. a) grind coffee coarser. b) reduce the pressing force. c) reduce the batch amount. 3) Presence of coffee grounds in the cup. a) coffee ground too fine. b) grinders worn out. a) grind coffee coarser. b) replace the grinders. If it is not possible to solve the problem as suggested, or if problems other than those described above occur, please contact the La San Marco S.p.A. authorized technical service centre. La San Marco S.p.A. reserves the right to apply technical changes to the equipment should they become necessary, without advance notice. 23 english 8. Declaration of conformity macinadosatore SM92-SM97 - SMLK - SMTK La San Marco S.p.A. Via Padre e Figlio Venuti, 10 34072 Gradisca d’Isonzo - Gorizia - Italy Tel. +39.0481.967111 Fax +39.0481.960166 http://www.lasanmarco.com E-mail: [email protected] It macinadosatore sm 92-97-LK-TK EN grinder-dispenser sm 92-97-LK-TK Fr moulin doseur sm 92-97-LK-TK de dosiermühle sm 92-97-LK-TK es molinillo-dosificator sm 92-97-LK-TK pt moinho-doseador sm 92-97-LK-TK EL ¢o™Imetpiko™ my§o™ kaºe sm 92-97-LK-TK