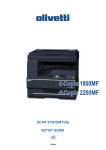
Download d-COLOR MF3300 / MF3800
Transcript
Tasti di utilità
Utility keys
Touches de fonction
Utility-Tasten
Teclas de función
d-COLOR MF3300 / MF3800
Code: 583202en
PUBLICATION ISSUED BY:
Olivetti S.p.A.
Gruppo Telecom Italia
Via Jervis, 77 - 10015 Ivrea (ITALY)
www.olivetti.com
Copyright © 2013, Olivetti
All rights reserved
The mark affixed to the product certifies that the
product satisfies the basic quality requirements.
The manufacturer reserves the right to carry out modifications to the product described in this manual at any time
and without any notice.
ENERGY STAR is a U.S. registered mark.
The ENERGY STAR program is an energy reduction plan introduced by theUnited States Environmental Protection
Agency in response to environmental issues and for the purpose of advancing the development and utilization of
more energy efficient office equipment.
Your attention is drawn to the following actions which could compromise the conformity attested to above, as well as
the characteristics of the product:
• incorrect electrical power supply;
• incorrect installation, incorrect or improper use or use not in compliance with the warnings provided in the
User’s Manual supplied with the product;
• replacement of original components or accessories with others of a type not approved by the manufacturer, or
performed by unauthorised personnel.
All rights reserved. No part of this material may be reproduced or transmitted in any form or by any means,
electronic or mechanical, including photocopying, recording or by any information storage and retrieval
system, without permission in writing from the Publisher.
Table of contents
1
Configuring Settings of This Machine
1.1
1.2
2
Displaying [Utility] ........................................................................................................................... 1-3
Displaying [Administrator Settings] .............................................................................................. 1-5
[Accessibility]
[Key Repeat Start/Interval] ................................................................................................................. 2-3
[Message Display Time] ..................................................................................................................... 2-3
[Sound Settings]................................................................................................................................. 2-4
[Brightness Adjustment]..................................................................................................................... 2-4
3
[One-Touch/User Box Registration]
[E-mail] ............................................................................................................................................... 3-3
[Fax] ................................................................................................................................................... 3-4
[SMB] ................................................................................................................................................. 3-5
[Confidential RX User Box] ................................................................................................................ 3-6
4
5
[User Settings]
4.1
[System Settings] ............................................................................................................................ 4-3
[Language Selection] ......................................................................................................................... 4-3
[Measurement Unit Setting] ............................................................................................................... 4-3
[Paper Tray]........................................................................................................................................ 4-3
[Auto Color Level Adjustment] ........................................................................................................... 4-3
4.2
[Custom Display Settings].............................................................................................................. 4-4
[Scan/Fax Settings]............................................................................................................................ 4-4
[Display Fax Activity] .......................................................................................................................... 4-4
4.3
[Copier Settings] ............................................................................................................................. 4-5
[Auto Zoom for Combine] .................................................................................................................. 4-5
[Default Copy Settings] ...................................................................................................................... 4-5
[Separate Scan Output Method] ........................................................................................................ 4-5
4.4
[Scan/Fax Settings]......................................................................................................................... 4-6
[JPEG Compression Level] ................................................................................................................ 4-6
[Black Compression Level] ................................................................................................................ 4-6
[Default Fax Settings]......................................................................................................................... 4-6
[Default Scan Settings]....................................................................................................................... 4-6
[Compact PDF Compression Level]................................................................................................... 4-6
[Print Reports] .................................................................................................................................... 4-6
4.5
[Printer Settings] ............................................................................................................................. 4-7
[Paper Setting] ................................................................................................................................... 4-7
[Print Reports] .................................................................................................................................... 4-8
[OOXML Print Settings]...................................................................................................................... 4-8
[Layout - Combination] ...................................................................................................................... 4-9
4.6
[Select Default Start App]............................................................................................................. 4-10
[Administrator Settings]
5.1
[System Settings] ............................................................................................................................ 5-3
[Power Supply/Power Save Settings] ................................................................................................ 5-3
[Date & Time Settings] ....................................................................................................................... 5-4
[Daylight Saving Time] ....................................................................................................................... 5-4
[Weekly Timer Settings] ..................................................................................................................... 5-4
[Restrict User Access]........................................................................................................................ 5-5
[Expert Adjustment]............................................................................................................................ 5-6
[List/Counter] ..................................................................................................................................... 5-7
d-Color MF 3300/3800
Contents-1
[Priority Tray] ...................................................................................................................................... 5-7
[Reset Settings] .................................................................................................................................. 5-8
[Folder Settings] ................................................................................................................................. 5-8
[Registered Key Settings]................................................................................................................... 5-8
[PDF/A default Setting] ...................................................................................................................... 5-9
5.2
[Administrator/Machine Settings] ............................................................................................... 5-10
[Administrator Registration] ............................................................................................................. 5-10
[Input Machine Address] .................................................................................................................. 5-10
5.3
[Address Registration List] .......................................................................................................... 5-11
[Speed Address List]........................................................................................................................ 5-11
[Group Address List] ........................................................................................................................ 5-11
[Program List]................................................................................................................................... 5-11
[E-Mail Subject/Text List] ................................................................................................................. 5-11
5.4
[User Authentication/Account Track] ......................................................................................... 5-12
[User Name List]............................................................................................................................... 5-12
[Logout Confirmation Screen Display Setting]................................................................................. 5-12
[User Account Counter] ................................................................................................................... 5-12
[Track Account Counter] .................................................................................................................. 5-12
[Card Authentication] ....................................................................................................................... 5-13
[Scan to Home Settings] .................................................................................................................. 5-13
5.5
[Network Settings] ........................................................................................................................ 5-14
[TCP/IP Setting] ............................................................................................................................... 5-14
[HTTP Server Settings]..................................................................................................................... 5-15
[FTP Settings]................................................................................................................................... 5-15
[E-mail Settings] ............................................................................................................................... 5-15
[SNMP Setting]................................................................................................................................. 5-15
[Bonjour Setting] .............................................................................................................................. 5-15
[DPWS Settings]............................................................................................................................... 5-15
[Detail Settings] ................................................................................................................................ 5-16
[IEEE802.1x Authentication Settings]............................................................................................... 5-16
5.6
[Copier Settings] ........................................................................................................................... 5-17
[Specify Tray When APS OFF] ......................................................................................................... 5-17
[Default Paper Type settings for Manual Tray]................................................................................. 5-17
5.7
[Printer Settings] ........................................................................................................................... 5-18
[Startup Page Setting]...................................................................................................................... 5-18
[Auto Continue] ................................................................................................................................ 5-18
[Paper Settings]................................................................................................................................ 5-18
[Hold Job Timeout]........................................................................................................................... 5-18
[Quality Settings] .............................................................................................................................. 5-19
[Emulation] ....................................................................................................................................... 5-21
5.8
[Fax Settings]................................................................................................................................. 5-22
[Header Information] ........................................................................................................................ 5-22
[Header/Footer Position] .................................................................................................................. 5-22
[Line Parameter Setting]................................................................................................................... 5-23
[TX/RX Settings] ............................................................................................................................... 5-24
[Function Settings] ........................................................................................................................... 5-25
[PBX Connection Settings]............................................................................................................... 5-26
[Report Settings] .............................................................................................................................. 5-27
[Job Settings List] ............................................................................................................................ 5-28
[Confidential RX User Box] .............................................................................................................. 5-28
[Network Fax Settings]..................................................................................................................... 5-29
5.9
[System Cooperation]................................................................................................................... 5-30
[Administrator Dispatch] .................................................................................................................. 5-30
[OpenAPI Settings]........................................................................................................................... 5-30
5.10
[Security Settings]......................................................................................................................... 5-31
[Administrator Password]................................................................................................................. 5-31
[Security Details] .............................................................................................................................. 5-31
[Enhanced Security Mode]............................................................................................................... 5-32
[HDD Settings] ................................................................................................................................. 5-33
5.11
5.12
[Paper Empty Alert Display Setting]............................................................................................ 5-34
[License Management] ................................................................................................................. 5-35
[Publish Request Code] ................................................................................................................... 5-35
[Activation] ....................................................................................................................................... 5-35
Contents-2
d-Color MF 3300/3800
[Enable Function List]....................................................................................................................... 5-35
5.13
[OpenAPI Certification Management Setting]............................................................................ 5-36
[Restriction Code Settings] .............................................................................................................. 5-36
d-Color MF 3300/3800
Contents-3
Contents-4
d-Color MF 3300/3800
1
Configuring Settings of This
Machine
1.1
1
Displaying [Utility]
1
Configuring Settings of This Machine
1.1
Displaying [Utility]
On the main menu, tap [Utility].
[Utility] allows you to configure settings of this machine, register destinations, and check the status of consumables.
Settings
Description
[Accessibility]
Configure settings to display the Control Panel or adjust operation sounds.
For details, refer to page 2-3.
[One-Touch/User Box
Registration]
Register E-mail destinations, fax destinations, SMB destinations, and Confidential User Box.
For details, refer to page 3-3.
[User Settings]
Tap this button to enable users to change settings.
You can change the defaults or screen displays of the copy, scan/fax, or print
function in a user-friendly manner to suit your requirements.
For details, refer to page 4-3.
[Administrator Settings]
This button displays items that can only be changed by the administrator. To
configure settings, you need to enter the administrator password for this machine.
You can specify the initial copy, print, or fax operations, power saving function,
and network function to suit your requirements. Also, you can manage the use
status of this machine or inhibit an information leakage by specifying the authentication or security function.
For details, refer to page 5-3.
[Check Consumable
Life]
Tap this button to check this machine's status of consumables (consumption
level).
Tapping Print allows you to print a list that shows the status of consumables.
d-Color MF 3300/3800
1-3
1
1-4
Displaying [Utility]
1.1
Settings
Description
[Job List]
Tap this button to check active jobs or job logs.
This option is displayed when [Utility] - [Administrator Settings] - [System Connection] - [OpenAPI Settings] - [Specified App Start Setting] is enabled.
[Counter]
Tap this button to display the total number of pages printed on this machine
on a function or color basis.
This option is displayed when [Utility] - [Administrator Settings] - [System Connection] - [OpenAPI Settings] - [Specified App Start Setting] is enabled.
d-Color MF 3300/3800
1.2
1.2
1
Displaying [Administrator Settings]
Displaying [Administrator Settings]
To display administrator settings, you need to enter the administrator password for this machine.
1
On the main menu, tap [Utility].
2
Tap [Administrator Settings].
3
Enter the administrator password for this machine.
% "12345678" is specified by default.
The [Administrator Settings] screen appears. The available setting items are as follows.
Settings
Description
[System Settings]
Configure the operating environment of this machine such as the date and
time of this machine, power saving function, functional operations, and
screen displays.
For details, refer to page 5-3.
[Administrator/Machine Settings]
Register information on the administrator and this machine.
For details, refer to page 5-10.
[Address Registration
List]
Print a destination list.
For details, refer to page 5-11.
[User Authentication/Account Track]
Configure settings to display the user name list or logout confirmation
screen when user authentication and account track are enabled.
For details, refer to page 5-12.
[Network Settings]
Configure the network function such as setting up TCP/IP and configuring
your environment for Scan TX.
For details, refer to page 5-14.
[Copier Settings]
Configure functions used in copy mode.
For details, refer to page 5-17.
[Printer Settings]
Configure print settings.
For details, refer to page 5-18.
[Fax Settings]
Configure the settings to use the fax or network fax function.
For details, refer to page 5-22.
[System Connection]
Configure settings to establish the association of this machine and other
system.
For details, refer to page 5-30.
[Security Settings]
Configure the security settings of this machine, such as password setting
and data management setting.
For details, refer to page 5-31.
[Paper Empty Alert
Display Setting]
Specify whether or not to display a warning message when the tray runs
out of paper.
For details, refer to page 5-34.
[License Management]
Issue a request code required to use an advanced function, or enable an
advanced function.
For details, refer to page 5-35.
[OpenAPI Certification
Management Setting]
Specify a restriction code to prevent an OpenAPI connection application
from being registered on this machine.
For details, refer to page 5-36.
d-Color MF 3300/3800
1-5
1
1-6
Displaying [Administrator Settings]
1.2
d-Color MF 3300/3800
2
[Accessibility]
2
2
[Accessibility]
[Key Repeat Start/Interval]
To display: [Utility] - [Accessibility] - [Key Repeat Start/Interval]
Pressing a key enters one character, and holding down a key starts entering successive characters. This is
referred to as a key repeat.
If necessary, change the time from pressing a key to starting a key repeat, and the interval to enter successive
characters.
Settings
Description
[Time to Start]
Change the time to start entering successive characters when holding down a
key.
[0.8 sec.] is specified by default.
[Interval]
Change the interval to hold down a key and enter successive characters.
[0.3 sec.] is specified by default.
[Message Display Time]
To display: [Utility] - [Accessibility] - [Message Display Time]
Change the time to display a message on the Touch Panel.
[3 sec.] is specified by default.
d-Color MF 3300/3800
2-3
2
[Sound Settings]
To display: [Utility] - [Accessibility] - [Sound Settings]
Select whether or not to output keying or warning sounds. If necessary, adjust the volume.
Settings
Description
[Set All]
Collectively specify all sounds. If necessary, adjust the volume at three levels.
Selecting [OFF] will result in no sound being output.
[Input Confirmation
Sound]
Select whether or not to output the following operation confirmation sounds.
To output sounds, adjust the volume at three levels.
• [Input Confirmation Sound]: A sound produced when a key is tapped to enter a character.
• [Invalid Input Sound]: A sound produced when a tapped key is invalid.
• [Basic Sound]: A sound produced when the default value item is selected
for an option subject to rotational switching.
[ON] or [Medium] is specified by default in every case.
[Successful Completion
Sound]
Select whether or not to output the following successful completion sounds.
To output sounds, adjust the volume at three levels.
• [Operation Complete Sound]: A sound produced when an operation has
ended normally.
• [Transmission Complete Sound]: A sound produced when a communication has ended normally.
[ON] or [Medium] is specified by default in every case.
[Completed Preparation Sound]
Select whether or not to output the completed preparation sound when this
machine is placed into the ready state. To output sounds, adjust the volume at
three levels.
[ON] or [Medium] is specified by default.
[Caution Sound]
Select whether or not to output the following caution sounds. To output
sounds, adjust the volume at three levels.
• [Low Caution Sound (Level 1)]: A sound produced when a message appears on the Touch Panel indicating that the replacement time is nearing
for consumables or replacement parts.
• [Low Caution Sound (Level 2)]: A sound produced when the user has made
a mistake while operating this machine.
• [Low Caution Sound (Level 3)]: A sound produced when an error, which can
be dealt with by referring to messages or manuals, has occurred.
• [Severe Caution Sound]: A sound produced when this machine detects an
error that will require checking by a service representative.
[ON] or [Medium] is specified by default in every case.
[Brightness Adjustment]
To display: [Utility] - [Accessibility] - [Brightness Adjustment]
Adjust the brightness level of the Touch Panel.
[0] is specified by default.
2-4
d-Color MF 3300/3800
3
[One-Touch/User Box
Registration]
3
3
[One-Touch/User Box Registration]
[E-mail]
To display: [Utility] - [One-Touch/User Box Registration] - [E-mail] - [New]
Register destination E-mail addresses.
Settings
Description
[No.]
Destination registration number. The smallest available number that is not
used is automatically assigned.
[Name]
Enter the destination name (using up to 72 characters).
[Favorites]
Select this option to register a frequently used destination. The registered destination is displayed in [Favorites], enabling you to easily specify a destination.
[Index]
Select a corresponding character so that the destination can be index
searched by registration name.
[E-mail]
Enter the destination mail address.
Tips
-
To check the settings for a registered destination, select its registered name, then tap [Check Settings].
-
To change the settings for a registered destination, select its registered name, then tap [Edit].
-
To delete a registered destination, select its registered name, then tap [Delete].
d-Color MF 3300/3800
3-3
3
[Fax]
To display: [Utility] - [One-Touch/User Box Registration] - [Fax]-[New]
Register the fax number of the destination.
Settings
Description
[No.]
Destination registration number. The smallest available number that is not
used is automatically assigned.
[Name]
Enter the destination name (using up to 72 characters).
[Favorites]
Select this option to register a frequently used destination. The registered destination is displayed in [Favorites], enabling you to easily specify a destination.
[Index]
Select a corresponding character so that the destination can be index
searched by name.
[Fax number]
Enter a destination fax number.
• When you use this machine in a PBX environment, tap [Outside] ([E] appears). A registered outside line number is automatically inserted.
• When you use this machine in a PBX environment, tap [Pause] following the
outside line number ([P] appears) to ensure dialing is successful.
• If you want to send out a push signal over the dial line, tap [Tone] ([T] appears).
• Enter [-] to separate a dial number. It does not affect the dialing of the number.
[Line Settings]
If necessary, specify how to send a fax to a destination you want to register.
You may change the settings you made here before sending a fax.
• [ECM OFF]:ECM is an error correction mode defined by ITU-T (International
Telecommunication Union - Telecommunication Standardization Sector).
Fax machines equipped with the ECM feature communicate with each other, confirming that the sent data is free of errors. This prevents image blurring caused by telephone line noise.
If you send a fax using a telephone line in an environment containing static,
it may take a longer time to communicate. In this case, the communication
time can be reduced by setting ECM to OFF for transmission. However, image or communication errors may occur depending on the specified communication time value, so change the value to suit conditions.
• [V34 OFF]: V34 is a communication mode used for super G3 fax communication. However, when the remote machine or this machine is connected
to a telephone line via PBX, you may not establish a communication in super G3 mode depending on telephone line conditions. In this case, it is recommended that you set the V34 mode to off to send data.
• [Check Dest. and Send]: When using the Check Dest. And Send function,
select [Yes]. The fax number specified for fax is checked against the destination fax number (CSI), and the fax is sent only when they match.
Tips
3-4
-
To check the settings for a registered destination, select its registered name, then tap [Check Settings].
-
To change the settings for a registered destination, select its registered name, then tap [Edit].
-
To delete a registered destination, select its registered name, then tap [Delete].
d-Color MF 3300/3800
3
[SMB]
To display: [Utility] - [One-Touch/User Box Registration] - [SMB]-[New]
Register a destination computer name (host name) or IP address. Also register a folder for saving a file or
information for accessing a folder.
Settings
Description
[No.]
Destination registration number. The smallest available number that is not
used is automatically assigned.
[Name]
Enter the destination name (using up to 72 characters).
[Favorites]
Select this option to register a frequently used destination. The registered destination is displayed in [Favorites], enabling you to easily specify a destination.
[Index]
Select a corresponding character so that the destination can be index
searched by name.
[Connection]
Register a destination computer name (host name) or IP address.
[Host Name]
Enter the host name or IP address of a destination computer.
• Example of computer name (host name) entry: "HOME-PC"
• Example of IP address (IPv4) entry: "192.168.1.1"
• Example of IP address (IPv6) entry: "fe80::220:6bff:fe10:2f16"
[File Path]
Enter the shared folder name of the computer specified in [Host Name] (using
up to 255 bytes).
• Entry example: "scan"
When specifying a folder in the shared folder, insert a symbol, "\", between
folder names.
• Entry example: "scan\document"
[User ID]
Enter the name of a user who has privileges to access the folder specified in
[File Path] (using up to 255 bytes).
• For workgroup user, only type in the user name. Entry example: "User01"
• For domain user, type in user-name@domain-name. Entry example: "[email protected]"
[Password]
Enter the password (using up to 127 bytes).
[Browse]
Detect the target computer on the network, then select the shared folder.
Information of the selected folder is registered.
Tips
-
To check the settings for a registered destination, select its registered name, then tap [Check Settings].
-
To change the settings for a registered destination, select its registered name, then tap [Edit].
-
To delete a registered destination, select its registered name, then tap [Delete].
d-Color MF 3300/3800
3-5
3
[Confidential RX User Box]
To display: [Utility] - [One-Touch/User Box Registration] - [Confidential RX User Box]-[New]
Register a User Box for confidential communication.
Settings
Description
[User Box Name]
Enter the Confidential User Box name (using up to 20 characters).
[No.]
Displays a registration number of the Confidential User Box. The smallest
available number that is not used is automatically assigned.
[Comm. Password]
Enter the password for confidential RX (using up to 20 digits).
To confirm, enter the password again into [Password Confirmation].
[Print Password]
To restrict printing files in the Confidential User Box with the password, enter
the password (using up to 64 characters).
To confirm, enter the password again into [Password Confirmation].
Tips
3-6
-
To change the User Box settings you have registered, select the User Box name and tap [Edit].
-
To delete an existing User Box, select the User Box name and tap [Delete].
d-Color MF 3300/3800
4
[User Settings]
4.1
4
[System Settings]
4
[User Settings]
4.1
[System Settings]
[Language Selection]
To display: [Utility] - [User Settings] - [System Settings] - [Language Selection]
Select a language to display information on the Touch Panel.
Settings
Description
[Language Selection
Display]
Select a language to display information on the Touch Panel.
The default value depends on the region the machine is used in.
[Measurement Unit Setting]
To display: [Utility] - [User Settings] - [System Settings] - [Measurement Unit Setting]
Select a measurement unit for numeric values displayed on the Touch Panel from [mm] and [Inch].
The default value depends on the region the machine is used in.
[Paper Tray]
To display: [Utility] - [User Settings] - [System Settings] - [Paper Tray]
Specify the settings related to selection and switching of paper trays.
Settings
Description
[Auto Tray Select]
When you have selected [Auto] in [Paper], select target paper trays for auto tray
selection. The machine selects the tray loaded with optimal paper among the
trays set to [ON].
[ON] is specified by default in every case.
[Auto Tray Switching]
When the paper tray has become empty during printing, select whether or not
to enable automatic switching to a paper tray that contains paper of the same
size, same orientation, and same type (ATS: Auto Tray Switch).
However, ATS is available for the paper tray that is selected in [Auto Tray Select].
[OFF] is specified by default.
[Print Lists]
Select a paper tray to print out various lists such as the configuration list or
counter list.
[Tray 1] is specified by default.
[Auto Paper Selection]
Specify whether or not to automatically select the tray with [User1] or [User2]
loaded when [Auto] is selected for [Paper].
[OFF] is specified by default in every case.
[Auto Color Level Adjustment]
To display: [Utility] - [User Settings] - [System Settings] - [Auto Color Level Adjustment]
When setting the color mode to [Auto Color] to scan an original, adjust the standard to judge whether the
original is in color or black and white. The standard can be adjusted at five levels.
[2] is specified by default.
d-Color MF 3300/3800
4-3
4
4.2
[Custom Display Settings]
4.2
[Custom Display Settings]
[Scan/Fax Settings]
To display: [Utility] - [User Settings] - [Custom Display Settings] - [Scan/Fax Settings]
Change the default main screen in Fax, Scan To E-mail, and Scan To Folder modes.
Settings
Description
[Fax Default Tab]
Change the default main screen in Fax mode.
[Favorites] is specified by default.
[Scan to E-mail Default
Tab]
Change the default main screen in Scan To E-mail mode.
[Favorites] is specified by default.
[Scan to Folder Default
Tab]
Change the default main screen in Scan To Folder mode.
[Favorites] is specified by default.
[Display Fax Activity]
To display: [Utility] - [User Settings] - [Custom Display Settings] - [Display Fax Activity]
Select whether or not to display the screen indicating the machine status during fax transmission.
4-4
Settings
Description
[TX Display]
Select whether or not to display a screen indicating a fax is being sent.
[OFF] is specified by default.
[RX Display]
Select whether or not to display a screen indicating a fax is being received.
[OFF] is specified by default.
d-Color MF 3300/3800
4.3
4.3
[Copier Settings]
4
[Copier Settings]
[Auto Zoom for Combine]
To display: [Utility] - [User Settings] - [Copier Settings] - [Auto Zoom for Combine]
Select whether or not to adjust the image automatically to optimal zoom ratio when you specify [Combine]
and select [Auto] for [Paper].
-
[Auto Display Zoom Ratio]: Automatically adjusts to the optimal zoom ratio.
-
[OFF]: Select this option to specify the zoom ratio manually.
[Auto Display Zoom Ratio] is specified by default.
[Default Copy Settings]
To display: [Utility] - [User Settings] - [Copier Settings] - [Default Copy Settings]
Change the default settings (settings when the power is turned on, or the Reset is pressed) in copy mode.
You can change the setting by selecting [Current Setting] after the setting in copy mode is changed.
[Factory Default] is specified by default.
[Separate Scan Output Method]
To display: [Utility] - [User Settings] - [Copier Settings] - [Separate Scan Output Method]
Select the timing that the machine starts printing when scanning an original by specifying [Separate Scan].
-
[Page Print]: Printing begins while the original is being scanned. Select this option if you want to focus
on efficiency.
-
[Batch Print] Printing begins after all originals are scanned. You can delete data before printing begins
if you find an incorrect setting etc.
[Page Print] is specified by default.
d-Color MF 3300/3800
4-5
4
4.4
[Scan/Fax Settings]
4.4
[Scan/Fax Settings]
[JPEG Compression Level]
To display: [Utility] - [User Settings] - [Scan/Fax Settings] - [JPEG Compression Level]
Select the default compression method for color fax from [High Quality], [Standard] and [High Compression].
Data size is the largest in [High Quality] and the lowest in [High Compression].
[Standard] is specified by default.
Tips
A fax cannot be sent in color using the fax function.
[Black Compression Level]
To display: [Utility] - [User Settings] - [Scan/Fax Settings] - [Black Compression Level]
Select the default compression method for black-and-white fax from [MH] and [MH/MMR].
[MH/MMR] is specified by default.
[Default Fax Settings]
To display: [Utility] - [User Settings] - [Scan/Fax Settings] - [Default Fax Settings]
Change the default settings (settings when the power is turned on, and the Reset is pressed) in Fax mode.
You can change the setting by selecting [Current Setting] after settings in Fax mode have been changed.
[Factory Default] is specified by default.
[Default Scan Settings]
To display: [Utility] - [User Settings] - [Scan/Fax Settings] - [Default Scan Settings]
Change the default settings (settings when the power is turned on, and the Reset is pressed) in Scan To Email or Scan To Folder mode.
You can change the setting by selecting [Current Setting] after settings in Scan To E-mail or Scan To Folder
mode have been changed.
[Factory Default] is specified by default.
[Compact PDF Compression Level]
To display: [Utility] - [User Settings] - [Scan/Fax Settings] - [Compact PDF Compression Level]
Select the compression level to save a file in the Compact PDF format from [High Quality] or [High Compression].
[High Quality] is selected by default.
[Print Reports]
To display: [Utility] - [User Settings] - [Scan/Fax Settings] - [Print Reports]
Print TX Report and RX Report.
4-6
Settings
Description
[TX Report]
Prints a report that contains transmission results.
[Do not print] is specified by default.
[RX Report]
Prints a report that contains receiving results.
[Do not print] is specified by default.
d-Color MF 3300/3800
4.5
4.5
4
[Printer Settings]
[Printer Settings]
[Paper Setting]
To display: [Utility] - [User Settings] - [Printer Settings] - [Paper Setting]
Configure the paper and paper tray settings used for printing, and the setting on printing condition if no setting is specified by the printer driver.
Settings
Description
[Paper Tray]
Configure the settings on the paper tray.
[Tray 2] and [Tray 3] are available when the optional Paper Feed Unit is installed.
[Default Tray]
Select a paper tray you want to use preferentially.
[Tray 1] is specified by default.
[Manual Feed]
Specify the size and type of the paper loaded in Manual Feed Tray.
• [Paper Size]: When loading a standard size paper, select the paper size.
• [Custom Size]: Enter the width and length of paper when using custom-size
paper.
• [Paper Type]: Select the type of the paper loaded in the tray.
[Tray 1]
Specify the size and type of the paper loaded in Tray 1.
• [Paper Size]: When loading a standard size paper, select the paper size.
• [Paper Type]: Select the type of the paper loaded in the tray.
[Tray 2]
Specify the size and type of the paper loaded in Tray 2.
• [Paper Size]: When loading a standard size paper, select the paper size.
• [Paper Type]: Select the type of the paper loaded in the tray.
[Tray 3]
Specify the size and type of the paper loaded in Tray 3.
• [Paper Size]: When loading a standard size paper, select the paper size.
• [Paper Type]: Select the type of the paper loaded in the tray.
[Duplex]
Select whether or not to enable 2-sided printing.
[OFF] is specified by default.
[Number of Copies]
Enter the number of copies to be printed.
[1] is specified by default.
[Collate]
When multiple sets of copies are printed, select whether the paper output position of each set is staggered to help you locate the first page of each set.
[OFF] is specified by default.
[Binding Position]
Select the binding position for 2-sided printing.
[Left Bind] is selected by default.
[Auto Tray Switching]
When the paper tray has become empty during printing, select whether or not
to allow automatic switching to a paper tray that contains paper of the same
size, same orientation, and same type (ATS: Auto Tray Switch).
[ON] is specified by default.
[Tray Mapping]
Specify the paper tray to be used for printing when a print job is received by a
printer driver manufactured by another company.
[Tray Mapping
Mode]
Select whether or not to enable the tray mapping.
[OFF] is specified by default.
[Logical Tray 0] to
[Logical Tray 9]
Assigns logical trays 0 to 9 to physical trays.
[Original Direction]
Select the orientation of the image to be printed.
[PORTRAIT] is specified by default.
[Minimal Print]
Select whether or not to slightly reduce the full page size when directly printing
a PDF, PPML, or OOXML (docx, xlsx, or pptx) file.
This function is available when printing the entire original image, including its
edges.
[OFF] is specified by default.
[TIFF Image Paper Setting]
Specify the method for determining the paper to be used when a TIFF, JPEG,
or PDF file is directly printed.
• [Auto Paper Select]: Prints on paper that matches the image size.
• [Priority Paper Size]: Prints on the primary paper size.
[Priority Paper Size] is specified by default.
d-Color MF 3300/3800
4-7
4
[Printer Settings]
4.5
[Print Reports]
To display: [Utility] - [User Settings] - [Printer Settings] - [Print Reports]
Print the printing-related lists such as the configuration list or counter list.
Settings
Description
[Configuration Page]
A list that contains information and settings of this machine is printed.
[Statistics Page]
A list that contains statistics information, such as the number of pages printed,
is printed.
[Font List]
The PostScript and PCL font lists are printed.
[HDD Directory List]
A list of HDD directories is printed.
[Counter List]
Prints a list that contains counter information.
[OOXML Print Settings]
To display: [Utility] - [User Settings] - [Printer Settings] - [OOXML Print Settings]
Configure the default print settings when directly printing of OOXML (docx, xlsx, pptx) files is carried out.
4-8
Settings
Description
[OOXML Print Mode]
Select whether to give priority to either the image quality or speed when directly printing of an OOXML (docx, xlsx, or pptx) file is carried out.
[Speed Mode] is specified by default.
[Print Sheet/Book]
Select whether to print the currently selected sheet or the entire book when
handling an Excel file.
The [Current Sheet] is specified by default.
[Paper]
Select a paper size to print an OOXML (docx, xlsx, or pptx) file.
[Auto] is specified by default.
[Paper Type]
Select a paper type to print an OOXML (docx, xlsx, or pptx) file.
[Auto] is specified by default.
d-Color MF 3300/3800
4.5
4
[Printer Settings]
[Layout - Combination]
To display: [Utility] - [User Settings] - [Printer Settings] - [Layout - Combination]
Configure the default combination settings for direct printing.
Settings
Description
[Combine]
Select whether or not to reduce and print multiple pages on the same side of
a single sheet of paper.
[OFF] is specified by default.
[Line]
Enter a number of pages to be placed in a horizontal orientation.
[1] is specified by default.
[Column]
Enter a number of pages to be placed in a vertical orientation.
[1] is specified by default.
[Aggregate order]
Select a method to arrange pages.
[Horizontal] is specified by default.
[Aggregate direction]
Select a direction of page layout.
[Top Left to Bottom Right] is specified by default.
[Layout Settings]
Set the layout in details.
• [Page Spacing - Row Interval]: Set a page space in the row direction. [0] is
specified by default.
• [Page Spacing - Column Interval]: Set a page space in the column direction. [0] is specified by default.
• [Margin - Top Margin]: Set a margin at the top of a page. [0] is specified by
default.
• [Margin - Bottom Margin]: Set a margin at the bottom of a page. [0] is specified by default.
• [Margin - Left Margin]: Set a margin at the left of a page. [0] is specified by
default.
• [Margin - Right Margin]: Set a margin at the right of a page. [0] is specified
by default.
• [Page magnification]: Select whether to set the zoom ratio automatically or
arbitrarily. [Auto] is specified by default.
• [Page Zoom - Manual Input]: Set any zoom ratio to enlarge or reduce the
page size. [100] is specified by default.
• [Page frame]: Select to print a border line between pages. [OFF] is specified
by default.
d-Color MF 3300/3800
4-9
4
4.6
[Select Default Start App]
4.6
[Select Default Start App]
To display: [Utility] - [User Settings] - [Select Default Start App]
To use application software to communicate with this machine via OpenAPI, select the application software
you want to open first when this machine has started.
Related setting (for the administrator)
This option is available when [Specified App Start Setting] is enabled in [Administrator Settings]. For details,
refer to page 5-30.
4-10
d-Color MF 3300/3800
5
[Administrator Settings]
5.1
5
[System Settings]
5
[Administrator Settings]
5.1
[System Settings]
[Power Supply/Power Save Settings]
To display: [Utility] - [Administrator Settings] - [System Settings] - [Power Supply/Power Save Settings]
Configure the settings on how to use the Power key and the machine action in Power Save mode.
Settings
Description
[Sleep Mode Setting]
Change the time period from when an operation has been completed on the
machine until when it automatically enters Sleep mode.
Sleep mode provides a greater power saving effect than Low Power mode.
However, the time required to return to Normal mode is longer than the time
required to recover from Low Power mode.
The default value depends on the region the machine is used in.
[Power Save Key]
Select whether to use the Power key on the Control Panel as a sub power
OFF key or as a power save key.
• [Power Save]: Press the Power key briefly to shift to Power Save mode
(Low Power or Sleep mode). Hold down the Power key to turn the sub power off.
• [Sub Power OFF]: Press the Power key briefly to turn the sub power off. If
the Power key is held down, Power Save mode shifts to ErP Auto Power
Off mode (near the status when the main power is turned off), which offers
a greater power saving effect than that in Sub Power Off mode.
The default value depends on the region the machine is used in.
[Enter Power Save
Mode]
When this machine receives a print job from a fax machine or computer in
Power Save mode, select the timing to switch to Power Save mode after the
print job has completed.
• [Normal]: Switches to Power Save mode based on the time specified in
[Low Power Mode Setting] or [Sleep Mode Setting].
• [Immediately]: Switches to Power Save mode immediately after a print job
has ended.
[Immediately] is specified by default.
[Power Consumption in
Sleep Mode]
Select whether or not to reduce the power consumption in Sleep mode.
• [Enabled]: Further reduces the power consumption in Sleep mode. Select
[Enabled] in normal conditions.
• [Disabled]: Select this option when a smooth network communication is not
established while [Enabled] is enabled.
[Enabled] is specified by default.
[Low Power Mode Setting]
Change the time period from when an operation has been completed on the
machine until when it automatically enters Low Power mode.
In Low Power mode, the display of the Touch Panel is turned off to reduce
power consumption.
The default value depends on the region the machine is used in.
[Power Save Settings]
Select the type of power saving mode when pressing the Power key on the
Control Panel.
• [Low Power]: Switches to Low Power mode. Turns off the Touch Panel
display to reduce power consumption.
• [Sleep]: Switches to Sleep mode. Sleep mode provides a greater power
saving effect than Low Power mode. However, the time required to return
to Normal mode is longer than the time required to recover from Low Power
mode.
[Low Power] is specified by default.
d-Color MF 3300/3800
5-3
5
[System Settings]
5.1
[Date & Time Settings]
To display: [Utility] - [Administrator Settings] - [System Settings] - [Date & Time Settings]
Specify the machine's current date and time and time zone.
Settings
Description
[Date Setting]
Enter the current date.
[Time Setting]
Enter the current time.
[Time Zone]
To automatically adjust the time of this machine using an NTP server, set the
time difference between UTC and your local area in multiples of 30 minutes.
[00:00] is specified by default.
[Daylight Saving Time]
To display: [Utility] - [Administrator Settings] - [System Settings] - [Daylight Saving Time]
Select whether or not to apply daylight saving time settings.
To apply daylight saving time, enter the number of hours to move the clock forward to reflect daylight saving
time. The current time is set forward to reflect daylight saving time.
[OFF] is specified by default.
[Weekly Timer Settings]
To display: [Utility] - [Administrator Settings] - [System Settings] - [Weekly Timer Settings]
Select whether or not to automatically switch between power save and Normal mode using the weekly timer.
To use the weekly timer, specify the schedule for switching between Power Save and Normal modes.
5-4
Settings
Description
[Enable Settings]
Specify whether or not to use the weekly timer.
For Europe and North America: [ON] is specified by default.
For Other area: [OFF] is specified by default.
[Time Settings]
Specify the time for switching to the power saving mode ([OFF Time]) and the
time for returning to Normal mode ([ON Time]) for each day of the week.
• If you tap [Set All] in the setting window of each day of the week, [OFF Time]
and [ON Time] of the selected day of the week are applied to all days of the
week.
• Tapping [Check Settings] allows you to check the setting status of each
day of the week.
6:00 is specified for [ON Time] and 20:00 is specified for [OFF Time] by default
for all days of a week.
[Password for NonBusiness Hours]
When the machine is set in Power Save mode specified by weekly timer, specify whether or not to restrict use of this machine by requesting a password.
To request a password in order to restrict operation, enter the password for a
user to enter (using up to eight characters).
[OFF] is specified by default.
[Power Save Mode Setting]
Select a power saving mode to which the machine enters based on the weekly
timer.
• [Sleep]: This mode has a lower power saving effect than [ErP Auto Power
OFF] mode; however, it allows you to receive print jobs from a fax machine
or computer. The received jobs are printed when the machine returns to
Normal mode.
• [ErP Auto Power OFF]: A mode that provides a higher more effective power
saving effect. In this mode, you cannot receive all jobs.
For Europe and North America: [ErP Auto Power OFF] is specified by default.
For Other area: [Sleep] is specified by default.
If an optional FAX Kit is installed, the setting value is fixed to [Sleep].
d-Color MF 3300/3800
5.1
5
[System Settings]
[Restrict User Access]
To display: [Utility] - [Administrator Settings] - [System Settings] - [Restrict User Access]
Configure a setting to restrict user's change or deletion operations.
Settings
Description
[Restrict Access to Job
Settings]
Specify items that cannot be changed by the user.
[Delete Other User
Jobs]
Select whether or not to allow the user to delete other user jobs if user authentication is used on this machine.
If [Allow] is selected, you can delete other user jobs on the [Job List] screen.
[Restrict] is specified by default.
[Registering and
Changing Addr.]
Select whether or not to allow the user to register or change destinations.
[Allow] is specified by default.
[Restrict Operation]
[Restrict Broadcasting]
d-Color MF 3300/3800
Specify items for which access is restricted.
Select whether or not to prohibit the user from sending faxes to multiple destinations. To prohibit broadcast, select [Yes].
[OFF] is specified by default.
5-5
5
[System Settings]
5.1
[Expert Adjustment]
To display: [Utility] - [Administrator Settings] - [System Settings] - [Expert Adjustment]
Correct a defective print image.
5-6
Settings
Description
[Printer Adjustment]
Adjust the print start position and defective print images.
[Leading Edge Adjustment]
Select the type of paper (plain paper, plain paper (Glossy Mode), thick paper,
envelope) for adjusting the print position. Adjust the print start position at the
leading edge of the paper relative to the paper discharge direction for each paper type.
[0.0 mm] is specified by default.
[Centering]
Select the paper tray for adjusting the print position. Adjust the print start position at the left-hand edge of the paper relative to the paper discharge direction for each paper tray.
[0.0 mm] is specified by default.
[Leading Edge Adjustment (Duplex
Side 2)]
Select the type of paper (plain paper, plain paper (Glossy Mode), thick paper,
envelope) for adjusting the print position. Adjust the print start position at the
leading edge of the back side of the paper relative to the paper discharge direction for printing the back side during 2-sided printing, for each paper type.
[0.0 mm] is specified by default.
[Centering (Duplex
Side 2)]
Select the paper tray for adjusting the print position. Adjust the print start position at the left-hand edge of the paper relative to the paper discharge direction for printing the back side during 2-sided printing, for each paper tray.
[0.0 mm] is specified by default.
[Media Adjustment]
Adjust print defects (voids, white spots, roughness) that are caused by paper
properties for each paper type.
• [First Side]: Select this option if defective images are found on the front side
of 1-sided or 2-sided printing. Select the paper type to adjust a defective
image.
• [Second Side]: Select this option if defective images are found on the back
side of 2-sided printing. Select the paper type to adjust a defective image.
Copy or print after configuration, then repeat adjustments, if necessary.
[Calibration Setting]
Change the timing for executing image stabilization as well as the type of image stabilization, if necessary. Make selection according to the printing frequency and the color/black use ratio.
• [Priority Color]: Select this option when both the printing frequency and the
color printing ratio are high. Color image stabilization is performed if a
change in absolute humidity is detected during warm-up.
• [Priority Monochrome]: Select this option when both the printing frequency
and the color printing ratio are low. Monochrome image stabilization is performed if a change in absolute humidity is detected during warm-up. Color
image stabilization is to be performed before printing color documents.
• [Standard]: Select this option when the printing frequency is low and the
color printing ratio is high. Normal image stabilization is performed if a
change in the absolute humidity is detected during warm-up.
[Standard] is specified by default.
[Image ADJ Param]
Change parameters to adjust an image, if necessary.
[0] is specified by default.
[Density Adjustment]
Adjust the image density for each printing color when printing on thick paper,
in glossy mode, or at 1200 dpi.
The larger the number, the darker the background.
[0] is specified by default.
[Monochrome Density
Adj.]
Adjust the density of an image to be printed in black and white.
The larger the number, the darker the background.
[0] is specified by default.
d-Color MF 3300/3800
5.1
5
[System Settings]
Settings
Description
[Paper Separation Adjustment]
Adjust the paper separation position on each side of paper for 2-sided printing.
• [Front]: Adjust the balance of the paper separation or image transfer performance when a paper jam or image failure occurs on the front side for 1sided or 2-sided printing due to high ambient temperature and humidity.
• [Back]: Adjust the balance of the paper separation or image transfer performance when a paper jam or image failure occurs on the back side for 2sided printing due to high ambient temperature and humidity.
Increase the value if paper jams are occurring, and decrease it if the image is
transferred unevenly.
[0.0 mm] is specified by default.
[Main Scan Direction
Zoom Adjustment]
Adjust the zoom ratio in the main scanning direction for each color.
[0] is specified by default.
[Main Scan Direction
Zoom Adjustment
Proof Print]
Print a test pattern to adjust the zoom ratio in the main scanning direction.
[List Output]
Print error log information or halftone patterns.
[Event Log]
Print event logs such as error logs or consumable replacement histories.
[Halftone 64]
Print a halftone pattern of density 25% for each color.
[Halftone 128]
Print a halftone pattern of density 50% for each color.
[Halftone 256]
Print a halftone pattern of density 100% for each color.
[Gradation]
Print a gradation pattern.
[Life]
[New Release]
Configure a setting to replace consumables.
Reset the counter value after replacing the fusing unit, transfer belt unit, transfer roller unit, and toner filter.
[List/Counter]
To display: [Utility] - [Administrator Settings] - [System Settings] - [List/Counter]
Prints the job setting list of this machine and configure the paper count.
Settings
Description
[Management List]
Prints a list of settings for [User Settings] and [Administrator Settings] among
others.
[Activity Report]
Print a report that contains sending and receiving records.
[User Account Counter
List Page]
Print a report that contains counter information.
[Scan TX Report]
Prints a report that contains scan sending records.
[Priority Tray]
To display: [Utility] - [Administrator Settings] - [System Settings] - [Priority Tray]
Select a tray to be used with top priority.
If paper of the same size is loaded in multiple trays, paper is fed from the tray with top priority.
[Tray 1] is specified by default.
d-Color MF 3300/3800
5-7
5
[System Settings]
5.1
[Reset Settings]
To display: [Utility] - [Administrator Settings] - [System Settings] - [Reset Settings]
Select whether or not to reset the functions and settings that are currently displayed when this machine has
not been operated for a certain period of time.
Settings
Description
[System auto reset]
Select whether or not to reset all settings (except registered settings) when this
machine has not been operated for a certain period of time.
[Priority Mode]
Select a function that is to be displayed in preference after the settings have
been reset.
[Home] is specified by default.
[System Auto Reset
Time]
Enter the amount of time that elapses until the selected function is reset.
[1 min.] is specified by default.
[Auto Reset]
Select whether or not to reset all settings (except registered settings) for each
of Copy, Fax, and Scan functions when this machine has not been operated
for a certain period of time.
To reset them, set the amount of time that elapses before the settings are reset.
[1 min.] is specified by default.
[Folder Settings]
To display: [Utility] - [Administrator Settings] - [System Settings] - [Folder Settings]
Specify the time to automatically delete files saved on the HDD or configure a setting related to the use of
USB memory.
Settings
Description
[Document Delete Time
Setting]
Specify the time to automatically delete files from the date and time when files
were saved on the HDD.
• To specify the time with the number of days, select the desired one from [1
day], [2 days], [3 days], [7 days], and [30 days] in [Time Settings].
• To specify the time in hours, select [Custom] in [Time Settings], then enter
the value (in minutes) between 5 and 720 minutes in [Custom Setting].
• To keep files, select [Save] in [Time Settings].
[1 day] is specified by default.
[Document Hold Setting]
Select whether or not to hold a printed file on the HDD.
[ON] is specified by default.
[Scanned Documents
Delete Frequency Setting]
Specify the time to automatically delete files on the HDD.
• Select from [12 Hours], [1 day], [2 days], [3 days], [7 days], and [30 days].
• To keep files, select [Save].
[Save] is specified by default.
[External Memory
Function Settings]
Specify whether or not to allow users to print or save files from or on USB
memory.
[Restrict Scan to
USB]
Select whether or not to prohibit saving on USB memory.
[OFF] is specified by default.
[Print Document]
Select whether or not to enable to print files from USB memory.
[ON] is specified by default.
[Registered Key Settings]
To display: [Utility] - [Administrator Settings] - [System Settings] - [Registered Key Settings]
Change the functions to be assigned to 1 to 10Key pad on the Control Panel using [Basic Functions].
You cannot select a function assigned to other Register key.
The default value depends on the region the machine is used in.
5-8
d-Color MF 3300/3800
5.1
[System Settings]
5
[PDF/A default Setting]
To display: [Utility] - [Administrator Settings] - [System Settings] - [PDF/A default Setting]
Change the default when creating a PDF/A-based PDF file.
[OFF] is specified by default.
d-Color MF 3300/3800
5-9
5
5.2
[Administrator/Machine Settings]
5.2
[Administrator/Machine Settings]
[Administrator Registration]
To display: [Utility] - [Administrator Settings] - [Administrator/Machine Settings] - [Administrator Registration]
Register the name, E-mail address and extension number of the machine administrator.
Settings
Description
[Name]
Enter this machine's e administrator name (using up to 20 characters).
[E-mail Address]
Enter the E-mail address of this machine's administrator (using up to 320 characters).
[Extension No.]
Enter the extension number of the machine administrator (using up to eight
digits).
[Input Machine Address]
To display: [Utility] - [Administrator Settings] - [Administrator/Machine Settings] - [Input Machine Address]
Register the machine's device name and E-mail address.
5-10
Settings
Description
[Device Name]
Enter the name of this machine (using up to 10 characters).
The file name automatically assigned in scanning and sending incorporates the
name specified for [Device Name].
[E-mail Address]
Enter this machine's E-mail address (using up to 320 characters).
This E-mail address is used as the E-mail or Internet fax sender's E-mail address. To use the E-mail or Internet fax transmission function, you need to configure settings.
d-Color MF 3300/3800
5.3
5.3
5
[Address Registration List]
[Address Registration List]
[Speed Address List]
To display: [Utility] - [Administrator Settings] - [Address Registration List] - [Speed Address List]
Print the list of one-touch destinations registered on this machine. After selecting the type of the one-touch
destination (E-mail, fax, SMB, FTP, WebDAV, and Internet fax) to be printed, specify printing conditions, then
start printing.
Settings
Description
[Starting Destination
No.]
Specify the registration number of the destination to start printing from.
[Number of Destinations]
Specify the number of destinations you want to print.
[Print]
Prints the list based on the conditions specified in [Starting Destination No.]
and [Number of Destinations].
[Group Address List]
To display: [Utility] - [Administrator Settings] - [Address Registration List] - [Group Address List]
Print the list of groups registered on this machine. Specify printing conditions, then start printing.
Settings
Description
[Starting Destination
No.]
Specify the registration number of the destination to start printing from.
[Number of Destinations]
Specify the number of destinations you want to print.
[Print]
Prints the list based on the conditions specified in [Starting Destination No.]
and [Number of Destinations].
[Program List]
To display: [Utility] - [Administrator Settings] - [Address Registration List] - [Program List]
Print the list of program destinations registered on this machine. After selecting the type of the program destination (E-mail, fax, SMB, FTP, WebDAV, Internet fax, address book, and group) to be printed, specify printing conditions, then start printing.
Settings
Description
[Starting Destination
No.]
Specify the registration number of the program to start printing from.
[Number of Destinations]
Specify the number of programs you want to print.
[Print]
Prints the list based on the conditions specified in [Starting Destination No.]
and [Number of Destinations].
[E-Mail Subject/Text List]
To display: [Utility] - [Administrator Settings] - [Address Registration List] - [E-Mail Subject/Text List]
Print the list of E-mail subjects and message texts registered on this machine.
d-Color MF 3300/3800
5-11
5
5.4
[User Authentication/Account Track]
5.4
[User Authentication/Account Track]
[User Name List]
To display: [Utility] - [Administrator Settings] - [User Authentication/Account Track] - [User Name List]
Select whether or not to recall the list of user names registered on this machine from the login screen when
user authentication is enabled.
Selecting [ON] enables you to select the login user from the list of user names registered on this machine.
[OFF] is specified by default.
[Logout Confirmation Screen Display Setting]
To display: [Utility] - [Administrator Settings] - [User Authentication/Account Track] - [Logout Confirmation
Screen Display Setting]
Specify whether or not to display the logout confirmation screen on the Touch Panel when you tap [Access]
to log out from the login mode (registered user or public user).
[ON] is specified by default.
Tips
This setting is displayed when User Authentication/Account Track is enabled. User Authentication / Account
Track can only be configured using Web Connection. For details, refer to Chapter 1 in [User's Guide Applied
Functions].
[User Account Counter]
To display: [Utility] - [Administrator Settings] - [User Authentication/Account Track] - [User Account Counter]
Use this option to check the number of pages for each user and to reset the counter.
To reset the counter, select the user to clear the counter for, then tap [Counter Clear]. Tapping [Counter All
Clear] to clear all users' counters.
Tips
This setting is displayed when User Authentication/Account Track is enabled. User Authentication / Account
Track can only be configured using Web Connection. For details, refer to Chapter 1 in [User's Guide Applied
Functions].
[Track Account Counter]
To display: [Utility] - [Administrator Settings] - [User Authentication/Account Track] - [Track Account Counter]
Use this option to check the number of pages used for each account and to reset the counter.
To reset the counter, select the account track to clear the counter for, then tap [Counter Clear]. Tapping
[Counter All Clear] to clear all account tracks' counters.
Tips
This setting is displayed when User Authentication/Account Track is enabled. User Authentication / Account
Track can only be configured using Web Connection. For details, refer to Chapter 1 in [User's Guide Applied
Functions].
5-12
d-Color MF 3300/3800
5.4
[User Authentication/Account Track]
5
[Card Authentication]
To display: [Utility] - [Administrator Settings] - [User Authentication/Account Track] - [Card Authentication]
Associate user information with card ID. For details, refer to Chapter 6 in [User's Guide Applied Functions].
Tips
This setting is displayed when IC card authentication is enabled.
[Scan to Home Settings]
To display: [Utility] - [Administrator Settings] - [User Authentication/Account Track] - [Scan to Home Settings]
Select whether to enable the Scan to Home function.
This item can be configured when Active Directory is used as an authentication server.
[OFF] is specified by default.
d-Color MF 3300/3800
5-13
5
5.5
[Network Settings]
5.5
[Network Settings]
[TCP/IP Setting]
To display: [Utility] - [Administrator Settings] - [Network Settings] - [TCP/IP Setting]
Configure the settings to use this machine in a TCP/IP environment.
Settings
Description
[Enable]
Select whether or not to use TCP/IP.
[ON] is specified by default.
[IPv4 Settings]
Assign an IP address (IPv4) to this machine.
[IP Address]
When manually specifying the IP address, enter the fixed IP address.
[Subnet Mask]
When manually specifying the IP address, enter the subnet mask.
[Default Gateway]
When manually specifying the IP address, enter the default gateway.
[IP Application
Method Auto Setting]
When automatically specifying the IP address, select the method for automatic
retrieval.
• [DHCP Settings]: [ON] is specified by default.
• [BOOTP Settings]: [OFF] is specified by default.
• [ARP/PING Settings]: [OFF] is specified by default.
• [AUTO IP Settings]: Fixed to [Enable].
[IPv6 Setting]
[Enable]
Select whether or not to use IPv6.
[ON] is specified by default.
[Auto IPv6 Settings]
Select whether or not to automatically assign the IPv6 global address of this
machine.
Selecting [Enable] automatically assigns the IPv6 global address based on the
prefix length notified from the router and this machine's MAC address.
[Enable] is specified by default.
[Global Address]
When manually specifying the IPv6 address, enter the IPv6 global address.
[Gateway Address]
When manually specifying the IPv6 address, enter the gateway address.
[Link-Local Address]
Displays the link-local address that is automatically specified from the MAC
address of this machine.
[DNS Host]
[Dynamic DNS Settings]
5-14
Assign an IP address (IPv6) to this machine.
Configure the DNS settings when a DNS server is used.
Select whether or not to enable the Dynamic DNS function.
When your DNS server supports the Dynamic DNS function, the specified host
name can be automatically registered on the DNS server or changes can be
automatically updated as long as [Enable] is selected.
[Disable] is specified by default.
[IPsec Setting ]
Specify whether or not to use IPsec.
To configure the IPsec detailed setting, use Web Connection. For details, refer to Chapter 1 in [User's Guide Applied Functions].
[Disable] is specified by default.
[IP Filtering (Permit Access)]
Select whether or not to specify an IP address that allows an access to this
machine in order to perform an access restriction.
To specify the IP address, use Web Connection. For details, refer to Chapter
1 in [User's Guide Applied Functions].
[Disable] is specified by default.
[IP Filtering (Deny Access)]
Select whether or not to specify an IP address that rejects an access to this
machine in order to perform an access restriction.
To specify the IP address, use Web Connection. For details, refer to Chapter
1 in [User's Guide Applied Functions].
[Disable] is specified by default.
[Raw Port Setting]
Specify a RAW port required for Port9100 printing.
[Enable]
Select whether or not to use the RAW port.
[Yes] is specified by default.
[Bidirectional]
Select whether or not to enable bidirectional communication of the RAW port.
[OFF] is specified by default.
d-Color MF 3300/3800
5.5
5
[Network Settings]
[HTTP Server Settings]
To display: [Utility] - [Administrator Settings] - [Network Settings] - [HTTP Server Settings]
Configure the settings on the HTTP server function of this machine.
Settings
Description
[HTTP Server Settings]
Select whether or not to use this machine as the HTTP server.
If you select [Disable], you cannot use Web Connection.
[Enable] is specified by default.
[IPP Settings]
Select whether or not to use IPP.
[Enable] is specified by default.
[FTP Settings]
To display: [Utility] - [Administrator Settings] - [Network Settings] - [FTP Settings]
Select whether or not to use this machine as the FTP server.
[Enable] is specified by default.
[E-mail Settings]
To display: [Utility] - [Administrator Settings] - [Network Settings] - [E-mail Settings]
Configure the settings on the E-mail transmission function of this machine.
Settings
Description
[E-Mail TX (SMTP)]
Select whether or not to send an E-mail from this machine.
[Enable] is specified by default.
[SNMP Setting]
To display: [Utility] - [Administrator Settings] - [Network Settings] - [SNMP Setting]
Specify whether or not to use SNMP (Simple Network Management Protocol).
[Enable] is specified by default.
[Bonjour Setting]
To display: [Utility] - [Administrator Settings] - [Network Settings] - [Bonjour Setting]
Specify whether or not to enable Bonjour when using this machine in the Mac OS environment.
Enabling the Bonjour function on this machine enables the computer to automatically detect this networked
machine and display it as an addable printer in the list.
[Enable] is specified by default.
[DPWS Settings]
To display: [Utility] - [Administrator Settings] - [Network Settings] - [DPWS Settings]
Specify whether or not to use Web Service (DPWS: Devices Profile for Web Services).
Settings
Description
[DPWS Settings]
Select whether or not to use the WS print function.
[Enable] is specified by default.
d-Color MF 3300/3800
5-15
5
[Network Settings]
5.5
[Detail Settings]
To display: [Utility] - [Administrator Settings] - [Network Settings] - [Detail Settings]
Configure the detailed network settings.
Settings
Description
[Device Setting]
Specify the network speed.
[Network Speed]
[SLP Setting]
Select the network speed according to your environment.
[Auto] is specified by default.
Select whether or not to enable SLP (Service Location Protocol).
[Enable] is specified by default.
[IEEE802.1x Authentication Settings]
To display: [Utility] - [Administrator Settings] - [Network Settings] - [IEEE802.1x Authentication Settings]
Select whether or not to use IEEE802.1X authentication.
To configure the IEEE802.1X detailed setting, use Web Connection. For details, refer to Chapter 1 in [User's
Guide Applied Functions].
[Disable] is specified by default.
5-16
d-Color MF 3300/3800
5.6
5.6
5
[Copier Settings]
[Copier Settings]
[Specify Tray When APS OFF]
To display: [Utility] - [Administrator Settings] - [Copier Settings] - [Specify Tray When APS OFF]
Select a paper tray to switch to after releasing the selection of [Auto] for [Paper].
-
[Tray Before APS ON]: Switches to the paper tray specified before releasing the selection of [Auto].
-
[Default Tray]: Switches to Tray 1.
[Tray Before APS ON] is specified by default.
[Default Paper Type settings for Manual Tray]
To display: [Utility] - [Administrator Settings] - [Copier Settings] - [Default Paper Type settings for Manual
Tray]
Specify the default paper type used in the Manual Feed Tray. If paper is loaded into the Manual Feed Tray,
the default paper type is automatically set.
[Plain Paper] is specified by default.
d-Color MF 3300/3800
5-17
5
5.7
[Printer Settings]
5.7
[Printer Settings]
[Startup Page Setting]
To display: [Utility] - [Administrator Settings] - [Printer Settings] - [Startup Page Setting]
Select whether or not to print the start page when turning this machine on.
[OFF] is specified by default.
[Auto Continue]
To display: [Utility] - [Administrator Settings] - [Printer Settings] - [Auto Continue]
Select whether or not to continue printing when the paper size and type of print job are different from that of
the paper loaded in the paper tray.
[OFF] is specified by default.
[Paper Settings]
To display: [Utility] - [Administrator Settings] - [Printer Settings] - [Paper Settings]
Specify the paper to be used ordinarily.
Settings
Description
[Paper]
Specify the size and type of the paper to be printed ordinarily.
• [Paper Size]: Select the paper size when using standard-size paper. The
default value depends on the region the machine is used in.
• [Custom Size]: Enter the width and length of paper when using custom-size
paper.
• [Paper Type]: Select the type of the paper to be used. [Plain Paper] is specified by default.
[Measurement Unit Setting]
Select a system of units for the paper to be used ordinarily from [mm] or [Inch].
The default value depends on the region the machine is used in.
[Hold Job Timeout]
To display: [Utility] - [Administrator Settings] - [Printer Settings] - [Hold Job Timeout]
Specify the time period during which a print job is stored on the HDD.
-
Select from [1 Hour], [4 Hours], [1 Day], or [1 Week].
-
When not holding a print job, select [Disable].
[Disable] is specified by default.
5-18
d-Color MF 3300/3800
5.7
5
[Printer Settings]
[Quality Settings]
To display: [Utility] - [Administrator Settings] - [Printer Settings] - [Quality Settings]
Adjust the image quality of the printed image.
Settings
Description
[Color Mode]
Select whether to print an image in color or gray scale.
[Color Mode] is specified by default.
[Brightness]
Adjust the brightness of the printed image.
[0] is specified by default.
[Halftone]
Select the halftone processing method for each of the [Image Printing], [Text
Printing], and [Graphics Printing] categories.
• [Line Art]: Intermediate colors are reproduced with high precision.
• [Details]: Intermediate colors are reproduced in detail.
• [Smooth]: Intermediate colors are reproduced smoothly.
The following shows the default settings.
• [Image Printing]: [Details]
• [Text Printing]: [Line Art]
• [Graphics Printing]: [Details]
[Edge Enhancement]
Select whether or not to sharpen edges for each of the [Image Printing], [Text
Printing], and [Graphics Printing] categories.
The following shows the default settings.
• [Image Printing]: [OFF]
• [Text Printing]: [ON]
• [Graphics Printing]: [ON]
[Edge Strength]
Select the degree of edge enhancement when sharpening the edges.
[Medium] is specified by default.
[Economy Print]
Select whether or not to adjust the printing density in order to save the amount
of toner consumed.
[OFF] is specified by default.
[PCL Settings]
Adjust the image quality for PCL printing.
[Contrast]
Adjust the contrast of the printed image.
[0] is specified by default.
[Image Printing]
Select the RGB image data processing method.
• [RGB SOURCE]: Specify the color space of the input RGB. [sRGB] is specified by default.
• [RGB Intent]: Specify the color conversion property that is changed from input RGB to device CMYK. [Photographic] is specified by default.
• [RGB Gray]: Specify the printing method of black and gray colors.
[Bk=CMYK Gray=CMYK] is specified by default.
[Text Printing]
Select the RGB text data processing method.
• [RGB SOURCE]: Specify the color space of the input RGB. [sRGB] is specified by default.
• [RGB Intent]: Specify the color conversion property that is changed from input RGB to device CMYK. [Vivid] is specified by default.
• [RGB Gray]: Specify the printing method of black and gray colors. [Bk=K
Gray=K] is specified by default.
[Graphics Printing]
Select the RGB graphic data processing method.
• [RGB SOURCE]: Specify the color space of the input RGB. [sRGB] is specified by default.
• [RGB Intent]: Specify the color conversion property that is changed from input RGB to device CMYK. [Vivid] is specified by default.
• [RGB Gray]: Specify the printing method of black and gray colors. [Bk=K
Gray=K] is specified by default.
[PS Settings]
d-Color MF 3300/3800
Adjust the image quality for PostScript printing.
5-19
5
[Printer Settings]
Settings
Description
[Image Printing]
Select the RGB image data processing method.
• [RGB SOURCE]: Specify the color space of the input RGB. [sRGB] is specified by default.
• [RGB Intent]: Specify the color conversion property that is changed from input RGB to device CMYK. [Photographic] is specified by default.
• [RGB Gray]: Specify the printing method of black and gray colors.
[Bk=CMYK Gray=CMYK] is specified by default.
• [Destination Profile]: Specify the output profile. To register a profile in this
machine, use Web Connection. For details, refer to Chapter 1 in [User's
Guide Applied Functions]. [Auto] is specified by default.
[Text Printing]
Select the RGB text data processing method.
• [RGB SOURCE]: Specify the color space of the input RGB. [sRGB] is specified by default.
• [RGB Intent]: Specify the color conversion property that is changed from input RGB to device CMYK. [Vivid] is specified by default.
• [RGB Gray]: Specify the printing method of black and gray colors. [Bk=K
Gray=K] is specified by default.
• [Destination Profile]: Specify the output profile. To register a profile in this
machine, use Web Connection. For details, refer to Chapter 1 in [User's
Guide Applied Functions]. [Auto] is specified by default.
[Graphics Printing]
Select the RGB graphic data processing method.
• [RGB SOURCE]: Specify the color space of the input RGB. [sRGB] is specified by default.
• [RGB Intent]: Specify the color conversion property that is changed from input RGB to device CMYK. [Vivid] is specified by default.
• [RGB Gray]: Specify the printing method of black and gray colors. [Bk=K
Gray=K] is specified by default.
• [Destination Profile]: Specify the output profile. To register a profile in this
machine, use Web Connection. For details, refer to Chapter 1 in [User's
Guide Applied Functions]. [Auto] is specified by default.
[Simulation]
Configure the simulation settings.
• [Simulation Profile]: Select the simulation profile for input CMYK. [NONE] is
specified by default.
• [Sim. Intent]: Specify color conversion properties to carry out a simulation.
[Relative Color] is specified by default.
• [CMYK Gray]: Specify the printing method of plate K in the CMYK input
data for simulation. [Bk=CMYK Gray=CMYK] is specified by default.
[Gradation Adjustment]
Adjust gradation when reproduction quality of the printed image is degraded.
[Tone Calibration]
Select whether or not to enable the density adjustment.
[ON] is specified by default.
[CMYK Density]
Adjusts the density of highlight, intermediate, and shadow parts for each color.
[0] is specified by default in every case.
[Image Stabilization]
Adjusts the displacement or inclination of the scanning section.
• [Initialize + Image Stabilization]: Initializes the log information on image stabilization control and executes image stabilization.
• [Image Stabilization Only]: Executes the standard image stabilization process.
[Image Stabilization Only] is specified by default.
[Color Separation]
5-20
5.7
Select whether or not to enable the color separation. If the color separation is
enabled, one page is divided into each color element of CMYK, and the divided
images are printed in 4 pages in black.
[OFF] is specified by default.
d-Color MF 3300/3800
5.7
5
[Printer Settings]
[Emulation]
To display: [Utility] - [Administrator Settings] - [Printer Settings] - [Emulation]
Specify the default printer language or font.
Settings
Description
[Default Emulation]
Select the Page Description Language. When you select [Auto], this machine
automatically switches between PCL and PS.
[Auto] is specified by default.
[PS Setting]
Configure the PS print settings.
[Wait Timeout]
Specify the time-out period after it is judged as a PS error.
If you select [0], time-out will not work.
[0] is specified by default.
[Print PS Errors]
Specify whether or not to print error information when an error occurs during
PS rasterization.
[OFF] is specified by default.
[PS Protocol]
Select the protocol that is used for PS data communication.
If you select [Auto], an appropriate protocol is automatically determined from
the PS print jobs.
[Auto] is specified by default.
[Auto Trapping]
Select whether or not to enable the auto trapping.
If you enable the auto trapping, printing is carried out by superimposing neighboring colors so as to prevent white space being generated around a picture.
[OFF] is specified by default.
[Black Overprint]
Select whether or not to enable the black overprint.
Enable the black overprint to superimpose black color on a neighboring color
to print so as to prevent white space being generated around black characters
or figures.
• [Text/Graphic]: Adjacent portion between a text and figure is overprinted
with black.
• [Text]: Black is overprinted on the adjacent colors in the text portion.
[OFF] is specified by default.
[PCL Settings]
Configure the PCL settings.
[CR/LF Mapping]
Select whether or not to replace the line feed codes when printing text data.
When you want to replace the line feed codes, select the replacement method.
[OFF] is specified by default.
[Line/Page]
Enter the number of lines of text data to be printed on one page.
The default value depends on the region the machine is used in.
[Font Setting]
Configure font settings for PCL.
• [Font Number]: Specify the default font. The displayed font number corresponds to the PCL font list. [0] is specified by default.
• [Pitch Size]: Specify the font pitch size. This option is available when [Font
Number] is set to 0 to 5. [10.00 pitch] is specified by default.
• [Point Size]: Specify the font pitch size. This option is available when [Font
Number] is set to 6 to 102. [12.00 points] is specified by default.
• [Symbol Set]: Select the font symbol set to be used. [PC8] is specified by
default.
[Barcode Font Settings]
Configure the bar code font settings.
• [Line Width]: Specify the line width for bar code font. [0] is specified by default.
• [Space Width]: Specify the space width for bar code font. [0] is specified by
default.
[XPS/OOXML Setting]
Specify whether or not to perform the verification of a digital signature or printing of error information when directly printing an XPS or OOXML (docx, xlsx,
or pptx) file.
[Verify XPS/OOXML
Digital Signature]
Select whether or not to verify a digital signature when printing an XPS or
OOXML (docx, xlsx, or pptx) file with a digital signature added.
When [ON] is selected, the data is not printed if the signature is invalid.
[OFF] is specified by default.
[Print XPS/OOXML
Errors]
Select whether or not to print error information when an error occurs while
printing an XPS or OOXML (docx, xlsx, or pptx) file.
[Print] is specified by default.
d-Color MF 3300/3800
5-21
5
5.8
[Fax Settings]
5.8
[Fax Settings]
[Header Information]
To display: [Utility] - [Administrator Settings] - [Fax Settings] - [Header Information]
Register this machine name, your company name (sender name), and the fax number that are to be printed
as sender information when faxes are transmitted.
Settings
Description
[Sender]
Enter this machine name or company name (sender name) that is to be printed
as sender information (using up to 30 bytes).
[Sender Fax No.]
Enter the fax number of this machine (using up to 20 digits, including + and
spaces).
The fax number you entered is printed as sender information.
[Header/Footer Position]
To display: [Utility] - [Administrator Settings] - [Fax Settings] - [Header/Footer Position]
Specify the format of sender information to be printed on a fax. Select whether or not to print reception information (date, time, and reception number) on faxes received by this machine.
5-22
Settings
Description
[Header Position]
Specify the position at which sender information is printed on a fax.
• [Inside Body Text]: Print sender information inside the original image. Part
of the original image may be cut off.
• [Outside Body Text]: Print sender information outside the original image.
• [OFF]: Prints nothing for sender information. [OFF] is not available depending on the region the machine is used in.
[Outside Body Text] is specified by default.
[TTI Print Position and
Character Size]
Select the size of characters to print a sender information.
• [Normal]: Print sender information in the normal text size.
• [Minimal]: Reduce the text height by half of the size set with [Normal]. It is
recommended that you select [Minimal] to prevent a fax image from being
cut off or to prevent a page from being divided when pages are printed at
a receiving machine.
[Normal] is specified by default.
[Print Receiver's Name]
Select whether or not to print a destination fax number as sender information.
If [OFF] is selected, the machine's fax number is printed instead of the destination fax number.
[ON] is specified by default.
[Footer Position]
Select whether or not to print reception information (date, time, and reception
number) on faxes received on this machine. To print them, select the position
to print the reception information.
• [Inside Body Text]: Print reception information inside the original image.
Part of the original image may be cut off.
• [Outside Body Text]: Print reception information outside the original image.
• [OFF]: Print nothing for reception information.
[OFF] is specified by default.
d-Color MF 3300/3800
5.8
5
[Fax Settings]
[Line Parameter Setting]
To display: [Utility] - [Administrator Settings] - [Fax Settings] - [Line Parameter Setting]
Configure the environment to use fax functions on this machine, such as the types of telephone lines (dialing
method) and fax receive mode.
Settings
Description
[Dialing Method]
Select the line type according to your environment.
The default value depends on the region the machine is used in.
[RX Mode ]
Select a receive mode.
• [Auto RX]: Automatically start receiving a fax if the call is a fax call.
• [Manual RX]: Manually request the reception of a fax. Select this option
when this machine is used with a telephone connected to it, which is frequently used, and if you always prefer to receive faxes manually.
[Auto RX] is specified by default.
[Ring Pattern]
Select a fax ring pattern when the DRPD (Distinctive Ring Pattern Detection)
service is used.
When this machine receives a call signal of the selected pattern, fax receiving
starts automatically.
[Normal Ring] is specified by default.
Note
In general use, set this to [Normal Ring]. If DRPD is set by mistake in a region
where DRPD cannot be used, it will result in a fax receiving failure.
[Number of RX Call
Rings]
If necessary, change the number of times the phone rings before automatically
receiving a fax.
The default value depends on the region the machine is used in.
[Number of Redials]
If the machine fails to send a fax successfully, it automatically redials the same
destination after a certain period of time has elapsed. If necessary, change the
number of redials.
The default value depends on the region the machine is used in.
[Redial Interval]
If necessary, change the redial intervals when you specified a value in [Number
of Redials].
[3 min.] is specified by default.
[Line Monitor]
Select whether or not to play sounds on the telephone line from speakers during fax communication.
[OFF] is specified by default.
[Line Monitor Sound
Volume (Send)]
Monitors sounds output from the machine. Specify the monitor sound volume
between 0 and 8.
This function is available only when [Line Monitor] is set to [ON].
[3] is specified by default.
Note
When communicating with fax, monitoring sound is generated even if send or
receive monitoring sound of this machine is set to [0] since the sound is generated both on this machine and on the destination side. For setting to mute,
set both [Line Monitor Sound Volume (Send)] and [Line Monitor Sound Volume
(Receive)] to [0], or set [Line Monitor] to [OFF].
[Line Monitor Sound
Volume (Receive)]
Monitors sounds output from the recipient, including switching equipment or
TA. Specify the monitor sound volume between 0 and 8.
This function is available only when [Line Monitor] is set to [ON].
[4] is specified by default.
Note
When communicating with fax, monitoring sound is generated even if send or
receive monitoring sound of this machine is set to [0] since the sound is generated both on this machine and on the destination side. For setting to mute,
set both [Line Monitor Sound Volume (Send)] and [Line Monitor Sound Volume
(Receive)] to [0], or set [Line Monitor] to [OFF].
[Manual RX V.34 OFF]
d-Color MF 3300/3800
Select whether or not to automatically release the V.34 mode when manually
receiving a fax (G3).
[Enable] is specified by default.
5-23
5
[Fax Settings]
5.8
[TX/RX Settings]
To display: [Utility] - [Administrator Settings] - [Fax Settings] - [TX/RX Settings]
Specify how to print faxes received and how to handle files in a polling transmission.
Settings
Description
[Duplex Print (RX)]
Select whether or not to print an original on both sides of paper when a multipage fax is received.
This option is not available if [Print Separate Fax Pages] is set to [ON].
[OFF] is specified by default.
[Inch Paper Priority
Over A4]
Select whether or not to preferentially print an original on inch-sized paper
when a fax is received.
The default value depends on the region the machine is used in.
[Print Paper Selection]
Select the criterion of selecting paper for printing a fax.
• [Auto Select]: Prints a fax on paper that is automatically selected to suit the
fax received.
• [Fixed Size]: Print a fax only on the paper specified in [Print Paper Size].
• [Priority Size]: Prints a fax on paper specified in [Print Paper Size]. If the machine runs out of specified paper, paper of the next closest size is used.
[Auto Select] is specified by default.
[Print Paper Size]
Select size of paper for printing received fax.
The initial value varies depending on the setting for [Inch Paper Priority Over
A4].
Note
To enable the setting for [Print Paper Size], set [Tray Selection for RX Print] to
[Auto].
[Tray Selection for RX
Print]
Specify a paper tray if you want to fix the paper tray used to print a fax.
[Auto] is specified by default.
[Reduction Ratio]
If necessary, change the reduction ratio that is used when printing a fax.
[96%] is specified by default.
Note
If [Reduction Ratio] is set to [100%], [Print Paper Selection] is set to [Auto Select], [Tray Selection for RX Print] to [Auto] and [Print Separate Fax Pages] to
[OFF].
5-24
[Print Separate Fax
Pages]
Select whether or not to print a fax longer than the standard size on separate
pages.
This option is not available if [Duplex Print (RX)] is set to [ON].
[OFF] is specified by default.
[File After Polling TX]
Select whether or not to delete a file after it is sent in response to a polling request if Polling TX is used to register files for polling.
[Delete] is specified by default.
d-Color MF 3300/3800
5.8
5
[Fax Settings]
[Function Settings]
To display: [Utility] - [Administrator Settings] - [Fax Settings] - [Function Settings]
Configure the settings for using various fax transmission and reception functions.
Settings
Description
[Function ON/OFF Setting]
Enable or disable fax transmission and reception functions, such as Confirm
Address that prevents wrong fax transmission, F-Code TX, and Relay RX.
[F-Code TX]
Select whether or not to use F-Code TX.
This option is available for confidential transmission or relay request.
[ON] is specified by default.
[Dest. Check Display Func.]
Select whether or not to show a list of specified destinations before sending a
fax.
[OFF] is specified by default.
[Confirm Addr (TX)]
Select whether or not to require the user to enter a fax number twice to send
a fax by directly entering the fax number.
This is convenient to prevent a fax from being sent to an incorrect destination.
[OFF] is specified by default.
[Confirm Addr (Register)]
Select whether or not to require the user enter a fax number twice to register
it when, for example, registering a destination or forwarding destination.
This is convenient to prevent the fax number from being incorrectly registered.
[ON] is specified by default.
[Restrict Fax TX]
Select whether or not to allow G3 fax transmission.
[Allow] is specified by default.
[Restrict Fax RX]
Select whether or not to allow G3 fax receiving.
[Allow] is specified by default.
[Restrict PC-Fax TX]
Select whether or not to allow PC-Fax TX using the fax driver.
[Allow] is specified by default.
[Restrict Internet
Fax TX]
Select whether or not to allow Internet fax transmission.
[Allow] is specified by default.
[Restrict Internet
Fax RX]
Select whether or not to allow Internet fax receiving.
[Allow] is specified by default.
[Memory RX Setting]
Select whether or not to use the Memory RX function.
When using the Memory RX function, enter the password to restrict accesses
to the Memory RX folder (using up to eight digits).
[OFF] is specified by default.
[Closed Network RX]
Select whether or not to use the Closed Network RX function.
When using the Closed Network RX function, enter the password to restrict
peers (using up to 4 digits). Inform the peer of the password you entered here.
[OFF] is specified by default.
[Forward TX Setting]
Configure the settings for using the Forward TX function.
[Enable Settings]
Select whether or not to use Forward TX.
[OFF] is specified by default.
[Forward Dest.]
Specify a destination where to forward a received fax.
Directly enter the fax number or display the address book, then select the desired one from the destinations (fax destinations, E-mail destinations, and Internet fax destinations) registered on this machine.
[Output Method]
Select whether or not to print a received fax on this machine when forwarding
it.
• [Forward & Print]: A received fax is forwarded and printed on this machine.
• [Forward & Print (If TX Fails)]: A received fax is forwarded and printed on
this machine.
[Forward & Print (If TX Fails)] is specified by default.
[PC-Fax RX Settings]
Configure the settings for using the PC-Fax RX function.
[Enable]
Select whether or not to use the PC-Fax RX function.
[Restrict] is specified by default.
[Print]
Select whether or not to print a received fax after it has been received.
[OFF] is specified by default.
[TSI User Box Setting]
d-Color MF 3300/3800
Configure the settings for using the TSI Routing function.
5-25
5
[Fax Settings]
Settings
5.8
Description
[Enable Settings]
Select whether or not to use the TSI Routing function.
[OFF] is specified by default.
[Print]
Select whether or not to print a received fax after it has been received.
[NO] is specified by default.
[TSI User Box Registration]
Register forwarding destinations for each sender's fax number (TSI). Select a
desired registration number, then tap [Edit].
• [Sender (TSI)]: Specify a sender's fax number.
• [Forwarding Destination]: Tap [Select From Address book], then select the
desired destination (SMB, FTP, or E-mail (Internet fax) destination).
[Nighttime RX Settings]
Configure the settings for using the Night RX function.
[Night Fax RX Print]
Select whether or not to use the Night RX function.
[OFF] is specified by default.
[Night RX Start
Time]
Enter the starting time of the nighttime zone.
[00:00] is specified by default.
[Night RX End Time]
Enter the ending time of the nighttime zone.
[00:00] is specified by default.
[PBX Connection Settings]
To display: [Utility] - [Administrator Settings] - [Fax Settings] - [PBX Connection Settings]
Select whether or not to connect this machine to a Private Branch Exchange (PBX) environment.
When connecting to a Private Branch Exchange (PBX) environment, enter the outside line number.
[OFF] is specified by default.
Tips
When this machine is connected to a Private Branch Exchange (PBX) environment, you can issue an outgoing
call to the outside without using [PBX Connection Settings]. In this case, type in P (pause) and recipient's
telephone number following the outside line number (number to connect from PBX to the outside).
5-26
d-Color MF 3300/3800
5.8
5
[Fax Settings]
[Report Settings]
To display: [Utility] - [Administrator Settings] - [Fax Settings] - [Report Settings]
Specify the conditions for printing fax-related reports.
Settings
Description
[Activity Report]
Specify the method to print a report (activity report) that contains results of faxes sent and received.
[Output Settings]
Specify whether or not to print an activity report. To print it, select when to print
it.
• [Daily]: Prints an activity report at a specified time you entered in [Output
Time Setting] every day.
• [Every 100 comm.]: Prints an activity report every 100 communications.
• [100/Daily]: Prints an activity report at a specified time you entered in [Output Time Setting] every day. In addition, a report is printed for every 100
communications.
• [OFF]: Does not print an activity report.
[Every 100 comm.] is specified by default.
[Output Time Setting]
If [Daily] or [100/Daily] is selected in [Output Settings], enter the time to print a
report.
[00:00] is specified by default.
[Output Limit Setting]
If [Daily] or [100/Daily] is selected in [Output Settings], select whether to print
a report of the latest 100 communications or a report of communications
(which are established after communications described in the previously printed report have occurred) within the last 24 hours.
[100 Communications] is specified by default.
[Remark Column
Print Setup]
Select whether or not to print user or account name in the remarks column of
the activity report if user authentication or account track is enabled for this machine.
• [Normal Printing]: The line status or sending setting will be printed.
• [User Name Printing]: The user name for user authentication will be printed.
• [Account Name Printing]: The account name for user authentication will be
printed.
[Normal Printing] is specified by default.
[TX Result Report]
Specify the method to print a report (TX result report) that contains fax transmission results.
[Output Settings]
Select the timing to print a transmission result report.
• [ON]: The report is printed every time a fax has been transmitted.
• [If TX Fails]: The report is printed if a fax transmission has failed.
• [OFF]: Does not print a TX result report.
[If TX Fails] is specified by default.
[TX Result Report
Image]
Select whether or not to print a reduced image on the first page of an original,
on a transmission result report.
[OFF] is specified by default.
[Timer Reservation TX
Report]
Select whether or not to print a report (timer reservation TX report) that contains reserved fax transmissions using the Timer TX function.
[ON] is specified by default.
[Confidential Rx Report]
Select whether or not to print a report (confidential RX report) that contains
confidential RX results.
[ON] is specified by default.
[PC-Fax TX Error Report]
Select whether or not to print a report (PC-Fax TX error report) for notifying that
a PC-Fax transmission has failed.
[OFF] is specified by default.
[Broadcast Result Report]
Specify the method to print a report (broadcast result report) that contains
broadcasting results.
[Enable Settings]
Select whether or not to print a broadcast result report.
[ON] is specified by default.
[Enable Settings]
Select whether to combine results of broadcast on all destinations involved or
list them for each destination.
[All Destinations] is specified by default.
d-Color MF 3300/3800
5-27
5
[Fax Settings]
5.8
Settings
Description
[TX Result Report
Check]
Select whether or not to display a screen that asks if you want to print a TX
Result Report each time a fax is sent.
[OFF] is specified by default.
[I-Fax RX Error Report]
Select whether or not to print a report (Internet fax RX error report) for notifying
that Internet fax receiving has failed.
[ON] is specified by default.
[MDN Message]
Select whether or not to print a report notifying that an Internet fax has been
sent to the recipient machine.
[ON] is specified by default.
[DSN Message]
Select whether or not to print a report notifying that an Internet fax has been
sent to the mail server of the recipient machine.
[OFF] is specified by default.
[Print E-mail Message
Body]
Select whether or not to print a report notifying that an Internet fax has been
successfully received after it was received. The report has the subject and
message body of an Internet fax.
[ON] is specified by default.
[Job Settings List]
To display: [Utility] - [Administrator Settings] - [Fax Settings] - [Job Settings List]
Print the list of settings associated with faxes.
[Confidential RX User Box]
To display: [Utility] - [Administrator Settings] - [Fax Settings] - [Confidential RX User Box] - [New]
Register a User Box for confidential communication.
Settings
Description
[User Box Name]
Enter the Confidential User Box name (using up to 20 characters).
[No.]
Displays a registration number of the Confidential User Box. The smallest
available number that is not used is automatically assigned.
[Comm. Password]
Enter the password for confidential RX (using up to 20 digits).
To confirm, enter the password again into [Password Confirmation].
[Print Password]
To restrict printing files in the Confidential User Box with the password, enter
the password (using up to 64 characters).
To confirm, enter the password again into [Password Confirmation].
Tips
5-28
-
To change the User Box settings you have registered, select the User Box name and tap [Edit].
-
To delete an existing User Box, select the User Box name and tap [Delete].
d-Color MF 3300/3800
5.8
5
[Fax Settings]
[Network Fax Settings]
To display: [Utility] - [Administrator Settings] - [Fax Settings] - [Network Fax Settings]
Change the settings of Internet fax environment and the default compression type of data to be transmitted.
Settings
Description
[Compression Type]
Change the default compression type to transmit an Internet fax.
[MMR] is specified by default.
[Internet Fax Receive
Ability]
This machine notifies its reception capability when returning a MDN message
if you are using the Internet Fax function. If necessary, change the reception
capability of this machine, which is notified upon returning a MDN message.
[Compression Type]
Change the compression type of a fax job the machine can receive.
[MH/MR/MMR] is specified by default.
[Resolution]
Change the resolution of a fax job the machine can receive.
[Standard/Fine/Super Fine/Ultra Fine] is specified by default.
[Internet Fax Extend
Settings]
Configure settings for fax reception confirmation (MDN/DSN) to be sent by this
machine if you are using the Internet fax function.
[MDN Request]
Select whether or not to request for fax reception result (MDN request) to the
destination.
If a MDN request is sent, the recipient machine returns a response message
upon reception of a fax, so that you can check that the fax is successfully received by the destination.
Also, by receiving a response message from the destination, you can obtain
the reception capability information of the destination. When a new response
message is received from a destination registered in the address book, the capability information is overwritten with new information.
[ON] is specified by default.
[DSN Request]
Select whether or not to request for fax reception result (DSN request) to the
destination mail server.
If you select [ON] for [MDN Request], priority is given to the MDN request.
[OFF] is specified by default.
[MDN Response]
Select whether or not to return a response message when a sender requests
for fax reception result (MDN request) to this machine.
[ON] is specified by default.
[MDN/DSN Response Monitoring
Time]
If necessary, change the waiting time for a response from the destination after
a MDN request or DSN request is sent by this machine.
If a response message is received after the specified waiting time, the machine
ignores the message.
[24 hours] is specified by default.
d-Color MF 3300/3800
5-29
5
5.9
[System Cooperation]
5.9
[System Cooperation]
[Administrator Dispatch]
To display: [Utility] - [Administrator Settings] - [System Cooperation] - [Administrator Dispatch]
When using a service that diagnoses the machine status remotely, send the machine's operating status to
the remote diagnosis system.
[OpenAPI Settings]
To display: [Utility] - [Administrator Settings] - [System Connection] - [OpenAPI Settings]
To use application software that communicates with this machine via OpenAPI, configure the OpenAPI settings of this machine.
Settings
Description
[Specified App Start
Setting]
Configure a setting to launch only the pre-specified OpenAPI application when
this machine has started up.
Note
This item is displayed when the OpenAPI application is registered.
[Specified Application Start]
Select whether or not to launch only the pre-specified OpenAPI application
when this machine has started up.
[Disable] is specified by default.
[Basic Functions
Setting]
When using this function, select whether or not to use the basic functions of
this machine.
[Restrict] is specified by default.
Note
This option is displayed when [Specified Application Start] is set to [Enable].
[Default Startup
App Selection]
When using this function, specify the OpenAPI application to be launched.
Note
This option is displayed when [Specified Application Start] is set to [Enable].
5-30
d-Color MF 3300/3800
5.10
5.10
5
[Security Settings]
[Security Settings]
[Administrator Password]
To display: [Utility] - [Administrator Settings] - [Security Settings] - [Administrator Password]
If necessary, change the machine's administrator password. Be sure to remember the changed password so
that you do not forget it.
Enter the current administrator password before setting a new administrator password.
[12345678] is specified by default.
Tips
If you enter an incorrect administrator password a configured number of times, you are prohibited from using
this machine. In this case, turn this machine on and off.
[Security Details]
To display: [Utility] - [Administrator Settings] - [Security Settings] - [Security Details]
Restricts functions that are related to authentication operations and data management to enhance security.
Settings
Description
[Password Rules]
Select whether or not to enable Password Rules. Before enabling Password
Rules, change the current password to the one that complies with the password rules.
[OFF] is specified by default.
Once Password Rules is enabled, the following rules are applied to any password that is configured on this machine.
• Only a password containing eight digits or more can be used.
• Passwords are case sensitive.
• A password consisting of a string of identical characters cannot be used.
• The previous password cannot be used.
The password rules are applied to:
• Administrator Password
• User Password
• Account Password
• Secured Job Password
• SNMP Password
[Manual Destination Input]
Select whether or not to allow the user to directly enter destinations.
[Allow] is specified by default.
[Job Log]
Select whether or not to obtain log information for each job log type.
[Billing Log]
Select whether or not to obtain an accounting log. You can obtain information
relevant to paper consumption for each user or account.
[ON] is specified by default.
[Count Log]
Select whether or not to obtain a counting log. You can obtain information
about paper consumption and the reduction rate of paper used for printing.
[ON] is specified by default.
[Audit Log]
Select whether or not to obtain an audit log. You can obtain user operation or
job history. You can track unauthorized actions or the leakage of information.
[ON] is specified by default.
[Overwrite]
Select whether or not to allow a log to be overwritten by a new log when the
hard disk becomes full.
[Restrict] is specified by default.
[Erase Job Log]
Erases job logs.
[Hide Personal Data]
On the [Job List] screen, select whether or not to hide personal information
such as destinations or document names.
[OFF] is specified by default.
[Hide Activity Log]
Select whether or not to hide activity logs on Scan to E-mail and Fax TX/RX.
If [ON] is selected, [Log] does not appear on the [Job List] screen.
[OFF] is specified by default.
d-Color MF 3300/3800
5-31
5
[Security Settings]
5.10
Settings
Description
[Initialize]
Select network settings, system settings, and all settings to carry out initialization.
[Enhanced Security Mode]
To display: [Utility] - [Administrator Settings] - [Security Settings] - [Enhanced Security Mode]
Select whether or not to enable the Enhanced Security Mode.
If you enable the Enhanced Security Mode, the various security functions are forcibly configured. This allows
you to ensure higher-level security of data management.
To enable the enhanced security mode, the following settings must have been configured.
Setting items in Administrator Settings
Settings to forcibly changed
[Security Settings] - [Security Details] [Password Rules]
Select [ON].
[Security Settings] - [Administrator
Password]
Set a password complying with password rules.
[Security Settings] - [HDD Settings] [HDD Encryption Setting]
Select [ON].
Configuring User Authentication in Web
Connection
For details, refer to Chapter 2 in [User's Guide Applied Functions].
In Web Connection, register the certificate.
For details, refer to Chapter 2 in [User's Guide Applied Functions].
If you enable the Enhanced Security Mode, the following settings are forcibly changed.
5-32
Setting items in Administrator Settings
Settings to forcibly changed
[System Settings] - [Restrict User Access] - [Restrict Access to Job Settings]
- [Registering and Changing Addr.]
Set to [Restrict].
[Security] - [Authentication] - [General
Settings] - [Public Access] in Web Connection
Set to [Restrict].
[User Authentication/Account Track] [User Name List]
Set to [OFF].
[Security] - [Authentication] - [General
Settings] - [Print without Authentication]
in Web Connection
Set to [Restrict].
[Network Settings] - [FTP Settings]
Set to [Disable].
[Network] - [E-mail Settings] - [S/MIME]
in Web Connection
•
•
•
[Network] - [SNMP Setting] - [SNMP
v1/v2c Settings] in Web Connection
[Write]: Set to [Disable].
[Network] - [SNMP Setting] - [SNMP v3
Settings] in Web Connection
[Security Level] of the read and write user is set to [Auth-password/Priv-password].
[Security] - [PKI Settings] - [SSL/TLS
Settings] in Web Connection
•
•
[S/MIME]: Set to [Enable].
[Digital Signature]: Set to [Select when sending].
[E-mail Text Encryption Method]: Set to [3DES].
[SSL/TLS]: Cannot be changed to invalid.
[Encryption Strength]: Cannot be changed to a setting in
which the strength is lower than [AES256, 3DES].
d-Color MF 3300/3800
5.10
5
[Security Settings]
Tips
-
A setting that has been forcibly changed when the [Enhanced Security Mode] was enabled will not be
changed if you disable the [Enhanced Security Mode].
-
Once the password rules have been enabled, an item for which a password that do not comply with the
rules has been configured will result in authentication failure.
[HDD Settings]
To display: [Utility] - [Administrator Settings] - [Security Settings] - [HDD Settings]
Manage this machine's HDD.
Settings
Description
[Check HDD Capacity]
Enable you to check the used space, total space and available space on the
HDD.
[Overwrite All Data]
Overwrite all data saved on all areas of the HDD when disposing this machine.
To perform delete by overwriting, select [HDD Overwrite Method], then tap [Execute].
The following modes are available in [HDD Overwrite Method].
• [Mode 1]: Overwrite with 0x00.
• [Mode 2]: Overwrite with single-byte random numbers - overwrites with
single-byte random numbers - overwrites with 0x00.
• [Mode 3]: Overwrite with 0x00 - Overwrites with 0xff - Overwrites with single-byte random numbers - Verifies.
• [Mode 4]: Overwrites with single-byte random numbers - Overwrites with
0x00 - Overwrites with 0xff.
• [Mode 5]: Overwrites with 0x00 - Overwrites with 0xff - Overwrites with
0x00 - Overwrites with 0xff.
• [Mode 6]: Overwrites with 0x00 - Overwrites with 0xff - Overwrites with
0x00 - Overwrites with 0xff - Overwrites with 0x00 - Overwrites with 0xff Overwrites with random numbers.
• [Mode 7]: Overwrites with 0x00 - Overwrites with 0xff - Overwrites with
0x00 - Overwrites with 0xff - Overwrites with 0x00 - Overwrites with 0xff Overwrites with 0xaa.
• [Mode 8]: Overwrites with 0x00 - Overwrites with 0xff - Overwrites with
0x00 - Overwrites with 0xff - Overwrites with 0x00 - Overwrites with 0xff Overwrites with 0xaa - Verifies.
[Mode 1] is specified by default.
[HDD Format]
Format the HDD.
Retrieve any data needed from the hard disk beforehand.
[HDD Encryption Setting]
Encrypts all data saved on the hard disk for protection purposes.
If you tap [OK] after selecting [ON], a message appears to notify you that the
HDD will be formatted. To encrypt data stored on the HDD, select [Start], tap
[OK], then enter the encryption passphrase (using 20 characters, case sensitive).
Entering the encryption passphrase restarts this machine and activates formatting of the HDD.
[OFF] is specified by default.
Note
If an HDD encryption setting is configured, the HDD is formatted, and data
saved on the HDD is erased. Therefore, we recommend that you finish an HDD
encryption setting before using this machine.
d-Color MF 3300/3800
5-33
5
5.11
[Paper Empty Alert Display Setting]
5.11
[Paper Empty Alert Display Setting]
To display: [Utility] - [Administrator Settings] - [Paper Empty Alert Display Setting]
For each tray, specify whether or not to display a warning message on the Touch Panel when the tray runs
out of paper.
The following shows the default settings.
5-34
-
[Tray 1] to [Tray 3]: [ON]
-
[Manual Feed]: [OFF]
d-Color MF 3300/3800
5.12
5.12
[License Management]
5
[License Management]
[Publish Request Code]
To display: [Utility] - [Administrator Settings] - [License Management] - [Publish Request Code]
Display this machine's serial number and request code.
[Activation]
To display: [Utility] - [Administrator Settings] - [License Management] - [Activation]
Enter the function code for identifying the advanced function and the license code for enabling the advanced
function to enable the advanced function.
[Enable Function List]
To display: [Utility] - [Administrator Settings] - [License Management] - [Enable Function List]
Displays a list of enabled functions.
d-Color MF 3300/3800
5-35
5
5.13
[OpenAPI Certification Management Setting]
5.13
[OpenAPI Certification Management Setting]
[Restriction Code Settings]
To display: [Utility] - [Administrator Settings] - [OpenAPI Certification Management Setting] - [Restriction
Code Settings]
Specify a restriction code to prevent an OpenAPI connection application from being registered on this machine.
For details, contact your service representative.
5-36
d-Color MF 3300/3800
DIRECTIVE 2002/96/EC ON THE TREATMENT, COLLECTION, RECYCLING AND
DISPOSAL OF ELECTRIC AND ELECTRONIC DEVICES AND THEIR COMPONENTS
INFORMATION
1. FOR COUNTRIES IN THE EUROPEAN UNION (EU)
The disposal of electric and electronic devices as solid urban waste is strictly prohibited: it must be collected separately.
The dumping of these devices at unequipped and unauthorized places may have hazardous effects on health and the
environment.
Offenders will be subjected to the penalties and measures laid down by the law.
TO DISPOSE OF OUR DEVICES CORRECTLY:
a) Contact the Local Authorities, who will give you the practical information you need and the instructions for handling the
waste correctly, for example: location and times of the waste collection centres, etc.
b) When you purchase a new device of ours, give a used device similar to the one purchased to our dealer for disposal.
The crossed dustbin symbol on the device means that:
- when it to be disposed of, the device is to be taken to the equipped waste collection centres and is to be
handled separately from urban waste;
- The producer guarantees the activation of the treatment, collection, recycling and disposal procedures in
accordance with Directive 2002/96/EC (and subsequent amendments).
2. FOR OTHER COUNTRIES (NOT IN THE EU)
The treatment, collection, recycling and disposal of electric and electronic devices will be carried out in accordance with the
laws in force in the country in question.


