1
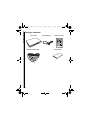
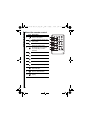
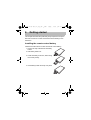
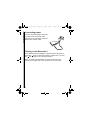
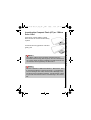
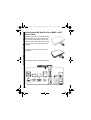
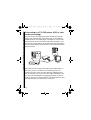
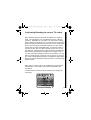
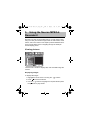
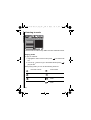
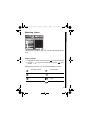
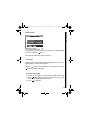
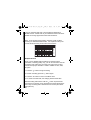
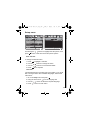
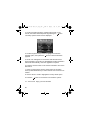
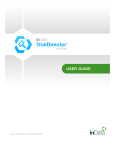
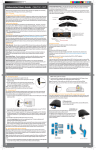
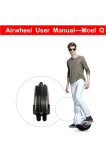
MPEG-4 Video Recorder_UM_EN.book
Page i
Monday, June 19, 2006
8:22 PM
MPEG-4 Video Recorder_UM_EN.book
Page ii
Monday, June 19, 2006
8:22 PM
Preface
Information in this document has been carefully checked for accuracy; however, no
guarantee is given as to the correctness of the contents. The information in this document is subject to change without notice. This document contains proprietary information protected by copyright. No part of this manual may be reproduced by any
mechanical, electronic or other means, in any form, without prior written permission
of the manufacturer.
All trademarks are the property of their respective owners.
Copyright© 2005. All Rights Reserved.
Safety Information
Please read the following safety instructions, and keep the user manual for later
reference.
• Use only the power adapter supplied with the product.
• Do not place the product near any source of heat or expose it to direct sunlight.
• Do not attempt to connect any computer accessory or electronic product without instruction from qualified service personnel. It may result in risk of electric
shock.
• Do not expose the product to moisture. Never spill any liquids on the product.
• Do not place the product in regions with extreme temperatures.
Routine care
Wipe the product with a soft cloth. Do not use abrasive powders or solvents, such as
benzene or thinner. When you leave the product unused for a long time, unplug the
AC adapter from the outlet.
● For the most up-to-date copy of the guide in English or a copy in German, French, Italian
or Spanish please visit:
http://www.neurostechnology.com/support
● Pour un exemplaire du guide d’utilisation en francais, consultez la page :
http://www.neurostechnology.com/support
● Per ottenere una copia del manuale utente in italiano, visitare:
http://www.neurostechnology.com/support
● Para obtener una copia de la guia del usuario en "Espanol" visite:
http://www.neurostechnology.com/support
● Ein Exemplar der deutschen Bedienungsanleitung finden Sie auf folgender Website:
http://www.neurostechnology.com/support
ii
MPEG-4 Video Recorder_UM_EN.book
Page iii
Monday, June 19, 2006
8:22 PM
Table of Contents
1
Overview
Features ................................................................................................ 1
Package contents .................................................................................. 2
About the Neuros MPEG-4 Recorder 2 ................................................. 3
Front view ..................................................................................... 3
Rear view ..................................................................................... 3
About the remote control ....................................................................... 4
2
Getting started
Installing the remote control battery ...................................................... 7
Connecting power ................................................................................. 8
Turning on the Recorder 2 .................................................................... 8
Inserting the Compact Flash (CF) or 1"Micro Drive Card ...................... 9
Inserting the MS Duo/Pro Duo, MMC or SD Series Card..................... 10
Connecting to a TV (viewing only)........................................................ 11
Connecting to a TV, DVD player, VCR or camcorder (recording) ....... 12
Confirming / Selecting the correct TV output........................................ 13
3
Using the Neuros MPEG-4 Recorder 2
Viewing pictures .................................................................................. 15
Displaying images ...................................................................... 15
Photo Settings menu .................................................................. 16
Slideshow ............................................................................. 16
Background music ................................................................ 17
Delete Files ........................................................................... 17
Listening to music ................................................................................ 18
Playing audio .............................................................................. 18
Setting menu for Music .............................................................. 19
Repeat .................................................................................. 19
Delete Files .......................................................................... 19
Watching videos .................................................................................. 21
Playing videos ............................................................................ 21
Setting menu for Video ............................................................... 22
Repeat .................................................................................. 22
Delete Files ........................................................................... 22
Recording video .................................................................... 24
Record menu .............................................................................. 24
Resolution .................................................................................. 24
Quality ........................................................................................ 24
iii
MPEG-4 Video Recorder_UM_EN.book
Page iv
Monday, June 19, 2006
8:22 PM
Quick setup .................................................................................24
Timer record ............................................................................... 25
Programs .............................................................................. 25
Start and Stop Times ............................................................ 25
Frequency ............................................................................. 26
Auto record ................................................................................. 26
Storage ....................................................................................... 26
Selecting the right recording resolution setting ................................... 27
Simple Record ...................................................................... 28
Setup menu ......................................................................................... 29
Date and Time ...................................................................... 29
Language .............................................................................. 29
Format Disk .......................................................................... 30
TV Output ............................................................................. 30
Factory Reset ....................................................................... 30
File browsing ....................................................................................... 31
Data management settings menu .............................................. 31
Copy ..................................................................................... 32
Delete ................................................................................... 32
Playing back recorded files ................................................................. 33
Playing back files recorded with the Recorder 2 ........................ 33
I. Sony PSP ......................................................................... 33
II. Neuros 442 Protable Media player / Recorder ................. 34
III. i-Pod Video ...................................................................... 35
IV. Nintendo Game Boy Micro .............................................. 42
V. Other Handhelds .............................................................. 43
4
Firmware Upgrade Instructions
Firmware Upgrade Instructions ........................................................... 45
5
Contact US
Contact Us............................................................................................ 47
6
Appendix
FCC Certification ................................................................................. 49
CE Notice (European Union) ............................................................... 50
Troubleshooting ................................................................................... 51
Specifications ...................................................................................... 52
iv
MPEG-4 Video Recorder_UM_EN.book
Page 1
Monday, June 19, 2006
8:22 PM
1. Overview
Congratulations on purchasing the Neuros MPEG-4 Recorder 2.
Now you can enjoy quality multimedia anywhere you go and
record your favorite video programs from a variety of video
sources. The Recorder 2 also plays back your favorite audio
tracks, and displays photos and video on your TV.
Refer to this user manual for detailed descriptions about the product and instructions for using it.
Features
The Neuros MPEG-4 Recorder 2 allows you to:
• record video from a TV, DVD, VCR or camcorder
• display images (jpg, gif, and bmp formats)
• play audio files (mp3 and wma formats)
• play videos (ASF, AVI, MP4 formats)
Package contents
MPEG-4 Video Recorder_UM_EN.book
Page 2
Monday, June 19, 2006
8:22 PM
Package contents
Recorder 2
Power Adapter
Remote Control
NTSC
PAL
STORAGE
RCA Video cables (x2)
DISPLAY
User Manual
Use
r
2
AB
Ma
nua
l
MPEG-4 Video Recorder_UM_EN.book
Page 3
Monday, June 19, 2006
8:22 PM
Refer to the following sections for information about the hardware
components of the Recorder 2.
Front view
Recording LED (Red)
CF
Power LED
IR
CF Card Slot
(Green ) Receiver
Memory Stick Pro
SD, MMC, Slot
Rear view
DC 5V
AV OUT
DC Power
AV Out
AV IN
AV In
3
About the Neuros MPEG-4 Recorder 2
About the Neuros MPEG-4 Recorder 2
About the remote control
MPEG-4 Video Recorder_UM_EN.book
Page 4
Monday, June 19, 2006
About the remote control
Icon Description
4
1.
Turns on the power
2.
Switches between NTSC and
PAL system
3.
Increases the volume
4.
Enters the setting menu
(Note:settings menu options
vary depending on when
selected)
5.
Decreases the volume
6.
Scrolls left
7.
Mutes all sound
8.
Zooms out
9.
Start and stop recording
10.
Rewinds playback of video
and audio files
11.
Switches between CF and
Memory Stick/SD/MMC.
12.
Turn on and off the on screen
display
NTSC
PAL
1
2
3
4
5
6
7
8
9
10
11
12
STORAGE
DISPLAY
AB
8:22 PM
MPEG-4 Video Recorder_UM_EN.book
Page 5
Monday, June 19, 2006
8:22 PM
About the remote control
Icon Description
NTSC
PAL
AB
13
14
15
16
13.
Returns to the top menu
14.
Repeats playback of selected
audio/video file.
19
20
15.
Returns to the previous menu
21
22
23
24
16.
Scrolls up
17.
Scrolls right
18.
Confirms selection of menu
item
19.
Zooms in
20.
Scrolls down
21.
Fast Forwards playback of
video and audio files
22.
Plays or pauses playback of
photo, video and audio
23.
Plays the next photo, video and
audio files
24.
Plays the previous photo, video
and audio files
17
18
STORAGE
DISPLAY
5
MPEG-4 Video Recorder_UM_EN.book
Page 6
Monday, June 19, 2006
8:22 PM
Sticker for Recording Setting
Before recording for target player (TV, PDA or PSP...), user can
refer to the sticker (as picture shows below) for the setting including resolution and quality.
Please refer to page 21 to setup the recording format.
Suggested Recording Resolutions
Economic
Normal
Fine
Super fine
Legend
640X480
TV
320X240
30fps
368X208
PSP
---
---
iPod
320X240
15fps
PDA
176X120
S/Phone
320X240
3GP
176X144
3GP
Mobile
Please see www.neurostechnology.com / supporteddevices.asp and the manual of your playback device for details.
MPEG-4 Video Recorder_UM_EN.book
Page 7
Monday, June 19, 2006
8:22 PM
2. Getting started
This chapter describes the preliminary steps required to set up the
Recorder 2 and how to make connections before starting to use
the device.
Installing the remote control battery
Follow these instructions to insert the remote control battery:
1. Push in the clip at the side of the battery
holder.
2. Pull battery holder out.
3. Insert the battery as shown, while noting
the correct polarity.
4. Push battery holder and snap it in place.
Connecting power
MPEG-4 Video Recorder_UM_EN.book
Page 8
Monday, June 19, 2006
8:22 PM
Connecting power
Connect the power adaptor to the DCin socket on the rear panel of the
Recorder 2. Plug the other end of the
adaptor into a power outlet.
Turning on the Recorder 2
Once the Recorder 2 is plugged in, the green power LED turns on.
Press the
button on the remote and the system turns on. Press
the
button again to turn off the Recorder 2.
Note: the green light will remain on even if the Recorder 2 is
turned off, as long as the unit is connected to a power outlet.
8
MPEG-4 Video Recorder_UM_EN.book
Page 9
Monday, June 19, 2006
8:22 PM
Inserting the Compact Flash (CF) or 1"Micro Drive Card
Inserting the Compact Flash (CF) or 1"Micro
Drive Card
Push the CF card or Hitachi 1" Micro
Drive into the CF card slot until it is firmly
in place.
To remove the card, grip the CF card and
gently pull.
Note1:
The Hitachi 1"Micro Drive should be formatted using the
Recorder 2 before using (See Page 22). This is to ensure that
the 1" Micro Drive has been formatted in the FAT16 format and
can therefore be recognized by the Recorder 2.
Note2:
File size is limited to 2 GB for the Hitachi 1" Micro Drive. This
is an inherent limitation of the FAT16 format. If you attempt to
record a file larger than 2 GB, the Recorder 2 will begin a second file once the 2 GB limit is reached. A small amount of data
may be lost while the Recorder 2 is transitioning to the second
file.
9
Page 10
Monday, June 19, 2006
8:22 PM
Inserting the MS Duo/Pro Duo, MMC or SD
Series Card
Insert the card into the card slot with the
metal contacts going in first and facing
up, until the card is firmly in place. The
beveled corner of the card must be away
from you and to the right as the card is
inserted.
To remove the card, grip the card and
pull gently.
O
MS
See diagram below for proper adapters:
CF
INSERT
MMCmobile
512 MB
1.0 GB
microSD/TransFlash
to SD Adapter
PUSH
PUSH
128 MB
1.0 GB
2.0GB
10
Memory Stick Duo Adaptor
LOCK
Lock
Adapter
RS-MMC
Inserting the MS Duo/Pro Duo, MMC or SD Series Card
MPEG-4 Video Recorder_UM_EN.book
DU
MPEG-4 Video Recorder_UM_EN.book
Page 11
Monday, June 19, 2006
8:22 PM
Connecting to a TV (viewing only)
Connecting to a TV (viewing only)
Connect the A/V connectors (red, white, and
yellow) of the A/V cable, to the corresponding input sockets on the TV. Connect the
other end to the AV Out socket at the back of
the Recorder 2.You will also need to set your
TV to the appropriate video channel to see
the user interface and set up your recording
preferences (use the TV/video button on your remote--Just like
you would for a VCR).
I
N
The appropriate channel dedicated to the inputs you are plugged
into varies. Please refer to your television's manual for details (or
try switching between channels)
Note: If the TV has only 1 video and 1 audio socket, insert the yellow connector in the video socket and the white connector in the
audio socket, leaving the red connector unused.
11
Connecting to a TV, DVD player, VCR or camcorder (recording)
MPEG-4 Video Recorder_UM_EN.book
Page 12
Monday, June 19, 2006
8:22 PM
Connecting to a TV, DVD player, VCR or camcorder (recording)
Connect the A/V connectors (red, white, and yellow) of the A/V
cable to the corresponding output connectors on the cable box,
satellite receiver, VCR, DVD player, camcorder etc. Connect the
other end to the AV In socket at the back of the Recorder 2. Connect the second A/V cable to the AV Out socket of the Recorder 2
and the corresponding input sockets on the TV as described in the
previous section.
I
N
S-VIDEO
ANTENNA IN
I
N
O
U
T
CHANNEL
3
4
Note: Most TVs do not have video output (only audio output). In
this case, you won't be able to record directly from the TV.
Instead, record TV shows from the cable box, satellite receiver
box, or PVR (like Tivo). If you don't have cable or satellite TV, you
can record from broadcast TV by plugging the video out from a
VCR into the A/V In on the Recorder 2, then plugging the A/V Out
from the Recorder 2 into the Video In on the TV.
12
MPEG-4 Video Recorder_UM_EN.book
Page 13
Monday, June 19, 2006
8:22 PM
Note: Different regions of the world use different TV output formats. For example, the U.S. uses NTSC and much of Europe
uses PAL. Depending on your region, you may need to change
the TV output from NTSC to PAL. If you have a color TV and only
black and white is visible when the Recorder 2 menu is visible (the
picture may also appear somewhat unstable), you may need to
change the TV output as detailed below. If colors are visible on
the menu screen, the TV output is already correct, and you can
skip this step. Changing the TV output is done by accessing the
Setup menu (see below) and changing the TV Output mode. If
you don't know what setting is used in your local region, you may
want to consult the user's guide for your TV set, but, if you have
any doubt, it will probably be easier to just follow the simple steps
below and use the format that makes the screen color and image
appear normal.
Note: Many TV sets in France use a different TV Output format
called Secam. This format is not currently supported by the
Recorder 2.
To determine the current TV Output setting and to change it (if
necessary):
Date M/D/Y
07 / 21 / 2001
Time H:M:S
20 : 57 : 35
Language
Dutch
Format Disk
CF
TV Output
PAL
Upgrade Devic~
Upgrade
SETUP
13
Confirming/Selecting the correct TV output
Confirming/Selecting the correct TV output
Confirming/Selecting the correct TV output
MPEG-4 Video Recorder_UM_EN.book
Page 14
Monday, June 19, 2006
8:22 PM
1. Highlight the Setup menu from the main menu screen using the
buttons.
2. Press
to access the Setup menu options.
3. You should see TV Output as one of the options along the left
side. The currently selected format (NTSC or PAL) will be displayed across from it on the right. If this is the desired format, you
are finished with this step. Simply exit the menu by pressing the
button. If you want to change the format, scroll down to the TV
Output line using the
buttons. Use the button to highlight
TV Output, then use the
buttons to change the format.
Once the desired format is displayed, exit the menu by pressing
the
button as above.
14
MPEG-4 Video Recorder_UM_EN.book
Page 15
Monday, June 19, 2006
8:22 PM
3. Using the Neuros MPEG-4
Recorder 2
Now that you have set up the Recorder 2, you are ready to start
using it to view your favorite images, listen to audio tracks, watch
videos, and record videos. This chapter provides detailed instructions for these tasks and for navigating through the OSD (On
Screen Display) menu.
Viewing pictures
<DCIM>
<MP_R001>
<MUSIC>
<PHOTO>
John_peel_~
_40896894_~
PHOTO
The Recorder 2 is able to display.JPG, .GIF and .BMP image file
formats.
Displaying images
To display still images:
1. Highlight the Photo menu icon using the
2. Press
buttons.
to access the file list.
3. Use the
buttons to highlight the required file and press
the
button to play the file.
Viewing pictures
MPEG-4 Video Recorder_UM_EN.book
Page 16
Monday, June 19, 2006
8:22 PM
Photo Settings menu
Slide Show
usic
Folder
MUSIC
Delete Files
On
Selected
PHOTO
To access the Settings menu related to viewing photos, press the
while in the main Photo menu. The following three functions
will appear:
SLIDESHOW
To set up a photo slide show, follow the procedure below:
1. Use the
buttons to scroll to and highlight the Slideshow option.
2. Use the
buttons to Select ALL photos or only the photos in the FOLDER for the slideshow or to turn the slideshow
OFF.
3. Use the
4. Using the
pressing the
button to return to the menu.
buttons, select a photo for the slide show by
button on the remote control. The screen
icon will change from
to .
5. Press
to play the slide show.
Note: If All is selected for the slide show then all pictures will
appear in the show. If Folder is selected then only those
16
MPEG-4 Video Recorder_UM_EN.book
Page 17
Monday, June 19, 2006
8:22 PM
6. While playing you can use
the picture.
and
to zoom out and in on
7. Pressing
will show the following: File information, Background Volume, Current Date and Time, and the zoom
amount.
BACKGROUND MUSIC
1. Use the
buttons to highlight the Music function.
2. Use the
buttons to turn ON or OFF the background
music during the slide show
.
DELETE FILES
To delete a file:
1. In the main Photo menu, navigate through the folders and
scroll to highlight a photo file you wish to delete. Once a
photo file is highlighted, press
to select it. You can tell
when a file is selected because the icon next to the file
changes to a double rectangle. More than one file can be
selected for deletion in a single session. Just highlight and
select them one at a time. You can de-select a highlighted file
by hitting
a second time.
2. Once you have selected all the files you wish to delete, press
the
button to display the Settings menu for the Photo
mode. Then scroll to Delete Files to highlight the word
"Selected", then press
.
3. Use the
keys to confirm YES or NO and press .
4. If multiple files are selected, they will all be deleted at once.
17
Viewing pictures
images in the current folder are displayed. When turned
Off, only the current image is displayed.
Listening to music
MPEG-4 Video Recorder_UM_EN.book
Page 18
Monday, June 19, 2006
8:22 PM
Listening to music
<__>
MUSIC
The Recorder 2 is able to Play. WMA and .MP3 audio file formats.
Playing audio
To play an audio file:
1. Highlight the Audio menu icon and press
list.
to access the file
2. Use the
buttons to go to the desired file and press
play the file.
While playing audio you can use the following functions:
Decrease volume
Fast forward
Increase volume
Rewind
Mute volume
Play previous audio
track
Play the next audio
track
18
to
MPEG-4 Video Recorder_UM_EN.book
Page 19
Monday, June 19, 2006
8:22 PM
Repeat
Delete Files
Listening to music
Setting menu for Music
Folder
MUSIC
Selected
MUSIC
To access the Settings menu for Music press
while in the main
Music menu. The following two functions are available:
Repeat
Use
to Choose Off, Single, Folder or All, then press
.
Select Off to turn the repeat function off, All repeats all tracks,
Single will repeat only a single track, and Folder will repeat all
tracks in the folder.
DELETE FILES
To delete a music file:
1. In the main Music menu, navigate through the folders and
scroll to highlight a music file you wish to delete. Once a file
is highlighted, press
to select it. You can tell when a file is
selected because the icon next to the file changes to a double
rectangle. More than one file can be selected for deletion in a
single action. Just highlight and select them one at a time.
19
Listening to music
MPEG-4 Video Recorder_UM_EN.book
Page 20
Monday, June 19, 2006
8:22 PM
You can un-select a highlighted file by hitting
a second
time.
2. Once you have selected all the files you wish to delete, press
the
button to display the Settings menu for the Music
mode. Then scroll to Delete Files to highlight the word
"Selected", then press .
3. Use the
keys to confirm YES or NO and press .
4. If multiple files are selected, they will all be deleted at once.
20
MPEG-4 Video Recorder_UM_EN.book
Page 21
Monday, June 19, 2006
8:22 PM
Watching videos
Watching videos
<MP_ROOT>
<MUSIC>
<PHOTO>
beer can c~
computer_h~
glass_pane~
VIDEO
The Recorder 2 is able to play.ASF, .AVI and .MP4 image file formats.
Playing videos
1. Highlight the Video menu and press
to access the file list.
2. Use the
to go to the required file and press
to play
the file.
While playing the video, you can use the following functions:
Decrease volume
Fast forward
Increase volume
Rewind
Mute volume
Play previous video
clip
Play next video clip
21
Watching videos
MPEG-4 Video Recorder_UM_EN.book
Page 22
Monday, June 19, 2006
8:22 PM
Setting menu for Video
Folder
Repeat
Delete Files
MUSIC
Selected
VIDEO
To access the Video Settings menu for Video, press
while in
the main Video menu. The following two functions are available:
Repeat
Use
Press
to choose between Off, Single, Folder or All Then
.
Note: Select Off to turn the repeat function off, Single to repeat
just the current selection, Folder to repeat all in the folder,
or All to repeat all videos.
DELETE FILES
To delete a video file:
1. In the main Video menu, navigate through the folders and
scroll to highlight a video file you wish to delete. Once a file is
highlighted, press
to select it. You can tell when a file is
selected because the icon next to the file changes to a double
rectangle. More than one file can be selected for deletion in a
single session. Just highlight and select them one at a time.
22
MPEG-4 Video Recorder_UM_EN.book
Page 23
Monday, June 19, 2006
8:22 PM
the
button to display the Settings menu for the Video
mode. Then scroll to Delete Files to highlight the word
"Selected", then press .
3. Use the
keys to confirm YES or NO and press .
4. If multiple files are selected, they will all be deleted at once.
You can un-select a highlighted file by hitting
a second
time.
23
Watching videos
You can un-select a highlighted file by hitting
a second
time.
2. Once you have selected all the files you wish to delete, press
Recording video
MPEG-4 Video Recorder_UM_EN.book
Page 24
Monday, June 19, 2006
8:22 PM
Recording video
Record menu
Resolution
Quality
Quick Setup
368x208
MUSIC
Normal
Off
Timer Record
On
Auto Record
Off
Storage
CF
RECORDER
Resolution
To select a resolution:
1. Highlight the record section and press
Record Menu.
to access the
2. Use the
to choose among the resolution settings.(see
"Selecting the right recording resolution setting "on page 27").
Quality
To choose the quality of the recording,highlight the quality menu
and use the
buttons to choose either Normal or Economic in
320x240-15fps and 368x208 option. Use the buttons to choose
Super Fine, Fine, Normal or Economic in all other modes.
Quick setup
Use this when you want the Recorder 2 to shut off automatically
after a selected amount of time. Use the buttons to choose
between OFF, 1hr, 2hrs or 3hrs recording.
24
MPEG-4 Video Recorder_UM_EN.book
Page 25
Monday, June 19, 2006
8:22 PM
01
05
06
00
00
02
2000
03
00
00
CF
00
00CF 2000
00
00
CF
MUSIC
04
Off
Previous
Save
Recording video
Timer record
Exit
Next
RECORDER
To access the timer record function, scroll down to highlight Timer
record and press the
button.
The screen is divided into functional areas:
PROGRAMS
The Recorder 2 has 6 available recording programs. Use the following settings to setup each program.
Use the
button to scroll between the programs and use the
button to select the program.
START AND STOP TIMES
1. Use the
button to move between the date and the time.
2. Press
to highlight each section and then use the
tons to choose the appropriate number.
3. Press
but-
to complete.
25
Recording video
MPEG-4 Video Recorder_UM_EN.book
Page 26
Monday, June 19, 2006
8:22 PM
FREQUENCY
The frequency function allows you to choose when this recording
is activated.
NOTE: The unit must be on for Timer Recording to work. The unit
will not turn on automatically for timer recording.
1. Use the
or Weekly.
2. Press
buttons to choose between OFF, Once, Daily
to save.
Note: Timer recordings are deactivated while the Recorder 2 is
being used for playback. If recordings are scheduled while the
Recorder 2 is playing, a recording will not be initiated.
Auto record
Use the
buttons to turn ON or OFF. If the auto record turns
on, it will automatically start to record when there is a video source
input and the recording will stop if the source is turned off. Or you
can press the
button to stop the recording anytime.
Storage
Use the
buttons to choose between Compact Flash MS,
MMC, SD cards or MS Duo memory cards.
26
MPEG-4 Video Recorder_UM_EN.book
Page 27
Monday, June 19, 2006
8:22 PM
The 320x240,176x120 and the 640x480 modes record in a 4:3
aspect ratio (which is standard screen format found on regular
DVD's and most TV's). The 320 x 240-30fps mode is the resolution typical of most handhelds, and the files are fairly compact and
will play back on the greatest number of devices.
The 640x480 mode provides the highest resolution but also
requires the most data storage space. It is generally only recommended when you plan to play back the recorded files on a TV or
laptop. The extra resolution is wasted on small screens like those
on handhelds. While some handhelds can handle the higher resolution 640x480 files (the Neuros 442 for one), many (like the PSP
and the iPod Video) don't have the capability to play them at all.
The 368x208 resolution setting is used when recording from video
sources that are in the wide-screen (16:9) format, and some people like to use it when recording for playback on wide-screen
handhelds like the Sony PSP (see "Playing back recorded files).
This format uses about the same amount of data as the 320x24015fps format. Note: If you record in the 368x208 format from a
source that isn't 16:9, the upper or lower portions of the video may
be clipped on playback. If recording from a TV, make sure it's in
the wide-screen format. If from a DVD player, make sure the DVD
is wide-screen format and also that the player's video output is set
to 16:9.
320 x 240-15fps is designed for PDAs and some Smartphones.
Please refer to your playback device's manual for details concerning supported formats and resolutions.
27
Recording video
Selecting the right recording resolution setting
Recording video
MPEG-4 Video Recorder_UM_EN.book
Page 28
Monday, June 19, 2006
8:22 PM
176x120, 320x240-3GP and 176x120-3GP are designed for
Mobile Phones. Please refer to your Mobile Phones's manual for
details concerning supported formats and resolutions.
Note: As of the date of this printing, the PSP would not allow
zooming on 368x208 resolution files. It is hopeful that Sony will
correct this shortcoming in future firmware revisions.
Suggested Recording Resolutions
Economic
Normal
Fine
Super fine
Legend
640X480
TV
320X240
30fps
368X208
PSP
---
---
iPod
320X240
15fps
PDA
176X120
S/Phone
320X240
3GP
Mobile
176X144
3GP
Please see www.neurostechnology.com / supporteddevices.asp and the manual of your playback device for details.
Simple Record
Once you are satisfied with the settings for the Recorder 2
(resolution, recording quality, etc), you can do one-button manual
recording. First make sure your input source is turned on (and
turned to the proper channel if a cable or satellite TV box, PVR,
etc),then:
1. Press the
button to begin recording.
2. To finish recording press the
3. Press the
button again.
button to return to the Main menu.
4. To view the recorded file, see "Playing back recorder files".
Note:Recording will continue until the
button is pressed the
second time or until the card is full unless the Quick Setup time is
set to stop recording after a desired amount of time (see "Quick
Setup above").
28
MPEG-4 Video Recorder_UM_EN.book
Page 29
Monday, June 19, 2006
8:22 PM
Setup menu
Setup menu
Date M/D/Y
07 / 21 / 2001
Time H:M:S
20 : 57 : 35
Language
Factory Reset
Reset
v01.03.0022
English
Format Disk
CF
TV Output
PAL
Upgrade Devic~
Upgrade
SETUP
SETUP
Scroll using the
buttons to highlight the setup menu, then
press
to enter. There are seven setup menu options.
DATE AND TIME
To change the date and time:
1. Press
to highlight a selection.
2. Use the
buttons to change the value.
3. Use the
buttons to move between fields.
4. Press
when complete.
LANGUAGE
The default language of the Recorder 2 is English. If you would
like to change it to the other available languages, follow these
instructions:
1. Go to the setup menu and press .
2. Using the down arrow
go to the language bar.
3. Use the
4. Press
arrows to select the required language.
to return to main menu.
29
Setup menu
MPEG-4 Video Recorder_UM_EN.book
Page 30
Monday, June 19, 2006
8:22 PM
FORMAT DISK
To format the memory card:
1. To format the memory card, scroll down to the Format disk
section and Press .
2. Select YES to confirm formatting or NO to cancel.
TV OUTPUT
To select the TV output:
1. Use the
buttons to choose between NTSC or PAL.
2. The
button on the remote control will provide the same
function.
FACTORY RESET
To restore all settings to the factory default:
1. To restore factory settings, scroll down to the Factory Reset
function section and press .
2. Select YES to confirm reset or NO to cancel.
30
MPEG-4 Video Recorder_UM_EN.book
Page 31
Monday, June 19, 2006
8:22 PM
File browsing
File browsing
<__>
<MP_ROOT>
<MUSIC>
<101MNV01>
<PHOTO>
<PDA>
<TV>
beer can c~
computer_h~
glass_pane~
File Browser
The file browser allows you to view the contents of both the Compact Flash card and the MS/SD/MMC card at the same time.
By pressing
you can select a file.
Data Management Settings menu
Selected
Copy
Delete Files
MUSIC
Selected
File Browser
To access the Data Management Settings Menu press
following two functions are available:
. The
31
File browsing
MPEG-4 Video Recorder_UM_EN.book
Page 32
Monday, June 19, 2006
8:22 PM
COPY
The files can be copied from CF card to MS, SD or MMC card or
vice versa. Also, the files can be copied to a different folder of the
same memory card.
1. Files copied to a different memory card
In the File Browser, the left column is the source memory card
and right column is the destination. Switch the type of card in the
left column in the File Browser by pressing
. Highlight a file
from the main menu, go to the Data Management Settings menu
highlight copy,then press .
2. Files copied to a different folder
Choose the same memory card by pressing
. Highlight a file
from the main menu, go to the Data Management Settings menu,
highlight copy then press .
DELETE
1. Highlight a file from the main menu, go to the Data Management Settings menu highlight delete, then press .
2. You will be asked to confirm YES or NO. Press
your selection.
32
to confirm
MPEG-4 Video Recorder_UM_EN.book
Page 33
Monday, June 19, 2006
8:22 PM
Playing back files recorded with the Recorder 2.
You can use
the Recorder 2 to record video for playback on the
TM
Sony PSP ,Neuros 442 portable media player / recorder, the iPod
TM
TM
video, the Nintendo Gameboy Micro ,and many
handhelds. The
Recorder 2 files can also be played back on your PC or laptop
running any major operating system. Follow the steps below for
best results using the various playback devices.
I. Sony PSP
You must record using either the 320x240-30fps or the 368x208
format when recording for the PSP (the 640x480 setting will produce recordings that cannot be played on the PSP). The
320x240-30fps mode will produce a picture with a 4:3 aspect ratio
(like a regular TV). The PSP will playback these files in the 4:3
ratio, or you can use the zoom controls on the PSP to shape it to
fit the PSP's wide-format screen. The 368x208 mode will produce
a picture in the wide-screen format, so it is automatically in the
shape of the PSP screen. See page 24 for instructions on how to
select the recording resolution.
2. Before recording onto an MS (Pro) Duo Card with the
Recorder 2, you should first format the MS (Pro) Duo Card with
the PSP to be sure the recorded files will be recognized by the
PSP.
3. Once recording is complete, all you have to do is pop the MS
(Pro) Duo card out of the Recorder 2 and insert it into the Sony
PSP for playback.
Note: For files recorded in the 320x240-15fps mode, you can use
the zoom feature on the PSP to size the picture to best fit the PSP
33
Playing back recorded files:
Playing back recorded files:
Playing back recorded files:
MPEG-4 Video Recorder_UM_EN.book
Page 34
Monday, June 19, 2006
8:22 PM
screen. As of the date of this printing, the PSP would not allow
zooming on 368x208 resolution files. It is hopeful that Sony will
correct this shortcoming in future firmware revisions.
II. Neuros 442 Portable Media Player/Recorder
The Neuros 442 is a powerful portable media player that can both
play and record videos, photos, and music. Unlike many other
handhelds (including the PSP and the iPod Video), the 442 is
powerful enough to process even 640x480 files. This is important
because it means you can record a file one time that will have
near-DVD-quality resolution if played back on a TV (either with the
Recorder 2 or with the 442) and play the same file on the 442.
Although you can easily record files directly onto the 442, you may
also want to transfer recordings made with the Recorder 2 to the
442. To do that:
Play the file like you would any other on the 442 (see the 442
user's guide for details).
34
MPEG-4 Video Recorder_UM_EN.book
Page 35
Monday, June 19, 2006
8:22 PM
Note: Only files recorded in the 320x240-30fps or 368x208
modes can be played back on the iPod Video (the iPod Video cannot play any file with resolution greater than 480x480).
iPod Video Playback Procedure:
1. Install the "iTunes" driver on your PC (if you are already using
iTunes with your iPod Video, you have already done this and can
skip this step).
2. Transfer files recorded previously on memory card (using the
Recorder 2) to your PC using a card reader (purchased separately). Simply slide the memory card into the card reader, then
plug the card reader into a USB slot on your PC. Then drag and
drop the video files from the card reader onto your hard drive.
3. Connect your iPod Video to your PC, then open the "iTunes"
Utility.
35
Playing back recorded files:
III. i-Pod Video
Playing back recorded files:
MPEG-4 Video Recorder_UM_EN.book
Page 36
Monday, June 19, 2006
8:22 PM
4.Click on the "Edit" drop-down menu on the iPod Video, then
select "Preferences".
5. When the window shown below appears, click on "Video" item.
Next select "Automatically update all videos", then confirm "OK".
6. Click on the "File" drop-down menu, then select "Add File to
Library".
36
MPEG-4 Video Recorder_UM_EN.book
Page 37
Monday, June 19, 2006
8:22 PM
Playing back recorded files:
7. Next, highlight the MPEG-4 video files you wish to load onto the
iPod Video.
37
Page 38
Monday, June 19, 2006
8:22 PM
Playing back recorded files:
MPEG-4 Video Recorder_UM_EN.book
8. Wait while the iTunes utility loads the selected files onto the
iPod.
38
MPEG-4 Video Recorder_UM_EN.book
Page 39
Monday, June 19, 2006
8:22 PM
10. Click on the "File" drop-down menu again, then select "Update
'Username's' iPod".
39
Playing back recorded files:
9. When loading is complete, the loaded files will be listed in the
file category of iTunes.
Playing back recorded files:
MPEG-4 Video Recorder_UM_EN.book
Page 40
Monday, June 19, 2006
8:22 PM
11. Safely disconnect the Video iPod from your PC by following
the steps below.
.
40
MPEG-4 Video Recorder_UM_EN.book
Page 41
Monday, June 19, 2006
8:22 PM
13. Now you can enjoy the video programs YOU recorded, anytime and anywhere you want.
41
Playing back recorded files:
12. Enter the "Videos" mode of the iPod to play back the loaded
files.
Playing back recorded files:
MPEG-4 Video Recorder_UM_EN.book
Page 42
Monday, June 19, 2006
8:22 PM
IV. Nintendo Game Boy Micro
The Nintendo Game Boy Micro can support MPEG-4 files with
resolution up to 640x 480, so it can play back recordings from all
Recorder 2 resolution settings (320x240-30fps, 368x208, and
640x480). However, if you intend to use the recordings only for
playback on small screens like the Micro (and not on larger
screens like TV), we recommend that you use the 320x240-30fps
mode to save storage space. The extra resolution with 640x480 is
more than can be seen on small screens and is therefore wasted.
To play files on the Game Boy Micro, you will need an SD card.
then use a Yan Micro Media Adapter (purchased separately -- see
below photo for reference) to play files from the SD card on the
Game Boy Micro.
Nintendo Game Boy Micro
Play- Yan Micro Media Adapter
42
MPEG-4 Video Recorder_UM_EN.book
Page 43
Monday, June 19, 2006
8:22 PM
How files recorded with the Recorder 2 are transferred to a
handheld and whether or not they will play without conversion will
depend on the specific handheld. Files can be easily transferred
to those that will accept CF, MS, SD, MMC cards and mini-SD,
RS-MMC, T-Flash (in the same manner as for the PSP above.
Once the files are on the handheld, some may play right away.
Others may not. This is because, for various legal and technical
reasons specific to each device, the various handheld's support
various file formats and not others. These files may still be playable if the handheld owner can download certain software to their
device, or there may be software available to convert the files to a
format recognizable by the handheld when the files are on the PC
before being transferred to the handheld.
Neuros is continually working to make our products as compatible
with the various file formats as is legally possible, and the Neuros
customer support staff and community are very involved with helping each other work through issues like these. For more information and possible solutions, go to http://neurostechnology.com/
and click on the Forums pull-down menu or the Support pull-down
menu.
43
Playing back recorded files:
V. Other Handhelds (PDA's, Pocket PC's, etc.)
MPEG-4 Video Recorder_UM_EN.book
Page 44
Monday, June 19, 2006
8:22 PM
MPEG-4 Video Recorder_UM_EN.book
4.
Page 45
Monday, June 19, 2006
8:22 PM
Firmware Upgrade Instructions
Neuros may provide firmware upgrades from time to time to fix
bugs, add enhancements, etc. You can download these upgrades
(usually for free) by going to http://neurostechnology.com/support/
support.asp and following the links for upgrades. The date the latest firmware upgrade was posted will be shown for each Neuros
product. You can also see the version number by clicking on the
upgrade link.
If you aren't certain if you have the latest firmware version or not
on your Recorder 2, go to the Setup menu (as described below),
then scroll to the second page. The current firmware version number will be shown at the very bottom in the format: V.xx.xx.xxxx.
The higher the number after the 'V', the more recent the firmware
version. If the firmware version currently on your Recorder 2 is
older than the latest version on the Neuros web site, you can
update your firmware as follows:
1. Insert a memory card into a card reader (purchased separately)
and plug the card reader into a USB slot on your PC.
2. Go to the firmware download page on the Neuros website as
described above. Follow the instructions to download the latest
firmware version for the Recorder 2. Unzip and Save the new
vcr4800.bin file to the memory card (which will appear as USB
memory or something like that in Windows Explorer). Be sure to
save the file to the root directory of the memory card and not in
any folder or sub-folder.
3. Pull the memory card out of the card reader and insert it into the
Recorder 2.
MPEG-4 Video Recorder_UM_EN.book
Page 46
Monday, June 19, 2006
8:22 PM
4. Scroll to the Setup mode by pressing right arrows on the
remote, then select the Setup mode by pressing the
button.
The Setup options should now be displayed.
5. Scroll through the Setup menu to highlight the Firmware
Upgrade option, then press the
button to start the firmware
upgrade.
A "Clock" icon will appear on the screen while the firmware is
being upgraded. The clock icon will disappear and the Recorder 2
will turn off automatically, when the upgrade is complete.
6. Press the "Power" button on the remote controller to turn on the
Recorder 2.
7. Check out the firmware version at the bottom of the Setup
menu (as described above) to confirm that the new version is now
loaded.
8. Use the arrow to scroll to highlight the Factory Reset option.
9. Press the
button on the remote to do reset the system.
10. You're done. Enjoy your new firmware
46
MPEG-4 Video Recorder_UM_EN.book
Page 47
Monday, June 19, 2006
8:22 PM
5. Contact Us
You really are important to us. Call us and you'll be amazed how
quickly and easily you'll be connected to a real live person with a
genuine interest in your satisfaction. Try it.
866-5-NEUROS (866-563-8767)
Please use the following e-mail addresses to reach individuals of
the Neuros team:
General Information or Comments: [email protected]
Customer Support: [email protected]
Media and Analysts Requests: [email protected]
Interested Retailers: [email protected]
Developer Inquiries: [email protected]
Gamma Group Feedback: [email protected]
Corporate Headquarters
Neuros Technology International, L.L.C.
650 W. Lake Street
Suite 330
Chicago, IL 60661
Phone: 312-756-0061
For additional information please visit the Neuros web site at
www.neurostechnology.com
47
MPEG-4 Video Recorder_UM_EN.book
48
Page 48
Monday, June 19, 2006
8:22 PM
MPEG-4 Video Recorder_UM_EN.book
Page 49
Monday, June 19, 2006
8:22 PM
6. Appendix
FCC Certification
This equipment has been tested and
found to comply with the limits for a
Class B digital device, pursuant to
part 15 of the FCC Rules. These limits are designed to provide reasonable protection against harmful
interference in a residential installation. Operation is subject to the
following two conditions: (1) This device may not cause harmful
interference, and (2) this device must accept any interference
received, including interference that may cause undesired operation.
This equipment generates, uses and can radiate radio frequency
energy and, if not installed and used in accordance with the
instructions, may cause harmful interference to radio communications. However, there is no guarantee that interference will not
occur in a particular installation. If this equipment does cause
harmful interference to radio or television reception, which can be
determined by turning the equipment off and on, the user is
encouraged to try to correct the interference by one or more of the
following measures:
•
Reorient or relocate the receiving antenna.
•
Increase the separation between the equipment and receiver.
•
Connect the equipment into an outlet on a circuit different from that to
which the receiver is connected.
•
Consult the dealer or an experienced radio/ TV technician for help.
You are cautioned that any change or modifications to the equipment not expressly approved by the party responsible for compliance could void your authority to operate such equipment.
MPEG-4 Video Recorder_UM_EN.book
Page 50
Monday, June 19, 2006
8:22 PM
CE Notice (European Union)
Marking by the symbol indicates compliance of this recorder to the
EMC Directive of the European Union. Such marking indicates
that this recorder meets the following technical standards:
EN 55013:2002+A1:2003-”Limits and methods of measurement of
radio disturbance characteristics of broadcast receivers and associated equipment”.
EN 55020-”Electromagnetic immunity of broadcast receivers and
associated equipment”.
EN 61000-3-3-"Electromagnetic compatibility (EMC) - Part3: Limits - Section3: Limitation of voltage fluctuations and flicker in lowvoltage supply systems for equipment with rated current up to and
including 16 A."
EN 60950-"Safety of Information Technology Equipment."
EN 60950-1:2001- "Safety of Information Technology Equipment."
IEC 60950-1:2001-"Safety of Information Technology Equipment."
C-tick ( Australian Regulation )
This recorder is compliance with the Australian regulation ( AS/
NZS CISPR13 : 2003 Class B ).
VCCI ( Japanese Regulation )
This recorder is compliance with Japanese regulation ( V-2/04.04
& V-3/05.04 ).
To determine which classification applies to your recorder, examine the FCC registration label located on the back panel of the
recorder.
50
MPEG-4 Video Recorder_UM_EN.book
Page 51
Monday, June 19, 2006
8:22 PM
Troubleshooting
Please visit the website www.neurostechnology.com to get
the latest trouble shooting information and FAQ about the
Recorder 2.
Symptom
Possible cause
Possible remedy
No video display.
Unit has no power.
Ensure that unit is
plugged in correctly. You
should see a green LED
on the front panel if it is
plugged in correctly.
Refer to “About the Neuros MPEG-4 Recorder 2”
on page 3.
Cable connecting AV Out Refer to “Connecting to a
TV (viewing only)” on
to video monitor is not
page 11 for information.
properly connected.
Remote control not Obstruction in front of
functioning.
infrared sensor on
Recorder 2.
Memory card not
recognized by the
Recorder 2
Ensure that a line of sight
exists between the
remote control and the
sensor on the Recorder2.
Low battery power.
Replace battery in the
remote control.
Card not inserted
properly.
Refer to “Inserting the
Compact Flash (CF) or
1"Micro Drive Card” on
page 9 and “Inserting the
MS Duo/Pro Duo, MMC
or SD Series Card” on
page 10 for information
about proper handling of
memory cards. Never
force memory cards into
the Recorder 2.
51
MPEG-4 Video Recorder_UM_EN.book
Page 52
Monday, June 19, 2006
8:22 PM
Specifications
Video
encoder
Application
Formate
Video
decoder
1) MPEG-4 SP, MPEG-1 Layer 3 (MP3), 30 fps at D1
resolution
2) DivX 3.11 @ CIF resolution; 4.x; 5.x; 30 fps at D1
resolution
3) Quick time 6; MPEG-4 AAC-LC stereo, MP4 format
at D1 resolution
4) 3GP (MPEG4+AMR)15fps at 320x240 or 176x144
Resolution
1) *QVGA (320x240); MPEG4+AACLC, 30fps
*368 x 208 (16:9); MPEG4+AAC-LC,
30 fps
2) (640x480); MPEG4+AAC-LC, 30fps
2) TV
3) (320x240); MPEG4+AAC-LC, 30fps
3) iPod
4) (320x240); MPEG4+AAC-LC, 30fps
4) PDA/
(320x240); MPEG4, 15fps
Smartphone
5) *RS, MMC, T-Flash, Min SD, Micro
5) Mobile
SD, MMC mobile
Phone
*176x120;MPEG4+AAC-LC, 15fps
*320x240-3GP;MPEG4+AMR, 15fps
*176x144-3GP;MPEG4+AMR, 15fps
1) PSP
File formats
ASF, AVI, MP4, 3GP
Audio
decoder
Codec
G.726
AMR
MP3 decoding @ 30-320 kb/s CBR & VBR
WMA
Still image
Codec
JPEG decode (Baseline), BMP, GIF
(animated not included)
Resolution
Up to 16M pixels (4096 x 4096)
Thumbnails
Supported when the photo has the EXIF header
Image
Processing
Zoom in, Zoom out 1x/2x/4x
Storage
Memory
card
52
CF card, MS Duo card, MS Pro
Duo(with adapter) card
SD series, MMC, MS card
MPEG-4 Video Recorder_UM_EN.book
TV system
Page 53
Monday, June 19, 2006
8:22 PM
Video Out
Format
Power source External 5V AC/DC adaptor (100 ~ 240V, 1.4A)
Dimensions
and weight
118 x 87 x 18 mm, 140g
Typical Recording Times on a 1GB Card
Resolution/
Quality
Economic
Normal
Fine
Super fine
640x480
251min
(384kbps)
143min
(768kbps)
11min
60min
(1024kbps) (2048kbps)
Save Folder:
TV
TV
TV
320x24030fps
251min
(384kbps)
143min
(768kbps)
94min
77min
(1024kbps) (1535kbps)
TV
Save Folder:
PSP defined PSP defined PDA-iPod
368x208
251min
(384kbps)
Save Folder:
PSP defined PSP defined
320x24015fps
502min
(96kbps)
Save Folder:
PDAPDAPDAPDASmartphone Smartphone Smartphone Smartphone
320x24015fps
502min
(96kbps)
Save Folder:
PDAPDAPDAPDASmartphone Smartphone Smartphone Smartphone
PDA-iPod
143min
(768kbps)
N/A
402min
(192kbps)
402min
(192kbps)
335min
(384kbps)
335min
(384kbps)
N/A
201min
(768kbps)
201min
(768kbps)
176x120
502min
(64kbps)
402min
(128kbps)
335min
(256kbps)
201min
(512kbps)
Save Folder:
Mobile
Mobile
Mobile
Mobile
53
MPEG-4 Video Recorder_UM_EN.book
Page 54
Monday, June 19, 2006
8:22 PM
320x240-3GP 250min
(192kbps)
143min
(256kbps)
93min
(384kbps)
77min(768kb
ps)
Save Folder:
Mobile
Mobile
Mobile
400min
(192kbps)
333min
(256kbps)
250min
(384kbps)
Mobile
Mobile
Mobile
Mobile
176x144-3GP 500min
(128kbps)
Save Folder:
54
Mobile