1
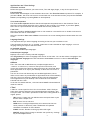
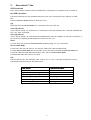
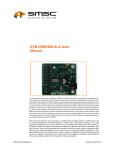
User Manual for use with Windows PC’s Compatible products: C-Pen 20/3.0/3.5 IMPORTANT NOTE: C-Pen 3.5 contains a Lithium-Ion battery. This battery type should NOT be uncharged for a longer period. If the C-Pen 3.5 is not used for a longer period, make sure to charge the battery every second month to keep the battery in shape! Thank you for choosing C-PEN™. With the C-Pen you may scan text and digits. Text editors, e-mail clients, business software and web browsers are all examples of programs able to receive text from the C-Pen. You can collect text from books, magazines, documents, invoices etc. simply by scanning the text with the C-Pen. The text will be inserted exactly where you want it. Just place the cursor in your favourite application and scan with the C-Pen. If using C-Pen 3.5, find out if your computer already is equipped with Bluetooth before continuing. IMPORTANT! Do NOT connect the C-Pen before the software is installed. 1. Install the C-Pen Core Software a. Close all open applications on the PC. b. The installation software is available for download at http://www.cpen.com/latest. Click Run to start the installation after download c. Follow the instructions on the screen. A message is displayed when the installation is complete. d. The C-Pen Core software will automatically launch after the installation has been completed. The C-Pen Core software is the main software that will make it possible to scan text to the cursor. When the C-Pen Core software is started you will find the C-Pen tray icon in the Windows system tray. This icon indicates that the C-Pen Core software is running properly. See the image to the right. 2. Connect C-Pen via USB All C-pen models have built-in USB-support. To connect the C-Pen to the PC, simply connect the USB cable to a USB port. This triggers Windows to load the USB drivers installed together with the C-Pen Core software. When Windows has completed loading the USB drivers, the C-Pen is ready to use. Check connection status by right click on the C-Pen icon in the tray menu (C-Pen Core thus needs to be started). 3. Connect C-Pen via Bluetooth This paragraph only applies to use with C-Pen 3.5. To connect two Bluetooth units with each other they have to be paired. ● Power up the C-pen 3.5 by press-and-hold the function button until the blue LED starts to flash (takes 3-5s). ● On your PC, go to Bluetooth Devices in the Control Panel and click on Add Device. Select C-pen 3.5 when found. ● Connect to C-Pen 3.5 by using the option Use passkey found in the documentation. The passkey is 1234. Check connection and/or battery status by right click on the C-Pen icon in the tray menu (C-Pen Core thus needs to be started). 1 4. Connect the Bluetooth Transceiver NOTE: This paragraph only applies if using C-Pen 3.5 AND the PC does not have built-in Bluetooth support. If your computer already has Bluetooth functionality with support for “Microsoft Bluetooth Stack” or “WidComm Bluetooth Stack” you can omit this step. However, in case of problems or if you do not already have any Bluetooth functionality on your PC you shall plug the included Bluetooth transceiver into a USB port on your computer. Wait for Windows to load the drivers. 5. C-Pen Core settings The C-Pen Core software must be started to use the C-Pen. C-Pen Core is the main software that will connect to your C-Pen and send the scanned text to the cursor. The C-Pen Core tray icon indicates that the program is running. NOTE! Tray icons may be hidden by the operating system depending on your settings. If you cannot see the icon, check the icons that are hidden by Windows. To start the C-Pen Core program, click the C-Pen Core Starter icon on your desktop. A shortcut to C-Pen Core software is also placed in the Windows Startup folder. The software will therefore start automatically each time you start the computer. To remove the autostart feature, simply delete the C-Pen Core shortcut from Windows Start Program Startup. When you close the C-Pen Core Window the program is minimised to the system tray. It is still active and will continue to work with the C-Pen. Right click on the C-Pen tray icon to access the C-Pen tray menu. The connection status is shown in the C-Pen tray menu (see images on previous page). To launch the C-Pen Core Window, click Open. To launch the C-Pen Core Windows and directly go to the settings, click Settings. To exit C-Pen Core software completely, click Exit. A sub-menu is available in the left part of the C-Pen Core main window. Each sub-menu item is explained below. My C-Pen In My C-Pen you will find general information about the C-Pen Core software. The C-Pen must be connected to your computer to see information about C-Pen model, battery status, firmware version and serial number. Bluetooth Status Host Bluetooth Status displays the current Bluetooth status of your computer. The status must be OK to get a successful Bluetooth connection with the C-Pen 3.5. C-Pen Bluetooth Status displays the current Bluetooth status of the C-Pen 3.5. If the computer (host) and the C-Pen are Bluetooth connected, the displayed status is Connected. When connecting the C-Pen via USB, the software will automatically try to make a Bluetooth connection to the C-Pen. You can also click the button Connect to connect them. Settings In Settings it is possible to create and use different profiles. Create a new profile by clicking the button Create new profile and then add a name for this profile. Specific settings can be assigned to each profile. The settings are automatically saved. Each profile will get its own tab at the top. To activate a specific profile, click the profile tab and click the checkbox Use this profile. 2 Applications and C-Pen Settings Characters and fonts Defines the type of characters you want to scan; Text and digits, Digits, or any of the special fonts. Function button Defines what should happen in the document when the C-Pen Function button is pressed. For example, if you select Enter, the cursor will move to a new blank row in the document when you press the Function button (corresponding to pressing Enter on the keyboard). Text stroke separator The Text stroke separator defines what should separate two pasted texts in the document. That is where the cursor should jump after text is pasted (C-Pen is lifted). For example, if you select Space, there will be a space between the text pasted and the next pasted text. C-Pen Core Select the checkbox Activate sound to hear a click sound for a successful scan. A double click sound is heard when the scan is unsuccessful. Select the checkbox Show scan window to activate the on-screen message that indicates when the scan occurs. Language Settings It is important that you select language according to the text you are about to scan. If the document is written in e.g. Swedish, make sure to select Swedish as input language. A correct language setting will improve the OCR result. All available language A list of all available input languages. Selected input languages Displays a list of the currently selected languages. Use drag and drop to move a language from one list to the other. You can also select a language in the list All available languages and click the button arrow down to move it to the list Selected input languages. Add-ons The C-Pen Core Add-on API allows any compliant application to “connect” to C-Pen Core, create its own specific Scan Profile, and receive the scanned text directly without having to be concerned about which application is on top on your desktop or where the text cursor is positioned. You can use C-Pen with almost any text enabled application, but to make it even easier we provide Add-on applications that work seamlessly with the C-Pen Core software. Without having to be the selected and active application on your desktop it still receives all text and data scanned with the C-Pen. In the list of available add-ons, click the button Install to download and install the add-on. C-Pad C-PAD™ is a control pad for the C-Pen Core software. With C-Pad you easily enter special characters and commands without releasing C-Pen from your hand. The C-Pad is provided as a PDF and is easily printed on a regular printer. – URL section: Create your own URL shortcuts and open them in your browser with a simple click. – EDIT section: Use to edit text. – USER section: Configure keystroke(s) to be inserted at the text cursor position or define any other combination of keyboard commands. See below for more details. – SCROLL section: Emulate scrolling up/down/left/right. – PROFILE section: Easily change to another scan profile by “clicking” any of the Profile buttons. 3 – NUMPAD section: Use the numpad to enter numbers at the text cursor position. – FUNCTION section: Contains various functions. – MOUSEPAD area: Enables mouse pointer movements. The C-Pen Function button emulates left-click when the C-Pen is on this surface. Programming C-Pad USER buttons Use any of the five configurable active buttons on C-Pad to send keystrokes and keystroke combinations. Each key is represented by one or more characters. Use the character itself to specify a single keyboard character. For example, to represent the letter A, enter the value: A in the text box to the right of the label User 1. To represent more than one character, append each additional character to the one preceding it. To represent the letters A, B, and C enter ABC in the User 1 text box. To send the text to the cursor or simulate the keystroke combination in the User 1 text box field “click” the active button with your C-Pen. Click on the C-Pad help button for more detailed information about C-Pad. Check for Updates When clicking Check for updates the software will connect to the C-Pen web page to check for new versions. User Manual When clicking User Manual you will download the latest version of the user manual directly from the C-Pen web page. 6. How Do I Use the C-Pen? The C-Pen Core software does not display the text you scan. The scanned text will be inserted at the cursor position. This means that you can scan text into any standard program. This is an example on how to scan text into MS Word. − First check that the C-Pen Core status windows reports that your C-Pen is connected. − Start MS Word. − Place the cursor where you want the text to appear. Do NOT click anywhere else as this will move the cursor and make your program window “passive”. − Place the tip of the C-Pen a few millimetres before the first character of the text. Press the C-Pen gently towards the paper and start moving it along the text line. Try to keep a steady line! Lift the CPen from the paper when you have scanned the last character. − The text you just scanned will instantly be inserted into MS Word. The text is fully editable, e.g. you can change font type and size in MS Word to customise the text. There is a video on the website that describes how it works in more detail. Note that there is a small automatic trigger at the tip of the C-Pen. This activates the scanning when the C-Pen is pressed against the paper. It is important that the trigger is pressed in during the complete scan. The automatic trigger is shown in the picture to the right. 7. Other Information Switching the C-Pen On and Off When the USB cable is connected (all C-Pen models) ● The C-Pen is always on when the USB cable is connected to a powered PC. ● C-Pen 3.5. will be powered off automatically in 10 minutes if the PC is powered off. Other C-Pen models turn off when the PC lose power. When the USB cable is not connected (only C-Pen 3.5) ● Press the Function key momentarily to start the C-Pen when the USB cable is not connected. The blue LED will illuminate for a short while, then flash rapidly to 4 indicate that it´s searching for the PC it is paired to. When the connection is established, the LED will flash slowly (1 time / second). ● Press-and-hold the Function button for about three seconds (until the blue LED turns off) to turn off the C-Pen 3.5. Battery Connect the USB cable between the C-Pen and the computer to charge the internal battery in the C-Pen. We recommend that you use a high-power USB port on the computer. The computer must be turned on for the battery to be charged. The battery status is available via the status window and under My C-Pen in the C-Pen Core software. To fully charge the battery, let the C-Pen charge until the battery status shows 100%. We recommend that you keep charging for another 30 minutes. The battery reaches its full capacity after it has been fully discharged and charged a few times. 8. Troubleshooting Which texts can I scan? You can scan printed text with a standard modern font. Font sizes between 5 and 22 points are supported. Scanning texts with an image background will not work. There must be a clear difference in contrast between the text and the background to get good character recognition. A glossy surface may cause reflections and affect the OCR. Is handwritten documents supported? No! C-Pen will not recognise a handwritten text. My computer does not recognise C-Pen when I connect it to the USB The latest C-Pen software is available at http://www.cpen.com/latest. The drivers included in the latest C-Pen software are certified by Microsoft to ensure compatibility with Windows XP, Windows Vista (32 bit and 64 bit), and Windows 7 (32 bit and 64 bit). NOTE that the grey/beige version of C-Pen 20 is ONLY compatible with 32 bit Windows versions. If there is a problem for Windows to automatically detect the drivers, use Windows Device Manager to manually point out the correct drivers. The correct drivers are by default installed on your hard drive in the folder C:\Program Files\C Technologies\C-Pen Core\UsbDriver. Some characters are not correctly recognised Make sure that you have selected the correct scan language in the C-Pen software settings. Also try scanning at different speeds. If you are scanning slowly you may get a better result by increasing the scan speed. I get a message that C-Pen Core is already running This message will appear if you are starting the C-Pen program when the program is already running. Only one program can connect to your C-Pen. To find the C-Pen software that is already running, take a look at the system tray to find the C-Pen tray icon. Windows may hide tray-icons depending on your settings. The same message can appear if you have two different C-Pen programs installed on the computer. If you have both a new and old version of the C-Pen program installed, it is recommended that you uninstall the old version. I cannot connect via Bluetooth The Bluetooth Status is displayed in the C-Pen Core software (under My C-Pen). Host Bluetooth Status must be OK to get a successful connection. If anything else is displayed, start by checking which Bluetooth stack that is implemented on your computer. To check it, go to the device manager and review all Bluetooth related information. Normally this information is displayed in the Bluetooth Devices or Bluetooth Radios category. Review it’s properties to get more detailed information. Supported stacks are: Microsoft Bluetooth stack and Widcomm Bluetooth stack. 5 9. More about C-Pen USB Connected The C-Pen is always turned on when the USB cable is connected to a computer which is turned on. Not USB Connected The functions below are only available when the C-Pen is not connected to the computer via USB. On Press the Function button briefly to start the C-Pen. Off Press and hold the Function button for 3 seconds to turn the C-Pen off. Auto Off (10 min) If the C-Pen is turned “on” and there is no connection to the host computer the C-Pen will automatically turn “off” after 10 minutes. Auto Off (60 min) If the C-Pen is turned “on” and connected via Bluetooth to the host computer it will stay on. However, if you do not scan anything for 60 minutes the C-Pen will turn “off”. Reset To reset the C-Pen, keep the Function button pressed (during “on”) for 14 seconds. Discoverable Mode To pair the C-Pen 3.5 with your PC, the C-Pen 3.5 has to be in discoverable mode. To enter Discoverable Mode first turn off the C-Pen. Then press and hold the Function button for 6 seconds. When the blue LED starts to blink, the C-Pen is in Discoverable Mode. The Bluetooth PIN of the C-Pen 3.5 is 1234. LED The blue LED of the C-Pen indicates if the C-Pen is “on” or “off”. It will also indicate the current operational mode according to the table below. LED Status Operational Mode No LED Off LED turned on or blinking On LED blinking 1 time every third second Bluetooth connected LED blinking 3 times per second Searching for Bluetooth host LED blinking 1 time per second Discoverable mode LED blinking rapidly Sending data 6 7