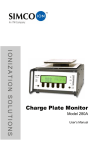
1
User Manual
Software Version 7.09
Part Number: MAN14AUTO
Document Number: #114
Manual by: George Campos
Copyright © October 1997
Ref: mfxAuto Manual 97.02
TABLE OF CONTENTS
Introduction
User Input Data Field ............................... 23
Multiple Choice Data Field ...................... 23
Select Data Field ...................................... 23
Nested Data Field ..................................... 23
Dialog Boxes ................................................... 23
Pick Lists ......................................................... 24
3.1 OVERVIEW OF FILE MENU ................................... 25
3.2 OPEN FILE ......................................................... 25
New EDL File: ................................................ 25
Recent Files ..................................................... 25
5
EDL MANAGEMENT ................................................... 5
RECORDING ................................................................ 5
CONFORMING .............................................................. 5
AUTO SPLITTING ......................................................... 6
CLIP NAMING ............................................................. 6
Quick Start
7
QS.1 SETTING UP HARDWARE ...................................... 7
QS.2 SETTING UP SOFTWARE ....................................... 7
QS.3 STARTING UP MFX AUTO ............................... 7
1. Getting Started
3. The File Menu
Note File .......................................................... 26
Minimize File .................................................. 26
Text File ........................................................... 26
3.3 SAVE AND SAVE AS ............................................. 26
3.4 COPY ................................................................. 27
3.5 SEARCH ............................................................. 27
3.6 OTHER ............................................................... 27
Add Scene Search ............................................ 27
Move Scene & Take Position ........................... 28
Alt. List Conversions ....................................... 29
3.7 DOS SHELL ....................................................... 29
3.8 PRINT ................................................................ 29
3.9A USER SETTINGS ................................................ 29
Video Type ....................................................... 30
File Mask ......................................................... 30
Change/View ................................................... 30
Open ................................................................ 30
Save As ............................................................ 30
3.9B THE USER SETTINGS DATA ENTRY WINDOW ....... 30
List # at Start-up ............................................. 31
View Window Rows / Auto-assemble
Window Rows .................................................. 31
Cursor Control Speed ..................................... 31
Auto-Save ........................................................ 31
Sync Preference ............................................... 31
Com Port Detection .................................. 32
Allow Video Edits .................................... 32
Advanced... ...................................................... 32
Use Edit Link Option ............................... 33
Moving Progress Display ......................... 33
Startup List Converts... ............................. 33
Strip A,B SR's .................................. 34
Convert None to 1 ............................ 34
Strip (AB) Scene's ............................ 34
Custom Convert ................................ 34
Minimize File(s) .............................................. 35
Use Default Minimize ..................................... 35
Minimize at Startup ......................................... 35
9
1.1 HARDWARE REQUIREMENTS ................................... 9
1.2 HARDWARE CONNECTIONS ..................................... 9
The MFX AUTO Protection Key ....................... 9
Interface Cable to Fairlight MFX3plus System ... 9
1.3 SOFTWARE INSTALLATION ..................................... 10
Windows ‘95 Setup .......................................... 10
Creating a Shortcut for MFX AUTO ........ 11
Activating Mouse Support & SMARTDRV .. 12
Windows 3.1 Setup .......................................... 12
DOS Installation ............................................. 13
1.4 STARTING MFX AUTO ...................................... 14
Opening an EDL File ...................................... 14
1.5 USER SETTINGS DATA ENTRY WINDOW ................ 15
1.6 USING THE HELP SYSTEM .................................... 16
Using Contextual Help .................................... 16
Using the Help Menu ...................................... 16
2. Interacting With MFX AUTO
25
17
2.1 MFX AUTO MAIN SCREEN ............................... 17
Screen Overview ............................................. 17
The Pull-Down Menus .................................... 17
Lists .......................................................... 18
List [1] .............................................. 18
The EDL Window ............................................ 18
List [2] .............................................. 19
In List Mode ............................................. 20
In Menu Mode .......................................... 20
In Auto-Assemble Mode .......................... 20
The Status Line ................................................ 20
2.2 USER INTERFACE IN MFX AUTO ....................... 21
Mouse Use ....................................................... 21
Using the Mouse ....................................... 21
Click Spots ............................................... 21
Data Entry Windows ....................................... 22
AUTO
MFX AUTO User Manual
2
4.7 RANGE ............................................................... 42
Mark Start <F7> ............................................ 43
Mark End <F8>.............................................. 43
Scroll & Mark <ALT ↑↓ > ............................. 43
Toggle <F5> or <ENTER> • ......................... 43
Auto-assemble Marks ...................................... 43
Mark Auto-assembled Events .................. 43
Mark Unassembled Events ....................... 43
Clear Ranges <CTRL F5> ............................. 43
Cut Ranges <CTRL F6> ................................ 43
Keep Ranges <CTRL F7> .............................. 43
Mirror .............................................................. 43
Mark Video Only Edits .................................... 43
4.8 OFFSET <ALT O> ............................................. 43
4.9 CLEAR AUTO MARKS .......................................... 44
4.10 MARK TIMECODE .............................................. 44
4.11 EVENT DURATION <SHFT F1> ........................... 44
4.12 REPORTS .......................................................... 44
List Report <ALT R> ...................................... 44
Serial Port Report <ALT P> .......................... 44
4.13 SWITCH LIST WINDOW ...................................... 44
Switch to Inactive List <ALT S> .................... 44
SwapFind Pos <ALT Z> ................................. 44
4.14 RENUMBER ....................................................... 44
4.15 CHECK TIMECODE NUMBERS ............................. 44
4.16 RECONVERT LIST 1 ........................................... 44
Minimize All Lists ........................................... 35
Sort List Automatically ................................... 35
List Report When Opened ............................... 36
Note File When Opened .................................. 36
Load Previous File .......................................... 36
Select Menu on First Click .............................. 36
Auto-Renumber ............................................... 36
Exploding Windows ......................................... 36
Compress EDL at Load ................................... 36
Arrow Style Pointer ......................................... 36
Sound Effects ................................................... 36
3.10 EXIT MFXAUTO <ALT X> ........................... 36
4. List Menu
37
4.1 OVERVIEW OF THE LIST MENU ............................. 37
4.2 SORT ................................................................. 37
C mode ............................................................ 37
Running Order ................................................ 37
Event ............................................................... 37
Scene ............................................................... 37
4.3 FIND .................................................................. 37
Item <F6> ....................................................... 38
Timecode ......................................................... 38
Scene <ALT F6> ............................................ 38
Find Next <F11> ............................................ 38
Find Prev <F12> ............................................ 38
Find Next Range <CTRL F11> ...................... 39
Find Prev Range <CTRL F12 ......................... 39
4.4 EDIT .................................................................. 39
Edit Line <ALT F1> ....................................... 39
Insert New Line <ALT INSERT> ................... 39
Delete Line <ALT DELETE> ......................... 39
Edit Scene # <ALT F3> .................................. 39
Insert Overall Event ........................................ 39
Toggle Assemble Mark <CTRL A> ................. 39
4.5 CONVERT ........................................................... 39
Defaults ........................................................... 39
Set Source Frame Rate .................................... 39
Set Record Frame Rate ................................... 40
Change Record Hour ...................................... 40
Dupe Record Timecode in Source ................... 40
Copy Source Hour to Sound Roll .................... 40
Equalize Source & Record Duration .............. 40
Combine Equal Events .................................... 40
Strip (A),(B) .................................................... 40
Sound Rolls .............................................. 41
Scene Numbers ......................................... 41
Convert None to 1 ........................................... 41
Custom Convert .............................................. 41
4.6 DELETE .............................................................. 42
Minimize List ................................................... 42
Custom delete .................................................. 42
Delete Highlighted Line <ALT DELETE> ..... 42
5. Auto-Assemble Menu
45
5.1 OVERVIEW OF THE AUTO-ASSEMBLE MENU .......... 45
5.2 PREP LIST FIRST THEN ASSEMBLE ....................... 45
5.3 AUTO-ASSEMBLE ................................................ 45
Interrupting Auto-assembly ............................ 46
5.4 ASSIGN EDITS TO TRACKS • ................................. 46
5.5 LINK ASSIGNED EDITS TO TRACKS • ..................... 46
5.6 CLEAR EDIT LINKS • ........................................... 46
5.7 DUPE WORK TRACK • ......................................... 46
5.8 CONFORM HIGHLIGHTED EVENT <ALT C> • ........ 46
5.9 RE-CONFORM • .................................................. 47
5.10 CONFORM EDIT TRACKS .................................... 47
5.11 SET CONFORM STYLE ....................................... 47
5.12 ADD SCENE SEARCH ......................................... 48
6. The MFX Functions Menu
49
6.1 OVERVIEW OF MFX FUNCTIONS MENU ................ 49
6.2 NAME CLIPS <ALT N> ...................................... 49
6.3 AUTO SPLIT ........................................................ 49
6.4 GO TO TIMECODE ............................................... 49
Send Disk ........................................................ 49
Source Start <F1> .......................................... 49
Record In <F3> .............................................. 49
Source Stop <F2>........................................... 49
Record Out <F4> ........................................... 49
AUTO
3
Table of Contents
Send Master .................................................... 49
Source Start <CTRL F1> ............................... 49
Record In <CTRL F3> ................................... 49
Source Stop <CTRL F2> ................................ 49
Record Out <CTRL F4> ................................. 49
6.5 GO TO TC IN EDL <F9> ................................... 49
6.6 SET MFX INPUT ................................................ 50
6.7 MFX SETUP ..................................................... 50
6.8 MARK AUDIO EDITS .......................................... 50
6.9 MARK VIDEO EDITS ........................................... 50
6.10 CLEAR PROJECT MARKS .................................... 50
6.11 GET VERSION <ALT V> .................................. 50
7. EDLs
Compare .......................................................... 62
Timecode .................................................. 62
Scene & Scene + Take .............................. 62
Same TC Gap .................................................. 62
Compensate ..................................................... 62
Set Track Data ................................................. 63
9.3 AUTO SPLIT EXAMPLE ......................................... 63
10. Naming Clips
10.1 OVERVIEW ........................................................ 65
10.2 NAMING CLIPS ................................................. 65
Keyboard .................................................. 65
Auto .......................................................... 65
Auto Add Quotes ...................................... 66
Track Selection ................................................ 66
Motion Control ................................................ 66
Edit Clip Name................................................ 66
Other Options ................................................. 66
51
7.1 INTRODUCTION TO EDLS ..................................... 51
7.2 GENERAL EDL DESCRIPTION .............................. 51
7.3 EDL FORMATS AND FLOPPY TYPES ...................... 52
7.4 EDL AUDIO CHANNEL CROSS REFERENCE ........... 53
7.5 HOW MFX AUTO CONVERTS EDLS .................. 53
Appendix A: Troubleshooting Guide
8. Using Auto-Assemble
55
67
BAD EDLS .............................................................. 67
IMPROPER MFX SETTINGS ........................................ 67
INTERFACE ERRORS ................................................... 67
Bad PC to MFX3plus connection ...................... 68
MFX3plus to Master machine errors .............. 68
Timeout Errors ................................................ 68
UART Overrun Errors ..................................... 68
ASYNC Errors ................................................. 68
8.1 OVERVIEW OF THE AUTO ASSEMBLE PROCESS ....... 55
8.2 PREPARING FOR AUTO-ASSEMBLY ........................ 55
8.3 THE AUTO-ASSEMBLY DATA ENTRY WINDOW ....... 55
Record & Conform .......................................... 56
Conform Style ................................................. 56
Record Track and Conform Track ................... 56
Head Handle, Tail Handle & Pre-Roll ........... 56
Name By .......................................................... 57
Group By ......................................................... 57
Unwind Source ................................................ 57
Project Frame Rate ......................................... 57
Gain ................................................................ 58
Advanced ......................................................... 58
[ ] or [-] Auto-Skip bad events ................. 58
[ ] or [-] Single Step ................................. 58
[ ] or [-] Wave Process .............................. 58
[M1] or [M2] Master Key ........................ 58
8.4 THE AUTO- ASSEMBLE PROCESS .......................... 58
Starting Auto-Assembly .................................. 59
Low Track ........................................................ 61
High Track ....................................................... 61
Start Track ....................................................... 61
Take From ........................................................ 61
Handle ............................................................. 61
No Handle Length ........................................... 61
9. Using Auto Split
65
Appendix B: Timecode
69
TIMECODE ................................................................ 69
NTSC - DROP FRAME vs NON-DROP,
and PAL (EBU) ............................................... 70
Non-drop Frame ....................................... 70
Drop Frame............................................... 70
PAL/SECAM - EBU................................. 70
Appendix C: Command Line Options 71
Appendix D: Keyboard Shortcuts
73
Appendix E: Glossary
79
61
9.1 OVERVIEW .......................................................... 61
9.2 AUTO SPLIT DATA ENTRY WINDOW ..................... 61
Minimum Separation Gap ............................... 62
AUTO
MFX AUTO User Manual
4
INTRODUCTION
MFX AUTO provides an interface to Fairlight MFX3plus and MFX3 systems to aid and automate the sound editing process of TV and Film productions.
Note: From now on, this manual will refer to the MFX3plus system. Since the two systems are
very similar, the vast majority of what applies to the MFX3plus also applies to the MFX3.
For purposes of this manual, we will use MFX3plus to represent both - and note in the text only
when something applies differently to the standard MFX3.
MFX AUTO allows the MFX3plus to assemble and conform source audio according to an audio
EDL. In this process, the audio is re-recorded from its original source and placed at the correct
timecode destination according to the EDL. To run MFX AUTO, a low-cost Windows-based PC is
connected to the MFX3plus with a provided serial interconnect cable.
MFX AUTO is powerful, with abundant features, yet intuitive and easy to use, with extensive
help menus available. The following describes some of these features:
EDL MANAGEMENT
EDLs (Edit Decision Lists) are easily manipulated inside MFX AUTO. Lists generated by
virtually all popular video editing controllers can be loaded, managed and edited, including CMX,
Grass Valley, Sony, and Ampex. MFX AUTO is also switchable between PAL and NTSC.
MFX AUTO provides powerful editing functions for editing and correcting errors encountered
in EDLs, including offsetting, source or record numbers, and either/or source or destination numbers
in both non-drop and drop frame and PAL.
MFX AUTO can output a filtered EDL with all the unneeded edits removed, sorted by reels and
then chronologically within reels, so that the source audio can be accessed quickly in a linear fashion,
keeping shuttle time on the source machine to a minimum.
RECORDING
MFX AUTO drives the MFX3plus during the recording of the audio from the source tapes with a
9-pin Sony protocol interface. This process takes complete control of the recording operation, only
requiring the operator to change source reels.
The user can set handles so that extra audio at the start and end of each clip is also recorded.
This extra audio is useful during editing to create smooth transitions between clips.
CONFORMING
Conforming can be performed on each clip after recording. Any extra handles that are recorded
are hidden (but are available for later editing), and the audio is copied to the destination timecode
position indicated by the edit decision list. Optionally, recording can be performed independent of
conforming and auto-conforming delayed until another time. It is also possible to re-conform audio
already recorded into the MFX3plus, useful in cases when the picture has been re-cut.
AUTO
5
Introduction
AUTO SPLITTING
After recording and conforming, MFX AUTO can direct the MFX3plus to automatically split the
conformed material by a number of criteria including Scene Number Only, Scene and Take Number
and Timecode (with user set ‘gap’ lengths). In addition, extended handles with fades can be automatically performed at every track split.
CLIP NAMING
During recording, clips can be automatically named by either Scene and Take Number or
Timecode. After editing, MFX AUTO provides an interface that allows the editor to rename each clip
for Dub Chart requirements. The editor is walked through the entire project and can rename clips
either manually or by selecting from a menu of the last 50 clip names for easy automatic entry.
AUTO
MFX AUTO User Manual
6
QUICK START
Objective: A condensed, quick summary tour through setting up and getting going with MFX
AUTO. Quick Start is recommended only for those who are already very familiar with the
processes involved and need minimal guidance.
For full information, and for step by step instructions through setting up and using MFX
Software, move on to the next chapter, Getting Started.
QS.1 SETTING UP HARDWARE
1)
Place the Protection Key (dongle) on the parallel port of your PC.
2)
Connect the Interface (null modem) cable between the serial port of your PC and the hanging serial port on the rear of the MFX3plus system keyboard.
3)
Turn on your PC system, then your MFX3plus system.
4)
Place the MFX AUTO installation diskette in the floppy drive of your PC.
QS.2 SETTING UP SOFTWARE
1)
Type A:INSTALL at the DOS Prompt (DOS systems) or at the Run window (Windows 3.1
or ‘95 systems).
2)
Select the desired options until MFX AUTO is completely installed.
QS.3 STARTING UP MFX AUTO
1)
Type MFX3AUTO (DOS), select MFX3AUTO from the File Manager
(Windows 3.1) or double-click the MFX3AUTO icon (Windows systems).
2)
Follow the instructions on the screen.
Note: For detailed instructions on any or all of the above, see Chapter 1: Getting Started.
AUTO
7
Quick Start
AUTO
MFX AUTO User Manual
8
1. GETTING STARTED
Objective: To understand the process of beginning to work with MFX AUTO - from preparing the
hardware, to installing the software, to setting the user preferences.
1.1 HARDWARE REQUIREMENTS
In order to properly run MFX AUTO, you need the following setup:
An MS-DOS or Windows (3.x or ‘95)-compatible PC with at least:
One RS-232 serial port
One Centronics parallel port
For DOS: A minimum of 4MB RAM / For Windows: a minimum 8MB RAM
A Color Monitor
A Fairlight MFX3 or MFX3plus System
(Although MFX AUTO will allow you to manipulate lists without being
connected to a Fairlight MFX system, all other functions require the MFX.)
1.2 HARDWARE CONNECTIONS
Before you begin the following hardware connections, make sure that both your Fairlight MFX
system and your PC system are completely turned off.
The MFX AUTO software requires two hardware connections on your PC:
•
•
MFX AUTO Protection Key
Interface Cable to Fairlight MFX3 or MFX3plus System
THE MFX AUTO PROTECTION KEY
The MFX AUTO Protection Key is a dongle that plugs into the parallel port on the back of
your PC. It does not have to be connected directly on the parallel port. If you have other devices on
the parallel bus (such as external drives, printers, etc.) you may use the Protection key as a passthrough device anywhere on the chain, including on the end of the chain.
INTERFACE CABLE TO FAIRLIGHT MFX3plus SYSTEM
In order to communicate with the Fairlight MFX system, you must plug in the supplied null
modem cable.
Note: Most PCs have two serial ports. (One of these is often used for the mouse). Since almost all
PC operating systems allow for up to four serial ports, MFX AUTO also supports four. By default,
MFX AUTO is set to auto-detect which port is connected to the MFX. See Com Port Detection, in
Chapter 3, section 3.9B, for information on possible mouse problems with this setting, and how to
change it if desired.
1)
Remove the supplied 9-pin to 9-pin null modem cable from the MFX software box.
Warning: Make sure to use the supplied null modem cable. Do not try to use an
ordinary serial cable.
2)
Plug either end of the cable to the selected serial port on the PC.
AUTO
9
Chapter 1: Getting Started
3)
Look on the rear of the keyboard on the MFX3plus system. A short cable should be hanging
from the 37-pin remote port connector. At the end of this cable is a 9-pin connector.
4)
Connect the other end of the null modem cable to the end of this cable.
Warning: Make sure to connect to the hanging cable, and not the rear port on the
MFX keyboard.
The hardware connections are now complete.
1.3 SOFTWARE INSTALLATION
1)
2)
3)
Turn on your PC system.
Turn on your Fairlight MFX3plus system.
When your Fairlight MFX3plus system is completely booted, a Project Menu will come up on
the screen.
You are now ready to install the MFX software on your PC.
WINDOWS ‘95 SETUP
1)
2)
3)
Insert the MFX AUTO Installation Disk in the A: Drive.
From the Start menu at the bottom of left of the Windows ‘95 desktop, select Run.
The RUN user input data field will appear. Enter A: INSTALL.
Note: MFX AUTO will also install from to B: drive. If you wish to install from this
drive instead, insert the MFX Installation disk into your B: drive, and type B: at the
first DOS prompt. Then once you are prompted with B:, type INSTALL.
4)
A dialog box entitled MFX AUTO INSTALL will appear.
The dialog box will present three options:
COMPLETE INSTALL, PARTIAL INSTALL AND CANCEL.
COMPLETE INSTALL will install MFX AUTO, along with all of its support files. This is
the recommended install for new users.
PARTIAL INSTALL will provide you with options, and you select which files will be
installed. This is recommended if you are installing an update to your previously installed
MFX AUTO, and don’t necessarily need to reinstall all of the support files.
CANCEL cancels the installation.
5)
6)
7)
Select the type of installation you would like to perform.
At the prompt, enter the directory where the source files are (A:).
At the next prompt, enter the directory where the new files will be installed. The default is
the main directory of the C: drive.
If this is where you would like the software to be installed, select OK.
If you wish to specify a different directory location, enter a new directory location at the
prompt.
AUTO
MFX AUTO User Manual
10
If you selected PARTIAL INSTALL, you will be given the option of selecting
the files you wish installed.
8)
A Verify dialog box will appear. Select OK to continue, or BACK to change.
As the software is installed on your drive, a status box will notify you of the progress. When
complete, a box will notify you: Files successfully copied.
9) Click OK or hit ENTER.
10) Choose the Video Type: NTSC or PAL. NTSC is the American standard, which uses 30
frames per second. PAL is the European standard which uses 25 frames per second. Select
the appropriate type.
11) A dialog box will appear, informing you that the next screen will allow you to customize the
operation of MFX AUTO. When you click OK, you will be taken to that screen.
12) You can customize the User Settings Dialog Box now, or at any point, by accessing this box
in the File Menu. Section 3.9a and 3.9b will give you a guided tour of the User Settings
Dialog Box.
13) The next box prompts: Would you like to change the AUTOEXEC.BAT file to include the
pathname for MFX AUTO? Select Yes or No.
The pathname is a list of other directories that the computer will search to find a file when
that file is not in the currently selected directory. By selecting Yes, you will add the
pathname you selected to install MFX AUTO to this list.
The next dialog box should read: INSTALL has successfully completed.
A Microsoft Windows Pop-Up Program Support window appears. Press CTRL C to close this
window and return to the Windows ‘95 desktop.
CREATING A SHORTCUT FOR MFX AUTO
The following instructions are for creating a shortcut for opening MFX AUTO from the Windows ‘95
desktop.
1)
2)
3)
4)
5)
6)
7)
Double-click on My Computer from the main
Windows desktop.
When that window opens, double-click your
Drive C: (or the drive you installed MFX
AUTO on.
Double-click the MFX3plus folder.
Click once to select the Mfx3auto icon.
Click the right mouse button to bring up a popup menu.
Select Shortcut from this menu. A shortcut for
the MFX AUTO program is created, and will
appear in the active window.
Drag this new icon, “Shortcut to Mfx3auto”,
from the MFX3plus window to the main Windows ‘95 desktop.
You can now open MFX AUTO from the MFX3plus window inside the drive you installed it in, or,
more conveniently, from the main Windows ‘95 desktop.
AUTO
11
Chapter 1: Getting Started
ACTIVATING MOUSE SUPPORT AND SMARTDRV
Though not necessary, there are two DOS programs that will help the operation
of MFX AUTO. Any mouse driver (usually called MOUSE.EXE) and
SMARTDRV.EXE. The mouse program does what you might think. It enables
mouse support. SMARTDRV.EXE is a disk cache program that greatly reduces
hard drive thrashing when accessing files.
1)
2)
3)
4)
5)
Click the right mouse button on the Mfx3auto icon or the Mfx3auto shortcut icon.
A pop-up menu will appear. Select Properties. Properties allows you to alter a wide range
of settings within the selected program or file.
On the top “index tab” of the Properties box, select Program.
In the Batch File box, type in the path for the mouse driver. Here we have it in the root
directory which is always the drive letter, a colon and a backslash. In this case, C:\MOUSE
is the program that will be run. Right after that, place a semi colon and then the path for
SMARTDRV.EXE.
Click Apply if you will continue to make changes in the Properties box. If you only wish to
install the mouse capabilities into MFX AUTO at this point, you can click on OK to leave
this box. Mouse capabilities will be activated when you open MFX AUTO.
WINDOWS 3.1 SETUP
1)
2)
3)
Insert the MFX AUTO Installation Disk in the A: Drive.
At the Windows 3.1 Program Manager, select RUN from the File Menu.
The Run window will appear. Type A:INSTALL.
Note: MFX AUTO will also install from to B: drive. If you wish to install from this
drive instead, insert the MFX Installation disk into your B: drive, and at Step B above,
type in B:INSTALL instead.
4)
A dialog box entitled MFX AUTO INSTALL will appear.
The dialog box will present three options: COMPLETE INSTALL, PARTIAL
INSTALL AND CANCEL.
COMPLETE INSTALL will install MFX AUTO, along with all of its support files. This is
the recommended install for new users.
PARTIAL INSTALL will provide you with options, and you select which files will be
installed. This is recommended if you are installing an update to your previously installed
MFX AUTO, and don’t necessarily need to reinstall all of the support files.
And CANCEL cancels the installation.
5)
6)
7)
Select the type of installation you would like to perform.
At the prompt, enter the directory where the source files are (A: or B:).
At the next prompt, enter the directory where the new files will be installed. The default is
the main directory of the C: drive.
If this is where you would like the software to be installed, select OK.
If you wish to specify a different directory location, enter a new directory location at the
prompt.
AUTO
MFX AUTO User Manual
12
If you selected PARTIAL INSTALL, you will be given the option of selecting
the files you wish installed.
8)
A Verify dialog box will appear. Select OK to continue, or BACK to change.
As the software is installed on your drive, a status box will notify you of the progress. When
complete, a box will notify you: Files successfully copied.
9) Click OK or hit ENTER.
10) Choose the Video Type: NTSC or PAL. NTSC is the American standard, which uses 30
frames per second. PAL is the European standard which uses 25 frames per second. Select
the appropriate type.
11) A dialog box will appear, informing you that the next screen will allow you to customize the
operation of MFX AUTO. When you click OK, you will be taken to that screen.
12) You can customize the User Settings Dialog Box now, or at any point, by accessing this box
in the File Menu. Section 3.9a and 3.9b will give you a guided tour of the User Settings
Dialog Box.
13) The next box prompts: Would you like to change the AUTOEXEC.BAT file to include the
pathname for MFX AUTO? Select Yes or No.
The pathname is a list of other directories that the computer will search to find a file when
that file is not in the currently selected directory. By selecting Yes, you will add the
pathname you selected to install MFX AUTO to this list.
The next dialog box should read: INSTALL has successfully completed.
Return to the Main window (inside the Windows 3.1 Program Manager window.)
1)
2)
3)
Select File Manager.
In File Manager, select MFX3plus from the left side directory column.
To open the MFX AUTO software, select MFX3auto.exe from the right side file column.
DOS INSTALLATION
1)
2)
3)
Insert the MFX AUTO Installation Disk in the A: Drive.
At the DOS prompt, type A:INSTALL.
A dialog box entitled MFX AUTO INSTALL will appear.
The dialog box will present three options: COMPLETE INSTALL, PARTIAL INSTALL AND
CANCEL.
COMPLETE INSTALL will install MFX AUTO, along with all of its support files. This is the
recommended install for new users, as it installs all files. (When finished, it will take you to
the User Settings Data Entry Window, where you can set program and file preferences. See
Chapter 3: The File Menu, for more information on setting the User Settings Data Entry
Window)
PARTIAL INSTALL will provide you with options, and you select which files will be installed.
This is recommended if you are installing an update to your previously installed MFX
AUTO, and don’t necessarily need to reinstall all of the support files. (Partial install also lets
you select Set User Parameters, where you can change all of your program and file preferences. You can also select this once you are in MFX AUTO, by selecting User Settings from
the File Menu. See Chapter 3: The File Menu, for more information)
And CANCEL cancels the installation.
AUTO
13
Chapter 1: Getting Started
4)
5)
6)
Select the type of installation you would like to perform.
At the prompt, enter the directory where the source files are. (A:)
At the next prompt, enter the directory where the new files will be installed. The default is
C:/MFX3PLUS.
If this is where you would like the software to be installed, select okay. MFX AUTO will
create a new directory if none exists.
If you wish to specify a different directory location, enter a new directory location at the
prompt.
If you selected PARTIAL INSTALL, you will be given the option of selecting
the files you wish installed.
7)
At the end of the installation, a message will appear: FILES SUCCESSFULLY
INSTALLED.
8) A dialog box will appear, with the following: WOULD YOU LIKE TO CHANGE THE
AUTOEXEC.BAT FILE TO INCLUDE THE PATHNAME FOR MFX AUTO? You will be
offered a YES and NO option.
9) Another dialog box will appear: INSTALL SUCCESSFULLY COMPLETED.
10) At the DOS prompt, you will be in whatever directory you’ve chosen to install the files.
1.4 STARTING MFX AUTO
OPENING AN EDL FILE
When you first open MFX AUTO, it will ask you to choose an Edit Decision List (EDL) file to
work on. MFX AUTO’s functions all center on manipulating EDLs, and therefore, won’t let you go
any further until you select a file to work on.
1)
When MFX AUTO asks for an EDL to open, select the directory and name of the EDL list
you wish to work on. After the first time you open a particular file, the file will remain on
MFX’s opening list, and the program will present its name to you as an option when you
begin.
Note: By selecting Load Last File in the User Settings page, you will automatically
have the last file you worked on opened when you start MFX AUTO.
AUTO
MFX AUTO User Manual
14
1.5 USER SETTINGS DATA ENTRY WINDOW
The User Settings Data Entry Window is accessed by opening the FILE drop down menu and
selecting USER SETTINGS, then CHANGE/VIEW •. This window allows you to change all of the
major settings, and keep separate settings files for each user of MFX AUTO.
Chapter 2, Interacting With MFX AUTO, presents information on entering data into all types of
data entry windows, and Chapter 3, The File Menu, contains a section that describes at length all of
the options available under the User Settings Data Entry Window.
The User Settings Data Entry Window (top) and Nested Sub-Windows
(default settings shown)
AUTO
15
Chapter 1: Getting Started
1.6 USING THE HELP SYSTEM
You access MFX AUTO’s Help System by either:
Selecting Help from the Help Menu (Help Topics Index) or
Pressing the ALT & H keys (Contextual Help) wherever you need help
USING THE HELP MENU
Selecting Help from the Help Menu (Help Topics)
brings up a screen with a list of options.
USING CONTEXTUAL HELP
Pressing the ALT & H keys provides Contextual Help - help related to the current function in use.
AUTO
MFX AUTO User Manual
16
2. INTERACTING WITH MFX AUTO
Objective: This section describes the main screens and windows of MFX AUTO, and describes all
of the ways to input data and make selections within the program, with the mouse and keyboard.
2.1 MFX AUTO MAIN SCREEN
SCREEN OVERVIEW
Pull-Down Menus
EDL
Window
Status Line
THE PULL-DOWN MENUS
To select a menu item either select with the mouse or press the
ALT key and the first letter of the menu desired.
Once a menu is selected you can browse it with the mouse or the
←↑↓→ arrow keys or directly choose an option by pressing its
highlighted letter.
Open
If the option has a
at the end, there is another sub-menu for it.
If the option has a • at the end there is help available by pressing
ALT H.
AUTO
17
Chapter 2: Interacting With MFX AUTO
THE EDL WINDOW
EDL List
Note how Sony EDLs (below) are formatted such that they take up the whole
display and therefore do not leave room for window frames and scroll bars.
Sony Format EDL List
LISTS
The EDL Window displays the EDL, or Edit Decision List, upon which MFX AUTO works.
LIST [1]
List 1 is a copy of the list that is loaded from the disk. All editing and searching routines can
be performed on List 1 though, so it can change.
AUTO
MFX AUTO User Manual
18
Number of Items
Path & Filename
List # Being Displayed.
Can be 1 or 2
List 1
LIST [2]
List 2 is the MFXAUTO version of List 1 which is used in Auto-assembly. Only lines that
have valid event numbers make it to list 2. The Audio columns A A1 AA/V, etc. are also
converted into a special format to ease into Auto-assembly.
Event #
SR #
Edit
Type
Source In
Record In
Source Out
Record Out
Audio Patching Info
List 2
AUTO
19
Chapter 2: Interacting With MFX AUTO
THE STATUS LINE
The bottom line on the screen is the status line. This line has various information about what is going
on during the program.
IN LIST MODE
Help
Type of Sort
Scene # if available
Indicates that Ranges
are Selected
Shows type of
MFX Connected:
MFX3 or MFX3plus
List Duration
IN MENU MODE
When the menu is selected, the Status Line is cleared to allow for descriptive lines of help
for some of the menu items.
IN AUTO-ASSEMBLE MODE
Status of
Assemble
Total time that
will be recorded.
Help messages
Elapsed time
AUTO
MFX AUTO User Manual
20
2.2 USER INTERFACE IN MFX AUTO
A lot of communication between MFX AUTO and the user is done with data entry windows,
dialog boxes and pick lists. These boxes or windows will warn you of problems, validate requests,
ask for data entry, or let you make selections.
In order to use the data entry windows, dialog boxes and pick lists, and all of the data entry and
selection points in MFX AUTO, it is important to first go over use of the mouse in MFX AUTO, as
well as the data entry keystrokes for moving around the lists and data fields within the program.
MOUSE USE
USING THE MOUSE
The mouse can be used extensively for navigating, highlighting, and selecting in MFX AUTO.
Wherever you are in the program, you can use the left button of the mouse to select an item. Within
Data Entry Windows, you can click on both buttons simultaneously to accept input and continue.
Note: The mouse action takes place upon the release of the mouse click, not on the first press.
CLICK SPOTS
There are many click spots available on MFX AUTO’s screens and EDL windows. Clicking
anywhere inside a framed “pick” window will select that item.
Opens new list
Switches to other List
Scroll up one
Start of list
Page Up
Slider bar shows
position
Page Down
End of List
Scroll down one
Saves current List
Finds same item in other List Note: The scrollbar
appears when there are
more items than will fit
in the display window.
Mouse Click Spots in Main List Window
Note: Sony lists are formatted such that they take up the entire display, and therefore
do not leave room for window frames and scroll bars.
AUTO
21
Chapter 2: Interacting With MFX AUTO
Show Help
Bring up Sort Menu
Edit Scene number
Bring up Range Menu
Mouse Click Spots in Bottom Status Line
DATA ENTRY WINDOWS
Data entry windows allow for more options than your typical dialog box, and they can contain a
variety of different types of data fields within their window.
The User Settings data entry window is a good example of multiple data entry types within one
window.
There are four types of data fields used in MFX AUTO:
User Input
Multiple Choice
Select (On or Off)
Nested
Select Data Field
allows you to choose only between
selected [ ],
or deselected [ - ]
Multiple-Choice Data Field
allows you to choose from NTSC
or PAL
User Input Data
Field
allows you
to type data
into it
Nested Data Field
When you select a Nested Data
Fields, such as Advanced... above, another
input screen pops up with more options
AUTO
MFX AUTO User Manual
22
USER INPUT DATA FIELD
Record Track [
]
User input fields need to have data typed into them. Most often they will ask for numbers for track
assignments or file names for saving.
MULTIPLE CHOICE DATA FIELD
Unwind Source [Off
]
[Forward]
[Reverse]
Multiple Choice Fields themselves have the data choices. You select by either clicking on the field
with the mouse, pressing the SPACEBAR, or pressing the + or - keys.
SELECT DATA FIELD
[
] Record [ - ] Record
Select fields are On or Off fields. When selected, a button shows in the box. When not selected, a dash
shows and the descriptive name is drawn dimmed. As with multiple choice fields, you select or deselect
by either clicking on the field with the mouse, pressing the SPACEBAR, or pressing the + or - keys.
Note: Some select fields affect other fields, so don’t be alarmed if, for example,
turning off the Record field in the Auto-assemble input page causes several other fields
to disappear.
NESTED DATA FIELD
Start-up List Converts [
]
Nested fields are simply an easy way to get to another input screen. You select by either
clicking on the field with the mouse, or pressing ENTER.
DIALOG BOXES
A lot of the communication between MFX AUTO and the user is done with dialog boxes. These
boxes will warn you of problems, offer solutions to problems, validate requests, ask for data entry
etc. Most dialog boxes have at least one option to choose.
These show up near the bottom of the box. If the dialog is not dangerous pressing the space bar will
always choose the first option. Otherwise you must either use the mouse to select the option, press
the highlighted letter of the option to directly select it or use the Tab key or arrow keys to highlight
the option then press enter.
AUTO
23
Chapter 2: Interacting With MFX AUTO
PICK LISTS
MFX AUTO uses 'pick lists' extensively for user selection of data.
Some examples of pick lists are :
EDL Lists (modified Pick List)
Pull Down Menus
Recent File Lists
Index Help Topics
These all have items that are grouped together in a window for selection by a user. If there are more
items than will fit in a window a scrollbar appears on the right border of the window.
AUTO
MFX AUTO User Manual
24
3. THE FILE MENU
Objective: To understand all of the options and features under the File drop-down menu.
3.1 OVERVIEW OF FILE MENU
The file menu contains all of the options for opening, saving, copying and printing files, as well
as for setting your user preferences for the program.
3.2 OPEN FILE
NEW EDL FILE:
When opening a new EDL file, you are first shown a list of files from the same drive and
directory where the current file was loaded from.
You may optionally press <SHIFT TAB> or click on the [D] to choose another drive. Floppy
drives are usually A: or B:. Fixed or Hard drives are usually C: or D:. Directories show up in blue
with a ‘\’ appended to the end. Files show up in yellow. To select a file use the up or down arrow
keys to position the yellow highlight bar on the file to open and press <ENTER> or double click on
the desired file name.
MFX AUTO needs EDLs in a certain format to work A check is done during the open process
to assure the list is in the proper format. MFX AUTO will not proceed past this point until a valid list
is encountered.
The following list formats are the most common and are known to work:
CMX 3400 & 3600
GVG (Grass Valley)
SONY
AMPEX
RECENT FILES
MFX AUTO saves a list of the ten most recent use EDL files and the path where they were
loaded from. You may use this list to open them.
AUTO
25
Chapter 3: The File Menu
NOTE FILE
This is a file with the same path and file name as the current EDL that is in use. The only
difference is the extension which is converted to .NTE. This file will only show up on the disk if you
edit and then save it. Use this file to keep information about the EDL. For instance, you can put in a
reminder to get a sound roll, or to get information about a bad event. If Note file at startup is set to Y
this file will be displayed when you first open the EDL that is associated with it.
MINIMIZE FILE
This is a small text file that you can use to make your own list that MFX AUTO will use to
minimize a list. If no extension is given in the file name .MIN is appended to the name and that is the
name that will be searched for on the disk.
EXAMPLE:
USERNAME.TXT would search for USERNAME.TXT
USERNAME would search for USERNAME.MIN
NOTE: Put only one item per line in this file.
EXAMPLE:
VIDEO
CD
TEMP
Do not use delimiters like _ , . / _ unless they are part of what you want to match in the search.
TEXT FILE
This is a general purpose text file that has no restrictions and can be used to store data such as
phone lists, etc.
3.3 SAVE AND SAVE AS
Choosing Save will save the list using the same path and file name that belongs to the list,
which in effect will overwrite the file that was opened.
Choosing Save As gives you the option to give a different file or path name. If you give a path
name that doesn’t exist, you are offered a chance to create it.
Note:
Saving Files works differently depending on the list that is active when saving.
If list 1 is active just that list is saved. No information is retained about cursor position, ranges, etc.
If list 2 is active, both list 2 and list 1 are combined into one file. If that file is re-opened they are
then separated back into the two lists. The current position in the list as well as any Auto-Assemble
or Range marks are saved.
AUTO
MFX AUTO User Manual
26
3.4 COPY
Whenever there is a list of files to select from either the Copy or Open file menu, you can copy
files from that point. If you want to copy more than one file you select them by pressing <F5> then
pressing <ENTER> on any valid file name. Only those files that have been marked will be copied.
Note that if you selected <Open>, you must use <F5> even for one file.
When copying files the destination must be a different directory or disk. Directory names are
similar to file names in that they can have up to 8 characters, a period, plus a 3 character extension.
Any more characters than the 8 + 3 will be truncated. You can string together a group of names
separated by a backslash (\).
Example :
C:\DOS
C:\WIN31\SYSTEM\TOOLS
C:\MFX3\EDLS
If the destination directory doesn't already exist, a small window is shown with some options to
choose. Choosing Create will create the directory and copy the files. Selecting Get Directory lets you
pick from a list of all available directories and then either use or edit them.
3.5 SEARCH
Search is a rather powerful routine that will completely search any disk for a file or files and
put the result into one list. The default searchpath C:\*.ED? will find any EDL files in any directory
on the C drive and display them with their path names.
You should use search when you don’t remember where an EDL file is located or when searching for a file with an extension other than .EDL. Search has the capabilities to open, delete, and copy
files. After the list of found files is shown, the Action field is shown next to the Start Path field.
There are three options with this field: [Open] [Delete] [Copy ]. You select from these by pressing
the SPACEBAR after the list of files is shown.
If you choose either Delete or Copy, you can mark ranges for multiple files. Holding down the
ALT key while pressing the up or down arrow keys marks or unmarks files.
3.6 OTHER
ADD SCENE SEARCH
When MFX AUTO encounters a list that it hasn’t saved in the converted format, it builds a list of
scene numbers (if they are available) as it loads the file. It does this by scanning the scene search list
and looking for matches of any of the names.
AUTO
27
Chapter 3: The File Menu
For example, there are five default search items built in:
TO CLIP NAME:
NAME:
COMMENT:
SCENE:
*
Given the following list:
TITLE:
FCM: DROP FRAME
FCM: NON-DROP FRAME
001 POP
A
C
00:00:00:01 00:00:00:02...
FROM CLIP NAME: XBARS & TONES TEST- (-3+2)
002 38
A
C
18:41:28:21 18:41:48:03...
FROM CLIP NAME: IS/2 (A)
003 38
A
C
18:46:29:23 18:46:48:12...
FROM CLIP NAME: IT/1 (A)
004 36
A
C
09:58:49:15 09:58:51:25...
FROM CLIP NAME: 1/2 (A)
The items in italic would be put in the scene list:
TITLE:
FCM: DROP FRAME
FCM: NON-DROP FRAME
001 POP
A
C
00:00:00:01 00:00:00:02...
FROM CLIP NAME: XBARS & TONES TEST- (-3+2)
002 38
A
C
18:41:28:21 18:41:48:03...
FROM CLIP NAME: IS/2 (A)
003 38
A
C
18:46:29:23 18:46:48:12...
FROM CLIP NAME: IT/1 (A)
004 36
A
C
09:58:49:15 09:58:51:25...
FROM CLIP NAME: 1/2 (A)
MOVE SCENE & TAKE POSITION
If requested, most picture editing systems generate EDLs with Scene & Take information after
the event # that they belong to.
Given the following list.
TITLE:
FCM: NON-DROP FRAME
001 POP
A
C
00:00:00:01 00:00:00:02...
FROM CLIP NAME: XBARS & TONES TEST- (-3+2)
002 38
A
C
18:41:28:21 18:41:48:03...
COMMENT: 1S/2 (A)
003 38
A
C
18:46:29:23 18:46:48:12...
* 1T/1 (A)
004 36
A
C
09:58:49:15 09:58:51:25...
SCENE: 1/2 (A)
The Scene & Take for event 002 would be 1S/2.
AUTO
MFX AUTO User Manual
28
MFXAUTO uses this system to build the scene & take list for the converted list. At least one system
puts the scene & take before the event #. If you find this to be the case Move Scene & Take will place
the scene & take information correctly.
ALT. LIST CONVERSIONS
MFX AUTO allows the user to define up to ten alternate conversions for any instances where a
list has an event that MFX AUTO can't convert.
These conversions are saved in the user’s user file. Normally this won't happen because every
possibility of each supported list type is understood by MFX AUTO. If it does happen though, here is
how you will add it to the ALT Conversions List.
After selecting ALT List Conversions a window is drawn showing any previously added conversions or if none have been added a default conversion of A2/V='2 ,2'. Press F1 for Add. A small data
input window opens which allows you to add the unconverted and the converted data.
Here is an example :
In the Unconverted box type 1A3
In the Convert to box type 1 ,3
Press F10.
You've now added an alternate conversion. If any list comes in with 1A3 in
its audio column it will be converted to 1 ,3.
3.7 DOS SHELL
Allows user to temporarily use DOS. Typing Exit will return to MFXAUTO.
3.8 PRINT
MFX AUTO allows for printing of either of its list formats to either letter or legal size paper. You
make your choices from three multiple choice data fields.
List to Print
Amount to Print
[List One] or [List Two]
[Whole List] or [Marked Ranges]
If you select Marked Ranges and no ranges are marked, this defaults to Whole List.
Paper Size [Letter] or [Legal]
This sets up how many lines to print before issuing a form feed command to the printer.
3.9A USER SETTINGS
The User Settings menu option allows three other options, each based around the User Settings
dialog box.
AUTO
29
Chapter 3: The File Menu
CHANGE/VIEW
Opens the User Settings dialog box, allowing you to view the set preferences, or alter them.
OPEN
The default filename for the user settings file is USER.USR. You can keep different files by
either calling up MFX AUTO with a specific user filename or using SAVE AS to give a different
name. Each of these files can contain their own set of preferences. Open allows you to open these
while in MFX AUTO. As soon as one is opened, its settings take effect.
SAVE AS
Lets you make a copy of your User Settings preference file, and save it under a different name
or a different location.
3.9B THE USER SETTINGS DATA ENTRY WINDOW
VIDEO TYPE
This was previously set (when you first installed the program), but can be changed here if
necessary.
NTSC is the American Standard which uses 30 frames per second.
PAL is the European standard which uses 25 frames per second.
FILE MASK
File masks allow you to filter what files MFX AUTO displays when you are at an Open EDL
dialog box.
AUTO
MFX AUTO User Manual
30
MS DOS allows a file name with a maximum of 11 letters. Up to 8 are allowed for the name
and up to 3 are allowed for the extension. The extension part is always preceeded by a period.
MFX AUTO always uses a mask of *.ED for selecting files. You may use a secondary mask to
show other files. For instance, *.* will show all files of any name and extension. By entering a
different extension at the File Mask option, you can have MFX AUTO display only files with the
suffix you request.
LIST # AT START-UP
MFX AUTO keeps three versions of the EDL in memory. List one is an exact copy of the list
that was loaded from disk. (Unless the user has edited it).
List two only has lines that can actually be Auto-assembled and does a conversion
of the A, AA, AA/V columns to its own format to ease in Auto-assembly.
List three is a collection of lines from list 2 that the user has chosen to Auto-assemble.
Lists one and two are accessible and available for all the optional commands.
You can choose which list is shown at start-up here.
VIEW WINDOW ROWS / AUTO-ASSEMBLE WINDOW ROWS
The number of rows displayed in the windows is user selectable.
The allowable range for view window is 1 though 21.
The allowable range for the Auto-assembly window is 1 through 15.
CURSOR CONTROL SPEED
Sets the speed that keys repeat when held down. 1 is fastest, 10 is slowest. Change the number with
the + , -, and SPACE keys.
AUTO-SAVE
Use either the SPACEBAR or arrow keys to change.
[Off ]
[List 1]
[List 2 ]
[List 2 after assemble]
[Either list]
Autosave disabled.
When list 1 changes, it is saved.
When list 2 changes, it is saved.
List 2 is saved after an auto-assemble.
When either list changes they are saved.
SYNC PREFERENCE
Your options are: [INT] [AES] [WCLK] [VIDEO] ([INPUT] MFX3plus only) [NONE]. Use
either the SPACEBAR or ← → keys to change.
If this is set to anything other than NONE, a check is made before Auto-assembly that the
MFX3 is set to the chosen sync type. If it is not, a warning is shown with an option to change to the
preferred sync type.
AUTO
31
Chapter 3: The File Menu
ADVANCED...
Pressing ENTER or clicking with the mouse here brings up another input window with more
advanced settings.
The Advanced user options dialog box offers the following options:
COM PORT DETECTION
This setting tells MFX AUTO how to find the Com Port that is connected to the
MFX3plus. Auto Detect automatically finds it; the other choices below go directly to
the selected Com Port:
[Auto-Detect] [COM 1] [COM 2] [COM 3] [COM 4]
Use either the SPACEBAR or + - keys to set this to the Com Port that the MFX3plus is
connected to.
NOTE: Selecting Auto-Detect can cause problems. When Auto-Detect is selected,
MFX AUTO tries every Com Port starting with COM 1 until a connection is made. If
you have a mouse connected to a port # that is lower than the MFX3plus is connected to,
the mouse is usually rendered unusable. If you don’t know what port # is connected to
the MFX3plus, try the following:
1)
With Com Port Detection set to Auto-Detect, restart MFX AUTO.
After a list has been loaded in, press ALT P. This will bring up a
Serial Port Report. (Serial is the same as Com). Under the Connect
Rate column, find the Com # that has either 9600 or 38400 in it.
That is the Com # to select in Com Port Detection.
ALLOW VIDEO EDITS
[
] [ - ]
Should be Off for most applications.
MFX AUTO needs to have an EDL opened and converted to fully operate. By default,
only audio edits get converted, so if you try to open a video only list it will fail and you
will be asked to open another EDL. Allow Video Edits was implemented primarily to
allow for those occasions when you want to view a video only list.
Video edits show up as VIDEO in the audio patching column of List 2, and are treated
as 1 ,1 edits during an assembly.
AUTO
MFX AUTO User Manual
32
USE EDIT LINK OPTION
When the Edit Link option is enabled, you will see three new options in the Autoassemble menu: Assign Edits to Tracks, Link Assigned Edits to Tracks, and Clear Edit
Links.
MFX AUTO understands 15 different patching schemes. Each edit (event) that can
assemble will have one of the following already assigned.
GVG
CMX
SONY
MFX AUTO
A1
A2
A3
A4
A12
A23
A34
A13
A24
A14
A123
A124
A134
A234
A1234
A
A2
NONE
NONE
AA
A2
NONE
A
A2
A
AA
AA
A
A2
AA
A1
A2
A
A
A1A2
A2
A
A1
A2
A1
A1A2
A1A2
A1
A2
A1A2
(1 ,1)
(2 ,2)
(1 ,3)
(1 ,4)
(12,12)
(23,23)
(34,34)
(13,13)
(24,24)
(14,14)
(*** )
(** *)
(* **)
( ***)
(****)
(AUD
(AUD
3)
4)
(AUD
(AUD
(AUD
(AUD
(AUD
(AUD
(AUD
(AUD
(AUD
(AUD
3)
3 4)
3)
4)
4)
3)
4)
3 4)
3 4)
3 4)
(A3)
(A4)
(A3)
(A3A4)
(A3)
(A4)
(A4)
(A3)
(A4)
(A3A4)
(A3A4)
(A3A4)
You are able to override the default patching meanings for these edits and
assign your own. To do this you first select Assign Edits from the AutoAssemble menu. You then select the edit type to assign from the list of edits shown and
press ENTER. This will bring up the Set MFX Input screen. Select the patching
scheme you want then press F10 to save. Continue this until all the edit types needed
are assigned. Finally select Link Assigned Edits from the Auto-Assemble menu and
you are done.
For example you could assign A2 (2 ,2) to record tracks 9-16, patching
them through inputs 1-8, and conforming them to tracks 5-12.
MOVING PROGRESS DISPLAY
Certain tasks that MFX AUTO performs such as loading/saving files,
sorting, timecode checking, can be represented on the bottom
status line as a 'moving progress display'. This involves displaying the task name that is
in progress along with ascending red boxes that draw from left to right along the status
line for the duration of the task being performed. Of course the faster the computer, the
less boxes are drawn.
When not enabled, three dots are shown after the task message.
STARTUP LIST CONVERTS...
Selecting this field brings up a separate input window that contains all of the optional
list 2 conversions that can be performed as the list is being loaded in.
AUTO
33
Chapter 3: The File Menu
STRIP A,B SRS
Sometimes A or B is appended to the soundroll number during the process of picture
editing. This can cause some confusion during the auto-assemble process. Selecting
this will remove them.
Converts A edits to double edits.
Converts A2 edits to double edits.
Converts AA edits to single edits.
Converts A2 edits to mapped A2 edits.
Converts mapped A2 edits to unmapped A2 edits.
Converts A1 and A2 edits that have the
same timecode into one AA (12,12) edit.
1 ,1 to 12,12
1, 2 to 12,12
12,12 to 1 ,1
2 ,2 to 1 ,2
1 ,2 to 2 ,2
Combine Events
CONVERT NONE TO 1
All list formats except CMX 340 offer four channels of audio. If an event has channel
three or four but not channel one or two and there is no patching information, by
default they convert to 3 ,3 or 4 ,4.
Example :
CMX
125 48
NONE C 16:43:15:27 16:43:30:27 01:15:56:02 01:16:11:04
AUD
3
FROM CLIP NAME: 41/1015
GRASS VALLEY OR SONY
125 48 A3 C
16:43:15:27 16:43:30:27 01:15:56:02 01:16:11:04
Would convert to 3 ,3 without selecting Convert.
Would convert to 1, 3 if Convert is selected.
You may also have one Custom Convert of your liking performed. Be aware, though,
that these converts are performed after list 2 is converted from list 1. This means that
only the 1 ,1 type numbers are able to be converted.
See CUSTOM CONVERT below.
STRIP (AB) SCENES
If a scene is shot with multiple cameras the camera letter is usually appended to the
scene #, such as: 19-1(A). Enabling Strip (AB) Scene's will remove them.
CUSTOM CONVERT
You can perform one custom convert at startup.
Item to find [
Item to replace [
]
]
Start Search [
]
[Start of line]...[Record column]
AUTO
MFX AUTO User Manual
34
Custom convert takes three parameters. The first is the search item. The second is the
replace item. The length of these two items must be the same for the convert function
to operate.
Example :
Search For
22,12
Replace With 12,12
Search For
TEMP
Replace With 101
Start Search sets the column where the search will start.
Start of Line : Start search from start of line, find match anywhere in line.
All of the other columns start the search at their positions and will only match if the
search item is found at the start of their positions.
MINIMIZE FILE(S)
If a file name is included in this field, MFX AUTO will load that file and extract item names in
the list to remove. Minimizing removes events from the EDL list that probably won’t auto-assemble.
THE FOLLOWING OPTIONS ARE EITHER SELECTED [ ]
OR DESELECTED [ - ]
USE DEFAULT MINIMIZE
MFX AUTO has a list of items built in that can exclude lines that probably won’t Auto-assemble. Selecting this will use the built in list when minimizing. The following examples are built
into MFX AUTO and are automatically removed from a list when Use Default Minimize is enabled.
Any line with source in and source out numbers that are the same.
Any line containing any one of the following:
?, BL, 999, NONE, ACAD, FX, MOS, POP, MX, MUSIC LDR
MINIMIZE AT STARTUP
If default minimize is selected or a user minimize file is supplied minimizing
can take place when a list is first opened.
MINIMIZE ALL LISTS
See MINIMIZE FILE(S) on previous page.
SORT LIST AUTOMATICALLY
A list should be sorted in C Mode order before assembling. This sorts the list by sound rolls
and source numbers in ascending order. Selecting this option performs that sort at startup.
AUTO
35
Chapter 3: The File Menu
LIST REPORT WHEN OPENED
With this selected, a fairly detailed report will be shown when the list is first loaded in.
NOTE FILE WHEN OPENED
If an edited and saved note file exists for the EDL being loaded, it can be shown at startup.
NOTE FILE:
This is a file with the same path and file name as the current EDL that is in use. The only
difference is the extension which is converted to .NTE. This file will only show up on the disk if you
edit and then save it. Use this file to keep information about the EDL. For instance, you can put in a
reminder to get a sound roll, or to get information about a bad event.
If Note File When Opened is selected on the user settings page this file will be displayed for
you when you first open the EDL that is associated with it.
LOAD PREVIOUS FILE
This option remembers the last EDL file used and automatically loads it at startup.
SELECT MENU ON FIRST CLICK
This sets how the mouse operates when selecting from the menu. If selected, items are chosen
on the first click without having to be highlighted. Otherwise, a menu item has to be highlighted
before being chosen.
AUTO-RENUMBER
Will renumber the list if it is unconverted.
EXPLODING WINDOWS
Many of the “windows” that appear in MFX AUTO have the ability to “explode” on and
“implode” off. This feature can be switched on and off here.
COMPRESS EDL AT LOAD
When this option is enabled, all blank lines are omitted from the list. This could help if you get
a large list with video edits included and a lot of blank lines. That could exceed the maximum events
allowed (3600) without using the compress option.
ARROW STYLE POINTER
[
] Selects an arrow style pointer, [ - ] Deselects it.
SOUND EFFECTS
Turns alert sound effects used in conjunction with certain messages on or off.
3.10 EXIT MFXAUTO <ALT X>
Selecting this option quits the program.
AUTO
MFX AUTO User Manual
36
4. LIST MENU
Objective: To understand all of the options and features under the List drop-down menu.
4.1 OVERVIEW OF THE LIST MENU
The List Menu provides a variety of functions for working on your EDL before Auto-assembly,
including converting, sorting, offsetting, marking ranges, and Timecode functions.
4.2 SORT
C MODE
Sort in ascending order with sound roll & source code as keys.
RUNNING ORDER
Sort in ascending order by Timecode.
EVENT
Sort in event number only.
SCENE
Sort in ascending order with scene #’s as keys.
4.3 FIND
There are five types of list searches in MFX AUTO.
In the List menu under Find, you can search for Item or TimeCode. These two actually use the
same search routine. The only difference is TimeCode uses a special input field to help input
Timecode numbers. The third is a Scene Search that can only be used on List 2, and searches for
scenes and takes. The fourth is Find & Replace in the Convert menu. This basically does what it
says - searching for the ‘Find’ item, and if found, replacing it with the ‘Replace’ item. The fifth is
Custom Delete in the Delete menu. This search deletes all events that match the ‘Delete’ item. With
Item and Timecode searches, you have the option of displaying the first event that matches, or
marking all of the matches.
AUTO
37
Chapter 4: The List Menu
All searches except Custom Delete and Scene Search have a field called Start Search.
Start Search [Start of line] - Selects the column where the search will start.
The options are:
Start of line
Soundroll column
Source in
Source out
Record in
Record out
Start of Line: Start search from start of line, find match anywhere in line.
All of the other columns start the search at their positions and will only match if the search item
is found at the start of their positions.
Finally, the Find field has one more field called Action. This allows you one of the following two
choices when a match is found.
Action [Display] or [Mark Range] - Decide what to do when a match is found.
Display
Mark Range
:
:
Display the first match
Marks all matches
ITEM <F6>
Search the list for a match of user input.
TIMECODE
Uses a special timecode input routine.
SCENE <ALT F6>
In List 2 (the converted list) the scene and take information is stored in a separate list. Whatever event is currently highlighted has its scene and take information displayed on the bottom status
line. Scene Search will search the scene and take list, and if a match is found display and highlight
the correct event. The user input search data is converted to uppercase before the search begins.
Partial searches are acceptable.
For example:
If you entered 40, any of the following would be found:
SC 40/3
40A/2
30B-1 (40)
FIND NEXT <F11>
Search forward from current position in list for previous item.
FIND PREV <F12>
Search backward from current position in list for previous item.
MFX AUTO User Manual
38
AUTO
FIND NEXT RANGE <CTRL F11>
Search forward from current position for next range.
FIND PREV RANGE <CTRL F12>
Search backward from current position for next range.
4.4 EDIT
EDIT LINE <ALT F1>
Edit the highlighted line.
INSERT NEW LINE <ALT INSERT>
Inserts a new line above the highlighted line.
DELETE LINE <ALT DELETE>
Removes the highlighted line from the list.
EDIT SCENE # <ALT F3>
Edits the scene number (List 2 only).
INSERT OVERALL EVENT
Inserts a new event at the top of List 2 with a start and stop time computed from the lowest and
highest Timecodes in List 2. This is used to auto-assemble the work track.
TOGGLE ASSEMBLE MARK <CTRL A>
Toggles the assemble mark of the highlighted event.
4.5 CONVERT
DEFAULTS
Select from some standard conversions:
1 ,1 to 12,12
12,12 to 1,1
2 ,2 to 12,12
2 ,2 to 1 ,2
? ,3 to 1 ,3
ANY to 1S,1S
(Special case for Auto Split with stereo marks)
SET SOURCE FRAME RATE
Drop Frame or Non Drop
AUTO
39
Chapter 4: The List Menu
SET RECORD FRAME RATE
Drop Frame or Non Drop
CHANGE RECORD HOUR
Instead of offsetting.
DUPE RECORD TIMECODE IN SOURCE
Mainly used to auto load Work Tracks.
COPY SOURCE HOUR TO SOUND ROLL
Can be helpful on incorrectly generated lists.
EQUALIZE SOURCE & RECORD DURATION
If the source & record durations are unequal they can be adjusted.
COMBINE EQUAL EVENTS
Combine Events will traverse List 2 looking for any equal 1 ,1 , 2 ,2 or 3 ,3 , 4 ,4 events. If any
are found, they are converted to a single event and the extra event is deleted from the list. Patching
information is retained.
Here are two examples of four events and the results after combining:
001
002
003
004
EXAMPLE 1:
100 1 ,1
100 2 ,2
999 1 ,3
5A
1 ,1
00:59:56:12
00:59:56:12
01:00:01:11
01:00:01:25
01:00:01:25
01:00:01:25
01:00:09:29
01:00:01:26
001
003
004
After selecting Combine Equal Events, the following would be left:
100 12,12 C 18:17:11:14 18:17:16:27 00:59:56:12
999 1 ,3 C 00:00:35:00 00:00:43:18 01:00:01:11
5A
1 ,1 C 19:50:05:15 19:50:05:16 01:00:01:25
01:00:01:25
01:00:09:29
01:00:01:26
001
002
003
004
EXAMPLE 2:
100 1 ,1
100 2 ,2
5
1 ,3
5
4 ,4
00:59:56:12
00:59:56:12
01:00:01:25
01:00:01:25
01:00:01:25
01:00:01:25
01:00:01:26
01:00:01:26
001
003
After selecting Combine Equal Events, the following would be left:
100 12,12 C 18:17:11:14 18:17:16:27 00:59:56:12
5
14,34 C 19:50:05:15 19:50:05:16 01:00:01:25
01:00:01:25
01:00:01:26
C
C
C
C
C
C
C
C
18:17:11:14
18:17:11:14
00:00:35:00
19:50:05:15
18:17:11:14
18:17:11:14
19:50:05:15
19:50:05:15
18:17:16:27
18:17:16:27
00:00:43:18
19:50:05:16
18:17:16:27
18:17:16:27
19:50:05:16
19:50:05:16
STRIP (A),(B)
Sometimes A or B is appended to the soundroll number and the scene number during the
process of picture editing. This can cause some confusion during the auto-assemble process. Selecting this option, then one of the following submenus, will remove them.
AUTO
MFX AUTO User Manual
40
SOUND ROLLS
Removes As or Bs appended to sound roll numbers.
SCENE NUMBERS
Removes As or Bs appended to scene numbers.
CONVERT NONE TO 1
All list formats except CMX 340 offer four channels of audio. If an event has channel three or four but
not channel one or two, and there is no patching information, by default they convert to 3 ,3 or 4 ,4.
For example:
CMX
125 48 NONE C
16:43:15:27 16:43:30:27 01:15:56:02 01:16:11:04
AUD 3
FROM CLIP NAME: 41/1015
125
GRASS VALLEY OR SONY
48 A3 C
16:43:15:27 16:43:30:27 01:15:56:02 01:16:11:04
Would convert to 3 ,3 without selecting Convert.
Would convert to 1 ,3 if Convert is selected.
Also, one Custom Convert may be performed. Be aware, though, that these converts are performed after
List 2 is converted from List 1. This means that only the 1 ,1 type numbers are able to be converted.
CUSTOM CONVERT
Custom Convert is used to search for item 1 & replace with item 2. (Item 1 & 2 must be same size).
Item to find [
Item to replace [
]
]
Start Search [
]
[Start of Line].......[Record column].
Custom convert takes three parameters. The first is the search item. The second is the replace
item. The length of these two items must be the same for the convert function to operate.
For example:
Search For
Replace With
22:12
12:12
Search For
REPLACE WITH
TEMP
101
Start Search sets the column where the search will start.
Start of Line starts the search from the start of the line, finding a match anywhere in the line.
All of the other columns start the search at their positions and will only match if the search
item is found at the start of their positions.
AUTO
41
Chapter 4: The List Menu
4.6 DELETE
MINIMIZE LIST
Remove from list events that won’t auto-assemble. What we mean by ‘Minimize’ is to remove
events from an EDL that probably won’t auto-assemble. MFX AUTO does this in a three step process:
1) Removes all ‘BLACK’ events.
2) Removes all events that have a zero length duration.
3) This third step is more involved and needs a some explanation.
Certain events can be included in an EDL that aren’t intended for Auto-assembly. An
example of this would be audio from a sound effect or music from a temp music score.
MFX AUTO uses a list of ten items that are commonly used to denote this in an EDL. ?,
999, NONE, ACD, FX, MOS, POP, MX, MUSIC, LDR. Each of these items is searched for
in the EDL and if any matches are found, that event is removed from the EDL.
This third step is an option in User Settings called Use Default Minimize that can be turned
off if desired.
See Minimize File for information on setting up a custom list of match items.
CUSTOM DELETE
Search list & remove any line that contains a user defined item.
DELETE HIGHLIGHTED LINE <ALT DELETE>
Removes the highlighted line from the list.
4.7 RANGE
Selected ranges can be chosen with either Enter, F5, F7 or F8 - or by holding the ALT key and
pressing the ↑ or ↓ keys.
Either ENTER or F5 marks the current line if it is not already marked, or else un-marks it and
then increments the position in the list by one.
F7 and F8 work together to mark larger ranges. Press one, then move to another position in the
list and press the other. All events within that range will be marked.
You can have as many separate groups of ranges as needed.
CTRL F5 clears any ranges that are marked.
CTRL F6 deletes from the list any un-marked ranges.
The mirror option from the menu reverses the marked state of the entire list. Any event that
wasn’t marked is marked and any event that was marked is un-marked.
Note: If any ranges are marked, all global functions (ie. Auto-assemble, Convert,
Delete, Offset) work only on those ranges.
AUTO
MFX AUTO User Manual
42
MARK START <F7>
Marks the start of a range.
MARK END <F8>
Marks the end of a range.
SCROLL & MARK <ALT ↑↓ >
Hold down the ALT key and press the↑ or ↓ keys.
TOGGLE <F5> OR <ENTER> •
Selects or Deselects according to current state of line.
AUTO-ASSEMBLE MARKS
MARK AUTO-ASSEMBLED EVENTS
Mark all events with the
mark.
MARK UNASSEMBLED EVENTS
Mark all events without the
mark.
CLEAR RANGES <CTRL F5>
Clears all ranges from the active list.
CUT RANGES <CTRL F6>
Remove all ranges from active list.
KEEP RANGES <CTRL F7>
Remove all lines that are not marked from active list.
MIRROR
Reverses the marked state of the current list.
MARK VIDEO ONLY EDITS
Marks all V edits in list 1.
4.8 OFFSET <ALT O>
This option offsets the selected timecode in the current list. A dialog box opens which allows
you to input an offset value, then choose which two columns to perform the offset on. + - change the
value by one when on the timecode field. The Space key selects whether to ADD or SUBTRACT
and which timecode columns to act on. This routine works correctly with DROP, NON DROP or
PAL timecode.
AUTO
43
Chapter 4: The List Menu
4.9 CLEAR AUTO MARKS
Clears all Auto-Assemble indicator marks.
4.10 MARK TIMECODE
Mark Timecode copies the timecode number in the MFX3plus LCD window to the timecode
column of the highlighted event at the selected position.
4.11 EVENT DURATION <SHFT F1>
Event Duration displays the source and record durations and equality of the highlighted event.
4.12 REPORTS
LIST REPORT <ALT R>
Shows various information gathered from the converted files.
SERIAL PORT REPORT <ALT P>
Shows Baud and Connect rates for MFX3plus remote operation.
4.13 SWITCH LIST WINDOW
SWITCH TO INACTIVE LIST <ALT S>
Switches to inactive list.
SWAPFIND POS <ALT Z>
Switches to inactive list at the same position as active list.
4.14 RENUMBER
Renumbers the event numbers of the current list in ascending order, starting from 1.
4.15 CHECK TIMECODE NUMBERS
Checks timecode for three conditions:
1) Invalid timecode numbers.
2) Source and record durations different.
3) In timecode number higher than out.
If an event meets any of those conditions, it is marked in the list in its own color and a warning
is displayed. No further action is taken.
4.16 RECONVERT LIST 1
Reconverts List 1.
MFX AUTO User Manual
AUTO
44
5. AUTO-ASSEMBLE MENU
Objective: To understand all of the options and features under the Auto-assemble drop-down
menu.
5.1 OVERVIEW OF THE AUTO-ASSEMBLE MENU
The Auto-Assemble Menu provides functions for preparing for, starting and overviewing the
Auto-assembly process.
5.2 PREP LIST FIRST THEN ASSEMBLE
Minimize and sort list before assembling.
5.3 AUTO-ASSEMBLE
This will Auto-assemble list 2 as is. To make sure the list is sorted properly and minimized, use Full
Auto-assemble.
The first window that appears is the data entry window to select the parameters that will be used
during the assembly. These parameters can be changed at any time during the assembly.
The following describes each parameter:
select
[ ]
[ ]
or
or
deselect
[-]
Record
[-]
Conform
Record and Conform are not tied together and can be selected independently. As with all input
menus, selecting or deselecting items that have fields related to them will cause those fields to either
be hidden or shown.
Use the SPACEBAR or mouse to select or deselect.
AUTO
45
Chapter 5: The Auto-Assemble Menu
INTERRUPTING AUTO-ASSEMBLY
The Auto-assembly process can be interrupted by pressing any key on the PC’s keyboard, or by
pressing the mouse. The process will either immediately pause, or if either a record or a conform is
in progress, finish that process and then pause. If you are in a record and want to immediately stop it,
press the END key.
There are eight options that are directly available from this point.
1)
2)
3)
4)
5)
6)
7)
8)
You may browse the list using the normal browse keys.
Press ALT F1 to edit the current line.
Press ENTER to start Auto-Assembly from the current position.
Press ALT C to conform the highlighted event.
Press ALT F10 to go back to the parameter window to change parameters.
Press either F1, F2, F3 or F4 to send the MFX to either Source In, Source Out, Record In,
Record Out time.
Press ALT H for Help.
Press ESC to cancel Auto-assemble.
Or you can press tab and get a list of options on the bottom of the screen display.
For a complete explanation on Auto-assembly, check Chapter 8, Using Auto-Assemble.
5.4 ASSIGN EDITS TO TRACKS •
Assigns Record and Conform information to edit types, rather than using EDL info. For a
complete description, please see Use Edit Link Option on page 33.
5.5 LINK ASSIGNED EDITS TO TRACKS •
This simply tells MFX AUTO to use the assigned edits when assembling and conforming. For
more information, please see Use Edit Link Option on page 33.
5.6 CLEAR EDIT LINKS •
This simply tells MFX AUTO to ignore any assigned edits and use the normal assemble and
conform. For more information, please see Use Edit Link Option on page 33.
5.7 DUPE WORK TRACK •
Assuming that there is a work track recorded (preferably in one take), Dupe Work Track will
split that track at all locations found in the EDL, making new clips for every edit. The choice of
naming the splits, as in an Auto-assembly by scene or timecode, or not naming the splits is offered.
It is also possible to rename the edits in a previously assembled track.
5.8 CONFORM HIGHLIGHTED EVENT <ALT C> •
When in the main list or paused in the Auto-assemble list, you can conform the highlighted
event by pressing ALT C. The Auto-assemble parameter settings will be used to determine which
tracks to use and what style of conform to use.
AUTO
MFX AUTO User Manual
46
5.9 RE-CONFORM •
There are basically two reasons to use re-conform. One is to conform an Auto-assembly that had the
Conform option turned off during the assembly. The other is to re-conform an already conformed
project to a new EDL.
When Re-conform starts, it prompts you for the record and conform tracks, the naming style, and the
project frame rate. This is the same data from the Auto-assemble parameters. It is very important
that the Record track, naming style, and project frame rate are set the same as when the original
assembly was done. The conform track can be changed.
After accepting the parameters, Re-Conform searches the project using the list and parameter information and conforms the clips that it finds. Clips that were recorded will be found even if they are
not the top layer. When clips are not found the event is added to a new list and you are offered a
chance to Save or Auto-assemble.
The Speed Conform option simply turns the Disk key on the MFX on or off before starting. When
off, Conform moves a little faster.
5.10 CONFORM EDIT TRACKS
Conform Edit Tracks is used to conform already edited tracks to a new and different EDL. After
selecting the group of tracks to be conformed, Conform Edit Tracks will then do a block copy of the
Source In Timecodes to the Record In Timecodes.
You must make sure that there are no overlapping Timecodes between the Source In and Record
Start. Probably the best way to do this is to block move the edited tracks one or two hours ahead or
behind their original position. Of course, you then offset the EDL’s Source In timecode to the same
hour that you placed the edited tracks.
Don’t use the typical “Nagra Trace” EDL for this - it won’t work. The EDL must have the Source
Timecodes traced back to the previous EDL’s Record Timecodes.
To select the tracks for conforming, press the SPACEBAR or click with the mouse to select or deselect tracks. Then press F10 or CTRL ENTER to start.
F5
De-selects all tracks
F6
Selects all tracks
5.11 SET CONFORM STYLE
[STANDARD]
[ADV1]
[ADV2]
This setting affects the conforms that are not in conjunction with records: Highlighted conforms,
conforms from the Auto-assemble page with Record deselected, and Re-conform.
The standard style conform is quicker than the ADVs but it is, if you will, dumb. It doesn’t confirm
that the expected clip actually exists. It just goes to the source location, does a copy, and then finishes the conform. If the expected clip doesn’t exist or is not the top layer, standard conform will not
know that, and will just conform whatever is in the MFX3plus buffer.
The ADV style conforms do confirm that a clip exists before conforming and will alert the user if any
don’t.
The difference between ADV1 and ADV2 is that ADV1 expects to find an exact match of the
clipname and the name derived from the EDL list while ADV2 only needs to match the soundroll
number.
AUTO
47
Chapter 5: The Auto-Assemble Menu
5.12 ADD SCENE SEARCH
When MFX AUTO encounters a list that it hasn’t saved in the converted format, it builds a list
of scene numbers (if they are available) as it loads the file. It does this by scanning the scene search
list and looking for matches of any of the names.
For example :
There are five default search items built in:
TO CLIP NAME:
NAME:
COMMENT:
SCENE
*
Given the following list:
TITLE:
FCM: DROP FRAME
FCM: NON-DROP FRAME
001 POP
A
C
00:00:00:01
00:00:00:02...
FROM CLIP NAME: XBARS & TONES TEST- (-3+2)
002 38
A
C
18:41:28:21
18:41:48:03...
FROM CLIP NAME: 1S/2 (*A)
003 38
A
C
18:46:29:23
18:46:48:12...
FROM CLIP NAME: 1T/1 (A)
004 36
A
C
09:58:49:15
09:58:51:25...
FROM CLIP NAME: 1/2 (A)
The items in italic are put into the scene list:
TITLE:
FCM: DROP FRAME
FCM: NON-DROP FRAME
001 POP
A
C
00:00:00:01
00:00:00:02...
FROM CLIP NAME: XBARS & TONES TEST- (-3+2)
002 38
A
C
18:41:28:21
18:41:48:03...
FROM CLIP NAME: 1S/2 (A)
003 38
A
C
18:46:29:23
18:46:48:12...
FROM CLIP NAME: 1T/1 (A)
004 36
A
C
09:58:49:15
09:58:51:25...
FROM CLIP NAME: 1/2 (A)
Up to five more searches may be added if required.
AUTO
MFX AUTO User Manual
48
6. THE MFX FUNCTIONS MENU
Objective: To understand all of the options and features under the MFX Functions drop-down menu.
6.1 OVERVIEW OF MFX FUNCTIONS MENU
Provides functions for naming clips, auto-splitting, marking edits, and setting MFX inputs and parameters.
6.2 NAME CLIPS <ALT N>
Name Clips is designed to extend the capabilities of the Name Clip function built into the
MFX3plus. Besides providing more editing capabilities, Name Clips also incorporates full-motion
control and track selection into the PC’s keyboard. During an editing session, the last fifty names are
remembered and available for recall.
For a complete description of the Name Clips process, check Chapter 10: Naming Clips.
6.3 AUTO SPLIT
After Auto-assembling, individual edits can be split to a selected range of tracks automatically.
For a complete description of the Auto Split process, check Chapter 9: Using Auto Split.
6.4 GO TO TIMECODE
SEND DISK
You can send the MFX to a timecode location by pressing either F1, F2, F3 or F4
SOURCE START <F1>
SOURCE STOP <F2>
RECORD IN <F3>
RECORD OUT <F4>
SEND MASTER
You can send whatever is the Master by pressing CTRL with either F1, F2, F3 or F4.
SOURCE START <CTRL F1>
SOURCE STOP <CTRL F2>
RECORD IN <CTRL F3>
RECORD OUT <CTRL F4>
6.5 GO TO TC IN EDL <F9>
Search the EDL for the timecode displayed in the MFX LCD.
AUTO
49
Chapter 6: The MFX Functions Menu
6.6 SET MFX INPUT
Used to patch, set the gain and input type of the MFX3plus tracks, in any available combination.
Trk
1 [
Patch
[1 ] [0 ]
]
Gain
[0 ]
Type
[ANLG +4]
Pressing the SPACEBAR or clicking the mouse selects or deselects the track.
Trk
2 [ - ]
Patch
Gain
Type
If a track is deselected, the Patch, Gain and Type fields disappear and that track will not be changed.
The patch data has two fields, used to assign two inputs to one track to perform stereo recording. The
gain and type fields are set by selecting from built in multiple choice values. Pressing the + and keys will increment or decrement the fields. The SPACEBAR also increments.
Function keys F5 through F9 perform the following:
F5
F6
F7
F8
F9
:
:
:
:
:
Sets all tracks off.
Sets all the tracks on.
Patches all tracks to input 1.
Patches tracks in 1 2 order.
Patches tracks in ascending order from 1.
Note: When Auto-assembling, there is a field between Trk and Patch called Cnfrm. This data tells
MFX AUTO where to conform that recorded track. To not perform a conform, set this field to 0.
Press F10 or CTRL ENTER to accept the data and make the changes to the MFX.
6.7 MFX SETUP
This option allows you to view or change important MFX parameters.
6.8 MARK AUDIO EDITS
Mark Audio Edits traverses List 2 and places a mark in the project for every event encountered. If
ranges are marked, only they are traversed.
6.9 MARK VIDEO EDITS
Mark Video Edits traverses List 1 looking for any occurrences of V in the audio column of valid
timecode events. If found, then it sends the MFX disk to the Record Start location and places a mark
there. If ranges are marked, only they are traversed.
6.10 CLEAR PROJECT MARKS
Clears all marks for the current project, except the project head and project tail marks which can’t be removed.
6.11 GET VERSION <ALT V>
This option shows the release version of the MFX and of MFX AUTO.
MFX AUTO User Manual
50
AUTO
7. EDLS
Objective: To understand the basics of Edit Decision Lists, how to use and translate them, and
how MFX AUTO converts them.
7.1 INTRODUCTION TO EDLS
Edit Decision Lists (EDLs) are the primary method of transferring information about an edit
project between editing systems. This is especially important in transferring Off-line decisions to the
On-line assembly.
There are many fine points about EDLs which can prevent a successful exchange of information if not understood. This chapter will provide an overview of EDLs, as well as tips on using them
successfully.
7.2 GENERAL EDL DESCRIPTION
An EDL is a special kind of database. It includes “events” that include the source to be recorded, and where to record it. It also includes information about transitions (Cuts, Dissolves,
Wipes) transition durations, etc.
Most EDLs are simple ASCII files - files containing alphanumeric characters, or “text only”.
This is true of most manufacturers’ EDL formats (CMX, GVG), regardless of the disk type they are
saved on (CMX, GVG, DOS). ASCII EDLs can be viewed and edited with a word processor as long
as the disk type can be accessed (most word processors can’t read CMX or GVG disk).
Sony saves the EDL as a “JIS” file, which is a modified ASCII file. These lists can’t be viewed
with a word processor. However, the data contained therein can be converted to ASCII, then, with
some exceptions, the EDL can be converted to be similar to the other manufacturers.
All these EDL formats (CMX, GVG, SONY, etc.) vary slightly in the exact location of the
“fields” of information, and in the exact “encoding: of these fields. These variations make each
format incompatible - for example, you can’t load a Grass Valley format list into a CMX editor.
However, they are similar enough so the basic edit information can be converted from one form to
another.
For an example, here is a simple sound edit in both CMX and Grass Valley (GVG):
CMX:
004 203
A
GVG:
0004 203
A1 C
SONY:
004 203 A1 C
C03:23:16:20 03:23:21:08
03:23:16:20 03:23:21:08
03:23:16.20 03:23:21.08
01:00:03:19
01:00:08:07
01:00:03:19
01:00:08:07
01:00:03.19
01:00:08.07
Note that the spacing between fields is different. This illustrates one of the many subtle
differences between list types. The Sony EDL is slightly different still. This causes incompatibility you need to generate an EDL of the correct format for whichever machine (editor) or program you
are going to use.
AUTO
51
Chapter 7: EDL Lists
These format differences are not so different that we can’t recognize one format to understand
the EDL’s general nature. The following examples are in CMX format.
A simple cut is represented by a single edit line and an “effect” (wipe, dissolve, key) is represented by two lines. In each line, the edit number comes first, followed the source reel name, the
channel(s) to record, the transition (cut, dissolve, etc.), transition duration (if it applies), Source IN
Timecode, Source OUT, Record IN, Record OUT.
An edit can have notes (any number) and other information for GPIs (General Purpose Interface), motion events, switcher event-memories, master/slave machines, etc.
Here are some examples (CMX format):
Cut to “Black”: on video and A1 & A2:
002
BL
AA/V
C
00:00:00:00 00:00:10:00 00:59:45:00 00:59:55:00
75 Frame Dissolve from Reel 115 to Reel 115B on Video and A1:
105
105
115 B
115B B
C
03:05:57:17 03:05:57:17 01:00:21:20 01:00:21:20
D 075 03:15:33:09 03:15:35:24 01:00:21:20 01:00:24:05
“Split” edit to Reel 018, first to video-only, then video and A1, with two notes:
SPLIT:
053 018 V
C
053 018 A
C
THIS IS A NOTE
THIS IS ANOTHER NOTE
01:21:05:19 01:21:06:26 01:00:51:11 01:00:52:18
01:21:05:25 01:21:06:26 01:00:51:17 01:00:52:18
7.3 EDL FORMATS AND FLOPPY TYPES
Floppy Type EDL Chart
EDL Formats Chart
MAXIMUM
NUMBER
OF EDITS
REEL NAMES
TIME
CODE
AUDIO
CHANNELS
CMX 340
999
1-3 characters
that evaluate to
numbers from 1 253 and "B"
CMX 3 4 0 0
999
8 character
alphanumeric
FCM
4
CMX 3600
999
8 character
alphanumeric
FCM
4
GVG 4.0
9999
6 character
alphanumeric
SMPTE
":" ";"
4
6 character
alphanumeric
"." ","
":" ";"
4
Sony 9100
FCM
2
FLOPPY FILE
NAMES
NATIVE DISC
TYPE
FILE TYPE
CMX 340.EDL
CMX (RT-11)
ASCII
6 Character
Alphanumeric
MYLIST1.EDL
CMX (RT-11)
ASCII
6 Character
Alphanumeric
MYLIST2.EDL
CMX (RT-11)
ASCII
6 Character
Alphanumeric
LST001.EDL
GVG (RT-11)
ASCII
6 Character
Alphanumeric
MYLIST2.EDL
last 2
characters
reserved by
Sony
DOS
JIS
AUTO
MFX AUTO User Manual
52
7.4 EDL AUDIO CHANNEL CROSS REFERENCE
GVG 6.0 CMX 340
V
A1 A2 A3 A4
*
*
*
*
*
*
*
*
*
*
*
*
*
*
*
*
*
*
*
A1
A
A2
A2
A
A3
A4
NONE
AUD 4
A
A4
A23
A2
AUD 3
A34
NONE
AUD 3
A2
A3
A
A3A4
A13
A
AUD 3
A
A3
A4
4
A2
AUD 4
A2
AUD 4
A1
A4
A123
AA
AUD 3
A1A2
A3
*
A124
AA
AUD 4
A1A2
A4
*
A134
A
AUD 3
4
A1
A3A4
*
A234
A2
AUD 3
4
A2
A3A4
*
*
*
A1234
AA
AUD 3
4
A1A2
A3A4
*
*
*
*
*
*
*
*
*
*
*
*
*
V
A1V
B
B
VA1
A2V
A2/V
A2/V
VA2
A4V
A12V
*
*
V
A3V
*
*
*
A1A2
*
*
*
AA
*
*
*
AA
A
*
*
A2
AUD 3
A24
*
*
*
A2
A14
*
*
A1
*
*
*
IN EDIT
EXTENSION
*
*
*
A
SONY 9100
IN EDIT
LINE
*
*
*
NOTE
EDIT
NONE
*
*
CHAN 3&4
FOLLOWING
A3
A12
*
CMX 3400 & 3600
IN
EDIT
LINE
AA/V
V
V
AUD 3
A
A3
V
AUD 4
V
A4
AA/V
VA1A2
A23V
A2/V
AUD 3
A34V
V
AUD 3
4
VA2
A3
V
A3A4
A13V
B
AUD 3
VA1
A3
*
A24V
A2/V
AUD 4
VA2
A4
*
A14V
B
AUD 4
VA1
A4
A123V
AA/V
AUD 3
VA1A2
A3
VA1A2
A4
*
*
A124V
AA/V
AUD 4
*
*
A134V
B
AUD 3
4
VA1
A3A4
*
*
*
A234V
A2/V
AUD 3
4
VA2
A3A4
*
*
*
A1234V
AA/V
AUD 3
4
VA1A2
A3A4
EDL Audio Channel Cross-Reference Chart
7.5 HOW MFX AUTO CONVERTS EDLS
MFX AUTO converts the ‘Audio’ part of the original EDL to its own format for easier Auto-assembly. For Auto-assembly, the number(s) to the left of the delimiter (,) pertain to the record track
and to the right pertain to the conform track. If the converted number is 1 ,1 that would mean record
and conform this event on the tracks selected in the Auto-assemble parameters window.
It is up to the user to make sure that the proper channels are patched to the record input tracks
on the MFX. The following show some examples and how they would be set up:
AUDIO
PARAMETERS
RESULTING RECORD & CONFORM
1 ,1
Record [3] Conform [5]
Record track 3 Conform track 5
2 ,2
Record [3] Conform [5]
Record track 4 Conform track 6
12,12
Record [3] Conform [5]
Record tracks 3&4 Conform tracks 5&6
****
Record [1] Conform [5]
Record tracks 1,2,3&4 Conform tracks 5,6,7&8
AUTO
53
Chapter 7: EDL Lists
The audio channel information in EDLs is different for the three formats supported. However,
MFX AUTO converts them all to the same format: (1 ,1 12,12 *** etc.)
If there are two or less channels, they are shown in the 1 ,1 format. That represents the source
in channel(s) followed by either a comma (audio edit only), or period (also a video edit) and the
channel(s) used on the picture editing system. For instance, given the following edit line:
026 05
1 ,2
C
15:16:25:28 15:16:53:12
01:00:36:28 01:01:04:12
The source was reel # 05. Its track 1 was used. The piece that was used was put on track 2 of the
picture editing system.
When three or more channels are used, they are shown with a combination of stars (*). The source in
and the picture editing tracks are assumed to be the same:
***
** *
* **
****
=
=
=
=
123
124
134
1234
MFX AUTO understands 15 different patching schemes. Each edit (event) that can assemble will
have one of the following already assigned:
GVG
CMX
SONY
MFX AUTO
A1
A
A1
(1 ,1)
A2
A2
A2
(2 ,2)
A3
NONE (AUD 3)
A (A3)
(1 ,3)
A4
NONE (AUD 4)
A (A4)
(1 ,4)
A12
AA
A1A2
(12,12)
A23
A2
A2 (A3)
(23,23)
A34
NONE (AUD 3 4)
A (A3A4)
(34,34)
A13
A
(AUD 3)
A1 (A3)
(13,13)
A24
A2
(AUD 4)
A2 (A4)
(24,24)
A14
A
(AUD 4)
A1 (A4)
(14,14)
A123
AA
(AUD 3)
A1A2 (A3)
(*** )
A124
AA
(AUD 4)
A1A2 (A4)
(** *)
A134
A
(AUD 3 4)
A1 (A3A4)
(* **)
A234
A2
(AUD 3 4)
A2 (A3A4)
( ***)
A1234
AA
(AUD 3 4)
A1A2 (A3A4)
(****)
(AUD 3)
MFX AUTO does its conversions by first determining the list type and then using the convert routine
for that list type. If during the conversion an event fails to convert, MFX AUTO will usually run it
through the other two list type routines to see if it converts with either of them. If it does, it is
indicated in the list by a lower case character placed next to the edit type column.
For instance, if the list type was determined to be CMX and the following event was encountered:
0002 002
A12
C
02:10:12:14 02:10:12:14
01:00:09:21
01:00:09:21
02:10:12:14 02:10:12:14
01:00:09:21
01:00:09:21
It would convert like this:
0002 002
12,12 Cg
The lower case “g” indicates that that event was converted using the GVG convert routine.
AUTO
MFX AUTO User Manual
54
8. USING AUTO-ASSEMBLE
Objective: To understand how to prepare for and begin the Auto-assemble process, and what
options are presented or available during the process.
8.1 OVERVIEW OF THE AUTO ASSEMBLE PROCESS
MFX AUTO allows the MFX3plus system to assemble and conform source audio according to
an audio EDL. This is one of its most powerful features, where MFX AUTO rerecords the audio
from its original source and places it at the correct timecode destination according to the EDL.
Chapter 5 gave you a complete tour of the Auto Assemble menu, explaining all of its features
and their locations. This chapter will guide you through the actual process of an Auto-assembly.
8.2 PREPARING FOR AUTO-ASSEMBLY
Confirm that all of the devices you will use for the auto-assembly are properly connected to your MFX3plus
system. This includes devices to play the source tapes, such as DATs, DA-88s and 1/4” machines.
Open MFX AUTO and select and open the EDL list you wish to perform the Auto-assembly on.
Select PREP LIST FIRST THEN ASSEMBLE from the Auto-assemble Menu. This will minimize
and the sort the list to prepare it for the Auto-assembly process.
A dialog box will open: Preparing (EDL NAME) for Auto-assembly. When the sorting and minimizing is completed, the Auto-Assemble Data Entry Window will automatically appear.
8.3 THE AUTO-ASSEMBLY DATA ENTRY WINDOW
NOTE: You can begin Auto-assembly by selecting this option in the Auto-assembly
first, and MFX-AUTO will Auto-assemble List 2 as is. To make sure the list is sorted
properly and minimized, make sure to select Prep list first from the Auto-Assemble
menu.
The Auto-assemble data entry window allows you to select the parameters that will be used
during the assembly. These parameters can be changed at any time during the assembly.
AUTO
55
Chapter 8: Using Auto-Assemble
RECORD & CONFORM
[ ] or [-] Record
[ ] or [-] Conform
Both of these options are selected ON [ ] or OFF [-]. As with all input menus, selecting or deselecting items that have fields related to them will cause those fields to either be hidden or shown. Use the
SPACEBAR or mouse to select or deselect them.
Record and conform are not tied together and can be selected independently.
CONFORM STYLE
[STANDARD]
[ADV1]
[ADV2]
If RECORD is not selected and CONFORM is selected, and the Fairlight MFX3plus software version
14.1.xx or greater, the CONFORM STYLE field appears.
This also appears as an option in the Auto-assemble Menu.
These settings affect the conforms that are not in conjunction with records. Highlighted conforms,
conforms from the Auto-assemble page with RECORD deselected, and RECONFORM.
The standard style conform is quicker than the ADVs, but is however, dumb. It doesn’t confirm that
the expected clip actually exists. It just goes to the source location, does a copy and then finishes the
conform. If the expected clip doesn’t exist or is not the top layer, standard conform will not know
that and will just conform whatever is in the MFX3plus buffer.
The ADV style conforms do confirm that a clip exists before conforming which includes popping a
clip to the top layer if needed. The user is alerted if a match isn’t found.
The difference between ADV1 and ADV2 is that ADV1 expects to find an exact match of the clip
name and the name derived from the EDL, while ADV2 only needs to match the soundroll number.
RECORD TRACK AND CONFORM TRACK
RECORD TRACK [ 3]
CONFORM TRACK [ 1]
Select the tracks to record to and to conform to.
You can bypass this option by entering 0 in the record field. This will invoke another data entry
window which allows you to independently select record and conform tracks and also allows you to
patch the MFX3plus input menu’s parameters. If you want to record, but not conform a track, enter 0
in the conform field. (See also section 6.6 - Setting MFX Input)
HEAD HANDLE, TAIL HANDLE & PRE-ROLL
HEAD HANDLE [ 3]
TAIL HANDLE [ 3]
PRE-ROLL
[ 3]
Head & Tail Handle is the amount in seconds that will be added to the recording.
AUTO
MFX AUTO User Manual
56
Example:
If the source code was 01:19:20:05 to 01:19:22:11 and Head & Tail handles were
3, then the recording would start at 01:19:17:05 and end at 01:19:25:11.
Pre-Roll is the amount in seconds that the MFX will subtract from the record
start time.
NAME BY
NAME BY
[Scene
]
[TimeCode]
[Off
]
Press the Spacebar to select.
If Name By is not set to Off, then Each recorded Clip is named either by scene number if Scene is
selected, or by timecode. The soundroll is always included in name.
If Scene is selected and there is no scene number for the event being recorded timecode is used
instead.
GROUP BY
GROUP BY
[Scene
]
[TimeCode]
[Off
]
Press the SPACEBAR to select.
The length of each recorded “Clip” is decided by these settings when sorted in “C” mode.
If Scene is selected, all occurrences of each scene will be recorded in one pass regardless of time
between them. Take numbers are included when the calculations are performed so for example scene
1-2 would not be grouped with scene 1-1.
If Timecode is selected a mathematical calculation of the Timecodes is used to determine the length
to record.
If either Off is selected, or the list is not sorted by Scene or C mode, no grouping is performed.
UNWIND SOURCE
UNWIND SOURCE [Off
]
[Forward ]
[Reverse]
Use either the SPACEBAR or + - keys to change.
To automatically wind source reels off, set this to the direction you wish to go. When each reel is
finished, it will be fast wound in the direction selected.
PROJECT FRAME RATE
PROJECT FRAME RATE [ND]
Project Frame Rate allows you to select between ND, DF or PAL.
MFX AUTO gets the Project Frame Rate information from the list that is loaded in. In the rare case
where a list doesn’t correctly supply the frame rate, MFX AUTO makes an accurate estimate. You
can change this here by pressing the SPACE BAR or +/- keys to cycle through the options.
AUTO
57
Chapter 8: Using Auto-Assemble
GAIN
GAIN [0]
Gain allows you to trim the audio level during the record. You can trim from +15
to -15. Gain should probably be left at 0.
To accept the parameters, press either CTRL ENTER or F10.
Pressing ESC will cancel Auto-assemble and return to the current list.
ADVANCED
[ ] OR [-] AUTO-SKIP BAD EVENTS
By default, MFX AUTO will alert the user with a message and whatever options
are available when a bad event is encountered.
Select this option to automatically skip to the next event without alerting the user.
[ ] OR [-] SINGLE STEP
If Single Step is selected, the user is prompted before every recording, and no
grouping is performed.
[ ] OR [-] WAVE PROCESS
Select this option to either Stretch, Vari, or Pitch-change recorded clips during
Auto-assembly. After a recording, the clip is changed to the option that is
selected in the wave menu. You are warned about this before an assembly, and
offered a chance to turn it off.
NOTES:
• Wave Process works with percent only, so you must have the
percent factor set up. See your MFX3plus manual for information.
• Be aware that for long recordings you may get an MFX NOT
RESPONDING dialog box. This is okay. Just wait until the wave process is
finished and select RETRY. The assembly will then continue.
[M1] OR [M2] MASTER KEY
Allows the user to choose which master key controls the MFX when in remote
mode.
8.4 THE AUTO- ASSEMBLE PROCESS
Choose Begin to start Auto-assemble.
As the process begins, you will be prompted to load the first sound roll required. From this window,
there are six options:
AUTO
MFX AUTO User Manual
58
1.
2.
3.
4.
5.
6.
Pressing ↑ or ↓ will scroll through the sound roll list.
BEGIN will start Auto-assembling with the selected sound roll.
NEXT will position the cursor at the next event that doesn’t have an auto-assemble mark and
pause the assembly.
PARAMETERS will go back to the previous window to change parameters.
ESC or CANCEL will cancel Auto-assemble.
HELP provides a little more information.
STARTING AUTO-ASSEMBLY
MFX AUTO will now control the MFX and perform all the recording or conforming automatically
until another sound roll is needed. Each time another sound roll is needed, the user will be prompted
to insert it in the player.
The # of events that will be recorded in one pass
AA column converted to
MFX AUTO Format
# of events to go
# of events left for
current sound roll
The Auto-assembly process can be paused by pressing any key on the PC’s keyboard, or by pressing
the mouse. The process will immediately pause, or if either a record or conform is in progress, it will
finish that process and then pause. If you are in a record and want to immediately stop it, press the
END key.
There are eight options that are directly available from this point.
1.
2.
3.
4.
5.
6.
7.
8.
You may browse the list by using the normal browse keys.
Press ALT F1 to edit the current line.
Press ENTER to start Auto-assembly from the current position.
Press ALT C to conform the highlighted event.
Press ALT F10 to go back to the parameter window to change parameters.
Press either F1, F2, F3 or F4 to send the MFX3plus to either Source In, Source Out, Record In
or Record Out time.
Press ALT H for Help.
Press ESC to cancel Auto-assemble.
AUTO
59
Chapter 8: Using Auto-Assemble
OR you can press TAB and get a list of options on the bottom of the screen display.
All the options at the bottom of the screen have been explained here previously, except for one:
Handle.
Handle allows you to set a head handle different to the one that has been set in the Auto-Assemble
settings. This handle will only be used for the next recording to be done. After that it reverts back to
the Auto-Assemble handle. Use this when an event is at the head of a take and the Auto-Assemble
head handle makes the source machine go out of the timecode range of that event.
AUTO
MFX AUTO User Manual
60
9. USING AUTO SPLIT
Objective: To understand the Auto Split process-when to use it, what it does, and how to set and
control preferences.
9.1 OVERVIEW
Auto-Split is designed to automate a procedure often used by dialogue editors. That is, placing
each conformed clip on a track within a selected range in an ordered manner. After Auto-assembling,
you can split the individual edits to a selected range of tracks automatically in a manner that rerecording mixers are familiar with. This is easily accomplished with Auto Split.
After an overview of the options under the Auto Split data entry window, an example of an
Auto Split will follow.
9.2 AUTO SPLIT DATA ENTRY WINDOW
LOW TRACK
The lowest track in the range.
HIGH TRACK
The highest track in the range.
START TRACK
Track to start splitting to within range.
TAKE FROM
What track the conform is on.
HANDLE
(in seconds)
Amount to add to the head and tail of a clip.
Note: If you precede the amount with a . the amount becomes
frames and a cross fade is performed.
NO HANDLE LENGTH
(in seconds)
Any clip this amount or less won’t have handles pulled out.
AUTO
61
Chapter 9: Using Auto Split
MINIMUM SEPARATION GAP
(in seconds)
Once a clip is put on a track, this is the amount of time before a new clip will again be put on that
track, that does not compare the preceeding clip.
COMPARE
[TimeCode]
[Scene ]
[Scene + Take]
This option is used to decide how to compare the source material for the splits:
TIMECODE
TimeCode will compare the source Timecodes of the highlighted event against the out Timecodes of
all the previously placed clips. If any are in the range set in Same TC Gap, the highlighted event is
placed on that track.
SCENE & SCENE + TAKE
Scene will compare the scene # (not including take #) of the highlighted event against the scene #s of
all the previously placed clips. If there is a match, the highlighted event is placed on that track.
Scene + Take is the same as Scene, except that Take #s are included in the comparison. In any of the
previous examples, if a match is not found, the highlighted clip is placed on the first track that has at
least the amount of space, set in Minimum Separation Gap, after the last clip is placed on it.
NOTE: There is a special case for stereo clips which must be indicated by converting
all stereo clip edits to 1S,1S. This will always allow for two tracks for each clip. (See
Convert) This will always allow for two tracks for each clip.
SAME TC GAP
(in seconds)
The amount of time that is used to calculate whether a clip should be placed on a certain track
regardless of spacing.
EXAMPLE:
Same TC Gap is set to [60] (one minute).
If a clip whose source timecode is 14:10:04:11 is placed on track 5 and the next
clip’s source timecode is 14:10:57:13, that clip will be placed on track five
regardless of any other open tracks within the range set.
Note: If compare is not set to TimeCode the timecode gap is ignored.
COMPENSATE
Compensate enables a special algorithm to allow for subframe inaccuracies that can occur during an
editing or syncing session, or when the NTSC setting is set to 29.97.
AUTO
MFX AUTO User Manual
62
SET TRACK DATA
With this set, you can manually type in the source and location timecode and the scene numbers for
the last position on every track.
9.3 AUTO SPLIT EXAMPLE
Let's say you would like to use tracks one through six as your 'split' tracks. You would set Low
Track to 1 and High Track to 6.
Start Track is usually set to the same as Low Track. Only change this when you want to force
the first split to a different track. Take From would normally be set to the same track that you conformed to. If the conform was two or more tracks wide, all of the tracks must be adjacent to the Take
From track.
Head & Tail Handle settings are used to automatically pull out a predetermined handle from
each clip as it is split and optionally perform a cross fade. The handles are determined as follows: If
the number is a whole number (1, 2, 3 etc.) they refer to seconds. For example, having head & tail
handle set to 1 would pull out one second head & tail handles.
If you precede the number with a period the handle amount becomes frames and a cross fade is
performed. Frame handles are performed in this way: The selected number is actually referring to the
fade. The amount to pull out is actually half of the selected number.
For example, with head & tail settings of .5 , the handle is pulled out 2.5 frames. We use
subframes to accomplish this, then a 5 frame fade is performed. No Handle Length is used to skip
the handle pulling function on short clips. Using 1 here is usually sufficient, resulting in having only
clips longer than one second with handles pulled out.
Auto Split doesn't just split every clip to a different track. (Although you can make it do that).
Using the settings in Minimum Separation Gap and Compare it decides what clips to group together
on the same track. The position and clip information of the last clip to be split for every track is kept.
That way, when the next clip is split the information can be scanned to determine if it should be
grouped with a previous clip.
Auto Split always follows these rules when splitting tracks. It goes to the timecode of the clip
to be split, calculates the start and end points from the head and tail handles, then scans each track to
see if any previously split clips compare the same as the new clip. If any do, the new clip is placed on
that track. If it doesn't it is placed on the lowest track available that has at least the number of seconds
set in minimum separation gap clear before the last clip that was placed. (See Compare under subsection 9.2 for a detailed description of how clips are compared)
AUTO
63
Chapter 9: Using Auto Split
AUTO
MFX AUTO User Manual
64
10. NAMING CLIPS
Objective: To understand the process of Naming Clips, with both MFX AUTO’s keyboard and
automatic functions.
10.1 OVERVIEW
Name Clips is designed to extend the capabilities of the Name Clip function built into the
MFX3plus. Besides giving more control capabilities, Name Clips also incorporates full motion
control and track selection into the PC’s keyboard. During an editing session, the last fifty names are
remembered and available for recall.
10.2 NAMING CLIPS
KEYBOARD
Selecting Keyboard allows you to manually go through a project and efficiently
name individual or multiple clips. This is commonly used for preparing a project
for cue sheet printing.
AUTO
(must be in List 2 to use)
Using the current highlighted event as the guide, this will name a single clip
either by scene & take, or by timecode, depending on the Name By parameters
set in the Auto-assemble page (see Chapter 8, section 8.3).
After you select Keyboard or Auto, a Name Clips user input data field
will come up.
Enter the track number you would like to start on. If you selected Auto,
that track is named. If you selected Keyboard, the Name Clips window
appears.
AUTO
65
Chapter 10: Naming Clips
TRACK SELECTION
The twelve function keys are mapped to either tracks 1-12 or 13-24. The current twelve tracks are shown
in the Tracks line. You toggle the mapping by pressing ALT F10. By choosing a function key, the track
associated with it is selected and soloed. The ↑ and ↓ keys increment or decrement track choice by one.
MOTION CONTROL
These are the motion control options when not editing a clip name:
When editing a clip name these are the options :
EDIT CLIP NAME
Pressing ENTER brings up the Clip Name edit window. After you've got the correct name, you
again press ENTER. It is at this point that the clip on the selected track is named.
If Add Quotes is on and there is enough room, the name is surrounded with double quotes. To
defeat this, you either turn Add Quotes off or press CTRL ENTER.
You also have the ability to name multiple clips with the same name automatically. When you
first press ENTER to bring up the edit window MFX AUTO stores the position of the MFX3plus.
When you again press ENTER to do the actual name, MFX AUTO again stores the position of the
MFX3plus.
The procedure for naming clips then follows this pattern: MFX AUTO sends the MFX3plus to
the first position that was stored and names the clip at that location. If the second position is greater
than the first, a jump right is performed and the clip at the new location is again named, and that
position is compared with the second position. This is repeated until all the clips between the first and
second position are named.
OTHER OPTIONS
AUTO ADD QUOTES
The Add Quotes function will automatically surround the name with double quotes, but only
under the following conditions:
•
•
There are no quotes already in the name.
There are at least two spaces left to perform the function.
AUTO
MFX AUTO User Manual
66
APPENDIX A: TROUBLESHOOTING GUIDE
MFX AUTO and the MFX3plus are both computer based products. Computers themselves have
zero tolerance for bad data. You might have heard the saying 'garbage in equals garbage out'. There
are many ways for garbage to get into MFX AUTO and MFX3plus. The most common as usual is
human error. It has been our experience here at Fairlight that over 90% of technical questions relating
to MFX AUTO can be traced back to bad data caused by human error, or just plain human error itself.
Therefore we have come up with some common problems and, if possible, their solutions.
BAD EDLS
Bad EDLs are the most common cause of problems. It is way beyond the scope of this manual
to describe all the possibilities that can cause a bad EDL, but what we can offer is this. Always get
the EDL in either a CMX, GVG or SONY format. Make sure that the disk format (different than the
EDL format) is either an MS-DOS, IBM, or PC format. If the source audio for the project is on
'dailies' make sure that the EDL was made with the 'Nagra Trace' option turned on. Finally, to make
full use of the options in MFX AUTO, make sure the Scene & Take information is included if available.
Even if you get an EDL that passes these tests, there are still many problems that can be caused
by it. These problems will have to be dealt with by you or the supplier of the EDL. Some of these
problems are invalid timecode numbers, wrong sound roll numbers listed, or missing edits. There are
no easy answers to these types of problems. They must be addressed case by case.
IMPROPER MFX SETTINGS
The MFX3plus is able to provide recording and lock synchronization for a wide range of source
material. Because of this there are more ways to set the MFX incorrectly. It's always a good idea to
review the chapter from the MFX3plus' manual on synchronization to determine the proper settings
for your situation. It is worth discussing the two input types here, analog and digital. For analog you
should have a video 'house' sync signal that is fed to the MFX and all other machines connected to it.
You should set your sync setting in the Digi menu to Video. For digital recording you might benefit
from having a digital 'house' sync connected to all machines.
Be aware that some error messages can be triggered by numerous problems. For instance,
during an assemble you may get the Unsuccessful Source Search error message. There are at least
four different problems that can cause this. An invalid timecode number, a bad sound roll number, a
head handle setting that is to high, or if you are doing a digital recording, improper MFX settings.
INTERFACE ERRORS
Interface errors are those annoying errors that can occur when running the MFX3plus in the
remote mode. Either one of two things happens to cause these errors. The PC to MFX3plus connection
isn't working or the MFX3plus to Master machine connection isn't working. There are two baud rates
available. 9600 and 38400. 38400 transfers data four times faster than 9600. Though 38400 is the
preferred choice it can cause problems on some older PC's. If you are having problems at 38400
switch to 9600 to rule this out.
AUTO
67
Appendix A: Troubleshooting Guide
BAD PC TO MFX3plus CONNECTION
This connection is made with a special 9 pin cable that was supplied with MFX AUTO. There are
separate wires to send to the MFX3plus and receive from the MFX3plus. If you don't see the MFX REMOTELY CONTROLLED message on the MFX3plus status line (the second line from the top) you need to
check this cable and all connections. If you get the MFX REMOTELY CONTROLLED message but then
get an MFX timeout error in MFX AUTO you need to check the return line on the cable or the connections.
MFX3plus TO MASTER MACHINE ERRORS
The master machine is the machine that has the source material to auto-assemble. This machine
must communicate with the MFX. Some things to check are :
1)
Make sure the 9 pin connection from the master machine is connected to the MFX on the same
port that is selected in the Auto-Assemble parameters window. This setting is M1 by default.
2)
Make sure the master machine is in external or remote mode and online.
3)
If you are using a switcher make sure it is set correctly and if it is try switching it back and
fourth a couple of times to clean the contacts.
TIMEOUT ERRORS
Timeout errors occur when MFX AUTO sends an instruction to the MFX3plus and does not
receive a response within the allotted time. (Usually 6 to 8 seconds). First make sure the 9 pin cable is
properly attached then check the following :
1)
The connection to the MFX may have been terminated by pressing Ctrl Q on the MFX or
some other means.
2)
The MFX may be busy in a process that doesn't allow remote connection.
3)
Setting the MFX LCD selection to a Master Setup function may prevent a remote connection.
4)
Ensure the MFX is turned on.
UART OVERRUN ERRORS
A UART overrun occurs when a piece of data being sent by the MFX3plus is received at the
serial port before MFX AUTO has a chance to process the previously sent data. That is, data is
coming too fast for MFX AUTO to handle. The only time this error should happen is when the baud
rate on the MFX3plus is set to 38400 and a slower 486 or 386 PC is being used. MFX AUTO has been
optimized for fast serial port transmission but there is a finite limit to the speed at which a given
machine can receive data.
There is a possibility that some system software is causing the problem. One known culprit is
disk caching software. If the problem persists you will have to select the lower baud rate setting of
9600 on the MFX3plus until you can upgrade to a faster PC.
ASYNC ERRORS
All async errors relate to the serial port on the PC. Most often they are caused by software but
they can mean a problem with the serial port itself. If you reboot the PC and still get an async error
it's time to try another port.
AUTO
MFX AUTO User Manual
68
APPENDIX B: TIMECODE
TIMECODE
Timecode is an electronic signal which labels video frames on video tape. The ideas for the
format were invented by NASA for telemetry tapes tracking space missions. The concept was
adopted by EECO in 1967 for video editing, and, after many similar (but incompatible) systems were
created, SMPTE created the standard in 1969. The European Broadcasting Union adopted the
standard and it is now called SMPTE/EBU (referred to simply as “timecode”).
Timecode may be recorded on tape in two ways:
A) Longitudinal Timecode, or LTC, is recorded on an audio channel or dedicated “address”
channel.
B) Vertical Interval Timecode or VITC, is recorded in the vertical interval of the video signal
itself.
These two formats are similar as far as the edit information they contain.
Longitudinal Timecode (LTC) is an electronic signal that switches from one voltage to
another, forming a string of pulses, or bits. Each one-second long chunk of this signal is
“sliced” into 2400 parts (for NTSC) or 2000 parts (for PAL/SECAM). This makes 80
Timecode bits for each video frame:
NTSC 2400 bits/sec divided by 30 frames/sec = 80 bits/frame PAL/SECAM 2000 bits/sec
divided by 25 frames/sec = 80 bits/frame
These 80 bits are given certain assignments according to the standard. There are these
important groups of information:
A)
B)
C)
D)
E)
F)
The hours/minutes/seconds/frames
Drop-frame flag - Whether this timecode is Drop-frame
Color-frame flag - Whether color framing is intended
User bits - “leftover” bits available for user assignment
“Sync word” - Tells an electronic reader where the frame information begins and ends and which direction the tape is moving
“Sync bits” - Help verify (together with the sync word) the position
of the data as the tape moves
VITC (Vertical Interval Timecode) format adds 10 extra bits to each frame label. These add the
following to the LTC list, above:
A) Additional “sync” bits between data bit groups
B) Field bit (allows video-field indexing accuracy)
C) Cyclical Redundancy Check (CRC) used for error detection
The hours/minutes/seconds/frames is the primary information we are interested in. This data is
Drop-frame, Non-drop frame or EBU (25 frames/sec, PAL/SECAM) as indicated by the “dropframe” flag.
The “sync word” and “sync bits” are the heart of how timecode works. As the tape moves,
these bits instruct the electronic reader which direction the tape is moving, where the hours/minutes/
seconds/frames, drop-frame bit, etc. are located and (if properly aligned on the tape) where the video
frames themselves are located with respect to the timecode stream.
AUTO
69
Appendix B: Timecode
So even though the tape is moving at an unknown speed in either direction as the machine is
used, the timecode can be read at all times (given a good recording and properly functioning equipment). Note that, at microscopic levels, the tape is jumping and jittering across the reader heads,
stopping, reversing direction, going into fast-forward, etc. The sync words and the design of the
readers makes it all work.
NTSC timecode comes in two types - Non-drop frame and Drop-frame, but there is only one
PAL/SECAM, sometimes called “EBU”. These are usually displayed as:
MOST SYSTEMS:
Non-drop frame: 1:00:00:00 colon in last position
Drop frame:
1:00:00;00 semicolon in last position
PAL/SECAM:
1:00:00:00 colon in last position
SONY:
Non-drop frame: 1:00:00.00 period in last position
Drop frame:
1:00:00,00 comma in last position
PAL/SECAM:
1:00:00.00 period in last position
NTSC - DROP FRAME VERSUS NON-DROP, AND PAL (EBU)
NON-DROP FRAME
NTSC video actually runs at 29.97 frames per second, not 30 fps, as is usually implied. If you
label all the NTSC frames incrementally, as with NON-DROP FRAME, a 01:00:00:00 label (a colon
in the last position indicates non-drop frame) will represent 108,000 video frames (from zero).
108,000 NTSC video frames actually takes 01:00:03:18 to play back. In other words, 01:00:00:00 in
NON-DROP frame is not truly 1 hour, but 1 hour and 3 seconds, 18 frames.
This unfortunately leads to the fact that timecode calculations do not represent real-time.
2:00:00:00 minus 1:00:00:00 equals 1:00:00:00 in non-drop frame, BUT the running time of this
duration is really 1:00:03:18.
DROP FRAME
Many people are very concerned with the actual running time. (Imagine a network making a 3
second & 18 frame error when advertisers at major televised events can be paying enormous amounts
of money per each second of airtime. The drop-frame labeling scheme was designed to overcome the
inaccuracy of non-drop frame labeling, and it is gospel in broadcasting.
The drop frame format represents NTSC running time accurately by “dropping out” some of its
frame labels - specifically, 2 frame labels at the end of each minute except each 10th minute. This
way, a display of drop frame 01:00:00;00 (semicolon indicates drop frame) represents 107,892 video
frames, or exactly one hour of real time from zero.
No actual video frames are “dropped” (where could they go?) - only the timecode labels of the
frames. At any point through the labeling sequence the timecode label is very close to the actual
elapsed time (from zero). Since the labels represent an accurate time-line, adding or subtracting
drop-frame timecode results in an accurate calculation - 2:00:00;00 minus 1:00:00;00 equals
1:00:00;00 - one true hour of running time.
PAL/SECAM - EBU
PAL and SECAM video run at precisely 25 frames per second so the DROP frame/NON-DROP
frame issue is meaningless. 01:00:00:00 in EBU represents 90,000 PAL video frames - precisely 1
hour of running time.
AUTO
MFX AUTO User Manual
70
APPENDIX C: COMMAND LINE OPTIONS
MFX AUTO is opened from MS-DOS by typing the name MFX AUTO and pressing ENTER.
From Windows 3.1 or ‘95, access MFX AUTO by clicking the icon set up for the program.
Command Line Options allow you affect the operation of MFX AUTO. Under MS DOS, you can
type these options directly into the DOS line. Under Windows 3.1 or ‘95, first access the MS DOS
box or line, then type in a command line option.
Example:
To start MFX AUTO with a userfile of myuser.usr and without making a remote connection,
you could either type:
MFX3AUTO /U MYUSER.USR /Ror
MFX3AUTO /r- /uMYUSER.USR
Case is not checked, so uppercase or lowercase type both have the same effect.
TYPE
ACTION
MFX3AUTO /R- :
Start MFX AUTO without making a remote
connection.
MFX3AUTO /F MYEDL :
Start MFX AUTO with a specified EDL file.
Can be any valid filename. Wildcards are okay.
MFX3AUTO /U MYUSER :
Start MFX AUTO with a specified user file.
Can be any valid filename.
MFX3AUTO /COMPRESS :
All blank lines are ommitted from the list. This
could help if you get a large list with video edits
included and a lot of blank lines.
MFX3AUTO /INT+ or /INT- :
Changes the operation of the status line wait
messages. INT- (default) shows three dots after
the wait message. INT+ draws a series of dots
after the wait message. INT+ draws a series of
dots after the wait message during the wait
period. Of course, the faster the computer, the
less dots are drawn.
AUTO
71
Appendix C: Command Line Options
AUTO
MFX AUTO User Manual
72
APPENDIX D: KEYBOARD SHORTCUTS
List Mode
KEYSTROKE
ACTION
≠↓
Scroll list up or down by one
PAGEUP
Scroll list up by one page
PAGEDOWN
Scroll list down by one page
HOME
Go to beginning of list
END
Go to end of list
F1...F4 will send the MFX disk to:
F1
Source in timecode of highlighted item
F2
Source out timecode of highlighted item
F3
Record in timecode of highlighted item
F4
Record out timecode of highlighted item
CTRL + F1...F4 will send whatever is the master to:
CTRL + F1
Source in timecode of highlighted item
C TR L + F 2
Source out timecode of highlighted item
C T RL + F 3
Record in timecode of highlighted item
CT R L + F 4
Record out timecode of highlighted item
SHIFT + F1
Show duration of Source highlighted item
ALT + F1
Edit highlighted item
ALT + F2
Edit/View list offset parameters (Be careful)
ALT + F3
Edit scene numbers
F5
Toggles the marked state of highlighted item and increments
position in list by one
F6
Brings up input routine for search
ALT + F6
Search for scene number in List 2
F7
Puts an internal mark for a range start
F8
If and internal mark is set, this marks all items between
the internal mark and the current position
ALT + ≠↓
Toggles the marked state of any item that is scrolled over
AUTO
73
Appendix D: Keyboard Shortcuts
List Mode (continued)
KEYSTROKE
ACTION
CTRL + F5
Clears any ranges
CTRL + F6
Removes any ranges from list
CTRL + F7
Keeps only marked ranges in list
F9
Searches EDL list for timecode in MFX LCD display
F10
Activate Help pick list
F11
Repeats last search forward from current position
F12
Repeats last search backward from current position
CTRL + F11
Searches forward for start of next range
CTRL + F12
Searches backwards for end of previous range
ALT + F,L,A,M or H
Opens menu window at appropriate topic
ALT + DELETE
Deletes highlighted item from list
ALT + INSERT
Inserts new item to list
ALT + S
Switch to inactive list
ALT + Z
Switch to inactive inactive list at same position as active
list
ALT + X
Quits MFX AUTO
ALT + R
Reports various facts about List 2
ALT + P
Reports various facts about the serial ports
ALT + C
Conforms the highlighted event
CTRL + A
Toggles the Auto-assemble mark of highlighted event
ALT + N
Name clips
ALT + V
Get information on Fairlight
AUTO
MFX AUTO User Manual
74
Data Input Mode (User Input Fields)
KEYSTROKE
ACTION
INSERT
Toggles the insert mode. A big cursor means insert
HOME
Moves the cursor to the first character in the given field
END
Moves the cursor to the end of the given field
←
Moves the cursor left one character. If the cursor is at the
beginning of a field, and there is more than one filed, it is
moved to the end of the previous field
→
Moves the cursor right one character. If the cursor is at
the end of a field, and there is more than one field, it is
moved to the beginning of the next field
CTRL+←
Moves the cursor left one word (Except when naming clips)
CTRL+→
Moves the cursor right one word (Except when naming clips)
DELETE
Deletes the character over the cursor
BACKSPACE
Deletes the character to the left of the cursor
CTRL+END
Deletes from the cursor position to the end of the line
CTRL+HOME
Deletes from the beginning of the line to the cursor
CTRL + Y
Clears the field
CTRL + T
Deletes the word to the right of the cursor
CTRL + R
Restores the original contents of the field and allows you
to continue editing
ALT+H
Opens Help
Data Input Mode (Multiple Fields Input Screen)
KEYSTROKE
ACTION
ENTER
Accepts the contents of the field and moves to the next one
≠
↑
Moves the cursor to the previous field
↓
Moves the cursor to the next field
TAB
Moves the cursor to the beginning of the next field
SHIFT+TAB
Moves the cursor to the beginning of the previous field
CTRL+PAGE UP
Moves the cursor to the first field on the screen
CTRL+PAGE DOWN
Moves the cursor to the last field on the screen
CTRL+ENTER or F10
Accepts data and allows you to continue
AUTO
75
Appendix D: Keyboard Shortcuts
Help Mode
KEYSTROKE
ACTION
F1
Switch to Help index
ALT+F1
Return to previous help
≠
↑
Scroll help up by one line
↓
Scroll help down by one line
PAGE UP
Scroll help up by one page
PAGE DOWN
Scroll help down by one page
HOME
Go to beginning of help line
END
Go to end of help line
CTRL+HOME
Go to top of screen
CTRL+END
Go to bottom of screen
CTRL+PAGE UP
Go to beginning of topic
CTRL+PAGE DOWN
Go to end of topic
TAB
Search forward for next topic link
SHIFT+TAB
Search backward for next topic link
ENTER
When cursor is over a topic link, shows help for that topic
F5
Search engine help for user selected text
F6
Repeat last search from last position
AUTO
MFX AUTO User Manual
76
Text Editor Mode
KEYSTROKE
ACTION
CTRL Y
Delete current line
CTRL Q Y
Delete from cursor to end ofline
CTRL T
Delete word to right of cursor. If the cursor is at end of a line,
the following line is joined with the current line
TAB
Move the cursor to the next tab stop. If insert mode is on, any
text to the right of the cursor is moved to the right of the tab
stop. When fixed tabs are in effect, the tab stops occur at 8
column intervals (by default). When smart tabs are in effect
(the default setting), the tab stops are determined by the
location of the words on the previous line; the first character
in each word represents a tab stop
F2
Save the current file and continue editing
ALT F2
Save the current file with a new name
F3
Load a new file. If the current file is modified, the user is
first asked if it should be saved
ESC
Quit editing. If text has changed, prompt user to save
F7
Mark the beginning of a block
F8
Mark the end of a block
CTRL K C
Copy the currently marked and displayed block to the position of
the cursor. The block markers are placed around the new copy of
the block
CTRL K V
Move the currently marked and displayed block to the position of
the cursor. The block markers remain around the block at its new
position
CTRL K Y
Delete the currently marked and displayed block
CTRL K R
Reads a file and places text at the cursor position and marks it
as a block. The user is asked for a file name
CTRL K W
Writes the marked and displayed block to a file. The user is
asked for a file name
(Continued on next page)
AUTO
77
Appendix D: Keyboard Shortcuts
Text Editor Mode (continued)
KEYSTROKE
ACTION
Searches the file for user specified text. After entering a
search string, the user is prompted for search options. There
are four options available: B, G, L and U
F6
B
G
L
U
-
Search
Search
Search
Ignore
Backwards
Globally
Locally, within marked block
Case (Default)
If the search string is found, the text is highlighted until a key
is pressed
CTRL Q A
This is the Search and Replace command. It works the same as F6,
except that the user is asked for a replace string. In addition
to the previous search options, an additional option of N is
available. If N is not selected, the user is asked to confirm
each replacement.
CTRL L
Repeats the last search
CTRL O C
Centers the line between column 1 and the right margin
CTRL Q L
Restore original contents of the current line
AUTO
MFX AUTO User Manual
78
APPENDIX E: GLOSSARY
A
Active List
The EDL on your screen which is currently activated.
AMPEX
A popular EDL format generated by the Ampex video editing controller.
ASCII
A simple “text only” file format containing only alphanumeric characters.
Auto-assemble
The automatic assembly and conforming of source audio according to the EDL. This is one of the key
features of MFX AUTO.
Auto Detect
The process by which MFX AUTO automatically concludes which port on the MFX AUTO PC is connected
by cable to the MFX3plus system.
C
C Mode
Sort mode in which the EDL is sorted in ascending order by sound roll & source code.
Click Spots
Locations on the MFX AUTO screen where a click of the mouse will activate a specific function.
Clips
A section or piece of sound in the MFX3plus.
CMX
A popular EDL format.
Com Port
A computer I/O (Input/Output) port through which the computer communicates with the outside world. The
standard com (also known as serial) port uses RS-232 or RS-422 protocols.
Cursor
A movable indicator on the screen, usually blinking, marking the position at which a character can be entered,
corrected, or deleted. The cursor position can be moved with the arrow keys, or by clicking with the mouse
in a different location.
D
Dialog Window
An on-screen message box that conveys or requests information from the user.
Data Entry Window
Windows which appear on your screen and contain a variety of different types of data fields for you to select
or enter information into.
DOS
Usually refers to MS-DOS (Microsoft-Disk Operating System), the standard, single user, non-graphical
operating system of IBM and IBM-compatible computers introduced in 1981.
79
AUTO
Appendix E: Glossary
D
DOS Shell
A menu-driven user interface for the MS-DOS operating system, that provides menu-driven access to most
DOS commands.
DOS Prompt
In MS-DOS, a letter representing the current disk drive followed by the greater-than symbol (>), which
together inform you that the operating system is ready to receive a command.
Drop Frame
An NTSC timecode format which uses a technique of dropping specific frame labels in order to have NTSC
video, which actually runs at 29.97 frames per second, run at 30 frames per second, thereby matching real time.
E
EDL
An EDL, or Edit Decision List, is a database list of a production’s edit points (events that include the source
to be recorded and where to record it, plus information on transitions). A record of all original scene location
time references, corresponding to a production’s transition events. EDLs are usually generated by computerized editing equipment.
Event
A line on an EDL list representing an edit activity to be performed.
F
Fields
Specified areas in user input windows for entering or selecting data.
G
Gain
A control which allows you to trim the audio level during a record. You can trim from +15 to -15, although
the recommended amount is 0.
GVG (Grass Valley Group)
A popular EDL format.
I
Inactive List
An EDL list on your screen which is currently activated.
J
JIS
Native file format in which Sony saves EDL files. JIS files are modified ASCII files which cannot be viewed
by with a word processor, although the EDL data contained can be converted to ASCII, then, with some
exceptions, into a format similar to other manufacturers’ formats.
AUTO
MFX AUTO User Manual
80
L
List 1
An exact copy of the EDL that you load from a disk.
List 2
The MFX AUTO version of List 1, which is used in Auto-assembly. Only lines that have valid event numbers
make it to List 2.
M
Minimizing
Removing events from an EDL that probably won’t Auto-assemble.
Multiple Choice Data Field
A data field which allows you to select from a list of pre-determined choices by clicking on the field with the
mouse, hitting the SPACEBAR, or pressing the + or - keys.
N
Nested Data Field
A data field which, when selected, takes you directly to another input screen.
Non-Drop Frame
The actual speed of NTSC video is 29.97, not 30 frames per second, and when its frames are run incrementally, one hour equals more than one hour real time. Drop Frame is a technique to make standard NTSC
video and audio run in a way equalling real time. Non-drop refers to the standard NTSC video and audio
running incrementally and unaltered.
NTSC
Standard of color TV broadcasting used mainly in the US, Canada, Mexico and Japan, featuring 525 lines per
frame and 30 frames per second.
Null Modem Cable
A specially configured serial cable for connecting two computers directly, without mediation by a modem.
P
PAL
The European color TV broadcasting standard featuring 625 lines per frame and 25 frames per second.
Pick List
A window with a list of items grouped together for selection by a user.
P
Pointer
An on-screen symbol, usually an arrow or a hand with pointing finger, that shows the current position of the
mouse. (The pointer doesn’t necessarily indicate the position of the cursor - to move the cursor with the
mouse, you must click the pointer on the desired cursor position.)
Pull-Down Menu
An on-screen menu of command options that appears after you select the command name of the menu bar.
AUTO
81
Appendix D: Keyboard Shortcuts
S
Select Data Field
Data fields which can only be turned on or off. When selected, a button occurs in the box, when de-selected, a dash.
Serial Port
A computer I/O (Input/Output) port through which the computer communicates with the outside world. The
standard serial port uses RS-232 or RS-422 protocols. (Also knows as the Com port)
SMPTE
Society of Motion Picture and Television Engineers. SMPTE Timecode is a Timecode format standard.
Sony Format
A popular EDL format.
Sound Rolls
Refers to media containing the sounds which will be recorded during an Auto-assemble.
Source Reel
The actual media containing the original recorded sound.
Status Line
A line of an application program’s display screen that is usually at the bottom of the screen, and describes
some elements of the state of the program (such as name of the file being modified, cursor location, etc.)
Syncing
Term used to describe the precise alignment of two signals or functions.
T
Timecode
A digital code number recorded onto a videotape for editing purposes. When decoded, the Timecode identifies every frame of a videotape using digits reading hours:minutes:seconds: and frames.
Track
A preselected area for placing audio in the MFX3plus. Up to twenty-four are available.
U
User Interface
All the features of a program or computer that govern the way people interact with the computer. Two
common examples are command driven programs and graphical user interfaces.
User Settings Data Input Window
An MFX AUTO input window that allows the customization of the program to the user’s needs.
AUTO
MFX AUTO User Manual
82
INDEX
A
Ampex Format ..................................................... 5, 25, 79
ASCII ..................................................................... 51, 79
Auto Split
Data entry window ................................................... 61
Example ................................................................... 63
Introduction ............................................................... 6
Overview .................................................................. 61
Auto-assemble
Data entry window ................................................... 55
Interrupting ....................................................... 46, 59
Options ............................................................... 55–58
Preparing for ............................................................ 55
Process introduction ........................................... 5, 55
Auto-Assemble Menu .................................................. 45
C
Clip Naming ............................................................ 6, 65
CMX Format ................. 5, 25, 33, 34, 51, 54, 67, 79
Com Port ........................................................................ 9
Detection .................................................................. 32
Command Line Options ............................................... 71
Conforming
Conform track .......................................................... 56
Highlighted event .................................................... 46
Introduction ............................................................... 5
Reconform ............................................................... 47
Record & conform ................................................... 56
Set conform style .............................................. 47, 56
Convert
Custom ..................................................................... 34
None to one .............................................................. 34
Startup list ................................................................ 33
Cursor Control Speed ................................................... 31
D
Data Entry Window ...................................................... 22
Auto split ................................................................. 61
Auto-assembly ......................................................... 55
User settings ............................................................ 15
Dialog Boxes ................................................................ 23
User settings 29–30
DOS Shell 29
Drop Frame 70
E
Conform edit tracks ................................................. 47
Edit ........................................................................... 39
Edit clip name .......................................................... 66
Edit line .................................................................... 39
Edit link option ........................................................ 33
Edit scene # .............................................................. 39
Link assigned edits to tracks ................................... 46
Mark audio edits ...................................................... 50
Mark video edits ...................................................... 50
EDLs
Audio channel cross reference ................................ 53
Compress at load ..................................................... 36
Converting ............................................................... 53
Floppy types ............................................................ 52
Formats .................................................................... 52
Introduction to ......................................................... 51
Management .............................................................. 5
New .......................................................................... 25
Opening ................................................................... 14
Window .................................................................... 18
Event
Combine equal events .............................................. 40
Duration ................................................................... 44
Insert overall event .................................................. 39
Mark auto-assembled/unassembled ........................ 43
Sort ........................................................................... 37
F
File Menu 2 ..................................................................... 5
G
Gain .............................................................................. 58
Glossary .................................................................. 79–82
GVG Format .............................. 25, 33, 51, 54, 67, 80
H
Handles ........................................................... 56, 60, 61
Hardware
Connections ............................................................... 9
Quick start ................................................................... 7
Requirements ............................................................. 9
Help
Contextual help ........................................................ 16
Help topics ............................................................... 16
Using help system .................................................... 16
Edit(s)
Allow video edits 3 ..................................................... 2
Assign edits to tracks ........................................ 33, 46
Clear edit links ......................................................... 46
AUTO
83
Index
I
Installation
Hardware .................................................................... 9
Quick start .................................................................. 7
Software ............................................................. 10–14
K
Keyboard Shortcuts ...................................................... 73
L
List
List 1 ........................................................................ 18
List 2 ........................................................................ 19
List Menu ............................................................... 37–44
M
MFX AUTO
Screen overview ....................................................... 17
MFX Functions Menu ............................................ 49–50
Minimize
Files ................................................................... 26, 35
List ........................................................................... 35
Mouse
Activating in Windows ’95 ...................................... 12
Mouse clicks ............................................................ 21
Use ........................................................................... 21
N
Non-drop Frame .................................................... 70, 81
NTSC ..................................................................... 69, 81
Null Modem Cable ............................................. 7, 9, 81
O
Cut ............................................................................ 43
Find next .................................................................. 39
Find previous ........................................................... 39
Keep ......................................................................... 43
Reconvert ...................................................................... 44
Recording ........................................................................ 5
Change hour ............................................................. 40
Dupe timecode in source ......................................... 40
Duration ................................................................... 40
In .............................................................................. 49
Out ........................................................................... 49
Record & conform ................................................... 56
Record track & conform track ................................. 56
Set frame rate ........................................................... 40
Reports ......................................................................... 44
List .................................................................... 36, 44
Serial port ................................................................. 44
S
Search ........................................................................... 27
Add scence search ............................................ 27, 48
SMRTDRV ................................................................... 12
SONY Format ..................... 25, 33, 34, 41, 51, 67, 70
Sort ............................................................................... 37
List automatically .................................................... 35
Status Line .................................................................... 20
Strip
(A), (B) .................................................................... 40
(AB) scenes .............................................................. 34
Scene numbers ......................................................... 41
Sound rolls ............................................................... 41
Sync Preference ............................................................ 31
T
PAL ....................................... 5, 22, 30, 57, 69, 70, 81
Pick Lists ...................................................................... 24
Print .............................................................................. 29
Protection Key ........................................................... 7, 9
Pull-down Menus ......................................................... 17
Timecode ............................................................... 38, 69
Check numbers ........................................................ 44
Drop frame ............................................................... 70
Dupe record in source .............................................. 40
Go to ........................................................................ 49
Mark ......................................................................... 44
Non-drop frame ....................................................... 70
PAL/SECAM - EBU ................................................ 70
Review ..................................................................... 69
Troubleshooting ..................................................... 67–68
Q
U
Quick Start ...................................................................... 7
User Settings Data Entry Window ........................ 15, 30
R
W
Range ............................................................................ 42
Clear ......................................................................... 43
Windows 3.1 Setup ....................................................... 12
Windows ’95 Setup ...................................................... 10
Offset ..................................................................... 42, 43
P
AUTO
MFX AUTO User Manual
84