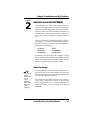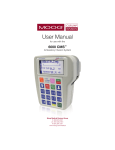
1
Sound Producer Pro User’s Manual ORCHID 1992, Orchid Technology. This manual is copyrighted. All rights reserved. This document may not, in whole or part, be copied, reproduced, reduced or translated by any means, either mechanical or electronic, without prior consent in writing from Orchid Technology, Incorporated. Sound Producer Pro and Orchid are trademarks of Orchid Technology. All other products mentioned in this manual are trademarks of their respective manufacturers. Orchid Technology 45365 Northport Loop West Fremont, CA 94538-9973 TABLE OF CONTENTS Foreword Before You Begin Introduction 5 6 7 CHAPTER 1 Installing the Sound Producer Pro 9 Sound Producer Diagram Summary of Jumper Settings 10 11 Step 1: Preparing Your Computer 11 Step 2: Preparing Your Sound Producer Pro 12 Jumper Settings Jumpers J1 and J2: Virtual Parallel Port Selector Jumper J4: Internal Speaker Connector Jumper J5: Speaker Amplification Jumper JP1: CD-Audio In Jumper JP2: SCSI Interrupt Selector Jumpers SW0 and SW1: SCSI Address Selector Step 3: Installing Your Sound Producer Pro 12 12 13 13 13 14 14 15 CHAPTER 2 Installation and DOS Software 17 Before You Begin 17 Using SINSTALL.EXE 18 DOS SOFTWARE Installation 19 Microsoft Windows Installation Build Voice Notes Playback Diskette 19 19 Changing the Address Settings under Windows 20 Running the Diagnostics Sound Producer Pro User's Manual 21 1 Set Environment for Sound Producer Pro 23 Configuring Sound Producer Pro 24 Setting the I/O Base Address 24 Setting the Interrupt Channel 25 Setting the DMA Channel Enabling/Disabling the Game Port Interface 25 26 Enabling/Disabling the CD-ROM Interface Setting the CD-ROM Interface Address 26 27 Sound Standards Configuration DOS Applications 29 Using Sound Tracks 29 Selecting a Song List 30 Playing Songs Adding Songs 30 31 Using CD Player 32 Using MSCDEX.EXE 35 Using Sound Master 36 Import File Formats Editing Sound Files 38 39 Editing a Sound Segment 43 Using Monologue Configuring Monologue 2 28 45 46 Modes of Operation Control Keys 47 47 Reconfiguring Operating Parameters Changing the Hot Key 51 52 Customizing the Dictionary Mouse Support for Monologue 52 52 Sound Producer Pro User's Manual Using Mixer for DOS Configuring Mixer for DOS 54 59 Using SoundScript Creating a Script Running a Script 60 60 61 Guidelines for Creating and Running a Script SoundScript Commands 63 64 CHAPTER 3 Windows Software 71 Using Orchid Voice Notes Quick Start 72 72 Recording a Message Embedding a Message 75 77 Playing a Message Playback Only 77 77 Using Jukebox 79 Playing a Playlist Editing a Playlist 81 82 Playlist Files Manager Adding New Events to a Playlist 84 85 Locating Sound Events Audition Sound Events 86 87 CD-ROM Disk Titles CD-ROM Track Names 87 87 Using Mixer for Windows Mixer Controls Sound Producer Pro User's Manual 89 89 3 Using WinDat Quick Start 92 92 Transport Controls Range Controls 93 94 Playing Files Auto Auditioning Files 97 97 Recording Files Editing Files 98 100 Modifying Files with Transforms Using WinDat's Windows Menu 102 104 APPENDIX A Technical Help Troubleshooting the Sound Producer Pro 105 105 APPENDIX B Technical Information Sound Producer Pro Technical Specifications Additional Features SCSI CD-ROM Drives Address Selections 4 108 108 109 111 112 I/O Port Addresses Interrupt Channels 112 113 DMA Channels CD-ROM Specifications 113 114 SCSI CD-ROM Interface Pin-Outs Game-MIDI Port Specifications 115 116 FCC Notice 117 Index 118 Sound Producer Pro User's Manual Orchid Technology has been a leading manufacturer of hardware and peripherals for personal computers since its incorporation in 1982, and is noted for introducing new standards to the personal computer industry: 1982 PCnet: the first personal computer Local Area Network. 1984 PCturbo: the first Accelerator board for PC compatible computers. 1985 ECCELL: the first PC Multifunction board with error correction. 1987 RamQuest 50/60: the first EMS (Expanded Memory Specification) product for the IBM PS/2 computers. 1990 ProDesigner II: the first Super VGA graphics adapter to support 1024 x 768 graphics in 256 colors on interlaced and non-interlaced monitors. 1991 Fahrenheit 1280°: first to ship a Windows accelerator, based on S3's 86C911 chip. 1992 Fahrenheit VA: first to ship a Windows accelerator with voice annotation built-in. With the introduction of Windows 3.1, and Orchid's experience and success in graphics, it is a natural transition to move into the multimedia arena. The combination of our video and audio boards will add the ultimate power to your PC—fast, crystal-clear color graphics and stereo sound! Introducing the Orchid Sound Producer Pro, a high-performance stereo sound board for 286, 386, and 486 personal computers. It features a 20-voice Stereo FM Music Synthesizer. Sound Producer Pro also supports four sound standards—AdLib, Sound Blaster Pro II, Disney Sound Source, and Covox Speech Thing. Thank you for purchasing the Sound Producer Pro. Care has been taken to ensure that it will provide you with years of trouble-free operation. We believe you will be pleased with your purchase. ORCHID Sound Producer Pro User's Manual 5 Before You Begin This manual will familiarize you with the features, installation and use of the Sound Producer Pro. There are several symbols and conventions used throughout this manual which will help to draw your attention to a feature or to focus on important information: When you see the Magnifying Glass it means the text is referring to something you should take a closer look at before proceeding further. FILENAMES All MS/PC DOS filenames and DOS commands will be emphasized by this type style. Common Names 6 BBS Bulletin Board System DAC Digital/Analog Converter MIDI Musical Instrument Digital Interface PC Refers to the family of IBM PC, PC/XT or PC/AT compatible computers TSR Terminate and Stay-Resident VGA Video Graphics Array Sound Producer Pro User's Manual INTRODUCTION The Sound Producer Pro is the ultimate high performance stereo sound board. It is designed to provide the highest quality of sound and maximum level of software compatibility for your personal computer. Sound Producer Pro supports four different types of sound standards—AdLib, Sound Blaster Pro II, Disney Sound Source, and Covox Speech Thing. It also complies with Microsoft Windows Multimedia Extension Level 1. This flexibility allows Sound Producer Pro to be compatible with many software programs, such as business presentations, education, games, and multimedia in both DOS and Windows environments. Sound Producer Pro features a 20-voice Stereo FM Music Synthesizer, producing high quality and realistic music. It also has a Stereo Digital/Analog Mixer that allows you to mix all the audio sources for playback operation and for recording. To round out support for Multimedia, the Sound Producer Pro includes a built-in AT-Bus CD-ROM drive interface, an optional SCSI CD-ROM drive interface, a MIDI interface built into the game port, and a built-in 4-watt amplifier. Better reproduction of the original sound can be achieved through Digitized Audio Playback and Digitized Audio Recording operations. Sound Producer Pro allows digitized sounds to be reproduced and recorded at a sampling rate of 4KHz to 44.1KHz (mono), or 4KHz to 22.05KHz (stereo). Sound Producer Pro also comes with several utility and application programs, and a sound driver for Windows 3.1—all for your enjoyment. Sound Producer Pro User's Manual 7 About This Manual This manual presumes that you are already familiar with your IBM PC-compatible computer. While the Sound Producer Pro has been designed to be easy to install, we recommend that you refer to your computer’s reference manual when terminology or installation steps are unfamiliar to you. This manual has been organized to help you set up and install the Sound Producer Pro as quickly as possible. Each section is divided into short, easy to follow steps, to help you understand the installation and function of the Sound Producer Pro. Chapter 1: Installing the Sound Producer Pro Whether you are a beginner or an experienced user, this chapter will give you important information on proper installation, and instructions on how to connect the microphone and speakers to the Sound Producer Pro. Chapter 2: Installation and DOS Software You will be given the information needed to install the sound driver, software utilities, DOS applications, and configure hardware settings. This chapter will also cover use of the diagnostics program to ensure that your sound board is working properly. Chapter 3: Windows Software This chapter will provide instructions in using the Windows software applications included with Sound Producer Pro. Appendix A and B: Technical Help and Information If you are experiencing installation difficulties or require troubleshooting information, Appendix A will give you checkpoints to look at to ensure that your Sound Producer Pro is operating properly. Appendix B will provide you with information on the Sound Producer Pro technical specifications and features. 8 Sound Producer Pro User's Manual Chapter 1: Installing the Sound Producer Pro Chapter 1 INSTALLING THE SOUND PRODUCER PRO The Sound Producer Pro was designed to be easy to use and easy to install. There are three fundamental steps to the installation: Step 1: Preparing your Computer You will need to take the cover off your computer and select an empty 16-bit expansion slot for the Sound Producer Pro. STATIC! Before handling the P9000/VLB, be sure to guard against electrostatic discharge. Do not wear clothing that causes static (such as wool sweaters). In most cases, touching the power supply housing before handling the board will discharge static electricity, or you may want to buy a Ground strap from your local computer store. Step 2: Preparing your Sound Producer Pro The Sound Producer Pro can be installed using the preset jumper settings. The jumpers are used to configure the Virtual Parallel Port, Speaker Amplification, Internal Speaker, and the SCSI Interrupt and Address Selectors. If you need to change the default settings, see Table 1.1 for the jumper settings. Step 3: Installing your Sound Producer Pro Sound Producer Pro allows for connection of various external devices, such as the microphone and speakers included, a CD player, CD-ROM, and a joystick. See Figure 1.1 for connection locations. Once your computer cover has been removed and the PC Speaker connected, gently push the card down into the expansion slot. After the card is securely seated, replace the cover. The Sound Producer Pro is now installed and ready to operate. After the installation is complete, the Sound Producer Pro Diagnostics Program should be run to ensure that the card is installed and working properly (see Chapter 2 for more information). Sound Producer Pro User's Manual 9 Chapter 1: Installing the Sound Producer Pro SCSI CD 1 1 AT CD JP 2 SCSI IRQ SW 0 SW 1 J1 ORCHID J2 J4 J5 CD AUDIO IN JP 1 PHONE VOLUME MIC. 1 1 LINE IN GAME Figure 1.1: Sound Producer Pro Jumper and Connector Locations 10 Sound Producer Pro User's Manual Chapter 1: Installing the Sound Producer Pro Summary of Jumper Settings The following table lists all of the jumpers used on the Sound Producer Pro. For the locations of the jumpers, see Figure 1.1. Jumper Jumpers J1 & J2 Jumper J4 Jumper J5 Jumper JP1 Jumper JP2 Jumpers SW0 & SW1 MIC Jumpers Setting Default Connect 1&2 ✔ Disconnect 1 & 2 See information on page 13 Connect 1&2 Disconnect 1 & 2 ✔ See information on page 13 Connect IRQ 12 See table on page 14 Connect 1 & 2 Connect 2 & 3 ✔ Function Virtual Parallel Port Selector Internal Speaker Connection Speaker Amplification - High Speaker Amplification - Low Connection for CD-ROM Interrupt Channels for SCSI Communications I/O Port address selection for SCSI CD-ROM Interface MIC BIAS Jumpers (do not change default) Table 1.1: Jumper Settings Step 1: Preparing Your Computer 1. Make sure the power to your computer is turned off and that all of the necessary power cords and cables are disconnected from the computer. 2. Remove the screws that secure the computer chassis cover and slide the cover off (be sure to keep the screws in a safe place). 3. Select a 16-bit expansion slot for the Sound Producer Pro. Sound Producer Pro User's Manual 11 Chapter 1: Installing the Sound Producer Pro Step 2: Preparing Your Sound Producer Pro Jumper Settings There are several jumper blocks used in the configuration of the Sound Producer Pro. The jumpers are located at positions J1, J2, J4, J5, JP1, JP2, SW0, and SW1. The next few pages will explain the use and proper settings of each jumper. See Table 1.1 for the jumper settings. Jumper blocks are configured by positioning a jumper connector over two pins on the jumper block. This creates a closed circuit across the two pins. Figure 1.2: Jumper Connector Jumpers J1 and J2: Virtual Parallel Port Selector Jumpers J1 and J2 are used to create a virtual parallel port on your PC. To take advantage of the Disney Sound Source standard, your PC must have a parallel port configured at one of the following addresses: 3BCH, 378H, or 278H. If your PC does not have a physical parallel port, configure both jumpers J1 and J2 for a virtual parallel port. Connect Pins 1 and 2 on both J1 and J2 to activate the Virtual Parallel Port. This is the default setting. 1 2 Figure 1.3: Jumper J1 and J2 (pins 1 and 2 connected) 12 Sound Producer Pro User's Manual Chapter 1: Installing the Sound Producer Pro Jumper J4: Internal Speaker Connector If no sound is received after installation, the four-pin plug may be connected backwards. Turn the connector in the opposite direction. Jumper J4 redirects the audio signals from your PC’s internal speakers, out to the external speakers connected to your PC. This allows for better sound quality and control of the volume level. See the section on Installing your Sound Producer Pro for detailed information. Jumper J5: Speaker Amplification Jumper J5 will increase or decrease the amplification signal from the internal speaker connection on your PC's motherboard. This will ensure a more balanced sound from your PC. Pins 1 and 2 disconnected. This is the default setting for a Low Amplification Signal. To achieve a High Amplification Signal, connect Pins 1 and 2. 1 2 Figure 1.4: Jumper J5 (pins 1 and 2 disconnected) Jumper JP1: CD-Audio In The CD-Audio In is a four-pin connector used for connection of your CD-ROM drive to the Sound Producer Pro. Sound Producer Pro User's Manual 13 Chapter 1: Installing the Sound Producer Pro Jumper JP2: SCSI Interrupt Selector The SCSI CD-ROM interface on the Sound Producer Pro requires an interrupt channel for SCSI communications. Jumper JP2 allows for easy selection of the available interrupt channels. The interrupt channels available are: IRQ4, IRQ11, IRQ12, and IRQ15. Pin 12 connected. This setting enables IRQ12. This is the default setting. 4 11 12 15 Figure 1.5: Jumper JP2 (IRQ12 connected) Jumpers SW0, SW1: SCSI Address Selector The SCSI CD-ROM interface on the Sound Producer Pro requires use of your PC's I/O port addresses to transfer CD-ROM data. The selectable addresses are CA00H, C800H, CE00H, and DE00H. If you encounter a conflict with another device, select another available address. The following table lists the base address settings and jumper configurations. Jumper SW0 Open Open Close Jumper SW1 Open Close Open Close Close Setting Base Address CA00H * Base Address C800H Base Address CE00H Base Address DE00H Table 1.2: I/O Port Address Settings * Default setting. 14 Sound Producer Pro User's Manual Configure jumpers JP2, SW0, and SW1 only if the optional SCSI Interface is in use. Chapter 1: Installing the Sound Producer Pro Step 3 : Installing Your Sound Producer Pro Once you have checked your Sound Producer Pro jumper settings, you are ready to install the Sound Producer Pro, the microphone, and the speakers included. 1. Select an empty 16-bit expansion slot for the Sound Producer Pro. 2. Remove the rear slot cover bracket if it is present (keep the screw for future use). If you do not want tones from the PC speaker to be redirected to the external speakers, skip steps 3 through 5. 3. Locate the built-in speaker connector on your motherboard and disconnect the four-pin connector. 4. Using the two connector wire cable included, connect one end of the wire cable (a fourpin plug) to the built-in speaker connector on the motherboard. 5. Connect the remaining end of the wire cable (a two-pin plug) to jumper J4 on the Sound Producer Pro. 6. Carefully hold the Sound Producer Pro by its top edges and lower it into its expansion slot. Ensure that the Sound Producer Pro seats firmly into the slot, and that it aligns properly with the computer's backplane. 7. Secure the Sound Producer Pro in place by fastening its metal bracket to the computer backplane (use the screw you removed in # 2). 8. Replace the cover of the computer along with the previously removed cables and power cords. Sound Producer Pro User's Manual 15 Chapter 1: Installing the Sound Producer Pro 9. Connect the microphone connector to the MIC jack on the metal bracket (see Figure 1.6). Mount the microphone on your monitor or on your keyboard. 10. Using the cable attached to the external speakers, connect the single connector end to the SPK jack on the metal bracket (see Figure 1.6). This will automatically disable the built-in PC speaker. Sound Producer Pro Installation is complete. LINE MIC SPK MIDI/ GAME BSG2 Figure 1.6: Sound Producer Pro Metal Bracket 16 Sound Producer Pro User's Manual Enhanced voice quality can be obtained by using external speaker(s). Chapter 2: Installation and DOS Software Chapter 2 INSTALLATION AND DOS SOFTWARE Sound Producer Pro comes with a sound driver for your software applications, as well as many DOS and Windows software applications for your enjoyment. Software utilities are also included to provide easy configuration of the hardware settings, external devices, and to verify installation of Sound Producer Pro. See the instructions for SINSTALL.EXE on the following page to automatically install the Sound Producer Pro software. The DOS software applications included are the following: CD Player Monologue SoundScript Mixer Sound Master Sound Tracks In addition, Sound Producer Pro supports a large library of DOS software that is compatible with the AdLib, Sound Blaster Pro II, Disney Sound Source, and Covox Speech Thing sound standards. Before You Begin If you wish to make a backup copy of your original diskettes, use the DOS DISKCOPY utility command. It is recommended that you install the Sound Producer Pro software on your hard drive. The software is in a compressed format, and will be automatically decompressed during installation. The instructions that follow assume you are using a floppy drive, designated as Drive A:, and a hard drive, designated as drive C:. Please substitute the correct drive letter if your computer is configured differently. Sound Producer Pro User's Manual 17 Chapter 2: Installation and DOS Software Using SINSTALL.EXE SINSTALL.EXE is an easy-to-use menu driven installation program, that allows you to automatically install the Sound Producer Pro software to your hard disk drive. Insert the Sound Producer Pro Diskette #1 into drive A: and type the following: A:\SINSTALL You will be prompted to enter the drive letter where you want the software to be installed. The installation program will create the C:\PRODUCER directory and several subdirectories. From the Sound Producer Pro Software and Driver Installation Program screen, press any key, and the following menu will appear: Orchid Technology Sound Producer Pro Complete Installation Sound Producer Pro Selective Installation Build Voice Notes Playback Diskette Information and Help ↑↓=Move ↵ =Select Esc=Previous Menu F1=Help F3=Abort Figure 2.1: SINSTALL Main Menu Screen The Complete Installation will copy over the Windows and DOS software applications. The Selective Installation will allow the choice of DOS or Windows software applications. From the Main Menu, select your installation choice by using the <↑ ↓> arrow keys and press <ENTER>. Proceed through the installation as prompted by the SINSTALL.EXE program. 18 Sound Producer Pro User's Manual Chapter 2: Installation and DOS Software DOS Software Installation Once you select the DOS Application Installation, the SINSTALL program copies automatically to your hard drive: the software configuration utilities, the Mixer, CD Player, SoundScript, Sound Master, Monologue, and Sound Tracks applications. This chapter provides detailed information on running the configuration utilities and the DOS applications. Microsoft Windows Software Installation Once you select the Microsoft Windows Installation, the SINSTALL program copies automatically to your hard drive: the Sound Producer Pro sound driver, Voice Notes, Jukebox, WinDAT, and Mixer applications. The sound driver is automatically activated, and a "Sound Producer Pro" window is automatically created in Windows. Follow the instructions below: 1. Start the Microsoft Windows application. 2. When Windows opens you will see a Sound Producer Pro window on the desktop. Inside the window you will see icons for the software applications installed from the SINSTALL program. 3. Move the Orchid Voice Notes icon to the Startup Group window, and restart Windows. The Voice Notes icon will always appear on the desktop. 4. To start any of the applications, double-click on the icon. For detailed information on running each application, see Chapter 3. Build Voice Notes Playback Diskette This option creates a diskette with a Playback only version of Voice Notes—a Windows sound driver that does not require a sound card. An automatic installer is also included on the diskette. Sound Producer Pro User's Manual 19 Chapter 2: Installation and DOS Software You can provide this diskette to your associates so that they can play Voice Notes embedded in documents you send them. The sound driver will be installed only if there is no sound hardware already installed that can play the PCM (Pulse Code Modulation) format sound. Changing the Address Settings Under Windows The SINSTALL program will automatically configure the drivers, and assign the Interrupt, Port, and DMA default address settings. If you need to change any of the settings due to address conflicts, follow the steps below: 1. From the Control Panel window, double-click on the Drivers icon. 2. From the Drivers window, click on the Add option. A list of drivers will appear. 3. Double-click on the "Sound Producer Pro WAVE & MIDI" driver. The "Driver Exits" window will appear and prompt you to select New or Current driver. Click on Current. 4. The Sound Producer Setup window will appear. Make your changes and click on OK. When the System Setting Change window appears, click on the "Restart Now" option. 20 Sound Producer Pro User's Manual The Windows address settings must match the address settings configured in SPCONFIG. See the section "Configuring Sound Producer Pro." Chapter 2: Installation and DOS Software Running the Sound Producer Pro Diagnostics The Setup Environment option must be run for first time installation, and every time a change is made in the address settings. The diagnostic program must be run to ensure that your Sound Producer Pro is installed and configured correctly. Change to the C:\PRODUCER\UTILITY directory and type the following: C:\SPSETUP The screen in Figure 2.2 will appear. Press <ENTER> to begin or <ESC> to quit. The diagnostic program will first run a detection test on the Sound Producer Pro. Then it will check the hardware configuration settings and display the information. Sound Producer Pro Diagnostics Ver 2.00 Copyright (c) 1992 AVS Group All rights reserved Sound Producer Testing Address Setting Interrupt Setting DMA Setting Sound Source Compatible Speech Thing Compatible :220H :IRQ 7 :Channel 1 :Detected :Detected ESC to quit, ENTER to continue . . . Sound Producer card detected Figure 2.2: Diagnostics Main Menu Press <ENTER> to run the test programs. The screen in Figure 2.3 will appear. The diagnostic program will run detection tests on the sound standards supported. The Setup Environment option will allow you to set the environment settings for Sound Producer Pro. This option must be run after running the test options (see the section "Set Environment for Sound Producer Pro"). Sound Producer Pro User's Manual 21 Chapter 2: Installation and DOS Software Sound Producer Pro Hardware Configuration Ver 2.00 Copyright (c) 1992 AVS Group All rights reserved Sound Producer Pro Output Test FM Voice Testing SB Voice Testing SP Voice Testing SS Voice Testing MIDI OUT Testing MIDI IN Testing Setup Environment ESC to quit, Arrow key select . . . . Esc - To Exit For each testing selection (except Setup Environment), music or voice output will be heard. Figure 2.3: Sound Producer Pro Test Screen FM Voice Testing Hardware test for AdLib feature SB Voice Testing Hardware test for Sound Blaster Pro II feature SP Voice Testing Hardware test for Covox Speech Thing feature SS Voice Testing Hardware test for Disney Sound Source feature MIDI OUT Testing Hardware test for the MIDI output MIDI IN Testing Hardware test for the MIDI input Setup Environment Sets the address settings in the AUTOEXEC.BAT file Use the <↑> <↓> arrow keys to make your selections and press <ENTER>. Proceed through the tests as prompted by the Sound Producer Pro diagnostic program. After completing the sound tests, run the Setup Environment option. 22 Sound Producer Pro User's Manual The "MIDI IN Testing" and "MIDI OUT Testing" options can only be used if you have a MIDI adapter attached to Sound Producer Pro. Chapter 2: Installation and DOS Software Set Environment for Sound Producer Pro Make sure you have enough environment space by including or increasing the /E parameter in the SHELL statement. Refer to your DOS manual for more information. The Setup Environment option will automatically setup an environment string in your AUTOEXEC.BAT file. Some software applications search for an environment string before executing to avoid an address conflict. This environment string will specify the I/O address, the Interrupt, and the DMA Channel settings of the Sound Producer Pro. You will see an environment string similar to the following: SET Blaster=A220 I7 D1 T4 To run Setup Environment, change to the C:\PRODUCER\UTILITY directory and type the following: C:\SPSETUP The Setup Environment option must be run for first time installation, and every time a change is made in the address settings. From the Sound Producer Testing screen, press <ENTER> to continue and the following screen will appear: Sound Producer Pro Hardware Configuration Ver 2.00 Copyright (c) 1992 AVS Group All rights reserved Sound Producer Pro Output Test FM Voice Testing SB Voice Testing SP Voice Testing SS Voice Testing MIDI OUT Testing MIDI IN Testing Setup Environment Updating environment will change AUTOEXEC.BAT file Continue? (Y/N) Sound Producer Card Detected Figure 2.4: Sound Producer Pro Test Screen Highlight the Setup Environment option and press <ENTER>. You will be prompted to press the <Y> key to update your AUTOEXEC.BAT file, or the <N> key to exit the program. Continue with the update of your AUTOEXEC.BAT file by pressing <Y> and then <ENTER>. Your system will automatically reboot to invoke the changes. Sound Producer Pro User's Manual 23 Chapter 2: Installation and DOS Software Configuring Sound Producer Pro ■ Run the Hardware Configuration Setup program only if you want to change any of the default hardware address settings. The hardware settings are software configured and include I/O Address, Interrupt Channel, DMA Channel, Game Port setting, CD ROM setting, and CD-ROM Address. To run the Sound Producer Pro Hardware Configuration program, change to the C:\PRODUCER\UTILITY directory and type the following: C:\SPCONFIG The Hardware Configuration Setup screen will appear and display the current address settings of Sound Producer Pro. Use the arrow keys to make your selection(s). Sound Producer Pro Diagnostics Ver 2.00 Copyright (c) 1992 AVS Group All rights reserved If you change the address settings using SPCONFIG , you must change the address settings in Windows. Refer to the section "Changing the Address Settings Under Windows." Hardware Configuration Setup Base Address IRQ Setting DMA Channel Setting Game Port Setting AT-BUS CD ROM Setting CD ROM Address Setting 220H IRQ 7 DMA 1 ENABLE DISABLE 300H Esc - To Exit Figure 2.5: Hardware Configuration Setup Main Menu Setting the I/O Base Address The Sound Producer Pro needs to use a range of your PC’s I/O addresses (base address starting at 220 Hex or 240 Hex) for data and command transfers. From the Hardware Configuration Setup menu, highlight the Base Address option and press the <ENTER> key. 24 Sound Producer Pro User's Manual The address 220H is commonly used for a BUS mouse. If you are using a BUS mouse, change the Sound Producer Pro I/O address to 240 Hex. Chapter 2: Installation and DOS Software Each time you make a change in the Hardware Configuration Setup, run the Set Environment for Sound Producer Pro option, to update the environment string in your AUTOEXEC.BAT file. The default base address (220H) is noted by an asterisk (*). If you encounter a conflict with another device in your system, select another base address selection. Use the <↑> and <↓> arrow keys to select the desired base address and press <ENTER>. The new I/O base address will be displayed in the Hardware Configuration Setup menu. Setting the Interrupt Channel An interrupt channel is needed for DMA transfers. Configure Sound Producer Pro by selecting the IRQ Setting option from the Hardware Configuration Setup menu. From the Hardware Configuration Setup menu, highlight the IRQ Setting option and press the <ENTER> key. The default interrupt channel (IRQ7) is noted by an asterisk (*). If you encounter a conflict with another device in your system, select another IRQ Setting selection. The other options available are IRQ2, IRQ5, and IRQ10. Use the <↑> and <↓> arrow keys to select the desired IRQ Setting and press <ENTER>. The new selection will be displayed in the Hardware Configuration Setup menu. Setting the DMA Channel The Sound Producer Pro uses a DMA Channel for block data transfers. Configure Sound Producer Pro for a DMA Channel address by selecting the DMA Channel Setting option from the Hardware Configuration Setup menu. From the menu, highlight the DMA Channel Setting option and press the <ENTER> key. Sound Producer Pro User's Manual 25 Chapter 2: Installation and DOS Software The default interrupt channel (DMA Channel 1) is noted by an asterisk (*). If you encounter a conflict with another device in your system, select another DMA Channel selection. Use the <↑> and <↓> arrow keys to select the desired setting and press <ENTER>. The new selection will be displayed in the Hardware Configuration Setup menu. Enabling/Disabling the Game Port Interface The Game I/O Port on the Sound Producer Pro is identical to the standard PC Game Control Adapter. You can connect any analog joystick with a 15-pin D-Sub connector to this port. The Game Port interface must be enabled before you can use it. From the Hardware Configuration Setup menu, highlight the Game Port Setting option and press the <ENTER> key. The default Game Port Setting is noted by an asterisk (*). If your PC has a game port already, you must remove it or disable the game port on Sound Producer Pro. Use the <↑> and <↓> arrow keys to select the desired setting and press <ENTER>. The new selection will be displayed in the Hardware Configuration Setup menu. Enabling/Disabling the CD-ROM Interface Sound Producer Pro features an AT-bus CD-ROM connector that will allow you to connect an internal or external CD-ROM drive. The CD-ROM drive must be enabled before you can use it. From the Hardware Configuration Setup menu, highlight the AT-BUS CD-ROM Setting option and press the <ENTER> key. 26 Sound Producer Pro User's Manual Some Software programs may not support DMA Channel 0 or DMA Channel 3. If you encounter problems running your software, you may want to use the default selection. Chapter 2: Installation and DOS Software The default AT-BUS CD-ROM Setting is noted by an asterisk (*). If your PC has a CD-ROM drive attached, you must select the Enable option in order to operate the drive. Use the <↑> and <↓> arrow keys to select the desired setting and press <ENTER>. The new selection will be displayed in the Hardware Configuration Setup menu. Setting the CD-ROM Interface Address The CD-ROM Interface on the Sound Producer Pro utilizes a range of your PC’s I/O port addresses for the transfer of CD-ROM data. The AT-BUS CD ROM Setting option must be enabled before you can configure the CD-ROM Interface address. After making changes to the Sound Producer Pro Hardware Configuration program, you must reboot your system for the new changes to take effect. From the Hardware Configuration Setup menu, highlight the CD ROM Address Setting option and press the <ENTER> key. The default CD-ROM Address Setting is noted by an asterisk (*). If you encounter a conflict with another device in your system, select another CD-ROM Address selection. Use the <↑> and <↓> arrow keys to select the desired setting and press <ENTER>. The new selection will be displayed in the Hardware Configuration Setup menu. Sound Producer Pro User's Manual 27 Chapter 2: Installation and DOS Software ■ Sound Standards Configuration You have the option of enabling or disabling the Disney Sound Source and Covox Speech Thing features on Sound Producer Pro. To execute this option, change to the C:\PRODUCER\UTILITY directory and type the following: C:\SPCOX / x Where x = ON Enable the Disney Sound Source and Covox Speech Thing features (default) OFF Disable the Disney Sound Source and Covox Speech Thing features To utilize the Disney Sound Source standard, you must have a parallel port configured at one of the following addresses: 3BCH, 378H, or 278H. If your PC does not have a parallel port, you may configure Jumpers J1 and J2 for a virtual parallel port. Refer to the Jumper Settings section in Chapter 1. The Covox Speech Thing standard requires the use of an I/O address on your PC. The addresses are 378H, 3BCH, 278H, 22FH, or 38CH. 28 Sound Producer Pro User's Manual All of the supported sound standards are built into the Sound Producer Pro. However, you can disable the Disney Sound Source and Covox Speech Thing features. Chapter 2: Installation and DOS Software DOS Applications ■ Using Sound Tracks The Sound Tracks program will play all your favorite songs. You can play from the list of 14 songs included, or you can add your own. Sound Tracks is a TSR (Terminate and StayResident) program that runs in the DOS environment. Before using the Sound Tracks program, you must first load it into memory. Change to the C:\PRODUCER directory and type the following: C:\SONG Once the program is successfully loaded into memory, the following message will be displayed: "Sound Tracks TSR is now loaded" To run Sound Tracks, press the <ALT> and </> keys simultaneously and the following menu will appear: Orchid Sound Tracks Additional songs (.CMF files) are available and can be downloaded from the Orchid BBS. 1. 2. 3. 4. 5. First Noel Bach Cannon The Entertainer Green Sleeve Play seLect paUse Memory 6. Hello My Baby 7. Invent 8. The Maple Leaf 9. Minute Walz 10. Mood Continue Next Stop Quit Figure 2.6: Sound Tracks Main Menu To exit Sound Tracks, press the <Q> or <ESC> keys. You can remove Sound Tracks from memory by typing "SONG/Q" and pressing <ENTER>. Once you turn off the Sound Tracks program, it will remain in memory. Sound Producer Pro User's Manual 29 Chapter 2: Installation and DOS Software You can turn it on again by pressing the <Alt> and </> keys simultaneously. If you encounter a conflict using Song with other TSR programs, you can use either of the following DOS programs to run Sound Tracks from the DOS prompt: PLAYCGA Runs Sound Tracks in CGA mode PLAYVGA Runs Sound Tracks in VGA mode SPLAY Runs Sound Tracks in VGA (1024 x768 resolution) mode The PLAYCGA, PLAYVGA, AND SPLAY files are available only on the Orchid BBS. The following options are available from the Sound Tracks Main Menu. Selecting a Song List Use the <←> or <→> arrow keys to change the song list screens. Playing Songs To play a song from the song list, select the number beside the song and press the Play <P> key. To include any number of songs in the selection list, select the song number, and press the Load <L> key (e.g., 6L, 8L, etc.). These songs will be stored into memory. You can play them at any time by pressing the Memory <M> key and play them back one after the other. To advance to the next song in the Memory list, you must press the <N> key. Other options from the menu include the following: Pause Resume Stop Next 30 - press the <U> key press the <C> key Press the <S> key Press the <N> key Sound Producer Pro User's Manual Chapter 2: Installation and DOS Software Adding Songs Using a DOS text editor program, you can add a .CMF file to the playback selection list by editing the SONG.LST file. To add a new song to the list follow the steps below: 1. Copy your .CMF file to the C:\PRODUCER\STRACKS directory. 2. Using an ASCII text editor, open the SONG.LST file. 3. Move to the end of the file and type in the file description (e.g., YourSong 1992). 4. On the next line, type in the .CMF file name (e.g., YourSong). Save and exit the text editor. Press the <ALT> and </> keys simultaneously to re-enter Sound Tracks and play the song(s) you added. Additional Information Because Song is a TSR program, it can conflict with other application programs. If you encounter any conflicts while running Sound Tracks, please note the following: • Do not remove the Sound Tracks program from memory by using the DOS Shell of an application program. Sound Tracks may not be completely removed from memory. To remove the Sound Tracks program from memory, you should exit completely from your application program. • If you encounter conflicts with other TSR programs, remove one TSR program at a time to determine where the conflict exists. Sound Producer Pro User's Manual 31 Chapter 2: Installation and DOS Software ■ Using CD Player The CD Player program allows you to play audio CD's under software control. The SINSTALL program will automatically place the following command in your CONFIG.SYS file: Device=C:\PRODUCER\UTILITY\SPCDU.SYS /D:MSCD000 SINSTALL will also place the following command in your AUTOEXEC.BAT file: C:\PRODUCER\DRIVERS\MSCDEX.EXE /D:MSCD000 Using an ASCII text editor, you can manually insert or modify these commands. If you are using a CDROM drive, it must be connected before running CD Player. To execute CD Player, change to the C:\PRODUCER\UTILITY directory and type the following: C:\CDPLAY The following screen will appear: Figure 2.7: CD Player Screen Use the <←> or <→> arrow keys to highlight any of the CD-ROM operations, and press <ENTER>. 32 Sound Producer Pro User's Manual Refer to the section "Using MSCDEX.EXE" for option parameters and descriptions for the MSCDEX.EXE driver. Chapter 2: Installation and DOS Software Mode Indicator The Mode Indicator will display the selected operation and highlight the control button. Pause/Continue This selection pauses the playback of the current track. When the control button is selected again, the current track will resume playing. Play This selection will start the playback operation of the CD-ROM drive. If playback is already selected, highlight the control button to restart playback of the current track. Stop Select the Stop control button to stop playing the current track. Next Track Selection of this operation will begin playing the next track. Once the compact disc's last track is reached, the CD-ROM drive will begin playing the first track. Previous Track Once the compact disc's first track is reached, the CDROM drive will begin playing the last track. Fast Forward You can forward the playback operation in 16 second intervals. If the CD-ROM is playing the last track, Fast Forward will be bypassed. Sound Producer Pro User's Manual 33 Chapter 2: Installation and DOS Software Rewind You can rewind in 16 second intervals. If the CDROM is playing the first track, Rewind will be bypassed. Volume, Balance, Bass, and Treble Control Modes These selections allow you to adjust the Volume, Balance, Bass, and Treble controls of your CD Player's sound. Once you have selected a control mode, use the <↑>key to access the Level Indicator panel. From the Level Indicator panel, use the <←> or <→> keys to adjust the level preferred for that control mode. To exit from the CD Player program, press the <ESC> key. The CD Player screen will close and return you to the DOS prompt. Additional Features Exiting the CD Player program will not affect the current operation of the CD-ROM drive. If your CD-ROM drive is playing when you exit, the CD-ROM drive will continue to play the disc until the last track. To resume control of the CD-ROM drive, re-run the CD Player program. The Sound Producer Pro also has a SCSI CD-ROM drive interface connector. This connector allows you to connect any SCSI CD-ROM drive that can play audio CDs. To take advantage of this feature, you must purchase the optional SCSI CD-ROM chip. 34 Sound Producer Pro User's Manual Chapter 2: Installation and DOS Software Using MSCDEX.EXE MSCDEX.EXE is the Microsoft CD-ROM Extension file driver. The SINSTALL program will automatically place this driver in your AUTOEXEC.BAT file. The following syntax is used: C:\PRODUCER\DRIVERS\MSCDEX.EXE/D:de-name [M/:n][/E][/V][/L:dr-ltr] The parameters are defined as follows: Parameter Description /D:de-name This parameter specifies the CDROM device name. This name must be identical to the device name used in the CONFIG.SYS statement. M/:n This parameter specifies the number of sector buffers used to cache the path table of a CD-ROM disc. Each drive should have a minimum of 4 to 5 buffers. The larger the buffer, the less your PC has to read directly from the CD-ROM drive. /E This parameter is used to specify expanded memory. /V This parameter displays memory usage when starting your PC. /L:dr-ltr This parameter is used to assign a drive letter to the first CD-ROM drive. Sound Producer Pro User's Manual 35 Chapter 2: Installation and DOS Software ■ Using Sound Master The Sound Master program allows to you record, play, edit, and enhance your recordings. Using the built-in editor, you can edit sound files of any length with the extensions of .VOC, .WAV, and .SND. To run the Sound Master program, change to the C:\PRODUCER directory and type the following: C:\SPMASTER The following screen will appear: Sound Master Figure 2.8: Select Sound File Menu Highlight the desired option by pressing the <TAB> or <Shift> + <TAB> keys. The options available are Play, Record, Delete, Import, and Accept. To select an option, use the <←> and <→>, or <↑> and <↓> keys, and press <ENTER>. Use the keys above to select a sound file to play. The name of the selected sound file will appear in the File Name input box. If you want to select sound files that are located in a different directory, specify the drive and directory in the File Name input box. 36 Sound Producer Pro User's Manual Chapter 2: Installation and DOS Software Play You can listen to a sound file of any length. While playing the sound file, the Playback dialogue box will appear and display information such as, file length, sampling rate, compression rate, and file type. You can stop playing the sound file at any time by pressing the <ESC> key or clicking the right button of the mouse. Record If you specify a filename to record that already exists, it will be overwritten. Record will allow you to create a new sound file. Type in the file name and press the <TAB> or <ENTER> key. This will give you access to the Sample Rate box to select the sampling rate for recording. Selecting a higher sampling rate will produce better sound quality. Delete Selecting a higher sampling rate will increase the amount of storage space required for the sound file. You can easily delete any of the sound files in the File List box. A confirmation box will prompt you to confirm the deletion of the selected file. Importing a Sound File Using the import option, you can import the .WAV, .SND, .VOC, .NTI and .8SV sound formats. These file formats are defined in Table 2.1. Sound Producer Pro User's Manual 37 Chapter 2: Installation and DOS Software Import File Formats .WAV Microsoft multimedia file format. .SND Raw wave data files with no header information. .NTI Amiga sample files used by the Tetra Compositor. .8SV Amiga IFF sound files (for import only). You cannot save a sound file in Amiga IFF format. .VOC Voice sound file format. Files with this extension can be saved in the .WAV, .SND or .NTI formats. Table 2.1: Import File Formats To start the import process, press the <TAB> key or the left mouse button. After the process has completed, the imported sound file is displayed as a wave form in the Edit Screen. For more information on editing, refer to the section "Editing Sound Files." Accept You can enhance or modify the sound files that you have recorded or imported. Accept displays your sound file as a wave form and then brings up the Edit Screen. From the Edit Screen you will see the available editing functions. For more information on editing refer to the section on Editing Sound Files. QUIT Quit will exit Sound Master and return you to the DOS prompt. 38 Sound Producer Pro User's Manual Chapter 2: Installation and DOS Software Editing Sound Files Select either the Accept or Import option from the Select Sound File dialogue box to display the Editing Screen. The Editing Screen will display the sound file in a wave form against a grid. The Editing Screen window also will display the following information for the selected sound file: • • • • The name of the sound file being edited The size of the sound file The current sample rate of the sound file The total playing time of the sound file A new sound file is created the first time you select Edit. You will be prompted to name the new file when select Exit. To select an editing process, press <TAB> to highlight your choice and press the <ENTER> key. The following options are available: Play Playing a sound file in edit mode will display a pulsing line across the screen. This line will show the current playback status of the sound file. Scope Selecting the Scope button will give you a graphic display of the audio input. You can play music from the connected audio device, and you can speak into the microphone to see the recorded sound waves. Exit at any time by pressing any key on your keyboard. Sound Producer Pro User's Manual 39 Chapter 2: Installation and DOS Software Echo You can add echo to your sound file to give it the highest degree of sound. Echo also can add special effects to your sound file. There are two parameters to configure for Echo: Delay Millisecond Sets the amount of delay before the echo starts Delay Volume The volume mixture of the echo and the original sound New Use the New option to select a new sound file to edit. A Save Work File dialogue box will appear and prompt you to save your current sound file. Type in the filename and press the <ENTER> key. Next, select the file format of your choice. Reverse Reverses the playback of a sound file. Insert Insert will add another sound file into the current sound file being edited. From this menu you can select the sound file for insertion or record a new sound file to be inserted. Select a sound file and press the <ENTER> key. Use the mouse to select the point in the original sound file to add the new sound file. If the sampling rate of the new inserted sound file is different from the file being edited, the sample rate will adjust accordingly. More More offers an additional set of editing processes. The options are on the following page. 40 Sound Producer Pro User's Manual The sound file for insertion should not be packed, contain any silence compression, or be a multi-block file. This will result in an unusable file. Chapter 2: Installation and DOS Software Fast Fast will sample a sound file without altering the pitch. A sound file originally sampled at 8KHz and played back at 16KHz will increase the pitch, and play the file back in half the time. Fast will re-sample a sound file and cut the size of the file in half. The file will play back at twice the speed without affecting the pitch. The Fast option modifies the time range without affecting the frequency range. Slow The Slow selection will re-sample a sound file and play it back at one-half the speed without altering the pitch. The original sound file will increase by twice the size. Rate Rate will "down" sample a sound file created with a high sampling rate, to a lower sampling rate. Rate can also "up" sample a sound file, with no gain in the resolution. Pitch This selection alters the pitch value within a sound file. Altering the pitch value will affect the playback time of the sound file. Volume Entering a value greater than 100 will result in an increase in volume, even if you selected decrease. Volume will increase or decrease the amplitude of sound files. Increasing the volume with values of 1050 will only have a slight effect on the sound file, but increasing with values of 50-200 will have a more noticeable effect. Decreasing the volume with values of 1-99 will decrease the volume of a sound file by the percentage of the number entered. For example, entering "50" will produce a sound file 50% as loud as the original file. Sound Producer Pro User's Manual 41 Chapter 2: Installation and DOS Software Mixer Mixer blends two sound files into a single sample. You can select a sound file to be mixed or record a new sound file for mixing. A Volume Mix parameter controls how loud the mix will be. The mixed-in sample can be a number between 1 and 100, but 50 to 60 is a recommended mixing level. If the sampling rate of the two sound files are different, Mixer will not adjust the sampling rates. More More will display the original set of editing options from the first Edit Screen. Pack/UnPack Pack will compress your recorded sound files to save storage space on your hard disk. There are three ratios of compression available—2:1, 3:1 and 4:1. With a 2:1 compression, the Pack function will save every two bytes of sound data in your original recording as one byte. You also can play back a packed sound file without unpacking it. In Edit mode, the packed sound file will display the UnPack button for playback mode. Fade Causes the beginning and ending of a sound file to fade in or fade out in volume. When selecting the amount of time, both the fade in and fade out time cannot exceed 1/2 of the total playback time of the sound file. Exit To exit Edit mode, press <ESC>. You will be prompted to save your current sound file. Type in the filename and press <ENTER>. You can save your current sound file in .VOC, .WAV, .SND, or .NTI file formats. 42 Sound Producer Pro User's Manual Using higher compression ratios like 3:1 or 4:1 may result in a loss of sound quality. Chapter 2: Installation and DOS Software Editing a Sound Segment From the Edit Screen, you have the option to edit a portion or segment of the sound file. From this menu, the following selections are available: Play You can play back a selected sound segment. Tools Tools provides different processes to manipulate a selected sound segment. Loop Loop repeats the segment up to a maximum of 10 times. Mute Mute replaces the segment with silence bytes. It is useful for removing noises without affecting the playback time. Reverse Reverse the sound segment and plays it backwards. Pitch Changes the pitch of the sound segment. It will also affect the playback time. Echo This selection adds an echo or delay effect to the sound segment. The parameters are the same as the Echo process for whole sound files. Sound Producer Pro User's Manual 43 Chapter 2: Installation and DOS Software Volume Volume will increase or decrease the amplitude of sound files. The parameters are the same as the Volume process for whole files. Cut Cut permanently removes the selected segment of the sound file. The Cut operation cannot be reversed. Zoom Zoom enlarges the selected sound segment to allow you to edit with better accuracy. You can select a new segment from within the currently zoomed segment, and repeat the process until the resolution reaches a ratio of 1:1. The resolution is displayed in the lower right corner of the screen. UnZoom UnZoom process reverses the Zoom process. It reverts the sound segment back to its previous size. Mute Mute replaces the selected sound segment with silence. Save You can save the selected sound segment as a new sound file. You will be prompted to enter the filename of the new sound file. Move You can move the selected sound segment to another location within the same sound file. 44 Sound Producer Pro User's Manual Chapter 2: Installation and DOS Software ■ Using Monologue Monologue is a realistic text-to-speech synthesizer program that adds speech to your text-based DOS applications, such as Lotus 1-2-3 (Rel 2.2), Microsoft Word, WordPerfect, and WordStar. When you highlight a row, column, paragraph or file, Monologue will read the text and generate voice output. Alternately, Monologue can be unloaded from memory by typing the UNLOAD command at the DOS prompt. Monologue is immediately available while you are using other application programs, by use of a HotKey. You can configure Monologue's speech and display parameters to your preference. Monologue will also allow you to save your own pronunciation of words and abbreviations. These configurations are saved in a configuration file and are implemented every time you run Monologue. To load Monologue into memory, change to the C:\PRODUCER\MONOLOG directory and type the following: C:\MONO The Monologue Start-up screen will appear. Monologue Version 3.0 Copyright (C) 1991 First Byte Alt-T HOT KEY Invoke Monologue UNLOAD DOS COMMAND LINE Unload Monologue (if loaded last) Figure 2.9: Monologue Start-up Screen This screen displays the Hot Key sequence used to activate the Monologue software (default Hot Key is <ALT> + <T>). To redefine the Hot Key sequence used to invoke Monologue, see the section on Reconfiguring Operating Parameters. Sound Producer Pro User's Manual 45 Chapter 2: Installation and DOS Software Configuring Monologue The Monologue software configuration must match the Sound Producer Pro settings. Monologue has a default configuration of I/O Port Address 220H and Interrupt Channel 7. If you need to modify the settings, change to the C:\PRODUCER\MONOLOG directory and type the following: C:\INSTALL Press the <F2> key and the following screen will appear: Monologue Installation Configuration Sound Accessory ( ) Standard internal speaker ( ) Sound Galaxy EX ( ) Sound Producer (*) Sound Producer Pro TAB key - select field OK Cancel Press F9 when done. F1 Help F2 Options F5 Install F9 Exit Figure 2.10: Monologue Configuration Screen From the configuration window, select the Sound Producer Pro option. Press the <ENTER> or <O> key to access the Sound Producer Pro Settings window. Use the appropriate keys to make your selection. Once you have made your changes, press the <O>key to exit to the Monologue Installation screen. Then press <F9> to exit to DOS. 46 Sound Producer Pro User's Manual Chapter 2: Installation and DOS Software Modes of Operation Searching, Selecting and Speaking are Monologue's three modes of operation. Some keys on your keyboard have specific functions depending on Monologue's mode. Searching Mode When Monologue is started with the "Hot Key" sequence, it comes up in Searching Mode. In this mode, the cursor can be moved around the screen without marking any text. The speech and display parameters also can be modified while in Searching Mode. Selecting Mode Monologue switches from Searching Mode to Selecting Mode by pressing the <ENTER> key. In Selecting Mode, movement of the cursor is reflected by reverse video. This mode is used to select the text to be spoken by Monologue. The speech and display parameters cannot be modified in this mode. Speaking Mode Monologue switches from Selecting Mode to Speaking Mode by pressing the <ENTER> key again. In this mode, all the text highlighted by the reverse video cursor will be spoken by Monologue. Once the selected text has spoken, Monologue will switch back to Searching Mode. Control Keys Monologue can be activated by using the default Hot Key sequence (<ALT> and <T> ). A reverse-video cursor will appear at the center of your screen. A status line at the bottom of the screen will display the various speech configuration parameters. Sound Producer Pro User's Manual 47 Chapter 2: Installation and DOS Software Monologue allows you to customize different aspects of the speech such as volume, speed, and pitch, by using the function keys on the keyboard. See the following infomation on the special use of the keyboard function keys in Monologue's operational modes. Note that each function key can be used for more than one mode. ENTER Searching Mode: Marks the beginning screen position for text selection and changes Monologue from Searching Mode to Selecting Mode. Selecting Mode: Will mark the ending screen position for text selection and change Monologue from Selecting Mode to Speaking Mode. The highlighted text will speak. ESC Searching Mode: Turns off Monologue and returns you to your application. Monologue will remain inactive in the memory until reactivated with the Hot Key. Selecting Mode: Exits to Searching Mode and leaves the marked text in the speech buffer. Speaking Mode: Exits to Selecting Mode at the end of the current speech block. Leaves unspoken text in the speech buffer. To resume speech output, press the <ENTER> key twice. ALT + F2 Searching Mode: Toggles the Status Line between reverse video and normal video. Monologue uses a color set to distinguish the Status Line from the background screen. Selecting Mode: Same as Searching Mode. 48 Sound Producer Pro User's Manual You can use the function keys to change the speech configuration settings, but you must rerun the CONFIG.SYS program to make the changes permanent. Chapter 2: Installation and DOS Software F3 Searching Mode: Increases the Speech Volume by "1" for each time the <F> key is pressed. The range of volume is 0 (silent) to 9 (loudest). (The default is 5). Selecting Mode: Same as Searching Mode. Monologue can be unloaded from memory at any time by typing UNLOAD at the DOS prompt. ALT + F3 Searching Mode: Decreases the Speech Volume by "1" for each time the <ALT> and <F3> keys are pressed simultaneously. Selecting Mode: Same as Searching Mode. F4 Searching Mode: Increases the Speech Speed by "1" for each time the <F3> key is pressed. The range of speed settings are 0 (slowest) to 9 (fastest). (The default is 5). Selecting Mode: Same as Searching Mode. ALT + F4 Searching Mode: Decreases the Speech Speed by "1" for each time the <ALT> and <F4> keys are pressed simultaneously. Selecting Mode: Same as Searching Mode. F5 Searching Mode: Increases the Speech Pitch by "1" for each time the <F5> key is pressed. The range of speed settings are 0 (low frequency) to 9 (high frequency ). (The default is 5). Selecting Mode: Same as Searching Mode. Sound Producer Pro User's Manual 49 Chapter 2: Installation and DOS Software ALT + F5 Searching Mode: Decreases the Speech Pitch by "1" for each time the <ALT> and <F5> keys are pressed simultaneously. Selecting Mode: Same as Searching Mode. F8 Searching Mode: Toggles the Text Parsing mode between Spreadsheet and Text modes. When a block of text is marked on the screen and sent for conversion to speech, Monologue will determine how and where to divide the text. In Text mode, the text is normally divided by sentence boundaries. In Spreadsheet mode, it is divided by a screen line. (Default is Text mode). Selecting Mode: Not available. F9 Searching Mode: The entire contents of the screen are sent for immediate speech output. Selecting Mode: Not available. ALT + F9 Searching Mode: Resets Monologue’s default parameters. Selecting Mode: Same as Searching Mode. F10 Searching Mode: Toggles the "Testing 1,2,3" message. When "ON" is selected, you will be able to set the speech parameters of your choice. Selecting Mode: Same as Searching Mode. 50 Sound Producer Pro User's Manual Interruption of speech can occur only at the end of a speech segment. Chapter 2: Installation and DOS Software Reconfiguring Operating Parameters Monologue allows you to reconfigure the basic operating parameters as well as the default speech configuration parameters for the volume, speed and pitch. To reconfigure the parameters, change to the C:\PRODUCER\MONOLOG directory and type the following: C:\CONFIG The Monologue Setup Program main menu will appear. Monologue Setup Program Set Speech & Display Parameters Change Hot Key Assignment Manage Exception Dictionary Print Dictionary Entries Exit - Save Changes Exit - Abandon Changes Menu Choice Information Define the settings Monologue uses when it is started. Speed, Volume, Pitch, Tone, Gender and Display options. Configuration changes made to display and speech parameters while Monologue is active, will not take effect immediately. You must unload and reload Monologue for the changes to take effect. ↑&↓ Move Menu Bar, "Enter" - Execute, "Esc" - EXIT TO DOS Figure 2.11: Setup Program Screen The configuration parameters are displayed with their default settings. You can change these settings by using the <TAB> key to move to the selection to be changed. From this screen, you may change the settings for the Volume, Speed, Pitch, Status Line (on/off), Help Screen (on/off), Screen Mode (monochrome/color), and Parsing Mode (text/spreadsheet). Save your new configuration parameters by selecting the Save (Exit Action) option. Sound Producer Pro User's Manual 51 Chapter 2: Installation and DOS Software Changing the Hot Key The Monologue Setup Program menu allows you redefine the Hot Key sequence used to invoke Monologue. To select a new sequence, press the keyboard key you want to use in conjunction with the <ALT> key. Your new selection will be displayed on the screen. Save your new configuration parameters by selecting the Save option. Customizing the Dictionary This option allows you to customize the Exception Dictionary. From this menu, enter the proper word and the "misspelled" word to the dictionary. Use only lower case letters. The exact match of the word will be pronounced. Monologue will pronounce the "misspelled" word for your approval. Continue these steps until you are satisfied with the pronunciation. Exit to the main menu by pressing <ENTER> or <ESC> from a blank line. Mouse Support for Monologue Any Microsoft-compatible mouse can be used to adjust any of the parameters which control the functions of Monologue. The left mouse button is used for most of the supported functions. The right mouse button is used only in conjunction with the left mouse button to invoke the <ESC> key. If you are a lefthanded user and have reversed the settings of the mouse buttons, Monologue will correctly interpret the change in the left-right adjustment. 52 Sound Producer Pro User's Manual Chapter 2: Installation and DOS Software Additional Information • Monologue requires exclusive use of the system timer to assure a steady flow of speech. Therefore, it may not function properly with programs that access the timer, such as DESQview (in MultiTasking mode) and PC-MOS/386. You may receive an "out of memory" error. • Monologue will not allow use of a communications program while speech is taking place. Sound Producer Pro User's Manual 53 Chapter 2: Installation and DOS Software ■ Using Mixer for DOS Sound Producer Pro comes with two mixer utilities for use in DOS. These utilities control the volume of stereo audio sources, such as Stereo CD-Audio, Stereo DAC, Stereo Line-in, Stereo FM, Stereo Microphone, Disney Sound Source, and Covox Speech Thing, during digitized audio playback. Using the SPMIXTSR.EXE mixer utility, you can mix the input sources and control their individual recording levels. The SPMIXER.EXE utility controls the audio mixer on Sound Producer Pro (see Table 2.2). Once the volumes of the audio sources have been adjusted, they are mixed and controlled by the main volume control. The Sound Producer Pro mixer utilities allow you to have full control of the main volume control, including the balance, bass and treble output. To load SPMIXTSR.EXE in memory, change to the C:\PRODUCER\UTILITY directory and type the following: C:\SPMIXTSR If the program was successfully loaded into memory, the following messages will be displayed: "Sound Producer PRO Mixer TSR is now loaded" "Press <ALT> + <D> to activate TSR" "Type SPMIXTSR -Q to remove TSR from memory" Once the SPMIXTSR.EXE program has been loaded into memory, start the program by pressing the <ALT> and <D> keys simultaneously. The menu in Figure 2.12 will appear. 54 Sound Producer Pro User's Manual Mixer Parameters configured in either DOS or Windows will override the other. Chapter 2: Installation and DOS Software Figure 2.12: Mixer Control Menu Highlight the desired option by using the <←> and <→> arrow keys, and press <ENTER>. The options available are: Volume, Panel, ADC, and Option. You also can select the options by pressing the highlighted letter (e.g., "V" for Volume). Volume The Volume option of the Mixer control panel controls the volume of the individual audio sources during playback operation. There are several options available under the Volume menu. To select each option use the <↑> and <↓> arrow keys. To adjust the volume level for each option use the <←> and <→> arrow keys. The <HOME> key will reset the volume level and allow you to reconfigure again. The following options are available from the Volume option menu: Mic Mic controls the stereo volume for the Microphone Input in 8-step intervals. Sound Producer Pro User's Manual 55 Chapter 2: Installation and DOS Software CD The CD selection controls the stereo volume for the CD-Audio in 16-step intervals. FM The FM selection controls the stereo volume for the FM Music Synthesizer in 16-step intervals. Line in The Line in selection controls the stereo volume for external audio equipment in 16-step intervals. Voice The Voice selection is the stereo volume control for the DACs (Digital-Analog Converters) in 16-step intervals. COVOX The COVOX selection is the volume control for the "Disney Sound Source" and "Covox Speech Thing" features in 16-step intervals. Panel The Panel option controls the master volume, balance, bass, and treble of the Sound Producer Pro. There are several options available under the Volume menu. To select each option use the <↑> and <↓> arrow keys. To make adjustments for each option, use the <←> and <→> arrow keys. The <HOME> key will reset the default levels and allow you to reconfigure. The following options are available from the Panel option menu: Volume The Volume selection is used to control the master volume in 16-step intervals. 56 Sound Producer Pro User's Manual Chapter 2: Installation and DOS Software Balance The Balance selection controls the left and right channel balancing in 16-step intervals. Bass The Bass selection controls the amount of boost and cut in volume (lower frequencies). ADC The ADC option provides utilities to control the digitized audio recording. There are two options available under the ADC menu. To select each option use the <↑> and <↓> arrow keys. To make adjustments for each option, use the <←> and <→> arrow keys. The <Home> key will reset the default levels and allow you to reconfigure. The following options are available from the ADC option menu: ADC Input Select This selection allows you to choose the type of audio input source to be used during digitized audio recording. The recording input sources include the CD Audio, Line in, or Microphone. The recording level will be preset. ADC Mix ADC Mix will enable or disable the recording mixer. If the ADC Mix is turned ON, the recording input source will be a combination of the Microphone, CD Audio, and Line in. The recording level of each input source can be individually controlled from the Volume option in the Mixer control panel, before mixing and recording. If the ADC Mix is turned OFF, the recording input source will be the selection from the ADC Input Select option. Sound Producer Pro User's Manual 57 Chapter 2: Installation and DOS Software Option Option allows you to configure additional options for audio control. There are several selections available under the Option menu. To make each selection use the <↑> and <↓> arrow keys. To make adjustments for each selection, use the <←> and <→> arrow keys. The <HOME> key will reset the default levels and allow you to reconfigure. The following selections are available from the Option menu: Card Reset Resets all of the mixer volume control levels to their default settings. Stereo/Mono Configures the digitized audio output for mono or stereo mode. Store This selection will store the individual volume settings of the mixer in the EEPROM. Storing the settings in the EEPROM will enable you to start up with your selected settings. Select Step This selection will configure your volume resolution for 8-step or 16-step intervals, to enable full compatibility with older software that requires 8-step volume settings. 58 Sound Producer Pro User's Manual Chapter 2: Installation and DOS Software Configuring Mixer for DOS The SPMIXER.EXE program is a DOS-based program used to control the audio mixer on Sound Producer Pro. You can configure your mixer at any time from the DOS prompt, or you can run the SPMIXER.EXE program from within the AUTOEXEC.BAT file. To configure the SPMIXER.EXE program, change to the C:\PRODUCER\UTILITY directory and type: C:\SPMIXER -OPTION : <VALUE> See the table below for the DOS command-line Options and Values (left and right). Option Value (L,R) VM VC VF VL VV VO 0..7 0..15, 0..15 0..15, 0..15 0..15, 0..15 0..15, 0..15 0..15 MIC volume setting CD volume setting FM volume setting Line in volume setting Voice volume setting Master volume setting PV PB PA PT 0..15, 0..15 0..15, 0..15 0..15 0..15 Balance volume setting Bass volume setting Treble volume setting Covox volume setting AI M,C,L AM N - On F - Off Recording Input source (MIC, CD, Line in) Recording Mixer On/Off MR MS MT N - Stereo F - Mono 16 - 16 step 8 - 8 step ME Setting Resets Mixer Volume settings Stores Mixer Volume settings Specifies Mixer mode Volume Resolution setting Table 2.2: Options & Values Sound Producer Pro User's Manual 59 Chapter 2: Installation and DOS Software ■ Using SoundScript SoundScript is an exciting, easy-to-use multimedia authoring language that combines sound and animation. Using a script, you can integrate graphic animation files in the .FLI format with the sound capabilities of Sound Producer Pro. The .FLI file format is an industry-standard for PC-based animation. SoundScript is excellent for use in creating business presentations, which results in impressive graphics combined with superb sound. SoundScript allows you to synchronize animation with several types of sound events, such as playback of MIDI (.MID) files, digital audio (.WAV or .VOC) files, and an audio CD. It also controls the Sound Producer Pro mixer parameters. To play back files with the extension (.FLI) you must have a VGA monitor . Creating a script file for SoundScript is easily accomplished by using a standard ASCII text editor, such as EDLIN in DOS or EDIT in DOS 5.0. SoundScript supports standard programming commands such as GOTO, WAIT, and LOOP. DOS commands are also executable from within a script. Creating a Script The following sample script file illustrates some capabilities of SoundScript. The MIDIJUKE.SCR sample script file changes SoundScript into a "jukebox" which plays the sample MIDI files included with Sound Producer Pro. While playing, the MIDI files are accompanied by animation and sound effects. This script file can be used as a starting point to modify and play any MIDI or digital audio file. Type the sample script file in Figure 2.13 into your ASCII text editor and print it out. This will allow you to follow along as the script runs. 60 Sound Producer Pro User's Manual Before creating your own script, see the section "Guidelines for Creating and Running a Script." Chapter 2: Installation and DOS Software mix master 127 mix synth 115 mix pcm 127 ;set master volume to full ;set synth volume to nearly full ;set digital audio volume to full :start stop mid run cls ;script returns to this point to restart ;stop playback of the MIDI file ;clear the screen with the DOS CLS command play scratch.wav play jukebox.fli ;play the "record scratch" sound ;play the jukebox animation run echo run echo run echo wait 300 stop wav Now Playing: ACTION3.MID Press [ESC] to quit Any other key to go to the next file ;wait 3 seconds ;stop the "record scratch" sound play wait mid • • etc... • GOTO :start :\songs\action3.mid ;play the MIDI file ;don't proceed until the MIDI file finishes • • • ;return to the line labelled ":start" Figure 2.13: Sample Script File This script file allows you to insert comments to be used for notes or troubleshooting. The comment lines are noted by a semicolon (;). SoundScript will bypass all text following a semicolon. Running a Script SoundScript uses the Voyetra Sound Factory and VMP drivers for its sound performance. These drivers must be loaded before using SoundScript. To automatically load the drivers and play the sample MIDI files, change to the C:\PRODUCER directory and type the following: Additional .MIDI and .WAV files are available and can be downloaded from the Orchid BBS. C:\MIDIJUKE 220 or C:\MIDIJUKE 240 The MIDIJUKE selection you make depends on the Hex address setting of the Sound Producer. Sound Producer Pro User's Manual 61 Chapter 2: Installation and DOS Software You can run the SPSETUP program in Chapter 2 to see the Hex address setting for Sound Producer. MIDIJUKE is the sample script file you created earlier. Once you run the script, you will see a "jukebox" and hear the MIDI files play accompanied by animation and digital audio sound effects. The top of the screen will show the name of the song playing. Press <ENTER> to play another song or press <ESC> to quit. 62 Sound Producer Pro User's Manual Chapter 2: Installation and DOS Software Guidelines for Creating and Running a Script SoundScript requires that you follow certain syntax guidelines. Most of these guidelines are illustrated in the sample script file. They are as follows: ✍ The script language may be entered in lower or upper case letters. ✍ Each command must be on a separate line. ✍ You may indent lines or leave blank lines for clarity. ✍ You may insert comments on any line except a line with a RUN command. Every comment must be preceded by a semicolon (;). ✍ Some of SoundScript's commands require values called arguments. The command and any argument must be separated by one or more spaces or tabs. ✍ The PLAY and LOOP type commands must include the complete DOS pathname to the file, if the file is not in the current directory. Be sure to include the extension if you named the file with one. To run SoundScript script files, follow these guidelines: ✍ Commands not supported by your hardware are bypassed. For example, if you do not have a VGA monitor, all commands to play .FLI files will be bypassed. If you do not have a CD-ROM drive all CDPLAY commands will be bypassed. ✍ If a syntax error occurs, execution will stop at the line where the error is encountered. A message will display showing the line number and the reason for the error. Sound Producer Pro User's Manual 63 Chapter 2: Installation and DOS Software ✍ When playing the .MID, .VOC, or .WAV sound files or CD audio track, the PLAY and CDPLAY commands will start at the specified line and then go to the next line. ✍ If you want to include animation with sound, you must place the sound command before the animation command. ✍ While waiting for a script to finish playing or executing any command, you can press any key to go to the next line. Press the <ESC> key at any time to terminate the script. SoundScript Commands SoundScript requires the use of certain commands to create a script. The following commands are listed with the appropriate argument. The required arguments are indicated by the "<" and ">" signs. The optional arguments are enclosed in brackets ( [ ] ). The following information lists all commands supported by SoundScript's scripting language. Animation Files (.FLI) The script execution will not continue until the .FLI file is finished playing. CDPLAY <from> [to] SoundScript will play a specified portion of an audio CD from the start of a range to the end of a range. These values are specified in the form of track number: minutes: seconds, with each value separated by a colon (:). See examples in the following tables. 64 Sound Producer Pro User's Manual If you are not sure how to use a certain command, refer to the sample script file. Chapter 2: Installation and DOS Software Command Description CDPLAY 2,3 Play all of track 2, stop at the beginning of track 3 Play the first 20 seconds of track 3 CDPLAY 3:0:0 3:0:20 Table 2.3: CDPLAY minutes & seconds The minutes and seconds values may be omitted. If so, SoundScript will interpret them as a zero (0). The following table shows examples of omitting the minutes and seconds in the argument. Command Location on CD CDPLAY 1:2:3 CDPLAY 1:2 CDPLAY 1 CDPLAY 1:3 Track 1, 2 minutes, 3 seconds Track 1, 2 minutes, 0 seconds Track 1, 0 minute, 0 second Track 1, 0 minute, 3 seconds Table 2.4: CDPLAY minutes & seconds omitted SoundScript also can play the CD from the starting point to the end of the disk by omitting the [to] argument. See the following commands for other ways to utilize CDPLAY. CDPLAY 1 Play the entire CD from the beginning of track 1 to the end of the disk CDPLAY 5:3:20 Play from track 5, 3 minutes, 20 seconds to the end of the disk CDSTOP Stops the CD Clear 0 The CLEAR 0 command inserted in your script will tell SoundScript not to reset your VGA card to its initial mode. This is useful if you want the final frame of the last animation file to remain on the screen after the script is finished. Sound Producer Pro User's Manual 65 Chapter 2: Installation and DOS Software Clear 1 The CLEAR 1 command will tell SoundScript to revert to its default method of resetting the VGA card when the script terminates. It clears the CLEAR 0 command. Clear <0/1> This command will do the work of both the previous commands. Clear 0/1 puts your VGA card into a mode which allows it to display animation files (.FLI), runs the script, then resets your VGA card to its initial state. This will remove any .FLI file image that may be left on the screen when the script terminates. Digital Audio Files (.WAV or .VOC) This command will stop playing a digital audio file and start a new one. The script execution will proceed immediately to the next line. MIX <parameter> <value> MIX configures the Sound Producer Pro mixer utility parameter settings. See the table below for the MIX command parameters. Parameter Description MASTER Master volume PCM Digital audio volume SYNTH FM synthesizer volume AUX1 CD audio volume AUX3 Volume of a line-level auxiliary device to the Line-in jack Table 2.5: MIX Command Parameters 66 Sound Producer Pro User's Manual Chapter 2: Installation and DOS Software The <value> can be any number from 0 to 127. For example, to set the volume for the FM Synthesizer, type: MIX SYNTH 100 To set the volume for the Digital Audio volume, type: MIX PCM 120 Repeat <n> SoundScript will run a block of commands a specified number of times. The end of the block of commands is marked by an EndRepeat command. Unlike the BASIC language, SoundScript does not support "nested" "Repeat" commands. You cannot place one Repeat routine within another. EndRepeat Marks the end of a block of commands used by the Repeat command. When SoundScript encounters this statement, it will skip back to the previous Repeat line until all steps are completed. GOTO <:label> The script execution will skip over all lines between this line and the line containing the label. Labels must be preceded by a colon (:). This command works exactly like the DOS "GOTO" command. For example, the following line would cause script execution to skip to the line containing the label :Start: GOTO :START GOTO can be used to make a script loop endlessly. This would work well for a free-running presentation. GOTO also can be used for debugging (finding and eliminating errors) the end of a long script file. Once the beginning of the script is working, insert a GOTO command at or near the beginning of the script. Sound Producer Pro User's Manual 67 Chapter 2: Installation and DOS Software This will enable you to move quickly to the section you want to debug. When you have successfully debugged the end section, remove the GOTO command. Play [d:\path\]<filename.ext> Starts the playback of a specified file. You must include the file's name and DOS extension. The file type, specified by its DOS extension, must be .FLI, .MID, .VOC, or .WAV. The drive and pathname must be included if the file is not in the current drive or directory. Run <command> Run can be used with the DOS "ECHO" command to display a line of text as part of your script. For example, the following command will display the string "Display this text." on the screen: Run Echo Display this text. Note the following information when you are using RUN to execute DOS commands. • SoundScript displays your text in 40-character text mode. • You cannot put a comment on the same line as a RUN command. If you do, DOS will try to execute the comment as part of the DOS command, which will result in an error. • Once the DOS command is started, SoundScript will resume execution from the line following the RUN command. Wait <filetype/CD/KEY/time> SoundScript will pause before executing the next command. The WAIT command can accept several different types of arguments. 68 Sound Producer Pro User's Manual Chapter 2: Installation and DOS Software Wait <filetype> Pauses the script until the current file has completed playing. The argument <filetype> can be .MID, .VOC, or .WAV. Wait CD Pauses the script until the current CD material has completed playing. Wait Key Pauses a script until any keyboard key is pressed. Wait <time> Pauses the script for a specified period of time. The argument <time> is in "hundredths of a second" (1 second is equivalent to 100 and 2 seconds—200). MIDI Files (.MID) MIDI will stop playing a MIDI file and start a new one. The script execution will proceed immediately to the next line. Stop <file type> Stops playing the current <file type> file. The file type can be .MID, .VOC, or .WAV. SYNC <filetype/CD> Allows SoundScript to keep playing an animation file (.FLI) until the specified sound file or CD material has completed playing. Sound Producer Pro User's Manual 69 Chapter 2: Installation and DOS Software 70 Sound Producer Pro User's Manual Chapter 3: Windows Software Chapter 3 WINDOWS SOFTWARE Software applications for Windows are included to take advantage of the capabilities of Sound Producer Pro in the Windows multimedia environment. The applications are installed automatically using the SINSTALL.EXE program. If you have not already installed your Windows applications, see the install instructions for SINSTALL.EXE in Chapter 2. In addition, Sound Producer Pro supports a large library of Windows software that is compatible with the AdLib, Sound Blaster Pro II, Disney Sound Source, and Covox Speech Thing sound standards. The Windows applications included are the following: Voice Notes Voice Notes enables you to add custom voice annotation to all Windows applications that support Object Linking and Embedding (OLE). JukeBox This manual presumes that you are already familiar with the basics of Microsoft Windows. Please refer to the Microsoft manual when terminology or installation steps are unfamiliar to you. Jukebox allows you to see and hear "sound events" entered into a playlist. You have the option to create or edit playlists, and to audition files. Mixer Controls the volume of your stereo audio sources during digitized audio playback. WinDAT WinDAT features options to play, record, display, and edit digital audio files. Sound Producer Pro User's Manual 71 Chapter 3: Windows Software ■ Using Voice Notes The Voice Notes program enables you to add custom voice annotation to all Windows applications that support the Object Linking and Embedding (OLE), such as documents, spreadsheets, and presentations. Using the microphone and speakers included, you can easily record and playback voice messages by utilizing the audio features of Windows 3.1. Before using Voice Notes, verify that you have connected the microphone to your Sound Producer Pro. Quick Start The following steps will familarize you with Voice Notes, to get you up and running quickly. 1. Start the Microsoft Windows application. 2. From the Accessories window, double-click on the application WRITE. 3. Press the CTRL + R keys (Hot Key function) to open the Voice Notes window and start recording (see Figure 3.1). 4. Speak to record a message, and then click Accept or press <ENTER> to embed your message into the WRITE application. 5. Once in the application, double-click on the icon to play the message. While the message is playing, the cursor will change to become to indicate that Voice Notes is in progress. Press the left mouse button to stop the message before completion. 72 Sound Producer Pro User's Manual OLE allows information in varying formats to be combined in a single document. Chapter 3: Windows Software Orchid Voice Notes Help Setup 0:00.0 0:00.0 Current Maximum Record Play Status Pause Accept Cancel Level Figure 3.1: Voice Notes Menu Screen The Voice Notes Window includes a menu bar with Setup and Help options. The options and selections are detailed below: Setup Opens a drop-down menu that allows you to check (✓) items for default settings. Set the following selections for your preference: Auto Record If checked, recording starts immediately upon opening of the Voice Notes Window by either of the following: - Selecting Restore from the icon pop-up menu. - Double clicking on the Voice Notes icon. - Selecting the Hot Key within an application that supports OLE. Sound Producer Pro User's Manual 73 Chapter 3: Windows Software If not checked, the Record button in the Voice Note Window must be clicked to begin recording. Default is checked (✓). Hot Key You can define a key combination that will automatically open the Voice Notes Window from within an application that supports OLE. If Auto Record is checked, the Hot Key function will allow you to record a voice note with a single key stroke. Default is CTRL + R. Maximum Length Allows you to pre-set the maximum length of a Voice Note. This data will be displayed in the Voice Notes Window in the "Maximum" box. Always on Top When checked, it allows the Voice Notes icon to remain on top of any open Window or application, with the program minimized. You can doubleclick on the icon at any time to activate it. Default is checked (✓). Help Opens a drop-down menu with the following choices: Index Help index on how to use the Voice Notes recorder. About Displays the copyright information and current version number of Voice Notes. 74 Sound Producer Pro User's Manual Chapter 3: Windows Software Recording a Message To enhance the clarity of your recording, place the microphone as close as possible, such as mounted on the side of your monitor or mounted on your keyboard. To record and play back a message, the following options are available from the Voice Notes Window: Record/Re-Record Starts the Voice Notes Recorder. Once you press this button it will become Re-Record. If you want to record your message again, press Re-Record to start over. The button will remain Re-Record until you press either the Accept or Cancel buttons. Once you press Accept, your recorded sound embedded in your document. You can then double-click on the Voice Notes icon to play your message. Play Plays back what you have recorded. Pause/Continue Stops the recording or playback. Once you press this button it will become Continue. You may continue recording or playback. Press Accept to accept the message, or press Cancel. Accept When you are satisfied with what you have recorded, press Accept and your note will be automatically embedded into your document and the Voice Notes Window will close. You may also press the <ENTER> key to accept. Sound Producer Pro User's Manual 75 Chapter 3: Windows Software Cancel Closes the Voice Notes Window without embedding your Voice Note. You may select any button at any time without having to press the Pause button. For example, while a recording is being made, pressing the <ENTER> key or clicking Accept, will stop the recording, close the window, and embed the Voice Note. Status A status window that reports the current status of Voice Notes—"Playing", "Recording", "Stopped", or "Ready". All of the status messages will appear in green text, except "Recording", which will appear in red. Current and Maximum These boxes will display the elapsed (current) time and maximum time. Level The Level meter displays a bar graph of your recording level with green, yellow, and red bars, while recording is in progress. 76 Sound Producer Pro User's Manual Chapter 3: Windows Software Embedding a Message You can embed voice messages in all Windows applications that support OLE. After you record and accept a message, the Voice Notes Window closes and automatically embeds the message in your document. To embed the Voice Note in your document or spreadsheet, follow the steps below: 1. Open the Microsoft Windows application. 2. Press CTRL + R keys (Hot Key function) to open the Voice Notes window and start recording. 3. Speak to record a message, and then click Accept or press <ENTER> to embed the message into your application. If you embed a message in a document that does not support OLE, the icon may display as a graphic. You can click on it, but it will not play. Playing a Message 1. Once in the application, double-click on the icon to play the message. While the message is playing, the cursor will change to become to indicate that Voice Notes is in progress. Press the left mouse button to stop the message before completion. Playback Only You can create a diskette with a Playback only version of Voice Notes and a sound driver for your associates. This will allow them to play Voice Notes embedded in documents you send them. The sound driver will be installed only if there is no sound hardware already installed that can play the PCM format sound. Sound Producer Pro User's Manual 77 Chapter 3: Windows Software To create a Playback only diskette, follow the step below: 1. Run the SINSTALL program and select "Build Voice Notes Playback Diskette" and follow the instructions. See Chapter 2 for information on the SINSTALL program. Additional Menu Options Voice Notes uses the optional "Always on Top" feature with the program minimized, to allow you access to Voice Notes options at any time. From your document or any Window, you can click once on the Voice Notes icon for additional options. The following options will appear: Restore Opens the Voice Notes Window. Move Allows you to move the Window without a mouse. Minimize Minimizes the Window to the Voice Notes icon. Close Closes the Window. Switch To Allows you to switch between windows without a mouse. These options also can be accessed from the Voice Notes Window. From the System Menu, access a pull-down menu by clicking once on the "-" box. 78 Sound Producer Pro User's Manual Chapter 3: Windows Software ■ Using Jukebox Jukebox provides an easy way to see and hear "sound events" entered into a "playlist", in the Windows environment. The playlist can include MIDI files, .WAV files, or CD tracks. Jukebox includes features such as the ability to create, edit, and save the playlists, and an Event Manager option to add, search for and audition files. The Jukebox main menu has two sub-menu windows—Playlist and Playlist Files Manager. Doubleclick on the Jukebox icon in the Sound Producer Pro window and the following menu will appear: Figure 3.2: Jukebox Playlist Screen The Playlist Jukebox supports only the .WAV, .MIDI, and CD tracks sound events. The Playlist option features selections to move, delete, and control playback of the playlist. It is divided into the following control areas: Menu Bar Uses pull-down menus common to most Windows applications. Sound Producer Pro User's Manual 79 Chapter 3: Windows Software Edit Controls For edit commands such as Cut, Copy, Paste, and Undo. Transport Controls Uses the Play, Stop, Pause, Previous , and Next control buttons, similiar to a tape deck or VCR. Playlist Title Box Displays the title of the current playlist. CD Title Box Displays the title of the current CD in the playlist. The Playlist Displays a list of the individual sound events in the playlist. Status Area Displays the current status of the Playlist. It also shows how many and what type of events are in the playlist. 80 Sound Producer Pro User's Manual Chapter 3: Windows Software Playing a Playlist When you open a Jukebox file and click on the Play button, the playlist will play each file or CD track one after the other. To play a playlist, follow the steps below: 1. Click on Open from the File menu. From the Open dialog box, type in the directory C:\PRODUCER\VOYETRA\JUKEBOX (or the directory where you stored the .JUK files). The file will load and display the playlist. You cannot edit or load a different playlist until you stop playback. The menu items will be grayedout while Jukebox is playing. 2. Click on the Play button to start the playlist at the beginning. If you do not highlight an event or the first event, playback will start at the beginning of the list. 3. Click on the Stop button to end the playback. 4. To start playing at a specific event in the playlist, highlight the desired event and then click on the Play button. For example, if you highlight the third event and click on the Play button, Jukebox will start playing the third event and continue playing to the end of the list. Running Jukebox in the Background Jukebox will stop running a playlist when you exit the program. To continue running the playlist, you can minimize the Jukebox application. It will continue to play sound events in the background while you work in another application. To start the playlist in background, follow these steps: 1. From the Jukebox menu, load a playlist and click on the Play button. Sound Producer Pro User's Manual 81 Chapter 3: Windows Software 2. After the playlist starts playing, minimize the Jukebox windows by clicking on the Minimize button at the right end of the Title Bar. You can now open any other Windows application. The playlist will play until it reaches the end. You can stop the playback by maximizing the Jukebox application and clicking the Stop button. The Loop Option Loop will play a song or group of songs repeatedly. When Loop is active, the current playlist will continue to play after reaching the end. To end the Loop process, click on the Stop button. 1. Click on Loop from the Options menu to invoke this feature. To end the Loop process, click on the Stop button. The default is OFF. Editing a Playlist Jukebox allows you to edit events and paste them in different parts of the playlist, using the Cut, Copy, Paste, and Undo commands. Cut and Copy Commands The Cut command will remove the selected data. To Cut a single event from the playlist, follow the steps below. 1. Click on the event you want to "cut". The event will be highlighted. 2. Click on the Cut button or choose Cut from the Edit menu. The highlighted event will be removed from the playlist. Use the steps above to "copy" an event, however, the Copy command will not remove the event from the playlist. 82 Sound Producer Pro User's Manual Chapter 3: Windows Software You can "cut" or "copy" a group of consecutive or nonconsecutive events by clicking and dragging the mouse. Paste Command Paste will add the events that you cut or copy to a different part of the same playlist or to a new playlist. To Paste events to the end of the playlist, follow the steps below. 1. If any events are highlighted, click on Deselect All from the Edit menu. 2. Click on the Paste button or choose Paste from the Edit menu. The events that you cut or copied will be added to the end of the playlist. To Paste an event within the playlist, follow the steps below. 1. Highlight the line just below the point where you want to Paste the event. 2. Click on the Paste button or choose Paste from the Edit menu. The event will be inserted above the highlighted line. If one or more events are highlighted, all "pasted" events will be inserted before the first highlighted event. Undo and Delete Commands Selecting the Undo menu command or the Undo button will undo your most recent editing operation. The Delete All commands will delete all events of a specified type from your playlist. Sound Producer Pro User's Manual 83 Chapter 3: Windows Software Playlist Files Manager The Playlist Files Manager will locate, audition, and add sound events to your playlist. From the Playlist window, double-click on Playlist Files Manager, and the following screen will appear: Figure 3.3: Playlist Files Manager Window The Playlist Files Manager window is divided into the following control options: CD Displays all the tracks available on the CD currently loaded in your CD-ROM drive. WAV Displays all files with a .WAV file extension. MID Displays all files with a .MID file extension. ALL Displays all files in the current directory, regardless of the extension. All of these control options are selectable by clicking on the VIEW button from the menu. 84 Sound Producer Pro User's Manual Chapter 3: Windows Software The WAV, MID, and ALL Buttons Click on either the WAV, MID, or ALL buttons, and two list boxes will appear. On the left side, a Directory list will display the available drives and directories. On the right side, a File list box will display files of the type chosen with the View option. The text boxes at the bottom of the window will display the directory and filename of the file that is currently highlighted. The CD Button Click on the CD button option and the Playlist Files Manager will display a single list box which displays the tracks on the current CD. At the bottom of the window, two text boxes will display the CD title and track number of the file currently highlighted. You also can manually enter CD titles and track numbers. Adding New Events to a Playlist From the Playlist Files Manager window, you can add new events to an existing playlist or create a new one. You can add the first event to your playlist, regardless to what section of the playlist is highlighted. To add new events to the playlist, follow the steps below. 1. Choose New from the File menu to load a new, blank playlist file. 2. If you have a CD-ROM drive and you want to include CD tracks in your playlist, insert an audio CD into the drive. If you do not name CD tracks, they will be listed as Track 1, Track 2, and so on. (Refer to the section - Entering Disk Titles and Track Names). Sound Producer Pro User's Manual 85 Chapter 3: Windows Software 3. Click on the Add button and the Sound Event Manager window will appear. 4. Click on the appropriate View button to select the type of sound event you want to display. If you select .WAV or .MID, select the drive/directory which contain the files. 5. From the Playlist Files Manager, double-click on the event you want to add to the playlist. That event will display as the only event in the playlist. 6. Double-click on additional events in the Sound Event Manager, one at a time, to add them to your playlist. To add a group of new events to your playlist, use the Copy and Paste commands. Use the same guidelines that you used in the Playlist window for these commands. Playlist Files Manager also will allow you to select a group of consecutive or non-consecutive events. You must use the Copy command to copy events from the Playlist Files Manager; you cannot use the Cut command. Locating Sound Events The Playlist Files Manager will help you locate and audition .WAV, and .MID files, or CD tracks, and add them to a playlist. To locate and audition sound events, follow the steps below. 1. Click on the Add button in the Sound Event Manager window. 2. Select the type of sound event to be displayed by clicking on the appropriate View button. If you select .WAV or .MID, select the drive/directory which contain the files. 86 Sound Producer Pro User's Manual All CD tracks in a playlist must be from the same CD. Chapter 3: Windows Software Auto Audition Sound Events You can audition sound events by clicking on them in the Playlist Files Manager window. There is no need to use the Play button. 1. Click on Auto Audition from the Options menu to invoke this feature. The default is OFF. CD-ROM Disk Titles When you select CD from the Playlist Files Manager, Jukebox initially displays Untitled as the disk's title and Track 1, Track 2, etc, for each of its tracks. The Jukebox program will allow you to enter the correct titles (or any other text) before you copy them to the playlist. The titles you enter will be added to the playlist when you save it. To enter a CD title, follow the steps below. 1. Load a CD into your CD-ROM drive. 2. Click on the Add button to enter the Sound Event Manager, then click on CD. 3. Place the cursor in the CD Title box and enter a title. For any track you add from the CD to a playlist, the title will appear in the Playlist window's CD Title box. When you save the playlist, all contents of the Playlist window's CD Title box will be saved. CD-ROM Track Names For track titles to appear in a playlist, you must enter them in the Playlist Files Manager before placing tracks in the playlist. You cannot edit the track names in a playlist. 1. Load a CD following steps 1 and 2 above. Sound Producer Pro User's Manual 87 Chapter 3: Windows Software 2. Place the cursor in the Track box and enter a Track name. 3. Enter a name into the Playlist Files Manager's Track Title text box. (You can remove the CD from the drive to look at the track titles. Make sure you replace it before continuing). 4. Save your playlist. Once you have created a track list, you can copy titles from the CD track list into any playlist. Additional Information • Jukebox is compatible with the Voyetra CD Player and Microsoft's Musicbox. It will automatically read disk titles and track lists created by either of these programs. • Track lists saved with the Voyetra CD Player or Microsoft Musicbox, are saved in a file called MUSICBOX.INI. When Jukebox scans a disk, it checks to see if a MUSICBOX.INI track list exists for that CD. If one is found, the disk title and track name will automatically be displayed in the Playlist Files Manager. 88 Sound Producer Pro User's Manual The CD track titles entered into the Playlist Files Manager cannot be saved. Before copying track titles to other playlists, it is recommended that you make a reference playlist for each CD. Chapter 3: Windows Software Using Mixer for Windows The Mixer program allows you to mix input sources. You can digitally control the mixer on Sound Producer Pro in the Windows environment. Mixer Parameters configured in either Windows or DOS will override the other. Double-click on the Mixer icon in the Sound Producer Pro window and the following menu will appear: Figure 3.4: Sound Producer Pro Mixer Menu There are six icons above Mixer Control on the menu. These selections allow you to individually control the volume of audio sources during playback operation. Select each one by clicking on the red horizontal bar above the icon, and moving the bar to the desired level. The selections available from left to right are: Before configuring the CD, FM, Line in and Voice selections, Sound Producer Pro must be set to Stereo mode. To set Stereo mode, click on the ST selection from the Mixer menu. Mic The Mic icon controls the stereo volume for the Microphone Input in 8-step intervals. CD The CD icon controls the stereo volume for the CDAudio in 16-step intervals. FM The FM icon controls the stereo volume for the FM Music Synthesizer in 16-step intervals. Sound Producer Pro User's Manual 89 Chapter 3: Windows Software Line in The Line in icon controls the stereo volume for external audio equipment in 16-step intervals. Voice The Voice icon is the stereo volume control for the DACs (Digital-Analog Converters) in 16-step intervals. COVOX The COVOX icon is the volume control for the Disney Sound Source and Covox Speech Thing features in 16-step intervals. Vol, Bal, Bas, Trb There are four buttons on the Mixer menu—Vol (Volume), Bal (Balance), Bas (Bass), Trb (Treble), to control the sound. To adjust the master Volume, Balance, Bass or Treble, click on the control button and turn it to your desired level. ADC The ADC controls the digitized audio recording. Click on the ADC option and the following menu will appear: Figure 3.5: ADC Select Screen 90 Sound Producer Pro User's Manual Chapter 3: Windows Software ADC Input Select From this selection you can choose the type of audio input source to be used during digitized audio recording. The recording input sources include the CD Audio, Line in, or Microphone. The recording level will be preset. ADC Mix ADC Mix gives you the option of enabling or disabling the recording mixer. If the ADC Mix is turned ON, the recording input source will be a combination of the Microphone, CD Audio, and Line in. Option Option allows you reset or save the current configuration. The following selections are available from the Option menu: Reset Card This selection resets all of the mixer volume control levels to their default settings. Save Setting You can store the individual volume settings of the mixer in the EEPROM. Storing the settings in the EEPROM will enable you to always startup with your selected settings. Exit Click on Exit to exit from the Mixer program, or press the <ALT> and <E> keys simultaneously. Sound Producer Pro User's Manual 91 Chapter 3: Windows Software ■ Using WinDAT WinDAT allows you to play, record, and edit digital audio files in the Windows environment. Features of WinDAT include easy-to-use tape deck styled control buttons, a Windows-type Clipboard, a graphic display of digital audio files, and powerful editing functions. New sound files are easily created by "cutting" and "pasting" from existing sound files. You can also Cut and Paste between two different files. The Clipboard feature in WinDAT allows you to view the contents before pasting. Quick Start The following steps will familarize you with WinDAT, to get you up and running quickly. Double-click on the WinDAT icon from the Sound Producer Pro window. You can load one of the digital audio files included or one of your own. 1. Click on Open from the WinDAT File menu. The Files dialog box will appear. 2. From the Format list box, select WAV as the desired file format. 3. Change to the C:\PRODUCER\VOYETRA\SOUNDS directory where the digital audio files are located, or the directory where your files are located. 4. From the Files list box, double-click on the filename or click on Open. After the file loads, WinDAT will return to the main menu. The filename will display at the top of the window, and a graphic display of the audio file will appear at the bottom of the window. 92 Sound Producer Pro User's Manual Chapter 3: Windows Software The File indicator will display the file length at the bottom right of the window. Figure 3.6 WinDAT Main Menu Screen The main menu screen has several control areas as well as several options available. The control areas are as follows: Menu Bar Uses pull-down menus common to most Windows applications. Transport Controls Uses the Play, Stop, Record, Rewind, and Fast Forward control buttons, similiar to a tape deck or VCR. See the figure below: Rewind Stop Play Pause Record Fast Forward Figure 3.7: Transport Controls Screen Sound Producer Pro User's Manual 93 Chapter 3: Windows Software You also can control the playback and recording of an audio file with your PC's keyboard. Following is a list of the keyboard keys equal to the Transport Controls buttons. Transport Controls Keyboard Controls Play Stop Rewind Fast Forward Pause Record [Spacebar] [Enter] [< ,] [> .] [P] [R] Range Controls The Range Controls are used to mark, play, or edit a specific range of a digital audio file. The selected portion (range) of a file is defined by its starting and ending times in seconds. The starting and ending time of a range can be specified to precisely 1/100th of a second. Mark Range Allows you to mark a range while you listen to a file. When you hear the beginning of the section you want to select, click on the Mark Range button. Hold the button down while the file plays, then release it at the end of the section. Start Time Controls Displays the starting time of the selected range in the format of "minutes:seconds:hundredths of seconds". Click on the Start Time Controls box to move the upper arrow to increase the starting time, or click on the lower arrow decrease the starting time. 94 Sound Producer Pro User's Manual Chapter 3: Windows Software Play Range Click on the Play Range button to start playback of the selected range. End Time Controls Displays the ending time of the selected range in the format of "minutes:seconds.hundredths of seconds". Click on the End Time Controls box to move the upper arrow to increase the ending time, or click on the lower arrow decrease the ending time. Graphic File Display Displays the waveform of the digital audio file loaded in WinDAT. A scroll bar allows you to scroll through the file. The waveform is displayed in the main menu window. See an example of a waveform in the figure below. Position Marker The Selected Range Figure 3.8: Graphic File Display (Waveform) The horizontal axis represents the time; the vertical axis represents amplitude or loudness. The file length is displayed in the Status Area at the lower right of the window. The length of the file will determine the amount of time shown by the Graphic File Display. Sound Producer Pro User's Manual 95 Chapter 3: Windows Software Status Area Gives information about the current file, such as Type, Sample Rate, Bit Length, current cursor position, and the total file size. Mono/Stereo Displays whether the audio file is in mono or stereo mode. Sample Rate (KHz) Displays the sample rate of the current audio file. Bit Length (Bits) Displays whether the audio file is 8-bit or 16-bit. Current Position Displays the current position in the audio file, in "minutes:seconds.hundredths of seconds." File Length Displays the file length in "minutes:seconds:hundredths of seconds." 96 Sound Producer Pro User's Manual Chapter 3: Windows Software Playing Files To play a file, follow the step below: 1. Click the Play button in the Transport Controls area. The digital audio file will play through your sound system. Playback will stop when the file ends. Auto Auditioning Files Using the Auto Audition option, you can automatically preview audio files before playing them. 1. Click on Auto Audition from the Options menu. Click on Open or Save As from the Files menu. Select a file from the Files list box and WinDAT will play that file until you stop it or select another file. Rewinding Files You can choose to manually rewind a file, or setup for automatic rewind, which will rewind the file to the beginning after it stops. 1. For manual rewind, double-click the Rewind button in the Transport Controls area. OR 2. Click on Auto Rewind from the Options menu. You can click on Auto Rewind again to disable it. Sound Producer Pro User's Manual 97 Chapter 3: Windows Software Recording Files WinDAT can perform digitized audio recording operations. Make sure that you have selected your recording source and sound level. 1. Click on Setup from the WinDAT Windows menu. The Setup dialog box will appear. 2. Choose a sample rate from the list in the Sample Rate box, or you can type in any value between 4000 and 23000. 3. Choose a file format (WAV or VOC), click on Stereo, then click on 8-bit for the bit-length. Notes for Setup parameters • Sound Producer Pro does not support 16-bit digital audio. An attempt to record or playback such a file will result in an "Unsupported Audio File Format" error message. • Higher sample rates result in better audio quality; lower sample rates result in a smaller file size. • Some slower computers may encounter problems recording at higher sample rates because they cannot write to the disk fast enough. • WinDAT supports different bit lengths in both stereo and mono modes. However, it cannot convert files between stereo and mono modes, or between different bit lengths. Once you have set WinDAT's recording parameters and verified your audio input source connections, you are now ready to record. Follow the instructions below. 1. To record from a CD or Tape player, "cue up" the material as needed. 98 Sound Producer Pro User's Manual The Sound Producer Pro Mixer utility can be used to adjust the playback sound level and select your recording source. Chapter 3: Windows Software 2. Click on the Record button in the Transport Controls area. WinDAT will go into recording standby mode. This is confirmed by a change in the appearance of the Record button. 3. Click on the Play button to start recording. This is confirmed by an additional change in the appearance of the Record button. The recording process will begin. 4. Click on the Stop button to stop recording. 5. Rewind WinDAT and click on the Play button to hear what you have just recorded. If you are satisfied with what you have recorded, you can save the recording as a file. 6. Click on Save from the File menu. The Files dialog box will appear. 7. If you are saving a new file, you will be prompted to type in a file name. Select the directory where you want to store your file. Sound Producer Pro User's Manual 99 Chapter 3: Windows Software Editing Files WinDAT provides powerful editing features which allow you to edit sections of a file. You can delete and copy a section, paste a new section, and insert a section of silence into a file. This is easily accomplished by specifiying the section or range of the file that you want to edit. The range is indicated by the Start Time and End Time Controls in the Range Controls area. The Start and End times will show in reverse-video. This gives you the precise starting or ending time values of the selected range. The range controls are displayed as follows: Mark Range Button Start Time Controls ❙ ❙ ▲ ➡ 0:12.75 Play Range Button End Time Controls 0:28.50 Figure 3.9: Range Controls You have a choice of how to select the range values of your file. The choices are: • Click on the Start Time or End Time controls and move up or down to reach your preferred start or end time. • You can mark the starting/ending range while you listen to a file. When you hear the beginning of the section you want to select, click on the Mark Range button. Hold the button down while the file plays, and release it when you come to the end of the section. The range will display in the Start Time and End Time Controls boxes. 100 Sound Producer Pro User's Manual Chapter 3: Windows Software Use the following choices to clear a selected range, select the entire file, or play a selected range: • To increase or decrease the start or end time, click on the Start and End Time controls and move up or down. • To clear a range selection, click anywhere in the Start or End Time Controls displays. • To select the entire file, double-click anywhere in the Start or End Time Controls displays. • To play back a selected range, click the Play Range button in the Range Controls area. Removing a Section of a File One of WinDAT's powerful editing features, this option allows you to remove a portion of a selected file. WinDAT has its own Clipboard. It does not use the Windows Clipboard. 1. Select the range of the file that you wish to remove. 2. Click on Cut from the Edit menu. 3. Play the file to hear the results of the edit. The Cut command deletes the selected range from the file and places it in WinDAT's Clipboard. The rest of the file is shifted to fill in the gap. Pasting in a File Inserts the contents of WinDAT's Clipboard at the marked position and shifts all data to the right. You also can use the Cut or Copy command to place something in the Clipboard. 1. Click on Clipboard from the Windows menu to verify that the data was copied in the Clipboard. Press the Play button to check the contents of the Clipboard. 2. Click on New from the File menu to Paste into a new file, or you can Paste the contents in an existing file. Sound Producer Pro User's Manual 101 Chapter 3: Windows Software Pasting data into a new file will start the range at 0.00. To Paste in an existing file, select the point where you want to Paste the Clipboard contents by specifiying it as the range's starting point. 3. Click on Paste from the Edit menu. The contents of the Clipboard will be inserted at the specified starting point in either an existing or new file. Mix Pasting in a File Similar to the Paste selection, Mix Paste will mix the contents of the Clipboard with the data in the current file. A starting point must be specified. Trimming a File Deletes all data except the selected range. The contents of the Clipboard will remain the same. Inserting Silence in a File Inserts a break of silence (from .01 to 10 seconds) at the starting point of a selected range. The remaining data will shift from the starting position to the right. Use the slider in the dialog box to adjust the length of the silence. Modifying Files with Transforms WinDAT allows you to modify your digital audio files, using the "Transforms" option. All the Transforms functions (see the figure below) operate on a selected range. Figure 3.11: Transforms Menu 102 Sound Producer Pro User's Manual Chapter 3: Windows Software Normalize Balances the fullness of the selected range and pushes the peak value to the best sound possible. Normalize also optimizes the loudness of files recorded at a low levels. Find Peak Scans the selected range and displays a pop-up window which reports the amplitude and location of the loudest sound. It will set the start point marker one second before and set the end point marker to 1 second after, the maximum amplitude value. Find Peak also will find the beginning of a word in a file containing recorded speech, or locate an unwanted peak. Scale Scale will increase or decrease the loudness of a selected range. You must specify a factor range between .01 to 10.00. A scaling factor of 2.0 will double the amplitude and a factor of 0.5 will cut the amplitude in half. Scale also allows you to match the loudness between files before Cutting and Pasting between them. Use the steps below to scale the loudness of a selected range: 1. Select the range you wish to scale, or click on Select All from the Edit Menu to scale the entire file. 2. Click on Scale from the Transforms menu. The Scale dialog box will appear. 3. Place your mouse pointer on the slider and move it up or down to select a scaling factor and click OK. Sound Producer Pro User's Manual 103 Chapter 3: Windows Software Using WinDat's Windows Menu Setup The Setup option is used for selecting the File Format (VOC or WAV), Sample Rate, Stereo/ Mono, Bit Length, Temp Directory and Work Directory. 1. Click on Setup from the WinDAT Windows menu. The Setup dialog box will appear. WinDAT will save any changes made as the new defaults, and write them to the "DAT" section of your WIN.INI file. 2. Click on the selections for your audio file. The Setup dialog box will always display the sample rate that the file was saved with. Changing the sample rate of an existing file will cause a change in the playback, speed, and pitch. Clipboard This option gives information on the contents of the Clipboard. It displays information such as the file the data came from, and the length of the section cut. The contents of WinDAT's Clipboard are stored in a file in the selected Temp Directory. You can audition the contents of the Clipboard before you Paste. Additional Information • WinDAT cannot edit Voice (.VOC ) files. If you load a .VOC file into WinDAT, the message "Compressed" will appear. • Some .VOC files are saved in a "multi-chunk" format. If you load one of these files into WinDAT, you are given the following options: - Load the file only (you cannot use the Edit or Transforms options). - Convert the file to the "non multi-chunk" ".VOC" data format (this may expand the size of the file). 104 Sound Producer Pro User's Manual Data pasted from the Clipboard will play back at the sample rate of the current file. Appendix A: Technical Help Appendix A TECHNICAL HELP Orchid Technology is known for its responsiveness to its customers. Appendix A will give you helpful hints for troubleshooting the Sound Producer Pro. Troubleshooting the Sound Producer Pro The following information will help you diagnose problems you may have with the Sound Producer Pro. Following these simple steps serves a two-fold purpose: You may be able to fix your problem and avoid having to contact the Orchid Technology Technical Support Department... or if these steps do not help you solve your problem, they will most certainly give you a better handle on what to tell the Technical Support Analysts once you do contact them. The information provided here is in symptom/response form. That is, a symptom is given, and a check point response is provided for you to look at. Symptom 1 No sound output during testing. Check 1. Is the external speaker properly connected to the Sound Producer Pro Stereo Audio Output jack? 2. Has the Volume Control button been adjusted to about mid-range? Sound Producer Pro User's Manual 105 Appendix A: Technical Help 3. Is there another adapter in your system that may be using the same address (I/O Address, DMA Channel or Interrupt)? If so, change its addressing or select another address for Sound Producer Pro. (Refer to Chapter 2 - Configuring Sound Producer Pro). 4. Run " SPMIXTSR" to verify the volume settings. Symptom 2 The computer locks up when running a Disney Sound Source compatible program. Check 1. Have you configured a parallel port at address 378H, 3BCH, or 278H? Have you enabled the Disney Sound Source option? 2. Is your printer turned on? If so, turn off the printer and disconnect the printer cable from your PC's parallel port. 3. Run "SPSETUP" to test the parallel port. Symptom 3 "Disk Could Not Keep Up with Digital Audio Rate." Check 1. Were you recording when you received this error message? Decrease the sample rate or bit resolution. If you where recording in stereo, switch to mono. 2. Have you de-fragmented your hard drive lately? Windat encountered a performance problem with your hard drive. Use one of the commercial disk optimizing utilities available. Excellent digital audio performance requires that you optimize your hard drive often. 106 Sound Producer Pro User's Manual Appendix A: Technical Help Symptom 4 "Could not load audio driver" or "General Protection Fault." Check 1. Is the Sound Producer Pro audio driver installed in Windows? If so, from the Control Panel window, click on the Drivers icon, click on Add, and reload the "Sound Producer Pro WAVE & MIDI" driver (see the section on Changing the Address Settings in Windows). Restart Windows and check the sound again. 2. Have you re-installed the sound driver? 3. Did you change the default address settings? If so, you need to reset the address settings in Windows (see the section on Changing the Address Settings in Windows). Symptom 5 "The mouse cursor is jumping all over the screen, and I cannot control it." Check 1. Change the Hex address of the Sound Producer and reload the Windows driver (run the SPCONFIG program and save the changes using SPSETUP). Reset the address settings in Windows (see step 3 above). Sound Producer Pro User's Manual 107 Appendix B: Technical Information Appendix B TECHNICAL INFORMATION The features and specifications of the Sound Producer Pro are covered in this Appendix. Included are the hardware address settings supported by the Sound Producer Pro, as well as specifications for the CDROM and the Game/MIDI Port. Sound Producer Pro Technical Specifications Features Full compatibility with the following sound standards: • Sound Blaster Pro II • AdLib • Disney Sound Source • Covox Speech Thing Video Standards Supported MDA, CGA, EGA and VGA Computers Supported: ISA machines: IBM ATs—286, 386, 486, and compatibles Card Size: 7.8" x 4.2" Connectors: DB-15 port for joystick/MIDI input 3.5 mm stereo jack for microphone input 3.5 mm stereo jack for speaker output 3.5 mm stereo jack for line input On-board interface for AT-BUS CD-ROM drive On-board SCSI controller socket for optional CD-ROM drive Temperature: Operating: from 0 to 40 degrees C Storage: from -25 to 90 degrees C 108 Sound Producer Pro User's Manual Appendix B: Technical Information Humidity: Operating: from 15% to 90% Storage: from 0% to 90% Additional Features: Synthesizer • 20-voice Stereo FM Music Synthesizer with four FM operators Stereo Digital/Analog Mixer (built-in) • Selectable input and mixing of all audio sources for recording: Line-in PC Speaker Stereo CD-Audio Stereo DAC Stereo FM Music Stereo Microphone Stereo Digitized Audio Playback • Two 8-bit Digital-to-Analog Converters (DACs), for output of digitized sounds such as speech, music, and special sound effects • Sampling Rate of : 4KHz to 44.1KHz (mono) 4KHz to 22.05KHz (Stereo) • Hardware audio decompression ADPCM (ratios of 2:1, 3:1, and 4:1) • DMA (direct memory access) or Programmed I/O transfer mode • Stereo Dynamic Adaptive Filtering - 1.6KHz to 18KHz (programmable) Sound Source DAC (8-bit)— sampling rate of 7KHz Sound Producer Pro User's Manual 109 Appendix B: Technical Information Stereo Digitized Audio Recording • Two 8-bit Analog-to-Digital Converters (ADCs), for recording sounds through all audio sources • Sampling Rate of 4KHz to 44.1KHz • DMA (direct memory access) or Programmed I/O transfer mode • Stereo Dynamic Adaptive Filtering -1.6KHz to 18KHz (programmable) CD-ROM • Built-in AT-Bus CD-ROM interface • Optional SCSI CD-ROM interface upgrade Stereo power amplifier (built-in) • 4 watts per channel • Stereo headset connector • Directly operates speakers and headphones Game Port/MIDI Interface • Standard built-in (15-pin D-sub) connector • Game I/O port for PC analog joystick • Built-in MIDI IN and MIDI OUT connector • MIDI time-stamp for Multimedia extension • Sound Blaster MIDI compatible • 64-byte FIFO buffer Stereo Microphone Input • Automatic Gain Control for direct sound input Volume control (software selectable) • Master Volume—range of 60dB in 16-step intervals • Left/Right Balance—range of +/-24dB 110 Sound Producer Pro User's Manual Appendix B: Technical Information • Bass/Treble—range of +/-15dB in 16-step intervals • Individual control for all audio sources—16step intervals each • Independent Left and Right Output Volume for stereo balancing—range of 64dB with 16step intervals Fade-in, fade-out, and panning features (software selectable) SCSI CD-ROM Drives Listed below are the CD-ROM Drives supported by the Sound Producer Pro when a SCSI chip is installed. Chinon CDS-431 Denon DRD-253 Hitachi CDR-1750S CDR-3650U LMSI/Philips CM131 CM212 CM210 CM214 NEC CDR-35 CDR-80 CDR-72 CDR-83 Panasonic CR-501 LK-MC501 CR-522 Pioneer DRM-600 Sony CDU-541 CDU-6111 CDU-6110 CDU-8022 Toshiba XM-2100A XM-3200A XM-5100 XM-3100A XM-3301B Sound Producer Pro User's Manual 111 Appendix B: Technical Information Address Selections The Sound Producer Pro uses I/O addresses, Interrupt Channels and DMA Channels. All addresses are software configured by using the Hardware Configuration Setup program. The charts that follow list all of the addresses available and descriptions. Also included are the specifications for the CD-ROM and the Game/ MIDI Port. I/O Port Addresses Address Description 200H - 207H Base + 0H Base + 0H Base + 1H Base + 2H Base + 2H Base + 3H Base + 4H Base + 5H Base + 6H Base + 8H Base + 8H Base + 9H Base + 0AH Base + 0CH Base + 0CH Base + 0EH 388H 388H 389H Game Port Left FM Music Status Left FM Music Register Address Left FM Music Data Port Right FM Music Status Right FM Music Register Address Right FM Music Data Port Mixer chip Register Address Port Mixer chip Data Port DSP Reset FM Music Status Port FM Music Register Address Port FM Music Data Port DSP Read Data DSP Write Data or Command DSP Write Buffer Status (bit 7) DSP Data Available Status (bit 7) FM Music Status Port FM Music Register Address Port FM Music Data Port Operation write/read read only write only read only read only write only read only write only read/write write only read only write only read only read only write only read only read only read only write only read only Table B.1: I/O Port Addresses Default is 220H, with the option of selecting 240H. 112 Sound Producer Pro User's Manual Appendix B: Technical Information Interrupt Channels Interrupt AT Machine IRQ 0 IRQ 1 IRQ 2 IRQ 3 IRQ 4 IRQ 5 IRQ 6 IRQ 7 IRQ 10 Used By System Timer Used By Keyboard Free For Use Free For Use ( or COM Port 2) Used By COM Port 1 Free For Use Used By Diskette Controller Default Used by Sound Producer Pro Free For Use Table B.2: Interrupt Addresses Default is IRQ7, with the option of selecting IRQ2, IRQ5, or IRQ10. DMA Channels DMA Channel DMA Channel 0 DMA Channel1 DMA Channel 2 DMA Channel 3 AT Machine Free For Use Default - Sound Producer Pro Used by Diskette Controller Free For Use Table B.3: DMA Channel Addresses Default is DMA Channel 1, with the option of selecting Channel 0, or Channel 3. Sound Producer Pro User's Manual 113 Appendix B: Technical Information CD ROM Specifications AT-Bus CD-ROM Interface Pin-Outs Pins Function Pins Function 01 Ground 02 CD-Reset 03 Ground 04 Ground 05 Ground 06 Operation Mode bit 0 07 Ground 08 Operation Mode bit 1 09 Ground 10 CD-Write 11 Ground 12 CD-Read 13 Ground 14 CD-Status bit 0 15 Ground 16 No Connection 17 Ground 18 No Connection 19 Ground 20 CD-Status bit 1 21 Ground 22 CD-Data Enable 23 Ground 24 CD-Status bit 2 25 Ground 26 CD-Status/Data Enable 27 Ground 28 CD-Status bit 3 29 Ground 30 Ground 31 CD-Data 7 32 CD-Data 6 33 Ground 34 CD-Data 5 35 CD-Data 4 36 CD-Data 3 37 Ground 38 CD-Data 2 39 CD-Data 1 40 CD-Data 0 Table B.4: AT-Bus Pin-Outs 114 Sound Producer Pro User's Manual Appendix B: Technical Information SCSI CD-ROM Interface Pin-Outs Pins Function Pins Function 01 Ground 02 Data Line: bit 0 03 Ground 04 Data Line: bit 1 05 Ground 06 Data Line: bit 2 07 Ground 08 Data Line: bit 3 09 Ground 10 Data Line: bit 4 11 Ground 12 Data Line: bit 5 13 Ground 14 Data Line: bit 6 15 Ground 16 Data Line: bit 7 17 Ground 18 Data Line: Odd Parity 19 Ground 20 Ground 21 Ground 22 Ground 23 Ground 24 Ground 25 No Connection 26 Terminator Power 27 Ground 28 Ground 29 Ground 30 Ground 31 Ground 32 Attention (initiator driven) 33 Ground 34 Ground 35 Ground 36 Bus is busy (or Tied) 37 Ground 38 Acknowledge 39 Ground 40 Resets The Bus (or Tied) 41 Ground 42 Message 43 Ground 44 Select (ID is on data lines) 45 Ground 46 -Control/Data 47 Ground 48 Request bus transaction 49 Input/-Output 50 Ground Table B.5: SCSI Pin-Outs Sound Producer Pro User's Manual 115 Appendix B: Technical Information Game/MIDI Port Specifications The Game port on Sound Producer Pro is identical to the standard PC Game Control adapter. The 15pin D-sub connector is also used as the built-in MIDI interface. If your PC has a game port, you can disable the game port on Sound Producer Pro (Refer to Chapter 2—Hardware Configuration Setup). See the diagram below for the port specifications. Figure B.1: Game/MIDI Port Wiring Diagram 116 Sound Producer Pro User's Manual FCC FCC NOTICE FCC# 138-SGNXPRO Sound Producer Pro Certified compliant with FCC Class B limits, part 15 To meet FCC requirements, shielded cables are required to connect the unit to a Class B certified device “This device complies with Part 15 of the FCC Rules. Operation is subject to the following two conditions: (1) this device may not cause harmful interference, and (2) this device must accept any interference received, including interference that may cause undesired operation.” This equipment generates and uses radio frequency energy and, if not installed and used properly in strict accordance with the manufacturer’s instructions, may cause interference to radio or television reception. This device has been tested and found to comply with the limits for a Class B computing device in accordance with the specifications in Subpart J of Part 15 of FCC Rules, which are designed to provide reasonable protection against such interference in a residential installation. Only equipment (computer input/output devices, terminals, printers, etc.) certified to comply with the Class B limits may be attached to this product. If this equipment causes interference to radio or television reception, which can be determined by turning the equipment off and on, the user is encouraged to try and correct the interference by one or more of the following measures: 1. Reorient the receiving antenna. 2. Relocate the computer with respect to the receiver. 3. Move the computer away from the receiver. 4. Plug the computer into an outlet which resides on a different circuit breaker than the receiver. 5. If necessary, consult your dealer, or an experienced radio or television technician for additional suggestions. You may find the booklet How To Identify and Resolve Radio-TV Interference Problems helpful. It was prepared by the Federal Communications Commission and is available from the U.S. Government Printing Office, Washington, DC 20402. Refer to stock number: 004-000-00345-4. Orchid Technology is not responsible for any radio or TV interference caused by unauthorized modifications to this equipment. It is the responsibility of the user to correct such interference. Operation with non-certified equipment is likely to result in interference to radio and TV reception. The user must use shielded interface cables in order to maintain the product within FCC compliance. Sound Producer Pro User's Manual 117 Index INDEX A AdLib sound standard - 7 Applications DOS - 29 Windows - 71 AT Bus CD-ROM Pin-outs - 114 AT CD connector - 10 B Board diagram - 10 Build Voice Notes Playback Diskette see SINSTALL C CD Player - 32 CD-ROM drive interface - 10 Changing the Address Settings in Windows - 20 in DOS - 23,24 Commands SoundScript - 64 Configuring Mixer for DOS - 59 Monologue - 46 Sound Producer Pro - 24 Sound Standards - 28 Connectors see Board diagram Covox Speech Thing sound standard - 7, 28 Creating a Script - 60 118 Sound Producer Pro User's Manual Index D DB-15 port for joystick/MIDI input - 10 Device Driver - 19 Diagnostics - 21 Disney Sound Source sound standard- 7, 28 DMA Channels - 113 DOS Software Installation - 19 G Guidelines for Creating and Running a Script - 63 Game Port - 10 Game/MIDI Port specifications - 116 H Hardware Test Programs - 21, 22 Help Troubleshooting - 105 I Installation DOS Software - 19 Installing the Sound Producer Pro - 15 Microphone - 10, 16 Microsoft Windows Software - 19, 71 Preparing Your Computer - 11 Preparing your Sound Producer Pro - 12 Interrupt Channels - 113 I/O Port Addresses - 112 Sound Producer Pro User's Manual 119 Index J Joystick port - 10 Jukebox - 79 Adding New Events to a Playlist - 85 CD-ROM Disk Titles - 87 CD-ROM Track Names - 87 Editing a Playlist - 82 Playing a Playlist - 81 Playlist Files Manager - 84 Running Jukebox in the Background - 81 Jumpers Locations of Jumpers - 10 Jumper Settings - 12 Jumpers J1 and J2 (Virtual Parallel Port Selector) - 12 Jumper J4 (Internal Speaker Connector) - 13 Jumper J5 (Speaker Amplification) - 13 Jumper JP1 (CD Audio In) - 13 Jumper JP2 (SCSI Interrupt Selector) - 14 Jumpers SW0 and SW1 (SCSI Address Selector) - 14 Jumpers MIC (MIC BIAS) - 14 L Line input jack - 10 M Microphone input jack - 10 Microsoft Windows Software Installation - 19 MIDI port - 10 Mixer for DOS - 54 Mixer for Windows - 89 Monologue - 45 Changing the Hot Key - 52 Control Keys - 47 Customizing the Dictionary - 52 120 Sound Producer Pro User's Manual Index Modes of Operation - 47 Mouse support - 52 R Running Sound Producer Pro Diagnostics - 21 Running a Script - 61 S SCSI CD-ROM Pin-outs - 115 SCSI CD-ROM Drives - 111 SCSI controller socket - 10 Software Utilities - 19, 21 Sound Master - 36 Edit a Sound Segment - 43 Editing Sound Files - 39 Import File Formats - 38 Sound Producer Pro Board diagram - 10 Configuring - 24 Set Environment - 23 Test Programs - 21, 22 SoundScript - 60 Commands - 64 Sound Standards Configuration- 28 Sound Blaster Pro II - 7 Sound Tracks - 29 Adding Songs - 31 Playing Songs - 30 Speaker output jack - 10 Summary of Jumpers Settings - 11 T Technical Help - 105 Sound Producer Pro User's Manual 121 Index Technical Information - 108 Technical Specifications - 108 Troubleshooting - 105 Disk could not keep up with Digital Audio Rate - 106 Computer locks up.... - 106 Could not load audio driver or.... -107 No sound output during testing - 105 The mouse cursor is jumping all over the screen.... - 107 U Utility Software - 17, 19 V Voice Notes - 72 Build Voice Notes Playback Diskette - 18, 19, 77 Embedding a Message - 77 Playing a Message - 77 Recording a Message - 75 Quick Start - 72 W WinDAT - 92 Auto Auditioning Files - 97 Editing Files - 100 Playing Files - 97 Modifying Files - 102 Recording Files - 98 Rewinding Files - 97 Quick Start - 92 Using WinDAT's Windows Menu - 104 Windows Software - 19, 71 122 Sound Producer Pro User's Manual