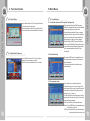
1
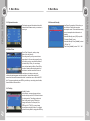
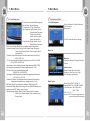
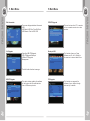
IMPORTANT SAFETY INSTRUCTIONS
product. The safety and operating instructions should be retained for future reference.
All warnings on the product and the operating instructions should be adhered to.
All operating and usage instructions should be followed.
Unplug this product from the wall outlet before cleaning.
Do not use liquid or aerosol cleaners. Use a damp cloth for cleaning and place
the receiver in well ventilated and no-heat environment. Do not use attachments
not recommended by the product manufacture as they may cause hazards.
Do not use this product near water for example, near a bath tub, wash bowl,
kitchen sink or laundry tub, in a wet basement, or near swimming pool, and
the like. Do not place this product on an unstable cart, stand, tripod, bracket, or table.
The product may fall, causing serious injury to a child or an adult and serious
damage to the product. Use only with a cart, stand tripod, bracket, or table
recommended by the manufacturer or sold with the product. Any mounting of the
Product should follow the manufacturer's instructions, and should use a mounting
accessory recommended by the manufacturer.
This apparatus shall not be exposed to dripping or splashing and that no object
filled with liquids, such as vases, shall be placed on the apparatus.
The main plug is used as the disconnect device. The disconnect device shall
IMPORTANT SAFETY INSTRUCTIONS
All the safety and operating instructions should be read before operating this
remain operable.
01
CONTENTS
1. Introduction
2. Controls & Features
2-1 Front Panel
2-2 Rear Panel
2-3 Remote Control Unit(RCU)
3. Connection Diagram of the Receiver
3-1 Connecting to a TV
3-2 Connecting to a HiFi system
3-3 Connecting to a TV with SCART and motorized system (DiSEqC 1.2 / USALS)
4. Function Guide
4-1 Channel Information
4-2 Changing Channels
4-3 Volume Control
4-4 Channel List for TV / Radio / Favorite
4-5 Language
4-6 Zoom
4-7 Teletext
4-8 Subtitles
4-9 Quick Scan
4-10 Quick Edit Channel
1-1 Main Features
120 programmable satellites / 6,000 programmable channels
950~2150 MHz IF range
MCPC/SCPC, C/KU reception
Fully MPEG 2 / DVB compliant
1 LNB input. IF loop through for 2nd receiver
Variable input symbol rate 1 ~ 45Msps
Oscilloscope / spectrum analyzer function for easy signal detection
Easy auto satellite program searching
ManuaI PID scan function
Picture-ln-Graphics function
Multi-Picture(4,9,10,13 or16 pictures) function
Multi language menu
Electronic Program Guide
8 favorite channel group selection / parental lock
Auto NTSC / PAL switching
Teletext suppored by OSD and VBI
RS 232 downloading
Data transfer / receiver-to-receiver and / or PC-to-receiver
DiSEqC version 1.2/1.3 supported
INTRODUCTION
CONTENTS
1. Introduction
1-1 Main Features
1-2 Accessories
5. Main Menu
5-1 Installation
5-2 System Setting
5-3 User Preference
5-4 Advanced Utility
6. New Features
6-1 A / V Selection
7. Troubleshooting
8. Technical Specifications
02
1-2 Accessories
,
User s manual : 1
Remote control unit : 1
Batteries(AAA Type) : 2 pieces
Warranty Card : 1
03
2. Controls & Features
2-1 Front Panel
2-2 Rear Panel
(SR-X7100USB titanium)
(SR-X7100USB titanium )
1 2
1
2 3 4
5
6
7
3
4
5 6
7
8
9
10
11
8
1 Power
To put the receiver in and out of standby mode.
2 Menu
Used to display the main menu.
3 OK
To show TV/Radio channel list and to select a program, highlighted line
or parameter value.
4 EXIT
Use this key return to the viewing mode from any menu function
5 VOL ◄/►
Volume up & down.
6 CH ▲/▼
Channel up & down.
7 Display
Shows channel number, error message,remote control commands and
time in standby mode.
8 To insert Smart Card (Optional)
To connect with USB disk (Optional)
1
2
3
4
5
6
7
8
9
10
11
IF IN: Satellite dish input (F-connector)
IF OUT: IF loop-through output to second receiver
RS-232C serial port: To read and load data information
TV SCART: For connection to a TV
0/12V: For connection to a LCD or PLASMA TV
Audio L / R RCA (phono) connectors: Stereo outputs for connection
to a HiFi system
Video RCA(phono)connector: Composite video output
ANT.IN: For a terrestrial (conventional) TV aeriaI
To TV: For connecting an RF cable to the aerial input of a TV
Mains lead: 100-240V~50 / 60Hz Max. 25W
Power ON / OFF Switch
CONTROLS & FEATURES
CONTROLS & FEATURES
04
2. Controls & Features
05
2. Controls & Features
AUDIO
TV/STB
SLEEP
SUB
TXT
MULTI
P/ N
RECALL
1 .;@
2 ABC
3 DEF
4 GHI
5 JKL
6 MNO
7PQRS
8 TUV
9 WXYZ
PGUP
0
[
2-3 Remote Control Unit (RCU)
TV/R
FAV+
PGDN
SAT
FAVFAV
EPG
CH
V
V
CH
MENU
EXIT
PAUSE
ZOOM
EDIT
INFO
USB
MP3
JPEG
PVR
LIST
PIP
A-B
T. S.
GOTO
R
SR-X7100USB
titanium
06
(MUTE) key: This key switches the sound on and off.
(POWER) key: The power key turns the receiver on and off.
AUDIO key: open the Audio Mode window.
TV/STB key: Switch TV output from STB to VCR Scart.
TV/R key: Selects TV or Radio channels.
SLEEP key: Sleep function in the viewing mode.
SUB key: Used to display the subtitle data.
TXT key: Used to display the Teletext data.
MULTI key: Multi Picture in the viewing mode.
P/N key: display Mode is used to switch the display mode.
RECALL key: toggle between the actual and the last selected channel.
Numeric keys(0-9): Numeric keys enable direct channel selection.
PGUP / PGDN keys: Used to move the highlight bar one page at a time on menu.
It is also used to change the channel up&down 100 channels.
SAT key: Select a satellite.
FAV+ / FAV- keys: switch the favorite channels in current satellite channels list directly.
EPG key: This key show program information about the selected channel.
FAV key: Change to last favorite channels or selects the favorite channels in the channeI list
V◄ / V► key: Used to move the highlight bar or change volume up/dn.
OK key: The OK key is used to select a program, highlight line or parameter value.It is also
used to show the TV/RADIO channel list while watching TV or listening to the RADIO.
CH ▲ / CH ▼ key: Used to move the highlight bar or change channel up/dn.
MENU key: Used to display the main menu.
EXIT key: Use this key return to the viewing mode from any menu function.
PAUSE key: to pause video during viewing normal display but audio remains active.
ZOOM key: Zoom function in the viewing mode.
EDIT key: to access directly to the "TV Channel List" menu.
INFO key: This key is used to display channel information.
USB key: access directly to the "Media Management" menu.
MP3 key: access directly to the "Media List-MP3" menu.
JPEG key: access directly to the "Media List-JPEG" menu.
PVR LIST key: access directly to the "Record List" menu.
PIP key: watch two channels from the transponder at the same time.
A-B key: set A to B and repeat the programs between this two points if no any interruption.
T.S. Key: you will be asked to "Do you want to time shift?" menu.
GOTO key: Jump to input time program.
key: will stop the recorded and want to stop play record.
key: will be asked to "Do you want to record?" Menu.
key: back the program fast
key: fast forward the program.
key: will stop the program and again will play the program continually.
key: the screen will record to the an mark point.
key: the screen will jump to the prior mark point.
key: the screen will jump to the next mark point.
CONTROLS & FEATURES
CONTROLS & FEATURES
2-3 Remote Control Unit (RCU)
2. Controls & Features
07
3. Connection Diagram of the Receiver
3-1 Connecting to a TV
- Connect the SCART lead between the main SCART socket on the TV and the
TV SCART socket on the receiver.
- Connect an RF lead from the To TV output on the receiver to the RF input
socket on the TV.
- Connect the TV aerial to the ANT.IN input socket on the receiver
" To receive high video quality,
please use either component or scart output only "
3-2 Connecting to a HiFi System
- Connect an RCA/Cinch stereo cable from the AUDIO L/R sockets on the
receiver to the LINE, AUX, SPACE or EXTRA input sockets on your HiFi system.
3-3 Connecting to a TV with SCART and Motorized System
(DiSEqC 1.2 / USALS)
- Connect one SCART lead between the main SCART socket on the TV and
the TV SCART socket on the receiver.
- Connect a coaxial cable to the IF IN connector on the receiver and the
other to the REC or receiver connector on the DiSEqC 1.2 / USALS motor.
Note: Please refer to DiSEqC1.2 / USALS connection.
CONNECTION DIAGRAN OF THE RECEIVER
CONNECTION DIAGRAN OF THE RECEIVER
08
" To receive high video quality,
please use either component or scart output only "
3. Connection Diagram of the Receiver
09
4. Function Guide
4-4 Channel List for TV/Radio/Favorite
Every time you change channels, program information will be displayed for a few
seconds.
The information may include:
1) Current time
2) Channel name
3) Current channel number & name, satellite
name & TP information
4) Symbol for CAS, Teletext, Alternate A/V,
EPG, parental lock information
5) Signal meta
6) Program information: Whenever you press
the Info button, the program information
window will appear.
You can change the channel list with the ▲/▼ keys on your RCU or Front panel.
4-2 Changing Channesl
You may change the channel by simply entering the channel number using
your RCU 0~9 keys. Alternately, you may use the ▲/▼ keys on the RCU
and/or the front panel of the receiver.
4-3 Volume Control
To control the volume, use the ◄/► keys on
the RCU.
The volume indicator will show for a few
seconds before automatically disappearing.
10
When you press the OK key, you can directly see the channel list
You can press INFO to switch the channel list
from three colums to one colums.
You can select the channel you would like to
watch by moving the highlighted bar to the
channel of your choice using ▲/▼ and then
pressing the OK key.
You can select the TV or Radio channel list by
using the TV/Redio key.
Use the FAV(grey) key for selecting the favorite
channel list.
Whenever you press the FAV button, the channel mode will be changed
as follows:
Normal→ Favorite 1→ Favorite 2→ Favorite 3→...→Favorite 8→Normal.
FUNCTION GUIDE
FUNCTION GUIDE
4-1 Channel Information
4. Function Guide
[Color Keys]
1) RED (FTA/CAS): When you want to change the channel of FTA and CA system
you want select item and press ok key.
2) GREEN (Satellite List): When you want to change the channel of the satellite
you want, select the satellite and press OK key.
3) YELLOW (Sort): By pressing the yellow key,
you will be able to select the sort method,
either Normal, Alphabetical, or Satellite.
Normal sort shows channels in the order in
which they have been added to the channel
list. Alphabetical sort shows channels in
Alphabetical order. If you select satellite sort,
only the channels on the selected satellite will
be shown, in the order in which they were
added. If you have selected satellite sort and
need to select a channel not on the selected
satellite, you will need to change the sort method before you can select that channel.
After changing the sort method, the channel numbers will likely change to
reflect the new ordering. The sort method may also be changed from the
Edit Channel screen or the EPG screen.
11
4. Function Guide
1.The [Zoom] key allows you to magnify a
certain area on the images and the current
screen will show.
2.Press [Zoom] key again, the image will
enlarge rotate as x1, x2, x4, x6, x8, x12, x16.
3.In “x2~x6” image, using [ ▲/▼◄/►]
keys to move the image center area you
want to see.
4.In zoom mode, press [Exit] to close “Zoom”
window.
When you are finished with multi-picture mode, press OK again, or the EXIT key
to return to the full screen viewing mode or BACK to return to the channel list.
5) Stylish Multi picture: Select stylish Multi picture,
and a current channel will be displayed in the first
box and followed by the next channels in the
successive boxes and also an activated channel
will be displayed in the center. You may change
the activated channel by using left, right keys and
OK key. If you want to lock the channel,
Press info key.
4-7 Teletext
The display of Teletext is based on transmitted
data using the EBU teletext specification and
DVB Bitmap. It is available only when the
current channel carries teletext service data.
VBI insertion mode and OSD (On Screen
Display) mode are supported.
In the VBI insertion mode, which is always on,
can only be viewed on a TV which supports
teletext using your TV's RCU.
In the OSD mode, you can view teletext even though your TV does not support
teletext. To watch teletext in OSD mode, press the button on the RCU.
0~9 : press page number. ◄/► : Page left and right list.
▲/▼ : Page up and down.
, : Page number increase and decrease by 100.
4-5 Language
A language option may appear at install stage
when the receiver finds no channel saved and you
can also choose preferred language from here.
You can choose preferred language by using ,
key Then press OK to confirm. You can also select
language option in the preference menu.
Language will be changed to English / German /
French / Spanish / Italian / Portuguese / Turkish /
Polish / Russian / Danish / Greek / Hungarian /
Arabic / Farsi / Dutch in order.
12
4-6 Zoom
FUNCTION GUIDE
FUNCTION GUIDE
4) BLUE(Multi Pictures): If you press the Blue
key, you will be able to choose between a
4, 9, 13 or 16 pictures display. After making
you selection, the screen will be divided and
the current channel will be displayed in the first
box in the upper-left corner, followed by the next
channels in the successive boxes until the screen
is full. You may then change and view the channel
by using the up, down, left, right keys to highlight
a box with the red box.
4. Function Guide
4-8 Subtitles
If the current channel provides subtitles, you
can see the or symbol indication in the
channel information box. When you want to
view subtitles, press the key on the RCU
and the language selection menu will appear.
Press the OK key to view subtitles after
selecting one of languages in the language
selection menu.
13
4. Function Guide
5-1 Installation
Press Scan button on RCU, and you will be able
to fine the channel very easily.
After selecting the satellite, if you start the Scan,
the channel of the relevant satellite will be found.
4-10 Quick Edit Channel
5-1-1 Installation (Antenna & Transponder Configuration)
This mode will display the LNB Frequency,
DiSEqC and transponder list of current satellite
and can adjust displayed information
for each selected satellite. When you want to
change the satellite, press OK on the Satellite
item cursor and then will display satellite list.
By selecting color Keys you can change to
Satellite Setting (RED), Antenna Positioning
(Green) and Multi Satellite Setup(Yellow) menu.
If you want to start scanning all of transponder
list for selected satellite, press BLUE key
(Search All).
MAIN MENU
FUNCTION GUIDE
4-9 Quick Scan
5. Main Menu
5-1-2 Satellite Setting
By pressing RED key in the Installation menu
will display and can adjust all of the items for
selected satellite.
If you want to go back to installation menu,
press Back key.
Press Edit Ch button on RCU, and you will be
able to edit the channel very easily.
Edit Ch button is workable event In Live mode.
5-1-3 Transponder Setup
14
In this mode you can modify and adjust
Transponder values. If you want to go to this
mode, press OK by moving cursor to bottom of
the screen and search for frequency wish to
change by up (+) / down (-).
You can modify the current frequency value by
pressing OK and use left () right () to find value
item needs to be changed.
Add: Press RED key to add new frequency.
Delete: Press GREEN key to deleted frequency
which have cursor line.
TP Search: Press BLUE key to start searching
of frequency which have cursor line.
15
5. Main Menu
5. Main Menu
5-1-7 Antenna Positioning
When you want edit PID (Packet Identifier) value,
press GREEN key in the Transponder which has
non-DVB standard channels and which only can
be found when you have entered necessary
settings.
You can also add or delete channels by color
keys from specific Transponder,
PCR PID: Enter the PID (Packer Identifier) for
the PCR (Program clock Reference).
Video PID: Enter PID for the video signal.
Audio PID: Enter PID for the audio signal.
5-1-5 Search All (Blue key in Installation menu)
By pressing the BLUE key in the Installation
menu, will search all channels of the satellite
regardless of the frequency.
If you want to stop Search All while search
channels, press RED key.
5-1-6 Multi Satellite Setup
This mode can be accessed by pressing YELLOW
key on the Installation menu. In this mode, you
can modify each satellite's setting value,
satellite list (add, delete, rename or move) and
operate multi satellite search.
RED key (Edit): To Add / Delete / Rename / Move
/Locked
BLUE key (Search All): To start channel searching
of selected all satellite.
16
Antenna Positioning (DiSEqC 1.2)
This mode will allow you to set the antenna
position for each satellite.
In order to use antenna positioning you must
use a motor controlled by DiSEqC 1.2 commands.
To move the antenna, select the desired satellite,
transponder, and step size. Then select Move
Dish and press ◄/► to move the antenna West
or East. If you selected continuous for the step
size, the antenna will move continuously until
you press another key. Once the antenna is
positioned properly, select Command Mode and choose save, then press OK to save
the position. The position number will then be displayed next to the satellite name.
When you want to move the antenna to a saved satellite position, select the satellite,
choose Go To for the Command Mode and press OK. To clear a saved satellite
position select satellite, choose Reset for the Command Mode and press OK.
MAIN MENU
MAIN MENU
5-1-4 PID Edit
Antenna Positioning (USALS)
This mode will allow you to use a DiSEqC 1.3 /
2.3 motor controlled by a USALS (Universal
Satellite Automatic Location System).
To move the antenna, press the OK key to
select the Satellite Position, My Longitude and
My Latitude.
Select Go To 0 and press OK in Command
Mode for Position 0 which, for the polar
positioner, is the imaginary the polar positioner,
is the imaginary point on the geo-stationary orbit of the satellite, which has the same
longitude as the place of installation.
Select Go To Position and press OK in Command Mode to send the Reference
command for the polar positioner which is utilized during re-calibration of the polar
motor function. If you wish to manually control the positioner, use the Step Size and
Move Dish commands to move the antenna.
17
5. Main Menu
5-2 System Setting
5-2-1 Edit Channel
The factory set password is 000000.
From these menus you can create and edit
channel lists. You can create a favorite channel
list, delete, rename and arrange the order of the
channels within the lists.
The TV list can contain hundreds of channels.
By creating your own favorite list, you can make
channel handling a bit more convenient or by
factory default.
Move Channels
In this mode you can arrange the sequence of
channels within your lists.
1) Select the channel you want to move using
the ▲/▼ keys.
2) Press the GREEN key to select the Move mode.
The right side of the highlighted channel will
change to indicate Move mode has been
selected. You can move more than one channel
at one time by marked.
3) Press ▲/▼ keys again to move the channel.
4) When the channel is in the desired position,
press OK to confirm the move.
Delete Channels / Delete Channel Groups
/ Delete All
In this mode you can delete individual channels
or channel groups or all channels from within your
lists.
Please note: Channels deleted in this way will be
permanently deleted. The only way to get them
back is to perform a new channel search.
1) Select the channel you wish to delete using
the ▲/▼ keys.
2) Press A-Z button to mark a channel for deleting.
3) Select Delete Mode by pressing the Red Key.
4) Select Selected Channel or All Channels by using the ▲/▼ keys.
5) Confirm the deletion by pressing the OK keys or else press the BACK or EXIT key if
you wish to cancel the operation.
Rename channels
Within any of your favorite lists you can rename
the channels. Mark the channel you want to
rename and press the YELLOW key.
The rename dialog box will then appear and let
you modify the existing name.
1) Select the specific channel which you want
to change the name of.
2) Press the YELLOW key on your RCU to
display rename mode.
3) Enter the characters (A…Z, 0…9) one-by-one using the ▲/▼◄/► keys.
4) Press the OK key for typing.
5) Press the YELLOW (Skip) key to make a space between characters.
6) Press the RED key if you wish to delete a character.
7) Press the GREEN (save) key to save the name.
MAIN MENU
MAIN MENU
18
5. Main Menu
Sort
See the page 11
(4-4 Channel list for TV/Radio/Favorite)
Channel Lock / Favorite
Pressing INFO key will select lock mode and
release.
If you turn on the favorite attribute the channel
will be added to your favorite list.
You can make favorite channel groups by press
FAY.
Normal Favorite1 - Favorite2... - Favorite8 Normal
19
5. Main Menu
5. Main Menu
5-2-3 Time Adjustment
Parental Control
In the parental control menu, you can set the
censorship classification or change the PIN
code. From the factory the default access PIN
code is set to 000000.
You can set On/Off by pressing left(◄) or
right(►).
The following settings can be altered from this
menu.
1) Menu lock: Only available SYSTEM SETTING
and INSTALLATION.
2) Channel lock: If you turn the lock attribute on by pressing the ◄/► keys, the
channel will only be viewable after you enter a password. This feature is useful to
prevent young viewers from watching inappropriate channels.
3) Scramble lock: If you turn the lock attribute on by pressing the ◄/► keys, the pay
channels will only be viewable after you enter a password.
4) Satellite lock: If you turn the lock attribute on by pressing the ◄/► keys, all the
channels under this satellite will only be viewable after you enter a password.
Automatic Update: This item is used to set the
time by using the time signal from the satellite.
Press ◄/► to change the setting.
“Date Setting” and “Current Time” items are
only available when the “Automatic Update”
is set to “OFF”. Press ◄/► to select one item
and use number buttons to input time and date
directly.
The “Automatic Update” item is only available
when “Automatic Update” is set to “ON”. Press
◄/► to set the “Automatic Update” value.
With every time you press the button the time offset will be increased/decreased by
half an hour.
Summer: Press ◄/► to switch this function “On” or “Off”.
Time Display: Press ◄/► to switch this function “On” or “Off”.NOTE: If the
current channel provides the correct time information, you will see the
current time after you entered “Local Time Setting” menu. If the channel doesn't
provide time information, you have to input the date and time information manually.
The most channels support the time signal.
Press [BACK] to leave the “Time” menu.
Change Password
From here you can change the access Password
from the standard 000000.
DO NOT FORGET IT. Without it you do not have
access to any of the functions where the code
is required.
To change the new access password, enter the
new password number and press ok.
You will then need to confirm your new password
by entering it once more and press ok.
20
MAIN MENU
MAIN MENU
5-2-2 Parental Control
5-2-4 Default Setting
In the default setting mode, you will be asked
to confirm your desire to clear all settings to
the factory default or not. Default channel
list will replace the existing channel list with
the factory default channel list. All satellite
and transponder lists will be set to the factory
default as will the user preference settings.
When you are ready to confirm setting the
system to the factory default, Press the OK
key. If you press the BACK key, the function
will be cancelled and return to the system
Installation menu.
21
5. Main Menu
5. Main Menu
5-2-8 Automatic Standby
This displays general information about which
hardware and software version your receiver is
running on.
Low Power Consumption: At this option, you
could Enable / Disable the low power
consumption mode. This mode allows saving
current consumption when the receiver is
stand-by.
Automatic Standby: press [OK] to open the
“Automatic Standby” menu.
Automatic Standby: Press [Vol◄/►] to select
“Off” and “On”.
Time: Press [Vol◄/►] to select “1hr” ~ “8hr”.
MAIN MENU
MAIN MENU
5-2-5 System Information
5-2-6 Event Timer
Event Type: Change ch, wake up, sleep.
Mode: once, daily, weekly
Press the green key, and you can add more
reservation list. You can change event type by
left / right key, and you can select the channel
in channel list by OK key. You can change
once, daily and weekly in Mode. Press OK key
in mode or duration after adjusting date, time
and channel, and the reservation is done. In
case that mode is sleep or change ch,
confirmation window appears and informs before 1 minute to be reserved all
reservation lists need the reserved time after 1 minute from now on. Select the EPG
list in Tip program guide and press RED key, and then you can simply enter the date,
time and channel into event timer.
5-2-7 Hot Key
Hot Key Function
In this function, user can change color keys
and function keys on the RCU for their functions
(In viewing mode). The setting can be made
from hot key menu by using OK button to
change the functions. For example, if the
RED key is for FTA/CAS, you can change
to event timer using this function. If you want to
go back to factory default, simply press RED key.
22
23
5. Main Menu
From here you can access the Menu Language,
First Audio Lang, Second Audio Lang,
TV screen format, TV Type, Video Output..
- Menu Language: English, German, French,
Spanish, Italian, Portuguese,
Turkish, Polish, Russian,
Danish, Greek, Hungarian,
Arabic, Farsi and Dutch.
- First Audio Lang: English, German, French,
Spanish, Italian, Portuguese,
Turkish, Polish, Russian, Danish, Greek, Hungarian, Arabic, Farsi and Dutch.
- Second Audio Lang: English, German, French, Spanish, Italian, Portuguese,
Turkish, Polish, Russian, Danish, Greek, Hungarian, Arabic,
Farsi and Dutch.
- TV Screen Format: Select the type of television screen format you have (Auto,
4:3PS, 4:3LB, 16:9)
- TV Type: Select the type of television screen type you have.(Auto, PAL, PAL-M,
APL-N, NTSC3.58, NTSC4.43)
- Video Output: Is use for switching the screen aspect ratio mode. (RGB, CVBS)
- RF Channel is use for switching the screen aspect ratio mode. ( 21-69)
- R F Audio Type: is used to switch the display mode.
(PAL-BG, PAL-I, PAL-DK, NTSC)
- Transparency: With this parameter you can set the transparency of the menus.
(10%, 20%, 30%, 40%, Off)
- Channel Info Timeout: This setting determines the duration the info window is
displayed on the screen when you change channels. (1 to 10)
LNB Power: Here you can set the power output to the LNB. (ON and OFF)
Press the Left / Right (◄/►) button to change the value, OK/BACK Button to go to
previous menu and EXIT button to go to full screen.
- Subtitle Language: English, German, French, Spanish, Italian, Portuguese,
Turkish, Polish, Russian, Danish, Greek, Hungarian, Arabic,
Farsi and Dutch.
5-4 Advanced Utilit
5-4-1 DVR Management
Select the Media List, Media Control and
Disk Information
Management.
The offer further functions to manage.
MAIN MENU
MAIN MENU
24
5-3 User Preference
5. Main Menu
Media List
will display and can adjust all of the items for.
Media list:
Folder / Mp3 (Music List) / Image (Picture List)
/ Record
Adjust function:
Rename / Delete / Move / New Folder /
Add play list / Find / Play / Lock / Copy /
To set the image as background
Media Control
Record Type: MPEG / Original TS
Reserved TMS Size: 0 / 200MB / 500MB
Jump Step Value: 1Min / 3Min / 5Min /
10Min / 15Min
Disk: C: / D: / E: .........
Format HDD: This process will delete what
you have made with Backup tools.
25
5. Main Menu
5. Main Menu
STB-STB Upgrade
The screen displays data about the current
HDD.
HDD Model / HDD Size / Time Shift Size /
HDD Remain / Files In HDD / HDD
5-4-2 Upgrade
This can be done from PC to receiver
or from a master receiver to a slave
receiver.
MAIN MENU
MAIN MENU
Disk Information
Backup to USB
Select the USB-STB Upgrade,
STB-STB Upgrade, Backup to
USB and OTA Upgrade
Management.
This function allows you Dump
Software and Ch.List & Setting fo
the receiver to external hard drives.
The offer further functions to manage.
USB-STB Upgrade
OTA Upgrade
This option allows updating the software
of the receiver with the received data
from a USB memory device.
26
This function can upgrade the
software of your receiver through
data sent by a satellite.
27
5. Main Menu
6-1 A/V Selection
5-4-3 Smart Card
In this option, you can find information about
the conditional access system. If there is no
card or it is placed incorrectly, information
about "No card", “Unknown" will be showed
on the screen. With a FELEC-CAS card,
information about the card will be showed.
Note: Card must be inserted with chip in
upper side.
Press Blue key in the viewing mode, and you can adjust the setting of Audio / Video.
Audio
Alternate Video: select the video channel in case that several video channels input.
Output Mode: select the audio output mode among stereo (LR), Mono (LL) and Mono
(RR) Alternate Audio: select the audio channel in case that several audio channels input.
Video
Display Mode: Select the type of television screen type you have Auto, PAL, PAL-M,
APL-N, NTSC3.58, NTSC4.43.
TV Screen Format: adjust the screen format among Auto, 4:3PS, 4:3LB, 16:9.
Video Output: adjust the video output RBG and CVBS.
VCR Loopthroug: adjust the VCR loopthroug STB Master and VCR Master.
NEW FEATURES
MAIN MENU
28
6. New Features
29
7. Troubleshooting
8. Technical Specifications
Problem
Possible causes
What to do
*The display on the front
panel does not light up.
*Main cable is not connected. *Check that the main cable
is plugged into the power
socket
*No sound or picture.
*Wrong connection of the
video / audio output to the
TV input terminal.
*Wrong connection of
satellite antenna cable.
*Wrong direction of
satellite antenna.
*Connect two terminals
correctly with a SCART
cable or RCA or RF cable.
*Connect the antenna cable
correctly.
*Adjust the direction of
antenna.
*No signal or weak signal.
*Check the cable connections
LNB and other equipment
connected between the LNB
and the receiver or adjust
the antenna.
*Type the setting value
correctly.
*Black-and-White screen
or V-Hold problem
*Wrong setting of channel
information in System
Installation Menu.
*Your TV mode is different
from satellite broadcasting
mode.
*Use TV of same mode. Use
a NTSC / PAL converter
connected to the receiver TV.
A/V & Data In / Out
TV SCART: Output (CVBS, RGB, Audio R / L)
VIDEO OUT: 1×RCA Cinch
AUDIO OUT: 2×RCA Cinch
RS232C: Transfer rate 115, 200 bps / 9 pin D-sub Type
Power Supply
Input Voltage: 100 - 240V ~ 50 / 60Hz
Type: SMPS
Power consumption: Max. 25W
Standby Power: 8W
Protection: Separate internal fuse.
The input should have lightning Protection
Physical Specification
Size (W*D*H): 260 * 210 * 55mm
Weight (Net): Approximately 1.5 Kg
Operating Temp: 0°C to + 45°C
Storage Temp: -10°C to + 70°C
Storage Humidity: 5%~ 95% RH (Non-Condensing)
TECHNICAL SPECIFICATIONS
TROUBLESHOOTING
There may be various reasons for abnormal operation of the unit. Therefore, if the
unit dies not work properly, check the unit according to the procedures shown in
the table below.
RF Modulator
*The RCU is not working
30
*Battery exhausted.
*Change the batteries.
*Fluorescent light interfering *Switch off the light.
with the remote controller.
*RCU is incorrectly aimed
*Aim the RCU at the receiver.
Connector: 75 IEC 1 69 2, Male / Female
Frequency: 470MHz to 860MHz
Output Channel: Ch21 ~ 69 for the Demodulator
TV Standard: PAL G / I / K, NTSC M selectable by Menu Setting
Pre - Set Channel: Channel 36 (or TBD)
31
8. Technical Specifications
Input Connector: F-type, IEC 169 24, Female
Frequency Range: 950MHz to 2150MHz
Input Impedance: 750hm or 75 . Unbalanced
Signal Level: -25 to -65dBm
LNB Power & Polarization: Vertical ±13V / Horizontal ±1 8V
Current: 500mA Max overload Protection
22KHz Tone: Frequency -22KHz ± 4KHz
Amplitude: 0.6V ± 0.2V
DiSEqC Control: Version 1.0 / 1.2 / 1.3 compatible
Demodulation: QPSK
Input Symbol Rate: 1-45 Ms / s
FEC Decoder: Convolutional Code Rate 1/2, 2/3, 3/4, 5/6 and 7/8
with constraint Length K=7
MPEG Transport Stream A/V Decoding
MPEG Transport Stream A/V Decoding
Transport ~ Stream: MPEG-2 ISO / IEC 13818
Transport ~ Stream: Specification
Profile Level: MPEG-2 MP @ ML
Input Rate: 100 Mbit/s Max
Aspect Ratio: 4:3, 16:9
Video Resolution: 720×576(PAL) / 720×480 (NTSC)
Audio Decoding: MPEG / MusiCam Layer l & ll
Audio Mode: Single channel / Dual channel joint stereo / Stereo
Sampling: 32, 44.1 and 48KHZ
Memory
Main Processor: NEC UPD61217 (32bit @ 284MIPS)
Flash Memory: 2 Mbyte
Program DRAM: 32 Mbyte
32
MEMO
TECHNICAL SPECIFICATIONS
Tuner & Channel
MEMO
MEMO
MEMO
MEMO
MEMO
MEMO
MEMO