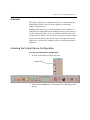
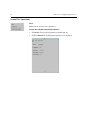
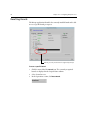
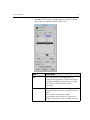
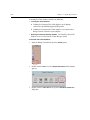
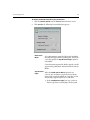
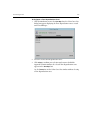
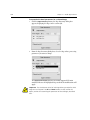
1
OutputOperationsFCV.fm Page 1 Monday, March 4, 2002 10:55 AM User Guide English Brisque Part 4 Output Operations version 4.0 399Z1R390B www.creo.com OutputOperationsFCV.fm Page 2 Monday, March 4, 2002 10:55 AM Copyright Copyright © 2002 Creo Inc. All rights reserved. No copying, distribution, publication, modification, or incorporation of this document, in whole or part, is permitted without the express written permission of Creo. In the event of any permitted copying, distribution, publication, modification, or incorporation of this document, no changes in or deletion of author attribution, trademark legend, or copyright notice shall be made. No part of this document may be reproduced, stored in a retrieval system, published, used for commercial exploitation, or transmitted, in any form by any means, electronic, mechanical, photocopying, recording, or otherwise, without the express written permission of Creo Inc. This document is also distributed in Adobe Systems Incorporated's PDF (Portable Document Format). You may reproduce the document from the PDF file for internal use. Copies produced from the PDF file must be reproduced in whole. . ................................................................................................... Trademarks The Creo wordmark, Creo logo, and the names of the Creo products and services referred to in this document are trademarks of Creo Inc. Adobe, Acrobat, the Acrobat logo and PDF are registered trademarks of Adobe Systems Inc., and are registered in the US Patents and Trademark Office and may be registered in other jurisdictions. Apple, AppleTalk, AppleShare, EtherTalk, LocalTalk, Macintosh, and Laserwriter are trademarks of Apple Computer Inc. Microsoft, Microsoft Windows NT, Microsoft Windows 2000, and Windows are trademarks or registered trademarks of Microsoft Corp. Xerox is a registered trademark of Xerox Corp. Other brand or product names are the trademarks or registered trademarks of their respective owners. . ................................................................................................... FCC Compliance The Creo equipment referred to in this document complies with the requirements in Part 15 of FCC Rules for a Class A computing device. Operation of the Creo equipment in a residential area may cause unacceptable interference to radio and TV reception, requiring the operator to take whatever steps are necessary to correct the interference. . ................................................................................................... Limitation of Liability The product, software or services are being provided on an "as is" and "as available" basis. Except as may be stated specifically in your contract, Creo Inc. expressly disclaims all warranties of any kind, whether express or implied, including, but not limited to, any implied warranties of merchantability, fitness for a particular purpose and noninfringement. You understand and agree that Creo Inc. shall not be liable for any direct, indirect, incidental, special, consequential or exemplary damages, including but not limited to, damages for loss of profits, goodwill, use, data or other intangible losses (even if Creo has been advised of the possibility of such damages), resulting from: (i) the use or the inability to use the product or software; (ii) the cost of procurement of substitute goods and services resulting from any products, goods, data, software, information or services purchased; (iii) unauthorized access to or alteration of your products, software or data; (iv) statements or conduct of any third party; (v) any other matter relating to the product, software, or services. The text and drawings herein are for illustration and reference only. The specifications on which they are based are subject to change. Creo Inc. may, at any time and without notice, make changes to this document. Creo Inc., for itself and on behalf of its subsidiaries, assumes no liability for technical or editorial errors or omissions made herein, and shall not be liable for incidental, consequential, indirect, or special damages, including, without limitation, loss of use, loss or alteration of data, delays, or lost profits or savings arising from the use of this document. .. . . . . . . . . . . . . . . . . . . . . . . . . . . . . . . . . . . . . . . . . . . . . . . . . . . . . . . . . . . . . . . . . . . . . . . . . . . . . . . . . . . . . . . . . . . . . . . . . . . . Patents This product is covered by one or more of the following U.S. patents: 4456924 4500919 4558302 4743091 4992864 5049901 5079721 5103407 5111308 5113249 5122871 5124547 5132723 5150225 5153769 5155782 5157516 5208818 5208888 5247174 5247352 5249067 5283140 5291273 5296935 5313278 5323248 5325217 5331439 5333064 5339176 5343059 5355446 5359451 5359458 5367360 5367388 5384648 5384899 5412491 5412737 5420702 5420722 5459505 5473733 5481379 5488906 5497252 5508828 5509561 5517359 5519852 5526143 5532728 5561691 5568595 5576754 5579115 5592309 5594556 5600448 5608822 5615282 5625766 5636330 5649220 5650076 5652804 5691823 5691828 5696393 5699174 5699740 5708736 5713287 5739819 5742743 5764381 5771794 5785309 5802034 5813346 5818498 5854883 5861904 5861992 5864651 5875288 5894342 5900981 5934196 5942137 5946426 5947028 5958647 5966504 5969872 5973801 5986819 5995475 5996499 5998067 6003442 6014471 6016752 6031932 6043865 6060208 6063528 6063546 6072518 6090529 6096461 6098544 6107011 6112663 6115056 6121996 6130702 6134393 6136509 6147789 6158345 6159659 6164637 6180325 6181362 6181439 6186068 6189452 6191882 6204874 6208369 6252522 6260482 .. . . . . . . . . . . . . . . . . . . . . . . . . . . . . . . . . . . . . . . . . . . . . . . . . . . . . . . . . . . . . . . . . . . . . . . . . . . . . . . . . . . . . . . . . . . . . . . . . . . . Creo Inc. 3700 Gilmore Way Burnaby, B.C., Canada V5G 4M1 Tel: (1) (604) 451-2700 Fax: (1) (604) 437-9891 http://www.creo.com .. . . . . . . . . . . . . . . . . . . . . . . . . . . . . . . . . . . . . . . . . . . . . . . . . . . . . . . . . . . . . . . . . . . . . . . . . . . . . . . . . . . . . . . . . . . . . . . . . . . . 399Z1R390B Table of Contents 38 Configuring Output Devices 1 Overview .................................................................................................................................................. 2 Accessing the Output Device Configuration .............................................................................................. 2 The Output Device Handling Window....................................................................................................... 3 Configuring Platesetters ........................................................................................................................... 6 Configuring a Lotem Platesetter......................................................................................................... 6 Lotem Platesetter Operations ........................................................................................................... 12 Configuring a Lotem 800 Quantum Platesetter ................................................................................ 16 Lotem 800 Quantum Operations ..................................................................................................... 20 Configuring a Trendsetter Platesetter............................................................................................... 20 Trendsetter Platesetter Operations ................................................................................................... 24 Configuring Imagesetters ....................................................................................................................... 27 Configuring a Dolev Imagesetter...................................................................................................... 27 Dolev Imagesetter Operations .......................................................................................................... 31 Configuring Proofers .............................................................................................................................. 34 Configuring an Iris Proofer............................................................................................................... 34 Iris Proofer Operations ..................................................................................................................... 36 Configuring Imposition Proofers ............................................................................................................. 39 Configuring an Imposition Proofer ................................................................................................... 39 Improof Operations ......................................................................................................................... 42 Configuring Halftone Proofers ................................................................................................................ 45 Configuring a Lotem Spectrum Halftone Proofer.............................................................................. 45 Lotem Spectrum Halftone Proofer Operations .................................................................................. 48 Configuring a Trendsetter Spectrum Halftone Proofer...................................................................... 51 Trendsetter Spectrum Halftone Proofer Operations .......................................................................... 54 Configuring a Kodak XP4 Halftone Proofer ...................................................................................... 57 Kodak XP4 Halftone Proofer Operations .......................................................................................... 63 Configuring Screen2Go .......................................................................................................................... 67 Screen2Go Operations..................................................................................................................... 72 Resetting Boards..................................................................................................................................... 74 39 Calibrating Output Devices 75 Dolev Calibration.................................................................................................................................... 76 Resolution Intensity Calibration........................................................................................................ 76 Lotem Calibration................................................................................................................................... 86 Laser Intensity Test........................................................................................................................... 86 Excurve Calibration................................................................................................................................. 92 Making a Test Exposure ................................................................................................................... 93 Creating the Excurve........................................................................................................................ 95 Verifying an Excurve ...................................................................................................................... 102 Modifying an Excurve .................................................................................................................... 104 Attaching the Appropriate Excurve to a Production Workflow........................................................ 105 Table of Contents Part 4 - Output Operations Optional Excurve Calibration Parameters........................................................................................ 109 Tone Reproduction ............................................................................................................................... 112 Launching the Application ............................................................................................................. 113 Creating a Tone Reproduction Curve ............................................................................................. 114 Modifying a Tone Reproduction Curve........................................................................................... 123 Deleting a Tone Reproduction Curve ............................................................................................. 123 Exiting the Application................................................................................................................... 123 40 Screen Sets 125 Overview .............................................................................................................................................. 126 Screen Types ........................................................................................................................................ 127 Traditional ..................................................................................................................................... 127 Class ............................................................................................................................................. 127 Semi-traditional ............................................................................................................................. 127 TurboScreen .................................................................................................................................. 128 Screening File Name Conventions ......................................................................................................... 129 Traditional Screen Set Name Conventions ...................................................................................... 129 Class Screen Set Name Conventions .............................................................................................. 130 FULLtone Screen Set Name Conventions ........................................................................................ 131 Semi-Traditional Screen Set Name Conventions ............................................................................. 131 TurboScreen Set Name Conventions .............................................................................................. 132 Staccato Screen Set Names............................................................................................................ 133 Creating a Screen Set ........................................................................................................................... 134 Basic Screen Set Parameters ................................................................................................................. 138 Defining the Exposure Resolution .................................................................................................. 138 Adding a User Comment to the File Name ..................................................................................... 139 Defining the Base Separation Parameters ....................................................................................... 140 Defining Class Screening FULLtone Parameters .............................................................................. 145 Defining the Parameters for Additional Separations ....................................................................... 148 Advanced Screen Set Parameters .......................................................................................................... 152 Defining Dot Shape Parameters ..................................................................................................... 155 Continuous Screening ................................................................................................................... 157 Defining the Laser Intensity............................................................................................................ 157 Adjusting the Spinner Speed.......................................................................................................... 158 Modifying a Screen Set......................................................................................................................... 159 Deleting a Screen Set ........................................................................................................................... 160 41 Press Format 161 Overview .............................................................................................................................................. 162 Accessing the Press Format Feature ...................................................................................................... 163 Creating a Custom Press Format........................................................................................................... 164 Modifying an Existing Press Format....................................................................................................... 167 Deleting a Press Format ........................................................................................................................ 168 Table of Contents 42 Exposing To Film iii 169 Overview .............................................................................................................................................. 170 Launching the Expose Application ........................................................................................................ 171 Arranging Separations .......................................................................................................................... 175 Defining Layout Parameters ........................................................................................................... 175 Examples - Exposure to 8-up Imagesetter....................................................................................... 180 Designating a Screen Set ...................................................................................................................... 183 Defining Punch Parameters................................................................................................................... 186 Creating Page Marks ............................................................................................................................ 189 Printing Slugs ....................................................................................................................................... 191 Designating an Excurve......................................................................................................................... 192 Customizing the Expose Parameters for Selected Pages ........................................................................ 193 Additional Expose Parameters............................................................................................................... 195 Black Frame/Short Feed.................................................................................................................. 198 Designating a Tone Reproduction Curve ........................................................................................ 200 Separation Handling ...................................................................................................................... 201 Exiting from the Application ................................................................................................................. 206 43 Exposing to Plate 207 Overview .............................................................................................................................................. 208 Launching the Plate Expose Application ................................................................................................ 209 Designating a Screen Set ...................................................................................................................... 213 Printing Labels/Slugs ............................................................................................................................. 216 Printing the Plate ID ....................................................................................................................... 216 Printing Slugs................................................................................................................................. 217 Assigning the Press Format ................................................................................................................... 219 Defining the Image Alignment ....................................................................................................... 220 Defining the Image Offset.............................................................................................................. 221 Selecting the Punch Parameters ..................................................................................................... 221 Assigning the Plate Set ......................................................................................................................... 224 Designating an Excurve......................................................................................................................... 226 Designating a Tone Reproduction Curve ............................................................................................... 227 Plate Load and Plate Unload Policies ..................................................................................................... 228 Additional Plate Expose Parameters ...................................................................................................... 229 Separation Handling ...................................................................................................................... 231 Customizing the Plate Expose Parameters for Pages or Layouts ............................................................. 235 Printing Selected Layouts ...................................................................................................................... 238 Exiting the Plate Expose Application...................................................................................................... 239 44 Screen2Go 241 Overview .............................................................................................................................................. 242 Launching the Application .................................................................................................................... 243 Arranging Layouts ................................................................................................................................ 247 Editing the Single Layout Parameters ............................................................................................. 247 Table of Contents Part 4 - Output Operations Defining the Output ............................................................................................................................. 250 Defining the Media Set.................................................................................................................. 250 Assigning Image to Media ............................................................................................................. 250 Creating Labels.............................................................................................................................. 252 Designating a Screen Set ...................................................................................................................... 253 Designating an Excurve ........................................................................................................................ 255 Designating a Tone Reproduction Curve ............................................................................................... 256 Separations Handling ........................................................................................................................... 257 Swapping screen parameters between separations ........................................................................ 257 Customizing Parameters for Selected Layouts or Pages ......................................................................... 259 Defining File Name and Location .......................................................................................................... 262 45 Create File 263 Overview .............................................................................................................................................. 264 Launching the Application.................................................................................................................... 264 Creating a Test File ............................................................................................................................... 267 Modifying a Test File ............................................................................................................................ 269 Viewing a Test File................................................................................................................................ 270 46 Lotem 800V Spectrum 271 Overview .............................................................................................................................................. 272 Launching the Application.................................................................................................................... 273 Media Tab............................................................................................................................................ 274 Exposure Tab........................................................................................................................................ 276 Layout Tab ........................................................................................................................................... 279 Screening Tab ...................................................................................................................................... 284 Separations Tab.................................................................................................................................... 286 Blue Line ....................................................................................................................................... 288 Previewing the Proofing Parameters ..................................................................................................... 289 Customizing Proof Parameters for Selected Segments .......................................................................... 290 Exiting the Application ......................................................................................................................... 291 47 TS Spectrum 293 Overview .............................................................................................................................................. 294 The Proof Media............................................................................................................................ 294 Launching the Application.................................................................................................................... 295 Selecting Layout Mode ......................................................................................................................... 300 Editing the Layout Parameters ....................................................................................................... 301 Designating a Screen Set ...................................................................................................................... 305 Spot Color Handling ...................................................................................................................... 307 Assigning a Tone Reproduction Curve .................................................................................................. 311 Defining Output Parameters ................................................................................................................. 312 Output Color Order ....................................................................................................................... 312 Output Media Parameters.............................................................................................................. 312 Table of Contents v Creating Labels..................................................................................................................................... 315 Customizing Proof Parameters for Selected Segments........................................................................... 316 Layout Inventory ............................................................................................................................ 316 Page Inventory............................................................................................................................... 318 48 Iris Controller 319 Introduction ......................................................................................................................................... 320 Monitor View ....................................................................................................................................... 321 Print View............................................................................................................................................. 321 Main View............................................................................................................................................ 322 49 Color2Disk 323 Typical Workflow.................................................................................................................................. 324 Defining the Color2Disk Parameters ..................................................................................................... 325 Defining the ICC Profiles................................................................................................................ 327 Convert Black Using....................................................................................................................... 328 Spot Color Handling ...................................................................................................................... 329 Selecting Specific Pages for Transformation ................................................................................... 329 Backup Handling ........................................................................................................................... 331 50 Kodak Approval 333 Introduction ......................................................................................................................................... 334 Selecting a Page Layout ........................................................................................................................ 336 Designating the Whisper Format........................................................................................................... 337 Whisper Format Options vs. Brisque Options.................................................................................. 337 Defining the Fitting Parameters............................................................................................................. 339 Proof Area ..................................................................................................................................... 340 Fitting............................................................................................................................................ 340 Defining a Label ................................................................................................................................... 342 Customizing Selected Pages ................................................................................................................. 342 Printing Selected Reader Spreads or Layouts ......................................................................................... 342 Exiting the Application.......................................................................................................................... 343 51 Kodak Approval XP4 345 Introduction ......................................................................................................................................... 346 The Proofing Process ............................................................................................................................ 348 Configuring Kodak Approval XP4 via PC Workstation .......................................................................... 349 Recipe Spot Color Database.................................................................................................................. 349 Using Recipe Spot Color Library ..................................................................................................... 349 Activating Color Database ............................................................................................................. 349 Creating a Kodak Recipe Color to Match a Spot Color ................................................................... 355 Generating a Proof ............................................................................................................................... 365 Selecting Page Layout Mode .......................................................................................................... 367 Table of Contents Part 4 - Output Operations Defining Layout-Specific Parameters .............................................................................................. 368 Working with Screen Sets.............................................................................................................. 373 Tone Reproduction Curves............................................................................................................. 376 Recipe Spot Color Handling ........................................................................................................... 378 Output Color Order ....................................................................................................................... 382 Defining Output and Geometry Parameters ................................................................................... 383 Creating Labels.............................................................................................................................. 387 Customizing Selected Pages .......................................................................................................... 389 Printing Selected Pages and Reader Spreads .................................................................................. 392 Submitting the Job to the Kodak Approval XP4 .................................................................................... 394 Appendix A. Adding a New Donor ....................................................................................................... 395 Kodak Donor Types Supported by Brisque ..................................................................................... 395 Adding a New Donor..................................................................................................................... 396 52 Combine 399 Configuring Output Devices Accessing the Output Device Configuration ........................................2 The Output Device Handling Window .................................................3 Configuring Platesetters......................................................................6 Configuring Imagesetters..................................................................27 Configuring Proofers.........................................................................34 Configuring Imposition Proofers........................................................39 Configuring Halftone Proofers...........................................................45 Configuring Screen2Go.....................................................................67 Resetting Boards ...............................................................................74 2 Chapter 38 – Configuring Output Devices Overview This chapter explains how to configure output devices from the Brisque, including how to define and view various parameters for Brisquesupported output devices. Handling of all output devices is basically identical. After each device is configured, the configuration may be modified or deleted, and each device may be reconfigured. All the devices are configured similarly with some exceptions due to differences in specific device parameters and operations. Despite some redundancy, this manual details the configuration of each output device separately, for simplicity and ease of navigation within the document. Accessing the Output Device Configuration To access the Output Device Configuration: 1. From the Launch Pad, open the Setup panel. Setup Panel 2. Double-click the Devices icon. The Output Devices Handling window appears. The Output Device Handling Window 3 The Output Device Handling Window All configurations of the output devices are performed from the Output Devices Handling window . New devices are configured, currently configured devices modified or deleted, and previously configured devices are reconfigured periodically. All the device groups and families, and the device configurations are displayed in this window, as well as the operations of each of the selected configurations. All device operations are accessed via the operation buttons in the Operations section. Device Section Collapse or Expand Configured Device (default) Operations Section 4 Chapter 38 – Configuring Output Devices Item Description Device Section The section is comprised of three columns: Device Type - displays the device groups such as platesetter, imagesetter, proofer, imposition proofer and halftone proofer. The list of device families appears under each group, such as Lotem and Trendsetter for the platesetter group, Lotem Spectrum, Trendsetter Spectrum and Kodak for the halftone proofer group. Each level is expandable or collapsible, using the triangular button on the left. Logical Name - displays the name of a specific configuration. When highlighted, relevant operations are enabled (in the Operations section). Model - displays the physical device name. Expand or Collapse icon Expand or collapse the entire list of devices. New... Initiate the New Device wizard for configuring a new output device. Modify... Modify parameters for an existing output device. Delete Delete an established output device configuration. Reconfigure Reestablish the connection to the selected device. Operations section Operations relevant to the output devices are accessed from here and are enabled when a particular configuration is selected. Some operations are connection-specific, others are applicable to all output devices. The Output Device Handling Window 5 Item Description Set as Default Sets the default device, when the device is configured more than once (alternative parameters such as TCP/ IP address can be used in different configurations). The default device appears in green and is automatically selected when performing operations relevant to the device. This option is relevant only when the platform supports more than one device configuration. Exit Exit the Output Devices Configuration window. 6 Chapter 38 – Configuring Output Devices Configuring Platesetters Configuring a Lotem Platesetter To check if a Lotem platesetter is configured: 1. In the Output Devices Handling window, click the arrow left of the Platesetter icon. 2. Click the arrow left of the Lotem icon. If a Lotem is configured, the connection to the Brisque appears under the Lotem icon, green when default. Important: No more than one Lotem is permitted. Certain Lotem platesetters are dual purpose devices. In addition to functioning as a platesetter, the device can function as a halftone proofer. (See Configuring a Lotem Spectrum Halftone Proofer on page 45). To configure a new Lotem platesetter: Note: To configure the Lotem 800 Quantum platesetter, see page 16. 1. Make sure the Lotem PC Controller application is running. Configuring Platesetters 7 2. In the Output Devices Handling window, click New.... The following window appears. 3. In the Logic Name box, type a logical name. 4. From the Device Group list box select PlateSetter. The Device Family list box is labeled Lotem. 5. In the TCP/IP address box, type the device address (for example: 192.9.100.2). 8 Chapter 38 – Configuring Output Devices 6. Click Next. If more than one TSP boards are mounted on the Brisque, the following window appears. Configuring Platesetters 9 7. From the Screen Board list box, select a TSP board then click Save. If the selected screen board is in use, a warning dialog appears, halting the device configuration to enable another board selection. If the configuration is successful, a device summary appears. 8. Click Save to save the configuration. If the connection was successful, a confirming message appears for a few seconds. The connection appears in the Output Devices Handling window, under the Lotem icon. 10 Chapter 38 – Configuring Output Devices To modify the Lotem platesetter parameters: 1. From the Output Devices Handling window, select the Lotem platesetter configuration and click Modify.... The following window appears. Configuring Platesetters 11 2. Change the TCP/IP address as required and click Next. If more than one TSP boards are mounted on the Brisque, the following window appears. 3. Select a TSP board from the Screen Board list box and click Save. If the selected screen board is in use, a warning dialog appears, halting the device configuration to enable another board selection. If the update was successful, a confirmation message appears for a few seconds. The modified connection appears in the Output Devices Handling window, under the Lotem icon. To delete the Lotem platesetter configuration: 1. From the Output Devices Handling window, select the Lotem platesetter configuration, then click Delete. The delete confirmation appears. 2. Click Yes in the confirmation dialog to delete. The configuration is removed from the Output Devices Handling window. 12 Chapter 38 – Configuring Output Devices To Reconfigure the Lotem platesetter: 1. From the Output Devices Handling window, select the Lotem platesetter configuration. 2. Click Reconfigure. The Brisque reads the data from the device and confirms the connection. It displays a confirmation dialog for a few seconds and stores the information in its database, if the device has been reconnected. Otherwise, a failure message appears. Important: In case of failure, check the physical connection to the device, then try to reconfigure. When a device is configured, the data is read and registered in the Brisque database. There is currently no warning mechanism if the device is disconnected or a component failed. Therefore, it’s recommended to reconfigure the device before every use. If problem persists, contact the local service center. Lotem Platesetter Operations View Enables you to view the device parameters, set in the PC Controller database. If the Lotem PC Controller application is not running, the Brisque displays data from the previous configuration. To view the selected Lotem parameters: 1. Click View. The Lotem parameters window appears. Configuring Platesetters 13 2. Click the General tab. The connection parameters are displayed. 3. Click the Media tab. A list of plate sets in the connected device appears. The currently installed plates, with plate size and thickness, are displayed in the text box. 14 Chapter 38 – Configuring Output Devices 4. Click the Parameters tab. Exposure parameters, maximum actual size, length, width, resolution and the installed punch system, are displayed. 5. Click OK to exit. Press Format See Chapter 41, Press Format. Lotem Calibration See Chapter 39, Calibrating Output Devices, Lotem Calibration on page 86. Excurve Calibration See Chapter 39, Calibrating Output Devices, Excurve Calibration on page 92. Tone Reproduction See Chapter 39, Calibrating Output Devices, Tone Reproduction on page 112. Configuring Platesetters 15 Screen Set See Chapter 40, Screen Sets. Reset Screen Board When the exposure process hangs for any reason, as may be indicated by the waiting message in the Process Indicator, you must reset the screen board (TSP or VLSI) in order to release and restore it to Ready state. Reset screen board is intended for troubleshooting only, and it is not recommended for use during an active normal process. Resetting the screen board will cause the process to stop, corrupting the film or plate currently being processed. In some cases, it can cause the system to freeze, which will require you to reboot the station. To reset a device screen board: ¾ From the Output Devices Handling window, select the device and click Reset Screen Board. (For additional information on resetting the screen boards, see Resetting Boards on page 74). 16 Chapter 38 – Configuring Output Devices Configuring a Lotem 800 Quantum Platesetter Based on the Lotem 800, the Lotem 800 Quantum is equipped with a new thermal head (TH2). The new head produces square dots instead of round dots, and the resolution is fixed to either 2400 or 2540 dpi (94.48819 dpm or 100 dpm, depending on the installed thermal head). The Lotem 800 Quantum is driven by the Brisque by two Turbo Screen Processor boards for a higher throughput. To configure a new Lotem 800 Quantum platesetter: 1. Make sure the Lotem PC Controller application is running. 2. In the Output Devices Handling window, click New.... The following window appears. 3. In the Logic Name box, type a logical name. 4. From the Device Group list box select PlateSetter. The Device Family list box is labeled Lotem. 5. In the TCP/IP address box, type the device address (for example: 149.115.54.80). Configuring Platesetters 17 6. Click Next. A device summary appears. The Device Type is identified as LotemQuantum. 7. Click Next. The following window appears. 18 Chapter 38 – Configuring Output Devices 8. Select TSP0 for the first screen board and TSP1 for the second board (default) settings and click Save, to save the configuration. If the connection was successful, a confirming message appears for a few seconds. The Lotem 800 Quantum configuration appears in the Output Devices Handling window, under the Lotem icon. Note: When a TSP board becomes problematic, you can configure the device with a single TSP board, which dramatically reduces the productivity, and therefore is not recommended. To modify the Lotem 800 Quantum platesetter parameters: 1. From the Output Devices Handling window, select the Lotem platesetter configuration and click Modify.... The following window appears. LotemQuantum is listed as the Device Model name. 2. Change the TCP/IP address as required. Configuring Platesetters 19 3. Click Next. The following window appears. 4. Click Next. The following window appears. You may now select Disabled from the Screen Board list box, if you want to operate with a single board. 20 Chapter 38 – Configuring Output Devices 5. Click Save, to save the configuration. If the update was successful, a confirmation message appears for a few seconds. The modified connection appears in the Output Devices Handling window, under the Lotem icon. To reconfigure, delete or reset the Lotem 800 Quantum configuration: ¾ Follow the instructions for the Lotem platesetter. (See page 11). Lotem 800 Quantum Operations The main difference in the Lotem 800 Quantum operations, compared to the Lotem platesetter, is that the Lotem Calibration operation is not available Configuring a Trendsetter Platesetter To check if a Trendsetter platesetter is configured: 1. In the Output Devices Handling window, click the arrow left of the Platesetter icon. 2. Click the arrow left of the Trendsetter icon. If a Trendsetter is configured, the connection to the Brisque appears under the Trendsetter icon, green when default. Important: The Trendsetter is a dual purpose device. In addition to functioning as a platesetter, the device can function as a halftone proofer. (See Configuring a Trendsetter Spectrum Halftone Proofer on page 51). To configure a New Trendsetter platesetter: 1. Make sure the Print Console application is running on the PC Controller. Configuring Platesetters 21 2. In the Output Devices Handling window, click New.... The following window appears. 3. In the Logic Name box, type a logical name. 4. From the Device Group list box select PlateSetter. The Device Family list box is labeled Trendsetter. 5. In the TCP/IP address box, type the device address (for example: 192.9.100.2). 22 Chapter 38 – Configuring Output Devices 6. Click Next. If the selected screen board is in use, a warning dialog appears, halting the device configuration to enable another board selection. If the configuration is successful a device summary appears. 7. Click Save, to save the configuration. If the connection was successful, a confirmation message appears for a few seconds. The connection appears in the Output Devices Handling window, under the Trendsetter icon. Configuring Platesetters 23 To modify the Trendsetter platesetter parameters: 1. From the Output Devices Handling window, select the Trendsetter platesetter configuration and click Modify.... The following window appears. Note: No specific Trendsetter model can be configured. The specific device model name shown in the dialog is not selected when configuring a new device. The information comes from the device itself and therefore cannot be changed. 2. Change the TCP/IP address, as required. 3. Click Next. If the selected screen board is in use, a warning dialog appears, halting the device configuration to enable another board selection. If the new configuration was successful a device summary appears. 4. Click Save, to save the modification. If the update was successful, a confirmation message appears for a few seconds. The connection appears in the Output Devices Handling window, under the Trendsetter icon. 24 Chapter 38 – Configuring Output Devices To delete the Trendsetter platesetter configuration: 1. From the Output Devices Handling window, select the Trendsetter platesetter configuration, then click Delete. The delete confirmation appears. 2. Click Yes. The configuration is removed from the Output Devices Handling window. To Reconfigure the Trendsetter platesetter: 1. From the Output Devices Handling window, select the Trendsetter platesetter configuration. 2. Click Reconfigure. The Brisque reads the data from the device and confirms the connection. It displays a confirmation dialog for a few seconds, if the device has been reconnected. Otherwise, a failure message appears. Important: In case of failure, check the physical connection to the device, and then try to reconfigure. If problem persists, contact the local service center. Trendsetter Platesetter Operations View Enables you to view the device parameters, set in the PC Controller database. To view the selected Trendsetter parameters: 1. Click View. The Trendsetter parameters window, containing three tabs, appears. Configuring Platesetters 25 2. Click the General tab. The configuration parameters are displayed. 3. Click the Media tab. A list of plate sets in the connected device appears. The currently installed plates, and each size and thickness are displayed in the text box. 26 Chapter 38 – Configuring Output Devices 4. Click the Parameters tab. Exposure parameters, maximum actual size, length, width, resolution and the installed punch system, are displayed. 5. Click OK to exit. Press Format See Chapter 41, Press Format. Excurve Calibration See Chapter 39, Calibrating Output Devices, Excurve Calibration on page 92. Tone Reproduction See Chapter 39, Calibrating Output Devices, Tone Reproduction on page 112. Screen Set See Chapter 40, Screen Sets. Reset Screen Board See Reset Screen Board on page 15. Configuring Imagesetters 27 Configuring Imagesetters Configuring a Dolev Imagesetter To check if a Dolev imagesetter is configured: 1. In the Output Devices Handling window, click the arrow left of the Imagesetter icon. 2. Click the arrow left of the Dolev icon. If a Dolev is configured, the connection to the Brisque appears directly under the Dolev icon, green when default. Important: No more than one Dolev device is permitted. To configure a new Dolev imagesetter: 1. In the Output Devices Handling window, click New.... The following window appears. 2. In the Logic Name box, type a logical name. 3. From the Device Group list box select Imagesetter. The Device Family list box is labeled Dolev. 28 Chapter 38 – Configuring Output Devices 4. Select a TSP or a VLSI board from the Screen Board list box (TSP0 or TSP1). 5. Click Next. If the selected screen board is in use, a warning dialog appears, halting the device configuration to enable another board selection. If the configuration is successful a device summary appears. 6. Click Save to save the configuration. If the connection was successful, a confirmation message appears for a few seconds. The connection appears in the Output Devices Handling window, under the Dolev icon. Configuring Imagesetters 29 To modify the Dolev imagesetter parameters: 1. From the Output Devices Handling window, select the Dolev imagesetter configuration and click Modify.... The following window appears. Note: The specific device model name shown in the dialog is not selected when configuring a new device. The information comes from the device itself and therefore cannot be changed. 2. From the Screen Board list box, select a TSP board (only if two boards are installed on the Brisque). 30 Chapter 38 – Configuring Output Devices 3. Click Next. If the selected screen board is in use, a warning dialog appears, halting the device configuration to enable another board selection. If the new configuration is successful a device summary appears. 4. Click Save to save the modification. If the update was successful, a confirmation message appears for a few seconds. The connection appears in the Output Devices Handling window, under the Dolev icon. To delete the Dolev imagesetter configuration: 1. From the Output Devices Handling window, select the Dolev imagesetter configuration, then click Delete. The delete confirmation appears. 2. Click Yes to delete. The configuration is removed from the Output Devices Handling window. Configuring Imagesetters 31 To reconfigure the Dolev imagesetter: 1. From the Output Devices Handling window, select the Dolev imagesetter configuration. 2. Click Reconfigure. The Brisque reads the data from the device and confirms the connection. It displays a confirmation dialog for a few seconds, if the device has been re-connected. Otherwise, a failure message appears. Important: In case of failure, check the physical connection to the device, then try to reconfigure. If problem persists, contact the local service center. Dolev Imagesetter Operations View Enables you to view the device parameters, set in the database. To view the selected Dolev parameters: 1. Click View. The Dolev parameters window appears. 2. Click the General tab. Configuration parameters are displayed. 32 Chapter 38 – Configuring Output Devices 3. Click the Media tab. The media type (film), size, quantity (in running meters), thickness, and the Resolution Intensity table are displayed. The delivery system (cassette) appears graphically. The currently used cassette is represented in black, the others are represented in gray. Use the Cassette list box to select a cassette and display its content. Configuring Imagesetters 33 4. Click the Parameters tab. Exposure parameters, maximum actual size, length, width, resolution and the installed punch system, are displayed. 5. Click OK to exit. Calibration See Chapter 39, Calibrating Output Devices, Dolev Calibration on page 76. Tone Reproduction See Chapter 39, Calibrating Output Devices, Tone Reproduction on page 112. Screen Set See Chapter 40, Screen Sets. Reset Screen Board See Reset Screen Board on page 15. 34 Chapter 38 – Configuring Output Devices Configuring Proofers Configuring an Iris Proofer To check if an Iris proofer is configured: ¾ In the Output Devices Handling window, click the arrow left of the Proof icon. If an Iris is configured, the connection to the Brisque appears under the Iris icon, green when default. Note: The Iris proofer is a SCSI connected device. Multiple Iris proofers are daisy-chained. Up to 2 Iris proofers can be connected to a Brisque. To configure a new Iris proofer: 1. In the Output Devices Handling window, click New.... The following window appears. 2. In the Logic Name box, type a logical name. Configuring Proofers 35 3. From the Device Group list box, select Proof. The Device Family list box is labeled Iris. If more than one device is connected via the SCSI, select a device from the Devices box. Important: The proofer transmits the device information as soon as it is physically connected to the Brisque. Once a logical name is selected it cannot be removed. 4. Click Next. If any problems are encountered with the connecting SCSI a warning dialog appears, halting the device configuration to enable reconnecting. If the configuration is successful, a device summary appears. 5. Click Save to save the configuration. If the connection was successful, a confirmation message appears for a few seconds. The connection appears in the Output Devices Handling window, under the Proof icon. To modify the Iris proofer parameters: Important: The Proofer configuration cannot be modified. When a Proofer is selected, the Modify button is disabled in the Output Devices Handling window. 36 Chapter 38 – Configuring Output Devices To delete the Iris proofer configuration: 1. From the Output Devices Handling window, select the Iris proofer configuration, then click Delete. The delete confirmation appears. 2. Click Yes to delete. The configuration is removed from the Output Devices Handling window. To reconfigure the Iris proofer: 1. From the Output Devices Handling window, select the Iris proofer configuration. 2. Click Reconfigure. The Brisque reads the data from the device and confirms the connection. if the device has been re-connected, a confirmation dialog appears for a few seconds. Otherwise, a failure message appears. Important: In case of failure, check the physical connection to the device, then try to reconfigure. If problem persists, contact the local service center. To set a device configuration as default: Important: This option is relevant only when the platform supports multi device configuration. 1. Select an Iris configuration, displayed in black. 2. Click Set as Default. The selected Iris configuration appears in green. Iris Proofer Operations View Enables you to view the device parameters, set in the Iris. To view the selected Iris parameters: 1. Click View. The Iris parameters window, containing two tabs, appears. Configuring Proofers 37 2. Click the General tab. Configuration parameters are displayed. 3. Click the Parameters tab. Proof parameters such as height, width and resolution (dpm or dpi), are displayed. 4. Click OK to exit. 38 Chapter 38 – Configuring Output Devices Proof Sets See Brisque Proof User Guide, Chapter 3, Proofer Sets. Color Sets See Brisque Proof User Guide, Chapter 5, DCP Color Sets. Proof Calibration See Brisque Proof User Guide, Chapter 5, DCP Color Sets. Configuring Imposition Proofers 39 Configuring Imposition Proofers Configuring an Imposition Proofer To check if an Imposition Proofer is configured: ¾ In the Output Devices Handling window, click the arrow left of the Improof icon. If an Improof is configured, the connection to the Brisque appears under the Improof icon, green when default. Note: Additional imposition proofing devices that are configured are displayed in black. To configure a new Imposition Proofer: 1. In the Output Devices Handling window, click New.... The following window appears. 2. In the Logic Name box, type a logical name. 3. From the Device Group list box, select Improof. 4. From the Device Family list box, select a family. 40 Chapter 38 – Configuring Output Devices 5. 6. From the Device Model list box, select a model. Device Family Device Model HP Improof 650C Improof 1050CP Improof 2000CP Improof 3000CP Improof 650C Improof 650C Iriswide Iriswide 43 Iriswide 62 ENCAD NovaJet Pro 50 Gerber IMPRESS IMPRESS 2000 Select Parallel Port or TCP/IP address, as the data communication method. If TCP/IP is selected, type the device address in the TCP/IP address box (for example: 192.9.100.2) Note: The Parallel Port is a direct connection and does not require a TCP/IP address. 7. Click Next. If the configuration was successful a device summary appears. 8. Click Save to save the configuration. If the connection was successful, a confirmation message appears for a few seconds. The connection appears in the Output Devices Handling window, under the Improof icon. Configuring Imposition Proofers 41 To modify the Imposition proofer parameters: 1. From the Output Devices Handling window, select the Imposition proofer configuration and click Modify.... The following window appears. 2. Select TCP/IP address or Parallel Port, depending on the device installation. 3. Click Next. If the new configuration was successful a device summary appears. 4. Click Save to save the modification. If the update was successful, a confirmation message appears for a few seconds. The Output Devices Handling window displays the connection under the Improof icon. To delete the Imposition proofer configuration: 1. From the Output Devices Handling window, select the Imposition proofer configuration, then click Delete. The delete confirmation appears. 2. Click Yes to delete. The configuration is removed from the Output Devices Handling window. 42 Chapter 38 – Configuring Output Devices To reconfigure the Imposition proofer: 1. From the Output Devices Handling window, select the Imposition proofer configuration. 2. Click Reconfigure. The Brisque reads the data from the device and confirms the connection. It displays a confirmation dialog for a few seconds, if the device has been re-connected. Otherwise, a failure message appears. Important: In case of failure, check the physical connection to the device, then try to reconfigure. If problem persists, contact the local service center. To set a device configuration as default: Important: This option is relevant only when the platform supports multi device configuration. 1. Select an Improof configuration, displayed in black. 2. Click Set as Default. The selected Improof configuration appears in green. Improof Operations View Enables you to view the device parameters, set in the PC Controller database. To view the selected Improof parameters: 1. Click View. The proofer parameters window appears. Configuring Imposition Proofers 43 2. Click the General tab. Configuration parameters are displayed. 3. Click the Parameters tab. Color and B&W Print Quality resolutions are displayed. 4. Click OK to exit. 44 Chapter 38 – Configuring Output Devices Tone Reproduction See Chapter 39, Calibrating Output Devices, Tone Reproduction on page 112. Configuring Halftone Proofers 45 Configuring Halftone Proofers Configuring a Lotem Spectrum Halftone Proofer To check if a Lotem Spectrum halftone proofer is configured: 1. In the Output Devices Handling window, click the arrow left of the Halftone Proof icon. 2. Click the arrow left of the Lotem Spectrum icon. If a Lotem Spectrum is configured, the connection to the Brisque appears under the Lotem Spectrum icon, green when default. To configure a new Lotem Spectrum halftone proofer: 1. Make sure the Lotem PC Controller application is running. 2. To connect a new Lotem Spectrum click New. The following window appears. 3. In the Logic Name box, type a logical name. 46 Chapter 38 – Configuring Output Devices 4. From the Device Group list box select Half Tone Proof. The Device Family list box is labeled Lotem Spectrum. 5. In the TCP/IP address box, type the device address (for example: 192.9.100.2). 6. Click Next. If the selected screen board is in use, a warning dialog appears, halting the device configuration. If the connection was successful, a device summary appears. 7. Click Save to save the configuration. If the connection was successful, a confirmation message appears for a few seconds. The connection appears in the Output Devices Configuration window, under the Lotem Spectrum icon. Configuring Halftone Proofers 47 To modify the Lotem Spectrum halftone proofer parameters: 1. From the Output Devices Handling window, select the Lotem Spectrum halftone proofer configuration and click Modify.... The following window appears. 2. Change the TCP/IP address as required. 3. Click Next. If the selected screen board is in use, a warning dialog appears, halting the device configuration to enable another board selection. If the new configuration was successful a device summary appears. 4. Click Save to save the modification. If the update was successful, a confirmation message appears for a few seconds. The connection appears in the Output Devices Handling window, under the Lotem Spectrum icon. To delete the Lotem Spectrum halftone proofer configuration: 1. From the Output Devices Handling window, select the Lotem Spectrum halftone proofer configuration, then click Delete. The delete confirmation appears. 2. Click Yes to delete. The configuration is removed from the Output Devices Handling window. 48 Chapter 38 – Configuring Output Devices To reconfigure the Lotem Spectrum halftone proofer: 1. From the Output Devices Handling window, select the Lotem Spectrum halftone proofer configuration. 2. Click Reconfigure. The Brisque reads the data from the device and confirms the connection. It displays a confirmation dialog for a few seconds, if the device has been re-connected. Otherwise, a failure message appears. Important: In case of failure, check the physical connection to the device, then try to reconfigure. If problem persists, contact the local service center. Lotem Spectrum Halftone Proofer Operations View Enables you to view the device parameters, set in the PC Controller database. If the Lotem PC Controller application is not running, the Brisque displays data from the previous configuration. To view the selected Lotem parameters: 1. Click View. The Lotem Spectrum parameters window appears. Configuring Halftone Proofers 49 2. Click the General tab. Configuration parameters are displayed. 3. Click the Media tab. The media set containing the list of donors loaded in the device, the vendor name and max. image size are displayed. 50 Chapter 38 – Configuring Output Devices 4. Click the Parameters tab. The resolution range of the expose (60-140 dpi) appears. 5. Click OK to exit. Press Format See Chapter 41, Press Format. Lotem Calibration See Chapter 39, Calibrating Output Devices, Lotem Calibration on page 86. Excurve Calibration See Chapter 39, Calibrating Output Devices, Excurve Calibration on page 92. Tone Reproduction See Chapter 39, Calibrating Output Devices, Tone Reproduction on page 112. Screen Set See Chapter 40, Screen Sets. Configuring Halftone Proofers 51 Reset Screen Board See Reset Screen Board on page 15. Configuring a Trendsetter Spectrum Halftone Proofer To check if a Trendsetter Spectrum halftone proofer is configured: 1. In the Output Devices Handling window, click the arrow left of the Halftone Proof icon. 2. Click the arrow left of the Trendsetter Spectrum icon. If a Trendsetter Spectrum is configured, the connection to the Brisque appears under the Trendsetter Spectrum icon, green when default. Important: No more than one Trendsetter device is permitted. Important: The Trendsetter is a dual purpose device. In addition to functioning as a halftone proofer, the device can function as a platesetter. (See Configuring a Trendsetter Platesetter on page 20). To configure a new Trendsetter Spectrum halftone proofer: 1. Make sure the Print Console application on the PC Controller, is running. 2. In the Output Devices Handling window, click New.... The following window appears. 52 Chapter 38 – Configuring Output Devices 3. In the Logic Name box, type a logical name. 4. From the Device Group list box select Half Tone Proof. The Device Family list box is labeled “Trendsetter Spectrum”. 5. In the TCP/IP address box, type the device address (for example: 192.9.100.2). 6. Click Next. If the selected screen board is in use, a warning dialog appears, halting the device configuration to enable another board selection. If the connection was successful a device summary appears. 7. Click Save to save the configuration. If the connection was successful, a confirmation message appears for a few seconds. The connection appears in the Output Devices Handling window, under the Trendsetter Spectrum icon. Configuring Halftone Proofers 53 To modify the Trendsetter Spectrum halftone proofer parameters: 1. From the Output Devices Handling window, select the Trendsetter Spectrum halftone proofer configuration and click Modify.... The following window appears. Note: The specific device model name shown in the dialog is not selected when configuring a new device. The information comes from the device itself and therefore cannot be changed. 2. Change the TCP/IP address as required. 3. Click Next. If the selected screen board is in use, a warning dialog appears, halting the device configuration to enable another board selection. If the new configuration was successful a device summary appears. 4. Click Save to save the modification. If the update was successful, a confirmation message appears for a few seconds. The Output Devices Handling window displays the connection under the Trendsetter Spectrum icon. 54 Chapter 38 – Configuring Output Devices To delete the Trendsetter Spectrum halftone proofer configuration: 1. From the Output Devices Handling window, select the Trendsetter Spectrum halftone proofer configuration, then click Delete. The delete confirmation window appears. 2. Click Yes to delete. The configuration is removed from the Output Devices Handling window. To reconfigure the Trendsetter Spectrum halftone proofer: 1. From the Output Devices Handling window, select the Trendsetter Spectrum halftone proofer configuration. 2. Click Reconfigure. The Brisque reads the data from the device and confirms the connection. It displays a confirmation dialog for a few seconds, if the device has been re-connected. Otherwise, a failure message appears. Important: In case of failure, check the physical connection to the device, then try to reconfigure. If problem persists, contact the local service center. Trendsetter Spectrum Halftone Proofer Operations View Enables you to view the device parameters, set in the PC Controller database. To view the selected Trendsetter Spectrum parameters: 1. Click View. The Trendsetter Spectrum parameters window, containing three tabs, appears. Configuring Halftone Proofers 55 2. Click the General tab. Configuration parameters are displayed. 3. Click the Media tab. A list of media sizes, each with its list of donors, appears. 56 Chapter 38 – Configuring Output Devices 4. Click the Parameters tab. Exposure parameters such as height, width and resolution of the proof, are displayed. 5. Click OK to exit. Tone Reproduction See Chapter 39, Calibrating Output Devices, Tone Reproduction on page 112. Screen Set See Chapter 40, Screen Sets. Reset Screen Board See Reset Screen Board on page 15. Configuring Halftone Proofers 57 Configuring a Kodak XP4 Halftone Proofer To check if a Kodak XP4 halftone proofer is configured: 1. In the Output Devices Handling window, click the arrow left of the Halftone Proof icon. 2. Click the arrow left of the Kodak icon. If a Kodak XP4 is configured, the connection to the Brisque appears under the Kodak icon, green when default. Important: No more than one KodakXP4 is permitted. To configure a new Kodak XP4 halftone proofer: 1. Make sure the Approval XP application, on the PC Host, is running. 2. In the Output Devices Handling window, click New.... The following window appears. 3. In the Logic Name box, type a logical name. 4. From the Device Group list box select Half Tone Proof. The Device Family list box is labeled Kodak. 5. In the TCP/IP address box, type the PC Host address (for example, 192.9.100.2). 58 Chapter 38 – Configuring Output Devices 6. Select a TSP board from the Screen Board list box (TSP0 or TSP1). 7. Click Next. If the selected screen board is in use, a warning dialog appears, halting the device configuration to enable another board selection. If the connection was successful a device summary appears. Configuring Halftone Proofers 59 8. Click Next. The following window appears. Kodak provides several variations for the basic colors of CMYK, Euro Yellow, Euro Cyan and Euro Magenta. The following window lists conflicting process colors. For example, Yellow and Euro Yellow. 9. Choose between the conflicting process colors, one of which will be chosen as a process donor (for example: between Yellow and Euro Yellow). 10. Click Save to save the configuration. If the connection was successful, a confirmation message appears for a few second. The connection appears in the Output Devices Handling window, under the Kodak icon. 60 Chapter 38 – Configuring Output Devices To modify the Kodak XP4 halftone proofer parameters: 1. From the Output Devices Handling window, select the Kodak XP4 halftone proofer configuration and click Modify.... The following window appears. 2. From the Screen Board list box, select a screen board as required (only if two boards are installed on the Brisque). Configuring Halftone Proofers 61 3. Click Next. If the selected screen board is in use, a warning dialog appears, halting the device configuration to enable another board selection. If the new configuration was successful a device summary appears. 62 Chapter 38 – Configuring Output Devices 4. Click Next. The following window appears. Kodak provides several variations for the basic colors of CMYK, Euro Yellow, Euro Cyan and Euro Magenta. The following window lists conflicting process colors. For example, Yellow and Euro Yellow. 5. Select between the conflicting process colors and click Save, to save the modification. If the update was successful, a confirmation message appears for a few seconds. The Output Devices Handling window displays the connection under the Kodak icon. To delete the Kodak XP halftone proofer configuration: 1. From the Output Devices Handling window, select the Kodak XP halftone proofer configuration, then click Delete. The delete confirmation window appears. 2. Click Yes to delete. The configuration is removed from the Output Devices Handling window. Configuring Halftone Proofers 63 To reconfigure the Kodak XP4 halftone proofer: 1. From the Output Devices Handling window, select the Kodak XP4 halftone proofer configuration. 2. Click Reconfigure. The Brisque reads the data from the device and confirms the connection. It displays a confirmation dialog for a few seconds, if the device has been re-connected. Otherwise, a failure message appears. Important: In case of failure, check the physical connection to the device, then try to reconfigure. If problem persists, contact the local service center. Kodak XP4 Halftone Proofer Operations View Enables you to view the device parameters, set in the PC Host database. To view the selected KodakXP4 parameters: 1. Click View. The KodakXP4 parameters window appears. 2. Click the General tab. Configuration parameters are displayed. 64 Chapter 38 – Configuring Output Devices 3. Click the Media tab. All the available donors defined on the PC Controller, including the additional colors, are displayed. Configuring Halftone Proofers 65 4. Click the Parameters tab. Exposure parameters such as height, width and resolution, are displayed. 5. Click OK to exit. Test The SAD (Solid Area Density) calibration is used to improve the operation of the Kodak Approval XP4 lasers and correct the drift in the density values, in order to enhance donor image quality. A test file, residing on the Kodak Approval XP4 PC, is proofed and the proof is measured by a spectrophotometer. The shift in the density values of the various donors is then entered to the Kodak database to calibrate the lasers. For complete information on the SAD calibration see the Kodak Approval XP4 Digital Color Proofing System User Manual. Tone Reproduction See Chapter 39, Calibrating Output Devices, Tone Reproduction on page 112. 66 Chapter 38 – Configuring Output Devices Screen Set See Chapter 40, Screen Sets. Reset Screen Board See Reset Screen Board on page 15. Configuring Screen2Go 67 Configuring Screen2Go Screen2Go is an application simulating an output device (logical device). Using an input Brisque job, Screen2Go creates an output file in a standard TIFF format (G4, LWZ or Pac Bit) sending it to the disk. Any output device that accepts standard TIFF G4, TIFF LWZ or Pac Bit TIFF files may run the Screen2Go output file. Since Screen2Go is defined as an output process, it must be configured as an output device. To check if a Screen2Go is configured: 1. In the Output Devices Handling window, click the arrow left of the Platesetter icon. 2. Click the arrow left of the Screen2Go icon. If a Screen2Go is configured, the connection to the Brisque appears under the Screen2Go icon, green when default. Note: Any additional configured Screen2Go devices are displayed in black. To configure a new Screen2Go: 1. In the Output Devices Handling window, click New.... The following window appears. 68 Chapter 38 – Configuring Output Devices 2. In the Logic Name box, type a logical name. 3. From the Device Group list box select Screen2Go. The Device Family list box is labeled Screen2Go. 4. Select a TSP board from the Screen Board list box (TSP0 or TSP1). 5. Click Next. The following window appears. If the selected screen board is in use, a warning dialog appears, halting the device configuration to enable another board selection. 6. Type the exposure sizes in the appropriate Size boxes. Type the resolution range in the To and From boxes. Select Orientation (Normal or Rotate 90). 7. Click Save to save the configuration. If the device was successfully configured, a confirmation message appears for a few seconds. The connection appears in the Output Devices Handling window, under the Screen2Go icon. Configuring Screen2Go 69 To modify the Screen2Go parameters: 1. From the Output Devices Handling window, select the Screen2Go configuration and click Modify.... The following window appears. 2. From the Screen Board list box, select a TSP board (only if two boards are installed on the Brisque). 70 Chapter 38 – Configuring Output Devices 3. Click Next. The following window appears. 4. Change the exposure sizes, resolution range and orientation parameters, as required. 5. Click Save, to save the configuration. If the new configuration was successful, a confirmation message appears for a few seconds. The connection appears in the Output Devices Handling window, under the Screen2Go icon. To delete the Screen2Go configuration: 1. From the Output Devices Handling window, select the Screen2Go configuration and click Delete. The delete confirmation appears. 2. Click Yes to delete. The configuration is removed from the Output Devices Handling window. Configuring Screen2Go 71 To reconfigure the Screen2Go configuration: 1. From the Output Devices Handling window, select the Screen2Go configuration. 2. Click Reconfigure. The Brisque reads the data from the device and confirms the connection. It displays a confirmation dialog for a few seconds, if the device has been re-connected. Otherwise, a failure message appears. Important: In case of failure, check the physical connection to the device, then try to reconfigure. If problem persists, contact the local service center. To set a device configuration as default: Important: This option is relevant only when the platform supports multi device configuration. 1. Select a Screen2Go configuration, displayed in black. 2. Click Set as Default. The selected Screen2Go configuration appears in green. 72 Chapter 38 – Configuring Output Devices Screen2Go Operations View Enables you to view the device parameter To view the selected Screen2Go parameters: 1. Click View. The Screen2Go parameters window appears. 2. Click the General tab. Configuration parameters are displayed. Configuring Screen2Go 73 3. Click the Parameters tab. Exposure parameters such as height, width and resolution of the plate, are displayed. 4. Click OK to exit. Screen Set See Chapter 40, Screen Sets. Reset Screen Board See Reset Screen Board on page 15. 74 Chapter 38 – Configuring Output Devices Resetting Boards The Brisque application identifies the currently installed board and is able to reset a specific board per request. Boards, presently installed and recognized by Brisque To reset a specific board: 1. Click the arrow left of the Boards icon. The currently recognized boards are displayed in the Logical Name column. 2. Select a board to reset. 3. In the Operations section, click Reset Board. Calibrating Output Devices Dolev Calibration ..............................................................................76 Lotem Calibration .............................................................................86 Excurve Calibration ...........................................................................92 Tone Reproduction ..........................................................................112 76 Chapter 39 – Calibrating Output Devices Dolev Calibration This chapter describes how to calibrate your Dolev imagesetter. The calibrations are performed before using the imagesetter for the first time, and for periodic verification of output quality. You can create and save different calibration tables (curves) for different types of media (different vendors, different sensitivities, and so on). The Resolution Intensity calibration sets the proper laser intensity for each resolution. Perform this calibration the first time the Dolev imagesetter is used, and every time that there is a change in media or processing. We recommend that you perform this calibration periodically, to ensure the quality of the exposed output. Important: You must calibrate the Resolution Intensity before creating an Excurve. Resolution Intensity Calibration To calibrate the Resolution Intensity: 1. From the Launch Pad, open the Setup panel and double click the Devices icon. The Output Devices Handling window appears. 2. From the Output Devices Handling window, click the triangular button next to ImageSetters, then select a Dolev configuration. The device operations are enabled. Dolev Calibration 77 3. Click Calibration. The Calibration window appears. Item Description Quick Test Generates a Resolution Intensity test at resolutions 60, 80, 100, 120, and 140, based on the existing parameters in the Resolution Intensity table of the connected output device. (When the connected imagesetter is a Dolev 800, each cassette generates a test.) Resolution: From, To - define the range (minimum, maximum) of resolutions to be calibrated. (The density values can be set in dpi or dpm.) # Steps - defines the number of resolution steps to be tested between the minimum and maximum set in the From and To boxes. 78 Chapter 39 – Calibrating Output Devices Item Description Intensity: From, To - define the intensity range (minimum, maximum.) Increment - defines the exposure steps between intensities. Decrease per Resolution - defines the decrease of intensity per resolution step to compensate for overlapping Halo effect with each increased intensity. Use this box when you are calibrating the optimum Resolution Intensity for several resolutions, to obtain strips which are closer to the target values. This is mainly a time saving feature. Options... Choose the size of the test strip. When the connected imagesetter is a Dolev 800, each cassette selected generates the test. Test Click to perform the test. List... You can build the Resolution Intensity table values from the Brisque. Click to edit the Resolution Intensity tables in the connected device. (See Building Resolution Intensity Tables from the Brisque on page 82). 4. From the Calibration Type list box, select Res. Intensity. 5. Type minimum and maximum values into the Resolution From and To boxes to define the range of the test. Note: To calibrate the imagesetter for one resolution only, enter the same value in both resolution boxes. 6. From the # Steps list box, select the number of resolution steps you want exposed on the film. Note: This feature is not available for Dolev 200 and Dolev 400 series imagesetters. Dolev Calibration 79 Enter values in the Intensity From and To boxes in µW (micro watts), to define the range of exposure intensities for each of the resolution steps. 8. In the Increment box, define the increments at which the density will be tested. This value determines how many strips are exposed per defined resolution. Example: if the Intensity values range from 1000 to 2000, in increments of 500, you get three test strips per resolution. The first at 1000, the second at 1500 and the third at 2000. 9. In the Decrease per Resolution box, set the decreased intensity per resolution, in units of µW (micro watts). Since the optimum intensity value decreases as the resolution increases, (for example, the optimum intensity for resolution 100 is always lower than the that for resolution 80), it is recommended to test a different range of intensities for each calibrated resolution. This enables you to shift the range of intensities down for each resolution step, so that you can center the test strips around the expected optimum intensity. Example: In the Calibration window, your defined parameters include six resolution steps, intensity from 5,000 to 20,000, and an increment of 3,000. If the Decrease per Resolution value is zero when you expose the film, you get one test strip exposed at intensity 5,000, one at 8,000, one at 11,000, one at 14,000, one at 17,000 and one at 20,000. Intensity (1000s) 7. 14 13 12 11 10 9 8 7 6 5 4 3 2 1 80 100 120 Resolution = The optimal intensity for the defined resolution 80 Chapter 39 – Calibrating Output Devices Intensity (1000s) This means that the curve of optimum intensities per resolution will fall off the chart rapidly, which will make it difficult to read properly. However, if you know that the optimum intensity for the first resolution step is in the range of 5,000 to 20,000, then you can assume that the optimum intensity for the second (higher) resolution step is lower. You could then, for example, enter a value of 500 in the Decrease per Resolution box, and the six test strips for the second resolution step will be exposed at intensities of 5,000, 7,500, 10,000, 12,500, 15,000, and 17,500. The remaining resolution steps follow the same pattern. This will make it easier to read the chart and record it. 14 13 12 11 10 9 8 7 6 5 4 3 2 1 80 100 120 Resolution = The optimal intensity for the defined resolution Dolev Calibration 81 10. Click Options..., to define optional parameters. The following window appears. Item Description Use Film From: This option is only available for the Dolev 800 family of imagesetters. Use this option to select a film cassette from the device, where a media is to be tested. If more than one cassette is selected, the test will be performed on media from all selected cassettes. Strip Length Defines the length of each test strip. Note: If you suspect exposure inconsistency along the drum width, expose one step over the maximum length of the drum. After exposing the media, check along the length of the strip with a densitometer for changes in density. Strip Width Defines the width of each test strip. 11. In the ResIntensity Options window, select small cassette, medium cassette, large cassette or any combination of the above, for relevant models. 12. From the Strip Length list box, select a strip length value. 13. From the Strip Width list box, select a strip width value. 14. Click OK to return to the Calibration window. 82 Chapter 39 – Calibrating Output Devices 15. Click Test, to initiate a test exposure based on the selected parameters. Note: If a Job is already being exposed on the imagesetter or platesetter, the test is exposed after the Job is complete. 16. Develop the film. Res: 80 Int: 7000 Res: 100 Int: 7000 Res: 120 Int: 7000 Res: 80 Int: 8000 Res: 100 Int: 8000 Res: 120 Int: 8000 Res: 80 Int: 9000 Res: 100 Int: 9000 Res: 120 Int: 9000 Res: 80 Int: 10,000 Res: 100 Int: 10,000 Res: 120 Int: 10,000 Res intensity strips for 3 resolutions 17. Using a densitometer, check the density of each strip, and record the results. 18. For each resolution, determine which test strip has the lowest d-max value within the recommended range. The recommended range varies from manufacturer to manufacturer - refer to the manufacturer specifications relevant to your media. 19. Use the test results to update the intensity values for the selected resolutions in the Resolution Intensity table. Building Resolution Intensity Tables from the Brisque You can build the Resolution Intensity table from the Brisque, as well as from the PC Controller. (The tables reside on the PC controller. The number of tables depends on the specific device.) Dolev Calibration 83 To build a Resolution Intensity table from the Brisque: 1. In the Calibration window, make sure that the selected Calibration Type is Res. Intensity and then click List. The Edit ResIntensity window appears. Note: The List button is disabled while the imagesetter is in use. Item Description Res. Intensity Selects a table to edit. The Current on Machine selection displays the data from the currently used table on the imagesetter. (calibration type) Note: For the Dolev 800 family, the Current on Machine selection is irrelevant, because each cassette is assigned a specific table from the PC controller. For example, the Dolev 800 family supports ten tables, the 4Press family supports six. 84 Chapter 39 – Calibrating Output Devices Item Description Table Entry: Although the Dolev 800 imagesetter enables you to define intensity values at two different settings, High is the only relevant setting for the Brisque. Resolution (dpm) Intensity Displays the selected Resolution Intensity table, each resolution with its assigned intensity. The value of the selected resolution and its intensity appear respectively in the boxes below for editing. Enter Updates the edited value into the selected table. Delete Deletes a selected value from the table. Default Restores default intensity value of 1500 (low) or 3000 (high) to selected resolution. Auto Select this Table for Media Type - Displays media type (set in the device). Vendor - Displays media vendor (assigned in the device). Load to Plotter Updates the selected table in the in the PC controller. 2. Click the Res. Intensity list box and select a table. The selected table parameters are displayed. 3. Click a resolution to select it. The row is highlighted and the values appear in the respective boxes below. • To modify the intensity, replace the value in the right box and click Enter. The new intensity value appears in the table (including the Decrease per Resolution value). • To delete a resolution, select it from the table and click Delete. The value is removed from the table. • To restore a default intensity value, select a modified value from the table and click Default. The default value of 1500 (Low Table Entry) or 3000 (High Table Entry) appears in the table. 4. Click Save to save the new table definitions in the PC controller. 5. Repeat this procedure as necessary, to define additional tables for different media. Dolev Calibration 85 Note: The options available in this window may vary slightly, according to the connected imagesetter. For further information about the resolution intensity tables, see the device manual. 86 Chapter 39 – Calibrating Output Devices Lotem Calibration You can access the following calibrations from the Calibration window. • Focus stepper motor test - Finds the focus stepper motor value that brings the beam focus to coincide with the plate surface. • Laser intensity and drum speed - Determine the optimal drum speed and laser intensity for a given plate at your working resolution (60, 80, 100, 120, 140 dpm). • Resolution stepper motor - Calibrates the resolution motor for five main resolution values (60, 80, 100, 120 and 140 dpm) • Beam delay - Finds the optimal beam delay. • Laser Uniformity (for Lotem models with 48 laser diodes) - Determine the uniformity of the lasers. Refer to the Lotem 800V family Installation Guide. Important: All above calibrations, except for the Laser Intensity and Drum Speed, are to be performed only by qualified field technicians. Laser Intensity Test The objective of the Intensity test is to find the required laser intensity for the exposure resolutions supported by your Lotem platesetter. In addition, it identifies the drum speed value for optimal intensity. The intensity test results depend on the type of plate, so perform this test for each plate type. Test results do not depend on plate size or thickness. Intensity test results also depend on given media batch, so performed them for each new batch. Once the optimal Laser Intensity and Drum Speed values are defined, they are transferred to the Lotem PC controller database. Lotem Calibration 87 To perform the Laser Intensity test: 1. From the Launch Pad, or from the Setup panel, double click the Devices icon. The Output Devices Handling window appears. 2. From the Output Devices Handling window, click the triangular button next to PlateSetters, then select a Lotem configuration. The device operations are enabled. 3. Click Lotem Calibration. The Calibration window appears Item Description Calibration Type Defines the calibration test type. (Perform only the Intensity test. The other tests are performed by field technicians). 88 Chapter 39 – Calibrating Output Devices Item Description Current Device Displays the currently connected device. Current Plate Displays the current plate type loaded on the Lotem. Screen Processor Displays the Screen Processor installed on the Lotem. (TSP or VLSI). Load/Unload Policy Load Plate before the Test! - Instruct the PC Controller to automatically load or not load a new plate before the test begins. (This enables you to reuse a loaded plate for additional calibration tests.) Unload Plate after the Test! - Instructs the PC Controller to automatically unload the plate or not unload the plate when the test is finished. This enables reusing the loaded plate in additional calibration tests. Image Offset Defines the vertical offset (along the drum) and horizontal offset (around the drum), in units of millimeter (mm). The (0,0) offset coordinate is located at the upper left corner of the plate. Using different offset values for each test is useful when you use the same plate for several tests. Plate Sensitivity Vendor supplied parameter. Resolution Displays a list of available resolutions (in dpm). Intensity Defines the optimal intensity for a specific resolution. (Type the result of the Intensity test for the specific resolution assigned to the plate. This will be transferred to the PC controller). Drum Speed Defines the drum speed value for the test. Lotem Calibration 89 Item Description Calculate all Points when Saving Defines at which resolutions the working conditions (Intensity and Drum Speed values) are updated when Saved. When selected, it forces the Brisque to update the working conditions for all the standard resolutions displayed in the Resolution table, when you Save. When Cleared, it forces the Brisque to update the working conditions for the resolution defined in the Resolution list box only, when you Save. Test Intensity Values From, To - Define the intensity range for this test. Number of Steps - Defines the requested number of exposures for the above range of Test Intensity Values. Size - Displays the calculated size of each step interval (Size of step = [To - From]/Number of Steps). This value cannot be modified and is intended only as a quick reference for the Lotem operator. Test Generates the test. Get Brings the current values from the PC controller. Save Saves the values back to the PC controller. 4. From the Calibration Type list box, select Intensity. The plate type and sensitivity parameters are automatically read from the PC Controller according to the plate currently loaded. Note: All Lotem Calibrations other than Intensity are performed by qualified field personnel. (See Lotem Calibration on page 86). 5. Define the Load Policy: Select or clear the Load plate before the test! check box. 6. Define the Unload Policy: Select or clear the Unload plate after the test! check box. 90 Chapter 39 – Calibrating Output Devices 7. Type the vertical (along the drum) and horizontal (around the drum) Image Offset values. 8. From the Resolution list box, select the test resolution (in dpm). 9. Click Get to retrieve the current Intensity and Drum Speed values from the PC controller. Note: At this point, do not modify the value in the Intensity box. After the Intensity test is completed, fill in the optimal Intensity test result in this box, which will be transferred to the PC Controller. 10. To change the Drum Speed, type the drum speed value for the test in the Drum Speed box. If optimal intensity results are not obtained, you should change the drum speed value and repeat the test. Note: The drum speed depends on many factors such as Plate type and rate of data transfer from the Brisque to the platesetter. Consult with your local Creo engineer for obtaining your recommended drum speed value. 11. Select or clear the Calculate All Points when Saving check box to define at which resolutions the working conditions (Intensity and Drum Speed values) are updated when Saved. 12. In the Test Intensity Values (mW) section, type the intensity range for this test in the From and To boxes. Note: The intensity depends on many factors such as Plate type and rate of data transfer from the Brisque to the platesetter. Consult your local Creo engineer to obtain recommended intensity values. 13. In the Number of steps box, enter the requested number of exposures for the above range of Test Intensity Values. The Size box displays the result. 14. Click Test to begin the exposure. Lotem Calibration 91 15. When the exposure is completed, develop the plate and examine the results. For first time users, a Creo engineer will advise how to analyze the results and determine the optimum intensity level. • Based on the exposed plate results, if satisfactory results are not obtained, change the Drum Speed value and repeat the test. • When satisfactory results are obtained, choose the optimal laser intensity that gives the best exposure. Enter this value in the Intensity box in the Lotem Calibration window. The optimal drum speed value is the drum speed value in which the optimal intensity was obtained. 16. Click Save to save the new Intensity Drum Speed values. These values are automatically transferred to the PC controller. Note: We recommend to manually type the values into the Resolution Intensity table in the PC controller. It is highly 17. Continue to another calibration test by selecting another option from the Calibration Type list box. Or, click Exit to exit this window. 92 Chapter 39 – Calibrating Output Devices Excurve Calibration This calibration is performed on Dolev imagesetters and Lotem platesetters. When performing the Excurve calibration, you generate a test exposure which you use to measure dot percentage values on film or plate. You enter these measured dot percentage values into a table. The system uses this table to correct the reproduction of dot percentage values on film or plate. After creating a table, you run a verification test. You must complete the Resolution Intensity calibration before performing the Excurve calibration. If you do not perform the Resolution Intensity calibration first, the results of the Excurve calibration will not be meaningful. Important: Always perform an uncalibrated test (real data), create a new Excurve, then verify by performing a calibrated test using the real values measured during the uncalibrated test. Excurve calibration with the Creo TurboScreen Processor: Within a screen frequency range of up to 175 lpi (lines per inch), Creo Turbo Screening provides a nearly perfect linear response to dot area values on file. Only 7 reference values are required to any correct film bias. Creo recommends the following coordinates: 0%, 5%, 25%, 50%, 80%, 95%, and 100%. Note: Using only 7 reference values will not effect vignette smoothness. For screen frequencies above 175 lpi and for TurboScreen FM screening, 11 to 18 reference values may be required to achieve linearization within 1-2% along the entire tone range. The following Excurve reference values are recommended for TurboScreen FM screens and for screen frequencies above 175 lpi: 0%, 2%, 5%, 10%, 15%, 25%, 35%, 50%, 60%, 70%, 80%, 90%, 95%, 100%. High screen rulings and TurboScreen FM screening tend to produce higher dot gain on press than conventional lower screen frequencies. Pay attention to the Excurve to maintain accurate linearization on film and plate with these screens. Compensation for dot gain on press is accomplished using the output Tone Reproduction Curve. (See Tone Reproduction on page 112). Excurve Calibration 93 Making a Test Exposure The first test exposure is performed without using a predefined Excurve. The resulting test data (dot percentage values measured) is without distortions as a result of an Excurve. To perform the Test Exposure: 1. From the Launch Pad, or from the Setup panel, double click the Devices icon. The Output Devices Handling window appears. 2. From the Output Devices Handling window, click the triangular button next to an imagesetter or a platesetter device type, then select a device configuration. The device operations are enabled. 3. For platesetters, click Excurve Calibration. The Excurve Calibration window appears. 4. For imagesetters click Calibration. The Calibration window appears. Select Excurve from the Calibration Type list box. The Excurve Calibration features are displayed. 94 Chapter 39 – Calibrating Output Devices Item Description Use Test Parms from Displays the selected test template The selected file and its path shown in the box below. Selection... Select a template using the browser. Test Exposure Uncalibrated - Performs test exposure using uncalibrated parameters. Calibrations will be determined from the resulting test strip. Calibrated - Performs test exposure using calibrated parameters, based on the values measured from the uncalibrated test strip. Options... Fine tunes the test parameters. Select the media to be used and its location, the separations and test patterns to be produced. (See Optional Excurve Calibration Parameters on page 109). Periodic Test Selected to perform automatic tests periodically. Make test every - Define specific time intervals at which the Excurve verification test is automatically performed. Test Generates the Excurve Calibration test. List... Selects an existing calibration curve, or create a new one. 5. Click Selection. The browser appears, showing a list of templates. 6. From the browser, select a template with defined Expose or Plate Expose parameters, on which you want to base the calibration. (Eventually, you will probably create templates to match your production needs, and may use them for calibration as well. To start, you may select the two predefined Creo Expose templates that exist in the system.) (RIP80_Expose133.jtt, or RIP100_Expose150.jtt, in the Templates/SciDef Templates folder.) Excurve Calibration 95 When you return to the Calibration window, the selected templates are displayed in the Use Test Params from box. If more than one template appears in the box when you perform the calibration, you get multiple test results. 7. Click the Uncalibrated Test Exposure option. 8. You may define any of the optional parameters. (For a complete explanation, see Optional Excurve Calibration Parameters on page 109). 9. Click Test. A test exposure is generated for each designated template. 10. Develop the exposed test films or plates. Note: If a Job is currently being exposed on the imagesetter or platesetter, the test is exposed after that Job finishes. Remarks: 100 98 95 93 90 88 85 80 75 70 65 60 55 50 45 40 35 30 25 20 15 12 10 7 5 2 0 cls133r8c 4-Jun-96 15:24:24:01 No Excurve K Remarks: 1 11. Use a densitometer to measure the dot percentage values of each exposed test area, and record the results. Note: To get accurate results, be sure to zero the densitometer to a ghost dot area on film or plate before measuring the dot area. Important: If the Resolution Intensity calibration on Dolev imagesetters or on Lotem platesetters, was not performed prior to running this test, the test results will not be meaningful. Creating the Excurve Once you have measured the dot percentage values of each exposed test strip, use the data to build a correction table (an Excurve) to correct the reproduction of dot percentage values. 96 Chapter 39 – Calibrating Output Devices You can create a new Excurve in one of two ways. You can create a curve from scratch, or you can modify an existing curve, and then save it under a new name. To create a new Excurve from scratch: 1. From the Calibration window, click List. The Calibration Curve List window appears. Excurve Calibration 97 2. Click New. The Edit Excurve window appears, showing the default values, (0,0) and (100,100) which describe a curve. Item Description Seps Selects an option from the Seps list box to designate the separation(s) to which this Excurve will apply. Normally this parameter is set to All, you can create an Excurve for a specific separation. Units Selects an option from the Units list box to determine how the dot values are displayed in the table. Percent values range from 0 to 100%. System values range from 0 to 255, and are the opposite of percentage values (0=100%, 255=0%). 98 Chapter 39 – Calibrating Output Devices Item Description Comment Whatever you type in this box appears in the Comment column of the Calibration Curve List window. The comment should help you identify the Excurve file. Enter Applies the inserted value to the selected parameter. Delete Deletes the selected percent value. Autoselect Parameters Define the expose conditions to which the Excurve is meant to be applied, when designated from the Expose window instead of designating a specific Excurve. Note: The Measured On Film column applies to plate media as well. 3. In the boxes under the table section, insert the table values. (For complete explanation, see Inserting Table Values on page 99.) 4. Click Save or Save as. The Save window appears. 5. Type a file name in the Save this Excurve as box and click OK. You return to the Calibration Curve List window where the new Excurve appears in the list. Excurve Calibration 99 To create a new Excurve based on an existing one: 1. From the Calibration window, click List. The Calibration Curve List window appears. 2. Select an Excurve from the list. 3. Click Modify. The Edit Excurve window appears, showing the previously defined table coordinates. 4. Modify the table values and the Excurve options, as necessary. 5. Click Save as. The Save window appears. 6. Click in the Save this Excurve as box then type a new file name. 7. Click OK. You return to the Calibration Curve List window where the new Excurve appears in the list. Inserting Table Values To create the Excurve, you must insert file values and measured values into the Excurve table. The numbers that are displayed on the test film or plate are file values. Measure the area indicated by a file value with a densitometer to determine the corresponding measured value. Normally, your Excurve table contains 21 sets of coordinates, evenly spaced from 1-100%. For a more precise calibration, increase the number of coordinates. If you have a problem with a range that you want to calibrate more carefully (highlights, or midtones, for example), add more coordinates that correspond to that range. To add coordinates to the table: 1. Type the File Value in the box below the File Value column. 2. Move to the box below the Measured on Film column, and type the corresponding value that you measured from the test strip with the densitometer. Note: The Measured On Film box applies to plate media as well. 3. Click Enter. The new coordinate is added to the table. 100 Chapter 39 – Calibrating Output Devices To change a set of coordinates: ¾ Delete the current set, then type the modified values in the table, as if they were new. To delete a coordinate: ¾ Select a row from the table and click Delete. Note: Numbers can be rounded off to n.0% or n.5%. The end-points (0,0 and 100,100) cannot be changed or deleted. Tip: Use the TAB key on the keyboard to move among the comment box and the boxes below the File Value column and the Measured on Film column. Use SHIFT+TAB to move through the three boxes in reverse order. Viewing a Graph of the Excurve The Excurve window displays two different curves: • The measured curve represents the coordinates made up of file values and measured on film values (Measured On Film applies to plate media as well). • The calculated curve represents the Excurve automatically created by the application to correct the disparity between file values and measured on film values. You can view either curve on the screen. Excurve Calibration 101 To view the Excurve: 1. Click the Expand icon ( ) at the upper right corner of the Excurve window, to open the display. (Click it again to close the display.) 2. To select which curve appears on the graph: click either Measured or Calculated. Note: When the Measured display option is selected, the data in the right column of the table displays the measured on film values. When the Calculated Display option is selected, the right column displays the automatically calculated correction values. 102 Chapter 39 – Calibrating Output Devices Controlling the Smoothness of the Curve You can control the smoothness of the displayed Excurve with the Curve Type option. Smoothing adds points between the user-defined points to smooth out the curve. 1. From the New or Modify Excurve window, select the Spline option, to activate smoothing of the Excurve. 2. Select the Linear option (this was the default option for Brisque version 2.8 and lower), to cancel the smoothing of the Excurve. Note: This option does not visually affect the calculated and measured curves in the New or Modify Excurve window. Its effect is seen on the actual Excurve generated from the input data (not displayed on the screen). Verifying an Excurve After creating the Excurve table, you may return to the Calibration window to verify that the system is calibrated properly. Important: Perform this verification test daily, depending on the standard of precision required for the media you are producing. To verify the Excurve: 1. To perform the first time verification of the Excurve, go back to the Calibration window and make sure that the selected Calibration Type option is Excurve. (Double click the Calibration icon to return to the Calibration window from the Launch Pad). 2. If you are performing a first time verification of the Excurve, the template on whom you base the calibration for the Expose parameters, exists in the Use test Params from box. Excurve Calibration 103 (If you are performing a periodic verification, and the template you wish to verify is not displayed in the Use Test Params from box, click the Selection icon, then from the browser, select the template to which the Excurve you want to verify is attached. When you return to the Calibration window, the selected template appears in the Use Test Params from box.) 3. Open to the template, and verify that the intended Excurve is actually attached. 4. Select the Calibrated Test Exposure option. 5. Click Test. A test exposure is generated, based on the defined Excurve table attached to the selected template. This time, the test exposure is made using the curve(s) you created in the previous section. 6. Develop the exposed test films or plates, use a densitometer to measure the dot percentages of each test strip and record the results. (For accurate results, zero the densitometer to a ghost dot area on the film or plate before measuring the dot area). If the measured values are within 2% of the corresponding file values, no further adjustment is required. Otherwise, you need to repeat the Excurve calibration. Make sure that you accurately measure the values with the densitometer, and increase the number of values in the table. Automatic Periodic Excurve Verification The Brisque enables you to define time intervals at which the Excurve verification test is automatically performed. At defined intervals, a test strip is exposed, based on the parameters defined by the Expose operation in the selected templates. To define automatic periodic verification tests: 1. In the Calibration window, select the Periodic Test box. 2. Click Make Test Every and select an option that defines how often the test should be run. 104 Chapter 39 – Calibrating Output Devices 3. In the At boxes, type the hour (HH) and minute (MM) that the test should run on test days. Modifying an Excurve When an Excurve is no longer accurate, run an uncalibrated test exposure (not based on an Excurve), measure the dot percentage values from the test strips with a densitometer, and type the new coordinates into the Excurve table. You can either build a new table, or modify an existing one. (See Creating the Excurve on page 95.) To modify an existing Excurve: 1. In the Excurve window, click List. The Calibration Curve List window appears. 2. From the Calibration Curve List window, select the Excurve you want to modify. The selected curve is highlighted. 3. Click Modify. The Edit Excurve window appears with the words Modify Curve written next to the icon in the upper left corner of the window. 4. Type the new measured on film values into the Excurve table. (See Inserting Table Values on page 99.) Note: The Measured On Film box applies to plate media as well. 5. When you finish modifying the table, click Save. The modified Excurve is saved under the original name. You return to the Calibration Curve List window. To delete an Excurve: 1. In the Excurve window, click List. The Calibration Curve List window appears. 2. From the Calibration Curve List window, select an Excurve. The selected Excurve is highlighted. 3. Click Delete. The Excurve is deleted and it disappears from the list. Excurve Calibration 105 Attaching the Appropriate Excurve to a Production Workflow In this section, we explain how to ensure that the correct Excurve is applied each time an exposure is made. Excurves are created to match specific expose conditions. You can use the Excurve AutoSelect feature to enable the system to automatically choose the correct Excurve for each exposure, or you can manually attach an Excurve to a template so that every time a file is processed by that template, the attached Excurve is applied. To manually attach a specific Excurve to a template: ¾ In the Expose window, designate an Excurve when you define Expose parameters via the Template Builder. (See Chapter 42, Exposing To Film, Designating an Excurve on page 192). To use the ExcurveAutoSelect feature, you must perform two steps: 1. When defining the Expose parameters of the template, designate the ExcurveAutoSelect file from the Expose window instead of designating a specific Excurve. (See Chapter 42, Exposing To Film, Designating an Excurve on page 192). 2. When creating the Excurve table, use the Auto Select Parameters option to define the Expose conditions to which the Excurve is meant to be applied. As long Excurve AutoSelect is selected in the Expose application window (the system default), the Excurve is automatically applied to the Expose. For example, if you indicate that a particular Excurve is meant to be applied to a negative output to film, with a resolution from 1016 dpi to 4064 dpi, and a conventional angle set, then, when you run a later Job whose Expose parameters match the above and whose Excurve Auto Select option is activated, this Excurve is automatically applied. Tip: Creo recommends creating different Excurves to apply to different Expose conditions including positive and negative exposures, different resolutions, mesh definitions and dot shapes. 106 Chapter 39 – Calibrating Output Devices To define AutoSelect parameters: 1. From the Excurve List window, select an Excurve and click Modify. The Edit Excurve window appears. 2. From the Edit Excurve window, click AutoSelect Parameters.... The Excurve AutoSelect window appears. 3. Select Negative or Positive to define whether this Excurve table is for negative or positive exposures. Note: To use the AutoSelect feature, at least two Excurve tables must be created, one for negative and one for positive exposures. Excurve Calibration 107 4. Click the Media list box and select the relevant media vendor and media type(s) for which this Excurve is relevant and keep the box expanded after selection (If you collapse the box, you cancel the selected option). 5. Click Resolution to define the range of expose resolutions by entering values into the From and To boxes. Keep the box expanded after selection (If you collapse the box, you cancel the selected option). 6. Click Screen Frequency to define a range of screen frequencies by entering values into the From and To boxes. Keep the box expanded after selection (If you collapse the box, the selection is canceled). 108 Chapter 39 – Calibrating Output Devices 7. Click the Dot Shape list box and select a dot shape or shapes from the list. Keep the box expanded after selection (If you collapse the box, the selection is canceled). 8. Click the Angle Set list box and select an angle set(s) from the list. Keep the box expanded after selection (If you collapse the box, the selection is canceled). 9. Click OK to confirm the selections and exit the AutoSelect window. Or, to exit without defining any parameters, click Cancel. Note: The possible options for table boxes vary, according to the connected output device. Excurve Calibration 109 Optional Excurve Calibration Parameters When you are calibrating an Excurve, you may choose to define several optional parameters. To define optional parameters for Lotem and Trendsetter platesetters: ¾ From the Calibration window (Excurve), click Options. The Excurve Options window appears. Item Description Test Pattern Defines standard test patterns, one verticall the other horizontal. Or, a custom image for the test pattern, selected from the browser. Test Separations Defines how many separations of the test image will be produced on film or plate. Normally, selecting just the Cyan separation is sufficient for calibration. 110 Chapter 39 – Calibrating Output Devices To define the optional parameters for the Dolev family: ¾ From the Calibration window (Excurve), click Options. The Excurve Options window appears. Item Description Use Film From Indicates film cassettes for the Dolev 800 family. Test Pattern Defines the orientation of the test pattern. Standard Vertical exposes the Standard test pattern in Portrait orientation. Standard Horizontal exposes the Standard test pattern in Landscape orientation. Or, a custom image. Test Separations Defines how many separations of the test image will be produced on film or plate. Normally, selecting just the Cyan separation is sufficient for calibration. Excurve Calibration 111 Defining the Custom Test Pattern When you perform the Excurve calibration, you can either use the standard test pattern, or define a custom test pattern. To designate an image for the custom test pattern: 1. Select the custom (unlabeled) Test Pattern box. The Selection button is activated. 2. Click Selection. A browser appears. For information on using the browser, see the Managing Files and Folders chapter. 3. From the browser, select the image file you want to expose then click OK. The selected file name appears in the custom (unlabeled) Test Pattern box. When you run the test, the selected image is exposed. 112 Chapter 39 – Calibrating Output Devices Tone Reproduction Tone Reproduction curves are created to compensate for press-related effects (such as dot gain) and to control image tonality. The curves are built according to data measured off the press and according to pre-calculated correction tables supplied by the printer. Tone Reproduction Curves are similar to Excurves, except that the measured values are taken from the press and not from film or plate media. The Tone Reproduction application on the Brisque enables you to create, modify or delete Tone Reproduction curves. The following applications on the Brisque enable you to apply a Tone Reproduction curve to an exposure job: • • • • Imposition Proof Halftone Proof Film Expose Plate Expose. Note: Before you begin the Tone Reproduction procedure, make sure that the Excurve calibration has been completed. Tone Reproduction 113 Launching the Application To launch the Tone Reproduction application: 1. From the Launch Pad, or from the Setup panel, double click the Devices icon. The Output Devices Handling window appears. 2. From the Output Devices Handling window, click the triangular button next to a device type, then click the triangular button next to a device. 3. Select a device configuration. The device operations are enabled. 4. Click Tone Reproduction. The Tone Reproduction Curve List window appears. 5. To select one or more files from the Tone Reproduction Curve list, click them one at a time. The selected files are highlighted. Note: To remove a file from the selected group, click it again. The selection is deemphasized. 114 Chapter 39 – Calibrating Output Devices Creating a Tone Reproduction Curve You can create a Tone Reproduction curve in one of two ways: • • Create a new curve Modify an existing curve and save it under a new name. To create a new Tone Reproduction curve: 1. From the Tone Reproduction Curve List window, click New. The Tone Reproduction Curve window appears. Item Description Seps Displays a list of separations. The currently selected separation appears in the box to the right of the list. Tone Reproduction 115 Item Description Spot Rename - Allows renaming a spot color from the Seps list. Remove - Removes a selected spot color from the Seps list. Limits Recalculates the curve to limit the minimum and maximum reproducible dot percentages on the cylinder. Curve Values Table The Curve Values table has 3 columns: File Value - contains standard reference values, taken from a test exposure. Creo recommends using 21 different file values. Required on Press - contains subjective, user-defined values for the density which is required on press. These values are either an approximation of the correction values, made by an experienced technician, or intentional distortions, used for special effects. Inserting values into the three columns results in two separate curves that make up one Tone Reproduction Curve file. The exposure that uses the file is affected by both curves. Measured on Press - contains the density values measured on the press after the Job has been printed. The Tone Reproduction application automatically compares the measured values against the file values and creates a Tone Reproduction curve that makes the correction for dot gain. Note: For accurate results, zero the densitometer to a ghost dot area on the media before measuring the dot area. Enter Inserts a new set of values into the table, typed in the boxes at the bottom of the table. Delete Removes a selected set of values from the table. 116 Chapter 39 – Calibrating Output Devices Item Description Curve Type Spline - Adds a smoothing effect to the curve, using interpolated points along the curve. Linear - Displays the curve with defined points only. Comment add a descriptive comment to the Tone Reproduction curve. The comment appears in the Tone Reproduction Curve List window. Save Saves the current curve. Save As... Opens a Save window, anabling you to save the updated curve under a different name. 2. Define the new curve using the different options contained in this window. (See Defining the Curve Values on page 118). 3. Click Save As. The Save window appears. 4. In the Save window, type a name in the Save this TR curve as box and click OK. You return to the Tone Reproduction Curve List window, and the new Tone Reproduction Curve is shown in the list. Tone Reproduction 117 To modify an existing curve: 1. Select a file from the Tone Reproduction Curve List. 2. Click Modify. The Tone Reproduction Curve window appears. 3. Modify the Tone Reproduction curve as necessary. 4. Click Save as. The Save window appears. Note: To add a descriptive comment to the Tone Reproduction curve file, before saving the file, type a comment into the Comment box. This text appears in the comment column of the Tone Reproduction Curve List. 5. In the Save as window, type a new file name in the Save this TR curve as box. 6. Click OK. You return to the Tone Reproduction Curve List window. 118 Chapter 39 – Calibrating Output Devices Defining the Curve Values You create a Tone Reproduction curve by entering coordinates into the table in the Tone Reproduction Curve window. ¾ To designate whether the Tone Reproduction curve applies to a specific separation or to all separations, click Seps before defining the curve and select an option from the list box. (For instructions on how to add Spot Colors to this list, see Adding Spot Colors to the Seps List Box on page 119). Tip: You can select All (all separations), a specific separation, or Others (the Spot Colors that are not displayed individually in this list). To enter a set of coordinates into the table: 1. Place the cursor in the box below the relevant table column and type in a value. Note: Use either the TAB key or the mouse to move the cursor between boxes. 2. After you type the coordinate values click Enter. The coordinates are displayed in the table. Note: Percent values are automatically rounded off to the nearest tenth of a percent. Tone Reproduction 119 To modify a set of coordinates: 1. Click a row of values in the table. The selected values are displayed in the three boxes below the columns. 2. Edit the values directly in the boxes below the columns. 3. Click Enter. The modified coordinates are displayed in the list. To delete a set of coordinates: 1. From the table, click a row of coordinates. The row is highlighted. 2. Click Delete. The coordinates are deleted from the table. Note: The end-points (0.0 and 100.0) cannot be modified or deleted. Adding Spot Colors to the Seps List Box Before you can build a custom Tone Reproduction curve for a specific spot separation, the name of that separation must appear in the Seps list box. You can add, remove, and rename Spot Colors that are displayed in the list. To add a Spot Color to the list: 1. Type the name of the color separation into the Seps box. 2. Click Enter. The spot color separation is added to the Seps list box. To remove a Spot Color from the list: 1. Select a Spot Color from the list. The name of the selected color appears in the Seps box. 2. Click Remove. The color is deleted from the list box. To rename a Spot Color in the list: 1. Select a Spot Color from the list. The name of the selected color appears in the Seps box. 2. In the Seps box, edit the color name. 3. Click Rename. The Spot Color is renamed. Note: You cannot delete or rename any of the CMYK colors. 120 Chapter 39 – Calibrating Output Devices Viewing the Tone Reproduction Graph The Tone Reproduction graph displays the curves created by the table values. 1. To display the Tone Reproduction graph click the Expand icon at the upper right corner of the Tone Reproduction Curve window. The window expands. Expand Collapse Item Description Measured Displays the correction curve the application automatically generates based on the numbers displayed in the File Value and the Measured on Press columns. Required Displays the user-defined curve based on coordinates made up of the values from the File Values and the Required on Press columns. Dot Gain Displays the discrepancy between the Measured and the Required on Press values. Tone Reproduction 121 2. To display the Measured curve or the Required curve, select the Required or the Measured check box, or both. 3. To view a graph of the Dot Gain, select the Dot Gain check box. 4. To close the Tone Reproduction graph, click the Collapse icon. Controlling Curve Smoothness You can control the smoothness of the Tone Reproduction curve (Dot Gain) with the Curve Type option. Smoothing adds points between the user-defined input points to smooth out the curve. 1. Select the Spline option from the Tone Reproduction Curve window to activate smoothing of the curve. The smoothing effect on the graph can be viewed on the screen. 2. Select the Linear option to deactivate smoothing of the curve. The curve returns to it’s original form. 122 Chapter 39 – Calibrating Output Devices Defining a Curve for Printing on a Gravure Press To print on a Gravure press, create a curve that limits the minimum and maximum reproducible dot percentages on the cylinder. Use the Limits window to define the maximum and minimum points of the curve. The maximum point is usually about 80%. The minimum point is usually 0%. To configure the Maximum and Minimum points of the curve: 1. Click Limits. The Limits window appears. 2. In the Min Value on Cylinder box, type the minimum value. 3. In the Max Value on Cylinder box, type the maximum value. 4. To leave 0% at 0, select the Leave 0% as defined check box. 5. To leave 100% at 100, select the Leave 100% as defined check box. 6. Click OK to confirm the values and exit the Limits window. (See the graph on page 120). Tone Reproduction 123 Modifying a Tone Reproduction Curve You can modify an existing Tone Reproduction curve. To modify a Tone Reproduction Curve: 1. From the Tone Reproduction Curve File list, select a file, or files and click Modify. The Tone Reproduction Curve window appears. Note: If you selected more than one file from the list, multiple Tone Reproduction Curve windows display. 2. Add, modify, or delete table coordinates as needed. (See Defining the Curve Values on page 118). 3. Click Save. The file is updated, and you return to the Tone Reproduction Curve List window. Deleting a Tone Reproduction Curve To delete a Tone Reproduction Curve file from the list: 1. Select the file and click Delete. The system prompts you to confirm the delete command. 2. Click OK. The file is deleted, and you return to the Tone Reproduction Curve List window. Exiting the Application ¾ To close the Tone Reproduction Curve window and exit the application, click Exit. Screen Sets Overview ........................................................................................126 Screen Types ...................................................................................127 Screening File Name Conventions....................................................129 Creating a Screen Set......................................................................134 Basic Screen Set Parameters ............................................................138 Advanced Screen Set Parameters.....................................................152 Modifying a Screen Set ...................................................................159 Deleting a Screen Set ......................................................................160 126 Chapter 40 – Screen Sets Overview Output applications on the Brisque, such as Film Expose, Plate Expose, Spectrum, Halftone Proofing and Screen2Go, enable you to select a predefined Screen Set to be applied to a particular Job or Template. This chapter describes how to create and modify screen sets. Screen sets contain different combinations of standard screening parameters used to expose a set of separations on the output device (Dolev, Lotem, Lotem Spectrum, Trendsetter, Trendsetter Spectrum, Screen2Go and Kodak Approval XP4). The Brisque supports the patented Creo TurboScreen screening technology provided by the Turbo Screen Processor (TSP) board, enabling on-the-fly screening and providing enhanced resolution in the fast axis (around the drum) direction. The result is smooth dot formation and the ability to produce high screen frequencies with low output device resolution. Creo TurboScreen output supports direct connectivity to Creo Dolev imagesetters, Lotem platesetters, Trendsetter platesetters, Lotem Spectrum and Trendsetter Spectrum, half-tone proofsetters, and indirect output (Screen2Go). Screen Types 127 Screen Types The Screen Set application on the Brisque supports the following Screen Set types: • • • • Traditional Class Semi-traditional TurboScreen. Note: Depending on which Screen Set you select, the Brisque automatically channels the exposure via the appropriate screening board. During exposure, the progress indicator on the Brisque informs you which board is being used. Traditional A matrix type screen set that supports older applications and hardware. Supported output devices are: Dolev, Lotem. Supported screen board: VLSI. Class A traditional screen set with improved print cell edge smoothness. Supported output device: Dolev. Supported screen board: VLSI. FULLtone Screen A Stochastic screen applied over VLSI technology. Semi-traditional A simulation of the Traditional screen set using TSP technology. Supported output device: Kodak Approval XP4. Supported screen board: TSP. 128 Chapter 40 – Screen Sets TurboScreen A high resolution, very fast data transfer rate stochastic screen set, built on advanced technology and new algorithms. Supported output devices are: Dolev, Lotem, Trendsetter, Screen2Go. Supported screen board: TSP. Staccato Screen A TurboScreen with Staccato dots, created from minute groups of laser dots of varying size and location. In the extreme highlight areas, generally below 5%, laser dot groupings may be smaller than the plate or press resolving capacity. To overcome this problem, a minimum spot size parameter is available. Minimum spot sizes are expressed in microns (µm = 1/1000 mm). For reliability, minimum spot sizes are never one laser dot, but a multiple of two in both directions. Staccato is a matrix based screen algorithm that calculates the preexposure (the micro elements are positioned repeatedly in the same coordinates on the grid, each time a specific separation is exposed). The only user definable parameters for Staccato are minimum spot size (Feature size), applied according to the formula: 1/expose res. X 2n. The smoothness of the Staccato pattern is subjective to laser intensity settings. There are two types of dot shapes available: • • Staccato FM - Supports 1200, 1600, 2400 and 3200 dpi resolution only. Turbo FM. Screening File Name Conventions 129 Screening File Name Conventions Screen sets are named according to conventions created to help you identify them easily. These naming conventions are not mandatory. Traditional Screen Set Name Conventions Traditional Screen Set names always begin with the designated Angle Set. • • • s = shifted c = conventional n = pseudo conventional - with the yellow separation at 60° instead of 90°. The next 2 to 3 digits indicate the Screen Frequency (in lines per inch). The Screen Frequency is followed by the character r plus 1 to 2 digits. Multiply this number by 10 to obtain the resolution in dots per mm. The next character represents the defined Dot Shape. • • • • • • c = composed r = round d = diamond g = gravure s = square m = geometric. For example: • A screen set named c80r6c indicates a traditional screen format, with a conventional angle set, a screen frequency of 80 lpi, a resolution of 60 dpm, and a composed dot shape. • A screen set named s133r10r indicates a Traditional screen format, with a shifted angle set, a screen frequency of 133 lpi, a resolution of 100 dpm, and a round dot shape. 130 Chapter 40 – Screen Sets Class Screen Set Name Conventions Class Screen Set names always begin with the letters cl. The next character indicates the designated Angle Set. • • • s = shifted c = conventional n = pseudo conventional - with the yellow separation at 60° instead of 90°. The next 2 to 3 digits indicate the Screen Frequency (in lpi). The Screen Frequency is followed by the character r plus 1 to 2 digits. Multiply this number by 10 to obtain the resolution in dpm. The next character represents the defined Dot Shape. • • • • • • c = composed r = round d = diamond g = gravure s = square m = geometric. For example: • A screen set named clc80r6c indicates a Class screen format, with a conventional angle set, a screen frequency of 80 lines per inch, a resolution of 60 dots per mm, and a composed dot shape. • A screen set named cls175r10c indicates a Class screen format, with a shifted angle set, a screen frequency of 175 lpi, a resolution of 100 dpm, and a composed dot shape. Screening File Name Conventions 131 FULLtone Screen Set Name Conventions FULLtone Screen Set names always begin with the letters ft. The next 2 to 3 digits represent the resolution in dots per mm. The next 4 to 6 characters represent the type of FULLtone. • • • • • • vfine = very fine fine = fine normal = normal coarse = coarse vcoars = very coarse vfine = very fine. For example: A screen set named ft80normal indicates a FULLtone screen plotter format, with a resolution of 80 dpm, and a normal type. Semi-Traditional Screen Set Name Conventions Semi-Traditional Screen Set names always begin with the designated Angle Set. • • • s = shifted c = conventional n = pseudo conventional - with the yellow separation at 60° instead of 90°. The next 2 to 3 digits indicate the Screen Frequency (in lpi). The Screen Frequency is followed by the character r plus 1 to 2 digits. Multiply this number by 10 to obtain the resolution in dpm. The next character represents the defined Dot Shape. • • • • • • c = composed r = round d = diamond g = gravure s = square m = geometric. 132 Chapter 40 – Screen Sets For example: • A screen set named c80r6c indicates a Semi-traditional screen format, with a conventional angle set, a screen frequency of 80 lpi, a resolution of 60 dpm, and a composed dot shape. Implemented on a TSP board. • A screen set named s133r10r indicates a Semi-traditional screen format, with a shifted angle set, a screen frequency of 133 lpi, a resolution of 100 dpm, and a round dot shape. Implemented on a TSP board. TurboScreen Set Name Conventions TurboScreen names always begin with the letters v. The next character indicates the designated angle set. • • • • • • • s = shifted c = conventional r = rational angle w = shifted + yellow 37.5° x = conventional + yellow 30° y = yellow moire free n = pseudo conventional - with the yellow separation at 600 instead of 90°. The next 2 to 3 digits indicate the screen frequency (in lpi). The screen frequency is followed by the character r plus 1 to 2 digits. Multiply this number by 10 to obtain the resolution in dpm. The next 1 to 2 characters represent the defined dot shape. • • • • • • • c = composed r = round d = diamond g = gravure s = square m = geometric c+ = composed enhanced Screening File Name Conventions • • • 133 d+ = diamond enhanced fm = Staccato ud = User Dot. For example: A screen set named vc80r20ud indicates a TurboScreen format, with a conventional angle set, a screen frequency of 80 lpi, a resolution of 200 dpm, and a User created dot shape. Staccato Screen Set Names Staccato names always begin with staccato. 134 Chapter 40 – Screen Sets Creating a Screen Set Normally, you create a new screen set by modifying an existing one, and then saving it under a different name. However, you can create a new screen set completely from scratch. In either case, the parameters you define are the same. Tip: We strongly recommend you use the Creo-supplied screen sets whenever possible. Each supplied screen set has been carefully tested. Screen sets you create or modify may not yield optimum results. To launch the Screen Set application: 1. From the Launch Pad, open the Setup panel, then double-click the Devices icon. The Output Devices Handling window appears. 2. From the Output Devices Handling window, select an output device configuration. The associated operations are enabled. 3. In the Operations section, click the Screen Set button. The Screen Set List dialog box appears, showing pre-defined and user-defined screens associated with the selected device. Creating a Screen Set 135 4. In the Screen Type list box, select a screen type. This automatically lists the appropriate screen sets. Important: A screen set listing Creo as the owner cannot be modified or deleted. You can use a Creo-owned file as a template on which to base a new screen set. For detailed information on using filters, see Chapter 2, Introduction to the Desktop, Brisque Filters on page 18. To create a new Screen Set based on an existing one: 1. From the Screen Set List dialog box, select thescreen set on which you want to base a new one, then click Modify. The Screen Set Name dialog box appears, with the name of the selected screen set in the Screen-Set Name box. Item Description Screen-Set Name Displays the selected screen set. Resolution Defines the height and width resolutions of the image that will be exposed on film, plate, cylinder, or halftone proofer. 136 Chapter 40 – Screen Sets Item Description Comment Adds a comment that appears in the Remark column of the Screen Set List. Import Separations from File Opens a browser to locate a file for import. Angle Designates screen angle for each color separation. Scr. Freq. Designates a screen frequency for each color separation. Adjust Fine-tunes the Screen Frequency values to prevent patterns from forming. Individual screen parameters may be modified when this option is selected. Dot Shape Selects a dot shape for each separation used in the screen set. Separations All separations are displayed in this section. Each separation’s dot shape information can be modified. 2. Change the screen set parameters as needed. (See Basic Screen Set Parameters on page 138 and Advanced Screen Set Parameters on page 152). 3. Click Save As. The Save dialog box appears. 4. In the Save as box, type a screen set name. 5. Click OK. You return to the Screen Set Name dialog box. 6. Click Done. You return to the Screen Set List window, and the new screen set is added to the list. The defined owner is User. Creating a Screen Set 137 To create a new screen set from scratch: 1. From the Screen Set List window, click New. The Screen Set Name dialog box appears, with the word NEW appearing in the Screen-Set Name box. 2. Define the screen set parameters. (See Basic Screen Set Parameters on page 138 and Advanced Screen Set Parameters on page 152). 3. Click Save. The Save dialog box appears. 4. In the Save as box, type a Screen Set name. 5. Click OK. You return to the Screen Set Name dialog box. 6. Click Done. You return to the Screen Set List window, and the new Screen Set is added to the list. 138 Chapter 40 – Screen Sets Basic Screen Set Parameters Defining the Exposure Resolution The resolution of the output device determines the number of rows of laser dots are exposed per linear unit. Dolev imagesetters and Lotem platesetters each have a range of output resolutions in discrete steps. The range is typically 40 to 200 dpm in steps of 20 dpm. Note: Resolution is related to screen frequency, but the two terms should not be confused. Screen frequency is the number of rows of printed dots per linear unit. The difference between the two parameters lies in the fact that a printed dot is constructed from a number of laser dots. (See Designating the Screen Frequency on page 141). Important: The Trendsetter supports 1200, 1600, 2400, or 3200 dpi. The Lotem Quantum supports 2400 dpi (94.48819 dpm) or 2540 dpi (100 dpm). The values selected for the resolution should equal the resolution of the LW being exposed, unless you are using a screen set whose resolution is double that of the LW. (See The Half Resolution Workflow on page 139). To define the image resolution: 1. In the Screen Set Name dialog box, click the arrow to the right of the Height box, and select a value from the list. Note: Notice the button between the Height and Width boxes. If the button displays an equal sign, the Width box automatically displays the same value as the Height box. In most cases, the height and width resolution values should be equal. 2. If you want to type different height and width values, click the button between the Height and Width boxes to toggle from the equal to the unequal sign. If you define different height and width values and change back to the equal sign, the Width box automatically displays the value of the Height box. Note: The Height and Width Resolution boxes support values with a precision of 5 decimal places. Basic Screen Set Parameters 139 The Half Resolution Workflow From the Brisque you can expose Pages whose LW resolution is exactly half the defined output resolution. For example, you can scan a full page at an LW resolution of 50 with a Creo scanner, the Creo EverSmart Pro or Creo EverSmart Supreme, and then expose it at resolution of 100, but you cannot scan a page at an LW resolution of 50 and then expose it at a resolution of 80. The LW resolution must be the same as the defined output resolution, or exactly half (when a Job includes half resolution pages, the system automatically exposes them at the defined output resolution). A high quality input file is needed to successfully implement Half Resolution workflow. Important: In a template that defines both RIP and Expose (film or plate), the LW resolution value defined by the selected screen set in the Expose window also defines the value in the RIP window. To implement the Half Resolution output into a workflow launched by such a template, you must select the LW Half Res check box in the RIP window. (See Chapter 18, RIP for more details). Adding a User Comment to the File Name You can add a descriptive comment to the Screen Set file. This comment appears in the Remark column of the Screen Set List and can help you identify a particular screen set. To generate a comment: ¾ In the Comment box, type a comment, such as create date, or use. The comment appears in the Remark column of the Screen Set List. 140 Chapter 40 – Screen Sets Defining the Base Separation Parameters The parameters described in this section define how each separation is exposed on film, plate, or cylinder. You can either define a parameter once, applying it to all separations, or customize the parameter for each separation. Use the boxes on the left side of the Serarations section to define all separation parameters. Use the boxes on the right side of the window to customize specific separation parameters. Designating an Angle Set You can designate predefined sets of angles for the screen sets. Your options are: • • • • Conventional1/2/3/4 - traditional press. Shifted1/2/3/4 - shifted 7.50. Pseudo Conventional - conventional with yellow shift. YMoire1/2/3 - rational angles. Defined Anglesa Angle set Cyan Magenta Yellow Black Conventional1 105 45 90 -15 Conventional2 105 -15 90 45 Conventional3 105 -15 120 45 Conventional4 -15 -105 60 45 Pseudo Convetional 105 -15 60 45 Shifted1 112.5 52.5 97.5 -7.5 Shifted2 112.5 -7.5 97.5 52.5 Basic Screen Set Parameters 141 Defined Anglesa Angle set Cyan Magenta Yellow Black Shifted3 112.5 -7.5 127.5 52.5 Shifted4 -7.5 112.5 67.5 52.5 YMoireFree1 15 75 0 45 YMoireFree2 15 75 0 45 YMoireFree3 15 75 0 45 a. These options are a result of extensive laboratory and field tests (in combination with the other screen factors) designed to prevent moiré and other interference patterns. Note: The Angle Set option is irrelevant when you select a Class screening FULLtone or Turbos screening Staccato dot shape. When you select User dot shapes, the Angle Set option is unavailable, as the parameters are defined in the User Dot application on the PC, and are saved with the dot shape in the User Dot file. To designate an Angle Set: ¾ In the Angle box, select an angle set. The screening angles for each separation, as defined by the selected angle set, appear in the Angle boxes beneath each separation. To designate the screening angle for a particular separation: ¾ In the Screening Angle box in the column below the separation name, type a new screening angle. Tip: When manually setting an angle to 45°, for any CMYK color separation, you can instruct the Brisque to automatically fine-tune all the Screen Frequency values (including spot color separations) to prevent patterns from forming. To activate this feature select the Scr. Freq. Adjust check box (available only for TurboScreen Sets). You can also enter an angle value of 00, but a screen frequency adjustment will be calculated only for that particular color separation. Designating the Screen Frequency Use the Screen Frequency parameter to designate a screen frequency for each color separation. Screen frequency, also known as screen ruling or mesh, determines the number of lpm that are exposed on the output media. 142 Chapter 40 – Screen Sets Common screen frequencies range from 3 to 12 lpm. Screen frequencies, defined in the default screen sets provided by Creo, are calculated to give the best dot structure and are unlikely to produce unwanted patterns. Important: Screen frequencies above 7 lpm typically result in different dot gain characteristics on press. To compensate for this among screen sets, use a Tone Reproduction curve. (See Chapter 39, Calibrating Output Devices, Tone Reproduction on page 112). Note: The screen frequency for Class screening, FULLtone or Staccato dot shapes cannot be modified. The defined expose resolution is what determines the screen frequency for Class FULLtone and Staccato screening. To define a Screen Frequency for all separations: 1. Select the Adjust check box. 2. Type a value in the Scr. Freq. box. (See Selecting a Dot Shape on page 142, for manually toggling the screen frequency). To define customized Screen Frequency values for separations: ¾ Type the appropriate value in the Screen box, under the specific separation. Tip: To change units of measurement, select millemeters or inches from the System References window. (Go to Utilities panel -> Prefs. icon -> System icon). Note: Screen Frequency boxes always display values in lines per millimeter (lpm) or dots per millimeter (dpm), even when the selected units of measurement in the Preferences are lpi and dpi. The values that you type in the boxes depend on the Preferences. Selecting a Dot Shape Use this option to select a halftone dot shape for the separations used in the screen set. Basic Screen Set Parameters 143 The dot shapes options are: • • • • • • Composed Diamond Square FULLtone (Class Screen only) Diamond+ (TurboScreen only) • • • • • Gravure Geometric Composed+ (TurboScreen only) Staccato FMa TurboScreen FM. Round a. Available for resolutions 1200,1600, 2400 and 3200 only. Note: Integrated Gravure System (IGS) workflows enable you to select userdefined dot shapes created by the User Dot application. For instructions on importing User Dot files to the Brisque, refer to the User Dot Installation and Operation Manual. For detailed information on selecting the correct dot shape for your application, refer to the Creo Turbo Screening Training Module. 144 Chapter 40 – Screen Sets The following table describes which dot shapes are supported by which screen types: Dot Shape Class Traditional SemiTraditional Turbo Screen Composed 9 9 9 9 Round 9 9 9 9 Diamond 9 9 9 9 Gravure 9 9 9 9 Square 9 9 9 9 Geometric 9 9 9 9 FULLtone 9 Composed+ 9 9 Diamond+ 9 9 Staccato FM 9 Turbo FM 9 User Dot 9 9 To define a Dot Shapes for all separations: ¾ In the Dot Shape box, select an option. Dot shapes created by the User Dot application appear at the end of the options, below a dividing line. Basic Screen Set Parameters 145 To define a custom Dot Shape for each separation: ¾ In the Dot Shape box, in each separation column, select an option. Note: When you select the FULLtone Dot Shape option, the Angle and Screen Frequency options become inactive. When you select the Staccato Dot Shape option, only the Screen Frequency and Feature size options become active. Defining Class Screening FULLtone Parameters Class Screening FULLtone is a stochastic screening technique in which the shape and placement of the dots occur randomly and there is no regular screen. The FULLtone option is only available when you are working with Class Screen sets and the connected output device is an imagesetter. You can define FULLtone parameters to apply to all separations or you can customize FULLtone parameters for individual separations To define the FULLtone parameters for all separations: ¾ In the Dot Shape box, select Fulltone. The Fulltonedialog box appears. 146 Chapter 40 – Screen Sets To define the FULLtone parameters for a specific separation: ¾ In the selected separation column, click Fulltone. The Fulltone dialog box appears. Note: The Fulltone... button is only visible when the Screen Set window is maximized (when the Advanced Parameters are visible on the screen). Separation Important: The Fulltone Parameters For box indicates the selected separation (or All). Item Description Type Select a FULLtone screen with different parameters. Highlight/ Shadow Dot Control This option controls the dot frequency of highlights and the shadow characteristics of FULLtone in ten levels (0 to 9). When you increase the Highlight/ Shadow Dot Control value, the dot size is increased in the extremes (highlight and shadow), preventing both dot loss and dot gain. Minimum Dot Spacing Use this option to define the minimum space between two dots. Maximum Dot Spacing Use this option to define the maximum space between two dots. Basic Screen Set Parameters 147 To select FULLtone screens with different characteristics: ¾ In the Type box, select one of the following options: • Very Fine - Provides even area coverage for a single separation. Very Fine offers the most dots per area, but is sensitive to film threshold dot loss, which can lead to a grainy effect. • Fine - Less sensitive to film threshold than Very Fine, but due to fewer dots per area is subject to interference between separations. • Normal - This type is the most recommended because it provides dot placement compromise and uniform spot shapes. It is not sensitive to dot loss and does not show interference between separations. • Coarse - This type is like Normal, but with less regular dot placement in highlight areas. • Very Coarse - Meets Flexo and Gravure printing requirements since the spot size is quite large. To increase the Highlight/Shadow Dot Control value: ¾ In the Highlight/Shadow Dot Control box, type a value between 0 and 9. To define the minimum space between two dots: ¾ In the Minimum Dot Spacing box, type a value between 1 and 3. To define the maximum space between two dots: ¾ In the Maximum Dot Spacing box, type a value between 1 and 9. To Exit the Fulltone dialog box: ¾ Click OK to save the newly defined FULLtone parameters and to return to the Screen-Set Name dialog box. Or, click Cancel to return to the Screen-Set Name dialog box without saving the newly defined parameters. 148 Chapter 40 – Screen Sets Defining the Parameters for Additional Separations Separations, other than Cyan, Magenta, Yellow or Black, encountered by any of the Expose applications (film, plate, cylinder or halftone proof) are screened according to parameters defined manually or automatically. Note: The system enables up to 32 separations. Manual Definitions To collectively define the parameters for additional separations: This option uses one parameter for all the Spot Colors (using the OTHERS column). ¾ In the Others column, define the screen parameters for all additional Spot Color separations. For example, when the Others column is set to 450, all the Spot Colors in the Job are exposed at 450. To individually define the parameters for additional separations: This option enables you to manually create individual parameter sets. 1. In the Separations section, select Others and type the exact (case sensitive) spot color name. Note: Make sure to type the exact name of the color as it is labeled in the image file, or the system will not be able to identify it, and will apply the Others parameters to it. Basic Screen Set Parameters 149 2. In the boxes underneath, type the angle, screen frequency and dot shape parameters. 3. Press ENTER. The new spot color is added to the list of separations and a new Others column is created in the column to the right. 4. Repeat the procedure for every additional spot color you wish to define individually. Note: The parameters set in the Others column cover all additional spot color separations, not defined individually. Type exact Spot Color name and set parameters. 150 Chapter 40 – Screen Sets To select a file with spot color separations from the browser: This option uses an imported file containing several special colors. 1. Click the Import Separations from File button. The Creo browser dialog box appears. 2. In the Show Hidden box, select a file and click OK. The separations appear, each in its own column, in the Spot Colors section in the Screen Set Name dialog box. Note: When you use this option, each spot color is shown separately (use the scroll bar to pan right and left), and its parameters can be manually modified. Spot Colors imported from Job file. Basic Screen Set Parameters 151 Automatic Definitions Define automatic spot color separation parameters by selecting the Cyclic ScreenSet check box in the output application window (Expose, Plate Expose, Halftone Proof and Screen2Go). The Cyclic Screen Set check box assigns screen parameters to each spot color in an incremental cyclic pattern, using the parameters assigned to Cyan, Magenta and Black (CMK) separations. For example, if the file contains Cyan, Magenta, Yellow, Black, Spot Color 1, Spot Color 2, Spot Color 3, Spot Color 4, Spot Color 5 and so on, Spot Color 1 will take on the Cyan parameters, Spot Color 2 will take on the Magenta parameters, Spot Color 3 will take on the Black parameters, Spot Color 4 will take on the Cyan parameters, Spot Color 5 will take on the Magenta parameters, and so on. (For additional information, see Chapter 42, Exposing To Film, Chapter 43, Exposing to Plate, and Chapter 46, Lotem 800V Spectrum). Note: Yellow parameters are not cycled to avoid moire. 152 Chapter 40 – Screen Sets Advanced Screen Set Parameters This section describes advanced parameters that should only be adjusted by those familiar with screening. We do not recommend adjusting the defaults supplied by Creo, as they are result of extensive field and laboratory research. To display the Advanced Screen Set parameters: ¾ Click the Expand icon ( ) at the top right-hand corner of the window. The advanced parameters appear. To collapse the Advanced Parameters section, click the Expand icon again. Item Description G-Ratio For Gravure dot shape only. To compensate for the low viscosity of gravure inks, square gravure dots may initially be given a concave. Once printed, the dots appear on the press sheet as round or square due to ink spread. The degree to which the dot is concave is controlled by the GRatio. Advanced Screen Set Parameters 153 Item Description D-Ratio For all dot shapes, except Square, Gravure, FULLtone, Staccato and User Dot. Dot shapes can be elliptical or elongated by manipulating the D-Ratio (adjusting the height and width ratio of a dot). Elliptical or elongated dots have the advantage of smoother tone transitions in midtones, though they may be subject to dot gain on press. Dupli This is a Class screening option for all dot shapes, except Gravure and Class screening FULLtone. Dupli controls dot loss in highlights. When it’s used, the screen frequency in highlights and shadows is reduced by 50%. This affects the threshold at which the frequency changes. There is no change at 0, while at 9, the threshold reaches into the quarter and three-quarter tones. P-Noise This is an option for all dot shapes, except Staccato and Class screening FULLtone. Occasionally, certain combinations of dot shape, screen frequency, and resolution cause small aberrations of dot construction to repeat themselves at regular intervals. This repetition shows up as an undesirable pattern. The addition of noise introduces irregularities into the screen that breaks up this undesirable pattern. Excessive noise may give the screen a harsh, grainy appearance. If you see an undesirable pattern, increase the noise in steps of 5% from the default for that screen set. The range of P-Noise values is between 0% and 2000%. You cannot define a P-Noise value for Staccato or Class Screening FULLtone, since the dot pattern is already randomized. 154 Chapter 40 – Screen Sets Item Description P-Noise (continue) The way the P-Noise parameter is defined depends on the screen type you are using. For Class and Traditional screen type you can define a single P-Noise value that applies to all noise dot area ranges. Feature size Defines the minimum size for printed spots. The default minimum spot size (in microns) is expressed as 1/res x 2000. Second, third and fourth successive alternatives for minimum spot size are multiples of this number. All these values are rounded to the nearest integer. When you’re working with Traditional Screen Sets, you can define the Feature size. Values range from 4 to 64. FULLtone (replaces Feature size) Feature size is switched to FULLtone only if the connected output device is an imagesetter and you’re working with a Class screen. (For information on defining the Class screen FULLtone parameters, see Defining Class Screening FULLtone Parameters on page 145). Continuous Screening Exposes multiple images at zero gap on one film, plate, or cylinder. Laser Intensity Overwrites the value defined in the Resolution Intensity tables. Spinner Speed Regulates the speed of the Spinner Motor. Note: If you are working with Class Screen Sets, FULLtone boxes replace Feature Size boxes. Advanced Screen Set Parameters 155 Defining Dot Shape Parameters Once you select a Dot Shape, you can further define the following Dot Shape parameters. To define G-Ratio values: ¾ In the G-Ratio box, type a value between 0 and 100 (%). The default G- Ratio is 65%. To define D-Ratio values: ¾ In the D-Ratio box, type a value. If the selected Dot Shape is Geometric, you can define D-Ratio values from 1 to 20%. If the selected Dot Shape is Composed, Round, Diamond, Composed Enhanced, or Diamond Enhanced, you can define the D-Ratio values from 21 to 100%. To define Dupli values: ¾ In the Dupli box, type a value between 0 and 9. To define P-Noise values for Class and Traditional Screen Type: ¾ In the P-Noise box, type a value between 0% and 2000%. For TurboScreen type you can define P-Noise range values that apply to a specific noise dot area range. 156 Chapter 40 – Screen Sets To define P-Noise values for TurboScreen type: 1. Click Noise. The Noise Params dialog box appears. 2. In the All Range box or Noise Ranges boxes, type P-Noise values between 0% and 2000%. To define Feature Size: ¾ In the Feature Size box, select a value from 10 to 320 µm. To define the minimum spot size: ¾ In the Spot Size box, select a value ranging from 10 to 320 mm, based on the following table: Resolutio n [dpm] Default Spot Size [µm] 2nd Option 3rd Option 4th Option 40 50 100 150 200 60 33 67 100 133 80 25 50 75 100 100 20 40 60 80 33 50 67 120 Advanced Screen Set Parameters 157 Resolutio n [dpm] Default Spot Size [µm] 2nd Option 3rd Option 4th Option 140 29 43 57 160 25 38 50 To customize any of the Dot Shape parameters for an individual separation: ¾ In the column below the separation name, in the required box, type a value. Continuous Screening Use this option when you are exposing multiple images at zero gap on one piece of film, plate, or cylinder, and you want to ensure continuous screen calculations between adjacent images. Note: When you are using the Step and Repeat option, and each image must be precisely the same (for example, stamps), make sure to clear the Continuous Screening check box. This ensures identical screen dot arrangement between adjacent images. Defining the Laser Intensity Under certain circumstances, you might want to define a specific laser intensity. Any value that you define in this box will overwrite the value defined in the Resolution Intensity tables on the connected imagesetter or platesetter. (See Chapter 39, Calibrating Output Devices, Dolev Calibration on page 76, or Lotem Calibration on page 86). To adjust the Laser Intensity parameter: ¾ In the Laser Intensity box, type a value. 158 Chapter 40 – Screen Sets Adjusting the Spinner Speed Use this option to regulate the speed of the spinner motor. When unwanted effects appear on film, plate, or cylinder as a result of the vibration of the imagesetter or platesetter, you may want to adjust the speed of the spinner motor. To adjust the Spinner Speed parameter: ¾ In the Spinner Speed box, type a value. If you type a value beyond the range of the connected output device, an error message displays the acceptable range. Note: For TurboScreen sets, the spinner speed value is selected from a list of predefined speeds. Modifying a Screen Set 159 Modifying a Screen Set You can modify all user-defined screen sets, except Creo screen sets. To modify a Screen Set: 1. From the Screen Set List window, select a screen set then click Modify. The Screen Set Name dialog box appears. 2. Change the screen set parameters as needed. (See Basic Screen Set Parameters on page 138 and Advanced Screen Set Parameters on page 152). 3. To revert to the original screen set parameters, click Reset. All the newly defined screen set parameters are canceled. 4. Click Save, to save the changes you have made to the screen set parameters. You return to the Screen Set List window. Tip: The Save button is unavailable when the owner of the Screen Set is Creo. 160 Chapter 40 – Screen Sets Deleting a Screen Set You can delete one or more screen sets at a time from the Screen Set List window. You cannot delete Creo screen sets. To delete a Screen Set: 1. From the Screen Set List window, select one or more files. The selected files are highlighted. To remove a file from the selected group, click it again. The file is deemphasized. 2. Click Delete. A message appears, prompting you to confirm the Delete command. 3. Click OK. The selected screen sets are removed from the list. Press Format Overview ........................................................................................162 Accessing the Press Format Feature .................................................163 Creating a Custom Press Format .....................................................164 Modifying an Existing Press Format .................................................167 Deleting a Press Format...................................................................168 162 Chapter 41 – Press Format Overview The Press Format defines plate-specific parameters of the press such as plate size, plate thickness, gripper margins, and punch system(s). The plate must conform to the range of parameters defined in the Press Format. Accessing the Press Format Feature 163 Accessing the Press Format Feature To access the Press Format feature: 1. From the Brisque Launch Pad, or from the Setup panel, double-click the Devices icon. The Output Devices Handling window appears. 2. In the Output Devices Handling window, select a platesetter configuration. The device operations are enabled. 3. In the Operations section, click Press Format. The Press Format List dialog box appears. Note: Two Press Formats are predefined in the Brisque: DefaultPress and DeafaultProofPress. They cannot be deleted. Only t 164 Chapter 41 – Press Format Creating a Custom Press Format To create a new Press Format: 1. In the Press Format List window, click New. The New Press Format dialog box appears. Note: The Lotem 400V, 800V and 800V² platesetters use customized Press Formats on the Brisque. The ThermoFlex 40/45 platesetter, however, requires you use the generic pre-configured Press Format configuration. Creating a Custom Press Format 165 Item Description Press Format The Press Format name. Plate Size Defines the dimensions of the plates that can be loaded in the selected Press Format. Around the Drum - Defines the plate height. Along the Drum - Defines the minimum and maximum width of the plate. Margins Head, Tail - The head and tail margins are non- exposable areas on the plate determined by the selected Press Format. Note: The minimum head and tail margins for the Lotem are 10 mm and 6 mm, respectively. These margins may be increased for the press. Left, Right - The left and right side margins determine the non-exposable areas on the plate. A minimum value of 0 mm for both side margins can be used. (See the diagram on page 162 for an illustration of the plate geometry). Plate Thickness Defines a minimum and maximum plate thickness. The plate thickness parameters are limited by the selected Press Format. Note: Do not enter a maximum thickness value larger than the thickness value defined in the PC Controller database. Max. Screen Frequency This parameter is not currently supported. Device List Displays the currently connected platesetter. Punch System Define the punch system, installed in the platesetter, to use. This parameter is defined according to the punch holes in the press. The available punch systems that are listed in the Punch System box are initially configured in the platesetter’s PC Controller. 166 Chapter 41 – Press Format Item Description Note: When a Job is exposed directly to plate using the selected Press Format, the Punch System defined appears as the default Punch Systems in the Expose application. Comment 2. Any comment typed here appears in the Press Format List window. In the Press Format box, type the Press Format name. This name appears in the Press Format list in the Plate Expose window. Important: Do not use the following characters, \/, :, *, ?, ", <, >, | or SPACE. These characters are automatically replaced with an underscore (_). 3. Set the rest of the parameters as required and click Save to store the new Press Format. The Press Format appears in the Press Format List dialog box. Note: The parameters of the selected Press Format must match the parameters of the plate defined in the platesetter’s PC Controller. Important: In the Plate Expose window the correct Press Format must be selected from the Press Format list. The Plate Set list shows all the defined plates that match the assigned Press Format. When you select a matching Press Format and Plate set, the names appear in green. If they do not match, the names appear in red. Modifying an Existing Press Format 167 Modifying an Existing Press Format To modify the parameters of an existing Press Format: 1. From the Press Format List window, select a Press Format and click Modify. The following dialog box appears. 2. Modify the relevant Press Format parameters as required. 3. Click Save. The data is saved in the local Brisque and is also transferred to the PC Controller database. Tip: When you click Save As, you open a New Name dialog box, enabling a copy of the current Press Format (with the changes) to be saved under a different name. 168 Chapter 41 – Press Format Deleting a Press Format To delete a Press Format: 1. In the Press Format List window, select a Press Format, then click Delete. A confirmation dialog box appears. 2. Click Yes. The Press Format is deleted from the list. Exposing To Film Overview ........................................................................................170 Launching the Expose Application ...................................................171 Arranging Separations ....................................................................175 Designating a Screen Set.................................................................183 Defining Punch Parameters .............................................................186 Creating Page Marks.......................................................................189 Printing Slugs..................................................................................191 Designating an Excurve ...................................................................192 Customizing the Expose Parameters for Selected Pages ...................193 Additional Expose Parameters .........................................................195 Exiting from the Application............................................................206 170 Chapter 42 – Exposing To Film Overview Use the options on the Expose window to define exactly how a Job exposes on the Imagesetter. You can define Expose related parameters such as: • • • • • • • • • Positive/Negative output Emulsion up/down Step and Repeat Punch system Layout mode Page Marks Excurve Calibration Tone Reproduction Curve Screen Set. Launching the Expose Application 171 Launching the Expose Application To define the Expose default operation parameters: ¾ From the Launch Pad, or from the Output panel, double-click the Expose icon. The Expose window appears. To edit the Expose parameters for a specific Job: ¾ From within the Job Ticket Editor, double-click the Expose icon. The Expose window appears. To edit the Expose parameters for a specific Template: ¾ From within the Template Builder, double-click the Expose icon. The Expose window appears. Item Description Job Ticket Template Displays the Job Ticket Template. Page Inventory Defines page expose parameters. 172 Chapter 42 – Exposing To Film Item Description Layouts Determines how images are arranged on the defined expose area. There are three different Layout modes: • Auto Arrange - automatically arranges the individual Pages or separations on the expose area. Select this option when you want to output plateready films. • Single - outputs only one separation per defined expose area. Select this options to output film that is to be manually stripped. • External - preserves the position of the images relative to one another, as defined by the Imposition application. Select this options to output film that is to be manually stripped. Params Defines other parameters that affect the separations exposure on the Layouts. Screen Set Displays the selected screen set. • List - Access the Screen Set List dialog box to select a screen set. • View/Modify - Displays and modifies the defined parameters in the selected screen set. Note: The Modify button only appears if you access the Expose window via the Job Ticket Editor. When the View button appears, you cannot edit the screen set parameters from this window. When you return to the Expose window after modifying a screen set, a red warning triangle appears beside the Screen Set box, as a reminder that the current screening parameters are not the same as the original parameters defined by the selected screen set (see Designating a Screen Set on page 183). Launching the Expose Application 173 Item Description Cyclic ScreenSet Assigns Spot Colors their screen parameters using the parameters assigned to Cyan, Magenta and Black (CMK) separations in an incremental cyclic pattern. For example, if the file contains Cyan, Magenta, Yellow, Black and 5 spot colors, Spot Color 1 will take on the Cyan parameters, Spot Color 2 will take on the Magenta parameters, Spot Color 3 will take on the Black parameters, Spot Color 4 will take on the Cyan parameters, Spot Color 5 will take on the Magenta parameters, and so on. The Yellow parameters are not used in order to avoid Moire problems. (See Chapter 40, Screen Sets, Defining the Parameters for Additional Separations on page 148). LW Res. Displays the LW resolution according to the defined resolution parameters in the selected screen set. Output Allows you to generate a negative or a positive exposure. Emulsion Determines the direction (up or down) of the emulsion in the exposure. Punch Activates the punch if one or more punch systems is installed in the imagesetter. Params - Modifies the punch parameters. Excurve Designates an Excurve file from a list of curves to be used during exposure. List - Displays the excurve file list, from which a curve may be selected. Marks Accesses the Page Marks parameters (enabled for Auto Arrange and Single modes). Params - Modifies the required page marks. 174 Chapter 42 – Exposing To Film Item Description Slug Enables you to print slug parameters that may be missing from the file (enabled for External mode). Params - Modifies Slug parameters to be printed. User Label Lets you enter a descriptive label to be exposed on the layout along with the other selected page marks. If the Marks option is cleared, this option is unavailable. Note: Click the Expand icon located at the top right of the Expose window to display additional parameters at the bottom of the Expose window. (See Additional Expose Parameters on page 195). Arranging Separations 175 Arranging Separations The dimensions of the expose area on film are user defined. Selecting a Layout mode determines how images are arranged on the defined expose area. ¾ To select a Layout mode, click one of the following icons: Auto Arrange The Auto Arrange Layout option automatically arranges the individual pages or separations on the expose area. Select this option when the position of the images relative to one another is not pre-set. Single The Single Layout option outputs only one separation per defined expose area. External Use the External Layout option when you are exposing Imposition Layouts that were created in a Macintosh Impositioning or packaging application, such as Preps, or in the Layout Assembly application. External Layout preserves the position of the images relative to one another, as defined by the Imposition application. Defining Layout Parameters From the Expose application you can define Layout parameters. 176 Chapter 42 – Exposing To Film To define various Layout parameters: 1. Click the Params button. The Layout dialog box appears. Item Description Method Choose one of the two options to determine how the images are arranged in the Auto Arrange mode. In the External and Single modes, the Film Save option is always selected and cannot be changed. Time Save Fil m he igh t When Time Save is selected, the imagesetter arranges the images along the width of the drum. The expose may be quicker than with Film Save, but may use more film. Film width Arranging Separations 177 Item Film Save When Film Save is selected, the imagesetter arranges the images along the height of the drum. Less film may use less film, but the expose may take longer than Time Save. m Fil he igh t Method (continue) Description Film width Separations Determines the arrangement of the separations to be exposed. This parameter together with the selected Method parameter and the current Layout mode, produces different exposure effects. (See Examples Exposure to 8-up Imagesetter on page 180). Multi Seps Select this option to expose the separations of one Layout (the CMYK of one or more Pages) followed by the separation of the next Layout, and so on. The film that is exposed using this option will have to be cut and rearranged manually when creating plates. Flat Flat exposes a single separation (flat) per expose area. For example, only the Job’s Cyans separations are exposed on one Layout. On the next Layout, the Job’s Magenta separations are exposed, etc.). Separation Gap Defines the space the system places between adjacent separations. 178 Chapter 42 – Exposing To Film Item Description Step & Repeat Use this option to expose one separation a number of times along the height and width of the film. Use the following boxes to define the Step & Repeat: No. of Steps - Determines how many times the separation is repeated in each direction (width and height) where 3 and 2 in the height and width boxes represent a matrix of exposures, 2 across and 3 high. Gap Size - Determines the height and width of the space between the repetitions of the page. Page Marks - Determines whether the marks defined in the Expose windows are displayed around each stepped and repeated image, or only once around the group. Per Copy - around each image 16-Nov-95 16-Nov-95 16-Nov-95 FRUT-P1 FRUT-P1 16-Nov-95 16-Nov-95 FRUT-P1 FRUT-P1 FRUT-P1 Once - around the stepped and repeated images 2. Define the relevant Layout parameters. a. In the Method section, select either Time Save or Film Save. b. In the Separations section, select either Multi-sep or Flat. Note: When selecting Multi-sep, the message “Multi-sep selected” appears in the Expose window with a red triangle. Arranging Separations 179 c. In the Separation gap Height and Width boxes, type the values. d. In the Number of Steps boxes, type the number of repetitions for each separation in a desired matrix (for example, 2 and 3 in the height and width boxes respectively, represent a matrix of exposures, 3 across and 2 high) Note: The matrix of exposures is limited by the size of the media. 3. e. In the Gap and Size boxes, type the vertical and horizontal gaps between the page repetitions. You may use a negative gap value for applications like packaging, when you want images to be nested only when one of the overlapping elements is white LW. f. For Page Marks, select Once to expose the page marks once around the stepped and repeated image, or Per Copy to expose the page marks around each copy of the stepped and repeated image. When you finish defining the Layout Parameters, click Close to return to the Expose window. 180 Chapter 42 – Exposing To Film Examples - Exposure to 8-up Imagesetter External Mode In the External Layout mode, Multi-sep (Film Save mode only) exposes two separations of a 4-up Job on an 8-up imagesetter on the same film. The film that is exposed will have to be cut and rearranged manually when creating plates. Layout 1 - Cyan Layout 1 - Magenta 4 1 4 1 2 3 2 3 External Multi-sep mode, 4-up Job to 8-up imagesetter (1 film) One layout per film Layout 1 - Cyan Film cut 4 3 1 4 1 2 Layout 1 - Magenta 2 3 Film cut One layout per film External Flat mode, 4-up Job to 8-up imagesetter (2 films) Arranging Separations 181 Single Mode In the Single Layout mode, Multi-sep (Film Save mode only) enables the exposure of more than one separation of the same Page on the same film. For example, all four CMYK separations of a Page can be printed on the same film on a 4-up or 8-up imagesetter. The film that is exposed will have to be cut and rearranged manually when creating plates. Page 1 C M Film cut Page 2 Y C Y M K K One page (four separations) per film Film cut One page (four separations) per film Single Multi-Sep mode, 2 page output to 8-up imagesetter (2 films) Page 1 C Page 1 M Page 1 Y Page 1 K Film cut with punch One page (one separation) per film Film cut without punch Single Flat mode, 1 page output to 8-up imagesetter (4 films) 182 Chapter 42 – Exposing To Film Auto Arrange Mode The following figure illustrates the exposure in the Auto Arrange Layout mode using either the Multi-sep or Flat options. Page 1 Page 2 C M C M Y K Y K Page 1 C M Y K Page 2 Auto Arrange Multi-Sep mode, 2-up Job output to 8-up imagesetter (1 films) C M Y K Auto Arrange Multi-Sep mode, 2-up Job output to 8-up imagesetter (1 films) Designating a Screen Set 183 Designating a Screen Set The screen set selected from the Expose window, defines all the screening parameters required for the exposure, including the LW resolution. When you define the Film Expose parameters in a Brisque Template that includes both the RIP and the Expose operations, the LW Resolution value in the RIP window is automatically defined by the expose LW Resolution of the attached screen set, and subsequently cannot be modified. Note: From the Brisque you can expose pages whose LW resolution is exactly half of the defined output resolution. This is called the half resolution workflow. To implement the half resolution output into a workflow, launch a Template that executes both RIP and Expose, and in the RIP window, select the LW Half Res. check box. If you RIP and then expose at double resolution, a message appears asking you if you wish to expose the pages at half resolution. Refer to Chapter 18, RIP for details. For additional information on screen sets, see Chapter 40, Screen Sets. 184 Chapter 42 – Exposing To Film To select a new screen set: 1. In the Expose window, click List, located next to the Screen-Set box. The Screen Set List dialog box appears. 2. From the Screen Set List dialog box, click the Screen Type box and select a screen type: Available Screen Types Screening Board Classa, Traditional SFL (VLSI) Semi-traditionalb, TurboScreenc TSP a. Class screens (not supported by Lotem platesetters) b. Semi-traditional screens (for example, Kodak Approval XP4) c. TurboScreen (Dolev imagesetters and Lotem platesetters) 3. After selecting the screen type, select the screen set you wish to apply. 4. To display and modify the defined parameters in the selected screen set, click Modify. The Screen Set Name dialog box appears. For additional information modifying on screen sets, see Chapter 40, Screen Sets. Designating a Screen Set 185 5. Select the Positive or Negative option. The Page icon, below the Page Inventory button, reflects your choice. 6. Click the Up (Mirror) or Down buttonsto determine whether the image will expose right-reading emulsion up or right-reading emulsion down. The Page icon below the Page Inventory button reflects your choice. 7. From the Screen Set List window, click OK to confirm the selection. You return to the Expose window. To exit the Screen Set List window without designating a new screen set, click Cancel. 8. If your screen set includes spot color separations, you can select the Cyclic ScreenSet check box. For details, see Cyclic ScreenSet on page 173. 186 Chapter 42 – Exposing To Film Defining Punch Parameters Use the Punch option to designate a punch system and define the punch alignment parameters. To define the Punch parameters: 1. Click the Punch check box. The Params button next to it is enabled. 2. Click Params. The Punch dialog box appears. The options that appear in the window vary, depending on the connected output device, and on the selected punch system. Defining Punch Parameters 187 Item Description Exposable Area Displays the maximum image size supported by the imagesetter. The exposable area is defined according to the cassette’s exposable area. Exposable Area = cassette’s size - offset values of output device. Varies between Dolev 4Press and Dolev 800. You cannot edit these boxes. Pivot Position Displays the existing punch configuration. They indicate the position of the punch hole that is defined as the pivot (normally the round hole). You cannot edit these boxes. (If the selected Punch System is External, this option is unavailable.) Punch System Enables you to select a punch system from a list of available systems. Alignment Designates the point on the image to be the reference point (for example, the top-left) when you position the image relative to the punch. If you select None, or External, you will not be able to define an offset. Offset from punch Defines exactly where the reference point (top-left, bottom-right, and so on) is positioned relative to the punch. Default is 0,0. If the defined Alignment is None or External, the Offset boxes are disabled. Note: Each punch system has one origin (pivot), or reference point, from where the measurements of the alignment are made. The plus and minus signs in the R-icon indicate a positive or negative offset and the direction. A positive offset moves the reference point down and to the right. A negative offset moves the reference point up and to the left. Minimum Film Feed Defines the minimum length of film that is fed when the punch is activated. (If the selected Punch System is External, this option is unavailable.) 188 Chapter 42 – Exposing To Film 3. From the Punch System list box, select a punch system. The R-icon in the bottom-right of the window reflects the general position of the punch system and the exposure on the film, relative to the expose area. 4. From the Alignment list box, select an alignment option The R-icon reflects your selection. 5. In the Offset Vertical and Horizontal boxes, type the distance of the reference point from the Punch. 6. Click Close to save the settings and to return to the Expose window. Note: The Page icon below the page Inventory button indicates that the Punch option is active. Creating Page Marks 189 Creating Page Marks Use the Marks option to select and define page marks for each separation. This option is unavailable when the External Layout option is selected. To create Page Marks: 1. Select the Marks check box. The Params button next to it is enabled. 2. Click Params. The Page Marks dialog box appears. 3. Select the required check boxes. The Page icon that appears below the Page Inventory button indicates that the Page Marks option is active. 4. • For the Registration Marks option, select either Positive or Negative to determine whether the registration marks expose as negative or positive. All other Marks automatically expose as positive. • For the Crop Marks checkbox, define the area of the bleed both vertically and horizontally by typing values in the Vertical and Horizontal boxes. Click Close to save the parameters and to return to the Expose window. 190 Chapter 42 – Exposing To Film 5. In the User Label box, type the text. Printing Slugs 191 Printing Slugs The External layout mode enables you to print slug parameters (and user comments) that may be missing from the application originally used to create the file. Important: The use of slugs decreases the exposable area on film. To print slugs: 1. In the Expose window, select the Slug check box. 2. Click the Params button, located right of the Slug check box. The Slug Params dialog box appears. 3. Select the required Slug check boxes. 4. In the Offset boxes, type the offset values for the slug position. 5. Click OK to save your selections, and to return to the Expose window. 6. To add a user-defined comment, click the User Label box in the Expose window and type your comment. 192 Chapter 42 – Exposing To Film Designating an Excurve When you define the Expose parameters, you can designate an Excurve file to correct for density and dot percentage variations. The selected excurve option appears in the Excurve box. (You may expose the image without using an Excurve file.) To designate a different Excurve: 1. In the Expose window, click the (Excurve) List button. The Excurve File List dialog box appears. 2. Select an Excurve from the list, or click AutoSelect to have the system automatically select the appropriate Excurve file for you. The Excurve is selected according to the Expose conditions and the Excurve AutoSelect parameters that were defined in the Calibration. 3. Click OK to confirm your selection. The name of the selected Excurve appears in the Excurve box. If you selected AutoSelect, the box displays the word AutoSelect, followed by the name of the automatically selected Excurve in parentheses. 4. Click Cancel to exit the Excurve File List window without selecting an Excurve. For detailed information on creating and modifying Excurves, see Chapter 39, Calibrating Output Devices, Excurve Calibration on page 92. Customizing the Expose Parameters for Selected Pages 193 Customizing the Expose Parameters for Selected Pages Use the Page Inventory option when you want to define certain expose parameters for a selected Page(s) in a document. The Page Inventory option appears below the Expand icon in the upper right corner of the Expose window. For example, use the Page Inventory option when exposing a multi-Page document where one or more of the Pages requires a different LW resolution than the rest of the document. The Page Inventory option is available when you are using the Job Ticket Editor to define the expose parameters for a specific Job that has multiple pages. It is not available when you are configuring a Template or the Expose default operation parameters. The following Expose parameters are not page-specific: Punch, Scale, Expose Media, Unload Policy, No. of Copies, Black Frame/Short Feed, and Blueline. Note: Any changes you make to the Expose parameters outside of the Page Inventory will modify the parameters for all the Pages belonging to the current Job. Only use the Page Inventory option to modify the parameters for selected Page(s). 194 Chapter 42 – Exposing To Film To define the expose parameters for a selected Page: 1. Click the Page Inventory. The Page Inventory dialog box appears, showing the Pages in the current Job, as well as the number of separations and LW resolutions of each Page. 2. From the Page Inventory window, highlight the page whose processing parameters you want to change. The Expose window reflects the highlighted Page. If, in the Page Inventory dialog box, you click All, any changes that you make apply to all the pages in the Job. 3. In the Expose window, modify the parameters for the highlighted page. The parameters that you edit apply to the Page that is highlighted in the Page Inventory window. 4. In the Page Inventory window, click Apply to Selection to confirm the change. The parameters are defined for the highlighted page. Note: Since you cannot select multiple pages (except by clicking All), you must repeat the above procedure to define custom parameters for other selected pages. If you define parameters for a selected page, then select a different page, without first clicking Apply to Selection, the Lose Changes to the Job Ticket? message appears. Click Yes to cancel the parameters defined, or click No to go back to the Page Inventory dialog box. 5. Exit the Page Inventory window. Additional Expose Parameters 195 Additional Expose Parameters Additional parameters are available for the Expose application. ¾ To access the additional options, click the Expand icon ( )that appears in the upper-right corner of the window. The window expands to display the following. Item Description Black Frame/ Short Feed During a Negative exposure and the Punch option selected, use this option to insert a black frame around the image. During a Positive exposure to a device with an accumulating cassette (Dolev 2Press or Dolev 4Press families) and the Punch option selected, use this option to conserve film. (See Black Frame/Short Feed on page 198.) Note: This feature is not available when the connected output device is a Dolev 200, Dolev 250, Dolev 400, Dolev 450, or Dolev 3136V. 196 Chapter 42 – Exposing To Film Item Description Margins You may create margins along the Top, Bottom, Left and Right sides of the exposure to reduce the area exposed on film. For example, if the film generated by the imagesetter is larger than the proof sheet, to make sure that the part of the film that extends beyond the proof sheet contains no exposed images, define margins to reduce the film’s expose area. Scale This option enables you scale the image at output. Expose Media Define the film size when the connected imagesetter is a Dolev 800 or Dolev 800V. Unload Policy Determines when the imagesetter cuts and unloads the film. Relevant for accumulating cassettes only (Dolev 2Press or Dolev 4Press families), this option determines whether cassette unloading will take place on a full cassette (20 meters), or at the end of each Job. (This option does not prevent you from manually unloading film from the imagesetter.) No. of Copies Lets you select the number of times each Layout is exposed (maximum 10 copies). Separation Handling The Separation Handling feature enables you to expose selected separations, swap the screening parameters between separations, and merge versions. Expose Sep Select the separations to be modified or exposed. Version Enables you to merge base separation with additional separations for different versions. Swap Enables you to swap the screening parameters between separations. B. Line Instructs the Brisque to send a Blueline proof to film. Ignore Pack Seps Selects or clears selection of Packaging type Die Line separations. Additional Expose Parameters 197 To modify the relevant parameters. 1. To insert margins, type values in the Top, Left, Bottom or Right Margin boxes. 2. To scale the image in the Scale boxes, type the horizontal and vertical scale values between 95% and 105%. 3. To set the Expose Media, in the Expose Media box, select Small, Medium, or Large to designate a specific cassette, or select Auto-Size to instruct the software to select the smallest cassette on which the exposure will fit, and to minimize wasted film. 4. To set the Load/Unload policy for accumulating casette type devices, in the Unload Policy box, select On Full Cassette or End of Job. 5. To change the number of exposures for each layout, in the Number of Copies box, type a value other than 1. 6. Click OK to save the parameters. 198 Chapter 42 – Exposing To Film Black Frame/Short Feed Depending upon the circumstances under which it is implemented, Black Frame/Short Feed can make production time more efficient and conserve film/polyester plate. Use Short Feed as a film/polyester plate saving option when you are exposing to a device with an accumulating cassette (Dolev 2Press or Dolev 4Press) and using Align to Punch. Drum Width Film Image Right margin Left margin Top margin Drum Height Black Frame Bottom margin The Black Frame option enables you insert a black frame around the image so that when you are working with negative exposures you won’t have to manually strip in a frame. The plate that will be produced from this exposure will not attract unnecessary ink. Use Black Frame when you are generating negative exposures onto polyester plates. Additional Expose Parameters 199 When Black Frame/Short Feed is active, the defined Output mode determines whether Black Frame or Short Feed is implemented, and the user-defined margins define exactly how the option is implemented. When the defined Output mode is Negative, a Black Frame is automatically inserted around the image, from the edges of the Page or Layout, to the edges of the user defined margins. The left and right margins also influence where the film/polyester plate is cut. Note: When you are exposing to polyester plates, you must define the imagesetter margins so that the Black Frames will overlap slightly. When the defined Output mode is Positive, Short Feed is implemented according to the user defined margins, which determine where the film/ polyester plate is cut. These user defined margins overwrite the defined imagesetter margins. Short Feed When you are making a positive exposure, use the Short Feed option to determine where the film is cut. When you are using Align to Punch, and the connected output device has an accumulating cassette (for example, Dolev 4Press), use Short Feed to save film. If the image size is smaller than the exposable area defined by the imagesetter, use the Left and Right margin boxes to define left and right margins that correspond to the film size. When the expose is complete, the film is advanced so that the next exposure begins after the defined left margin. When you are not using Align to Punch, the system automatically saves film. Top and Bottom margins have no effect on where the film is cut, but when you are not working with Align to Punch, all four margins define the image’s position. Tip: When you are not using Align to Punch, you may want to use Short Feed to define margins that ensure that the film size slightly exceeds the image size. Cutting the film so that it extends slightly beyond the edges of the image prevents a line from appearing on the image where the film edge ends. 200 Chapter 42 – Exposing To Film Designating a Tone Reproduction Curve Use the Tone Rep. option to designate a tone reproduction curve to the exposure. For information on creating and modifying, see Chapter 39, Calibrating Output Devices, Tone Reproduction on page 112. To designate a Tone Reproduction curve: 1. In the Expose window, click the (Tone Rep.) List button. The Tone Reproduction Files List dialog box appears. 2. Select a Tone Reproduction curve from the list. 3. Click OK to confirm your selection and return to the Expose window. The name of the selected Tone Reproduction Curve file appears in the Tone Rep. box. Click Cancel to exit the list without selecting a curve. Additional Expose Parameters 201 Separation Handling Use the Separation Handling feature to expose selected separationsand to exchange screening parameters between separations. The Expose application also enables you to expose multiple separations in a single Layout to the same film in order to prepare a Blueline proof. (See Defining the Expose Parameters for a Blueline Proof on Film on page 204). To select which separations are exposed: ¾ In the Separation Handling section, select the check box next to a separation. Or, Click All or None below the list of separations. Important: In all instances, when you are not preparing a film for a Blueline proof, make sure that the B.Line check box is cleared. 202 Chapter 42 – Exposing To Film Versions Brisque is capable of producing a Job in different versions. For example, the same poster may be printed in several versions (languages), destined for different countries. To do this, the Job output must contain the normal separations that make up a base (process and spots) and all the versions and special separations, each containing the information for the specific version. The printer will use the base separations to print a base to a Job, then add the different versions to different batches of the base in order to produce different versions of the same product. To merge base separations with versions: 1. In the Separation Handling section, select a separation, then click the ... button to the right, in the Version column. The Merge With dialog box appears, showing all available versions. Note: The Versions button in the Expose window is enabled (... instead of ..), only when a Job includes Versions. 2. Select or clear the versions you want to merge with the base separation and click OK. You return to the Expose window. For complete information on Versioning see Chapter 31, Versioning on the Brisque. Additional Expose Parameters 203 Swapping screen parameters between separations To swap the screening parameters between two separations: 1. In the Separation Handling section, select a separation, then click the ... button to the right in the Swap column. The Swap With dialog box appears. 2. In the Swap With dialog box, select the separation with the exposure angle you want to change to. 3. Click OK. The exposure angles are switched. The new separation name appears on the Swap button and the old name appears on the Swap button next to the separation to be switch with. For example: If you want to assign the Magenta expose angle to the Cyan, select the Cyan in the Separation Handling section and in the Swap With dialog box select Magenta. The Magenta expose angle will now be assigned to the Cyan, and the Cyan exposure angle will now be assigned to the Magenta . Note: When you enter the Swap With dialog box via the Template Builder, the Others option appears in the list, representing spot colors. If you enter the Swap With dialog box via the Job Ticket Editor, all spot colors are listed by name. 204 Chapter 42 – Exposing To Film 4. To cancel the swap definition, click the Reset button, or click the Swap With box itself, and select None from the Swap With dialog box. Important: A warning triangle appears at the bottom of the Expose window, along with a message that reads: Separations De-Selected/swapped! if any of the separations have not been selected for exposure or if any of them are swapped. For additional information on handling spot colors, see Chapter 40, Screen Sets, Advanced Screen Set Parameters on page 152. Defining the Expose Parameters for a Blueline Proof on Film From the Expose application you can instruct the Brisque to send a Blueline proof to film. A Blueline proof involves exposing multiple separations (CMYK and Spots) belonging to a single layout onto a single film and then producing a proof from the film. You define the exposure weight of each separation sent to the expose. The Blueline proof enables you to make sure that pages are imposed accurately and that the marks and layouts are correct. The Blueline proof is not intended to be used as a color proof. To define the Expose parameters for a Blueline exposure: 1. In the Expose window, select the B.Line check box. All the percentage boxes for the CMYK and Spot separations become available. 2. In the percentage boxes, next to each separation, type the percentage weight of exposure (between 0% and 100%) for each separation to be exposed on the same film. • Type a value of 0% for any separation that you do not want to be included in the Blueline proof. • Type a value of 100% for any separation whose full weight is to be included in the exposure. • The highest value that can be set for any separation is 100%. Any value larger than 100% is automatically reduced to 100%. • The default values for the color separations are: C=45%, M=35%, Y=20%, K=100% and Spots=100%. Additional Expose Parameters 205 Note: Blueline proofs do not support pre-separated files. If the Blueline output feature is performed on layouts containing pre-separated files, the Expose application will output only one of the separations. 206 Chapter 42 – Exposing To Film Exiting from the Application To exit the application: ¾ Click OK to confirm the changes and exit the Expose window. Or, click Reset to revert to the previously saved Expose parameters. The Expose window remains open. Or, click Cancel to exit the Expose window without saving changes to the Expose parameters. Exposing to Plate Overview ........................................................................................208 Launching the Plate Expose Application ..........................................209 Designating a Screen Set.................................................................213 Printing Labels/Slugs .......................................................................216 Assigning the Press Format..............................................................219 Assigning the Plate Set....................................................................224 Designating an Excurve ...................................................................226 Designating a Tone Reproduction Curve ..........................................227 Plate Load and Plate Unload Policies................................................228 Additional Plate Expose Parameters .................................................229 Customizing the Plate Expose Parameters for Pages or Layouts........235 Printing Selected Layouts ................................................................238 Exiting the Plate Expose Application ................................................239 208 Chapter 43 – Exposing to Plate Overview Use the options displayed in the Plate Expose window to define exactly how a Job is exposed directly to plate. Plate Expose enables you to choose a predefined Press Format, Punch System(s), Plate Set, and Screen Set. You can also define parameters such as a Slug, Plate ID, Image Offset, Positive/Negative Exposure, Layout Rotation, and Separation Handling. In addition, the Plate Expose window enables you to designate a Calibration and a Tone Reproduction Curve to a particular Job or automated workflow. When you expose an Imposition Job, the Pages are arranged according to the Imposition information, defined in either the Macintosh Preps application, or in the Brisque Layout Assembly application. Before exposing an imposition Job, make sure that the pages of the Job are in Creo CT and LW format, and that they reside in the location that you indicated when creating the imposition Job. Launching the Plate Expose Application 209 Launching the Plate Expose Application To edit the Plate Expose default operation parameters: ¾ From the Launch Pad, open the Output panel, then double-click the PlateExp icon. The Plate Expose window appears. To edit the Plate Expose parameters for a specific Job: ¾ From within the Job Ticket Editor dialog box, double-click the PlateExp icon. The Plate Expose window appears. To edit the Plate Expose parameters for a specific Template: ¾ From within the Template Builder dialog box, double-click the PlateExp icon. The Plate Expose window appears. 210 Chapter 43 – Exposing to Plate Item Description Apply CTP Params to Indicates the selected page or layout to which the parameters that you edit will apply. Inventory Customize the plate expose processing parameters for a selected page in a Job document or a selected layout in an imposition Job. Screen-Set Displays the selected screen set. Type - Displays the Screen Type (Traditional, TurboScreen, and so on). LW Res - Displays the LW resolution, according to the defined resolution parameters in the selected screen set. List - Select a Screen Set. View - Displays Screen Set parameters. If you open the Plate Expose window from the Job Ticket Editor dialog box, the Modify button appears instead of View. You can modify parameters through the Modify button. Cyclic ScreenSet Assigns spot colors their screen parameters using the parameters assigned to Cyan, Magenta and Black (CMK) separations in an incremental cyclic manner. For example: If the file contains Cyan, Magenta, Yellow, Black and 5 spot colors, Spot Color 1 takes on the Cyan parameters, Spot Color 2 takes on the Magenta parameters, Spot Color 3 takes on the Black parameters, Spot Color 4 takes on the Cyan parameters, Spot Color 5 takes on the Magenta parameters, and so on. The Yellow parameters are not used in order to avoid Moire problems.(See Chapter 40, Screen Sets). Launching the Plate Expose Application 211 Item Description Input orientation Use this feature to convey to the application how the image was arranged (landscape or portrait), so it can automatically rotate the image when needed. The Allow Input Orientation Selection check box in the Plate Expose Preferences (Preferences -> Output -> Plate Expose) must be selected to view this option. Print Plate ID Instructs the Plate Expose application to print the plate ID on the plate. Used for the quick re-expose feature in the Storage Manager application. Print Slug Instructs the Plate Expose application to print the slug on the plate. Slug Params - Select the Slug parameters to be printed. User Label Type a comment to be displayed on the plate next to the Plate ID. Press Format Select a Press Format. Punch Displays the punch system(s) configured for the currently selected Press Format. The punch system is defined for autoloading Lotem devices only. Params - Change the Punch System. Note: Punch parameters are not relevant to the Trendsetter device. Plate Set Select a plate set. The Brisque reads the plate sets from those installed in the device controller. Plate Size Displays the plate size for the currently selected plate set. 212 Chapter 43 – Exposing to Plate Item Description Plate Type Appears as either Positive or Negative. This value is defined in the PC Controller or the Print Console as Positive or Negative. Positive plate type is used for negative exposures, negative plate type is used for positive exposures. Alignment Determines the image reference to the plate. Image Offset Determines the offset reference from the point of alignment at which exposure begins. Excurve Displays the selected excurve. Exposure can be performed without the excurve. Tone Rep. Displays the selected tone reproduction curve. Exposure can be performed without the tone reproduction curve. Plate Policy Instructs the platesetter on the load/unload policy. (Not relevant for the Trendsetter). Note: Click the Expand icon located on the top-right of the Plate Expose window. Additional parameters at the bottom of the Plate Expose window. (See Additional Plate Expose Parameters on page 229). Designating a Screen Set 213 Designating a Screen Set The Screen Set selected from the Plate Expose window defines all the screening parameters required for the exposure, including the LW resolution. When you define the Plate Expose parameters in a Brisque template that includes both the RIP and the Plate Expose operations, the LW Resolution value in the RIP window is automatically defined by the Plate Expose LW Resolution of the attached Screen Set, and subsequently cannot be modified. Note: From the Brisque you can expose pages whose LW resolution is exactly half of the defined output resolution. This is called the Half Resolution workflow. If you RIP and then expose at double resolution, a message appears asking you if you wish to expose the Pages at half resolution. (For additional details, refer to Chapter 18, RIP). Tip: To implement the Half Resolution output into a workflow, launch a template that executes both RIP and Plate Expose, and select the LW Half Res. check box in the RIP window. To select a new Screen Set: 214 Chapter 43 – Exposing to Plate 1. In the Plate Expose window, click the List button, located next to the Screen-Set box. The Screen Set List window appears. 2. From the Screen Set List window, in the Screen Type box, select a screen type. Only the appropriate Screen Sets are displayed: Available Screen Types Screening Board Classa, Traditional SFL (VLSI) Semi-traditionalb, TurboScreenc TSP a. Class screens (not supported by Lotem platesetters). b. Semi-traditional screens (for example, Kodak Approval XP4). c. TurboScreen (Dolev filmsetters and Lotem Platesetters). 3. Select a Screen Set from the list. 4. Click the Filters button to filter the list of Screen Sets to meet user-defined parameters. (For a detailed description of Filters, refer to Chapter 2, Introduction to the Desktop, Brisque Filters on page 18.) Designating a Screen Set 215 5. To view the defined parameters of the selected screen set, from the Screen Set List window, click View. The Screen Set Name window appears. This window displays the existing parameters of the selected Screen Set, but does not enable you to modify them. If you open the Plate Expose via the Job Ticket Editor, the Modify button appears instead of the View button. To modify the defined parameters in the selected Screen Set, click Modify. The Screen Set Name window appears. (For detailed instructions on modifying and creating new Screen Sets, Chapter 40, Screen Sets). Note: If you open a file that contains Spot Colors and you selected the Cyclic ScreenSet box, the angles of the spots are sequentially defined according to the CMK angles. For example, Spot1 = C°, Spot2 = M°, and so on. When the Cyclic ScreenSet is not cleared, the angles of the spots are displayed with individually set parameters. When the View button appears, you cannot edit the screen set parameters from this window. 6. From the Screen Set List window, click OK to confirm the selection. You return to the Plate Expose window. To exit the Screen Set List window without designating a new Screen Set, click Cancel. Note: When you return to the Plate Expose window after modifying a Screen Set, a red warning triangle appears beside the Screen Set box as a reminder that the current screening parameters are not the same as the original parameters defined by the selected Screen Set. 7. If your screen set includes spot color separations, select the Cyclic ScreenSet check box. For details, see Cyclic ScreenSet on page 210. 8. To define image orientation, select Landscape or Portrait Input Orientation. Note: To enable this option, select the Allow Input Orientation Selection box in the Plate Expose Preferences dialog box. 216 Chapter 43 – Exposing to Plate Printing Labels/Slugs When exposing a Job to plate, you can command the Brisque to print the plate ID and other slugs (Time and Date, Job Name, Separation Name, Flat Name, and Screen Set Name) on the plate as well. Printing the Plate ID Each Job exposed directly to plate is designated a unique Plate ID. With the quick re-expose feature in the Storage Manager application, you can easily perform plate remakes in the event of a plate press emergency (such as a damaged, scratched or bent plate). The Storage Manager uses the plate ID to quickly identify the particular plate you wish to remake and sends it to re-exposure. The plate ID designated for each plate expose is composed of a unique number, which contains information such as the date and time the expose took place, and includes the separation color in the suffix. Note: The quick re-expose feature enables you to perform quick plate remakes for Jobs that appear in the On Press list in the Storage Manager. We recommend you store a Job in the on press mode for approximately 24-48 hours until the work is off the press. (For additional information on storing Jobs, see Chapter 29, Store and Chapter 30, The Storage Manager). ¾ To print the plate ID, from the Plate Expose window, select the Print Plate ID check box. The plate ID is always printed left of the Slug. ¾ To reposition the Plate ID mark, redefine the slug offsets from the CTP Slug Params window. (See Printing Slugs on page 217). Printing Labels/Slugs 217 Printing Slugs The Plate Expose application enables you to create a slug. The slug is printed on the plate within the head margin. ¾ To add a descriptive label to the slug, in the User Label box, type the Label text. The Label appears in the image slug area. To print a slug: 1. Select the Print Slug check box. The Slug Params button and the User Label box are enabled. The word labels appears in the layout that is displayed below the Page Inventory button. 2. Click the Slug Params... button. The CTP Slug Params window appears. 218 Chapter 43 – Exposing to Plate 3. Select the required Slugs check boxes. 4. To define the offset of the slug from the default position on the plate, in the Offset box, select an Offset option: • Vertical offset - The slug is displaced by a value defined in a vertical direction from the Head margin, depending on margin defined in the Press Format (a small margin width permits a small offset in the vertical direction). • Horizontal offset - The slug is displaced by value defined in a horizontal direction from the left side of the left-most image on the plate. 5. Click OK, to save your selections and return to the Plate Expose window, or click Cancel, to return to the Plate Expose window without saving your selections. Assigning the Press Format 219 Assigning the Press Format You can select a Press Format from the Press Format box. Tip: We strongly recommend you create specific hot folders or templates for each Press Format you have configured. If you are working offline, or are defining default Plate Expose parameters for a template, you may assign a predefined Press Format according to the requirements of the Job or Template. To select a Press Format: 1. In the Press Format list box, select a press format. If the press format name appears in green, its parameters conform to the parameters of the selected plate set. If a press format name appears in the list in red, its parameters do not confirm with the parameters of the selected plate set. Important: If you decide to redefine the press format from the Plate Expose application, you can only select an already predefined press format. You cannot modify the actual parameters of the Press Format from the Plate Expose window. To modify the Press Format parameters, do so via the Output Devices Handling window. (For additional information on the Press Format, refer to Chapter 41, Press Format). 220 Chapter 43 – Exposing to Plate Defining the Image Alignment The alignment determines the image position on the plate. Your options are: • • Top Left Top Center. The following schematic illustrates the Top Left and Top Center alignments for an image on the plate: H (height) - plate height (around the drum) W (width) - plate width (along the drum) ¾ To set up image alignment, in the Alignment box, select the alignment position. Assigning the Press Format 221 Defining the Image Offset Use the Image Offset box to shift the layout on the plate. The values you type into the Image Offset boxes redefine the point at which the platesetter begins to expose the image. ¾ To define the Image Offset, place the cursor within the Horizontal (along the drum) or Vertical (around the drum) boxes, then type the offset values for the image. The offset is relative to the selected alignment (Top Left or Top Center) previously defined. The following figure shows the image offset coordinates, relative to the defined alignment parameters and the geometry of the plate, after 1800 rotation: Offset from point of reference Selecting the Punch Parameters The punch system is defined for autoloading Lotem devices only. The Plate Expose application on the Brisque defines the punch system(s) and punch-related parameters to be used for the Plate Expose Job. The punch system(s) displayed in the Punch box on the Plate Expose window are defined by the punch system parameters of the currently selected press format. 222 Chapter 43 – Exposing to Plate From the Plate Expose window, you can further view the punch-related parameters, including the plate set, plate size, exposable area, punch system, image alignment, and image offset. The default settings for all of these parameters (except for image alignment and image offset) are set according to the predefined parameters of the currently selected press format. To define the Punch parameters: 1. Select the Punch check box. The Params... button is enabled. 2. Click the Params... button. The Punch window appears. Assigning the Press Format 223 Item Description Plate Set Displays the name of the defined plate set selected in the Plate Expose window. Plate Size Displays the dimensions of the plate for the selected press. The dimensions cannot be modified in this window. Exposable Area Displays the exposable area of the plate. The exposable area is the plate size less the head and tail margins. These values are all defined in the Press Format parameters. These dimensions cannot be modified in this window. Punch System Displays as default the Punch System(s) configured for the currently selected Press Format. (For more information, see Chapter 38, Configuring Output Devices, Lotem Platesetter Operations on page 12). If you are offline or defining default Plate Expose parameters for a template, you may assign a punch system according to the requirements of the Job or template. The punch systems that appear in the Punch System box are currently available on the configured Lotem platesetter. Alignment Displays the image alignment to the pivot position. Offset Displays the offset from the point of alignment. 3. Select the required Punch System(s) check box(es). 4. Click OK to save the current Punch parameters. You return to the Plate Expose window. Or, click Cancel to return to the Plate Expose window without saving your selections. 224 Chapter 43 – Exposing to Plate Assigning the Plate Set The Plate Set is comprised of the following parameters: • • • • Plate Set Plate Size Plate Type Plate Thickness (defined on Lotem PC Controller or Trendsetter Print Console). Note: The Lotem and Trendsetter platesetters support plates of various specifications from various vendors, and Creo does not promote plates from any specific company. When in the online mode, the Plate Expose application appearsion the Plate Set box the currently configured Plate Set(s) installed in your platesetter. This information is sent to the Brisque by PC Controller or Print Console, depending on the configured platesetter. When in the offline mode or when defining default Plate Expose parameters for a template, you may assign a predefined Plate Set according to the requirements of the Job or Template. To select a Plate Set: ¾ In the Plate Set box, select a plate set. The Plate Size and Plate Type boxes display the parameters defined in the selected plate set. If a plate set name appears in red in the list, its parameters clash with the parameters of the selected press format. If the plate set name appears in green, its parameters conform to the parameters of the selected press format. Assigning the Plate Set 225 The Plate Thickness parameter is not Plate Expose dependant but is specifically defined per plate. It is defined on the PC Controller for the Lotem, or the Print Console for the Trendsetter. Important: If you decide to redefine the plate set from the Plate Expose application, you can select an already predefined Plate Set. You cannot modify the actual plate set parameters from the Plate Expose window. Modify the plate set parameters from the Lotem PC Controller or a Print Console. 226 Chapter 43 – Exposing to Plate Designating an Excurve When you define the plate expose parameters, you can designate an excurve file to correct for density and dot percentage variations. The currently selected excurve appears in the Excurve box. (For information on creating and modifying Excurves, see Chapter 39, Calibrating Output Devices, Excurve Calibration on page 92). Note: You may expose the image without using an excurve. To designate a different Excurve: 1. In the Plate Expose window, click the (Excurve) List button. The Excurve File List window appears. 2. Select an Excurve from the list, or select AutoSelect to have the system automatically select the appropriate excurve file for you. When AutoSelect is selected, the excurve is selected according to the expose conditions defined by the selected screen set and according to the excurve AutoSelect parameters that were defined in the Calibration application. 3. Click OK to confirm your selection. The name of the selected Excurve appears in the Excurve box on the Plate Expose window. If you selected AutoSelect, the box displays the word AutoSelect, followed by the name of the automatically selected excurve in parentheses. Designating a Tone Reproduction Curve 4. 227 Click Cancel to exit the Excurve File List window without selecting an Excurve. Designating a Tone Reproduction Curve Select an option in the Tone Rep. box to designate a Tone Reproduction curve to the exposure. (For information on creating and modifying tone reproduction curves, see Chapter 39, Calibrating Output Devices, Tone Reproduction on page 112). Note: You may expose the image without using a Tone Reproduction curve. To designate a Tone Reproduction Curve: 1. In the Plate Expose window, click the (Tone Rep.) List button. The Tone Reproduction Files List window appears, showing a list of existing tone reproduction curve files. 2. Select a tone reproduction curve from the list. 3. Click OK to confirm your selection and return to the Plate Expose window. The name of the selected tone reproduction curve file appears in the Tone Rep. box on the Plate Expose window. Or, click Cancel to exit the window without selecting a curve. 228 Chapter 43 – Exposing to Plate Plate Load and Plate Unload Policies Important: The Load/Unload policy is defined at the job level, and cannot be customized per layout, page or separation. To define the Load/Unload plate policy: 1. 2. Define the load policy: a. Select the Load check box to instruct the platesetter to automatically load a new plate before the exposure begins. b. Clear the Load check box to instruct the platesetter not to automatically load a new plate before the exposure begins. Define the unload policy: a. Select the Unload check box to instruct the platesetter to automatically unload the plate when the exposure is finished. b. Clear the Unload check box not to automatically unload the plate when the exposure is finished. This enables you to re-expose the plate. Additional Plate Expose Parameters 229 Additional Plate Expose Parameters Additional parameters are available for the Plate Expose application. To set additional Plate Expose parameters: 1. Access the additional Plate Expose parameters by clicking the Expand icon ( ), located in the upper right corner of the window. The Plate Expose window expands and the following additional parameters are displayed: Item Description Scale Enables you to scale the Layout. The range of scaling you can perform is 95 - 105%. The height and width scale do not have to be identical. (Not applicable for the Trendsetter). Copies Enables you to select the number of times each layout is exposed. Reading Enables you to select whether the image is exposed as is or as a mirror image. Select Right to leave the layout as is. Select Wrong to flip the entire layout for mirror image. 230 Chapter 43 – Exposing to Plate Item Description Orientation Defines the orientation of an image when exposed to plate Most layouts created in Preps and is exposed on a Lotem must be rotated 180° in order to be aligned properly with the punch. The default is Rotate 180° for the Lotem, Normal for the Trendsetter. Separation Handling‘ The Separation Handling feature enables you to expose selected separations, swap the screening angle parameters between separations and merge versions. Expose Sep. - Enables you to select the separations to be exposed. Version - Enables you to merge base separation with additional separations for different versions. (For additional information on versions, see Chapter 31, Versioning on the Brisque). Swap - Enables you to swap the screening parameters between separations. B. Line - Instructs the Brisque to expose a Blueline (all the separations, combined) to plate. Ignore Pack Seps Selects or clears selection of Packaging type Die Line separations. Note: The schematic of the layout that appears below the Inventory button represents the current orientation, exposure and reading parameters. These parameters can be set in any combination. 2. In the horizontal and vertical Scale boxes, type the scale values. 3. In the Copies box, type the number of exposures per layout. Additional Plate Expose Parameters 231 4. In the Reading section, select Right to leave the layout as is, or Wrong to expose a mirror image. Right Wrong 5. In the Orientation section, select Rotate 180° to rotate the layout 180 degrees. Select Normal to leave the layout unrotated. Normal Rotate 1800 Important: In the Lotem 800V, the orientation of the drum is 90° in relation to the file orientation. The Brisque, therefore, automatically rotates all files 90° in order to comply with the drum orientation.. Separation Handling The separations selected for exposure are indicated in the Separation Handling section, under the Expose Sep. box. If Spot Colors are present in the Job, they also appear in the same list. If you are editing the plate expose parameters for a template (not for a specific Job), Others appears in the list of separations as an additional option to the process color separations. Others collectively defines the initial parameters for all spot colors in the template. The spot colors are exposed only when Others is selected in the Separation Handling section. 232 Chapter 43 – Exposing to Plate To select which separations are exposed: ¾ Select the check box, next to any of the separations (including Others). Or, click All or None, below the list of separations. Important: In all instances, when you are not preparing a Blueline for exposure, make sure that the B.Line check box is deselected. Versions Brisque is capable of producing a Job in different versions. For example, the same poster may be printed in several versions (languages). To do this, the Job output must contain the base (common) separations and all the separations, process colors, and spots, each containing the information for the specific version. The printer will then use the base separations to print a base for the Job, and then add the different versions to different batches of the base in order to produce the different versions of the same product. To merge base separation with versions: 1. In the Separation Handling section, select a separation, then in the Version column, click the ... button. The Merge With window appears, showing all available versions. Important: The Versions button, to the right of the separations, in the Plate Expose window is enabled (... instead of ..), only when the Job includes Versions. Additional Plate Expose Parameters 233 2. Select or clear the versions you want to merge with the base separation and click OK. You return to the Plate Expose window. (For additional information on versions, see Chapter 31, Versioning on the Brisque). Swapping screen parameters To swap the screening parameters between two separations: 1. In the Separation Handling section, select a separation, then in the Swap column, click the ... button. The Swap With window appears. 2. In the Swap With window, select a separation assigned with the exposure angle you wish to change to. 3. Click OK. The exposure angles are switched. The new separation name is displayed on the Swap button next to the selected separation and the old name is displayed on the Swap button next to the separation selected to switch with. For example: If you wish to assign the Magenta exposure angle to the Cyan separation, select the Cyan check box, click Swap, and in the Swap With window select Magenta. The Magenta exposure angle will now be assigned to the Cyan separation and the Cyan exposure angle will be assign to the Magenta separation, as indicated on the Swap buttons next to the separations in question, in the Separation Handling section. Note: When you open the Swap With window via the Template Builder dialog box, the Others option appears in the list, and represents Spot Colors. When you open the Swap With window via the Job Ticket Editor dialog box, if the file contains Spot Colors, they are listed by name. 234 Chapter 43 – Exposing to Plate 4. To cancel the swap definition, click the Reset button, in the Swap With box, select None from the Swap With window. (For additional information on handling Spot Colors, see Chapter 40, Screen Sets). Important: A warning triangle appears at the bottom of the Plate Expose window, along with a message that reads: Separations De-Selected/ swapped!, if any of the separations have not been selected for exposure or if any of them are swapped Defining the Expose Parameters for a Blueline From the Plate Expose application you can instruct the Brisque to expose a blueline to plate. A blueline exposure is a process of exposing multiple separations (CMYK and Spots) belonging to a single Layout onto a single plate. You define the exposure weight of each exposed separation. The blueline enables you to determine that pages are imposed accurately and that the marks and layouts are correct. The blueline is not intended for color checking. To define the expose parameters for a blueline exposure: 1. In the Plate Expose window, select the B.Line check box. All the percentage boxes for the CMYK and Spot separations become available. 2. In the percentage boxes next to each separation, type the percentage weight of exposure (between 0% and 100%) for each separation to be exposed on the same plate. • Type a value of 0% for any separation that you do not want to be included in the blueline exposure. • Type a value of 100% for any separation whose full weight is to be included in the blueline exposure. • The highest value that can be set for any separation is 100%. The default values for the color separations are: C=45%, M=35%, Y=20%, K=100%, and Spots=100%. Customizing the Plate Expose Parameters for Pages or Layouts 235 Customizing the Plate Expose Parameters for Pages or Layouts The Inventory button appears below the Expand icon in the upper right corner of the Plate Expose window. Use this option when you want to customize the Plate Expose parameters for: • A selected page in a Job document (for example, when exposing a multi-page Job where one or more of the pages requires a different mesh than the rest of the document). • A selected layout in an imposition Job (for example, when exposing a Job with more than one layout where one or more of the layouts require a different line screen or dot shape than the other layouts in the Job). Note: The Inventory button is available when you are using the Job Ticket Editor dialog box to define the plate expose parameters for a specific Job file that has multiple pages or layouts. This option is not available when you are configuring a template or the plate expose default operation parameters. The following Plate Expose parameters cannot be page-specific: • • • • Layout mode Punch Scale Copies. The following plate expose parameters cannot be layout-specific: • • • • • Slug Plate Set Press Format Image Offset Copies. 236 Chapter 43 – Exposing to Plate Important: You can select different screen sets for each page, however, all the screen sets you use must have the same resolution. To define the Plate Expose parameters for a selected page or layout: 1. From the Plate Expose window, click the Inventory. The Layout Inventory window appears. Imposition Job - The Layout Inventory list displays the Layouts in the current Job. Non-Imposition Job - The Layout Inventory list displays the Job itself. 2. From the Layout Inventory window, select the Layout whose processing parameters you want to change. In the Layout Inventory window, you can also click All to apply the modifications to all the Layouts. Note: Layout check boxes enable you to define which layouts are sent for exposure (including the All button). Using them does not enable you to customize the parameters of selected layouts as described here. (For instructions on using this option, refer to Printing Selected Layouts on page 238). Customizing the Plate Expose Parameters for Pages or Layouts 3. 237 If you want to view the Page level, select a layout (for an Imposition Job) or a Job (for a non-Imposition Job). The Page Inventory window appears, listing the pages of the selected Job or layout. The Apply CTP Params to box, in the Plate Expose window, indicates the selected page or layout to which the parameters that you edit will apply. In the Page Inventory window, you can also click the All button to apply the modifications to all the pages of the currently selected layout. 4. In the Plate Expose window, modify the parameters for the selected page or layout. 5. In the Page and Layout Inventory windows, click the Apply to Selection button to confirm the change. The parameters are defined for the selected page or layout. Both the Page and Layout Inventory and the Plate Expose windows remain open. Repeat the above procedure to define custom parameters for other selected pages or layouts, as needed. 6. When you finish customizing the parameters for the selected pages or layouts, double-click the Window Control boxes to exit the Page and Layout Inventory windows. Tip: If you decide that you want to modify parameters that will apply to all pages and layouts of a Job, create a new template or modify the entire Job Ticket Template (change the parameters globally) instead of modifying the parameters one page or layout at a time. 238 Chapter 43 – Exposing to Plate Printing Selected Layouts Use the layout inventory to expose selected layouts only. You cannot expose separate layout pages. Each selected layout’s pages are all exposed. To print selected Layouts: 1. From the Plate Expose window, click Inventory. The Layout Inventory window appears. 2. From the list in the Layout Inventory window, use the following methods to select the pages that you want to expose: • • • 3. To select multiple layouts, click the Layout check box. To clear a selected Layout, clear the Layout check box. To select all the Layouts in the list, click All. To exit the Layout Inventory window, double-click the Window Control box. You return to the Plate Expose window. Exiting the Plate Expose Application 239 Exiting the Plate Expose Application To exit the Plate Expose application: ¾ Click OK to confirm the changes and exit the Plate Expose window. Or, click Reset to revert to the previously saved Plate Expose parameters. The Plate Expose window remains open. Or, click Cancel to exit the Plate Expose window without saving changes to the Plate Expose parameters. Screen2Go Overview ........................................................................................242 Launching the Application ..............................................................243 Arranging Layouts...........................................................................247 Defining the Output........................................................................250 Designating a Screen Set.................................................................253 Designating an Excurve ...................................................................255 Designating a Tone Reproduction Curve ..........................................256 Separations Handling ......................................................................257 Customizing Parameters for Selected Layouts or Pages....................259 Defining File Name and Location .....................................................262 242 Chapter 44 – Screen2Go Overview Screen2Go is a new application operating on the Brisque that converts native Brisque files, such as CT, LW, NCT, CTHS, LWHS, page and Job formats to compressed 1-bit TIFF files. Three types of compression are available: CCITT G4, LZW TIFF, and MAC Packbit. Each color separation is converted to a TIFF file which includes the required screening. The screen set parameters are set according to the output device requirements (resolution, angles, and so on). Screen2Go uses the TSP board to perform the TIFF file screening. If necessary, the file can be rotated using the rotation board. Screen2Go creates an output TIFF file from the input Brisque file and saves it to a defined location on disk. The file can also be sent to a predefined send hot folder on the Brisque. The output TIFF file can be exposed on a variety of Creo output devices or sent to 3rd-party output devices via the network or removable media. Screen2Go is licensed and password protected and is available in three sizes: • • • Screen2Go_4up - 4 up Screen2Go_8up - 8 up Screen2Go_VLF - 32 up. Note: License information can be verified via the Smit application. Launching the Application 243 Launching the Application To define the Expose default operation parameters: ¾ From the Launch Pad, or from the Output panel, double-click the Screen2Go icon. The Screen2Go window appears. To edit the Expose parameters for a specific Job: ¾ From within the Job Ticket Editor, double-click the Screen2Go icon. The Screen2Go window appears. To edit the Expose parameters for a specific Template: ¾ From within the Template Builder, double-click the Screen2Go icon. The Screen2Go window appears. Item Description Inventory Modifies parameters for specific layouts or pages within each layout. 244 Chapter 44 – Screen2Go Item Description Layouts Determines how the image(s) is arranged on a defined output area. • Single - Outputs a single image on the media area. • External - Outputs an imposition Job. The layout is pre-arranged. Params - Fine tunes the Single mode. Disabled for the external mode because the layout is set externally (Imposition). Image Display Section Displays a representation of the output image as defined by the various parameters. Media Set Displays the media set configurations defined in the Output Device Handling application. Max Area - Indicates use of the entire media set area. Enables the alignment parameter. Slug Prints slug data. You can select what information is printed in the slug. User Label User comment, appended to the slug data. Screen Set Displays screen set parameters. List - Selects a screen set from a list. Modify - Modifies screen set parameters. Excurve Displays an Excurve. List - Selects an excurve from the list of available excurves. (Optional). Tone Rep. Displays a Tone Reproduction curve. List - Selects a Tone Reproduction curve from the list of available curves. (Optional). Output Determines the type of exposure. Negative - Exposes the background. Positive - Exposes the image. Launching the Application 245 Item Description Reading Determines the direction of exposure. Wrong - Mirror image. Right - The image as originally defined. Orientation Determines the positioning of the image on the media. Normal - Image is not rotated on the media. Rotate 180 - Image is rotated 180° on media. Image Offset Determines the vertical and horizontal offset from the point of alignment. Alignment Determines the alignment of the image with the media. Options are: Top-center - Centers the image at the top-center of media. Bottom-right - Aligns the image to the bottom-right of the media. Bottom-center - Centers the image at the bottom-center of media. Top-left - Aligns top-left of image with top-left of media. Note: Image offset is calculated from the point of alignment. This parameter is enabled only when the Max Area check-box is selected. File Type Determines the output TIFF file compression type. Available options are: • • • TIFF LZW (default) Packbit Mac CCITT Group4. File Name The name you issue to the output file. Path The full path for the location of the output file. Selection - Opens a browser for the selection of a path. 246 Chapter 44 – Screen2Go Item Description Separation Section Defines separations handling (process and spot). To exit the application: ¾ Click OK to confirm the changes and exit the Screen2Go window. Or, click Reset to revert to the previously saved Screen2Go parameters. The TScreen2Go window remains open. Or, click Cancel to exit the Screen2Go window without saving changes to the Screen2Go parameters. Arranging Layouts 247 Arranging Layouts The dimensions of the output image are user defined. Selecting a layout mode determines how images are arranged on the media. To select a Layout Mode, click one of the following icons: Single Creates a file from a a single image or individual pages of an imposition job, when the relative position of the image is not important. External Creates a file from imposition layouts created in the Preps on the Macintosh or Layout Assembly on the Brisque. The layout parameters defined in the application, used to create the file, are preserved. The order of the pages can not be altered. Note: The representation of the selected layout mode appears in the Image Display section on the right. Editing the Single Layout Parameters The parameters of the Single Layout can be further edited. To edit Single Layout parameters: 1. Click the Single Layout icon. The Params button is activated. 2. Click the Params button. The Single Mode Layout window appears. 248 Chapter 44 – Screen2Go Item Description Repeat Repeats an image along the width and height of the output area. Gap Sets the Gap size between the repeated images in both the horizontal and vertical directions. Steps Defines indented steps (in conjunction with the In parameter) for repeated image rows. In Defines the step indentations. Option available: • • All Rows - Adds an indentation step to each row. Even Rows - Sets each even row with a step indentation. • Odd Rows - Sets each odd row with a step indentation. Page marks Indicates how the marks are applied. Once - Indicates mark setting around the group of images that make up the layout. Per Copy - Indicates mark setting around each image on the output. 3. In the vertical and horizontal Repeat boxes, type the number of times you wish to repeat the image in the vertical and horizontal direction. 4. In the Gap boxes, type the gap size between the repeated images in the horizontal and the vertical directions. 5. In the Step box, type the size of indentation between rows. From the In list box select one of the options: • • • All Row - Each row is indented by the step value Even Rows - Each even row is indented by the step value Odd Rows - Each odd row is indented by the step value. Arranging Layouts 249 For example: All Rows Step 6. Even Rows Step Odd Rows Step To set page marks, select Once for a single set around a layout, or Per Copy for a set of page marks around each image. For example: Once 7. Per Copy Click Close to close the Single Mode Layout window and return to the Screen2Go window. 250 Chapter 44 – Screen2Go Defining the Output Defining the Media Set When you configure the Screen2Go as an output device, you define the media sets. Each media set is a different configuration of the output device. For additional information on configuring Screen2Go as an output device, see Chapter 38, Configuring Output Devices, Configuring Screen2Go on page 67. To define the Media Set: 1. From the Media Set box, select the name of the required media set. 2. If you wish to utilize the entire media set expose area, select the Max. Area check box. The Alignment option in the Screen2Go window is enabled, along with Image offset. Assigning Image to Media You can determine how the image is placed on the media. To define output image parameters: 1. Select Negative (all that is not the image is exposed) or Positive (expose the image only) Output. 2. Select Right Reading to set the image right, or Wrong Reading for mirror image. Right Wrong Defining the Output 251 3. Select Normal Orientation or Rotate 180, for inverted image. Normal Rotate 1800 4. From the File Type box, select a compression type to the output. The following options are available: • • • 5. TIF LZW (default) Packbit Mac CCITT Group4 From the Alignment box, select an alignment option. • • • • Top-center - Centers the image on the top-center of the media. Bottom-right - Aligns the image bottom-right corner with bottomright corner of media. Bottom-center - Centers the image at bottom-center of media. Top-left - Aligns the image top-left corner with top-left corner of media. 6. In the Image Offset boxes type the horizontal and vertical offset values, relative to image alignment. Media Top-center Horizontal offset Image Top-center Vertical offset Top-center 252 Chapter 44 – Screen2Go Creating Labels The Screen2Go application enables you to add a label to the output file. To add labels to the output file: 1. In the Screen2Go window, select the Slug check box and click the button to its right. The Slug parameters window appears. 2. To place the label in the correct position relative to the image (slug data and user label), type offset values in the horizontal and vertical offset boxes. 3. Select or clear specific Slug check boxes and then click OK. You return to the Screen2Go window and the Slug is visible in the Image display section on the right side of the Screen2Go window. Slug data 4. To add a user label, in the User Label box, type a comment. Designating a Screen Set 253 Designating a Screen Set The Screen Set you select from the Screen2Go window defines all the screening parameters for the output file, including LW Resolution... To select a Screen Set: 1. In the Screen2Go window, click the Screen Set List button. The Screen Set list window appears. 2. Use the filters to limit the selection of screen sets. For additional information on filters, see Chapter 2, Introduction to the Desktop, Brisque Filters on page 18. 3. Select a screen set from the list and click OK to exit the Screen Set List window and return to the Screen2Go window. 254 Chapter 44 – Screen2Go To modify Screen Set parameters: 1. In the Screen Set section, click the Modify button. The Screen Set Parameters window appears. 2. Modify screen resolution, separation angle and dot shape, as well as Spot colors parameters and other advanced screening parameters. For complete information on defining Screen Sets, see Chapter 40, Screen Sets. Designating an Excurve 255 Designating an Excurve You can apply an excurve to the Screen2Go output TIFF file. To select an Excurve: 1. Click the excurve List button. The Excurve List window appears. 2. Select an Excurve and click OK. You return to the Screen2Go window and the excurve name appears in the Excurve box. Note: Application of an Excurve is optional. None can be selected. For additional information on Excurves, see Chapter 39, Calibrating Output Devices, Excurve Calibration on page 92. 256 Chapter 44 – Screen2Go Designating a Tone Reproduction Curve You can apply a tone reproduction curve to the Screen2Go output TIFF file. To select a Tone reproduction curve: 1. Click the Tone Rep. List button. The Tone reproduction List window appears. 2. Select a Tone Reproduction curve and click OK. You return to the Screen2Go window and the tone reproduction name appears in the Tone Rep. box. Note: Application of a tone reproduction curve is optional. None can be selected. For additional information on Tone reproduction, see Chapter 39, Calibrating Output Devices, Tone Reproduction on page 112. Separations Handling 257 Separations Handling The Separation Handling feature lets you select the separations for the output file, as well as swap the screening parameters between separations. To select which separations are selected: ¾ Select the required separations check box. Or, click the All or None buttons. Swapping screen parameters between separations To swap the screening parameters between two separations: 1. In the Separation Handling section, select a separation, then click the Swap with button in the Swap with column. The Swap With window appears. 2. In the Swap With window, select a separation assigned the exposure angle you wish to change to. 258 Chapter 44 – Screen2Go 3. Click OK. The exposure angles are switched. The new separation name appears on the Swap button next to the selected separation and the old name appears on the Swap button next to the separation selected to switch with. For example: If you want to assign the Magenta exposure angle to the Pantone808 spot separation, select the Pantone808 spot separation in the Separation Handling section and in the Swap With window select Magenta. The Magenta exposure angle is assigned to the Pantone808 spot separation and the Pantone808 spot separation exposure angle is assigned to the Magenta separation. 4. To cancel the swap definition, click Reset. Or, in the Swap With box, select None from the Swap With window. For additional information on handling Spot Colors, see Chapter 40, Screen Sets, Advanced Screen Set Parameters on page 152. Customizing Parameters for Selected Layouts or Pages 259 Customizing Parameters for Selected Layouts or Pages The Inventory option appears in the upper right corner of the Screen2Go window. Use this option when you want to customize the Screen2Go processing parameters for: • A selected layout of an imposition Job (for example, when creating a file with more than one layout where one or more of the layouts requires a different line screen or dot shape than the other layouts in the Job). • A selected page (for example, when creating a file from a multi-page Job where one or more of the pages requires a different mesh than the rest of the document). Note: The Inventory option is available when you are using the Job Ticket Editor dialog box to define the Screen2Go parameters for a specific Job file that has multiple pages or layouts. This option is not available when you are configuring a template or the Screen2Go default operation parameters. Important: You can select different screen sets for each page, however all the screen sets you use must have the same resolution. 260 Chapter 44 – Screen2Go To define the Screen2Go parameters for a selected layout or page: 1. From the Screen2Go window, click the Inventory button. The Layout Inventory window appears, while the Screen2Go window remains open. 2. In the Layout Inventory window, select the Layout check boxes you want to include in the output file (click All to select all the layouts). 3. From the Layout Inventory window, click the layout whose processing parameters you want to change. If the layout contains pages, the Page Inventory window appears. Customizing Parameters for Selected Layouts or Pages 261 4. From the Page Inventory window, select the pages whose processing parameters you want to change. Click All to select all the pages. 5. In the Screen2Go window modify the parameters for the selected pages, then click the Apply to Selection button, in the Page Inventory window. 6. When you finish customizing the parameters for the selected pages or layouts, double-click the Window Control boxes to exit the Page and Layout Inventory windows. Tip: If you decide that you want to modify a parameter that will apply to all pages and layouts of a Job, create a new template or modify the entire Job Ticket Template (that is, change the parameters globally) instead of modifying the parameter one page or layout at a time. 262 Chapter 44 – Screen2Go Defining File Name and Location You can determine the location to where the output file is saved. To define file location: 1. In the File Name box, type the output file name. 2. Click the Selection button, next to the Path box. The browser appears. 3. From the Directory Tree section, select the output folder. The path appears in the Selected Item box. 4. Click OK. The browser is closed and the selected path appears in the Path box, in the Screen2Go window. Create File Overview ........................................................................................264 Launching the Application ..............................................................264 Creating a Test File ..........................................................................267 Modifying a Test File .......................................................................269 Viewing a Test File...........................................................................270 264 Chapter 45 – Create File Overview The Create File utility on the Brisque enables you to create customized test files. You can use these files for custom calibrations on the Imagesetter or Platesetter. You can also use these files to verify or identify a specific problem on the output device. The files that you define using the Create File utility define a specific resolution, color separations, and size. Launching the Application To launch the application: 1. From the Brisque Launch Pad, open the Services panel. 2. From the Services panel, double-click the Create File icon. The Create A File window appears. Item Description Path Displays the file path. Set... Opens the browser to select an existing file. Launching the Application 265 Item Description File Name Displays the file name of a selected test file. File Type Defines the file type. The following options are available: • LW - When you expose the file, the defined file resolution must match the LW resolution defined by the selected Screen Set in the Expose or Plate Expose operation parameters. • • CT - The file can have any defined resolution. Deg - Select to create a vignette test file. When selected, the Strip type boxes are unavailable. • Grid - Select this option when you want to check the imagesetter with a test file that displays a grid. When selected, the Strip type and Separations boxes are replaced by the Grid Parameters boxes. Note: With the Brisque you can Expose to Film or to Plate, pages whose LW resolution is exactly half of the defined output resolution. (For detailed information about using the Half Resolution workflow, refer to the Chapter 27, CopyDot Workflow.) Strip Type Defines the type of strip to be generated. The following options are available: • RC - a matrix of rectangular strips (stepped both horizontally and vertically) • • Num H Strips VS - vertical strips HS - horizontal strips Defines the number of horizontal steps, when the defined strip type is either HS or RC. If the combined dimensions of the total number of strips exceed the defined file height, the test pattern is cropped. 266 Chapter 45 – Create File Item Description Num V Strips Defines the number of vertical steps when the defined strip type is either VS or RC. If the combined dimensions of the total number of strips exceed the defined file width, the test pattern is cropped. Strip Height Defines the height of the strips. If you choose not to define the strip height, the application automatically defines the strip height to fill the defined file height. Strip Width Defines the width of the strips. If you choose not to define the strip width, the application automatically defines the strip width to fill the defined file width. File Height Defines the height of the generated file. If you define a file whose height is larger than the test pattern, the pattern is repeated to fill the defined height. File Width Defines the width of the generated file. If you define a file whose width is larger than the test pattern, the pattern is repeated to fill the defined width. File H res Defines the height resolution. File W res Defines the width resolution. Separations The Cyan, Magenta, Yellow and Black separation check boxes define the separations you want to output. Each includes the range of dot percent values for the exposure. The range is divided into the number of strips defined in both the vertical and horizontal directions. First Color - Defines the starting dot percentage (first strip). Last Color - Defines the ending dot percentage (last strip). Creating a Test File 267 Creating a Test File To create a new test file: 1. Click the Set... button to select the location of the file. 2. In the File name box, type the file name. Note: If you select a file from the browser, the name appears in the File name box. 3. In the File height box, type the total height of the file. 4. In the File width box, type the total width of the file. 5. In the File H res box, type the resolution in the height dimension (in dpm). 6. In the File W res box, type the resolution in the width dimension (in dpm). Tip: To implement the Half Resolution output into a workflow launched by a template that executes both the RIP and Expose or Plate Expose operations, select the LW Half Res. check box in the RIP window. This overrides the LW Resolution value defined by the selected screen set in the Expose or Plate Expose window. 7. Select LW, CT Deg or Grid strip type. If you are creating an LW file, you must add the .lw extension after the file name. Select Deg when the test file is a vignette. When Deg is selected, the Strip type boxes become inactive. Select Grid when you want to check the imagesetter with a test file that displays a grid. When Grid is selected, the Strip type and Separations sections are replaced by the Grid Params sections. 8. In the Num H strips box, type the number of strips the file width is to be divided into. 268 Chapter 45 – Create File 9. In the Num V strips box, type the number of strips the file height is to be divided into. 10. In the Strip Height box, type the strip height. If you choose not to define this dimension, the application calculates the strip height (file height / number of horizontal strips). 11. In the Strip Width box, type the strip width. If you choose not to define this dimension, the application calculates the strip width (file width / number of vertical strips). 12. Select each separation you want to generate. Each separation includes the number of strips defined, horizontal and vertical (RC type will include a matrix of both horizontal and vertical). For each separation, define the range of dot percentage. a. In the First color box, type the starting dot percentage. b. In the Last color box, type the ending dot percentage. For example, when you generate a Magenta separation with 5 horizontal and 6 vertical strips, at a dot percentage range of 20% to 80%, the created file will include horizontal strips of 20%, 35%, 50%, 65% and 80%, and vertical strips of 20%, 32%, 44%, 56%, 68% and 80%. 13. Click Run. A file is created in the location you specified. 14. Click Quit to exit the application. Modifying a Test File 269 Modifying a Test File To modify a test file: 1. Click the Set button. The browser appears. 2. In the browser, select the test file. The file appears in the Create File window. 3. Modify the parameters according to your needs. 4. Click Run. The file is updated with the new parameters. Note: If you change the file name, a new file is created with the new parameters in the same location. 270 Chapter 45 – Create File Viewing a Test File To view a test file: ¾ Right-click the test file and select Preview. The file appears via the Preview application. The created CT/RC file, displayed using the Preview application The created Grid file, displayed using the Preview application For additional information on previewing files, see Chapter 16, Preview. Lotem 800V Spectrum Overview ........................................................................................272 Launching the Application ..............................................................273 Media Tab .......................................................................................274 Exposure Tab...................................................................................276 Layout Tab ......................................................................................279 Screening Tab..................................................................................284 Separations Tab...............................................................................286 Previewing the Proofing Parameters ................................................289 Customizing Proof Parameters for Selected Segments .....................290 272 Chapter 46 – Lotem 800V Spectrum Overview The Lotem 800V Spectrum produces digital color halftone proofs as well as imaging plates. Media for up to three (3) proofs can be loaded into a proofing tray that is inserted into the upper tray of the Dual Loading Cassette (DLC). The media is then automatically loaded onto the drum inside the platesetter and imaged. (For complete instructions, see the Lotem 800V Family Quick Start Guide, 399Z52565B). The Lotem Spectrum parameters define exactly how a Job is proofed. Among other parameters, you define the group set and screen set, and, if needed, you may designate a calibration excurve and a tone reproduction curve to be applied to the proof. Launching the Application 273 Launching the Application To define the Lotem Spectrum default operation parameters: ¾ From the Launch Pad, or from the Output panel, double-click the Lotem Spectrum icon. The Lotem Spectrum window appears. To edit the Lotem Spectrum parameters for a specific Job: ¾ From within the Job Ticket Editor dialog box, double-click the Lotem Spectrum icon. The Lotem Spectrum window appears. To edit the Lotem Spectrum parameters for a specific Template: ¾ From within the Template Builder dialog box, double-click the Lotem Spectrum icon. The Lotem Spectrum window appears. The Lotem Spectrum window is composed of five (5) tabs (Media, Exposure, Layout, Screening, and Separations). Preview Inventory 274 Chapter 46 – Lotem 800V Spectrum To exit the application: ¾ Click OK to confirm the changes and exit the Lotem Spectrum window. Or, click Cancel to exit the Lotem Spectrum window without saving changes to the Lotem Spectrum parameters. Media Tab Use the Media tab to select the Lotem Spectrum device and the proofing media. To modify the Media parameters: 1. Click Media. The Media tab appears. Preview Inventory Media Tab 275 Item Description Select Device Selects the device configuration. Select Media Selects a donor set from a list defined on the PC Controller. Media Size Displays the selected media size. Donor Set Displays the list of donors as defined in the PC Controller. 2. From the Select Device list box, select your Lotem Spectrum configuration. Note: If more than one configuration for the Lotem Spectrum was defined in the Output Device Handling window. (For more information see Chapter 38, Configuring Output Devices). 3. From the Select Media list box, select the donor set. The components of the currently selected donor set are listed in the Donor Set section, and the dimensions of the receiver of the currently selected donor set are listed in the media size. 276 Chapter 46 – Lotem 800V Spectrum Exposure Tab Use the Exposure tab to specify the proofed area and the Reading parameters and to define a slug and marks. To modify the Exposure parameters: 1. Click Exposure to display the exposure parameters. Preview Inventory Item Description Exposure Selects the type of exposure. Available options: Positive or Negative. Reading Selects the direction of the resulting proof. Options are: Right - Keeps the original direction of the page. Wrong - Flips the page horizontally. Exposure Tab 277 Item Description Print Slug Enables editing of the print slug. Print Marks Enables editing of the print marks. 2. In the Exposure box, select the exposure type. • • 3. 4. Click Positive when using a Donor Set Click Negative when using blue line media. In the Reading box, select the direction of the resulting proof. • Click the Wrong check box to flip the page horizontally (when using a donor set) • Click the Right check box to keep the original direction of the page (when using blue line media). Select the Print Slug and Print Marks check boxes to access the parameters on the corresponding tabs. Note: If you did not select the Print Slug or the Print Marks check boxes under the Exposure tab, the parameters on the corresponding tabs are inactive. 278 Chapter 46 – Lotem 800V Spectrum 5. Click . The Marks/Slug Parameters window appears. 6. Edit the Marks and the Slug dialog boxes, then click OK to exit and return to the Lotem Spectrum window. Layout Tab 279 Layout Tab Use the Layout tab to set the proofing layout parameters, such as proofing mode, alignment, offset, scale, and orientation of the proofed job. To modify the Layout parameters: 1. Click Layout to display Layout parameters. Preview Inventory 280 Chapter 46 – Lotem 800V Spectrum Item Description Layout Mode Determines how the image(s) is arranged on the defined Proof area. • • Auto - Arranges the pages from the job(s) optimally for proofing. Single - Proofs a single image on the exposure area. • External - Proofs an imposition Job. The layout is pre-arranged. • Readers Spread - Creates a layout, with a left and right spread, as it would appear in a book (differs from imposition layout, where the pages are arranged next to each other according to the design folds). The Reader Spread option is enabled only when defined in a template and applied to a job. Alignment Determines the image starting point of exposure. Options are: Top-Center - Aligns the image starting point with the media top-center. Top-left - Aligns the image starting point with the media top-left (0,0). Offset Defines the offsets image starting position from the media alignment point (in millimeters). Scale Defines the relevant mode of image to output. The following options are available: Manual - Increases or decreases the proof size of each layout. Enter percentage(s) in the 95-105% range. The default is 100% (no scaling). Tiling - Proofs a large image at full size over several receivers. Clipping - Proofs a large image without scaling and clips the excess off. Layout Tab 281 Item Description Orientation Sets the rotation angle of the exposed image on the proofed media. 0° - No rotation 90° - Rotate 90° 2. 3. In the Layout Mode box, select a suitable layout for your job. • Select Auto if your job includes several pages or if you wish to expose several jobs on the same template and proof media. (Auto Arrange). • Select Single if your job includes a single page only (for example, a poster) and you want no other jobs to appear on the same proof. • • Select External for Imposition Jobs. Select Reader Spread for Imposition Jobs. This mode simulates the actual layout (that is, the pages are ordered on the proof as they should after binding). To set the Reader Spread parameters, click appears. . The layout window 282 Chapter 46 – Lotem 800V Spectrum Item Description Bleed & Cut Marks Displays Bleed and Cut marks. Gap Between Pages - Gap size (in millimeters) between the images in both the horizontal and vertical directions. This option is disabled when the Bleed & Cut Marks check box is selected. Paper Saving Determines if two or more spreads may be proofed on the same output. This check box is selected by default. Gap Between Spreads - Gap size (in millimeters) between the spreads in both the horizontal and vertical directions. This option is enabled when the Paper Saving check box is selected. Publication Type Determines the of bounding side. Left Bound - For publications such as English. Right Bound - For publications such as Japanese. 4. From the Alignment list box, select Top-Left or Top-Center to specify the starting point of exposure. Note: The selected value is used as the [0,0] reference offset points on the receiver relative to the drum. 5. In the vertical and horizontal Offset boxes, type the vertical and horizontal offset values from Top-Left or Top-Center as defined in the Alignment box. Proofing starts at this point. Layout Tab 283 6. 7. From the Scale list box, select the relevant mode. • Select Manual to manually increase or decrease the exposure size of each layout. Enter percentage(s) in the 95-105% range. The default is 100%. • Select Tiling for a job larger than the receiver so the proof is tiled over several receivers. • Select Clipping for a job that is larger than the receiver so the proof is cropped to fit the receiver (excess is clipped off). In the Orientation box, select the rotation angle of the exposed image on the proofing media. • Select 0° for an imposition Job or for a Job in landscape orientation. • Select 90° for a Job in portrait orientation. 284 Chapter 46 – Lotem 800V Spectrum Screening Tab Use the Screening tab to set the screening enhancement parameters, to select the screen set, excurve, and tone reproduction curve for the proofing job. To modify the Screening parameters: 1. Click the Screening tab to display the screening parameters. Preview Inventory Item Description Screen Set Selects the screen set, or enables you to view the currently selected screen set parameters. Type Displays the screen set type. This box displays the values of the selected screen set. LW Res. Displays the input file LW resolution. Screening Tab 285 Item Description Dot Shape Displays the screen set Dot Shape. This box displays the values of the selected Screen Set. Excurve Select an excurve from the available list. (Optional - None is a valid selection). Tone Rep. Selecs a tone reproduction curve from the available list. (Optional - None is a valid selection). 2. To select a screen set, click . The Screen Set List window appears. 3. From the Screen Set List window, select a screen set and click OK to return to the Lotem Spectrum window. The Screen Set name appears in the Screen Set box and the parameters are reflected in the Type, LW Res. and Dot Shape boxes. 4. To view the parameters of the currently selected screen set, click the View button. Note: For complete information on screen sets, see the Screen Sets chapter. 5. In the Excurve box, select an excurve. Select None if no excurve is required, or AutoSelect to use the first available excurve in the list. Note: For complete information on excurves, see the Excurve section in the Calibration chapter. 6. In the Tone Rep. box, select a tone reproduction curve . Select None if none is required. Note: For complete information on Tone Reproduction curves, see the Tone Reproduction section in the Calibration chapter. 286 Chapter 46 – Lotem 800V Spectrum Separations Tab Use the Separations tab to manipulate the process separations parameters and Spot Colors, and to select or clear separations for proofing, swap screening parameters between separations, and define spot color handling. To modify the Separations parameters: 1. Click the Separations tab to display the Separation parameters. Preview Inventory Selected separation Cleared separation Item Description Separation Selecting separations. Spot Handling Assigning color donor to spots. Swap Switching color parameters between separations. B. Line Separations Tab 287 Selecting separations for proofing: 1. In the Separation column, do one of the following: • • Select the check box next to each separation to be proofed. Clear the check box next to each separation not to be proofed. You can assign a Spot Color separation an available donor from a list when the separation special color is not available. 2. Click Separations. The Separations tab appears. 3. Select the spot color separation (for example, PANTONE 1385 CV). 4. In the Spot Handling box, select a donor color or Process. The specific color is assigned to the selected separation. Important: If Process is selected, proofing the spot color is divided among the process colors. For example, if the spot color is made up of 20% Cyan, 35% Magenta, 50% Yellow and 10% Black, each of the process donors is responsible for the relative part of the spot color. A special color donor can only be assigned to one separation. Once assigned, it is removed from the list. 288 Chapter 46 – Lotem 800V Spectrum To avoid patterning, you can swap between separation parameters, from the available separations list. Blue Line 5. Click Separations. The Separations tab appears. 6. Select the Spot Color separation (for example, PANTONE 1385 CV). 7. In the Swap box, select a separation (for example, Magenta). The parameters of the new separation are assigned to the selected separation and vice versa. Previewing the Proofing Parameters 289 Previewing the Proofing Parameters The Lotem Spectrum application enables you to preview the file parameters at any point. To preview the file parameters: ¾ Click the Preview icon. The Preview section extends from the bottom of the window showing current file parameters. Preview icon To remove the Preview feature: ¾ Click the preview icon. The Lotem Spectrum window is contracted. 290 Chapter 46 – Lotem 800V Spectrum Customizing Proof Parameters for Selected Segments The Lotem Spectrum Inventory option appears in the upper-right corner of the Lotem Spectrum window. Use this option when you want to define certain proof parameters for a selected layout(s) or page(s) in a job. For example, when proofing a multi-layout or multi-page job where one or more of the layouts or pages requires different parameters than the rest of the job). The inventory option is available when using the Job Ticket Editor dialog box to define the Lotem Spectrum parameters for a specific job containing multiple layouts or pages, and is not available when configuring a template or the Spectrum default operation parameters. Note: Any changes you make to the Lotem Spectrum parameters outside of the Layout or Page Inventory, will modify the parameters for all the Layout or Pages belonging to the current job. To modify selected items: 1. From the Lotem Spectrum window, click the inventory icon. The Lotem Spectrum window extends to include the inventory feature. Inventory icon Exiting the Application 291 2. In the Inventory section, select a specific page. 3. Click the tab where the parameters are to be modified. The page parameters are displayed in the selected tab. 4. Modify the parameters. 5. Click OK. Exiting the Application ¾ Click OK to confirm the changes and exit the Lotem Spectrum window. Or, click Cancel to exit the Lotem Spectrum window without saving changes to the Lotem Spectrum parameters. TS Spectrum Overview ........................................................................................294 Launching the Application ..............................................................295 Selecting Layout Mode....................................................................300 Designating a Screen Set.................................................................305 Assigning a Tone Reproduction Curve .............................................311 Defining Output Parameters............................................................312 Creating Labels ...............................................................................315 Customizing Proof Parameters for Selected Segments .....................316 294 Chapter 47 – TS Spectrum Overview The Spectrum application produces a Halftone proof on a carrier medium using a set of manually placed media in a tray especially arranged for a specific job. The application is capable of scaling an input file supporting any resolution to the device resolution. (For example, the input may be 3600 dpi and output 2400 dpi). The Proof Media The media used for proofing are manually stacked in a tray containing all the required separation media for a job. The tray contains the process donors (CMYK), spot color donors (if required) and a receiver, stacked in the order of proofing (in ascending order): Spots, Black, Yellow, Magenta, Cyan, and Receiver on top. Before the media tray is mounted, a carrier is placed on the drum on which the receiver is mounted. The carrier comes in different sizes (4up, 8up). Carrier Receiver Donor Launching the Application 295 Launching the Application To define the Spectrum default operation parameters: ¾ From the Launch Pad, or from the Output panel, double-click the Spectrum icon. The Trendsetter Spectrum window appears. To edit the Spectrum parameters for a specific job: ¾ From within the Job Ticket Editor editor box, double-click the Spectrum icon. The Trendsetter Spectrum window appears. To edit the Spectrum parameters for a specific template: ¾ From within the Template Builder dialog box, double-click the Spectrum icon. The Trendsetter Spectrum window appears. 296 Chapter 47 – TS Spectrum Item Description Page Inventory Defines proof parameters for a selected layout(s) or page(s). Apply Proof Params to Displays the job, layout, or page name, the proofing parameters are to be applied to. Layout Determines how an image(s) is arranged on defined Proof area. • • Auto Arrange - Optimally arranges the pages from the job(s) for proofing. Single - Proofs a single image on the exposure area. • External - Proofs an imposition Job. The layout is pre-arranged. • Readers Spread - Creates a layout, with a left and right spread, as it would appear in a book (differs from imposition layout, where the pages are arranged next to each other according to the design folds). The Readers Spread option is enabled only when defined in a template and applied to a job. Parmas - Fine tunes the layout mode. Disabled for the External mode because the layout is set externally (Imposition). Screen set Selects a screen set from a list. List - Opens the Screen Set List window to select from. Cyclic ScreenSet The decision to automatically assign process color parameters in a cyclic manner (CMK) to the spot color separations is shifted from the screen set definition to the application stage of the screen set. Launching the Application 297 Item Description Screen Set LW Res Displays the LW resolution according to the defined resolution parameters in the selected screen set. View - Views the screen parameters. Tone Rep. (Optional). Displays the tone reproduction curve assigned to the job. List - Opens the Tone Reproduction List window to select a file. Spot-Color Handling Manipulates the spot colors assigned to the screen set. Options are: • All to Process - Converts all spot colors to process color. • Specific - Enables matching between specific spot colors and special color donors (in the Spectrum Separation List window). • Specify - Opens the Spectrum Separation List window, where spot colors are matched with available special colors or process donors. When opened in the All Process mode, separations can only be selected for the job, spot colors can’t be assigned special color donors. When opened in the Specific mode, separations can be selected for the job and spot colors can be assigned special color donors. No. Copies Determines the number of proofs produced in the job. Note: Requires additional sets of media when there is more than one. Media Set Displays available media sizes from Print Console. The Dimensions are displayed in Horizontal and Vertical boxes. 298 Chapter 47 – TS Spectrum Item Description Fitting Defines the placement of the job on the output. The following options are available: Tiling - Proofs oversized images at full size. The portion of the image that fits the layout is proofed on the initial set of donors. Excess image proofing requires additional sets of donors. Manual Scale - Scales the image manually to any size of output media (in %). Scale to Fit - Scales the image automatically to fit the output media. Clip Center - Centers the image on the output without scaling it down and clips off the excess image. Clip Offset - Starts proofing the image from a point offset from point 0,0 and scales the rest of the image down to fit the output media. Image position Determines the image position on the output media. Options are: Center - Centers the image to the top-center of the media. Offset - Offsets the image to the top-right (0,0) of the media. Rotate Selects the proof orientation. Options are: 0° - Proof the image unrotated. 90° - Rotate the image 90°. Layout Size/ Page Size Displays the layout size or the page size when selected from the inventory to be modified individually. Launching the Application 299 Item Description Output Color Order Displays the donor list defined in Print Console, in order of proofing. Remove - Removes a donor from the list. Update - Restores the entire list from Print Console. ⇑ − Moves a donor up the list. ⇓ − Moves a donor down the list. Labels Assigns label parameters to the output. Labels - opens a dialog box for label modifications. User Label - Assigns a user defined label to output. To exit the application: ¾ Click OK to confirm the changes and exit the Trendsetter Spectrum window. Or, click Reset to revert to the previously saved Trendsetter Spectrum parameters. The Trendsetter Spectrum window remains open. Or, click Cancel to exit the Trendsetter Spectrum window without saving changes to the Trendsetter Spectrum parameters. 300 Chapter 47 – TS Spectrum Selecting Layout Mode The Layout mode determines how to arrange the image(s) on the output media. To select a layout mode: ¾ In the Layout section of the Trendsetter Spectrum window, click a Layout icon. The layout name appears in the box below the Layout icons and a representation of the layout appears in the section located to the right of the icons. Layout Mode Icon Layout Description Single Proofs a single image or individual pages of an imposition Job, when the relative position of the image is not important. Auto Arrange Proofs multiple images on a single layout, arranged automatically by the application, when the relative position of the images is not important. This option saves media. External Proofs imposition layouts created in the Preps on the Macintosh or Layout Assembly on the Brisque. The layout parameters defined in the application, used to create the file, are preserved. The order of the pages cannot be altered. Selecting Layout Mode 301 Layout Mode Icon Layout Reader Spread Description Proofs facing pages of a layout, unlike in the External mode. Available for imposition Jobs only. Must be a standalone operation or appended to the Translate or Send operations. Editing the Layout Parameters The parameters of each layout, with the exception of External (all its parameters are pre-defined in the creating application), can be further edited. To edit Single Layout parameters: 1. Click the Single Layout icon. The Params button is activated. 2. Click the Params button. The Single Mode Layout window appears. Item Description Step & Repeat Proofs an image a number of times along the width (horizontal) and height (vertical) of the output area. No. of Steps Assigns a number of single image repetitions in the horizontal (width) and vertical (height) directions. 302 Chapter 47 – TS Spectrum Item Description Gap Size Gap size between the repeated images in both the horizontal and vertical directions. 3. In the No. of Steps boxes, type the number of image repetitions in the horizontal and vertical directions. 4. In the Gap Size boxes, type the gap size you want between the repeated images, in the horizontal and the vertical directions. 5. Double-click the Window Control box to close the Single Mode Layout window and return to the Trendsetter Spectrum window. Important: Make sure the total area of the of repeated images does not exceed the output area. Otherwise, another set of media will be requested by the application to complete the task. To edit Auto Arrange Layout parameters: 1. Click the Auto Arrange Layout icon. The Params button is activated. 2. Click the Params button. The Auto Arrange Mode Layout window appears. Item Description Best Fit Arranges as many images as possible on the output. FIFO (First In First Out). Arranges images on the output one after the other, in the order of proofing. Selecting Layout Mode 303 Item Description Gap Size Gap size between the images in both the horizontal and vertical directions. 3. Select Best Fit or FIFO as the method for arranging images on the output. 4. In the Gap Size boxes, type the gap size you want between the images, in the horizontal and the vertical directions. 5. Double-click the Window Control box to close the Auto Arrange Mode Layout window and to return to the Trendsetter Spectrum window. To edit Reader Spread Layout parameters: 1. Click the Reader Spread Layout icon. The Params button is activated. 2. Click Params. The Reader Spread Mode Layout window appears. Item Description Bleed & Cut Marks Displays bleed and cut marks. Gap Between Pages - Gap size between the images in both the horizontal and vertical directions. This option is disabled when the Bleed & Cut Marks check box is selected. 304 Chapter 47 – TS Spectrum Item Description Paper Saving Determines if two or more spreads may be proofed on the same output. This check box is selected by default. Gap Between Spreads - Gap size between the spreads in both the horizontal and vertical directions. This option is enabled when the Paper Saving check box is selected. Publication Type Determines the bounding side. Left Bound - for publications in left-right reading languages such as English. Right Bound - for publications in right-left reading languages such as Japanese. 3. Select Bleed & Cut Marks to add marks around each spread the (Gap Between Pages box is unavailable). To set gaps between pages, clear the Bleed & Cut Marks check box. 4. Select the Paper Saving box to allow for two or more spreads per layout, then type the gap size in the Gap Between Spreads vertical and horizontal boxes. 5. Double-click the Window Control box to close the auto arrange mode Layout window and return to the Trendsetter Spectrum window. Designating a Screen Set 305 Designating a Screen Set The Screen Set selected from the Trendsetter Spectrum window defines all the screening parameters required for proofing, including LW Resolution. Note: From the Brisque you can proof pages whose LW resolution is exactly half of the defined output resolution. This is called the half resolution workflow. If you RIP and then proof at double resolution, a message appears asking you if you wish to proof the pages at half resolution. (For additional information refer to Chapter 18, RIP). To select a Screen Set: 1. In the Trendsetter Spectrum window, click the List button, next to screen set. The Screen Set List window appears. 2. Use the filters to limit the selection of screen sets. For additional information on filters, see Chapter 2, Introduction to the Desktop, Brisque Filters on page 18. 306 Chapter 47 – TS Spectrum 3. Select a screen set from the list and click OK to exit the Screen Set List window and return to the Trendsetter Spectrum window. 4. To view the defined parameters of the screen set, click the View button, located to the right of Screen-Set LW Res. box. 5. In the Trendsetter Spectrum window, select the Cyclic ScreenSet check box to automatically define spot color dot shape angle parameters in a cyclic manner (CMKCMK, and so on). To learn more about the manual or automatic assignment of spot color separation dot shape angle, see Chapter 40, Screen Sets, Defining the Parameters for Additional Separations on page 148. Designating a Screen Set 307 Spot Color Handling This option enables you to specify which donors are used to express the spot colors. Two methods are available: • Convert all spot colors to process colors (use only the process colors donors to make up all the spot colors). • Specify special color donors for spot colors (use special color donors to create the spot colors, one donor per one spot color). To convert all spot colors to the process colors: 1. Select All to Process from the Spot-color Handling box. This option causes the application to express all the spot colors in terms of process (CMYK) colors. For example, if a spot color is composed of 20% Cyan, 30% Magenta, 35% Yellow and 10% Black, the All to Process box will cause the spot color to be composed of only process colors, each contributing its relative part of the spot color. 308 Chapter 47 – TS Spectrum 2. Click the Specify button. The spectrum separation List window appears, showing the Spot Handling method. 3. In the Proof column, select the Proof check boxes to select the separations for proofing. Click the All button to select all the separations, or none to select none. 4. Click OK to return to Trendsetter Spectrum window. Designating a Screen Set 309 To assign a special donor to a spot color: 1. In the Spot-color Handling box, select Specific, then click the Specify button. The Spectrum Separation List window appears. 2. In the Proof column, make sure all separations required for current proof are selected. Tip: Click All to select all, or None to clear all and to then select specific colors. 3. Select the specific spot color, then, in the Spot Method box, select the special donor to match. The selected donor is removed from the list of available donors and is listed in the Spot Method column. 4. Repeat this process for spot colors, as required, until no more special color donor appear on the list. Any additional spot colors will be automatically converted to process. Important: The list of special color donors is defined in Print Console, and appears in the Output Color Order box of the Trendsetter Spectrum Template window when clicking the Update button. You can only assign one special color donor to one spot color. Excess spot colors are converted to process colors. 310 Chapter 47 – TS Spectrum 5. Click OK to return to the Trendsetter Spectrum window. Note: The application prompts of donor waste and separation mismatch when special donors are listed in the Output Color Order box and not used in the job. For example, with the All to Process method, when special color donors appear on the list. Assigning a Tone Reproduction Curve 311 Assigning a Tone Reproduction Curve Assigning a tone reproduction curve to the Trendsetter Spectrum is optional, and None may be selected. To select a Tone Reproduction curve: 1. Click the Tone Rep. List button. The Color Curve List window appears. 2. Select a Tone Reproduction curve and click Select. The Tone Reproduction curve name appears in the Tone Rep. box on the Trendsetter window. 312 Chapter 47 – TS Spectrum Defining Output Parameters Output parameters may be assigned from the Trendsetter Spectrum window. Output Color Order The Output Color Order box displays the list of donors in the Brisque, including special color donors, in order of proof (first on list, first to proof). The donors list is defined in Print Console, and the list on the Brisque can be updated at any time. It is important that donors selected when specifying Spot-Color Handling (see Spot Color Handling on page 307) match the list of donors in the Output Color Order box. The application prompts of donors waste and separation mismatch when special donors are listed in the Output Color Order box and not used in the job. To refresh the donor list from Print Console: ¾ Click the Update button. The list is updated to match the list on Print Console. To remove a donor from the list: ¾ Select a donor from the list and click the Remove button. The donor is deleted from the list. To change the order of donors on the list: ¾ Select a donor, then click the up arrow or down arrow to reposition the selected donor. Note: The Output Color Order box must match the order of donors in the media tray. Output Media Parameters To set the output media parameters: 1. In the Media Set box, select a media set that matches the parameters of the output media. 2. If the image has to be rotated, in the Rotate box, select Rotate 90°. Defining Output Parameters 313 Fitting This option enables you to customize the size of the image(s) on the output in a variety of methods. Use this option primarily for oversized images and large imposition Jobs. To select a fitting method: ¾ In the Trendsetter Spectrum window, in the Fitting box, select one of the options. Item Description Tiling Proofs the image at its full size. If the image is larger than the output media, the image is broken into segments and is proofed on as many overlapping outputs as needed. Manual Scale Scales the image manually to any size on output media (in %). The image is proofed in its entirety, scaled down to the defined percentage value. Scale to Fit Scales the image automatically to fit the output. The image is proofed in its entirety, to fit on the output. No cropping occurs. Clip Center Centers the image on the output media without scaling it down and clips off the excess image. The resulting proof is an image at 100% with any excess around the margins cropped out. Use this option when centering the image is important. Clip Offset Starts proofing the image from a point offset from point 0,0 and scales the rest of the image to fit the output media. Use this option when a selected partial image must be proofed over the entire output media. 314 Chapter 47 – TS Spectrum Image Position This option enables you to customize the position of the image on the output media. To select an image position: ¾ On the Trendsetter Spectrum window, in the Image Position box, select one of the options: • • Center - Centers the image to the top-center of the media. Offset - Offsets the image from the top-right (0,0) of the media. Creating Labels 315 Creating Labels The Trendsetter Spectrum application enables you to add labels to the proof on the output. The label can include the file name, time and date of proof, tone reproduction curve name, screen set name, job ticket name, and a color strip To add labels to the proof: ¾ In the Trendsetter Spectrum window, select the Labels check box. To edit the labels: 1. Click the Labels button. The Labels Parameters window appears. 2. Select or Clear the specific label check boxes. 3. Double-click the Labels Window Control box to return to the Trendsetter Spectrum window. 4. To add a user label, in the User Label box, type a comment. 316 Chapter 47 – TS Spectrum Customizing Proof Parameters for Selected Segments The Layout or Page Inventory box appears in the upper-right corner of the Trendsetter Spectrum window. Use this option when you want to define certain proof parameters for a selected layout(s) or page(s) in a job. For example, when proofing a multi-layout or multi-page job, where one or more of the layouts or pages requires different parameters than the rest of the job. The Inventory box is available when using the Job Ticket Editor dialog box to define the Trendsetter Spectrum parameters for a specific job containing multiple layouts or pages, and is not available when configuring a Template or the Spectrum default operation parameters. Note: Any changes you make to the Trendsetter Spectrum parameters outside of the layout or page Inventory will modify the parameters for all the Layouts or Pages belonging to the current job. Layout Inventory The Layout Inventory is enabled when editing the Job Ticket parameters for an imposition Job using the external layout or reader spread layout modes. To define the proof parameters for a selected Layout: 1. From the Trendsetter Spectrum window, click the Layout Inventory button. The Layout Inventory window appears, showing the job layouts. Customizing Proof Parameters for Selected Segments 317 2. If you want to proof only specific layouts, clear the Proof All check box in the Layout Inventory window. All the check boxes are cleared. 3. Select the Proof check box next to each layout destined for proofing, or, type To and From values in the boxes. The required Layouts are selected. If you want all Layout to be proofed, leave all check boxes selected. 4. Select a Layout whose parameters are to be modified. 5. In the Trendsetter Spectrum window, modify the parameters for the selected Layout. 6. In the Layout Inventory window, click the Apply to Selection button. Only the parameters of the selected layout are modified. 7. Repeat for each Layout to be modified. 8. Close the Layout Inventory window. 318 Chapter 47 – TS Spectrum Page Inventory The Page Inventory is enabled when editing the Job Ticket parameters for a non-Imposition Jobs using the Auto Arrange Layout or Single layout modes. To define the proof parameters for a selected Page: 1. From the Trendsetter Spectrum window, click the Page Inventory button. The Page Inventory window appears, showing the Job Pages. 2. If you want to proof only specific pages, clear the Proof All check box. All the check boxes are cleared. 3. Select the required Proof check box, or, type To and From values in the available boxes. The pages are selected. If you want all pages to be proofed, leave all check boxes selected. 4. Select a page whose parameters are to be modified. 5. In the Trendsetter Spectrum window, modify the parameters for the selected page. 6. In the Page Inventory window, click the Apply to Selection button. The parameters of the selected page only are modified. 7. Repeat for each page to be modified. 8. Close the Page Inventory window. Iris Controller Introduction ....................................................................................320 Monitor View..................................................................................321 Print View .......................................................................................321 Main View ......................................................................................322 320 Chapter 48 – Iris Controller Introduction The Iris Controller is a software control panel that allows communication with and monitoring of the Brisque-supported Iris proofers from the Brisque itself. This chapter describes how to view information from the Iris Controller. It does not detail the different options available for each particular Iris proofer. Refer to the documentation supplied with your Iris proofer to obtain a detailed description of the options available for your proofer. To display the Iris Controller: 1. From the Brisque Launch Pad, open the Services panel. 2. From the Services panel, double-click the Iris Controller icon; the <Device> Panel appears. View Buttons ¾ To exit the Iris Controller, close the <Device> panel. Notice the three View buttons, in the upper right-hand corner. Use these buttons to display the <Device> Panel in one of three view configurations. You can display the Iris Controller in one of three configurations, Monitor, Print, and Main, by clicking one of the three View buttons. The different configurations display varying degrees of information. Monitor View 321 Monitor View Button Print View Button Main Controller View Button Monitor View The Monitor view allows you to minimize clutter on your desktop, while keeping tabs on the basic status of the Iris proofer. We recommend keeping this window open whenever you are exporting files to the proofer, then, if you require more detailed information on the status of a Job, you can switch to a more detailed view. ¾ To display the Iris Controller in Monitor view, click the top View button. Please note that the proofer icon varies, depending upon the connected device. Print View The Print view displays the name of the Job that is being proofed, a time bar that indicates the progress of the Job, and any error messages generated by the Job. ¾ To display the Iris Controller in Print view, click the middle View button. 322 Chapter 48 – Iris Controller Main View The Main view provides information on the printer status, enables you to control the paper in the proofer, run diagnostics, monitor the system log, manage information and memory, and define preferences. For a thorough explanation of this window, see the documentation supplied by Iris. ¾ To display the Iris Controller in Main view, click the bottom View button. For detailed description of the Iris Controller options refer to the relevant Iris Proofer User Guide. Color2Disk Typical Workflow.............................................................................324 Defining the Color2Disk Parameters ................................................325 324 Chapter 49 – Color2Disk Typical Workflow Color2Disk is a color management application for the Brisque. Color2Disk performs a color transformation, applying the ICC profiles, and saves to disk a new file with new CMYK values. The transformed file can then be sent for output to any output device. This provides the flexibility of cross-platform compatibility, for all Creo and supported third party output devices and not necessarily directly connected to the Brisque. Color2Disk can be a stand-alone operation or part of simple or complex workflow. In a workflow environment, Color2Disk is normally be placed before an output operation. However, since it is possible to revert transformed files back to their original format, more than one color transformation can be performed in the same flow, allowing you to perform different manipulations for each output step, according to your needs. In following example we illustrate a basic Color2Disk workflow, whose final output source is a remote color printer: 1. On the Brisque, RIP and FAF (trap) the Job. 2. Using the DCP functionality on the Brisque, prepare the ICC profiles specific to the final output color printer. 3. Use Color2Disk to transform the Job according to the color printer's ICC profiles. 4. Via the network, transfer the transformed Job files to the remote station driving the color printer. 5. Immediately print the transformed Job to the color printer without performing any color matching operations. Make sure though that your printer is correctly calibrated. Defining the Color2Disk Parameters 325 Defining the Color2Disk Parameters You can edit the Color2Disk default operation parameters, or you can edit the Color2Disk parameters for a Template or a specific Job. ¾ To edit the Color2Disk default operation parameters, from the Launch Pad, open the Operations panel, then double-click the Color2Disk icon; the Color2Disk dialog box appears. ¾ To edit the Color2Disk parameters for a specific Job, from within the Job Ticket Editor, double-click the Color2Disk icon; the Color2Disk dialog box appears. ¾ To edit the Color2Disk parameters for a specific Template, from within the Template Builder, double-click the Color2Disk icon; the Color2Disk dialog box appears. 326 Chapter 49 – Color2Disk To perform a color transformation, from the Color2Disk dialog box, do the following: 1. Define the ICC Profiles to be used in the Color Transformation. See Defining the ICC Profiles on page 327. 2. Define how Spot Colors are handled. This option is currently unavailable - Spot Color will be ignored and remain untouched. 3. (Optional) If you wish to transform only selected Pages in the current Job, then use the Inventory option. See Selecting Specific Pages for Transformation on page 329. 4. From the Convert Black Using box, select the USR or GCR. Do not change the default settings. 5. Use the Backup Handling options to create backup copies of the original files before the color transformation and to control the direction of the color transformation (that is, Original Transformed). See Backup Handling on page 331. 6. Click OK to begin the transformation. If you try to transform a Job that has already been transformed by Color2Disk, you will receive a prompt to confirm the color transformation. Or, click Cancel to close the Color2Disk application without performing a color transformation. Important: Color2Disk supports all Brisque formats, except for Imposition Jobs. The input file must contain at least four separations of CMYK. If not, the transformation process will be aborted, and you will receive the following message: “Illegal file type”. Transformed jobs/pages/files can be easily identified by their unique icon (a transformed file has an extra RGB color bar at the bottom of the icon): Untouched Original Job Color2Disk Transformed Job Defining the Color2Disk Parameters 327 Defining the ICC Profiles The ICC Profiles Type section in the Color2Disk dialog box, you define the color matching mechanism to be used for the color transformation: • Device-Link profile - uses a single color transformation file that is comprised of a source and destination ICC profile. • Output Profile - uses two ICC profiles located on the local Brisque to define the transformation: - this is the output standard ICC profile that describes the output target, for example Cromalin. The Source ICC profile is also known as the Output Standard profile. Source profile - this is the ICC profile created specifically for your output device. The Destination ICC profile is also known as the Device profile. Destination profile Note: Color2Disk also supports ICC profiles created by any non-Creo application. However, the Source and Destination profiles used must both originate from the same application. The ICC profiles to be used for the color transformation should reside in the ICC_Profiles subfolder under the Shareditems folder on the local Brisque. - not all devices are equal when it comes to the color gamut they can reproduce. To specify the way the colors of an image, especially out-of-gamut colors, are translated to the color gamut of your output device, define the Rendering Intent parameter of the output profile: Rendering Intent • Relative Colorimetric - The colors are normalized to the white paper for the source and the output devices, respectively. The white of the source is mapped to the white of the output device. In addition, colors that fall within both devices are left unchanged, while the out-of-gamut colors are clipped to the nearest printable equivalent. Note: There may be special cases in which the paper white of the source device is not mapped to the paper white of the output device. • Absolute Colorimetric - This option is similar to Relative Colorimetric, however, normalizing to paper white does not occur. The white of the source device is simulated (if possible) on the output device. 328 Chapter 49 – Color2Disk To define the ICC Profile parameters: ¾ From the Color2Disk dialog box, select either the Device-Link Profile or Output Profile option. If you select Device-Link Profile, then from the menu list, select the appropriate profile. The Device Link profiles are located on the local Brisque within the Profiles subfolder under the Shareditems folder. If you select Output Profile, then you must further characterize the Source and Destination ICC profiles to be used. These profiles are located on the local Brisque within the Profiles subfolder under the Shareditems folder. You must also define the Rendering Intent parameter. Convert Black Using ¾ Select Convert Black Using optoin and, from the list box, select the USR or GCR. Do not change the default settings. In UCR, the black plate is used to add depth to shadow areas and to neutral colors. In GCR, more black ink is used over a wider range of colors. GCR separations tend to reproduce dark, saturated colors somewhat better than Defining the Color2Disk Parameters 329 UCR separations, and maintain gray balance better on press. The type of separation you should use is determined by the paper stock you are using and the requirements of your print shop. Spot Color Handling Currently, Color2Disk operation transforms only CMYK colors. If Spot Colors appear in the Job, they are left untouched and maintain their original gamuts. Selecting Specific Pages for Transformation With the Inventory option, you can selectively choose pages to which the color transformation must be applied. This allows more control over the process and avoids performing unnecessary transformations, such as on black and white pages, saving time and disk space. When you are defining the Color2Disk parameters for a Template, or for the system default Color2Disk operation, the Apply Color Matching Params to box displays All Pages. When you open the Color2Disk application via the Job Ticket Editor, the name of the active file appears in the box. 330 Chapter 49 – Color2Disk To select specific Pages for transformation: 1. From the Color2Disk dialog box, click the Inventory button; the Inventory window appears. 2. From the list in the Inventory window, use any of the following methods to select the Pages that you want to Color2Disk to transform. 3. • To select multiple Pages, select the Pages. Make sure the All check box is cleared. • Clear the check boxes to the left of a selected Pages or click None to clear all of the Pages from the list. • • Select the All check box to select all of the Pages in the list. If you want to select a contiguous series of Pages, type in the first and last Page of the group in the From and To boxes, then press ENTER. To exit the Page Inventory window, click Close; you return to the Color2Disk dialog box. Defining the Color2Disk Parameters 331 Backup Handling You use the Backup Handling options to: • • Create backup copies of the original files before color transformations. Control the direction of the color transformation. Create Backup You can instruct the Color2Disk operation to make a backup copy of the input Job's files before the color transformation process is performed. Backup copies must be made if you wish to revert the transformed files to their original format. ¾ To create a backup copy of the original input files, select the Create Backup option. CT and LW files that are backed up are given the .BCK suffix in their filename, for example, Sample2-P1-CT1.nlw => sample2-P1CT1.BCK.nlw. Note, only the CT and LW files are given the .BCK suffix, not the Job and Page folders. Revert to Original Revert to Original enables you to take files that have been processed with the Color2Disk operation, and to revert them back to their original format. The Revert to Original process deletes the transformed files and renames the backup copies to their original name. Therefore, you must have the backup copies for the reversion to work. ¾ Select the Revert to Original option; the remaining options in the Color2Disk dialog box become unavailable. Kodak Approval Introduction ....................................................................................334 Selecting a Page Layout ..................................................................336 Designating the Whisper Format .....................................................337 Defining the Fitting Parameters .......................................................339 Defining a Label..............................................................................342 Customizing Selected Pages ............................................................342 Printing Selected Reader Spreads or Layouts....................................342 Exiting the Application ....................................................................343 334 Chapter 50 – Kodak Approval Introduction Use the Brisque to proof Jobs on a Kodak Approval proofer. The connection between the Brisque and the Kodak Approval proofer is made via a (Whisper-based) Kodak RIP station. Output from the Brisque to the Kodak Approval XP4 halftone proofer is described separately in Chapter 51, Kodak Approval XP4. Kodak Approval can be located within a sequence of processes defined by a Template, or it can be a stand alone operation. If you are generating a Reader Spread proof of an Imposition Job, the Kodak Approval operation must either be a stand alone operation, or be coupled with the Translate operation. If you are going to use the Kodak Approval application as a stand alone process, the input files must already be RIPed or translated into the Creo Job format. You use the options contained in the Brisque Kodak Approval dialog box to define proofing parameters such as whether the Job is proofed as a single or multi-Page Layout, as an External Layout, or as a Reader Spread. The Brisque dialog box also contains the options for defining the order in which color separations are output to the proofer, and some fitting parameters. Additional parameters, mainly related to fitting, are defined by the Whisper Format. See Designating the Whisper Format on page 337. To configure the Kodak Approval, refer to Brisque Installation Guide, Chapter 2, Configure the Kodak Approval IFM (Micro Whisper). ¾ To edit the Kodak Approval default operation parameters, from the Launch Pad, open the Output panel, then double-click the Kodak icon; the Kodak Approval window appears. ¾ To edit the Kodak Approval parameters for a specific Job, from within the Job Ticket Editor, double-click the Kodak icon; the Kodak Approval window appears. Introduction 335 ¾ To edit the Kodak Approval parameters for a specific Template, from within the Template Builder, double-click the Kodak icon; the Kodak Approval window appears. Note: If the Kodak Approval Proof operation is part of a multi-operation workflow, and is situated after a Send operation, the Proof parameters defined on the local station and the relevant files are sent to the defined remote station, and the Proof operation is carried out remotely. 336 Chapter 50 – Kodak Approval Selecting a Page Layout Selecting a Layout mode instructs the application how to arrange the images on paper. Use the External Layout mode to proof a predefined Imposition Layout that was created in Preps, or in the Layout Assembly application. The External Layout mode preserves the Layout parameters that were defined by the application that created the file. The External Layout mode enables you to you proof the Layout of Pages on the flat. If you want to generate a proof of the facing Pages of the final publication, use the Reader Spread Layout mode. The Reader Spread Layout mode is available for Imposition Jobs only. If you are proofing a Job where the relative position of images is not important, use either the Single or Auto Arrange Layout modes. The Single Layout mode also enables you to“Step and Repeat” an image on the proof. For a detailed description of the Layout modes and related options, see Brisque Proof User Guide, Selecting Page Layout Mode on page 83. Designating the Whisper Format 337 Designating the Whisper Format A Whisper Format is a collection of user defined parameters that help determine exactly how a file is output from the Kodak Approval proofer. Although the options contained in the Brisque Kodak Approval window define some of the proofing parameters, additional parameters are defined by the Whisper Format. The most important parameters defined by the Whisper Format are those related to fitting instructions. It is, therefore, necessary to indicate the Whisper Format that define output parameters. ¾ To define the Whisper Format, in the Format Name box, type the exact name of the Whisper Format that defines the desired output parameters. (This box is not case sensitive.) Certain parameters defined by the Whisper Format can also be defined from the Kodak Approval window on the Brisque. Usually, if the same parameter is defined in both the Kodak Approval dialog box (on the Brisque) and the Whisper Format, the Brisque parameter overwrites the Whisper Format parameter. Whisper Format Options vs. Brisque Options The following table outlines the parameters defined by the Whisper Format, the parameters defined in the Kodak Approval dialog box, and their relationship to each another. Whisper Format Option The Equivalent BrisqueKodak Approval Option Comments Proof Offset Image Position Currently, the Brisque/Kodak Approval workflow does not support Proofing with an offset. Recipe Special Colors There is no support for using the spot donor in the Brisque/Kodak Approval workflow. Spot color data is automatically converted to process. Output Color Order Output Color Order Brisque overwrites. Mirror Width Mirror Brisque overwrites. 338 Chapter 50 – Kodak Approval Whisper Format Option The Equivalent BrisqueKodak Approval Option Fitting: Fitting: Comments None None Rotate --- If the Whisper Format Rotate option is on, it is implemented in addition to the Brisque defined fitting parameters. Scale --- To use this option, from the Fitting box, select None on the Brisque. Normally, if any other Fitting option is selected on the Brisque, the scale definition in the Whisper Format is ignored. See the Important Note below. Trim Center Clip Center Normally, Brisque overwrites. See the Important Note below. Trim Offset Clip Offset Normally, Brisque overwrites. See the Important Note below. Tiling Tiling Normally, Brisque overwrites. See the Important Note below. --- All Jobs arriving from the Brisque are assigned Normal Priority. Priority Number of Copies No. of Copies Data Legend: Labels: Name File Name Separation --- Date Time and Date The Label defined on the Brisque and the Data Legend defined by the Whisper format are printed. Defining the Fitting Parameters Whisper Format Option 339 The Equivalent BrisqueKodak Approval Option Description Control Strip Free Text --- Comments Selecting the Data Legend option from below the Format Name box only affects the dimensions that appear in the Proof Area boxes, and has no effect on any Data Legend definitions that exist in the selected Whisper Format. Selecting the Control Strip option from below the Format Name box only affects the dimensions that appear in the Proof Area boxes, and has no effect on any Control Strip definitions that exist in the selected Whisper Format. Note: When there is no equivalent Brisque option (---), the designated Whisper Format defines the parameter. Important: Normally, the Brisque fitting parameters overwrite the fitting parameters defined by the Whisper Format. If, however, the file that reaches the Whisper defines a full format image (323 x 488.95mm), and the Whisper Format defines a Label or a Control Strip, in addition to the Brisque defined fitting parameters which have already been implemented, the image may be scaled or trimmed, according to the Whisper Format definitions, to make room for the Label/Control Strip. If the Format defines a Data Legend or Control Strip, we recommend selecting the relevant option/s from beneath the Format Name box. Selecting one or both of these options automatically recalculates the maximum print area, and displays those dimensions in the Proof Area boxes. Defining the Fitting Parameters 340 Chapter 50 – Kodak Approval Proof Area The selected Proof Area defines the print area on the proof paper. Currently, the only available Proof Area option is Kodak Approval (323 x 488.95 mm). There are two check boxes below the Format Name box. Selecting either one of them affects the dimensions that appear in the Proof Area boxes. If the selected format defines a Data Legend or Control Strip, we recommend selecting the relevant check boxes. The dimensions in the Proof Area boxes are automatically updated to reflect the remaining maximum Proof (print) Area. This has no effect on Data Legend and Control Strip definitions that exist in the selected Whisper Format, but is meant to assist you while defining the Fitting parameters on the Brisque. Fitting Enables you to crop and to customize the size of the printed images. ¾ In the Fitting box, select one of the following options: None, Clip Center, Clip Offset or Tiling. If you select None, the fitting parameters are defined by the selected Whisper Format, and fitting is performed on the Whisper. ¾ Normally, if you select Clip Center, Clip Offset or Tiling, then the options in the Brisque dialog box define the cutting and fitting parameters, and the Fitting parameters defined by the selected Whisper Format are irrelevant. (See the Important Note on page 339). Note: In order to scale the image, in the Format Name box, designate a Whisper Format that defines scaling, and in the Brisque Fitting box, select None. Note that if the defined fitting is None, and the file size exceeds the format size, the Job will fail. Defining the Fitting Parameters 341 None When you select None, the Whisper performs the fitting according to the parameters defined by the selected Whisper Format. Clip Center Centers the image on the Page, and crops the edges if the image is larger than the paper size. (Performed on the Brisque.) Clip Offset Type values in the Ú and Ù boxes to crop the image from the Top Left. (Performed on the Brisque.) Tiling Select this option when you want to proof an image that is larger than the Kodak Approval paper. Tiling divides the image into different pieces, and outputs each piece onto a separate piece of paper. There is a 2.5 millimeter overlap on the sides of each tile. If the overlap causes an additional tile to be created, then it is automatically canceled. Put the pieces of paper next to each other to reconstruct the image. 1:4 Proof: Scaled down to fit onto one paper. 1:1 Proof: Image Tiled onto multiple papers. 342 Chapter 50 – Kodak Approval Defining a Label The Brisque/Kodak Approval workflow enables you to define a Label. The Label can include the file name, the print time and date, and user defined comments. If the selected Whisper Format defines a Data Legend, the Label is printed in addition to the Data Legend. To define a Label: 1. Select the Labels check box; the Labels button becomes active. 2. Click the Labels button; the Labels dialog box appears. 3. Select the desired options. 4. To exit, close the dialog box. ¾ To add a user comment to the Label, make sure that the Labels check box is selected, and type the desired comment in the text box. Customizing Selected Pages When you are proofing a Job with multiple Pages, you can customize the Kodak Approval parameters for a selected Page. This feature is available only when you are defining parameters for a Job via the Job Ticket Editor, and when the defined Layout mode is Single Page. For detailed information, see Brisque Proof User Guide, Selecting Page Layout Mode on page 83. Printing Selected Reader Spreads or Layouts When working in the Reader Spread Layout mode, you can generate a proof of all of the Reader Spreads in a Job, or you can use the Spreads Inventory feature to print selected Reader Spreads only. Similarly, when you are working in the External Layout mode, you can generate a proof of all of the Layouts in the Job, or you can use the Layout Inventory feature to print selected Layouts only. The Inventory feature is available only when you are defining parameters for a Job via the Job Ticket Editor, and when the Template predefined the Reader Spread Layout mode. Exiting the Application 343 In order to work in the Reader Spread mode, you must drag an Imposition Job (the whole Job, and not just selected Layouts) onto a Template that predefines the Reader Spread Layout mode. For detailed information, see Brisque Proof User Guide, Printing Selected Pages and Reader Spreads on page 110. Exiting the Application ¾ Click OK to confirm the newly defined parameters and exit the Kodak Approval window. ¾ Click Reset to revert to the previously saved parameters. The Kodak Approval window remains open. ¾ Click Cancel to exit the window without saving changes. Kodak Approval XP4 Introduction ....................................................................................346 The Proofing Process .......................................................................348 Configuring Kodak Approval XP4 via PC Workstation......................349 Recipe Spot Color Database ............................................................349 Generating a Proof..........................................................................365 Submitting the Job to the Kodak Approval XP4 ...............................394 Appendix A. Adding a New Donor ..................................................395 346 Chapter 51 – Kodak Approval XP4 Introduction The Kodak Approval XP4 is a digital halftone proofing system capable of outputting four 4-up proofs (16 pages) an hour at a fixed resolution of either 2400 or 2540 dpi (according to your Kodak Approval XP4 model). The Brisque interfaces with the Kodak Approval XP system in a traditional Brisque workflow environment to produce high quality color proofs. The Kodak Approval XP4 proofing application on the Brisque takes Brisque Jobs and converts them to screened bitmap separations that are sent via direct TCP/IP networking to the Kodak XP host system (residing on an NT station), which are then ready to be imaged. The Kodak XP host is a Windows NT application that combines queue management, the proofer driver, and diagnostics. The screening of the Brisque Job is performed via the TSP card resulting in digital "dot-screen" proof. The Brisque enables you to select a TurboScreen Screen Set and Tone Reproduction curve for the output of each Job to the Kodak Approval XP4. The combination of the advanced technology of the Brisque TurboScreen, the color and dot gain management tools of the Brisque, and the technology of the Kodak Approval XP4 system now take digital proofing closer to offset quality. The following graphic illustrates the effect of the Brisque TurboScreen on the output of the proof. The magnified area of the screened file, on the right, displays the screening of the Kodak Approval XP4, which closely simulates the final offset result. The magnified area on the left is that of a non-screened file. The result is a continuous tone output. Introduction 347 No screening Halftone Turboscreen This chapter describes all the procedures you perform from the Brisque prior to and including sending the Job to the PC workstation for proofing on the Kodak Approval XP4. Refer to the supplied Kodak Approval XP4 documentation for further instructions on how to work with the PC workstation and its software applications. Important: Before you start the Kodak Approval XP4 Proof application, you must first configure the PC workstation and the Kodak Approval XP device. 348 Chapter 51 – Kodak Approval XP4 The Proofing Process Brisque DFE PC Workstation Kodak Approval XP4 Digital Color Imager Laminator Basic Brisque-Kodak Approval XP4 Floor Plan The proofing process – from Brisque to Kodak Approval XP4 imager: 1. Send a Brisque Job to the Kodak Approval XP4 Proof application on the Brisque. 2. In the Kodak Approval XP4 Proof application define parameters such as layout mode, screen ruling, screen angle, tone reproduction curve, solid area density, image positioning, image width and height, scaling, XY offset values and labeling. The Brisque creates a bitmap file for each separation and sends it to the Kodak Approval XP workstation for processing and queuing. The image data is sent from the PC workstation on the Kodak Approval XP4, one separation at a time to donor media. The data on the donor media is then transferred to the intermediate film (a "collection sheet" for all four colors). The intermediate film is fed into the laminator, where it is transferred to paper. Configuring Kodak Approval XP4 via PC Workstation 3. 349 Compare the paper proof to your original copy to test for color match and adjust the original image file as needed. Configuring Kodak Approval XP4 via PC Workstation Refer to Chapter 38, Configuring Output Devices, Configuring a Kodak XP4 Halftone Proofer on page 57 for detailed instructions. Recipe Spot Color Database Kodak recipe colors are used to manage and reproduce spot colors on the Kodak Approval XP4 using CMYK and donor colors. The Brisque now supports output to the Kodak Approval XP4 halftone proofer using Kodak recipe colors. The recipe colors are made of a mix of Kodak color donors at specific color densities. Supported software: • • Brisque version 4.0 Kodak Approval XP4 (NT) ver 1.4 There are two ways of reproducing spot colors: • • Using Recipe Spot Color library (supplied by Kodak) Creating a new Recipe color to match a spot color Using Recipe Spot Color Library The Recipe Spot Color Library is included in the Color database described in the Brisque Proof User Guide, Chapter 6, Spot Color Database (DCP Workflow). Activating Color Database The initial construction of the Color database occurs during the actual installation of the Brisque software. It is extremely important that you define the location of the database in relation to the local Brisque. 350 Chapter 51 – Kodak Approval XP4 Activating the Color database includes the following: • • Locating the Color Database Defining the location of the Color database on the Brisque connected to your Kodak Approval XP4 proofer. Defining the location of the Color database server from remote Brisque stations situated at your workplace. Defining an automatic backup schedule - this should be done if the database server is located on the remote Brisque station. To activate the Color database: 1. From the Brisque Launch Pad, open the Utilities panel. 2. Double-click the Prefs. icon; the Brisque Preferences main window appears. 3. Double-click the Color DB icon to open the Data Base Preferences dialog box. Recipe Spot Color Database 351 4. In the Database location box, type the station name, or click List and select it from the browser. 5. To set the time for the automatic backup, select the Automatic backup check box and type the time (hh:mm) you want to execute a backup. If the Color database is located on the local Brisque station, leave this check box clear. You can perform a Color database backup any time by clicking the Backup Now button. 6. Click OK to save settings. The Color database now is activated. Important: Defining the database location is required on all Brisque stations connected to the Kodak proofer at your work site. From each Brisque station, repeat the above procedure. After the Color database has been located, the following situations may occur: • If a successful connection with the specific remote station designated as the Color database server has been established, but the Color database cannot be found, the following message is displayed: “Can’t open database in [station_name]” This indicates that the Color database is not defined on this specific remote station. You should define the Color database location as described in Activating Color Database on page 349. • If no connection can be established with the selected station, for example, if you entered an incorrect IP address, or the remote station is down, an error message appears. 352 Chapter 51 – Kodak Approval XP4 If you have changed the location of an already established Color database server to a different Brisque, then you must use the same procedure described here to redefine all of the Brisque stations that are connected to the Kodak Approval XP4 at your work site. Before you use this procedure, the “new” database server must first be defined and activated. To invoke the Spot Database for the first time: 1. From the Brisque Launch Pad, open the Setup Panel and double-click the Spot Database icon; the Spot Color DB main window appears empty. 2. Click the Recipe Spot tab. Recipe Spot Color Database 353 3. Click Install to install the Recipe Spot Color database; the Recipe Spot Library dialog box appears. 4. Select the RecipeColorDB.lib folder in the right section. The RecipeColorDB library with its full path appears in the Selected Item list. 5. Click OK to start the installation. This process takes a few minutes to complete. The progress indicator appears dislaying the status of installation. Upon completion, the Recipe Spot Color library content appears in the Spot Color DB main window indicating a successful installation. 354 Chapter 51 – Kodak Approval XP4 The Donors column displays donors that are used to reproduce recipe the spot colors. The Library box displays the name of the Recipe Spot Color library. ¾ To find a recipe spot color in the database, from the Spot Search box, select option and click Find. ¾ To delete a recipe spot color from the database, select it and click Delete. Recipe Spot Color Database 355 Creating a Kodak Recipe Color to Match a Spot Color If your Job contains spot colors that are not included in the Recipe Spot Color database, you can create a new Recipe color to match this spot color. A new recipe spot can be added to the Kodak Recipe Color library or another library in the Recipe Spot Color database. This procedure involves two steps, working on both the Kodak Approval workstations (NT) and the Brisque: • Preparing a complete Kodak recipe color book - the Kodak recipe book contains a wide matrix of color ranges and density mixes against which you match your desired spot colors. • Creating your Kodak Recipe Spot Colors on the Brisque - you match your desired spot colors to Kodak recipe color patches from the recipe book to determine the recipe's color properties. You then record the recipe color's parameters (donor separations and color densities) in the recipe spot color database on the Brisque. Preparing a Complete Kodak Recipe Color Book Each color recipe "chart" constitutes a matrix of "recipe patches", made up of two or more color separations at various color densities (see figure on the next page). You need only prepare the recipe book once and then use it as a reference, over and over again to match your spot colors. Two recipe spot color types are available: • Simple recipes - each donor in the recipe color chart is printed at a 100% tint separation value, with varying densities values, normally ranging from -40 to 40. • Full recipes - both the tint and density values of the donors vary. Full recipes are usually needed when simple recipes begin to show unwanted patterning in the low density ranges. Important: Make sure your Kodak Approval XP4 is fully calibrated before you generate a recipe color book. 356 Chapter 51 – Kodak Approval XP4 Recipe Color Patch Yellow Density Values Magenta Density Values To prepare a complete Kodak recipe color book: 1. On the Kodak Approval XP4 NT workstation, launch the Approval XP application. 2. From the menu bar, select Tools and then Recipe Color Generator. The Recipe Color Generator dialog box appears. Recipe Spot Color Database 357 3. From the Recipe Color Generator dialog box, generate your recipe color charts. Do the following for a "simple recipe" color book: • Start with a mix of 2 separations, and then continue with a mix of 3 separations (see table below) - this will give you a total of 22 charts, on condition you use CMYK donor colors only. • Set the following colors and parameters in the Recipe Color Generator dialog box: No. of Seps. Separations Starting Density Click Density Click Increment No. of Charts 2 Yellow + Magenta –40 5 1 2 Cyan + Yellow –40 5 1 2 Cyan + Magenta –40 5 1 3 Cyan + Yellow + Magenta –40 (Cyan+Yellow) –40 to 40 (Magenta) 5 (Cyan + Yellow) 0 (Magenta) 19 358 Chapter 51 – Kodak Approval XP4 Define the Cyan and Yellow parameters for all recipe color charts, as follows: Density = –40 and Increment = 5. In addition, define each color chart with a "fixed" Magenta density and zero increment. Begin the first chart by defining the Magenta density at -40, and continue in increments of 5 for each successive chart, until you reach a density of 40. Important: At low density values, unwanted patterning may occur, producing non-uniform color distribution within the printed recipe color patches. Create your Kodak Recipe Colors on the Brisque To match your spot color to a Kodak recipe color patch 1. From the Kodak recipe color book, determine which recipe color patch best matches each desired spot color. Important: If your spot color does not match recipe color patch in the recipe book, print more recipe color charts with different color profiles and densities. 2. From the Brisque Launch Pad, open the Setup panel, and double-click the Spot Database icon. The Spot/Recipe Color DB main window appears. Recipe Spot Color Database 359 3. In the Library box, select a library to which you wish to add a new spot. 4. To add Kodak donor colors to the donor list, click Donors, and then define the new donors from the dialog box that appears. You may add donors that are not installed on the Kodak device, but will be added at later time prior to output. If you change or add donors in the Kodak Approval XP4 device, you must reconfigure the device settings via the Output Device Handling application on the Brisque (see Appendix A. Adding a New Donor on page 395). 360 Chapter 51 – Kodak Approval XP4 5. Add your recipe spot color to the Recipe Spot Color database. To do this: • Click New. The Recipe Spot dialog box appears. Recipe Spot Color Database 361 • In the New Spot Color box, type the recipe spot name. The name must be identical to the spot color name as appears in your Job, including space- and case-usage. • In the Group box, type a group name to define the recipe spot colors by category. Or, in the Group box, select a defined recipe group. To place the new recipe spot color in all recipe groups, select All. 6. From the list of available Kodak donor colors, define the Kodak donors and make-up values which comprise the recipe spot color: • From the Add Donor box, select a donor color. Then click Add; the donor appears in the Donor Name list. By default, the following color profile is given to the donor: Density = 0% and Tint = 100%. 362 Chapter 51 – Kodak Approval XP4 If the donor colors are missing from the Add Donor box, go back to the Spot/Recipe Color DB main window, and click the Donors button. Then, from the dialog box that appears, define the appropriate donor colors. • In the Density box, type the density of the recipe color patch that best matches your spot color, using your prepared recipe color charts. • In the Tint box, type the donor's tint percentage (simple recipe are set to 100%; see Preparing a Complete Kodak Recipe Color Book on page 355 for details). Note: The tint is always defined in units of percentage, no matter what Color Space unit you defined in the Brisque system preferences (see the Chapter 4, Brisque Utilities & Preferences). 7. • Repeat this procedure for each additional Kodak color donor comprising the recipe. • To remove a donor from the recipe, select it from the list and click Remove. • Use the arrows on the right of the Donor Name list to change the output order of the donors. Note, the output order of the donors are defined in the Kodak Approval XP4 application on the Brisque. (Optional) Attach a Tone Reproduction curve to the recipe spot color. Recipe Spot Color Database 363 To do this: • • Select the Use Tone Rep. check box. Click List and select a curve from the Tone Reproduction Curve list. Note: If you do not designate a Tone Reproduction curve for the recipe spot color, the Brisque uses the curve defined for the process colors in the Kodak XP4 window. main 8. If you attach a Tone Reproduction curve to the recipe spot color and apply the Media Save option, the Brisque applies both curves to the relevant recipe spot and process elements, separately, on the same media. 9. (Optional) To add user comments to the recipe spot color, such as usability notes or owner identification, enter text in the Comment box. The comments appear next to each recipe spot name in the Spot/ Recipe Color DB main window. 10. Click Save to save the recipe spot color in the Recipe Spot Color database. You return to the Spot/Recipe Color DB dialog box and the new recipe spot color appears in the Spot Color list. Or, click Save As to save the recipe spot color under a different spot name. This is useful if you want to create a new recipe spot color based on an existing one. Click Cancel to exit and cancel any changes made. 11. In the Spot/Recipe Color DB main window, click Done to exit. 364 Chapter 51 – Kodak Approval XP4 ¾ To modify an existing recipe spot color, select it from the Spot/Recipe Color DB main window and click Modify. Generating a Proof 365 Generating a Proof The proofing step is usually part of workflow template, but it may be a stand-alone operation, as well. If you are generating a Reader Spread proof for an Imposition Job, the Kodak Approval XP4 operation must either be a stand alone process, or coupled with the Translate or Send operation. If you are going to use the Kodak Approval XP4 Proof application as a stand alone process, then the input files must already be RIPed or Translated into the Brisque Job format. If the Kodak Approval XP4 operation is a part of a multi-operation workflow, and is situated after a Send operation, the Kodak Approval XP4 parameters are defined on the local station, the relevant files are sent to the remote station, and the Proof operation is carried out remotely. ¾ To edit the Kodak Approval XP4 Proof default operation parameters, from the Brisque Launch Pad, open the Output panel, then doubleclick the KodakXP4 icon; the Kodak Approval XP main window appears. ¾ To edit the Kodak Approval XP4 Proof parameters for a specific Job, from within the Job Ticket Editor, double-click the KodakXP4 icon; the Kodak Approval XP main window appears. ¾ To edit the Kodak Approval XP4 Proof parameters for a specific Template, from within the Template Builder, double-click the KodakXP4 icon; the Kodak Approval XP main window appears. If you drag-and-drop a multi-Page Job on to the default Kodak Approval XP4 operation icon, and then change the default parameters on the fly (e.g. paper size, fitting, offset, etc.), the changes affect the first Page only. To change all the Pages, you must either: • • • Apply the changes to each Page with the Page Inventory feature. Redefine the template. Redefine the default operation parameters before dragging and dropping the multi-Page Job on to it again. 366 Chapter 51 – Kodak Approval XP4 Kodak Approval XP4 - main application window Note: When you start the Kodak Approval XP proofing application, the name of the connected Kodak proofer appears in the upper left hand corner of the Kodak Approval XP main window. If no Kodak proofer is connected, you are prompted by the Brisque before the main application window opens. Generating a Proof 367 Selecting Page Layout Mode A Layout mode instructs the application on how to arrange the images on the output media. ¾ To select a Layout mode, from the Layouts section of the Kodak Approval XP main window, click one of the Layout mode button icons. The name of the Layout mode appears below the Layout mode button icons and the parameters in the Kodak Approval XP window are updated according to the selected Layout mode. The "R-icon" in the upper right corner illustrates the arrangement of the images. Note: To generate a Reader Spread proof, you must drag-and-drop an Imposition Job on to the KodakXP4 operation icon or on to a template whose KodakXP4 parameters already define the Reader Spread Layout mode. You cannot select the Reader Spread Layout mode on the fly. Nor can you select a different Layout mode on the fly for a Job already predefined in the Reader Spread Layout mode. Layout Mode Icon R-icon Description Single Use the Single Layout mode to output a single image, or to proof Pages of an Imposition Job individually. Auto Arrange Use the Auto Arrange Layout mode when you want to output multiple images on a single piece of paper. This option saves paper. You can use this option to proof Pages of an Imposition Job, in random order, a few Pages at a time. External Use the External Layout mode to proof Imposition Layouts created in the Preps or in the Layout Assembly application on the Brisque. The External Layout mode preserves the Layout parameters defined in the application used to create the file. 368 Chapter 51 – Kodak Approval XP4 Layout Mode Icon R-icon Reader Spread Description While the External Layout mode enables you to proof the Layout of Pages on the flat, the Reader Spread Layout mode enables you to proof the facing Pages of the final publication. The Reader Spread proof must either be a stand alone operation, or be coupled with the Translate or Send operation. This option is available for Imposition Jobs only. If you are proofing a Job where the relative position of the pictures is not important, use either the Single or Auto Arrange Layout modes. Defining Layout-Specific Parameters When you select the Single, Auto Arrange, or Reader Spread Layout mode, you can further define the Layout parameters using the options contained in the Layout dialog box. The Layout parameters vary for the different Layout modes. When proofing in the External mode, the Params button (for accessing the Layout dialog box) is unavailable, since you want to preserve the Layout parameters defined in the application used to create the file. To define the Single Layout parameters: 1. Click the Single Layout icon; the Params button becomes active. 2. Click Params; the following Layout dialog box appears. Generating a Proof 369 In the Layout dialog box, set parameters to exposes one image a number of times along the width and/or along the height of the print area, and to leaves gaps between the repeated images. Number of Steps ¾ In the Ú and Ù boxes, type values to repeat the image as many times into the height and width of the print area. Important: If the number of copies exceeds the print area, the Brisque will crop the entire last image that extends out of the print dimensions. Gap Size ¾ In the Ú and Ù boxes, type values to define how much space is left between repeated images. 3. Close the dialog box to return to the Kodak Approval XP main window. 370 Chapter 51 – Kodak Approval XP4 To define the Auto Arrange Layout parameters: 1. Click the Auto Arrange Layout icon; the Params button becomes active. 2. Click the Params button; the Layout dialog box appears. Method Selecting one of the two methods invokes a specific algorithm that determines the placement of multiple images on film. Best Fit When you select the Best Fit option, the Kodak XP4 Proof application attempts to arrange the files so that as many images as possible appear on one piece of intermediate film. This method saves paper, and may also save time, because multiple images are printed in one pass. FIFO (First In, First Out) This option arranges the files on to the paper, one after the other, in the order they are arrive for proofing. Gap Size ¾ In the Ú and Ù boxes, type values to define the gap between the different files that are printed on the intermediate film. 3. Close the dialog box to return to the Kodak Approval XP main window. Generating a Proof 371 To define the Reader Spread Layout parameters: 1. Click the Reader Spread icon; the Params button becomes active. 2. Click Params; the following Layout dialog box appears. Bleed & Cut Marks Select this option to proof the Bleed and Cut Marks that will also appear on the printing plate. When you select this option, the Gap Between Pages option is unavailable. Clear this option to proof the Reader Spread as it will appear in the publication, without the Bleed and Cut Marks. Gap Between When the Bleed and Cut Marks option is not Pages selected, you can define a gap between two facing Pages on the proof. By default, the Gap value is zero, and the Pages appear right next to each other. ¾ In the Gap Between Pages box, type a value to define a gap between facing Pages on the proof. 372 Chapter 51 – Kodak Approval XP4 Paper Saving Select this option to print two or more spreads on the same sheet. This option is designed to save media. The number of spreads that can be printed, depends on the original size of the images the size of the media, and whether you have defined Crop Marks and Labels. By default, the Paper Saving option is selected. Important: The Paper Saving calculation is performed according to the original size of the image (that is according to 100% scaling), even if a Fitting value other than 100% is defined in the Kodak Approval XP main window. When Paper Saving is selected, the Gap Between Spreads option becomes available. Gap Between Spreads Type in values in the Gap Between Spread box to define the horizontal and vertical gaps between the Spreads on the proof. The vertical value applies to the gap between upper and lower spreads, while the horizontal value applies to the gap between the facing Spreads. Publication Type Select Left Bound for a publication that will be bound on the left (e.g. an English language publication). Select Right Bound for a publication that will be bound on the right (e.g. a Japanese language publication). 3. Close the dialog box to return to the Kodak Approval XP main window. Generating a Proof 373 Working with Screen Sets The Brisque is connected directly to the PC workstation of the Kodak Approval XP4 via the Turbo Screen Processor (TSP) card. The TSP is a high speed screening processor that implements the patented Brisque TurboScreen technology, performing on the fly data combine and half tone screening functions. Utilizing the advanced technology of the TSP, the Kodak Approval XP4 proof application on the Brisque allows you to select Turbo Screen Sets to simulate digital screening on the output proof itself. Since the resulting laminated proof digitally simulates the offset screening, a more accurate and near-offset quality proof is produced. The Screen Set application enables you to use the Stacatto 1 and Stacatto 2 (previously, FM) dot shape stocastic method for the Kodak Approval XP4. The Screen Set box displays the currently selected screen set. The List button enables you to view screen sets created for the Kodak Approval XP4. From the View button you can view the parameters of the selected Screen Set The Screen Set LW Res. box displays the LW resolution defined by the currently selected screen set. The Kodak Approval XP4 supports screen sets set at 94.488 (2400 dpi) or 100 dpm (2540 dpi) resolution only, depending on the Kodak Approval XP4 model. Note: You cannot modify the parameters of any of the predefined screen sets from the Kodak Approval XP main window. Start the Screen Sets application from the Output Devices Handling window to modify screen sets. If you need to create or modify a Screen Set, refer to Chapter 40, Screen Sets. 374 Chapter 51 – Kodak Approval XP4 Selecting a Screen Set If the defined parameters of the attached Screen Set do not match the conditions of the Job you are proofing, you can designate a different Screen Set. To designate a different Screen Set: 1. Click the List button next to the Screen Set box; the Screen Set List window appears displaying the Kodak Approval XP4 Screen Sets defined on the local Brisque with the Screening application. 2. Select a Screen Set from the list. 3. To view the defined parameters of any Screen Set in the list, select a Screen Set and then click View; the Screen Set Name dialog box appears. Click Done when you are finished viewing the parameters. 4. From the Screen Set List dialog box, click OK to confirm your selection; you are returned to the Kodak Approval XP main window, where the name of the designated Screen Set appears in the Screen Set box. Or, click Cancel. Generating a Proof 375 Viewing the Screen Set Parameters To view the defined parameters of the attached Screen Set: 1. Click View ; the Screen Set Name dialog box appears with the parameters for the selected screen set. Alternatively, click List, then from the Screen Set List dialog box, select a screen set. Then, click View; the same Screen Set Name dialog box as above, appears. 2. Click the icon in the top right corner to view additional parameters for the selected screen set. 3. Click Done when you are finished viewing the parameters; you are returned to the Kodak Approval XP main window. Cyclic Screen Set Select this option to assign each recipe spot color its screen parameters (angle, screen frequency, dot shape) using the parameters, in an cyclic manner, assigned to Cyan, Magenta and Black separations. Note: The Yellow parameters are not cycled in order to avoid moire. For example, the file contains Cyan, Magenta, Yellow, Black, Spot Color1, Spot Color 2, Spot Color 3, Spot Color 4, Spot Color 5, etc. 376 Chapter 51 – Kodak Approval XP4 Spot Color 1 will be assigned the Cyan parameters, Spot Color 2 will be assigned the Magenta parameters, Spot Color 3 will be assigned the Black parameters, Spot Color 4 will be assigned the Cyan parameters, Spot Color 5 will be assigned the Magenta parameters, and so on. Use the Cyclic Screen Set to override the parameters defined in the screen set. ¾ Clear the Cyclic Screen Set check box to use the recipe spot color parameters defined via the Screen Set application. If you need to create or modify a Screen Set, refer to Chapter 40, Screen Sets. Tone Reproduction Curves Create Tone Reproduction curves to compensate for press-related effects, such as dot gain, and to control image tonality. The Kodak Approval XP4 Proof application on the Brisque enables you to select a Tone Reproduction curve to proof and simulate the actual Tone Reproduction curves used for the final offset exposure. The Tone Reproduction curves are created by the Tone Reproduction application on the Brisque. The curves are built according to data measured off the paper of the laminated intermediate film. The data measured is performed according to pre-calculated correction tables supplied by the printer. The Tone Rep. box displays the currently selected Tone Reproduction curve. If you need to create or modify a Tone Reproduction curve, see Chapter 39, Calibrating Output Devices, Tone Reproduction on page 112. Generating a Proof 377 To designate a Tone Reproduction Curve: 1. Click the List button, next to the Tone Rep. box; the Color Curve List dialog box appears displaying the Tone Reproduction curves created on the local Brisque. 2. Select the desired Tone Reproduction curve. 3. Click Select to confirm your selection and return to the Kodak Approval XP main window; the selected Tone Reproduction curve appears in the Tone Rep. box. Or, click Cancel to exit the Color Curve List window without selecting a Tone Reproduction curve. 378 Chapter 51 – Kodak Approval XP4 Recipe Spot Color Handling Before proofing the Job, make sure the spot colors in the Job have been defined in the Recipe Spot Color database. Ensure that the recipe spot names exactly match the spot color names in the job, including case-usage and other special characters, such as spaces and underscores. All recipe spot colors defined in the Job are proofed as independent separations, each with its own Tone Reproduction curve, density and tint parameters, which are completely distinct from the Job's CMYK parameters. Using the Media Save option you can print the recipe spot colors on the same donor colors, saving media in your Kodak Approval XP4 device. To proof using Recipe Spot Colors: 1. In the Spot Color Handling box, select an option. All to Process Automatically converts all spot colors to process (according to the CMYK equivalents defined in your Job). All to Donor Automatically converts all colors in the output Job, including spot colors, to their respective donors loaded into the machine. All to Recipe Automatically treats all spot colors in the Job as Kodak recipe spot colors, as defined in the Recipe Spot Color database. Make sure you define all spot colors in the Recipe Spot Color database. The missing recipe spot will be proofed according to the Default Policy that you defined using the Output Preferences application. For more information refer to Brisque Proof User Guide, Defining the Proof Preferences on page 112. Generating a Proof 379 Specific Allows you to define how each spot color in the Job is treated, as process, donor or Kodak recipe spot color. ¾ Click Specify; the dialog box displays the color separations of the current Job. Then, select each spot color and define its output method in the Choose Method box (Process, Donor, or Recipe). ¾ In the Override Angle column, designate the angle for each spot color. When proofing, this angle is be applied to the spot color separations regardless of the angle defined in the Screen Set or assigned by selecting Cyclic Screen Set check box. 2. Select the check boxes on the left (see screen capture above) to define which ones you wish to output. By default, all are selected. Note: If you clear any of the process separations, your recipe spot colors are still printed. For example if your recipe is made up of Cyan and Magenta, and you clear only the Magenta separation, the Brisque will still print the Magenta separation, with only the elements containing that particular recipe spot color. 380 Chapter 51 – Kodak Approval XP4 3. (Optional) Define the Media Save option. Normally, if recipe spot colors are present, each recipe color is printed as a unique units, following the output order of the process separations. Using the Media Save option, you can instruct the Kodak to simultaneously print the recipe colors with their respective process donors, thereby, using media already on the drum intended for the process separations. This will be done in the Output Color Order window. • Select the Media Save box to activate this option. The output order of recipe spot colors (defined by each recipe spot color) are ignored. • Clear the Media Save box to print the recipe colors separately. This option is only valid if you select the Specific or All to Recipe in the Spot Color Handling box. For example, take a Job containing the four process colors, CMYK, and two recipe spot colors. Where the first recipe is made of Cyan and Magenta, and the second recipe of Cyan and Yellow. Activating and deactivating Media Save results in the following: Sep. No. and Output Order Media Save Off Media Save On 1 Cprocess Cprocess Crecipe1 Crecipe2 2 Mprocess Mprocess Mrecipe1 3 Yprocess Yprocess Yrecipe2 4 Kprocess Kprocess 5 Crecipe1 - 6 Mrecipe1 - 7 Crecipe2 - 8 Yrecipe2 - Total separations: 8 4 Generating a Proof 381 4. To define the output order of the process and special donors, use the arrows on the right of the Output Color Order list. Note: The output order of donors in each recipe color is defined by the recipe's output parameters), unless you use the Media Save option, whereby, the output order of process colors dictates the output order of the recipe spot colors in the particular Job. 5. If a donor appears in red, the Brisque cannot detect the donor in the Kodak Approval XP4 device. This normally occurs if you start the Kodak XP4 application on the Brisque via a template that was originally defined when the donor was present in the device. • • 6. To remove the donor from the list, select it and click Remove. If you add the donor to the device, open the Output Device Handling application on the Brisque and reconfigure the Kodak Approval XP4. Then select the donor in the above list, and click Update. The donor's name will change to black (see Appendix A. Adding a New Donor on page 395). Click OK to proof your Job. 382 Chapter 51 – Kodak Approval XP4 Output Color Order This option defines the order in which the Kodak Approval XP imager outputs the color separations to the intermediate film. Normally, the order matches the order of the donor media loaded on to the spindles. ¾ Use the arrows to change the order of donor colors. ¾ Click Remove to remove the selected donor color from the list. ¾ If some of the donor colors appear in red, this means that they have not be updated since the last Kodak Approval XP system configuration. Click Update. Generating a Proof 383 Defining Output and Geometry Parameters The Kodak Approval XP main window contains the output parameters: Output Color Order and Number of Copies. It also contains other parameters that enable you to determine the geometry of the output such as Paper Size, Fitting, Image Position, and Rotate. No. Copies ¾ Enter a value in the No. Copies box to generate a specific number of copies of an image. Paper Size The selected paper size defines the print area dimensions of the Kodak Approval XP4 media. This value cannot be modified. 384 Chapter 51 – Kodak Approval XP4 Fitting Enables you to crop, scale and customize the size of the printed images. This option is used primarily to handle oversized images and larger imposition jobs. ¾ In the Fitting box, select one of the following options: Manual Scale, Scale to Fit, Clip Center, Clip Offset, or Tiling. Manual Scale Manual scale enables you to customize the scaling of the image. Type values in the Ú and Ù boxes to define by what percentage the image is scaled. The values can be less than, equal to, or greater than 100%. Scale to Fit Automatically scales the image down or up to fit the selected paper size. When you select this option, the Ú and Ù boxes disappear. Clip Center Crops the edges of a Page symmetrically, if they extend beyond the maximum print area of the selected paper. Clip Offset To crop the image from the top-left, select this option and, in the Ú and Ù boxes, type values. Tiling Select this option when you want to proof an image that is larger than the intermediate film, and you don’t want to scale down the image to fit on to one film. Tiling divides the image into different pieces, and outputs each piece on to a separate film. There is a 2.5 mm overlap on the sides of each tile. (If the overlap causes an additional tile to be created, then it is automatically canceled.) After exposure and lamination, put the pieces of paper next to each other to reconstruct the image. Generating a Proof 385 1:4 Proof: Scaled down to fit onto one paper. 1:1 Proof: Image Tiled onto multiple papers. Scaling and Tiling - Single Page Job Scaling and Tiling - Imposition Job 386 Chapter 51 – Kodak Approval XP4 Image Position Allows you to determine where the image is positioned on the film. ¾ Click the Image Position button and select one of the following options from the menu list: Center Automatically centers the image on the film. Offset Enables you to define the offset of the image in relation to the XP4 media. The 0,0 origin is set at the top left corner of the film. Currently, the Brisque enables an offset position of 0,0 only on the Kodak Approval XP4. ¾ Type values in the Ú and Ù boxes. Note: The Fitting => Clip Offset values define the absolute clip dimensions, as long as the Image Position=> Offset values define the offset. Rotate ¾ To select the print orientation, in the Rotate box, select either 0° or 90° rotation. Generating a Proof 387 Creating Labels The Kodak Approval XP4 proofing application enables you to add labels to the printed image. To add labels: 1. Select the Labels check box to toggle the option on; the Labels button becomes available. Note: Whenever a label option is selected in the Labels dialog box, the R-icon in the Kodak Approval XP main window indicates labels, regardless of the Labels check box being selected. 2. Click the Labels button; the Labels dialog box appears. 3. Select the required option.Copying a Color Strip to the Brisque File Name Prints the file name on the proof. Time & Date Prints the print time and date on the proof. Tone Rep Name Prints the name of the Tone Reproduction Curve used on the proof. Screen Set Name Prints the name of the Screen Set used on the proof. 388 Chapter 51 – Kodak Approval XP4 Job Ticket Name Prints the name of the Job ticket on the proof. Color Strip Prints a color strip (e.g. an Iris strip, Brunner strip, or a custom CT or LW) at the top left of the proof. Specify which color strip by clicking the menu button, then selecting an option from the menu list. Only color strips located in the SharedItems folder on the Brisque appear in the list. Print Appears only in the window when the Auto Arrange Layout mode is selected. When a Layout includes more than one Page, you can either print the filename once for the entire print or under each Page that appears in the print area. Select the Once option to instruct the application to print the filename only once in the print area. Select the Per Page option to instruct the application to print the filename below each Page that appears in the print area. layout1 Trash.job#1409.jt Once Trash-P1.assg Trash.job#1409.jt Trash-P3.assg Trash.job#1409.jt Trash-P2.assg Trash.job#1409.jt Trash-P4.assg Trash.job#1409.jt Per Page 4. Close the Labels dialog box and return to the Kodak Approval XP main window. 5. To add any text to the end of the label, place the cursor in the User Label box, type the text and then press ENTER; when you output the file to the Kodak Approval XP4, the text appears at the end of the label. Note: Before you can define a color strip in the Labels dialog box, the color strip must be copied to the appropriate folder on the Brisque. Generating a Proof 389 To copy a color strip from a Macintosh to the Brisque: 1. On the Macintosh, mount the Brisque volume called SharedItems on to the Macintosh desktop. 2. Open the SharedItems volume, and move the Color Strip into the folder called Color_Strip. On the Brisque, the name of the color strip will appear in the Labels dialog box, within the Color Strip box. The color strip can be any file type supported by the Proof application, that is CT, LW, Page, Job, TIFF, etc. Customizing Selected Pages You can customize the proof parameters for a selected Page when you proof a Job with multiple Pages. This feature is available only when you define parameters for a Job via the Job Ticket Editor, and the Layout mode is Single. When you define the Kodak Approval XP4 parameters for a Template, or for the system default Kodak Approval XP4 operation, the Apply Proof Params to box indicates All Pages. However, when you launch the Kodak Approval XP main window via the Job Ticket Editor, the name of the active file appears in the box (see below for example). 390 Chapter 51 – Kodak Approval XP4 To customize the Proof parameters for a selected Page: 1. Click the Page Inventory button; the Page Inventory dialog box appears, displaying the Pages in the current Job. 2. From the Page Inventory dialog box, select the Page whose processing parameters you want to change. The Apply Proof Params to box in the Kodak Approval XP main window, indicates the highlighted Page to which the modifications will apply. Important: The check box to the left of each Page allows you to define which Pages are sent for proof. The All and None buttons are also used for this option, and not for customizing the parameters of selected Pages, described here. Generating a Proof 391 3. Leave the Page Inventory dialog box open in the background, then toggle to the Kodak Approval XP main window, and modify the parameters for the selected Page. 4. Toggle back to the Page Inventory dialog box, click Apply to Selection to confirm the change; the parameters are defined for the selected Page, and both the Page Inventory dialog box and the application windows remain open. Since you cannot select multiple Pages, you must repeat the above procedure to define custom parameters for other selected Pages, as needed. Tip: To modify a parameter to be applied to all Pages of a Job, create a new Template instead of modifying the parameter one Page at a time. 392 Chapter 51 – Kodak Approval XP4 Printing Selected Pages and Reader Spreads You can use the Page and Layout Inventory to print only selected Pages or Reader Spreads. To print selected Pages: 1. Click Page Inventory; the Page Inventory dialog box appears. 2. From the list in the Page Inventory dialog box, use any of the following methods to select the Pages that you want to proof. ¾ To select multiple Pages, click the check box to the left of each Page. Make sure the All check box is cleared. ¾ To clear a selected Page, it clear the check box to the left of the selected Page, or click None to clear all of the Pages from the list. ¾ To select all of the Pages in the list, click All. ¾ To select a contiguous series of Pages, type in the first and last Page of the group in the From and To boxes, respectively, then press ENTER. 3. Close the Page Inventory dialog box to return to the Kodak Approval XP main window. Generating a Proof 393 To print selected Reader Spreads: 1. Click Layout Inventory ; the Layout Inventory dialog box appears. Note, you must be in the Reader Spread mode. Note: In order to work in the Reader Spread mode, you must drag an entire Imposition Job (not just selected Layouts) on to a Template that has the Reader Spread Layout mode predefined. 2. From the list in the Layout Inventory dialog box, use any of the following methods to select the Reader Spreads that you want to proof. ¾ To select multiple Reader Spreads, click the check box to the left of each Reader Spread. Make sure the All check box is cleared. ¾ To clear a Reader Spread, clear the check box to the left of the selected Reader Spread, or click None to clear all of the Reader Spreads from the list. ¾ To select all of the Reader Spreads in the list, click All. ¾ To select a contiguous series of Reader Spreads, type in the first and last Reader Spread of the group in the From and To boxes, respectively, then press ENTER. 3. Close the Page Inventory dialog box to return to the Kodak Approval XP main window. 394 Chapter 51 – Kodak Approval XP4 Submitting the Job to the Kodak Approval XP4 If you invoked the Kodak Approval XP main window via a Job Ticket, and you have completed defining the Proof parameters, you can submit the Job for exposure to the Kodak Approval XP4. When you submit the Job for proofing to the Kodak Approval XP4, the Brisque first creates a bitmap image for each separation, and saves the files on the PC workstation in the Job Queue directory. This process can be viewed from either the: • Brisque - under the Now Running list in the Queue Manager. The current operation is given the KodakXP_ prefix. • PC station - under the Active queue of the Kodak Approval XP4 Queue Manager. The Job is identified by its Job name and its status appears as RIPing. Refer to the documentation supplied with your Kodak Approval XP4 system for more information. To submit the Job for Proofing via a Job Ticket: 1. When you finish defining the parameters in the Kodak Approval XP main window, click OK; you return to the Job Ticket Editor. ¾ Click Reset to revert to the previously saved parameters. The Kodak Approval XP main window remains open. ¾ Click Cancel to exit the Kodak Approval XP main window without saving changes. 2. Click Submit; a bitmap proof of the entire Job (or the specific Pages/ Reader Spreads that you may have selected) is generated and saved on the PC workstation. 3. Once the Job is completely saved on the PC workstation, the message End proof of <xxx.job> to KodakXP4 appears on the Brisque. The Job exits the Brisque Queue Manager and now resides on the PC Queue Manager awaiting to be proofed by the Kodak Approval XP4. Appendix A. Adding a New Donor 395 Appendix A. Adding a New Donor Kodak Donor Types Supported by Brisque The Brisque supports all Kodak process donor types that do not conform to the Cyan, Magenta Yellow, and Black naming convention of the Brisque, for example, Euro-donors (EuroMagenta and EuroYellow etc). The use of non-standard naming conventions may create some conflicts, especially when dealing with special donors and recipe colors that have similar names, such as Yellow and EuroYellow. In this section we describe how to configure the Brisque to handle these conflicts. The example we use here, is EuroYellow. Important steps after installing new donors on the Kodak Approval XP4: 1. From the Output Device Handling application on the Brisque, reconfigure the Kodak process donor setup by defining which of the donors are process colors. 2. From the KodakXP4 output application on the Brisque, you must update any Job Ticket and template using the old donor setup. This must only be done after you configure the Brisque, as described above. 3. • From the Brisque Launch Pad, open the Output panel, and double-click the KodakXP4 icon. • From the KodakXP4 main window, below the Output Color Order list, click Update (see following pages for screen captures). • If you are modifying the default parameters for the Kodak XP4 application, click Set as Default in the Job Ticket Editor (do this after making the changes and closing the Kodak XP main window). From the Recipe Spot Color database on the Brisque, rebuild any recipe colors using donor colors no longer installed in the Kodak Approval XP4, with the new donors. This is crucial, since density and tints vary amongst different donors, resulting in an inaccurate match for the recipe spot color. If you proof a Job with recipe spot colors, using donors components no longer in the Kodak machine, the The missing recipe spot will be proofed according to the Default Policy that you defined using the Output Preferences application. 396 Chapter 51 – Kodak Approval XP4 For more information refer to Brisque Proof User Guide, Defining the Proof Preferences on page 112. Adding a New Donor If more than four donors are installed in the Kodak Approval XP4, you must define which of these donors are process colors. For example, you added EuroYellow to the existing Cyan, Magenta, Yellow, and Black. To designate EuroYellow instead of Yellow as the process color donor, do the following: 1. From the Output Device Handling application on the Brisque, select Kodak XP4 and click Reconfigure. Important: Each time donors are changed in your device, this step must be performed before proofing. 2. If in addition to the basic four process colors more colors are included in the donor group, a selection must be made between conflicting process colors. In this case, the Device Wizard dialog box appears, displaying the conflicting colors. 3. Select EuroYellow as a process color donor. Appendix A. Adding a New Donor 397 4. Click Save, to save the configuration. If the connection was successful, a confirmation message appears for a few second. 5. Click Update to update the Output Color Order list. Note: In the Kodak Approval XP main window on the Brisque, before you update the process donor output order list, Yellow appears in black (see screen capture below), and not in red. This is because it is still located in the Kodak machine. You are required, however, to update the list, since Yellow is no longer designated as a process color. Screening parameters for the EuroYellow process color will be taken from the Yellow column in the Screen Set application on the Brisque. 6. From the Recipe Spot Color database, if you wish to replace Magenta with EuroYellow in any recipe spot color, you must rebuild the recipe spot color. If you still wish to keep Yellow as a donor in your recipe spot color, there is no need to rebuild it, since Yellow is still located in the Kodak machine. Combine 400 Chapter 52 – Combine The Combine application enables you to apply the Combine Algorithm to a file that will not be proofed from the Brisque. If, for example, you want to proof a Brisque Job on a Whisper driven Iris 3000 proofer, or on any other proofer that cannot be driven by the Brisque, you can prepare the Job using the Combine operation on the Brisque. The Combine algorithm analyzes the jagged edges of LW and CT elements and performs a smoothing function on them enabling high quality output. Simply process the Brisque Job with the Combine operation, then copy the resulting file to the device from where you intend to proof the Job. The Brisque Combine application supports files that contain Spot Colors. During the Combine operation, Spot Colors are converted into their process color equivalents. For a fully automated workflow, from the Combine dialog box, define the output folder so that once the Combine operation is complete, the application automatically continues on the destination folder, without your having to perform a manual copy. In a template, the Combine operation should be near the end of the workflow, after RIP and FAF, perhaps before a Hold, that precedes an Expose or Plate Expose operation. Combine can also be a stand-alone operation, performed on a Brisque Job. The Combine operation does not modify the input file. Note: The same Combine algorithm is also integrated into the Brisque Proof operation. The algorithm is automatically applied to any file that is proofed on a Brisque-driven Iris Proofer. ¾ To edit the Combine default operation parameters, from the Launch Pad, open the Output panel and double-click the Combine icon; the Combine dialog box appears. ¾ To edit the Combine parameters for a specific Job, from within the Job Ticket Editor, double-click the Combine icon; the Combine dialog box appears. ¾ To edit the Combine parameters for a specific Template, from within the Template Builder, double-click the Combine icon; the Combine dialog box appears. 401 Output Folder ¾ Click the Selection button, then use the browser to define a destination for the file that will be generated by the Combine operation. Output File Name Use this box to name the file that will result from the Combine operation. This box is active only when you enter the Combine dialog box via the Job Ticket Editor. (Keep in mind the naming conventions of the device from where you are going to Proof the Job.) 402 Chapter 52 – Combine File Type Use this option to define the format of the file that will be generated by the Combine operation. ¾ If you are going to output the resulting file from another Brisque, you must select CT Native. ¾ If you are going to take the resulting file into a Macintosh application, select CT Handshake. ¾ Select TIFF CT and EPS to generate a file in a format that is widely supported across different platforms. Quality Standard/High Standard and High quality enhancement apply to LW elements only (the CT elements are not modified). Normally, Standard generates adequately accurate results. If Standard is not precise enough for your purposes, then High applies a more exact algorithm to the LW. Best This quality level uses the same High smoothing algorithm (as described above), but enhances both LW and CT elements. CT Resolution The value that you type in the CT Resolution box reflects the resolution at which the Proofing device will print the file.