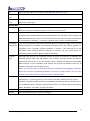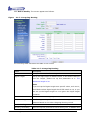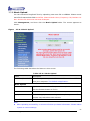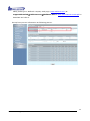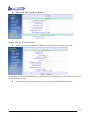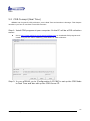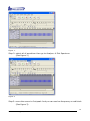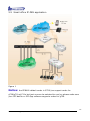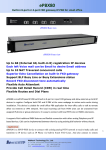
1
ePBX40 User’s Manual A built-in 4-port analog FXO IP-PBX Version: V2.1 Released Date : 07-2015 CH1. Overview ......................................................................................... 9 1.1 Specifications .................................................................................................. 9 1.2 Hardware Overview..................................................................................... 10 1.2.1 Front Panel ................................................................................................. 10 1.2.2 The Back Panel .......................................................................................... 11 CH2. 2.1 Start to configure ePBX40 ................................................. 12 Connection ePBX40 ..................................................................................... 12 2.1.1 2.1.2 CH3. 3.1 Network Configuration ............................................................................. 13 Extension Configuration .......................................................................... 15 Full Web Configurations ..................................................... 25 Telephony ........................................................................................................ 27 3.1.1 Line Setting ................................................................................................ 27 3.1.2 Tone Setting ............................................................................................... 30 3.1.3 Disconnect Tone Recording ..................................................................... 31 3.2 Configuration ................................................................................................. 34 3.2.1 3.2.2 3.2.3 3.2.4 3.2.5 3.2.6 3.2.7 3.2.8 3.2.9 IP PBX ......................................................................................................... 34 Office Call Rule .......................................................................................... 40 Feature Code ............................................................................................. 43 SIP Extension ............................................................................................ 47 SIP Trunk .................................................................................................... 55 SIP Trunk Registration ............................................................................. 60 Outgoing Routing ...................................................................................... 64 Incoming Routing Call Rule ..................................................................... 68 Dial Group .................................................................................................. 70 3.2.10 Speed Dial .................................................................................................. 71 3.2.11 T.38 FAX ...................................................................................................... 73 3.3 Information .................................................................................................... 74 3.3.1 Subscriber Information ............................................................................ 74 3.3.2 Call Monitor ................................................................................................ 75 3.3.3 System Info ............................................................................................... 77 3.4 Network ........................................................................................................... 78 3.4.1 Network ...................................................................................................... 78 3.4.2 DDNS Srv. .................................................................................................. 81 3.5 Management .................................................................................................. 82 3.5.1 Time Setting .............................................................................................. 82 2 Welltech Technology Co., Ltd. 3.5.2 3.5.3 3.5.4 3.5.5 3.5.6 3.5.7 3.5.8 3.5.9 3.5.10 CH4. SMTP Setting ............................................................................................. 84 VM Setting .................................................................................................. 85 Security....................................................................................................... 86 Firmware Upload ....................................................................................... 87 Music Upload .............................................................................................. 88 Import Setting ........................................................................................... 89 Export Setting ........................................................................................... 90 Reset To Default ........................................................................................ 91 Reboot System .......................................................................................... 91 Application Setting ............................................................... 92 4.1 Call Features .................................................................................................. 92 4.1.1 Authentication ........................................................................................... 92 4.1.2 Automated Attendant ............................................................................... 92 4.1.3 4.1.4 4.1.5 4.1.6 Call Call Call Call Forward Forward Forward Forward on Busy ............................................................................... 92 on No Answer ..................................................................... 92 Unconditional ..................................................................... 92 Unavailable ......................................................................... 92 4.1.7 4.1.8 4.1.9 4.1.10 4.1.11 4.1.12 4.1.13 4.1.14 4.1.15 4.1.16 Call Hold/Retrieval (Client based) ......................................................... 93 Call Routing ................................................................................................ 93 Call Waiting (Client or extension devices based Only ) ..................... 93 Caller ID ..................................................................................................... 93 CLIR (Caller Line Identification Restriction) ........................................ 93 Do Not Disturb (Client based) ................................................................ 93 Flexible Extension Logic .......................................................................... 94 Music On Hold ............................................................................................ 94 Music On Transfer ..................................................................................... 94 Call Pickup .................................................................................................. 94 4.1.17 4.1.18 4.1.19 4.1.20 4.1.21 Call Park...................................................................................................... 94 Time and Date ........................................................................................... 94 Trunk (i.e. WellGate 2540 or 2680 FXO Gateway) ............................. 94 IP Phone ..................................................................................................... 94 Call Monitor ................................................................................................ 94 CH5 Appendix ........................................................................................ 95 5.1 Application between Welltech CPE device and ePBX40 ................... 95 5.1.1 The VOIP Gateway (2504 and 2608) can register to ePBX40 ......... 98 5.1.2 trunk ePBX40 register to IP Telephony Service Provider(ITSP) as a SIP 103 3 Welltech Technology Co., Ltd. 5.1.3 Subscriber in ITSP side should be able to contact Extension of ePBX40.................................................................................................................... 107 5.2 Application of multiple ePBX40 ............................................................ 109 5.2.1 Connect multiple ePBX40 and call extensions between them ........... 109 5.2 CDR Concept (Real Time) ........................................................................ 116 5.3 How to convert audio files ...................................................................... 118 5.4 How to analyze disconnect tone........................................................... 120 5.5 Small office IP-PBX application ............................................................ 125 Figure List Figure 1.2.1 front panel ................................................................. 10 Figure 2.1.1 Network Setting........................................................ 13 Figure 2.1.2-1 Line Setting (up to 4 Lines) ............................. 15 Figure 2.1.2-2 SIP Extension (up to 60 external IP devices)15 Figure 2.1.2-3 Line Setting (built-in 4 port FXO) ................... 17 Figure 2.1.2-4 Extension Setting (External 60 IP devices) .. 17 Figure 2.1.3-1 SIP Trunk ............................................................ 21 Figure 2.1.3-2 Trunk Setting ...................................................... 22 Figure 3.1.1-1 Line Setting (built-in 4-port FXO gateway account number) ............................................................................. 27 Figure 3.1.1-2 Line Setting (Details setting of built-in 4-port FXO Lines) ........................................................................................ 28 4 Welltech Technology Co., Ltd. Figure 3.1.3-1 Disconnect tone Recording Procedures ......... 32 Figure 3.2.1-1 IP PBX Setting .................................................... 35 Figure 3.2.2-1 Office Call Rule ................................................... 40 Figure 3.2.1-2 Office 1 Call Rule ............................................... 41 Figure 3.2.3-1 Feature Code ...................................................... 43 Figure 3.2.4-1 SIP Extension ..................................................... 47 Figure 3.2.4-2 Extension Setting .............................................. 48 Figure 3.2.4-3 Extension Setting of Quick add ....................... 51 Figure 3.2.4-4 Extension Setting .............................................. 54 Figure 3.2.5-1 SIP Trunk ............................................................ 55 Figure 3.2.5-2 Trunk Setting ...................................................... 56 Figure 3.2.5-3 Trunk Setting ...................................................... 59 Figure 3.2.6-1 SIP Trunk Registration page ............................ 60 Figure 3.2.6-2 SIP Trunk Setting .............................................. 61 Figure 3.2.6-3 SIP Trunk Setting .............................................. 63 Figure 3.2.7-1 Outgoing Call Routing ....................................... 64 Figure 3.2.7-1 Outgoing Routing............................................... 65 Figure 3.2.8-2 Incoming Routing Setting ................................ 68 Figure 3.2.9-2 Dial Group Setting ............................................. 70 5 Welltech Technology Co., Ltd. Figure 3.2.10-1 Speed Dial Table .............................................. 71 Figure 3.2.10-2 Speed Dial ........................................................ 71 Figure 3.2.11 T.38 FAX ................................................................ 73 Figure 3.3.1-1 Subscriber Info .................................................. 74 Figure 3.3.2-1 Call Monitor ........................................................ 75 Figure 3.3.3-1 System Info ........................................................ 77 Figure 3.4.1-1 Network Setting ................................................. 78 Figure 3.4.1-2 Network Routing ................................................ 80 Figure 3.4.2-1 DDNS Setting ..................................................... 81 Figure 3.5.1-1 Time Setting ....................................................... 82 Figure 3.5.2-1 SMTP Setting ...................................................... 84 Figure 3.5.3-1 VM Setting .......................................................... 85 Figure 3.5.4-1 Security ............................................................... 86 Figure 3.5.5-1 Firmware Upload................................................ 87 Figure 3.5.6-1 Music Upload ...................................................... 88 Figure 3.5.7-1 Import Setting ................................................... 89 Figure 3.5.8-1 Export Setting .................................................... 90 Figure 3.5.9 Rest To Default ...................................................... 91 Figure 3.5.10 Reboot System .................................................... 91 6 Welltech Technology Co., Ltd. Table List Table Table Table Table 1.2.1 front panel .............................................................................................. 11 1.2.2 back panel .............................................................................................. 11 2.1.1 Network Setting ................................................................................... 13 2.1.2-1 Line Setting........................................................................................ 15 Table Table Table Table Table Table Table Table Table 2.1.2-2 SIP Extension .................................................................................... 16 2.2.1-3 Line Setting........................................................................................ 17 2.2.1-4 Extension Setting ............................................................................ 18 2.1.3-1 SIP Trunk ............................................................................................ 21 2.1.3-2 Trunk Setting .................................................................................... 22 3.1.1-1 Line Setting ....................................................................................... 27 3.1.1-2 Line Setting ....................................................................................... 28 3.1.2-1 Tone Setting ...................................................................................... 30 3.1.3-1 Disconnect tone Recording Commands .................................. 33 Table Table Table Table Table Table Table Table Table 3.2.1-1 IP PBX .................................................................................................. 35 3.2.2-1 Office Call Rule ................................................................................. 40 3.2.1-2 Extension Setting ............................................................................ 41 3.2.3-1 Feature Code ..................................................................................... 44 3.2.4-1 Extension ............................................................................................ 47 3.2.4-2 Extension Setting ............................................................................ 48 3.2.4-3 Extension Setting ............................................................................ 51 3.2.4-4 Extension Setting ............................................................................ 54 3.2.5-1 SIP Trunk ............................................................................................ 55 Table Table Table Table Table Table Table Table 3.2.5-2 Trunk Setting..................................................................................... 56 3.2.6-1 SIP Trunk Setting ............................................................................ 60 3.2.6-2 SIP Trunk Setting ............................................................................ 61 3.2.7-1 Outgoing Call Routing .................................................................... 64 3.2.7-2 Outgoing Routing ............................................................................ 65 3.2.8-2 Incoming Routing Setting ............................................................ 68 3.2.9-1 Dial Group Setting .......................................................................... 70 3.2.10-2 Speed Dial ....................................................................................... 71 Table 3.2.11 T.38 FAX ................................................................................................ 73 Table 3.3.1-1 Subscriber Info ................................................................................. 74 Table 3.3.2-1 Call Monitor ........................................................................................ 75 7 Welltech Technology Co., Ltd. Table Table Table Table Table Table Table Table Table 3.3.3-1 System Info ....................................................................................... 77 3.4.1-1 Network Setting ............................................................................... 78 4.2.1-2 Network Routing .............................................................................. 80 3.4.2-1 DDNS Setting (IPV4) ..................................................................... 81 3.5.1-1 Time Setting ...................................................................................... 82 3.5.2-1 SMTP Setting ..................................................................................... 84 3.5.3-1 VM Setting .......................................................................................... 85 3.5.4-1Security................................................................................................. 86 3.5.5-1 Firmware Upload.............................................................................. 87 Table 3.5.6-1 Music Upload ..................................................................................... 88 Table 3.5.7-1 Import Setting .................................................................................. 89 Table 3.5.8-1 Export Setting ................................................................................... 90 8 Welltech Technology Co., Ltd. CH1. Overview ePBX40 is an IP based PBX which includes legend digital PABX telephony services, Auto Attendant and Music Ring Back Tone features together. It has built-in 4-port FXO gateway to reduce installation extra jobs. ePBX40 is not only an IP-PBX, but also an efficient communication tool to help your business and management more efficient. With flexible and full functionality, ePBX40 gives a complete transition from traditional PABX to the new generation IP-PBX. 1.1 Specifications Protocol SIP RFC 3261 Compliance WAN Network: Support Fixed IP, DHCP, And PPPoE mode IVR Web Based Auto Attendant Call Rule Scheduled And Fixed Greeting Support Branch Office (2 offices) different greeting Toll Restriction Provide Different Level Toll Restriction Services Support Call Duration Restriction Support Personal Password Support Outgoing Call Routing Password PBX Call Features Flexible PSTN/FXO interface incoming/outgoing features Call Transfer (Consultant, Blind) Call Forward (Busy, No Answer, Unconditional, Unavailable) Call Hold and Retrieval Call Routing Call Waiting Call Pickup (Global, Specific) Call Park CLIR (Caller Line Identification Restriction) DND (Do Not Disturb) Dial Group (Ring All, Sequential Ring, Dynamic Ring) Speed Dial Music Ring Back Tone Music On Hold Music On Transfer Built-in CDR Report Call Monitor BLF, Busy Lamp Field (RFC 4235) Voice mail T38 FXO Call Features Up-to 4 ports built-in FXO Gateway Caller ID detection (DTMF and FSK Bellcore) PSTN line Disconnect Detection PSTN Loop Current Drop Disconnect Tone Configurable Incoming Ring Count Before Answer Dial Delay Setting after Off-Hook PSTN line (To wait for Dial tone before sending DTMF digits) Codecs G.711 a-Law 9 Welltech Technology Co., Ltd. G.711 u-Law G.729 pass through Note: ePBX40 DOES NOT support either Transcodes or Video codec (Video Phone). Both ends of IP devices can only use one of above Codecs to talk by registering to ePBX40. Technical Features Support DDNS (WAN port only) Built-in NTP Client and Server Subscriber NAT Traversal (IP extension devices talk between WAN and LAN port) Behind NAT Support (up to 8 NAT concurrent Calls) Multilingual Web User Interface Management: Web Browser Management (Support Windows IE only) HTTP Firmware Upgrade Export/Import Configuration to back-up your configuration Network Interface: WAN x 1 port, LAN x 1 port. DTMF: RFC2833 and SIP-Info Capacity 4 FXO ports(Built-in) and external 60 SIP subscribers 8 NAT concurrent calls 1.2 Hardware Overview 1.2.1 Front Panel Front panel LEDs of ePBX40 indicates network activities and FXO gateway ports status. Figure 1.2.1 front panel LED Description Power When the power adapter is connected, the LED will light up green. Status When system is startup successfully, the LED will light up green. Reset When click the reset key over 5 seconds, this will light up green until the system automatically reboot. WAN This will light up green when the gateway’s WAN port is physically connected to the public internet. When data is transmitted through this port, it will flash green. The default IP of WAN port is DHCP. LAN This will light up green when the gateway’s LAN port is physically connected to a local network (Refer to Rear Panel section in page number for location of LAN port). When data is transmitted through this port, it will flash green. The default IP of LAN port is 192.168.123.123. 10 Welltech Technology Co., Ltd. TEL1~TEL4 The status LED for FXO port 1-4, this will light up amber orange when the connected phone is engaged in a conversation. It will flash amber orange when there is an incoming call. Table 1.2.1 front panel LED and COM port Description Power When the power adapter is connected, the LED light up green. WAN This LED light up green when the gateway’s WAN port is physically connected to the public internet. It will flash green. The default IP of WAN port is DHCP. When data is transmitted through this port, it flashes green. WAN status LAN LAN status Line1 to Line4 This LED light up green when the gateway’s LAN port is physically connected to a local network (Refer to Rear Panel section for location of LAN port). The default IP of LAN port is 192.168.123.123. When data is transmitted through this port, it will flash green. The LED status of FXO ports 1-4 are as follows. 1. Flashing: No PSTN/PBX line connects to RJ-11 FXO port. 2. Steady OFF: PSTN/PBX line connects to RJ-11 FXO port and in Idle mode. 3. Flashing: An incoming Ring to FXO port. 4. Steady ON: FXO port is in busy status. 1.2.2 The Back Panel Here are back Panel photo. Figure 1.2.2 Back Panel Table 1.2.2 back panel Item Description Line 1 to Line 4 LAN The RJ-11 socket for PSTN/FXO line (the color is gray) 10/100 Base-T RJ-45 socket for LAN port, connects to computer for Webpage configuration. And also let SIP IP devises connect at private IP address. It doesn’t support data Internet connection. WAN 10/100 Base-T RJ-45 socket for WAN port, connects to the Internet IP network. The IP address of WAN port is used for other extensions to DC12V-1.5A register at ePBX40 IP-PBX. The power socket, input with DC 12V at 1.5A rating. 11 Welltech Technology Co., Ltd. CH2. Start to configure ePBX40 2.1 Connection ePBX40 Step 1: Connect LAN port of ePBX40 with your computer via crossover cable directly or connect with Switch/Hub via straight through cable. Step 2: Prepare one computer, and change the IP address to be static (fixed) IP at 192.168.123.12x with subnet mask 255.255.255.0. Note: Please use Windows XP IE 6.0 web browser or above version to configure ePBX40 webpage setting. Welltech products don’t support other Web Browser such as Firefox to configure. Otherwise, you may not be able to save your changes at webpage. Step 3: Open IE Browser and link to default LAN IP address of ePBX40 at 192.168.123.123 with default port number 10087, i.e. http://192.168.123.123:10087 Step 4: Login ePBX40 with default user ID: root, and Password: root. After login ePBX40, you can start to configure basic and advanced features. Step 5: To start To make ePBX40 work, some basic and advanced configurations have to be done first, those include Network (WAN and LAN IP address), Extensions (extension number and password) and Line (FXO ports account number and dial rule). Notice: please remember to back up your configuration and IVR package after you have configured them. Please go to page of Export Setting to export and save them at your computer. 12 Welltech Technology Co., Ltd. 2.1.1 Network Configuration To change your Network Setting, click Network, and then click the Network Setting table. The screen appears as follows. Figure 2.1.1 Network Setting The following table describes the features in this screen. Table 2.1.1 Network Setting Label Description WAN Port Setting: Mode IP Address Subnet Mask Default Gateway Primary DNS Secondary DNS Default Gateway Backup Select ePBX40 WAN port network mode to be Fixed IP, DHCP or PPPoE. Note: If you want other extensions IP devices from Internet to register to ePBX40 via WAN port, you have to select Fixed IP mode and give a static and physical IP address. Enter the IP Address, If ePBX40 was set to fixed IP mode. Enter the Subnet Mask Address, If ePBX40 was set to fixed IP mode. Enter the Default Gateway Address, If ePBX40 was set to fixed IP mode. Enter the IP address for Primary DNS. The default is 168.95.1.1. Enter the IP address for Secondary DNS. The default is null. Select Enable option, if there are any connection problem occurred on primary default gateway connections, all the traffic 13 Welltech Technology Co., Ltd. will be guided and switched to the secondary default gateway for proper operation. The default is Disable. Secondary Default Gateway Enter the Secondary Default Gateway. If you choose the Check Point Enter the Check Point IP address if you choose the Default Default Gateway Backup to Enable. Gateway Backup to Enable. ePBX40 uses the ping command to PING this IP address in order to check if there are any connection problem occurred on primary default gateway connections. Current used Default Gateway PPPoE ID This field display existing used Default Gateway IP address. PPPoE PWD Enter the PPPoE Password if you choose the Mode to PPPoE. MAC This field shows the MAC address. The MAC address cannot be Enter the PPPoE ID if you choose the Mode to PPPoE. modified. LAN Port Setting: IP Address Enter the IP Address. The default is 192.168.123.123. Subnet Mask Enter the Subnet Mask Address. The default is 255.255.255.0. MAC This field shows the MAC address. The MAC address can’t be changed. Network Routing Table: Select Select this check box, then modify or delete it. Destination This field shows the IP address. Network This field shows the Subnet Mask address. Gateway This field shows the Default Gateway address. When you enable this feature, ePBX40 sends all packets to this gateway instead of WAN or LAN gateway. Default is blank. Add Click on the Add button, then display Network Routing screen. Modify IP address can be modified by clicking on the check box next to the IP address and click on the Modify button. Delete IP address can be deleted by clicking on the check box next to the IP address and click on the Delete button. Apply Click on the Apply button to save your customized settings and exit this screen. Cancel Click on the Cancel button to give up these changes. 14 Welltech Technology Co., Ltd. 2.1.2 Extension Configuration Both Line Setting (built-in 4-port FXO Gateway) and external SIP extensions (up to 60 IP devices) have to configure its unique account to register on ePBX40. To configure Extension account, click Configuration, and then click the Extension table. The screen appears as follows. Figure 2.1.2-1 Line Setting (up to 4 Lines) Line Setting (built-in 4-port FXO Gateway) only support configuration built-in up to 4 Lines FXO gateway parameters. Both External FXO Gateway device (via local LAN port) and Remote FXO Gateway devices (via Internet) register on ePBX40, Only use SIP Trunk command to configure. Figure 2.1.2-2 SIP Extension (up to 60 external IP devices) The following table describes the features in this screen. Table 2.1.2-1 Line Setting Label Description Select Select this check box, then modify or delete each FXO line. The total amount was limited to 4. Line ID This field shows the Line ID from 1 to 4 which is reference to connection port at front and rear panel. Line Number This field shows the Line Number which is not a PSTN number or PBX extension number. Instead, this number is for ePBX40 internal SIP account used only. Comment This field shows the remark information such as user name, PSTN line number or PBX’s extension number for system 15 Welltech Technology Co., Ltd. manager notice. Type This field shows built-in 4-port Type information. Currently, ePBX40 only provide FXO port and it shows Local Trunk. Dial Plan This field shows the Dial Plan information includes routes plans. Modify One of 4-Line configuration can be modified by clicking on the checkbox next to the Line ID and click on the Modify button. Table 2.1.2-2 SIP Extension Label Description Select Select this check box, then modify or delete. Extension Number This field shows the Extension Number. Comment This field shows the remark information such as user name. NAT Traversal This field shows the NAT Traversal enable or disable. Dial Plan This field shows the Dial Plan information includes routes plans. Add Click on the Add button, and then display a new Extension Setting screen. Modify An extension can be modified by clicking on the checkbox next to the extension and click on the Modify button. Delete An extension can be deleted by clicking on the checkbox next to the extension and click on the Delete button. Quick Add Click on the Add button, then display an new Extension Setting screen. Quick Delete Click on the Quick Delete button, then display a batch of Extension number to be deleted. Total Count This field shows Total subscriber Counts information. Number Search Enter the search number, then click enter key. The screen will display matched search data. Total Page This field shows Total Pages of subscriber information. Page This field shows Page Number information where you are. You can Enter page number, then click enter key. The screen will display this page data. Next/Prev Click on the Next/Prev to Next/Previous Page. The system will auto display the Next or Previous page Information. Click Add/Modify. The screen appears as follows to configure more in details parameters. 16 Welltech Technology Co., Ltd. Figure 2.1.2-3 Line Setting (built-in 4 port FXO) Figure 2.1.2-4 Extension Setting (External 60 IP devices) The following table describes the features at above screen. Table 2.2.1-3 Line Setting Label Description Line Number Assign one number which is also the SIP registration name for this Line. Dial Plan A PSTN/FXO incoming Call behavior description. Define the dialing plan for Extension. It specifies the location of the instruction used to control what extension is allowed to do, and what to do with incoming calls to this extension. In this field, you can Choose 5 dial levels for Extension, including [ext-only], [ext+R1], [ext+R12], [ext+R123], [ext+allroutes]. You can define an “Outgoing call” record, to a certain Route Level, as R1, R2…, etc. [ext-only] means this FXO Line 17 Welltech Technology Co., Ltd. incoming call only go to Extension. [ext+R1] means this FXO Line incoming call only go to Extension and Route Level with R1. [ext+R12] means this FXO Line incoming call only go to Extension and Route Level with R1 and R2. [ext+R123] means this FXO Line incoming call only go to Extension and Route Level with R1, R2 and R3. [ext+allroutes] means this FXO Line incoming call only go to Extension and Route Level with R1, R2, R3 and R4(allroutes). Note: For more information about Route Level, please refer to the user manual: Chapter 3.2.7 Outgoing Routing. Hotline Each FXO Line incoming call can directly Hotline (Direct forward) to your predefined Office 1, Office 2 (a group of extensions) and your desire extensions(such as operator) or Mobile phone (select one free FXO line to dial out or use SIP trunk to dial) or City phone call. Caller ID Detection Your local Telco PSTN’s caller ID specification could be either DTMF or FSK Bellcore protocol. You need to consult your local PSTN company’s specification and give proper Caller ID type configuration in order to detect and carry Caller ID to extension when there is an incoming call. Current Drop For Disconnect PSTN line or PBX extension drop tip/ring loop current to present a disconnect call. ePBX40 has this feature to detect the absence of loop current in order to release FXO Line. Answer Ring Count FXO port answers an incoming call automatically after pre-configured Ring count reached. The Ring Count has to set up to 2 if you want to detect FSK type caller ID from PSTN line. Dial Delay Time This delay time was used to wait for Dial tone before sending DTMF digits. Some PSTN line may not give dial tome immediately after Off Hook. Input(Encode)Gain Adjust volume from PSTN line to FXO port (default is 0 dB). Manual Hunt To allow all of extension to get this line. Default is disable. Output(Decode)Gain Adjust volume from FXO port to PSTN line (default is 0 dB). Comment You can enter a 20 letter words of note here. Apply Click on the Apply button to save your customized settings and exit this screen. Cancel Click on the Cancel button to give up changes. Table 2.2.1-4 Extension Setting Label Description Extension Number Assign one number which is also the SIP registration name for this extension. Assign the register password for SIP IP devices (for instance, IP Phone or FXS gateway) to register on ePBX40. Password 18 Welltech Technology Co., Ltd. Office Call Group Select the office group in which this extension was belonged to. You can use the Call Group parameter to assign an Extension to one or more groups. Pickup Group You can use the Pickup Group option in conjunction with this parameter to allow a ringing phone to be answered from another extension. Note: The Pickup Group is to allocate extensions to the same Call Pickup Group. One extension is only authorized to pick up remote ring extensions when they are assigned to the same Call Pickup Group. By default code, remote ringing extensions can be answered by pressing digit *1. Extension can be defined to multiple Call Groups. To enter multiple Call Pickup Group number at one Extension by a “comma”. For example, input “1,3,5” into Call Group or Pickup Group. Dial Plan Describe extension dial out authority behavior. Define the dialing plan for Extension. It specifies the location of the instruction used to control what extension is allowed to do, and what to do with incoming calls for this extension. In this field, you can Choose 5 dial levels for Extension, including [ext-only], [ext+R1], [ext+R12], [ext+R123], [ext+allroutes]. You can define an “Outgoing call” record, to a certain Route Level, as R1, R2…, etc. [ext-only] means this subscriber can only call to Extension. [ext+R1] means the subscriber with such Dial Plan can call to Extension and Route Level with R1. [ext+R12] means the subscriber with such Dial Plan can call to Extension and Route Level with R1 and R2. [ext+R123] means the subscriber with such Dial Plan can call to Extension and Route Level with R1, R2 and R3. [ext+allroutes] means the subscriber with such Dial Plan can call to Extension and Route Level with R1, R2, R3 and R4(allroutes). Note: For more information about Route Level, please refer to the user manual: Chapter 3.2.7 Outgoing Routing. NAT Traversal If the Extension device is installed behind a device performing NAT such as firewall or router, and need to register to ePBX40 on public network, this extension has to enable this function. Enable NAT Traversal to force ePBX40 to ignore the contact information for the Extension and use the address from which the packets have been received. Fixed Trunk ID User can define a Fixed Trunk for a certain extensions. When such extension makes an outgoing call via routing table, ePBX40 will check “Fixed Outgoing Call Rule” first. If “Fixed Outgoing Call Rule” is enabled, ePBX40 will confirm the Fix Trunk ID for the calling party. That means the outbound call will 19 Welltech Technology Co., Ltd. be routed by Fixed Trunk ID, if you define the Fixed Trunk ID for the calling party and you also enable “Fixed Outgoing Call Rule”. Note: For more information about Fixed Outgoing Call Rule, please refer to the user manual: Chapter 3.2.7 Outgoing Routing. Absolute Timeout Specify the timeout value for the outgoing calls. Please also go (Toll Restriction) to Outgoing Call Rule page to enable the Route Timeout BLF Enable Busy Line Field functions for extensions if your function to restrict talking time (Toll Restriction). extension support BLF feature such as iP380 IP Phone. Forward CallerID By default, the “from header of SIP invite” contains the caller’s line number when forward function is activated. But this may make some errors occurred for some SIP Trunk services. So we add this function in the “Extension Setting” page, let user modify the line number of SIP Invite’ s from header, from calling party’s number to the called party’s number. In other words, the receiver sees the forwarder’s extension number instead. Unconditional FWD Enable Unconditional forward function by adding forwarding number. No Answer FWD Enable No Answer forward function by adding forwarding number. Busy FWD Enable Busy forward function by adding forwarding number. Unavailable FWD Enable Unavailable forward function by adding forwarding number. Comment You can input a 20 bytes note for each extension here. MailBox User can select to disable or enable mail box function. If this function is enabled, user could input e-mail address for the Extension. When having voice mail of incoming call, system will send this voice mail to the specified e-mail address. Apply Click on the Apply button to save your customized settings and exit this screen. Cancel Click on the Cancel button to give up these changes. 20 Welltech Technology Co., Ltd. SIP Trunk Configuration When external FXO devices were installed at either local LAN or remote locations as well as IP Trunk, for instance, WellGate 2540 or 2680 (or connect to other SIP Server or IP-PBX via external IP network), the SIP Trunk field has to configure properly. To change SIP Trunk configuration, click Configuration, and click the SIP Trunk table as well. The screen appears as follows. Figure 2.1.3-1 SIP Trunk The following table describes the features at above screen. Table 2.1.3-1 SIP Trunk Label Description Select Select this check box and modify or delete it. Trunk Number This field shows the Trunk Number information which register at ePBX40. Comment This field shows the remark information. NAT Traversal This field shows the NAT Traversal information if this device was installed behind router. This field shows the Dial Plan information when either IP Trunk or External FXO Gateway has incoming call to extensions of ePBX40. This field shows the Maximum concurrent call to this trunk. For example, the concurrent call from ePBX40 to external SIP Server or IP-PBX. There is no limitation if this field left blank. Dial Plan Maximum Channels Add Click on the Add button to display a new Trunk Setting screen. Modify A Trunk can be modified by clicking on the checkbox next to the Trunk and click on the Modify button to modify its contents. A Trunk record can be deleted by clicking on the checkbox next to that Trunk and click on the Delete button. Delete Total Count This field shows Total Counts of trunk information. Number Search Enter the search number, then click enter key. The screen will display matched search data. Total Page This field shows Total Pages of trunk information. Page This field shows Page Number information. You can Enter page number, then click enter key. The screen will display this page data. Next/Prev Click on the Next/Prev to Next/Previous Page. The system will auto display the Next or Previous trunk Information. 21 Welltech Technology Co., Ltd. Example 1: Set up SIP Trunk number to external FXO gateway and IP Trunk. This example is to configure Trunk Number to external FXO gateway and IP Trunk. See the following screen at Figure 2.1.3-2. Figure 2.1.3-2 Trunk Setting The following table describes the features at above screen. Table 2.1.3-2 Trunk Setting Label Description Trunk Number Assign one number to Trunk. This number is also the registration name for this Trunk device (On-Net or Off-Net FXO devices). Note: The Trunk Number can also be a “Trunk ID”. In the Routing Table page, you should define the destination of prefix route. When you define the prefix route, you should set the Trunk ID (Trunk Number) in the Trunk page first; then you could enter correct Trunk ID in the Destination field. Password Assign registration password of Trunk device to register at ePBX40. Host Setting the Host field to Dynamic enable one trunk device to register to ePBX40. Then ePBX40 knows how to reach that trunk device. When the Host field was set to [Pre-define], an IP address or FQDN (domain name) field pop up and need to define properly. ePBX40 only recognizes external SIP trunk with this Pre-define IP address to connect with. Dial Plan Define the dialing plan for SIP Trunk. It specifies the location of the instruction used to control which phone number is allowed to go, and what to do with incoming calls for this Trunk. In this field, you can Choose 6 dial levels for Extension, including [from-pstn], [ext-only], [ext+R1], [ext+R12], [ext+R123], 22 Welltech Technology Co., Ltd. [ext+allroutes]. You can define an “Outgoing call” record to a certain route level, such as R1, R2…, etc. 1.[from-pstn] is used for Trunk only. An incoming call from External FXO gateway or IP Trunk, it can only reach assigned operator, extensions, group or matched schedule call rule. 2.[ext-only] means this External subscribers can reach not only defined above “from–pstn” features and all Extensions, but also activate applications such as DND, Call Forward, Extension Password, CLID and etc. It can also uses PBX features such as Pick up, Call Park, Speed dial and etc. 3.[ext+R1] means the external subscribers with such Dial Plan can call to Extensions and Route Level with R1. 4.[ext+R12] means the external subscribers with such Dial Plan can call to Extensions and Route Level with R1 and R2. 5.[ext+R123] means the external subscribers with such Dial Plan can call to Extensions and Route Level with R1, R2 and R3. 6.[ext+allroutes] means the external subscribers with such Dial Plan can call to Extension and Route Level with R1, R2, R3 and R4 (allroutes). Note: For more information about Route Level, please refer to Chapter 3.2.7 : Outgoing Routing. Keypad (DTMF Tone External FXO gateway and IP Trunk can select Keypad type to Type) be RFC2833, In-band, or SIP-Info and Auto. To choose Auto to select Keypad type automatically. Choose RFC2833, In-band or SIP-Info will force the Extension to use RFC2833, In-band or SIP-Info accordingly and the setting should be matched the Keypad setting of Trunk device. NAT Traversal If the SIP IP device is located at different location (via remote Internet) with ePBX40 and install behind an NAT device, such as firewall or router, and want to register at ePBX40 via IP network. Then this function has to be enabled. Enable NAT Traversal to force ePBX40 to ignore the contact information from the IP Trunk and use the address from which the packets had been received. Port Port is used to define SIP signal port if you want to listen from a different SIP signal port other than 5060. Welltech strongly suggest not to use 5060 port because it is easy to be hacked to make expensive international call. We suggest you to use port 23 Welltech Technology Co., Ltd. between 8000 to 9000. You registration IP devices has to configure the same port number if you configure SIP port other than 5060. External Server This field is going to set up the domain name in the SIP From Address (i.e. SIP URI. Setting up this to avoid from unexpected issues if the Server or IP-PBX) service provider needs information for authentication. Maximum Channels This feature limits the maximum channels for this Trunk. For example, you set up 2 at this field; only 2 outgoing calls could go through this Trunk. Default is no limitation maximum calls. Outbound Caller ID Some service providers require the correct registered caller ID if it received an incoming call. ePBX40 will send the Extension’s caller ID to this Trunk as default value, if this field left empty. Note: Normally, SIP From URI contains the Extension’s calling ID and ePBX40’s IP address, but some ITSP ( SIP Server ) may reject this call due to security consideration. You can modify the Calling ID and IP/Domain in the fields of [External Server Address] and [Outbound Caller ID] when the call is going through ePBX40 to the Destination (Trunk) to avoid such security issue. If you have installed a Welltech FXO gateway as the Trunk, you can use the default Trunk number 888 and 889 as the FXO’s register number. For the FXO gateway, you may simply configure these fields: Trunk Number, Password, Host, Dial Plan, Keypad, NAT Traversal and RTP Mode. If you set up the ITSP ( external SIP Server or IP-PBX ) as the Trunk, you may need to set up the following configuration : Port, External Server Address and Outbound Caller ID. Caller ID Display When inbound call is coming from either external FXO Trunk or Name IP trunk, such as 888. The caller ID Name will be the “PSTN number” or “888”. Specify this field will be used as your desire setting instead. Comment You can enter a 20 bytes note for each Trunk here. CLIR Support CLIR means "Caller Line Identification Restriction". This feature is to hide the caller's number. For example, ext 101 call to ext 102. But 101 won’t like to show the caller ID to 102. So 101 can 24 Welltech Technology Co., Ltd. activate this feature to hide the caller ID. When 102 got a call from 101, the LCD of 102 should display "Anonymous". Apply Click on the Apply button to save your settings and exit this screen. Cancel Click on the Cancel button to give up this change. CH3. Full Web Configurations After Login ePBX40, you will see screen as follows. There are five main categories. Click on each category to extend detail items. Telephony: Include all telephony configurations of ePBX40. (for built-in FXO Lines) Line Setting Tone Setting (Disconnect Tone Frequency and ON/OFF time setting) Configuration: Include all telephony configurations of ePBX40. IP PBX Office Call Rule Feature Code SIP Extension SIP Trunk SIP Trunk Reg. Outgoing Routing Incoming Routing Dial Group Speed Dial T.38 FAX Information: To show related information. Subscriber Info. Call Monitor System Info. Network: To show related information. Network DDNS Server. 25 Welltech Technology Co., Ltd. Management: Include all system management of ePBX40. Time Setting SMTP Setting VM Setting Security Firmware Upload Music Upload Import Setting Export Setting Reset To Default Soft Reset Reboot System: To reboot ePBX40. 26 Welltech Technology Co., Ltd. 3.1 Telephony The webpage configuration helps you configure Line Setting, Tone Setting and Disconnect Tone analysis. 3.1.1 Line Setting Line Setting is going to configure built-in 4-port FXO gateway account number on ePBX40. To change built-in 4-port FXO gateway account number, click Telephony, and then click the Line Setting. The screen appears as shown below. Figure 3.1.1-1 Line Setting (built-in 4-port FXO gateway account number) Table 3.1.1-1 Line Setting Label Description Select Select this check box, then modify or delete it. Line ID This field shows the FXO Line ID physical or port number. Line Number This field shows the FXO Line Number information to register to ePBX40 IP-PBX. Comment This field shows the Comment or remarks information to this line. Type This field shows the Type information of this line. Dial Plan This field shows the Dial Plan information of this line. 27 Welltech Technology Co., Ltd. Figure 3.1.1-2 Line Setting (Details setting of built-in 4-port FXO Lines) Table 3.1.1-2 Line Setting Label Description Line Number Assign one number to this Line. This number is also the registration name on ePBX40 IP-PBX. Dial Plan Define the dialing plan for each Line has come in to ePBX40. It specifies the location of the instruction used to control what extension is allowed to do, and what to do with incoming calls for this extension. In this field, you can Choose 5 dial levels for Extension, including [ext-only], [ext+R1], [ext+R12], [ext+R123], [ext+allroutes]. You can define an “Outgoing call” record, to a certain Route Level, as R1, R2…, etc. 1. [ext-only] means this FXO Line can only call to Extensions. 2. [ext+R1] means this FXO Line with such Dial Plan can call to Extension and Route Level with R1. 3. [ext+R12] means this FXO Line with such Dial Plan can call to Extension and Route Level with R1 and R2. 4. [ext+R123] means this FXO Line with such Dial Plan can call to Extension and Route Level with R1, R2 and R3. 5.[ext+allroutes] means this FXO Line with such Dial Plan can call to Extension and Route Level with R1, R2, R3 and R4(allroutes). Note: For more information about Route Level, please refer to the user manual: Chapter 3.2.7 Outgoing Routing. BLF Enable BLF (Busy Line Field) function for this extension. In general 28 Welltech Technology Co., Ltd. case, BLF was used with IP Phone with LCD display to indicate your desire’s extension or FXO line busy status. Hotline Each FXO Line incoming call can directly Hotline (Direct forward) to your predefined Office 1, Office 2 (a group of extensions) and your desire extensions(such as operator) or Mobile phone (select one free FXO line to dial out or use SIP trunk to dial) or City phone call. Caller ID Detection Your local Telco PSTN’s caller ID specification could be either DTMF or FSK Bellcore protocol. Consult your local PSTN company’s specification and give proper Caller ID type configuration in order to detect and carry Caller ID to extension correctly when there is an incoming call. DTMF: DTMF caller ID detect FSK Bellcore: FSK Caller ID detect. FSK Bellcore with Date and Time: to filter Date and time by FSK caller ID. (only send caller ID) Current Drop For Disconnect PSTN line or PBX extension drop tip/ring loop current to present an disconnect call. ePBX40 has this feature to detect the absence of loop current in order to release FXO Line. Answer Ring Count FXO port answers an incoming call automatically after pre-configured Ring count reached. The Ring Count has to set up to 2 if you want to detect FSK type caller ID from PSTN line. Manual Hunt To allow all of extension to get this line. Default is disable. Adjust volume from PSTN line to FXO port (default is 0 dB). Adjust volume from FXO port to PSTN line (default is 0 dB). You can enter a 20 letter words of note here. Click on the Apply button to save your customized settings and exit this screen. Click on the Cancel button to give up changes. Input(Encode)Gain Output(Decode)Gain Comment Apply Cancel 29 Welltech Technology Co., Ltd. 3.1.2 Tone Setting The configuration page is used to set up the disconnect tone to be detected. The detected tone is the Disconnect Tone 1 & 2 (for FXO Line) and the others tone are used for FXS gateway generating purpose. The disconnect tone was generated from PSTN Line to inform FXO Line that the remote party drop this call. Figure 3.1.2-1 Tone Setting Table 3.1.2-1 Tone Setting Label Description Disconnect Tone Click button of “Go” to go to the Disconnect Tone Recording Recording page. See 3.1.3 Disconnect Tone Recording Country Template To select a Country to use the tone parameters. When you select a country, the following tone was configured automatically according to that country’s tone specification. Copy After you have selected country and press “COPY” command, the corresponded tone of that country will be configured automatically. Signal Type Define desire Tone type such as continuous or Cadence tone. Freq 1 In most case, the tone was generated by dual tone frequency. (0,300-1980Hz) This field was to fill in the low frequency if you have dual frequency or single frequency. Freq 2 (0,300-1980Hz) Level 1 (0-63db) Level 2 (0-63db) On 1 (0-10230ms) Off 1 (0-10230ms) On 2 (0-10230ms) The high frequency was filled in here if there is dual frequency tone. The tone strength level of low frequency. Default is 13 dB. The tone strength level of high frequency. Default is 13 dB. To configure ON time of the first cycle cadence Tone. To configure OFF time of the first cycle cadence Tone. Some tone may provide the second cycle of tone cadence. This field support ON time of the second cadence tone. If your 30 Welltech Technology Co., Ltd. Off 2 (0-10230ms) Deviation(ON/OFF time) country’s PSTN has not the second ON/OFF time, please set up to 0. Some tone may provide the second cycle of tone cadence. This field support OFF time of the second cadence tone. If your country’s PSTN has not the second ON/OFF time, please set up to 0. The tolerance of cadence ON/OFF time. Dial (FXS Only) This row is to configure Dial tone frequency and cadence time. Call Waiting (FXS This row is to configure Call Waiting tone frequency and Only) cadence time. Ring Back (FXS Only) This row is to configure Ring Back tone frequency and cadence time. Disconnect 1 (FXO There are two sets of disconnect tone to configure. The first set only) of disconnect tone. To configure disconnect tone for FXO port to detect in order to release FXO port after call was dropped. Disconnect 2 (FXO There are two sets of disconnect tone to configure. The second only) set of disconnect tone. To configure disconnect tone for FXO port to detect in order to release FXO port after call was dropped. Stutter Dial (FXS Call Waiting message light for analog phone set only. Only) Busy (FXS only) This row is to configure Busy tone frequency and cadence time. Apply Click on the Apply button to save your customized settings and exit this screen. Cancel Click on the Cancel button to give up change. 3.1.3 Disconnect Tone Recording This section is going to illustrate how to record disconnect tone which was generated from local PSTN to inform FXO Line to release FXO port. The recorded tone file was stored at RAM inside ePBX40. Please export this tone file after recording. Once ePBX40 was reset or City power was fail, this tone file will be lost. The procedures to record disconnect tone, please see the following Webpage description at Figure 3.1.3-1. After exporting disconnect tone file, there is one voice frequency analysis software to tell 31 Welltech Technology Co., Ltd. exact Frequency, Cadence ON/OFF time and you need to fill in tone table for FXO Line port to detect exact disconnect tone in order to release FXO port after call. Please see Section 5.4 in details. Figure 3.1.3-1 Disconnect tone Recording Procedures Disconnect Tone Recording Steps. Step 1: Go to ePBX40 webpage at Configuration IP PBX to set up voice codec priority at G.711U. Step 2: Go to Webpage at Telephony Tone Disconnect Tone Recording General Setting PSTN Line No to enter remote PSTN side phone number which is busy in talking state. In this example at above Figure 3.1.3-1, the PSTN number is 82263290 and FXO Line port is 7. Next, press Apply and go to Management command to do Soft Reset. Step 3: Use one IP Phone or IP devices which was registered ePBX40 and dial the PSTN number you have entered at Step 2 (the number is 82263290, for example). And this call will use FXO port 7 to dial out to local PSTN network. Step 4: Because this PSTN number is in busy status (at Step 2’s configuration), you will hear Disconnect Tone (for example, Du… Du.. Du..) after dialing. Keep hearing this disconnect tone for 5 seconds. Then hang up this call. Step 5: Go to webpage at Telephony Tone Disconnect Tone Recording as following command to Export Tone file if this disconnect tone recording is successful. 32 Welltech Technology Co., Ltd. Step 6: If you have exported disconnect tone file to your computer successfully, make sure to clear PSTN Line number at Disconnect Tone Recording Procedures General Setting PSTN Line No and configure your desire voice codec such as G.729 at Configuration IP PBX to set up voice codec priority at G.711U when ePBX40 go back to normal operation mode. Click Apply and Soft Reset to take effect of your setting. See the following webpage. Step 7: Use third party program to analyze recorded disconnect tone. The procedures were described at another chapter at this user guide. Table 3.1.3-1 Disconnect tone Recording Commands Label Description Export Export recorded disconnect tone file to your computer. It is a ZIP compressed file. Please unzip it for analysis. PSTN Line No Enter a busy Phone number which was connected at PSTN network. Line ID for analysis To select a FXO Line ID (FXO Line port from 1 to 4) to use. Apply Click the Apply button to save your settings and exit this screen. Cancel Click the Cancel button to give up change. 33 Welltech Technology Co., Ltd. 3.2 Configuration This screen helps you configure the following features of IP PBX, Office Call Rule, Feature Code, SIP Extension, SIP Trunk, SIP Trunk Reg., Outgoing Routing, Incoming Routing, Dial Group and Speed Dial. 3.2.1 IP PBX To change your General Setting, click Configuration IP PBX table. The screen appears as follows. (See figure 3.2.1-1) 34 Welltech Technology Co., Ltd. Figure 3.2.1-1 IP PBX Setting The following table describes the content in this screen Table Label 3.2.1-1 IP PBX Description SIP Setting IP-PBX Enter the IP-PBX Realm of ePBX40. This parameter is used for authentication when Realm there are more than one ePBX40 (or other IP-PBX or SIP Server) to connect, and 35 Welltech Technology Co., Ltd. they have inter-calls between ePBX40s. Please refer to SIP Trunk configuration. IP-PBX Enter the IP-PBX User Agent. IP-PBX User Agent was used as a string name User Agent specifying the value for the user agent field in the SIP header. The default value is IP-PBX. Proxy Port Enter the Proxy Port. This optional parameter allows you to control the port in which you wish the ePBX40 to accept SIP connections. Default is 5060. In order to avoid hacker from invading your IP-PBX to make a lot of expensive international call, We strongly suggest not to use port 5060. You can use any other port such as 8080 or 8088. RTP Port Enter the RTP Port Start. The voice media will use RTP as the transport protocol. You Start can define the RTP port range that ePBX40 used. Default start port is 10000. Note : ePBX40 don’t support VIDEO call. RTP Port Enter the RTP Port End. The voice media will use RTP as the transport protocol. You End can define the RTP port range that ePBX40 used. Default end port is 20000. Note: Default RTP ports ranges are from 10000 to 20000 and default proxy port is 5060. If your ePBX40 was installed behind a firewall/Router, please make sure you have already opened the RTP ports (10000-20000) and proxy port (5060). Please make sure the proxy port (5060) has already mapped to ePBX40 SIP Port number configuration. We suggest you to change proxy port from 5060 to others such as 8080 or 8088. Max Expire This sets the maximum time of registration, in seconds. This value limits the Time maximum registration expiry time. If remote client (IP device) send longer expiry time than this value, the ePBX40 will use the Default Expire Time (see the explanation at next field) to reply remote client. Default This sets the default SIP registration expiry time, in seconds. A client should define Expire Time this value when it registers to ePBX40 initially. This default value you set here will be used only if the client does not specify a timeout when it registers ePBX40. On the other hand, If ePBX40 is going to register another SIP Trunk, this is the registration timeout value that it will send to the remote device. SIP Port By default, ePBX40 will append SIP Port behind the SIP URI, except the port 5060. Append VOIP By default, it is enable. Attack Protection User-Agent There are provided 3 fields to block VOIP attack by user-agent, default is blocked Denied string of friendly-scanner on field 1. String Codec Priority 36 Welltech Technology Co., Ltd. Codec Codec negotiation is attempted in the order in which the voice Codec Priority is Priority defined. Default is G.729 Pass-Thru with the first priority. ePBX40 supports voice codec of G.729 Pass-Thru, G.711U, and G.711A only. Any SIP devices which are going to register or link with ePBX40, they MUST contain one of above Voice Codec at least. Keypad User can select Keypad type to be RFC2833 or SIP-Info. You can Choose RFC2833 or SIP-Info here and force the IP devices use RFC2833 or SIP-Info only and the setting should be also matched the Keypad setting of Extension IP devices. Note: RFC 2833 payload type only supports 101. PBX Setting CDR Mode Choose the mode for CDR(Call Detail record). You can disable the CDR or send the CDR record to an external storage server. You can also store the CDR records inside ePBX40’s SDRAM memory (Maximum 500 records). Note: SDRAM memory CAN NOT keep CDR records once ePBX40 was reset or Power off. You have to copy CDR to another storage device daily in order to prevent from losing CDR records. Disable: Choose this one to Disable CDR function. Real Time: You can install a CDR program at external PC Windows environment to collect and store CDR records. The compatible CDR program are both SYSLOG Server and Welltech proprietary. If you want to use Welltech CDR Program, please visit Welltech technical support website to download. http://www.welltech.com/support/support_e.htm Note: If you choose the CDR Mode to Real Time, you should install a CDR program to collect and store CDR records. The IP address of CDR server at the [CDR-Server IP] field has to fill properly. Every 5 seconds, ePBX40 will send a CDR record to external CDR-Server at port 23519. And CDR-Server will collect such records as a CSV file. The port of CDR server is configurable. Default is 23519. Storage: If you do not prepare an external PC as a CDR server. You can define the CDR Mode to Storage. ePBX40 will store the CDR records inside ePBX40 after end of each call. The inside CDR storage maximum is 500 records of CDR. If the storage space was full, the latest record will replace the existing one by date and time. Note: If you choose the CDR Mode to store, you can download the CDR file by 37 Welltech Technology Co., Ltd. pressing Export button of Export CDR field. When you export CDR file, ePBX40 will clean the CDR records from storage memory. ePBX40 can only store 500 CDR records maximum. If you do not export the CDR file when the records are full, the latest call record will replace the earliest CDR recorded one. Note: ePBX40 don’t provide any warning messages to indicate CDR storage are full. CDR-Server If you choose the CDR Mode to Real Time, input the IP address of CDR server here IP in which you installed either SYSLOG Server or Welltech CDR program externally. CDR-Server If you choose the CDR Mode to Real Time, here you can change the destination port Port of CDR server. Default is 23519. Export CDR If you chose the CDR Mode to Storage, you can press Export button to download the CDR file. The CDR file was built at CSV file format. Ext Ring This field defines the maximum ring time if the call is made between Extensions to Time Extensions or extension to IP Phone. The ring stops and drop call automatically once 20 seconds arrive. Default time is 20 seconds. Out Ring This field defines the maximum ring time if the call is made from Extension to Time outside Line (another SIP PBX extensions; defined by outgoing routing). For instance, extension dials to IP trunk (can’t use in external FXO gateway and built-in FXO line port). Default is no limitation timeout. Music RBT If this call was made between extensions. Enabling this option will provide music to the calling party as Ring Back Tone until the call was answered. Music RBT If this call was forwarded from Auto Attendant. Enabling this option will provide (Post-AA) music to the calling party as Ring Back tone until the call was answered. Call ePBX40 has call monitor function. The call status will be refreshed by the refresh Monitor times configuration. Default is 30 seconds and can be changed here. Refresh RTP Time Auto detect caller and callee RTP packets, if any side not sending RTP packets over Out this time, it will auto release this call. SRVlookup Enable or disable Server lookup. DNS Server is a way of setting up a logical, Support resolvable address where ePBX40 can reach. This allows calls to be forwarded to different locations without the need to change the logical address at each call, if you have setup one DNS Server properly. If you are not sure about your environment, please disable it. This option is Disable by default. Invalid Normally, a busy tone will be heard if caller dial to a non-exist number. Enable this Number option, the caller should hear an voice announcement to notify the receiving Support number was not existed. Call Park Enter the Call Park extension number. Once you put a call HOLD on Call park to 3rd 38 Welltech Technology Co., Ltd. Ext. party, he/she dials 700 to retrieve this hold call. Default is 700. Call Park Enter Call Park Pool range. Default is 701 to 720. Pool Call Park Input how much time to keep this Call Park. The call ring back to origin when call Time park time was expiry. Behind NAT Behind NAT If your ePBX40 was installed behind NAT, we strongly suggest you to enable Behind NAT to avoid any unexpected issues, such as “one way voice”. External IP If you enter External IP address, ePBX40 will take that IP address as its argument. If ePBX40 was installed behind NAT, the SIP header will normally use the private IP address assigned to the server. The remote device does not know how to route back to this address; therefore, it must be replaced with a valid, routable address. Secondary This should cooperate with Default Gateway Backup in Network page. When Default External IP Gateway Backup is enabled, the ePBX40 will auto switch the default gateway to secondary one if primary default gateway is broken. The External IP is not functional when Backup Default Gateway is chosen. So you must enter the Secondary External IP for Backup Default Gateway. External External Host takes a fully qualified domain name as its argument. If ePBX40 was Host installed behind NAT, the SIP header will normally use the private IP address assigned to the server. If you set up this option, ePBX40 will perform periodically DNS lookups on the hostname and replace the private IP address with the IP address returned from the DNS lookup. Note: You should not set up both External IP and External Host together; otherwise there will be some unexpected problems occurred. In other words, you can only choose either External IP or External Host for “Behind NAT”. Local Net Local Net is used to tell ePBX40 which IP address are considered local. If one of calling party or receiving party is not under Local Net, ePBX40 will set up the address in the SIP header that can be translated to that specified by External IP or the IP address can be looked up with External Host. The format will be IP/ Subnet Mask. Example: 192.168.1.0/ 255.255.255.0 Apply Click the Apply button to save your settings and exit this screen. Cancel Click the Cancel button to give up change. 39 Welltech Technology Co., Ltd. 3.2.2 Office Call Rule ePBX40 can Forward an incoming call to internal voice announcement (IVR) or to certain destination (extensions) during office working hours. ePBX40 provides 2 groups of office call rule (**999 and **998). User can setup a FXO gateway and hotline to **999 (for office 1) or **998 (for office 2) to reach auto attendant which support from ePBX40. Configure ePBX40 to route calls to destination when it received an invite with **999, ePBX40 will confirm the current time and forward this call to AA (Auto Attendant ), EXT (Extension), Group or Outbound. If you choose the destination to EXT, Group or Outbound, please remember to enter the destination number into the following field. To change your Office Call Rule, click Configuration Office Call Rule table. The screen appears as shown below. Figure 3.2.2-1 Office Call Rule The following table describes the table in this screen Table 3.2.2-1 Office Call Rule Label Description Select Select one of two offices , and then modify it. Representative No. This field shows the Representative number information. The default is **999 and **998. Comment This field shows your desire remarks information. Operator This field shows the Operator information. Call Rule This field shows the Call Rule information. Modify A Representative number can be modified by clicking the checkbox next to the Representative number and click the Modify button. Click Modify. The screen appears as shown below. 40 Welltech Technology Co., Ltd. Figure 3.2.1-2 Office 1 Call Rule The following table describes the function in this screen. Table Label 3.2.1-2 Extension Setting Description General Setting Representative No Enter the Representative Number. Comment You can enter a 20 bytes note to comment information. Call Rule Rule Choose one option to the Call Rule. Provide drop-down options: Scheduled Call Rule, Fixed to Working Time Call Rule, Fixed to Non-working Time Call Rule, Fixed to Special Time Call Rule. Working Day Choose the Working Days period. Working Time AM Choose the Working Time AM (before noon). Provide drop-down options: AA, EXT, Group, Outbound at TO field. Please select one option here. Lunch Break Choose one option to the Lunch Break time. Provide drop-down options: AA, EXT, Group, Outbound at TO field. Please select one option here. Working Time PM Choose one option to the Working Time PM ( afternoon ). Non-working Time Choose one option to the Non-working Time. Operator setting 41 Welltech Technology Co., Ltd. Operator Configure the Operator number and the destination to Extension or Call Group. OP to Group Input Group Number here to be an operator. AA setting Play AA Greeting You can define how many times to play greeting announcement when an incoming call reached Auto Attendant (AA) system. AA Greeting End & By default, the caller will hear greeting messages of 3 times Interval Timer when he reaches the auto attendant. There are 3 seconds intervals between two greeting messages. The intervals time can be changed here. AA Greeting End To Route this call to destination after greeting announcement (Working Time) finished and incoming Calling user didn’t do any action according to voice announcement instruction on working time. AA Greeting End To Route this call to destination after greeting announcement (Lunch Break) finished and incoming Calling user didn’t do any action according to voice announcement instruction on Lunch Break time. AA Greeting End To Route this call to destination after greeting announcement (non-Working Time) finished and incoming Calling user didn’t do any action according to voice announcement instruction on non-Working time. AA Greeting End To Route this call to destination after greeting announcement (Special Time) finished and incoming Calling user didn’t do any action according to voice announcement instruction on Special time. Import Greeting File Name: Choose one Greeting file. Provide drop-down options: greeting-day.wav (Working Time Greeting), greeting-noon.wav (Lunch Break Greeting). File: Type in the location of the file you want to upload in this field or click the Browse button to find it. Import: Click the Import button to upload greeting file. Apply Click the Apply button to save your settings and exit this screen. Cancel Click on the Cancel button to give up change. 42 Welltech Technology Co., Ltd. 3.2.3 Feature Code ePBX40 provides the following features to extensions. To activate these features, please use dial key of FXS analog phone or IP Phone to dial ePBX40 to set up these features. It only applies to that FXS analog phone or IP Phone that you are dialing from. The factory default feature code is shown as Webpage of ePBX40. To change your desire Feature Code, click Configuration, and then click the Feature Code table. The screen appears as shown below. Figure 3.2.3-1 Feature Code 43 Welltech Technology Co., Ltd. The following table describes these features in this screen. Table 3.2.3-1 Feature Code Label Description DND Activated The code is to activate DND (Do Not Disturb). Default is *78. DND Deactivated The code is to deactivate DND. Default is *79. UCF Activated The code is to activate Unconditional Forward. Default is *72. For example, dialing *72101 will forward all incoming call from your phone to extension 101. UCF Deactivated The code is to deactivate Unconditional Forward. Default is *73. BF Activated The code is to activate Busy Forward. Default is *90. For example, dialing *90101 will forward call to extension 101 if you are on the phone. BF Deactivated This code is to deactivate Busy Forward. Default is *91. NAF Activated This code is to activate No Answer Forward. Default is *92. For example, dialing *92101 will forward call to extension 101 if you are not answering. NAF Deactivated This code is to deactivate No Answer Forward. Default is *93. UAF Activated This code is to activate Unavailable Forward. Default is *94. For example, dialing *94101 will forward call to extension 101 if your phone is not registering to ePBX40. UAF Deactivated This code is to deactivate Unavailable Forward. Default is *95. OUCF Start When you are not able to access Internet to configure your IP devices, making a PSTN call to ePBX40 via FXO Port or FXO Gateway to enable remote control function to setup remote control Unconditional Forward to specific extension. Default access code is *87+extension number to forward. Note: 1. You can dial to ePBX40 via PSTN FXO port or FXO gateway, and it answers call by playing greeting message to ask you to enter service code. 2. Dial code [*87]+Extension number to enable access this extension, the greeting messages popup again to ask for dial access code. For example: dial *87305 will enable extension 305 to accept remote control forwarding feature. Go to next command at OUCF Activated to see details. 3. You can enable or disable OUCF function. OUCF Activated This code is to activate Remote Unconditional Forward number. Default is *88+forwarding number. 44 Welltech Technology Co., Ltd. Note: When you finished setting Note 2 at above “OUCF Start” command, continue to dial *880282265699 to forward call to number 0282265699 at extension 305 automatically. OUCF Deactivated This code is to Disable Unconditional Forward to one extension. Default is *89+Extension number. Note: 1. You can dial to ePBX40 via PSTN FXO gateway, and it answers call by playing greeting message to ask you to enter service code. 2. Dial code [*87]+Extension number to enable access this extension, the greeting messages popup again to ask for dial access code. For example: dial *87305 will enable extension 305 to accept remote control forwarding feature. 3. Following greeting message, dial to [*89] to disable OUCF function at extension 305. CF Deactivated Disable all of the Forward function, including Unconditional Forward, Busy Forward, No Answer Forward and Unavailable Forward. Default is *96. CLIR (per call) Prefix Default code is *67. Add this prefix hide the caller’s number to one specific receiver extension only. For example, 101 does not want to show his caller ID to receiver extension 102. Then, 101 can dial to "*67102". When 102 received incoming call, the LCD of 102 should display "Anonymous". There is no Caller ID from 101 to deliver to 102. If extension 101 dials to "102", 102 should see the Caller ID as 101. CLIR Activated Default code is *31. This feature is to disable Caller ID to send to any receiver extensions. For example, 101 dial to "*31", ePBX40 should add the CLIR record of 101 into its database. When 101 calls to any number, the called party should always show "Anonymous". CLIR Deactivated Default code is *32. Dial to *32 remove the CLIR record from the database of ePBX40. Ext Pwd Activated Default code is *80. Ext Pwd means extension password. This is a personal password to make external outgoing call. For example, extension 101 dials to *80+123, the Ext Pwd is activated. From now on, extension 101 must enter the password 123 prior to make external outgoing calls which are 45 Welltech Technology Co., Ltd. defined in the [Outgoing Routing] page.. Ext Pwd Deactivated Default code is *81. This code is to disable extension password (Ext Pwd). Group Picked Up Default code is *1. Dial *1 can pick up neighbor incoming call which stay at the same extension Group. Specific Picked Up Default code is *213. Dial *213+extension number to pick up specific extension number. For Example: To pick up extension 101, dial *213101 to pick up that call. Apply Click Apply button to save your settings and exit this screen. Cancel Click Cancel button to exit this screen without changes. 46 Welltech Technology Co., Ltd. 3.2.4 SIP Extension SIP Extension accounts are external IP devices to register ePBX40. To register these external Extensions, click Configuration and then click the SIP Extension table. The screen appears as shown below. SIP extension can be IP Phone or FXS gateway. Figure 3.2.4-1 SIP Extension The following table describes the table in this screen Table 3.2.4-1 Extension Label Description Select Select one box, then modify or delete it. Extension Number This field shows Extension Number information Comment This field shows the note information. NAT Traversal This field shows the NAT Traversal Enable/Disable information. Once this feature was activated, the call between WAN and LAN can be passed through automatically. Dial Plan This field shows the Dial Plan information. Add Click Add button, new Extension Setting screen appear. Modify An extension can be modified by clicking the checkbox next to the extension and click the Modify button. Delete An extension can be deleted by clicking the checkbox next to an extension and click the Delete button. Quick Add Click Add button, display new Extension Setting screen. Quick Delete Click Delete button, display delete Extension Setting screen. Total Count This field shows Total Counts information. Number Search Enter search number and click ENTER key. The screen will display matched search data. 47 Welltech Technology Co., Ltd. Total Page This field shows Total Page of external SIP extensions information. Page This field shows Page Number information. You can Enter page number, then click enter key. The screen will display this page data. Next/Prev Click Next/Prev Key to Next/Previous Page. The system will auto display the Next or Previous Information. Click Add/Modify at one extension, it shows details configuration screen as follows. Figure 3.2.4-2 Extension Setting The following table describes features at above screen. Table 3.2.4-2 Extension Setting Label Description Extension Number Assign this number to Extension. This number is also the register name for device. Password Assign password of device to register on ePBX40. Office Select location or office where this extension situates. There are only two locations or offices can be configured. Go to webpage setting of Configuration Office Call Rule Comment to enter name. Call Group You can use the Call Group parameter to assign an Extension to one or more groups. It means the SIP extension can be picked up by other group. Pickup Group Use Pickup Group option in conjunction with this group allows a 48 Welltech Technology Co., Ltd. ringing phone to be answered from another extension. Note: Pickup Group is used to control if one extension can answer a neighbor ring. Both extensions have to configure to the same call group and pickup group to implement Pickup ring. By default, dial code *1 can answer any ringing extensions in the same call group and pickup group. You can define multiple Call Groups and Pickup Groups to one Extension by a “comma”. For example, enter “1,3,5” into Call Group or Pickup Group. For example: There are three extensions A, B and C are configured to the following group table. Extension A B C Call Group 1 2 1,2 Pickup Group 1 2 1,2 Case 1. When A call to B or B call to A, then C can pick up A or B by dialing service code *1. Case 2. When C call to A or C call to B, then A or B can’t pick up the call by service code *1. Because “A“ can only pick up the “call group 1” and “B“ can only pick up the “call group 2”. Both A and B stay at two different pick up group. Extension C was assigned to both Group 1 and 2, so it can be picked up by A and B. Dial Plan Define the dial plan to Extension. It specifies the instruction used to control what the phone is allowed to do, and what to do with incoming calls of this extension. In this field, you can Choose 5 dial levels for Extension, including [ext-only], [ext+R1], [ext+R12], [ext+R123], [ext+allroutes]. You can define an “Outgoing call” record to certain Route Level. [ext-only] means this subscriber can only call to Extension. [ext+R1] means the subscriber with such Dial Plan can call to Extension and Route Level with R1. [ext+R12] means the subscriber with such Dial Plan can call to Extension and Route Level with R1 and R2. [ext+R123] means the subscriber with such Dial Plan can call to Extension and Route Level with R1, R2 and R3. [ext+allroutes] means the subscriber with such Dial 49 Welltech Technology Co., Ltd. Plan can call to Extension and Route Level with R1, R2, R3 and R4. Note: For more information about Route Level, please refer to Chapter 3.2.7 Outgoing Routing. At webpage configuration, Go to Configuration Outgoing Routing Routed Features Route Level. NAT Traversal If the Extension was installed behind firewall or router, and need to register to ePBX40 which stay on physical internet network, this feature has to enable. Enable NAT Traversal to force ePBX40 to ignore the contact information to that Extension and use the address from which the packets have been received. Fixed Trunk ID User can define a Fixed Trunk to one extension. When such extension makes an outgoing call via routing table, ePBX40 will check “Fixed Outgoing Call Rule” first. If “Fixed Outgoing Call Rule” is enabled, ePBX40 will use the Fixed Trunk ID for the calling party. That means the outbound call will be routed by Fixed Trunk ID, if you define both Fixed Trunk ID and enable “Fixed Outgoing Call Rule” for the calling party. Note: For more information about Fixed Outgoing Call Rule, please refer to Chapter 3.2.7 Absolute Timeout Outgoing Routing. Specify the timeout value for the outgoing calls. ePBX40 will drop this call if receiver device do not response this call within Timeout period. Please also go to Outgoing Routing page to enable the Route Timeout function. See Chapter 3.2.7 Outgoing Routing in details. BLF Enable BLF (Busy Line Field) function for this extension. In general case, BLF was used with IP Phone with LCD display to indicate your desire’s extension or FXO line busy status. Forward CallerID By default, the “from header of SIP invite” contains the Caller’s line number (Calling No.) when Forward function is activated. But this may make error for some SIP Trunk services. This feature provides an alternative feature to modify line number of SIP Invite’s from header, from Calling Party’s number to Called Party’s number by selecting Ext No. Unconditional FWD Enable Unconditional forward call to the number here. These 50 Welltech Technology Co., Ltd. numbers can be any extensions, outgoing PSTN call or SIP trunk call. No Answer FWD Enable No Answer forward call to the number here. These numbers can be any extensions, outgoing PSTN call or SIP trunk call. Busy FWD Enable Busy forward call to the number here. These numbers can be any extensions, outgoing PSTN call or SIP trunk call. Unavailable FWD Enable Unavailable forward call to the number here. These numbers can be any extensions, outgoing PSTN call or SIP trunk call. Comment You can enter a 20 bytes note for this extension here. Apply Click Apply button to save your customized settings and exit this screen. Cancel Click Cancel button to exit this screen without changes. Click Quick Add. The screen appears as shown below. Figure 3.2.4-3 Extension Setting of Quick add The following table describes the table in this screen Table 3.2.4-3 Extension Setting Label Description Quick Add Enter the number of the Quick Add. If you enter 24, a new extension number will be created by increasing one number from starting extension number within 24 numbers. For instance, the starting extension number is 330, the new created numbers are from 330 to 353. Extension Number Assign the starting number of Extension. This number is also the register name for device. 51 Welltech Technology Co., Ltd. Password Select Normal option to Subscriber Type. Assign the register password for device to register on ePBX40, the password will automatically increase by 1 digit. Call Group You can use the Call Group parameter to assign an Extension to one or more groups. It means the SIP extension can be picked up by other group. Pickup Group Use Pickup Group option in conjunction with this group to allow a ringing phone to be answered from another extension. Note: Pickup Group is used to control if one extension can answer a neighbor ring. Both extensions have to configure to the same call group and pickup group to implement Pickup ring call. By default, dial code *1 can answer any ringing extensions in the same call group and pickup group. You can define multiple Call Groups and Pickup Groups to one Extension by a “comma”. For example, enter “1,3,5” into Call Group or Pickup Group. For example: There are three extensions A, B and C are configured to the following group table. Extension A B C Call Group 1 2 1,2 Pickup Group 1 2 1,2 Case 1. When A call to B or B call to A, then C can pick up A or B by dialing service code *1. Case 2. When C call to A or C call to B, then A or B can’t pick up the call by service code *1. Because “A“ can only pick up the “call group 1” and “B“ can only pick up the “call group 2”. Both A and B stay at two different pick up group. Extension C was assigned to both Group 1 and 2, so it can be picked up by A and B. Dial Plan Define the dial plan to Extension. It specifies the instruction used to control what behavior of the phone is allowed to do, and what to do with incoming calls of this extension. In this field, you can Choose 5 dial levels for Extension, including [ext-only], [ext+R1], [ext+R12], [ext+R123], [ext+allroutes]. You can define an “Outgoing call” record to certain Route 52 Welltech Technology Co., Ltd. Level. [ext-only] means this subscriber can only call to Extension. [ext+R1] means the subscriber with such Dial Plan can call to Extension and Route Level with R1. [ext+R12] means the subscriber with such Dial Plan can call to Extension and Route Level with R1 and R2. [ext+R123] means the subscriber with such Dial Plan can call to Extension and Route Level with R1, R2 and R3. [ext+allroutes] means the subscriber with such Dial Plan can call to Extension and Route Level with R1, R2, R3 and R4. Note: For more information about Route Level, please refer to Chapter 3.2.7 Outgoing Routing. At webpage configuration, Go to Configuration Outgoing Routing Routed Features Route Level. NAT Traversal If the Extension device was installed behind a device performing NAT, such as firewall or router, and need to register to ePBX40 on Physical internet network, then user has to enable this function. Enable NAT Traversal to force ePBX40 to ignore the contact information for the Extension and use the address from which the packets are being received. BLF Enable BLF (Busy Line Field) function for this extension. In general case, BLF was used with IP Phone with LCD display to indicate your desire’s extension or FXO line busy status. Apply Click Apply button to save your customized settings and exit this screen. Cancel Click Cancel button to quit this screen without saving. Click Quick Delete. The screen appears as shown below. 53 Welltech Technology Co., Ltd. Figure 3.2.4-4 Extension Setting The following table describes the table in this screen Table 3.2.4-4 Extension Setting Label Description Quick Delete Enter how many extensions to delete. If you enter 5, that means there are 5 extensions to be deleted. Extension Number Enter the starting Extension Number to be deleted automatically. The next number was increased 1 to previous number to delete. For instance, the starting number is 101. The extension 101, 102, 103, 104 and 105 are going to be deleted. Apply Click Apply button to save your customized settings and exit this screen. Cancel Click Cancel button to exit this screen without saving. 54 Welltech Technology Co., Ltd. 3.2.5 SIP Trunk SIP Trunk account is to configure both external FXO Trunk (FXO device, e.g. WellGate 2540 or 2680) and IP Trunk to register to ePBX40 or set up some necessary configuration for SIP trunk. To change your SIP Trunk, click Configuration, and then click SIP Trunk table. The screen appears as shown below. Figure 3.2.5-1 SIP Trunk The following table describes the table in this screen Table 3.2.5-1 SIP Trunk Label Description Select Select this check box to modify or delete. Trunk Number This field shows the Trunk Number information. Comment This field shows the Comment information. NAT Traversal This field shows the NAT Traversal Enable/Disable information. Dial Plan This field shows the Dial Plan information includes routes plans. Maximum Channels This field shows the Maximum Channels (Simultaneous concurrent call) at this SIP Trunk. Add Click Add button to display new SIP Trunk Setting screen. Modify A SIP Trunk Number can be modified by clicking checkbox next to the Trunk Number and click Modify button. Delete A Trunk Number can be deleted by clicking the checkbox next to the Trunk Number and click the Delete button. Total Count This field shows Total SIP Trunk Count information. Number Search Enter the search Trunk Number, then click enter key. The screen will display matched search Trunk Number. Total Page This field shows Total Page information. Page This field shows Page Number information. You can Enter page number, then click enter key. The screen will display this page data. 55 Welltech Technology Co., Ltd. Next/Prev Click the Next/Prev to Next/Previous Page. The system will auto display the Next or Previous Information. Example 1: Set up external FXO gateway as SIP Trunk. Click Add/Modify. The screen appears as shown below. Figure 3.2.5-2 Trunk Setting The following table describes features in this screen. Table 3.2.5-2 Trunk Setting Label Description Trunk Number Assign the number of Trunk. This number is also used as the register name for Trunk device. Note: The Trunk Number can also be a “Trunk ID”. In the Routing Table page, you should define the destination of prefix route. When you define the prefix route, you should set up the Trunk ID (Trunk Number) in the Trunk page first; then you could enter the correct Trunk ID in the Destination field. Password Assign the register password for device to register on ePBX40. Host Set up the Host to Dynamic require the SIP trunk device to register ePBX40 so that the ePBX40 know how to reach the trunk. You can also set up the Host to an IP address or FQDN (domain name) if you set up the Host to [Pre-define]. There is a field [Address] appeared when you choose Host to 56 Welltech Technology Co., Ltd. [Pre-define]. Only those devices whose IP address or domain name matched Pre-defined address allow to make a call. Dial Plan Define Dial Plan for Trunk. It specifies the location of the instruction used to control what dial out routes of the phone is allowed to do for this Trunk. In this field, there are 6 dial levels for Extension, including [from-pstn], [ext-only], [ext+R1], [ext+R12], [ext+R123], [ext+allroutes]. You can define an “Outgoing call” record, to certain route levels such as R1, R2, R3 and R4. [from-pstn] is used to call FXO Trunk only. [ext-only] means this subscriber can only call to Extension only. [ext+R1] means the subscriber with such Dial Plan can call to Extension and Route Level with R1. [ext+R12] means the subscriber with such Dial Plan can call to Extension and Route Levels with R1 and R2. [ext+R123] means the subscriber with such Dial Plan can call to Extension and Route Levels with R1, R2 and R3. [ext+allroutes] means the subscriber with such Dial Plan can call to Extension and Route Levels with R1, R2, R3 and R4. Note: For more information about Route Level, please refer to Chapter 3.2.7 Outgoing Routing. NAT Traversal If the Trunk device was installed behind a device performing NAT, such as firewall or router, and need to register to ePBX40 on public network. This function has to be enabled. Enable NAT Traversal to force ePBX40 to ignore the contact information for the SIP Trunk and use the address from which the signal packets have been received. Voice RTP packets were routed through ePBX40 once there is a call ongoing. Port To define the SIP signal port if you want to listen on a nonstandard SIP signal port. External Server This field allows you to set up the domain name or IP address in Address the SIP From URI. Set up this will avoid unexpected issues happened if the service provider needs authentication. Maximum Channels This command limits the maximum channels for this SIP Trunk to dial out. For example, if you set up 2 at this field, only 2 outgoing calls could go out via this Trunk simultaneously. Default is no limitation. Outbound Caller ID Some service providers need to verify the correct registered caller ID if they receive an incoming call. Default value of 57 Welltech Technology Co., Ltd. ePBX40 send the Extension’s Caller ID to this SIP Trunk if you set up empty here. Note: Normally, SIP From URI protocol contains both the Extension’s Calling ID and ePBX40’s IP address. But some ITSP may reject this call due to security consideration. You can modify the Calling ID and IP/Domain in the fields of [External Server Address] and [Outbound Caller ID] when the call is going to the Destination (SIP Trunk) via the ePBX40 to avoid such security issue. If you installed one external FXO gateway as the SIP Trunk, you can simply use the default Trunk 888 or 889 as the FXO’s register number. To install external FXO gateway, you need to configure Trunk Number, Password, Host, Dial Plan and NAT Traversal Mode. If you set up the ITSP ( SIP Server) as the SIP Trunk, you may need to set up the following configuration: Port, External Server Address and Outbound Caller ID. Caller ID Display When an Inbound call is coming from SIP Trunk, such as 888. Name The default Caller ID Name will be either “PSTN number” or “888”. Specify a number will replace above two numbers to display at extension. Comment You can enter a 20 bytes note for each Trunk here. CLIR Support CLIR (Caller Line Identification Restriction) is a feature to hide the Caller's Number. For example, extension 101 calls to extension 102. But 101 won’t like to show the caller ID to 102. So 101 can activate this feature to hide the caller ID. When 102 got a call from 101, the LCD of 102 should display "Anonymous". Apply Click Apply button to save your customized settings and exit this screen. Cancel Click Cancel button to exit this screen. 58 Welltech Technology Co., Ltd. Example 2: Set up Trunk ID for SIP Trunk Click Add/Modify. The screen appears as shown below. Figure 3.2.5-3 Trunk Setting 59 Welltech Technology Co., Ltd. 3.2.6 SIP Trunk Registration SIP Trunk is used for ePBX40 to register to other systems only, such as remote ITSP’s SIP Server or remote location’s IP-PBX ePBX40 through IP network. SIP Trunk Registration screen shows information of SIP Trunks. You will see the registered Line Number, Account and Server IP address, port number and the Register Status. Press Add to create a new Trunk or Modify the specified SIP Trunk. Press Delete will delete the specified SIP Trunk. To change your SIP Trunk Setting, click Configuration, and then click the SIP Trunk Setting table. The screen appears as shown below. Figure 3.2.6-1 SIP Trunk Registration page The following table describes the table in this screen Table 3.2.6-1 SIP Trunk Setting Label Description Select Select this check box to modify or delete it. Line Number This field shows the Line Number information to access this SIP Trunk. Account This field shows the Account information. IP Address/DNS This field shows the IP Address or DNS information. Port This field shows the Port information. Status This field shows the Status information to register to remote device. Add Click Add button to display a new SIP Trunk Setting screen. Modify Register to remote Server information can be modified by clicking the Modify button. Delete Register to remote Server information can be deleted by clicking the Delete button. Total Count This field shows Total Count information. Number Search Enter the search number, then click enter key. The screen will display matched search data. 60 Welltech Technology Co., Ltd. Total Page This field shows Total Page information. Page This field shows Page Number information. You can Enter page number, then click enter key. The screen will display this page data. Next/Prev Click the Next/Prev to Next/Previous Page. The system will auto display the Next or Previous Information. Example 1: Disable SIP Trunk Setting In SIP Trunk Setting table. Click Add or Modify. The screen appears as shown below. Add New SIP Trunk or modify one to configure ePBX40 register to IP Telephony Service provider(ITSP). ITSP will provide related account information for ePBX40 to register. After disable this SIP Trunk, both outgoing call and incoming call don’t allow to go through this trunk. Click Add or Modify. The screen appears as shown. Figure 3.2.6-2 SIP Trunk Setting The following table describes the table in this screen. Table 3.2.6-2 SIP Trunk Setting Label Description Enable Check to enable this SIP Trunk. Blank to Disable. Line Number Line Number for registering to ITSP SIP Server or neighbor IP-PBX. Account Account Name or ID for registering to ITSP SIP Server or neighbor IP-PBX. Password Account Password for registering to ITSP SIP Server or neighbor IP-PBX. 61 Welltech Technology Co., Ltd. IP Address/DNS Enter IP address or domain name of ITSP server. Port Port number of remote ITSP server or IP-PBX for registering. SIP Domain You can insert the SIP Domain here if it is necessary. Some SIP platform may verify incoming correct SIP Domain which was located in the From header of SIP protocol. Modify this field let ePBX40 register to SIP Trunk successfully. Realm Realm configuration of ITSP SIP Server or another ePBX40 or IP-PBX. Note: When a call was initiated from ePBX40 to a remote SIP Trunk, the remote SIP Server or IP-PBX may attempt to authenticate this Call for security consideration. ePBX40 should reply correct Account ID and Password to remote Server or IP-PBX. How does ePBX40 know which ID and Password it should send? When the call is going to SIP Trunk via ePBX40, the remote SIP Server or IP-PBX may reply a 407 code (SIP protocol format) to ePBX40, which contains a parameter called “Realm” for authentication. ePBX40 will re-sent this call and contains correct ID and Password based on the Realm which was configured here. The Realm should be unique. For more information about Realm, please contact with your ITSP Service provider’s or remote SIP Server technician. If you have multiple ePBX40s to connect in a group, you may want those ePBX40s to call each other. You should set up the Extension to let those ePBX40 can register to each other (other IP-PBX), and you should configure unique [Realm] in the webpage of Configuration IP PBX. Status Once SIP Trunk is configured and enabled, here will show the registration status. Apply Click Apply button to save your customized settings and exit this screen. Cancel Click Cancel button to exit this screen without saving. 62 Welltech Technology Co., Ltd. Example 2: Enable SIP Trunk Setting Click Add or Modify. The screen appears as follows. Figure 3.2.6-3 SIP Trunk Setting After enable this SIP Trunk, both outgoing call and incoming call allow to go through this trunk according to its configuration. 63 Welltech Technology Co., Ltd. 3.2.7 Outgoing Routing Outgoing Call Rule means from subscribers (Extension or FXO or SIP IP Trunk registered on ePBX40) to call out. To change your Outgoing Call Routing, click Configuration, and then click the Outgoing Routing table. The screen appears as follows. Figure 3.2.7-1 Outgoing Call Routing The following table describes this feature in this screen. Table 3.2.7-1 Outgoing Call Routing Label Description Select Select this check box to modify or delete it. Prefix This field shows the Prefix information. Digits Length This field shows the Digits Length to be dialed. Office This field shows allowable outgoing call office name. Destination This field shows the Destination of this outgoing Routes. Add Click Add to add Outgoing Routing Setting Screen. Modify Click Modify to modify Outgoing Routing Setting screen. Delete Click Delete to delete list. Total Count This field shows Total Count information. Number Search Enter the search number, then click enter key. The screen will display matched search data. Total Page This field shows Total Page information. Page This field shows Page Number information. You can Enter page number, then click enter key. The screen will display this page data. Next/Prev Click the Next/Prev to next or previous Page. The system will auto display the next or previous page Information. 64 Welltech Technology Co., Ltd. Click Add or Modify. The screen appears as follows. Figure 3.2.7-1 Outgoing Routing The following table describes the table in this screen Table 3.2.7-2 Outgoing Routing Label Description Prefix Set up prefix number for routing rule. Digits Length Set up the digit length of dialed number, if user doesn’t want to limit the length, please set up this parameter to 0. The maximum length is 20. Note: If you set up the Digits Length as a specific value, such as 10, the dialed number digits length should full match to 10, or you can set up the Digits Length to 0 to ignore the digits length limitation. Office Selected allowable outgoing call office or location. Template Copy It will copy settings for below Basic Setting and Routed Features based on the other Outgoing Routing record. Basic Setting Primary, Secondary, There are up to 8 priorities for each routing rule, if ePBX40 fails 65 Welltech Technology Co., Ltd. Third, Fourth, Fifth, to route to primary destination three times, it will try to route to Sixth, Seventh and secondary or third destination until eighth destination. Eighth Destination Each Priority has one destination number to fill in. Note: Before setting up the Routing Table, Trunk information in the Trunk page has to be configured first. Then this field contains the Trunk ID for choosing. If the Trunk was set up to Dynamic in the Host field and it doesn’t register ePBX40, it will skip this “priority” directly and route call to next priority immediately. If the Trunk was set up to an Address in the Host field and this Address is not reachable, ePBX40 will try three times first. If it still fails, ePBX40 route call to next priority. Add To add assigned number in front of dial number. For example, you set up 02 here and the called number is 03123, ePBX40 add 02 and send out 0203123 as the called number. Drop To drop specified length of number. For example, you set up 2 here and the called number is 03123, ePBX40 drop 03 and send out 123 as outgoing number. Note: If you set up both Drop and Add features, ePBX40 will implement Drop first and then Add. DROP has the first priority than ADD to implement at this route rule. Route Password Set up password here, ePBX40 will request password before sending the dialing number to Trunk. ePBX40 will play IVR announcement to ask for entering password to verify authority. Routed Features Fixed Outgoing Call ePBX40 will use the Fixed Trunk ID to route this call from Rule extension if you have enabled both Fixed Outgoing Call Rule here and Fixed trunk ID at Extension Setting. That means ePBX40 will route the call to a fixed Trunk ID if you enable this feature. For example, you have set up Fixed Trunk ID to 888 at extension 101. And you enable Fixed Outgoing call Rule for a certain route record, such as 8 with length 10. When extension 101 calls a number at 8xxxxxxxxx, ePBX40 will route this call to 888 no matter what Primary Destination number you have setup for such route record at extension 101. Note: For more information about Fixed Trunk ID, please refer 66 Welltech Technology Co., Ltd. to Chapter 3.2.4 Route Timeout SIP Extension. Click to enable this function. ePBX40 will drop this call if receiver device do not response this call within Timeout period. See Chapter 3.2.4 SIP Extension at Absolute Timeout in details. Route Level Select one from R1, R2, R3 or R4. Suppose one route Level was selected at R3 and one Outgoing Routing rule with prefix 0. That means only those extensions with Dial Plan [ext+R123] and [ext+allroutes] can use such record because only these two Dial Plan contain the Route Level of R3. Apply Click the Apply button to save your customized settings and exit this screen. Cancel Click the Cancel button to exit this screen without saving. Example of Outgoing Routing: If user set up prefix as 002, digits length as 12, Primary destination as 888, Drop as 3, and Add as 0. When one extension dials 002912345678, according to above Outgoing Routing, the following number will be sent out. 002912345678→912345678 (Drop 3 digits) →0912345678 (Add 0) Finally, ePBX40 will send out 0912345678 to Trunk ID 888. 67 Welltech Technology Co., Ltd. 3.2.8 Incoming Routing Call Rule Incoming Routing Call Rule means an incoming call which device was not registered to this ePBX40 directly. However, the calling device was registered to an SIP Server or IP-PBX in which ePBX40 was registered to. ePBX40 works as an Extension of SIP Server or IP-PBX at this application. ePBX40 will perform the following behaviors based on the “Incoming Routing” rule. Suppose ePBX40 received an incoming call from SIP Trunk and its caller ID is 070070 which was registered to external SIP Server or IP-PBX directly. The Incoming Routing was configured to Prefix=070070, Digits Length=6, Add=**999 and Drop=6. ePBX40 will drop 6 digits first and then add **999 as the destination number. The **999 is the default number of auto attendant. So the caller will hear greeting voice messages because this call will be routed to ePBX40’s auto attendant. Digits Length was used to compare the incoming call total digits length. If the incoming call total digits length DO NOT match Digits length number exactly, this incoming call will be neglected by this Incoming Routing table. ePBX40 continues to search other number which match this incoming call number. If none of matched number, ePBX40 will replies SIP command 403 (Forbidden) to the Calling device. To change Incoming Routing, click Configuration, and then click the Incoming Routing table. The screen appears as follows. Notice: The incoming call rule is used to look for the extension number that is matched with the DNIS (Receiver side) which had been processed by digit manipulation. If there is not any extension found, this call will be rejected. Figure 3.2.8-2 Incoming Routing Setting The following table describes the features in this screen. Table 3.2.8-2 Incoming Routing Setting Label Description Prefix Enter the prefix number for routing rule. Digits Length Enter the Digits Length to compare incoming number, if user 68 Welltech Technology Co., Ltd. doesn’t want to limit the length, please set up this parameter as 0 (no limitation of digit length). The maximum length is 20. If you set up the Digits Length as a specific value such as 10, the incoming number should match to 10 exactly, or you can set up the Digits Length to 0 to ignore the digits length limitation. If the incoming number from external SIP Server or IP-PBX equal to Prefix, you should set up the Digits Length to meet this Prefix’s digits length. If the incoming number does not equal to Prefix, you can set up the Digits Length as 0 to ignore Digits Length. Add Enter the Add assigned number. For example, if you have set up **999 here and you do not set up Drop number. Suppose incoming number is 070070101, the ePBX40 will add **999 then this number **999070070101 as the incoming number. Drop Enter the drop specified length of number. For example, you set up 6 here and you do not set up Add number. If the incoming number is 070070101, the ePBX40 will drop 070070 then this new number 101 as incoming number. If you set up both Drop and Add features, ePBX40 will Drop first and next Add. For example, the ePBX40 received an incoming number 070070, which was sending from an external SIP Server or IP-PBX, ePBX40 will drop 6 digits first and then add **999 as the destination number. **999 is the default number of auto attendant. So the caller will hear greeting because the incoming number will be routed to auto attendant. Apply Click the Apply button to save your customized settings and exit this screen. Cancel Click the Cancel button to exit this screen without saving. 69 Welltech Technology Co., Ltd. 3.2.9 Dial Group Dial Group is used to set up the [group dialing]. To enter Group Number and set specific members is to join this group. To change your Dial Group, click Configuration, and then click the Dial Group table. The screen appears as follows. Figure 3.2.9-2 Dial Group Setting The following table describes the table in this screen Table 3.2.9-1 Dial Group Setting Label Description Group Number Enter the Group Number. The Group number should NOT be the same with Extension, Trunk Number, and Speed Dial Number. All of the Numbers should be unique at ePBX40 system. Telephone Number Enter the Telephone Number to join this Dial Group. You can enter multiple numbers by a “comma”, such as [101,102,103] Ring Type You can choose the Ring type for Dial Group; Ring All (Ring all numbers at this group), Sequential Ring (Ring first one until Pre-Configured maximum Ring time. If no answer this call, it ring to next extension) and Random Ring. Extension maximum Ring time was configured at Section 3.2.1 IP PBX PBX Setting Ext Ring Time. Dial Group End To This feature decides the final destination if there is not anyone of group answered this call. You can select IVR or a Number (extension or PSTN number or SIP Trunk number). Apply Click the Apply button to save your customized settings and exit this screen. Cancel Click the Cancel button to exit this screen without saving. 70 Welltech Technology Co., Ltd. 3.2.10 Speed Dial Speed Dial Table was used to set up the Speed Dial function. You can enter a Speed Dial Number and set up the destination number to Telephone Number field in Table. Extension can dial the Speed Dial Number and ePBX40 will send out Telephone Number instead. To change your Speed Dial Table, go to Configuration Speed Dial Speed Dial Table. The screen appears as follows. Figure 3.2.10-1 Speed Dial Table Note: If you want to modify a current Speed Dial record, you should delete the current record first and add another new one. Example: Set Speed Dial Number as *400 and Telephone Number as 0282265699. When caller dial *400, ePBX40 will send out this number 0282265699 as destination number. Click Add or Modify. The screen appears as follows. Figure 3.2.10-2 Speed Dial The following table describes the features in this screen. Table 3.2.10-2 Speed Dial Label Description Speed Dial Number Enter the Speed Dial Number. The Speed Dial Number should 71 Welltech Technology Co., Ltd. not be the same with Extension or Trunk Number or Group Number. All of the Numbers should be unique inside ePBX40 system. Telephone Number Enter the Telephone Number. Apply Click the Apply button to save your customized settings and exit this screen. Cancel Click the Cancel button to exit this screen without saving. 72 Welltech Technology Co., Ltd. 3.2.11 T.38 FAX To change your T.38 FAX, click Configuration, and then click the T.38 FAX table. The screen appears as shown. Figure 3.2.11 T.38 FAX The following table describes the table in this screen Table 3.2.11 T.38 FAX Label Description Mode Select Enable option if your will use T.38 FAX function. The default is Enable. T.38 Start Port Enter the Start Port Number. The default is 4000. T.38 End Port Enter the End Port Number. The default is 49999. T.38 Redundancy Enter the Redundancy count. The default is 2. Apply Click on the Apply button to save your customized settings and exit this screen. Cancel Click on the Cancel button to begin configuration this screen afresh. 73 Welltech Technology Co., Ltd. 3.3 Information The Information screens can view Subscriber Information, Call Monitor and System Information. 3.3.1 Subscriber Information You can check Phone Number, IP Address, for Extension and Trunk here. If subscriber registered on ePBX40, the IP Address will show up. On the other hand, if the subscriber doesn’t register successfully on ePBX40, the IP Address will be displayed none. Click Information Subscriber Info table. The screen appears as follows. Figure 3.3.1-1 Subscriber Info The following table describes the features in this screen. Table 3.3.1-1 Subscriber Info Label Description Phone number This field shows Phone Number and status. : Idle, : this line is busy now. 74 Welltech Technology Co., Ltd. (blinking): Ringing, : Not register ePBX40 now. Type This field shows this subscriber is an local extension (built-in FXO Lines and local IP devices) or SIP Trunk (External FXO gateway or IP trunk). IP Address This field shows IP Address of this subscriber. DND This field shows Do Not Disturb status. CLR This field shows Caller Line Identification Restriction status. Ext Pwd This field shows Extension Password information. Total Count This field shows Total Count information. Number Search Enter the search number and click enter key. The screen will display matched search data. Total Page This field shows Total Page information. Page This field shows Page Number information. You can Enter page number and click enter key. The screen will display this page data. Next/Prev Click the Next/Prev to Next/Previous Page. The system will auto display the Next or Previous Information. 3.3.2 Call Monitor Click Information Call Monitor table. The screen appears as follows. Figure 3.3.2-1 Call Monitor The following table describes the features in this screen. Table 3.3.2-1 Call Monitor Label Description State This field shows State information and status. : Answered (blinking): Ringing. Caller Number This field shows Caller Number information. Called Number This field shows Called Number information. Start Time This field shows Call start time and Date information. 75 Welltech Technology Co., Ltd. Elapsed Time This field shows Elapsed Time information. Total Count This field shows Total Count information. Number Search Enter the search number and click enter key. The screen will display matched search data. Total Page This field shows Total Page information. Page This field shows Page Number information. You can Enter page number and click enter key. The screen will display this page data. Next/Prev Click the Next/Prev to Next/Previous Page. The system will auto display the Next or Previous Information. 76 Welltech Technology Co., Ltd. 3.3.3 System Info Click Information System Info table. The screen appears as follows. Figure 3.3.3-1 System Info The following table describes the features in this screen. Table 3.3.3-1 System Info Label Description Application This field shows Application firmware version. Library This field shows Library version. Hold Tone/Music RBT This field shows Hold Tone and Music RBT wave file. Configuration This field shows Configuration file in this ePBX40. IVR This field shows IVR information. 77 Welltech Technology Co., Ltd. 3.4 Network The Network screens can see the configuration Network and DDNS Server status. 3.4.1 Network To change your Network Setting, click Network Network Setting table. The screen appears as above. Figure 3.4.1-1 Network Setting The following table describes the table in this screen Table 3.4.1-1 Network Setting Label Description WAN Mode Select ePBX40 WAN port network mode to be Fixed IP or DHCP or PPPoE. IP Address Enter the IP Address if Fixed IP mode was set. Subnet Mask Enter the Subnet Mask Address if Fixed IP mode was set. Default Gateway Enter the Default Gateway Address if Fixed IP mode was set. Primary DNS Enter the IP address for Primary DNS. The default is 168.95.1.1. Secondary DNS Enter the IP address for Secondary DNS. The default is null. Default Gateway Select Enable option, if any connection problem occurred on Backup primary default gateway connections, all the traffic will be 78 Welltech Technology Co., Ltd. routed to the secondary default gateway for proper operation. The default is Disable. Secondary Default Enter the Secondary Default Gateway. If you choose the Gateway Default Gateway Backup to Enable. Check Point Enter the Check Point IP address. ePBX40 Ping this IP address to verify if there are any connection problem happened on primary default gateway connections. If you choose the Default Gateway Backup to Enable. Current use Default This field will display current used Default Gateway IP address. Gateway PPPoE ID Enter the PPPoE ID if you choose the Mode to PPPoE. PPPoE PWD Enter the PPPoE Password if you choose the Mode to PPPoE. MAC This field shows up the MAC address. The MAC address can not be modified. LAN IP Address Enter the LAN port IP Address. The default is 192.168.123.123. Subnet Mask Enter the Subnet Mask Address. The default is 255.255.255.0. MAC This field shows up the MAC address. The MAC address cannot be modified. Network Routing Table Select Select this check box to modify or delete it. Destination This field shows up the IP address. Network This field shows up the Subnet Mask address. Gateway This field shows up the Default Gateway address. Add Click the Add button to display a new Network Route screen. Modify IP address can be modified by clicking the checkbox next to the IP address and click the Modify button. Delete IP address can be deleted by clicking the checkbox next to the IP address and click the Delete button. Apply Click the Apply button to save your customized settings and exit this screen. Cancel Click the Cancel button to exit this screen without saving. Click Add or Modify. The screen appears as follows. You can add or modify a network routing record. Input subnet as Destination, subnet mask as Net mask, and gateway as Gateway. 79 Welltech Technology Co., Ltd. Figure 3.4.1-2 Network Routing The following table describes the features in this screen. Table 4.2.1-2 Network Routing Label Description Destination Enter the IP Address. Netmask Enter the Subnet Mask Address. Gateway Enter the Default Gateway Address. Apply Click the Apply button to save your customized settings and exit this screen. Cancel Click the Cancel button to exit this screen without saving. 80 Welltech Technology Co., Ltd. 3.4.2 DDNS Srv. To change your DDNS Setting, click Network, and then click the DDNS Srv. (IPV4) table. The screen appears as follows. Figure 3.4.2-1 DDNS Setting The following table describes the features in this screen. Table 3.4.2-1 DDNS Setting (IPV4) Label Description Mode Select the Enable option if you will use DDNS function. The default is Disable. Domain Name Enter the IP address or URL for your DDNS server. User Name Enter your account. Password Enter the password assigned to you. Apply Click the Apply button to save your customized settings and exit this screen. Cancel Click the Cancel button to exit this screen without saving. 81 Welltech Technology Co., Ltd. 3.5 Management The management screens can help you to configure Time, Security, Firmware Upload, Music Upload, Import, Export, Rest to Default, Soft Reset and Reboot system. 3.5.1 Time Setting To select correct Time Setting for ePBX40, the time will affect CDR time display. And you can also check the system current time here. To change your Time Setting, click Management, and then click the Time Setting table. The screen appears as follows. Figure 3.5.1-1 Time Setting The following table describes the features in this screen. Table 3.5.1-1 Time Setting Label Description Time Setting NTP Client Select Enable option if you will use NTP client. The default is Enable. Remote NTP Server Enter the IP address or URL for your time server. Check with your SIP/Network administrator if you are not sure of this information. The default is 168.95.195.12. 82 Welltech Technology Co., Ltd. Time Zone Choose the Time Zone of your location. This will set the time differences between your time zone and Greenwich Mean Time (GMT). The default is (GMT+08:00) Beijing, Hong Kong, Perth, Singapore, Taipei. Current Time This field display the time of your ePBX40. NTP Server Local NTP Server Select the Enable or Disable option if you use Local NTP Server. Enable this option will make ePBX40 to be a NTP server and send the ePBX40’s local time to the NTP client. The default is Enable. Apply Click the Apply button to save your customized settings and exit this screen. 83 Welltech Technology Co., Ltd. 3.5.2 SMTP Setting ePBX40 can support Voice Mail to e-mail. Before activate this feature, you should give the ePBX40 an e-mail account and set the SMTP for ePBX40, so that the ePBX40 has the ability to send the leaved message to the subscriber’s mail box. Figure 3.5.2-1 SMTP Setting Table 3.5.2-1 SMTP Setting Label Description SMTP Setting Mail address Enter the mail address here for ePBX40 SMTP Server Enter the SMTP server address. Account If your SMTP server needs the user account for Authentication, please input user account here Password If your SMTP server needs the password for Authentication, please input password here. SMTP Server Auth Enable or Disable SMTP Server Authentication. 84 Welltech Technology Co., Ltd. 3.5.3 VM Setting User can set the configurations related with Voice Mail. Figure 3.5.3-1 VM Setting Table 3.5.3-1 VM Setting Label Description General Setting Maximum Length Define the Voice message duration Voice mail to e-Mail Setting e-Mail Subject Specifies the email subject of voicemail notification email messages. e-Mail Encode Defines the character set for voicemail messages. e-Mail Body Specifies the email body of voicemail notification email messages Below are the variables to let user input into e-Mail Subject and e-Mail Body. VM_NAME: The receiver’s name. VM_DUR: The total time of message. VM_MSGNUM: The id of current message. (workable for ePBX100A only) VM_MAILBOX: The receiver’s mailbox number. VM_CIDNUM: The sender’s number. VM_DATE: The date of message sent. 85 Welltech Technology Co., Ltd. 3.5.4 Security To change your Security Settings, click Management, and then click the Security table. The screen appears as follows. Figure 3.5.4-1 Security The following table describes the feature in this screen. Table 3.5.4-1Security Label Description HTTP Http Port Enter the port number in which You can change the Http port for ePBX40. Default is 10087. Note: After Changing the Http port, you should reboot your ePBX40 manually to activate Http Port setting. Web Title Enter the display name of Web Title User ID Enter the User ID. Default is root. Password Enter the Password. Default is root. Telnet Telnet Port Enter the port number which You can change the Telnet port for ePBX40. Default is 23. User ID Enter the User ID. Default is root. Password Enter the Password. Default is root. 86 Welltech Technology Co., Ltd. 3.5.5 Firmware Upload Click Management, and then click the Firmware Upload table. The screen appears as follows. Figure 3.5.5-1 Firmware Upload The following table describes the features in this screen. Table 3.5.5-1 Firmware Upload Label Description Application, Library Select one option to upload ePBX40 Firmware from your computer. The default is Application. Firmware Upload File Type in the location of the file you want to upload in this field or click the Browser button to find it. Browse Click Browser to find the file you want to upload. Apply Click the Apply button to begin the upload process. This process may take about two minutes. Cancel Click the Cancel button to exit this screen without saving. Note: Normally, you only need to upgrade the Application but in some situation you may need to upgrade the Library. For more information, please refer to the released note of ePBX40. After pressing Apply, please wait for successful message appeared, and DO NOT power off. After upload successfully, on screen will show up successful messages. Please reboot system to renew system firmware. 87 Welltech Technology Co., Ltd. 3.5.6 Music Upload You can customize Ring Back Tone by uploading new wave file on ePBX40. Please record wave file format as both PCM and G729. Channel Mode: Mono, Frequency: 8K, Bit Rate: 16 bits. And the file size must less than 2 Mbytes. Click Management, and then click the Music Upload table. The screen appears as shown. Figure 3.5.6-1 Music Upload The following table describes the feature in this screen. Table 3.5.6-1 Music Upload Label Description Hold Tone/Music RBT Select this option to upload ePBX40 Hold Tone or Music RBT file from your computer. The default is Application. Music Upload File Type in the location of the file you want to upload in this field or click the Browse button to find it. Browse Click Browser to find the file you want to upload. Apply Click the Apply button to begin the upload process. This process may take about two minutes. Cancel Click the Cancel button to exit this screen without saving. Note: After uploading successfully, on screen will show up related information. Please reboot system to renew settings. 88 Welltech Technology Co., Ltd. 3.5.7 Import Setting If You have saved ePBX40’s configuration file before by using EXPORT Command from ePBX40, you can import this file back to this ePBX40 and doesn’t need to re-configured it. Click Management, and then click the Import Setting table. The screen appears as follows. Figure 3.5.7-1 Import Setting The following table describes the features in this screen. Table 3.5.7-1 Import Setting Label Description Configuration, IVR Select one option to upload ePBX40 current configuration from Package, IVR File your computer. (gsm/g729) Import Setting Group Name Choose the Group Name of your IVR Group. File Name Choose the file name of your IVR file (gsm/g729). File Type in the location of the file you want to upload in this field or click the Browser button to find it. Browse Click Browser to find the file you want to upload. Apply Click the Apply button to begin the upload process. This process may take about two minutes. Cancel Click the Cancel button to exit this screen without saving. Note: After pressing Apply, please wait for successful messages, and DO NOT power off. After Import successfully, on screen will show up related information. Please reboot system to renew settings. 89 Welltech Technology Co., Ltd. You can choose the Configuration or IVR option and import the file to restore the configuration setting, and you can also choose the IVR File option and import a specific IVR files to ePBX40. If you choose the option to IVR File (gsm/g729). Before importing the IVR File to ePBX40, you should prepare the wav files by yourself first, the format are gsm and g729 files. You should choose the Group and select file name, then you can import a specific file with wav and g729 format to ePBX40 to replace the old one. 3.5.8 Export Setting You can export configuration and IVR Package files. If there is more than one ePBX40 need to be configured, you can export configuration of one ePBX40, and then import this setting file to other ePBX40. There is not necessary to configure each ePBX40 one by one. Click Management, and then the Export Setting table. The screen appears as follows. Figure 3.5.8-1 Export Setting The following table describes the features in this screen. Table 3.5.8-1 Export Setting Label Description Configuration Select one option to save ePBX40 current configuration to your computer. Default file name is configuration.cfg IVR Package Select this option to save ePBX40 IVR voice wave file to your computer. Default file Name: sounds.ivr Export Click Export to save your customized settings and exit this screen. 90 Welltech Technology Co., Ltd. 3.5.9 Reset To Default Click Management, and then the Reset To Default table. Click the Apply button to clears all user-entered configuration information and returned the ePBX40 to factory default settings. Notice: before you rest to default, please go to page of Export Setting to export your configuration and IVR package. Figure 3.5.9 Rest To Default 3.5.10 Reboot System Click Management, and then the Reboot System table. Click the Apply button to Reboot the ePBX40. This action does not affect the ePBX40’s configuration data. Figure 3.5.10 Reboot System 91 Welltech Technology Co., Ltd. CH4. Application Setting 4.1Call Features 4.1.1 Authentication When ePBX40 got a Registration or Invite (incoming call) from a remote location, it will reply Authentication due to security consideration. 4.1.2 Automated Attendant The ePBX40 supports Automated Attendant. You can record the default greeting and the other announcements by Extension. 4.1.3 Call Forward on Busy ePBX40 supports “server forward”. Dial *90 to activate Call Forward on Busy and *91 to deactivate. For example, extension 101 dial *90102, there will be an announcement to notify you the call forward is enabled, and someone call to extension 101 but it is on the phone. The call will be routed to extension 102. 4.1.4 Call Forward on No Answer ePBX40 supports “server forward”. Dial *92 to activate Call Forward on No Answer and *93 to deactivate. For example, extension 101 dial *92102, there will be an announcement to notify you the call forward is enabled, and someone call to extension 101 but it is no answer. The call will be routed to extension 102. 4.1.5 Call Forward Unconditional ePBX40 supports “server forward”. Dial *72 to active Unconditionally Forward and *73 to deactivate. For example, extension 101 dial *72102, there will be an announcement to notify you the call forward is enabled, and someone call to extension 101, the call will be routed to extension 102 directly. 4.1.6 Call Forward Unavailable If subscriber is not registering, the call will be forwarded to another number when Unavailable Forward is enabled. To activate Unavailable Forward, press *94xxx, where the *94 is the feature code to activate Unavailable Forward and xxx is the destination number. Pressing [*95] to deactivate. For example, extension 101 dial *94102, there will be an announcement to notify you the Unavailable Forward is enabled, and someone call to extension 101, but it is not registering, the call will be routed to extension 102. 92 Welltech Technology Co., Ltd. 4.1.7 Call Hold/Retrieval (Client based) Normally, the call hold and call retrieval was done by Client. ePBX40 only relay the SIP signal for such function between two clients. 4.1.8 Call Routing Click Configuration, and then click the Outgoing Routing table, you can set the Outgoing Call Routing record for a specified Prefix. Click Configuration, and then click the Incoming Routing table, you can set the Incoming Call Routing record for a specified Prefix. 4.1.9 Call Waiting (Client or extension devices based Only ) The ePBX40 does not support “server Call Waiting” now (because ePBX40 loading is too heavy to support it). This feature should be implemented by client side only. 4.1.10 Caller ID The ePBX40 will route the caller ID from caller to callee ( receiver side ). 4.1.11 CLIR (Caller Line Identification Restriction) CLIR means "Caller Line Identification Restriction". It is a feature to hide the caller's number. For example, extension 101 calls to extension 102. But 101 doesn’t like to show up the Calling ID to extension 102. So extension 101 can activate this feature to hide the calling ID. When extension 102 got a call from extension 101, the caller ID number of 102 should display "Anonymous". ePBX40 could support two kinds of CLIR. a) CLIR (per call): for example, extension 101 doesn’t like to show the Calling ID to extension 102. Extension 101 can dial *67102 where the *67 is the feature for CLIR (per call). When 102 got the incoming call, the LCD of 102 should display "Anonymous". If 101 dial 102, then 102 should see the Caller ID as 101. b) CLIR (database type): For example, 101 dial *31, ePBX40 should add the CLIR record of extension 101 into its database. When extension 101 calls other extensions, the called party should always show "Anonymous". Extension 101 can dial *32 to disable this feature. 4.1.12 Do Not Disturb (Client based) ePBX40 can support “server DND”. User can dial to *78 to active it and *79 to deactivate. For example, extension 101 dial to *78, there will be an announcement to notify you the DND is enabled, and someone call to 101 then the call will be rejected directly. 93 Welltech Technology Co., Ltd. 4.1.13 Flexible Extension Logic You can set the digits length of subscriber to 25 digits. 4.1.14 Music On Hold ePBX40 will play music if the user is under Hold status. 4.1.15 Music On Transfer ePBX40 will play music if the user is under Transfer status. 4.1.16 Call Pickup ePBX40 can support Call Pickup. For example: Ext-A is ringing, Ext-B can press *1 for Global or Group pickup. You can also press *213 + ext number for specific call pick up. 4.1.17 Call Park By default, extension 700 was used to park a call. While in conversation, press transfer key and then dial 700. ePBX40 will park and hold this call at number 701 or 702. Dial number 701 at different extension can retrieve this parked call and the conversation can be continued. If a caller has been parked for a longer time than 45 seconds, ePBX40 will ring the original extension who initiated this parked call. 4.1.18 Time and Date You can select correct Time Zone at ePBX40, the time will affect CDR time display. 4.1.19 Trunk (i.e. WellGate 2540 or 2680 FXO Gateway) You can install a FXO gateway as a Trunk. The FXO gateway can connect with a PSTN line so that your Extension can dial to PSTN via external FXO gateway. 4.1.20 IP Phone You can install IP Phone as an Extension such as LP389S or iP380 IP Phone. 4.1.21 Call Monitor Click Information, and then click Call Monitor, you can monitor the call status if the call were routed by ePBX40. 94 Welltech Technology Co., Ltd. CH5 Appendix 5.1 Application between Welltech CPE device and ePBX40 SIP Extensions register to ePBX40 Step 1: Setup network for ePBX40 and iP380 or LP389S IP Phone Set up ePBX40 with WAN [IP_Address:61.218.41.183, Netmask: 255.255.255.240, Gateway: 61.218.41.177, DNS: 168.95.1.1], LAN [IP_Address:192.168.22.100, Netmask: 255.255.255.0]. After setting finish, please press Apply and reboot your ePBX40. When you got a new ePBX40, you can connect its LAN port to configure Network Setting first. The default LAN IP address is 192.168.123.123. For more information, please refer to user’s manual CH2. Start to configure SIPPBX ePBX40. See the following page. 95 Welltech Technology Co., Ltd. Set up IP information for LP389S IP Phone. You can set the IP information of LP389S from its LCD via navigation keys, or you can login its WEB interface by default IP 10.1.1.3. Go to “Device Setting Network” to setup network as follows, then press Apply. For more information about LP389S, Please go to Welltech Web Site at Support and downloadIP Phone LP-389SLP389_v106 User Guide.zip to download for configuration reference. See the following webpage. Step 2: Configure Extensions In ePBX40, prepare Extension accounts for Client device. (There are 10 default Extensions, from 101 to 110, so we use the default setting for this Example). See the following ePBX40 webpage. These extensions can be external IP Phone or FXS Gateway. For more information about Extension page, please go to user’s manual CH3 Full Web Configurations. 96 Welltech Technology Co., Ltd. For LP389S or iP380 IP Phone register to ePBX40, you can use default SIP extension number or modify it. For Example: IP Phone LP389S registers to ePBX40 with account 108 of default SIP extension. You can set up the SIP configuration of LP389S by its LCD, or you can also login its WEB interface. Go to SIP lines, setup the proxy server address and registered number and etc. After configuration, please remember to Active and press Apply it. For more information about LP389S IP Phone, please refer it from user manual. The following webpage is LP389S IP Phone configuration. If all of above setting are correct, you can go to Information Subscriber Info page to confirm if the registration status are correct or not. See the following webpage. 97 Welltech Technology Co., Ltd. 5.1.1 The VOIP Gateway (2504 and 2608) can register to ePBX40 Step 1: Setup network for WellGate 2504 (4 port FXS gateway) and WellGate 2608 (8 port FXS Gateway) Set up IP information for WellGate 2504. You can set up the IP information, login its WEB interface by default IP 10.1.1.3. Go to Device Setting page to setup network setting as below. After set up the network info, please press Apply and wait for about 1 minute to active new IP address. For more information about WellGate 2504, please go to Welltech’s Web Page (www.welltech.com) at Support and DownloadVOIP GatewayWellGate 2504 WellGate 2504 User Guide Release to download and refer it. See the following page. Set IP information for WellGate 2608. You can set up the IP info, login its WEB interface by default IP 10.1.1.3. Go to Network Configuration WAN Setting page to setup network setting as below. After set the network info, please press Apply after reboot system. For more information about WellGate 2608, please go to Welltech web page (www.welltech.com) at Support and DownloadVOIP GatewayWellGate 26xx 26xx User Manual V108a.pdf to download and refer it. 98 Welltech Technology Co., Ltd. Step 2: Prepare extension numbers for WellGate 2504 and WellGate 2608 In ePBX40, prepare extension accounts for WellGate 2504 and WellGate 2608. (There are numbers 104 to 107 for 2504, 108 to 115 for 2608). Step 3: Setup extension numbers for WellGate 2504 and WellGate 2608 This Example, we have 1 WellGate 2504 and 1 WellGate 2608 register to ePBX40 with extension numbers 104 to 115. You can set up the SIP Information of two devices by its WEB interface for configuration as follows. For WellGate 2504, please go to FXS Setting page to enter accounts information and proxy server information. After configure, please press Apply. For more information about 99 Welltech Technology Co., Ltd. WellGate 2504, please go to Welltech web page (www.welltech.com) at support&downladVOIP GatewayWellGate 2504 WG2504 User Guide Release 2.03f to download and refer it. Set up account information as following picture. Set up Proxy server information as following picture. For WellGate 2608, please go to General configuration SIP Setting page to enter proxy server information and Line Setting page to enter accounts information. After configure, please press Apply and Reboot system. For more information about WellGate 100 Welltech Technology Co., Ltd. 2608, please go to Welltech company web page (www.welltech.com) at support&downladVOIP GatewayWellGate 26xx 26xx User Manual V108a.pdf to download and refer it. Set up Proxy server information as following picture. 101 Welltech Technology Co., Ltd. Set up accounts information as following picture. If all above settings are correct, you can go to Information Subscriber Info page to confirm the register status on ePBX40 WEB page. 102 Welltech Technology Co., Ltd. 5.1.2 ePBX40 register to IP Telephony Service Provider(ITSP) as a SIP trunk ePBX40 can register to another ITSP as a SIP trunk. So the Subscriber from ITSP and ePBX40 extensions can call each other. Step1: Obtain register account Apply an account from ITSP with “Line number 0700666888, Account: 0700666888, Password: 123123”. And the proxy address of ITSP is 211.22.42.195, port 5062. Maybe the ITSP also need to provide “Realm”, so you should also enter Realm for the SIP Trunk, otherwise the call from ePBX40 to ITSP may be rejected. For more information about “Realm”, please contact with your ITSP engineer. Step2: Set up ePBX40 to register ITSP. Enter the necessary information in SIP Trunk Reg page. In this example, the “Realm” is 103 Welltech Technology Co., Ltd. empty due to some ITSP does not need Authentication for incoming call. For more information about SIP Trunk, please go to this user’s manual at CH3 Full Web Configurations. Step3: Confirm the register status of SIP Trunk Please confirm the register status. If the Status shows Registered, which means SIP Trunk registration is OK. Step4: Create a same sip trunk number in Trunk Setting Enter account number and passowrd at field of Trunk Number and Password. The Host type must selected “Pre-define”. Enter SIP Server IP address and port number which were provided from IP Telephony Service provider (ITSP). See the following webpage screen. 104 Welltech Technology Co., Ltd. Step5: Set up Prefix route in Outgoing Routing page Go to Outgoing Routing Page to set up Prefix route, so that the Extensions can dial to Mobile Phone 0922123123 via ITSP. For more information about Routing Table, please go to user’s manual CH3 Full Web Configurations. In this example, we set up prefix code at 09 and there is not limited digits length (0). The first destination is going to ITSP and the 2nd destination is going to built-in FXO Line port number (201). And we also set up the Routed Password for this prefix route. 105 Welltech Technology Co., Ltd. Confirm the Outgoing Call Rule. Now the Extensions can dial to 09xxxxxxxx to reach mobile phone via ITSP. If extension called out with prefix number 0, the ePBX40 will play an voice announcement to this extension and ask for entering route password. If the password is correct, then ePBX40 will dial to destination. 106 Welltech Technology Co., Ltd. 5.1.3 Subscriber in ITSP side should be able to contact Extension of ePBX40. The number of 070111222 is a subscriber from ITSP. It can call extension of ePBX40. See the following diagram. Step1: Confirm the ePBX40 register to ITSP successfully. Go to “SIP Trunk Reg.” Page to confirm the registered status of SIP Trunk. The Status must display “Registered” Step2: Set up incoming call rule. Go to Routing Table page to set up incoming call rule. If ePBX40 received an incoming call with prefix number 0700, it should play a voice greeting to caller and wait for entering extension number. Dial 101 to reach extension of ePBX40. 107 Welltech Technology Co., Ltd. We set up the incoming call rule with Prefix 0700 and Digits Length 4. When ePBX40 received a called number with 0700, it will drop 4 digits after add **999. Now, if ePBX40 got an incoming call from ITSP with number 0700, ePBX40 will dial to **999 (auto attendant). Then the caller can continue to dial the Extensions. 108 Welltech Technology Co., Ltd. 5.2 Application of multiple ePBX40 There are two ePBX40 in two locations, one is in HQ and another is in Branch. We hope both companies can call the extensions between each other. And we hope extensions in Branch can call PSTN via HQ. 5.2.1 Connect multiple ePBX40 and call extensions between them Case 1. Call extensions each other Step1: Set up ePBX40 Realm Set up IP-PBX Realm at HQ. 109 Welltech Technology Co., Ltd. Set up IP-PBX Realm of Branch. Step2: Set up Trunk Account In HQ, set up trunk account for Branch, so that Branch can register to HQ. We suggest you to set up the DialPlan to [ext+allroute]. That means the call from Branch can use all the resource of HQ. In Branch, set up trunk account for HQ, so that HQ can register to Branch. 110 Welltech Technology Co., Ltd. We suggest you to set up the DialPlan to [ext+allroute]. That means the call from HQ can use all the resource of Branch. Step3: Register to each other In HQ, register to Branch as follows. Remember to set up the Realm as well. In Branch, register to HQ as follows. Remember to set up the Realm as well. 111 Welltech Technology Co., Ltd. Step4: Set up outgoing routing In HQ, set up routing table as follows. So the user in HQ can call extension 401 which is located in Branch. Note: In the outgoing routing, only allow one office dial out. So you also need to create another prefix number and let extensions of office 2 can dial out to Branch office if you had created office 2. The Example is as follows. If extensions of office 2 want to dial to ext:401, user has to dial 55401. 112 Welltech Technology Co., Ltd. In Branch IP PBX, set up routing table as follows. So the user in Branch can call extension 301 which is located in Branch. Now the extensions of these two ePBX40 can call each other. There is an important thing you should pay attention. All the numbers of HQ and Branch should be unique. For example, there is an Extension 401 in branch. If you hope user in HQ can contact with 401 which located in Branch, there should not have any number equal to 401 in HQ, including Extension, Trunk, Dial Group…, etc. Case 2. Call local PSTN number between two ePBX40s Suppose in Branch office local PSTN area code is 02, number is 8xxxxxxx, HQ local PSTN area code is 04, number is 2xxxxxxx. Step1: Set up outgoing routing In HQ, set up routing table as follows. The Prefix code is 02; Digits Length is 0; Drop is 2, so the user in HQ can call PSTN number 028xxxxxxx which is located in Branch. The ePBX40 will drop 02 first and then send 8xxxxxxx to Branch. See the following webpage screen. 113 Welltech Technology Co., Ltd. In Branch, set up routing table as follows. Prefix is 8; Digits Length is 0, so the user in HQ can call PSTN number 028xxxxxxx which is located in Branch. The ePBX40 will receive and allow 8xxxxxxx to send out to FXO Port in Branch. 114 Welltech Technology Co., Ltd. In Branch, set up routing table as follows. Prefix is 04; Digits Length is 0; Drop is 2, so the user in Branch can call PSTN number 042xxxxxxx which is located in HQ. The ePBX40 will drop 02 first and then send 2xxxxxxx to Branch. In HQ, set routing table as below. Prefix is 2; Digits Length is 0, so the user in Branch can call PSTN number 042xxxxxxx which is located in Branch. The ePBX40 will receive and allow 2xxxxxxx to send out in HQ FXO Port. Note: in the outgoing routing only allow one office dial out. So you also need to create another prefix number and let extensions of office 2 can be dial out to Branch office, if you had created 115 Welltech Technology Co., Ltd. office. 5.2 CDR Concept (Real Time) ePBX40 has 2 types for CDR collection, one is Real Time and another is Storage. This chapter introduce you how to use Real Time CDR function. Step 1: Install CDR program at your computer. So the PC will be a CDR collection server. Go to http://www.welltech.com/support/ePBX40.htm to download CDR program and install it to your PC. After installing, press Start for CDR collection. Step 2: In your ePBX40, go to [Configuration IP PBX] to set up the CDR Mode to Real Time and also set up the CDR-Server IP. 116 Welltech Technology Co., Ltd. Step 3: If ePBX40 got a call record, it will send a TCP packet to CDR server. Then CDR server will show the CDR log as follows. Step 4: CDR server will collect CDR record for each day as CSV files. That means the CDR server will store many CDR files. Please press View CDR goes to \CDRCollector_v1xx\ReceiveFile to get the CDR CSV files. The file name looks like [2012-9-28.csv], and you can use Microsoft Excel to open and edit it. We strongly suggest you to STOP CDR Collector if you want to view Today’s call record 117 Welltech Technology Co., Ltd. (TodayTemp.csv), otherwise the CDR Collector may lose the new call recorded due to the CSV file for Today (TodayTemp.csv) is being opened. The CDR file looks like below. The title for each column is: A:Caller ID Name, B:Caller ID, C:Called ID, D:Start date and Time, E:Answer date and Time, F: End call date and Time, G:Call Duration (seconds), H:Talk Time (Seconds), I:State. 5.3 How to convert audio files ePBX40 supports voice code G.729 and GSM audio files; we provide a free tool for convert audio files. Please go to ePBX40 of Welltech’s WEB page to download it. Please put the audio files in the Convert folder. For example: convert the greeting-day.wav file to G.729 file. Step 1: Execution the tool of convert 118 Welltech Technology Co., Ltd. There are list all of support files type. Step 2: Enter the original file name and destination name after pressing enter key. 119 Welltech Technology Co., Ltd. Step 3: Complete done. Step 4: check the new generation file in the Convert folder. 5.4 How to analyze disconnect tone We provide a free tool for analysis disconnect tone. Please go to ePBX40 of Welltech’s WEB page to download it. Step 1: open disconnect tone file (see figure 1) 120 Welltech Technology Co., Ltd. Figure 1. Step 2: select all of waveform then go to Analyze Plot Spectrum. (See figure 2) Figure 2 Step 3: move the cursor to first peak. And you can see low frequency on red block. (See figure 3) 121 Welltech Technology Co., Ltd. Figure 3 Step 4: move the cursor to secondary peak. And you can see the high frequency on red block. (See figure 4) Figure 4 Step 5: Enter two values on Freq 1 and Freq 2 at disconnect 1. (See figure 5) 122 Welltech Technology Co., Ltd. Figure 5 Step 6: select a thick waveform to see the value of Ring ON time. Please select it from front to end. This value is 0.27sec (270ms). (See figure 6) Figure 6 Step 7: select a slim waveform between two thick waveforms to see the value of Ring OFF time. This value is 0.27sec (270ms). (See figure 7) 123 Welltech Technology Co., Ltd. Figure 7 Step 8: Enter two values on On 1 and Off 1 and On 2 and Off 2 of disconnect 1. (See figure 8) Step 9: Click apply and reboot it. Notice: About more disconnect tone type information. (Such as single frequency) Please go to Welltech company web FAQ Analyze Disconnect Tone of Wellgate 2540 to refer it. 124 Welltech Technology Co., Ltd. 5.5 Small office IP-PBX application Figure 1 Notice: the EPBX40 default codec is G729 (we support codec for g729/g711a/g711u but just one can be selected to use) so please make sure your SIP device or SIP App software supports codec for g729. 125 Welltech Technology Co., Ltd. Configure of this case (see figure 1): 1. Introduction of network environment ADSL Modem for EPBX40 WAN port and Router (with DHCP server) use. (set for static IP or PPPoE, we suggest you to use static IP, for instance: we set WAN IP is 61.218.42.211, subnet mask is 255.255.255.240, default gateway is 61.218.42.209) DHCP server for IP Phone or PC to use in private network (For instance: we set IP range is 192.168.1.2 ~192.168.1.123 for static IP and 192.168.1.124~192.168.1.254 for DHCP) EPBX40 LAN port used static IP 192.168.1.123 (default is 192.168.123.123) 2. Start to configure EPBX40 Step 1: to connect LAN port IP with 192.168.123.123 by IE browser. Step 2: to be changed LAN port IP to 192.168.1.123 / subnet mask 255.255.255.0, WAN port IP to 61.218.42.211, subnet mask 255.255.255.240, default gateway 61.218.42.209. (see figure 2) 126 Welltech Technology Co., Ltd. Figure 2 Step 3: register to EPBX40 by IP Phone or FXS gateway or other SIP software. EPBX40 prepare 10 extension numbers by default. User can to use it or to create new extensions. (see figure 3) Figure 3 Step 4: to configure outgoing routing. Specify more prefixes number to go out via local FXO port. Such as local Telecom number. In this we are area code is 02, local Telecom number is 8xxxxxxx, total digits length is 10 (include area code 02). Configure all options. 127 Welltech Technology Co., Ltd. Prefix: 02 Digits Length: 10 Destination: selected one or more FXO line number to out. (201~208 is EPBX40 default FXO line numbers) (see figure 4 and figure 5) Figure 4 Figure 5 128 Welltech Technology Co., Ltd. 3. Outgoing via remote FXO Gateway In this case, we use Wellgate2540 (4 port FXO) and Wellgate2680 (8 port FXO) for example. Step 1: Creating a new SIP trunk or using default sip trunk on EPBX40 (EPBX40 prepare 2 SIP trunk numbers of 888 and 889 by default) (see figure 6) Figure 6 Step 2: using Wellgate2540 sip trunk (figure 7) to register number 888 and Wellgate2680 sip trunk (figure 8) to register number 889. Figure 7 129 Welltech Technology Co., Ltd. Figure 8 Step 3: go to Epbx40 web page Configuration Outgoing Routing to configure destination via number 888 or 889. 130 Welltech Technology Co., Ltd.