Download BULK LOG STAND 2 Patent
Transcript
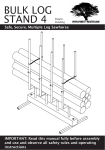
BULK LOG
STAND 2
Patent
Pending
Safe, Secure, Multiple Log Sawhorse
IMPORTANT: Read this manual fully before assembly
and use and observe all safety rules and operating
instructions
Contents
Technical Specification
2
Technical Specification
Exploded View
Parts List
Assembly
Operation
Safety
Warranty
Maximum total weight of logs
Length
Width
Height (stored)
Minimum working height
Maximum working height
Weight
2
3
4
4
8
10
12
150 kg
640 mm
590 mm
690 mm
720 mm
1300 mm
8.2 kg
Bulk Log Stand 2
2
Exploded View
1
10
3
9
8
4
5
7
6
Bulk Log Stand 2
3
Parts List
Item
1
2
3
4
5
6
7
8
9
10
Description
Log securing chain
Telescopic upright
U-Support
M8 x 45 mm cap head bolt
Large washer
Small washer
Foot
Bolt tube
Wood base
Thumbscrew
Qty
2
4
2
4
2
2
2
2
1
4
STEP 1:
Assembly
Insert the bolt tubes (8) into
the outermost holes in the
wood base (9). The tubes
should be inserted from
the side with only 2 holes
visible, until approximately
28 - 29 mm of tube is still
protruding.
4
Bulk Log Stand 2
STEP 2:
Assembly
Insert the protruding end
of one of the bolt tubes
into the hole in the top
of a foot (7) and secure
using a M8 x 45mm bolt
(4) and small washer (6).
Ensure that the bolt is
tight before proceeding to
step 3.
STEP 3:
Using a M8 x 45mm bolt
(4) and a large washer (5),
secure the bolt tube to the
wood base.
Bulk Log Stand 2
5
Assembly
STEP 4:
Repeat the procedure for
the remaining foot. As
before, first connect the
foot to the bolt tube using
a M8 x 45 bolt and small
washer then connect the
tube to the wood with a
M8 x 45 bolt and large
washer.
2
1
STEP 5:
Insert a U-Support (3) into
one of the holes in the top
of the wood base. Ensure
the locating tube is fully
seated in the hole. Repeat
for the second U-Support.
6
Bulk Log Stand 2
Insert a telescopic upright
(2) into one of the guide
tubes of a U-Support and
secure with a thumbscrew
(10). Repeat for the
remaining telescopic
tubes.
Bulk Log Stand 2
Assembly
STEP 6:
7
Operation
STEP 1:
Adjust the height of the
telescopic uprights to suit
the quantity of logs to be
sawn. To adjust an upright,
unscrew the thumbscrew,
move the upright to the
required height and tighten
the thumbscrew.
eq
ua
l
eq
ua
l
STEP 2:
Load the logs into the
U-Supports so that the
overhangs outside of the
U-Supports are roughly
equal.
Ensure you do not exceed
the maximum total weight of
logs given on page 2.
8
Bulk Log Stand 2
STEP 3:
Operation
Take a log securing chain (1)
and place one loop over each
of the telescopic uprights of
a U-Support. Note that the
flat part of the loop to which
the chain is attached should
be angled downwards.
Allow the chain to slide
down the uprights so it rests
on the logs.
Repeat for the second
securing chain on the other
U-Support.
1
3
2
STEP 4:
Begin cutting the logs by
sawing the overhanging
ends to the required
length of log then saw
down between the two
U-Supports.
If the overhanging ends
need to be cut into multiple
logs then cut alternately
from each end in order to
keep the weight over the
centre of the stand.
Bulk Log Stand 2
9
Operation
STEP 5:
For easy storage turn the
U-Supports so they are
roughly parallel to the side
of the wood base and lower
the telescopic uprights.
The feet can also be turned
roughly parallel to the base,
note it may be necessary to
loosen the top bolt in each
bolt tube to do this. Ensure that when the feet are
turned back to the working
position the bolts are retightened.
Saftey
IMPORTANT: Please read these instructions care-
10
fully. Note the safe operational requirements, warnings & cautions. Use the product correctly and with
care for the purpose for which it is intended. Failure to
do so may cause damage and/or personal injury and
will invalidate the warranty. Please keep these instructions safe for future use.
Bulk Log Stand 2
IMPORTANT SAFETY INFORMATION
Use the log stand on firm level ground only. Do not use on
sloping or uneven ground.
After securing the logs in the log stand, check the stability
and balance before starting to cut. The log stand must not be
able to tilt.
Safety
Before using the log stand always check that all nuts and
bolts are secure and that the log stand is not damaged.
Read and observe the operating instructions of the chainsaw
you are using and wear all recommended safety gear. Always
wear safety shoes or boots in case a log is accidentally
dropped on your feet.
Only cut with the bottom of the chainsaw bar as the log
may otherwise shift away from the rotating chain, become
unstable and increase the risk of personal injury.
Clear and stack the sawn logs away from the log stand to
keep the work area clear of obstructions and safety hazards.
IMPORTANT: Check that the logs are secure and the log
stand is stable before beginning to cut.
WARNING: Do not exceed the specified maximum total log
weight as given on page 2 of this manual.
Bulk Log Stand 2
11
Warranty
Warranty
This product carries a one (1) year limited warranty against
defects in workmanship and materials. Should this product
become defective within the stated warranty period, return it
to the store with proof of purchase, and it will be replaced or
repaired free of charge.
This warranty does not apply if the product has been
subjected to physical abuse, neglect, misuse, wear and tear,
incorrect use or has been modified in any way.
This warranty in no way affects your statutory rights.
IMPORTANT: NO RESPONSIBILITY IS ACCEPTED FOR
INCORRECT USE OF THIS PRODUCT.
NOTE: It is our policy to continually improve products and as such
we reserve the right to alter data, specifications and component
parts without prior notice.
Manufactured under license for Forest Master Limited.
Head Office:
Forest Master Ltd, Industry Road, Heaton, Newcastle Upon Tyne,
NE6 5XB, United Kingdom.
Tel: +44 191 2966939
email: [email protected] - web: www.forest-master.com
12
Bulk Log Stand 2


