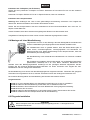
1
BEDIENUNGSANLEITUNG USER MANUAL NKB SERIES ACTIVE SPEAKER SYSTEM aaaaaaaaaaaaaaaaaaaaaaaaaaaaaaaaaaaaaaaaaaaaaaaaaaaaaaaa aaaaaaaaaaaaaaaaaaaaaaaaaaaaaaaaaaaaaaaaaaaaaaaaaaaaaaaa aaaaaaaaaaaaaaaaaaaaaaaaaaaaaaaaaaaaaaaaaaaaaaaaaaaaaaaa aaaaaaaaaaaaaaaaaaaaaaaaaaaaaaaaaaaaaaaaaaaaaaaaaaaaaaaa aaaaaaaaaaaaaaaaaaaaaaaaaaaaaaaaaaaaaaaaaaaaaaaaaaaaaaaa aaaaaaaaaaaaaaaaaaaaaaaaaaaaaaaaaaaaaaaaaaaaaaaaaaaaaaaa aaaaaaaaaaaaaaaaaaaaaaaaaaaaaaaaaaaaaaaaaaaaaaaaaaaaaaaa aaaaaaaaaaaaaaaaaaaaaaaaaaaaaaaaaaaaaaaaaaaaaaaaaaaaaaaa aaaaaaaaaaaaaaaaaaaaaaaaaaaaaaaaaaaaaaaaaaaaaaaaaaaaaaaa aaaaaaaaaaaaaaaaaaaaaaaaaaaaaaaaaaaaaaaaaaaaaaaaaaaaaaaa aaaaaaaaaaaaaaaaaaaaaaaaaaaaaaaaaaaaaaaaaaaaaaaaaaaaaaaa aaaaaaaaaaaaaaaaaaaaaaaaaaaaaaaaaaaaaaaaaaaaaaaaaaaaaaaa aaaaaaaaaaaaaaaaaaaaaaaaaaaaaaaaaaaaaaaaaaaaaaaaaaaaaaaa aaaaaaaaaaaaaaaaaaaaaaaaaaaaaaaaaaaaaaaaaaaaaaaaaaaaaaaa aaaaaaaaaaaaaaaaaaaaaaaaaaaaaaaaaaaaaaaaaaaaaaaaaaaaaaaa aaaaaaaaaaaaaaaaaaaaaaaaaaaaaaaaaaaaaaaaaaaaaaaaaaaaaaaa aaaaaaaaaaaaaaaaaaaaaaaaaaaaaaaaaaaaaaaaaaaaaaaaaaaaaaaa aaaaaaaaaaaaaaaaaaaaaaaaaaaaaaaaaaaaaaaaaaaaaaaaaaaaaaaa aaaaaaaaaaaaaaaaaaaaaaaaaaaaaaaaaaaaaaaaaaaaaaaaaaaaaaaa aaaaaaaaaaaaaaaaaaaaaaaaaaaaaaaaaaaaaaaaaaaaaa aaaaaaaaaaaaaaaaaaaaaaaaaaaaaaaaaaaaaaaaaaaaaaaaaaaaaaaa aaaaaaaaaaaaaaaaaaaaaaaaaaaaaaaaaaaaaaaaaaaaaa aaaaaaaaaaaaaaaaaaaaaaaaaaaaaaaaaaaaaaaaaaaaaaaaaaaaaaaa aaaaaaaaaaaaaaaaaaaaaaaaaaaaaaaaaaaaaaaaaaaaaa aaaaaaaaaaaaaaaaaaaaaaaaaaaaaaaaaaaaaaaaaaaaaaaaaaaaaaaa aaaaaaaaaaaaaaaaaaaaaaaaaaaaaaaaaaaaaaaaaaaaaa aaaaaaaaaaaaaaaaaaaaaaaaaaaaaaaaaaaaaaaaaaaaaaaaaaaaaaaa aaaaaaaaaaaaaaaaaaaaaaaaaaaaaaaaaaaaaaaaaaaaaa aaaaaaaaaaaaaaaaaaaaaaaaaaaaaaaaaaaaaaaaaaaaaaaaaaaaaaaa aaaaaaaaaaaaaaaaaaaaaaaaaaaaaaaaaaaaaaaaaaaaaa aaaaaaaaaaaaaaaaaaaaaaaaaaaaaaaaaaaaaaaa aaaaaaaaaaaaaaaaaaaaaaaaaaaaaaaaaaaaaaaaaaaaaaaaaaaaaaaa aaaaaaaaaaaaaaaaaaaaaaaaaaaaaaaaaaaaaaaaaaaaaa aaaaaaaaaaaaaaaaaaaaaaaaaaaaaaaaaaaaaaaa aaaaaaaaaaaaaaaaaaaaaaaaaaaaaaaaaaaaaaaaaaaaaaaaaaaaaaaa aaaaaaaaaaaaaaaaaaaaaaaaaaaaaaaaaaaaaaaaaaaaaa aaaaaaaaaaaaaaaaaaaaaaaaaaaaaaaaaaaaaaaa aaaaaaaaaaaaaaaaaaaaaaaaaaaaaaaaaaaaaaaaaaaaaaaaaaaaaaaa aaaaaaaaaaaaaaaaaaaaaaaaaaaaaaaaaaaaaaaaaaaaaa aaaaaaaaaaaaaaaaaaaaaaaaaaaaaaaaaaaaaaaa aaaaaaaaaaaaaaaaaaaaaaaaaaaaaaaaaaaaaaaaaaaaaaaaaaaaaaaa aaaaaaaaaaaaaaaaaaaaaaaaaaaaaaaaaaaaaaaaaaaaaa aaaaaaaaaaaaaaaaaaaaaaaaaaaaaaaaaaaaaaaa aaaaaaaaaaaaaaaaaaaaaaaaaaaaaaaaaaaaaaaaaaaaaaaaaaaaaaaa aaaaaaaaaaaaaaaaaaaaaaaaaaaaaaaaaaaaaaaaaaaaaa aaaaaaaaaaaaaaaaaaaaaaaaaaaaaaaaaaaaaaaa aaaaaaaaaaaaaaaaaaaaaaaaaaaaaaaaaaaaaaaaaaaaaaaaaaaaaaaa aaaaaaaaaaaaaaaaaaaaaaaaaaaaaaaaaaaaaaaaaaaaaa aaaaaaaaaaaaaaaaaaaaaaaaaaaaaaaaaaaaaaaa aaaaaaaaaaaaaaaaaaaaaaaaaaaaaaaaaaaaaaaaaaaaaaaaaaaaaaaa aaaaaaaaaaaaaaaaaaaaaaaaaaaaaaaaaaaaaaaaaaaaaa aaaaaaaaaaaaaaaaaaaaaaaaaaaaaaaaaaaaaaaa aaaaaaaaaaaaaaaaaaaaaaaaaaaaaaaaaaaaaaaaaaaaaaaaaaaaaaaa aaaaaaaaaaaaaaaaaaaaaaaaaaaaaaaaaaaaaaaaaaaaaa aaaaaaaaaaaaaaaaaaaaaaaaaaaaaaaaaaaaaaaa aaaaaaaaaaaaaaaaaaaaaaaaaaaaaaaaaaaaaaaaaaaaaaaaaaaaaaaa aaaaaaaaaaaaaaaaaaaaaaaaaaaaaaaaaaaaaaaaaaaaaa aaaaaaaaaaaaaaaaaaaaaaaaaaaaaaaaaaaaaaaa aaaaaaaaaaaaaaaaaaaaaaaaaaaaaaaaaaaaaaaaaaaaaaaaaaaaaaaa aaaaaaaaaaaaaaaaaaaaaaaaaaaaaaaaaaaaaaaaaaaaaa aaaaaaaaaaaaaaaaaaaaaaaaaaaaaaaaaaaaaaaa aaaaaaaaaaaaaaaaaaaaaaaaaaaaaaaaaaaaaaaaaaaaaaaaaaaaaaaa aaaaaaaaaaaaaaaaaaaaaaaaaaaaaaaaaaaaaaaaaaaaaa aaaaaaaaaaaaaaaaaaaaaaaaaaaaaaaaaaaaaaaa aaaaaaaaaaaaaaaaaaaaaaaaaaaaaaaaaaaaaaaaaaaaaaaaaaaaaaaa aaaaaaaaaaaaaaaaaaaaaaaaaaaaaaaaaaaaaaaaaaaaaa aaaaaaaaaaaaaaaaaaaaaaaaaaaaaaaaaaaaaaaa aaaaaaaaaaaaaaaaaaaaaaaaaaaaaaaaaaaaaaaaaaaaaaaaaaaaaaaa aaaaaaaaaaaaaaaaaaaaaaaaaaaaaaaaaaaaaaaaaaaaaa aaaaaaaaaaaaaaaaaaaaaaaaaaaaaaaaaaaaaaaa aaaaaaaaaaaaaaaaaaaaaaaaaaaaaaaa aaaaaaaaaaaaaaaaaaaaaaaaaaaaaaaaaaaaaaaaaaaaaaaaaaaaaaaa aaaaaaaaaaaaaaaaaaaaaaaaaaaaaaaaaaaaaaaaaaaaaa aaaaaaaaaaaaaaaaaaaaaaaaaaaaaaaaaaaaaaaa aaaaaaaaaaaaaaaaaaaaaaaaaaaaaaaa aaaaaaaaaaaaaaaaaaaaaaaaaaaaaaaaaaaaaaaaaaaaaaaaaaaaaaaa aaaaaaaaaaaaaaaaaaaaaaaaaaaaaaaaaaaaaaaaaaaaaa aaaaaaaaaaaaaaaaaaaaaaaaaaaaaaaaaaaaaaaa aaaaaaaaaaaaaaaaaaaaaaaaaaaaaaaa aaaaaaaaaaaaaaaaaaaaaaaaaaaaaaaaaaaaaaaaaaaaaaaaaaaaaaaa aaaaaaaaaaaaaaaaaaaaaaaaaaaaaaaaaaaaaaaaaaaaaa aaaaaaaaaaaaaaaaaaaaaaaaaaaaaaaaaaaaaaaa aaaaaaaaaaaaaaaaaaaaaaaaaaaaaaaa aaaaaaaaaaaaaaaaaaaaaaaaaaaaaaaaaaaaaaaaaaaaaaaaaaaaaaaa aaaaaaaaaaaaaaaaaaaaaaaaaaaaaaaaaaaaaaaaaaaaaa aaaaaaaaaaaaaaaaaaaaaaaaaaaaaaaaaaaaaaaa aaaaaaaaaaaaaaaaaaaaaaaaaaaaaaaa aaaaaaaaaaaaaaaaaaaaaaaaaaaaaaaaaaaaaaaaaaaaaaaaaaaaaaaa aaaaaaaaaaaaaaaaaaaaaaaaaaaaaaaaaaaaaaaaaaaaaa aaaaaaaaaaaaaaaaaaaaaaaaaaaaaaaaaaaaaaaa aaaaaaaaaaaaaaaaaaaaaaaaaaaaaaaa aaaaaaaaaaaaaaaaaaaaaaaaaaaaaaaaaaaaaaaaaaaaaaaaaaaaaaaa aaaaaaaaaaaaaaaaaaaaaaaaaaaaaaaaaaaaaaaaaaaaaa aaaaaaaaaaaaaaaaaaaaaaaaaaaaaaaaaaaaaaaa aaaaaaaaaaaaaaaaaaaaaaaaaaaaaaaa aaaaaaaaaaaaaaaaaaaaaaaaaaaaaaaaaaaaaaaaaaaaaaaaaaaaaaaa aaaaaaaaaaaaaaaaaaaaaaaaaaaaaaaaaaaaaaaaaaaaaa aaaaaaaaaaaaaaaaaaaaaaaaaaaaaaaaaaaaaaaa aaaaaaaaaaaaaaaaaaaaaaaaaaaaaaaa aaaaaaaaaaaaaaaaaaaaaaaaaaaaaaaaaaaaaaaaaaaaaaaaaaaaaaaa aaaaaaaaaaaaaaaaaaaaaaaaaaaaaaaaaaaaaaaaaaaaaa aaaaaaaaaaaaaaaaaaaaaaaaaaaaaaaaaaaaaaaa aaaaaaaaaaaaaaaaaaaaaaaaaaaaaaaa aaaaaaaaaaaaaaaaaaaaaaaaaaaaaaaaaaaaaaaaaaaaaaaaaaaaaaaa aaaaaaaaaaaaaaaaaaaaaaaaaaaaaaaaaaaaaaaaaaaaaa aaaaaaaaaaaaaaaaaaaaaaaaaaaaaaaaaaaaaaaa aaaaaaaaaaaaaaaaaaaaaaaaaaaaaaaa aaaaaaaaaaaaaaaaaaaaaaaaaaaaaaaaaaaaaaaaaaaaaaaaaaaaaaaa aaaaaaaaaaaaaaaaaaaaaaaaaaaaaaaaaaaaaaaaaaaaaa aaaaaaaaaaaaaaaaaaaaaaaaaaaaaaaaaaaaaaaa aaaaaaaaaaaaaaaaaaaaaaaaaaaaaaaa aaaaaaaaaaaaaaaaaaaaaaaaaaaaaaaaaaaaaaaaaaaaaaaaaaaaaaaa aaaaaaaaaaaaaaaaaaaaaaaaaaaaaaaaaaaaaaaaaaaaaa aaaaaaaaaaaaaaaaaaaaaaaaaaaaaaaaaaaaaaaa aaaaaaaaaaaaaaaaaaaaaaaaaaaaaaaa aaaaaaaaaaaaaaaaaaaaaaaaaaaaaaaaaaaaaaaaaaaaaaaaaaaaaaaa aaaaaaaaaaaaaaaaaaaaaaaaaaaaaaaaaaaaaaaaaaaaaa aaaaaaaaaaaaaaaaaaaaaaaaaaaaaaaaaaaaaaaa aaaaaaaaaaaaaaaaaaaaaaaaaaaaaaaa aaaaaaaaaaaaaaaaaaaaaaaaaaaaaaaaaaaaaaaaaaaaaaaaaaaaaaaa aaaaaaaaaaaaaaaaaaaaaaaaaaaaaaaaaaaaaaaaaaaaaa aaaaaaaaaaaaaaaaaaaaaaaaaaaaaaaaaaaaaaaa aaaaaaaaaaaaaaaaaaaaaaaaaaaaaaaa aaaaaaaaaaaaaaaaaaaaaaaaaaaaaaaaaaaaaaaaaaaaaaaaaaaaaaaa aaaaaaaaaaaaaaaaaaaaaaaaaaaaaaaaaaaaaaaaaaaaaa aaaaaaaaaaaaaaaaaaaaaaaaaaaaaaaaaaaaaaaa aaaaaaaaaaaaaaaaaaaaaaaaaaaaaaaa aaaaaaaaaaaaaaaaaaaaaaaaaaaaaaaaaaaaaaaaaaaaaaaaaaaaaaaa aaaaaaaaaaaaaaaaaaaaaaaaaaaaaaaaaaaaaaaaaaaaaa aaaaaaaaaaaaaaaaaaaaaaaaaaaaaaaaaaaaaaaa aaaaaaaaaaaaaaaaaaaaaaaaaaaaaaaa aaaaaaaaaaaaaaaaaaaaaaaaaaaaaaaaaaaaaaaaaaaaaaaaaaaaaaaa aaaaaaaaaaaaaaaaaaaaaaaaaaaaaaaaaaaaaaaaaaaaaa aaaaaaaaaaaaaaaaaaaaaaaaaaaaaaaaaaaaaaaa aaaaaaaaaaaaaaaaaaaaaaaaaaaaaaaa aaaaaaaaaaaaaaaaaaaaaaaaaaaaaaaaaaaaaaaaaaaaaaaaaaaaaaaa aaaaaaaaaaaaaaaaaaaaaaaaaaaaaaaaaaaaaaaaaaaaaa aaaaaaaaaaaaaaaaaaaaaaaaaaaaaaaaaaaaaaaa aaaaaaaaaaaaaaaaaaaaaaaaaaaaaaaa aaaaaaaaaaaaaaaaaaaaaaaaaaaaaaaaaaaaaaaaaaaaaaaaaaaaaaaa aaaaaaaaaaaaaaaaaaaaaaaaaaaaaaaaaaaaaaaaaaaaaa aaaaaaaaaaaaaaaaaaaaaaaaaaaaaaaaaaaaaaaa aaaaaaaaaaaaaaaaaaaaaaaaaaaaaaaa aaaaaaaaaaaaaaaaaaaaaaaaaaaaaaaaaaaaaaaaaaaaaaaaaaaaaaaa aaaaaaaaaaaaaaaaaaaaaaaaaaaaaaaaaaaaaaaaaaaaaa aaaaaaaaaaaaaaaaaaaaaaaaaaaaaaaaaaaaaaaa aaaaaaaaaaaaaaaaaaaaaaaaaaaaaaaa aaaaaaaaaaaaaaaaaaaaaaaaaaaaaaaaaaaaaaaaaaaaaa aaaaaaaaaaaaaaaaaaaaaaaaaaaaaaaaaaaaaaaa aaaaaaaaaaaaaaaaaaaaaaaaaaaaaaaa aaaaaaaaaaaaaaaaaaaaaaaaaaaaaaaaaaaaaaaaaaaaaa aaaaaaaaaaaaaaaaaaaaaaaaaaaaaaaaaaaaaaaa aaaaaaaaaaaaaaaaaaaaaaaaaaaaaaaa aaaaaaaaaaaaaaaaaaaaaaaaaaaaaaaaaaaaaaaaaaaaaa aaaaaaaaaaaaaaaaaaaaaaaaaaaaaaaaaaaaaaaa aaaaaaaaaaaaaaaaaaaaaaaaaaaaaaaa aaaaaaaaaaaaaaaaaaaaaaaaaaaaaaaaaaaaaaaaaaaaaa aaaaaaaaaaaaaaaaaaaaaaaaaaaaaaaaaaaaaaaa aaaaaaaaaaaaaaaaaaaaaaaaaaaaaaaa aaaaaaaaaaaaaaaaaaaaaaaaaaaaaaaaaaaaaaaaaaaaaa aaaaaaaaaaaaaaaaaaaaaaaaaaaaaaaaaaaaaaaa aaaaaaaaaaaaaaaaaaaaaaaaaaaaaaaa aaaaaaaaaaaaaaaaaaaaaaaaaaaaaaaaaaaaaaaaaaaaaa aaaaaaaaaaaaaaaaaaaaaaaaaaaaaaaaaaaaaaaa aaaaaaaaaaaaaaaaaaaaaaaaaaaaaaaa aaaaaaaaaaaaaaaaaaaaaaaaaaaaaaaaaaaaaaaaaaaaaa aaaaaaaaaaaaaaaaaaaaaaaaaaaaaaaaaaaaaaaa aaaaaaaaaaaaaaaaaaaaaaaaaaaaaaaa aaaaaaaaaaaaaaaaaaaaaaaaaaaaaaaaaaaaaaaaaaaaaa aaaaaaaaaaaaaaaaaaaaaaaaaaaaaaaa aaaaaaaaaaaaaaaaaaaaaaaaaaaaaaaa aaaaaaaaaaaaaaaaaaaaaaaaaaaaaaaa aaaaaaaaaaaaaaaaaaaaaaaaaaaaaaaa aaaaaaaaaaaaaaaaaaaaaaaaaaaaaaaa © Copyright Für weiteren Gebrauch aufbewahren! Keep this manual for future needs! Nachdruck verboten! Reproduction prohibited! Inhaltsverzeichnis/Table of contents 1. EINFÜHRUNG ............................................................................................................................................... 3 2. SICHERHEITSHINWEISE............................................................................................................................. 3 3. BESTIMMUNGSGEMÄSSE VERWENDUNG .............................................................................................. 5 4. RECHTLICHE HINWEISE............................................................................................................................. 7 4.1 Kleine Hörkunde....................................................................................................................................... 7 5. BEDIENELEMENTE UND ANSCHLÜSSE................................................................................................... 8 6. INSTALLATION .......................................................................................................................................... 10 6.1 Stacking ................................................................................................................................................. 11 6.2 Satellitensysteme ................................................................................................................................... 11 6.3 Montage auf einem Stativ bzw. Boxenhochständer............................................................................... 12 6.4 Montage auf einer Wandhalterung......................................................................................................... 13 6.5 Fliegende Installation ............................................................................................................................. 13 7. ANSCHLÜSSE ............................................................................................................................................ 14 7.1 Audiogeräte anschließen ....................................................................................................................... 14 7.2 Hinweise zur Verlegung Audiokabeln .................................................................................................... 14 7.3 Anschluss ans Netz................................................................................................................................ 15 8. BEDIENUNG ............................................................................................................................................... 15 8.1 MP3-Player ............................................................................................................................................ 15 9. REINIGUNG UND WARTUNG.................................................................................................................... 16 9.1 Sicherungswechsel ................................................................................................................................ 16 10. TECHNISCHE DATEN .............................................................................................................................. 17 1. INTRODUCTION ......................................................................................................................................... 18 2. SAFETY INSTRUCTIONS .......................................................................................................................... 18 3. OPERATING DETERMINATIONS.............................................................................................................. 20 4. LEGAL INSTRUCTIONS............................................................................................................................. 21 4.1 Information on hearing loss.................................................................................................................... 22 5. OPERATING ELEMENTS AND CONNECTIONS ...................................................................................... 23 6. INSTALLATION .......................................................................................................................................... 25 6.1 Stacking ................................................................................................................................................. 26 6.2 Satellite systems .................................................................................................................................... 26 6.3 Installation on a stand or speaker stand ................................................................................................ 27 6.4 Installation on a wall mounting............................................................................................................... 28 6.5 Suspended installation ........................................................................................................................... 28 7. CONNECTIONS .......................................................................................................................................... 29 7.1 Connecting audio devices ...................................................................................................................... 29 7.2 Information on installing audio cables.................................................................................................... 29 7.3 Connection with the mains ..................................................................................................................... 30 8. OPERATION ............................................................................................................................................... 30 8.1 MP3 player ............................................................................................................................................. 30 9. CLEANING AND MAINTENANCE ............................................................................................................. 31 9.1 Replacing the fuse ................................................................................................................................. 31 10. TECHNICAL SPECIFICATIONS............................................................................................................... 32 Diese Bedienungsanleitung gilt für die Artikelnummern/This user manual is valid for the article numbers 11038781, 11038782, 11038784, 11038785, 11038787, 11038788, 11038790, 11038791 Das neueste Update dieser Bedienungsanleitung finden Sie im Internet unter: You can find the latest update of this user manual in the Internet under: www.omnitronic.com 2/32 00058980.DOC, Version 1.1 BEDIENUNGSANLEITUNG Aktive Lautsprecherbox ACHTUNG! Gerät vor Feuchtigkeit und Nässe schützen! Vor Öffnen des Gerätes vom Netz trennen! Lesen Sie vor der ersten Inbetriebnahme zur eigenen Sicherheit diese Bedienungsanleitung sorgfältig durch! Alle Personen, die mit der Aufstellung, Inbetriebnahme, Bedienung, Wartung und Instandhaltung dieses Gerätes zu tun haben, müssen - entsprechend qualifiziert sein - diese Bedienungsanleitung genau beachten - die Bedienungsanleitung als Teil des Produkts betrachten - die Bedienungsanleitung während der Lebensdauer des Produkts behalten - die Bedienungsanleitung an jeden nachfolgenden Besitzer oder Benutzer des Produkts weitergeben - sich die letzte Version der Anleitung im Internet herunter laden 1. EINFÜHRUNG Wir freuen uns, dass Sie sich für eine OMNITRONIC Lautsprecherbox entschieden haben. Wenn Sie nachfolgende Hinweise beachten, sind wir sicher, dass Sie lange Zeit Freude an Ihrem Kauf haben werden. Nehmen Sie das Gerät aus der Verpackung. 2. SICHERHEITSHINWEISE Diese Lautsprecherbox hat das Werk in sicherheitstechnisch einwandfreiem Zustand verlassen. Um diesen Zustand zu erhalten und einen gefahrlosen Betrieb sicherzustellen, muss der Anwender unbedingt die Sicherheitshinweise und die Warnvermerke beachten, die in dieser Gebrauchsanweisung enthalten sind. Unbedingt lesen: Bei Schäden, die durch Nichtbeachtung dieser Bedienungsanleitung verursacht werden, erlischt der Garantieanspruch. Für daraus resultierende Folgeschäden übernimmt der Hersteller keine Haftung. Bitte überprüfen Sie vor der ersten Inbetriebnahme, ob kein offensichtlicher Transportschaden vorliegt. Sollten Sie Schäden an dem Anschlusspanel oder am Gehäuse entdecken, nehmen Sie die Lautsprecherbox nicht in Betrieb und setzen sich bitte mit Ihrem Fachhändler in Verbindung. BRANDGEFAHR! Die verwendeten Materialien dieser Lautsprecherbox sind leicht entflammbar. Wird am Einsatzort B1 gefordert, muss der Betreiber deshalb die Oberfläche in regelmäßigen Abständen mit einem geeigneten Brandschutzmittel behandeln. 3/32 00058980.DOC, Version 1.1 LEBENSGEFAHR! Eine herabstürzende Lautsprecherbox kann tödliche Unfälle verursachen. Alle Sicherheitshinweise in dieser Bedienungsanleitung müssen unbedingt eingehalten werden. Bitte beachten Sie, dass Boxen durch Bassschläge und Vibrationen verrutschen können. Außerdem stellen unbeabsichtigte Stöße durch DJs, Musiker oder das Publikum ein erhöhtes Risiko dar. Deshalb muss die Box immer gegen Verrutschen gesichert oder der entsprechende Bereich abgesperrt werden. ACHTUNG! Seien Sie besonders vorsichtig beim Umgang mit gefährlicher Netzspannung. Bei dieser Spannung können Sie einen lebensgefährlichen elektrischen Schlag erhalten! Der Aufbau entspricht der Schutzklasse I. Der Netzstecker darf nur an eine Schutzkontakt-Steckdose angeschlossen werden, deren Spannung und Frequenz mit dem Typenschild des Gerätes genau übereinstimmt. Ungeeignete Spannungen und ungeeignete Steckdosen können zur Zerstörung des Gerätes und zu tödlichen Stromschlägen führen. Den Netzstecker immer als letztes einstecken. Der Netzstecker muss dabei gewaltfrei eingesetzt werden. Achten Sie auf einen festen Sitz des Netzsteckers. Lassen Sie die Netzleitung nicht mit anderen Kabeln in Kontakt kommen! Seien Sie vorsichtig beim Umgang mit Netzleitungen und -anschlüssen. Fassen Sie diese Teile nie mit feuchten Händen an! Feuchte Hände können tödliche Stromschläge zu Folge haben. Netzleitungen nicht verändern, knicken, mechanisch belasten, durch Druck belasten, ziehen, erhitzen und nicht in die Nähe von Hitze- oder Kältequellen bringen. Bei Missachtung kann es zu Beschädigungen der Netzleitung, zu Brand oder zu tödlichen Stromschlägen kommen. Die Kabeleinführung oder die Kupplung am Gerät dürfen nicht durch Zug belastet werden. Es muss stets eine ausreichende Kabellänge zum Gerät hin vorhanden sein. Andernfalls kann das Kabel beschädigt werden, was zu tödlichen Stromschlägen führen kann. Achten Sie darauf, dass die Netzleitung nicht gequetscht oder durch scharfe Kanten beschädigt werden kann. Überprüfen Sie das Gerät und die Netzleitung in regelmäßigen Abständen auf Beschädigungen. Werden Verlängerungsleitungen verwendet muss sichergestellt werden, dass der Adernquerschnitt für die benötigte Stromzufuhr des Gerätes zugelassen ist. Alle Warnhinweise für die Netzleitung gelten auch für evtl. Verlängerungsleitungen. Gerät bei Nichtbenutzung und vor jeder Reinigung vom Netz trennen! Fassen Sie dazu den Netzstecker an der Grifffläche an und ziehen Sie niemals an der Netzleitung! Ansonsten kann das Kabel und der Stecker beschädigt werden was zu tödlichen Stromschlägen führen kann. Sind Stecker oder Geräteschalter, z. B. durch Einbau nicht erreichbar, so muss netzseitig eine allpolige Abschaltung vorgenommen werden. Wenn der Netzstecker oder das Gerät staubig ist, dann muss es außer Betrieb genommen werden, der Stromkreis muss allpolig unterbrochen werden und das Gerät mit einem trockenen Tuch gereinigt werden. Staub kann die Isolation reduzieren, was zu tödlichen Stromschlägen führen kann. Stärkere Verschmutzungen im und am Gerät dürfen nur von einem Fachmann beseitigt werden. Es dürfen unter keinen Umständen Flüssigkeiten aller Art in Steckdosen, Steckverbindungen oder in irgendwelche Geräteöffnungen oder Geräteritzen eindringen. Besteht der Verdacht, dass - auch nur minimale - Flüssigkeit in das Gerät eingedrungen sein könnte, muss das Gerät sofort allpolig vom Netz getrennt werden. Dies gilt auch, wenn das Gerät hoher Luftfeuchtigkeit ausgesetzt war. Auch wenn das Gerät scheinbar noch funktioniert, muss es von einen Fachmann überprüft werden ob durch den Flüssigkeitseintritt eventuell Isolationen beeinträchtigt wurden. Reduzierte Isolationen können tödliche Stromschläge hervorrufen. In das Gerät dürfen keine fremden Gegenstände gelangen. Dies gilt insbesondere für Metallteile. Sollten auch nur kleinste Metallteile wie Heft- und Büroklammern oder gröbere Metallspäne in das Gerät gelangen, 4/32 00058980.DOC, Version 1.1 so ist das Gerät sofort außer Betrieb zu nehmen und allpolig vom Netz zu trennen. Durch Metallteile hervorgerufene Fehlfunktionen und Kurzschlüsse können tödliche Verletzungen zur Folge haben. Bevor das Gerät eingeschaltet wird, müssen alle Fader und Lautstärkeregler auf "0" bzw. auf Minimum gestellt werden. ACHTUNG: Boxen immer zuletzt einschalten und zuerst ausschalten! Kinder und Laien von der Box fern halten! GESUNDHEITSRISIKO! Beim Betreiben einer Beschallungsanlage lassen sich Lautstärkepegel erzeugen, die zu irreparablen Gehörschäden führen können. Im Gehäuseeinneren befinden sich keine zu wartenden Teile. Eventuelle Servicearbeiten sind ausschließlich dem autorisierten Fachhandel vorbehalten! 3. BESTIMMUNGSGEMÄSSE VERWENDUNG Bei dieser Lautsprecherbox handelt es sich um ein aktives System zur Festinstallation und für den Mobilbetrieb. Dieses Produkt wurde ausschließlich zur Verwendung in Innenräumen konzipiert. Die Modelle NKB-208A und NKB-208AP sind für den Anschluss an 230 V AC, 50 Hz ~ Wechselspannung zugelassen. Die Modelle NKB-210A und NKB-210AP sind für den Anschluss an 115/250 V AC, 50/60 Hz ~ Wechselspannung zugelassen. Die Modelle NKB-212A, NKB-215A, NKB-212AP, NKB-215AP sind für den Anschluss an 90-250 V AC, 50/60 Hz ~ Wechselspannung zugelassen. Bitte beachten Sie: An ein Aktivsystem dürfen nur Signale mit Line-Pegel angeschlossen werden. Die Eingänge niemals an den Lautsprecherausgang einer Endstufe anschließen! Die angegebene Maximalleistung der Lautsprecherbox beschreibt kurzfristige Leistungsspitzen (Peak), die die Box maximal aufnehmen kann. Die entsprechende RMS-Dauerleistung ist - wie bei allen ähnlichen Boxen (auch anderer Hersteller) - deutlich geringer. Die Maximalleistung der Lautsprecherbox darf niemals überschritten werden. Bitte achten Sie während des Betriebes darauf, dass die Lautsprecherbox stets angenehm klingt. Werden Verzerrungen hörbar ist davon auszugehen, dass entweder der Verstärker oder die Lautsprecherbox überlastet sind. Dies kann schnell zu Schäden entweder an dem Verstärker oder an der Lautsprecherbox führen. Regeln Sie daher bei hörbaren Verzerrungen die Lautstärke entsprechend herunter, um Schäden zu vermeiden. Durch Überlast zerstörte Boxen sind von der Garantie ausgeschlossen. Beim Betreiben einer Beschallungsanlage lassen sich Lautstärkepegel erzeugen, die zu Gehörschäden führen können. Bitte beachten Sie unbedingt den Abschnitt "Rechtliche Hinweise". ACHTUNG! Lautsprecherboxen dürfen nur von unterwiesenen Personen betrieben werden. Gefahr durch abstürzende Boxen und von Gehörschäden durch zu hohe Schallpegel! Die wechselnden örtlichen Gegebenheiten müssen sicherheitstechnisch berücksichtigt werden. Die Lautsprecherbox darf nicht in einer Umgebung eingesetzt oder gelagert werden, in der mit Spritzwasser, Regen, Feuchtigkeit oder Nebel zu rechnen ist. Beim Einsatz von Nebelgeräten ist zu beachten, dass die Box nie direkt dem Nebelstrahl ausgesetzt ist und mindestens 0,5 m von einem Nebelgerät entfernt betrieben wird. Der Raum darf nur so stark mit Nebel gesättigt sein, dass eine gute Sichtweite von mindestens 10 m besteht. Die Umgebungstemperatur muss zwischen -5° C und +45° C liegen. Halten Sie die Lautsprecherbox von direkter Sonneneinstrahlung (auch beim Transport in geschlossenen Wägen) und Heizkörpern fern. Die relative Luftfeuchte darf 50 % bei einer Umgebungstemperatur von 45° C nicht überschreiten. Dieses Gerät darf nur in einer Höhenlage zwischen -20 und 2000 m über NN betrieben werden. 5/32 00058980.DOC, Version 1.1 Diese Lautsprecherbox darf nur auf einen festen, ebenen, rutschfesten, erschütterungsfreien, schwingungsfreien und feuerfesten Untergrund aufgestellt werden. Bitte beachten Sie: Beim Einsatz dieser Lautsprecherbox in öffentlichen bzw. gewerblichen Bereichen ist eine Fülle von Vorschriften zu beachten, die hier nur auszugsweise wiedergegeben werden können. Der Betreiber muss sich selbständig um Beschaffung der geltenden Sicherheitsvorschriften bemühen und diese einhalten! Vergewissern Sie sich vor der Montage, dass die Montagefläche mindestens die 5-fache Punktbelastung des Eigengewichtes der Installation aushalten kann (z. B. 20 kg Gewicht - 100 kg Punktbelastung). Die Montagehöhe der Lautsprecherbox darf ohne Absturzsicherung niemals 100 cm überschreiten. Die Aufhängevorrichtung der Lautsprecherbox muss so gebaut und bemessen sein, dass sie 1 Stunde lang ohne dauernde schädliche Deformierung das 10-fache der Nutzlast aushalten kann. ACHTUNG! Diese Lautsprecherbox darf niemals auf eine andere Lautsprecherbox aufgestellt werden Lebensgefahr durch herabstürzende Boxen! ACHTUNG! Diese Lautsprecherbox darf niemals fliegend aufgehängt werden - Lebensgefahr durch herabstürzende Boxen! Diese Lautsprecherbox lässt sich als Topteil auf eine Bassbox (Satellitensystem), einen Boxenhochständer, ein geeignetes Stativ oder eine geeignete Wandhalterung montieren. Die maximale Belastbarkeit der Distanzstange, des Boxenhochständers, des Stativs oder der Wandhalterung darf niemals überschritten werden. Dabei muss jedoch unbedingt sichergestellt werden, dass das Satellitensystem über eine ausreichende Standfestigkeit verfügt. Es sind nur solche Systeme zulässig, bei denen das Eigengewicht der Bassbox doppelt so hoch ist als das des Topteils. Außerdem gilt, dass die Grundfläche der Bassbox in Bezug auf das montierte Topteil immer ausreichend dimensioniert sein muss, damit ein Umstürzen verhindert wird. Achten Sie bei der Montage, beim Abbau und bei der Durchführung von Servicearbeiten darauf, dass der Bereich unterhalb des Montageortes abgesperrt ist. Nehmen Sie die Lautsprecherbox erst in Betrieb, nachdem Sie sich mit seinen Funktionen vertraut gemacht haben. Lassen Sie die Lautsprecherbox nicht von Personen bedienen, die sich nicht mit der Anlage auskennen. Wenn Anlagen nicht mehr korrekt funktionieren, ist das meist das Ergebnis von unsachgemäßer Bedienung! Diese Lautsprecherbox ist nicht für den harten Road-Einsatz gedacht. Die Box ist nur für den gelegentlichen Transport geeignet. Beim Transport muss die Box vorsichtig und ruckfrei bewegt werden. Lautsprecherboxen dürfen nicht fliegend mit Krananlagen befördert werden. Das Ablegen oder Stapeln schwerer Gegenstände auf der Lautsprecherbox ist nicht zulässig. Lautsprecherboxen dürfen niemals von Personen bestiegen werden. Reinigen Sie die Lautsprecherbox niemals mit Lösungsmitteln oder scharfen Reinigungsmitteln, sondern verwenden Sie ein weiches und angefeuchtetes Tuch. Beachten Sie bitte, dass eigenmächtige Veränderungen an der Lautsprecherbox aus Sicherheitsgründen verboten sind. Wird die Box anders verwendet als in dieser Bedienungsanleitung beschrieben, kann dies zu Schäden am Produkt führen und der Garantieanspruch erlischt. Außerdem ist jede andere Verwendung mit Gefahren, wie z. B. Abstürzen, Gehörschäden etc. verbunden. 6/32 00058980.DOC, Version 1.1 4. RECHTLICHE HINWEISE Beim Betreiben einer Beschallungsanlage lassen sich Lautstärkepegel erzeugen, die zu Gehörschäden führen können. Nach DIN 15905 Teil 5 hat der Veranstalter die Pflicht, den Pegel zu messen, eine Überschreitung des Grenzwertes zu verhindern und die Messung zu protokollieren. Bitte beachten Sie für den Themenkomplex "Lärm bei Veranstaltungen" die folgenden Rechtsgrundlagen: Strafgesetzbuch § 223 ff: bundesrecht.juris.de/bundesrecht/stgb TA Lärm: www.umweltdaten.de DIN 15905-5: www.din.de Arbeitsstättenverordnung § 15: www.lgl.bayern.de/arbeitsschutz Berufsgenossenschaftliche Vorschrift BGV B3: www.pr-o.info VDI-Richtlinie: VDI 2058 Blatt 2: www.vdi.de Durch hohe Lautstärken hervorgerufene Gehörschädigungen können den Tatbestand der Körperverletzung erfüllen und strafrechtlich verfolgt werden. Bitte beachten Sie, dass der Veranstalter für die Einhaltung von bestimmten Lärmpegeln verantwortlich ist. Wird dieser Lärmpegel überschritten, muss evtl. die Veranstaltung abgebrochen werden. Kommt der Veranstalter seinen Verkehrssicherungspflichten nicht nach, ist er zivilrechtlich für alle dadurch entstehende Schäden haftbar, z. B.: Die Krankenkasse der Geschädigten kann die Behandlungskosten einklagen. Der Geschädigte selbst kann auf Schmerzensgeld klagen. Dadurch entstehende (wirtschaftliche) Schäden können durch eine zivilrechtliche Klage vom Bediener der Anlage eingefordert werden. Wenn sozialversicherungspflichtig Beschäftigte eine Beschallungsanlage betreiben gilt: Bei Musikveranstaltungen liegt fast immer ein Lärmbereich vor. Somit hat der Arbeitgeber Warnschilder aufzustellen und Gehörschutzmittel bereitzustellen. Die Arbeitnehmer haben diese zu benutzen. Bitte beachten Sie: OMNITRONIC haftet nicht für Schäden, die durch unsachgemäße Installation und übermäßige Lautstärken verursacht werden! 4.1 Kleine Hörkunde Immer mehr junge Menschen leiden unter einem Hörverlust von 25 Dezibel und mehr, überwiegend hervorgerufen durch laute Musik von tragbaren MP3-Playern und CD-Abspielgeräten oder in der Diskothek. Wer Musik über Beschallungsanlagen wiedergibt, sollte wissen, welchen Schallpegeln er sein Gehör und das des Publikums aussetzt. Sie erreichen im zeitlichen Mittel ohne weiteres 75 bis 105 dB(A) in der Disco bzw. 95 bis 115 dB(A) bei einem Rockkonzert. Einzelne Pegelspitzen können die Schmerzgrenze überschreiten, die bei 130 dB(A) liegt. Solche Werte sind typisch für den Betrieb einer Motorkettensäge oder eines Presslufthammers.. Übersicht über verschiedene Schallpegel 20 dB Blätterrascheln 100 dB Presslufthammer 40 dB im Wohnraum bei geschlossenem Fenster 110 dB Rock-/Popkonzert (mit einigem Abstand zur Bühne) 60 dB Unterhaltung 125 dB startender Düsenjet in 100 m Entfernung 70 dB Großraumbüro 130 dB Schmerzgrenze 85 dB mittlerer Straßenverkehr 140 dB Düsentriebwerk in 25 Metern Entfernung 95 dB Schwerlastverkehr Dabei ist zu beachten, dass eine Verdoppelung der Leistungszufuhr eine Steigerung des Schallpegels um 3 dB bedeutet. Das menschliche Gehör empfindet aber erst eine Steigerung des Schallpegels um 10 dB als eine Verdoppelung der Lautstärke. Die Schädigung des Gehörs hängt aber vom Schallpegel ab und setzt schon lange vor dem Erreichen der Schmerzgrenze ein! Viele täuschen sich selbst mit der Vorstellung, dass Lärm etwas sei, woran man sich "gewöhne". Dass eine positive Einstellung zu einem bestimmten Geräusch physiologische Reaktionen abschwächen kann, soll 7/32 00058980.DOC, Version 1.1 nicht bestritten werden. Eine ganz andere Sache ist jedoch die schleichende Wirkung auf das Innenohr: die Überreizung und allmähliche Auflösung der Haarzellen des Cortischen Organs. Der Grund, weshalb Menschen nach einer gewissen Belastungszeit Lärm, an den sie sich scheinbar "gewöhnt" haben, nicht mehr als störend empfinden, liegt schlicht darin, dass sie einen Hörschaden erlitten haben. Dieser macht sie unempfindlich für die Frequenzen, die den lautesten Teil des Lärms bilden. "Anpassung" an Lärm kann also nichts anderes bedeuten als den Versuch, mit der durch Lärm verursachten Taubheit im täglichen Leben zurechtzukommen. Die Taubheit selbst ist unheilbar; sie kann durch Hilfsmittel wie z. B. Hörgeräte nur sehr unvollkommen ausgeglichen werden. Subjektiv wird die Hörverschlechterung so empfunden, als seien die Ohren "in Watte gepackt". Häufig bildet sie sich zwar recht rasch zurück, jedoch bleibt meist eine Einbuße der Hörempfindlichkeit zurück. Um eine ausreichende Erholung des Gehörs zu gewährleisten, sollte der Lärmpegel während mindestens 10 Stunden nicht über 70 dB(A) steigen. Wesentlich höhere Schalldruckpegel während dieser Ruhepause können die Erholung erschweren und die Bildung einer bleibenden Gehörminderung oder eines Gehörschadens (Tinitus) begünstigen. Deshalb: Wer sein Gehör liebt, sich einen Gehörschutz schiebt! 5. BEDIENELEMENTE UND ANSCHLÜSSE Diese Anleitung beschreibt exemplarisch die Rückseite des Modells NKB-215AP. Die Abbildungen und Eigenschaften der anderen Modelle sind ähnlich. 8/32 00058980.DOC, Version 1.1 1 MP3-Player 12 Line-Eingang L Nur bei den Modellen NKB-212AP und NKB-215AP. XLR-Buchse und Cinch-Buchsen für den Anschluss von Audiogeräten mit Line-Pegel-Ausgängen (z. B. Mischpult, CD-Player). 2 Display L Die Modelle NKB-208A/AP besitzen eine 6,3-mmKlinkenbuchse und Cinch-Buchsen. 3 Taste MODE langer Tastendruck: Zum Ein- und Ausschalten des MP3-Players. kurzer Tastendruck: Zum Umschalten zwischen den Datenträgern USB und Speicherkarte. 4 Taste ► 13 Durchschleifausgang Line-Ausgang (XLR- und 6,3-mm-Klinke), parallel geschaltet mit dem Line-Eingang, zum Weiterleiten des Eingangssignals an ein Gerät mit Line-Eingang, z. B. eine weitere aktive Lautsprecherbox. L Die Modelle NKB-208AAP und NKB-210A/AP besitzen jeweils nur eine 6,3-mm-Klinkenbuchse. Zum Umschalten zwischen Wiedergabe und Pause. 5 Taste Beendet die Wiedergabe. 14 Lautstärkeregler für den Mikrofoneingang 6 Taste 12 15 Lautstärkeregler für den Line-Eingang Zum Anwählen der Zufallswiedergabe. 16 Lautstärkeregler für die Gesamtlautstärke 7 Speicherkartensteckplatz Zum Einsetzen einer SD(HC)-Speicherkarte. 17 Klangregler 2-fach-Klangregelung für das Mischsignal: TREBLE = Höhen, BASS = Bässe. 8 USB-Anschluss USB-Anschluss (Typ A) zum Einstecken eines USBSpeichergeräts. 9 Tasten und 18 Betriebsanzeige 19 Übersteuerungsanzeige Kurzer Tastendruck: Zur Titelwahl Langer Tastendruck: Zum schnellen Vor-/Rücklauf 20 Netzschalter Schaltet die Lautsprecherbox an und aus. 10 Lautstärkeregler für den MP3-Player 21 Netzanschluss mit Sicherungshalter 11 Mikrofoneingang XLR- und 6,3-mm-Klinkenbuchse zum Anschluss eines Mikrofons. L Die Modelle NKB-208A/AP besitzen nur eine 6,3-mmKlinkenbuchse. Stecken Sie hier die Netzleitung ein. Ersetzen Sie die Sicherung nur bei ausgestecktem Gerät und nur durch eine gleichwertige Sicherung. Der korrekte Wert ist am Gerät angegeben. L Bei den Modellen NKB-210A/AP kann der Sicherungshalter in zwei Positionen eingesetzt werden, um zwischen 230 V und 115 V umzuschalten. Die Werkseinstellung ist 230 V. 9/32 00058980.DOC, Version 1.1 6. INSTALLATION Die Lautsprecherbox kann frei im Raum aufgestellt werden. Der Untergrund muss fest, eben, rutschfest, erschütterungsfrei, schwingungsfrei und feuerfest sein. Die Montagefläche muss mindestens die 5-fache Punktbelastung des Eigengewichtes der Installation aushalten (z. B. 20 kg Gewicht - 100 kg Punktbelastung). Die Montagehöhe der Lautsprecherbox darf ohne zusätzliche Sicherungen niemals 100 cm überschreiten. Über den Einbauflansch auf der Unterseite lässt sich die Lautsprecherbox auch auf einem Subwoofer, Stativ oder einer Wandhalterung installieren. Zum Transport sind an der Lautsprecherbox zwei Tragegriffe angebracht. Die Box soll an diesen Tragegriffen ruckfrei von zwei möglichst gleich großen Personen getragen werden. Das Tragen der Box durch eine Person soll vermieden werden, da durch das Gewicht der Box und durch die ungünstige Hebelwirkung Rückenschäden und Zerrungen möglich sind. Bitte beachten Sie, dass ab einem Boxengewicht von 25 kg immer zwei Personen zum Transport vorgeschrieben sind. Aufstellen und Ausrichten Beim Einsatz von Lautsprecherboxen auf z. B. einer Bühne sollten die Boxen immer so aufgestellt werden, dass Mikrofone und Plattenspieler sich stets hinter den Boxen befinden. So können gefährliche und unangenehme Rückkopplungen vermieden werden. Sollte solch eine Aufstellung der Boxen nicht möglich sein, dann müssen Mikrofone und Plattenspieler möglichst weit von den Boxen entfernt stehen. Beim Einsatz der Lautsprecherboxen als Monitorboxen ist sorgfältig auf die Vermeidung von Rückkopplungen zu achten. Die Lautsprecherboxen eines PA-Systems plaziert man normalerweise links und rechts neben der Bühne. Stellen Sie die Box möglichst nicht auf der Bühne auf, sondern auf geeigneten Tischen oder Podesten davor. Um eine optimale Schallverteilung und ein gutes Klangergebnis zu erzielen, sollte die Lautsprecherbox so hoch aufgestellt werden, dass sie über das Publikum hinwegschallt. Der Basslautsprecher einer fullrange Box sollte sich auf Augenhöhe des Publikums befinden. Bitte beachten Sie die Sicherheitshinweise unter den verschiedenen Installationsarten. Lautsprecherkombinationen werden immer Bass-Mitten-Höhen (von unten nach oben) aufgestellt. Dabei ist darauf zu achten, dass die Membranen aller Lautsprecher sowohl horizontal wie auch vertikal auf einer Ebene liegen. Dadurch ist gewährleistet, dass alle Frequenzbereiche gleichzeitig abstrahlen und keine Zeitund Phasenverschiebungen zwischen ihnen auftritt. Stellen Sie die Boxen immer so auf, dass ein Mindestabstand von drei Metern zum Publikum eingehalten werden kann. Nur so können Sie sicherstellen, dass bei unvernünftigen Zuhörern kein Gehörschaden verursacht wird. Sperren Sie den Bereich vor den Boxen mit geeigneten Mitteln ab. Vermeidung von Rückkoppelungen Eines der häufigsten Probleme beim Umgang mit Lautsprecherboxen sind Rückkoppelungen. Sie machen sich durch Pfeifen oder Heulen bemerkbar. Rückkoppelungen entstehen immer dann, wenn ein Signal von einem Mikrofon aufgenommen, verstärkt, vom Lautsprecher wiedergegeben und dann erneut vom Mikrofon aufgenommen wird. Die Voraussetzung für eine Rückkoppelung ist jedoch, dass das wiedergegebene Signal lauter als das Originalsignal ist. Eine Rückkoppelung tritt dabei nie über den gesamten Frequenzbereich auf, sondern nur bei einer besonders überbetonten Frequenz. Achten Sie deshalb immer darauf, dass insbesondere Monitorboxen so weit vom Mikrofon entfernt aufgestellt werden, dass eine erneute Aufnahme des Mikrofonsignals unmöglich ist. Besondere Belastungsspitzen wie Feedback (Mikrofonrückkopplung), ein starkes Bass-Brummen oder die Schläge eines auf den Boden fallenden Mikrofons können die Lautsprecher in sehr kurzer Zeit zerstören und zu sofortigen Gehörschäden führen. Solche extreme Belastungsspitzen müssen vermieden werden. Es empfiehlt sich, geeignete Equalizer oder Kompressoren/Limiter vorzuschalten. 10/32 00058980.DOC, Version 1.1 6.1 Stacking ACHTUNG! Diese Lautsprecherbox darf niemals auf eine andere Lautsprecherbox aufgestellt werden Lebensgefahr durch herabstürzende Boxen! Diese Lautsprecherbox kann auf dem Boden oder einem geeigneten Bühnenelement etc. aufgestellt werden. aaaaaaaaaaaaaaaaaaaaaaaaaaaaaaaaaaaaaaaaaaaaaaaaaa aaaaaaaaaaaaaaaaaaaaaaaaaaaaaaaaaaaaaaaaaaaaaaaaaa aaaaaaaaaaaaaaaaaaaaaaaaaaaaaaaaaaaaaaaaaaaaaaaaaa aaaaaaaaaaaaaaaaaaaaaaaaaaaaaaaaaaaaaaaaaaaaaaaaaa aaaaaaaaaaaaaaaaaaaaaaaaaaaaaaaaaaaaaaaaaaaaaaaaaa aaaaaaaaaaaaaaaaaaaaaaaaaaaaaaaaaaaaaaaaaaaaaaaaaa aaaaaaaaaaaaaaaaaaaaaaaaaaaaaaaaaaaaaaaaaaaaaaaaaa aaaaaaaaaaaaaaaaaaaaaaaaaaaaaaaaaaaaaaaaaaaaaaaaaa aaaaaaaaaaaaaaaaaaaaaaaaaaaaaaaaaaaaaaaaaaaaaaaaaa aaaaaaaaaaaaaaaaaaaaaaaaaaaaaaaaaaaaaaaaaaaaaaaaaa aaaaaaaaaaaaaaaaaaaaaaaaaaaaaaaaaaaaaaaaaaaaaaaaaa aaaaaaaaaaaaaaaaaaaaaaaaaaaaaaaaaaaaaaaaaaaaaaaaaa aaaaaaaaaaaaaaaaaaaaaaaaaaaaaaaaaaaaaaaaaaaaaaaaaa aaaaaaaaaaaaaaaaaaaaaaaaaaaaaaaaaaaaaaaaaaaaaaaaaa aaaaaaaaaaaaaaaaaaaaaaaaaaaaaaaaaaaaaaaaaaaaaaaaaa aaaaaaaaaaaaaaaaaaaaaaaaaaaaaaaaaaaaaaaaaaaaaaaaaa aaaaaaaaaaaaaaaaaaaaaaaaaaaaaaaaaaaaaaaaaaaaaaaaaa aaaaaaaaaaaaaaaaaaaaaaaaaaaaaaaaaaaaaaaaaaaaaaaaaa aaaaaaaaaaaaaaaaaaaaaaaaaaaaaaaaaaaaaaaaaaaaaaaaaa aaaaaaaaaaaaaaaaaaaaaaaaaaaaaaaaaaaaaaaaaaaaaaaaaa aaaaaaaaaaaaaaaaaaaaaaaaaaaaaaaaaaaaaaaaaaaaaaaaaa aaaaaaaaaaaaaaaaaaaaaaaaaaaaaaaaaaaaaaaaaaaaaaaaaa aaaaaaaaaaaaaaaaaaaaaaaaaaaaaaaaaaaaaaaaaaaaaaaaaa aaaaaaaaaaaaaaaaaaaaaaaaaaaaaaaaaaaaaaaaaaaaaaaaaa aaaaaaaaaaaaaaaaaaaaaaaaaaaaaaaaaaaaaaaaaaaaaaaaaa aaaaaaaaaaaaaaaaaaaaaaaaaaaaaaaaaaaaaaaaaaaaaaaaaa aaaaaaaaaaaaaaaaaaaaaaaaaaaaaaaaaaaaaaaaaaaaaaaaaa aaaaaaaaaaaaaaaaaaaaaaaaaaaaaaaaaaaaaaaaaaaaaaaaaa aaaaaaaaaaaaaaaaaaaaaaaaaaaaaaaaaaaaaaaaaaaaaaaaaa aaaaaaaaaaaaaaaaaaaaaaaaaaaaaaaaaaaaaaaaaaaaaaaaaa aaaaaaaaaaaaaaaaaaaaaaaaaaaaaaaaaaaaaaaaaaaaaaaaaa aaaaaaaaaaaaaaaaaaaaaaaaaaaaaaaaaaaaaaaaaaaaaaaaaa aaaaaaaaaaaaaaaaaaaaaaaaaaaaaaaaaaaaaaaaaaaaaaaaaa aaaaaaaaaaaaaaaaaaaaaaaaaaaaaaaaaaaaaaaaaaaaaaaaaa aaaaaaaaaaaaaaaaaaaaaaaaaaaaaaaaaaaaaaaaaaaaaaaaaa aaaaaaaaaaaaaaaaaaaaaaaaaaaaaaaaaaaaaaaaaaaaaaaaaa aaaaaaaaaaaaaaaaaaaaaaaaaaaaaaaaaaaaaaaaaaaaaaaaaa aaaaaaaaaaaaaaaaaaaaaaaaaaaaaaaaaaaaaaaaaaaaaaaaaa aaaaaaaaaaaaaaaaaaaaaaaaaaaaaaaaaaaaaaaaaaaaaaaaaa aaaaaaaaaaaaaaaaaaaaaaaaaaaaaaaaaaaaaaaaaaaaaaaaaa aaaaaaaaaaaaaaaaaaaaaaaaaaaaaaaaaaaaaaaaaaaaaaaaaa aaaaaaaaaaaaaaaaaaaaaaaaaaaaaaaaaaaaaaaaaaaaaaaaaa aaaaaaaaaaaaaaaaaaaaaaaaaaaaaaaaaaaaaaaaaaaaaaaaaa aaaaaaaaaaaaaaaaaaaaaaaaaaaaaaaaaaaaaaaaaaaaaaaaaa aaaaaaaaaaaaaaaaaaaaaaaaaaaaaaaaaaaaaaaaaaaaaaaaaa aaaaaaaaaaaaaaaaaaaaaaaaaaaaaaaaaaaaaaaaaaaaaaaaaa aaaaaaaaaaaaaaaaaaaaaaaaaaaaaaaaaaaaaaaaaaaaaaaaaa aaaaaaaaaaaaaaaaaaaaaaaaaaaaaaaaaaaaaaaaaaaaaaaaaa aaaaaaaaaaaaaaaaaaaaaaaaaaaaaaaaaaaaaaaaaaaaaaaaaa aaaaaaaaaaaaaaaaaaaaaaaaaaaaaaaaaaaaaaaaaaaaaaaaaa aaaaaaaaaaaaaaaaaaaaaaaaaaaaaaaaaaaaaaaaaaaaaaaaaa aaaaaaaaaaaaaaaaaaaaaaaaaaaaaaaaaaaaaaaaaaaaaaaaaa aaaaaaaaaaaaaaaaaaaaaaaaaaaaaaaaaaaaaaaaaaaaaaaaaa aaaaaaaaaaaaaaaaaaaaaaaaaaaaaaaaaaaaaaaaaaaaaaaaaa aaaaaaaaaaaaaaaaaaaaaaaaaaaaaaaaaaaaaaaaaaaaaaaaaa aaaaaaaaaaaaaaaaaaaaaaaaaaaaaaaaaaaaaaaaaaaaaaaaaa aaaaaaaaaaaaaaaaaaaaaaaaaaaaaaaaaaaaaaaaaaaaaaaaaa aaaaaaaaaaaaaaaaaaaaaaaaaaaaaaaaaaaaaaaaaaaaaaaaaa aaaaaaaaaaaaaaaaaaaaaaaaaaaaaaaaaaaaaaaaaaaaaaaaaa aaaaaaaaaaaaaaaaaaaaaaaaaaaaaaaaaaaaaaaaaaaaaaaaaa aaaaaaaaaaaaaaaaaaaaaaaaaaaaaaaaaaaaaaaaaaaaaaaaaa aaaaaaaaaaaaaaaaaaaaaaaaaaaaaaaaaaaaaaaaaaaaaaaaaa aaaaaaaaaaaaaaaaaaaaaaaaaaaaaaaaaaaaaaaaaaaaaaaaaa aaaaaaaaaaaaaaaaaaaaaaaaaaaaaaaaaaaaaaaaaaaaaaaaaa aaaaaaaaaaaaaaaaaaaaaaaaaaaaaaaaaaaaaaaaaaaaaaaaaa aaaaaaaaaaaaaaaaaaaaaaaaaaaaaaaaaaaaaaaaaaaaaaaaaa aaaaaaaaaaaaaaaaaaaaaaaaaaaaaaaaaaaaaaaaaaaaaaaaaa aaaaaaaaaaaaaaaaaaaaaaaaaaaaaaaaaaaaaaaaaaaaaaaaaa aaaaaaaaaaaaaaaaaaaaaaaaaaaaaaaaaaaaaaaaaaaaaaaaaa aaaaaaaaaaaaaaaaaaaaaaaaaaaaaaaaaaaaaaaaaaaaaaaaaa aaaaaaaaaaaaaaaaaaaaaaaaaaaaaaaaaaaaaaaaaaaaaaaaaa aaaaaaaaaaaaaaaaaaaaaaaaaaaaaaaaaaaaaaaaaaaaaaaaaa aaaaaaaaaaaaaaaaaaaaaaaaaaaaaaaaaaaaaaaaaaaaaaaaaa aaaaaaaaaaaaaaaaaaaaaaaaaaaaaaaaaaaaaaaaaaaaaaaaaa aaaaaaaaaaaaaaaaaaaaaaaaaaaaaaaaaaaaaaaaaaaaaaaaaa aaaaaaaaaaaaaaaaaaaaaaaaaaaaaaaaaaaaaaaaaaaaaaaaaa aaaaaaaaaaaaaaaaaaaaaaaaaaaaaaaaaaaaaaaaaaaaaaaaaa aaaaaaaaaaaaaaaaaaaaaaaaaaaaaaaaaaaaaaaaaaaaaaaaaa aaaaaaaaaaaaaaaaaaaaaaaaaaaaaaaaaaaaaaaaaaaaaaaaaa aaaaaaaaaaaaaaaaaaaaaaaaaaaaaaaaaaaaaaaaaaaaaaaaaa aaaaaaaaaaaaaaaaaaaaaaaaaaaaaaaaaaaaaaaaaaaaaaaaaa aaaaaaaaaaaaaaaaaaaaaaaaaaaaaaaaaaaaaaaaaaaaaaaaaa aaaaaaaaaaaaaaaaaaaaaaaaaaaaaaaaaaaaaaaaaaaaaaaaaa aaaaaaaaaaaaaaaaaaaaaaaaaaaaaaaaaaaaaaaaaaaaaaaaaa aaaaaaaaaaaaaaaaaaaaaaaaaaaaaaaaaaaaaaaaaaaaaaaaaa aaaaaaaaaaaaaaaaaaaaaaaaaaaaaaaaaaaaaaaaaaaaaaaaaa aaaaaaaaaaaaaaaaaaaaaaaaaaaaaaaaaaaaaaaaaaaaaaaaaa aaaaaaaaaaaaaaaaaaaaaaaaaaaaaaaaaaaaaaaaaaaaaaaaaa aaaaaaaaaaaaaaaaaaaaaaaaaaaaaaaaaaaaaaaaaaaaaaaaaa aaaaaaaaaaaaaaaaaaaaaaaaaaaaaaaaaaaaaaaaaaaaaaaaaa aaaaaaaaaaaaaaaaaaaaaaaaaaaaaaaaaaaaaaaaaaaaaaaaaa aaaaaaaaaaaaaaaaaaaaaaaaaaaaaaaaaaaaaaaaaaaaaaaaaa aaaaaaaaaaaaaaaaaaaaaaaaaaaaaaaaaaaaaaaaaaaaaaaaaa aaaaaaaaaaaaaaaaaaaaaaaaaaaaaaaaaaaaaaaaaaaaaaaaaa aaaaaaaaaaaaaaaaaaaaaaaaaaaaaaaaaaaaaaaaaaaaaaaaaa aaaaaaaaaaaaaaaaaaaaaaaaaaaaaaaaaaaaaaaaaaaaaaaaaa aaaaaaaaaaaaaaaaaaaaaaaaaaaaaaaaaaaaaaaaaaaaaaaaaa aaaaaaaaaaaaaaaaaaaaaaaaaaaaaaaaaaaaaaaaaaaaaaaaaa aaaaaaaaaaaaaaaaaaaaaaaaaaaaaaaaaaaaaaaaaaaaaaaaaa aaaaaaaaaaaaaaaaaaaaaaaaaaaaaaaaaaaaaaaaaaaaaaaaaa 6.2 Satellitensysteme aaaaaaaaaaaaaaaaaaaaaa aaaaaaaaaaaaaaaaaaaaaa aaaaaaaaaaaaaaaaaaaaaa aaaaaaaaaaaaaaaaaaaaaa aaaaaaaaaaaaaaaaaaaaaa aaaaaaaaaaaaaaaaaaaaaa aaaaaaaaaaaaaaaaaaaaaa aaaaaaaaaaaaaaaaaaaaaa aaaaaaaaaaaaaaaaaaaaaa aaaaaaaaaaaaaaaaaaaaaa aaaaaaaaaaaaaaaaaaaaaa aaaaaaaaaaaaaaaaaaaaaa aaaaaaaaaaaaaaaaaaaaaa aaaaaaaaaaaaaaaaaaaaaa aaaaaaaaaaaaaaaaaaaaaa aaaaaaaaaaaaaaaaaaaaaa aaaaaaaaaaaaaaaaaaaaaa aaaaaaaaaaaaaaaaaaaaaa aaaaaaaaaaaaaaaaaaaaaa aaaaaaaaaaaaaaaaaaaaaa aaaaaaaaaaaaaaaaaaaaaa aaaaaaaaaaaaaaaaaaaaaa Wird eine Lautsprecherbox mit Einbauflansch auf eine Bassbox montiert, spricht man von einem Satellitensystem. Dabei muss jedoch unbedingt sichergestellt werden, dass das Satellitensystem über eine ausreichende Standfestigkeit verfügt. Die Grundfläche der Bassbox muss in Bezug auf das montierte Topteil immer ausreichend dimensioniert sein, damit ein Umstürzen verhindert wird. Wenn Sie Zweifel an der Sicherheit einer möglichen Installationsform haben, installieren Sie das System NICHT! Die Verbindung zwischen Bassbox und Topteil darf ausschließlich über eine geeignete Distanzstange und passende Einbauflansche ausgeführt werden. Die maximale Belastbarkeit der Distanzstange darf niemals überschritten werden. Eine Installation als Satellitensystem darf immer nur auf dem Boden aufgestellt werden! Der Installationsort einer solchen Installation muss immer so ausgewählt werden, dass sich keine Personen unter dem System befinden können! Achten Sie darauf, dass der entsprechende Bereich abgesperrt ist. Ein unbeabsichtigtes Bewegen des Systems muss verhindert werden - auch unter Brandbedingungen! Die Aufstellung ist nur auf tragfähigen Flächen zulässig. Gegebenenfalls ist ein geeigneter Unterbau, z. B. durch einen Ausgleichsfuß, zu schaffen. Das System darf niemals bewegt werden bevor das Topteil demontiert ist! Bei der Wahl des Installationsmaterials ist auf optimale Dimensionierung zu achten um optimale Sicherheit zu gewährleisten. 11/32 00058980.DOC, Version 1.1 6.3 Montage auf einem Stativ bzw. Boxenhochständer Stative oder Satellitensysteme dürfen nur auf einer ebenen Fläche mit maximal 5° Neigung aufgestellt werden. aaaaaaaaaaaaaaaaaaaa aaaaaaaaaaaaaaaaaaaa aaaaaaaaaaaaaaaaaaaa aaaaaaaaaaaaaaaaaaaa aaaaaaaaaaaaaaaaaaaa aaaaaaaaaaaaaaaaaaaa aaaaaaaaaaaaaaaaaaaa aaaaaaaaaaaaaaaaaaaa aaaaaaaaaaaaaaaaaaaa aaaaaaaaaaaaaaaaaaaa aaaaaaaaaaaaaaaaaaaa aaaaaaaaaaaaaaaaaaaa aaaaaaaaaaaaaaaaaaaa aaaaaaaaaaaaaaaaaaaa aaaaaaaaaaaaaaaaaaaa aaaaaaaaaaaaaaaaaaaa aaaaaaaaaaaaaaaaaaaa aaaaaaaaaaaaaaaaaaaa aaaaaaaaaaaaaaaaaaaa aaaaaaaaaaaaaaaaaaaa Achtung: Auf Stativen montierte Boxen bzw. Satellitensysteme können beim Umstürzen erhebliche Verletzungen verursachen! Beim Verwenden von Stativen oder Satellitensystemen unter Einfluss von Horizontalkräften, z. B. durch Wind, kann die Standsicherheit beeinträchtigt werden. Es sind deshalb zusätzliche Sicherungsmaßnahmen, z. B. Anbringen von Ballastgewichten, zu treffen. Werden Abspannseile oder verlängerte Ausleger verwendet, Gefahrenbereich zu kennzeichnen und gegebenenfalls abzusperren. ist der Vor dem Aus- und Einfahren der Rohre muss immer ein Sicherheitsbereich um das Stativ oder Satellitensystemen herum abgesperrt werden. Dieser Sicherheitsbereich muss einen Durchmesser haben, der der 1,5-fachen maximalen Auszugshöhe entspricht. Ausgefahrene Rohre müssen immer mit den vorgesehenen Sicherungsvorrichtungen gesichert werden! Die Gesamtmasse der Installation (=Gesamtgewicht aller Einzelteile) darf die zulässige Tragfähigkeit des Montageortes niemals überschreiten. Das Stativ muss außerhalb des Handbereichs von Personen installiert werden. Ein unbeabsichtigtes Bewegen des Systems muss verhindert werden - auch unter Brandbedingungen! Der Installateur ist für die Einhaltung der vom Hersteller angegebenen Traglast, der Sicherheitsanforderungen sowie der Qualifikation eventueller Mitarbeiter verantwortlich. Während des Aufenthalts von Personen unter der Last müssen alle notwendigen Sicherheitsmaßnahmen getroffen werden, um Verletzungen zu vermeiden. Das Personal ist über den Inhalt der Betriebsanleitung und die sich aus der Nutzung des Systems ergebenden Gefahren zu unterweisen. Bezogen auf den jeweiligen Standort sind alle notwendigen Maßnahmen gegen Verschieben und zur Sicherstellung der Standsicherheit zu schaffen. Die Aufstellung ist nur auf tragfähigen Flächen zulässig. Gegebenenfalls ist ein geeigneter Unterbau, z. B. durch einen Ausgleichsfuß, zu schaffen. Das System darf niemals bewegt werden bevor das Topteil demontiert ist! Bei der Wahl des Installationsmaterials ist auf optimale Dimensionierung zu achten um optimale Sicherheit zu gewährleisten. Lösen Sie die Feststellschraube der Stellfüße. Ziehen Sie die Stellfüße aus, bis die Querstreben in einem 90° Winkel zu den Stellfüßen stehen. Ziehen Sie die Feststellschraube der Stellfüße fest. ACHTUNG: Auf rutschigen Böden sind die Stellfüße mittels Schrauben oder Nägeln an den vorgesehenen Löchern zu sichern oder Anti-Rutschmatten verwenden. 12/32 00058980.DOC, Version 1.1 Installation des TV-Zapfens (nur für Stative) Setzen Sie einen passenden TV-Zapfen am oberen Stativende auf und ziehen Sie ihn mit dem seitlichen Hebel fest. Passender TV-Zapfen: EUROLITE TV-35 TV-Zapfen für Boxen, Best.-Nr. 60000735 Installation der Lautsprecherbox Achtung: Beim Aufbringen der Last ist eine gleichmäßige Lastverteilung erforderlich. Die Traglast des Stativs bzw. Boxenhochständers darf niemals überschritten werden! Setzen Sie die Lautsprecherbox über den Anbauflansch auf den Boxenhochständer bzw. über den TVZapfen auf das Stativ auf. Achten Sie darauf, dass die maximale Auszugslänge des Rohres nicht überschritten wird. Ausgefahrene Teleskoprohre müssen immer mit einer Fallsicherung abgesichert werden. 6.4 Montage auf einer Wandhalterung Vergewissern Sie sich vor der Montage, dass die Montagefläche mindestens die 5-fache Punktbelastung des Eigengewichtes des Gerätes aushalten kann. aaaaaaaaaaaaaaaaaaaaaaaaaaa aaaaaaaaaaaaaaaaaaaaaaaaaaa aaaaaaaaaaaaaaaaaaaaaaaaaaa aaaaaaaaaaaaaaaaaaaaaaaaaaa aaaaaaaaaaaaaaaaaaaaaaaaaaa aaaaaaaaaaaaaaaaaaaaaaaaaaa aaaaaaaaaaaaaaaaaaaaaaaaaaa aaaaaaaaaaaaaaaaaaaaaaaaaaa aaaaaaaaaaaaaaaaaaaaaaaaaaa aaaaaaaaaaaaaaaaaaaaaaaaaaa aaaaaaaaaaaaaaaaaaaaaaaaaaa aaaaaaaaaaaaaaaaaaaaaaaaaaa aaaaaaaaaaaaaaaaaaaaaaaaaaa aaaaaaaaaaaaaaaaaaaaaaaaaaa aaaaaaaaaaaaaaaaaaaaaaaaaaa aaaaaaaaaaaaaaaaaaaaaaaaaaa aaaaaaaaaaaaaaaaaaaaaaaaaaa aaaaaaaaaaaaaaaaaaaaaaaaaaa aaaaaaaaaaaaaaaaaaaaaaaaaaa aaaaaaaaaaaaaaaaaaaaaaaaaaa aaaaaaaaaaaaaaaaaaaaaaaaaaa aaaaaaaaaaaaaaaaaaaaaaaaaaa aaaaaaaaaaaaaaaaaaaaaaaaaaa aaaaaaaaaaaaaaaaaaaaaaaaaaa aaaaaaaaaaaaaaaaaaaaaaaaaaa aaaaaaaaaaaaaaaaaaaaaaaaaaa aaaaaaaaaaaaaaaaaaaaaaaaaaa Der Installationsort muss so gewählt werden, dass das Gerät absolut plan an einem festen, erschütterungsfreien, schwingungsfreien und feuerfesten Ort befestigt werden kann. Mittels Wasserwaage muss überprüft werden, dass das Gerät absolut plan befestigt wurde. Die Wandhalterung muss außerhalb des Handbereichs von Personen installiert werden. Die Festigkeit der Installation hängt entscheidend von der Befestigungsunterlage (Bausubstanz, Werkstoff) wie z. B. Holz, Beton, Gasbeton, Mauersteine ab. Deshalb muss das Befestigungsmaterial unbedingt auf den jeweiligen Werkstoff abgestimmt werden. Erfragen Sie die passende Dübel/Schraubenkombination von einem Fachmann unter Angabe der max. Belastbarkeit und des vorliegenden Werkstoffes. Die Wandhalterung muss immer über alle Befestigungslöcher angebracht werden. Verwenden Sie geeignete Schrauben und vergewissern Sie sich, dass die Schrauben fest mit dem Untergrund verbunden sind. Die maximale Nutzungsdauer der Wandhalterung darf niemals überschritten werden. Vorgehensweise: Schritt 1: An der Installationsfläche der Wandhalterung befinden sich Löcher zur Installation. Schritt 2: Halten Sie die Wandhalterung an die Stelle, wo sie installiert werden soll. Schritt 3: Markieren Sie Ihre Bohrlöcher mit einem Bleistift oder einem geeigneten Werkzeug. Schritt 4: Bohren Sie die Löcher. Schritt 5: Halten Sie die Wandhalterung in der gewünschten Position und schrauben Sie sie fest. Schritt 6: Installieren Sie die Lautsprecherbox auf der Wandhalterung. 6.5 Fliegende Installation ACHTUNG! Diese Lautsprecherbox darf niemals fliegend aufgehängt werden - Lebensgefahr durch herabstürzende Boxen! 13/32 00058980.DOC, Version 1.1 7. ANSCHLÜSSE Alle Anschlüsse dürfen nur bei ausgeschaltetem Gerät hergestellt bzw. verändert werden! 7.1 Audiogeräte anschließen 1. Schließen Sie an den Line-Eingang LINE INPUT die Signalquelle an. Es können Audiogeräte mit LineAusgang wie z. B. ein Mischpult oder CD-Spieler angeschlossen werden. 2. Schließen Sie ein Mikrofon an den Mikrofoneingang MIC INPUT an. 3. Am Line-Ausgang LINE OUT steht das durchgeschleifte Eingangssignal des Line-Eingangs zur Verfügung. Hier kann z. B. der Line-Eingang einer weiteren aktiven Lautsprecherbox angeschlossen werden. Belegung symmetrische XLR-Leitung: Symmetrische XLR-Verbindung 2 1 3 1 = Masse / Schirm 2 = Plus-Phase (+) 3 = Minus-Phase (-) 1 Eingang 2 3 Ausgang Um eine XLR-Verbindung unsymmetrisch an zu schließen, müssen Pin 1 und 3 gebrückt werden. Belegung Klinkenstecker: 7.2 Hinweise zur Verlegung Audiokabeln Gute Kabelführung verbessert die Klangqualität Ihres Systems enorm. Signalkabel sollten kurz und direkt sein, da hohe Frequenzen stark gedämpft werden, wenn die Kabel unnötig lang sind. Außerdem ist die Gefahr von Brummeinstreuungen und Rauschen bei langen Kabeln erheblich größer. Müssen jedoch lange Kabelwege zurückgelegt werden, sollten auf jeden Fall symmetrische Kabel verwendet werden. Um höchste Klangqualität zu erhalten verwenden Sie zum Anschluss Ihres Equipments bitte nur hochwertige Leitungen. Behandeln Sie Kabel immer sorgfältig und schützen Sie sie beim Transport vor Beschädigung. Verlegen Sie Kabel immer sauber und übersichtlich und schützen Sie sie vor Beschädigung. Kabel müssen so verlegt werden, dass keine Personen darüber stolpern können. Fixieren Sie die Kabel immer mit geeignetem Klebeband. Kabel sollten geradlinig verlegt werden (keine Schlaufen bilden, Überschüsse S-förmig legen). Kabel immer weit entfernt von Netzzuleitungen verlegen (keinesfalls dicht parallel). Stellen Sie niemals schwere Gegenstände wie Boxen, Flightcases etc. auf Kabel. Betreiben Sie Kabel nie im aufgewickelten Zustand. 14/32 00058980.DOC, Version 1.1 7.3 Anschluss ans Netz Schließen Sie das Gerät nach dem Anschließen aller Geräte über das Netzkabel ans Netz an. Die Belegung der Anschlussleitungen ist wie folgt: Leitung Braun Blau Gelb/Grün Pin Außenleiter Neutralleiter Schutzleiter International L N Der Schutzleiter muss unbedingt angeschlossen werden! Wenn das Gerät direkt an das örtliche Stromnetz angeschlossen wird, muss eine Trennvorrichtung mit mindestens 3 mm Kontaktöffnung an jedem Pol in die festverlegte elektrische Installation eingebaut werden. Das Gerät darf nur an eine Elektroinstallation angeschlossen werden, die den VDE-Bestimmungen DIN VDE 0100 entspricht. Die Hausinstallation muss mit einem Fehlerstromschutzschalter (RCD) mit 30 mA Bemessungsdifferenzstrom ausgestattet sein. 8. BEDIENUNG 1. Stellen Sie vor dem Einschalten den Regler VOLUME auf Minimum, um Einschaltgeräusche zu vermeiden. Schalten Sie dann die Lautsprecherbox mit dem Netzschalter ein. Die Betriebsanzeige POWER leuchtet. 2. Drehen Sie den Regler VOLUME für die Gesamtlautstärke so weit auf, dass das Mischungsverhältnis der Eingangskanäle optimal eingestellt werden kann. 3. Stellen Sie mit den beiden Lautstärkereglern LEVEL das gewünschte Lautstärkeverhältnis für den Mikrofonkanal und den Line-Eingang ein. 4. Stellen Sie mit den Klangreglern das gewünschte Klangbild ein. Durch Verstellen der Regler lassen sich die Höhen (Regler TREBLE) und Bässe (Regler BASS) anheben bzw. senken. Stehen die Regler in Mittelstellung, findet keine Frequenzgangbeeinflussung statt. 5. Stellen Sie mit dem Regler VOLUME die endgültige Gesamtlautstärke ein. Bei Übersteuerung leuchtet die Anzeige CLIP. Reduzieren Sie dann die Lautstärke entsprechend. 6. Bitte achten Sie während des Betriebs darauf, dass die Lautsprecherbox stets angenehm klingt. Werden Verzerrungen hörbar, dann ist davon auszugehen, dass entweder der Verstärker oder die Lautsprecher überlastet sind. Dies kann schnell zu Schäden führen. Regeln Sie daher bei hörbaren Verzerrungen die Lautstärke entsprechend herunter, um Schäden zu vermeiden. Durch Überlast zerstörte Lautsprecher sind von der Garantie ausgeschlossen. Kontrollieren Sie regelmäßig mit einem Schallpegelmesser, ob Sie den geforderten Grenzwert einhalten. 7. Stellen Sie nach dem Betrieb den Regler VOLUME auf Minimum und schalten Sie die Lautsprecherbox mit dem Netzschalter aus. Die Betriebsanzeige erlischt. 8.1 MP3-Player L Nur bei den Modellen NKB-...AP mit integriertem MP3-Player 1. Drücken Sie die Taste MODE 3 Sekunden, um den MP3-Player einzuschalten. 2. Stecken Sie ein USB-Gerät in den USB-Anschluss ein und/oder eine Speicherkarte in den Kartensteckplatz. Nach dem Einsetzen eines Datenträgers wird dieser als Abspielmedium angewählt und eingelesen. Drücken Sie die Taste ►, um die Wiedergabe des ersten Titels zu starten. Um die Wiedergabe zu unterbrechen, drücken Sie die Taste ► erneut. Mit einem kurzen Druck auf die Taste MODE kann im Pausemodus zwischen den Datenträgern umgeschaltet werden. 3. Stellen Sie mit dem Lautstärkeregler MP3 LEVEL den Lautstärkepegel für den MP3-Player ein. 4. Mit den Tasten und kann auf Titel vor- oder zurückgesprungen und der schnelle Vor- und Rücklauf gestartet werden: kurzer Druck auf Taste : Sprung auf den nächsten Titel kurzer Druck auf Taste : Sprung auf den vorherigen Titel langer Druck auf Taste : schneller Vorlauf langer Druck auf Taste : schneller Rücklauf 5. Mit der Taste 12 aktiveren Sie die Zufallswiedergabe. Die Titel werden nun nach dem Zufallsprinzip abgespielt. Zum Zurückschalten auf normale Wiedergabe drücken Sie die Taste 12 erneut. 6. Um ein USB-Gerät zu entfernen, ziehen Sie es aus dem USB-Anschluss. Um eine Speicherkarte auszugeben, drücken Sie diese leicht an woraufhin sie herausspringt und abgezogen werden kann. Beenden Sie zuvor immer erst die Wiedergabe mit der Taste ►oder der Taste . Entfernen Sie dann erst den Datenträger, um Schäden oder Datenverlust zu vermeiden. 15/32 00058980.DOC, Version 1.1 9. REINIGUNG UND WARTUNG LEBENSGEFAHR! Vor Wartungsarbeiten unbedingt allpolig vom Netz trennen! Der Unternehmer hat dafür zu sorgen, dass sicherheitstechnische und maschinentechnische Einrichtungen mindestens alle vier Jahre durch einen Sachverständigen im Umfang der Abnahmeprüfung geprüft werden. Der Unternehmer hat dafür zu sorgen, dass sicherheitstechnische und maschinentechnische Einrichtungen mindestens einmal jährlich durch einen Sachkundigen geprüft werden. Dabei muss unter anderem auf folgende Punkte besonders geachtet werden: 1) Alle Schrauben, mit denen die Box oder Gehäuseteile montiert sind, müssen fest sitzen und dürfen nicht korrodiert sein. 2) An Gehäuse, Befestigungen und Montageort (Decke, Abhängung, Traverse) dürfen keine Verformungen sichtbar sein. 3) Die elektrischen Anschlussleitungen dürfen keinerlei Beschädigungen, Materialalterung (z. B. poröse Leitungen) oder Ablagerungen aufweisen. Weitere, auf den jeweiligen Einsatzort und die Nutzung abgestimmte Vorschriften werden vom sachkundigen Installateur beachtet und Sicherheitsmängel behoben. Die Lautsprecherbox sollte regelmäßig von Verunreinigungen wie Staub usw. gereinigt werden. Verwenden Sie zur Reinigung ein fusselfreies, angefeuchtetes Tuch. Auf keinen Fall Alkohol oder irgendwelche Lösungsmittel zur Reinigung verwenden! Im Geräteinneren befinden sich außer der Sicherung keine zu wartenden Teile. Wartungs- und Servicearbeiten sind ausschließlich dem autorisierten Fachhandel vorbehalten! 9.1 Sicherungswechsel Wenn die Feinsicherung des Gerätes defekt ist, darf diese nur durch eine Sicherung gleichen Typs ersetzt werden. Vor dem Sicherungswechsel ist das Gerät allpolig von der Netzspannung zu trennen (Netzstecker ziehen). Vorgehensweise: Schritt 1: Öffnen Sie den Sicherungshalter an der Geräterückseite mit einem passenden Schraubendreher. Schritt 2: Entfernen Sie die defekte Sicherung aus dem Sicherungshalter. Schritt 3: Setzen Sie die neue Sicherung in den Sicherungshalter ein. Schritt 4: Setzen Sie den Sicherungshalter wieder im Gehäuse ein. L Nur bei den Modellen NKB-210A/AP: Der Sicherungshalter kann in zwei Positionen eingesetzt werden, um zwischen 230 V und 115 V umzuschalten. Klingt die Lautsprecherbox verzerrt ist eventuell einer der Lautsprecher defekt. In diesem Fall die Lautsprecherbox ggf. nochmals an einem anderen Verstärker testen. Ist der Klang danach immer noch verzerrt sollte die Lautsprecherbox nicht mehr weiter betrieben werden, um weitere Schäden an der Box zu vermeiden. Setzen Sie sich in diesem Fall bitte mit einer Fachwerkstatt in Verbindung. Wenn an der Lautsprecherbox klappernde Geräusch hörbar sind könnte es sein, dass sich Schrauben durch die ständigen oder übermäßigen Vibrationen gelöst haben. In diesem Fall sollte die Lautsprecherbox von einem Fachmann überprüft werden. Außerdem muss speziell im gewerblichen Bereich vor jedem Einsatz der Lautsprecherbox geprüft werden, ob die Lautsprecherbox und die Lautsprecher in der Lautsprecherbox noch sicher befestigt sind. Sollten einmal Ersatzteile benötigt werden, verwenden Sie bitte nur Originalersatzteile. Wenn die Anschlussleitung dieses Gerätes beschädigt wird, muss sie durch eine besondere Anschlussleitung ersetzt werden, die von Ihrem Fachhändler erhältlich ist. Sollten Sie noch weitere Fragen haben, steht Ihnen Ihr Fachhändler jederzeit gerne zur Verfügung. 16/32 00058980.DOC, Version 1.1 10. TECHNISCHE DATEN Spannungsversorgung: Belastbarkeit nominal: Belastbarkeit Programm: Komponenten: Eingänge: Mic: Line: Durchschleifausgang: Max. Schalldruck (1 m): Impedanz: Frequenzbereich: Maße (HxBxT): Gewicht: NKB-208A/AP 230 V AC, 50 Hz ~ 90 W RMS 180 W 20 cm Woofer (8"), 2,5 cm Horn (1") 6,3-mm-Klinke NKB-210A/AP 115/250 V AC, 50/60 Hz ~ 120 W RMS 200 W 25 cm Woofer (10"), 3,5 cm Horn (1,35") 6,3-mm-Klinke, Stereo-Cinch 6,3-mm-Klinke 6,3-mm-Klinke, 3-pol. XLR Stereo-Cinch, 3-pol. XLR 6,3-mm-Klinke 105 dB 114 dB NKB-212A/AP NKB-215A/AP 90-250 V AC, 50/60 Hz ~ 200 W RMS 300 W 30 cm Woofer (12"), 3,5 cm Horn (1,35") 200 W RMS 300 W 38 cm Woofer (15"), 4,4 cm Horn (1,73") 6,3-mm-Klinke, 3-pol. XLR Stereo-Cinch, 3-pol. XLR 6,3-mm-Klinke, 3-pol. XLR 117 dB 120 dB 8Ω 60 Hz - 18 kHz 55 Hz - 18 kHz 50 Hz - 18 kHz 400 x 255 x 220 mm 515 x 320 x 290 mm 592 x 405 x 320 mm 8 kg 12 kg 20 kg 40 Hz - 18 kHz 710 x 485 x 380 mm 22 kg Bitte beachten Sie: Technische Änderungen ohne vorherige Ankündigung und Irrtum vorbehalten. 16.02.2012 © 17/32 00058980.DOC, Version 1.1 USER MANUAL Active Speaker System CAUTION! Keep this device away from rain and moisture! Unplug mains lead before opening the housing! For your own safety, please read this user manual carefully before you initially start-up. Every person involved with the installation, operation and maintenance of this device has to - be qualified - follow the instructions of this manual - consider this manual to be part of the total product - keep this manual for the entire service life of the product - pass this manual on to every further owner or user of the product - download the latest version of the user manual from the Internet 1. INTRODUCTION Thank you for having chosen an OMNITRONIC speaker system. If you follow the instructions given in this manual, we are sure that you will enjoy this speaker system for a long period of time. Unpack your speaker system. 2. SAFETY INSTRUCTIONS This speaker system has left our premises in absolutely perfect condition. In order to maintain this condition and to ensure a safe operation, it is absolutely necessary for the user to follow the safety instructions and warning notes written in this user manual. Important: Damages caused by the disregard of this user manual are not subject to warranty. The dealer will not accept liability for any resulting defects or problems. Please make sure that there are no obvious transport damages. Should you notice any damages on the connection panel or on the casing, do not take the speaker system into operation and immediately consult your local dealer. DANGER OF BURNING! The materials used in this speaker system are easily flammable. If B1 is required at the installation place, the surface must be treated with an appropriate fire retardant in regular intervals. DANGER TO LIFE! A crashing speaker system can cause deadly accidents. All safety instructions given in this manual must be observed. 18/32 00058980.DOC, Version 1.1 Please note that speaker systems could move due to bass-beats and vibrations. Furthermore, unintended pushes from DJs, musicians or the audience present further risk. This is why the speaker system must always be secured against moving or the respective area has to be blocked. This device falls under protection-class I. The power plug must only be plugged into a protection class I outlet. The voltage and frequency must exactly be the same as stated on the device. Wrong voltages or power outlets can lead to the destruction of the device and to mortal electrical shock. Always plug in the power plug least. The power plug must always be inserted without force. Make sure that the plug is tightly connected with the outlet. Never let the power-cord come into contact with other cables! Handle the power-cord and all connections with the mains with particular caution! Never touch them with wet hands, as this could lead to mortal electrical shock. Never modify, bend, strain mechanically, put pressure on, pull or heat up the power cord. Never operate next to sources of heat or cold. Disregard can lead to power cord damages, fire or mortal electrical shock. The cable insert or the female part in the device must never be strained. There must always be sufficient cable to the device. Otherwise, the cable may be damaged which may lead to mortal damage. Make sure that the power-cord is never crimped or damaged by sharp edges. Check the device and the power-cord from time to time. If extension cords are used, make sure that the core diameter is sufficient for the required power consumption of the device. All warnings concerning the power cords are also valid for possible extension cords. Always disconnect from the mains, when the device is not in use or before cleaning it. Only handle the power-cord by the plug. Never pull out the plug by tugging the power-cord. Otherwise, the cable or plug can be damaged leading to mortal electrical shock. If the power plug or the power switch is not accessible, the device must be disconnected via the mains. If the power plug or the device is dusty, the device must be taken out of operation, disconnected and then be cleaned with a dry cloth. Dust can reduce the insulation which may lead to mortal electrical shock. More severe dirt in and at the device should only be removed by a specialist. There must never enter any liquid into power outlets, extension cords or any holes in the housing of the device. If you suppose that also a minimal amount of liquid may have entered the device, it must immediately be disconnected. This is also valid, if the device was exposed to high humidity. Also if the device is still running, the device must be checked by a specialist if the liquid has reduced any insulation. Reduced insulation can cause mortal electrical shock. There must never be any objects entering into the device. This is especially valid for metal parts. If any metal parts like staples or coarse metal chips enter into the device, the device must be taken out of operation and disconnected immediately. Malfunction or short-circuits caused by metal parts may cause mortal injuries. Before the device is switched on all faders and volume controls have to be set to "0" or "minimum" position. CAUTION: Turn the speaker system on last and off first! Keep away children and amateurs! HEALTH HAZARD! By operating amplifying systems, you can produce excessive sound pressure levels that may lead to permanent hearing loss. There are no serviceable parts inside the speaker system. Maintenance and service operations are only to be carried out by authorized dealers. 19/32 00058980.DOC, Version 1.1 3. OPERATING DETERMINATIONS This speaker system is an active system which can be used for permanent installations or for mobile use. This product was designed for indoor use only. Models NKB-208A/AP are allowed to be operated with an alternating current of 230 V AC, 50 Hz ~. Models NKB-210A/AP are allowed to be operated with an alternating current of 115/250 V AC, 50/60 Hz ~. Models NKB-212A/AP, NKB-215A/AP are allowed to be operated with an alternating current of 90-250 V AC, 50/60 Hz ~. The given maximum power of the speaker system describes short-term peaks the system can handle as a maximum. The correspondent RMS power is - as of all comparable systems (also from other manufacturers) - significantly lower. The maximum power of the speaker system must never be exceeded. When operating the speaker system, please make sure that the loudspeakers always sound well. When distortions can be heard, either the amplifier or the loudspeaker is overloaded. Overloads can quickly lead to amplifier or speaker damage. In order to avoid damage, please reduce the volume immediately when distortions can be heard. When speaker systems are destroyed by overload, the guarantee becomes void. By operating speaker systems with an amplifier, you can produce excessive sound pressure levels that may lead to permanent hearing loss. Please refer to the explanations under "Legal instructions". WARNING! Speaker systems must only be operated by instructed persons. Danger of Life due to crashing speaker systems or hearing loss due to excessive sound pressure levels! The different local conditions have to be considered in terms of safety rules. This speaker system must never be operated or stockpiled in surroundings where splash water, rain, moisture or fog may harm the speaker system. When using smoke machines, make sure that the speaker system is never exposed to the direct smoke jet and is installed in a distance of 0.5 meters between smoke machine and speaker system. The ambient temperature must always be between -5° C and +45° C. Keep away from direct insulation (particularly in cars) and heaters. The relative humidity must not exceed 50 % with an ambient temperature of 45° C. This device must only be operated in an altitude between -20 and 2000 m over NN. This speaker system must only be installed at a solid, plane, anti-slip, vibration-free, oscillation-free and fireresistant location. Please note: when using this speaker system in public or industrial areas, a series of safety instructions have to be followed that this manual can only give in part. The operator must therefore inform himself on the current safety instructions and consider them. Before installing the system, make sure that the installation area can hold a minimum point load of 5 times the system's load (e.g. weight 20 kg - point load 100 kg). The speaker system must never be installed higher than 100 cm without secondary attachment. The installation of the speaker system has to be built and constructed in a way that it can hold 10 times the weight for 1 hour without any harming deformation. DANGER! This speaker system must never be stacked - Danger to Life due to crashing speaker systems! DANGER! This speaker system must never be suspended - Danger to Life due to crashing speaker systems! 20/32 00058980.DOC, Version 1.1 This speaker system can be installed on top of a subwoofer (satellite system), on a speaker stand, an appropriate stand or an appropriate wall mounting. The carrying capacity of the distance-tube, the speaker stand, the stand or the wall mounting must never be exceeded. The satellite system must always provide enough stability. Satellite systems are only allowed if the subwoofer's weight is twice as much as the top speaker's weight. Furthermore, the subwoofer's base surface must always be sufficiently dimensioned in relation to the top speaker in order to prevent tilting over. Make sure that the area below the installation place is blocked when rigging, derigging or servicing the fixture. Operate the speaker system only after having familiarized with its functions. Do not permit operation by persons not qualified for operating the speaker system. Most damages are the result of unprofessional operation! This speaker system is not designed for road use. The speaker system is designed only for seldom transports. When transporting this speaker system, it must be moved carefully and without force. Speaker systems must never be transported with cranes. Never stack heavy objects on this speaker system. Persons must never climb onto this speaker system. Never use solvents or aggressive detergents in order to clean the speaker system! Rather use a soft and damp cloth. Please consider that unauthorized modifications on the speaker system are forbidden due to safety reasons! If this speaker system will be operated in any way different to the one described in this manual, the product may suffer damages and the guarantee becomes void. Furthermore, any other operation may lead to dangers like crashes, hearing loss etc. 4. LEGAL INSTRUCTIONS Operating an amplification system can produce extremely high noise levels that may cause a permanent hearing loss. The legal instructions for using an amplification system vary from country to country. The user must always inform himself on the legal instructions valid in his country and apply them to his situation. Always monitor the sound pressure level when operating an amplification system in discotheques, concerts etc. Never exceed the permissible noise level exposures as specified by your authorities. The monitoring of the noise levels must be documented in an appropriate way. In Germany, the following instructions are binding: Strafgesetzbuch § 223 ff: bundesrecht.juris.de/bundesrecht/stgb TA Lärm: www.umweltdaten.de DIN 15905-5: www.din.de Arbeitsstättenverordnung § 15: www.lgl.bayern.de/arbeitsschutz Berufsgenossenschaftliche Vorschrift BGV B3: www.pr-o.info VDI-Richtlinie: VDI 2058 Blatt 2: www.vdi.de Hearing damage caused by high noise levels can be treated as physical injury and persecuted by law. Please note that the organizer is responsible for keeping to a specified noise level. If this noise level will be exceeded, the event may be cancelled immediately. If the organizer does not fulfil his safety duties, he is reliable by civil law for any damages occurred, e.g.: Pay the treatment costs of the damaged person. Pay a smart money to the damaged person. Economic damage caused can be demanded from the operator of the amplification system. 21/32 00058980.DOC, Version 1.1 If hired persons work with amplification systems: the noise levels of music events are almost always too high. This is why the entrepreneur has to set up warning signs and provide hearing protectors. The staff has to use these. Please note: OMNITRONIC cannot be made liable for damages caused by incorrect installations and excessive noise levels! 4.1 Information on hearing loss More and more young people suffer from hearing loss of 25 decibel or more, mainly caused by loud music from portable MP3 and CD players or discotheques. Everybody operating amplification systems should know to what sound pressure levels he exposes his or the audience's hearing. As an average levels between 75 and 105 dB(A) in the discotheque or 95 and 115 dB(A) at a rock concert are reached. Individual peaks can exceed the pain level at 130 dB(A). Such levels are typical for motor chainsaws or jack hammers. Overview on the different noise levels 80 dB Heavy traffic or telephone ringing 10 dB Heartbeat 20 - 30 dB Whisper 90 dB Pneumatic drill 40 dB Average home 100 dB Power mower 50 dB Light traffic 120 dB Boom box in car 60 dB Normal conversation 130 dB Pain level 70 dB Vacuum cleaner 140 dB Jet plane 30 meters overhead It is important to know that doubling the power increases the noise level by 3 dB. The human hearing does only recognizes a doubling of the sound level when the noise level is increased by 10 dB. Damaging the hearing does not depend on the sound level but on the noise level and starts way before the pain level. Many people deceive themselves by thinking that noise is something they can get accustomed to. It is possible that a positive opinion of a certain noise can reduce the physiological reaction, but the slow impacts on the inner hearing must not be neglected: over stimulation and continuous elimination of the Cortic organ's hair cells. The reason why some people have got accustomed to a certain noise level and are no longer disturbed is that they have already suffered a hearing damage. This damage make the insensitive to those frequencies forming the loudest part of the noise. Getting accustomed to noise does not mean anything other than trying to get along with the hearing loss in everyday life. The hearing loss itself cannot be healed, it can only be compensated by hearing aids. Subjectively, the hearing loss feels like dampened ears. This effect weakens with the time, but a loss in hearing sensitivity often remains. In order to relax the hearing sufficiently, the noise level should not exceed 70 dB(A) for 10 hours. Higher noise levels during this relaxing period can prevent the relaxation and promote a permanent hearing damage (Tinitus) or hearing loss. Therefore: Whoever wants to maintain his hearing should use hearing protectors! 22/32 00058980.DOC, Version 1.1 5. OPERATING ELEMENTS AND CONNECTIONS This user manual describes the rear panel of the NKB-215AP as a reference. Illustrations and features of the other models are comparable. 6 Button 12 1 MP3 player L For models NKB-212AP and NKB-215AP only. For selecting random play. 2 Display 7 Memory card slot Slot for inserting an SD(HC) card. 3 Button MODE long actuation: switches the MP3 player on and off short actuation: for switching between the data carriers USB and SD 4 Button ► 8 USB port USB port (type A) for inserting a USB storage device. 9 Buttons and For switching between play and pause. short actuation: for title selection long actuation: for fast forward/reverse 5 Button 10 Level control for the MP3 player Stops the playback. 23/32 00058980.DOC, Version 1.1 11 Microphone input 17 Tone controls XLR and 6.3 jack input for connecting a microphone. 2-way tone control for the mixed signal: TREBLE = high frequencies, BASS = low frequencies. L Model NKB-208A only have a 6.3 mm jack input. 18 Power indicator 12 Line input XLR and RCA input for connecting audio units with line level output (e.g. mixer, CD player). L Models NKB-208A/AP have 6.3 mm jack and RCA inputs. 19 Clip indication 20 Power switch Turns power to the speaker system on and off. 13 Feed-through output Line output (XLR and 6.3 mm jack), connected in parallel to line input, for feeding the input signal to a unit with line input, e.g. another active speaker system. L Models NKB-208A/AP and NKB-210A/AP only have a 6.3 mm jack input each. 14 Level control the microphone input 21 Power input and fuse holder Plug in the supplied power cable here. Only replace the fuse when the device is disconnected from mains. Only use fuses of the same rating and power. The correct fuse value is specified on the rear panel. L Models NKB-210A/AP: The fuse holder can be switched to one of two positions, i.e. 230 V and 115 V. The default setting is 230 V. 15 Level control the line input 16 Level control the overall volume 24/32 00058980.DOC, Version 1.1 6. INSTALLATION The speaker system can be set up as desired. The location must be solid, plane, anti-slip, vibration-free, oscillation-free, and fire-resistant. The installation area must hold a minimum point load of 5 times the system's load (e.g. weight 20 kg - point load 100 kg). The speaker system must never be installed higher than 100 cm without secondary attachment. The speaker system can also be installed on a subwoofer, stand or wall mounting via the flange on the bottom. The speaker system features two transportation handles. It should be carried without force by two persons of the same size. Carrying the speaker system by one person should be avoided as the high weight and the strain could lead to back damages and torsions. Please note that all speaker systems with more than 25 kg weight must be transported with two persons. Installing and orienting the speaker system When installing the speaker system on e.g. a stage, microphones and turntables should always be located behind the speaker systems. In this way, you can avoid dangerous and unpleasant feedback. If you cannot install the speaker systems this way, the microphones and turntables should be located as far away as possible from the speaker systems. When using the speaker system as monitor-system make sure to avoid feedback. The speaker systems of a PA system are normally located left and right to the stage. Do not install the speaker systems on the stage, but rather on appropriate tables or platforms in front of the stage. In order to produce a clear sound, the speaker systems should be installed in a way that they throw the sound over the audience's heads. A full-range speaker system should be installed at listeners' eye level. Please refer to the safety instructions under Installation. Loudspeaker combinations need to be installed bass-middle-high (from bottom to top). Make sure that the membranes of all speakers are in one line vertically and horizontally. Only in this way all frequency ranges are produced at the same time and without any time or phase delays. Always install the speaker systems in a way that a minimum distance of three meters to the audience is kept. This is the only way to avoid hearing damage for unreasonable listeners. Block the area in front of the speaker systems with appropriate means. Avoiding feedback One of the most frequent problems when operating speaker systems are feedback. They can be recognized by howling and growling loudspeakers. Feedback are created then a signal is recorded by a microphone, amplified, played back by a loudspeaker and then again recorded by the microphone. The prerequisite for feedback is that the played back signal is louder than the original signal. A feedback never cover the whole frequency range but only one overboosted frequency. Make sure that you install especially the monitor-speakers so far away from the microphone that another recording of the microphone signal is impossible. Extreme levels like feedback, bass-hum or the beats of a dropping microphone can destroy the loudspeakers within very short time and produce immediate hearing damage. Such extreme levels must be avoided at any rate. We recommend to use appropriate equalizers and compressors/limiters. 25/32 00058980.DOC, Version 1.1 6.1 Stacking DANGER! This speaker system must never be stacked - Danger to Life due to crashing speaker systems! This speaker system may only be installed on the floor or appropriate stage elements etc. aaaaaaaaaaaaaaaaaaaaaaaaaaaaaaaaaaaaaaaaaaaaaaaaaa aaaaaaaaaaaaaaaaaaaaaaaaaaaaaaaaaaaaaaaaaaaaaaaaaa aaaaaaaaaaaaaaaaaaaaaaaaaaaaaaaaaaaaaaaaaaaaaaaaaa aaaaaaaaaaaaaaaaaaaaaaaaaaaaaaaaaaaaaaaaaaaaaaaaaa aaaaaaaaaaaaaaaaaaaaaaaaaaaaaaaaaaaaaaaaaaaaaaaaaa aaaaaaaaaaaaaaaaaaaaaaaaaaaaaaaaaaaaaaaaaaaaaaaaaa aaaaaaaaaaaaaaaaaaaaaaaaaaaaaaaaaaaaaaaaaaaaaaaaaa aaaaaaaaaaaaaaaaaaaaaaaaaaaaaaaaaaaaaaaaaaaaaaaaaa aaaaaaaaaaaaaaaaaaaaaaaaaaaaaaaaaaaaaaaaaaaaaaaaaa aaaaaaaaaaaaaaaaaaaaaaaaaaaaaaaaaaaaaaaaaaaaaaaaaa aaaaaaaaaaaaaaaaaaaaaaaaaaaaaaaaaaaaaaaaaaaaaaaaaa aaaaaaaaaaaaaaaaaaaaaaaaaaaaaaaaaaaaaaaaaaaaaaaaaa aaaaaaaaaaaaaaaaaaaaaaaaaaaaaaaaaaaaaaaaaaaaaaaaaa aaaaaaaaaaaaaaaaaaaaaaaaaaaaaaaaaaaaaaaaaaaaaaaaaa aaaaaaaaaaaaaaaaaaaaaaaaaaaaaaaaaaaaaaaaaaaaaaaaaa aaaaaaaaaaaaaaaaaaaaaaaaaaaaaaaaaaaaaaaaaaaaaaaaaa aaaaaaaaaaaaaaaaaaaaaaaaaaaaaaaaaaaaaaaaaaaaaaaaaa aaaaaaaaaaaaaaaaaaaaaaaaaaaaaaaaaaaaaaaaaaaaaaaaaa aaaaaaaaaaaaaaaaaaaaaaaaaaaaaaaaaaaaaaaaaaaaaaaaaa aaaaaaaaaaaaaaaaaaaaaaaaaaaaaaaaaaaaaaaaaaaaaaaaaa aaaaaaaaaaaaaaaaaaaaaaaaaaaaaaaaaaaaaaaaaaaaaaaaaa aaaaaaaaaaaaaaaaaaaaaaaaaaaaaaaaaaaaaaaaaaaaaaaaaa aaaaaaaaaaaaaaaaaaaaaaaaaaaaaaaaaaaaaaaaaaaaaaaaaa aaaaaaaaaaaaaaaaaaaaaaaaaaaaaaaaaaaaaaaaaaaaaaaaaa aaaaaaaaaaaaaaaaaaaaaaaaaaaaaaaaaaaaaaaaaaaaaaaaaa aaaaaaaaaaaaaaaaaaaaaaaaaaaaaaaaaaaaaaaaaaaaaaaaaa aaaaaaaaaaaaaaaaaaaaaaaaaaaaaaaaaaaaaaaaaaaaaaaaaa aaaaaaaaaaaaaaaaaaaaaaaaaaaaaaaaaaaaaaaaaaaaaaaaaa aaaaaaaaaaaaaaaaaaaaaaaaaaaaaaaaaaaaaaaaaaaaaaaaaa aaaaaaaaaaaaaaaaaaaaaaaaaaaaaaaaaaaaaaaaaaaaaaaaaa aaaaaaaaaaaaaaaaaaaaaaaaaaaaaaaaaaaaaaaaaaaaaaaaaa aaaaaaaaaaaaaaaaaaaaaaaaaaaaaaaaaaaaaaaaaaaaaaaaaa aaaaaaaaaaaaaaaaaaaaaaaaaaaaaaaaaaaaaaaaaaaaaaaaaa aaaaaaaaaaaaaaaaaaaaaaaaaaaaaaaaaaaaaaaaaaaaaaaaaa aaaaaaaaaaaaaaaaaaaaaaaaaaaaaaaaaaaaaaaaaaaaaaaaaa aaaaaaaaaaaaaaaaaaaaaaaaaaaaaaaaaaaaaaaaaaaaaaaaaa aaaaaaaaaaaaaaaaaaaaaaaaaaaaaaaaaaaaaaaaaaaaaaaaaa aaaaaaaaaaaaaaaaaaaaaaaaaaaaaaaaaaaaaaaaaaaaaaaaaa aaaaaaaaaaaaaaaaaaaaaaaaaaaaaaaaaaaaaaaaaaaaaaaaaa aaaaaaaaaaaaaaaaaaaaaaaaaaaaaaaaaaaaaaaaaaaaaaaaaa aaaaaaaaaaaaaaaaaaaaaaaaaaaaaaaaaaaaaaaaaaaaaaaaaa aaaaaaaaaaaaaaaaaaaaaaaaaaaaaaaaaaaaaaaaaaaaaaaaaa aaaaaaaaaaaaaaaaaaaaaaaaaaaaaaaaaaaaaaaaaaaaaaaaaa aaaaaaaaaaaaaaaaaaaaaaaaaaaaaaaaaaaaaaaaaaaaaaaaaa aaaaaaaaaaaaaaaaaaaaaaaaaaaaaaaaaaaaaaaaaaaaaaaaaa aaaaaaaaaaaaaaaaaaaaaaaaaaaaaaaaaaaaaaaaaaaaaaaaaa aaaaaaaaaaaaaaaaaaaaaaaaaaaaaaaaaaaaaaaaaaaaaaaaaa aaaaaaaaaaaaaaaaaaaaaaaaaaaaaaaaaaaaaaaaaaaaaaaaaa aaaaaaaaaaaaaaaaaaaaaaaaaaaaaaaaaaaaaaaaaaaaaaaaaa aaaaaaaaaaaaaaaaaaaaaaaaaaaaaaaaaaaaaaaaaaaaaaaaaa aaaaaaaaaaaaaaaaaaaaaaaaaaaaaaaaaaaaaaaaaaaaaaaaaa aaaaaaaaaaaaaaaaaaaaaaaaaaaaaaaaaaaaaaaaaaaaaaaaaa aaaaaaaaaaaaaaaaaaaaaaaaaaaaaaaaaaaaaaaaaaaaaaaaaa aaaaaaaaaaaaaaaaaaaaaaaaaaaaaaaaaaaaaaaaaaaaaaaaaa aaaaaaaaaaaaaaaaaaaaaaaaaaaaaaaaaaaaaaaaaaaaaaaaaa aaaaaaaaaaaaaaaaaaaaaaaaaaaaaaaaaaaaaaaaaaaaaaaaaa aaaaaaaaaaaaaaaaaaaaaaaaaaaaaaaaaaaaaaaaaaaaaaaaaa aaaaaaaaaaaaaaaaaaaaaaaaaaaaaaaaaaaaaaaaaaaaaaaaaa aaaaaaaaaaaaaaaaaaaaaaaaaaaaaaaaaaaaaaaaaaaaaaaaaa aaaaaaaaaaaaaaaaaaaaaaaaaaaaaaaaaaaaaaaaaaaaaaaaaa aaaaaaaaaaaaaaaaaaaaaaaaaaaaaaaaaaaaaaaaaaaaaaaaaa aaaaaaaaaaaaaaaaaaaaaaaaaaaaaaaaaaaaaaaaaaaaaaaaaa aaaaaaaaaaaaaaaaaaaaaaaaaaaaaaaaaaaaaaaaaaaaaaaaaa aaaaaaaaaaaaaaaaaaaaaaaaaaaaaaaaaaaaaaaaaaaaaaaaaa aaaaaaaaaaaaaaaaaaaaaaaaaaaaaaaaaaaaaaaaaaaaaaaaaa aaaaaaaaaaaaaaaaaaaaaaaaaaaaaaaaaaaaaaaaaaaaaaaaaa aaaaaaaaaaaaaaaaaaaaaaaaaaaaaaaaaaaaaaaaaaaaaaaaaa aaaaaaaaaaaaaaaaaaaaaaaaaaaaaaaaaaaaaaaaaaaaaaaaaa aaaaaaaaaaaaaaaaaaaaaaaaaaaaaaaaaaaaaaaaaaaaaaaaaa aaaaaaaaaaaaaaaaaaaaaaaaaaaaaaaaaaaaaaaaaaaaaaaaaa aaaaaaaaaaaaaaaaaaaaaaaaaaaaaaaaaaaaaaaaaaaaaaaaaa aaaaaaaaaaaaaaaaaaaaaaaaaaaaaaaaaaaaaaaaaaaaaaaaaa aaaaaaaaaaaaaaaaaaaaaaaaaaaaaaaaaaaaaaaaaaaaaaaaaa aaaaaaaaaaaaaaaaaaaaaaaaaaaaaaaaaaaaaaaaaaaaaaaaaa aaaaaaaaaaaaaaaaaaaaaaaaaaaaaaaaaaaaaaaaaaaaaaaaaa aaaaaaaaaaaaaaaaaaaaaaaaaaaaaaaaaaaaaaaaaaaaaaaaaa aaaaaaaaaaaaaaaaaaaaaaaaaaaaaaaaaaaaaaaaaaaaaaaaaa aaaaaaaaaaaaaaaaaaaaaaaaaaaaaaaaaaaaaaaaaaaaaaaaaa aaaaaaaaaaaaaaaaaaaaaaaaaaaaaaaaaaaaaaaaaaaaaaaaaa aaaaaaaaaaaaaaaaaaaaaaaaaaaaaaaaaaaaaaaaaaaaaaaaaa aaaaaaaaaaaaaaaaaaaaaaaaaaaaaaaaaaaaaaaaaaaaaaaaaa aaaaaaaaaaaaaaaaaaaaaaaaaaaaaaaaaaaaaaaaaaaaaaaaaa aaaaaaaaaaaaaaaaaaaaaaaaaaaaaaaaaaaaaaaaaaaaaaaaaa aaaaaaaaaaaaaaaaaaaaaaaaaaaaaaaaaaaaaaaaaaaaaaaaaa aaaaaaaaaaaaaaaaaaaaaaaaaaaaaaaaaaaaaaaaaaaaaaaaaa aaaaaaaaaaaaaaaaaaaaaaaaaaaaaaaaaaaaaaaaaaaaaaaaaa aaaaaaaaaaaaaaaaaaaaaaaaaaaaaaaaaaaaaaaaaaaaaaaaaa aaaaaaaaaaaaaaaaaaaaaaaaaaaaaaaaaaaaaaaaaaaaaaaaaa aaaaaaaaaaaaaaaaaaaaaaaaaaaaaaaaaaaaaaaaaaaaaaaaaa aaaaaaaaaaaaaaaaaaaaaaaaaaaaaaaaaaaaaaaaaaaaaaaaaa aaaaaaaaaaaaaaaaaaaaaaaaaaaaaaaaaaaaaaaaaaaaaaaaaa aaaaaaaaaaaaaaaaaaaaaaaaaaaaaaaaaaaaaaaaaaaaaaaaaa aaaaaaaaaaaaaaaaaaaaaaaaaaaaaaaaaaaaaaaaaaaaaaaaaa aaaaaaaaaaaaaaaaaaaaaaaaaaaaaaaaaaaaaaaaaaaaaaaaaa aaaaaaaaaaaaaaaaaaaaaaaaaaaaaaaaaaaaaaaaaaaaaaaaaa aaaaaaaaaaaaaaaaaaaaaaaaaaaaaaaaaaaaaaaaaaaaaaaaaa aaaaaaaaaaaaaaaaaaaaaaaaaaaaaaaaaaaaaaaaaaaaaaaaaa aaaaaaaaaaaaaaaaaaaaaaaaaaaaaaaaaaaaaaaaaaaaaaaaaa aaaaaaaaaaaaaaaaaaaaaaaaaaaaaaaaaaaaaaaaaaaaaaaaaa aaaaaaaaaaaaaaaaaaaaaaaaaaaaaaaaaaaaaaaaaaaaaaaaaa 6.2 Satellite systems aaaaaaaaaaaaaaaaaaaaaa aaaaaaaaaaaaaaaaaaaaaa aaaaaaaaaaaaaaaaaaaaaa aaaaaaaaaaaaaaaaaaaaaa aaaaaaaaaaaaaaaaaaaaaa aaaaaaaaaaaaaaaaaaaaaa aaaaaaaaaaaaaaaaaaaaaa aaaaaaaaaaaaaaaaaaaaaa aaaaaaaaaaaaaaaaaaaaaa aaaaaaaaaaaaaaaaaaaaaa aaaaaaaaaaaaaaaaaaaaaa aaaaaaaaaaaaaaaaaaaaaa aaaaaaaaaaaaaaaaaaaaaa aaaaaaaaaaaaaaaaaaaaaa aaaaaaaaaaaaaaaaaaaaaa aaaaaaaaaaaaaaaaaaaaaa aaaaaaaaaaaaaaaaaaaaaa aaaaaaaaaaaaaaaaaaaaaa aaaaaaaaaaaaaaaaaaaaaa aaaaaaaaaaaaaaaaaaaaaa aaaaaaaaaaaaaaaaaaaaaa aaaaaaaaaaaaaaaaaaaaaa A satellite system is a system where a speaker system with flange is installed on top of a subwoofer. The satellite system must always provide enough stability. The subwoofer's base surface must always be sufficiently dimensioned in relation to the top speaker in order to prevent tilting over. The subwoofer and the top speaker must only be connected via an appropriate distance tube and flange. The carrying capacity of the distance tube must never be exceeded. A satellite system or a combination of speaker system/speaker stand or speaker system/stand must only be installed on the ground! When choosing the installation spot, please make sure that such an installation has to be installed in a way that no person can enter the area below the system! Make sure that the respective area is blocked. An unintended movement of the load has to be avoided - also in case of fire! The installation is only allowed on carrying areas. In some cases, an appropriate substructure, e.g. via an balancing foot, has to be created. The system must never be moved before the top speaker is uninstalled! When choosing the installation material, optimum dimensions have to be chosen in order to secure maximum safety. 26/32 00058980.DOC, Version 1.1 6.3 Installation on a stand or speaker stand Stands or satellite systems must only be installed on a plane area with a maximum inclination angle of 5°. aaaaaaaaaaaaaaaaaaaa aaaaaaaaaaaaaaaaaaaa aaaaaaaaaaaaaaaaaaaa aaaaaaaaaaaaaaaaaaaa aaaaaaaaaaaaaaaaaaaa aaaaaaaaaaaaaaaaaaaa aaaaaaaaaaaaaaaaaaaa aaaaaaaaaaaaaaaaaaaa aaaaaaaaaaaaaaaaaaaa aaaaaaaaaaaaaaaaaaaa aaaaaaaaaaaaaaaaaaaa aaaaaaaaaaaaaaaaaaaa aaaaaaaaaaaaaaaaaaaa aaaaaaaaaaaaaaaaaaaa aaaaaaaaaaaaaaaaaaaa aaaaaaaaaaaaaaaaaaaa aaaaaaaaaaaaaaaaaaaa aaaaaaaaaaaaaaaaaaaa aaaaaaaaaaaaaaaaaaaa aaaaaaaaaaaaaaaaaaaa Caution: Speaker systems installed on stands or satellite systems may cause severe injuries when crashing! When using stands or satellite systems under the influence of horizontal forces, e.g. through wind, the standing safety can be impaired. This is why additional safety measures like attaching ballast weights have to be taken. If inclined tension cables or prolonged outriggers are used, the area of danger has to be marked or even be blocked. Before lifting or lowering the telescopic tubes, you must always block a safety area around the stand or satellite system. This safety area must have a diameter of 1.5 times the maximum height. Lifted telescopic tubes always have to be secured with a secondary securing! The total weight of the installation (=total weight of all individual parts) must never exceed the maximum load of the installation area. The stand has to be installed out of the reach of people. An unintended movement of the load has to be avoided - also in case of fire! The installer is responsible for adhering to the carrying capacity given by the manufacturer, the safety requirements and the qualification of possible coworkers. When people are located below the load, all necessary safety measures have to be taken in order to avoid injury. The personnel has to be instructed on the content of the user manual and on the dangers related with operating stands. Depending upon the individual installation spot, all necessary measures against movement and for securing the standing safety have to be created. The installation is only allowed on carrying areas. In some cases, an appropriate substructure, e.g. via an balancing foot, has to be created. The system must never be moved before the top speaker is uninstalled! When choosing the installation material, optimum dimensions have to be chosen in order to secure maximum safety. Loosen the fixation screws of the legs. Pull the legs out until the cross struts stand at a 90° angle to the legs. Tighten the fixation screws of the legs. DANGER! If installing on slippery surfaces, the legs must be secured with screws or nails via the provided holes or a anti-slippery mat has to be used. Installation of the TV pin (only for stands) Attach an appropriate TV pin to the top end of the stand and fasten it with the handle at the side. Suitable TV pin: EUROLITE TV-35 TV-pin for speakers, No. 60000735 27/32 00058980.DOC, Version 1.1 Installation of the speaker system Caution: The loads have to be installed in a balanced way. The carrying capacity of the stand or speaker stand must never be exceeded! Install the speaker system via the flange on the speaker stand or via the TV pin on the stand. Make sure that the maximum lifting height of the tube is never exceeded. Lifted telescopic tubes always have to be secured with a secondary securing! 6.4 Installation on a wall mounting Before attaching the speaker system, make sure that the installation area can hold a minimum point load of 5 times the speaker system's weight. aaaaaaaaaaaaaaaaaaaaaaaaaaa aaaaaaaaaaaaaaaaaaaaaaaaaaa aaaaaaaaaaaaaaaaaaaaaaaaaaa aaaaaaaaaaaaaaaaaaaaaaaaaaa aaaaaaaaaaaaaaaaaaaaaaaaaaa aaaaaaaaaaaaaaaaaaaaaaaaaaa aaaaaaaaaaaaaaaaaaaaaaaaaaa aaaaaaaaaaaaaaaaaaaaaaaaaaa aaaaaaaaaaaaaaaaaaaaaaaaaaa aaaaaaaaaaaaaaaaaaaaaaaaaaa aaaaaaaaaaaaaaaaaaaaaaaaaaa aaaaaaaaaaaaaaaaaaaaaaaaaaa aaaaaaaaaaaaaaaaaaaaaaaaaaa aaaaaaaaaaaaaaaaaaaaaaaaaaa aaaaaaaaaaaaaaaaaaaaaaaaaaa aaaaaaaaaaaaaaaaaaaaaaaaaaa aaaaaaaaaaaaaaaaaaaaaaaaaaa aaaaaaaaaaaaaaaaaaaaaaaaaaa aaaaaaaaaaaaaaaaaaaaaaaaaaa aaaaaaaaaaaaaaaaaaaaaaaaaaa aaaaaaaaaaaaaaaaaaaaaaaaaaa aaaaaaaaaaaaaaaaaaaaaaaaaaa aaaaaaaaaaaaaaaaaaaaaaaaaaa aaaaaaaaaaaaaaaaaaaaaaaaaaa aaaaaaaaaaaaaaaaaaaaaaaaaaa aaaaaaaaaaaaaaaaaaaaaaaaaaa aaaaaaaaaaaaaaaaaaaaaaaaaaa The wall mounting must be installed out of the reach of people. The durability of the installation depends very much on the material used at the installation area (building material) such as wood, concrete, gas concrete, brick etc. This is why the fixing material must be chosen to suit the wall material. Always ask a specialist for the correct plug/screw combination indicating the maximum load and the building material. The wall mounting must always be installed via all fixation holes. Do only use appropriate screws and make sure that the screws are properly connected with the ground. The wall mounting's maximum service life must never be exceeded. Procedure: Step 1: On the wall mounting, there are holes for the installation. Step 2: Hold the wall mounting onto the location where it is to be installed. Step 3: Mark the bore holes with a pen or a suitable tool. Step 4: Drill the holes. Step 5: Hold the wall mounting in the desired position and tighten the screws. Step 6: Install the speaker on the wall mounting. 6.5 Suspended installation This speaker system must never be suspended - Danger to Life due to crashing speaker systems! 28/32 00058980.DOC, Version 1.1 7. CONNECTIONS All connections have to be made or changed only if the speaker system is switched off! 7.1 Connecting audio devices 1. Connect the signal source to the jack LINE INPUT. It is possible to connect the line output of e.g. a mixer or CD player. 2. Connect a microphone to the jack MIC INPUT. 3. The line input signal fed-through is available at the jack LINE OUT. This output allows to connect the line input of e.g. another active speaker system. Occupation balanced XLR connection: Balanced use with XLR connectors 2 1 3 1 = Ground / Shield 2 = Hot (+) 3 = Cold (-) 1 Input 2 3 Output For unbalanced use pin 1 and pin 3 have to be bridged Occupation jack plug: Unbalanced use of mono 1/4" jack plugs Balanced use of stereo 1/4" jack plugs Tip = Signal (+) Tip = hot (+) Ring = cold (-) Sleeve = Ground / Shield Sleeve = Ground / Shield Tip Tip Sleeve Ring Sleeve Strain relief clamp Strain relief clamp For connection of balanced and unbalanced plugs, ring and sleeve have to be bridged at the stereo plug. 7.2 Information on installing audio cables A good cable run improves the sound quality remarkably. Signal cables should be short and direct, since high frequencies will mostly be absorbed if cables are unnecessarily long. Besides that a longer cable may lead to humming and noise trouble. If long cable runs are unavoidable, you should use balanced cables. In order to obtain highest sound quality, only use high-quality cables for connecting the devices. Always treat cables carefully and protect them from damages during transportation. Install cables always in a structured way and protect them from damage. Cables must be installed in a way that no person can stumble over them. Always fix cables with an appropriate tape. Cables should be installed directly (no loops, S-shaped overlengths). Always install cables far away from power cables (never closely parallel). Never put heavy objects like speaker systems, flightcases etc. on cables. Never operate cables wound up. 29/32 00058980.DOC, Version 1.1 7.3 Connection with the mains Finally, use the supplied power cable to connect the speaker system to the mains. The occupation of the connection cables is as follows: Cable Brown Blue Yellow/Green Pin Live Neutral Earth International L N The earth has to be connected! If the device will be directly connected with the local power supply network, a disconnection switch with a minimum opening of 3 mm at every pole has to be included in the permanent electrical installation. The device must only be connected with an electric installation carried out in compliance with the IEC standards. The electric installation must be equipped with a Residual Current Device (RCD) with a maximum fault current of 30 mA. 8. OPERATION 1. Prior to switching on, turn the control VOLUME to minimum to avoid a possible switching-on noise. Then switch on the speaker system with the power switch. The power indicator lights. 2. Turn up the control VOLUME so that the mixing ration of the input channels can be adjusted in an optimum way. 3. Adjust the desired volume ratio with the level controls of the microphone channel and the line input. 4. Adjust the desired sound with the tone controls. By adjusting the tone controls, the high frequencies (control TREBLE) and the low frequencies (control BASS) can be boosted or attenuated. With the controls in mid-position, the frequency response is not affected. 5. Adjust the definite level of the overall volume with the control VOLUME. In case of overload, the CLIP indicator lights up. In this case, reduce the volume correspondingly. 6. When operating the speaker system, please make sure that the loudspeakers always sound well. When distortions can be heard, either the amplifier or the loudspeakers are overloaded. Overloads can quickly lead to amplifier or speaker damage. In order to avoid damage, please reduce the volume immediately when distortions can be heard. When speaker systems are destroyed by overload, the guarantee becomes void. Always check the sound pressure level with a meter in order to keep to the threshold. 7. After operation, set the control VOLUME to minimum, then switch off the speaker system with the power switch. The power indicator extinguishes. 8.1 MP3 player L For models NKB-...AP with integrated MP3 played only. 1. Press the button MODE 3 seconds to switch on the MP3 player. 2. Insert a USB device into the USB port and/or a memory card into the card slot. After loading a data carrier, it is selected as the playback medium and read in. Press the button ► to start the playback of the first title. To interrupt the playback, press the button ►once again. In pause mode, short actuation of the button MODE switches between the data carriers. 3. Adjust the desired volume for the MP3 player with the level control MP3 LEVEL. 4. With the buttons and , you can skip titles in forward or backward direction and start fast forward and reverse: short actuation of the button : skip to the next title short actuation of the button : skip to the previous title long actuation of the button : fast forward long actuation of the button : fast reverse 5. With the button 12, you can activate random play. The titles are now played in random order. To return to normal play, press the button 12 once again. 6. To remove a USB device, disconnect it from the USB port. To eject a memory card, slightly press it into the slot until it comes out and can be removed. Prior to removing a data carrier, always terminate the playback with the button ► or the button . Never attempt to remove data carriers in play mode. Otherwise damage or loss of data may occur. 30/32 00058980.DOC, Version 1.1 9. CLEANING AND MAINTENANCE DANGER TO LIFE! Disconnect from mains before starting maintenance operation! The operator has to make sure that safety-relating and machine-technical installations are inspected by an expert after every four years in the course of an acceptance test. The operator has to make sure that safety-relating and machine-technical installations are inspected by a skilled person once a year. The following points have to be considered during the inspection: 1) All screws used for installing the speaker systems or parts of the speaker system have to be tightly connected and must not be corroded. 2) There must not be any deformations on housings, fixations and installation spots (ceiling, suspension, trussing). 3) The electric power supply cables must not show any damages, material fatigue (e.g. porous cables) or sediments. Further instructions depending on the installation spot and usage have to be adhered by a skilled installer and any safety problems have to be removed. We recommend a frequent cleaning of the speaker system. Please use a soft lint-free and moistened cloth. Never use alcohol or solvents! There are no serviceable parts inside the device except for the fuse. Maintenance and service operations are only to be carried out by authorized dealers. 9.1 Replacing the fuse If the fine-wire fuse of the device fuses, only replace the fuse by a fuse of same type and rating. Before replacing the fuse, unplug mains lead. Procedure: Step 1: Open the fuseholder on the rear panel with a fitting screwdriver. Step 2: Remove the old fuse from the fuseholder. Step 3: Install the new fuse in the fuseholder. Step 4: Replace the fuseholder in the housing. L Models NKB-210A/AP: The fuse holder can be switched to one of two positions, to switch between 230 V and 115 V operation. If the speaker system distorts, one of the loudspeakers may be defective. Test the speaker system once more with another amplifier. If the sound remains distorted, the speaker system should not be operated any more in order to prevent further damage. Please contact your dealer. If clacking sounds are heard from the speaker system, screws may have loosened due to the continuous vibrations. The speaker system should be checked by a specialist. Especially for public use, the speaker system should be checked before every operation so that the speaker system and the speakers in the systems are always well fixed. Should you need any spare parts, please use genuine parts. If the power supply cable of this device becomes damaged, it has to be replaced by a special power supply cable available at your dealer. Should you have further questions, please contact your dealer. 31/32 00058980.DOC, Version 1.1 10. TECHNICAL SPECIFICATIONS Power supply: Rated power: Program power: Components: Inputs: Mic: Line: Feed-through output: Max. SPL (1 m): Frequency range: Dimensions (HxWxD): Weight: NKB-208A/AP 230 V AC, 50 Hz ~ 90 W RMS 180 W 20 cm woofer (8"), 2.5 cm horn (1") 6.3 mm jack 6.3 mm jack, stereo RCA 6.3 mm jack NKB-210A/AP 115/250 V AC, 50/60 Hz ~ 120 W RMS 200 W 25 cm woofer (10"), 3.5 cm horn (1.35") 6.3 mm jack, 3-pin XLR stereo RCA, 3-pin XLR 6.3 mm jack NKB-212A/AP NKB-215A/AP 90-250 V AC, 50/60 Hz ~ 200 W RMS 300 W 30 cm woofer (12"), 3.5 cm horn (1.35") 200 W RMS 300 W 38 cm woofer (15"), 4.4 cm horn (1.73") 6.3 mm jack, 3-pin XLR stereo RCA, 3-pin XLR 6.3 mm jack, 3-pin XLR 105 dB 114 dB 117 dB 60 Hz - 18 kHz 55 Hz - 18 kHz 50 Hz - 18 kHz 400 x 255 x 220 mm 515 x 320 x 290 mm 592 x 405 x 320 mm 8 kg 12 kg 20 kg 120 dB 40 Hz - 18 kHz 710 x 485 x 380 mm 22 kg Please note: Every information is subject to change without prior notice. 16.02.2012 © 32/32 00058980.DOC, Version 1.1