1
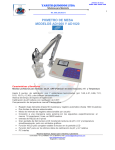
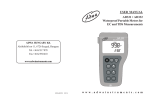
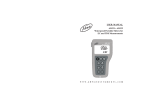
USER MANUAL
AD110 and AD111
pH/°C and pH/mV/°C Meters
ADWA INSTRUMENTS Kft.
Alsókikötõ sor 11, 6726 Szeged, Hungary
Tel. +36 62 317 878
Fax +36 62 550 610
e-mail: [email protected]
www.adwainstruments.com
MANAD110R3
06/09
w w w . a d w a i n s t r u m e n t s . c o m
Dear Customer,
Thank you for choosing an Adwa product.
Please read carefully this manual before starting
operations.
This instrument is in compliance with the EMC Directive
89/336/EEC and Low Voltage Directive 73/23/EEC for
electrical equipments.
For additional technical information, please e-mail us at
[email protected].
NOTES
TABLE OF CONTENTS
Introduction .......................................................... 4
Technical Data ..................................................... 5
Display and Keyboard Functions ........................... 6
Measurements ..................................................... 8
Calibration .......................................................... 11
Battery Replacement ...........................................14
Electrode Maintenance ........................................15
Probes and Solutions ............................................16
Warranty ............................................................17
Notes .................................................................18
18
3
INTRODUCTION
WARRANTY
AD110 and AD111 are compact pH meters featuring
automatic pH calibration, hold function, low battery indication, temperature measurement and compensation.
In addition, AD111 can measure in the mV range, if
using proper electrode.
Adwa warrants this product to be free of defects in material
and workmanship as stated in the operating manual. If repair
or adjustment is necessary and has not been the result of
abuse, misuse or improper handling within the warranty period, please contact your dealer or the nearest Adwa Office for
an RGA (Returned Goods Authorization) number to put on
the outside of your package. Warranted service will be made
without charge.
The meter is warranted for a period of 2 years, while probes
are warranted for 6 months. The warranty period commences
from the original date of sale.
Warranty is only valid when the product is used under normal
conditions and in accordance with the instruction manual.
The warranty is void if the instrument is repaired or serviced
by unauthorized personnel, not used in accordance to the
instructions, or if non-Adwa accessories such as buffer solutions, probes, etc. are used in conjunction with the meter.
Adwa will not be held responsible for any accident whether
directly or indirectly, caused by the use of this instrument.
Both models are supplied complete with:
• A1230B pH electrode with Epoxy body, tip protection bottle, BNC connector and 1 m cable
• A7662 stainless steel temperature probe, 1 m cable
• pH 4.01 and pH 7.01 calibration buffers (20 ml sachet
each)
• Batteries (4 x 1.5V AA alkaline)
• Instruction manual
4
17
PROBES AND SOLUTIONS
A1230B
pH electrode with Epoxy body, tip
protection bottle, BNC connector
and 1 m cable
A3230B
ORP electrode with Epoxy body, tip
protection bottle, BNC connector
and 1 m cable
Stainless steel temperature probe with
1 m cable
pH 4.01 buffer, 20 ml sachet, 25 pcs
pH 7.01 buffer, 20 ml sachet, 25 pcs
pH 10.01 buffer, 20 ml sachet, 25 pcs
3.5M KCl + AgCl electrolyte solution
for refillable electrodes, 30 ml bottle
A7662
A70004P
A70007P
A70010P
A7071S
16
TECHNICAL DATA
AD110
AD111
Range
-2.00 to 16.00 pH / -5.0 to 105.0°C
--±1000 mV
Resolution
0.01 pH / 0.1°C
--1 mV
Accuracy
±0.02 pH
±0.5°C up to 60°C / ±1°C outside
--±2 mV
pH Calibration
Automatic, 1 or 2 point,
with 3 memorized buffer values
(pH 4.01, 7.01 and 10.01)
mV Calibration --Factory
Temp. Calibration
Factory
Temp. Compensation
Automatic or 25°C fixed
Battery Type / Life
4 x 1.5V AA / approx. 1500 hours of use
Auto-off
After 8 minutes of non-use
Environment
0 to 50°C; RH max 95%
Dimensions
70 x 145 x 26 mm
Weight
Approx. 200 g
5
DISPLAY AND KEYBOARD FUNCTIONS
ELECTRODE MAINTENANCE
Storage
To minimize clogging and ensure a quick response time,
the glass bulb and the junction of the pH electrode should
always be kept moist.
When not in use, store the electrode with the tip protective bottle. If you need to add some solution to the tip
protective bottle, use the A7071S electrolyte solution.
Periodic Maintenance
Inspect electrode and cable. The cable used for the connection to the instrument must be intact and there must
be no points of broken insulation on the cable or cracks
on the electrode stem or bulb. If any scratches or cracks
are present, replace the electrode.
Rinse off any salt deposits with water.
Connectors must be perfectly clean and dry.
Cleaning Procedure
Soak in deionized water for approximately 30 minutes,
then rinse the electrode thoroughly with deionized water
and soak it in A7071S electrolyte solution for at least 1
hour before taking measurements.
6
15
BATTERY REPLACEMENT
When the batteries become weak, the
battery symbol on the LCD lights up.
When the low battery indicator appears only a few hours
of battery life is remaining. It is recommended to replace the batteries immediately.
In addition, when the battery level is
too low to ensure reliable readings, the
Battery Error Prevention System
(BEPS) warns the user by displaying
the “Eb” message and then switches
the instrument off.
To replace the batteries remove the
battery compartment cover on the
rear of the instrument and replace all
four 1.5V AA batteries while paying
attention to their polarity.
Batteries should only be replaced in
a safe area and using the battery type
specified in this instruction manual.
14
Display
1. H symbol, lights up to indicate that the reading is
frozen on display
2. Battery symbol, lights up to indicate a low battery
condition
3. Measure unit of the displayed reading: pH, mV
(AD111 only) or °C
Keyboard
4. ON/OFF key, to turn the instrument ON and OFF
5. SET/HOLD key, to select measurement range, confirm calibration points, and freeze reading on display
(keep pressed)
6. CAL key, to enter/exit calibration mode
7
MEASUREMENTS
• Each instrument is supplied complete with four 1.5V
batteries. Install the batteries as explained in the “Battery Replacement” paragraph (see page 14).
• Attach pH electrode and temperature probe to the connectors on the top of the instrument.
• Turn ON by pressing the ON/OFF
key.
• Remove the protective bottle from the
pH electrode tip. Immerse pH electrode and temperature probe in the
solution to be tested, stir gently and
wait for stable reading.
8
• When also this buffer is recognized,
press SET/HOLD to confirm and store
the second calibration point; the meter
will return to normal mode.
Note: If a solution with wrong pH value
is used as buffer for calibration,
the LCD displays the “Ec” message.
Note: To exit the calibration mode, press CAL at any
time. The meter will display dashes and then return to normal measurement mode.
Note: To reset to the default values, after entering
the calibration mode and before the first point is
confirmed (pH tag is blinking), press and hold
the SET/HOLD key, and then CAL.
Note: For better accuracy it is recommended to carry
out a 2-point calibration procedure.
13
Note: If the pH 7.01 buffer was used, press SET/HOLD
again to exit the calibration mode. Otherwise, if a different buffer was used, the meter automatically returns to normal mode.
• For a two-point calibration, immerse
pH electrode and temperature probe
in pH 7.01 buffer.
• The meter automatically recognizes
and displays the buffer value.
• When the pH tag stops blinking, press
SET/HOLD to confirm and store the
first calibration point.
• The meter will then ask for the second buffer.
• Immerse pH electrode and temperature probe in pH 4.01 (or pH 10.01)
buffer.
12
Note: The pH electrode tip should be submersed at
least 4 cm into the solution.
Note: The temperature probe should be located as near
as possible to the pH electrode.
• Press the SET/HOLD key to display
the desired range: pH, mV (only for
AD111 with the proper electrode), or
°C (temperature).
pH readings are automatically compensated for temperature variations.
• If the temperature probe is not connected, the compensation is done at a
fixed value of 25°C (the “°C” tag blinks
to advise the operator).
• To freeze the display, from measurement mode, press
and hold the SET/HOLD key until the “H” tag lights up.
Press SET/HOLD again to return to normal mode.
• After use, turn the meter OFF by pressing ON/OFF
and disconnect the probes.
9
• Clean the pH electrode with water and insert the tip
protection bottle. Never let the electrode tip dry.
See “Electrode Maintenance” paragraph (page 15) for
details.
CALIBRATION
The instrument is factory calibrated for mV and temperature ranges. Contact your dealer for re-calibration, if necessary.
For pH calibration, proceed as follows:
• Enter the calibration mode by pressing CAL key. “7.01
pH” will start blinking.
• For a single-point calibration, immerse pH electrode and temperature
probe in any of the memorized buffers
(e.g. pH 4.01, 7.01 or 10.01).
• The meter automatically recognizes
and displays the buffer value.
• When the pH tag stops blinking, press
SET/HOLD to confirm the calibration
point.
10
11