1
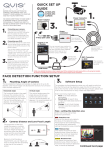
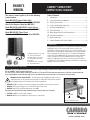
OWNER’S MANUAL CAMBRO® CAMDUCTION® COMPLETE HEAT CHARGER This owner’s manual applies to all of the following product models: Model MDSCDCP9 (Special Order Only) For use with CAMBRO Camduction Pellet MDSCDP9 Note: Pellet Requires Underliner MDSCDL9 Model MDSCDCB9 & MDSCDC9X1 (Single Phase) For use with CAMBRO Camduction Base MDSCDB9 Model MDSCDC9X3 (Three Phase) For use with CAMBRO Camduction Base MDSCDB9 Table of Contents I. Introduction�������������������������������������������������������������������������������� 1 II. Safety Instructions and Warnings��������������������������������������������1-2 III. Product Specifications���������������������������������������������������������������� 2 IV. Set Up and Operating Instructions���������������������������������������������� 3 V. Cleaning and Maintenance������������������������������������������������������3-4 VI. Product Drawings����������������������������������������������������������������������� 5 VII. Wiring Diagram and Electrical Components�������������������������������� 6 VIII.Troubleshooting Guide��������������������������������������������������������������� 7 IX. Replacement Parts��������������������������������������������������������������������� 7 X. Cambro Warranty and Product Liability��������������������������������������� 8 I. Introduction Camduction Charger covered by U.S. Patent 8,263,906 B2 Camduction Base covered by U.S. Patent D630,897 S and D635,394 S Camduction Pellet covered by U.S. Patent D628,854 S Congratulations on the purchase of your new Cambro Camduction Complete Heat Charger. Here is a step-by-step guide for proper operation and maintenance. If you have any questions, please contact your Cambro Sales Representative, visit the Web site at www.cambro.com or contact Customer Service Department at 1‑800‑833‑3003 or 1‑714‑848‑1555. All Warranty Service in the USA or CANADA must be performed by a Cambro Authorized Service Technician. Please refer to Warranty Section for coverage and details. For all Warranty Service, please call 1‑800‑854‑7631 ext. 4118 or 1‑714‑848‑1555. Service on Out-of-Warranty repairs MUST be performed by a Qualified Technician or Electrician. II. Safety Instructions and Warnings IMPORTANT: Please read ALL instructions prior to first use. Follow all warnings and instructions marked on charger unit and in this manual. Use only CAMBRO ® authorized replacement parts. For service please contact Cambro at 800-854-7631 x4118 or 1-714-848-1555. Units under warranty must be serviced by a Cambro Authorized Service Agent ONLY to remain under warranty. Please refer to Warranty section in the back of user manual for coverage details. WARNING! ELECTRIC SHOCK HAZARD. Use only supplied cord, plug AND proper power source on Single Phase Units. Use 10 gauge wires for input power on all Three Phase Units. Must be installed by a qualified technician and according to local electrical requirements. • WARNING! Do NOT use if power cord is frayed or damaged or plug blades are missing, bent or broken. • WARNING! USE only power supply source as indicated on label on back of unit. • WARNING! Connect into properly grounded power source ONLY. Plug single phase models directly into matching locking receptacle. Never use an adapter. • CAUTION! Do NOT use in wet or damp conditions. • WARNING! NEVER place wet Camduction® Pellet or Base in compartment. 4" (10,2 cm) Close Up of single phase model www.cambro.com II. Safety Instructions and Warnings, Con't. • W ARNING! NEVER multi-charge/re-heat HOT Camduction Pellets or Bases that have been removed from compartment. ALWAYS charge room temperature Camduction Pellets or Bases ONLY. Re‑heating hot or warm Pellets or Bases may result in damage to Pellet/Base and/or Charger. • CAUTION! When using a mobile cart to hold the Camduction Charger, the cart should only be moved for cleaning purposes and not used for transporting the Charger. WARNING! ELECTRIC SHOCK HAZARD. Keep electrical parts dry. NEVER use in wet or damp locations. • WARNING! NEVER submerge charger in water or spray water on or near unit. • WARNING! Always UNPLUG or disconnect unit from power source prior to cleaning or service. ALL power MUST be removed and the charger unplugged or disconnected before cleaning the station areas. • WARNING! NEVER steam or pressure clean or hose down cabinet. May cause electrical shock to operator. NEVER use corrosive cleaners to clean cabinet. NEVER use a wet cloth to clean shelves or charging stations unless ALL power has been removed and the charger is unplugged or disconnected. We recommend stainless steel cleaner for stainless steel surfaces. DO NOT place anything on top of charger. NOTICE! Pellets and bases must never be connected into compartment power pin sockets when charger is first turned on or after charger is turned back on after POWER SAVING MODE. Do not store pellets or bases in charger when not in use. NOTICE! This appliance is NOT intended for use by children under the age of 8 or persons with reduced physical, sensory or mental capabilities OR with lack of experience and knowledge concerning the use of the application. NOTICE! Children should be supervised to ensure that they do not play with the appliance. NOTICE! Cleaning and user maintenance shall NOT be made by children without supervision. III. Product Specifications Charger Models Heats Capacity Voltage/Phase Amps Hz Plug Configuration Cord Length Product Dimensions Product Weight Initial Heat Up Time Heat Up Time (Base/Pellet) All Indicator Lights Single Phase Single Phase Three Phase MDSCDCP9 (Special Order Only) Camduction Pellet Only 20 Pellets 208 – 240 VAC, Single Phase 24.9 (MAX) 50/60 NEMA L6-30P MDSCDCB9 / MDSCDC9X1 Camduction Base 20 Bases 208 – 240 VAC, Single Phase 24.9 (MAX) / 18 50/60 NEMA L6-30P (US, CAN) or 32- 6h/200-250 Euro Rnd Plug (INT'L) 6 feet (183 cm) 30" W x 18 7/8" D x 34 5/8" H (76,2 cm x 47,9 cm x 87,9 cm) 108 lbs (49,2 kg) 4-5 1/2 minutes* 12 seconds** LED MDSCDC9X3 Camduction Base 20 Bases 208 – 240 VAC, Three Phase (L-L) 12 50/60 N/A 6 feet (183 cm) 30" W x 18 7/8" D x 34 5/8" H (76,2 cm x 47,9 cm x 87,9 cm) 108 lbs (49,2 kg) 4-5 1/2 minutes* 12 seconds** LED *Heat up to 20 Camduction Bases at one time in 4 – 5 1/2 minutes (based on voltage supply) from start up before each meal service. **Every 12 seconds (based on voltage supply) WHEN being removed and replaced during meal service. 2 N/A 30" W x 18 7/8" D x 34 5/8" H (76,2 cm x 47,9 cm x 87,9 cm) 108 lbs (49,2 kg) 4-5 1/2 minutes* 12 seconds** LED IV. Set Up and Operating Instructions 1. Set unit backside down and screw in each leg. No tools required. 2. Prior to use: Set charger on a stable, level surface and adjust legs by rotating the foot of the legs until all four are making contact with surface. 3. On Single Phase models; Plug into properly grounded outlet with specified power supply. Voltage over 250 Vac will cause the charger to error. 4. On Three Phase models; A qualified technician must connect power to the charger not exceeding the stated value on the data plate and must include a ground. All local codes and/or regulations must be followed when supplying power to the charger. Voltage over 250 Vac will cause the charger to error. 5. Charger MUST be EMPTY before turning ON. EMPTY charger AFTER each meal service. NOTE: Charger will NOT TURN ON if there are Pellets or Bases pre-loaded and connected in compartments 6. Turn power switch ON. Main power indicator light on top front will turn GREEN. Each compartment indicator light will flash RED, then GREEN and then OFF, indicating compartments are ready to load. 7. If a compartment light is flashing RED and GREEN, refer to Trouble Shooting Guide, Section (1), page (7). 8. Slide ROOM TEMPERATURE ONLY Pellets or Bases into compartments and connect with power pin socket. Compartment light will turn RED then GREEN in 4 – 5 1/2 minutes (based on voltage supply), indicating Pellet or Base is HOT and ready to use. 9. During meal service, replace charged Pellets or Bases with room temperature ONLY Pellets or Bases for fast continuous service. 10. If Pellet or Base FAILS to heat up, refer to the Trouble Shooting Guide, Section (1), page (7). 11. POWER SAVING MODE- Charger is divided into 3 charging zones. Each zone supports 6 - 7 compartments. Any zone not in use for 45 minutes will go into POWER SAVING MODE. All compartment lights in that zone will go OFF indicating NO power to pin sockets. To use ALL ZONES, turn charger OFF, REMOVE ALL bases, turn charger ON and go back to instruction # 6. DO NOT slide HOT Pellets or Bases back into compartments. 12.After each completed meal service, REMOVE all Pellets or Bases and turn charger OFF. V. Cleaning and Maintenance WARNING! ELECTRIC SHOCK HAZARD. Turn off and unplug or disconnect power to charger before performing cleaning or maintenance/service. Cleaning and maintenance shall not be made by children without supervision. 1. Use clean cloth to wipe charger compartment shelves. 2. Clean outside of cabinet with a nonabrasive cloth dampened with a solution of warm water and mild soap or detergent. Or use a commercial stainless steel cleaner, following manufacturer’s directions. See Safety Instructions and Warnings for complete details. 3. To remove and clean the 20-compartment shelving unit, follow these steps: a. Unscrew and remove the 4 slotted-screws from front of Charger (see Fig. A). b. Carefully pull out and remove compartment shelving unit from Charger. c. Clean unit with a clean cloth. d. Slide unit back into Charger and secure with 4 slotted-screws. 4. Before plugging in charger after cleaning, ensure power cord is not frayed, damaged and plug blades are not bent or broken or missing. Replace cord/plug immediately if damaged with approved Cambro® replacement parts only. Call for service. 5. The Camduction® Base (MDSCDB9) is made of two separate parts that are factory assembled: a Base Pellet and a Base Rim. If necessary, these may be disassembled and reassembled for cleaning by following the directions on page 4. 6. Place Pellet or Base with socket pins facing up for cleaning through dishwasher. Failure to do so may result in bent or damaged pins that will not connect properly into power pin socket. Figure A: View of slotted-screw. 3 V. Cleaning and Maintenance Con't. Step 1: Firmly grasp the Base Rim on both sides with the arrow on the Base Pellet facing forward. Step 2: Pull both sides of the Base Rim out and push the Base Pellet up from the bottom until it snaps out of the Base Rim. Step 3: To reassemble, align the arrow on the top of the Base Pellet with the notch/line on the inside of the Base Rim. Step 4:Place the Base Rim with the Base Pellet on the edge of a table. Holding the Base Pellet down with your left hand, pull the Base Rim out with your right hand in three places as shown above, until the Base Pellet snaps securely into place. Step 5: Turn the Base upside down to verify that the Base Pellet and Base Rim are assembled together correctly as shown above. 4 VI. Product Drawings Pellet Charger for Base Charger for Camduction ® Pellet Camduction Base Pellet Charger Base Charger Design To Stop The Base From Coming Off Pellet Insertion Side View Pellet Insertion Top View Base Insertion Top View Base Insertion Side View 5 VII. Wiring Diagram and Electrical Components Camduction Board Zone Connection Top Board 1: Compartments are connected to the top board. Middle Board 2: Compartments are connected to the middle board. Bottom Board 3: Compartments are connected to the bottom board. Thermostat: 60T21 X-13779-A Thermostat: 60T21 X-13779-A Pellet/Base Connector Pellet/Base LED 1 2 3 4 LED 20 CAM005 PELLET 1 8 7 6 5 3 2 1 4 3 2 1 2 3 8 7 6 5 4 3 2 1 PELLET 20 LED 1 1 CAM006 System LED PCB CAM006 3 2 1 Sys LED LED 11 8 7 6 5 3 2 1 PELLET 10 4 1 3 2 1 CAM007 2 Power Cord: NEMA L6-30P G B W Breaker: AK2-B0-24-630-221-D LINE LOAD White Black Green Connect to Chassis 6 LED 10 Lug View Sticker on the Bottom 8 7 6 5 4 3 2 1 1 2 3 PELLET 11 VIII. Troubleshooting Guide Problem Possible Causes Possible Solutions 1. Charger is ON. Top indicator light is GREEN. Bases or Pellets are loaded in Charger. Compartment lights are flashing RED & GREEN • Bases or Pellets were pre-loaded and connected into the compartment power pin sockets before turning charger ON. • Turn Charger OFF, Disconnect Base or Pellet from each compartment power pin socket. Turn charger back ON. Wait for top indicator light to turn GREEN before loading. • Slide room temperature Bases or Pellets into compartments, ONLY after power is turned on. 2. Charger is ON and EMPTY. Top indicator light does not turn GREEN. • No power source • Power cord not properly connected to live power source. • Power cord or plug damaged. • Verify power to the receptacle. • Ensure charger is completely plugged into the proper specified live power source. • Replace power cord. Call for service. 3. Power source and cord/plug are verified OK. Power switch is ON. Top indicator light does not turn GREEN. • Tripped breaker switch. • Defective power switch.. • Reset building outlet breaker switch. • Reset Charger – turn OFF then back ON. • Replace power switch. Call for service. 4. Charger is ON. Top indicator light is GREEN. Compartment light remains OFF when Base or Pellet is inserted into compartment power pin socket. • Slide Base or Pellet into same compartment • Base or Pellet is NOT properly inserted into power socket pin again. pin socket. • Try same Base or Pellet in another compartment. • Compartment power pin socket is NOT working. • Charger has switched one or more charging zones to • Turn Charger OFF. Disconnect Base or Pellet from POWER SAVING MODE after 45 minutes of NON-USE each compartment power pin socket. Turn charger and has automatically turned OFF power to SOME or back ON. Wait for top indicator light to turn GREEN ALL of the compartment power pin sockets. before loading dry, room temperature Bases or Pellets into compartments. • LED light is not working. • If a light or lights remain OFF, LED light(s) could be defective and need to be replaced. OR a compartment power pin socket(s) could be defective and needs to be replaced. Call for service. 5. Compartment LED light is GREEN but Base or Pellet is COLD • Base or Pellet NOT properly inserted into compartment power pin socket. • Base or Pellet NOT working properly. • Compartment power pin socket is not working. • Slide Base or Pellet into same compartment socket pin again. • Try same Base or Pellet in another compartment. If it heats up properly, then replace power pin socket in the malfunctioning compartment. Call for service. • If Base or Pellet does not heat up, it’s defective and must be replaced. 6. Base or Pellet heats up but compartment LED light does not turn RED or GREEN. • LED light not connected to board. • Defective LED light • Wire light connection disconnected. Call for service. • Replace LED light. Call for service. 7. Smoke or fumes coming from Bases or Pellet s loaded in compartments and charging. • Hot Bases or Pellets were loaded BACK into compartments without cooling to room temperature between uses and have RE-CHARGED and OVERHEATED. • Bent or damaged pins are causing ARCING or HIGH HEAT at the pins. • Carefully remove Base or Pellet and replace with dry, room temperature Base or Pellet. Replace Bases or Pellets if they do not perform correctly or have visible damage. Damaged Bases or Pellets may cause damage to the Charger. • Do not use Bases or Pellets with damaged pins. Inspect all pins and if damaged, replace Base or Pellet. NOTE: There are no Owner/Operator serviceable parts located inside the Camduction Complete Heat Charger. Please contact Cambro for ALL service calls. ALL electrical adjustments or electrical part replacements MUST BE completed by an Authorized Cambro Service Technician. For service in USA or CANADA, please call 1-800-833-3003 ext. 4118. IX. Replacement Parts Please visit www.cambro.com for a complete list of replacement parts. The model number of the Cambro® Camduction® Complete Heat Charger is required to determine the correct replacement part. The model number and serial number can be found on the side adjacent to the electrical cord of the unit. TO ORDER REPLACEMENT PARTS: • Call Cambro Customer Service at 1-800-833-3003 or 1-714-848-1555. • Fax your order to 714-842-3430. • Call your local Cambro Representative or Distributor 7 X. Cambro® Warranty And Product Liability LIMITED ORIGINAL COMMERCIAL ELECTRICAL EQUIPMENT WARRANTY FOR CAMDUCTION ® COMPLETE HEAT CHARGER ONLY Cambro Manufacturing warrants its new product(s) to be free from defects in material and workmanship for a period of one (1) year from the date of shipment from authorized CAMBRO distribution locations. This Warranty is subject to the following conditions and limitations: 1. This warranty is limited to product(s) sold by Cambro Manufacturing to the original user in the continental United States and Canada. For International Warranty Claims contact your local Cambro Representative. 2. The Liability of Cambro Manufacturing is limited to the repair or replacement of any part found to be defective. Parts and labor required for preventive maintenance or cleaning are not covered under this warranty. 3. Cambro Manufacturing will bear normal charges incurred in the repair or replacement of a warranted piece of equipment within 50 miles (80 kilometers) of an authorized service agency. Time and travel charges in excess of 50 miles (80 kilometers) will be the responsibility of the person or firm requesting the service. All labor to repair and/or service the warranted unit(s) shall be performed during regular working hours. Overtime premium will be charged to the buyer and is NOT covered by this warranty. 4. Charges incurred by delays or operating restrictions that hinder the service technician’s ability to access or perform service to equipment in question are NOT covered by this warranty. This includes Institutional, Correctional, Military, and Marine facilities. 5. Cambro Manufacturing will bear no responsibility or liability for any product(s) which have been mishandled, abused, misapplied, misused, subjected to harsh chemical action, damaged by flood, fire, or other acts of nature, field modified by unauthorized personnel or which have altered or missing serial numbers. 6. Cambro Manufacturing does not recommend or authorize the use of any product(s) in a non-commercial application, including but not limited to residential use. The use or installation of any product(s) in non-commercial applications renders all warranties, express or implied, including the warranties of MERCHANTABILITY and FITNESS FOR A PARTICULAR PURPOSE, null and void, including any responsibility for damage, costs and legal actions resulting from use or installation of product(s) in any noncommercial setting. 7. Adjustments such as calibrations, leveling, tightening of fasteners or utility connections normally associated with the original installation are the responsibility of the dealer or installer and not that of Cambro Manufacturing. Improper installation includes, but is not limited to, use of inadequate electrical wiring and/or insufficient or improper voltage. 8. Replacement part(s) which are replaced in the field by CAMBRO authorized service technicians ONLY will be warranted for the duration of the equipment warranty or 90 days effective from date of installation, whichever is greater. This warranty is for part(s) cost only and does not include freight or labor charges. 9. This states the exclusive remedy against Cambro Manufacturing relating to the product(s), whether in contract or in tort or under any other legal theory, and whether arising out of warranties, representations, instructions, installations or defects from any cause. Cambro Manufacturing shall not be liable, under any legal theory, for loss of use, revenue or profit, or for substitute use of or performance, or for incidental, indirect, or special or consequential damages or for any other loss or cost of a similar type. 10.THIS WARRANTY AND THE REPRESENTATIONS AND TERMS SET FORTH HEREIN ARE EXCLUSIVE AND IN LIEU OF ALL OTHER WARRANTIES AND LIABILITIES, INCLUDING BUT NOT LIMITED TO, OTHER WARRANTIES, EXPRESS OR IMPLIED, OF MERCHANTABILITY AND FITNESS FOR PARTICULAR USE AND CONSTITUTES THE ONLY WARRANTY OF CAMBRO MANUFACTURING WITH RESPECT TO THE PRODUCT(S). NOTE: Cambro Camduction Base and Pellet have a two (2) year pro-rated warranty from the date of shipment from authorized Cambro distribution locations. Telephone 714 848 1555 Toll Free 800 854 7631 Customer Service 800 833 3003 © Cambro Manufacturing Company 5801 Skylab Road, Huntington Beach, California 92647-2056 UMCDC1011 REV E Printed in USA 09/14 UMCD1011 REV E RETURN POLICY:Cambro Manufacturing products cannot be returned without prior written factory authorization (RMA). The restocking charge is 15% plus any costs required to recondition the equipment. No returns accepted after 90 days from date of invoice. Electrical components returned are subject to inspection prior to credit being issued. Electrical components which have been installed by an operator or non-approved service agent are not returnable for credit.