1
THE ELECTRIC PENCIL WORD PROCESSOR
Operator's Manual
Copyright (C) 1977 Michael Shrayer
All Rights Reserved
TABLE OF CONTENTS
Introduction . . . . . . . . . .
System Hardware Requirements . .
Using This Manual . . . . . . . .
Glossary . . . . . . . . . . . .
Getting Started . . . . . . . . .
Commands and Functions . . . . .
Cursor Motion Commands . . . . .
Scrolling and Display Control . .
Delete and Insert . . . . . . . .
Block Movement . . . . . . . . .
LF, FF, TAB and RETURN . . . . .
String Search . . . . . . . . . .
Search and Rep lace . . . . . . .
Coded String Searches . . . . . .
Repeat Function . . . . . . . . .
Sub-System Command Table . . . .
Tape Reader . . . . . . . . . . .
Tape Writer . . . . . . . . . . .
Tape Verify . . . . . . . . . . .
Word and Record Number . . . . .
Clearing Commands . . . . . . . .
Setting up Print Values . . . . .
Printing . . . . . . . . . . . .
Titling Pages and Page Numbering
Underlining . . . . . . . . . . .
Exit System . . . . . . . . . . .
Loading The Electric Pencil . . .
Registration . . . . . . . . . .
Patch Locations . . . . . . . . .
.
.
.
.
.
.
.
.
.
.
.
.
.
.
.
.
.
.
.
.
.
.
.
.
.
.
.
.
.
.
.
.
.
.
.
.
.
.
.
.
.
.
.
.
.
.
.
.
.
.
.
.
.
.
.
.
.
.
.
.
.
.
.
.
.
.
.
.
.
.
.
.
.
.
.
.
.
.
.
.
.
.
.
.
.
.
.
.
.
.
.
.
.
.
.
.
.
.
.
.
.
.
.
.
.
.
.
.
.
.
.
.
.
.
.
.
.
.
.
.
.
.
.
.
.
.
.
.
.
.
.
.
.
.
.
.
.
.
.
.
.
.
.
.
.
.
.
.
.
.
.
.
.
.
.
.
.
.
.
.
.
.
.
.
.
.
.
.
.
.
.
.
.
.
.
.
.
.
.
.
.
.
.
.
.
.
.
.
.
.
.
.
.
.
.
.
.
.
.
.
.
.
.
.
.
.
.
.
.
.
.
.
.
.
.
.
.
.
.
.
.
.
.
.
.
.
.
.
.
.
.
.
.
.
.
.
.
.
.
.
.
.
.
.
.
.
.
.
.
.
.
.
.
.
.
.
.
.
.
.
.
.
.
.
.
.
.
.
.
.
.
.
.
.
.
.
.
.
.
.
.
.
.
.
.
.
.
.
.
.
.
.
.
.
.
.
.
.
.
.
.
.
.
.
.
.
.
.
.
.
.
.
.
.
.
.
.
.
.
.
.
.
.
.
.
.
.
.
.
.
.
.
.
.
.
.
.
.
.
.
.
.
.
.
.
.
.
.
1
2
2
3
6
7
8
8
9
10
10
11
11
12
12
13
13
14
14
14
15
15
17
18
18
19
19
19
20
THE ELECTRIC PENCIL
OPERATOR'S MANUAL
Page 1
INTRODUCTION
The Electric Pencil is a Character Oriented Word Processing System. This means
that text is entered as a continuous string of characters and is manipulated as
such. This allows the user enormous freedom and ease in the movement and handling
of text. Since lines are not delineated, any number of characters, words, lines or
paragraphs may be inserted or deleted anywhere in the text. The entirety of the
text shifts and opens up or closes as needed in full view of the user. The typing
of carriage returns as well as word hyphenation is not required since each line of
text is formatted automatically. As text is typed in and the end of a screen line
is reached, a partially completed word is shifted to the beginning of the following
line. Whenever text is inserted or deleted, existing text is pushed down or pulled
up in a wrap around fashion. Everything appears on the video display screen as it
occurs thereby eliminating any guesswork. Text may be reviewed at will by variable
speed scrolling both in the forward and reverse directions.
By using the search or the search and replace function, any string of characters
may be located and/or replaced with any other string of characters as desired.
Specific sets of characters within encoded strings may also be located and used in
creating selective mailing lists.
When text is printed, The Electric Pencil automatically inserts carriage returns
where they are needed.
Numerous combinations of Line Length, Page Length,
Character Spacing, Line Spacing and Page Spacing allow for any form to be handled.
Right Justification gives right-hand margins that are even. Camera ready copy is
produced when a printer such as the Diablo Hy-Type with variable horizontal spacing
is used. Pages may be numbered as well as titled.
This manual was prepared using The Electric Pencil. Printing was done on a Diablo
1620 using a OCR-B printwheel and a carbon film ribbon. Line length was set to 75
characters across and page length was set to a maximum of 54 lines per page.
THE ELECTRIC PENCIL
OPERATOR'S MANUAL
Page 2
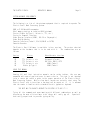
SYSTEM HARDWARE REQUIREMENTS
The following is a List of the minimum equipment that is required to operate The
Electric Pencil Word Processing System.
8080 or Z-80 Based Microcomputer
8K of memory starting at Location 0000 (minimum)
Printer (Diablo Hy-Type II, Selectric, TTY, etc.)
Printer to Computer Interface
Video Display Interface (VDM-1, SOL-20 or Polymorphic)
Video Display Monitor
Cassette Interface (Tarbell, SOL-20/SOLOS or CUTER)
Cassette Recorder
The Electric Pencil Software is available in four versions. The version selected
depends on the hardware that is to be used with it. The combinations are as
follows:
Version
SP
SS
SV
DV
Video/Cassette Interface
Printer
TTY, Selectric,
TTY, Selectric,
TTY, Selectric,
Diablo Hy-Type
etc.
etc.
etc.
II
Polymorphic/Tarbell
SOL-20 or VDM-1 /CUTS
VDM-1/Tarbell
VDM-1/Tarbell
USING THIS MANUAL
Knowing full well that instruction manuals can be rather tedious, this one was
assembled with ease of application as its main criteria. This text is not intended
to be a course but rather a guide to the proper operation of The Electric Pencil
Word Processing System. Within a few hours, anyone can certainly start using The
Electric Pencil and in Less than a few days can be expert at it. It is assumed
that the reader is familiar with a standard electric typewriter keyboard.
THE BEST WAY TO LEARN TO OPERATE THIS SYSTEM IS TO USE IT !!!
Trying all the commands and experimenting with different combinations as well as
discovering the most efficient ways to do things will really pay off. Speed will
be directly proportional to previous typing ability.
THE ELECTRIC PENCIL
OPERATOR'S MANUAL
Page 3
========
GLOSSARY
========
Any words that may be new to the reader are included in this glossary. Commonly
used words that may have a special meaning in the context of word processing are
also included. Words that appear within definitions that are also defined in the
glossary are capitalized.
If any of the text seems vague while reading this
manual, simply go back to the last point in the text that was fully understood,
read forward to the word that was not fully understood, and look it up. Try it, it
works!
BLOCK
Any amount of text as small as one CHARACTER or as large as an entire FILE.
BLOCK may be a WORD or a sentence or a paragraph or a group of paragraphs.
A
CHARACTER
Any letter, number, punctuation or symbol appearing on the VIDEO DISPLAY SCREEN or
keyboard.
CLEAR
The action of erasing or wiping out or deleting text from the face of the VIDEO
DISPLAY SCREEN or from the FILE AREA.
COMMAND
A CONTROL CHARACTER or normal letter CHARACTER that is used to tell The Electric
Pencil what to do.
CONTROL
A keyboard key that is used together with any letter key to create a CONTROL
CHARACTER.
CONTROL CHARACTER
A keyboard key used with the CONTROL key to tell The Electric Pencil what to do.
CURSOR
A solid white block which appears on the VIDEO DISPLAY SCREEN and is used to
indicate the CHARACTER or space about to be typed, moved, inserted or deleted.
THE ELECTRIC PENCIL
OPERATOR'S MANUAL
Page 4
========
GLOSSARY
========
DEFAULT VALUE
A PRINT VALUE assumed by The Electric Pencil whenever no value is specified by the
user.
DELETE
The process of removing a CHARACTER, a space, a line or a BLOCK of text from the
VIDEO DISPLAY SCREEN.
FILE
The entirety of text that has been entered onto the VIDEO DISPLAY SCREEN and
subsequently into the memory of The Electric Pencil. All the text resident within
the system at any given time is called a FILE.
FILE AREA
The area in memory that has been reserved for the FILE. When The Electric Pencil
is first turned on, this area is automatically determined by the system by
examining all available contiguous (adjoining) memory and claiming it. Whenever
the FILE AREA is full, the message "FILE AREA FULL" will appear on the screen.
JUSTIFICATION
The process of adjusting spaces within a Line of text in order to create an even
right-hand margin.
PAGE
Sixteen Lines of text appearing on the VIDEO DISPLAY SCREEN.
lines of text when referring to a printed PAGE.
May be any number of
PAGENATION
The process of automatically numbering pages.
PRINTER
An electric typewriter that prints text from The Electric Pencil FILE AREA onto
paper.
THE ELECTRIC PENCIL
OPERATOR'S MANUAL
Page 5
========
GLOSSARY
========
PRINT VALUE
A value assigned to a printing function by the user or by the system.
will determine Line Length, PAGE Length, Line Spacing, etc.
This value
READ
The action of moving a FILE from a cassette tape and inserting it into the FILE
AREA. ("Playing" a tape into the computer)
RECORD
Any BLOCK of text that is terminated by a LINE FEED or a FORM FEED. A RECORD may
be as short as one CHARACTER or as Long as the entire FILE. A RECORD is most
nearly like a paragraph.
SCROLL
The action of the text moving up or down the VIDEO DISPLAY SCREEN. More than 16
lines of text (one PAGE) must exist in the FILE for this action to occur.
STRING
Any consecutive grouping of Letters, spaces, numbers, punctuation or symbols.
this system, a STRING may be anywhere from 1 to 40 characters Long.
In
VIDEO DISPLAY SCREEN
The electronic display unit of The Electric Pencil. Also called a CRT (Cathode Ray
Tube) or monitor or simply screen. It may also be the face of a television set.
WORD
Any amount of characters with at Least one space at either end.
short as one CHARACTER or as long as one line.
A WORD may be as
WRITE
The action of moving text from the FILE AREA and recording it onto cassette tape.
("Recording" a tape from the computer)
THE ELECTRIC PENCIL
OPERATOR'S MANUAL
Page 6
GETTING STARTED
Whenever The Electric Pencil is entered for the first time or the system is
cleared, the video display screen will display:
THE ELECTRIC PENCIL (C) 1977 MICHAEL SHRAYER
Depressing any key on the keyboard will clear the screen and the character that was
typed will appear in the HOME or upper left-hand corner of the screen. A file may
now be started by typing in whatever text is desired. Note that RETURN is not used
at the end of a line and that any partially completed word that doesn't fit on the
line will be brought down to the next line. Typing can proceed normally until the
end of a paragraph is reached. At this point a LINE FEED should be typed to
terminate the paragraph or record. Any additional LINE FEEDS will insert blank
lines after the record. If this is to be the end of a page, a FORM FEED is typed.
Before continuing with this manual, the user is advised to try this in order to get
a "feel" of how text is entered into The Electric Pencil file area.
It is recommended that sentences begin at the extreme left margin since indentation
can not be guaranteed unless a line is terminated by a LINE FEED. Whenever a
specific number of spaces within a line are essential, the line must be terminated
by a LINE FEED. This is because lines are not delineated and may be broken up at
any point during printing. Exactly where a line will end is determined by the line
length that is selected by the user just prior to printing. However, by assuming
manual control of The Electric Pencil during printing, indentation is possible.
Experimentation and imagination will bring about almost any desired results in the
final printing of text.
THE ELECTRIC PENCIL
OPERATOR'S MANUAL
Page 7
COMMANDS AND FUNCTIONS
NOTE: Control Character Commands require that the CONTROL key and the specified
alphabetic character key be depressed simultaneously. Control Character Commands
(with the exception of LINE FEED and FORM FEED) will not appear on the video
display screen. In this text, all references to Control Character Commands shall
be designated by enclosing them in parenthesis, e.g. (A), (B). Standard keyboard
characters when referenced shall be enclosed in brackets, e.g. [A], [B], [5], etc.
COMMAND
(A)
(S)
(W)
(Z)
(N)
(Q)
(B)
(E)
(X)
(D)
(F)
(Y)
(G)
(T)
(U)
(H)
(J)
(L)
(I)
(M)
(V)
(C)
(R)
(K)
(P)
(O)
FUNCTION
CURSOR LEFT
CURSOR RIGHT
CURSOR UP
CURSOR DOWN
CURSOR HOME
CURSOR to END of FILE
CURSOR TO BEGINNING of FILE
SCROLL UP
(Forward)
SCROLL DOWN (Backwards)
DELETE CHARACTER
INSERT CHARACTER
DELETE LINE
INSERT LINE
ERASE to END of LINE
DELETE BLOCK
INSERT BLOCK
Same as LINE FEED
Same as FORM FEED
Same as TAB
Same as RETURN
STRING SEARCH
CONTINUE SEARCH
REPEAT FUNCTION
SUB-SYSTEM COMMAND TABLE
PRINT,
EXIT SYSTEM
CONTROL
DELETE
ESCAPE
FORM FEED
LINE FEED
RETURN
TAB
CREATE CONTROL CHARACTER
BACKSPACE and ERASE CHARACTER
RETURN to MAIN SYSTEM
TERMINATE a PAGE
TERMINATE a RECORD
CURSOR to BEGINNING of LINE
CURSOR 8 SPACES to the RIGHT
CONTROL CHARACTERS were selected
significance as shall be discussed.
for
VERSION SS NOTES
Left arrow may also be used
Right arrow may also be used
Up arrow may also be used
Down arrow may also be used
Use (N) or HOME
Use (Q)
Jumps to SOLOS or CUTER
location
and
convenience
rather
than
THE ELECTRIC PENCIL
OPERATOR'S MANUAL
Page 8
CURSOR MOTION COMMANDS
Notice that the most often used Cursor Motion Command keys are clustered at the
left of the keyboard. The keys that move the cursor UP and DOWN, and to the LEFT
and RIGHT form a diamond that conveniently points in these directions. The (Q) in
the upper left hand corner represents HOME, which is also the upper left corner of
the video display screen.
MOVING THE CURSOR TO THE BEGINNING AND END OF FILE
The (B) and (N) are not as heavily used as the above cursor commands and therefore
are not located in the same area. (B) returns the cursor to the beginning of the
file and (N) moves the cursor to the end of the file.
HOME (Q)
(W) UP
/\
/ \
/
\
LEFT (A) /
\
\
/
\
/
\ /
\/
(Z) DOWN
(E) SCROLL UP
(S) RIGHT
(X) SCROLL DOWN
SCROLLING AND DISPLAY CONTROL
SCROLLING is the action of the text moving up or down the video display screen.
More than 16 lines of text (one page) must exist in the file for this action to
occur. The (E) and (X) keys scroll the screen up and down respectively. The
cursor will disappear from the screen during a scroll. Scrolling speed may be
controlled by typing the numerals [1] through [5] while scrolling. [1] is the
fastest speed, and [5] is the slowest. Further control is provided by the SPACE
BAR, which temporarily halts the scroll. Continued depressions of the SPACE BAR
will scroll one line at a time in the direction previously selected. The RETURN
key will continue the scroll after it has been halted by the SPACE BAR. Whenever
the end of the file is reached or when ESCAPE is used, the scroll will stop
completely; the cursor will re-appear on the screen, and total system control will
return to the user.
THE ELECTRIC PENCIL
OPERATOR'S MANUAL
Page 9
DELETE CHARACTER
(D) is used to delete a character that exists in a body of text. The cursor is
simply placed over the character to be deleted, and (D) is typed. The entire text
then moves towards the cursor one position. Multiple deletions are also possible
from any location by deleting one character or space at a time.
INSERT CHARACTER
The Electric Pencil is normally in an over-write mode.
This means that any
character typed will appear wherever the cursor is located. If there is already a
character at the current cursor position, the new character typed will replace the
existing one. By typing (F), the Insert Mode is entered. The cursor itself will
change in its appearance to warn the user that the system is now in Insert Mode.
The manner of change will depend upon the equipment that is used with The Electric
Pencil. While in the Insert Mode any character typed will automatically shift the
entire text to the right and insert the new character into the cursor position.
Typing (F) or leaving the current line will exit the Insert Mode and the cursor
will assume its normal form. When the end of a line is reached, while in the
Insert Mode (or even while in the normal over-write mode), an entire line will be
opened up to allow for additional character insertion. If a line is only partially
filled, (D) will pull up the rest of the text to the cursor. Doing the above
actions will demonstrate more clearly what actually happens far better than this
manual can.
DELETE LINE
(Y) will delete whatever line the cursor is currently on.
INSERT LINE
(G) will move the line that the cursor is currently on down one and the cursor will
assume a position at the beginning of that line. Text may now be typed in as
needed and when the end of the line is reached, another (G) will automatically be
entered by the system allowing the user to continue entering text without
interuption.
ERASE TO END OF LINE
(T) erases all text from the current cursor position to the end of the current
line.
THE ELECTRIC PENCIL
OPERATOR'S MANUAL
Page 10
BLOCK MOVEMENT
A block is s defined as any amount of text as small as one character or as large as
an entire file. It may be a word or a sentence or a paragraph or a group of
paragraphs. In order to move a block of text to another part of the file or to
delete a block of text, it must first be marked. The character used to mark the
boundaries of a block is [\]. This character is also called a "marker". To mark
the boundaries of a block, the cursor is placed over the first character of the
text desired and then the [\] key is depressed. The action will be the same as if
the Insert Mode was entered. The text will shift right and the "marker" will be
placed. The cursor should now be moved to one character beyond the end of the
block of text desired and similarly marked. Exactly two markers must be used;
otherwise, a MARKER ERROR message will appear on the video display screen when a
move is attempted. ESCAPE is used when this occurs to return to the system so that
the user can place the markers correctly. Markers may be deleted using the search
function. Markers are automatically deleted during a block delete. Markers should
not be placed after a LF character on the screen. Instead, place the marker at the
beginning of the following line. This will prevent the appearance of two markers
on the screen.
DELETE BLOCK
(U) will delete a block that has been correctly marked as stated above. The block
markers are also deleted during this action. If a block is incorrectly marked or
not marked at all, "MARKER ERROR" will appear on the video display screen.
INSERT BLOCK
(H) is used to insert a correctly marked block at any selected cursor position and
may be repeated as often as desired. "MARKER ERROR" will appear on the video
display screen if an attempt is made to move a block into itself or if more or less
than two markers exist in the file.
LF, FF, TAB and RETURN
LF [LINE FEED] is used to terminate a record or to place an empty line between
records.
FF [FORM FEED] is also used to terminate a record, but when it is
encountered during printing, the printer will advance the paper to the top of the
next page. TAB may be used as an "express" key to quickly move across the screen
as well as its normal function of tabbing 8 spaces to the right. RETURN moves the
cursor to the beginning of the current line and also terminates commands in the
sub-system command table.
THE ELECTRIC PENCIL
OPERATOR'S MANUAL
Page 11
STRING SEARCH
The search function is used to Locate any string of characters that may exist in
the file from the current cursor position to the end of the file. (V) clears the
video display screen and then displays:
SEARCH STRING?
The character string desired followed by a RETURN is then typed in by the user.
The maximum string Length is 40 characters. The first occurence of the string from
the cursor position forward will appear as the top Line on the video display
screen.
The search may be continued by typing control character (C).
Each
subsequent "find" will also appear as the top line on the screen. When the end of
the file is reached or the string no longer exists in the file,
CAN NOT LOCATE "String"
will appear on the video display screen.
selected areas within a file.
This function is used to quickly locate
SEARCH and REPLACE
This function is used to locate a string and replace it with another string. The
old and new strings may be of different lengths. The way this is handled is as
follows:
SEARCH STRING? Old string/New string/12
followed by a RETURN. 12 represents the number of times that the replacement is to
occur and may be any decimal number. In the event that "Old string" only appears 8
times in the text (from the current cursor position), the screen will clear and
display:
LOCATED "Old string" 8 TIMES
The actual replacement will have been made 8 times. If "Old string" occurs 12 or
more times in the text, 12 replacements will be made and the cursor will return to
the file.
All occurences of "Old string" can be replaced by typing a number
greater than the possible occurences of "Old string" at the end of the reply to the
SEARCH STRING? question. For example:
SEARCH STRING? Mr. Jones/Mr. Smith/9999
The system will respond with:
LOCATED "Mr. Jones" 14 TIMES
Assuming "Mr. Jones" appears only 14 times in the text.
THE ELECTRIC PENCIL
OPERATOR'S MANUAL
Page 12
CODED STRING SEARCHES
Strings may be also located where only a certain pattern is required. Assuming a
file consists of names and addresses of clients with a code prefix as follows:
WS1234HP
Tom Jones
15 E. 94th St.
New York, N.Y. 10028
WP1235LP
Bill Smith
3800 Wilshire Blvd.
Los Angeles, CA. 90016
WS6784HL
Elmer Brown
300 N. Vermont
Los Angeles, CA. 90028
SEARCH STRING? WS###4H
will locate Tom Jones. Typing a control character (C) will then locate Elmer
Brown. Note that [#] is a "don't care" character. Using this function, a selected
mailing list can be produced. Other uses might include lists of sales prospects
with action dates to represent appointments, expirations, service dates, etc. Data
can be selectively extracted from a file automatically using the coded string
search function.
REPEAT FUNCTION
Most functions may be repeated any number of times as per the following examples:
(R)[5](D)
will delete 5 characters.
(R)[22][.]
will type 22 periods.
(R)[3](P)
will print 3 times.
The cursor will disappear whenever (R) is typed and will return after the number of
repeats are performed. In the event of a typing error, the cursor will return and
nothing else will happen. This three part command is not visible on the screen.
THE ELECTRIC PENCIL
OPERATOR'S MANUAL
Page 13
SUB-SYSTEM COMMAND TABLE
Within The Electric Pencil is a Sub-System Command Table that permits
implementation of additional commands as well as the setting up of Print Values.
(K) clears the video display screen and displays the Sub-System Command Table as
follows:
(Not in Version SS)
(DV Version only)
(SV and SP Versions only)
(SS Version only)
TAPE
TAPE
TAPE
WORD
RCRD
CLER
CLER
CLER
RGHT
LINE
CHAR
PAGE
PAGE
LEFT
PAGE
PRNT
LINE
READER
WRITER
VERIFY
NUMBER
NUMBER
AA CUR
AB CUR
SYSTEM
JUSTFY
SPACNG
SPACNG
SPACNG
LENGTH
MARGIN
NUMBER
LENGTH
LENGTH
R
W
V
X
Y
CAA
CAB
CLR
J0-1
S1-5
H8-50
A2-20
G1-72
MO-100
N1-255
PO-255
L25-125
While in this mode, the standard keyboard keys are used alone without the CONTROL
key. The above commands are NOT Control Character Commands.
When these commands are referenced in this text, they shall be enclosed
brackets, e.g. [A], [B], [5]. All commands must be terminated with RETURN.
DELETE key is used to backspace, and the ESCAPE key is used to leave
sub-system. Command entry errors are indicated with a question mark "?" on
video display screen. Note that some of the functions are abbreviated on
screen.
in
The
the
the
the
[R] TAPE READER
To enter a file that is on cassette tape into the file area of The Electric Pencil,
first depress the Tape Reader command [R], then run the cassette recorder to a
little before the file starts on the tape, press the cassette recorder play button,
and then hit RETURN. The cursor will disappear from the screen and reading will
begin. When the file has been correctly read into memory, "READY" will appear on
the screen. If there is an error in the tape, "TAPE ERROR" will appear. When a
file is read into The Electric Pencil, it is normally placed at the end of any
material that may already exist in the file area. If this is to be a new file, the
file area should be cleared. See [CLR], [CAA] and [CAB]. If the incoming file is
too long for the existing memory, "FILE AREA FULL" will appear on the screen. The
partially loaded file will then be removed from the file area with no
THE ELECTRIC PENCIL
OPERATOR'S MANUAL
Page 14
damage to the current file, if any. Version SS only: Files may be also called by
name per the SOLOS/CUTER format. Typing R SAMPL/2 will start cassette unit 2,
search for the file "SAMPL" and place the file into the file area when it is found.
A file name may be up to 5 characters long and the default value of the tape unit
is 1. Addresses are not used.
[W] TAPE WRITER
To write a file onto cassette tape, first place the cursor to the position in the
file from which you wish to write. If the entire file is needed, then (B) should
be used to place the cursor at the beginning of file. (K) will then bring up the
Sub-System Command Table. Depress [W], start the cassette recorder in Record mode
at a convenient location on the tape, let the tape run for 3-5 seconds and hit
RETURN. The cursor will disappear and writing will begin. When the file has been
recorded onto tape, "WRITTEN" will appear on the screen. Stop the recorder, rewind
to a little before the location where the writing started and VERIFY. When working
with lengthy text, it is advisable to periodically write the file onto tape as a
precaution against power failures which can destroy all material in the file area
as well as The Electric Pencil itself. Version SS only: Files may be named per the
SOLOS/CUTER format. Typing W PENCL/1 will start cassette unit 1 and the system
will then proceed to write a standard file header followed by the file itself. The
file will be a type D for Data file and not executable. File tapes may be scanned
for content using the CA command in SOLOS.
[V] TAPE VERIFY
NOT AVAILABLE IN VERSION SS
IV] is basically the same as [R] except the file is not placed into the file area.
It is, however, checked for correctness, and returns with "VERIFIED if the tape is
correct or with "TAPE ERROR" if it is not. A tape just written showing "TA ERROR"
should be re-written with [W]. Continual tape errors indicate faulty tape or a
faulty cassette recorder.
[X] WORD NUMBER
[X] will return the number of words that are in the file from the current cursor
position. A word is defined as any amount of characters with at least one space at
either end. A word may be as short as one character or as long as one line.
[Y] RECORD NUMBER
[Y] will return the number of records that are in the file from the current cursor
position. A record is defined as any block of text that is terminated by a LINE
FEED or a FORM FEED (L). A record may be as short as one character or as long as
the entire file. A record is most nearly like a paragraph.
THE ELECTRIC PENCIL
OPERATOR'S MANUAL
Page 15
CLEARING COMMANDS
The following clearing commands require three characters to be entered by the user
as a precaution against accidental destruction of the file area. These commands
should be used with caution since any material in the file area cannot be retrieved
once it has been erased. Back-up copies of text should always be made of files
before text is cleared.
[CAA] CLEAR ALL AFTER CURSOR
[CAA] will clear all text in the file from the cursor position just prior to
entering the Sub-System to the end of the file. Upon completion, the Sub-System is
aborted and normal operation is resumed.
[CAB] CLEAR ALL BEFORE CURSOR
[CAB] will clear all text in the file from the cursor position just prior to
entering the Sub-System to the beginning of the file. The character under the
cursor will not be cleared. Upon completion, the Sub-System is aborted and normal
operation is resumed.
[CLR] CLEAR SYSTEM
[CLR] will clear the entire file area as well as reset all PRINT VALUES to their
DEFAULT VALUES. The video display screen will clear and display:
THE ELECTRIC PENCIL (C) 1977 MICHAEL SHRAYER
[CLR] as well as [CAA] and [CAB] should be used with care.
SETTING UP PRINT VALUES
The following PRINT VALUES are automatically set to DEFAULT VALUES when The
Electric Pencil is first entered or when [CLR] is used. Whenever a command is
entered without a value and is followed by a RETURN, the system assumes the DEFAULT
VALUE for that command.
[J] RIGHT JUSTIFY
DEFAULT VALUE=0
[J0] (zero) sets the system to print as many characters on a line as will fit
without justifying the right-hand margin of the text. [J1] tells the system to
calculate the number of characters in a line and expand the text so that the
right-hand margin is justified (even). The Selectric versions do this by inserting
additional blank spaces between words, while the Diablo version actually spreads
out the spaces between characters. Hyphenation is normally not required using
[J1].
THE ELECTRIC PENCIL
[S] LINE SPACING
OPERATOR'S MANUAL
Page 16
DEFAULT VALUE=1
[S1] through [S5] sets the amount of blank lines between text lines that will
appear in printing (single spacing, double spacing, etc.).
[H] CHARACTER SPACING
DEFAULT VALUE=10
Version DV only: [H8] through [H50] sets the amount of space between characters
during printing. The values of [H] are what is called HMI (Horizontal Motion
Index) in a Diablo Product Description Manual.
[A] PAGE SPACING
DEFAULT VALUE=12
Version SV and SP only: [A2] through [A20] is the a amount of spaces (empty
lines) between pages during printing.
This function is handled mechanically on
the Diablo versions.
[G] PAGE LENGTH
DEFAULT VALUE=54
[G1] through [G72] sets the amount of lines of text that will appear on a page
during printing. An empty line also counts as a line of text.
[M] LEFT MARGIN
DEFAULT VALUE=0
[M0] through [M100] sets the position of the left margin.
LENGTH must not exceed the carriage width of the printer.
[N] PAGE NUMBER
VER. SS ONLY
This value added to LINE
DEFAULT VALUE=1
[N1] through [N255] sets the first page number to be used during printing. This
assumes that pagenation has been set up. The highest page number available is 255
and then the system resets to 0, 1, 2, etc.
[P] PRINT LENGTH
DEFAULT VALUE=0
[PO] enables printing of all the text from the cursor position to the end of the
file. [P1] through [P255] sets the number of records that will be printed from the
cursor position onward.
THE ELECTRIC PENCIL
[L] LINE LENGTH
OPERATOR'S MANUAL
Page 17
DEFAULT VALUE=62
[L25] through [L125] sets the number of characters per line of text that will be
printed. Using justification, the number of actual characters per line will vary
but the over-all character width of the line will be the value selected. At the
DEFAULT VALUE, the line length will be the same as that which appears on the video
display screen, and if justification is not selected, the text will be printed
exactly as it appears on the screen.
PRINTING
(P) commands The Electric Pencil to start printing text from the current cursor
position forward. The amount of text that will be printed is governed by the
setting of Print Length [P] in the sub-system. The format that the printed page
will assume is determined by the Print Values set up by the user prior to printing.
Printing may be repeated in order to obtain multiple copies of text by using the
Repeat Command (R).
The print head of the printer will print forwards and
backwards in the Diablo version while the Selectric versions will print forward
only.
Version SS only: The Electric Pencil uses the I/O ports selected by
SOLOS/CUTER for its keyboard and printer. Output pseudo port 0 is ALWAYS the video
display screen and if selected as the output device, PRINTING WILL NOT OCCUR!! Use
SE 0=1, 2 or 3 to select the printer. I/O should be set just prior to entering The
Electric Pencil.
PRINTING with a DIABLO
The Form length switch on the Diablo Hy-Type II should be set to the desired form
size. The paper is then manually advanced to the top of form and the SET TOF
switch then depressed. Additional information on how this is accomplished will be
found in the Diablo Manual. The cursor is then placed over the first character of
text text desired, and (P) is typed.
Printing will begin.
Printing may be
controlled by using the SPACEBAR, RETURN and ESCAPE as in scrolling.
PRINTING with a SELECTRIC, TTY, ETC.
Page Spacing [A] in the sub-system will determine the number of lines between
pages. The paper is manually advanced to the top of form desired. This position
will be where printing will actually start on the paper. The cursor is then placed
over the first character of text desired, and (P) is typed. Printing will begin.
Printing may be controlled by using the SPACE BAR, RETURN and ESCAPE as in
scrolling.
THE ELECTRIC PENCIL
OPERATOR'S MANUAL
Page 18
TITLING PAGES and PAGE NUMBERING
Pages may have title headings as in this manual by entering the following
information at the beginning of the file onto the video display screen:
$This is a Sample Title Heading [LF]
Note that in the above example a dollar sign [$] MUST precede the title and a LINE
FEED MUST be typed after the title text. In order for the title to appear in
printing as a title, printing MUST start with the cursor directly over the dollar
sign [$]. Otherwise, the title will be printed as regular text. If the title
length is greater than the Line Length [L] minus 10 selected in the sub-system, the
title text will appear on the printed page as regular text. Whenever a title
heading is used, pages will be automatically numbered at the extreme top right of
each page as they appear in this manual. If only page numbering is desired without
a page title, only the dollar sign [$] immediatly followed by a LINE FEED is used.
Printing must also begin directly over the [$]. In the course of printing, title
headings may be changed by placing additional title headings (using the above form)
into the text.
The Electric Pencil will recognize these ONLY if they appear
directly after a FORM FEED (L). The new title heading will then appear on all
subsequent pages till the end of printing, unless still another title is inserted
after a FORM FEED. Page numbering will remain sequential throughout. The starting
page number will always be 1 unless set otherwise in the sub-system.
UNDERLINING
Words or phrases may be underlined ONLY in lines shorter than 62 characters and
terminated by a LINE FEED. Underlining is not permissable within justified text.
Text is underlined by entering the following onto the video display screen:
THIS IS A TEST [LF]
______________ [LF]
will print: THIS IS A TEST
This is a NEW test [LF]
___ [LF]
will print: This is a NEW test
The above examples apply to the Diablo versions ONLY. On a Selectric, TTY, etc.,
the above form is reversed. The underline goes on the top and the text goes
directly below it.
THE ELECTRIC PENCIL
OPERATOR'S MANUAL
Page 19
EXIT SYSTEM
(O) is used to exit The Electric Pencil and go to a different location within the
computer. This location is presently set at 0E000H, but may be patched to any
location desired. See the patch locations section of this manual. If there isn't
anything located at 0E000H, DO NOT use this command. It will destroy The Electric
Pencil and its file area.
Should this occur, re-loading the system will be
required.
Version SS only: (O) exits The Electric Pencil and returns system
control to SOLOS/CUTER.
LOADING THE ELECTRIC PENCIL (VERSION SS)
Use the SOLOS/CUTER commands XE PENCL or GE PENCL to load The Electric Pencil. If
GE PENCL is used, then EX 0 will start the program. XE PENCL will automatically
load and start the program. The screen will clear and The Electric Pencil will
sign on. A good idea is to select the print device just prior to entering The
Electric Pencil. The only patch locations that may be needed are 0B40H which is
the number of printer nulls required (currently set to 0), and 0B3EH which is the
null character (currently set to 0).
LOADING THE ELECTRIC PENCIL (TARBELL CASSETTE)
The cassette interface input routine supplied with the Tarbell Cassette Interface
must be used. The starting address is 0000H and the block length is 1000H. A
proper load is indicated by a 'G' appearing on the terminal. The computer is then
reset, and The Electric Pencil will sign on. If this doesn't occur, some patches
may be required to allow The Electric Pencil to operate with your system.
Information as to specifically what patches to make for your system may be obtained
from the source where you purchased your tape. The following pages contain the
patch locations that may be required.
REGISTRATION
Please fill out the registration form that appears on the last page of this manual
so that your name will be placed on a mailing list to receive information of any
up-dates as well as improvements to The Electric Pencil. Happy Word Processing !!!
ADDR
0000
0000
0000
0000
0000
0000
0000
0000
0000
0000
0002
0004
0006
0008
000A
0019
0019
0082
0082
011D
011D
07C6
07C6
0922
0922
0927
0927
0927
0927
0929
092B
092E
0932
0934
0936
095E
095E
095E
095E
0960
0962
0964
0967
0968
096A
0A2C
0A2C
OCAA
0CB9
0E7C
0E7C
B1 B2 B3 B4 B5 EROR LINE
0001
0002
0003
0004
0005
0006
0007
0008
0009
00 00
0032
00 00
0033
00 00
0034
00 00
0035
00 00
0036
00 00
0037
0046
C8
0047
0098
7F
0099
0167
00 E0
0168
1055
7F
1056
1241
1B
1242
1247
1248
1249
DB 00
1250
E6 01
1251
C2 27 09
1252
C9
1253
DB 01
1257
E6 7F
1258
C9
1259
1282
1283
1284
F5
1285
DB 00
1286
E6 80
1287
C2 60 09
1288
F1
1289
D3 01
1290
C9
1291
1394
1B
1395
1B
1704
1B
1715
1817
00 CC
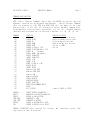
1818
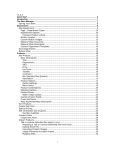
PATCH LOCATIONS VER. DV
;
;
;
;
;
;
;
;
;
PAGE 20
THE ELECTRIC PENCIL WORD PROCESSOR
WITH
DIABLO PRINT PACKAGE
VER. DV REV 0 VDM-1 MAY 1977
COPYRIGHT (C) 1977 MICHAEL SHRAYER
ALL RIGHTS RESERVED
DW
DW
DW
DW
DW
DW
0
0
0
0
0
0
RESERVED FOR USER
INITIALIZATION OF
I/O BOARD SUCH AS
IMSAI SIO-2, ETC.
DB
CTRL
VDM CONTROL PORT
DB
RUB
DELETE CHARACTER
DW
MONI
SYSTEM MONITOR
DB
RUB
DELETE CHARACTER
;
;
;
;
;
DB
ESC
;
;
KEYBOARD INPUT
;
STATS IN
STAT
ANI DAV
JNZ STATS
RET
INP8 IN
DATA
ANI 127
RET
;
;
PRINTER OUTPUT
;
OUT8 PUSH PSW
IN
STAT
ANI TBE
JNZ OUT8+1
POP PSW
OUT DATA
RET
;
DB
ESC
DB
ESC
DB
ESC
;
BASE DW
0CC00H
ESCAPE CHARACTER
ROUTINE
GET KEYBOARD STATUS
MASK STATUS BIT
MAY NEED JZ HERE
GET KEYBOARD DATA
STRIP PARITY BIT
ROUTINE
GET PRINTER STATUS
MASK STATUS BIT
MAY NEED JZ HERE
OUTPUT TO PRINTER
ESCAPE CHARACTER
ESCAPE CHARACTER
ESCAPE CHARACTER
VDM MEMORY ADDRESS
ADDR
0000
0000
0000
0000
0000
0000
0000
0000
0000
0000
0002
0004
0006
0008
000A
0019
0019
0082
0082
011D
011D
07C1
07C1
091D
091D
0922
0922
0922
0922
0924
0926
0929
092D
092E
0931
0932
0932
0932
0932
0933
0935
0937
093A
093B
093D
09FF
09FF
0B3B
0B3D
0DEC
B1 B2 B3 B4 B5 EROR LINE
0001
0002
0003
0004
0005
0006
0007
0008
0009
00 00
0032
00 00
0033
00 00
0034
00 00
0035
00 00
0036
00 00
0037
0046
C8
0047
0098
7F
0099
0167
00 E0
0168
1054
7F
1055
1240
1B
1241
1246
1247
1248
DB 00
1249
E6 01
1250
C2 22 09
1251
C9
1252
DB 01
1256
E6 7F
1257
C9
1258
1259
1260
1261
F5
1262
DB 00
1263
E6 80
1264
C2 33 09
1265
F1
1266
D3 01
1267
C9
1268
1371
1B
1372
00
1529
00
1533
00 CC
1756
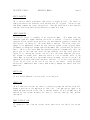
PATCH LOCATIONS
;
;
;
;
;
;
;
;
;
VER.SV
PAGE 21
THE ELECTRIC PENCIL WORD PROCESSOR
WITH
STANDARD PRINT PACKAGE
VER. SV
REV 0
VDM-1
MAY 1977
COPYRIGHT (C) 1977 MICHAEL SHRAYER
ALL RIGHTS RESERVED
DW
DW
DW
DW
DW
DW
0
0
0
0
0
0
RESERVED FOR USER
INITIALIZATION OF
I/O BOARD SUCH AS
IMSAI SIO-2, ETC.
DB
CTRL
VDM CONTROL PORT
DB
RUB
DELETE CHARACTER
DW
MONI
SYSTEM MONITOR
DB
RUB
DELETE CHARACTER
;
;
;
;
;
DB
ESC
;
;
KEYBOARD INPUT
;
STATS IN
STAT
ANI DAV
JNZ STATS
RET
INP8 IN
DATA
ANI 127
RET
;
;
PRINTER OUTPUT
;
OUT8 PUSH PSW
IN
STAT
ANI TBE
JNZ OUT8+1
POP PSW
OUT DATA
RET
;
DB
ESC
DB
0
DB
0
BASE DW
0CC00H
ESCAPE CHARACTER
ROUTINE
GET KEYBOARD STATUS
MASK STATUS BIT
MAY NEED JZ HERE
GET KEYBOARD DATA
STRIP PARITY BIT
ROLE
GET PRINTER STATUS
MASK STATUS BIT
MAY NEED JZ HERE
OUTPUT 70 PRINTER
ESCAPE CHARACTER
NULL CHARACTER
NUMBER OF NULLS
VDM MEMORY ADDRESS