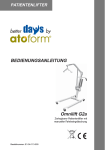
Download PATIENT LIFTER Operating manual Omnilift 170
Transcript
P AT I E N T L I F T E R
Operating manual
Omnilift 170
Manual leg operation
Order number: E1-04-119-001
Omnilift 170
Introduction
Welcome to the exciting Omnilift range of mobile hoists from Days
Healthcare.
These products are extremely user friendly and adaptable, designed to
ensure they meet the varying needs of professionals the carer and the
client.
Comfort and ease of use is of paramount importance. When required to
determine what offers the most flexibility and comfort for your clients,
the combination of an Omnilift hoist alongside the introduction of our
new sling range, provides you with the perfect partnership, offering you
solutions designed to meet your requirements.
The manual has been drawn up using information available at the time
of printing with regard to construction and operation of the Omnilift.
We reserve the right to make changes due to technical improvements.
If you have any questions about the Omnilift, please contact your
medical equipment supplier (see dealer stamp on back page of manual).
3
Issued: 09.06.2006
Omnilift 170
1.0
Contents
Safety instructions ............................................................................. 6
1.1 Symbols used .............................................................................. 6
1.2 Proper use ................................................................................... 6
1.3 General information ...................................................................... 6
1.4 Information about assembling the Omnilift ................................... 7
1.5 User guidelines ............................................................................ 7
1.6 Maintenance guidelines ............................................................... 9
2.0 Extent of delivery ............................................................................... 9
3.0 Components ..................................................................................... 10
4.0 Assembling the Omnilift .................................................................. 11
4.1 Assembling the Omnilift ............................................................. 11
5.0 Safety equipment ............................................................................. 12
5.1 EMERGENCY STOP switch ...................................................... 12
5.2 Emergency lowering (electric) .................................................... 12
5.3 Emergency lowering (mechanical) .............................................. 13
5.3.1 Emergency lowering settings .......................................... 13
6.0 Operating the Omnilift ..................................................................... 14
6.1 General safety measures ........................................................... 14
6.2 LED function in hand set ............................................................ 14
6.3 Raising / transfering / lowering person ........................................ 15
6.3.1 Open the chassis ........................................................... 15
6.3.2 Operating the brakes ...................................................... 16
6.3.3 Operating the boom ........................................................ 16
7.0 The battery ........................................................................................ 17
7.1 Charging checks ........................................................................ 17
7.1.1 Hand set functions .......................................................... 17
7.1.2 Control unit display explanations .................................... 17
7.2 Charging the battery ................................................................... 18
7.2.1 Charging information ....................................................... 18
7.2.2 Charging periods ............................................................. 18
7.2.3 Removing battery from Omnilift ...................................... 18
7.2.4 Charging the battery ....................................................... 19
7.2.5 After charging ................................................................. 21
8.0 Transport and storage ...................................................................... 22
9.0 Cleaning ........................................................................................... 23
10.0 Disinfection ...................................................................................... 23
11.0 Inspection the Omnilift .................................................................... 24
11.1 Daily checks .............................................................................. 24
4
Issued: 09.06.2006
Omnilift 170
12.0
13.0
14.0
15.0
16.0
17.0
Contents
11.2 Inspection plan .......................................................................... 24
11.2.1 Requirements on inspection personnel ............................ 24
11.2.2 Inspection intervals ......................................................... 24
11.2.3 Inspection instructions (for copying) ............................... 25
11.2.4 Measurements ................................................................ 27
Troubleshooting ............................................................................... 28
Temporary storage the Omnilift ...................................................... 29
Disposal ............................................................................................ 29
Appendix .......................................................................................... 30
15.1 Nameplate ................................................................................. 30
15.2 Specifications ............................................................................ 30
15.3 Dimensions ................................................................................ 31
Spare parts ....................................................................................... 32
Warranty ............................................................................................ 32
5
Issued: 09.06.2006
Omnilift 170
Safety information
1.0 Safety instructions
1.1
Symbols used
The following symbols are used throughout this manual:
Caution
This symbol identifies safety information relating to
hazards while using the Omnilift.
NOTE
You will also find information about handling the product under
this symbol.
1.2
Proper use
The Omnilift 170 is used exclusively for the lifting and transfering of
needy persons. It is only designed for transfering patients short
distances.
The manufacturer accepts no liability if the device is not properly used.
Use of the Omnilift is only permitted after the owner has been given
suitable training and taken the condition of the patient into account.
Please consult the patient’s doctor in borderline cases or if in doubt.
Limitations of use!
• Patients weighing more than 170 kg may not be lifted with the
Omnilift.
1.3
General information
Before assembling or using the Omnilift, please read this
operating manual carefully through!
Ensure that:
• the operating manual has been read by all persons who will be using
the Omnilift.
• all persons authorised to carry out assembly or maintenance of the
Omnilift must have access to this operating manual at all times.
Any damages resulting from nonobservance of this operating
manual are excluded from the guarantee.
6
Issued: 09.06.2006
Omnilift 170
Safety information
Risk of accidents!
• Only use the Omnilift for its correct and proper use.
The Omnilift is not a toy or gymnastic apparatus.
• Only use the Omnilift when it is in perfect working order.
• As soon as you notice any fault which could influence the
function and safety of the Omnilift, take it to your dealer to
be rectified.
1.4
Information about assembling the Omnilift
Clamping and crushing hazard!
There is an increased crushing and trapping hazard around
all joints on the Omnilift.
• When assembling, please take care around these hazard
zones.
Injury hazard due to improper assembly!
• Ensure that all Omnilift components have been correctly
assembled.
• After assembling, check all adjustment facilities for
perfect functioning.
Injury hazard!
• Only carry out work using suitable tools.
• Only carry out such work if you are practised in the use of the
tools to be used.
Always carry out a brake function test after maintenance
work and repairs!
1.5
User guidelines
Accident hazard!
• Always ensure that the wheel brakes are working perfectly
after assembling the Omnilift.
• If the Omnilift is not being used, always secure it by locking
the wheel brakes:
- while raising or lowering the patient
- during pauses while travelling
- when the Omnilift is unused and in storage
7
Issued: 09.06.2006
Omnilift 170
Safety information
Risk of accidents!
• You must ensure that the Omnilift and slings are in perfect
working condition every time before use.
• Only use the Omnilift on level solid ground.
• Avoid inclines and slippery floors.
• Unsettled patients should always be helped by an additional
carer. The carer must also be made aware of all hazards.
• Do not travel over any obstacles.
• Take care while passing through tight spaces such as doors and
narrow hallways.
• Never travel with the Omnilift when the chassis has been opened.
• Take care when going round corners.
• Only use the pushing handles while travelling.
• Ensure the person is in the lowest and most comfortable
position before travelling.
• Never leave the Omnilift unattended when a patient is in it.
• Never use the electric Omnilift under a shower.
Hazards due to mechanical faults!
• Always ensure that the prescribed maintenance is carried out
at the intervals stated.
Clamping and crushing hazard!
There is an increased crushing and trapping hazard around all
joints on the Omnilift.
• When carrying out adjustments, always ensure that nobody
reaches into these hazard areas.
8
Issued: 09.06.2006
Omnilift 170
1.6
Extent of delivery
Maintenance guidelines
Maintenance work may only be carried out by knowledgeable and
trained personnel.
Hazards due to mechanical faults!
• If any breakdowns occur, stop using the Omnilift immediately
and secure it against unauthorised use.
• Never carry out any modifications to the Omnilift’s mechanical
fittings unless they have been authorised by the manufacturer.
Any manufacturer’s guarantee liability is voided by
unauthorised alterations.
• Only carry out maintenance and repair work with suitable tools.
• Only use accessories and spare parts authorised by Days
Healthcare
2.0 Extent of delivery
The Omnilift is supplied packed in one carton.
Before starting to assemble the Omnilift, please check the packaging
contents using the attached list. If defects are noted, or components are
missing, please contact your medical equipment supplier.
(1) Chassis
(2) Mast with
control unit, actuator and hand set
(3) Operating lever
(4) Charging station with mains cable
(5) Operating manual
9
Issued: 09.06.2006
Omnilift 170
Components
3.0 Components
Boom
Mast
Spreader bar
Hand set
Control unit
with battery
Push handles
Actuator
Operating lever
to open chassis
Castors
Chassis
10
Issued: 09.06.2006
Castors with
brake
Omnilift 170
Assembling the Omnilift
4.0 Assembling the Omnilift
Before commencing assembly of the Omnilift, check the package
contents against chapter 2.0 „Extent of delivery“. If any faults are
apparent or components are missing, please contact Days Healthcare
or your medical supplier.
Observe safety information in chapter 1.0!
Inserting the mast
4.1
Assembling the Omnilift
➨ Set up the chassis and apply all the
wheel brakes on the Omnilift. Before
doing this, please read chapter 6.2.2
„Operation“.
➨ Insert mast (1) into chassis receptacle.
➨ Tighten the clamping screw (2) for the
boom in a clockwise direction.
Assembling operating
lever
➨ Insert operating lever (6) into running
gear receptacle.
11
Issued: 09.06.2006
Omnilift 170
Safety devices
5.0 Safety equipment
5.1
EMERGENCY STOP switch
➨ Switch on - press EMERGENCY STOP
switch.
The actuator stops immediately when the
EMERGENCY STOP switch is pressed.
It can no longer be operated using the
hand set.
➨ Switch off - turn EMERGENCY STOP
switch to the right.
The EMERGENCY STOP switch lock is
released by spring pressure.
The lifter is then ready for use.
5.2
Emergency lowering (electric)
The Omnilift boom can be electrically
lowered if the hand set has broken.
Lowering boom:
➨ Press key (1) on control unit (use a biro).
➨ Boom lowers slowly.
12
Issued: 09.06.2006
Lowering boom
Omnilift 170
5.3
Safety devices
Emergency lowering (mechanical) Lowering boom
If the actuator or control unit breaks down,
the Omnilift boom can be mechanically
lowered by unlocking the actuator.
Lowering boom:
➨ Pull the actuator unlocking lever up (3).
➨ Boom lowers slowly.
NOTE
Boom will only lower under load.
5.3.1 Emergency lowering settings
Accident hazard if emergency lowering is
incorrectly adjusted!
• Adjustments to the emergency lowering system may only be
carried out by specialist personnel.
• The Omnilift must not be carrying patients while adjustments
are being carried out.
You have the facility to adjust the
Adjusting emergency
emergency lowering brake depending on the lowering
weight of the patient (the permissible
maximum carrying capacity is set at the
works).
The brake is loosened slightly by turning the
setting screw (a) to the left (b), and
tightened by turning it to the right (c).
Caution!
This setting may only be carried out by
authorised personnel.
While doing so, please observe the following:
setpoint: the raising/lowering speed may not
exceed 0.15 m/s under load.
13
Issued: 09.06.2006
Omnilift 170
Operation
6.0 Operating the Omnilift
NOTE
The battery must be charged before initial use (see chapter 7.2).
6.1
General safety measures
Observe safety information in chapter 1.0!
Clamping and crushing hazard!
There is an increased crushing and trapping hazard around all
joints on the Omnilift.
• When carrying out adjustments, always ensure that nobody
reaches into these hazard areas.
When carrying out adjustments, please observe the following points:
• Before raising or lowering the person in the lift, ensure that there are
no foreign bodies blocking the boom movement range.
• Always observe the person sitting in the Omnilift and the Omnilift
surroundings while making adjustments.
• Avoid operating the actuators continuously for more than two minutes
(intermittent operation).
Maximum continuous operation of actuators = 2 minutes.
• Always lower the Omnilift boom to its lowest position before shutting
down.
6.2
LED function in hand set
The indicator lamp (LED) illuminates
green if the hand set is actuated.
14
Issued: 09.06.2006
LED in hand set
Omnilift 170
6.3
Operation
Raising / transfering / lowering person
Please note:
• Before raising or lowering
- open chassis
• Before travelling
- retract chassis
6.3.1 Open the chassis
Open chassis
Open the chassis:
➨ 1.) Press operating lever downwards
(loosen detent).
➨ 2.) Press operating lever to left as far as
limit stop.
Retracting chassis
Retracting the chassis:
➨ 1.) Press operating lever downwards
(loosen detent).
➨ 2.) Bring operating lever to central
position.
NOTE
The detent engages automatically
when you release the operating lever.
15
Issued: 09.06.2006
Omnilift 170
6.3.2 Operating the brakes
Operation
Wheel brakes
➨ (a / lock) = lock wheel brake.
➨ (b / free) = release wheel brake.
6.3.3 Operating the boom
➨ Press button for required direction.
a = raise boom
b = lower boom
NOTE
• The boom can be raised or lowered
between 15 and 40 times per battery
charging, depending on the weight of
persons being lifted.
• The control unit switches the
actuator off once the boom has
reached its limit position or is
blocked by an obstacle.
16
Issued: 09.06.2006
Hand set
Omnilift 170
Charging battery
7.0 The battery
7.1
Charging checks
The battery charging status is checked
using the hand set and the control unit
display.
7.1.1 Hand set functions
An audible warning sounds when a key is
pressed = indicating battery level at 50 %.
➨ Charge battery after use.
7.1.2 Control unit display explanations
LED control unit
The display shows the battery charging
status:
100% (1) = battery fully charged
75 % (2) = reduced battery level,
charge battery end of day
50 % (3) = reduced battery level,
charge battery after use.
25 % (4) = minimum battery level,
charge batteries, do not use
Omnilift until fully charged!
17
Issued: 09.06.2006
Omnilift 170
7.2
Charging battery
Charging the battery
7.2.1 Charging information
• Before the first use, recharge the battery for at least 10 hours.
• If the Omnilift is not being used, the battery needs to be charged at
least once per month, otherwise they will discharge by themselves
over time and the Omnilift will not be operational.
• The surrounding temperature should be between 10° and 30°C.
The charging period is longer at lower temperatures.
• Only charge the battery in dry rooms.
• The charger has an auto switch-off facility which prevents
overcharging the battery.
7.2.2 Charging periods
Between 5 and 14 hours depending on
current battery status.
7.2.3 Removing battery from Omnilift
➨ (1.) Pull locking lever.
➨ (2.) Ease battery out.
➨ (3.) Lift to remove.
18
Issued: 09.06.2006
Removing battery
Omnilift 170
7.2.4 Charging the battery
Charging battery
Plugging in the mains
cable
➨ Plug the mains cable plug into the
charging station socket.
Inserting battery
➨ Place the battery (1) in the charging
station.
To do this:
(1.) Place the battery on the top holder
and push into the bottom receptacle
on the charge unit.
(2.) Press the battery until the locking
device engages.
19
Issued: 09.06.2006
Omnilift 170
Charging battery
NOTE
Sequence
1. Mains cable in charging station
2. Mains plug in mains socket
Plugging in the mains
plug
must be observed when connecting
and disconnecting the charging
station.
➨ Plug charging station mains plug into
mains socket and switch on.
NOTE
The charging station switches on
automatically when connected to
the mains.
Explanation of charging station LEDs:
Green (1) and orange (2) illuminate
-> charging in progress
Green illuminates/orange off
-> charging complete
20
Issued: 09.06.2006
LED control unit
Omnilift 170
7.2.5 After charging
➨ Switch off, remove mains plug from
socket.
Charging battery
Removing
the mains
plug
Removing battery
➨ Remove battery from charging station.
To do this:
(1.) Pull locking lever.
(2.) Fold battery up.
(3.) Remove battery upwards.
Inserting battery
➨ Place battery in Omnilift.
To do this:
(1.) Place the battery on the top holder
and
push into the bottom receptacle on
the control unit.
(2.) Press the battery until the locking
device engages.
21
Issued: 09.06.2006
Omnilift 170
8.0 Transport and storage
The Omnilift can be dismantled in a few
moves so that it can also be easily
transported.
Always secure the components against
slipping during transport.
➨ Lower the boom to the lowest setting
(see Chapter 6.2.3).
➨ Remove the operating lever (1).
➨ Loosen wing nut (2).
➨ Separate top section (3) from chassis.
22
Issued: 09.06.2006
Transport and storage
Dismantling the
Omnilift
Omnilift 170
Cleaning
9.0 Cleaning
➨ Light soiling or dust is best removed using soft cloths.
➨ Heavy soiling can best be removed with damp cloths and slightly
soapy water.
Use a dry cloth to dry the Omnilift off after cleaning!
NOTE
• Do not use any sharp-edged tools such as knives, metal
scrapers or aggressive solvents for cleaning.
• Do not use high-pressure cleaners for cleaning.
• Only use mild detergents without scouring agents to clean any
surfaces.
• Please observe instructions for use on the detergents to avoid
damage to the component surfaces.
10.0 Disinfection
If disinfection during use is necessary, only suitable cleaning
agents may be used. Please observe instructions for use on the
disinfectant.
23
Issued: 09.06.2006
Omnilift 170
Inspection
11.0 Inspection the Omnilift
Hazards due to electric and mechanical faults!
• If the Omnilift should become defective, take it out of operation
immediately and secure it against unauthorised use (removing
battery - chapter 7.3).
• Always report any faults found immediately to the responsible
persons!
11.1 Daily checks
The following routine checks can be carried
out by the care personnel or carer before
everyday use:
➨ Visual check of all Omnilift components
for damage.
➨ Check function of wheel lock.
➨ Check function of actuator.
a = raise / b = lower
11.2 Inspection plan
11.2.1 Requirements on inspection personnel
All inspection work described below may only be carried out by expert
trained personnel. Evaluation of the checklist and maintenance work
carried out on the Omnilift may only be carried out by expert personnel
with suitable training, knowledge and experience.
11.2.2 Inspection intervals
The inspection intervals are dependent on the type of operations the
Omnilift carries out.
• Under normal surrounding and operating conditions, Days Healthcare
recommends inspection intervals of at least once a year in accordance
with LoLER regulations for the inspection of mechanical and electric
components, and for the measurement checks in accordance with
German BGV A3.
• If the Omnilift is stored for a period of time then brought back into
service, inspections should take place before first use (after reassembly)
and then at least once a year in accordance with LoLER regulations.
• The inspection intervals should be decreased if the Omnilift is subject to
increased use and loading (e.g. in old people’s home). In case of doubt,
please contact your medical equipment supplier.
24
Issued: 09.06.2006
Omnilift 170
Inspection
11.2.3 Inspection instructions (for copying)
Customer-No.: ______________________
Address: ______________________________________________
______________________________________________
______________________________________________
Type:_________ Device No.:_____________ Year of manf.:__________
Description
(Component / inspection for)
Hand set
Assessment
visual check of cable and plug
electric function
Actuator
visual check of cable and plug
electric function
electric emergency lowering
mechanical emergency lowering
Mains cable charging station
visual check
Mechanical leg action
joint without play
easy function
Control unit
EMERGENCY STOP
function
Housing without damage
Mast fixing
Battery
check voltage
replace battery more than
4 years old
Mast
visual check of welded seams
no damage
tight fit on chassis
OK
defective
❐
❐
❐
❐
❐
❐
❐
❐
❐
❐
❐
❐
❐
❐
❐
❐
❐
❐
❐
❐
❐
❐
❐
❐
❐
❐
❐
❐
❐
❐
❐
❐
❐
❐
❐
❐
25
Issued: 09.06.2006
Omnilift 170
Inspection
Description
(Component / inspection for)
Boom
Assessment
visual check of welded seams
no damage
joint without play
Spreader bar
Visual check of welded seams
no damage
connection to boom
Chassis
Visual check of welded seams
no damage
castors without damage
brake function
castors without damage
Carry out instrumentation check (chapter 12.2.4)
OK
defective
❐
❐
❐
❐
❐
❐
❐
❐
❐
❐
❐
❐
❐
❐
❐
❐
❐
❐
❐
❐
❐
❐
❐
❐
The following components must be replaced:
__________________________________________________________________
__________________________________________________________________
__________________________________________________________________
__________________________________________________________________
The device can be used again
Yes / No
Next inspection:____________________________
__________________________________________________________________
Date
Signature Inspector
Name of inspection company
________________________________
Date:
Operator’s signature
26
Issued: 09.06.2006
Omnilift 170
Inspection
11.2.4 Measurements
Some countries in the European Union have a legal requirement to carry
out the measurements listed below.
The nursing bed operator is responsible for determining the appropriate
national regulations.
All measurements described below may only be carried out by expert
trained personnel and with the use of suitable measuring instruments.
Any faults noted must be reported to the responsible person
immediately and rectified.
Description
Assessment
OK
defective
The following measurements must be carried out in
accordance with DIN VDE 0751:
Equivalent leakage currents
❒
❒
Information about measurement of equivalent leakage currents:
Typical value:
< 20 µA
Measurement locations: shorted-out mains plug (L+N) against polished,
metallic location on charging station frame
(bolts etc.)
27
Issued: 09.06.2006
Omnilift 170
Troubleshooting
12.0 Troubleshooting
Fault
possible cause
Remedy
The boom does not move up or
down despite pressing the key
on the hand set.
No optical or acoustic charging
reminder signal is apparent.
EMERGENCY
STOP switch is
pressed.
Unlock
EMERGENCY
STOP switch by
turning to the right.
Boom cannot be raised or
lowered.
Plugs are not
correctly plugged
into the control
unit.
Insert plug correctly
into control unit.
Battery empty.
Charge battery.
Battery defective.
Replace battery.
Actuator defective.
Replace actuator.
Control unit
defective.
Replace control
unit.
Hand set
If a loud click can
be heard from the
control unit when
you press and
release the key,
you can assume
there is no defect
in the hand set.
Possible cause of
fault: Control unit
defective!
Actuator defective.
Replace actuator.
Control unit
defective.
Replace control
unit.
If you cannot rectify the faults, please contact your dealer.
Do not open any electronic components, otherwise the product
liability warranty from the manufacturer will cease.
The actuator can run down to the lowest position even if the battery
is almost empty under normal conditions.
28
Issued: 09.06.2006
Omnilift 170
Temporary storage / Disposal
13.0 Temporary storage the Omnilift
If you do not intend to the use the Omnilift for longer periods, you
should prepare it as follows:
➨ Remove soiling and dust.
➨ Charge the battery completely.
Care during storage:
➨ Charge the battery once per month (see chapter 7.2).
14.0 Disposal
To comply with national law, the following
instructions are guidelines for the disposal
of your product at the end of its life or when
it ceases to function economically.
Recent legislation on electrical equipment
indicates that the equipment must be
disposed of in a proper manner.
• The product and /or its components are
not to enter the system of landfill sites.
• The product and /or its components are
not to be disposed of in domestic
household waste.
• The electrical and material parts are to be
disposed of as scrap or recycling
materials.
• Local waste collection depots are
available to advice and dispose of
electrical products.
• Batteries which contain liquid acid must
be stored and disposed of separately at
these depots.
• Please enquire about disposal depots with
your local authority.
• Should you require further advice, please
contact your supplier or nearest dealer.
29
Issued: 09.06.2006
Omnilift 170
Appendix
Nameplate
15.0 Appendix
15.1 Nameplate
The nameplate (1) is located on
the Omnilift mast.
15.2 Specifications
Type:
Floor-travelling lifter; can be dismantled
Lifting system:
Electric motor
Travel:
measured from floor to
supporting arm mounting
67 cm – 206 cm
Lifting capacity:
170 Kg
Number of lifts possible
per battery charge:
Approx. 40 lifts at 85 kg patient weight.
Charging period:
Approx. 5 - 14 hours
Control unit with battery: Input: 100 V- 240 V AC
Output: 24 V DC
I max. 4 A
On duration max.: 15 %
in continuous operation max. 2 min. /
5 switch cycles per min.
Actuator:
Input: 24 V DC
I max. 4 A
Safety class: IP 54
On duration max.: 15 %
in continuous operation max. 2 min. /
5 switch cycles per min.
Hand set:
switching UP / DOWN
30
Issued: 09.06.2006
Omnilift 170
Appendix
Noise emission level:
LpA < = 42 db(A) to DIN 45635-19-01-KL2
Chassis:
extendable
4 lightweight castors, 360° swivelling,
2 off. with locking device for turning and
rolling movement
Weight:
Total weight:
40.0 kg
Chassis:
19.5 kg
Mast with actuator: 20.5 kg
Material:
Mast:
steel
Chassis: steel
Surface: white RAL 9010
powder-coated
15.3 Dimensions
Chassis width
(travel legs parallel)
59 cm
Chassis width (open)
116 cm
Chassis length
115 cm
Chassis height with
roller diameter 75 mm
Roller diameter 100 mm
12 cm (front)
13.5 cm (back)
Overall lifter height
boom at bottom
134 cm
boom height
Lowest setting
highest setting
48 cm
183 cm
Boom length
79 cm
31
Issued: 09.06.2006
Omnilift 170
Spare parts / Warranty
16.0 Spare parts
Spare parts can be obtained from your Days Healthcare pecialist
dealer. Only original Days Healthcare pare parts may be used
(See dealer stamp on reverse of the envelope).
17.0 Warranty
The omnilift carries a 24 months warranty, the batteries carry a 12
months warranty from date of purchase.
Important!
• During the warranty period any parts that have become defective due
to faulty workmanship or material will be repaired or replaced without
charge by Days Healthcare supplier / dealer.
• The warranty excludes all items that have been subject to undue wear
and items subjected to misuse.
• Unauthorized changes or modifications will forfeit your warranty.
• If a defect or fault is discovered, the Days Healthcare supplier /
dealer from whom the omnilift was purchased should be notified
immediately.
Limitation of liability
The warranty does not extend to the consequential costs resulting from
fault clearence, in particular freight and travel costs, loss of earnings,
expenses, etc.
The manufacturer will not accept responsibility for any damage or injury
caused by misuse or non-observance of the instructions set out in this
user manual.
32
Issued: 09.06.2006
(Dealer´s stamp)
Days Healthcare UK Ltd
North Road
Bridgend Industrial Estate
Bridgend
CF31 3TP
(t) + 044 1656 66 47 00
(f) + 044 1656 66 47 50
(e) [email protected]
(w) www.dayshealthcare.com


