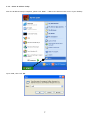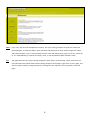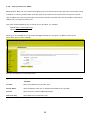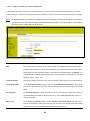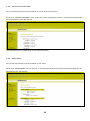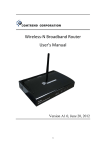
1
Conceptronic 150N Wireless LAN Broadband Router User’s Manual Version: 1.1 Contents CHAPTER I: PRODUCT INFORMATION 1-1. Introduction and safety information 1-2. Safety Information 1-3. Package Contents 1-4. Familiar with your new wireless broadband router CHAPTER II: SYSTEM AND NETWORK SETUP 2-1. Build network connection 2-2. Connecting to wireless broadband router by web browser 2-2-1. Windows XP IP address setup 2-2-2. Windows Vista IP address setup 2-2-3. Router IP address lookup 2-2-4. Connect the router’s management interface by web browser 2-3. Using ‘Quick Setup’ 2-3-1. Setup procedure for ‘Dynamic IP’ 2-3-2. Setup procedure for ‘Static IP’ 2-3-3. Setup procedure for ‘PPPoE xDSL’ 2-3-4. Setup procedure for ‘PPTP xDSL’ 2-3-5. Setup procedure for ‘L2TP xDSL’ 2-3-6. Setup procedure for ‘Telstra Big Pond’ 2-4. Basic Setup 2-4-1. Time zone and time auto-synchronization 2-4-2. Change management password 2-4-3. Remote Management 2-5. Setup Internet Connection (WAN Setup) 2-5-1. Setup procedure for ‘Dynamic IP’ 2-5-2. Setup procedure for ‘Static IP’ 2-5-3. Setup procedure for ‘PPPoE’ 2-5-4. Setup procedure for ‘PPTP’ 2-5-5. Setup procedure for ‘L2TP’ 2-5-6. Setup procedure for ‘Telstra Big Pond’ 2-5-7. Setup procedure for ‘DNS’ 2-5-8. Setup procedure for ‘DDNS’ 2-6. Wired LAN Configurations 2-6-1. LAN IP section 2-6-2. DHCP Server 2-6-3. Static DHCP Leases Table 2-7. Wireless LAN Configurations 2-7-1. Basic Wireless Settings 2-7-1-1. Setup procedure for ‘AP' 2-7-1-2. Setup procedure for ‘Station-Infrastructure' 2-7-1-3. Setup procedure for ‘AP Bridge - Point to Point’ 2-7-1-4. Setup procedure for ‘AP Bridge - Point to Multi Point’ 2-7-1-5. Setup procedure for ‘AP Bridge - WDS’ 2-7-1-6. Setup procedure for ‘Universal Repeater' 2-7-2. Advanced Wireless Settings 2-7-3. Wireless Security 2-7-3-1. Disable wireless security 2-7-3-2. WEP - Wired Equivalent Privacy 2-7-3-3. Wi-Fi Protected Access (WPA) 2-7-3-4. WPA RADIUS 2-7-4. Wireless Access Control 2-7-5. Wi-Fi Protected Setup (WPS) 2-7-6. Security Tips for Wireless Network CHAPTER III: ADVANCED FUNCTIONS 3-1. Quality of Service (QoS) 3-1-1. Basic QoS Settings 3-1-2. Add a new QoS rule 3-2. Network Address Translation (NAT) 3-2-1. Basic NAT Settings (Enable or disable NAT function) 3-2-2. Port Forwarding 3-2-3. Virtual Server 3-2-4. Port Mapping for Special Applications 3-2-5. UPnP Setting 3-2-6. ALG Settings 3-3. Firewall 3-3-1. Access Control 3-3-1-1. Add PC 3-3-2. URL Blocking 3-3-3. DoS Attack Prevention 3-3-3-1. DoS - Advanced Settings 3-3-4. Demilitarized Zone (DMZ) 3-4. System Status 3-4-1. System information and firmware version 3-4-2. Internet Connection Status 3-4-3. Device Status 3-4-4. System Log 3-4-5. Active DHCP client list 3-4-6. Statistics 3-5. Configuration Backup and Restore 3-6. Firmware Upgrade 3-7. System Reset CHAPTER IV: 4-1. Troubleshooting 4-2. Glossary 4-3. License Agreement APPENDIX Chapter I: Product information 1-1. Introduction and safety information Thank you for purchasing this wireless broadband router! This high cost-efficiency router is the best choice for Small office / Home office users, all computers and network devices can share a single xDSL / cable modem internet connection at high speed. Easy install procedures allows any computer users to setup a network environment in very short time - within minutes, even inexperienced. When the number of your computers and network-enabled devices grow, you can also expand the number of network slot by simple attach a hub or switch, to extend the scope of your network! All computers and IEEE 802.11b/g/Draft-N wireless-enabled network devices (including PDA, cellular phone, game console, and more!) can connect to this wireless router without additional cabling. With a compatible wireless card installed in your PC, you can transfer file for up to 150Mbps (transfer data rate). Other features of this router including: High Internet Access throughput Allow multiple users to share a single Internet line Supports up to 253 users Share a single Cable or xDSL internet connection Access private LAN servers from the internet Four wired LAN ports (10/100M) and one WAN port (10/100M) Work with IEEE 802.11b/g/Draft-N wireless LAN devices Support DHCP (Server/Client) for easy IP-address setup Support multiple wireless modes like: AP, Station-Infrastructure, Wireless Bridge and Universal Repeater. Advanced network and security features like: Special Applications, QoS, DMZ, Virtual Servers, Access Control, Firewall. Allow you to monitor the router‟s status like: DHCP Client Log, System Log, Security Log and Device/Connection Status Easy to use Web-based GUI for network configuration and management purposes Remote management function allows configuration and upgrades from a remote computer (over the Internet) Auto MDI / MDI-X function for all wired Ethernet ports. 1 1-2. Safety information In order to keep the safety of users and your properties, please follow the following safety instructions: This router is designed for indoor use only; DO NOT place this router outdoor. DO NOT put this router at or near hot or humid places, like kitchen or bathroom. Also, do not left this router in the car in summer. DO NOT pull any connected cable with force; disconnect it from the router first. If you want to place this router at high places or hang on the wall, please make sure the router is firmly secured. Falling from high places would damage the router and its accessories, and warranty will be void. Accessories of this router, like antenna and power supply, are danger to small children under 3 years old. They may put the small parts in their nose or month and it could cause serious damage to them. KEEP THIS ROUTER OUT THE REACH OF CHILDREN! The router will become hot when being used for long time (This is normal and is not a malfunction). DO NOT put this router on paper, cloth, or other flammable materials. There‟s no user-serviceable part inside the router. If you found that the router is not working properly, please contact your dealer of purchase and ask for help. DO NOT disassemble the router, warranty will be void. If the router falls into water when it‟s powered, DO NOT use your hand to pick it up. Switch the electrical power off before you do anything, or contact an experienced technician for help. If you smell something strange, or even see some smoke coming out from the router or power supply, remove the power supply or switch the electrical power off immediately, and call dealer of purchase for help. 1-3. Package contents The following items are present in the package of the Conceptronic 150N Wireless Router: Conceptronic C150BRS4 – 150N Wireless Router Power supply 12V DC, 1A Network (LAN) cable Product CD-ROM Multi language quick installation guide Warranty card & CE declaration booklet 2 1-4. Familiar with your new wireless broadband router Front Panel LED Name Light Status Description PWR On Router is switched on and correctly powered. On Wireless WPS function is enabled. Off Wireless network is switched off. Flashing Wireless LAN activity (transferring or receiving data). On WAN port is connected. Off WAN port is not connected. Flashing WAN activity (transferring or receiving data). On LAN port is connected. Off LAN port is not connected. Flashing LAN activity (transferring or receiving data). WLAN WAN LNK/ACT LAN 1-4 LNK/ACT Back Panel Item Name Description Antenna It is 3dBi dipole antenna. Radio ON/OFF Switch the button to activate or deactivate the wireless functions. Reset / WPS Reset the router to factory default settings (clear all settings) or start WPS function. Press this button and hold for 10 seconds to restore all settings to factory defaults, and press this button for less than 5 seconds to start WPS function. 1-4 Local Area Network (LAN) ports 1 to 4. WAN Wide Area Network (WAN / Internet) port. Power Power connector, connects to A/C power adapter. 3 Chapter II: System and network setup 2-1. Build network connection Please follow the following instruction to build the network connection between your new WIRELESS router and your computers, network devices: A. Connect your xDSL / cable modem to the WAN port of router by Ethernet cable. B. Connect all your computers, network devices (network-enabled consumer devices other than computers, like game console, or switch / hub) to the LAN port of the router. C. Connect the A/C power adapter to the wall socket, and then connect it to the „Power‟ socket of the router. D. Please check all LEDs on the front panel. „PWR‟ LED should be steadily on, WAN and LAN LEDs should be on if the computer / network device connected to the respective port of the router is powered on and correctly connected. If PWD LED is not on, or any LED you expected is not on, please recheck the cabling, or jump to ‘4-2 Troubleshooting’ for possible reasons and solution. 2-2. Connecting to wireless broadband router by web browser After the network connection is built, the next step you should do is setup the router with proper network parameters, so it can work properly in your network environment. Before you can connect to the router and start configuration procedures, your computer must be able to get an IP address automatically (use dynamic IP address). If it‟s set to use static IP address, or you‟re unsure, please follow the following instructions to configure your computer to use dynamic IP address: 4 2-2-1. Windows XP IP address setup: A. Click „Start‟ button (it should be located at lower-left corner of your computer), then click control panel. Double-click Network and Internet Connections icon, click Network Connections, then double-click Local Area Connection, Local Area Connection Status window will appear, and then click „Properties‟ B. Select „Obtain an IP address automatically‟ and „Obtain DNS server address automatically‟, then click „OK‟. 5 2-2-2. Windows Vista IP address setup: A. Click „Start‟ button (it should be located at lower-left corner of your computer), then click control panel. Click View Network Status and Tasks, and then click Manage Network Connections. Right-click Local Area Network, then select ‘Properties’. Local Area Connection Properties window will appear, select „Internet Protocol Version 4 (TCP / IPv4)‟, and then click „Properties‟. B. Select „Obtain an IP address automatically‟ and „Obtain DNS server address automatically‟, then click „OK‟. 6 2-2-3. Router IP address lookup After the IP address setup is complete, please click „Start‟ -> „Run‟ at the bottom-lower corner of your desktop: Input „cmd‟, then click „OK‟ 7 Input „ipconfig‟, then press „Enter‟ key. Please check the IP address followed by „Default Gateway‟ (In this example, the IP address of router is 192.168.0.1, please note that this value may be different.) Note: If the IP address of Gateway is not displayed, or the address followed by „IP Address‟ begins with „169‟, please recheck network connection between your computer and router, and / or go to the beginning of this chapter, to recheck every step of network setup procedure. 2-2-4. Connect the router’s management interface by web browser After your computer obtained an IP address from router, please start your web browser, and input the IP address of router in address bar. The following message should be shown: Please input user name and password in the field respectively, default user name is „admin‟, and default password is „admin‟, then press „OK‟ button, and you can see the web management interface of this router: 8 Note: If you can‟t see the web management interface, and you‟re being prompted to input user name and password again, it means you didn‟t input username and password correctly. Please retype user name and password again. If you‟re certain about the user name and password you type are correct, please go to „4-2 Troubleshooting‟ to perform a factory reset, to set the password back to default value. Tip: This page shows the four major setting categories: Quick Setup, General Setup, Status, and Tools. You can find the shortcut which leads to these setting categories at the upper-right corner of every page, and you can jump to another category directly by clicking the link, and don‟t have to go back to the first page. 9 2-3. Using ‘Quick Setup’ This router provides a „Quick Setup‟ procedure, which will help you to complete all required settings you need to access the Internet in very short time. Please follow the following instructions to complete the „Quick Setup‟: Please go to QuickSetup menu by clicking „Quick Setup‟ button. And the following message will be displayed: A. Set Time Zone Here are descriptions of every setup items: Time Zone Select a timezone location from the drop-down list. Time Server Address Input the IP address / host name of time server here Daylight Savings If the country you live uses daylight saving, please check „Enable Function‟ box, and choose the duration of daylight saving. 10 After you finish with all settings, please click „Apply‟ button. B. Broadband Type Please choose the broadband (Internet connection) type you‟re using in this page. There are six types of Internet connection, they are: Dynamic IP - Please go to section 2-3-1 Static IP - Please go to section 2-3-2 PPPoE - Please go to section 2-3-3 PPTP - Please go to section 2-3-4 L2TP - Please go to section 2-3-5 Telstra Big Pond - Please go to section 2-3-6 If you‟re not sure, please contact your Internet service provider. A wrong Internet connection type will cause connection problem, and you will not be able to connect to internet. If you want to go back to previous step, please press „Back‟ button on the bottom of this page. Note: Some service providers use „DHCP‟ (Dynamic Host Configuration Protocol) to assign IP address to you. In this case, you can choose „Dynamic IP‟ as Internet connection type, even you‟re using another connection type, like xDSL. Also, some cable modem uses PPPoE, so you can choose „PPPoE‟ for such cable modem connection, even you‟re using a cable modem. 11 2-3-1. Setup procedure for ‘Dynamic IP’ Here are descriptions of every setup items: Host Name Please input the host name of your computer, this is optional, and only required if your service provider asks you to do so. MAC address Please input MAC address of your computer here, if your service provider only permits computer with certain MAC address to access internet. If you‟re using the computer which used to connect to Internet via cable modem, you can simply press „Clone MAC‟ button to fill the MAC address field with the MAC address of your computer. After you finish with all settings, please click „OK‟ button; if you want to go back to previous menu, click „Back‟. 12 2-3-2. Setup procedure for ‘Static IP’ Here are descriptions of every setup items: IP address Please input IP address assigned by your service provider. Subnet Mask Please input subnet mask assigned by your service provider DNS address Please input the IP address of DNS server provided by your service provider. Gateway Address Please input the IP address of the Gateway provided by your service provider. You must use the addresses provided by your Internet service provider, wrong setting value will cause connection problem. When you finish with all settings, press „OK‟; if you want to go back to previous menu, click „Back‟. Note: You can choose this Internet connection method if your service provider assigns a fixed IP address (also know as static address) to you, and not using DHCP or PPPoE protocol. Please contact your service provider for further information. 13 2-3-3. Setup procedure for ‘PPPoE’ Here are descriptions of every setup items: User Name Please input user name assigned by your Internet service provider here. Password Please input the password assigned by your Internet service provider here. Service Name Please give a name to this Internet service, this is optional MTU Please input the MTU value of your network connection here. If you don‟t know, you can use default value. Connection Type Please select the connection type of Internet connection you wish to use. There are 3 options: „Continuous‟ Keep internet connection alive, do not disconnect. „Connect on Demand‟ Only connects to Internet when there‟s a connect attempt. „Manual‟ Only connects to Internet when „Connect‟ button on this page is pressed, and disconnects when „Disconnect button is pressed. Idle Time Out Please input idle time out. Specify the time to shutdown internet connect after no internet activity is detected by minute. This option is only available when connection type is „Connect on Demand‟. When you finish with all settings, please click „OK‟; if you want to go back to previous menu, click „Back‟. 14 2-3-4. Setup procedure for ‘PPTP’ PPTP requires two kinds of setting: WAN interface setting (setup IP address) and PPTP setting (PPTP user name and password). Here we start from WAN interface setting: Select the type of how you obtain IP address from your service provider here. You can choose „Obtain an IP address automatically‟ (equal to DHCP, please refer to „Dynamic IP‟ section above), or „Use the following IP address‟ (i.e. static IP address). WAN interface settings must be correctly set, or the Internet connection will fail even those settings of PPTP settings are correct. Please contact your Internet service provider if you don‟t know what you should fill in these fields. 15 Next, the PPTP settings section: Here are descriptions of every setup items: User Name Please input user ID (user name) assigned by your Internet service provider here. Password Please input the password assigned by your Internet service provider here. PPTP Gateway Please input the IP address of PPTP gateway assigned by your Internet service provider here. Connection ID Please input the connection ID here, this is optional and you can leave it blank. MTU Please input the MTU value of your network connection here. If you don‟t know, you can use default value. BEZEQ-ISRAEL Setting item „BEZEQ-ISRAEL‟ is only required to check if you‟re using the service provided by BEZEQ network in Israel. Connection Type Please select the connection type of Internet connection you wish to use, please refer to last section for detailed descriptions. Idle Time Out Please input the idle time out of Internet connection you wish to use, and refer to last section for detailed descriptions. When you finish with all settings, please click „OK‟; if you want to go back to previous menu, click „Back‟. 16 2-3-5. Setup procedure for ‘L2TP’ L2TP is another popular connection method for xDSL and other Internet connection types, and all required setting items are the same with PPTP connection. Like PPTP, there are two kinds of required setting. We‟ll start from „WAN Interface Settings‟: Please select the type of how you obtain IP address from your service provider here. You can choose „Obtain an IP address automatically‟ (equal to DHCP, please refer to „Dynamic IP‟ section above), or „Use the following IP address‟ (equal to static IP address, please refer to „PPPoE‟ section above). WAN interface settings must be correctly set, or the Internet connection will fail even those settings of PPTP settings are correct. Please contact your Internet service provider if you don‟t know what you should fill in these fields. 17 Next, the L2TP settings section: Here are descriptions of every setup items: User Name Please input user ID (user name) assigned by your Internet service provider here. Password Please input the password assigned by your Internet service provider here. L2TP Gateway Please input the IP address of PPTP gateway assigned by your Internet service provider here. MTU Please input the MTU value of your network connection here. If you don‟t know, you can use default value. Connection Type Please select the connection type of Internet connection you wish to use, please refer to last section for detailed descriptions. Idle Time Out Please input the idle time out of Internet connection you wish to use, and refer to last section for detailed descriptions. When you finish with all settings, please click „OK‟; if you want to go back to previous menu, click „Back‟. 18 2-3-6. Setup procedure for ‘Telstra Big Pond’ This setting only works when you‟re using Telstra big pond‟s network service in Australia. You need to input: User Name Please input the user name assigned by Telstra. Password Please input the password assigned by Telstra. Assign login server manually Check this box to choose login server by yourself. Server IP Address Please input the IP address of login server here. When you finish with all settings, click „OK‟; if you want to go back to previous menu, click „Back‟. When all settings are finished, you‟ll see the following message displayed on your web browser: Please click „Apply‟ button to prepare to restart the router, and you‟ll see this message: Please wait for about 30 seconds, then click „OK‟ button. You‟ll be back to router management interface again, and the router is ready with new settings. 19 2-4. Basic Setup In this chapter, you‟ll know how to change the time zone, password, and remote management settings. Please start your web browser and log onto router web management interface, then click „General Setup‟ button on the left, or click „General Setup‟ link at the upper-right corner of web management interface. 2-4-1. Time zone and time auto-synchronization Please follow the following instructions to set time zone and time auto-synchronization parameters: Please click „System‟ menu on the left of web management interface, then click „Time Zone‟, and the following message will be displayed on your web browser: Please select time zone at „Set time zone‟ drop-down list, and input the IP address or host name of time server. If you want to enable daylight savings setting, please check „Enable Function‟ box, and set the duration of daylight setting. When you finish, click „Apply‟. 20 You‟ll see the following message displayed on web browser: Press „Continue‟ to save the settings made and back to web management interface; press „Apply‟ to save the settings made and restart the router so the settings will take effect after it reboots. Note: You can refer to the instructions given in last chapter: „Using Quick Setup‟, for detailed descriptions on time zone settings. 2-4-2. Change management password Default password of this router is „admin‟, and it‟s displayed on the login prompt when accessed from web browser. There‟s a security risk if you don‟t change the default password, since everyone can see it. This is very important when you have wireless function enabled. To change password, please follow the following instructions: Please click „System‟ menu on the left of web management interface, then click „Password Settings‟, and the following message will be displayed on your web browser: Here are descriptions of every setup items: Current Password Please input current password here. New Password Please input new password here. Confirm Password Please input new password here again. When you finish, click „Apply‟. If you want to keep original password unchanged, click „Cancel‟. 21 If the password you typed in „New Password‟ and „Confirm Password‟ field are not the same, you‟ll see the following message: Please retype the new password again when you see above message. If you see the following message: It means the content in „Current Password‟ field is wrong, please click „OK‟ to go back to previous menu, and try to input current password again. If the current and new passwords are correctly entered, after you click „Apply‟, you‟ll be prompted to input your new password: Please use new password to enter web management interface again, and you should be able to login with new password. 22 2-4-3. Remote Management This router does not allow management access from Internet, to prevent possible security risks (especially when you defined a weak password, or didn‟t change default password). However, you can still management this router from a specific IP address by enabling the „Remote Management‟ Function. To do so, please follow the following instructions: Please click „System‟ menu on the left of web management interface, then click „Remote Management‟, and the following message will be displayed on your web browser: Here are descriptions of every setup items: Host Address Input the IP address of the remote host you wish to initiate a management access. Port You can define the port number this router should expect an incoming request. If you‟re providing a web service (default port number is 80), you should try to use other port number. You can use the default port setting „8080‟, or something like „32245‟ or „1429‟. (Any integer between 1 and 65534) Enable Select the field to start the configuration. When you finish with all settings, click „Apply‟, and you‟ll see the following message displayed on web browser: Press „Continue‟ to save the settings made and back to web management interface; press „Apply‟ to save the settings made and restart the router so the settings will take effect after it reboots. 23 Note: When you want to manage this router from another computer on internet, you have to input the IP address and port number of this router. If your Internet service provider assigns you with a static IP address, it will not be a problem; but if the IP address your service provider assigns to you will vary every time you establish an internet connection, this will be a problem. Please either asks your service provider to give you a static IP address, or use dynamic IP to host name mapping services like DDNS. Please refer to chapter 2-5-8 „DDNS client‟ for details. Note: Default port number the web browser will use is „80‟. If the „Port‟ setting in this page is not „80‟, you have to assign the port number in the address bar of web browser manually. For example, if the IP address of this router is 1.2.3.4, and the port number you set is 8888, you have to input following address in the address bar of web browser: http://1.2.3.4:8888 24 2-5. Setup Internet Connection (WAN Setup) Internet connections setup can be done by using „Quick Setup‟ menu described in chapter 2-3. However, you can setup WAN connections up by using WAN configuration menu. You can also set advanced functions like DDNS (Dynamic DNS) here. To start configuration, please follow the following instructions: Please click „WAN‟ menu on the left of web management interface, and the following message will be displayed on your web browser: Please select an Internet connection method depend on the type of connection you‟re using. You can either click the connection method on the left or right. If you select the connection method on the right, please click „More Configuration‟ button after a method is selected. Dynamic IP - Please go to section 2-5-1 Static IP - Please go to section 2-5-2 PPPoE - Please go to section 2-5-3 PPTP - Please go to section 2-5-4 L2TP - Please go to section 2-5-5 Telstra Big Pond - Please go to section 2-5-6 DNS - Please go to section 2-5-7 DDNS - Please go to section 2-5-8 25 2-5-1. Setup procedure for ‘Dynamic IP’: Here are descriptions of every setup items: Host Name Please input host name of your computer, this is optional, and only required if your service provider asks you to do so. MAC Address Please input MAC address of your computer, if your service provider only permits computer with certain MAC address to access internet. If you‟re using the computer which used to connect to Internet via cable modem, you can simply press „Clone Mac address‟ button to fill the MAC address field with the MAC address of your computer. After you finish with all settings, please click „Apply‟; if you want to remove and value you entered, please click „Cancel‟. After you click „Apply‟, the following message will be displayed on your web browser: Please click „Continue‟ to back to previous setup menu; to continue on router setup, or click „Apply‟ to reboot the router so the settings will take effect (Please wait for about 30 seconds while router is rebooting). 26 2-5-2. Setup procedure for ‘Static IP’: Here are descriptions of every setup items: IP Address Please input IP address assigned by your service provider. Subnet Mask Please input subnet mask assigned by your service provider Default Gateway Please input the IP address of DNS server provided by your service provider. After you finish with all settings, please click „Apply‟ button and the following message will be displayed on your web browser: Please click „Continue‟ to back to previous setup menu; to continue on other setup procedures, or click „Apply‟ to reboot the router so the settings will take effect (Please wait for about 30 seconds while router is rebooting). If you want to reset all settings in this page back to previously-saved value, please click „Cancel‟ button. 27 2-5-3. Setup procedure for ‘PPPoE’: Here are descriptions of every setup items: User Name Please input user name assigned by your Internet service provider here. Password Please input the password assigned by your Internet service provider here. Service Name Please give a name to this Internet service, this is optional. MTU Please input the MTU value of your network connection here. If you don‟t know, you can use default value. Connection Type Please select the connection type of Internet connection you wish to use. Continuous – The connection will be kept always on. If the connection is interrupted, the router will re-connect automatically. Connect On-Demand – Only connect when you want to surf the Internet. “Idle Time Out” is set to stop the connection when the network traffic is not sending or receiving after an idle time. Manual – After you have selected this option, you will see the “Connect” button and “Disconnect” button, click “’Connect” and the router will connect to the ISP. If you want to stop the connection, please click “Disconnect” button. Idle Time Out If you have selected the connection type to “Connect-On-Demand”, please input the idle time out. 28 After you finish with all settings, please click „Apply‟ button and the following message will be displayed on your web browser: Please click „Continue‟ to back to previous setup menu; to continue on other setup procedures, or click „Apply‟ to reboot the router so the settings will take effect (Please wait for about 30 seconds while router is rebooting). If you want to reset all settings in this page back to previously-saved value, please click „Cancel‟ button. 2-5-4. Setup procedure for ‘PPTP’: PPTP requires two kinds of setting: WAN interface setting (setup IP address) and PPTP setting (PPTP user name and password). 29 Here we start from WAN interface setting: Select the type of how you obtain IP address from your service provider here. You can choose „Obtain an IP address automatically‟ (equal to DHCP, please refer to „Dynamic IP‟ section above), or „Use the following IP address‟ (i.e. static IP address) WAN interface settings must be correctly set, or the Internet connection will fail even those settings of PPTP settings are correct. Please contact your Internet service provider if you don‟t know what you should fill in these fields. Now we go to PPTP settings section. Here are descriptions of every setup items: User Name Please input user ID (user name) assigned by your Internet service provider here. Password Please input the password assigned by your Internet service provider here. PPTP Gateway Please input the IP address of PPTP gateway assigned by your Internet service provider here. Connection ID Please input the connection ID here, this is optional and you can leave it blank. MTU Please input the MTU value of your network connection here. If you don‟t know, you can use default value. BEZEQ-ISRAEL If you are connecting to the BEZEQ network in Israel. Please enable this function. Connection type Please select the connection type of Internet connection you wish to use, please refer to section 2-5-3 for detailed descriptions. Idle Time Out Please input the idle time out of Internet connection you wish to use, and refer to section 2-5-3 for detailed descriptions. When you finish with all settings, please click „Apply‟ button and the following message will be displayed on your web browser: Please click „Continue‟ to back to previous setup menu; to continue on other setup procedures, or click „Apply‟ to reboot the router so the settings will take effect (Please wait for about 30 seconds while router is rebooting). If you want to reset all settings in this page back to previously-saved value, please click „Cancel‟ button. 30 2-5-5. Setup procedure for ‘L2TP’: Here are descriptions of every setup items: User ID Please input user ID (user name) assigned by your Internet service provider here. Password Please input the password assigned by your Internet service provider here. L2TP Gateway Please input the IP address of PPTP gateway assigned by your Internet service provider here. MTU Please input the MTU value of your network connection here. If you don‟t know, you can use default value. Connection Type Please select the connection type of Internet connection you wish to use, please refer to section 2-5-3 for detailed descriptions. Idle Time Out Please input the idle time out of Internet connection you wish to use, and refer to section 2-5-3 for detailed descriptions. When you finish with all settings, please click „Apply‟ button and the following message will be displayed on your web browser: 31 Please click „Continue‟ to back to previous setup menu; to continue on other setup procedures, or click „Apply‟ to reboot the router so the settings will take effect (Please wait for about 30 seconds while router is rebooting). If you want to reset all settings in this page back to previously-saved value, please click „Cancel‟ button. 2-5-6. Setup procedure for ‘Telstra Big Pond’: This setting only works when you‟re using Telstra big pond‟s network service in Australia. You need to input: User Name Please input the user name assigned by Telstra. Password Please input the password assigned by Telstra. Assign login server manually Check this box to choose login server by yourself. Server IP Address Please input the IP address of login server here. When you finish with all settings, click „Apply‟ button and the following message will be displayed on your web browser: Please click „Continue‟ to back to previous setup menu; to continue on other setup procedures, or click „Apply‟ 32 to reboot the router so the settings will take effect (Please wait for about 30 seconds while router is rebooting). If you want to reset all settings in this page back to previously-saved value, please click „Cancel‟ button. 33 2-5-7. Setup procedure for ‘DNS’: If you select „Dynamic IP’ or „PPPoE‟ as Internet connection method, at least one DNS server‟s IP address should be assigned automatically. However, if you have preferred DNS server, or your service provider didn‟t assign the IP address of DNS server because of any reason, you can input the IP address of DNS server here. Here are descriptions of every setup items: Primary DNS Please input the IP address of DNS server provided by your service provider. Secondary DNS Please input the IP address of another DNS server provided by your service provider, this is optional. Note: Only IP address can be entered here; DO NOT use the hostname of DNS server! (i.e. only numeric characters and dots are accepted) 10.20.30.40……………………………………………………………… Correct dns.serviceprovider.com…………………………………………... Incorrect After you finish with all settings, please click „Apply‟ button and the following message will be displayed on your web browser: Please click „Continue‟ to back to previous setup menu; to continue on other setup procedures, or click „Apply‟ to reboot the router so the settings will take effect (Please wait for about 30 seconds while router is rebooting). If you want to reset all settings in this page back to previously-saved value, please click „Cancel‟ button. 34 2-5-8. Setup procedure for ‘DDNS’: DDNS (Dynamic DNS) is an IP-to-Hostname mapping service for those Internet users who don‟t have a static (fixed) IP address. It will be a problem when such user wants to provide services to other users on Internet, because their IP address will vary every time when connected to Internet, and other user will not be able to know the IP address they‟re using at a certain time. This router supports DDNS service of several service providers, for example: DynDNS (http://www.dyndns.org) TZO (http://www.tzo.com) Please go to one of DDNS service provider‟s webpage listed above, and get a free DDNS account by the instructions given on their webpage. Here are descriptions of every setup items: Dynamic DNS If you want to enable DDNS function, please select „Enabled‟; otherwise please select „Disabled‟. Provider Select your DDNS service provider here. Domain Name Input the domain name you‟ve obtained from DDNS service provider. Account Input account or email of DDNS registration. Password / Key Input DDNS service password or key. 35 After you finish with all settings, please click „Apply‟ button and the following message will be displayed on your web browser: Please click „Continue‟ to back to previous setup menu; to continue on other setup procedures, or click „Apply‟ to reboot the router so the settings will take effect (Please wait for about 30 seconds while router is rebooting). If you want to reset all settings in this page back to previously-saved value, please click „Cancel‟ button. 36 2-6. Wired LAN Configurations Before all computers using wired Ethernet connection (i.e. those computers connect to this router‟s LAN port 1 to 4 by Ethernet cable) can communicate with each other and access internet, they must have a valid IP address. There are two ways to assign IP addresses to computers: static IP address (set the IP address for every computer manually), and dynamic IP address (IP address of computers will be assigned by router automatically. It‟s recommended for most of computers to use dynamic IP address, it will save a lot of time on setting IP addresses for every computer, especially when there are a lot of computers in your network; for servers and network devices which will provide services to other computer and users that come from Internet, static IP address should be used, so other computes can locate the server. Please follow the following instructions to set wired LAN parameters: Please click „LAN‟ menu on the left of web management interface, there are three setup groups here: „LAN IP‟, „DHCP Server‟, and „Static DHCP Leases Table‟. Here are setup instructions for each of them: 37 2-6-1. LAN IP section: Here are descriptions of every setup items: IP address Please input the IP address of this router. Subnet Mask Please input subnet mask for this network. 802.1d Spanning Tree If you wish to activate 802.1d spanning tree function, select „Enabled‟ for setup item „802.1d Spanning Tree‟, or set it to „Disabled‟ DHCP Server If you want to activate DHCP server function of this router, select „Enabled‟, or set it to „Disabled‟. Recommended Value if you don’t know what to fill: IP Address: 192.168.0.1 Subnet Mask: 255.255.255.0 802.1d Spanning Tree: Disabled DHCP Server: Enabled 38 2-6-2. DHCP Server: These settings are only available when „DHCP Server‟ in „LAN IP‟ section is „Enabled‟, and here are descriptions of every setup items: Lease Time Please choose a lease time (the duration that every computer can keep a specific IP address) of every IP address assigned by this router from dropdown menu. Start IP Please input the start IP address of the IP range. End IP Please input the end IP address of the IP range. Domain Name If you wish, you can also optionally input the domain name for your network. This is optional. Recommended Value if you don’t know what to fill: Lease Time: Two Weeks (or „Forever‟, if you have less than 20 computers) Start IP: 192.168.0.100 End IP: 192.168.0.200 Domain Name: (leave it blank) Note: 1. The number of the last field (mentioned „d‟ field) of „End IP‟ must be greater than „Start IP‟, and can not the same with router‟s IP address. 2. The former three fields of IP address of „Start IP‟, „End IP‟, and „IP Address of „LAN IP‟ section (mentioned „a‟, „b‟, and „c‟ field) should be the same. 3. These settings will affect wireless clients too. 39 2-6-3. Static DHCP Leases Table: This function allows you to assign a static IP address to a specific computer forever, so you don‟t have to set the IP address for a computer, and still enjoy the benefit of using DHCP server. Maximum 16 static IP addresses can be assigned here. (If you set ‘Lease Time’ to ‘forever’ in ‘DHCP Server’ section, you can also assign an IP address to a specific computer permanently, however, you will not be able to assign a certain IP address to a specific computer, since IP addresses will be assigned in random order by this way). Here are descriptions of every setup items: Enable Static DHCP Leases Check this box to enable this function, otherwise uncheck it to disable this function. MAC Address Input the MAC address of the computer or network device (total 12 characters, with character from 0 to 9, and from a to f, like „001122aabbcc‟) IP address Input the IP address you want to assign to this computer or network device ‘Add’ After you inputted MAC address and IP address pair, click this button to add the pair to static DHCP leases table. If you want to remove all characters you just entered, click „Clear‟. After you clicked „Add‟, the MAC address and IP address mapping will be added to „Static DHCP Leases Table‟ section. If you want to delete a specific item, please check the „Select‟ box of a MAC address and IP address mapping, then click „Delete Selected‟ button; if you want to delete all mappings, click „Delete All‟. If you want to deselect all mappings, click „Reset‟. After you finish all LAN settings, please click „Apply‟ button on the bottom of this page. After you click „Apply‟, the following message will be displayed on your web browser: Please click „Continue‟ to back to previous setup menu; to continue on router setup, or click „Apply‟ to reboot the router so the settings will take effect (Please wait for about 30 seconds while router is rebooting). 40 2-7. Wireless LAN Configurations If your computer, PDA, game console, or other network devices which is equipped with wireless network interface, you can use the wireless function of this router to let them connect to Internet and share resources with other computers with wired-LAN connection. You can also use the built-in security functions to protect your network from being intruded by malicious intruders. Please follow the following instructions to set wireless parameters: Please click „Wireless‟ menu on the left of web management interface, and the following message will be displayed on your web browser. You must enable wireless function of this router, or the wireless interface of this router will not function. Please select „Enable‟, then click „Apply‟ button. If you‟re coming here because you want to disable wireless function, please select „Disable‟, then click „Apply‟ button. After you click „Apply‟, the following message will be displayed on your web browser: Please click „Continue‟ to back to previous setup menu; to continue on other setup procedures, or click „Apply‟ to reboot the router so the settings will take effect (Please wait for about 30 seconds while router is rebooting). 41 2-7-1. Basic Wireless Settings Please click „Wireless‟ menu on the left of web management interface, then click „Basic Settings‟, and the following message will be displayed on your web browser: This wireless router can work in 6 modes: Access Point Standard wireless AP. Station-Infrastructure Configure the router to Ethernet device such us TV, Game player, HDD&DVD to enable the Ethernet device be a wireless station. AP Bridge-Point to Point Connect this router with another wireless router, to expand the scope of network. AP Bridge-Point to Multi-Point Connect this router with up to four other wireless routers, to expand the scope of network. AP Bridge-WDS Connect this router with up to four WDS-capable wireless routers, to expand the scope of network. Universal Repeater The router can act as Station and AP at the same time. It can use Station function to connect to a Root AP and use AP function to service all wireless stations within its coverage. Note: For „AP Bridge-Point to Point‟ and „AP Bridge-Point to Multi-Point‟ mode, wireless router is operated in wireless bridge dedicated mode – wireless router is only used to expand the scope of network, and no wireless clients will be accepted. If you want to use your wireless router to expand the scope of network, and also accept wireless clients, please select „AP Bridge-WDS‟ or „Universal Repeater„ mode. 42 Please select a proper operation mode you want to use from „Mode‟ dropdown menu, and continue on other operation mode specific settings: Access Point - Please go to section 2-7-1-1 Station-Infrastructure - Please go to section 2-7-1-2 AP Bridge-Point to Point - Please go to section 2-7-1-3 AP Bridge-Point to Multi-Point - Please go to section 2-7-1-4 AP Bridge-WDS - Please go to section 2-7-1-5 Universal Repeater - Please go to section 2-7-1-6 2-7-1-1. Setup procedure for ‘Access Point’: Please select the radio band you want to use from „Band‟ dropdown menu, and the following message will be displayed: Here are descriptions of every setup items: Band Please select the radio band from one of following options: 2.4 GHz (B) 2.4GHz band, only allows 802.11b wireless network client to connect this router (maximum transfer rate 11Mbps). 2.4 GHz (N) 2.4GHz band, only allows 802.11n wireless network client to connect this router (maximum transfer rate 150Mbps). 2.4 GHz (B+G) 2.4GHz band, only allows 802.11b and 802.11g wireless network client to connect this router (maximum transfer rate 11Mbps for 802.11b clients, and maximum 54Mbps for 802.11g clients). 43 2.4 GHz (G) 2.4GHz band, only allows 802.11g wireless network client to connect this router (maximum transfer rate 54Mbps). 2.4 GHz (B+G+N) 2.4GHz band, allows 802.11b, 802.11g, and 802.11n wireless network client to connect this router (maximum transfer rate 11Mbps for 802.11b clients, maximum 54Mbps for 802.11g clients, and maximum 150Mbps for 802.11n clients). Note: For 802.11b and 802.11g mode, the signals can be transmitted only by antenna 1 (The antenna in the right side of the rear panel). For 802.11n mode: The router is operating in a 1T2R Spatial Multiplexing MIMO configuration. 1 antenna is for signal transmitting and 2 antennas are for signal receiving. SSID This is the name of wireless router. You can type any alphanumerical characters here, maximum 32 characters. SSID is used to identify your own wireless router from others when there are other wireless routers in the same area. Default SSID is „C150APM‟, it‟s recommended to change default SSID value to the one which is meaningful to you, like myhome, office_room1, etc. Channel Number Please select a channel from the dropdown list of „Channel Number‟, available channel numbers are 1 to 13 for European countries, 1 to 11 for USA. You can choose any channel number you want to use, and almost all wireless clients can locate the channel you‟re using automatically without any problem. However, it‟s still useful to remember the channel number you use, some wireless client supports manual channel number select, and this would help in certain scenario when there is some radio communication problem. Associated Clients Click „Show Active Clients‟ button, then an “Active Wireless Client Table” will pop up. You can see the status of all active wireless stations that are connecting to the access point. Note: If you don‟t have special reason to limit the type of allowed wireless client, it‟s recommended to choose „2.4 GHz (B+G+N)‟ to maximize wireless client compatibility. Tips: You can try to change channel number to another one if you think the data transfer rate is too slow. There could be some other wireless routers using the same channel, which will disturb the radio communication between wireless client and the wireless router. 44 2-7-1-2. Setup procedure for ‘Station-Infrastructure’: In this mode, you can connect the router to Ethernet device such us TV, Game player, HDD&DVD to enable the Ethernet device be a wireless station and join to a wireless network through an access point or AP router. Here are descriptions of every setup items: Band Select the band you want to use. SSID This is the name of wireless network. You can type the SSID of the network you would like to connect here. Site Survey When you use this wireless router as a wireless station for Ethernet network device to have wireless capability, you have to associate it with a working access point. Click „Select Site Survey‟ button, then a “Wireless Site Survey Table” will pop up. It will list all available access points near by. You can select one access point in the table and it will join wireless LAN through this access point. 45 2-7-1-3. Setup procedure for ‘AP Bridge-Point to Point’: In this mode, you can connect your wireless router with another, to combine two access points and expand the scope of wireless network, and all clients (wired only – AP will not accept wireless clients in this mode) of two wireless routers will think they‟re on the same physical network. This function is very convenient when you need to connect two networks between two buildings. Here are instructions about how to connect two wireless routers together: Note: Two wireless routers must use the same mode, band, channel number, and security setting! Here are descriptions of every setup items: Band Select the band you want to use, two wireless routers must use the same setting. Channel Number Select the channel you want to use, two wireless routers must use the same setting. MAC Address 1 Input the MAC address of another wireless router. Security Settings Click to setting security for this connection (Please go to section „2-7-3 Wireless Security‟ for detailed instructions). 46 2-7-1-4. Setup procedure for ‘AP Bridge-Point to Multi-Point’: In this mode, you can connect your wireless router with at least four wireless routers to expand the scope of wireless network, and all clients (wired only – AP will not accept wireless clients in this mode) of the wireless routers will think they‟re on the same physical network. Here are descriptions of every setup items: Band Select the band you want to use, all the wireless routers must use the same setting. Channel Number Select the channel you want to use, all the wireless routers must use the same setting. MAC address 1 ~ 4 Input the MAC address of other wireless routers. Security Settings Click to set security settings for this connection (Please go to section „2-7-3 Wireless Security‟ for detailed instructions). 47 2-7-1-5. Setup procedure for ‘AP Bridge – WDS’ In this mode, you can expand the scope of network by combining up to four other access points together, and every access point can still accept wireless clients. Note: For WDS mode, the output signal nature is the same as that of normal AP mode. Here are descriptions of every setup items: Band Select the band you want to use, all the wireless routers must use the same setting. SSID Input the SSID of your wireless router, the setting should be the same with other wireless routers for the convenience of roaming. Channel Number Select the channel you want to use, all the wireless routers must use the same setting. Associated Clients Click „Show Active Clients‟ button, then an “Active Wireless Client Table” will pop up. You can see the status of all active wireless stations that are connecting to the access point. MAC address 1 ~ 4 Input the MAC address of other wireless routers. Security Settings Click to set security settings for this connection (Please go to section „2-7-3 Wireless Security‟ for detailed instructions). 48 2-7-1-6. Setup procedure for ‘Universal Repeater’ In this mode, the router can act as a wireless repeater; it can be Station and AP at the same time. It can use Station function to connect to a Root AP and use AP function to service all wireless stations within its coverage. Note: For Repeater Mode, this router will demodulate the received signal, checking if this signal is noise for the operating network then have the signal modulated and amplified again. The output power of this mode is the same as that of WDS and normal AP mode. Here are descriptions of every setup items: Band Select the band you want to use, all the wireless routers must use the same setting. SSID This is the name of wireless router. You can type any alphanumerical characters here, maximum 32 characters. SSID is used to identify your own wireless router from others when there are other wireless routers in the same area. Default SSID is „C150APM‟, it‟s recommended to change default ESSID value to the one which is meaningful to you, like myhome, office_room1, etc. Channel Number Select the channel you want to use, all the wireless clients must use the same setting. Associated Clients Click „Show Active Clients‟ button, then an “Active Wireless Client Table” will pop up. You can see the status of all active wireless stations that are connecting to the access point. Root AP SSID In „Universal Repeater‟ mode, this device can act as a station to connect to a Root AP. You should assign the SSID of the Root AP here or click „Select Site Survey‟ button to choose a Root AP. Site Survey Click „Select Site Survey‟ button, then a “Wireless Site Survey Table” will pop up. It will list all available access points near by. You can select one access point in the table and the router will join wireless LAN through this access point. 49 After you finish the wireless setting, please click „Apply‟ button, after you click „Apply‟, the following message will be displayed on your web browser: Please click „Continue‟ to back to previous setup menu; to continue on router setup, or click „Apply‟ to reboot the router so the settings will take effect (Please wait for about 30 seconds while router is rebooting). 2-7-2. Advanced Wireless Settings This router provides some advanced control of wireless parameters, if you want to configure these settings, please click „Wireless‟ menu on the left of web management interface, then click „Advanced Settings‟, and the following message will be displayed on your web browser: 50 Here are descriptions of every setup items: Fragment Threshold Set the Fragment threshold of wireless radio. Do not modify default value if you don’t know what it is, default value is 2346. RTS Threshold Set the RTS threshold of wireless radio. Do not modify default value if you don’t know what it is, default value is 2347. Beacon Interval Set the beacon interval of wireless radio. Do not modify default value if you don’t know what it is, default value is 100. DTIM Period Set the DTIM period of wireless radio. Do not modify default value if you don’t know what it is, default value is 3. Data Rate Set the wireless data transfer rate to a certain value. Since most of wireless devices will negotiate with each other and pick a proper data transfer rate automatically. It’s not necessary to change this value unless you know what will happen after modification. N Data Rate Same as above, but only for 802.11n clients. Channel Width Set channel width of wireless radio. Do not modify default value if you don’t know what it is, default setting is ‘Auto 20/40 MHz’. Preamble Type Set the type of preamble. Do not modify default value if you don’t know what it is, default setting is ‘Short Preamble’. Broadcast ESSID Decide if the wireless router will broadcast its own ESSID or not. You can hide the ESSID of your wireless router (set the option to „Disable‟), so only people those who know the ESSID of your wireless router can get connected. CTS Protect Enabling this setting will reduce the chance of radio signal collisions between 802.11b and 802.11g/n wireless access points. It‟s recommended to set this option to „Auto‟ or „Always‟. However, if you set to „None‟, your wireless router should be able to work fine, too. Tx Power You can set the output power of wireless radio. Unless you‟re using this wireless router in a really big space, you may not have to set output power to 100%. This will enhance security (malicious / unknown users in distance will not be able to reach your wireless router). WMM The short of Wi-Fi MultiMedia, it will enhance the data transfer performance of multimedia contents when they‟re being transferred over wireless network. If you don’t know what it is / not sure if you need it, it’s safe to set this option to ‘Enable’, however, default value is ‘Disable’. 51 After you finish these wireless settings, please click „Apply‟ button, button, and the following message will be displayed on your web browser: Please click „Continue‟ to back to previous setup menu; to continue on router setup, or click „Apply‟ to reboot the router so the settings will take effect (Please wait for about 30 seconds while router is rebooting). 2-7-3. Wireless Security It’s very important to set wireless security settings properly! If you don‟t, hackers and malicious users can reach your network and valuable data without your consent and this will cause serious security problem. To set wireless security settings, Please click „Wireless‟ menu on the left of web management interface, then click „Security Settings‟, then follow the following instructions to set wireless security settings: Please select an encryption method from „Encryption‟ dropdown menu, there are four options: 2-7-3-1. Disable wireless security When you select this mode, data encryption is disabled, and every wireless device in proximity will be able to connect your wireless router if no other security measure is enabled (like MAC address access control - see section 2-7-4, or disable ESSID broadcast). Only use this option when you really want to allow everyone to use your wireless router, and you don’t care if there’s someone reads the data you transfer over network without your consent. 52 2-7-3-2. WEP - Wired Equivalent Privacy When you select this mode, the wireless router will use WEP encryption, and the following setup menu will be shown on your web browser: Here are descriptions of every setup items: Key Length There are two types of WEP key length: 64-bit and 128-bit. Using „128-bit‟ is safer than ‟64-bit‟, but will reduce some data transfer performance. Key Format There are two types of key format: ASCII and Hex. When you select a key format, the number of characters of key will be displayed. For example, if you select ‟64-bit‟ as key length, and „Hex‟ as key format, you‟ll see the message at the right of „Key Format‟ is „Hex (10 characters), which means the length of WEP key is 10 characters. Default Tx Key You can set up to four sets of WEP key, and you can decide which key is being used by default here. If you don’t know which one you should use, select ‘Key 1’. Encryption Key 1 ~ 4 Input WEP key characters here, the number of characters must be the same as the number displayed at „Key Format‟ field. You can use any alphanumerical characters (0-9, a-z, and A-Z) if you select „ASCII‟ key format, and if you select „Hex‟ as key format, you can use characters 0-9, a-f, and A-F. You must enter at least one encryption key here, and if you entered multiple WEP keys, they should not be same with each other. Enable 802.1x Authentication IEEE 802.1x is an authentication protocol. Every user must use a valid account to login to this wireless router before accessing the wireless LAN. The authentication is processed by a RADIUS server. This mode only authenticates user by IEEE 802.1x, but it does not encryption the data during communication. If there is a RADIUS server in you environment, please enable this function. Check this box and another sub-menu will appear: 53 RADIUS Server IP Address Please input the IP address of radius server here RADIUS Server Port Please input the port number of radius server here. RADIUS Server Password Please input the port number of radiuspassword here. Tips: Some examples of WEP key (Don‟t use those examples; use the one of your own!): ASCII (5 characters): pilot phone 23561 2Hyux ASCII (13 characters): digitalFAMILY 82Jh26xHy3m&n Hex (10 characters): 287d2aa732 1152dabc85 Hex (26 characters): 9284bcda8427c9e036f7abcd84 #@xmL To improve security level, do not use those words which can be found in a dictionary or too easy to remember! („pilot‟ and „phone‟ listed above are bad examples; just intended to show you how a WEP key look like). Wireless clients will remember the WEP key, so you only have to input the WEP key on wireless client once, and it‟s worth to use complicated WEP key to improve security level. After you finish WEP setting, please click „Apply‟ button and the following message will be displayed on your web browser: Please click „Continue‟ to back to previous setup menu; to continue on other setup procedures, or click „Apply‟ to reboot the router so the settings will take effect (Please wait for about 30 seconds while router is rebooting). 54 2-7-3-3. Wi-Fi Protected Access (WPA): When you select this mode, the wireless router will use WPA encryption, and the following setup menu will be shown on your web browser: Here are descriptions of every setup items: WPA Unicast Cipher Suite Please select a type of WPA cipher suite. Available options are: WPA (TKIP), WPA2 (AES), and WPA2 Mixed. You can select one of them, but you have to make sure your wireless client support the cipher you selected. Pre-shared Key Format Select the type of pre-shared key, you can select Passphrase (8 or more alphanumerical characters, up to 63), or Hex (64 characters of 0-9, and a-f). Pre-shared Key Please input the WPA passphrase here. It‟s not recommended to use a word that can be found in a dictionary due to security reason. After you finish WPA Pre-shared key setting, please click „Apply‟ button and the following message will be displayed on your web browser: Please click „Continue‟ to back to previous setup menu; to continue on other setup procedures, or click „Apply‟ to reboot the router so the settings will take effect (Please wait for about 30 seconds while router is rebooting). Note: Some wireless clients (especially those manufactured before year 2003) only support WEP or WPA (TKIP) cipher. A driver upgrade would be needed for those clients to use WPA and WPA2 encryption. 55 2-7-3-4. WPA RADIUS: If you have a RADIUS server, this router can work with it and provide safer wireless authentication. Here are descriptions of every setup items: WPA Unicast Cipher Suite Please select a type of WPA cipher suite. Available options are: WPA (TKIP), WPA2 (AES), and WPA2 Mixed. You can select one of them, but you have to make sure your wireless client support the cipher you selected. RADIUS Server IP Address Please input the IP address of your Radius authentication server here. RADIUS Server Port Please input the port number of your Radius authentication server here. Default setting is 1812. RADIUS Server Password Please input the password of your Radius authentication server here. After you finish with all settings, please click „Apply‟ button and the following message will be displayed on your web browser: Please click „Continue‟ to back to previous setup menu; to continue on other setup procedures, or click „Apply‟ to reboot the router so the settings will take effect (Please wait for about 30 seconds while router is rebooting). 56 2-7-4. Wireless Access Control This function will help you to prevent unauthorized users from connecting to your wireless router; only those wireless devices who have the MAC address you assigned here can gain access to your wireless router. You can use this function with other security measures described in previous section, to create a safer wireless environment. Up to 20 MAC addresses can be assigned by using this function. Please click „Wireless‟ menu on the left of web management interface, then click „Access Control‟, and the following message will be displayed on your web browser: All allowed MAC addresses will be displayed in „MAC Address Filtering Table‟. Here are descriptions of every setup items: Delete Selected If you want to delete a specific MAC address entry, check the „select‟ box of the MAC address you want to delete, then click „Delete Selected‟ button. (You can select more than one MAC addresses). Delete All If you want to delete all MAC addresses listed here, please click „Delete All‟ button. Enable Access Control To enforce MAC address filtering, you have to check „Enable Wireless Access Control‟. When this item is unchecked, wireless router will not enforce MAC address filtering of wireless clients. MAC Address Input the MAC address of your wireless devices here, dash ( - ) or colon ( : ) are not required. (i.e. If the MAC address label of your wireless device indicates „aa-bb-cc-dd-ee-ff‟ or „aa:bb:cc:dd:ee:ff‟, just input „aabbccddeeff‟. 57 Comment You can input any text here as the comment of this MAC address, like „ROOM 2A Computer‟ or anything. You can input up to 16 alphanumerical characters here. This is optional and you can leave it blank, however, it‟s recommended to use this field to write a comment for every MAC addresses as a memory aid. Add Click „Add‟ button to add the MAC address and associated comment to the MAC address filtering table. Clear Click „Clear‟ to remove the value you inputted in MAC address and comment field. After you finish with all settings, please click „Apply‟ button and the following message will be displayed on your web browser: Please click „Continue‟ to back to previous setup menu; to continue on other setup procedures, or click „Apply‟ to reboot the router so the settings will take effect (Please wait for about 30 seconds while router is rebooting). If you want to reset all settings in this page back to previously-saved value, please click „Cancel‟ button. 58 2-7-5. Wi-Fi Protected Setup (WPS) Wi-Fi Protected Setup (WPS) is the simplest way to build connection between wireless network clients and this wireless router. You don‟t have to select encryption mode and input a long encryption passphrase every time when you need to setup a wireless client, you only have to press a button on wireless client and this wireless router, and the WPS will do the rest for you. This wireless router supports two types of WPS: Push-Button Configuration (PBC), and PIN code. If you want to use PBC, you have to push a specific button on the wireless client to start WPS mode, and switch this wireless router to WPS mode too. You can push Reset/WPS button of this wireless router, or click „Start PBC‟ button in the web configuration interface to do this; if you want to use PIN code, you have to know the PIN code of wireless client and switch it to WPS mode, then provide the PIN code of the wireless client you wish to connect to this wireless router. The detailed instructions are listed follow: Please click „Wireless‟ menu on the left of web management interface, then click „WPS‟, and the following message will be displayed on your web browser: 59 Here are descriptions of every setup items: Enable WPS Check this box to enable WPS function, uncheck it to disable WPS. WPS Information WPS-related system information will be displayed here: WPS Status: If the wireless security (encryption) function of this wireless router is properly set, you‟ll see „Configured‟ message here. If wireless security function has not been set, you‟ll see „unConfigured‟. PinCode Self: This is the WPS PIN code of this wireless router. This code is useful when you need to build wireless connection by WPS with other WPS-enabled wireless devices. SSID: The SSID of this wireless router will be displayed here. Authentication Mode: The wireless security authentication mode of this wireless router will be displayed here. If you don‟t enable security function of the wireless router before WPS is activated, the router will auto set the security to WPA (AES) and generate a set of passphrase key for WPS connection. Passphrase Key: The wireless security key of the router will be displayed here. Config Mode There are „Registrar‟ and „Enrollee‟ modes for the WPS connection. When „Registrar‟ is enabled, the wireless clients will follow the router‟s wireless settings for WPS connection. When „Enrollee‟ mode is enabled, the router will follow the wireless settings of wireless client for WPS connection. Configure by Push Button Click „Start PBC‟ to start Push-Button style WPS setup procedure. This wireless router will wait for WPS requests from wireless clients for 2 minutes. The „WLAN‟ LED on the wireless router will be steady on for 2 minutes when this wireless router is waiting for incoming WPS request. Enter Client PIN Code Please input the PIN code of the wireless client you wish to connect, and click „Start PIN‟ button. The „WLAN‟ LED on the wireless router will be steady on when this wireless router is waiting for incoming WPS request. 60 2-7-6. Security Tips for Wireless Network Here are some quick tips to help you improve the security level of your wireless network: 1. Never use simple words (like school, apple and computer) as WEP encryption or WPA passphrase. 2. A complicated (the combination of number, alphabet, even symbol, and long enough) WEP key and WPA passphrase is much safer than simple and short ones. Remember that the wireless client is capable to keep the key or passphrase for you, so you only have to input the complicated key or passphrase once. It‟s not too trouble but will greatly improve security level. 3. You can hide the ESSID of this router by set „Broadcast ESSID‟ option to „Disable‟. Your wireless router will not be found by other people in proximity if they‟re just using the AP scanning function of their wireless client, and this can reduce the chance of being intruded. 4. Use „Access Control‟ function described in section 2-7-4, so those people who are not in your list will not be able to connect to your network. 61 Chapter III: Advanced functions 3-1. Quality of Service (QoS) Quality of service provides an efficient way for computers on the network to share the internet bandwidth with a promised quality of internet service. Without QoS, all computers and devices on the network will compete with each other to get internet bandwidth, and some applications which require guaranteed bandwidth (like video streaming and network telephone) will be affected, therefore an unpleasing result will occur, like the interruption of video / audio transfer. With this function, you can limit the maximum bandwidth or give a guaranteed bandwidth for a specific computer, to avoid said unpleasing result from happening. 3-1-1. Basic QoS Settings Please click „Qos‟ menu on the left of web management interface and the following message will be displayed on your web browser: 62 Here are descriptions of every setting: Enable QoS Check this box to enable QoS function, unselect this box if you don‟t want to enforce QoS bandwidth limitations. Total Download Bandwidth You can set the limit of total download bandwidth in kbits. To disable download bandwidth limitation, input „0‟ here. Total Upload Bandwidth You can set the limit of total upload bandwidth in kbits. To disable upload bandwidth limitation, input „0‟ here. Current QoS Table All existing QoS rules will be displayed here. Add Click „Add‟ button to add a new QoS rule, see section 3-1-2 „Add a new QoS rule‟ below. Edit If you want to modify the content of a specific rule, please check the „select‟ box of the rule you want to edit, then click „Edit‟ button. Only one rule should be selected a time! If you didn‟t select a rule before clicking „Edit‟ button, you‟ll be prompted to add a new rule. Delete You can delete selected rules by clicking this button. You can select one or more rules to delete by check the „select‟ the box of the rule(s) you want to delete a time. If the QoS table is empty, this button will be grayed out and can not be clicked. Delete All By clicking this button, you can delete all rules currently in the QoS table. If the QoS table is empty, this button will be grayed out and can not be clicked. Move Up You can pull up the priority of the QoS rule you selected by clicking this button. Move Down You can lower the priority of the QoS rule you selected by clicking this button. After you finish with all settings, please click „Apply‟ button and the following message will be displayed on your web browser: Please click „Continue‟ to back to previous setup menu; to continue on other setup procedures, or click „Apply‟ to reboot the router so the settings will take effect (Please wait for about 30 seconds while router is rebooting). If you want to reset all settings in this page back to previously-saved value, please click „Cancel‟ button. 63 3-1-2. Add a new QoS rule After you click „Add‟ button in QoS menu, the following message will appear: Here are descriptions of every setup items: Rule Name Please give a name to this QoS rule (up to 15 alphanumerical characters) Bandwidth Set the bandwidth limitation of this QoS rule. You have to select the data direction of this rule (Upload of Download), and the speed of bandwidth limitation in Kbps, then select the type of QoS: „guarantee‟ (guaranteed usable bandwidth for this rule) or „max‟ (set the maximum bandwidth for the application allowed by this rule). Local IP Address Specify the local (source) IP address that will be affected by this rule. Please input the starting IP address in the left field, and input the end IP address in the right field to define a range of IP addresses, or just input the IP address in the left field to define a single IP address. Local Port Range Please input the range of local (source) port number that will be affected by this rule. If you want to apply this rule on port 80 to 90, please input ’80-90‟; if you want to apply this rule on a single port, just input the port number, like „80‟. Remote IP Address Specify the remote (destination) IP address that will be affected by this rule. Please input the starting IP address in the left field, and input the end IP address in the right field to define a range of IP addresses, or just input the IP address in the left field to define a single IP address. Remote Port Range Please input the range of remote (destination) port number that will be affected by this rule. If you want to apply this rule on port 80 to 90, please input ‟80-90‟; if you want to apply this rule on a single port, just input the port number, like „80‟. If the remote (destination) IP address and /or port number is universal, just leave it blank. 64 Traffic Type Please select the traffic type of this rule, available options are None, SMTP, HTTP, POP3, and FTP. You can select a specific traffic type for this rule, if you want to make this rule as a IP address based rule (apply the limitation on all traffics from / to the specified IP address / port number), select „None‟. Protocol Please select the protocol type of this rule, available options are TCP and UDP. If you don‟t know what protocol your application uses, please try „TCP‟ first, and switch to „UDP‟ if this rule doesn‟t seems to work. After you finish with all settings, please click „Save‟ button, you‟ll be brought back to previous menu, and the rule you just set will appear in current QoS table; if you did anything wrong, you‟ll get an error message when you click „Save‟ button, please correct your input by the instructions given by the error message. If you want to erase all values you just entered. Click „Reset‟. 65 3-2. Network Address Translation (NAT) Network address translations solve the problem if sharing a single IP address to multiple computers. Without NAT, all computers must be assigned with a valid Internet IP address to get connected to Internet, but Internet service providers only provide very few IP addresses to every user. Therefore it‟s necessary to use NAT technology to share a single Internet IP address to multiple computers on local network, so everyone can get connected to Internet. Please follow the following instructions to set NAT parameters: 3-2-1. Basic NAT Settings (Enable or disable NAT function) Please click „NAT‟ menu on the left of web management interface, and the following message will be displayed on your web browser: To enable NAT function, please select „Enable‟ for „NAT Module‟; to disable, please select „Disable‟. After you made the selection, please click „Apply‟ button and the following message will be displayed on your web browser: Please click „Continue‟ to back to previous setup menu; to continue on other setup procedures, or click „Apply‟ to reboot the router so the settings will take effect (Please wait for about 30 seconds while router is rebooting). 66 3-2-2. Port Forwarding This function allows you to redirect a single port or consecutive ports of Internet IP address to the same port of the IP address on local network. The port number(s) of Internet IP address and private IP address (the IP address on local network) must be the same. If the port number of Internet IP address and private IP address is different, please use „Virtual Server‟ function, described in next section. Please click „NAT‟ menu on the left of web management interface, then click „Port Forwarding‟, and the following message will be displayed on your web browser: Here are descriptions of every setup items: Enable Port Forwarding Check this box to enable port mapping, and uncheck this box to disable port mapping. Private IP Input the IP address of the computer on local network which provides internet service. Computer Name Pull down the menu and all the computers connected to the router will be listed here. You can easily to select the computer name without checking the IP address of the computer. Type Select the type of connection, TCP or UDP. If you‟re not sure, please select „Both‟. Port Range Input the starting port number in the left field, and input the ending port number in the right field. If you only want to redirect a single port number, just fill the port number in the left field. Comment Please input any text to describe this mapping, up to 16 alphanumerical characters. 67 Add Add the mapping to port forwarding table. Reset Remove all inputted values. Port Forwarding Table All existing port forwarding mappings will be displayed here. Delete Please select a port forwarding mapping by clicking the „Select‟ box of the mapping, then click „Delete Selected‟ button to remove the mapping. If there‟s no existing mapping, this button will be grayed out. Delete All Delete all mappings existed in virtual server table. Reset Unselect all mappings. After you finish with all settings, please click „Apply‟ button and the following message will be displayed on your web browser: Please click „Continue‟ to back to previous setup menu; to continue on other setup procedures, or click „Apply‟ to reboot the router so the settings will take effect (Please wait for about 30 seconds while router is rebooting). If you want to reset all settings in this page back to previously-saved value, please click „Cancel‟ button. 68 3-2-3. Virtual Server This function allows you to redirect a port on Internet IP address (on WAN port) to a specified port of an IP address on local network, so you can setup an Internet service on the computer on local network, without exposing it on Internet directly. You can also build many sets of port redirection, to provide many different Internet services on different local computers via a single Internet IP address. Please click „NAT‟ menu on the left of web management interface, then click „Virtual Server‟, and the following message will be displayed on your web browser: Here are descriptions of every setup items: Enable Virtual Server Check this box to enable virtual server, and uncheck this box to disable virtual server. Private IP Input the IP address of the computer which provides Internet service. Computer Name Pull down the menu and all the computers connected to the router will be listed here. You can easily to select the computer name without checking the IP address of the computer. Private Port Input the port number of the IP address which provides Internet service. Type Select the type of connection, TCP or UDP. If you‟re not sure, please select „Both‟. Public Port Please select the port number of Internet IP address which will be redirected to the port number of local IP address defined above. Comment Please input any text to describe this mapping, up to 16 alphanumerical characters. Add Add the mapping to virtual server table. Reset Remove all inputted values. Virtual Server Table All existing virtual server mappings will be displayed here. 69 Delete Please select a virtual server mapping by clicking the „Select‟ box of the mapping, then click „Delete Selected‟ button to remove the mapping. If there‟s no existing mapping, this button will be grayed out. Delete All Delete all mappings existed in virtual server table. Reset Unselect all mappings. After you finish with all settings, please click „Apply‟ button and the following message will be displayed on your web browser: Please click „Continue‟ to back to previous setup menu; to continue on other setup procedures, or click „Apply‟ to reboot the router so the settings will take effect (Please wait for about 30 seconds while router is rebooting). If you want to reset all settings in this page back to previously-saved value, please click „Cancel‟ button. 70 3-2-4. Port Mapping for Special Applications Some applications require more than one connection a time; these applications won‟t work with simple NAT rules. In order to make these applications work, you can use this function to let these applications work. Here are descriptions of every setup items: Enable Check this box to enable special applications and uncheck this box to disable virtual server. IP Address Input the IP address of the computer which you want to open the ports. Computer Name Pull down the menu and all the computers connected to the router will be listed here. You can easily to select the computer name without checking the IP address of the computer. TCP Port to Open This is the out going (Outbound) range of TCP port numbers for this particular application. UDP Port to Open This is the out going (Outbound) range of UDP port numbers for this particular application. Comment The description of this setting. Popular Applications This section lists the more popular applications that require multiple connections. Select an application from the Popular Applications selection and click „Add‟ to save the setting to „Current Trigger-Port Table.‟ Add Add the setting to the „Current Trigger-Port Table.‟ Reset Click „Reset‟ will clear all above setting and you can set up again. 71 Current Trigger-Port All the settings for the special applications will be listed here. If you want to remove some Special Application settings from the " Current Trigger-Port Table", select the Special Application settings you want to remove in the table and then click "Delete Selected". If you want remove all Special Appliacation settings from the table, just click "Delete All" button. Click "Reset" will clear your current selections. Delete Please select a special application by clicking the „Select‟ box of the mapping, then click „Delete Selected‟ button to remove the setting. If there‟s no setting here, this button will be grayed out. Delete All Delete all settings existed in trigger port table. Reset Unselect all settings. Note: Only one LAN client can use a particular special application at a time. After you finish with all settings, please click „Apply‟ button and the following message will be displayed on your web browser: Please click „Continue‟ to back to previous setup menu; to continue on other setup procedures, or click „Apply‟ to reboot the router so the settings will take effect (Please wait for about 30 seconds while the router is rebooting). If you want to reset all settings in this page back to previously-saved value, please click „Cancel‟ button. 72 3-2-5. UPnP Setting This function enables network auto-configuration for peer-to-peer communications, with this function, network devices will be able to communicate with other devices directly, and learn about information about other devices. Many network device and applications rely on UPnP function nowadays. Please click „NAT‟ menu on the left of web management interface, then click „UPnP‟, and the following message will be displayed on your web browser: There is only one option in this page, please select „Enable‟ or „Disable‟ to enable or disable UPnP function, then click „Apply‟ button, and the following message will be displayed on your web browser: Please click „Continue‟ to back to previous setup menu; to continue on other setup procedures, or click „Apply‟ to reboot the router so the settings will take effect (Please wait for about 30 seconds while router is rebooting). If you want to reset all settings in this page back to previously-saved value, please click „Cancel‟ button. 73 3-2-6. ALG Settings Application Layer Gateway (ALG) is a special function of this router. It includes many preset routing rules for numerous applications which require special support. With these supports, those applications which required special support will be able to work with NAT architecture. Please click „NAT‟ menu on the left of web management interface, then click „ALG Settings‟, and the following message will be displayed on your web browser: There are many applications listed here. Please check the box of the special support for applications you need, and then click „Apply‟ button and the following message will be displayed on your web browser: Please click „Continue‟ to back to previous setup menu; to continue on other setup procedures, or click „Apply‟ to reboot the router so the settings will take effect (Please wait for about 30 seconds while router is rebooting). If you want to reset all settings in this page back to previously-saved value, please click „Cancel‟ button. 74 3-3. Firewall Excepting NAT, this router also provides firewall function to block malicious intruders from accessing your computers on local network. These functions include inbound attack prevention, and block outbound traffics, like block URLs which have pre-defined keywords. Please follow the following instructions to enable or disable firewall function: Please click „Firewall‟ menu on the left of web management interface, and the following message will be displayed on your web browser: Please select „Enable‟ or „Disable‟ to enable or disable firewall function of this router, the click „Apply‟ button, and the following message will be displayed on your web browser: Please click „Continue‟ to back to previous setup menu; to continue on other setup procedures, or click „Apply‟ to reboot the router so the settings will take effect (Please wait for about 30 seconds while router is rebooting). 75 3-3-1. Access Control This function allows or denies computers with specific MAC address from connecting to the network; it can also allow or deny computers with specific IP address, protocol, or port. Please click „Firewall‟ menu on the left of web management interface, then click „Access Control‟, and the following message will be displayed on your web browser: Here are descriptions of every setup items: Enable MAC Filtering Check this box to enable MAC address based filtering, and please select „Deny‟ or „Allow‟ to decide the behavior of MAC filtering table. If you select deny, all MAC addresses listed in filtering table will be denied from connecting to the network; if you select allow, only MAC addresses listed in filtering table will be able to connect to the network, and rejecting all other network devices. Client PC MAC Address Please input the MAC address of computer or network device here, dash ( - ) or colon ( : ) are not required. (i.e. If the MAC address label of your wireless device indicates „aa-bb-cc-dd-ee-ff‟ or „aa:bb:cc:dd:ee:ff‟, just input „aabbccddeeff‟ Computer Name Pull down the menu and all the computers connected to the router will be listed here. You can easily to select the computer name without checking the IP address of the computer. Comment You can input any text here as the comment of this MAC address, like „ROOM 2A Computer‟ or anything. You can input up to 16 alphanumerical characters here. This is optional and you can leave it blank, however, it‟s recommended to use this field to write a comment for every MAC addresses as a memory aid. 76 Add Click „Add‟ button to add the MAC address and associated comment to the MAC address filtering table. Reset Remove all inputted values. Current MAC Filtering Table All existing MAC addresses in filtering table will be listed here. Delete If you want to delete a specific MAC address entry, check the „select‟ box of the MAC address you want to delete, then click „Delete Selected‟ button. (You can select more than one MAC addresses). Delete All If you want to delete all MAC addresses listed here, please click „Delete All‟ button. Reset You can also click „Reset‟ button to unselect all MAC addresses. Enable IP Filtering Check this box to enable IP address based filtering, and please select „Deny‟ or „Allow‟ to decide the behavior of IP filtering table. If you select deny, all IP addresses listed in filtering table will be denied from connecting to the network; if you select allow, only IP addresses listed in filtering table will be able to connect to the network, and rejecting all other network devices. IP Filtering Table All existing IP addresses in filtering table will be listed here. Add PC Click this button to add a new IP address to IP filtering table, up to 20 IP addresses can be added. Please refer to section 3-3-1-1 „Add PC‟ below. Delete If you want to delete a specific IP address entry, check the „select‟ box of the IP address you want to delete, then click „Delete Selected‟ button. (You can select more than one IP addresses). Delete All If you want to delete all IP addresses listed here, please click „Delete All‟ button. After you finish with all settings, please click „Apply‟ button and the following message will be displayed on your web browser: Please click „Continue‟ to back to previous setup menu; to continue on other setup procedures, or click „Apply‟ to reboot the router so the settings will take effect (Please wait for about 30 seconds while router is rebooting). If you want to reset all settings in this page back to previously-saved value, please click „Cancel‟ button. 77 3-3-1-1. Add PC After button is clicked, the following message will be displayed on your web browser: Here are descriptions of every setup items: Client PC Description Please input any text to describe this IP address, up to 16 alphanumerical characters. Client PC IP Address Please input the starting IP address in the left field, and input the end IP address in the right field to define a range of IP addresses, or just input the IP address in the left field to define a single IP address. Client PC Service Please check all services you want to allow or deny this IP address to use, you can check multiple services. Protocol If the service you need is not listed above, you can create a new service on your own. Please select TCP or UDP, if you‟re not sure, please select „Both‟. Port Range Please input the port range of new service here. If you want to specify port 80 to 90, please input ’80-90‟; if you want to apply this rule on a single port, just input the port number, like „80‟. Add When you finish with all settings, please click „Add‟ to save settings, you‟ll be brought back to previous menu, and the rule you just set will appear in current IP filtering table. If you want to remove all settings in this page, click „Reset‟ button. 78 3-3-2. URL Blocking If you want to prevent computers in local network from accessing certain website (like pornography, violence, or anything you want to block), you can use this function to stop computers in local network from accessing the site you defined here. This function is useful for parents and company managers. Please follow the following instructions to set URL blocking parameters: Please click „Firewall‟ menu on the left of web management interface, then click „URL Blocking‟, and the following message will be displayed on your web browser: Here are descriptions of every setup items: Enable URL Blocking Check this box to enforce URL Blocking, uncheck it to disable URL Blocking. URL/Keyword Input the URL (host name or IP address of website, like http://www.blocked-site.com or http://11.22.33.44), or the keyword which is contained in URL (like pornography, cartoon, stock, or anything). Add Click „Add‟ button to add the URL / keyword to the URL / Keyword filtering table. Reset Click „Reset‟ to remove the value you inputted in URL/Keyword field. Current URL Blocking Table All existing URL/Keywords in filtering table will be listed here. Delete If you want to delete a specific URL/Keyword entry, check the „select‟ box of the MAC address you want to delete, then click „Delete Selected‟ button. (You can select more than one MAC addresses). Delete All If you want to delete all URL/Keyword listed here, please click „Delete All‟ button. Reset You can also click „Reset‟ button to unselect all URL/Keywords. 79 After you finish with all settings, please click „Apply‟ button, and the following message will be displayed on your web browser: Please click „Continue‟ to back to previous setup menu; to continue on other setup procedures, or click „Apply‟ to reboot the router so the settings will take effect (Please wait for about 30 seconds while router is rebooting). If you want to reset all settings in this page back to previously-saved value, please click „Cancel‟ button. 80 3-3-3. DoS Attack Prevention Denial of Service (DoS) is a common attack measure, by transmitting a great amount of data or request to your Internet IP address and server, the Internet connection will become very slow, and server may stop responding because it is not capable to handle too much traffics. This router has a built-in DoS attack prevention mechanism; when you activate it, the router will stop the DoS attack for you. Please follow the following instructions to set DoS prevention parameters: Please click „Firewall‟ menu on the left of web management interface, then click „DoS‟, and the following message will be displayed on your web browser: Here are descriptions of every setup items: Ping of Death Ping of Death is a special packet, and it will cause certain computer to stop responding. Check this box and the router will filter this kind of packet out. Discard Ping From WAN Ping is a common and useful tool to know the connection status of a specified remote network device, but some malicious intruder will try to fill your network bandwidth with a lot of PING request data packet, to make your internet connection become very slow, even unusable. Check this box and the router will ignore all inbound PING request, but when you activate this function, you will not be able to ping your own router from internet, too. Port Scan Some malicious intruder will try to use a „port scanner‟ to know how many ports of your Internet IP address are open, and they can collect a lot of valuable information by doing so. Check this box and the router will block all traffics which are trying to scan your Internet IP address. 81 Sync Flood This is another kind of attack, which uses a lot of fake connection request to consume the memory of your server, and try to make your server become unusable. Check this box and the router will filter this kind of traffic out. Advanced Settings Click this button and you can set advanced settings of the DoS prevention method listed above, please see section 3-3-3-1 „DoS – Advanced Settings‟ below. After you finish with all settings, please click „Apply‟ button and the following message will be displayed on your web browser: Please click „Continue‟ to back to previous setup menu; to continue on other setup procedures, or click „Apply‟ to reboot the router so the settings will take effect (Please wait for about 30 seconds while router is rebooting). If you want to reset all settings in this page back to previously-saved value, please click „Cancel‟ button. 82 3-3-3-1. DoS - Advanced Settings When you click „Advanced‟ button in DoS menu, the following message will be displayed on your web browser: Here are descriptions of every setup items: Ping of Death Set the threshold of when this DoS prevention mechanism will be activated. Please check the box of Ping of Death, and input the frequency of threshold (how many packets per second, minute, or hour), you can also input the „Burst‟ value, which means when this number of „Ping of Death‟ packet is received in very short time, this DoS prevention mechanism will be activated. Discard Ping From WAN Check the box to activate this DoS prevention mechanism. Port Scan Many kind of port scan methods are listed here, please check one or more DoS attack methods you want to prevent. Sync Flood Like Ping of Death, you can set the threshold of when this DoS prevention mechanism will be activated. After you finish with all settings, please click „Apply‟ button and the following message will be displayed on your web browser: Please click „Continue‟ to back to previous setup menu; to continue on other setup procedures, or click „Apply‟ to reboot the router so the settings will take effect (Please wait for about 30 seconds while router is rebooting). If you want to reset all settings in this page back to previously-saved value, please click „Cancel‟ button. 83 84 3-3-4. Demilitarized Zone (DMZ) Demilitarized Zone (DMZ) refers to a special area in your local network. This area resides in local network, and all computers in this area uses private IP address, too. But these private IP addresses are mapped to a certain Internet IP address, so other people on Internet can fully access those computers in DMZ. Please follow the following instructions to set DMZ parameters: Please click „Firewall‟ menu on the left of web management interface, then click „DMZ‟, and the following message will be displayed on your web browser: Here are descriptions of every setup items: Enable DMZ Check this box to enable DMZ function, uncheck this box to disable DMZ function. Public IP Address You can select „Dynamic IP‟ or „Static IP‟ here. If you select „Dynamic IP‟, you have to select an Internet connection session from dropdown menu; if you select „Static IP‟, please input the IP address that you want to map to a specific private IP address. Client PC IP Address Please input the private IP address that the Internet IP address will be mapped to. Computer Name Pull down the menu and all the computers connected to the router will be listed here. You can easily to select the computer name without checking the IP address of the computer. Add Click „Add‟ button to add the public IP address and associated private IP address to the DMZ table. Reset Click „Clear‟ to remove the value you inputted in Public IP address and Client PC IP address field. 85 Current DMZ Table All existing public IP address and private IP address mapping will be displayed here. Delete If you want to delete a specific DMZ entry, check the „select‟ box of the DMZ entry you want to delete, then click „Delete Selected‟ button. (You can select more than one DMZ entries). Delete All If you want to delete all DMZ entries listed here, please click „Delete All‟ button. Reset You can also click „Reset‟ button to unselect all DMZ entries. After you finish with all settings, please click „Apply‟ button and the following message will be displayed on your web browser: Please click „Continue‟ to back to previous setup menu; to continue on other setup procedures, or click „Apply‟ to reboot the router so the settings will take effect (Please wait for about 30 seconds while router is rebooting). If you want to reset all settings in this page back to previously-saved value, please click „Cancel‟ button. 86 3-4. System Status The functions described here will provide you with system related information. To enter system status menu, please either click „Status‟ link located at the upper-right corner of web management interface, or click „Status‟ button in main menu. 3-4-1. System information and firmware version You can use this function to know the system information and firmware version of this router. Please click „Status‟ link located at the upper-right corner of web management interface, and the following message will be displayed on your web browser: Note: The information displayed above may vary on your router status page. 87 3-4-2. Internet Connection Status You can use this function to know the status of current Internet connection. Please click „Internet Connection‟ menu on the left of web management interface, and the following message will be displayed on your web browser: This information will vary depending on the connection status. 3-4-3. Device Status You can use this function to know the status of your router. Please click „Device Status‟ menu on the left of web management interface and the following message will be displayed on your web browser: This information will vary depending on the device status. 88 3-4-4. System Log All important system events are logged. You can use this function to check the event log of your router. Please click „System Log‟ menu on the left of web management interface, and the following message will be displayed on your web browser: The system events will be displayed in this page, and here are descriptions of every buttons: Save Save current event log to a text file. Clear Delete all event logs displayed here. Refresh Refresh the event log display. 89 3-4-5. Security Log All information about network and system security is kept here, and you can use this function to check the security event log of your router. Please click „Security Log‟ menu on the left of web management interface, and the following message will be displayed on your web browser: The system events will be displayed in this page, and here are descriptions of every buttons: Save Save current event log to a text file. Clear Delete all event logs displayed here. Refresh Refresh the event log display. 90 3-4-5. Active DHCP client list If you‟re using the DHCP server function of this router, you can use this function to check all active DHCP leases issued by this router. Please click „Active DHCP client‟ menu on the left of web management interface, and the following message will be displayed on your web browser: All information about active DHCP leases issued by this router will be displayed here. You can click „Refresh‟ button to display latest information. 3-4-6. Statistics You can use this function to check the statistics of wireless, LAN, and WAN interface of this router. Please click „Statistics‟ menu on the left of web management interface, and the following message will be displayed on your web browser: You can click „Refresh‟ button to display latest information. 91 3-5. Configuration Backup and Restore You can backup all configurations of this router to a file, so you can make several copied of router configuration for security reason. To backup or restore router configuration, please follow the following instructions: Please click „Tool‟ located at the upper-right corner of web management interface, then click „Configuration Tools‟ on the left of web management interface, then the following message will be displayed on your web browser: Here are descriptions of every buttons: Backup Settings Press „Save‟ button, and you‟ll be prompted to download the configuration as a file, default filename is „config.bin‟, you can save it as another filename for different versions, and keep it in a safe place. Restore Settings Press „Browse…‟ to pick a previously-saved configuration file from your computer, and then click „Upload‟ to transfer the configuration file to router. After the configuration is uploaded, the router‟s configuration will be replaced by the file you just uploaded. Restore to Factory Default Click this button to remove all settings you made, and restore the configuration of this router back to factory default settings. 92 3-6. Firmware Upgrade The system software used by this router is called as „firmware‟, just like any applications on your computer, when you replace the old application with a new one; your computer will be equipped with new function. You can also use this firmware upgrade function to add new functions to your router, even fix the bugs of this router. To upgrade firmware, please follow the following instructions: Please click „Tool‟ located at the upper-right corner of web management interface, then click „Firmware Upgrade‟ on the left of web management interface, then the following message will be displayed on your web browser: Click „Browse‟ button first, you‟ll be prompted to provide the filename of firmware upgrade file. Please download the latest firmware file from our website, and use it to upgrade your router. After a firmware upgrade file is selected, click „Apply‟ button, and the router will start firmware upgrade procedure automatically. The procedure may take several minutes, please be patient. Note: Never interrupt the upgrade procedure by closing the web browser or physically disconnect your computer from router. If the firmware you uploaded is corrupt, the firmware upgrade will fail, and you may have to return this router to the dealer of purchase to ask for help. (Warranty voids if you interrupted the upgrade procedure). 93 3-7. System Reset If you think the network performance is bad, or you found the behavior of the router is strange, you can perform a router reset, sometime it will solve the problem. To do so, please click „Tool‟ located at the upper-right corner of web management interface, then click „Reset‟ on the left of web management interface, then the following message will be displayed on your web browser: Please click „Apply‟ to reset your router, and it will be available again after few minutes, please be patient. 94 Chapter IV: Appendix 4-1. Troubleshooting If you found the router is working improperly or stop responding to you, don‟t panic! Before you contact your dealer of purchase for help, please read this troubleshooting first. Some problems can be solved by you within very short time! Scenario Solution Router is not responding to a. Please check the connection of power cord and network cable of this router. me when I want to access it All cords and cables should be correctly and firmly inserted to the router. by web browser b. If all LEDs on this router are off, please check the status of A/C power adapter, and make sure it‟s correctly powered. c. You must use the same IP address section which router uses. d. Are you using MAC or IP address filter? Try to connect the router by another computer and see if it works; if not, please restore your router to factory default settings (pressing „reset‟ button for over 10 seconds). e. Set your computer to obtain an IP address automatically (DHCP), and see if your computer can get an IP address. f. If you did a firmware upgrade and this happens, contact your dealer of purchase for help. g. If all above solutions don‟t work, contact the dealer of purchase for help. Can‟t get connected to a. Go to „Status‟ -> „Internet Connection‟ menu, and check Internet connection Internet status. b. Please be patient, sometime Internet is just that slow. c. If you connect a computer to Internet directly before, try to do that again, and check if you can get connected to Internet with your computer directly attached to the device provided by your Internet service provider. d. Check PPPoE / L2TP / PPTP user ID and password again. e. Call your Internet service provide and check if there‟s something wrong with their service. f. If you just can‟t connect to one or more website, but you can still use other internet services, please check URL/Keyword filter. g. Try to reset the router and try again later. h. Reset the device provided by your Internet service provider too. i. Try to use IP address instead of hostname. If you can use IP address to communicate with a remote server, but can‟t use hostname, please check DNS setting. 95 I can‟t locate my router by a. „Broadcast ESSID‟ set to off? my wireless client b. All two antennas are properly secured. c. Are you too far from your router? Try to get closer. d. Please remember that you have to input ESSID on your wireless client manually, if ESSID broadcast is disabled. File download is very slow a. Are you using QoS function? Try to disable it and try again. or breaks frequently b. Internet is slow sometimes, being patient. c. Try to reset the router and see if it‟s better after that. d. Try to know what computers do on your local network. If someone‟s transferring big files, other people will think Internet is really slow. e. If this never happens before, call you Internet service provider to know if there is something wrong with their network. I can‟t log onto web a. Make sure you‟re connecting to the correct IP address of the router! management interface: b. Password is case-sensitive. Make sure the „Caps Lock‟ light is not illuminated. password is wrong c. If you really forget the password, do a hard reset. Router become hot a. This is not a malfunction, if you can keep your hand on the router‟s case. b. If you smell something wrong or see the smoke coming out from router or A/C power adapter, please disconnect the router and A/C power adapter from utility power (make sure it‟s safe before you‟re doing this!), and call your dealer of purchase for help. The date and time of all a. Adjust the internal clock of router. event logs are wrong 96 4-2. Glossary Default Gateway (Router): Every non-router IP device needs to configure a default gateway‟s IP address. When the device sends out an IP packet, if the destination is not on the same network, the device has to send the packet to its default gateway, which will then send it out towards the destination. DHCP: Dynamic Host Configuration Protocol. This protocol automatically gives every computer on your home network an IP address. DNS Server IP Address: DNS stands for Domain Name System, which allows Internet servers to have a domain name (such as www.Broadbandrouter.com) and one or more IP addresses (such as 192.34.45.8). A DNS server keeps a database of Internet servers and their respective domain names and IP addresses, so that when a domain name is requested (as in typing "Broadbandrouter.com" into your Internet browser), the user is sent to the proper IP address. The DNS server IP address used by the computers on your home network is the location of the DNS server your ISP has assigned to you. DSL Modem: DSL stands for Digital Subscriber Line. A DSL modem uses your existing phone lines to transmit data at high speeds. Ethernet: A standard for computer networks. Ethernet networks are connected by special cables and hubs, and move data around at up to 10/100 million bits per second (Mbps). Idle Timeout: Idle Timeout is designed so that after there is no traffic to the Internet for a pre-configured amount of time, the connection will automatically be disconnected. IP Address and Network (Subnet) Mask: IP stands for Internet Protocol. An IP address consists of a series of four numbers separated by periods, which identifies a single, unique Internet computer host in an IP network. Example: 192.168.2.1. It consists of 2 portions: the IP network address, and the host identifier. ISP Gateway Address: (see ISP for definition). The ISP Gateway Address is an IP address for the Internet router located at the ISP's office. ISP: Internet Service Provider. An ISP is a business that provides connectivity to the Internet for individuals and other businesses or organizations. LAN: Local Area Network. A LAN is a group of computers and devices connected together in a relatively small area (such as a house or an office). Your home network is considered a LAN. MAC Address: MAC stands for Media Access Control. A MAC address is the hardware address of a device connected to a network. The MAC address is a unique identifier for a device with an Ethernet interface. It is comprised of two parts: 3 bytes of data that corresponds to the Manufacturer ID (unique for each manufacturer), plus 3 bytes that are often used as the product‟s serial number. NAT: Network Address Translation. This process allows all of the computers on your home network to use one IP address. Using the broadband router‟s NAT capability, you can access the Internet from any computer on your home network without having to purchase more IP addresses from your ISP. 97 Port: Network Clients (LAN PC) uses port numbers to distinguish one network application/protocol over another. Below you will find a list of some common used ports and their corresponding application: Port Application Port Application 20 FTP data (FTP server) 80 21 FTP data (FTP server) 110 POP3 (Mail server – incoming) 22 SSH (Secure shell) 2000 Remotely Anywhere 23 Telnet 5800 VNC 25 SMTP (Mail server – outgoing) 5900 VNC HTTP (Web server) For more ports and their corresponding applications, see http://portforward.com/cports.htm. PPPoE: Point-to-Point Protocol over Ethernet. Point-to-Point Protocol is a secure data transmission method originally created for dial-up connections; PPPoE is for Ethernet connections. PPPoE relies on two widely accepted standards, Ethernet and the Point-to-Point Protocol. It is a communications protocol for transmitting information over Ethernet between different manufacturers Protocol: A protocol is a set of rules for interaction agreed upon between multiple parties so that when they interface with each other based on such a protocol, the interpretation of their behavior is well defined and can be made objectively, without confusion or misunderstanding. Router: A router is an intelligent network device that forwards packets between different networks based on network layer address information such as IP addresses. Subnet Mask: A subnet mask, which may be a part of the TCP/IP information provided by your ISP, is a set of four numbers (e.g. 255.255.255.0) configured like an IP address. It is used to create IP address numbers used only within a particular network (as opposed to valid IP address numbers recognized by the Internet, which must be assigned by InterNIC). TCP/IP, UDP: Transmission Control Protocol/Internet Protocol (TCP/IP) and Unreliable Datagram Protocol (UDP). TCP/IP is the standard protocol for data transmission over the Internet. Both TCP and UDP are transport layer protocol. TCP performs proper error detection and error recovery, and thus is reliable. UDP on the other hand is not reliable. They both run on top of the IP (Internet Protocol), a network layer protocol. WAN: Wide Area Network. A network that connects computers located in geographically separate areas (e.g. different buildings, cities, countries). The Internet is a wide area network. Web-based management Graphical User Interface (GUI): Many devices support a graphical user interface that is based on the web browser. This means the user can use the familiar Netscape or Microsoft Internet Explorer to Control/configure or monitor the device being managed. 98 4-3. License Agreement Licensing Information This Conceptronic product C150BRS4 includes copyrighted third-party software licensed under the terms of the GNU General Public License. Please see The GNU General Public License for the exact terms and conditions of this license. All used software packages are copyright by their respective authors. Please see the source code for detailed information. Availability of source code Conceptronic. has exposed the full source code of the GPL licensed software, including any scripts to control compilation and installation of the object code. All future firmware updates will also be accompanied with their respective source code. For more information on how you can obtain our open source code, please visit our web site. 99 GNU GENERAL PUBLIC LICENSE Version 2, June 1991 Copyright (C) 1989, 1991 Free Software Foundation, Inc. Temple Place, Suite 330, Boston, MA 02111-1307 USA Everyone is permitted to copy and distribute verbatim copies of this license document, but changing it is not allowed. Preamble The licenses for most software are designed to take away your freedom to share and change it. By contrast, the GNU General Public License is intended to guarantee your freedom to share and change free software--to make sure the software is free for all its users. This General Public License applies to most of the Free Software Foundation's software and to any other program whose authors commit to using it. (Some other Free Software Foundation software is covered by the GNU Library General Public License instead.) You can apply it to your programs, too. When we speak of free software, we are referring to freedom, not price. Our General Public Licenses are designed to make sure that you have the freedom to distribute copies of free software (and charge for this service if you wish), that you receive source code or can get it if you want it, that you can change the software or use pieces of it in new free programs; and that you know you can do these things. To protect your rights, we need to make restrictions that forbid anyone to deny you these rights or to ask you to surrender the rights. These restrictions translate to certain responsibilities for you if you distribute copies of the software, or if you modify it. For example, if you distribute copies of such a program, whether gratis or for a fee, you must give the recipients all the rights that you have. You must make sure that they, too, receive or can get the source code. And you must show them these terms so they know their rights. We protect your rights with two steps: (1) copyright the software, and (2) offer you this license which gives you legal permission to copy, distribute and/or modify the software. Also, for each author's protection and ours, we want to make certain that everyone understands that there is no warranty for this free software. If the software is modified by someone else and passed on, we want its recipients to know that what they have is not the original, so that any problems introduced by others will not reflect on the original authors' reputations. 100 Finally, any free program is threatened constantly by software patents. We wish to avoid the danger that redistributors of a free program will individually obtain patent licenses, in effect making the program proprietary. To prevent this, we have made it clear that any patent must be licensed for everyone's free use or not licensed at all. The precise terms and conditions for copying, distribution and modification follow. GNU GENERAL PUBLIC LICENSE TERMS AND CONDITIONS FOR COPYING, DISTRIBUTION AND MODIFICATION 0. This License applies to any program or other work which contains a notice placed by the copyright holder saying it may be distributed under the terms of this General Public License. The "Program", below, refers to any such program or work, and a "work based on the Program" means either the Program or any derivative work under copyright law: that is to say, a work containing the Program or a portion of it, either verbatim or with modifications and/or translated into another language. (Hereinafter, translation is included without limitation in the term "modification".) Each licensee is addressed as "you". Activities other than copying, distribution and modification are not covered by this License; they are outside its scope. The act of running the Program is not restricted, and the output from the Program is covered only if its contents constitute a work based on the Program (independent of having been made by running the Program). Whether that is true depends on what the Program does. 1. You may copy and distribute verbatim copies of the Program's source code as you receive it, in any medium, provided that you conspicuously and appropriately publish on each copy an appropriate copyright notice and disclaimer of warranty; keep intact all the notices that refer to this License and to the absence of any warranty; and give any other recipients of the Program a copy of this License along with the Program. You may charge a fee for the physical act of transferring a copy, and you may at your option offer warranty protection in exchange for a fee. 2. You may modify your copy or copies of the Program or any portion of it, thus forming a work based on the Program, and copy and distribute such modifications or work under the terms of Section 1 above, provided that you also meet all of these conditions: a) You must cause the modified files to carry prominent notices stating that you changed the files and the date of any change. 101 b) You must cause any work that you distribute or publish, that in whole or in part contains or is derived from the Program or any part thereof, to be licensed as a whole at no charge to all third parties under the terms of this License. c) If the modified program normally reads commands interactively when run, you must cause it, when started running for such interactive use in the most ordinary way, to print or display an announcement including an appropriate copyright notice and a notice that there is no warranty (or else, saying that you provide a warranty) and that users may redistribute the program under these conditions, and telling the user how to view a copy of this License. (Exception: if the Program itself is interactive but does not normally print such an announcement, your work based on the Program is not required to print an announcement.) These requirements apply to the modified work as a whole. If identifiable sections of that work are not derived from the Program, and can be reasonably considered independent and separate works in themselves, then this License, and its terms, do not apply to those sections when you distribute them as separate works. But when you distribute the same sections as part of a whole which is a work based on the Program, the distribution of the whole must be on the terms of this License, whose permissions for other licensees extend to the entire whole, and thus to each and every part regardless of who wrote it. Thus, it is not the intent of this section to claim rights or contest your rights to work written entirely by you; rather, the intent is to exercise the right to control the distribution of derivative or collective works based on the Program. In addition, mere aggregation of another work not based on the Program with the Program (or with a work based on the Program) on a volume of a storage or distribution medium does not bring the other work under the scope of this License. 3. You may copy and distribute the Program (or a work based on it, under Section 2) in object code or executable form under the terms of Sections 1 and 2 above provided that you also do one of the following: a) Accompany it with the complete corresponding machine-readable source code, which must be distributed under the terms of Sections 1 and 2 above on a medium customarily used for software interchange; or, b) Accompany it with a written offer, valid for at least three years, to give any third party, for a charge no more than your cost of physically performing source distribution, a complete machine-readable copy of the corresponding source code, to be distributed under the terms of Sections 1 and 2 above on a medium customarily used for software interchange; or, 102 c) Accompany it with the information you received as to the offer to distribute corresponding source code. (This alternative is allowed only for noncommercial distribution and only if you received the program in object code or executable form with such an offer, in accord with Subsection b above.) The source code for a work means the preferred form of the work for making modifications to it. For an executable work, complete source code means all the source code for all modules it contains, plus any associated interface definition files, plus the scripts used to control compilation and installation of the executable. However, as a special exception, the source code distributed need not include anything that is normally distributed (in either source or binary form) with the major components (compiler, kernel, and so on) of the operating system on which the executable runs, unless that component itself accompanies the executable. If distribution of executable or object code is made by offering access to copy from a designated place, then offering equivalent access to copy the source code from the same place counts as distribution of the source code, even though third parties are not compelled to copy the source along with the object code. 4. You may not copy, modify, sublicense, or distribute the Program except as expressly provided under this License. Any attempt otherwise to copy, modify, sublicense or distribute the Program is void, and will automatically terminate your rights under this License. However, parties who have received copies, or rights, from you under this License will not have their licenses terminated so long as such parties remain in full compliance. 5. You are not required to accept this License, since you have not signed it. permission to modify or distribute the Program or its derivative works. you do not accept this License. However, nothing else grants you These actions are prohibited by law if Therefore, by modifying or distributing the Program (or any work based on the Program), you indicate your acceptance of this License to do so, and all its terms and conditions for copying, distributing or modifying the Program or works based on it. 6. Each time you redistribute the Program (or any work based on the Program), the recipient automatically receives a license from the original licensor to copy, distribute or modify the Program subject to these terms and conditions. You may not impose any further restrictions on the recipients' exercise of the rights granted herein. You are not responsible for enforcing compliance by third parties to this License. 103 7. If, as a consequence of a court judgment or allegation of patent infringement or for any other reason (not limited to patent issues), conditions are imposed on you (whether by court order, agreement or otherwise) that contradict the conditions of this License, they do not excuse you from the conditions of this License. If you cannot distribute so as to satisfy simultaneously your obligations under this License and any other pertinent obligations, then as a consequence you may not distribute the Program at all. For example, if a patent license would not permit royalty-free redistribution of the Program by all those who receive copies directly or indirectly through you, then the only way you could satisfy both it and this License would be to refrain entirely from distribution of the Program. If any portion of this section is held invalid or unenforceable under any particular circumstance, the balance of the section is intended to apply and the section as a whole is intended to apply in other circumstances. It is not the purpose of this section to induce you to infringe any patents or other property right claims or to contest validity of any such claims; this section has the sole purpose of protecting the integrity of the free software distribution system, which is implemented by public license practices. Many people have made generous contributions to the wide range of software distributed through that system in reliance on consistent application of that system; it is up to the author/donor to decide if he or she is willing to distribute software through any other system and a licensee cannot impose that choice. This section is intended to make thoroughly clear what is believed to be a consequence of the rest of this License. 8. If the distribution and/or use of the Program is restricted in certain countries either by patents or by copyrighted interfaces, the original copyright holder who places the Program under this License may add an explicit geographical distribution limitation excluding those countries, so that distribution is permitted only in or among countries not thus excluded. In such case, this License incorporates the limitation as if written in the body of this License. 9. The Free Software Foundation may publish revised and/or new versions of the General Public License from time to time. Such new versions will be similar in spirit to the present version, but may differ in detail to address new problems or concerns. Each version is given a distinguishing version number. If the Program specifies a version number of this License which applies to it and "any later version", you have the option of following the terms and conditions either of that version or of any later version published by the Free Software Foundation. If the Program does not specify a version number of this License, you may choose any version ever published by the Free Software Foundation. 104 10. If you wish to incorporate parts of the Program into other free programs whose distribution conditions are different, write to the author to ask for permission. For software which is copyrighted by the Free Software Foundation, write to the Free Software Foundation; we sometimes make exceptions for this. Our decision will be guided by the two goals of preserving the free status of all derivatives of our free software and of promoting the sharing and reuse of software generally. NO WARRANTY 11. BECAUSE THE PROGRAM IS LICENSED FREE OF CHARGE, THERE IS NO WARRANTY FOR THE PROGRAM, TO THE EXTENT PERMITTED BY APPLICABLE LAW. EXCEPT WHEN OTHERWISE STATED IN WRITING THE COPYRIGHT HOLDERS AND/OR OTHER PARTIES PROVIDE THE PROGRAM "AS IS" WITHOUT WARRANTY OF ANY KIND, EITHER EXPRESSED OR IMPLIED, INCLUDING, BUT NOT LIMITED TO, THE IMPLIED WARRANTIES OF MERCHANTABILITY AND FITNESS FOR A PARTICULAR PURPOSE. PROGRAM IS WITH YOU. THE ENTIRE RISK AS TO THE QUALITY AND PERFORMANCE OF THE SHOULD THE PROGRAM PROVE DEFECTIVE, YOU ASSUME THE COST OF ALL NECESSARY SERVICING, REPAIR OR CORRECTION. 12. IN NO EVENT UNLESS REQUIRED BY APPLICABLE LAW OR AGREED TO IN WRITING WILL ANY COPYRIGHT HOLDER, OR ANY OTHER PARTY WHO MAY MODIFY AND/OR REDISTRIBUTE THE PROGRAM AS PERMITTED ABOVE, BE LIABLE TO YOU FOR DAMAGES, INCLUDING ANY GENERAL, SPECIAL, INCIDENTAL OR CONSEQUENTIAL DAMAGES ARISING OUT OF THE USE OR INABILITY TO USE THE PROGRAM (INCLUDING BUT NOT LIMITED TO LOSS OF DATA OR DATA BEING RENDERED INACCURATE OR LOSSES SUSTAINED BY YOU OR THIRD PARTIES OR A FAILURE OF THE PROGRAM TO OPERATE WITH ANY OTHER PROGRAMS), EVEN IF SUCH HOLDER OR OTHER PARTY HAS BEEN ADVISED OF THE POSSIBILITY OF SUCH DAMAGES. END OF TERMS AND CONDITIONS How to Apply These Terms to Your New Programs If you develop a new program, and you want it to be of the greatest possible use to the public, the best way to achieve this is to make it free software which everyone can redistribute and change under these terms. To do so, attach the following notices to the program. It is safest to attach them to the start of each source file to most effectively convey the exclusion of warranty; and each file should have at least the "copyright" line and a pointer to where the full notice is found. , 1 April 1989 Ty Coon, President of Vice This General Public License does not permit incorporating your program into proprietary programs. If your program is a subroutine library, you may consider it more useful to permit linking proprietary applications with the library. If this is what you want to do, use the GNU Library General Public License instead of this License. 105 GNU LESSER GENERAL PUBLIC LICENSE Version 2.1, February 1999 Copyright (C) 1991, 1999 Free Software Foundation, Inc. 02110-1301 51 Franklin Street, Fifth Floor, Boston, MA USA Everyone is permitted to copy and distribute verbatim copies of this license document, but changing it is not allowed. [This is the first released version of the Lesser GPL. It also counts as the successor of the GNU Library Public License, version 2, hence the version number 2.1.] Preamble The licenses for most software are designed to take away your freedom to share and change it. By contrast, the GNU General Public Licenses are intended to guarantee your freedom to share and change free software--to make sure the software is free for all its users. This license, the Lesser General Public License, applies to some specially designated software packages--typically libraries--of the Free Software Foundation and other authors who decide to use it. You can use it too, but we suggest you first think carefully about whether this license or the ordinary General Public License is the better strategy to use in any particular case, based on the explanations below. When we speak of free software, we are referring to freedom of use, not price. Our General Public Licenses are designed to make sure that you have the freedom to distribute copies of free software (and charge for this service if you wish); that you receive source code or can get it if you want it; that you can change the software and use pieces of it in new free programs; and that you are informed that you can do these things. To protect your rights, we need to make restrictions that forbid distributors to deny you these rights or to ask you to surrender these rights. These restrictions translate to certain responsibilities for you if you distribute copies of the library or if you modify it. For example, if you distribute copies of the library, whether gratis or for a fee, you must give the recipients all the rights that we gave you. You must make sure that they, too, receive or can get the source code. If you link other code with the library, you must provide complete object files to the recipients, so that they can relink them with the library after making changes to the library and recompiling it. And you must show them these terms so they know their rights. We protect your rights with a two-step method: (1) we copyright the library, and (2) we offer you this license, which gives you legal permission to copy, distribute and/or modify the library. 106 To protect each distributor, we want to make it very clear that there is no warranty for the free library. Also, if the library is modified by someone else and passed on, the recipients should know that what they have is not the original version, so that the original author's reputation will not be affected by problems that might be introduced by others. Finally, software patents pose a constant threat to the existence of any free program. We wish to make sure that a company cannot effectively restrict the users of a free program by obtaining a restrictive license from a patent holder. Therefore, we insist that any patent license obtained for a version of the library must be consistent with the full freedom of use specified in this license. Most GNU software, including some libraries, is covered by the ordinary GNU General Public License. This license, the GNU Lesser General Public License, applies to certain designated libraries, and is quite different from the ordinary General Public License. We use this license for certain libraries in order to permit linking those libraries into non-free programs. When a program is linked with a library, whether statically or using a shared library, the combination of the two is legally speaking a combined work, a derivative of the original library. The ordinary General Public License therefore permits such linking only if the entire combination fits its criteria of freedom. The Lesser General Public License permits more lax criteria for linking other code with the library. We call this license the "Lesser" General Public License because it does Less to protect the user's freedom than the ordinary General Public License. competing non-free programs. for many libraries. It also provides other free software developers Less of an advantage over These disadvantages are the reason we use the ordinary General Public License However, the Lesser license provides advantages in certain special circumstances. For example, on rare occasions, there may be a special need to encourage the widest possible use of a certain library, so that it becomes a de-facto standard. library. To achieve this, non-free programs must be allowed to use the A more frequent case is that a free library does the same job as widely used non-free libraries. In this case, there is little to gain by limiting the free library to free software only, so we use the Lesser General Public License. In other cases, permission to use a particular library in non-free programs enables a greater number of people to use a large body of free software. For example, permission to use the GNU C Library in non-free programs enables many more people to use the whole GNU operating system, as well as its variant, the GNU/Linux operating system. Although the Lesser General Public License is Less protective of the users' freedom, it does ensure that the user of a program that is linked with the Library has the freedom and the wherewithal to run that program using a modified version of the Library. 107 The precise terms and conditions for copying, distribution and modification follow. Pay close attention to the difference between a "work based on the library" and a "work that uses the library". The former contains code derived from the library, whereas the latter must be combined with the library in order to run. GNU LESSER GENERAL PUBLIC LICENSE TERMS AND CONDITIONS FOR COPYING, DISTRIBUTION AND MODIFICATION 0. This License Agreement applies to any software library or other program which contains a notice placed by the copyright holder or other authorized party saying it may be distributed under the terms of this Lesser General Public License (also called "this License"). Each licensee is addressed as "you". A "library" means a collection of software functions and/or data prepared so as to be conveniently linked with application programs (which use some of those functions and data) to form executables. The "Library", below, refers to any such software library or work which has been distributed under these terms. A "work based on the Library" means either the Library or any derivative work under copyright law: that is to say, a work containing the Library or a portion of it, either verbatim or with modifications and/or translated straightforwardly into another language. (Hereinafter, translation is included without limitation in the term "modification".) "Source code" for a work means the preferred form of the work for making modifications to it. For a library, complete source code means all the source code for all modules it contains, plus any associated interface definition files, plus the scripts used to control compilation and installation of the library. Activities other than copying, distribution and modification are not covered by this License; they are outside its scope. The act of running a program using the Library is not restricted, and output from such a program is covered only if its contents constitute a work based on the Library (independent of the use of the Library in a tool for writing it). Whether that is true depends on what the Library does and what the program that uses the Library does. 1. You may copy and distribute verbatim copies of the Library's complete source code as you receive it, in any medium, provided that you conspicuously and appropriately publish on each copy an appropriate copyright notice and disclaimer of warranty; keep intact all the notices that refer to this License and to the absence of any warranty; and distribute a copy of this License along with the Library. You may charge a fee for the physical act of transferring a copy, and you may at your option offer warranty protection in exchange for a fee. 108 2. You may modify your copy or copies of the Library or any portion of it, thus forming a work based on the Library, and copy and distribute such modifications or work under the terms of Section 1 above, provided that you also meet all of these conditions: a) The modified work must itself be a software library. b) You must cause the files modified to carry prominent notices stating that you changed the files and the date of any change. c) You must cause the whole of the work to be licensed at no charge to all third parties under the terms of this License. d) If a facility in the modified Library refers to a function or a table of data to be supplied by an application program that uses the facility, other than as an argument passed when the facility is invoked, then you must make a good faith effort to ensure that, in the event an application does not supply such function or table, the facility still operates, and performs whatever part of its purpose remains meaningful. (For example, a function in a library to compute square roots has a purpose that is entirely well-defined independent of the application. Therefore, Subsection 2d requires that any application-supplied function or table used by this function must be optional: if the application does not supply it, the square root function must still compute square roots.) These requirements apply to the modified work as a whole. If identifiable sections of that work are not derived from the Library, and can be reasonably considered independent and separate works in themselves, then this License, and its terms, do not apply to those sections when you distribute them as separate works. But when you distribute the same sections as part of a whole which is a work based on the Library, the distribution of the whole must be on the terms of this License, whose permissions for other licensees extend to the entire whole, and thus to each and every part regardless of who wrote it. Thus, it is not the intent of this section to claim rights or contest your rights to work written entirely by you; rather, the intent is to exercise the right to control the distribution of derivative or collective works based on the Library. In addition, mere aggregation of another work not based on the Library with the Library (or with a work based on the Library) on a volume of a storage or distribution medium does not bring the other work under the scope of this License. 109 3. You may opt to apply the terms of the ordinary GNU General Public License instead of this License to a given copy of the Library. To do this, you must alter all the notices that refer to this License, so that they refer to the ordinary GNU General Public License, version 2, instead of to this License. (If a newer version than version 2 of the ordinary GNU General Public License has appeared, then you can specify that version instead if you wish.) Do not make any other change in these notices. Once this change is made in a given copy, it is irreversible for that copy, so the ordinary GNU General Public License applies to all subsequent copies and derivative works made from that copy. This option is useful when you wish to copy part of the code of the Library into a program that is not a library. 4. You may copy and distribute the Library (or a portion or derivative of it, under Section 2) in object code or executable form under the terms of Sections 1 and 2 above provided that you accompany it with the complete corresponding machine-readable source code, which must be distributed under the terms of Sections 1 and 2 above on a medium customarily used for software interchange. If distribution of object code is made by offering access to copy from a designated place, then offering equivalent access to copy the source code from the same place satisfies the requirement to distribute the source code, even though third parties are not compelled to copy the source along with the object code. 5. A program that contains no derivative of any portion of the Library, but is designed to work with the Library by being compiled or linked with it, is called a "work that uses the Library". Such a work, in isolation, is not a derivative work of the Library, and therefore falls outside the scope of this License. However, linking a "work that uses the Library" with the Library creates an executable that is a derivative of the Library (because it contains portions of the Library), rather than a "work that uses the library". The executable is therefore covered by this License.Section 6 states terms for distribution of such executables. When a "work that uses the Library" uses material from a header file that is part of the Library, the object code for the work may be a derivative work of the Library even though the source code is not. Whether this is true is especially significant if the work can be linked without the Library, or if the work is itself a library. The threshold for this to be true is not precisely defined by law. If such an object file uses only numerical parameters, data structure layouts and accessors, and small macros and small inline functions (ten lines or less in length), then the use of the object file is unrestricted, regardless of whether it is legally a derivative work. (Executables containing this object code plus portions of the Library will still fall under Section 6.) 110 Otherwise, if the work is a derivative of the Library, you may distribute the object code for the work under the terms of Section 6. Any executables containing that work also fall under Section 6, whether or not they are linked directly with the Library itself. 6. As an exception to the Sections above, you may also combine or link a "work that uses the Library" with the Library to produce a work containing portions of the Library, and distribute that work under terms of your choice, provided that the terms permit modification of the work for the customer's own use and reverse engineering for debugging such modifications. You must give prominent notice with each copy of the work that the Library is used in it and that the Library and its use are covered by this License. You must supply a copy of this License. If the work during execution displays copyright notices, you must include the copyright notice for the Library among them, as well as a reference directing the user to the copy of this License. Also, you must do one of these things: a) Accompany the work with the complete corresponding machine-readable source code for the Library including whatever changes were used in the work (which must be distributed under Sections 1 and 2 above); and, if the work is an executable linked with the Library, with the complete machine-readable "work that uses the Library", as object code and/or source code, so that the user can modify the Library and then relink to produce a modified executable containing the modified Library. (It is understood that the user who changes the contents of definitions files in the Library will not necessarily be able to recompile the application to use the modified definitions.) b) Use a suitable shared library mechanism for linking with the Library. A suitable mechanism is one that (1) uses at run time a copy of the library already present on the user's computer system, rather than copying library functions into the executable, and (2) will operate properly with a modified version of the library, if the user installs one, as long as the modified version is interface-compatible with the version that the work was made with. c) Accompany the work with a written offer, valid for at least three years, to give the same user the materials specified in Subsection 6a, above, for a charge no more than the cost of performing this distribution. d) If distribution of the work is made by offering access to copy from a designated place, offer equivalent access to copy the above specified materials from the same place. e) Verify that the user has already received a copy of these materials or that you have already sent this user a copy. 111 For an executable, the required form of the "work that uses the Library" must include any data and utility programs needed for reproducing the executable from it. However, as a special exception, the materials to be distributed need not include anything that is normally distributed (in either source or binary form) with the major components (compiler, kernel, and so on) of the operating system on which the executable runs, unless that component itself accompanies the executable. It may happen that this requirement contradicts the license restrictions of other proprietary libraries that do not normally accompany the operating system. Such a contradiction means you cannot use both them and the Library together in an executable that you distribute. 7. You may place library facilities that are a work based on the Library side-by-side in a single library together with other library facilities not covered by this License, and distribute such a combined library, provided that the separate distribution of the work based on the Library and of the other library facilities is otherwise permitted, and provided that you do these two things: a) Accompany the combined library with a copy of the same work based on the Library, uncombined with any other library facilities. This must be distributed under the terms of the Sections above. b) Give prominent notice with the combined library of the fact that part of it is a work based on the Library, and explaining where to find the accompanying uncombined form of the same work. 8. You may not copy, modify, sublicense, link with, or distribute the Library except as expressly provided under this License. Any attempt otherwise to copy, modify, sublicense, link with, or distribute the Library is void, and will automatically terminate your rights under this License. However, parties who have received copies, or rights, from you under this License will not have their licenses terminated so long as such parties remain in full compliance. 9. You are not required to accept this License, since you have not signed it. permission to modify or distribute the Library or its derivative works. do not accept this License. However, nothing else grants you These actions are prohibited by law if you Therefore, by modifying or distributing the Library (or any work based on the Library), you indicate your acceptance of this License to do so, and all its terms and conditions for copying, distributing or modifying the Library or works based on it. 10. Each time you redistribute the Library (or any work based on the Library), the recipient automatically receives a license from the original licensor to copy, distribute, link with or modify the Library subject to these terms and conditions. You may not impose any further restrictions on the recipients' exercise of the rights granted herein. You are not responsible for enforcing compliance by third parties with this License. 112 11. If, as a consequence of a court judgment or allegation of patent infringement or for any other reason (not limited to patent issues), conditions are imposed on you (whether by court order, agreement or otherwise) that contradict the conditions of this License, they do not excuse you from the conditions of this License. If you cannot distribute so as to satisfy simultaneously your obligations under this License and any other pertinent obligations, then as a consequence you may not distribute the Library at all. For example, if a patent license would not permit royalty-free redistribution of the Library by all those who receive copies directly or indirectly through you, then the only way you could satisfy both it and this License would be to refrain entirely from distribution of the Library. If any portion of this section is held invalid or unenforceable under any particular circumstance, the balance of the section is intended to apply, and the section as a whole is intended to apply in other circumstances. It is not the purpose of this section to induce you to infringe any patents or other property right claims or to contest validity of any such claims; this section has the sole purpose of protecting the integrity of the free software distribution system which is implemented by public license practices. Many people have made generous contributions to the wide range of software distributed through that system in reliance on consistent application of that system; it is up to the author/donor to decide if he or she is willing to distribute software through any other system and a licensee cannot impose that choice. This section is intended to make thoroughly clear what is believed to be a consequence of the rest of this License. 12. If the distribution and/or use of the Library is restricted in certain countries either by patents or by copyrighted interfaces, the original copyright holder who places the Library under this License may add an explicit geographical distribution limitation excluding those countries, so that distribution is permitted only in or among countries not thus excluded. In such case, this License incorporates the limitation as if written in the body of this License. 13. The Free Software Foundation may publish revised and/or new versions of the Lesser General Public License from time to time. Such new versions will be similar in spirit to the present version, but may differ in detail to address new problems or concerns. Each version is given a distinguishing version number. If the Library specifies a version number of this License which applies to it and "any later version", you have the option of following the terms and conditions either of that version or of any later version published by the Free Software Foundation. If the Library does not specify a license version number, you may choose any version ever published by the Free Software Foundation. 14. If you wish to incorporate parts of the Library into other free programs whose distribution conditions are incompatible with these, write to the author to ask for permission. For software which is copyrighted by the Free Software Foundation, write to the Free Software Foundation; we sometimes make exceptions for this. Our decision will be guided by the two goals of preserving the free status of all derivatives of our free software and of promoting the sharing and reuse of software generally. 113 NO WARRANTY 15. BECAUSE THE LIBRARY IS LICENSED FREE OF CHARGE, THERE IS NO WARRANTY FOR THE LIBRARY, TO THE EXTENT PERMITTED BY APPLICABLE LAW. EXCEPT WHEN OTHERWISE STATED IN WRITING THE COPYRIGHT HOLDERS AND/OR OTHER PARTIES PROVIDE THE LIBRARY "AS IS" WITHOUT WARRANTY OF ANY KIND, EITHER EXPRESSED OR IMPLIED, INCLUDING, BUT NOT LIMITED TO, THE IMPLIED WARRANTIES OF MERCHANTABILITY AND FITNESS FOR A PARTICULAR PURPOSE. THE ENTIRE RISK AS TO THE QUALITY AND PERFORMANCE OF THE LIBRARY IS WITH YOU. SHOULD THE LIBRARY PROVE DEFECTIVE, YOU ASSUME THE COST OF ALL NECESSARY SERVICING, REPAIR OR CORRECTION. 16. IN NO EVENT UNLESS REQUIRED BY APPLICABLE LAW OR AGREED TO IN WRITING WILL ANY COPYRIGHT HOLDER, OR ANY OTHER PARTY WHO MAY MODIFY AND/OR REDISTRIBUTE THE LIBRARY AS PERMITTED ABOVE, BE LIABLE TO YOU FOR DAMAGES, INCLUDING ANY GENERAL, SPECIAL, INCIDENTAL OR CONSEQUENTIAL DAMAGES ARISING OUT OF THE USE OR INABILITY TO USE THE LIBRARY (INCLUDING BUT NOT LIMITED TO LOSS OF DATA OR DATA BEING RENDERED INACCURATE OR LOSSES SUSTAINED BY YOU OR THIRD PARTIES OR A FAILURE OF THE LIBRARY TO OPERATE WITH ANY OTHER SOFTWARE), EVEN IF SUCH HOLDER OR OTHER PARTY HAS BEEN ADVISED OF THE POSSIBILITY OF SUCH DAMAGES. END OF TERMS AND CONDITIONS 114 BSD LICENSE Redistribution and use in source and binary forms, with or without modification, are permitted provided that the following conditions are met: * Redistributions of source code must retain the above copyright notice, this list of conditions and the following disclaimer. * Redistributions in binary form must reproduce the above copyright notice, this list of conditions and the following disclaimer in the documentation and/or other materials provided with the distribution. * Neither the name of Conceptronic nor the names of its contributors may be used to endorse or promote products derived from this software without specific prior written permission. THIS SOFTWARE IS PROVIDED BY CONCEPTRONIC ''AS IS'' AND ANY EXPRESS OR IMPLIED WARRANTIES, INCLUDING, BUT NOT LIMITED TO, THE IMPLIED WARRANTIES OF MERCHANTABILITY AND FITNESS FOR A PARTICULAR PURPOSE ARE DISCLAIMED. IN NO EVENT SHALL CONCEPTRONIC BE LIABLE FOR ANY DIRECT, INDIRECT, INCIDENTAL, SPECIAL, EXEMPLARY, OR CONSEQUENTIAL DAMAGES INCLUDING, BUT NOT LIMITED TO, PROCUREMENT OF SUBSTITUTE GOODS OR SERVICES; LOSS OF USE, DATA, OR PROFITS; OR BUSINESS INTERRUPTION) HOWEVER CAUSED AND ON ANY THEORY OF LIABILITY, WHETHER IN CONTRACT, STRICT LIABILITY, OR TORT (INCLUDING NEGLIGENCE OR OTHERWISE) ARISING IN ANY WAY OUT OF THE USE OF THIS SOFTWARE, EVEN IF ADVISED OF THE POSSIBILITY OF SUCH DAMAGE. 115 REVISED BSD LICENSE Redistribution and use in source and binary forms, with or without modification, are permitted provided that the following conditions are met: * Redistributions of source code must retain the above copyright notice, this list of conditions and the following disclaimer. * Redistributions in binary form must reproduce the above copyright notice, this list of conditions and the following disclaimer in the documentation and/or other materials provided with the distribution. * Neither the name of Conceptronic nor the names of its contributors may be used to endorse or promote products derived from this software without specific prior written permission. THIS SOFTWARE IS PROVIDED BY CONCEPTRONIC ``AS IS'' AND ANY EXPRESS OR IMPLIED WARRANTIES, INCLUDING, BUT NOT LIMITED TO, THE IMPLIED WARRANTIES OF MERCHANTABILITY AND FITNESS FOR A PARTICULAR PURPOSE ARE DISCLAIMED. IN NO EVENT SHALL CONCEPTRONIC BE LIABLE FOR ANY DIRECT, INDIRECT, INCIDENTAL, SPECIAL, EXEMPLARY, OR CONSEQUENTIAL DAMAGES (INCLUDING, BUT NOT LIMITED TO, PROCUREMENT OF SUBSTITUTE GOODS OR SERVICES; LOSS OF USE, DATA, OR PROFITS; OR BUSINESS INTERRUPTION) HOWEVER CAUSED AND ON ANY THEORY OF LIABILITY, WHETHER IN CONTRACT, STRICT LIABILITY, OR TORT (INCLUDING NEGLIGENCE OR OTHERWISE) ARISING IN ANY WAY OUT OF THE USE OF THIS SOFTWARE, EVEN IF ADVISED OF THE POSSIBILITY OF SUCH DAMAGE. 116