1
Plesk 8.2 for Linux/Unix Administrator's Guide 2 Copyright Notice ISBN: N/A SWsoft. 13755 Sunrise Valley Drive Suite 600 Herndon VA 20171 USA Phone: +1 (703) 815 5670 Fax: +1 (703) 815 5675 © Copyright 1999-2007, SWsoft Holdings, Ltd. All rights reserved Distribution of this work or derivative of this work in any form is prohibited unless prior written permission is obtained from the copyright holder. Patented hosting technology protected by U.S.Patents 7,099,948; 7,076,633. Patents pending in the U.S. Linux is a registered trademark of Linus Torvalds. ASPLinux and the ASPLinux logo are registered trademarks of SWsoft. RedHat is a registered trademark of Red Hat Software, Inc. Solaris is a registered trademark of Sun Microsystems, Inc. X Window System is a registered trademark of X Consortium, Inc. UNIX is a registered trademark of The Open Group. Intel, Pentium, and Celeron are registered trademarks of Intel Corporation. MS Windows, Windows 2003 Server, Windows XP, Windows 2000, Windows NT, Windows 98, and Windows 95 are registered trademarks of Microsoft Corporation. IBM DB2 is a registered trademark of International Business Machines Corp. SSH and Secure Shell are trademarks of SSH Communications Security, Inc. MegaRAID is a registered trademark of American Megatrends, Inc. PowerEdge is a trademark of Dell Computer Corporation. Request Tracker is a trademark of Best Practical Solutions, LLC All other trademarks and copyrights referred to are the property of their respective owners. 3 Contents Preface 7 Who Should Read This Guide ....................................................................................................... 7 Typographical Conventions ........................................................................................................... 7 Feedback ....................................................................................................................................... 8 About Plesk 9 Overview of Business Model, Users Accounts and Permissions ................................................ 10 Overview of Software Components Managed by Plesk .............................................................. 11 What's New in This Version......................................................................................................... 11 Getting Started 13 Logging in to Plesk ...................................................................................................................... 14 If You Forgot Your Password ............................................................................................ 16 Becoming Familiar with Plesk's Interface .................................................................................... 16 Items in the Desktop View ................................................................................................. 18 Items in the Standard View ............................................................................................... 19 Changing Your Password and Contact Information .................................................................... 20 Configuring Your Control Panel 21 Upgrading License Key for Your Control Panel .......................................................................... 21 Upgrading the Trial License Key ....................................................................................... 22 Installing Additional License Keys for Plesk Add-ons ....................................................... 23 Upgrading Your License Key ............................................................................................ 23 Rolling Back to Your Previously Used License Key .......................................................... 24 Securing Your Control Panel ....................................................................................................... 25 Restricting Administrative Access to Control Panel .......................................................... 25 Securing Communication to Server with SSL Encryption ................................................. 26 Customizing Your Control Panel ................................................................................................. 29 Changing Interface Language and Skin ............................................................................ 30 Customizing the Control Panel in the Standard View ....................................................... 32 Customizing the Control Panel in the Desktop View......................................................... 43 Adjusting Session Idle Time ........................................................................................................ 48 Configuring and Maintaining Your Server 49 Adding and Removing IP Addresses........................................................................................... 50 Configuring DNS Services ........................................................................................................... 53 Configuring Plesk to Run Behind a Firewall ...................................................................... 56 Configuring Mail Services ............................................................................................................ 57 Setting Up Anti-Spam Protection ...................................................................................... 58 Configuring Antivirus ......................................................................................................... 63 Configuring Mailman Mailing List Software ....................................................................... 64 Configuring Plesk for Database Hosting ..................................................................................... 64 Setting Up Remote Database Hosting .............................................................................. 65 Managing Database Servers............................................................................................. 68 Enabling Support for Adobe ColdFusion ..................................................................................... 70 Enabling Support for Miva E-commerce Applications ................................................................. 72 Preface 4 Configuring Statistics ................................................................................................................... 74 Configuring E-mail Notification System ....................................................................................... 74 Configuring Help Desk ................................................................................................................ 78 Adjusting System Date and Time ................................................................................................ 80 Starting, Stopping and Restarting Services ................................................................................ 81 Enabling Piped Logs for Web Server to Reduce the Risk of Web Service Disruption ................ 82 Monitoring Mail Server Message Queue and Troubleshooting Mail Congestion ........................ 82 Scheduling Tasks ........................................................................................................................ 84 Extending Plesk Capabilities with Modules ................................................................................. 86 Installing Modules ............................................................................................................. 87 Configuring and Managing Modules ................................................................................. 87 Removing Modules ........................................................................................................... 88 Serving Your Customers 89 Before You Start Serving Your Customers ................................................................................. 90 Simplifying Setup of User Accounts .................................................................................. 90 Simplifying Setup of Domains and Web Sites ................................................................... 94 Prepackaging Applications Your Customers Can Use...................................................... 98 Predefining Content for New Web Sites ......................................................................... 103 Managing User Accounts .......................................................................................................... 105 Adding User Accounts ..................................................................................................... 106 Modifying User Accounts ................................................................................................ 109 Suspending and Unsuspending User Accounts.............................................................. 115 Removing User Accounts ................................................................................................ 116 Hosting Web Sites ..................................................................................................................... 117 Obtaining Domain Names ............................................................................................... 117 Setting Up Hosting Account for a Web Site .................................................................... 119 Publishing a Site ............................................................................................................. 127 Previewing a Site ............................................................................................................ 133 Deploying Databases ...................................................................................................... 134 Installing Applications ...................................................................................................... 137 Securing E-commerce Transactions with Secure Sockets Layer Encryption ................. 140 Restricting Access to Web Site's Resources with Password Protection ........................ 145 Organizing Site Structure with Subdomains ................................................................... 149 Setting Up Additional Domain Names for a Site (Domain Aliases) ................................. 150 Hosting Personal Web Pages on Your Web Server ....................................................... 153 Setting Up Anonymous FTP Access to the Server ......................................................... 155 Customizing Web Server Error Messages ...................................................................... 157 Customizing DNS Zone Configuration for Domains........................................................ 159 Serving Sites with External Domain Name Servers ........................................................ 163 Serving Domain Names for Sites Hosted on Other Servers (Domain Forwarding) ........ 165 Transferring Domains Between User Accounts .............................................................. 166 Suspending and Unsuspending Domains ....................................................................... 166 Removing Domains ......................................................................................................... 167 Using E-mail Services ............................................................................................................... 168 Creating Mailboxes ......................................................................................................... 169 Setting Up Your E-mail Program for Retrieving Mail from Your Mailbox ........................ 170 Accessing Your Mail from a Web Browser ...................................................................... 171 Protecting Mailboxes from Spam .................................................................................... 172 Protecting Mailboxes from Viruses ................................................................................. 177 Suspending and Unsuspending Mailboxes ..................................................................... 178 Removing Mailboxes ....................................................................................................... 179 Switching off the Mailbox Service When You Have Decided to Turn Your Account into a Mail Forwarder ........................................................................................................................ 179 Setting Up Mail Forwarding to a Single E-mail Address ................................................. 180 Setting Up Mail Forwarding to Multiple E-mail Addresses .............................................. 182 Removing Mail Forwarders ............................................................................................. 184 Setting Up Automatic Reply ............................................................................................ 185 Preface 5 Switching off Automatic Reply......................................................................................... 187 Setting Up Site-Wide Preferences for Handling Mail to Nonexistent Users (Mail Bounce)188 Introducing Similar Changes to a Number of Mail Accounts at Once ............................. 189 Sending E-mail Notices to Multiple Customers at Once ................................................. 190 Maintaining Mailing Lists ................................................................................................. 196 Using Help Desk for Resolving Your Customers' Issues .......................................................... 200 Viewing Trouble Tickets in Your Help Desk .................................................................... 201 Commenting and Closing Trouble Tickets ...................................................................... 202 Migrating User Accounts, Domain Names and Web Sites from Other Hosting Platforms ........ 203 Performing Migration Within a Single Server .................................................................. 206 Backing Up and Restoring Your Data 211 Backing Up the Entire Server .................................................................................................... 212 Backing Up Individual User Accounts with User's Domains ..................................................... 212 Backing Up Individual Domains (Web Sites) ............................................................................. 213 Scheduling Backups .................................................................................................................. 213 Optimizing Server Performance ...................................................................................... 216 Restoring Data From Backup Archives ..................................................................................... 217 Maintaining Backup Files Repository ........................................................................................ 218 Uploading Backup Files to Server ................................................................................... 219 Downloading Backup Files from Server .......................................................................... 219 Removing Backup Files from Server .............................................................................. 220 Configuring Control Panel for Using FTP Repository................................................................ 220 Viewing Statistics 221 Adjusting Preferences for Web Statistics Presentation by Webalizer ....................................... 223 Hiding and Unhiding Internal References from Your and Other Sites ............................ 224 Grouping and Ungrouping References from Other Sites ................................................ 225 Hiding and Unhiding Direct Requests ............................................................................. 226 Automating Report Generation and Delivery by E-mail ............................................................ 227 Viewing Log Files and Configuring Recycling of Log Files ....................................................... 229 Monitoring Connections to Control Panel and FTP Services 230 Monitoring Connections to Control Panel .................................................................................. 230 Monitoring Connections to FTP Service .................................................................................... 231 Logging Actions Performed by Your Customers in the Control Panel 232 Setting Up Action Logging ......................................................................................................... 233 Downloading the Action Log ...................................................................................................... 234 Clearing the Action Log ............................................................................................................. 234 Using Centralized Access to Your Numerous Plesk Servers 235 Adding a Server Record ............................................................................................................ 236 Viewing Server Information and Logging in to a Server ............................................................ 236 Removing a Server Record ....................................................................................................... 237 Upgrading Your Control Panel 238 Changing Updater Settings ....................................................................................................... 240 Blocking Access to Updater Functions from the Control Panel ................................................ 241 Preface Appendix A. Advanced Features 6 242 Using Event Tracking Mechanism ............................................................................................. 242 Adding Event Handlers ................................................................................................... 243 Removing Event Handlers .............................................................................................. 256 Including Directives into Web Server Configuration File ........................................................... 257 Changing Tomcat Java Connector Ports .................................................................................. 258 Restoring Mail Configuration ..................................................................................................... 258 7 CHAPTER 1 Preface Who Should Read This Guide This guide is intended for hosting resellers who manage their servers through Plesk control panel and have access to server administrator's account in the control panel. Typographical Conventions Before you start using this guide, it is important to understand the documentation conventions used in it. The following kinds of formatting in the text identify special information. Formatting convention Type of Information Example Special Bold Items you must select, such as menu options, command buttons, or items in a list. Go to the System tab. Titles of chapters, sections, and subsections. Read the Basic Administration chapter. Italics Used to emphasize the importance of a point, to introduce a term or to designate a command line placeholder, which is to be replaced with a real name or value. The system supports the so called wildcard character search. Monospace The names of commands, files, and directories. The license file is located in the http://docs/common /licenses directory. Preface Preformatte d Preformatte d Bold On-screen computer output in your command-line sessions; source code in XML, C++, or other programming languages. What you type, contrasted with on-screen computer output. 8 # ls –al /files total 14470 # cd /root/rpms/php CAPITALS Names of keys on the keyboard. SHIFT, CTRL, ALT KEY+KEY Key combinations for which the user must press and hold down one key and then press another. CTRL+P, ALT+F4 Feedback If you have found a mistake in this guide, or if you have suggestions or ideas on how to improve this guide, please send your feedback to [email protected]. Please include in your report the guide's title, chapter and section titles, and the fragment of text in which you have found an error. 9 CHAPTER 2 About Plesk Plesk is a hosting automation solution that gives hosting providers full control over the managed Web hosting servers and simplifies setup and management of user accounts, Web sites, and e-mail accounts. Plesk is stable, secure and reliable, and the main benefit of using Plesk is that it will save you and your technical staff much time and effort: all your customers (and customers of your resellers) will have personal isolated control panel environments and will be able to manage their sites and e-mail accounts on their own. In this chapter: Overview of Business Model, Users Accounts and Permissions........................ 10 Overview of Software Components Managed by Plesk ..................................... 11 What's New in This Version ............................................................................... 11 About Plesk 10 Overview of Business Model, Users Accounts and Permissions Plesk user accounts hierarchy is limited to three user levels: client accounts, domain administrator accounts, e-mail user accounts. For your customers who need to resell hosting services or host numerous domains/web sites, you will create client accounts. Note: for the purpose of hosting your own sites, you should use a special service account which is created during Plesk setup. The account is registered with the control panel under the name My Domains. Customers with access to client accounts can host on the server any number of sites you allow. They can host the sites of their own and/or resell hosting services to other users: for that purpose your resellers can create domain administrator accounts for their own customers. Customers with access to domain administrator accounts cannot resell Web hosting services or host more than one site on their hosting accounts. They can only manage their own sites. In the current implementation of Plesk control panel, domain administrator accounts can be created only after the respective domains (web sites) are hosted on the server. All site owners can set up e-mail accounts for themselves and provide other users with mail hosting services: for that purpose, they create e-mail user accounts and grant email users with access to control panel. Site owners can also host personal web pages or small sites for other users under their domains. However, the owners of such sites usually do not have their own domain names and cannot have a dedicated control panel environment. All permissions for operations performed in the control panel you define for a reseller (client account) allow the reseller to further assign them to his or her customers. The resource allotments you define for a reseller can be further redistributed among reseller's customers. For a full list of permissions and resource usage limits you can define, refer to the Managing User Accounts (on page 105) section. All quotas you define for a client or domain administrator's account are soft quotas: the control panel indicates resource overage by showing the respective icons in the control panel, sends notices by e-mail to the respective users, but it does not automatically suspend user accounts or Web sites. The control panel does not have a built-in billing system, therefore, we recommend that you use a third-party solution of your choice, or use Plesk together with HSPcomplete. About Plesk 11 Overview of Software Components Managed by Plesk Plesk control panel works in cooperation with the following third-party software components and services: Bind DNS server Apache Web server ProFTPd FTP server MySQL and PostgreSQL database servers Qmail mail server Courier-IMAP IMAP/POP3 server Mailman mailing list server Spamassassin anti-spam software Dr.Web antivirus Webalizer and AWStats statistical packages Tomcat After installation of Plesk package, all essential services, such as DNS, Web, FTP and Mail are configured to run with the default optimal settings, so you can start serving your customers right away. However, we recommend that you review the default settings to make sure that they satisfy your needs, and create user account templates and domain templates, which will simplify further setup of hosting accounts. What's New in This Version Plesk 8.2 offers you the following new features and enhancements: Enhancements in Auto-installer Auto-installer provides more detailed error messages. Auto-installer can retrieve and install operating system updates for RedHat Enterprise Linux ES. Kaspersky Antivirus module for Plesk Now you can use Kaspersky Antivirus to scan mail traffic for viruses. Kaspersky Antivirus is customizable and allows filtering of specific types of attachments. For more information, see the Kaspersky Antivirus Module Administrator's Guide at http://www.swsoft.com/en/products/plesk/docs/. About Plesk 12 New site application format Now Plesk supports site applications in a new format, which is to become the standard for all Web applications. This format will be supported by a number of large hosting companies. For more information, visit http://swdn.swsoft.com/en/openfusion/. 13 CHAPTER 3 Getting Started This chapter describes the first actions you need to perform after installation of the Plesk control panel. In this chapter: Logging in to Plesk ............................................................................................ 14 Becoming Familiar with Plesk's Interface........................................................... 16 Changing Your Password and Contact Information ........................................... 20 Getting Started 14 Logging in to Plesk To log in to your Plesk control panel: 1 Open your web browser, and in the address bar type the URL where your Plesk control panel is located. For example, https://your-domain.com:8443, where your-domain.com is the domain name of your Web host. 2 Press ENTER. Plesk login screen will open. 3 Type the user name 'admin' and your password into the Login and Password boxes, respectively. If this is your first login to the freshly installed control panel, use the default password 'setup'. 4 If you log in for the first time, select the language for your control panel from the Interface language menu. If you had previously specified the interface language and saved it in your interface preferences, leave the User default value selected. 5 Click Login. After your first login, you should accept the license agreement and then specify the host name and IP addresses to assign to the server. 6 Read carefully the terms of the License Agreement and, if you agree to all the terms, select the I agree to the terms of this license agreement and Do not show it again check boxes. 7 Click Accept to proceed to the postinstall configuration. 8 In the Full hostname field, enter your server's host name. This should be a fully qualified host name but without a trailing dot (e.g. host.domain.tld). 9 Specify the IP address that will be used as the default address of your server. You have the following two options: Select one of your existing IP address from the drop-down box. This list is populated automatically and contains all IP addresses available on the server. OR Click the Add IP Address option button, select the network interface and enter the new IP address and subnet mask in the IP address box. Note: With Plesk you can mark all your IP addresses as shared or dedicated before you assign them to your customers. This allows the control panel to distinguish between them and not to let you assign a dedicated IP address to several customers at once. A dedicated IP address can be assigned to a single customer, while a shared IP address can be shared among several user accounts. 10 In the Shared IP section, specify the type for existing addresses: shared or exclusive. Click the Shared and Exclusive buttons to change the types of IP addresses. Getting Started 15 You can skip this stage and define the type of IP addresses later (Server > IP Addresses). 11 In the Administrator's preferences section, change the default administrator password. Change the default administrator's password. Enter the new password and confirm it in the New password and Confirm password fields. The password can have up to 14 symbols. Note that the password is case sensitive. Note: Do not forget to change the administrator's password from the default one to your own personalized password; otherwise, access to the control panel under the administrator account will be available with the default password 'setup', which is known to many users of Plesk. 12 Click OK. 13 Fill in administrator‘s contact information. Be sure to leave the I would like to create a default client account check box selected: Plesk assigns Web sites to client accounts, and selecting this check box will create a special user account "My Domains", which you will use for hosting your own Web sites. 14 Click OK. Getting Started 16 If You Forgot Your Password You can retrieve your forgotten password in any of the following ways: Look it up in the /etc/psa/.psa.shadow file on the server's file system. Use the password reminder in the control panel. To use the password reminder: 1 In your web browser‘s address bar, type the URL where your Plesk control panel is located (for example, https://your-domain.com:8443) 2 Press ENTER. Plesk login screen will open. 3 Click the Forgot your password? link. 4 Specify your login name and e-mail address registered in the system. 5 Click OK. Your password will be sent to your e-mail. If your password cannot be sent by email because it was stored by the system in encrypted form, you will be prompted to set up a new password using a secret code that will be generated for that purpose and sent to you. 6 Once you received the e-mail from the password reminder, click the link in the message body. A new browser window will open. 7 Specify your login name and a new password. The Secret Code field of the form should be automatically filled by the system, and if it is not, copy the secret code from the message you received to the clipboard and paste to the form. 8 Click OK to submit. Note: You should use the secret code within 24 hours after its generation, otherwise it will expire and you will need to go through the whole process again. Becoming Familiar with Plesk's Interface When you log in to control panel, it can open in either a standard view, a simplified desktop view, or a combination of both. The standard view is a customary view of the control panel divided into two main areas: navigation pane on the left and the main screen where operations are performed on the right. Getting Started Figure 1: Standard Administrator's interface The desktop view can show server statistics and shortcuts to the operations you frequently perform—everything you may need can now be accessible from a single screen. Figure 2: Administrator's Desktop view You can switch between the views (by installing the appropriate license key) or use a combination of them for your control panel. You can also specify what view should be shown to other control panel users. To customize your control panel, refer to the Customizing the Control Panel (on page 43) chapter. 17 Getting Started 18 Items in the Desktop View The desktop view originally shows four sections: Server Information. This shows your hostname, control panel version, operating system and kernel versions, license key number, and system uptime. Statistics. This shows average processor load for the last minute, five minutes, and fifteen minutes, memory and disk space usage, number of served client accounts and hosted domains (Web sites). The client accounts include accounts of resellers and customers who have several sites—owners of a single domain are not counted. Tools. This group shows shortcuts to the operations that you can perform through the control panel. You can freely add and remove these shortcuts. Favorites. This group shows five types of shortcuts sorted by type and placed on the respective tabs. The Clients tab shows the shortcuts to administrative tools available for a selected user account, the Domains tab shows shortcuts to domain administration tools, the Mail Accounts tab shows shortcuts to the e-mail account administration tools. The Shortcuts tab shows all other types of shortcuts that do not relate to user accounts, domains and e-mail accounts. The Recent tab shows last ten control panel screens you have been on. The Favorites group also provides search tool for finding user accounts, web site hosting accounts, and e-mail accounts. To use the search tool, select the item type from the drop-down box, type the search criteria (this can be any combination of symbols, search is case insensitive) and click Search. Getting Started 19 Using Wizards When you work with Plesk in the Desktop view, you accomplish the tasks you need through wizards. Each wizard is a series of consecutive screens. To accomplish a task using a wizard, follow the instructions displayed on the wizard screens. For information on individual options, refer to the respective sections of this guide. Items in the Standard View The navigation pane is located on the left. It gives you access to sets of administrative functions: Clients. This is where you manage your clients and all data related to their accounts. Domains. This is where you manage Web sites and their respective e-mail services. Server. This shortcut gives you access to server administration functions. Modules. This is where you manage the additional modules that extend Plesk capabilities, such as Firewall, Game Server, VPN and others. Sessions. When clients, site and mailbox owners log in to control panel, or connect to the server via FTP protocol, they establish sessions that you can monitor and terminate. Master. This shortcut gives you access to centralized management of Plesk enabled servers. Help Desk. This is the help desk system integrated with your control panel. You can use it to view and solve the problems reported to you by your customers. Help. Provides context sensitive help. Log Out. When finished working with control panel, click this icon to close your session. Below the Help icon, there is a context help tip area. It provides a brief description of the current screen or available operations. When you place the mouse pointer over a system element or status icon, it displays additional information. To navigate through Plesk, you can also use a path bar: a chain of links that appears in the right part of the screen, below the banner area. To return to a previous screen, use the Up Level icon in the upper-right corner of the screen. To find items in lengthy lists, use search boxes located above every list of items: type a search criterion into the input box, and click Search. A list will show the items matching the search criteria. To return back to viewing all items, click Show All. To sort a list by a certain parameter in ascending or descending order, click on the parameter's title in the column heading. The order of sorting will be indicated by a small triangle displayed next to the parameter's title. Getting Started 20 Changing Your Password and Contact Information To update your contact information: 1 Select the Server shortcut in the navigation pane 2 Click the Edit icon in the Administrator information group. 3 Update your information as required, and click OK. To change your password: 1 2 3 4 Select the Server shortcut in the navigation pane Click the Change Password icon in the Administrator information group. Enter your old and new passwords. Click OK. If you forgot your password: 1 In your web browser‘s address bar, type the URL where your Plesk control panel is located. 2 For example, https://your-server.com:8443. 3 Press ENTER. Plesk login screen will open. 4 Click the Forgot your password? link. 5 You will be prompted to specify your login name and e -mail address registered in the system. Type your login name into the Login box, type your e-mail address registered in the system into the E-mail box, and click OK. 6 If your password cannot be sent by e-mail because it was stored by the system in encrypted form, you will be prompted to set up a new password using a secret code that will be generated for that purpose and sent to your e-mail. 7 Once you received the e-mail from the password reminder, click the link in the message body. A new browser window will open. 8 At this step, specify your login name and a new password. The Secret Code field of the form should be automatically filled by the system, and if it is not, copy the secret code from the message you received to the clipboard and paste to the form. 9 Click OK to submit. The instructions on how to restore your password will be sent to your e-mail address. 21 CHAPTER 4 Configuring Your Control Panel This chapter discusses the configuration steps required to set up and manage your Plesk Control Panel. In this chapter: Upgrading License Key for Your Control Panel ................................................. 21 Securing Your Control Panel ............................................................................. 25 Customizing Your Control Panel........................................................................ 29 Adjusting Session Idle Time .............................................................................. 48 Upgrading License Key for Your Control Panel Plesk comes with a trial license key, which is automatically installed to the control panel. This license key allows you to create one user account, host one web site and one mail box. Therefore, to fully use the Plesk control panel as you need, you should obtain a license key from SWsoft or one of its resellers and install it to the control panel. Plesk license keys have a built-in expiration date. This has been implemented to help prevent fraud and theft. It requires the Plesk software to check with SWsoft's licensing server during a 10 day grace period (prior to the expiration date) to verify that the key has not been reported stolen and is being used in accordance with the End User License Agreement (that is, installed on only one server). Once this is verified, the expiration date is prolonged. Plesk will attempt to connect over TCP/IP to the licensing server through port 5224. Please make sure that this is not blocked by a firewall. The update process runs automatically and the Plesk Administrator does not need to do anything unless there is a problem. Should the Plesk key expire, check your firewall and then go to Server > License Management and click Retrieve Keys. If the key cannot be updated, contact your reseller or SWsoft (if you purchased the license directly from SWsoft). You can test the connection to the licensing server anytime by going to Server > License Management and clicking Retrieve Keys. Configuring Your Control Panel 22 Upgrading the Trial License Key To upgrade the trial license key: 1 Go to Server > License Management and click Order New Key. 2 The SWsoft online store will open in a separate browser window. In this window, select the items and features you want to include into your Plesk license and click Submit. In the next steps, indicate the currency, number of license keys, provide contact details, billing address, and payment method, and submit the form. The new key will be sent to the specified e-mail address. 3 Save the new key to the hard drive on your local machine. 4 Open again the License Management screen in Plesk (Server > License Management) and click Upload Key. 5 Enter the path to the key file that you saved on your local machine or click Browse to locate it. 6 Select the Replace the currently installed license key with the selected one check box to confirm that you really want to replace the current license key with the new one. If this check box is not selected, the new license key will not be installed and installation will be aborted. 7 If your new license key allows hosting fewer sites than you already host on the server, Plesk will stop working. However, to prevent the control panel from comparing the amount of the resources used and those covered by the new key, select the Allow the resources usage override check box. This might be helpful if you want to temporarily install a license key that covers less resources and then upgrade it through the control panel interface. 8 Click OK to install the new key to the control panel. Configuring Your Control Panel 23 Installing Additional License Keys for Plesk Add-ons To install an additional license key for an add-on Plesk component: Click the Server shortcut in the navigation pane. Click the License Management icon in the System group. Click Order Control Panel Add-Ons. The SWsoft online store page listing available add-ons will open in a separate browser window. On this page, select the add -ons you want to order and click Submit. 5 Because Plesk add-ons are added to the license keys that already exist, the Plesk Number Checking System page will open. Enter the number of your license key to which you add this feature and click Submit. 6 In the next steps, indicate the currency, number of keys, provide contact details, billing address, and payment method, and submit the form. You will be notified by e-mail when your order is processed. 7 When you receive the e-mail notification, return to the License Management screen (Server > License Management) and click Retrieve Keys to retrieve the ordered license key. Plesk License Manager will retrieve the upgraded license key from the SWsoft licensing server and automatically install it to your control panel. 1 2 3 4 Upgrading Your License Key If you are planning to expand your customer base and host more sites on the server than your current license allows, you need to upgrade your license key. To upgrade the license key: 1 2 3 4 Click the Server shortcut in the navigation pane. Click the License Management icon in the System group. Click Order Control Panel Upgrades. On the SWsoft online store page, select the desired upgrade option and click Submit. 5 In the next step, indicate purchase details and submit the form. You will be notified by e-mail when your order is processed. 6 After you receive the e-mail notification, return to the License Management screen (Server > License Management) and click Retrieve Keys to retrieve the ordered license key. Plesk License Manager will retrieve the purchased license key from the Plesk licensing server and automatically upload it to your control panel. Configuring Your Control Panel Rolling Back to Your Previously Used License Key To roll back to the license key you previously used: 1 Click the Server shortcut in the navigation pane. 2 Click the License Management icon in the System group. 3 Click Roll Back Key. The previously installed license key will be restored. 24 Configuring Your Control Panel 25 Securing Your Control Panel Restricting Administrative Access to Control Panel To alleviate security concerns, you may want to restrict administrative access to your control panel from specific IP addresses. To allow administrative access to control panel only from specific IP addresses or networks: 1 Go to Server > Access. 2 Click Add New Network and specify the required IP addresses. Click OK. To specify subnets, you can use wildcard symbols (*) and subnet masks. 3 Select the Denied from the networks that are not listed option, and click Set. When prompted to confirm the operation, click OK. To prohibit administrative access from specific IP addresses or networks: 1 Go to Server > Access. 2 Click Add New Network and specify an IP address. Click OK. To specify subnets, you can use wildcard symbols (*) and subnet masks. 3 Select the Allowed, excluding the networks in the list option, and click Set. When prompted to confirm the operation, click OK. By default Plesk allows multiple simultaneous sessions for several users logged into the control panel using the same login and password combination. This can be useful when delegating management functions to other users or in case if you accidentally close your browser without logging out, thus becoming unable to log in again until your session expires. You may want to switch off this capability, if you do not need it. To disallow concurrent sessions for your administrative control panel: 1 Go to Server > Edit. 2 Clear the Allow multiple sessions under administrator's login check box and click OK. Configuring Your Control Panel 26 Securing Communication to Server with SSL Encryption For security reasons, you can access your control panel only through a secure connection provided by Secure Sockets Layer-enabled hypertext transfer protocol. All data you exchange with the Plesk managed server are encrypted, thus preventing interception of sensitive information. The SSL certificate used in the data encryption process is automatically generated and installed on the server during installation of the control panel. This is the so-called self-signed certificate: it is not signed by a recognized certification authority (CA), therefore, upon attempt to connect to your control panel, you and your customers will see warning messages in Web browsers. To gain customer confidence, you should purchase an SSL certificate from a reputable certification authority, and install it to the control panel. You can either: use the facilities for purchasing SSL certificates from GeoTrust, Inc. provided by your control panel, OR create a certificate signing request (CSR) from the control panel and send it to the certification authority of your choice, which will create an SSL certificate for you. Note: If you are going to use the control panel's facilities for purchasing a certificate through MyPlesk.com online store, you should not use command line tools for creating the certificate signing request. To purchase an SSL certificate from GeoTrust, Inc. through MyPleskCom online store and secure your control panel: 1 Go to Server > Certificates. A list of SSL certificates that you have in your repository will be displayed. 2 Click Add New Certificate. 3 Specify the certificate properties: Certificate name. This will help you identify this certificate in the repository. Encryption level. Choose the encryption level of your SSL certificate. We recommend that you choose a value more than 1024 bit. Specify your location and organization name. The values you enter should not exceed the length of 64 symbols. Specify the host name for which you wish to purchase an SSL certificate. For example: your-domain.com Enter your e-mail address. 4 Make sure that all the provided information is correct and accurate, as it will be used to generate your private key. 5 Click Buy Cert. Your private key and certificate signing request will be generated — do not delete them. MyPlesk.com login page will open in a new browser window. Configuring Your Control Panel 27 6 Register or login to an existing MyPlesk.com account and you will be taken step by step through the certificate purchase procedure. 7 Choose the type of certificate that you wish to purchase. 8 Click Proceed to Buy and order the certificate. In the Approver E-Mail drop-down box, please select the correct Approver e-mail. The approver e-mail is an e-mail address that can confirm that certificate for specific domain name was requested by an authorized person. 9 Once your certificate request is processed, GeoTrust, Inc. will send you a confirmation e-mail. After they receive the confirmation from you, they will send the certificate to your e-mail. 10 When you receive your SSL certificate, save it on your local machine or network. 11 Return to the SSL Certificates repository (Server > Certificates). 12 Click Browse in the middle of the page and navigate to the location of the saved certificate. Select it, and then click Send File. This will upload the certificate to the repository. 13 Select the check box corresponding to the certificate you just added, and click Secure control panel. To secure your control panel with an SSL certificate from other certificate authorities: 1 Go to Server > Certificates. A list of SSL certificates that you have in your repository will be displayed. 2 Click Add New Certificate. 3 Specify the certificate properties: Certificate name. This will help you identify this certificate in the repository. Encryption level. Choose the encryption level of your SSL certificate. We recommend that you choose a value more than 1024 bit. Specify your location and organization name. The values you enter should not exceed the length of 64 symbols. Specify the host name for which you wish to purchase an SSL certificate. For example: your-domain.com Enter your e-mail address. 4 Make sure that all the provided information is correct and accurate, as it will be used to generate your private key. 5 Click Request. Your private key and certificate signing request will be generated and stored in the repository. 6 Download the certificate signing request (CSR) file and save it on your machine. To do this, click the respective icon. 7 Once downloaded, open the file in a text editor, copy the text enclosed in lines -----BEGIN CERTIFICATE REQUEST----- and ----END CERTIFICATE REQUEST----- to the clipboard. Configuring Your Control Panel 28 8 Using your favorite mail client software, create a new e -mail message and paste the text from the clipboard. Send this message to the Certification Authority that will create an SSL certificate in accordance with the information you supplied. 9 When you receive your SSL certificate, save it on your local machine or network. 10 Return to the SSL Certificates repository (Server > Certificates). 11 Click Browse in the middle of the page and navigate to the location of the saved certificate. Select it, and then click Send File. This will upload the certificate to the repository. 12 Select the check box corresponding to the certificate you just added, and click Secure control panel. In case you need to generate a self-signed certificate for some reason, follow this procedure: 1 Go to Server > Certificates. A list of SSL certificates that you have in your repository will be displayed. 2 Click Add New Certificate. 3 Specify the certificate properties: Certificate name. This will help you identify this certificate in the repository. Encryption level. Choose the encryption level of your SSL certificate. We recommend that you choose a value more than 1024 bit. Specify your location and organization name. The values you enter should not exceed the length of 64 symbols. Specify the host name for which you wish to purchase an SSL certificate. For example: your-domain.com Enter your e-mail address. 4 Click the Self-Signed button. Your certificate will be generated and stored in the repository. Configuring Your Control Panel 29 Customizing Your Control Panel The control panel's Desktop view and Standard view (as described in the chapter Becoming Familiar with Plesk's Interface (on page 16)) have different customization settings which are adjusted in different areas of the control panel. To customize the Desktop view, refer to the section Customizing the Control Panel in the Desktop View (on page 43). To customize the Standard view (that is, all areas and screens of the control panel except for Desktop), refer to the section Customizing the Control Panel in the Standard View (on page 31). Note that you can choose to have in your control panel only Desktop view, only Standard view, or both views at once: to do this, you need to obtain and install a license key that supports the required interface view. However, you can specify what view should be shown to other control panel users regardless of your license key features. This chapter explains how to accomplish the following tasks: Change the interface language and theme (skin) for your control panel (on page 30) Remove unwanted buttons from the control panel (on page 32) Add custom hyperlink buttons to the control panel (on page 41) Set a custom logo to the banner area of the control panel (on page 40) Add support for more control panel languages (on page 38) Add interface themes (skins) (on page 39) Add to and remove items from the Desktop (on page 43) Configuring Your Control Panel 30 Changing Interface Language and Skin To change the interface language and skin for your control panel and for your customers, follow these steps: 1 Go to Server > Control Panel > Server Preferences. 2 Specify the following: a Default locale. Select the interface language that will be set as default for new control panel users. b Default skin. Select the interface skin (theme) that will be set as default for new control panel users. c Administrator's interface language. Select the language for your control panel. d Administrator's interface skin. Select the skin (theme) for your control panel. 3 Click OK. Note that on that control panel screen, there are also the following settings, which you might want to review (we recommend leaving their default values for most users): a Button label length. To prevent lengthy button captions in languages other than English from overlapping in the control panel, you may want to specify a limit here. Any button caption longer than the defined limit will be shortened and ended with ellipsis (...). b Prevent users from working with the control panel until interface screens are completely loaded. Leave this selected to avoid errors that might occur when users try to interact with control panel before is it ready. c Default interface customization template. Once you customize the control panel and save the settings in a template as described in Using Interface Customization Templates (on page 32), you will be able to select your template here. d Desktop preset. Once you customize the desktop and save the settings in a template as described in Using Desktop Presets (on page 45), you will be able to select your template here. e Administrator's interface customization template. Once you customize the control panel and save the settings in a template as described in Using Interface Customization Templates (on page 32), you will be able to select your template here. f Allow multiple sessions under administrator's login. By default Plesk allows multiple simultaneous sessions for several users logged into the control panel using the same login and password combination. This can be useful when delegating management functions to other users or in case if you accidentally close your browser without logging out, thus becoming unable to log in again until your session expires. You may want to switch off this capability, if you do not need it. g Full host name. Configuring Your Control Panel 31 h Apache restart interval. Any changes to hosting account settings made through control panel take effect only when Web server is restarted. By default, Web server is set to restart not more than once in every 15 minutes. This value is optimal for most cases, and we recommend leaving this default setting. Note that when there are no changes in hosting account settings, the Web server is not forced to restart. i Traffic statistics retention period. By default, statistics are kept for three months. You may want to specify another period here. j Items that statistical utilities should count when calculating disk space and bandwidth usage. Configuring Your Control Panel 32 Customizing the Control Panel in the Standard View Using Interface Customization Templates Interface customization templates are sets of interface customization options assigned to Plesk users. You can configure custom settings for interface elements and save these settings in a template. Then, you assign the template to specific client accounts. Default Customization Template is created automatically after Plesk installation. Initially, the default template allows user access to all interface elements of the control panel. The default template is automatically applied to all user accounts, including the administrator, if no other template is explicitly specified. The default template cannot be removed from the control panel. You can set another template as a default one. In the list of templates, the default template is displayed in bold. Thus, to customize interface options for customers, you can either modify the default template or create own customization templates and assign them to user accounts. Note that if you need to hide only buttons related to MyPlesk.com e-commerce portal and buttons related to currently unavailable features (such buttons are shown in the control panel as grayed out), you can do so without using interface customization templates. This is described in Hiding and Unhiding Sets of Buttons. Creating Templates To create a template and specify custom rules for interface elements: 1 Go to Server > Interface Management > Interface Templates tab and click Add Interface Template. 2 On the next page, enter the name for the new template. This field is required. 3 Select the Default check box to make this template default. Remember that the default template is applied to all user accounts for which no other template is explicitly defined. 4 Click Show Toolbar to customize the rules for interface elements. The toolbar serves to customize the appearance of buttons on Plesk screens for user accounts. The toolbar appears at the bottom of a Plesk screen. When the toolbar is on, you can navigate through Plesk interface screens and define rules for separate buttons. 5 Navigate to a Plesk screen on which you want to customize interface elements. 6 On the toolbar, click the Customize button to switch on the customization mode. 7 Click the transparent screen over a button you want to customize and select one of the following options in the drop-down menu: Configuring Your Control Panel Hide – Hide this button from all users, including the administrator Admin Only – Hide this button from all users, but show for the administrator Show – Always show this button for all users Default – Reset previous customizations you have made for this button to the default settings. 33 8 When you finish customizing buttons, click OK on the toolbar. 9 Click Hide toolbar to exit the customization mode. 10 Return to the list of interface customization templates (Server > Interface Management > Interface templates). The template you have just created is added to the list of customization templates. You can now assign the template to user accounts. Configuring Your Control Panel 34 Assigning Templates to User Accounts To assign a template to your interface: 1 Go to Server > Edit. 2 In the Administrator's interface customization template menu, select the customization template you need and click OK. Note: In the list of templates, the template currently used for the administrator‘s interface is shown in italic. The default template name is displayed in bold. If you are using the default template, it is marked as bold italic. To assign a template to a client account: 1 Go to Server > Interface Management > Interface Templates tab. 2 In the list of templates, click the number in the Usage column. This number shows the number of client accounts that currently use this template. 3 Click Add New Client to assign this template to another client account. 4 In the list of clients that do not use this template, select one or several client accounts and click OK. The template will be assigned to the selected client accounts. Note: You can also assign a template to a client when you are creating a new client account or editing client account preferences. To create a new account, click Clients in the navigation pane, then click Add New Client Account. To edit client account preferences, click Clients in the Navigation pane and then click the client name you need. Removing Templates To remove one template or several templates from the control panel: 1 Go to Server > Interface Management > Interface Templates tab. 2 Select a template or several templates using the check boxes on the right. 3 Click Remove Selected. 4 Confirm the removal and click OK. The specified templates are removed from the control panel and the default template is assigned to all users that previously used the removed templates. Configuring Your Control Panel 35 Changing Default Template To set another template as a default template: 1 Go to Server > Interface Management > Interface Templates tab. 2 Select a check box corresponding to the template you need. 3 Click Default. The selected template will be used for all users for which no template is explicitly defined. Exporting and Importing Templates To import a template created on one Plesk server to another Plesk server: 1 Go to Server > Interface Management > Interface Templates tab. 2 Click the icon to save the template you want to export to a file. 3 In the File Download dialog box, click Save and specify the location on your hard drive where to save the file. The template settings will be saved as a template_name.xml file. 4 Transfer the template file to another Plesk server. 5 On another Plesk-enabled server, go to Server > Interface Management > Interface templates tab and click Upload. 6 Enter the name of the template to be imported or locate the template file on the hard drive. The file must be in .xml format. 7 Click OK. View the customization settings of this template. In this step, you can click Show Toolbar to edit the template. 8 When you finish editing, click OK. The new template will be uploaded to this machine. 9 Assign this template to client accounts (see the Assigning Templates to User Accounts section). Configuring Your Control Panel 36 Hiding and Unhiding Sets of Buttons You can easily hide predefined groups of buttons from the Plesk interface. In this case, users do not see the controls they are not allowed to operate or the features that are not supported (services not installed). To hide groups of buttons: 1 Click the Server shortcut in the navigation pane. 2 Click the Interface Management icon in the Control Panel group. 3 Click the Interface templates tab. 4 Click the Preferences icon in the Tools group. 5 Select the check boxes to hide the following groups of controls: Grayed out buttons. Originally, grayed out icons in the control panel interface show services or components that are not installed and, hence, cannot be managed through the control panel. You can hide these buttons to prevent users from being disappointed that some services are unavailable. To hide all unavailable buttons, select the Hide all grayed out buttons by default check box. Limit management controls. To prevent users from viewing grayed out limit management controls they are not allowed to operate, select the Hide from users the limit management controls they are not allowed to operate check box. Permission management controls. To prevent users from viewing grayed out permission management controls they are not allowed to operate, select the Hide from users the permission management controls they are not allowed to operate check box. 6 Under Button sets, select the check boxes to hide the following sets of buttons or other control panel elements: Buttons related to services provided by MyPlesk.com online store. If you are reselling domain registration services and SSL certificates, select the check boxes Hide buttons for domain registration, Hide buttons for certificate purchasing, and Hide buttons for extra services. All buttons related to MyPlesk.com will be removed from the control panel at all user levels. Mail bounce controls. If you wish to prohibit your users from using their own mail bounce policies for e-mail addressed to nonexistent e-mail recipients within their domains, select the Hide mail bounce controls check box. Control panel items that promote third-party services: link to Fotolia Web site (stock photos) and newsfeeds from www.moreover.com which are shown in the default pages for newly hosted Web sites and in the Webmail application. 7 Click OK. To make groups of hidden buttons visible in the interface: 1 Click the Server shortcut in the navigation pane. 2 Click Interface Management icon in the Control Panel group. 3 Click the Interface templates tab. Configuring Your Control Panel 4 Click the Preferences icon in the Tools group. 5 Clear the corresponding check boxes to make the hidden groups of buttons again visible in the interface. 6 Click OK. 37 Configuring Your Control Panel 38 Super Administrative Overrides The super administrator (root) can define a set of controls that are never shown in Plesk control panel, even to a user with administrative privileges (and even in the Customization mode). To do this: 1 Customize the interface through the Plesk control panel. 2 Create an empty file with name root.controls.lock in /plesk_installation_directory/var/. 3 Login to the MySQL database server and retrieve the values describing the state of the hidden controls. # mysql -uadmin -Dpsa –p mysql> select page, control from itmpl_data; +-------------------------+-------------+ | /server/server.php3 | key_info | +-------------------------+-------------+ 4 Add these values to the /plesk_installation_directory/var/root.controls.lock file separating them with colons: /server/server.php3:key_info 5 Save the file. The values you put into this file will override the customizations made through the control panel. Installing and Uninstalling Interface Languages You can download new language packs from SWsoft site and install them to the control panel. The number of languages you can use with your control panel depends on the license key you purchased. The control panel will alert you when you attempt to install more languages than allowed. To view the interface languages installed in the control panel: 1 Click the Server shortcut in the navigation pane. 2 Click the Interface Management icon in the Control Panel group. The following information is displayed: Language status icon shows the current status of the language pack: language pack is accessible to users, not accessible, the language pack is not available to users because the limit on the number of language packs supported by your current license is exceeded. Note: you can make a language unavailable to control panel users. To do this, click an icon . To make a language available to users, click an icon . Language code contains the four-letter language code; Language shows the name of the language; Configuring Your Control Panel Country displays the countries where this language is native; Used displays the number of control panel users at all levels that use this language in their interface. 39 To install a new language pack that you downloaded from SWsoft web site: 1 2 3 4 Click the Server shortcut in the navigation pane. Click the Interface Management icon in the Control Panel group. Click the Add Locale button. Enter the path to the language pack file or use the Browse button to locate it. If you use an RPM-based system, use language pack files with the .rpm file name extension. If you use a DEB-based system, use the language pack files with the .deb file name extension. If you use a FreeBSD system, use language pack files with the .tgz or .tbz file name extension. If you use a MacOS system, use language pack files with the .sh file name extension. 5 Click OK to install the language to the system. To uninstall a language pack from the control panel: 1 Click the Server shortcut in the navigation pane. 2 Click the Interface Management icon in the Control Panel group. 3 Select the appropriate check box and click next page, confirm the removal operation. Remove Selected. On the If the language pack you have just removed is used by some other users, their interface language will be automatically set to the default language. The default language of the Plesk distribution package (en-US) cannot be removed. Installing and Uninstalling Control Panel Themes (Skins) You can develop and use custom skins for your control panel. Be aware that use of skins created by third parties can be dangerous, as the skin packages can contain malicious code. We strongly recommend that you use only the skins received from the trusted sources. To view currently installed skins: 1 Click the Server shortcut in the navigation pane. 2 Click the Interface Management icon in the Control Panel group. 3 Click the Skins tab. Configuring Your Control Panel 40 To download a skin package: 1 Click the Server shortcut in the navigation pane. 2 Click the Interface Management icon in the Control Panel group. 3 Click the Skins tab. 4 Click the appropriate Download Skin. icon, or click a skin title and then click 5 Select the type of archive you would like to have the skin files packed into, and click OK. Once the skin is prepared for downloading, a file download dialog window appears. 6 Click Save, specify the location and file name for the downloaded skin package file to be saved, and then click Save. You can now prepare your own skin by modifying the contents of the downloaded archive file. To learn how to create custom skins for Plesk control panel, see the Skins Reference document (Server > Interface Management > Skins > Skins Reference). To install a new skin to control panel: 1 Click the Server shortcut in the navigation pane. 2 Click the Interface Management icon in the Control Panel group. 3 Click the Skins tab. 4 Click Add New Skin. Specify the skin package file location and click OK. To update the contents of an already installed skin: 1 2 3 4 Click the Server shortcut in the navigation pane. Click the Interface Management icon in the Control Panel group. Click the Skins tab. Click a skin title and then click Update Skin. Specify the skin package file location and click OK. To remove one or several skins from the repository: 1 Click the Server shortcut in the navigation pane. 2 Click the Interface Management icon in the Control Panel group. 3 Click the Skins tab. 4 Select the corresponding check box and click confirm removal and click OK. Remove Selected. Then, Note: When you remove a skin, which is currently used within a certain user‘s control panel environment, the user‘s control panel appearance is automatically changed to the default skin. You cannot remove the default control panel skin. Configuring Your Control Panel 41 Rebranding Your Control Panel with a Custom Logo Banner You can replace the default Plesk logo banner in the top frame with your own logo. It will be visible to your customers when they log in to their control panels. You can also make your logo a clickable hyperlink. You should use a GIF, JPEG or PNG format file for your logo, preferably not larger than 100 kilobytes to minimize the download time. It is recommended that you use an image of 50 pixels in height. To set up your logo image: Click the Server shortcut in the navigation pane. Click the Logo Setup icon in the Control Panel group. Specify the path to file or click Browse to locate it. Click Open. To make the logo clickable hyperlink that refers users to your corporate web site, type the desired URL into the Enter new URL for logo box. 5 Click OK to submit. 1 2 3 4 When you wish to restore the default Plesk logo, click the Default Logo button. Adding and Removing Custom Hyperlink Buttons To add a custom hyperlink button to your Plesk control panel and specify whether your customers will see it in their control panels: 1 Go to Server > Custom Buttons and click Add New Button. 2 Specify properties of the button: Type the text that will show on your button in the Button label box. Choose the location for your button. To place it in the navigation pane, select the Navigation pane option from the Location drop-down box. To place it on each client's home page or desktop, select the Client home page option. To place it on each domain owner's home page or desktop (domain owners are your reseller's customers), select the Domain administration page option. Specify the priority of the button. Plesk will arrange your custom buttons on the control panel in accordance with the priority you define: the lower the number – the higher is priority. Buttons are placed in the left-to-right order. To use an image for a button background, type the path to its location or click Browse to browse for the desired file. It is recommended that you use a 16x16 pixels GIF or JPEG image for a button to be placed in the navigation pane, and 32x32 pixels GIF or JPEG image for buttons placed in the main frame or desktop. Type the hyperlink of your choice to be attached to the button into the URL box. Using the check boxes, specify whether to include the information, such as domain name, FTP login, FTP password and other data to be transferred within the URL. These data can be used for processing by external web applications. Configuring Your Control Panel 42 In the Context help tip contents input field, type in the help tip that will be displayed when you hover the mouse pointer over the button. Select the Open URL in the Control Panel check box if you wish the destination URL to be opened in the control panel's right frame, otherwise leave this check box unchecked to open the URL in a separate browser window. If you wish to make this button visible to your customers, your resellers and their customers with access to control panel, select the Visible to all sub-logins checkbox. 3 Click OK to complete creation. To remove a hyperlink button from your Plesk control panel: 1 Go to Server > Custom Buttons. 2 Select a check box corresponding to the button that you wish to remove and click Remove Selected. Configuring Your Control Panel 43 Customizing the Control Panel in the Desktop View To add or remove items from the desktop: 1 Go to Desktop > Customize Desktop. 2 Specify whether to show the Server Information group and what items to show there. Clearing check boxes will remove the respective items from the desktop. 3 Specify what tasks you would like to accomplish through the control panel. The appropriate shortcuts will be placed to the desktop. The Selected tasks list shows the tasks for which shortcuts are already placed on the desktop. The Available tasks list shows the tasks for which you do not yet have shortcuts on your desktop. To add a shortcut to the desktop, select the required tasks in the Available tasks list and click Add >>. To remove a shortcut from the desktop, select the task that you do not need in the Selected tasks list and click << Remove. 4 To show your custom buttons on the desktop, under Tools, select the Custom buttons check box. 5 Specify whether to show the Statistics and Favorites group and what items to show there. Clearing check boxes will remove the respective items from the desktop. The Favorites group shows the links to items or control panel screens that you added to desktop by navigating to the respective control panel screens and clicking Add To Favorites or Create Shortcut icon. 6 Click OK. To add items to the Favorites group of the desktop: 1 Navigate to the control panel screen you need. 2 Click either the Add To Favorites or Create Shortcut icon in the upper right corner of the screen. 3 If you want to specify a custom label and description for the shortcut, clear the Use default check boxes and specify the desired label and description, then click OK. To modify label or description for a shortcut in the Favorites group: 1 On the desktop, click the shortcut that you wish to modify. 2 Click the Edit Favorite or Edit Shortcut icon in the upper right corner of the screen. 3 Modify the label and description as desired and click OK. OR Configuring Your Control Panel 1 On the desktop, click the icon corresponding to the shortcut that you wish to modify. 2 Modify the label and description as desired and click OK. To remove items from the Favorites group of the desktop: 1 On the desktop, click the shortcut that you wish to remove. 2 Click the Edit Favorite or Edit Shortcut icon in the upper right corner of the screen, then click Remove. OR On the desktop, click the icon corresponding to the shortcut that you wish to remove, then click Remove. 44 Configuring Your Control Panel 45 Using Desktop Presets Alternately, you can modify items in the desktop view by modifying and applying desktop presets. The presets contain configurations of interface elements. You can have several presets for your interface and switch between them when needed. You can predefine the appearance of interface for your customers and customers of your resellers. To customize your desktop by means of a template: 1 Go to Server > Interface Management > Desktop Presets tab and click the Default Administrator Desktop shortcut in the list of desktop presets. If you wish to create a new preset based on an existing one, click the corresponding icon. 2 Specify the configuration preset name. 3 Select the Default check box to apply this preset to the interface. 4 Specify whether to show the Server Information group and what items to show there. Clearing check boxes will remove the respective items from the desktop. 5 Specify what tasks you would like to accomplish through the control panel. The appropriate shortcuts will be placed to the desktop. The Selected tasks list shows the tasks for which shortcuts are already placed on the desktop. The Available tasks list shows the tasks for which you do not yet have shortcuts on your desktop. To add a shortcut to the desktop, select the required tasks in the Available tasks list and click Add >>. To remove a shortcut from the desktop, select the task that you do not need in the Selected tasks list and click << Remove. 6 To show your custom buttons on the desktop, select the Custom buttons check box located above the list of Available tasks. 7 To show on the desktop a shortcut to functions for creating new custom hyperlink buttons, select the Show the following buttons in the footer: Create a new custom button check box below the Available tasks list. 8 Specify whether to show the Statistics and Favorites groups and what items to show there. Clearing check boxes will remove the respective items from the desktop. The Favorites group shows the links to items or control panel screens that you added to desktop by navigating to the respective control panel screens and clicking Add To Favorites or Create Shortcut. 9 Click OK. Configuring Your Control Panel 46 To customize desktop for your resellers and customers who have several domains (client accounts): 1 Go to Server > Interface Management > Desktop Presets tab and click the Default Client Desktop shortcut in the list of desktop presets. If you wish to create a new preset based on an existing one, click the corresponding icon. 2 Specify the configuration preset name. 3 Select the Default check box to apply this preset to the interface. 4 Specify what tasks you would like your users to accomplish through the control panel. The appropriate shortcuts will be placed to the desktop. The Selected tasks list shows the tasks for which shortcuts are already placed on the desktop. The Available tasks list shows the tasks for which there are no shortcuts on the desktop. To add a shortcut to the desktop, select the required tasks in the Available tasks list and click Add >>. To remove a shortcut from the desktop, select the task that you do not need in the Selected tasks list and click << Remove. 5 To show custom buttons on the desktop, select the Custom buttons check box located above the list of Available tasks. 6 To show on the desktop a shortcut to functions for creating new custom hyperlink buttons, select the Show the following buttons in the footer: Create a new custom button check box below the Available tasks list. 7 Specify whether to show the Statistics and Favorites group and what items to show there. Clearing check boxes will remove the respective items from the desktop. The Favorites group shows the links to items or control panel screens that your users add to their desktops by navigating to the respective control panel screens and clicking the clicking Add To Favorites or Create Shortcut. 8 Click OK. To customize desktop for your resellers' customers (domain owner accounts): 1 Go to Server > Interface Management > Desktop Presets tab and click the Default Domain Owner Desktop shortcut in the list of desktop presets. If you wish to create a new preset based on an existing one, click the corresponding icon. 2 Specify the configuration preset name. 3 Select the Default check box to apply this preset to the interface. 4 Specify what tasks you would like users to accomplish through the control panel. The appropriate shortcuts will be placed to the desktop. The Selected tasks list shows the tasks for which shortcuts are already placed on the desktop. The Available tasks list shows the tasks for which there are no shortcuts on the desktop. Configuring Your Control Panel To add a shortcut to the desktop, select the required tasks in the Available tasks list and click Add >>. To remove a shortcut from the desktop, select the task that you do not need in the Selected tasks list and click << Remove. 47 5 To show custom buttons on the desktop, select the Custom buttons check box located above the list of Available tasks. 6 To show on the desktop a shortcut to functions for creating new custom hyperlink buttons, select the Show the following buttons in the footer: Create a new custom button check box below the Available tasks list. 7 Specify whether to show the Statistics and Favorites group and what items to show there. Clearing check boxes will remove the respective item s from the desktop. The Favorites group shows the links to items or control panel screens that users add to their desktops by navigating to the respective control panel screens and clicking Add To Favorites or Create Shortcut. 8 Click OK. To download a configuration preset in XML format: 1 Go to Server > Interface Management > Desktop Presets tab. 2 Select the check boxes corresponding to the presets that you wish to download and click Export selected to file. 3 When prompted, specify file name and location where to save file and click OK. To upload a configuration preset in XML format: 1 Go to Server > Interface Management > Desktop Presets tab and click Upload. 2 Specify the path to preset file or click Browse to locate it. 3 Select the Overwrite presets with the same name and type check box if you wish to avoid errors on overwriting presets already registered in the control panel, then click OK. 4 To apply the preset, click its title, select the Default check box and click OK. To remove a preset: 1 Go to Server > Interface Management > Desktop Presets tab. 2 Select the check box corresponding to the preset that you wish to remove and click Remove Selected. Confirm removal and click OK. Configuring Your Control Panel 48 Adjusting Session Idle Time You can adjust the allowed idle time for any session in Plesk as required. To adjust session security parameters: 1 Click Server shortcut in the navigation pane. 2 Click Session Settings in the Control Panel group. 3 Specify the required Session idle time in minutes in the appropriate field. Should a user session remain idle for the time period exceeding the one specified as the Session idle time, the Control Panel terminates this session. 4 Click OK. To reset all parameters back to their default values: 1 Click Server shortcut in the navigation pane. 2 Click Session Settings in the Control Panel group. 3 Click Default. The default session idle time will be set to 30 minutes. 4 Click OK. 49 CHAPTER 5 Configuring and Maintaining Your Server After you have installed Plesk software on your server and configured the control panel, you need to configure your system and set up all services required for its operation. In order to configure your Plesk managed server via the control panel follow the instructions provided in this chapter. In this chapter: Adding and Removing IP Addresses ................................................................. 50 Configuring DNS Services ................................................................................. 53 Configuring Mail Services .................................................................................. 57 Configuring Plesk for Database Hosting ............................................................ 64 Enabling Support for Adobe ColdFusion............................................................ 70 Enabling Support for Miva E-commerce Applications ........................................ 72 Configuring Statistics......................................................................................... 74 Configuring E-mail Notification System.............................................................. 74 Configuring Help Desk ...................................................................................... 78 Adjusting System Date and Time ...................................................................... 80 Starting, Stopping and Restarting Services ....................................................... 81 Enabling Piped Logs for Web Server to Reduce the Risk of Web Service Disruption .......................................................................................................................... 82 Monitoring Mail Server Message Queue and Troubleshooting Mail Congestion 82 Scheduling Tasks .............................................................................................. 84 Extending Plesk Capabilities with Modules ........................................................ 86 Configuring and Maintaining Your Server 50 Adding and Removing IP Addresses After installation, Plesk reads all your IP addresses from the network configuration files and can then use these IP addresses for hosting DNS domains and Web sites. When you obtain a new IP address that you would like to use on the server, you should add the address through the control panel, as Plesk might not recognize manual modifications you make to the network configuration files. With Plesk you can mark all your IP addresses as shared or dedicated before you assign them to your customers. This allows the control panel to distinguish between them and not to let you assign a dedicated IP address to several customers at once. A dedicated IP address can be assigned to a single customer, while a shared IP address can be shared among several user accounts. Note that SSL protection with authentic digital certificates and Anonymous FTP services are available only to dedicated hosting accounts on a dedicated IP address. Shared hosting accounts can also have SSL protection, but visitors to such protected sites will get error messages in their browsers. Note: in this version of Plesk control panel, dedicated IP addresses are referred to as Exclusive IP addresses. To view the IP addresses you have at your disposal: 1 Go to Server > IP Addresses. Your IP addresses are listed and the following supplementary information is given: An icon in the S (Status) column shows if your IP address is properly configured on the network interface. If your IP address was removed from the network interface, an icon will show . An icon in the T (Type) column shows if an address was allocated to a single customer as a dedicated IP address, and if an address is shared among many customers. The IP address, Subnet Mask and Interface columns show which IP addresses are on which network interfaces. The Clients column shows the number of user accounts who you assigned a given IP address. To view the users by names, click the respective number in the Clients column. The Hosting column shows a number of web sites hosted on an IP address. To view the domain names of these web sites, click the respective number in the Hosting column. 2 To update the list of IP addresses and their status, click Reread IP. To add a new IP address to the server: 1 Go to Server > IP Addresses and click Add New IP Address. Configuring and Maintaining Your Server 51 2 Select the network interface for the new IP from the Interface dropdown box. All network cards installed on your server are shown in this drop-down box. 3 Enter the IP address and subnet mask in the corresponding box (e.g., 123.123.123.123/16). 4 Select the type of the new IP address, shared or exclusive, using the IP type radio button. 5 From the drop-down box, select the SSL certificate for the new IP address. You can select the following certificates: Default certificate - the certificate that comes with the Plesk distribution package. However, this certificate is not recognized by web browsers as it is not signed by a Certificate Authority (a warning message appears). The default certificate is used to provide access to the control panel via the https protocol (https://<Plesk Server name or IP>:8443/). Other certificates - the certificates (self-signed or signed by a Certificate Authority) that you added to the repository of SSL certificates (about adding certificates, see the Securing Sites with SSL encryption section). 6 Click OK. To remove an IP address from the server: 1 Go to Server > IP Addresses. 2 Select the respective check box and click removal and click OK. Remove Selected, confirm To assign an IP address to a user: 1 Go to Server > IP Addresses and click the respective number in the Clients column, then click Add New Client. 2 Select the user account you need and click OK. To revoke an IP address from a user: 1 Go to Server > IP Addresses and click the respective number in the Clients column. 2 Select the respective check box and click 3 Confirm removal and click OK. Remove Selected. To specify what web site will open when users refer to the web resource on your server by an IP address: 1 Go to Server > IP Addresses and click the respective number in the Hosting column. All sites hosted on this IP will be listed. Configuring and Maintaining Your Server 2 Select the site you need and click Set as Default. To change an IP address allocation type (shared, exclusive) or assign another SSL certificate to an IP address: 1 Go to Server > IP Addresses and click the IP address you need. 2 Select the IP address allocation type and SSL certificate you need, and click OK. 52 Configuring and Maintaining Your Server 53 Configuring DNS Services Your control panel works in cooperation with the BIND DNS server, which enables you to run DNS service on the same machine where you host Web sites. Setup of DNS zones for newly added domains is automated: When you add a new domain name to control panel, a zone file is automatically generated for it in accordance with the server-wide DNS zone template and registered in the name server's database, and name server is instructed to act as a primary (master) DNS server for the zone. You can: Add resource records to and remove from the template Override the automatic zone configuration with custom settings on a per-domain basis Switch off the domain name service on this machine if your provider or another organization is running DNS service for your sites To view the default records in the server-wide DNS template: 1 Click the Server shortcut in the navigation pane. 2 Click the DNS icon in the Services group. All resource record templates will be displayed. The <ip> and <domain> templates are automatically replaced in the generated zone with real IP addresses and domain names. To add a new resource record to the server-wide DNS template: 1 Click the Server shortcut in the navigation pane. 2 Click the DNS icon in the Services group. 3 Click the Add New Record icon in the Tools group. 4 Select the resource record type and specify the record properties as desired. Note that you can use <ip> and <domain> templates that will be replaced in the generated zone with real IP addresses and domain names. You can use a wildcard symbol (*) to specify any part of the domain name, and you can specify the exact values you need. 5 Click OK. To remove a resource record from the server-wide DNS template: 1 Click the Server shortcut in the navigation pane. 2 Click the DNS icon in the Services group. 3 Select a check box corresponding to the record template you wish to remove, and click Remove Selected. Configuring and Maintaining Your Server 54 4 Confirm removal and click OK. Plesk updates automatically the zone name, hostname, administrator‘s e-mail address, and serial number, and writes the default values for the rest of Start of Authority record parameters to the zone files it maintains. If you are not satisfied with the default values, you can change them through the control panel. To change the Start of Authority (SOA) record settings in the server-wide DNS template: 1 Click the Server shortcut in the navigation pane. 2 Click the DNS icon in the Services group. 3 Click SOA Preferences. 4 Specify the desired values: TTL. This is the amount of time that other DNS servers should store the record in a cache. Plesk sets the default value of one day. Refresh. This is how often the secondary name servers check with the primary name server to see if any changes have been made to the domain's zone file. Plesk sets the default value of three hours. Retry. This is the time a secondary server waits before retrying a failed zone transfer. This time is typically less than the refresh interval. Plesk sets the default value of one hour. Expire. This is the time before a secondary server stops responding to queries, after a lapsed refresh interval where the zone was not refreshed or updated. Plesk sets the default value of one week. Minimum. This is the time a secondary server should cache a negative response. Plesk sets the default value of three hours. 5 Click OK. The new SOA record parameters will be set for the newly created domains. By default, transfer of DNS zones is allowed only for name servers designated by NS records contained within each zone. If your domain name registrar requires that you allow transfer for all zones you serve: 1 Click the Server shortcut in the navigation pane. 2 Click the DNS icon in the Services group. 3 Click the Common ACL icon in the Tools group. A screen will show all hosts to which DNS zone transfers for all zones are allowed. 4 Click the Add New Address icon. 5 Specify the registrar's IP or network address and click OK. Configuring and Maintaining Your Server 55 If you are using third-party DNS servers, and are not running your own DNS server, you should switch off your control panel's DNS server: 1 Click the Server shortcut in the navigation pane. 2 Click the DNS icon in the Services group. 3 Click the Switch off icon in the Tools group. To restore the original configuration of server-wide DNS template: 1 Click the Server shortcut in the navigation pane. 2 Click the DNS icon in the Services group. 3 Click the Default icon in the Tools group. You can specify whether your DNS server should provide recursive service for queries. With recursive service allowed, your DNS server, when queried, performs all the lookup procedures required to find the destination IP address for the requestor. When recursive service is not allowed, your DNS server performs minimal number of queries only to find a server that knows where the requested resource resides and to redirect the requestor to that server. Therefore, recursive service consumes more server resources and makes your server susceptible to denial-of-service attacks, especially when the server is set to serve recursive queries from clients outside your network. After your install Plesk, the built-in DNS server defaults to serving recursive queries only from your own server and from other servers located in your network. This is the optimal setting. If your upgraded from earlier versions of Plesk, your DNS server defaults to serving recursive queries from any host. If you want to change the settings for recursive domain name service: 1 Click the Server shortcut in the navigation pane. 2 Click the DNS icon in the Services group. 3 Click the DNS Preferences icon in the Tools group. 4 Select the option you need: To allow recursive queries from all hosts, select Any host. To allow recursive queries from your own server and hosts from your network, select Localnets. To allow recursive queries only from your own server, select Localhost. 5 Click OK. Configuring and Maintaining Your Server 56 Configuring Plesk to Run Behind a Firewall If you are running Plesk behind a firewall, you might encounter certain problems with resolution of domain names served by Plesk: when you set up a new DNS domain in Plesk, its zone file includes a resource record that associates the domain name with the IP address your Plesk server is on, i.e. an internal network address like 192.168.1.1. As the 192.168.x.x IP addresses are reserved by the Internet Assigned Numbers Authority (IANA) for use by private networks, this domain name will not be accessible to the Internet users. To work around this, you would have to associate this domain name with the IP address of the firewall machine in the domain‘s zone file (Domains > domain name > DNS). We recommend using the DNS zone template (Server > DNS) to automate association of the newly added domain names with appropriate IP addresses. Let‘s consider setting up a Plesk server running on 192.168.1.1 in a private network protected by a firewall, which is running on 11.22.33.44: 1 Click the Server shortcut in the navigation pane. 2 Click the DNS icon under the Services group. 3 Locate all resource records of A type. As you cannot edit any of these records, you should delete them and then create the new records: be sure to leave the values in the Name column unchanged for each A record, but replace the <ip> templates in the Value column with the IP address of your firewall host – 11.22.33.44. 4 Configure your firewall so as to ensure the proper address translation. Configuring and Maintaining Your Server 57 Configuring Mail Services Your control panel works in cooperation with Qmail mail server, which provides mail services for your domains. After installation the mail server is configured automatically and is ready to serve, however, we recommend that you review the default settings to make sure that they satisfy your needs: 1 Click the Server shortcut in the navigation pane. 2 Click the Mail icon in the Services group. The server-wide mail preferences screen will open on the Preferences tab. 3 If you wish to limit the size of an e-mail message that can be sent through your server, type the desired value in kilobytes into the Maximum letter size box, otherwise, leave this field blank. 4 Select the mail relay mode. With closed relay the mail server will accept only e-mail addressed to the users who have mailboxes on this server. Your customers will not be able to send any mail through your outgoing SMTP server, therefore, we do not recommend closing mail relay. With relay after authorization, only your customers will be able to receive and send e-mail through your mail server. We recommend that you leave the authorization is required option selected, and specify allowed authentication methods: POP3 authorization. With POP3 authorization, once a user has successfully authenticated to the POP server, he or she is permitted to receive and send email through the mail server for the next 20 minutes (default value). You can adjust this interval by specifying another value in the lock time box. SMTP authorization. With SMTP authorization, your mail server requires authorization if the e-mail message must be sent to an external address. Your mail server supports LOGIN, CRAM-MD5 and PLAIN methods of SMTP authorization. 5 If you wish to protect your users from dictionary attacks by not allowing them to use simple passwords, select the Check the passwords for mailboxes in the dictionary option. A dictionary attack is when someone tries to find out a valid user name and password by running a program that tries different combinations of dictionary words in different languages. Dictionary attacks can be successful because many users choose their passwords carelessly. 6 Select the mail account name format. Selecting the Use of short and full names is allowed option will allow users to log in to their mail accounts by specifying only the left part of e-mail address before the @ sign (e.g. username), or by specifying the full e-mail address (e.g. [email protected]). To avoid possible authorization problems for e-mail users who reside in different domains but have identical user names and passwords, we recommend that you choose the Only use of full mail account names is allowed option. Configuring and Maintaining Your Server 58 Once you have set your mail server to support only full mail account names, you will not be able to switch back to supporting short account names until you make sure there are no encrypted passwords for mailboxes and user accounts with coinciding user names and passwords residing in different domains. 7 Click OK to submit any changes. Note: If you wish to set up anti-spam systems, such as SpamAssassin spam filter, or protection systems based on DNS blackhole lists or Sender Policy Framework (SPF), proceed to the Setting Up Anti-Spam Protection (on page 58) section. Setting Up Anti-Spam Protection To protect your users from spam, you can use the following tools with your control panel: SpamAssassin spam filter. It is a powerful spam filter that uses a wide variety of local and network tests to identify spam signatures. You can configure the spam filter so as to either delete suspicious messages when they come to your mail server, or change the subject line and add "X-Spam-Flag: YES" and "X-Spam-Status: Yes" headers to the messages. The latter can be useful for users who prefer to filter mail with mail filtering programs installed on their own computers. To learn more about SpamAssassin, visit http://spamassassin.apache.org. To configure and switch on the SpamAssassin filter, proceed to the Setting Up SpamAssassin Spam Filter (on page 59) section. DNS blackhole lists. This spam prevention system is based on DNS queries made by your mail server to a database, which contains known and documented sources of spam, as well as an extensive listing of dynamic IP addresses. Any positive response from this database should result in your mail server returning a '550' error, or rejection of the requested connection. To configure your mail server for working with DNSBL databases, proceed to the Switching On Spam Protection Based on DNS Blackhole Lists (on page 60) section. Sender Policy Framework (SPF). This spam prevention system is also DNS querybased. It is designed to reduce the amount of spam sent from forged e-mail addresses. With SPF, an Internet domain owner can specify the addresses of machines that are authorized to send e-mail for users of his or her domain. Receivers that implement SPF then treat as suspect any e-mail that claims to come from that domain but fails to come from locations that domain authorizes. To learn more about SPF, visit http://www.openspf.org/howworks.html. To enable filtering based on SPF, proceed to the Setting Up Support for Sender Policy Framework System (on page 61) section. Server-wide black and white lists. Black and white lists are standard mail server facilities. You can use the black list to specify the domains from which mail must not be accepted, and white list to specify the IP addresses of machines or networks from which mail must always be accepted. To set up server-wide black and white lists, proceed to the Setting Up Server-wide Black and White Lists (on page 62) section. Configuring and Maintaining Your Server 59 Setting Up SpamAssassin Spam Filter To switch on SpamAssassin spam filter: 1 Click the Server shortcut in the navigation pane. 2 Click the Spam Filter icon in the Services group. 3 To let your users set their own spam filtering preferences on a permailbox basis, select the Apply individual settings to spam filtering check box. 4 If you wish to adjust the amount of system resources the spam filter should use, type the desired value from 1 to 5 into the Maximum number of worker spamd processes to run (1-5) box (1 is the lowest load, and 5 is the highest). We recommend that you use the default value. 5 If you wish to adjust the spam filter's sensitivity, type the desired value in the The score that a message must receive to qualify as spam box. SpamAssassin performs a number of different tests on contents and subject line of each message. As a result, each message scores a number of points. The higher the number, the more likely a message is spam. For example, a message containing the text string ―BUY VIAGRA AT LOW PRICE!!!‖ in Subject line and message body scores 8.3 points. By default, the filter sensitivity is set so that all messages that score 7 or more points are classified as spam. When your users receive lots of spam messages with the current setting, to make filter more sensitive, try setting a lesser value in the The score that a message must receive to qualify as spam box; for example, 6. When your users are missing e-mails because your spam filter thinks they are junk, try reducing filter sensitivity by setting a higher value in the The score that a message must receive to qualify as spam box. 6 Specify how to mark messages recognized as spam. At the server level, you cannot set the server-wide spam filter to automatically delete spam: you can do it only on a per-mailbox basis. So, for the server-wide policy, you can choose only marking messages as spam: ―X-Spam-Flag: YES‖ and ―X-Spam-Status: Yes‖ headers are added to the message source by default, and if you want, the spam filter will additionally include a specific text string to the beginning of Subject line. To include a desired combination of symbols or words to the message subject, type it into the Add the following text to the beginning of subject of each message recognized as spam box. If you do not want the spam filter to modify message subject, leave this box blank. If you want to include into the subject line the number of points that messages score, type _SCORE_ in this box. 7 If you do not want your users to receive e-mail from specific domains or individual senders, click the Black List tab, and then add the respective entries to the spam filter‘s black list: Configuring and Maintaining Your Server 60 To add entries to the black list, click Add Addresses. If you have a list of entries stored in a file, click Browse to specify it, and then click OK. Otherwise, select the From List option, and type the e-mail addresses into the E-mail addresses box. Place each address in one row, or separate addresses with a coma, a colon, or a white space. You can use an asterisk (*) as a substitute for a number of letters, and question mark (?) as a substitute for a single letter. For example: [email protected], [email protected], *@spammers.net. Specifying *@spammers.net will block the entire mail domain spammers.net. To save the entries you added, click OK, then confirm adding, and click OK again. To remove entries from the black list, under the Black List tab, select the entries and click Remove Selected. Confirm removal and click OK. 8 If you want to be sure that you and your users will not miss e -mail from specific senders, click the White List tab, and then add e-mail addresses or entire domains to the spam filter‘s white list: To add entries to the white list, click Add Addresses. If you have a list of entries stored in a file, click Browse to specify it, and then click OK. Otherwise, select the From List option, and type the e-mail addresses into the E-mail addresses box. Place each address in one row, or separate addresses with a coma, a colon, or a white space. You can use an asterisk (*) as a substitute for a number of letters, and question mark (?) as a substitute for a single letter. For example: [email protected], [email protected], *@mycompany.com. Specifying *@mycompany.com will add to the white list all e-mail addresses that are under the mycompany.com mail domain. To save the entries you added, click OK, then confirm adding, and click OK again. To remove entries from the white list, under the White List tab, select the entries and click Remove Selected. Confirm removal and click OK. 9 Once finished with setting up the spam filter, click the Switch On icon, and then click OK. Now all the incoming mail will be filtered on the server side. By default, spam filter does not delete spam mail, it only adds the "X-Spam-Flag: YES" and "X-SpamStatus: Yes" headers to the message, and "*****SPAM*****" text string to the beginning of Subject line of each message recognized as spam. If you have enabled the Apply individual settings to spam filtering option, then your users will be able to set their spam filters so as to automatically delete junk mail. They will also be able to set up their personal black and white lists of correspondents that will override the server settings, and teach the spam filter on a per-mailbox basis. If you wish to adjust spam filtering settings for a specific mailbox, proceed to the Protecting Mailboxes From Spam section. Switching On Spam Protection Based on DNS Blackhole Lists You can use free and paid subscription blackhole lists with your server. Visit http://spamlinks.net/filter-dnsbl-lists.htm http://spamlinks.net/filter-dnsbl-lists.htm and choose a DNSBL server you want to use. To switch on spam protection based on DNSBL: 1 Click the Server shortcut in the navigation pane. Configuring and Maintaining Your Server 61 2 Click the Mail icon in the Services group. 3 Select the Switch on spam protection based on DNS blackhole lists check box. 4 In the DNS zones for DNSBL service input box, specify the host name that your mail server should query, for example: sbl.spamhaus.org. 5 Click OK. Now, e-mail messages from known spammers should be rejected with an error code 550 (connection refused). Setting Up Support for Sender Policy Framework System To set up support for Sender Policy Framework on your server: 1 Click the Server shortcut in the navigation pane. 2 Click the Mail icon in the Services group. The server-wide mail preferences screen will open on the Preferences tab. 3 Select the Switch on SPF spam protection check box and specify how to deal with e-mail: To accept all incoming messages regardless of SPF check results, select the Create only Received SPF-headers, never block option from the SPF checking mode drop-down box. This option is recommended. To accept all incoming messages regardless of SPF check results, even if SPF check failed due to DNS lookup problems, select the In case of DNS lookup problems, generate temporary errors option from the SPF checking mode drop-down box. To reject messages from senders who are not authorized to use the domain in question, select the option Reject mail if SPF resolves to fail from the SPF checking mode drop-down box. To reject the messages that are most likely from senders who are not authorized to use the domain in question, select the option Reject mail if SPF resolves to softfail from the SPF checking mode drop-down box. To reject the messages from senders who cannot be identified by SPF system as authorized or not authorized because the domain has no SPF records published, select the option Reject mail if SPF resolves to neutral from the SPF checking mode drop-down box. To reject the messages that do not pass SPF check for any reason (for example, when sender's domain does not implement SPF and SPF checking returns the "unknown" status), select the option Reject mail if SPF does not resolve to pass from the SPF checking mode drop-down box. 4 To specify additional rules that are applied by the spam filter before the SPF check is actually done by the mail server, type the rules you need in the SPF local rules box. We recommend that you add a rule for checking messages against the open database of trusted senders, for example, 'include:spf.trusted-forwarder.org'. For more information on SPF rules, visit http://www.ietf.org/internet-drafts/draft-schlittspf-classic-02.txt. Configuring and Maintaining Your Server 62 5 To specify the rules that are applied to domains that do not publish SPF records, type the rules into the SPF guess rules box. Specifying a/24 mx/24 ptr gives good results for spam filters scoring Received-SPF lines. 6 To specify an arbitrary error notice that is returned to the S MTP sender when a message is rejected, type it into the SPF explanation text box. If no value is specified, the default text will be used as a notification. 7 To complete the setup, click OK. Setting Up Server-wide Black and White Lists To block mail from specific domains: Click the Server shortcut in the navigation pane. Click the Mail icon in the Services group. Click the Black List tab. Click the Add Domain icon. Specify the name of the domain from which you do not want to receive e-mail. For example, 'evilspammers.net'. 6 Click OK. 1 2 3 4 5 7 Repeat steps from 4 to 6 to add as many domains as required. To allow mail reception from specific domains or networks: Click the Server shortcut in the navigation pane. Click the Mail icon in the Services group. Click the White List tab. Click the Add Network icon. Specify an IP address or range of IP addresses from which mail must always be accepted. 6 Click OK. 1 2 3 4 5 7 Repeat steps from 4 to 6 to add as many addresses as required. Configuring and Maintaining Your Server 63 Configuring Antivirus To provide your e-mail users with anti-virus protection, you can use either the Dr. Web or Kaspersky Antivirus solutions. Both Dr. Web and Kaspersky Antivirus can scan server's mail traffic in real time, however, only Kaspersky Antivirus allows fine tuning and filtering of specific file types from attachments. The both programs require an additional license key with annual renewal. Check the current prices with your provider or visit SWsoft site at http://www.swsoft.com/en/buyonline/plesk8/. To install Dr. Web or Kaspersky Antivirus: 1 Go to Server > Updater. 2 Click your Plesk version. 3 In the list of components, select either Dr.Web antivirus or Kaspersky antivirus. 4 Click Install. After the installation is completed, obtain and install a license key for the selected antivirus program, as described in the following steps. 5 Go to Server > License Management. 6 Click Order New Key. The SWsoft online store page listing available add-ons opens in a new browser window. 7 On this page, select the check box next to the Dr. Web antivirus or Kaspersky Antivirus item and click ADD TO MY BASKET. 8 Because Plesk add-ons are added to the license keys that already exist, the Plesk Number Checking System page will open. Enter the number of your license key to which you add this feature and click Submit. 9 In the next steps, indicate the currency, number of keys, provide contact details, billing address, and payment method, and submit the form. You will be notified by e-mail when your order is processed. 10 When you receive the e-mail notice, return to the License Management screen (Server > License Management) and click Retrieve Keys to retrieve the ordered license key. Plesk License Manager will retrieve the upgraded license key from the SWsoft licensing server and install it to your control panel. 11 Go to Server > Mail. 12 Under Antivirus preferences, select the antivirus you need and click OK. If you installed Dr.Web, you can switch on antivirus protection only on a per-mailbox basis, and only after you have set up mailboxes. By default, virus definitions are retrieved every 5 hours from Dr.Web site, and this setting is not changeable through the control panel. Configuring and Maintaining Your Server 64 To set up anti-virus protection for a mailbox, proceed to the Protecting Mailboxes From Viruses section. If you installed Kaspersky Antivirus, for instruction on setting up and using antivirus, see the Kaspersky Antivirus Module Administrator's Guide at http://www.swsoft.com/en/products/plesk/docs/. Configuring Mailman Mailing List Software To provide your customers with capabilities to run their own mailing lists or newsletters, you should install the GNU Mailman package on your server (you could have done so during installation of Plesk), and set up the mailing list administrator's account— otherwise it will not work. To set up the mailing list administrator's account from your control panel: 1 Click the Server shortcut in the navigation pane. 2 Click the Set Up Mailman icon. 3 Specify the user name and password that you will use for administration of mailing lists and their settings. 4 Click OK. Once you have set up the Mailman administrator's account, you can configure the mailing list software or change your administrative login and password by visiting the URL: http://lists.yourservername.tld/mailman/admin/mailman Note: After you have set up Mailman administrator's account, the Set Up Mailman icon will be no longer be accessible from the control panel. Configuring Plesk for Database Hosting You can host users' databases either on a single server or on a number of different servers. Having the user databases on a remote server can be useful in multi-server installations, where centralized database hosting can be preferable for administration, backup, and resource utilization. However, if you have a single Plesk server, you are advised to keep all databases on it. To use remote database servers with your hosting machine, you need to: 1 Set up a remote database server: 1. Install MySQL or PostgreSQL software. 2. Set up database administrator's account. 3. Enable network access to the database server. 2 Configure Plesk for working with your remote database server. Configuring and Maintaining Your Server 65 Setting Up Remote Database Hosting If you are going to use a Plesk-managed server as a remote database server, you do not need to install MySQL software: Plesk comes with MySQL software, which is automatically installed during installation of Plesk. In this case, you only need to enable network access to this database server and then register it with Plesk. To set up a MySQL database server: 1 Copy to your server a MySQL distribution package from your operating system distribution disk, or download it from www.mysql.com site and save it on your server. 2 Log in as root to your server and change to the directory where you saved the RPM distribution. Type the following command at the prompt: rpm -ivh mysql_file_name.rpm 3 Set the database server administrator‘s password. Type the following command at the prompt: mysqladmin -u root password your_desired_password Change your_desired_password to anything you like. 4 Now proceed to the instructions on registering your database server with Plesk. To set up a PostgreSQL database server: 1 Copy to your server a PostgreSQL distribution package from your operating system distribution disk, or download it from www.postgresql.org site and save it on your server. 2 Log in as root to the server where you want to host databases, and change to the directory where you saved the distribution package. 3 Install the package in a way suitable for your operating system. For RPM based Linux systems, type the following command at the prompt: rpm -ivh postgresql_file_name.rpm For deb package based Linux systems, issue the command: apt-get install package_name For FreeBSD systems, to install from a package, issue the following command: pkg_add pgsql-<version>.tgz To install from ports, issue the following commands: cd /usr/ports/databases/postgresql<version>-server make install package clean Configuring and Maintaining Your Server 66 4 Open the file /var/lib/pgsql/data/postgresql.conf with a text editor. If you are installing PostgreSQL version earlier than 8, add the line tcpip_socket = true to this file. If you are installing PostgreSQL version later than 8, add the line listen_addresses = '*'. 5 Open the file /var/lib/pgsql/data/pg_hba.conf with a text editor and make sure the following lines are there: # local DATABASE USER METHOD [OPTION] local samegroup all password # host DATABASE USER IP-ADDRESS IP-MASK METHOD [OPTION] host samegroup all 0.0.0.0 0.0.0.0 md5 6 To restart PostgreSQL, issue the following command at the prompt: service postgresql restart 7 To set the database server administrator‘s password, issue the following commands at the prompt (change 'your_desired_password' to anything you like): psql -d template1 -U postgres alter user postgres with password 'your_desired_password'; 8 Now proceed to the instructions on registering your database server with Plesk. To register a database server with Plesk: 1 2 3 4 5 Log in to Plesk. Click the Server shortcut in the navigation pane. Click the Database Servers icon in the Services group. Click the Add Database Server icon in the Tools group. Specify the properties of the database server: Specify hostname or IP address of the database server. Specify the port number the database server is listening on. By default, MySQL servers listen on port 3306, and PostgreSQL on port 5342. You can leave the Port number box blank, if your database server is listening on the default port. Specify which database type is running on the database server. To make this database server default for hosting customers‘ databases, select the check box labeled Use this server as default for MySQL. If you have a PostgreSQL database server, select the check box labeled Use this server as default for PostgreSQL. Specify the database server administrator's login name and password. 6 Click OK. Configuring and Maintaining Your Server 67 To set up database hosting preferences that will affect all databases created through Plesk: 1 Go to Server > Database Servers > Preferences. 2 To simplify maintenance of customers' databases, select the Force Database Prefix check box. All names of newly created databases will look like client's login name_database name. This will allow you to locate databases related to a particular Plesk user. Note that even if you do not select this check box, on creation of a new database, Plesk will add client's login name to the database name input box, and you will be able to edit it or remove it. 3 Specify whether creation of databases is allowed on your Plesk server. Some applications do not support remote databases and can work only with databases hosted on the same server. We recommend leaving the default option Allow local hosting of databases for these site applications selected, otherwise, you will not be able to use such applications. 4 Click OK. Configuring and Maintaining Your Server Managing Database Servers To manage a database server: 1 Click the Server shortcut in the navigation pane. 2 Click the Database Servers icon in the Services group. 3 Click the icon corresponding to the database server you need. A web interface of a database management tool will open in a separate browser window. To change the MySQL database server administrator's password: 1 Login to the MySQL database server as root. 2 Login to MySQL as root. 3 Issue the command at the prompt: mysql> SET PASSWORD for ROOT = PASSWORD('new_password'); Where root is the user account, and new_password is the new administrator‘s password. 4 Log in to your Plesk control panel. 5 Click the Server shortcut in the navigation pane. 6 Click the Database Servers icon in the Services group. 7 Click the database server‘s name. 8 Type the new administrator‘s password and click OK. To change the PostgreSQL database server administrator's password: 1 Login to the PostgreSQL database server as root. 2 Login to PostgreSQL as root. 3 Issue the command at the prompt: ALTER USER root WITH PASSWORD 'new_password'; 4 Log in to your Plesk control panel. 5 Click the Server shortcut in the navigation pane. 6 Click the Database Servers icon in the Services group. 7 Click the database server‘s name. 8 Type the new administrator‘s password and click OK. To unregister a database server from Plesk: 1 Click the Server shortcut in the navigation pane. 68 Configuring and Maintaining Your Server 69 2 Click the Database Servers icon in the Services group. 3 Select the check box to the right of the database server‘s name. 4 Click Remove Selected. 5 Confirm the operation and click OK. To unregister from Plesk a database server that has databases or is assigned as default for hosting customers' databases: 1 Delete databases from the database server: 1. Click the Server shortcut in the navigation pane. 2. Click the Database Servers icon in the Services group. 3. Click the host name of a database server that you wish to unregister from Plesk. 4. Click the Databases tab. 5. Select the checkbox in the upper-right corner of the list to select all databases. 6. Click Remove Selected. 7. Confirm removal and click OK. 2 Make another database server default: 1. Click the Database servers shortcut in the path bar at the top of the screen. 2. Click the host name of a database server that you wish to make default. This should be the same database server type (MySQL or PostgreSQL) as the one you are going to delete. 3. Select the check box labeled Use this server as default for MySQL. If you have a PostgreSQL database server, select the check box labeled Use this server as default for PostgreSQL. 4. Click OK. 3 Return to the list of database servers (Server > Database Servers). 4 Select a check box corresponding to the database server that you no longer need. 5 Click Remove Selected. 6 Confirm the operation and click OK. Important: You cannot remove site applications‘ databases this way. To remove them, you should uninstall the respective site applications from the domains that use them. For instructions on managing databases, refer to the Deploying Databases (on page 134) section of this guide. Configuring and Maintaining Your Server 70 Enabling Support for Adobe ColdFusion To install Adobe ColdFusion: 1 Once you have purchased a ColdFusion distribution package, copy it to your Plesk server. 2 Login as 'root' to the server and run the coldfusion-70-lin.bin installation file. 3 Choose your language and press ENTER. 4 Read the Introduction and press ENTER. 5 Read carefully the end user license agreement and accept i t. A preinstallation check will be performed. 6 Choose installation type: select the option Install new version of ColdFusion MX with a serial number and type in the serial number. Press ENTER. 7 Select the type of installation: leave the Server configuration option selected and press 1. 8 Press 2 or ENTER to confirm that you do not yet have Adobe ColdFusion installed. 9 Choose the installation options and press 4 to continue with installation. 10 Specify an absolute path to the installation folder. The default installation folder is /opt/coldfusionmx7. Press ENTER. 11 If you had earlier versions of ColdFusion installed, you can choose to migrate your settings. Otherwise press ENTER to continue. 12 Configuration of Web Servers. Press 2 to continue with installation. 13 Leave the Runtime user name field blank. Press ENTER. 14 Specify the password that you will use to control access to the ColdFusion MX Administrator. 15 Disable the ColdFusion Remote Development Service (RDS): type 'n'. 16 Press ENTER to confirm installation. 17 Once the installation is completed, press ENTER to exit the installer. 18 If your server is running Linux for 64-bit platforms, modify the files /etc/init.d/coldfusionmx7 and [path_to_coldfusion_installation]/bin/coldfusion — comment out the following lines: SUSEFLAG=`grep 'SuSE Linux 8.1\|UnitedLinux 1.0' /etc/SuSE-release /etc/UnitedLinux-release /etc/UnitedLinux-release 2> /dev/null` if [ ! "$SUSEFLAG" ]; then LD_ASSUME_KERNEL=2.2.9 export LD_ASSUME_KERNEL fi Configuring and Maintaining Your Server 71 1 2 3 4 5 Login to Plesk control panel as administrator. Click the Server shortcut in the left side navigation pane. Click the Updater icon in the right frame. Click a link corresponding to the appropriate release version. Select the check box corresponding to the ColdFusion support for Plesk item, and click Install. Confirm the installation when prompted. 6 Once the selected components are installed, click the ColdFusion Settings icon on the Server Administration screen (Plesk control panel > Server). 7 Specify the path to ColdFusion installation directory and click OK. To uninstall Adobe ColdFusion from your server: 1 Log in as root. 2 Enter the following command to go to the cf_root/uninstall directory: cd cf_root/uninstall 3 Enter the following command: ./uninstall.sh 4 When the program completes, remove any remaining files and directories in the cf_root directory. 5 Log in to Plesk control panel as administrator, click the Server shortcut in the navigation pane, and then click the Components icon. 6 Click the Refresh icon. The list of installed components will be updated. Your control panel will find out that you deinstalled ColdFusion and will remove the ColdFusion related controls from the control panel screens or will make them unselectable and mark them with the (component is not installed) comment. Configuring and Maintaining Your Server 72 Enabling Support for Miva E-commerce Applications To allow your customers use Miva e-commerce solutions, you need to install on the server the Miva Empresa package shipped with Plesk distribution (if you did not install it during installation of Plesk), and then enable support for Miva applications for the respective hosting accounts. The Miva Fasttrack and Miva Merchant online store applications are shipped with Plesk as standard Web applications, which you or your customers can install from the control panel‘s Application Vault section (Domains > domain name > Application Vault > Add New Application). Note that your customers will need to obtain a license either from Miva or from SWsoft and specify its serial number during installation of Miva applications. To learn more about Miva solutions, refer to http://docs.smallbusiness.miva.com/enUS/merchant/WebHost/webhelp/web_host_resources.htm To install the Miva Empresa package: 1 Go to Server > Updater. 2 Click the Plesk 8.1.1 shortcut. 3 Locate the Miva Empresa Support item and select the check box on the left. 4 Click Install. Now the Miva Empresa server environment is installed. To enable support for Miva applications for all newly created hosting accounts using domain templates: 1 Go to Domains > Domain Templates. 2 Click the template name you need. 3 Select the Miva support check box and click OK. To enable support for Miva applications for existing hosting accounts: 1 Click the Domains shortcut in the navigation pane. 2 Select the check boxes corresponding to the domain names you need, and click Group Operations. 3 Under the Hosting group, select the Switched on option to the left of the Miva support field. 4 Click OK. Configuring and Maintaining Your Server 73 To enable support for Miva applications for an individual hosting account: 1 Go to Domains > domain name > Setup. 2 Select the Miva support check box and click OK. To install Miva Fasttrack or Miva Merchant on a site, follow the instructions provided in the Installing Applications (on page 137) chapter. Configuring and Maintaining Your Server 74 Configuring Statistics After installation, the control panel's statistical utility is set up to: Count the inbound and outbound traffic Count the disk space occupied by web content, log files, databases, mailboxes, web applications, mailing list archives, and backup files Keep the traffic statistics only for the last three months To review or adjust these settings: 1 Click the Server shortcut in the navigation pane. 2 Click the Server Preferences icon in the Control Panel group. 3 Under the System preferences group, specify the term during which the bandwidth usage statistics should be kept for your customers. 4 Specify the items that should be considered when disk space and bandwidth usage is calculated. 5 Click OK. When you need to view statistics, refer to chapter Viewing Statistics (on page 221) for instructions. Configuring E-mail Notification System The control panel notifies you and your customers of disk space and bandwidth overage by sending e-mail notifications. With the default settings, however, domain and web site owners are not notified. We recommend that you enable resource overage notification for domain and web site owners because they need to know what happens to their domains and web sites. Apart from resource overage, the control panel can notify the appropriate users when: New user accounts are created New domains are added Hosting accounts are expired (expiration date is defined for user accounts and Web sites separately) There are new requests for assistance (trouble tickets) from your customers in Help Desk The requests are fulfilled and the trouble tickets are closed in Help Desk New comments are posted to the existing trouble tickets The closed trouble tickets are reopened because the customer has encountered the same problem again Configuring and Maintaining Your Server 75 To view or modify the notification system settings: 1 Go to Server > Notifications. 2 By selecting the check boxes in the Notifications table, specify the types of control panel users or external e-mail users who should receive notices on events. We recommend that you also select all check boxes in the domain administrator column in order to let your resellers' customers know what happens to their Web sites. 3 To view or edit the default notice text, click the respective the Text column. icon in In notices you can use tags that will be replaced with actual data (see the table below). 4 Specify when to send the user account and domain (Web site) hosting account expiration notices. By default, such notices are se nt 10 days in advance. Click OK. Table. Tags used in notification messages Event type Tags that can be used in notices The data that tags denote Creation of a user account <client> or <client_contact_name> user's first and last name <client_login> user name for authorization in the control panel <password> user's password for authorization in the control panel <hostname> host name for access to control panel <client_login> user name for authorization in the control panel <client> or <client_contact_name> user's first and last name <expiration_date> user account expiration date <domain_name> or <domain> domain name <client_login> user name for authorization in the control panel <client> or <client_contact_name> user's first and last name Expiration of a user account Addition of a new domain name to the server Configuring and Maintaining Your Server Domain (Web site) hosting account expiration Resource overage Help Desk events <ip> IP address the domain is hosted on <domain_name> or <domain> domain name <client_login> user name for authorization in the control panel <client_contact_name> or <client> user's first and last name <expiration_date> account expiration date <domain> or <domain_name> domain name <client_login> user name for authorization in the control panel <client> or <client_contact_name> user's first and last name <disk_usage> information on disk space usage <disk_space_limit> information on the disk space allocated to the account <traffic> information on bandwidth usage <traffic_limit> information on the bandwidth amount allotted to the account <ticket_id> trouble ticket identification number automatically assigned by the system <reporter> returns user name for requests submitted by resellers or multi-domain customers, a domain name for requests submitted by domain owner, and e-mail address if the request was submitted by e-mail. <server> the host name 76 Configuring and Maintaining Your Server <ticket_comment> the contents of the ticket, or a comment posted 77 Configuring and Maintaining Your Server 78 Configuring Help Desk Help Desk is a convenient way for your customers to reach you when they need your assistance. After you set it up and switch on, the Help Desk becomes accessible to all users who were granted access to control panel, including your resellers, domain owners, and e-mail users. Additionally, you can allow submission of problem reports by e-mail. Your Help Desk shows all reports posted by your resellers and their customers. Your reseller's Help Desk shows only reports posted by himself or herself and his or her customers. The domain owner's Help Desk shows only reports posted by himself or herself and by e-mail users under his or her domain. To configure Help Desk and allow your customers post problem reports through the control panel: 1 Go to Help Desk > General Settings. 2 Select the Allow customers to submit tickets check box. 3 Select the trouble ticket queue, priority and category that will be offered to your customers as the default choice. When users post a new ticket, they can specify the order in which they would prefer their problems to be resolved (queue), the priority of their requests (priority), and the category to which the problem is related (category). The queue, priority and category are abstract entities: they have no effect on the system, but they can help you decide what problems to resolve in the first place. There are three predefined queues and priority levels and nine predefined categories including Database, DNS, FTP, General, Hosting, Mail, Mailing Lists, Site Applications, and Tomcat Java. You can remove these items and add your own. 4 Click Switch On in the Tools group, then click OK. If you wish to allow users to submit problem reports by e-mail: 1 Create a POP3 mailbox with an e-mail address like [email protected] or anything you like. 2 Configure the Help Desk to periodically retrieve problem reports from that mailbox and post them to your Help Desk. 3 Inform your customers of the Help Desk's e-mail address. To allow users to submit problem reports to Help Desk by e-mail: 1 Go to Help Desk > Mail Gate Settings. 2 Specify the following settings: Configuring and Maintaining Your Server 79 Notification sender's name, and Notification sender's return address. Once a report has been retrieved by e-mail and posted to the Help Desk, the Help Desk sends a notice to the report sender. This allows the report sender to subsequently add comments to the report by replying to the message. Therefore, we recommend that you specify your Help Desk's e-mail address in the Notification sender's return address box, and type a phrase like "<company name> Help Desk" into the Notification sender's name box. Be sure to specify your organization name in place of <company name> and omit the quotation marks. POP3 server: POP3 server the mail should be fetched from. POP3 login: user name for authentication to the mail server. New POP3 password: password that will be used for authentication to the mail server and retrieving problem reports from the mailbox. Confirm POP3 password: retype password for confirmation. Query mail once in: specify how often Help Desk should check for new reports. Ticket subject must start with: specify the combination of symbols the subject line of e-mail messages (problem reports) must start with. This can help filter out spam. All e-mail messages that do not have the specified combination of symbols in the subject line will be deleted. 3 Click Switch On in the Tools group and click OK. To view, add, edit, or remove queues: 1 Go to Help Desk > Queues. The queues will be presented in a list. To add a new queue, click Add New Queue, type the desired number into the Title box, leave the Switched on check box selected, and click OK. To edit a queue, click its title in the Title column. Edit it as required, and click OK. To temporarily disallow your users to select a queue when posting new reports, click its title in the Title column, clear the Switched on check box, and click OK. To delete a queue, select the respective check box and click Remove Selected. To view, add, edit, or remove priorities: 1 Go to Help Desk > Priorities. The priorities will be presented in a list. To add a new priority, click Add New Priority, type the desired combination of symbols into the Title box, leave the Switched on check box selected, and click OK. To edit a priority, click its title in the Title column. Edit it as required, and click OK. To temporarily disallow your users to select a priority when posting new reports, click its title in the Title column, clear the Switched on check box, and click OK. To delete a priority, select the respective check box and click Selected. Remove To view, add, edit, or remove categories: 1 Go to Help Desk > Categories. The categories will be presented in a list. Configuring and Maintaining Your Server To add a new category, click Add New Category, type the desired combination of symbols into the Title box, leave the Switched on check box selected, and click OK. To edit a category, click its title in the Title column. Edit it as required, and click OK. To temporarily disallow your users to select a category when posting new reports, click its title in the Title column, clear the Switched on check box, and click OK. To delete a category, select the respective check box and click Selected. 80 Remove To disallow customers to send reports to Help Desk by e-mail: 1 Go to Help Desk > Mail Gate Settings. 2 Click Switch off in the Tools group. To disallow use of Help Desk for all your customers and resellers: 1 Go to Help Desk > General Settings. 2 Click Switch off in the Tools group. Also see the Using Help Desk for Resolving Your Customers' Issues section. Adjusting System Date and Time You can manually set the server date and time through the interface and enable server time synchronization with a Network Time Protocol (NTP) server. To adjust the system date and time settings: 1 Click the Server shortcut in the navigation pane. 2 Click System Time. 3 Edit the time and date settings as desired, and select your time zone. You will need to reboot your Plesk server for the time zone change to take effect. 4 To synchronize your server time with that of a server running the Network Time Protocol, select the Synchronize system time check box, and specify a valid IP address or a domain name. For a list of available NTP servers, visit http://ntp.isc.org/bin/view/Servers/WebSearch?search=open+access& scope=text 5 Click OK. Configuring and Maintaining Your Server 81 Note. Enabling the Synchronize system time function will override any time and date you manually enter in the System Date and Time fields. It is also important to be sure the domain name or IP address you enter for synchronization is a valid NTP server. If not, this function will not work and your server will continue running with its current time settings. Starting, Stopping and Restarting Services You can monitor, start, stop and restart various Plesk services from the control panel. To see the status of a service: 1 Select the Server shortcut in the navigation pane. 2 Click Service Management on the Server administration page. The current state of a service is marked by an icon: for the service running, for the service stopped, and if service is not installed or its management capabilities are not supported by the license key. To start a service: 1 Select the Server shortcut in the navigation pane. 2 Click Service Management on the Server administration page. 3 Click the icon corresponding to the service you wish to start. To restart a service: 1 Select the Server shortcut in the navigation pane. 2 Click the Service Management icon on the Server administration page. 3 Click the icon corresponding to the service you wish to restart. To stop a service: 1 Select the Server shortcut in the navigation pane. 2 Click the Service Management icon on the Server administration page. 3 Click the icon corresponding to the service you wish to stop. Configuring and Maintaining Your Server 82 Enabling Piped Logs for Web Server to Reduce the Risk of Web Service Disruption If you are going to host more than 300 domains or Web sites on your server, you should switch on support for piped logs in the Apache Web server. To do this, follow these steps: 1 Log in to the server shell. 2 Issue the command mysql -uadmin -p`cat /etc/psa/.psa.shadow` -D psa -e "replace into misc (param,val) values ('apache_pipelog', 'true');" 3 Rebuild Apache configuration by issuing the command websrvmng v -a This will allow to host about 900 domains/Web sites. If you need to host more than 900 domains/Web sites, then you will need to recompile Apache and some other system packages, as described in the online knowledge base article at http://kb.swsoft.com/en/260. Monitoring Mail Server Message Queue and Troubleshooting Mail Congestion If your customers complain that they cannot send e-mail through your mail server, this can mean that your mail server is overloaded and cannot cope with the amount of received messages. This can happen when somebody is sending spam through your mail server, or the qmail-send daemon responsible for sending mail is down. To return your mail server to an operable state, delete the unwanted messages from the mail server‘s message queue. To see the messages in the message queue and to delete them: 1 Click the Server shortcut in the navigation pane. 2 Click Mail icon in the Services group. 3 Click the Mail Queue tab. The following information will be presented: Configuring and Maintaining Your Server 83 Total number of undelivered messages. When messages come to your mail server they are first added to the main queue. Then, the mail server preprocesses them in order to find out whether they should be delivered to a local e-mail account on the same server or sent further to a remote recipient‘s email address. After preprocessing, the messages directed at local mail recipients are put to a local queue, and the messages directed at remote recipients are put to a remote queue. Once delivered, the messages are removed from the queues. Message properties: subject, sender, recipient, queue type (local, remote, not preprocessed), date the message was sent from user‘s computer, the time lapsed since the moment when message was put to queue (age), and message size. 4 To find a message with specific subject, select the queue in the Queues drop-down box, type the desired combination of symbols into the Subject box, and click Search. The messages matching your search criteria will be listed at the bottom of the screen. To reset the filter, click Show All. 5 To find a message from a specific sender, click the Show Advanced link, type the sender‘s e-mail address into the Envelope Sender box, and click Search. The messages matching your search criteria will be listed at the bottom of the screen. To reset the filter, click Show All. 6 To find a message addressed to a specific recipient, click the Show Advanced link, type the recipient's e-mail address into the Recipients box, and click Search. The messages matching your search criteria will be listed at the bottom of the screen. To reset the filter, click Show All. 7 To find a message by date, age, or size, click the Show Advanced link, type the required values into the Date, Age, or Size boxes, respectively, and click Search. The messages matching your search criteria will be listed at the bottom of the screen. To reset the filter, click Show All. 8 To delete a message from the queue, select the corresponding check box and click Remove Selected. To delete all messages from the queue, select the check box in the upper-right corner of the messages list, and click Remove Selected. Configuring and Maintaining Your Server 84 Scheduling Tasks If you need to run scripts on your server at specific time, use the task scheduling facility on your server to make the system automatically run the scripts for you. Important: To prohibit control panel users from scheduling tasks on behalf of user "root", create on the server's file system an empty file with name root.crontab.lock in the location /plesk_installation_directory/var/. During installation of Plesk the following tasks are automatically created: autoreport.php – delivers daily, weekly and monthly reports on clients and domains (three separate tasks) backupmng – initiates scheduled backing up of domains once every 30 minutes statistics – generates statistics on the limits imposed on domains, such as traffic, disk usage, and so on mysqldump.sh - creates a backup copy of three MySQL databases: psadump, MySQL, and Horde databases As all these tasks are related to domain statistics, databases and reports, it is strongly recommended that you neither change nor remove these tasks. Note. You can also schedule tasks on a per-domain basis. To do so, follow the same procedures listed below, but instead of going to Server > Scheduled Tasks, go to Domains > domain name > Scheduled Tasks. To schedule a task: 1 Click the Server shortcut in the navigation pane. 2 Click the Scheduled Tasks icon in the Services group. 3 Select the system user account on whose behalf the task will be executed. 4 Click Add New Task. 5 Specify when to run your command: Minute - enter the value from 0 to 59 Hour - enter the value from 0 to 23 Day of the Month - enter the value from 1 to 31 Month - enter the value from 1 to 12, or select the month from a drop-down box Day of the Week - enter the value from 0 to 6 (0 for Sunday), or select the day of the week from a drop-down box You can schedule the time using the UNIX crontab entry format. In this format, you can enter several values separated by commas. Two numbers separated by a hyphen mean an inclusive range. For example, to run a task on the 4th, 5th, 6th, and 20th of a month, type 4-6,20. Configuring and Maintaining Your Server 85 insert an asterisk to specify all values allowed for this field. For example, to run a task daily, type * in the Day of the Month text box. To schedule the task to run every Nth period, enter the combination */N, where N is the legal value for this field (minute, hour, day, month). For example, */15 in the Minute field schedules the task to start every 15 minutes. You can type the contracted names of months and days of the week, which are the first three letters: Aug, Jul, Mon, Sat, etc. However, the contracted names cannot be separated with commas or used together with numbers. 6 Specify which command to run. Type it into the Command input box. 7 Click OK. To temporarily suspend execution of a scheduled task: 1 Click the Server shortcut in the navigation pane. 2 Click the Scheduled Tasks icon in the Services group. 3 Select the system user account on whose behalf the task is executed. 4 Locate the task that you want to suspend and click on the command name. 5 Clear the Switched on check box and click OK. To resume execution of scheduled task: Click the Server shortcut in the navigation pane. Click the Scheduled Tasks icon in the Services group. Select the system user account on whose behalf the task is executed. Locate the task whose execution you want to resume and click the command name. 5 Select the Switched on check box and click OK. 1 2 3 4 To cancel a task: 1 Click the Server shortcut in the navigation pane. 2 Click the Scheduled Tasks icon in the Services group. 3 Select the system user account on whose behalf the task is executed. 4 Select a check box to the left of the task that you want to cancel. 5 Click Remove Selected. 6 Confirm removal and click OK. Configuring and Maintaining Your Server 86 Extending Plesk Capabilities with Modules In this version of Plesk, you can extend the functionality of your control panel without upgrade. This can be done by installing additional functional components, available as modules developed by SWsoft or third parties. The modules can be easily installed, removed, and configured directly from the control panel. The modules come as a single RPM package, a self-extracting shell script, or in any other form suitable to your operating system. If you wish, you can also install the module from the command line. When you install the module on server using the control panel, you are taken to the module‘s configuration screen. The following modules are available for Plesk 8: Acronis True Image Server management module - Allows to create server disk backup images without interrupting server operations and perform easy and fast recovery of the entire system. This module is free, however, the Acronis True Image Server application requires a license key, which you can purchase and install through Plesk control panel. *Battlefield 2 Game Server module - Allows to install and manage Battlefield 2 game servers. *Counter-Strike Game Server module - Allows to install and update Half-Life: Counter-Strike game server, to create and manage games. Firewall module - Helps you protect your host and private network from unauthorized access. Kaspersky Antivirus module - Scans mail traffic for viruses and provides filtering of e-mail attachments.Remote Administration of Sitebuilder module - Provides functionality for remote administration of SiteBuilder2. Samba Fileserver Configuration module - Helps you share your directories in SMB network. Virtual Private Networking module - Builds a secure network over insecure channels. Watchdog module - Monitors Plesk control panel services and scans your server for security vulnerabilities. Plesk modules marked with asterisk (*) require installing additional license keys (see page 23) for being used. When you install Plesk on FreeBSD systems, all modules are installed by default. During installation of Plesk on RPM/Deb package-based systems you are prompted to choose the modules you would like to install. Configuring and Maintaining Your Server 87 Installing Modules You can install a module to the Plesk server in two ways: from the control panel (recommended), and from the command line. To install modules from the control panel: 1 Login as administrator to the control panel. 2 Select the Modules shortcut in the navigation pane 3 Click Manage Modules. 4 Click Add new module. 5 Select a module package file, and click OK. To install modules from the command line: 1 Login as root to the server, where Plesk is installed. 2 Run the command /plesk_installation_directory/admin/bin/modulemng -install --file=<module_filename>, where 'plesk_installation_directory' is the directory you installed Plesk to. Example: /usr/local/psa/admin/bin/modulemng --install --file=cs-gs-1.0.0rh9.build72041021.16.i586.rpm Note: All modules that come with Plesk are located in the directory /opt/modules in Plesk distribution. Configuring and Managing Modules Before you begin to use the module, you should configure it. Configuration steps vary depending on each module. Once you install a module on the server using the control panel, you are taken to the module‘s configuration screen. If you installed the module from the command line, you need to configure it via Plesk. To access the module configuration screen: Select the Modules shortcut in the navigation pane, and then click the button labeled with module‘s name. Or Select the Modules shortcut in the navigation pane, and then click Manage Modules. In the list of modules, click the module‘s name presented as link. Configuring and Maintaining Your Server 88 Some modules might require you to install a license key in order to be able to use them. You can check out the terms of usage on the module manufacturer‘s web site, or look them up in the control panel‘s Modules management screen: for each module installed there is a corresponding list entry accompanied by an icon, which shows whether license key is required. There are three types of icon that indicate the following: - the module does not require a license key - the module requires a license key, and the key is installed - the module requires a license key, but the key is not installed. If a module is provided by SWsoft, Inc. and requires a license key, you can obtain it from SWsoft, Inc. using the License Manager function. In other cases, you should obtain the information on installation of license keys for modules from the module manufacturer. Removing Modules You can remove modules from Plesk in two ways: from the control panel (recommended), and from the command line. To remove a module using a control panel: 1 2 3 4 Login as admin to the control panel. Select the Modules shortcut in the navigation pane. Click Manage Modules. Select a checkbox corresponding to the module you wish to remove, and click Remove Selected. To remove a module from the command line: 1 Login as root to the server, where Plesk is installed. 2 Run the command /plesk_installation_directory/admin/bin/modulemng -remove --module=<module_codename>. Example: /usr/local/psa/admin/bin/modulemng --remove --module=cs-gs You can look up a module‘s codename by running the following command: # echo "SELECT name, display_name FROM psa.Modules;" | mysql -u admin –p<admin_password> psa 89 CHAPTER 6 Serving Your Customers This chapter provides you with detailed instructions on setting up and managing user accounts, web sites, and e-mail accounts. In this chapter: Before You Start Serving Your Customers ........................................................ 90 Managing User Accounts .................................................................................. 105 Hosting Web Sites ............................................................................................. 117 Using E-mail Services ....................................................................................... 168 Using Help Desk for Resolving Your Customers' Issues.................................... 200 Migrating User Accounts, Domain Names and Web Sites from Other Hosting Platforms ........................................................................................................... 203 90 Before You Start Serving Your Customers This section explains the actions you are suggested to do before you start serving your customers. Simplifying Setup of User Accounts If you are going to serve numerous users, you may want to create account configuration presets, referred to as client templates, that will simplify setting up user accounts for new customers. The templates cover all resource usage allotments, permissions and limits that you can define for a user account. To create a client template: 1 2 3 4 Click the Clients shortcut in the navigation pane. Click the Client Templates icon in the Tools group. Click Add New Client Template. Specify the template properties: Template name. Specify a name for this template. During setup of a new user account, you will be prompted to select the required template by its name. Therefore, we recommend that you choose a meaningful name that corresponds to one of your hosting plans or describes the amount of allotted resources. For example, Reseller account, 5GB disk space, 100 domains. Access to control panel. Specify whether the customer will be able to access the control panel for managing his or her account and sites. Domain creation. Specify whether the customer will be able to set up hosting accounts for new sites. Physical hosting management. Specify whether the customer will be able to set up hosting accounts, modify hosting account features and switch on or off support for programming and scripting languages. PHP safe mode management. Specify whether the customer will be able to switch the PHP safe mode off for his or her sites. By default, PHP is configured to operate in safe mode with functional restrictions. To learn more about PHP safe mode, refer to http://php.net/features.safe-mode. Some web applications may not work properly with safe mode enabled: If an application on a site fails due to safe mode, switch the safe mode off by clearing the PHP 'safe_mode' on check box in the hosting account properties (Domains > domain name > Setup icon in the Hosting group). Management of shell access to server. Specify whether the customer will be able to access the server shell through Secure Shell protocol and allow his or her own customers to do so. Hard disk quota assignment. Specify whether the customer will be able to assign hard quotas on disk space for his or her own web sites and for web sites of his or her customers. Subdomains management. Specify whether the customer will be able to set up additional sites under his or her domains and allow his or her customers to do so. Serving Your Customers 91 Domain aliases management. Specify whether the customer will be able to set up additional alternative domain names for his or her web sites and allow his or her users to do so. Log rotation management. Specify whether the customer will be able to adjust the cleanup and recycling of processed log files for his or her sites. Anonymous FTP management. Specify whether the customer will be able to have an FTP directory where all users could download and upload files without the need to enter login and password. A web site should reside on a dedicated IP address in order to use anonymous FTP service. Task scheduling. Specify whether the customer will be able to schedule tasks in the system. Scheduled tasks can be used for running scripts or utilities on schedule. Domain limits adjustment. Specify whether the customer will be able to adjust resource allotments for his or her account. DNS zone management. Specify whether the customer will be able to manage the DNS zones of his or her domains. Java applications management. Specify whether the customer will be able to install Java applications and applets on web sites through the control panel. Mailing lists management. Specify whether the customer will be able to use mailing lists provided by the GNU Mailman software. Spam filter management. Specify whether the customer will be able to use SpamAssassin spam filter and customize filtering settings. Antivirus management. Specify whether the customer will be able to use server-side antivirus protection for filtering incoming and outgoing mail. Backup and restore functions. Specify whether the customer will be able to use the control panel's facilities to back up and restore his or her sites. To allow storing backup files on the server, select the local repository check box. To allow the customer to use an arbitrary FTP server for storing backups, select the remote (FTP) repository check box. User interface. Specify the type of user interface the customer will be able to use standard, desktop, or both. Desktop management. Specify whether the customer will be able to customize his or her desktop interface. Ability to use remote XML interface. Specify whether the customer will be able to remotely manage his or her Web sites through custom applications. The XML interface can be used for developing custom applications integrated with Web sites, which could be used, for instance, for automating setup of hosting accounts and provisioning of services for customers purchasing hosting services from your reseller's site. To learn more about using Plesk control panel's XML interface (also referred to as Plesk API RPC), please visit http://download1.swsoft.com/Plesk/Plesk8.1/Doc/plesk-8.1-apirpc/index.htm. Maximum number of domains. Specify the total number of domain names/web sites your customer will be able to host on the server. This includes web sites hosted on this server, and domain forwarders that point to web sites hosted on other servers. Domain aliases (additional domain names for a site hosted on this server) and subdomains are counted separately and are not limited by this resource type. 92 Plesk 8.2 for Linux/Unix Administrator's Guide Maximum number of subdomains. Specify the total number of subdomains that the customer will be able to host. Maximum number of domain aliases. Specify the total number of additional alternative domain names that the customer will be able to use for his or her web sites. Disk space. Specify the total amount of disk space in megabytes that is allocated to the customer. It includes disk space occupied by all files related to user's domains/web sites: web site contents, databases, applications, mailboxes, log files and backup files. This is the so-called soft quota: when it is exceeded, the user account and domain names/web sites are not suspended automatically, only the appropriate notices are sent to your and your customer's e-mail addresses and the resource overage is indicated by the icon shown in your and your customer's control panels to the left of the user name (see the list of clients that opens when you click the Clients shortcut in the navigation pane) or domain name (see the list of domain names that opens when you click the Domains shortcut in the navigation pane). Maximum amount of traffic. Specify the amount of data in megabytes that can be transferred from the customer's web sites during a month. Once the limit is reached, the appropriate notices are sent to your and your customer's e-mail addresses and the resource overage is indicated by the corresponding icon shown in the control panel to the left of the user name (see the list of clients that opens when you click the Clients shortcut in the navigation pane) or domain name (see the list of domain names that opens when you click the Domains shortcut in the navigation pane). Maximum number of web users. Specify the total number of personal web pages that your customer can host for other users under his or her domains. This service is mostly used in educational institutions that host non-commercial personal pages of their students and staff. These pages usually have web addresses like http://yourdomain.com/~username. See the Hosting Personal Web Pages (on page 153) section for details. Maximum number of databases. Specify the total number of databases that the customer can host on the server. Maximum number of mailboxes. Specify the total number of mailboxes that the customer can host on the server. Mailbox quota. Specify the amount of disk space in kilobytes that is allocated to each mailbox. Maximum number of mail forwarders. Specify the total number of mail forwarders that the customer can set up. Maximum number of mail autoresponders. Specify the total number of automatic responses that the customer can set up. Maximum number of mailing lists. Specify the total number of mailing lists that you customer can host on the server. To provide users with mailing lists, you should install the GNU Mailman software. Maximum number of Java applications. Specify the total number of Java applications or applets that can be hosted on the server. Serving Your Customers 93 Validity period. Specify the term for a hosting account. At the end of the term, all customer's domains/web sites will be suspended, its Web, FTP and mail services will no longer be accessible to the Internet users, and the reseller and his or her customers (domain owners) will not be able to log in to the control panel. Accounts cannot be automatically renewed, therefore, in order to bring the hosted domain names/web sites back to operation, you will need to manually renew the user account: Click the Clients shortcut in the navigation pane, click the client name you need, click the Limits icon, specify another term in the Validity period box, click OK, then click the Switch On icon in the Tools group (Clients > client name). IP address allocation. Specify the shared IP addresses that you wish to allocate to the customer. If you wish to automatically provision dedicated IP addresses, select the Allocate exclusive IP addresses to client check box and specify the number of IP addresses that should be taken from your IP range and assigned to the customer. 5 Click OK to complete creation of a template. During setup of a new user account, you will select the required template and the account will be created and allocated the resources you defined. To modify a template: 1 Click the Clients shortcut in the navigation pane. 2 Click the Client Templates icon in the Tools group. 3 Click the template name you need. 4 Modify the settings as required and click OK. Note that modifying templates does not affect the existing user accounts that were created by these templates. To remove a template that you no longer need: 1 Click the Clients shortcut in the navigation pane. 2 Click the Client Templates icon in the Tools group. 3 Select a check box corresponding to the template you no longer need. 4 Click Remove Selected. Confirm removal and click OK. 94 Plesk 8.2 for Linux/Unix Administrator's Guide Simplifying Setup of Domains and Web Sites If you are going to serve numerous users with a great number of domains, you may want to create hosting configuration presets, referred to as domain templates, which will simplify setting up hosting accounts for new domains and web sites. The templates cover all resource usage allotments, permissions and limits that you can define for a hosting account, plus mail bounce and Web statistics retention settings. To create a domain template: 1 2 3 4 Click the Domains shortcut in the navigation pane. Click the Domain Templates icon in the Tools group. Click Add Domain Template. Specify the template properties: 1. Template name. Specify a name for this template. During setup of a new hosting account, you will be prompted to select the required template by its name. Therefore, we recommend that you choose a meaningful name that corresponds to one of your hosting plans or describes the amount of allotted resources. For example, Mail hosting, 1GB disk space, 500 mailboxes. 2. Mail to nonexistent users. Specify the domain-wide mail bounce options: When somebody sends an e-mail message to an e-mail address that does not exist under your domain, the mail server on your domain accepts mails, processes it, and when it finds out that there is no such a recipient under your domain, it returns the mail back to sender with the ―this address no longer accepts mail‖ notice. You can choose to: change the default notice if you do not like it (leave the Bounce with message option selected and type another message into the input box), forward undelivered mail to another e-mail address (select the Forward to address option and specify the e-mail address you need), or reject mail without accepting it (select the Reject option). This setting can decrease mail server load caused by a large amount of spam, which is often directed at randomly generated user names. However, for spammers this can somewhat speed up scanning your mail server for valid e-mail addresses. 1. WebMail. Specify whether the users of mailboxes in this domain should be able to read their mail through a browser based WebMail application. 2. Maximum number of subdomains. Specify the number of subdomains that can be hosted under this domain. 3. Maximum number of domain aliases. Specify the total number of additional alternative domain names that the site owner will be able to use for his or her web site. 4. Disk space. Specify the total amount of disk space allocated to a hosting account associated with the domain. This amount is measured in megabytes. It includes disk space occupied by all files related to this domain/web site: web site contents, databases, applications, mailboxes, log files and backup files. This is the so-called soft quota: when it is exceeded, domain names and web sites are not suspended automatically, only the appropriate notices are sent to your and your client's e-mail addresses and the resource overage is indicated by the icon shown in the control panel to the left of the domain name (see the list of domain names by clicking the Domains shortcut in the navigation pane). Serving Your Customers 95 5. Maximum amount of traffic. Specify the amount of data in megabytes that can be transferred from the web site during a month. Once the limit is reached, the appropriate notices are sent to your and your client's e-mail addresses and the resource overage is indicated by a corresponding icon shown in the control panel to the left of the domain name (see the list of domain names by clicking the Domains shortcut in the navigation pane). 6. Maximum number of web users. Specify the number of personal web pages that the domain owner can host for other users under his or her domain. This service is mostly used in educational institutions that host non-commercial personal pages of their students and staff. These pages usually have web addresses like http://yourdomain.com/~username. If you wish to allow execution of scripts embedded in personal web pages, select also the Allow the web users scripting check box. See the Hosting Personal Web Pages (on page 153) section for details. 7. Maximum number of databases. Specify the number of databases that can be hosted in a domain. 8. Maximum number of mailboxes. Specify the number of mailboxes that can be hosted in a domain. 9. Mailbox quota. Specify the amount of disk space in kilobytes that is allocated to each mailbox in a domain. 10. Maximum number of mail forwarders. Specify the number of mail forwarders that can be used in a domain. 11. Maximum number of mail autoresponders. Specify the number of automatic responses that can be set up in a domain. 12. Maximum number of mailing lists. Specify the number of mailing lists that the domain owner can run in a domain. The mailing lists are served by the GNU Mailman software, which may or may not be installed on the server. If it is not installed and your customers would like to use it, you may want to to install it. To allow the use of mailing lists, you should also put a check mark into the Mailing lists check box under the Preferences group. 13. Maximum number of Java applications. Specify the maximum number of Java applications or applets that the domain owner can install under a domain. 14. Validity period. Specify the term for a hosting account. At the end of the term, the domain/web site will be suspended, its Web, FTP and mail services will no longer be accessible to the Internet users, and domain owner will not be able to log in to the control panel. Hosting accounts cannot be automatically renewed, therefore, in order to bring the hosted domain name/web site back to operation, you will need to manually renew the hosting account: click the Domains shortcut in the navigation pane, click the domain name your need, click the Limits icon, specify another term in the Validity period box, click OK, then click the Switch On icon in the Domain group (Domains > domain name). 15. Log rotation. All connections to the Web server and requests for files that were not found on the server are registered in log files. These log files are analyzed by the statistical utilities running on the server, which then present graphical reports on demand. If you need to view the contents of these raw log files for debugging purposes, on your Home page, click the domain name you need, click Log Manager, and then click the log file name you need. To prevent these log files from growing too large, you should enable automatic cleanup and recycling of log files: select the Switch on log rotation check box, 96 Plesk 8.2 for Linux/Unix Administrator's Guide specify when to recycle log files, specify how many instances of each log file processed by Plesk's statistical utilities to store on the server, specify whether they should be compressed, specify whether they should be sent to an e-mail address after processing. 16. Traffic statistics retention. Specify the number of months during which the bandwidth usage statistics should be kept on the server. 17. DNS. Specify whether the DNS server on your Web host should act as a master (primary) or slave (secondary) name server for the domain name zone. A primary name server stores locally the zone file it serves, while a secondary server only retrieves a copy of this file from the primary. You would normally leave the Master option selected. 18. Physical hosting account. If you are going to host not only domain names, but also web sites, select the Physical hosting check box and specify the hosting features: Hard disk quota. In addition to the soft quota, you can specify the so-called hard quota that will not allow writing more files to the web space when the limit is reached. At attempt to write files, users will get "Out of disk space" error. SSL support. Secure Sockets Layer encryption is generally used for protecting transfer of sensitive data during online transactions on e-commerce Web sites that run on dedicated IP addresses. SSL certificates that participate in the encryption process are usually applied to a single domain name on a single IP address, therefore, each site that needs SSL protection must be hosted on a dedicated IP address. An exception to this is subdomains, which you can protect with a wildcard certificate. Installing an SSL certificate on a Web server that hosts several web sites with different domain names on a single IP address (shared or name-based hosting) is technically possible, however, it is not recommended: the encryption will be provided, but users will get warning messages on attempt to connect to the secure site. To allow SSL encryption for Web sites, select the SSL support check box. Use a single directory for housing SSL and non-SSL content. By default, when users publish their sites through their FTP accounts, they need to upload the web content that should be accessible via secure connections to the httpsdocs directory, and the content that should be accessible via plain HTTP, to the httpdocs directory. For the convenience of publishing all content through a single location – httpdocs directory, select the Use a single directory for housing SSL and non-SSL content check box. FrontPage support. Microsoft FrontPage is a popular web site authoring tool. To enable users to publish and modify their sites through Microsoft FrontPage, select the FrontPage support and FrontPage over SSL support check boxes and set the FrontPage authoring option to allowed. Support for programming and scripting languages widely used in development of dynamic Web sites and server-side Web applications. Specify which of the following programming and scripting languages should be interpreted, executed or otherwise processed by the web server: Active Server Pages (ASP), Server Side Includes (SSI), PHP hypertext preprocessor (PHP), Common Gateway Interface (CGI), Fast Common Gateway Interface (FastCGI), Perl, Python, ColdFusion, and Miva scripting required for running Miva e-commerce solutions. Serving Your Customers 97 Web statistics. To allow domain/web site owner to view the information on the number of people visited his or her site and the pages of the site they viewed, select the statistical package you need from the Web statistics menu (AWStats is recommended), and select the accessible via password protected directory /plesk-stat/ check box. This will install the statistical software of your choice, which will generate reports and place them into the password-protected directory. The domain/web site owner will then be able to access Web statistics at the URL: https://your-domain.com/plesk-stat/webstat using his or her FTP account login and password. Custom error documents. When visitors coming to your site request pages that the web server cannot find, the web server generates and displays a standard HTML page with an error message. If you wish to create your own error pages and use them on your server or allow your customers to do that, select the Custom error documents check box. Shell access to server with FTP user's credentials. This allows a site owner to upload securely web content to the server through a Secure Socket Shell connection, however, allowing shell access also poses a potential threat to the server security, so we recommend that you do not allow shell access. Leave the Forbidden option selected. 5 Click OK to complete creation of a template. During setup of a hosting account for a new domain/web site, you will select the required template and the hosting account will be created and allocated the resources and hosting services you defined. To modify settings for a single domain or Web site: 1 Click the Domains shortcut in the navigation pane. 2 Click the domain name you need. 3 To allocate more disk space, bandwidth and other resources, click the Limits icon in the Domain group, adjust the settings as required, and click OK. 4 To add hosting features, such as support for programming languages and scripts, click the Setup icon in the Hosting group, adjust the settings as required and click OK. To modify settings for a number of domains or Web sites: 1 Click the Domains shortcut in the navigation pane. 2 Select the check boxes corresponding to the domain names you need. 3 Click the Group Operations icon located above the list of domains. 4 Modify the settings as required and click OK. To reflect the changes in your domain templates that will apply to the newly created accounts: 1 Click the Domains shortcut in the navigation pane. 2 Click the Domain Templates icon in the Tools group. 3 Click the template name corresponding to the domain template you wish to update. 4 Modify the settings as required and click OK. Note that modifying templates does not affect the existing domains and web sites. 98 Plesk 8.2 for Linux/Unix Administrator's Guide To remove a template that you no longer need: 1 Click the Domains shortcut in the navigation pane. 2 Click the Domain Templates icon in the Tools group. 3 Select a check box corresponding to the template you no longer need. 4 Click Remove Selected. Confirm removal and click OK. Prepackaging Applications Your Customers Can Use Plesk comes with a number of free and paid site applications that you can choose to provide to your customers or remove from the control panel script library (referred to as application vault). You can also distribute your custom applications. All free applications from the control panel's application vault are automatically added to the application pool of each customer you serve. However, paid applications can be added to the customer's pool only upon purchase. You can set usage rules for any site application in the vault. For example, you can make a certain free application a commercial one that will be available to your customers only if you add it to their application pools under your conditions (for instance, after you received payment). When you change a free site application into a commercial one, it is withdrawn from the application pools of all clients. Now only you can add this application to your clients' application pools when needed. When you change a commercial application into a free one, it becomes free of charge for all clients. Table. The applications shipped with Plesk application vault. Application name Description Link to application developer's site AdvancedPoll Poll management system. http://www.proxy2.de Serving Your Customers AnyInventory Inventory management program. http://anyinventory.sourceforge.n et/ AutoIndex Web site directory indexing system. http://autoindex.sourceforge.net b2evolution Blog. http://b2evolution.net bbclone Counter. http://www.bbclone.de Brim Personal online organizer. http://www.brim-project.org/ Coppermine Photogallery. http://coppermine.sourceforge.n et CSLH Customer support. http://www.proxy2.de Docbase Knowledge base management system. http://docbase.sourceforge.net/ Drupal Content management system and http://drupal.org/ blogging engine. eGroupWare Application for coordination of group activities. http://www.egroupware.org/ gallery Photo gallery. http://gallery.menalto.com geeklog Weblog. http://www.geeklog.net/ gtchat Chat. http://www.gtchat.de ilohamail Webmail program. http://ilohamail.org/ Joomla! Content management system and http://joomla.org/ Web application framework. Miva Merchant Online store. http://smallbusiness.miva.com/pr oducts/merchant/mm5/ Miva Fasttrack Online store. http://smallbusiness.miva.com/pr oducts/merchant/ft/ Mambo Content management system. http://www.mamboserver.com Mantis Issue tracking system. http://www.mantisbt.org/ MediaWiki Knowledgebase and content management system. http://www.mediawiki.org/wiki/M ediaWiki Moodle Program for creating online education sites. http://moodle.org/ 99 100 Plesk 8.2 for Linux/Unix Administrator's Guide MyOrgBook Online organizer. http://www.myorgbook.com Noah's Classifieds Classifieds system. http://classifieds.phpoutsourcing. com/ openbiblio Library. http://obiblio.sourceforge.net osCommerce E-commerce system. http://www.oscommerce.com Owl Knowledge base and documentation storage system. http://owl.sourceforge.net phpAdsNew (Openads) Banner rotation management and tracking system for gathering statistics. http://phpadsnew.com phpBB Forum. http://www.phpbb.com phpBook Guestbook. http://www.smartisoft.com phpBugTracker Bug tracking system. http://sourceforge.net/projects/p hpbt phpDig Search system. http://www.phpdig.net phpMyFamily Genealogic system. http://www.phpmyfamily.net phpMyVisites Web site statistics. http://www.phpmyvisites.us/ MyPhpMoney Personal finance management. http://myphppmoney.sourceforg e.net PHProjekt Application for coordination of group activities. http://www.phprojekt.com/ PHP Surveyor PHP Surveyor is a set of PHP http://phpsurveyor.sourceforge.n scripts that interact with MySQL to et develop surveys, publish surveys and collect responses to surveys. phpWebsite Content management system. http://sourceforge.net/projects/p hpwebsite/ phpWiki Documentation storage and retrieval system where anyone can edit published pages. http://phpwiki.sourceforge.net pLog Blog. http://www.plogworld.net pmachinefree Web publishing platform. http://pmachinepro.com/ PostNuke Content management system. http://www.postnuke.com Serving Your Customers PPWSE Plesk Professional Web Site http://www.swsoft.com/en/produ Editor is a content management cts/plesk75reloaded/addons/ppw system developed by SWsoft. It is se/ a predecessor of SWsoft SiteBuilder. Serendipity Content management system and http://www.s9y.org/ blogging. Sitebar Bookmark server. http://sourceforge.net/projects/sit ebar Siteframe Content management system. http://siteframe.org/ SMF Online forum. http://www.simplemachines.org/ Tellme Network services (whois, traceroute). http://kimihia.org.nz/projects/tell me/ TikiWiki Content management system. http://tikiwiki.org/ TUTOS Work process organization tool. Includes a calendar, address manager, bug tracking system, project task management, timetracking, etc. http://www.tutos.org/homepage/i ndex.html Typo 3 Content management system. http://typo3.org UebiMiau Web mail client. http://www.uebimiau.org/ WebCalendar Calendar and schedule management system. http://www.k5n.us/webcalendar. php WebShopManag The WebShopManager allows you http://webshopmanager.com/ er to manage a fully functional online store from a centralized webbased administration system. WordPress Publishing platform (blog). http://www.wordpress.org XOOPS Content management system. http://www.xoops.org/ XRMS Customer relations management. http://xrms.sourceforge.net To view the information on applications you have in the vault: 1 Click the Server shortcut in the navigation pane. 2 Click the Application Vault icon in the Services group. All applications stored in the vault are listed in the Site Application Packages group. 101 102 Plesk 8.2 for Linux/Unix Administrator's Guide The icon in the first left column indicates the type of the site application: - the free site application requiring no license key, included in the default installation of Plesk for free, automatically added to the application pool of each customer you serve. - the commercial site application requiring a license key, purchased from SWsoft additionally. - the commercial site application requiring a license key, purchased from SWsoft additionally, with no key installed at the moment. Note: if you wish to purchase and install a license key for a commercial application, such as Plesk Professional Web Site Editor, refer to the section Installing Additional License Keys for Plesk Add-ons (on page 23). The icon in the second column left to the site application name indicates the site application usage rules you defined: - free of charge, automatically added to the application pools of all clients; - commercial, can be added to a client application pool only by you under certain conditions. The Name column displays the name of the site application. The Version column displays site application version. The Release column shows the site application release number. The Instances column denotes how many times the application was deployed on a web site. The Clients column shows the number of users using the site application. The Description column gives a brief description for each site application. To add an application to the application vault: 1 2 3 4 Click the Server shortcut in the navigation pane. Click the Application Vault icon in the Services group. Click Add New Application Package. Click Browse and locate your application in an RPM package or shell installation script format, then click OK. The application is now installed to the application vault and you can add it to the customer's application pool, or install on a site you need (this will automatically add the application to the customer's pool). To remove an application from the application vault: 1 Click the Server shortcut in the navigation pane. 2 Click the Application Vault icon in the Services group. 3 Select a check box corresponding to the application you want to remove and click Remove Selected. 4 Confirm removal and click OK. The application package will be removed from the server application vault, however, the application instances installed on users' sites will not be deinstalled. Serving Your Customers 103 To make a certain free application a commercial one or vice versa: 1 Click the Server shortcut in the navigation pane. 2 Click the Application Vault icon in the Services group. 3 Click the icon in the second column left to the corresponding site application name. To add a commercial application to a customer's application pool: 1 2 3 4 5 Click the Server shortcut in the navigation pane. Click the Application Vault icon in the Services group. Click a hyperlinked number in the Clients column. Click Add New Client. Select the user you need and click OK. If you need to install an application on a site, refer to the Installing Applications (on page 137) section. Predefining Content for New Web Sites You can set your control panel to automatically include specific files and directories into Web spaces created for newly hosted Web sites. This can be a set of useful scripts, custom error messages, a placeholder index.html page, or any other files of your choice. These files can then be replaced, edited or removed on a per-site basis. To set up the control panel so as to automatically include your Web content into Web spaces: 1 On your local file system, create the required directories: httpdocs, httpsdocs, cgi-bin, anon_ftp, error_docs. 2 Place the files you need into the directories you have created: Place web pages into httpdocs and httpsdocs directories, scripts to cgi-bin directory, and custom error messages to error_docs directory. 3 Pack the directories and files into an archive file in tgz, tar, tar.gz, or zip format. Make sure that the directories are in the root of the archive file and not in a subdirectory. 4 5 6 7 Log in to your Plesk control panel. Select the Server shortcut in the navigation pane. Click the Skeleton icon in the Services group. Click the Browse button to locate the archive file on your local computer, select the file, and click the Send File button. 104 Plesk 8.2 for Linux/Unix Administrator's Guide To revert back to the original structure of web server directories and files: 1 Select the Server shortcut in the navigation pane. 2 Click the Skeleton icon in the Services group. 3 Click the Default button. 105 CHAPTER 7 Managing User Accounts Plesk users hierarchy is limited to three user levels: client accounts, domain administrator accounts, and e-mail user accounts. All these types of users can have access to control panel for managing their own web sites and e-mail accounts. For users who need to resell hosting services or host numerous domains/web sites, you should create client accounts. And then, your resellers can create domain administrator accounts for their own customers. A domain administrator's account can be created only after the user's site is hosted on the server. A domain administrator account is limited to having only one site, however, a domain administrator can provide other users with mail hosting services under his or her domain. For that purpose, e-mail user accounts are created and granted access to control panel. In this chapter: Adding User Accounts ....................................................................................... 106 Modifying User Accounts ................................................................................... 109 Suspending and Unsuspending User Accounts ................................................. 115 Removing User Accounts .................................................................................. 116 Serving Your Customers 106 Adding User Accounts This chapter focuses on client level accounts that you will create for your customers or resellers. If you need to create a domain administrator's account for your reseller's customer, assign permissions and allocate resources, see the Setting Up Hosting Account for a Web Site (on page 119) section. If you need to create an e-mail user account, see the Creating Mailboxes section. To accommodate a new customer or reseller: 1 Click the Clients shortcut in the navigation pane. 2 Click the Add New Client Account icon in the Tools group. 3 Specify the contact and billing information. Contact name, login name and password are mandatory fields. 4 If you have predefined user account templates, you can select the template you need from the Select template drop-down box. 5 Leave the Proceed to configuring client's IP pool check box selected because you should assign at least one IP address to th e user— otherwise the customer will not be able to host sites. Click OK. 6 Allocate IP addresses to the customer. Select the addresses you need from the Vacant IPs box and click Add >>. Keep in mind that ecommerce site hosting customers need dedicated (exclu sive) IP addresses: one dedicated IP address per one site. 7 Click OK. You are now taken to the client account management screen. This is the first screen with which your customer starts working when he or she is logged in to his or her control panel account. For this reason, this screen is referred to as Client Home page. To take a tour of the customer's control panel environment, you may want to log in to control panel under customer's credentials or you can read the Plesk Client's Guide to get more details. 8 Next, to provision your customer with resources, if you created the user account without using a template, click the Limits icon in the Tools group. 9 Specify the following items: Maximum number of domains. Specify the total number of domain names/web sites your customer will be able to host on the server. This includes web sites hosted on this server, and domain forwarders that point to web sites hosted on other servers. Domain aliases (additional domain names for a site hosted on this server) and subdomains are counted separately and are not limited by this resource type. Maximum number of subdomains. Specify the total number of subdomains that the customer will be able to host. Serving Your Customers 107 Maximum number of domain aliases. Specify the total number of additional alternative domain names that the customer will be able to use for his or her web sites. Disk space. Specify the total amount of disk space in megabytes that is allocated to the customer. It includes disk space occupied by all files related to user's domains/web sites: web site contents, databases, applications, mailboxes, log files and backup files. This is the so-called soft quota: when it is exceeded, the user account and domain names/web sites are not suspended automatically, only the appropriate notices are sent to your and your customer's e-mail addresses and the resource overage is indicated by the icon shown in your and your customer's control panels to the left of the user name (see the list of clients that opens when you click the Clients shortcut in the navigation pane) or domain name (see the list of domain names that opens when you click the Domains shortcut in the navigation pane). Maximum amount of traffic. Specify the amount of data in megabytes that can be transferred from the customer's web sites during a month. Once the limit is reached, the appropriate notices are sent to your and your customer's e-mail addresses and the resource overage is indicated by the corresponding icon shown in the control panel to the left of the user name (see the list of clients that opens when you click the Clients shortcut in the navigation pane) or domain name (see the list of domain names that opens when you click the Domains shortcut in the navigation pane). Maximum number of web users. Specify the total number of personal web pages that your customer can host for other users under his or her domains. This service is mostly used in educational institutions that host non-commercial personal pages of their students and staff. These pages usually have web addresses like http://your-domain.com/~username. See the Hosting Personal Web Pages (on page 153) section for details. Maximum number of databases. Specify the total number of databases that the customer can host on the server. Maximum number of mailboxes. Specify the total number of mailboxes that the customer can host on the server. Mailbox quota. Specify the amount of disk space in kilobytes that is allocated to each mailbox. Maximum number of mail redirects. Specify the total number of mail forwarders to a single recipient that the customer can set up. Maximum number of mail groups. Specify the total number of mail forwarders to multiple recipients that the customer can set up. Maximum number of mail autoresponders. Specify the total number of automatic responses that the customer can set up. Maximum number of mailing lists. Specify the total number of mailing lists that you customer can host on the server. To provide users with mailing lists, you should install the GNU Mailman software. Maximum number of Java applications. Specify the total number of Java applications or applets that can be hosted on the server. Serving Your Customers 108 Validity period. Specify the term for a hosting account. At the end of the term, all customer's domains/web sites will be suspended, its Web, FTP and mail services will no longer be accessible to the Internet users, and the reseller and his or her customers (domain owners) will not be able to log in to the control panel. Accounts cannot be automatically renewed, therefore, in order to bring the hosted domain names/web sites back to operation, you will need to manually renew the user account: Click the Clients shortcut in the navigation pane, click the client name you need, click the Limits icon, specify another term in the Validity period box, click OK, then click the Switch On icon in the Tools group (Clients > client name). 10 Click OK. 11 To specify the operations that the customer will be able to perform through his or her control panel, if you created this user account without using a predefined user account template, click the Permissions icon in the Tools group. 12 Grant the required permissions to the customer: Access to control panel. Specify whether the customer will be able to access the control panel for managing his or her account and sites. Domain creation. Specify whether the customer will be able to set up hosting accounts for new sites. Physical hosting management. Specify whether the customer will be able to set up hosting accounts, modify hosting account features and switch on or off support for programming and scripting languages. PHP safe mode management. Specify whether the customer will be able to switch the PHP safe mode off for his or her sites. By default, PHP is configured to operate in safe mode with functional restrictions. To learn more about PHP safe mode, refer to http://php.net/features.safe-mode. Some web applications may not work properly with safe mode enabled: If an application on a site fails due to safe mode, switch the safe mode off by clearing the PHP 'safe_mode' on check box in the hosting account properties (Domains > domain name > Setup icon in the Hosting group). Management of shell access to server. Specify whether the customer will be able to access the server shell through Secure Shell protocol and allow his or her own customers to do so. Hard disk quota assignment. Specify whether the customer will be able to assign hard quotas on disk space for his or her own web sites and for web sites of his or her customers. Subdomains management. Specify whether the customer will be able to set up additional sites under his or her domains and allow his or her customers to do so. Domain aliases management. Specify whether the customer will be able to set up additional alternative domain names for his or her web sites and allow his or her users to do so. Log rotation management. Specify whether the customer will be able to adjust the cleanup and recycling of processed log files for his or her sites. Serving Your Customers 109 Anonymous FTP management. Specify whether the customer will be able to have an FTP directory where all users could download and upload files without the need to enter login and password. A web site should reside on a dedicated IP address in order to use anonymous FTP service. Task scheduling. Specify whether the customer will be able to schedule tasks in the system. Scheduled tasks can be used for running scripts or utilities on schedule. Domain limits adjustment. Specify whether the customer will be able to change resource allotments (described at the step 9 of this procedure) for his or her own account. DNS zone management. Specify whether the customer will be able to manage the DNS zones of his or her domains. Java applications management. Specify whether the customer will be able to install Java applications and applets on web sites through the control panel. Mailing lists management. Specify whether the customer will be able to use mailing lists provided by the GNU Mailman software. Spam filter management. Specify whether the customer will be able to use spam filter provided by the SpamAssassin software. Antivirus management. Specify whether the customer will be able to use serverside antivirus protection for filtering incoming and outgoing mail. Allow backup/restore. Specify whether the customer will be able to use the control panel's facilities to back up and restore his or her sites. To allow storing backup files on the server, select the local repository check box, to allow the customer to use an arbitrary FTP server for storing backups, select the remote (FTP) repository check box. Ability to use remote XML interface. Specify whether the customer will be able to remotely manage his or her Web sites through custom applications. The XML interface can be used for developing custom applications integrated with Web sites, which could be used, for instance, for automating setup of hosting accounts and provisioning of services for customers purchasing hosting services from your reseller's site. To learn more about using Plesk control panel's XML interface (also referred to as Plesk API RPC), please visit http://download1.swsoft.com/Plesk/Plesk8.1/Doc/plesk-8.1-api-rpc/index.htm. User interface. Specify the type of user interface the customer will be able to use standard, desktop, or both. Desktop management. Specify whether the customer will be able to customize his or her desktop interface. 13 Click OK. You can now tell your customer the URL to control panel and login credentials. Modifying User Accounts To add or remove an IP address from a customer's IP pool: 1 Click the Clients shortcut in the navigation pane. 2 Click the client name you need. Serving Your Customers 110 3 Click IP pool. To allocate an IP address, click Add New IP Address, select the address or addresses (to select multiple IP addresses, press and hold the Control button on the keyboard and left-click the required addresses) in the Vacant IPs box and click OK. To revoke an IP address, select the respective check box and click Selected. Confirm removal and click OK. To assign an SSL certificate to an IP address, click the IP address you need, select the required certificate from the SSL Certificate drop-down box and click OK. To specify the web site that will open when users refer to the web resource on your server by an IP address (actual only for sites sharing the same IP address), click the number in the Hosting column, select the domain name you need, and click Set As Default. Remove To update contact information or change password for access to control panel: 1 Click the Clients shortcut in the navigation pane. 2 Click the client name you need. 3 Click the Edit icon in the Tools group. 4 Fill in the required information and click OK. To change user's FTP password: 1 2 3 4 Click the Click the Click the Type the boxes. 5 Click OK. Domains shortcut in the navigation pane. domain name you need. Setup icon in the Hosting group. new password into the New FTP password and Confirm password To modify permissions for operations a customer can perform through the control panel: 1 2 3 4 Click the Clients shortcut in the navigation pane. Click the client name you need. Click the Permissions icon in the Tools group. Specify the required permissions and click OK. To allocate more resources to the customer: 1 Click the Clients shortcut in the navigation pane. 2 Click the client name you need. 3 Click the Limits icon in the Tools group. Serving Your Customers 4 Specify the resource allotments and click OK. To change user's control panel interface language and skin: 1 Click the Clients shortcut in the navigation pane. 2 Click the client name you need. 3 Click the Preferences icon in the Tools group. 4 Specify the interface language, skin, interface customization templates and click OK. 111 Serving Your Customers 112 Modifying Accounts for Your Resellers' Customers (Domain Administrators) To allow your reseller's customer access the control panel: Click the Domains shortcut in the navigation pane. Click the domain name you need. Click the Domain Administrator icon in the Domain group. Select the Allow domain administrator's access check box, type the password for access to control panel (the domain administrator's login name is always his or her domain name), fill in the contact information and specify the operations the user will be able to perform through his control panel. 5 Click OK. 1 2 3 4 To update contact information or change password for access to control panel: 1 2 3 4 Click the Domains shortcut in the navigation pane. Click the domain name you need. Click the Domain Administrator icon in the Domain group. Fill in the required information and click OK. To change user's FTP password: 1 Click the Domains shortcut in the navigation pane. 2 Click the domain name you need. 3 Click the Setup icon in the Hosting group. 4 Type the new password into the New FTP password and Confirm password boxes. 5 Click OK. To modify permissions for operations the site owner can perform through the control panel: 1 2 3 4 Click the Domains shortcut in the navigation pane. Click the domain name you need. Click the Domain Administrator icon in the Domain group. Specify the required permissions and click OK. Serving Your Customers To allocate more resources to the site owner: 1 2 3 4 Click the Domains shortcut in the navigation pane. Click the domain name you need. Click the Limits icon in the Domain group. Specify the resource allotments and click OK. To change user's control panel interface language and skin: 1 Click the Domains shortcut in the navigation pane. 2 Click the domain name you need. 3 Click the Domain Administrator icon in the Domain group. 4 Specify the interface language, skin, interface customization templates and click OK. 113 Serving Your Customers 114 Introducing Similar Changes to Numerous Hosting Accounts To change hosting options for a number of hosting accounts at once: 1 Select the required hosting accounts. Click the Domains shortcut in the navigation pane and select the check boxes corresponding to the required domains, if you want to change several domain administrator accounts at once. or Click the Clients shortcut in the navigation pane and select the check boxes corresponding to the required clients, if you want to change several client accounts at once. 2 Click Group Operations. 3 In the Permissions section (available only when editing client accounts), you can see the list of all client permissions. To change the availability of certain actions for the clients, select an appropriate radio-button to Switch on, Switch off, or Do not change to leave it as is. 4 In the Limits section, you can see the list of all hosting account limits. To change a certain limit, select an appropriate drop-down box on the left side of the list. Adjust the settings as required: Select Unlimited to remove the corresponding limit. Select Value and type the numeric value to set the corresponding limit to the specified value. Select Increase (+), select the type of value (specific units or percentage) and type the numeric value to increase the corresponding limit by the specified value (in specific units or percents). Select Decrease (-), select the type of value (specific units or percentage) and type the numeric value to decrease the corresponding limit by the specified value (in specific units or percents). Leave the Do not change value selected, to leave it as is. 5 In the Hosting section (available only when editing domain administrator accounts), you can see the list of hosting parameters. To change a certain feature availability for the domains, select an appropriate option button: Switch on, Switch off, or Do not change to leave it as is. 6 In the Preferences section, you can see the list of hosting account preferences. To set a certain preferences setting for the clients or domains, select an appropriate option button: Switch on, Switch off, or Do not change to leave it as is. 7 In the Services section (available only when editing domain administrator accounts), you can define the various domain services availability. To do this, select an appropriate option button: Switch on, Switch off, or Do not change to leave it as is. 8 Click OK. Serving Your Customers 115 Suspending and Unsuspending User Accounts To suspend a user account and user's sites: 1 Go to Clients and click the client name you need. 2 Click Switch off in the Tools group. Access to control panel will be blocked for the user and his or her customers (site owners). User's domains/web sites will be suspended, their Web, FTP and mail services will no longer be accessible to the Internet users. To unsuspend a user account and user's sites: 1 Go to Clients and click the client name you need. 2 Click Switch On in the Tools group. To suspend a domain administrator account with domain/web site: 1 Go to Domains and click the client name you need. 2 Click Switch off. The domain/web site will be suspended, its Web, FTP and mail services will no longer be accessible to the Internet users, and domain owner will not be able to log in to the control panel. To unsuspend a domain administrator account with domain/web site: 1 Go to Domains and click the client name you need. 2 Click Switch On. Serving Your Customers 116 Removing User Accounts To remove a user account with user's Web sites: 1 Click the Clients shortcut in the navigation pane. 2 Select a check box corresponding to the user account you want to remove and click Remove Selected. 3 Confirm removal and click OK. The user account with all user's sites will be removed from the server. To remove a site owner's account from the server: 1 Click the Domains shortcut in the navigation pane. 2 Select the check box corresponding to the domain/Web site you wish to remove and click Remove Selected. 3 Confirm removal and click OK. The domain administrator account and all data related to the domain/web site will be removed from the server. Serving Your Customers 117 Hosting Web Sites Obtaining Domain Names Before you publish a site on the Internet, you must register your unique domain name with a domain name registration authority. A domain name is an easy-to-remember web site address. When you want to visit a web site, you enter a domain name (e.g. your-domain.com) or a Uniform Resource Locator (e.g. http://www.your-domain.com) into your browser's address bar. In order to show you the requested site, your browser first needs to find out the IP address corresponding to the requested domain name because machines address each other by IP addresses—domain names were devised for humans. So, the browser queries the name servers in the distributed Domain Name System, which translates the requested domain name to IP address and returns the IP address to the browser. Finally, the browser connects to the web server at the specified IP address and retrieves the web pages from there. Thus, to allow other users to find your site by its domain name, you must register your domain name with the Domain Name System. When choosing a domain name for your site, consider a word or combination of words that is relevant to your business, brand name, or topic of interest. A domain name should be easy to remember. If your domain name will comprise several words, you may want to separate these words with hyphens: this will help search engines distinguish between words, therefore, the users will be able to find your site faster. To increase the chances to find your site for your customers, you may also want to buy the non-hyphenated version of the same domain name, for example, yourdomain.com and redirect it to your original domain - your-domain.com. To protect your domain name, you may want to register it in different top level domains: your-domain.com, your-domain.net. For a domain name comprising a single word that users can misspell and type incorrectly, you may also want to purchase one or few misspelled versions of your domain name that you will point to your original site. To give you a real life example of how this can be: there is the Google search engine with a primary web site address www.google.com. Knowing that people sometimes swap two adjacent letters or type more letters than required, the three additional domain names pointing to the original site were set up: www.gogle.com, www.goolge.com, and www.gooogle.com. Once you have decided on the right domain name, you can register it with a domain name registration authority, or ask your service provider to do that for you. Registration cost varies among registrars (usually from 4 to 10 US dollars per year). It is possible to register and manage domain names through Plesk, if your service provider enabled this option. To register a domain name through Plesk, click Register on your Home page. You will be taken to MyPlesk.com website, where a simple step-by-step wizard will guide you through the registration procedure. Serving Your Customers To manage domain names through Plesk, click Manage on your Home page. You will be taken to MyPlesk.com website, where you can log in and manage your domain names. 118 Serving Your Customers 119 Setting Up Hosting Account for a Web Site To host a web site on the server: 1 2 3 4 Click the Clients shortcut in the navigation pane. Click the required client in the list. Click Add New Domain. Specify the domain name just as you have registered it. Leave the www check box selected if you wish to allow users to access the site by a common and habitual URL like www.your-domain.com. Having the www alias preceding a domain name will not cost you anything, but it will allow users to get to the site no matter what they type in their browsers: www.your-domain.com and your-domain.com will both point to the same site. 5 If you have previously created a domain template for this client and predefined all hosting features and resource usage allotments (as described in the chapter Simplifying Setup of Domains and Web Sites (on page 94)), select the required template from the Select template box. 6 If you have a number of IP addresses to choose from, select the required address from the Select an IP address drop-down box. Bear in mind that e-commerce sites need a dedicated IP address (not shared among other sites) to implement Secure Sockets Layer data encryption. 7 Make sure that there is a check mark in the Proceed to hosting setup check box and click OK. 8 Select the Physical hosting option to host the Web site on this machine. Upon completion of this procedure, your control panel will set up the domain name server on this machine to serve the new domain name and prepare the web server to serve the new Web site: a new zone file with appropriate resource records will be added to the Domain Name Server's configuration files, a web space will be created inside the Web server's directory, and necessary user accounts will be created on the server. Note: If the site is hosted on another machine, and you wish to set up your control panel's DNS server only to serve the DNS zone for that site, select either Frame forwarding or Standard forwarding option. With standard forwarding, a user is redirected to the site and the actual site's URL is shown in the user's browser, so the user always knows that he or she is redirected to another URL. With frame forwarding, a user is redirected to the site without knowing that the site actually resides at another location. For example: your customer has a free personal web site with his or her Internet Service Provider or a free Web host, and the Web site address is http://www.geocities.com/~myhomepage. The customer purchased a second level domain name www.myname.com and wants you to provide domain forwarding to his Web site. In this case you would normally choose the Frame forwarding service. See the chapter Serving Domain Names for Sites Hosted on Other Servers (Domain Forwarding) for details. 9 Specify the properties of a hosting account: Serving Your Customers 120 SSL support. Secure Sockets Layer encryption is generally used for protecting transfer of sensitive data during online transactions on e-commerce Web sites that run on dedicated IP addresses. SSL certificates that participate in the encryption process are usually applied to a single domain name on a single IP address, therefore, each site that needs SSL protection must be hosted on a dedicated IP address. An exception to this is subdomains, which you can protect with a wildcard certificate. Installing an SSL certificate on a Web server that hosts several web sites with different domain names on a single IP address (shared or name-based hosting) is technically possible, however, it is not recommended: the encryption will be provided, but users will get warning messages on attempt to connect to the secure site. To allow SSL encryption for Web sites, select the SSL support check box. Use a single directory for housing SSL and non-SSL content. By default, when users publish their sites through their FTP accounts, they need to upload the web content that should be accessible via secure connections to the httpsdocs directory, and the content that should be accessible via plain HTTP, to the httpdocs directory. For the convenience of publishing all content through a single location – httpdocs directory, select the Use a single directory for housing SSL and non-SSL content check box. FTP login and FTP password. Specify the user name and password that will be used for publishing the site to the server through FTP. Retype the password into the Confirm Password box. Hard disk quota. Specify the amount of disk space in megabytes allocated to the web space for this site. This is the so-called hard quota that will not allow writing more files to the web space when the limit is reached. At attempt to write files, users will get the "Out of disk space" error. Hard quotas should be enabled in the server's operating system, so if you see the "Hard disk quota is not supported" notice to the right of the Hard disk quota field, but would like to use the hard quotas, log in to the server shell and run the command quotaon -a. Shell access to server with FTP user's credentials. This allows a site owner to upload securely web content to the server through a Secure Socket Shell connection, however, allowing shell access also poses a potential threat to the server security, so we recommend that you do not allow shell access. Leave the Forbidden option selected. FrontPage support. Microsoft FrontPage is a popular web site authoring tool. To enable users to publish and modify their sites through Microsoft FrontPage, select the FrontPage support and FrontPage over SSL support check boxes, set the FrontPage authoring option to allowed, and specify the FrontPage Administrator's login and password. Serving Your Customers 121 Support for programming and scripting languages widely used in development of dynamic Web sites and server-side Web applications. Specify which of the following programming and scripting languages should be interpreted, executed or otherwise processed by the web server: Active Server Pages (ASP), Server Side Includes (SSI), PHP hypertext preprocessor (PHP), Common Gateway Interface (CGI), Fast Common Gateway Interface (FastCGI), Perl, Python, ColdFusion, and Miva scripting required for running Miva e-commerce solutions. By default, PHP is configured to operate in safe mode with functional restrictions. To learn more about PHP safe mode, refer to http://php.net/features.safe-mode http://php.net/features.safe-mode. Some web applications may not work properly with safe mode enabled: If an application on your site fails due to safe mode, switch the safe mode off by clearing the PHP 'safe_mode' on check box in the hosting account properties (Domains > domain name > Setup icon in the Hosting group). Web statistics. To allow domain/web site owner to view the information on the number of people visited his or her site and the pages of the site they viewed, select the statistics program you need from the Web statistics menu (AWStats is recommended), and select the accessible via password protected directory /plesk-stat/ check box. This will install the statistics software of your choice, which will generate reports and place them into the password protected directory. The domain/web site owner will then be able to access Web statistics at the URL: https://your-domain.com/plesk-stat/webstat using his or her FTP account login and password. Note: When you switch from one statistics program to another, all reports created by the previously used statistics program are deleted and new reports are created in accordance with the information read from log files kept on the server. This means that if you configured the system (at Domains > domain name > Log Manager > Log Rotation) so as to keep log files only for the last month, then Web statistics will be available only for the last month. Custom error documents. When visitors coming to a site request pages that the web server cannot find, the web server generates and displays a standard HTML page with an error message. If you wish to create your own error pages and use them on your web server or allow your customers to do that, select the Custom error documents check box. 10 Click OK. Now your server is ready to accommodate the new web site, and the site owner can publish the site to the server. For instructions on publishing a Web site, refer to the Publishing a Site (on page 127) section of this guide. Note: If you transferred this domain name from another Web host, you will need to update the host DNS address with the domain name registrar so as to point to your name servers: log in to your registrar's web site, locate the forms used to manage the domain host pointers, and replace the current DNS host settings with your name servers' host names. The information on new name servers will spread across the DNS system within 48 hours. If you have registered several domain names that you would like to point to a site hosted on this server, you should set up domain aliases. Refer to the Setting Up Additional Domain Names for a Site (Domain Aliases) section for details. Serving Your Customers 122 If you need to host several domains on your machine that will point to a site hosted on another server, you should set up domain forwarding. Refer to chapter Serving Domain Names for Sites Hosted on Other Servers (Domain Forwarding) for details. Serving Your Customers 123 Limiting the Amount of Resources a Site Can Consume By default, new web sites that you set up without the help of domain templates, are allowed to consume unlimited amounts of bandwidth (data transfer) and disk space. To limit the amount of resources this site can consume: 1 Click the Domains shortcut in the navigation pane. 2 Click the domain name you need. 3 Click the Limits icon. 4 Adjust the resource usage allotments as required: Maximum number of subdomains. Specify the number of subdomains that can be hosted under this domain. Maximum number of domain aliases. Specify the number of additional alternative domain names that the site owner will be able to use for his or her web site. Disk space. Specify the total amount of disk space allocated to a hosting account associated with the domain. This amount is measured in megabytes. It includes disk space occupied by all files related to this domain/web site: web site contents, databases, applications, mailboxes, log files and backup files. This is the so-called soft quota: when it is exceeded, domain names and web sites are not suspended automatically, only the appropriate notices are sent to your and site owner's e-mail addresses and the resource overage is indicated by a corresponding icon shown in the control panel to the left of the domain name (see the list of domain names that opens when you click the Domains shortcut in the navigation pane). And then it is up to you to decide what to do with the web site: a you can notify the domain owner and suspend the domain/web site after a grace period until you receive the payment (not so good for your business, but if you are going to follow that way, see the Suspending and Unsuspending Hosting Accounts and Web Sites section), OR b upgrade the account for your customer (see the instructions on upgrading accounts in the Modifying User Accounts (on page 109) section). Maximum amount of traffic. Specify the amount of data in megabytes that can be transferred from the web site during a month. Once the limit is reached, the appropriate notices are sent to your and site owner's e-mail addresses and the resource overage is indicated by a corresponding icon shown in the control panel to the left of the domain name (see the list of domain names that opens when you click the Domains shortcut in the navigation pane). When a web site starts attracting more visitors and requires more bandwidth, consider upgrading an account (see the instructions on upgrading accounts in the Modifying User Accounts (on page 109) section). Serving Your Customers 124 Maximum number of web users. Specify the number of personal web pages that the domain owner can host for other users under his or her domain. This service is mostly used in educational institutions that host non-commercial personal pages of their students and staff. These pages usually have web addresses like http://your-domain.com/~username. If you wish to allow execution of scripts embedded in personal web pages, select the Allow the web users scripting check box. See the Hosting Personal Web Pages (on page 153) section for details. Maximum number of databases. Specify the number of databases that can be hosted in a domain. Maximum number of mailboxes. Specify the number of mailboxes that can be hosted in a domain. Mailbox quota. Specify the amount of disk space in kilobytes that is allocated to each mailbox in a domain. Maximum number of mail forwarders. Specify the number of mail forwarders that can be used in a domain. Maximum number of mail autoresponders. Specify the number of automatic responses that can be set up in a domain. Maximum number of mailing lists. Specify the number of mailing lists that the domain owner can run in a domain. The mailing lists are served by the GNU Mailman software, therefore the GNU Mailman should be installed and configured before your customers can use it. Maximum number of Java applications. Specify the maximum number of Java applications or applets that the domain owner can install in a domain. Validity period. Specify the term for a hosting account. At the end of the term, the domain/web site will be suspended, its Web, FTP and mail services will no longer be accessible to the Internet users, and domain owner will not be able to log in to the control panel. Hosting accounts cannot be automatically renewed, therefore, in order to bring the hosted domain name/web site back to operation, you will need to manually renew the hosting account: click Domains shortcut in the navigation pane, click the domain name your need, click the Limits icon, specify another term in the Validity period box, click OK, then click the Switch On icon in the Domain group (Domains > domain name). 5 Click OK. Serving Your Customers 125 Allowing the Site Owner to Log in to Control Panel To allow the site owner to log in to control panel for managing his or her web site: 1 2 3 4 Click the Domains shortcut in the navigation pane. Click the required domain name in the list. Click the Domain Administrator icon in the Domain group. Select the Allow domain administrator's access check box. 5 Type the password for access to the site owner's control panel. For security reasons, the password should be more than 8 symbols, and it should comprise a combination of letters, numbers, and punctuation; dictionary words and proper names should be avoided. 6 Specify the settings related to the appearance of user's control panel, if desired: interface language, theme (skin), the limit on number of characters that can appear on custom buttons placed into the control panel by the site owner. 7 Leave the Allow multiple sessions check box selected to allow the site owner to have several simultaneous sessions in the control panel. 8 Leave the Prevent users from working with the control panel until interface screens are completely loaded check box selected. This will forbid users from submitting data or performing operations until the control panel is ready to accept them. 9 Specify the operations that the site owner will be able to perform in his or her control panel: Physical hosting management. Allow or disallow full control of the hosting account and Web space. FTP password management. Allow or disallow the user to change his or her FTP account password. Management of shell access to the server. It is recommended that you leave the Client cannot allow or disallow shell access option selected. Hard disk quota assignment. Allow or disallow the site owner to adjust the hard quota on disk space allocated to his or her web space. Subdomains management. Allow or disallow the site owner to set up, modify and remove subdomains. Domain aliases management. Allow or disallow the site owner to set up additional alternative domain names for his or her web site. Log rotation management. Allow or disallow the site owner to adjust the cleanup and recycling of processed log files. Anonymous FTP management. Allow or disallow the site owner to have an FTP directory where all users could upload and download files without the need to enter login and password. A Web site should reside on a dedicated IP address in order to use anonymous FTP. Task scheduling. Allow or disallow the site owner to schedule tasks in the system. Scheduled tasks can be used for running scripts or utilities on schedule. Serving Your Customers 126 DNS zone management. Allow or disallow the site owner to manage the DNS zone of his or her domain. This is recommended only for experienced users. Java applications management. Allow or disallow the site owner to install Java applications and applets on the web site. Mailing lists management. Allow or disallow the site owner to use mailing lists provided by the GNU Mailman software. Spam filter management. Allow or disallow the site owner to use spam filter provided by the SpamAssassin software. Antivirus management. Allow or disallow the site owner to use server-side antivirus protection for filtering incoming and outgoing mail. Allow backup/restore. Specify whether the site owner will be able to use the control panel's facilities to back up and restore his or her site. To allow storing backup files on the server, select the local repository check box. To allow the site owner to use an arbitrary FTP server for storing backups, select the remote (FTP) repository check box. User interface. Shows what type of Plesk control panel interface the site owner can use - standard, desktop, or both. Desktop management. Shows whether the site owner can customize and manage their desktop interface. 10 Specify the site owner's contact information. 11 Click OK. Now you can tell your customer the control panel's URL, login and password. The URL is https://<user's_domain_name>:8443, where <user's_domain_name> is the domain name without the www alias. The login name that the site owner should specify in order to log in to the control panel is his or her domain name, for example, your-domain.com. Serving Your Customers 127 Publishing a Site Publishing your site means uploading web pages, scripts and graphic files that compose your site to your web space in any of the following ways: Through FTP connection Through Plesk File Manager Through Secure Shell connection (only for users of Linux and FreeBSD operating systems) Through Microsoft FrontPage software (only for users of Microsoft Windows operating systems) FTP is one of the most common and easiest ways to upload files. Uploading Sites Through FTP 1 Connect to the server with an FTP client program, using FTP account credentials that you specified during setup of hosting account or obtained from your provider. Enable the passive mode if you are behind a firewall. 2 Upload files and directories that should be accessible through HTTP protocol to the httpdocs directory, and files/directories that should be transferred securely over SSL protocol to the httpsdocs directory. 3 Place your CGI scripts into the cgi-bin directory. 4 Close your FTP session. Serving Your Customers 128 Uploading Sites Through Plesk File Manager To upload files through Plesk File Manager: 1 2 3 4 Log in to Click the Click the Click the Plesk control panel. Domains shortcut in the navigation pane. required domain name in the list. File Manager icon in the Hosting group. 5 Create and upload files and directories. Place the files and directories that should be accessible via HTTP protocol to the httpdocs directory, and files/directories that should be transferred securely over SSL protocol to the httpsdocs directory. Place your CGI scripts into the cgi-bin directory. Add New To create a new directory within your current location, click the Directory button. To create new files in the required directory, click Add New File, in the File creation section specify the file name, select the Use html template check box, if you want file manager to insert some basic html tags to the new file, and click OK. A page will open allowing you to enter the content or html-formatted source of a new file. After you are done, click OK. To upload a file from the local machine, click Add New File, specify the path to its location in the File source box (or use the Browse button to locate the file), and click OK. When you upload web content through File Manager or FTP, your control panel automatically sets the appropriate access permissions for files and directories. The permissions are represented as three sets of symbols, for example, 'rwx rwx r--'. The first set tells what the owner of the file or directory can do with it; the second tells what the user group, the file or directory belongs to, can do with the file or directory; the third set indicates what other users (the rest of the world, i.e. Internet users visiting a site) can do with the file or directory. R means the permission to read the file or directory, W means the permission to write to the file or directory, and X means the permission to execute the file or look inside the directory. To modify permissions for a file or directory, in the Permissions column, click the respective hyperlink representing the set of permissions. Modify the permissions as desired and click OK. To edit the source code of a file, click . To edit the Web page in the built-in visual editor (available only to users of Microsoft Internet Explorer), click . When editing an HTML file, Plesk opens internal WYSIWYG editor by default. If you want to edit the source code of the HTML file, click Html. To return back to WYSIWYG mode, click Design. To view the file, click . To rename a file or directory, click . Type in a new name and click OK. Serving Your Customers 129 To copy or move a file or directory to another location, select the required file or directory using the appropriate check box, and click Copy/Move. Specify the destination for the file or directory to be copied or renamed to, then click Copy to copy, or Move to move it. To update the file or directory creation date, click updated with the current local time. Touch. The time stamp will be To remove a file or directory, select the corresponding check box, and click Selected. Confirm removal and click OK. Remove Uploading Sites Through SSH Connection If your are using a Linux or FreeBSD operating system on your local computer and have access to server shell, use the ‗scp‘ command to copy files and directories to the server: scp your_file_name [email protected]:path to copy files, and scp –r your_directory_name [email protected]:path to copy entire directories. After publishing, you will be able to work with files and directories on your account using SSH terminal web application integrated in your Plesk control panel (Domains > domain name > SSH Terminal). Publishing Sites with Microsoft FrontPage Microsoft FrontPage deals with two kinds of Web sites: disk-based and server-based. In short, a disk-based site is a FrontPage Web site you create on your local hard disk and then later publish to a Web server. A server-based site is one you create and work with directly on a Web server, without the extra step of publishing. This section provides you with instructions on publishing only disk-based web sites. You can publish disk-based web sites either through FTP or HTTP. If your server is running FrontPage Server Extensions, you would publish your site to an HTTP location. For example: http://your-domain.com/MyWebSite. If your server supports FTP, you would publish to an FTP location. For example: ftp://ftp.your-domain.com/myFolder. After publishing, you can manage your site through FrontPage Server Extensions. To access FrontPage Server Extensions management interface: 1 2 3 4 Log in to Plesk. Click the Domains shortcut in the navigation pane. Click the required domain name in the list. To manage a site, which is not protected by SSL, click FP Webadmin. To manage an SSL-enabled site, click FP-SSL Webadmin. 5 Type your FrontPage administrator‘s login name and password, and click OK. For instructions on using FrontPage server extensions, see online help (FP Webadmin > Help) or visit Microsoft web site. Serving Your Customers 130 Publishing from Microsoft FrontPage through FTP To publish files through FTP: 1 Open your FrontPage program. 2 Open a FrontPage Web site: open File menu and select the Open Site item. 3 Go to Remote Web site view: click the Web Site tab, and then the Remote Web Site button at the bottom of the window. 4 Set up your Remote Web Site Properties: Click the Remote Web Site Properties button in the upper-right corner of the window. Select FTP as the remote Web server. In the Remote Web site location box, type your host name (e.g., ftp://ftp.yourdomain.com) In the FTP directory box, type your FTP directory if your hosting company provided one. Leave it blank if they did not specify one. Select the Use Passive FTP check box if your computer or network is protected by a firewall. 5 Click OK to connect to the remote site. The Remote Web site view will show files that you have in your local and remote sites. 6 Click the Publish Web site button in the lower-right corner of the window. Serving Your Customers 131 Publishing from Microsoft FrontPage through HTTP To publish files through HTTP on a server that supports FrontPage Server Extensions: 1 Open your FrontPage program. 2 Open a FrontPage Web site: open File menu and select the Open Site item. 3 Go to Remote Web site view: click the Web Site tab, and then the Remote Web Site button at the bottom of the window. 4 Click the Remote Web Site Properties button in the upper-right corner of the window. 5 On the Remote Web Site tab, under Remote Web server type, click FrontPage or SharePoint Services. 6 In the Remote Web site location box, type the Internet address, including the protocol, of the remote Web site that you want to publish folders and files to — for example, http://www.your-domain.com — or click Browse to locate the site. 7 Do any of the following: To use Secure Sockets Layer (SSL) for establishing a secure communications channel to prevent the interception of critical information, click Encryption connection required (SSL). To use SSL connections on your Web server, the server must be configured with a security certificate from a recognized certificate authority. If the server does not support SSL, clear this check box. Otherwise, you will not be able to publish folders and files to the remote Web site. To remove specific types of code from Web pages as they are being published, on the Optimize HTML tab, select the options you want. To change the default options for publishing, on the Publishing tab, select the options you want. 8 Click OK to connect to the remote site. The Remote Web site view will show files that you have in your local and remote sites. 9 Click the Publish Web site button in the lower-right corner of the window. Serving Your Customers 132 Publishing Sites with Adobe Dreamweaver Before publishing a site from Dreamweaver, you need to define the site properties, that is, you need to tell Dreamweaver where your site files are located on your computer, and to specify the server to which you want to publish the site. To define a site in Dreamweaver: 1 From the Site menu, choose New Site. The Site Definition screen opens. 2 Click the Advanced tab. 3 In the Local Info category, specify the following: Site name. This will show in Web browser‘s title bar. Local root folder. This is the folder on your computer where all of your site files are stored. For example c:\My Site Default images folder. Specify the folder where your site‘s graphic files are stored. For example c:\My Site\images HTTP address. Specify your domain name. For example, http://yourdomain.com 4 From the Category menu, select the Remote Info item. 5 From the Access menu, select the FTP option. Most likely, your server supports publishing through FTP (File Transfer Protocol, commonly used for transferring files over the Internet). 6 Specify the following settings: FTP host. Type your FTP host name without the ftp:// prefix. For example, your-domain.com. Host directory. Specify the directory on the server where your site will reside. In most cases, this is httpdocs. Login and password. Specify the login name and password for access to the FTP account. Use passive FTP. Select this option only if your computer is behind a firewall. 7 To ensure that you specified the correct login and password, and that Dreamweaver can connect to the server, click the Test button. 8 To save the settings, click OK. To publish your site: 1 Open your site in Dreamweaver. 2 From the Site menu, select the Put option (or press Ctrl+Shift+U simultaneously). Serving Your Customers 133 Previewing a Site Once you published a site on the server, you may want to make sure that it functions properly in the actual hosting environment. You can preview the site through your favorite web browser, even if the information on the domain name has not yet propagated in the Domain Name System. Note that Macromedia Flash and CGI scripts will not work during preview. To preview a site: 1 Click the Domains shortcut in the navigation pane. 2 Click the required domain name in the list. 3 Click Site Preview in the Hosting group. Serving Your Customers 134 Deploying Databases If your web server incorporates data processing applications or is designed to generate web pages dynamically, you will likely need a database for storing and retrieving data. You can either create a new database for a site or import the data from your previously backed up MySQL or PostgreSQL database. Creating or Importing a Database To create a new database on a hosting account: 1 2 3 4 Click Click Click Click the Domains shortcut in the navigation pane. the required domain name in the list. Databases. Add New Database. 5 Enter a name for the database. We recommend that you choose a name that starts with a Latin alphabet symbol and comprises only alphanumeric and underscore symbols (up to 64 symbols). 6 Select the database type that you are going to use: MySQL or PostgreSQL. Click OK. 7 To set up database administrator‘s credentials, click Add New Database User. 8 Type a user name and a password that will be used for accessing the contents of the database. 9 Click OK. To import an existing database: Click the Domains shortcut in the navigation pane. Click the required domain name in the list. Click Databases. Click Add New Database. Enter a name for the database. We recommend that you choose a name that starts with a Latin alphabet symbol and comprises only alphanumeric and underscore symbols (up to 64 symbols). 6 Select the database type that you are going to use: MySQL or PostgreSQL. Click OK. 7 To set up database administrator‘s credentials, click Add New Database User. 1 2 3 4 5 8 Type a user name and a password that will be used for accessing the contents of the database. Click OK. Serving Your Customers 135 9 Click the DB WebAdmin icon in the Tools group. An interface to phpMyAdmin (or phpPgAdmin) database management tool will ope n in a separate browser window. 10 Click on the Query window icon in the left frame. 11 Click the Import files tab. 12 Select the text file that contains the data and click Go. 13 Click the Insert data from a text file link. To manage your databases and their contents, use your favorite MySQL or PostgreSQL client or the web based database management tool accessible from Plesk control panel (Domains > domain name > Databases > Database name > DB WebAdmin). Creating Database User Accounts If you collaborate with other people on managing a web site and wish to give them access to the database, you should create separate user accounts for them. To create a database user account: 1 Go to Domains > domain name > Databases > database name and click Add New Database User. 2 Type a user name and a password that will be used for accessing the contents of the database. Click OK. Changing Database User Passwords To change password for a database user: 1 Go to Domains > domain name > Databases > database name > database user name. 2 Type a new password and click OK. Serving Your Customers 136 Removing Database User Accounts To remove a database user account: 1 2 3 4 5 Click the Domains shortcut in the navigation pane. Click the required domain name in the list. Click Databases in the Services group. Click the required database name. A list of database users will open. Select a check box corresponding to the user account that you wish to remove. 6 Click Remove Selected. Next, confirm removing and click OK. Removing Databases To remove a database with its contents: 1 Click the Domains shortcut in the navigation pane. 2 Click the required domain name in the list. 3 Click Databases in the Services group. 4 Select a check box corresponding to the database that you wish to remove. If the required check box appears grayed out, this means that this database is used by a site application and you can remove it only by uninstalling the respective application. 5 Click Remove Selected. 6 Confirm removal and click OK. Serving Your Customers 137 Installing Applications To enhance a web site with valuable features, such as guest books, forums, hit counters, photo galleries, and e-commerce solutions, you can install the respective applications from Plesk web application library (Domains > domain name > Web Applications). To install an application on your site: 1 Go to Domains > domain name > Web Applications and click Install New Application. A list of site applications available for installation will be displayed. 2 Select the required web application in the list, then select the domain you want this application to be installed to in the Target domain menu. To view help on a certain site application, click . The help page containing the general information on this site application will open in a separate browser window. 3 Click Install. Some applications will display a license agreement. Read the license agreement carefully, and if you agree with it, select the I agree check box and click Next >>. 4 Specify whether you wish to create a hyperlink to the application and place it in the control panel. 5 Specify the installation preferences and other information that may be required by the application (the requirements may vary among applications). When finished, click Install. After the application was installed, you can insert a link to this application into the web pages of your site, for example, on your home page. Otherwise, you and your users will have to access this application by typing its URL, which can be too long to remember. To access the web interface of an application, do any of the following: Type the URL in your browser. For example: http://your-domain.com/forum/. Go to Domains > domain name > Web Applications and click application you need. If you chose to add a hyperlink button to your Plesk control panel during installation of an application, then click the respective button on the domain administration screen (Domains > domain name) or navigation pane. corresponding to the To reconfigure an application or change the application administrator’s password: Go to Domains > domain name > Web Applications and click application you wish to reconfigure. corresponding to the To uninstall an application: 1 Go to Domains > domain name > Web Applications, and select a check box corresponding to the application that you no longer need. 2 Click Remove Selected, confirm the removal and click OK. The application will be uninstalled and its databases removed from the server. Serving Your Customers 138 If you want a certain Web-application to be started when someone tries to enter a domain, it can be done by creating a default domain application. To set an application as default for a domain: 1 Go to Domains > domain name > Web Applications. 2 Select a check box corresponding to Web Application you want to set as default and click Default. Click OK to confirm. Now, when a user enters an URL in the address field of his browser (for example, http://example.com), he is taken to the default Web-application. Installing Java Web Applications You can install Java Web application packages in the Web archive format (WAR). These Java applications are not distributed with Plesk, therefore you should obtain them separately. To install a Java Web application: 1 Go to Domains > domain name > Web Applications > Java Applications tab and click Switch On. This will start the Tomcat service, which provides an environment for Java code to run in cooperation with a web server. 2 Click Install New Application. 3 Specify the path to an application package you wish to install (this can be an application package in WAR format saved on your computer‘s hard drive), or click Browse to navigate to it, then click OK. Now the application is installed and the respective entry is added to the list of installed Java applications (Domains > domain name > Web Applications > Java Applications). To access the web interface of a Java Web application, do any of the following: Go to Domains > domain name > Web Applications > Java Applications tab, and click a respective hyperlink in the Path column. Type the URL in your browser. For example: http://yourdomain.com:9080/storefront/. To stop, start or restart a Java Web application: 1 Go to Domains > domain name > Web Applications > Java Applications tab. A list of installed applications will open. 2 Locate an application on the list, and use the icons in the right part of the list to perform the required operations: To start an application, click the icon . To stop an application, click the icon . To restart an application, click the icon . Serving Your Customers 139 To uninstall a Java Web application: 1 Go to Domains > domain name > Web Applications > Java Applications tab. 2 Select a check box corresponding to the application that you no longer need. Click Remove Selected, confirm the removal and click OK. The application will be uninstalled and its databases removed from the server. Installing Ruby Web Applications You can install on your site custom Web applications developed in the Ruby programming language. To install on your site an application written in Ruby: 1 Go to Domains > Domain name > Setup. 2 Select the CGI and FastCGI check boxes, and click OK. 3 Connect to your FTP account, change to the /htdocs directory, and create a subdirectory where the application files will reside. Let's call this directory your_application, for illustration purposes. 4 Upload the application files to the htdocs/your_application directory. 5 Create a file with name .htaccess in this directory, open it with a text editor of your choice and add the following lines into the file : RewriteEngine On RewriteRule ^$ /public/index.html [L] RewriteCond %{REQUEST_URI} !^/your_application/public RewriteRule ^(.*)$ /public/$1 [L] RewriteCond %{REQUEST_FILENAME} !-f RewriteRule ^(.*)$ public/dispatch.fcgi/$1 [QSA,L] 6 Save the file. 7 Remove the file your_application/public/.htaccess 8 Open the file your_application/public/dispatch.fcgi with a text editor and put the following lines there: #!/usr/bin/ruby 9 Save the file. Now the web application will be accessible at the following URL: http://yourdomain.com/your_application. Serving Your Customers 140 Securing E-commerce Transactions with Secure Sockets Layer Encryption If your clients are running an e-commerce business, they need to secure transactions between their customers and their site. To prevent the valuable data, such as credit card numbers and other personally identifiable information from being stolen, you should use the Secure Sockets Layer protocol, which encrypts all data and transfers them securely over the SSL connection. And even if someone intercepts the data for malicious intent, they will not be able to decrypt and use them. To implement the Secure Sockets Layer protocol on your web server, you should purchase an SSL certificate from a reputable certificate vendor (these vendors are called Certificate Authorities), and then install this certificate on your site. To enable SSL protection, you must host your site on a dedicated IP address, which is not shared among other web sites. There are numerous certificate authorities to choose from. When considering one, pay attention to reputation and credibility of the CA. Knowing how long they have been in business and how many customers they have will help you make the right choice. Your Plesk control panel provides facilities for purchasing SSL certificates from GeoTrust, Inc. Serving Your Customers 141 Obtaining and Installing SSL Certificates from GeoTrust, Inc. To purchase an SSL certificate through MyPleskCom online store and secure a site: 1 Click the Domains shortcut in the navigation pane. 2 Click the required domain name in the list. 3 Click Certificates in the Services group. A list of SSL certificates that you have in your repository will be displayed. 4 Click Add New Certificate. 5 Specify the certificate properties: Certificate name. This will help you identify this certificate in the repository. Encryption level. Choose the encryption level of your SSL certificate. We recommend that you choose a value more than 1024 bit. Specify your location and organization name. The values you enter should not exceed the length of 64 symbols. Specify the domain name for which you wish to purchase an SSL certificate. This should be a fully qualified domain name. Example: www.your-domain.com. Enter the domain administrator's e-mail address. 6 Make sure that all the provided information is correct and accurate, as it will be used to generate your private key. 7 Click Buy Cert. Your private key and certificate signing request will be generated — do not delete them. MyPlesk.com login page will open in a new browser window. 8 Register or login to an existing MyPlesk.com account and you will be taken step by step through the certificate purchase procedure. 9 Choose the type of certificate that you wish to purchase. 10 Click Proceed to Buy and order the certificate. In the Approver E-Mail dropdown box, please select the correct Approver e -mail. 11 The approver e-mail is an e-mail address that can confirm that certificate for specific domain name was requested by an authorized person. 12 Once your certificate request is processed, GeoTrust, Inc. will send you a confirmation e-mail. After they receive the confirmation from you, they will send the certificate to your e-mail. 13 When you receive your SSL certificate, save it on your local machine or network. 14 Return to the SSL Certificates repository (Domains > domain name > Certificates). 15 Click Browse in the middle of the page and navigate to the location of the saved certificate. Select it, and then click Send File. This will upload and install the certificate against the corresponding private key. 16 Return to the domain's administration screen (Domains > domain name) and click Setup in the Hosting group. Serving Your Customers 142 17 Select the SSL certificate that you wish to install from the Certificate drop-down box. If there is no Certificate drop-down box on the screen, this means that you are on a shared hosting account; therefore, you need to upgrade your hosting package and purchase a dedicated IP address from your hosting provider. 18 Select the SSL support check box and click OK. Serving Your Customers 143 Obtaining and Installing SSL Certificates from Other Certification Authorities To secure a site with an SSL certificate from other certificate authorities: 1 Click the Domains shortcut in the navigation pane. 2 Click the required domain name in the list. 3 Click Certificates in the Services group. A list of SSL certificates that you have in your repository will be displayed. 4 Click Add New Certificate. 5 Specify the certificate properties: Certificate name. This will help you identify this certificate in the repository. Encryption level. Choose the encryption level of your SSL certificate. We recommend that you choose a value more than 1024 bit. Specify your location and organization name. The values you enter should not exceed the length of 64 symbols. Specify the domain name for which you wish to purchase an SSL certificate. This should be a fully qualified domain name. Example: www.your-domain.com. Enter the domain administrator's e-mail address. 6 Make sure that all the provided information is correct and accurate, as it will be used to generate your private key. 7 Click Request. Your private key and certificate signing request will be generated and stored in the repository. 8 Download the certificate signing request (CSR) file and save it on your machine. To do this, click the respective icon. 9 Once downloaded, open the file in a text editor, copy the text enclosed in lines -----BEGIN CERTIFICATE REQUEST----- and ----END CERTIFICATE REQUEST----- to the clipboard. 10 Using your favorite mail client software, create a new e -mail message and paste the text from the clipboard. Send this message to the Certification Authority that will create an SSL certificate in accordance with the information you supplied. 11 When you receive your SSL certificate, save it on your local machine or network. 12 Return to the SSL Certificates repository (Domains > domain name > Certificates). 13 Click Browse in the middle of the page and navigate to the location of the saved certificate. Select it, and then click Send File. This will upload and install the certificate against the corresponding private key. 14 Return to the domain's administration screen (Domains > domain name) and click Setup in the Hosting group. 15 Select the SSL certificate that you wish to install from the Certificate drop-down box. Serving Your Customers 144 If there is no Certificate drop-down box on the screen, this means that you are on a shared hosting account; therefore, you need to upgrade your hosting package and purchase a dedicated IP address from your provider. 16 Select the SSL support check box and click OK. Creating and Installing Free Self-signed SSL Certificate If you do not feel like paying money for SSL certificates, but still need to secure a site, you can create a self-signed certificate and install it on your web server. This will provide data encryption; however, your customers‘ browsers will show warning messages telling that your certificate is not issued by a recognized authority. Thus, using self-signed certificates is not recommended as it will not instill confidence in customers, and is likely to adversely affect the online sales of your client. To secure a site with a self-signed SSL certificate: 1 Go to Domains > domain name > Certificates and click Add New Certificate. 2 Specify the certificate properties: Certificate name. This will help you identify this certificate in the repository. Encryption level. Choose the encryption level of your SSL certificate. We recommend that you choose a value more than 1024 bit. Specify your location and organization name. The values you enter should not exceed the length of 64 symbols. Specify the domain name for which you wish to generate an SSL certificate. For example: www.your-domain.com. Enter the domain owner's e-mail address. 1. Click Self-Signed. Your certificate will be generated and stored in the repository. 3 Return to the domain's administration screen (Domain > domain name) and click Setup in the Hosting group. 4 Select the self-signed SSL certificate from the Certificate drop-down box. If there is no Certificate drop-down box on the screen, this means that you are on a shared hosting account; therefore, you need to upgrade your hosting package and purchase a dedicated IP address from your hosting provider. 5 Select the SSL support check box and click OK. Serving Your Customers 145 Uninstalling a Certificate from Your Site To uninstall a certificate from your site and disable SSL protection: 1 Make sure that the certificate you want to remove is not used at the moment. 2 Go to Domains > domain name > Setup. The Certificate drop-down box indicates which SSL certificate is currently used. 3 If the certificate that you want to remove is currently in use, you should first release it: in the Certificate drop-down box, select another certificate and click OK. 4 Remove the certificate from repository. 5 To permanently remove the certificate from repository, go to Domains > domain name > Certificates , select a check box corresponding to the certificate that you no longer need and click Remove Selected. Confirm removal and click OK. 6 Disable SSL support if you no longer need it. 7 Go to Domains > domain name > Setup. 8 Clear the SSL support check box and click OK. Restricting Access to Web Site's Resources with Password Protection If you have directories in a site that only authorized users should see, restrict access to these directories with password protection. Serving Your Customers 146 Protecting a Resource To password protect a directory in your site and to specify authorized users: 1 2 3 4 Click Click Click Click the Domains shortcut in the navigation pane. the required domain name in the list. the Directories icon in the Hosting group. Add New Directory. 5 Specify the path to the directory that you wish to password protect. This can be any directory existing in the site, for example: /private. If the directory that you would like to protect has not yet been created, specify the path and the directory name – Plesk will create it for you. 6 Specify in what location (also called document root) your password protected directory resides or will reside. For example: To protect the httpdocs/private directory, type '/private' in the Directory name box and select the Non-SSL check box. To protect the httpsdocs/private directory, type '/private' in the Directory name box and select the SSL check box. To protect your CGI scripts stored in the cgi-bin directory, leave '/' in the Directory name box and select the cgi-bin check box. Make sure there are no white spaces after the slash symbol; otherwise, a protected directory will be created with the name consisting of white spaces. 7 In the Header Text box, type a resource description or a welcoming message that your users will see when they visit the protected area. 8 Click OK. The directory you specified will be protected. 9 To add authorized users, click Add New User. 10 Specify the login name and password that will be used for accessing the protected area. The password should be from 5 to 14 symbols in length. Click OK. 11 To add more authorized users for this protected resource, repeat the steps 7 and 8. Serving Your Customers 147 Specifying Authorized Users To add an authorized user of a protected directory: 1 2 3 4 5 Click Click Click Click Click the Domains shortcut in the navigation pane. the required domain name in the list. the Directories icon in the Hosting group. on the name of the directory you need. the Add New User icon. 6 Specify the login name and password that will be used for accessing the protected area. The password should be from 5 to 14 symbols in length. 7 Click OK. To change password for an authorized user of a protected directory: 1 Click the Domains shortcut in the navigation pane. 2 Click the required domain name in the list. 3 Click the Directories icon in the Hosting group. 4 Click on the name of the directory you need. A list of authorized users will open. 5 Click on the user‘s name. 6 Specify the new password and re-type it for confirmation. 7 Click OK. To revoke a permission to access the protected directory from a user: Click the Domains shortcut in the navigation pane. Click the required domain name in the list. Click the Directories icon in the Hosting group. Click on the name of the directory you need. A list of authorized users will open. 5 Select a check box corresponding to the user‘s name. 1 2 3 4 6 Click Remove Selected. Confirm the operation and click OK. Serving Your Customers Unprotecting a Resource To remove password protection and make the resource available to the public: 1 Click the Domains shortcut in the navigation pane. 2 Click the required domain name in the list. 3 Click the Directories icon in the Hosting group. A list of password protected directories will open. 4 Select a check box corresponding to the name of the directory, from which you want to remove protection. 5 Click Remove Selected. The protection will be removed and the contents of the directory will be accessible to the public without restrictions. 148 Serving Your Customers 149 Organizing Site Structure with Subdomains Subdomains are additional domain names that enable you to: Organize logically the structure of your site Host additional Web sites or parts of a Web site on the same server without the need to pay for registration of additional domain names An example of using subdomains: You have a Web site your-product.com dedicated to promoting your software product. For publishing user‘s guides, tutorials and list of frequently asked questions, you can organize the subdomain 'userdocs' so that your users will be able to access online user documentation directly by visiting the domain name userdocs.your-product.com. Setting up Subdomains To set up a subdomain: 1 Click the Domains shortcut in the navigation pane. 2 3 4 5 Click the required domain name in the list. Click the Subdomains icon. Click the Add New Subdomain icon. Type the subdomain name as desired. This can be, for example, a topic of a site, organization department, or any other combination of letters, numbers and hyphens (up to 63 characters in length). The subdomain name must begin with an alphabet character. Subdomain names are case insensitive. 6 If this subdomain will hold a part of your own Web site that you manage on your own, leave the Use the FTP user account of the parent domain option selected. If this subdomain will hold a separate web site that will belong to or will be managed by another person, select the Create a separate user account for this subdomain option, and specify the login name and password that will be used for accessing the web space through FTP and publishing web site content. 7 If this subdomain will require secure transactions, select the SSL support checkbox. Then, the SSL certificate installed under the parent domain will be used for encrypting transactions. By default, when you publish the site, you need to upload the web content that should be accessible via secure connections to the httpsdocs directory, and the content that should be accessible via plain HTTP, to the httpdocs directory. For your convenience, you can choose to publish all content through a single location – httpdocs directory, to do this, select the option Use a single directory for housing SSL and non-SSL content. 8 Specify the programming languages in which the web site is developed. Otherwise, the web site may not function properly. Serving Your Customers 150 For example, if the web site is written mainly in ASP and uses some applications written in PHP, such as those from the Application Vault (Home > domain name> Application Vault), select the ASP support and PHP support check boxes. 9 If you wish to limit the amount of disk space that can be occupied by web content under this subdomain, type the desired value in megabytes into the Hard disk quota box. When the specified limit is exceeded, you will not be able to add files to the web space, and editing existing files may corrupt them. 10 To complete the setup, click OK. It may take up to 48 hours for the information on new subdomain to spread in the Domain Name System and become available to the Internet users. To publish web content to the subdomain‘s web space, follow the instruction presented in the Publishing a Site (on page 127) section. Removing Subdomains To remove a subdomain with its web content: 1 Click the Domains shortcut in the navigation pane. 2 Click the required domain name in the list. 3 Click Subdomains. 4 Select a check box corresponding to the subdomain name that you wish to remove, and click Remove Selected. 5 Confirm removal and click OK. The subdomain configuration and its web content will be removed from the server. Setting Up Additional Domain Names for a Site (Domain Aliases) If you have registered with a domain name registrar several domain names that you would like to point to the same web site that you host on your server, you should set up domain aliases. If you need to serve several domain names that point to a web site hosted on another server, you should set up domain forwarding: see the Serving Domain Names for Sites Hosted on Other Servers (Domain Forwarding) (on page 165) section for instructions. Serving Your Customers 151 Setting Up Domain Aliases To set up a domain alias: 1 2 3 4 Click Click Click Click the the the the Domains shortcut in the navigation pane. required domain name in the list. Domain Aliases icon. Add Domain Alias icon. 5 Type the desired domain alias name, for example alias.com. Domain aliases can comprise letters, digits and hyphens. Each part of the domain alias between dots should not be longer than 63 symbols. 6 Select the Synchronize DNS zone with the primary domain check box if you want the domain alias to use the same DNS zone resource records as in primary domain. With this setting, any subsequent changes in resource records of the primary domain's zone will be applied to the DNS zone of this domain alias. 7 Select the Mail check box, if you want e-mail directed at the e-mail addresses under the domain alias to be redirected to the e -mail addresses under your original domain name. Example: You have an e-mail address [email protected]. You have set up an alias for your domain name, for example, alias.com. If you want to receive mail to your mailbox [email protected] when it is sent to [email protected], select the Mail check box. 8 Select the Web check box. Otherwise, the web server will not serve the web content to users coming to your site by typing the domain alias in their browsers. 9 Select the Java Web applications check box if you have Java applications installed on your site and you want them to be accessible through the domain alias. 10 Click OK. Serving Your Customers 152 Modifying Properties of Domain Aliases To change the properties of an alias: 1 2 3 4 5 Click Click Click Click Click the the the the the Domains shortcut in the navigation pane. required domain name in the list. Domain Aliases icon. alias name you need. Preferences icon in the Tools group. To modify resource records in the DNS zone of a domain alias: 1 Click the Domains shortcut in the navigation pane. 2 Click the required domain name in the list. 3 Click Domain Aliases. 4 Click the alias name you need. 5 Click DNS Settings. 6 Add, edit or remove the resource records as required: To add a resource record to the zone, click Add New Record. Specify the required values and click OK to write the values to the zone. To modify a resource record, under the Host column, click a hyperlink corresponding to the record you need. To remove a record, select a check box corresponding to the record you wish to remove and click Remove Selected. Removing Domain Aliases To remove an alias from a domain: 1 2 3 4 Click the Domains shortcut in the navigation pane. Click the required domain name in the list. Click the Domain Aliases icon. Select a check box corresponding to the domain alias that you want to remove. 5 Click Remove Selected. Confirm removal and click OK. Serving Your Customers 153 Hosting Personal Web Pages on Your Web Server You can host on your Web server personal Web pages for individuals who do not need their own domain names. This service is popular with educational institutions that host non-commercial personal pages of their students and staff. These pages usually have web addresses like http://your-domain.com/~username, however, you can set up personal web pages with alternative web addresses like http://[email protected], if you like. To accommodate a personal web page on your server, allocate a separate Web space and set up an FTP account for publishing: 1 Click the Domains shortcut in the navigation pane. 2 3 4 5 Click the required domain name in the list. Click the Web Users icon. Click Preferences. By default, personal web pages have addresses like http://yourdomain.com/~username. If you wish to allow access to personal web pages by alternative web addresses like http://[email protected], select the Allow [email protected] access format check box. 6 If you wish to allow execution of scripts embedded in personal web pages, select the Allow the web users scripting check box. 7 Click OK. The settings you have defined at the steps 3 and 4 are common for all personal web pages you might host on your web server. Therefore, you will not need to perform steps 3 and 4 next time you set up a web space for a personal web page. 8 Click Add New Web User. 9 Specify a user name and password that will be used for accessin g the web space through FTP and publishing the web page. You can use only lowercase alphanumeric, hyphen and underscore symbols in user name. The user name should begin with an alphabet character. It cannot contain white spaces. The password cannot contain quotation marks, white space, user's login name, and should be between 5 and 14 characters in length. 10 Specify the programming languages that should be supported for the Web page. For example, if the web page is written in PHP, select the PHP support check box. 11 If you wish to limit the amount of disk space that can be occupied by the Web page content, type the desired value in megabytes into the Hard disk quota box. When the specified limit is exceeded, the Web page owner will not be able to add files to his or her web space. 12 Click OK. Serving Your Customers 154 Now you can tell your user the FTP account credentials, so that he or she can publish their web page. Changing FTP Password for a Web Page Owner To change FTP password for a web page owner: 1 Go to Domains > domain name > Web Users > web user name. 2 Type the new password into the New password and Confirm password boxes and click OK. Allocating More Disk Space to the Web Page Owner To allocate more disk space to the web page owner: 1 Go to Domains > domain name > Web Users, then click the required web user name. 2 Type the amount of disk space in megabytes into the Hard disk quota box and click OK. Removing Web Page Owner's Account To remove a web page owner’s account together with their web page: 1 Click the Domains shortcut in the navigation pane. 2 Click the required domain name in the list. 3 Click Web Users in the Hosting group. 4 Select a check box to the right of the user name you wish to remove and click Remove Selected. 5 Confirm removal and click OK. Serving Your Customers 155 Setting Up Anonymous FTP Access to the Server If you host a site on a dedicated IP address, you can set up a directory within the site, where other users will be able to anonymously download or upload files through FTP. Once anonymous FTP is enabled, the users will be able to log in to the ftp://ftp.yourdomain.com with the "anonymous" login name and any password. To allow anonymous FTP access: 1 Click the Domains shortcut in the navigation pane. 2 3 4 5 Click the required domain name in the list. Click the Anonymous FTP icon. To activate anonymous FTP service, click the Switch On icon. To set up a welcoming message to be displayed when users log in to FTP site, select the Display login message check box and type the message text in the input field as desired. Note that not all FTP clients display welcoming messages. 6 To allow visitors to upload files to the /incoming directory, select the Allow uploading to incoming directory check box. 7 To allow users to create subdirectories in the /incoming directory, select the Allow creation of directories in the incoming directory check box. 8 To allow downloading files from the /incoming directory, select the Allow downloading from the incoming directory checkbox. 9 To limit the amount of disk space that can be occupied by uploaded files, clear the Unlimited check box corresponding to the Limit disk space in the incoming directory option, and specify the amount in kilobytes. This is the hard quota: the users will not be able to add more files to the directory when the limit is reached. 10 To limit the number of simultaneous connections to the anonymous FTP server, clear the Unlimited check box corresponding to the Limit number of simultaneous connections option and specify the number of allowed connections. 11 To limit the bandwidth for anonymous FTP connections, clear the Unlimited check box corresponding to the Limit download bandwidth for this virtual FTP domain option and enter the maximum bandwidth in kilobytes per second. 12 Click OK. To modify settings for anonymous FTP server or switch it off: 1 Click the Domains shortcut in the navigation pane. 2 Click the required domain name in the list. 3 Click the Anonymous FTP icon. Serving Your Customers 4 Adjust the settings as required and click OK. To switch off the anonymous FTP service, click the Switch off icon in the Tools group. 156 Serving Your Customers 157 Customizing Web Server Error Messages When visitors coming to a site request pages that the web server cannot find, the web server generates and displays a standard HTML page with an error message. The standard error messages may inform of problems, but they do not usually say how to resolve them or how to get the lost visitor on his way, and they also look dull. You may want to create your own error pages and use them on your web server. With Plesk you can customize the following error messages: 400 Bad File Request. Usually means the syntax used in the URL is incorrect (for example, uppercase letter should be lowercase letter; wrong punctuation marks). 401 Unauthorized. Server is looking for some encryption key from the client and is not getting it. Also, wrong password may have been entered. 403 Forbidden/Access denied. Similar to 401; a special permission is needed to access the site - a password and/or username if it is a registration issue. 404 Not Found. Server cannot find the requested file. File has either been moved or deleted, or the wrong URL or document name was entered. This is the most common error. 405 Method Not Allowed. The method specified in the Request-Line is not allowed for the resource identified by the Request-URI. 406 Not Acceptable. The resource identified by the request is only capable of generating response entities which have content characteristics not acceptable according to the accept headers sent in the request. 407 Proxy Authentication Required. This code is similar to 401 (Unauthorized), but indicates that the client must first authenticate itself with the proxy. 412 Precondition Failed. The precondition given in one or more of the request-header fields evaluated to false when it was tested on the server. This response code allows the client to place preconditions on the current resource metainformation (header field data) and thus prevent the requested method from being applied to a resource other than the one intended. 414 Request-URI Too Long. The server is refusing to service the request because the Request-URI is longer than the server is willing to interpret. This rare condition is only likely to occur when a client has improperly converted a POST request to a GET request with long query information, when the client has descended into a URI "black hole" of redirection (e.g., a redirected URI prefix that points to a suffix of itself), or when the server is under attack by a client attempting to exploit security holes present in some servers using fixed-length buffers for reading or manipulating the Request-URI. 415 Unsupported Media Type. The server is refusing to service the request because the entity of the request is in a format not supported by the requested resource for the requested method. 500 Internal Server Error. Could not retrieve the HTML document because of serverconfiguration problems. 501 Not Implemented. The server does not support the functionality required to fulfill the request. This is the appropriate response when the server does not recognize the request method and is not capable of supporting it for any resource. 502 Bad Gateway. The server, while acting as a gateway or proxy, received an invalid response from the upstream server it accessed in attempting to fulfill the request. Serving Your Customers 158 To configure Plesk’s web server to show custom error pages for a domain: 1 Switch on support for custom error documents through Plesk. 1. Click the Domains shortcut in the navigation pane. 2. Click the required domain name in the list. 3. Click Setup. 4. Select the Custom Error Documents check box. 5. Click OK. 2 If you access Plesk remotely, connect to your FTP account on the Plesk server, and go to the error_docs directory. If you access Plesk locally, go to the directory /vhosts/yourdomain.com/error_docs/. 3 Edit or replace the respective files. Be sure to preserve the correct file names: 400 Bad File Request - bad_request.html 401 Unauthorized - unauthorized.html 403 Forbidden/Access denied - forbidden.html 404 Not Found - not_found.html 405 Method Not Allowed - method_not_allowed.html 406 Not Acceptable - not_acceptable.html 407 Proxy Authentication Required proxy_authentication_required.html 412 Precondition Failed - precondition_failed.html 414 Request-URI Too Long - request-uri_too_long.html 415 Unsupported Media Type - unsupported_media_type.html 500 Internal Server Error - internal_server_error.html 501 Not Implemented - not_implemented.html 502 Bad Gateway - bad_gateway.html 4 Restart your web server or wait for a few hours till your web server is restarted. After that, the web server will start using your error documents. Serving Your Customers 159 Customizing DNS Zone Configuration for Domains For each new domain name, your control panel automatically creates DNS zone in accordance with the configuration preset you define. The domain names should work fine with the automatic configuration, however if you need to perform custom modifications in the domain name zone, you can do that through your control panel. Viewing Resource Records To view the resource records in a DNS zone of a domain: 1 Click the Domains shortcut in the navigation pane. 2 Click the required domain name in the list. 3 Click the DNS icon in the Services group. A screen will show all resource records for a given domain. Serving Your Customers 160 Adding Resource Records To add a new resource record to the zone: 1 2 3 4 Click Click Click Click the the the the Domains shortcut in the navigation pane. required domain name in the list. DNS icon in the Services group. Add New Record icon in the Tools group. 5 Select a resource record type, and specify the appropriate data: For an A record you will need to enter the domain name for which you wish to create an A record. If you are simply defining an A record for your main domain, then you should leave the available field empty. If you are defining an A record for a name server then you will need to input the appropriate entry for the given name server (ie. ns1). Then, you need to enter the appropriate IP address to which to associate the domain name. For a NS record, you will need to enter the domain name for which you wish to create the NS record. If you are defining an NS record for your main domain, then you will leave the available field blank. Then enter the appropriate name server name in the field provided. You will need to enter the complete name (i.e. ns1.mynameserver.com). For a MX record, you will need to enter the domain for which you are creating the MX record. For the main domain, you would simply leave the available field blank. You will then need to enter your mail exchanger, this is the name of the mail server. If you are running a remote mail server named 'mail.myhostname.com' then you would simply enter 'mail.myhostname.com' into the field provided. You will then need to set the priority for the mail exchanger. Select the priority using the drop-down box: 0 is the highest and 50 is the lowest. Keep in mind you would also need to add the appropriate A record, and/or CNAME if applicable for the remote mail exchange server. For a CNAME record, you will need to first enter the alias domain name for which you wish to create the CNAME record. You then need to enter the domain name within which you want the alias to reside. Any domain name can be entered. It does not need to reside on the same server. For a PTR record you will first enter the IP address/mask for which you wish to define the pointer. Then enter the appropriate domain name for this IP to be translated to. For a TXT record, you will be able to enter an arbitrary text string, which could be a description or an SPF record. 6 Click OK to submit the data. Serving Your Customers 161 Modifying Resource Records To modify the properties of a resource record: Click the Domains shortcut in the navigation pane. Click the domain name you need. Click the DNS icon. Click the hyperlink in the Host column corresponding to the resource record you want to modify. 5 Modify the record as required and click OK. 1 2 3 4 To modify the entries in the Start of Authority (SOA) record for a domain: 1 2 3 4 5 Click the Domains shortcut in the navigation pane. Click the domain name you need. Click the DNS icon. Click SOA Preferences. Specify the desired values: TTL. This is the amount of time that other DNS servers should store the record in a cache. Plesk sets the default value of one day. Refresh. This is how often the secondary name servers check with the primary name server to see if any changes have been made to the domain's zone file. Plesk sets the default value of three hours. Retry. This is the time a secondary server waits before retrying a failed zone transfer. This time is typically less than the refresh interval. Plesk sets the default value of one hour. Expire. This is the time before a secondary server stops responding to queries, after a lapsed refresh interval where the zone was not refreshed or updated. Plesk sets the default value of one week. Minimum. This is the time a secondary server should cache a negative response. Plesk sets the default value of three hours. 6 Click OK. Serving Your Customers Removing Resource Records To remove a resource record from the zone: 1 2 3 4 Click the Domains shortcut in the navigation pane. Click the required domain name in the list. Click DNS Settings in the Services group. Select a check box corresponding to the record you wish to remove. 5 Click Remove Selected. 6 Confirm removal and click OK. Restoring the Original Zone Configuration To restore the original zone configuration in accordance with the server-wide DNS settings: 1 Click the Domains shortcut in the navigation pane. 2 Click the required domain name in the list. 3 Click the DNS icon in the Services group. 4 In the IP address drop-down box, select the IP address to be used for restoring the zone, specify whether a www alias is required for the domain, and click the Default button. The zone configuration will be recreated. 162 Serving Your Customers 163 Serving Sites with External Domain Name Servers If you host web sites on this server and have a standalone DNS server acting as a primary (master) name server for your sites, you may want to set up your control panel's DNS server to function as a secondary (slave) name server. To make the control panel's DNS server act as a secondary name server: 1 Click the Domains shortcut in the navigation pane. 2 3 4 5 6 7 Click the required domain name in the list. Click DNS Settings in the Services group. Click Switch in the Tools group. Specify the IP address of the primary (master) DNS server. Click Add. Repeat steps from 1 to 5 for each web site that needs to have a secondary name server on your server. To make the control panel’s DNS server act as a primary for a zone: 1 2 3 4 Click the Domains shortcut in the navigation pane. Click the required domain name in the list. Click DNS Settings in the Services group. Click Switch in the Tools group. The original resource records for the zone will be restored. If you have external name servers authoritative for some of your web sites, switch off the control panel‘s DNS service for each site served by external name servers: 1 2 3 4 Click the Domains shortcut in the navigation pane. Click the required domain name in the list. Click DNS Settings in the Services group. Click Switch off in the Tools group. Turning the DNS service off for the zone will refresh the screen, so that only a list of name servers remains. Note: The listed name server records have no effect on the system. They are only presented on the screen as clickable links to give you a chance to validate the configuration of the zone maintained on the external authoritative name servers. 5 Repeat the steps from 1 to 3 to switch off the local domain name service for each site served by external name servers. If you wish to validate the configuration of a zone maintained on authoritative name servers: 1 Click the Domains shortcut in the navigation pane. 2 Click the required domain name in the list. 3 Click DNS Settings in the Services group. Serving Your Customers 164 4 Add to the list the entries pointing to the appropriate name servers that are authoritative for the zone: click Add, specify a name server, and click OK. Repeat this for each name server you would like to test. The records will appear in the list. 5 Click on the records that you have just created. Plesk will retrieve the zone file from a remote name server and check the resource records to make sure that domain‘s resources are properly resolved. The results will be interpreted and displayed on the screen. Serving Your Customers 165 Serving Domain Names for Sites Hosted on Other Servers (Domain Forwarding) If you need to serve a domain name or several domain names that point to a web site hosted on another server: 1 Click the Clients shortcut in the navigation pane. 2 Click Add New Domain. 3 Specify the domain name. Leave the www check box selected if you wish to allow users to access the site by a common and habitual URL like www.your-domain.com. Having the www alias preceding the domain name will allow users to get to the site no matter what they type in their browsers: www.your-domain.com and your-domain.com will both point to the site. 4 Leave the Create domain without template option selected in the Select template menu. 5 If you have a number of IP addresses to choose from, select the required address from the Select an IP address drop-down box. Bear in mind that e-commerce sites need a dedicated IP address (not shared among other sites) to implement Secure Sockets Layer data encryption. 6 Make sure that there is a check mark in the Proceed to hosting setup check box and click OK. 7 Choose the forwarding type: select either Frame forwarding or Standard forwarding option. With standard forwarding, a user is redirected to the site and the actual site's URL is shown in the user's browser, so the user always knows that he or she is redirected to another URL. With frame forwarding, a user is redirected to the site without knowing that the site actually resides at another location, therefore, Frame forwarding should be preferred. 8 Click OK. 9 Specify the destination URL: the current web site address that you would like this domain to point to. 10 Click OK. 11 Repeat the steps from 1 to 9 to add as many domain forwarders as required. Serving Your Customers 166 Transferring Domains Between User Accounts To transfer a domain or several domains from one user account to another: 1 Select the Domains shortcut in the navigation pane. Alternatively, you can select the Clients shortcut in the navigation pane and click on the required client name. 2 Select the check boxes corresponding to the domains you wis h to transfer and click Change Owner. 3 Select the destination account you want to transfer selected domains to and click Next >>. Plesk will check if the destination client account can provide the appropriate amount of resources for the transferred domains to function properly. If the destination client account does not have the resources to accommodate the new domains, the lacking resources will be highlighted. To allocate the required amount of resources to the destination client account, go to Clients > client name > Limits, adjust the amount of resources available to the accordingly, and start the domain transfer procedure again. You can also choose IP addresses for transferred domains by selecting the destination IP address from the New IP address menu corresponding to the required domain. 4 Click Finish to complete the procedure. Suspending and Unsuspending Domains To suspend a domain: 1 Select the Domains shortcut in the navigation pane. 2 Click the domain you need. 3 Click Switch off. The domain will be suspended, its Web, FTP and mail services will no longer be accessible to the Internet users, and domain owner will not be able to log in to the control panel. To unsuspend a domain: 1 Select the Domains shortcut in the navigation pane. 2 Click the domain you need. 3 Click Switch On. Serving Your Customers Removing Domains To delete a domain with its content: 1 Click the Domains shortcut in the navigation pane. 2 Select a check box corresponding to the domain name you wish to remove. 3 Click Remove Selected, confirm removal and click OK. To delete a subdomain with its Web content: 1 Click the Domains shortcut in the navigation pane. 2 Click the domain name you need. 3 Click the Subdomains icon in the Hosting group. 4 Select the check box corresponding to the subdomain you wish to remove. 5 Click Remove Selected, confirm removal and click OK. 167 168 CHAPTER 8 Using E-mail Services You can use a number of different e-mail services with a single e-mail account. For example, you can have an e-mail address that will accept mail as any standard mailbox, forward to a number of recipients, and send an automatic response to the original message sender. If you are going to serve mailboxes under a specific domain with an external mail server, follow these steps: 1 Go to Domains > domain name > DNS Settings. 2 In the Record type column, locate an MX record, and click the respective link in the Host column on the left. 3 In the Enter mail exchanger box, type the external mail server's host name, for example, mailserver.example.com. 4 5 6 7 Click Click Click Click OK. Up Level to return to the domain management screen. Mail. Switch Off. In this chapter: Creating Mailboxes ............................................................................................169 Setting Up Your E-mail Program for Retrieving Mail from Your Mailbox .............170 Accessing Your Mail from a Web Browser .........................................................171 Protecting Mailboxes from Spam .......................................................................172 Protecting Mailboxes from Viruses .....................................................................177 Suspending and Unsuspending Mailboxes ........................................................178 Removing Mailboxes..........................................................................................179 Switching off the Mailbox Service When You Have Decided to Turn Your Account into a Mail Forwarder .........................................................................................179 Setting Up Mail Forwarding to a Single E-mail Address .....................................180 Setting Up Mail Forwarding to Multiple E-mail Addresses ..................................182 Removing Mail Forwarders ................................................................................184 Setting Up Automatic Reply ...............................................................................185 Switching off Automatic Reply ............................................................................187 Setting Up Site-Wide Preferences for Handling Mail to Nonexistent Users (Mail Bounce) .............................................................................................................188 Introducing Similar Changes to a Number of Mail Accounts at Once .................189 Sending E-mail Notices to Multiple Customers at Once .....................................190 Maintaining Mailing Lists ....................................................................................196 Serving Your Customers 169 Creating Mailboxes If you wish to have an e-mail address associated with a site, like [email protected], you should create a mailbox. To do this: To create a mailbox: 1 Go to Domains > domain name > Mail and click Add New Mail Account. 2 Your domain name is shown to the right of @ sign, so you only need to specify the desired name for the mailbox. This can be, for example, your first name and last name separated by a dot, a department name, or any other text in Latin symbols. The name should be short enough to remember. It can comprise alphanumeric, dash, dot and underscore symbols. 3 Specify a password that you will use for accessing your mailbox. 4 Make sure that a check mark is present in the Mailbox check box, then click OK. Now your mailbox is created on the provider‘s server, and you can set up your favorite e-mail program so as to receive and send e-mail messages through your new mailbox. To create mailboxes for other users: 1 Go to Domains > domain name > Mail and click Add New Mail Account. 2 Your domain name is shown to the right of @ sign, so you only need to specify the desired name for the mailbox. This can be, for example, user‘s first name and last name separated by a dot, a department name, or any other text in Latin symbols. The name should be short enough to remember. It can comprise alphanumeric, dash dot and underscore symbols. 3 Specify a password that mailbox owner will use for accessing his or her mailbox. 4 To allow the mailbox owner to manage his or her mailbox through a mailbox administration panel, select the Control panel access check box and specify the language for the user‘s control panel. 5 Make sure that a check mark is present in the Mailbox check box. If required, limit the amount of disk space that this mailbox can use. To do this, under Mailbox quota select the Enter size option and type the desired value in kilobytes. Click OK. 6 To allow the mailbox owner configure and use spam filter and antivirus, click Permissions, select the respective check boxes and click OK. Now, the mailbox is created, and a separate e-mail administration panel has been set up in Plesk. To enter it, the mailbox owner should visit the URL https://yourdomain.com:8443, type his or her e-mail address into the Login box, type the password for the mailbox into the Password box, and then click Login. Serving Your Customers 170 Setting Up Your E-mail Program for Retrieving Mail from Your Mailbox To set up Microsoft Outlook Express: 1 2 3 4 Open Microsoft Outlook Express. Go to Tools > Accounts. Click the Mail tab to open a list of your mail accounts. Click the Add > button and select the Mail … item. 5 Enter your name as you want it to appear in any messages you send, and click Next >. 6 Type your e-mail address that you created through Plesk (for example, [email protected]), and click Next >. 7 Select the protocol of your incoming mail server. 8 Specify the mail domain name as the incoming and outgoing mail server (for example: mail.your-domain.com), and click Next >. 9 Type your e-mail address in the Account name box (for example: [email protected]). 10 Type your password. This should be the password that you specified during creation of the mailbox through Plesk. 11 Leave the Remember password box checked, if you do not wish to be prompted to enter password each time your e-mail program connects to the mail server to check for new mail, and click Next >. 12 To complete setting up your e-mail program, click Finish. To set up Mozilla Thunderbird: 1 2 3 4 Open Mozilla Thunderbird. Go to Tools > Account Settings… Click Add Account. The Account Wizard will open. Leave the Email account option selected, and click Next >. 5 Enter your name as you want it to appear in any messages you send. 6 Type your e-mail address that you created through Plesk. For example, [email protected]. Click Next >. 7 Select the protocol of your incoming mail server. 8 Specify the mail domain name as the incoming and outgoing mail server (for example: mail.your-domain.com), and click Next >. 9 In the Incoming User Name box, specify your full e-mail address (for example, [email protected]), and click Next >. Serving Your Customers 171 10 Enter the name by which you would like to refer to this account (for example, Work Account) and click Next >. 11 Verify that the information you entered is correct, and click Finish. 12 Click OK to close the Account Settings wizard. Accessing Your Mail from a Web Browser You can read your mail and compose new messages even if you are far from your home or office computer. To do this, you first need to allow access to the Horde Webmail interface that is integrated with your control panel. Then you can work with your mail from any computer with Internet connection and Web browser installed, or a WAP-enabled cellular phone or a handheld computer (PDA). To allow access to the Webmail interface: 1 2 3 4 5 6 Click the Domains shortcut in the navigation pane. Click the domain name you need. Click the Mail icon. Click Preferences. Select the WebMail check box. Click OK. Note: Activation and deactivation of Webmail for your domain involves modifications in DNS zone, therefore, there is actually a certain delay present when activating and deactivating Webmail due to the speed of DNS registration mechanisms. To access your mailbox through Webmail: 1 Open a Web browser (or a WAP browser, if you are working from a handheld device), and type the URL: http://webmail.your-domain.com, where your-domain.com is the name of your domain. Press ENTER. The webmail login screen will open. 2 Type the user name and password that you specified during creation of your mailbox and click Log in. Serving Your Customers 172 Protecting Mailboxes from Spam To protect your mailbox from undesirable correspondence, do not publish your e-mail address on Internet forums and switch on the server-side spam filter provided by the SpamAssassin software. When you need to publish your e-mail address, create a disposable e-mail address - email alias - for your primary e-mail address, and publish it instead. All messages sent to the e-mail alias will come into your mailbox. Once you start getting spam, remove that alias and create another one. If you have a mailbox at another domain or mail server, you may want to set up a disposable e-mail forwarder. Setting Up Additional Disposable E-mail Addresses (Mail Aliases) To set up an e-mail alias for a mailbox: 1 Click the Domains shortcut in the navigation pane. 2 3 4 5 6 Click Click Click Click Type the required domain name in the list. Mail in the Services group. the e-mail address you need. Add New Mail Alias. a desired name and click OK. The messages addressed to your additional e-mail address (e-mail alias) will get to your mailbox. You can see the list of currently used mail aliases by clicking Show Aliases on the page that shows a list of mail accounts under the domain. To remove an e-mail alias from a mailbox: 1 Click the Domains shortcut in the navigation pane. 2 Click the required domain name in the list. 3 Click Mail in the Services group. 4 Click the e-mail address you need. 5 Select the check box corresponding to the alias that you wish to remove, and click Remove Selected. Setting Up Spam Filter If you receive undesirable correspondence to an e-mail address that you cannot or do not want to remove, consider setting up spam filter for your mailbox. To do this, Enable SpamAssassin spam filter on the Plesk server, if you installed the SpamAssassin component on the server, and Install spam filtering software of your choice to work with e-mail program on your home or office computer. Serving Your Customers 173 Switching on Spam Filter To switch on spam filtering for a mailbox: 1 Click the Domains shortcut in the navigation pane. 2 Click the required domain name in the list. 3 Click the Mail icon in the Services group. 4 Click the e-mail address you need. 5 Click the Spam Filter icon in the Tools group. 6 Configure the following settings as desired: The score required before a mail is considered spam. This setting adjusts spam filter sensitivity. SpamAssassin performs a number of different tests on contents and subject line of each message. As a result, each message scores a number of points. The higher the number, the more likely a message is spam. For example, a message containing the text string ―BUY VIAGRA AT LOW PRICE!!!‖ in Subject line and message body scores 8.3 points. By default, the filter sensitivity is set so that all messages that score 7 or more points are classified as spam. If you receive lots of spam messages with the current setting, to make filter more sensitive, try setting a lesser value in the The score required before a mail is considered spam box; for example, 6. If you are missing your e-mails because your spam filter thinks they are junk, try reducing filter sensitivity by setting a higher value in the The score required before a mail is considered spam box. Note: To further improve spam filter accuracy, you may want to train your spam filter on e-mail messages you receive (see the instructions on improving accuracy of spam detection in the following section). What to do with spam mail. If you are sure that your spam filter is accurate, you may want to set the filter to automatically delete all incoming messages recognized as spam. To do this, select the Delete option. If you wish to filter mail with the software on your local computer, select the Mark as spam and store in mailbox option, and then specify how spam filter should mark the messages recognized as spam. ―X-Spam-Flag: YES‖ and ―X-Spam-Status: Yes‖ headers are added to the message source by default, and if you want, the spam filter will also include a specific text string to the beginning of Subject line. To include a desired combination of symbols or words to the message subject, type it into the Add the following text to the beginning of subject of each message recognized as spam box. If you do not want the spam filter to modify message subject, leave this box blank. If you want to include into the subject line the number of points that messages score, type _SCORE_ in this box. 7 If you do not want to receive e-mail from specific domains or individual senders, click the Black List tab, and then add the respective entries to the spam filter‘s black list: Serving Your Customers 174 To add entries to the black list, click Add Addresses. If you have a list of entries stored in a file, click Browse to specify it, and then click OK. Otherwise, select the From List option, and type the e-mail addresses into the E-mail addresses box. Place each address in one row, or separate addresses with a coma, a colon, or a white space. You can use an asterisk (*) as a substitute for a number of letters, and question mark (?) as a substitute for a single letter. For example: [email protected], [email protected], *@spammers.net. Specifying *@spammers.net will block the entire mail domain spammers.net. To save the entries you added, click OK, then confirm adding, and click OK again. To remove entries from the black list, under the Black List tab, select the entries and click Remove Selected. Confirm removal and click OK. 8 If you want to be sure that you will not miss e-mail from specific senders, click the White List tab, and then add e-mail addresses or entire domains to the spam filter‘s white list: To add entries to the white list, click Add Addresses. If you have a list of entries stored in a file, click Browse to specify it, and then click OK. Otherwise, select the From List option, and type the e-mail addresses into the E-mail addresses box. Place each address in one row, or separate addresses with a coma, a colon, or a white space. You can use an asterisk (*) as a substitute for a number of letters, and question mark (?) as a substitute for a single letter. For example: [email protected], [email protected], *@mycompany.com. Specifying *@mycompany.com will add to the white list all e-mail addresses that are under the mycompany.com mail domain. To save the entries you added, click OK, then confirm adding, and click OK again. To remove entries from the white list, under the White List tab, select the entries and click Remove Selected. Confirm removal and click OK. 9 Once finished with setting up the spam filter, click the Switch On icon, and then click OK. Serving Your Customers 175 Improving Accuracy of Spam Detection You can improve accuracy of spam detection by training the spam filter on the e-mail messages that you have in your mailbox. To improve accuracy of spam detection: 1 Click the Domains shortcut in the navigation pane. 2 Click the required domain name in the list. 3 Click the Mail icon in the Services group. 4 Click the e-mail address you need. 5 Click the Spam Filter icon in the Tools group. 6 Click the Training tab. All e-mail messages you have in your mailbox are presented on the screen. Each message is accompanied by an icon in the left column, which tells if a message is recognized as spam - , non-spam - , or not recognized at all - . If you have already trained your spam filter on a message and the results were recorded in the spam filter‘s database, an icon is shown in the right column. 7 Train the spam filter. In most cases, you can tell if a message is spam by looking at its subject line and sender‘s name. If they do not give you any clue, try looking inside the message using your e-mail program or webmail interface. To mark a message as spam, select the corresponding check box and click ‘It’s Spam!’. To mark a message as not spam, select the corresponding check box and click ‘It’s Not Spam’. To remove any information on a given message from the spam filter database, select the corresponding check box and click ‘Forget It’. 8 Once finished with training, you can remove spam e-mails from your mailbox using your e-mail program or Horde IMP Webmail interface. Serving Your Customers 176 Clearing Spam Filter's Database If you have accidentally made your spam filter learn a great number of spam e-mails as non-spam or vice versa, your spam filter will likely produce incorrect results. In this case, clear the spam filter's database and then repeat training. To clear spam filter’s database: 1 2 3 4 5 6 7 Click Click Click Click Click Click Click the the the the the the the Domains shortcut in the navigation pane. required domain name in the list. Mail icon in the Services group. e-mail address you need. Spam Filter icon in the Tools group. Training tab. Clear button. Switching off Spam Filter To switch off spam filtering for a mailbox: 1 Click the Domains shortcut in the navigation pane. 2 Click the required domain name in the list. 3 Click the Mail icon in the Services group. 4 Click the e-mail address you need. 5 Click the Spam Filter icon in the Tools group. 6 Click the Switch Off Spam Filtering icon and click OK. Serving Your Customers 177 Protecting Mailboxes from Viruses To defend your system from viruses, do not open suspicious e-mail attachments, enable anti-virus protection on the server side, and be sure to have a firewall and antivirus software installed on your personal computer. Keep your operating system up-todate and timely install security hot fixes and patches. Switching on Anti-virus Protection To switch on anti-virus protection for a mailbox: 1 2 3 4 5 6 Click the Domains shortcut in the navigation pane. Click the required domain name in the list. Click the Mail icon. Click the e-mail address you need. Click the Antivirus icon in the Tools group. Choose the desired mail scanning mode. You can switch on scanning for incoming mail, outgoing mail, or both. Note: If Kaspersky Antivirus is used on the server, then you can use the Scanning settings icon to adjust scanning settings. To view the information about scanning settings, click the Help shortcut in the navigation pane. 7 Click OK. Switching off Anti-virus Protection To switch off anti-virus protection for a mailbox: 1 2 3 4 5 6 7 Click the Domains shortcut in the navigation pane. Click the required domain name in the list. Click the Mail icon. Click the e-mail address you need. Click the Antivirus icon in the Tools group. Select the Do not scan for viruses option. Click OK. Serving Your Customers 178 Suspending and Unsuspending Mailboxes To temporarily suspend e-mail services for a mailbox: 1 2 3 4 5 Click Click Click Click Click the Domains shortcut in the navigation pane. the required domain name in the list. Mail. the e-mail address, whose e-mail services you wish to suspend. Mailbox in the Tools group. 6 Clear the Mailbox check box. 7 Click OK. To resume e-mail services for a suspended mailbox: 1 Click the Domains shortcut in the navigation pane. 2 3 4 5 6 7 Click the required domain name in the list. Click Mail. Click the e-mail address, whose e-mail services you wish to resume. Click Mailbox in the Tools group. Select the Mailbox check box. Click OK. To temporarily suspend e-mail services for all mailboxes in a domain: 1 Click the Domains shortcut in the navigation pane. 2 Click the required domain name in the list. 3 Click Mail. 4 Click Switch off in the Tools group. To resume e-mail services for all mailboxes in a domain: 1 2 3 4 Click Click Click Click the Domains shortcut in the navigation pane. the required domain name in the list. Mail. Switch On in the Tools group. Serving Your Customers 179 Removing Mailboxes To remove a mailbox: 1 2 3 4 Click the Domains shortcut in the navigation pane. Click the required domain name in the list. Click Mail. Select a check box corresponding to the mailbox that you wish to remove. 5 Click Remove Selected. 6 When prompted, confirm removal and click OK. Switching off the Mailbox Service When You Have Decided to Turn Your Account into a Mail Forwarder If you are going to use your existing e-mail account as a mail forwarder or mailing list, you are recommended to switch off the mailbox service: a mailbox keeps all incoming messages and messages are not removed automatically after being forwarded. Therefore, if you choose to have the "mailbox + mail forwarder" configuration on your account, be sure to clean up the mailbox from time to time. To switch off the mailbox service for your account discarding all messages in your mailbox: 1 2 3 4 5 6 7 Click the Click the Click the Click the Click the Deselect Click OK. Domains shortcut in the navigation pane. required domain name in the list. Mail icon. required e-mail address. Mailbox icon in the Tools group. the Mailbox check box. Serving Your Customers 180 Setting Up Mail Forwarding to a Single E-mail Address To set up an e-mail address that will accept mail and forward it to another e-mail address: 1 2 3 4 5 Click the Domains shortcut in the navigation pane. Click the required domain name in the list. Click Mail in the Services group. Click Add New Mail Account. Specify the desired name for the mail forwarder next to Mail account name. The domain name is shown to the right of @ sign, so you only need to type the name. This can be, for example, your first name and last name separated by a dot, a department name, or any other text in Latin symbols. The name should be short enough to remember. It can comprise alphanumeric, dash dot and underscore symbols. Clear the Mailbox and Control panel access check boxes. Click OK. Click Redirect in the Tools group. Select the Redirect check box. Type the destination e-mail address to which you would like to forward e-mail. 11 Click OK. 6 7 8 9 10 To set up an e-mail address that will accept mail, pass it through the spam filter and then forward it to another e-mail address: 1 2 3 4 5 Click the Domains shortcut in the navigation pane. Click the required domain name in the list. Click Mail in the Services group. Click Add New Mail Account. Specify the desired name for the forwarder‘s e-mail address next to Mail Account Name. The domain name is shown to the right of @ sign, so you only need to type the name. This can be, for example, your first name and last name separated by a dot, a department name, or any other text in Latin symbols. The name should be short enough to remember. It can comprise alphanumeric, dash dot and underscore symbols. 6 Make sure that the Mailbox check box is selected. Without a mailbox, you will not be able to apply spam filtering. 7 Specify a password that will be used for accessing the mailbox: You will likely need to clean the contents of mailbox from time to time. Serving Your Customers Click OK. Click Redirect in the Tools group. Select the Redirect check box. Type the destination e-mail address to which you would like to forward e-mail. 12 Click OK. 8 9 10 11 Suspending and Unsuspending Mail Forwarders To suspend a mail forwarder: 1 Click the Domains shortcut in the navigation pane. 2 Click the required domain name in the list. 3 Click Mail. 4 Click the e-mail address, whose forwarding service you wish to suspend. 5 Click Redirect in the Tools group. 6 Clear the Redirect check box. 7 Click OK. To unsuspend a mail forwarder: Click the Domains shortcut in the navigation pane. Click the required domain name in the list. Click Mail. Click the e-mail address, whose forwarding service you wish to resume. 5 Click Redirect in the Tools group. 6 Select the Redirect check box. 7 Click OK. 1 2 3 4 181 Serving Your Customers 182 Setting Up Mail Forwarding to Multiple E-mail Addresses To set up an e-mail address that will accept mail and forward it to multiple other e-mail addresses: 1 Click the Domains shortcut in the navigation pane. 2 Click the required domain name in the list. 3 Click Mail in the Services group. 4 Click the required e-mail address. 5 Click Mail Group. 6 Click Add New Member. You should add at least one e-mail address before enabling mail forwarding to several e-mail addresses. 7 Enter the desired external e-mail address into the E-mail input box or select one or more of the listed mail accounts using check boxes. 8 Click OK. 9 Click Switch On. Serving Your Customers 183 Adding and Removing Recipient Addresses To add an external e-mail address to the list of mail accounts that receive forwarded email correspondence: 1 Go to Domains > domain name > Mail > mail account > Mail Group, then click Add New Member. 2 Enter the desired external e-mail address into the E-mail input field and click OK. To remove an external e-mail address from the list of mail accounts that receive forwarded e-mail correspondence: 1 Go to Domains > domain name > Mail > mail account > Mail Group. 2 Select the check box corresponding to the mail account you want to remove from the list. 3 Click Remove Selected, confirm removal and click OK. To add an e-mail address registered on your server to the list of mail accounts that receive forwarded e-mail correspondence: 1 Go to Domains > domain name > Mail > mail account > Groups. 2 Select the required multiple e-mail forwarder in the Available mail groups list and click Add >>, then click OK. An e-mail address registered on your server can also be added to the subscription list using the procedure for adding an external e-mail address (see above). To remove an e-mail address registered on your server from the list of mail accounts that receive forwarded e-mail correspondence: 1 Go to Domains > domain name > Mail > mail account > Groups. 2 Select the required multiple e-mail forwarder in the Member of the following mail groups list and click << Remove, then click OK. An e-mail address registered on your server can also be removed from the subscription list using the procedure for removing an external e-mail address (see above). Switching off Mail Forwarding to Multiple E-mail Addresses To disable the e-mail forwarding to several e-mail addresses: 1 2 3 4 5 Click Click Click Click Click the Domains shortcut in the navigation pane. the required domain name in the list. Mail in the Services group. the required e-mail address. Mail Group. Serving Your Customers 184 6 Click Switch Off. Removing Mail Forwarders To remove a mail forwarder: 1 Click the Domains shortcut in the navigation pane. 2 Click the required domain name in the list. 3 Click Mail. 4 Select a check box corresponding to the mail forwarder that you wish to remove. 5 Click Remove Selected. 6 When prompted, confirm removal and click OK. Serving Your Customers 185 Setting Up Automatic Reply If you are going on vacation and will not be able to check your mail for a while, you may want to leave a vacation notice that will be automatically sent to your correspondents once they send e-mail to your address. This is done with automatic reply facility, also referred to as autoresponder. Aside from vacation notices, organizations can use automatic replies to notify customers that their orders or technical support requests were received and will soon be processed. Automatic replies can include prewritten messages in plain text or HTML format, and they can contain attached files as well. To set up automatic reply for a mailbox: Click the Domains shortcut in the navigation pane. Click the required domain name in the list. Click the Mail icon. Click the e-mail address, for which you wish to set up an automatic reply. 5 Click the Autoresponders icon in the Tools group. 6 If you are not going to attach any files to the automatic reply, proceed to the step 6. To attach a file to the automatic reply: 1 2 3 4 1. Click the Attachment Files icon in the Tools group. 2. Click Browse to locate the file, and once selected, click Send File. The file will be added to the attachment files storage, and you will be able to attach this file to a number of different automatic replies. 3. Once finished, click Up Level and proceed to the next step. 7 Click the Add New Autoresponder icon in the Tools group. 8 Configure the automatic reply: 1. Type a name for this automatic reply into the Autoresponder name box. For example, Vacation notice. 2. If you want your incoming mail to be forwarded to another email address while you are away, specify an e-mail address in the Upon automatic response, forward the original message to the specified e-mail box. 3. If you want this automatic reply to be sent in reply to any incoming e-mail message, in the Conditions group, leave the always respond option selected. If you wish to automatically reply only to e-mail messages that contain specific words in the message text or subject line, select the appropriate option, and type the word combination in the input box. 4. By default, the subject line of incoming e-mail will be inserted into the automated reply. To use a custom subject, type it into the Reply subject input box. Serving Your Customers 186 5. As your correspondents may not figure out that the message they received from you was an automatic response, they may want to respond to your auto-reply. So, you should specify your e-mail address as the Return address, otherwise, their messages will be directed at the autoresponder‘s address. 6. Specify the automatic reply message format (plain text or HTML) and character encoding (UTF-8 is recommended). If you use HTML tags in your auto-reply message, you should select the HTML option. 7. Type your message in the Reply with text field. 8. Attach your files, if needed. To do this, click the Add New Attachment button, select the check box corresponding to the file that you previously uploaded to the attachment storage, and click OK. To remove an attached file from the automatic reply, select the corresponding checkbox, and click Remove Selected. 9. To limit the number of automated responses per day to the same e-mail address, enter the desired number in the respective input box under Limits. The default setting is to respond no more than ten times in one day to the same e-mail address. 10. To reduce mail server load, you may want to limit the number of unique addresses that the autoresponder will remember. To do this, enter the desired number into the Store up to box. 9 Click OK. 10 Click the Switch On icon in the Tools group. Serving Your Customers 187 Switching off Automatic Reply To switch off an automatic reply for a mailbox: Click the Domains shortcut in the navigation pane. Click the required domain name in the list. Click Mail. Click the e-mail address, for which you wish to switch off the automatic reply. 5 Click Autoresponders in the Tools group. 6 Click Switch off. 1 2 3 4 The automatic reply is now switched off. Its configuration is not deleted from the control panel, so the next time you need to use this automatic reply, repeat the above procedure, clicking Switch On on the last step. To delete an automatic reply configuration that you no longer need: 1 Click the Domains shortcut in the navigation pane. 2 Click the required domain name in the list. 3 Click Mail. 4 Click the e-mail address you need. 5 Click Autoresponders in the Tools group. 6 Select a check box corresponding to the configuration name, and click Remove Selected. Serving Your Customers 188 Setting Up Site-Wide Preferences for Handling Mail to Nonexistent Users (Mail Bounce) When somebody sends an e-mail message to an e-mail address that does not exist under your domain, the mail server, by default accepts mail, processes it, and when it finds out that there is no such a recipient under the domain, it returns the mail back to sender with the ―this address no longer accepts mail‖ notice. You can choose to: Change the default notice if you do not like it, Forward all such mail to the desired e-mail address, Reject such mail without accepting it and without notifying senders. This setting can decrease mail server load caused by a large amount of spam, which is often sent to randomly generated user names. However, for spammers, this can somewhat speed up scanning your mail server for valid e-mail addresses. To configure the site-wide settings for handling mail to nonexistent users: 1 2 3 4 Click Click Click Click the Domains shortcut in the navigation pane. the required domain name in the list. Mail. Preferences. 5 Choose a desired option and specify the information as required. 6 Click OK. Serving Your Customers 189 Introducing Similar Changes to a Number of Mail Accounts at Once To save time and effort, you can change the settings of multiple mail accounts at once. This feature is called group operations. To perform group operations on multiple mail accounts: 1 Click the Domains shortcut in the navigation pane. 2 Click the required domain name in the list. 3 Click Mail in the Services group. 4 Select the check boxes corresponding to the mail accounts whose settings you want to change. 5 Click Group Operations. 6 Adjust the settings as necessary: Select Switch on to enable the corresponding option for the selected mail accounts. Select Switch off to disable the corresponding option for the selected mail accounts. Leave Do not change selected if you don't want to change the corresponding option. 7 Click OK. 190 CHAPTER 9 Sending E-mail Notices to Multiple Customers at Once When you need to inform your customers of scheduled server maintenance, or to introduce new service offerings, you can use the Mass E-mail function (Server > Mass Email Messages) to send notices to all of your customers at once. You may want to create message templates and use them when needed, or you can send messages without using any templates. Read this chapter to learn how to: Create message templates for further use (on page 191) Send e-mail to multiple customers (on page 194) In this chapter: Creating, Editing and Removing Message Templates ....................................... 191 Sending E-mail Notices ..................................................................................... 194 Serving Your Customers 191 Creating, Editing and Removing Message Templates To create a new message template: 1 Go to Server > Mass E-Mail Messages and click Add Mass E-Mail Template. 2 Specify template name in the Template name field. 3 Specify sender's name and e-mail address in the From field. You can specify name, e-mail address or both. To specify both name and e-mail address, use the following format: Name <[email protected]>. For example: John Doe <[email protected]>. 4 Select the recipients for your e-mail message: If you want clients to receive your message, select the Clients check box and select the required scope of recipients: All to send message to all clients, Selected only to send message only to the clients you select manually, All except selected to send message to all clients except the ones you select manually. To select several clients, click Select Addresses to the right of the Clients check box (note that this button is not available if All mode is selected), select the required clients in the Available clients field and click Add >>. To remove clients from the list of selected clients, select the required clients in the Selected clients field and click << Remove. If you want domain administrators to receive your message, select the Domain Administrators check box and select the required scope of recipients: All to send message to all domain administrators, Selected only to send message only to the domain administrators you select, All except selected to send message to all domain administrators except the ones you select. To select several domain administrators, click Select Addresses to the right of the Domain Administrators check box (note that this button is not available if All mode is selected), select the required domain administrators in the Available domain administrators field and click Add >>. To remove domain administrators from the list of selected domain administrators, select the required domain administrators in the Selected domain administrators field and click << Remove. You can see your choice of selected clients and domain administrators anytime by clicking the respective Show/Hide Selected button. If you want a copy of the message to be sent to your mailbox, select the Plesk Administrator check box. 5 Specify the subject of your message in the Subject field. 6 Enter your message in the Message text field in plain text format. If you want Plesk to automatically insert the recipient names into your message, use <name> variable. The names will be taken from the information specified in the Contact name field. 7 Click OK to save the template. Serving Your Customers 192 To edit a message template: 1 Go to Server > Mass E-Mail Messages and click the required template in the list. 2 Specify template name in the Template name field. 3 Specify sender name and e-mail address in the From field. You can specify name, e-mail address or both. To specify both name and e-mail address, use the following format: Name <[email protected]>. For example: John Doe <[email protected]>. 4 Select the recipients for your e-mail message: If you want clients to receive your message, select the Clients check box and select the required scope of recipients: All to send message to all clients, Selected only to send message only to the clients you select manually, All except selected to send message to all clients except the ones you select manually. To select several clients, click Select Addresses to the right of the Clients check box (note that this button is not available if All mode is selected), select the required clients in the Available clients field and click Add >>. To remove clients from the list of selected clients, select the required clients in the Selected clients field and click << Remove. If you want domain administrators to receive your message, select the Domain Administrators check box and select the required scope of recipients: All to send message to all domain administrators, Selected only to send message only to the domain administrators you select, All except selected to send message to all domain administrators except the ones you select. To select several domain administrators, click Select Addresses to the right of the Domain Administrators check box (note that this button is not available if All mode is selected), select the required domain administrators in the Available domain administrators field and click Add >>. To remove domain administrators from the list of selected domain administrators, select the required domain administrators in the Selected domain administrators field and click << Remove. You can see your choice of selected clients and domain administrators anytime by clicking the respective Show/Hide Selected button. If you a copy of the message to be sent to your mailbox, select the Plesk Administrator check box. 5 Specify the subject of your message in the Subject field. 6 Enter your message in the Message text field in plain text format. If you want Plesk to automatically insert the recipient names into your message, use <name> variable. The names will be taken from the information specified in the Contact name field. 7 Click OK to save the changes. Serving Your Customers 193 To remove a message template: 1 Go to Server > Mass E-Mail Messages. 2 Select the check box corresponding to the mass e-mail message template you want to remove and click Remove Selected. Confirm the removal and click OK. Serving Your Customers 194 Sending E-mail Notices To send an e-mail message to multiple customers at once: 1 Click Server in the navigation pane, then click Mass E-Mail Messages. 2 If you want to use a message template that you previously created (as described in the Creating, Editing and Removing Message Templates (on page 191) section), click the respective icon in the Create message column. If you want to send a custom message, click Send Mass E-Mail. 3 Specify sender's name and e-mail address in the From field. You can specify name, e-mail address or both. To specify both name and e-mail address, use the following format: Name <[email protected]>. For example: John Doe <[email protected]>. 4 Select the recipients for your e-mail message: If you want clients to receive your message, select the Clients check box and select the required scope of recipients: All to send message to all clients, Selected only to send message only to the clients you select manually, All except selected to send message to all clients except the ones you select manually. To select several clients, click Select Addresses to the right of the Clients check box (note that this button is not available if All mode is selected), select the required clients in the Available clients field and click Add >>. To remove clients from the list of selected clients, select the required clients in the Selected clients field and click << Remove. If you want domain administrators to receive your message, select the Domain Administrators check box and select the required scope of recipients: All to send message to all domain administrators, Selected only to send message only to the domain administrators you select, All except selected to send message to all domain administrators except the ones you select. To select several domain administrators, click Select Addresses to the right of the Domain Administrators check box (note that this button is not available if All mode is selected), select the required domain administrators in the Available domain administrators field and click Add >>. To remove domain administrators from the list of selected domain administrators, select the required domain administrators in the Selected domain administrators field and click << Remove. You can see your choice of selected clients and domain administrators anytime by clicking the respective Show/Hide Selected button. If you want to send a copy of this message to your e-mail, select the Plesk Administrator check box. 5 Specify the subject of your message in the Subject field. 6 Enter your message in the Message text field in plain text format. If you want Plesk to automatically insert the recipient names into your message, use the <name> variable. The names will be taken from the information specified in the Contact name field. Serving Your Customers 195 7 If you want to save this message (both the text itself and information about its recipients) as a template for further use, select the check box to the left of Save text to a new template named field and specify the template name in this field. 8 Click Send to send the message. If you have chosen to save the message contents as a template, a template will be created and placed in the list of available templates. Serving Your Customers 196 Maintaining Mailing Lists If you wish to deliver offers and promotions to your customers, run a newsletter, or inform visitors of your site of recent updates, you should set up a mailing list on your site and subscribe your users to it or invite them to subscribe themselves. Mailing list is a convenient way to reach a number of readers at once: it contains a list of subscribers‘ e-mail addresses, which are combined under a single e-mail address, to which you post your information or a newsletter. Mailing lists are provided by the GNU Mailman software, which may or may not be installed on your server. To make sure that you can use mailing lists, contact your provider or look it up in the control panel: go to Home > Mail, click the Mailing lists tab, and see if there is an Add New Mailing list icon displayed in color. Setting Up a Mailing List To set up a mailing list: Click the Domains shortcut in the navigation pane. Click the required domain name in the list. Click the Mail icon in the Services group. Click the Mailing lists tab. Click the Switch On icon in the Tools group to start up the Mailman software on the server. 6 Click the Add New Mailing List icon in the Tools group. 1 2 3 4 5 7 Specify the desired name for the mailing list. This can be, for example, a department name, a topic of the mailing list, or any other text in Latin symbols. The name should be short enough to remember. It can comprise alphanumeric, dash, dot and underscore symbols. 8 Specify the password that will be used for administering the mailing list. 9 Specify the mailing list administrator‘s e-mail. 10 Leave the Notify administrator of the mailing list creation check box selected. You will receive instructions on using and managing the mailing list at the administrator‘s e-mail you specified. Keep that message for your records. 11 Click OK. To post a newsletter issue or other information to the mailing list, send it by e-mail to the mailing list‘s e-mail address. All subscribed users will receive it. Serving Your Customers 197 Configuring a Mailing List Your mailing list is operable with the default settings. However, you may want to configure it, for example, so as to enable moderation, filter content of the posts or to archive messages. To do this from the control panel: 1 2 3 4 Click Click Click Click the the the the 5 Click the Domains shortcut in the navigation pane. required domain name in the list. Mail icon in the Services group. Mailing lists tab. icon next to the desired mailing list‘s e-mail address. A login screen opens. 6 Type the list administrator‘s password and click Let me in …. Alternately, you can access the mailing list configuration the following way: 1 In your web browser, enter the following URL: http://lists.<yourdomain.com>/mailman/admin/<listname> (where <your-domain.com> is your domain name, and <listname> is the name of the mailing list (i.e. the left part of the mailing list‘s e-mail address before the @ sign). A login screen opens. 2 Type the list administrator‘s password and click Let me in …. Serving Your Customers Subscribing and Unsubscribing Users To subscribe users to mailing list: the Domains shortcut in the navigation pane. the required domain name in the list. Mail. the Mailing lists tab. 1 2 3 4 Click Click Click Click 5 6 7 8 Click the required mailing list name. Click Add New Member. Specify subscriber‘s e-mail address. Click OK. To unsubscribe users from mailing list: 1 2 3 4 Click Click Click Click the Domains shortcut in the navigation pane. the required domain name in the list. Mail. the Mailing lists tab. 5 Click the required mailing list name. 6 Select a check box to the left of the user‘s e-mail address. 7 Click Remove Selected. 8 Confirm removal and click OK. 198 Serving Your Customers Posting to Your Mailing List To post a newsletter issue or other information to the mailing list, send it by e-mail to the mailing list‘s e-mail address. All subscribed users will receive it. Removing Mailing Lists To remove a mailing list from site: 1 Click the Domains shortcut in the navigation pane. 2 3 4 5 Click the required domain name in the list. Click Mail. Click the Mailing lists tab. Select a check box corresponding to the mailbox that you wish to remove. 6 Click Remove Selected. 7 When prompted, confirm removal and click OK. 199 200 CHAPTER 10 Using Help Desk for Resolving Your Customers' Issues If you decided to use the help desk integrated with the control panel and configured it as described in the Configuring Help Desk (on page 78) section, then you can use it to receive problem reports or requests for assistance from your customers and notify them when their issues are resolved. In this chapter: Viewing Trouble Tickets in Your Help Desk ....................................................... 201 Commenting and Closing Trouble Tickets ......................................................... 202 Serving Your Customers 201 Viewing Trouble Tickets in Your Help Desk To view the problem reports you have in the Help Desk: 1 Click the Help Desk shortcut in the navigation pane. 2 If you need to view the problem reports submitted by users of this server, go to step 4. 3 If you need to view problem reports submitted to Help Desk on another server you manage using the Master function (as described in the section Using Centralized Access to Your Numerous Plesk Servers (on page 235)), in the Global Help Desk group, click Servers, then select the server you need. 4 To view new problem reports, in the Local Tickets group, click New. To view all reports, click All. To view all opened and not resolved problem reports, click All Opened. To view the tickets the users reopened because they found that their issues were not resolved, click Reopened. To review the closed tickets, click Closed. 5 The tickets will be listed and the following supplementary information will be displayed: Id: identification number assigned by the system upon submission, Ticket Subject: a summary entered by the ticket reporter, Ticket Status: new, reopened, closed, Reporter Type: a type of control panel user account or an e-mail address the ticket came from - a client, domain administrator, e-mail user with access to control panel, or user submitted a ticket by e-mail, Reporter Name: a name of person who submitted the ticket, domain names for tickets submitted by domain owners, or e-mail addresses for tickets submitted by e-mail, Modified: the date the ticket was modified - a comment appended, or status changed, Queue: the order in which the problem reporters would prefer their issues to be resolved, Priority: the severity of a problem estimated by the problem reporter, Category: the category to which the ticket is related. 6 To see what is inside a ticket, click a ticket id or ticket subject. Serving Your Customers 202 Commenting and Closing Trouble Tickets To close a ticket when the issue was resolved or to post your comment: 1 Click the Help Desk shortcut in the navigation pane. If you need to visit Help Desk on another server you manage, in the Global Help Desk group, click Servers, then select the server you need. 2 Locate the ticket you need and click its subject or identification number. 3 To close, reopen or post a comment to the ticket, select the operation you would like to perform from the Ticket Event drop-down box, and type a new comment into the New Comment input field if required. Click OK to submit. Serving Your Customers 203 Migrating User Accounts, Domain Names and Web Sites from Other Hosting Platforms Migration of user accounts, domain names and web sites from other hosting platforms to Plesk control panel is performed by Plesk Migration Manager tool, created for easy and fast migration from other, competitive control panels to Plesk, and also for migration from older releases of Plesk and from different platforms of Plesk. At the present moment you can migrate the following platforms to Plesk: Confixx 1.65, 2, 3 CommuniGate Pro older releases of Plesk and Slash (for FreeBSD or Linux) Cobalt Raq 2, 3, 4, 550, XTR cPanel 9, 10 Ensim 3.5, 4 To migrate all user accounts, domains, and web sites with applications from other hosting platforms: 1 2 3 4 Click the Server shortcut. Click the Migration Manager icon in the Services group. Click the Start New Migration icon in the Tools group. Leave the Migration option selected, and specify the following options: The source host. Specify either the IP address or the host name of the server, from which you want to transfer data. The login name and password used for logging in to the remote host you are migrating. You can either use the 'root' login, or use an account with sudo enabled, provided that this account is allowed to run any commands through sudo. Note: If you have enabled on the source host the ability to obtain superuser privileges without supplying a password (there is the line user (ALL)=ALL NOPASSWD:ALL in the file /etc/sudoers), then you do not need to specify any password in the Sudo password box. 5 Make sure that the remote hosting platform is running, and the "iconv" utility is installed in the remote host's operating system. 6 Click Next>>. The migration manager will connect to the specified host and gather information on the business objects of the remote hosting platform. 7 Select the Dump all option in the Migration mode group. Serving Your Customers 204 8 If the Migration Manager detected the hosting platform incorrectly, select the platform from the Source platform drop-down box. 9 If you want to specify data compression options, domain templates to be applied during migration, or remote host‘s hard drive partitions that should be used for storing temporary files, click the Advanced tab, and select the required options. 10 Click Next>>. 11 Once the data are retrieved from the remote host, specify the IP address mapping settings and click Migrate. 12 Once migration is completed, a detailed report will be presented on the screen. Click OK to exit the wizard. To migrate individual user accounts, domain names and web sites with applications from other hosting platforms: 1 2 3 4 Click the Server shortcut. Click Migration Manager. Click the Start New Migration icon in the Tools group. Leave the Migration option selected, and specify the following options: The source host. Specify either the IP address or the host name of the server, from which you want to transfer data. The login name and password used for logging in to the remote host you are migrating. You can either use the "root" login, or use an account with sudo enabled, provided that this account is allowed to run any commands through sudo. 5 Make sure that the remote hosting platform is running, and the "iconv" utility is installed in the remote host's operating system. 6 Click Next>>. The migration manager will connect to the specified host and gather information on the business objects of the remote hosting platform. 7 Select the Select objects that your wish to migrate from host option. 8 If the Migration Manager detected the hosting platform incorrectly, select the platform from the Source platform drop-down box. 9 If you want to specify data compression options, domain templates to be applied during migration, or remote host‘s hard drive partitions that should be used for storing temporary files, click the Advanced tab, and select the required options. 10 Click Next>>. 11 Select which objects you wish to migrate to Plesk: To migrate user accounts, click the Accounts tab and specify which accounts should be migrated by selecting the corresponding check boxes, then click Migrate. Serving Your Customers 205 To migrate domain names, select the Domains tab and specify which domains should be migrated by selecting the corresponding check boxes, then click Migrate. On the next screen, select which user account on the Plesk server you want to migrate the domains to. Then, click Migrate. 12 Select the IP address on your Plesk host, to which the remote host‘s IP addresses should be mapped. 13 Click Migrate. 14 Once migration is completed, a detailed report will be presented on the screen. Click OK to exit the wizard. Serving Your Customers 206 Performing Migration Within a Single Server If you wish to migrate to Plesk 8 from another hosting platform or earlier versions of Plesk, and cannot afford additional hardware for this operation, you can do it in one of the following ways: Migration with use of chrooted environment. Plesk cannot be installed on the machine running other control panel software. To circumvent this limitation, you need to create a kind of virtual environment, such as chroot. Plesk can be installed into chrooted environment in a special mode. Once Plesk is installed into the chrooted environment, you can migrate data from your hosting platform into the chrooted environment. After successful completion, you will be able to shut your previously used hosting platform down and use Plesk as your main control panel. Use of data import feature of Migration Manager. You should have a hard disk with operating system and Plesk software installed. This feature allows importing to Plesk the data gathered by migration agent. Once the data are obtained, you will have to move them to the disk with Plesk installation and reboot to the operating system where Plesk is installed. After successful completion, you will be able to remove your previously used hosting platform. Migrating Data Using Chrooted Environment You are advised to create a chrooted environment on a separate partition. This is required for you to be able to use this partition as a root file system upon completion of installing Plesk and migrating data to it. You must have super user permissions in order to configure the chrooted environment. In order to create a chrooted environment, you will need at least 2 gigabytes of disk space for the operating system and Plesk installation, plus some amount of disk space for user data. You can set up your system into a chrooted environment using the utility from the chroot_tool.zip package, which is available at ftp://download1.swsoft.com/Plesk/Plesk8.0/Extensions, or use other third-party utilities such as, for instance, mach (http://mach.sourceforge.net). Important: We strongly recommend that you backup all the data on your hard drive prior to setting up chrooted environment. To migrate data using chrooted environment: 1 Prior to installing Plesk, make sure that port 8443 is not used. If some program uses this port, you should reconfigure it so as to free the port. 2 Copy the Plesk installer file to the chrooted directory. 3 Enter the chrooted environment using the command chroot <directory_name>. 4 Define the value for variable CHROOTISH=yes. Serving Your Customers 207 export CHROOTISH=yes 5 Configure mysql as follows: mysql_install_db chown -R mysql /var/lib/mysql/ 6 Run mysql without networking. This can be done differently for different versions of MySQL. For instance, for MySQL version 3 this is done with the command 'safe_mysqld --skipnetwork &', and for version 4 the command is 'mysqld_safe --skipnetworking &'. 7 Run Plesk installer and follow the instructions presented on the screen. 8 Once Plesk installation is completed, log in to control panel, click the Server shortcut, then click the Migration Manager icon, and then click the Start Migration icon. 9 Specify your host as the data source, and proceed with migration as usual. 10 Once the migration is completed, you need to reboot server to start it from chroot partition. 11 Remove the "NO_RESTART_DAEMON" parameter from /etc/psa/psa.conf file. 12 Make sure that everything works correctly. In case of errors you can reboot to your previously used partition with other control panel. To boot to the chrooted environment: 1 Add to the boot manager an item for booting up from the partition with chrooted environment. Example: Let‘s suppose you have Fedora Core 2 operating system and GRUB boot manager installed. 1. Change to the ./boot/grub/ directory. 2. Check out where your chrooted environment is set up using the command fdisk -l. Disk /dev/sda: 2097 MB, 2097152000 bytes 128 heads, 32 sectors/track, 1000 cylinders Units = cylinders of 4096 * 512 = 2097152 bytes Device /dev/sda1 /dev/sda2 /dev/sda3 Boot * Start 1 51 920 End 50 919 1000 Blocks 102384 1779712 165888 Disk /dev/sdb: 2418 MB, 2418016256 bytes Id 83 83 82 System Linux Linux Linux swap Serving Your Customers 208 255 heads, 63 sectors/track, 293 cylinders Units = cylinders of 16065 * 512 = 8225280 bytes Device /dev/sdb1 Boot Start End 1 293 Blocks 2353491 Id 83 System Linux In our case it is the partition /dev/sdb1. 1. Open file grub.conf or menu.list in a text editor, and add the following records: title Fedora Core-chroot (2.6.5-1.358) root (hd1,0) kernel /boot/vmlinuz-2.6.5-1.358 ro root=/dev/sdb1 initrd /boot/initrd-2.6.5-1.358.img 2. Save changes. 1 Create an initial ramdisk in the chrooted environment. Example for Fedora Core 2. Let‘s suppose you have chrooted environment set up in the directory /disk2. 1. Enter the chroot using the command chroot /disk2. 2. Remove the current image of initail ramdisk. ls /boot/ System.map-2.6.5-1.358 initrd-2.6.5-1.358.img config-2.6.5-1.358 vmlinuz-2.6.5-1.358 rm -f /boot/initrd-2.6.5-1.358.img 1. Create new image of initail ramdisk: mkinitrd /boot/initrd-2.6.5-1.358.img 2.6.5-1.358 Example for SuSe 9.1 Let‘s suppose you have chrooted environment set up in the directory /disk2. 2. Enter the chroot using the command chroot /disk2. 3. Remove the current image of initail ramdisk using the command mkinitrd. 1 Restart your system. Serving Your Customers 209 Migrating Data Using Data Import Feature If you have a hard disk with operating system and Plesk software installed, you can use the Import configuration feature of Plesk Migration Manager. To migrate your data using data import feature: 1 Mount the disk where your Plesk is installed. 2 Choose the migration agent suitable for your source hosting platform. Migration agents are stored in the directory /plesk_installation_directory/PMM/agents/ on your Plesk drive: Alabanza /plesk_installation_directory/PMM/agents/AlabanzaX/ Confixx 1.65, 2, 3 /plesk_installation_directory/PMM/agents/ConfixxX/ Ensim 3.5, 4 - /plesk_installation_directory/PMM/agents/EnsimX/ Hsphere /plesk_installation_directory/PMM/agents/HsphereX/ Plesk 2.5.x, 5.x, 6.x, 7.x /plesk_installation_directory/PMM/agents/PleskX/ Slash - /plesk_installation_directory/PMM/agents/Slash/ Cobalt RaQ2 - /plesk_installation_directory/PMM/agents/RaQ2/ Cobalt Raq550 /plesk_installation_directory/PMM/agents/RaQ550/ Cobalt Raq3 - /plesk_installation_directory/PMM/agents/RaQ3/ Cobalt Raq4 - /plesk_installation_directory/PMM/agents/RaQ4/ cPanel 9, 10 /plesk_installation_directory/PMM/agents/cPanel9/ CommuniGate Pro /plesk_installation_directory/PMM/agents/Cgp/ 3 Change to the directory /plesk_installation_directory/PMM/var/ on your Plesk drive, copy all agent-related files and subdirectories from /plesk_installation_directory/PMM/agents/agent_name/ to the current directory. 4 Copy all files and subdirectories from /plesk_installation_directory/PMM/agents/shared/ to the current directory. 5 Start the migration agent with –get-status option: ./<your platform name>.pl --get-status. Serving Your Customers 210 6 If agent suits your platform, you will be able to make a copy of all data using the option –dump-all, or make a copy of selected entities using the option –dump-domains for migrating domains, or –dumpaccounts for migrating user accounts (you can run the migration agent with –h option for details). For example: <agent_file_name> -dump-domains=domain1, domain2, domain3. 7 Once agent has finished its job, move the contents of the directory /plesk_installation_directory/PMM/var/pma to the directory /plesk_installation_directory/PMM/archives and copy the file /plesk_installation_directory/PMM/var/<your platform name>.xml to /plesk_installation_directory/PMM/var/dump.xml. 8 Reboot to the operating system where Plesk is installed. 9 After successful boot up, login to the control panel, click the Server shortcut, then click the Migration Manager icon, and then click Start Migration. 10 Select the Import configuration mode option, and follow the instructions presented on the screen. 211 CHAPTER 11 Backing Up and Restoring Your Data With the current version of backup and restore utilities installed with your control panel, you can: Back up the entire server. You can do this only through the command line. The backup archive will include your control panel license key, mail server and DNS server settings, information on database servers, domain templates, virtual host skeletons, user accounts, domains, web sites with web content, SSL certificates, databases, site applications, and custom buttons. Back up individual user accounts with domains. The backup archive will include all control panel configurations and data related to the user account and user's domains (Web sites), including the information on resource allotments and permissions to perform operations within the control panel. Back up individual domains (Web sites). The backup archive will include all data related to domain administrator's account, domain (web site) and mail services, including the contents of mailboxes, Horde Turba address book contact lists, anti-spam and antivirus settings. Schedule backups. To schedule a backup of entire server, you will need to add a cron task that will run the backup utility on schedule. Scheduling backup of user accounts and domains can be done through the control panel. Restore your data from backup archives. Your customers granted with the permission to use the backup and restore facilities can back up and restore their own account settings and Web sites through the control panel. Your customers, resellers and your resellers' customers will find shortcuts to their backup repositories on their Home pages (Home > Backup). If you have access to the server shell and feel comfortable working with the command line, you might also be interested in reading the Backup and Restore Command Line Utilities User's Guide available in zipped HTML format at http://download1.swsoft.com/Plesk/Plesk8.0/Doc/plesk-8-backup-restore-usersguide.zip, and Adobe PDF at http://download1.swsoft.com/Plesk/Plesk8.0/Doc/plesk-8backup-restore-users-guide.pdf. In this chapter: Backing Up the Entire Server ............................................................................ 212 Backing Up Individual User Accounts with User's Domains ............................... 212 Backing Up Individual Domains (Web Sites)...................................................... 213 Scheduling Backups .......................................................................................... 213 Restoring Data From Backup Archives .............................................................. 217 Maintaining Backup Files Repository ................................................................. 218 Configuring Control Panel for Using FTP Repository ......................................... 220 Backing Up and Restoring Your Data 212 Backing Up the Entire Server To backup the server configuration settings and all user data you have on your hosting machine: 1 Log in as root to your server. 2 Change to the directory, where Plesk is installed: cd /plesk_installation_directory/bin 3 Run the following command: ./pleskbackup all <filename> Where the <filename> is a target backup file name with absolute or relative path. The data will be backed up without disruption of hosting services and downtime. The resulting backup archive will be placed in the directory you specified. Backing Up Individual User Accounts with User's Domains To back up a user account with domains: 1 Click the Clients shortcut in the navigation pane. 2 Click the client name you need. 3 Click the Back Up icon in the Tools group. 4 If you want to back up and store the backup file on an FTP server, click the FTP repository tab, then click FTP Account Properties to specify the destination FTP server (as described in the section Configuring Control Panel for Using FTP Repository (see page 220)), if you have not done so yet. 5 Click the Backup Now icon in the Tools group. 6 Specify the backup file name and give a description to the backup file. 7 To create a multivolume backup, select the respective check box and specify volume size in megabytes. 8 Select the repository where you would like to store the backup file. 9 To save the user account settings, select the Back up client's preferences and account details check box. 10 Select the domains to back up. To back up individual domains, select the corresponding check boxes in the list of domains. Backing Up and Restoring Your Data 213 To back up all user's domains, select the check box in the upper left corner of the list of domains. 11 Click Back Up Now. 12 The backup will start and the progress will be shown. To update the information on the screen, click Refresh. 13 Upon completion of the backup process, click OK. The backup file will be saved to the repository you selected, and will be accessible either from the FTP server, or from the location Clients > client name > Backup. Backing Up Individual Domains (Web Sites) To back up a domain (web site): 1 Click the Domains shortcut in the navigation pane. 2 Click the domain name you need. 3 Click the Back Up icon in the Domain group. 4 If you want to back up and store the backup file on an FTP server, click the FTP repository tab, then click FTP Account Properties to specify the destination FTP server, if you have not done so yet. 5 Click the Backup Now icon in the Tools group. 6 Specify the backup file name and give a description to the backup file. 7 To create a multivolume backup, select the respective check box and specify volume size in megabytes. 8 Select the repository where you would like to store the backup file. 9 Click Back Up Now. 10 The backup will start and the progress will be shown. To update the information on the screen, click Refresh. 11 Upon completion of the backup process, click OK. The backup file will be saved to the repository you selected, and will be accessible either from the FTP server, or from the location Domains > domain name > Backup. Scheduling Backups To schedule backup of the server configuration and all user data: 1 Click the Server shortcut in the navigation pane. 2 Click the Scheduled Tasks icon in the Services group. 3 Click Add New Task. 4 Specify when to run the backup. Backing Up and Restoring Your Data 214 Minute - enter the value from 0 to 59 Hour - enter the value from 0 to 23 Day of the Month - enter the value from 1 to 31 Month - enter the value from 1 to 12, or select the month from a drop-down box Day of the Week - enter the value from 0 to 6 (0 for Sunday), or select the day of the week from a drop-down box You can schedule the time using the UNIX crontab entry format. In this format, you can enter several values separated by commas. Two numbers separated by a hyphen mean an inclusive range. For example, to run a task on the 4th, 5th, 6th, and 20th of a month, type 4-6,20. insert an asterisk to specify all values allowed for this field. For example, to run a task daily, type * in the Day of the Month text box. To schedule the task to run every Nth period, enter the combination */N, where N is the legal value for this field (minute, hour, day, month). For example, */15 in the Minute field schedules the task to start every 15 minutes. You can type the contracted names of months and days of the week, which are the first three letters: Aug, Jul, Mon, Sat, etc. However, the contracted names cannot be separated with commas or used together with numbers. 5 Specify the command in the Command input box: usr/local/psa/bin/pleskbackup all <filename> Where the <filename> is a target backup file name with absolute or relative path to its location. 6 Click OK. The data will be backed up without disruption of hosting services and downtime. The resulting backup archive will be placed in the directory you specified. To schedule backup of a user account and user's sites: 1 2 3 4 Click Click Click Click the the the the Clients shortcut in the navigation pane. client name you need. Backup icon in the Tools group. Schedule Backup icon in the Tools group. 5 Specify when and how often to perform backup. 6 To enable recycling of backup files, clear the Unlimited check box and type the maximum allowed number of files in the repository. When this limit is reached, the oldest backup files are removed. 7 Specify the combination of symbols that backup file names should begin with. This will help you distinguish between backup files. 8 Select the repository where you would like to store the backup file. 9 To create a multivolume backup, select the respective check box and specify volume size in megabytes. Backing Up and Restoring Your Data 215 10 To save the user account settings, select the Back up client's preferences and account details check box. 11 Select the domains to back up. To back up all domains, select the check box in the upper left corner of the list of domains. To back up individual domains, select the corresponding check boxes in the list of domains. 12 Click the Switch On icon in the Tools group. 13 Click OK. To schedule backup of a single domain (web site): 1 2 3 4 5 6 Click the Domains shortcut in the navigation pane. Click the domain name you need. Click the Backup icon in the Tools group. Click the Schedule Backup icon in the Tools group. Specify when and how often to perform backup. To enable recycling of backup files, clear the Unlimited check box and type the maximum allowed number of files in the repository. When this limit is reached, the oldest backup files are removed. 7 Specify the combination of symbols that backup file names should begin with. This will help you distinguish between backup files. 8 Select the repository where you would like to store the backup file. 9 To create a multivolume backup, select the respective check box and specify volume size in megabytes. 10 Click the Switch On icon in the Tools group. 11 Click OK. Backing Up and Restoring Your Data 216 Optimizing Server Performance If you serve numerous web sites, you may want to configure the scheduled backup and restore processes, so that they do not consume much server resources. To reduce the server load: 1 Go to Server > Backup Settings. 2 Specify the number of simultaneous backup processes in the Maximum number of simultaneously running scheduled backup processes box. The default value is 10. Type a lesser value. 3 Select the Execute scheduled backup processes with low priority check box. 4 Click OK. Backing Up and Restoring Your Data 217 Restoring Data From Backup Archives You can restore data backed up by Plesk 7.5.4 control panel. Before you restore such data, you need to log in as root to your server and run the conversion utility for each backup file created by 7.5.4 as follows: plesk_installation_directory/bin/backup-convert.py convert -o <new backup file name> <old backup file name>, where <new backup file name> is the path to the new backup file created by the conversion utility, and <old backup file name> is a backup file created by Plesk 7.5.4. To restore the server configuration and all user data from a backup file: 1 Log in as root to your server. 2 Change to the directory, where Plesk is installed: cd /plesk_installation_directory/bin 3 Generate a file that defines mapping of items (user accounts, sites, etc.) stored in the backup file to the items currently served by your Plesk hosting platform. To do this, run the following command from the command line: ./pleskrestore --create-map <backup file name> -map <map file name> If you have a multivolume backup, you should specify the first volume as the <backup file name>. A mapping file will be generated and saved to the specified location. In most cases you will not need to edit this file: you will need to review its contents and specify mapping for items only if you fail to restore data from a backup due to object conflicts (for example, the range of IP addresses listed in the backup file is different from those available on the server), or if you wish to specify individual objects that should be restored. 4 To restore all backed up data, including server and control panel configuration, applications vaults, user accounts, web sites, databases, and mailboxes with e-mail messages, run the command: ./pleskrestore --restore <backup file name> -map <map file name> -level all where the <backup file name> and <map file name> are the paths to the backup and map files, respectively. If you have a multivolume backup, you should specify the first volume as the <backup file name>. The data will be restored without disruption of hosting services and downtime. The server configuration settings and all user data (including the content of Web sites and messages in mailboxes) will be overwritten. To restore a user account with domains: 1 Click the Clients shortcut in the navigation pane. 2 Click the client name you need. Backing Up and Restoring Your Data 218 3 Click the Backup icon in the Tools group. 4 If you wish to restore data from a file stored on an FTP server, click the FTP Repository tab. 5 6 7 8 Click the backup file name you need. Select the Restore client's preferences and account details check box. Select the domains that you would like to restore. Click Next >>. If this account or any of its domains were assigned other IP addresses or database servers than specified in the backup file, you will be prompted to resolve the conflicts by selecting the new IP address and database server to use. Click Next >>. 9 Restoring will start and its progress will be shown. To update the information on the screen, click Refresh. 10 Upon completion of the restoring process click OK. To restore a domain (Web site): 1 Click the Domains shortcut in the navigation pane. 2 Click the domain name you need. 3 Click the Backup icon in the Tools group. 4 If you wish to restore data from a file stored on an FTP server, click the FTP Repository tab. 5 Click the backup file name you need. 6 Click Restore Now. Restoring will start and its progress will be shown. To update the information on the screen, click Refresh. 7 Upon completion of the restoring process click OK. Maintaining Backup Files Repository Domain backups are usually stored in separate backup repositories for each domain hosted on your server. They are accessed by clicking Domains shortcut, clicking the required domain name and clicking Backup. You can manage these backup repositories by: Uploading backup files stored on another computer Downloading backup files to another computer Removing redundant backup files from backup repository Backing Up and Restoring Your Data 219 Uploading Backup Files to Server To upload a backup file to a backup repository within the control panel: 1 Access the repository you need. To access a repository of a specific client, click the Clients shortcut in the navigation pane, click the user name you need, and then click the Backup icon in the Tools group. To access a repository related to a specific Web site, click the Domains shortcut in the navigation pane, click the domain name you need, and then click the Backup icon in the Tools group. 2 Click Upload Files to Local Repository. 3 Click Browse and select the required backup file. 4 Click OK. The backup file will be uploaded to the backup repository. Downloading Backup Files from Server To download a backup file from a backup repository within the control panel: 1 Access the repository you need. To access a repository of a specific client, click the Clients shortcut in the navigation pane, click the user name you need, and then click the Backup icon in the Tools group. To access a repository related to a specific Web site, click the Domains shortcut in the navigation pane, click the domain name you need, and then click the Backup icon in the Tools group. 2 Click the icon corresponding to the backup file you wish to download. 3 Select the location where you wish to save the backup file and click Save. The backup file will be downloaded from the backup repository. Backing Up and Restoring Your Data 220 Removing Backup Files from Server To remove a backup file from a backup repository in the control panel: 1 Access the repository you need. To access a repository of a specific client, click the Clients shortcut in the navigation pane, click the user name you need, and then click the Backup icon in the Tools group. To access a repository related to a specific Web site, click the Domains shortcut in the navigation pane, click the domain name you need, and then click the Backup icon in the Tools group. 2 Select a check box corresponding to the backup file you wish to remove. 3 Click Remove Selected. 4 Confirm removal and click OK. Configuring Control Panel for Using FTP Repository If you are going to use an FTP server for storing backup files, you should set up the control panel appropriately: 1 Navigate to the repository you need: For a repository on a client account level, go to Clients > client name > Back Up > FTP Repository > FTP Account Properties. For a repository on a domain level, go to Domains > domain name > Back Up > FTP Repository > FTP Account Properties. 2 Specify the following properties: FTP server's IP address or host name. Directory on the server, where you want to store backup files. User name and password for access to the FTP account. 3 Click OK. 221 CHAPTER 12 Viewing Statistics To view the information on server usage: 1 Click the Server shortcut in the navigation pane. 2 Click the Statistics icon in the System group. The following information will be presented: Processor information. Plesk version and build number. Operating system and its kernel version. Plesk license key number. Server uptime. Processor load averages for the last 1 minute, 5 minutes and 15 minutes. The amount of RAM installed and used. The amount of swap space used. Hard disk usage by partitions and directories. The connected (mounted) storage and network storage devices. The number of hosted domains: active shows the domains that are online; problem shows the domains that have exceeded the disk space and bandwidth allotments but still online; passive shows the domains that are offline because they were suspended by you or your resellers. 3 Click the Refresh icon to update the server statistics with the latest data. To view the information on software components installed on your server and managed by the Plesk control panel: 1 Click the Server shortcut in the navigation pane. 2 Click the Component Info icon in the System group. 3 Click the Refresh icon to update the information. To view a consolidated report on a user account and user's sites: 1 Click the Clients shortcut in the navigation pane. 2 Click the user name you need. 3 Click the Report icon in the Tools group. Viewing Statistics 222 To view a detailed report on server resources and hosting features used by a specific domain name/web site: 1 Click the Domains shortcut in the navigation pane. 2 Click the domain name you need. 3 Click the Report icon. Common operations on reports: To get more details, select the Full Report option from the Report drop-down menu. To adjust the amount of information presented in a report, click the Customize icon, and then modify an existing report template (to do this, click a report template name) or create a new report template (to do this, click the Add New Layout icon). Next, specify how much information you want in each section of the report: select None if you do not want any information, select Summary if you want a concise overview, or select Full if you need a detailed report. Select the Use as default report check box and click OK. To delete a custom report layout, select the check box corresponding to the report layout name and click Remove Selected. To print the report, click the Print icon. A report will open in a separate browser window. Select the File > Print option from the browser's menu to print the report. To send the report by e-mail, type the recipient's e-mail address into the input box located to the right of the Report group and click the Send by E-mail icon. If you are the recipient, then you do not need to specify an e-mail address: the system assumes by default that you are the report recipient and specifies your e-mail address registered with your control panel account. To have the reports automatically generated and delivered by e-mail on a daily, weekly, or monthly basis, click the Report Delivery icon and follow the instructions supplied in the "Automating report generation and delivery by e-mail" section. To find out how many people visited a site, from what countries, and what pages of the site they viewed: 1 Click the Domains shortcut in the navigation pane. 2 Click the domain name you need. 3 Click the Report icon. 4 View the statistics for the web pages or files downloaded from or uploaded to specific areas of your site: To view the statistics for web pages transferred from your site over hypertext transfer protocol (HTTP), click Web Stats. To view the statistics for web pages transferred from your site over secure hypertext transfer protocol (HTTPS), click Web Stats SSL. To view statistics for files transferred over file transfer protocol (FTP), click FTP Stats. To view the bandwidth usage by months, click the Traffic History icon. Viewing Statistics 223 To view the bandwidth usage by FTP, Web and mail services in this domain, click the Traffic icon. Note: If you use the Webalizer statistical package on your account, you can customize the graphical reports shown by Webalizer. For instructions, refer to the Adjusting Preferences for Web Statistics Presentation by Webalizer (see page 223) section. Alternately, you can view the Web statistics for a site by visiting the following URL: https://your-domain.com/plesk-stat/webstat. When prompted for username and password, specify the FTP account credentials. In this chapter: Adjusting Preferences for Web Statistics Presentation by Webalizer ................. 223 Automating Report Generation and Delivery by E-mail...................................... 227 Viewing Log Files and Configuring Recycling of Log Files ................................. 229 Adjusting Preferences for Web Statistics Presentation by Webalizer By default, statistical utility counts and reports the requests for web pages and other files made from your site—by your own web pages. So, when a user‘s browser requests from your site a single web page that contains references to other files, such as scripts, cascading style sheets, media files, and the like, the statistical utility reports these references to files as if they were visits to your web page. Thus, with the default settings your usage statistics is inaccurate. You may want to: Hide these internal references, and references from other sites. Group references from a number of sites, so as to show them as if they originated from a single location. Hide direct requests. Direct requests are sent to your web server when users access your site by typing the URL in their browsers. Viewing Statistics 224 Hiding and Unhiding Internal References from Your and Other Sites To hide the internal references or references from other sites: 1 Click the Domains shortcut in the navigation pane. 2 3 4 5 6 7 Click the domain name you need. Click the Report icon. Click the Web Statistics Preferences icon. Click the Hide Entries icon. In the Entry type drop-down box, leave the Referrer value selected. In the Referrer field, type the domain name from which you do not want the referrers shown in web statistics reports. You can use the '*' wildcard character to specify a part of domain name. 8 Click OK. To unhide references: 1 Click the Domains shortcut in the navigation pane. 2 Click the domain name you need. 3 Click the Report icon. 4 Click the Web Statistics Preferences icon. All hidden entries will be presented in a list. 5 Select the check boxes corresponding to the entries you wish to unhide and click Remove Selected. 6 Confirm the operation and click OK. Viewing Statistics 225 Grouping and Ungrouping References from Other Sites To group references from a specific site: 1 2 3 4 5 Click Click Click Click Click the the the the the Domains shortcut in the navigation pane. domain name you need. Report icon. Web Statistics Preferences icon. Grouped referrers tab. 6 Click the Group Referrers icon. 7 Type the group name that you wish to be shown f or all referrers on the specific site. 8 In the Referrer input box, specify the site (domain name) from which all referrers should be grouped. You can use the '*' wildcard character to specify a part of domain name. 9 Click OK. To ungroup references from a specific site: Click the Domains shortcut in the navigation pane. Click the domain name you need. Click the Report icon. Click the Web Statistics Preferences icon. Click the Grouped referrers tab. All referrer group names will be presented in a list. 6 Select the check box corresponding to the required group name and click Remove Selected. 7 Confirm the operation and click OK. 1 2 3 4 5 Viewing Statistics 226 Hiding and Unhiding Direct Requests To hide direct requests: 1 2 3 4 5 Click Click Click Click Click the the the the the Domains shortcut in the navigation pane. domain name you need. Report icon. Web Statistics Preferences icon. Hide Entries icon. 6 In the Entry type drop-down box, select the Direct request value. 7 Click OK. To unhide direct requests: 1 Click the Domains shortcut in the navigation pane. 2 Click the domain name you need. 3 Click the Report icon. 4 Click the Web Statistics Preferences icon. All hidden entries will be presented in a list. 5 Select the check box corresponding to the Direct request entry and click Remove Selected. 6 Confirm the operation and click OK. Viewing Statistics 227 Automating Report Generation and Delivery by E-mail To receive consolidated reports on one or several user accounts on a regular basis: 1 Go to Clients > client name > Report > Report Delivery, then click Add Delivery Schedule. 2 To receive the report to your e-mail address registered with the system, select the the server administrator value from the Deliver to dropdown menu. To receive the report to another e-mail address, select the the e-mail address I specify option and type the e-mail address. To send the reports to the client, select the the client option. To send the client reports to all respective clients, select the Report on all clients option. 3 Select the delivery interval from the Delivery frequency drop-down menu and click OK. You can have the report delivered each day, each week, or each month. To change the delivery schedule for an account status report: 1 Go to Clients > client name > Report > Report Delivery. 2 Under the Frequency column, click a hyperlink corresponding to the delivery schedule you would like to change. 3 Adjust the settings as required and click OK. To stop receiving the account status reports: 1 Go to Clients > client name > Report > Report Delivery. 2 Select a check box corresponding to the delivery schedule a nd click Remove Selected. Confirm removal and click OK. To receive detailed reports on one or several domains/web sites on a regular basis: 1 Go to Domains > domain name > Report > Report Delivery, then click Add Delivery Schedule. 2 To receive the report to your e-mail address registered with the system, select the server administrator value from the Deliver to dropdown menu. To receive the report to another e-mail address, select the e-mail address I specify option and type the e-mail address. If this domain name/web site belongs to another user, you may want to send the report to that user: select the client or domain administrator option. Viewing Statistics 228 3 To receive a report on a given domain/web site, leave this domain option selected. To receive detailed reports on each domain that belongs to a given user account, select the all domains of this client option. To receive reports on all domains hosted on the server, select the all domains option. 4 Select the delivery interval from the Delivery frequency drop-down menu and click OK. You can have the report delivered each day, each week, or each month. To change the delivery schedule for a detailed domain/web site report: 1 Go to Domains > domain name > Report > Report Delivery. 2 Under the Frequency column, click a hyperlink corresponding to the delivery schedule you would like to change. 3 Adjust the settings as required and click OK. To stop receiving the domain reports: 1 Go to Domains > domain name > Report > Report Delivery. 2 Select a check box corresponding to the delivery schedule and click Remove Selected. Confirm removal and click OK. Viewing Statistics 229 Viewing Log Files and Configuring Recycling of Log Files All connections to the Web server and requests for files that were not found on the server are registered in log files. These log files are analyzed by the statistical utilities running on the server, which then present graphical reports on demand. You may want to download these log files to your computer for processing by third-party statistical utilities, or view their contents for web server debugging purposes. To prevent these log files from growing too large, you should enable automatic cleanup and recycling of log files: 1 Go to Domains > domain name > Log Manager > Log Rotation and click Switch On. If you see only Switch off there, this means that log recycling is already switched on. 2 Specify when to recycle log files and how many instances of each log file to store on the server. Also specify whether they should be compressed and sent to an e-mail address after processing. Click OK. To view the contents of a log file or download it to your computer: Go to Domains > domain name and click Log Manager in the Hosting group. A list of log files will show. To specify the number of lines from the end of the log file that you would like to view, type a number into the input box under the Preferences group. To view the contents of a log file, click its file name. To download a file to your computer, click an icon you need. To remove a processed log file from the server, select a corresponding check box and click Remove Selected. Confirm removal and click OK. corresponding to the file 230 CHAPTER 13 Monitoring Connections to Control Panel and FTP Services In this chapter: Monitoring Connections to Control Panel .......................................................... 230 Monitoring Connections to FTP Service ............................................................ 231 Monitoring Connections to Control Panel To find out who of your customers is logged in to the control panel at the moment: 1 Click Sessions in the navigation pane. All sessions including yours will be presented and the following details will be displayed: Type. A type of control panel user who established the session: for server administrator. for client. for domain or Web site owner. for mailbox owner. Login. The login name the user is logged in as. IP address. The IP address from which the control panel is accessed. Logon time. The date and time when the user logged in to the control panel. Idle time. The time that user was not doing anything in the control panel while being logged in. 2 To refresh the list of user sessions, click Refresh. 3 To end a user session, select the respective check box and click Remove Selected, then confirm removal and click OK. Monitoring Connections to Control Panel and FTP Services 231 Monitoring Connections to FTP Service To find out who is connected to your server via FTP, in what directories they currently are and what files they are uploading to or downloading from the server: 1 Click Sessions in the navigation pane. 2 Click the FTP Sessions tab. All sessions including yours will be presented and the following details will be displayed: Type. The type of user who established the session: for users not registered with the control panel. for anonymous FTP users. for domain or web site administrators. for subdomain administrators. for web users (owners of personal web pages without individual domain names). Status. The current status of FTP connection. FTP user login. The login name used for access to FTP account. Domain name. The domain the FTP user is currently connected to. Current location. The directory the FTP user is currently at. File name. The file name being operated on. Speed. Transfer speed in kilobytes. Progress, %. The file transfer operation progress in percentage. IP address. The IP address from which the FTP account is accessed. Logon time. The time lapsed since the moment user logged in. Idle time. The time that user was not doing anything while being connected to the server through FTP. 3 To refresh the list of FTP sessions, click Refresh. 4 To end a session, select the respective check box and click Selected. Remove 232 CHAPTER 14 Logging Actions Performed by Your Customers in the Control Panel You may wish to keep track of actions performed by various users in the system. All actions will be recorded in a log file that you will be able to download for viewing. The following system events (actions) can be logged: Administrator information changed System service restarted, started, or stopped IP address added, removed, changed Login settings (allowed period of inactivity for all user sessions in the control panel) changed Client account created, deleted, personal or system information changed The status of client account changed (suspended/unsuspended) Client's interface preferences changed Client's IP pool changed Site applications were added to or removed from a client's pool The limit on disk space is reached for a client account The limit on traffic usage is reached for a client account A Desktop preset was created, deleted, or modified The limit on disk space is reached for a domain The limit on traffic usage is reached for a domain Domain administrator account properties changed Domain created, deleted, settings changed Domain owner changed Domain status changed (suspended/unsuspended) DNS zone updated for a domain Subdomain created, deleted, settings changed Domain alias created, deleted, settings changed DNS zone of the domain alias changed Client account limits (resource allotments) changed Client's permissions changed Domain limits (resource allotments) changed Users logged in and out of the control panel Mail accounts created, deleted, changed Mailing lists created, deleted, settings changed Physical hosting created, deleted, changed Standard or frame forwarding hosting accounts were created, deleted, reconfigured Logging Actions Performed by Your Customers in the Control Panel Web user account created, deleted, changed Site application installed, reconfigured, uninstalled Site application package installed, uninstalled, updated License key expired or updated Database server created, deleted, updated Database created or deleted Database user account created, deleted, updated Plesk component was updated or added 233 In this chapter: Setting Up Action Logging..................................................................................233 Downloading the Action Log ..............................................................................234 Clearing the Action Log ......................................................................................234 Setting Up Action Logging To set up action logging: 1 Select the Server shortcut in the navigation pane. 2 Click Action Log in the Control Panel group. 3 In the Logged actions group, select the actions to be logged using the check boxes. 4 In the Store records in the database field, specify the action log cleaning options: on a daily, weekly or monthly basis, or in accordance with the specified number of records stored in the database. 5 To retain all action log records, select the Do not remove records option. 6 To apply all the changes made, click OK. Logging Actions Performed by Your Customers in the Control Panel Downloading the Action Log To download the action log to your machine: 1 Go to Server > Action Log. 2 In the Log files section, select the time period using the drop-down boxes, and click Download. The dialog window will open, prompting you to select the location for the downloaded log file to be saved to. 3 Select the location, and click Save. Clearing the Action Log To clear the action log: 1 Go to Server > Action Log. 2 In the Log files section, click Clear Log. 234 235 CHAPTER 15 Using Centralized Access to Your Numerous Plesk Servers If you have a number of Plesk-managed servers, you can use the control panel on one of your servers for accessing and managing the other servers. To check if this feature is available within your control panel, see if there is the Master shortcut in the navigation pane. What the Master function can do for you is remember your credentials for accessing other Plesk-managed servers (almost like your Web browser's password manager): When you need to log in to control panel on any of your servers, you will need to get to the list of your slave servers in the control panel and click an icon. The control panel running on another server will open in a new browser window. In addition to giving you a single point of entry to a number of servers, the Master function can also poll other servers you specify, retrieve information on state of system services and resource usage, and display this information in your control panel. As you can see, the Master function can only save you a little time and a few clicks, that's all it really does. If you have numerous servers and need truly centralized server management, you should use Plesk Expand or HSPcomplete solutions by SWsoft. In this chapter: Adding a Server Record .................................................................................... 236 Viewing Server Information and Logging in to a Server ..................................... 236 Removing a Server Record ............................................................................... 237 Using Centralized Access to Your Numerous Plesk Servers 236 Adding a Server Record To add a record on a Plesk-managed server to your control panel: 1 Go to Master > Add New Server. 2 Enter the hostname and port number (8443) in the respective fields, specify login name and password for Plesk to be able to log on to the given slave server. You may also wish to type in a descrip tion for the slave server. Select the Do not request information from the server check box, if you do not want the detailed server information to be retrieved and presented at that time. 3 Click Set. 4 To upload an SSL certificate that will be used for secure connection to that server's control panel, click the Certificate button. Click Browse... to locate your certificate file or paste the certificate contents from the clipboard. After that, click the Send File or Send Text button respectively to upload the certificate to the slave server. When you need to modify a server record, click the Master shortcut in the navigation pane, and then click the host name you need. Viewing Server Information and Logging in to a Server To view information on a server and to log in to the server's control panel: 1 Click the Master shortcut in the navigation pane. The following information is displayed for all servers you added: Status icon in the S column: - the server is in operable state and there is no resource overage, - some system service is down, - there is at least one user account that exceeded resource (disk space or bandwidth) allotments, - the server is down or inaccessible, - the server was not polled for its status. Hostname. Description you specified. 2 To view a detailed server report, click the hostname you need. Using Centralized Access to Your Numerous Plesk Servers 3 To log in to the server's control panel, click the respective 237 icon. Removing a Server Record To remove a server record: 1 Click the Master shortcut in the navigation pane. 2 Select the check box corresponding to the record you wish to remove. 3 Click Remove Selected. Then, confirm removal and click OK. 238 CHAPTER 16 Upgrading Your Control Panel You can easily install the necessary updates, control panel add-ons, and even upgrade your control panel to the latest available release using Plesk Updater function within your control panel. To upgrade your Plesk control panel or update its components: 1 Click the Server shortcut in the navigation pane. 2 Click the Updater icon in the Services group. The control panel connects to the SWsoft's official Plesk Update server at URL http://autoinstall.plesk.com, retrieves information on the available releases, then analyses the components installed in the system and displays the lists of available releases and component updates. For each release a brief description of available operations is displayed. Note: If you have a number of Plesk-managed servers and have set up a mirror of the Plesk Update server in your network (as described in Plesk 8 Installation Guide), refer to the section Changing Updater Settings to configure Plesk Updater to retrieve installation files from the local mirror. 3 Select the release version that you want to update, or upgrade to. A list of available components appears. 4 Select the check boxes corresponding to the components you wish to install and click Install. A confirmation screen appears. 5 Specify your e-mail address. You will be sent a notice by e-mail once update is completed. To confirm installation of the selected components, select the check box and click OK. The components/updates you selected will be downloaded and automatically installed in the background mode. Notes on updating procedures: When upgrading to a new control panel version, you will be notified by e-mail of upgrade procedure start and end. The notification message will include the event log and a list of installed packages, if upgrade is successful. However, you may not receive any error notice if your mail server fails. In this case you can check for errors in the autoinstaller.log file located in the /tmp directory on the server hard drive. All control panel operations are suspended during installation of the so-called ―base‖ packages that affect the control panel‘s core functionality. If you need to install a new license key after upgrade, refer to the Upgrading Your License Key section. If you experience any problems with installing a license key, please contact [email protected]. Upgrading Your Control Panel In this chapter: Changing Updater Settings ............................................................................... 240 Blocking Access to Updater Functions from the Control Panel .......................... 241 239 Upgrading Your Control Panel 240 Changing Updater Settings By default, updates for Plesk and updates for your operating system are downloaded from the official Plesk Update server at http://autoinstall.plesk.com. If you want to receive Plesk updates from a local network storage, do the following: 1 Click the Server shortcut in the navigation pane. 2 Click the Updater icon in the Services group. 3 Click Preferences. 4 Click the Plesk Update Source tab. 5 From the Source type menu, select the Network storage option and specify the URL to the directory where updates reside. 6 Click OK to apply settings. If you want to receive updates for your server's operating system from the operating system vendor's site, do the following: Click the Server shortcut in the navigation pane. Click the Updater icon in the Services group. Click Preferences. Click the Sources of Operating System Updates tab. To exclude the Plesk Updates server from the updates sources, click the icon , corresponding to the Plesk updates server entry, in the S column. 6 Click Add Source and specify the following: 1 2 3 4 5 7 Source type. Leave the repomd (xml-rpm-metadata repository) value selected if you are going to receive updates from the vendor's site. To receive updates from a directory on the server's hard disk or from a mounted network share, select the directory (local directory) value. Source URL. Type the URL where the package files are located. For example, http://download.fedora.redhat.com/fedora/linux/core/updates /2/i386. Source priority. If you use several download sites, you can specify the order in which they should be polled for updates. To do this, specify different level of priority for each of the sources: select a value from the list, or select Custom and type a number from 1 (lowest) to 999 (highest). Authentication. If you need to authenticate at the vendor's site in order to receive updates, select the Authentication check box and specify your user name and password. Click OK. Upgrading Your Control Panel 241 Blocking Access to Updater Functions from the Control Panel If you delegate server administration tasks to other users, but do not want them to use the Updater function or change the updating settings from the control panel, you can remove the screens related to Updater settings and the Updater icon from the control panel. To do this, use the following MySQL command: echo 'REPLACE misc SET param="disable_updater", val="true"' | mysql psa -uadmin -p`cat /etc/psa/.psa.shadow` To restore the Updater icon and screens in the control panel, use the following MySQL command: echo 'REPLACE misc SET param="disable_updater", val="false"' | mysql psa -uadmin -p`cat /etc/psa/.psa.shadow` 242 CHAPTER 17 Appendix A. Advanced Features In addition to operations available via control panel, Plesk software provides several advanced management capabilities, available to the administrator from the command line. The administrator can: Use event tracking mechanism to organize data interchange between Plesk and external systems Include domain-specific Apache configuration directives into web server configuration file Change Tomcat connector ports Restore Plesk mail configuration In this chapter: Using Event Tracking Mechanism ......................................................................242 Including Directives into Web Server Configuration File .....................................257 Changing Tomcat Java Connector Ports............................................................258 Restoring Mail Configuration ..............................................................................258 Using Event Tracking Mechanism The Event Manager is designed to help you organize data interchange between Plesk and external systems. It works the following way: you create a script to be executed upon a certain control panel event, and then create an event handler that triggers the event processing. You can assign several handlers to a single event. Important: Plesk administrator can create the event handlers that will be run on the server on behalf of user root. If you wish to restrict usage of the root account, create an empty file with name root.event_handler.lock in the location /plesk_installation_directory/var/. Appendix A. Advanced Features 243 Adding Event Handlers Let's, for example, create an event handler for the 'client account creation' event. The handler will accept a client name and the client's login from environment variables. For simplicity we will use a shell-script called test-handler.sh that looks as follows: #!/bin/bash echo "--------------" >> /tmp/event_handler.log /bin/date >> /tmp/event_handler.log # information on the event date and time /usr/bin/id >> /tmp/event_handler.log # information on the user, on behalf of which the script was executed (to ensure control) echo "client created" >> /tmp/event_handler.log # information on the created client account echo "name: ${NEW_CONTACT_NAME}" >> /tmp/event_handler.log # client's name echo "login: ${NEW_LOGIN_NAME}" >> /tmp/event_handler.log # client's login echo "--------------" >> /tmp/event_handler.log This script prints some information to a file so that we could control its execution (we cannot output information to stdout/stderr, as the script is executed in the background mode). Suppose, that our script is located in the directory /plesk_installation_directory/bin (for instance). Let's register it by creating an event handler via the control panel: 1 Select the Server shortcut in the navigation pane. 2 Click the Event Manager icon in the Control Panel group. 3 Click the Add New Event Handler icon. The event handler setup page appears: 4 Select the event, you wish to assign a handler to in the Event dropdown box. 5 Select the priority for handler execution, or specify a custom value. To do this, select custom in the Priority drop-down list and type in the value. When assigning several handlers to a single event you can specify the handler execution sequence, setting different priorities (higher value corresponds to a higher priority). 6 Select the system user, on behalf of which the handler will be executed ("root" user, for example). 7 In the Command input field, specify a command to be executed upon the selected event. In our example it is /usr/local/psa/bin/test-handler.sh. 8 Click OK. Appendix A. Advanced Features 244 Note: In the script, we have specified the variables $NEW_CONTACT_NAME and $NEW_LOGIN_NAME. During execution of the handler, they will be replaced with name and login of the created client respectively. The entire list of available variables is provided in the following section. You should keep in mind that with the removal operations, the variables of type $NEW_xxx are not set. And with creation operations the parameters of type $OLD_xxx are not set. Now if you login to your Plesk control panel and create a new client, specifying the value 'Some Client' in the Contact name field, and 'some_client' in the field Login, the handler will be invoked, and the following records will be added to the /tmp/event_handler.log: Fri Mar 16 15:57:25 NOVT 2007 uid=0(root) gid=0(root) groups=0(root) client created name: Some client login: some_client If you want to specify one or few handlers more, repeat the actions above for another handler. The parameter templates that can be used when setting up an event handler are presented in the table below: Table. Available Event Handler Parameter Templates Environment variable name Component name and description Previously used value New value Notes For the event 'Session (login) settings changed' Allowed period of inactivity for all control panel users OLD_SESSION_IDLE_TIM NEW_SESSION_IDLE_TIME E For the events 'Desktop preset created, modified, deleted' Unique identification number of a desktop preset OLD_DESKTOP_PRESET NEW_DESKTOP_PRESET_ID _ID Type of desktop preset (default preset for administrator's desktop, OLD_DESKTOP_PRESET NEW_DESKTOP_PRESET_TY client's desktop, domain _TYPE PE administrator's desktop, or a user's custom preset) Desktop preset name OLD_DESKTOP_PRESET NEW_DESKTOP_PRESET_NA _NAME ME For the events 'Client account created', 'Client account updated', 'Client account removed' Login name OLD_LOGIN_NAME NEW_LOGIN_NAME Required Appendix A. Advanced Features Contact name OLD_CONTACT_NAME NEW_CONTACT_NAME Company name OLD_COMPANY_NAME NEW_COMPANY_NAME Phone OLD_PHONE NEW_PHONE Fax OLD_FAX NEW_FAX E-mail OLD_EMAIL NEW_EMAIL Address OLD_ADDRESS NEW_ADDRESS City OLD_CITY NEW_CITY State/province OLD_STATE_PROVINCE NEW_STATE_PROVINCE Postal/zip code OLD_POSTAL_ZIP_CODE NEW_POSTAL_ZIP_CODE Country OLD_COUNTRY 245 Required NEW_COUNTRY For the events 'Domain created', 'Domain updated', 'Domain deleted' Domain Name OLD_DOMAIN_NAME NEW_DOMAIN_NAME required For the events 'Subdomain created', 'Subdomain updated', 'Subdomain deleted' Subdomain Name OLD_SUBDOMAIN_NAME NEW_SUBDOMAIN_NAME Required Parent domain name OLD_DOMAIN_NAME Required FTP account OLD_SYSTEM_USER_TY NEW_SYSTEM_USER_TYPE PE Subdomain administrator's login name OLD_SYSTEM_USER Hard disk quota OLD_HARD_DISK_QUOTA NEW_HARD_DISK_QUOTA SSI support OLD_SSI_SUPPORT NEW_SSI_SUPPORT PHP support OLD_PHP_SUPPORT NEW_PHP_SUPPORT CGI support OLD_CGI_SUPPORT NEW_CGI_SUPPORT Perl support OLD_MOD_PERL_SUPPO NEW_MOD_PERL_SUPPORT RT Python support OLD_MOD_PYTHON_SUP NEW_MOD_PYTHON_SUPPO PORT RT ColdFusion support OLD_COLDFUSION_SUPP NEW_COLDFUSION_SUPPOR ORT T Apache::ASP support OLD_APACHE_ASP_SUP NEW_APACHE_ASP_SUPPO PORT RT SSL support OLD_SSL_SUPPORT NEW_DOMAIN_NAME NEW_SYSTEM_USER NEW_SSL_SUPPORT For the events 'Domain alias created, updated, deleted, DNS zone modified' Domain alias name OLD_DOMAIN_ALIAS_NA NEW_DOMAIN_ALIAS_NAME Required ME Domain alias switched on or off OLD_STATUS NEW_STATUS Appendix A. Advanced Features 246 Web service for domain OLD_DOMAIN_ALIAS_WE NEW_DOMAIN_ALIAS_WEB alias is on or off B Mail service for domain OLD_DOMAIN_ALIAS_MAI NEW_DOMAIN_ALIAS_MAIL alias is on or off L Support for accessing web applications in Java OLD_DOMAIN_ALIAS_TO NEW_DOMAIN_ALIAS_TOMC for domain alias visitors MCAT AT (on or off) For the events 'Physical hosting created', 'Physical hosting updated' Domain name OLD_DOMAIN_NAME NEW_DOMAIN_NAME IP address OLD_IP_ADDRESS NEW_IP_ADDRESS IP type OLD_IP_TYPE NEW_IP_TYPE System user OLD_SYSTEM_USER NEW_SYSTEM_USER System user's password OLD_SYSTEM_USER_PA NEW_SYSTEM_USER_PASS SSWORD WORD Shell access OLD_SYSTEM_SHELL NEW_SYSTEM_SHELL FP support OLD_FP_SUPPORT NEW_FP_SUPPORT FP-SSL support OLD_FPSSL_SUPPORT NEW_FPSSL_SUPPORT FP authoring OLD_FP_AUTHORING NEW_FP_AUTHORING FP admin login OLD_FP_ADMIN_LOGIN NEW_FP_ADMIN_LOGIN FP admin password OLD_FP_ADMIN_PASSW NEW_FP_ADMIN_PASSWOR ORD D SSI support OLD_SSI_SUPPORT NEW_SSI_SUPPORT PHP support OLD_PHP_SUPPORT NEW_PHP_SUPPORT CGI support OLD_CGI_SUPPORT NEW_CGI_SUPPORT Perl support OLD_MOD_PERL_SUPPO NEW_MOD_PERL_SUPPORT RT Apache ASP support OLD_APACHE_ASP_SUP NEW_APACHE_ASP_SUPPO PORT RT SSL support OLD_SSL_SUPPORT NEW_SSL_SUPPORT Web statistics OLD_WEB_STATISTICS NEW_WEB_STATISTICS Custom error documents OLD_APACHE_ERROR_D NEW_APACHE_ERROR_DOC OCUMENTS UMENTS Hard disk quota OLD_HARD_DISK_QUOTA NEW_HARD_DISK_QUOTA Required For the event 'Physical hosting deleted' Domain name OLD_DOMAIN_NAME NEW_DOMAIN_NAME Required Appendix A. Advanced Features 247 For the events 'Mail account created', 'Mail account deleted' E-mail address OLD_MAILNAME NEW_MAILNAME Required (in the format mailname @domain ) Required (in the format mailname @domain ) For the event 'Mail account updated' E-mail address OLD_MAILNAME NEW_MAILNAME Mailbox OLD_MAILBOX NEW_MAILBOX Password OLD_PASSWORD NEW_PASSWORD Mailbox quota OLD_MAILBOX_QUOTA NEW_MAILBOX_QUOTA Redirect OLD_REDIRECT NEW_REDIRECT Redirect address OLD_REDIRECT_ADDRES NEW_REDIRECT_ADDRESS S Mail group OLD_MAIL_GROUP Autoresponders OLD_AUTORESPONDERS NEW_AUTORESPONDERS NEW_MAIL_GROUP Access to control panel OLD_MAIL_CONTROLPAN NEW_MAIL_CONTROLPANEL for e-mail user EL_ACCESS _ACCESS For the event 'Web user deleted' Domain name OLD_DOMAIN_NAME NEW_DOMAIN_NAME Required Web user name OLD_WEBUSER_NAME NEW_WEBUSER_NAME Required For the events 'Web user created', 'Web user updated' Domain name OLD_DOMAIN_NAME NEW_DOMAIN_NAME Required Web user name OLD_WEBUSER_NAME NEW_WEBUSER_NAME Required Web user's password OLD_WEBUSER_PASSW NEW_WEBUSER_PASSWOR ORD D SSI support OLD_SSI_SUPPORT NEW_SSI_SUPPORT PHP support OLD_PHP_SUPPORT NEW_PHP_SUPPORT CGI support OLD_CGI_SUPPORT NEW_CGI_SUPPORT Perl support OLD_MOD_PERL_SUPPO NEW_MOD_PERL_SUPPORT RT Python support OLD_MOD_PYTHON_SUP NEW_MOD_PYTHON_SUPPO PORT RT Apache ASP support OLD_APACHE_ASP_SUP NEW_APACHE_ASP_SUPPO PORT RT Appendix A. Advanced Features Hard disk quota 248 OLD_HARD_DISK_QUOTA NEW_HARD_DISK_QUOTA For the event 'Client limits changed' Contact name OLD_CONTACT_NAME NEW_CONTACT_NAME Maximum number of domains OLD_MAXIMUM_DOMAIN NEW_MAXIMUM_DOMAINS S Maximum amount of disk space OLD_MAXIMUM_DISK_SP NEW_MAXIMUM_DISK_SPAC ACE E Maximum amount of traffic OLD_MAXIMUM_TRAFFIC NEW_MAXIMUM_TRAFFIC Maximum number of Web users OLD_MAXIMUM_WEBUSE NEW_MAXIMUM_WEBUSERS RS Maximum number of databases OLD_MAXIMUM_DATABA NEW_MAXIMUM_DATABASE SES S Maximum number of mailboxes OLD_MAXIMUM_MAILBOX NEW_MAXIMUM_MAILBOXES ES Mailbox quota OLD_MAXIMUM_MAILBOX NEW_MAXIMUM_MAILBOX_Q _QUOTA UOTA Maximum number of mail redirects OLD_MAXIMUM_MAIL_RE NEW_MAXIMUM_MAIL_REDI DIRECTS RECTS Maximum number of mail groups OLD_MAXIMUM_MAIL_GR NEW_MAXIMUM_MAIL_GROU OUPS PS Maximum number of mail autoresponders OLD_MAXIMUM_MAIL_AU NEW_MAXIMUM_MAIL_AUTO TORESPONDERS RESPONDERS Maximum number of mailing lists OLD_MAXIMUM_MAIL_LIS NEW_MAXIMUM_MAIL_LISTS TS Maximum number of Java applications OLD_MAXIMUM_TOMCAT NEW_MAXIMUM_TOMCAT_W _WEB_APPLICATIONS EB_APPLICATIONS Account expiration date OLD_EXPIRATION_DATE NEW_EXPIRATION_DATE Required Appendix A. Advanced Features For the event "Client's permissions changed" Login name OLD_LOGIN_NAME NEW_LOGIN_NAME Permission to use the control panel OLD_CP_ACCESS NEW_CP_ACCESS Permission to manage Web site hosting account OLD_PHYSICAL_HOSTIN NEW_PHYSICAL_HOSTING_ G_MANAGEMENT MANAGEMENT Permission to switch OLD_PHP_SAFE_MODE_ NEW_PHP_SAFE_MODE_MA PHP_safe mode off and MANAGEMENT NAGEMENT on Permission to assign hard quotas on disk space OLD_HARD_DISK_QUOT NEW_HARD_DISK_QUOTA_ A_ASSIGNMENT ASSIGNMENT Permission to manage subdomains OLD_SUBDOMAINS_MA NAGEMENT Permission to manage domain aliases OLD_DOMAIN_ALIASES_ NEW_DOMAIN_ALIASES_MA MANAGEMENT NAGEMENT NEW_SUBDOMAINS_MANA GEMENT Permission to change OLD_LIMITS_ADJUSTME NEW_LIMITS_ADJUSTMENT the resource allotments NT for the user's Web sites Permission to manage OLD_DNS_ZONE_MANA DNS zones for domains GEMENT NEW_DNS_ZONE_MANAGE MENT Permission to adjust log OLD_LOG_ROTATION_M NEW_LOG_ROTATION_MAN recycling ANAGEMENT AGEMENT Permission to schedule OLD_CRONTAB_MANAG NEW_CRONTAB_MANAGEM tasks and automate EMENT ENT execution of scripts Permission to manage anonymous FTP service OLD_ANONYMOUS_FTP _MANAGEMENT NEW_ANONYMOUS_FTP_M ANAGEMENT Permission to manage Java Web applications and Java Web service OLD_WEB_APPLICATIO NS_MANAGEMENT NEW_WEB_APPLICATIONS_ MANAGEMENT Permission to manage Web statistics (switch between statistics programs) OLD_WEB_STATISTICS_ NEW_WEB_STATISTICS_MA MANAGEMENT NAGEMENT Permission to manage access to the server shell over SSH OLD_SYSTEM_ACCESS_ NEW_SYSTEM_ACCESS_MA MANAGEMENT NAGEMENT Permission to manage OLD_NON_CHROOTED_ NEW_NON_CHROOTED_SH access to the server SHELL_MANAGEMENT ELL_MANAGEMENT shell in chrooted environments over SSH Permission to manage mailing lists OLD_MAILING_LISTS_M ANAGEMENT NEW_MAILING_LISTS_MANA GEMENT Permission to back up and restore data through the control panel and use the backup repository on the server OLD_BACKUP_RESTOR E_FUNCTIONS_USE_LO CAL_REPOSITORY NEW_BACKUP_RESTORE_F UNCTIONS_USE_LOCAL_RE POSITORY 249 Appendix A. Advanced Features 250 Permission to back up OLD_BACKUP_RESTORE NEW_BACKUP_RESTORE_F and restore data through _FUNCTIONS_USE_FTP_ UNCTIONS_USE_FTP_REPO the control panel and REPOSITORY SITORY use backup repositories on third-party FTP servers Permission to use the XML API for Web site management OLD_ABILITY_TO_USE_R NEW_ABILITY_TO_USE_REM EMOTE_XML_INTERFACE OTE_XML_INTERFACE Permission to use the Desktop interface OLD_ABILITY_TO_USE_D NEW_ABILITY_TO_USE_DAS ASHBOARD_INTERFACE HBOARD_INTERFACE Permission to use the standard Plesk control panel interface OLD_ABILITY_TO_USE_S NEW_ABILITY_TO_USE_STA TANDARD_INTERFACE NDARD_INTERFACE Permission to customize OLD_ABILITY_TO_MANA NEW_ABILITY_TO_MANAGE_ Desktop GE_DASHBOARD DASHBOARD Permission to manage spam filtering settings OLD_ABILITY_TO_MANA NEW_ABILITY_TO_MANAGE_ GE_SPAMFILTER SPAMFILTER Permission to manage antivirus settings OLD_ABILITY_TO_MANA NEW_ABILITY_TO_MANAGE_ GE_VIRUSFILTER VIRUSFILTER For the event 'Domain limits updated' Domain name OLD_DOMAIN_NAME NEW_DOMAIN_NAME Maximum amount of disk space OLD_MAXIMUM_DISK_SP NEW_MAXIMUM_DISK_SPAC ACE E Maximum amount of traffic OLD_MAXIMUM_TRAFFIC NEW_MAXIMUM_TRAFFIC Maximum number of web users OLD_MAXIMUM_WEBUSE NEW_MAXIMUM_WEBUSERS RS Maximum number of databases OLD_MAXIMUM_DATABA NEW_MAXIMUM_DATABASE SES S Maximum number of mailboxes OLD_MAXIMUM_MAILBOX NEW_MAXIMUM_MAILBOXES ES Mailbox quota OLD_MAXIMUM_MAILBOX NEW_MAXIMUM_MAILBOX_Q _QUOTA UOTA Maximum number of mail redirects OLD_MAXIMUM_MAIL_RE NEW_MAXIMUM_MAIL_REDI DIRECTS RECTS Maximum number of mail groups OLD_MAXIMUM_MAIL_GR NEW_MAXIMUM_MAIL_GROU OUPS PS Maximum number of mail autoresponders OLD_MAXIMUM_MAIL_AU NEW_MAXIMUM_MAIL_AUTO TORESPONDERS RESPONDERS Maximum number of mailing lists OLD_MAXIMUM_MAIL_LIS NEW_MAXIMUM_MAIL_LISTS TS Maximum number of java applications OLD_MAXIMUM_TOMCAT NEW_MAXIMUM_TOMCAT_W _WEB_APPLICATIONS EB_APPLICATIONS Expiration date OLD_EXPIRATION_DATE NEW_EXPIRATION_DATE Required Appendix A. Advanced Features 251 For the events 'Mailing list created', 'Mailing list updated', 'Mailing list deleted' Domain name OLD_DOMAIN_NAME NEW_DOMAIN_NAME Required Mailing list name OLD_MAIL_LIST_NAME NEW_MAIL_LIST_NAME Required Mailing list enabled OLD_MAIL_LIST_ENABLE NEW_MAIL_LIST_ENABLED D For the events 'Control panel user logged in', 'Control panel user logged out' Contact name OLD_CONTACT_NAME NEW_CONTACT_NAME For the event 'Domain administrator account updated' Allow domain administrator access OLD_ALLOW_DOMAIN_U NEW_ALLOW_DOMAIN_USE SER_ACCESS R_ACCESS Login name OLD_LOGIN_NAME NEW_LOGIN_NAME Required Domain name OLD_DOMAIN_NAME NEW_DOMAIN_NAME Required Contact name OLD_CONTACT_NAME NEW_CONTACT_NAME Company name OLD_COMPANY_NAME NEW_COMPANY_NAME Phone OLD_PHONE NEW_PHONE Fax OLD_FAX NEW_FAX E-mail OLD_EMAIL NEW_EMAIL Address OLD_ADDRESS NEW_ADDRESS City OLD_CITY NEW_CITY State/Province OLD_STATE_PROVINCE NEW_STATE_PROVINCE Postal/ZIP code OLD_POSTAL_ZIP_CODE NEW_POSTAL_ZIP_CODE Country OLD_COUNTRY NEW_COUNTRY Appendix A. Advanced Features For the event 'Domain administrator's permissions changed' Login name OLD_LOGIN_NAME NEW_LOGIN_NAME Domain name OLD_DOMAIN_NAME NEW_DOMAIN_NAME Permission to manage Web site hosting account OLD_PHYSICAL_HOSTIN NEW_PHYSICAL_HOSTING_ G_MANAGEMENT MANAGEMENT Permission to change FTP password OLD_MANAGE_FTP_PAS NEW_MANAGE_FTP_PASS SWORD WORD Permission to assign hard quotas on disk space OLD_HARD_DISK_QUOT NEW_HARD_DISK_QUOTA_ A_ASSIGNMENT ASSIGNMENT Permission to manage subdomains OLD_SUBDOMAINS_MA NAGEMENT Permission to manage domain aliases OLD_DOMAIN_ALIASES_ NEW_DOMAIN_ALIASES_MA MANAGEMENT NAGEMENT Permission to manage DNS zone for the Web site OLD_DNS_ZONE_MANA GEMENT NEW_SUBDOMAINS_MANA GEMENT NEW_DNS_ZONE_MANAGE MENT Permission to adjust log OLD_LOG_ROTATION_M NEW_LOG_ROTATION_MAN recycling ANAGEMENT AGEMENT Permission to schedule OLD_CRONTAB_MANAG NEW_CRONTAB_MANAGEM tasks and automate EMENT ENT execution of scripts Permission to manage anonymous FTP service OLD_ANONYMOUS_FTP _MANAGEMENT NEW_ANONYMOUS_FTP_M ANAGEMENT Permission to manage Java Web applications and Java Web service OLD_WEB_APPLICATIO NS_MANAGEMENT NEW_WEB_APPLICATIONS_ MANAGEMENT Permission to manage Web statistics (switch between statistics programs) OLD_WEB_STATISTICS_ NEW_WEB_STATISTICS_MA MANAGEMENT NAGEMENT Permission to manage access to the server shell over SSH OLD_SYSTEM_ACCESS_ NEW_SYSTEM_ACCESS_MA MANAGEMENT NAGEMENT Permission to manage access to the server shell in chrooted environment over SSH OLD_NON_CHROOTED_ NEW_NON_CHROOTED_SH SHELL_MANAGEMENT ELL_MANAGEMENT Permission to manage mailing lists OLD_MAILING_LISTS_M ANAGEMENT NEW_MAILING_LISTS_MANA GEMENT Permission to back up and restore data through the control panel and use the backup repository on the server OLD_BACKUP_RESTOR E_FUNCTIONS_USE_LO CAL_REPOSITORY NEW_BACKUP_RESTORE_F UNCTIONS_USE_LOCAL_RE POSITORY 252 Appendix A. Advanced Features Permission to back up and restore data through the control panel and use backup repositories on third-party FTP servers Permission to use the XML API for Web site management Permission to use the Desktop interface Permission to use the standard Plesk control panel interface Permission to customize Desktop Permission to manage spam filtering settings Permission to manage antivirus settings 253 OLD_BACKUP_RESTORE NEW_BACKUP_RESTORE_F _FUNCTIONS_USE_FTP_ UNCTIONS_USE_FTP_REPO REPOSITORY SITORY OLD_ABILITY_TO_USE_R NEW_ABILITY_TO_USE_REM EMOTE_XML_INTERFACE OTE_XML_INTERFACE OLD_ABILITY_TO_USE_D NEW_ABILITY_TO_USE_DAS ASHBOARD_INTERFACE HBOARD_INTERFACE OLD_ABILITY_TO_USE_S NEW_ABILITY_TO_USE_STA TANDARD_INTERFACE NDARD_INTERFACE OLD_ABILITY_TO_MANA GE_DASHBOARD OLD_ABILITY_TO_MANA GE_SPAMFILTER OLD_ABILITY_TO_MANA GE_VIRUSFILTER NEW_ABILITY_TO_MANAGE_ DASHBOARD NEW_ABILITY_TO_MANAGE_ SPAMFILTER NEW_ABILITY_TO_MANAGE_ VIRUSFILTER For the events 'Site application installed', 'Site application reconfigured', Site application uninstalled' Site application package OLD_PACKAGE_NAME name NEW_PACKAGE_NAME Required Domain type (domain or OLD_DOMAIN_TYPE subdomain) NEW_DOMAIN_TYPE Required Installation path (httpdocs or httpsdocs) NEW_DIRECTORY Required OLD_DIRECTORY Installation path within OLD_INSTALLATION_PRE NEW_INSTALLATION_PREFIX Required the destination directory FIX For the events 'Site application package installed', 'Site application package uninstalled' Site application package OLD_PACKAGE_NAME name NEW_PACKAGE_NAME Required For the events 'Site application package added to client's pool', 'Site application package removed from client's pool' Login name OLD_LOGIN_NAME NEW_LOGIN_NAME Package name OLD_PACKAGE_NAME NEW_PACKAGE_NAME For the events 'Service stopped, started, or restarted' Service OLD_SERVICE NEW_SERVICE Required Required For the events 'IP address created, changed, or deleted' IP address OLD_IP_ADDRESS NEW_IP_ADDRESS IP mask OLD_IP_MASK NEW_IP_MASK Interface OLD_INTERFACE NEW_INTERFACE IP type OLD_IP_TYPE NEW_IP_TYPE Appendix A. Advanced Features 254 For the events 'Forwarding created, changed, deleted' Domain name OLD_DOMAIN_NAME NEW_DOMAIN_NAME Forwarding type OLD_FORWARDING_TYP NEW_FORWARDING_TYPE E URL OLD_URL Required NEW_URL For the event 'Administrator information changed' Login name OLD_LOGIN_NAME NEW_LOGIN_NAME Contact name OLD_CONTACT_NAME NEW_CONTACT_NAME Company name OLD_COMPANY_NAME NEW_COMPANY_NAME Phone number OLD_PHONE NEW_PHONE Fax OLD_FAX NEW_FAX E-mail OLD_EMAIL NEW_EMAIL Address OLD_ADDRESS NEW_ADDRESS City OLD_CITY NEW_CITY State/Province OLD_STATE_PROVINCE NEW_STATE_PROVINCE Postal/Zip code OLD_POSTAL_ZIP_CODE NEW_POSTAL_ZIP_CODE Country OLD_COUNTRY Required NEW_COUNTRY For the events 'Client status updated' Contact name OLD_CONTACT_NAME NEW_CONTACT_NAME Required Login name OLD_LOGIN_NAME NEW_LOGIN_NAME Required Status OLD_STATUS NEW_STATUS For the events 'Client preferences updated' Contact name OLD_CONTACT_NAME NEW_CONTACT_NAME Required Login name OLD_LOGIN_NAME NEW_LOGIN_NAME Required Page size OLD_LINES_PER_PAGE NEW_LINES_PER_PAGE Interface skin OLD_INTERFACE_SKIN NEW_INTERFACE_SKIN For the event 'Client's IP pool changed' Contact name OLD_CONTACT_NAME NEW_CONTACT_NAME Required IP address OLD_IP_ADDRESS NEW_IP_ADDRESS Required Status OLD_STATUS NEW_STATUS For the event 'Limit on disk space was reached for the client account' Contact name OLD_CONTACT_NAME NEW_CONTACT_NAME Required Disk space limit OLD_MAXIMUM_DISK_SP NEW_MAXIMUM_DISK_SPAC Required ACE E Appendix A. Advanced Features 255 For the events 'Limit on traffic usage was reached for the client account' Contact name OLD_CONTACT_NAME NEW_CONTACT_NAME Traffic limit OLD_MAXIMUM_TRAFFIC NEW_MAXIMUM_TRAFFIC Required For the events 'Domain status changed' Domain name OLD_DOMAIN_NAME NEW_DOMAIN_NAME Domain status OLD_STATUS NEW_STATUS Required For the event 'DNS zone updated for domain' Domain name OLD_DOMAIN_NAME NEW_DOMAIN_NAME Required NEW_DOMAIN_NAME Required For the event 'Limit on disk space reached for domain' Domain name OLD_DOMAIN_NAME Disk space limit OLD_MAXIMUM_DISK_SP NEW_MAXIMUM_DISK_SPAC ACE E For the event 'Limit on traffic reached for domain' Domain name OLD_DOMAIN_NAME NEW_DOMAIN_NAME Traffic limit OLD_MAXIMUM_TRAFFIC NEW_MAXIMUM_TRAFFIC Required For the events 'Database server created, modified, deleted' Database server's IP address OLD_DATABASE_SERVE NEW_DATABASE_SERVER R For the event 'Plesk component upgraded' Plesk component name OLD_PLESK_COMPONEN NEW_PLESK_COMPONENT_ T_NAME NAME For the events 'Database created, deleted' Database server's IP address OLD_DATABASE_SERVE NEW_DATABASE_SERVER R Database name OLD_DATABASE_NAME NEW_DATABASE_NAME For the events 'Database user account created, changed, deleted' Database server's IP address OLD_DATABASE_SERVE NEW_DATABASE_SERVER R Database identification number OLD_DATABASE_ID Database user name OLD_DATABASE_USER_ NEW_DATABASE_USER_NA NAME ME Database user password OLD_DATABASE_USER_ NEW_DATABASE_USER_PAS PASSWORD SWORD NEW_DATABASE_ID For the event 'License key update' License key number OLD_LICENSE License key type (Plesk, OLD_LICENSE_TYPE additional) NEW_LICENSE NEW_LICENSE_TYPE Required Appendix A. Advanced Features License key name (for additional keys) OLD_LICENSE_NAME 256 NEW_LICENSE_NAME Removing Event Handlers To remove an event handler: 1 Select the Server shortcut in the navigation pane. 2 Click Event Manager in the Control Panel group. 3 Select the corresponding check boxes in the list of handlers and click Remove selected. Appendix A. Advanced Features 257 Including Directives into Web Server Configuration File You can include domain-specific Apache configuration directives into web server configuration file. In Plesk each domain has virtual hosts configuration stored in a separate file httpd.include. On all Linux systems, this file is located in the directory /var/www/vhosts/<domain-name>/conf/. On FreeBSD systems, this file is located in the directory /usr/local/psa/home/vhosts/<domain-name>/conf/. If you upgraded from Plesk version 7.5.4 or earlier, try looking for this file in the directory /home/httpd/vhosts/<domain-name>/conf/. Note: you can change the location of virtual host directories using the transvhosts.pl utility, which is located either in /usr/local/psa/bin/ or /opt/psa/bin/ directory, depending on your operating system. This file is overwritten each time the virtual host configuration is changed, thus any manual alterations made to the file are discarded. To use custom directives or redefine those inserted by Plesk, you need to create the files vhost.conf and/or vhost_ssl.conf with necessary directives in the directory /path_to_vhosts/<domain-name>/conf/ for a domain, and /path_to_vhosts/<domain-name>/subdomains/<subdomain-name>/conf/ for a subdomain. If any of these files exist by the time the main configuration file is generated, Plesk inserts the appropriate Include directive into the HTTP and/or HTTPS virtual host context respectively. For security reasons, only root can create the vhost.conf and vhost_ssl.conf files. For the changes to take effect, you need to run the following command: /plesk_installation_directory/admin/sbin/websrvmng --reconfigure-vhost --vhost-name=<domain_name> Appendix A. Advanced Features 258 Changing Tomcat Java Connector Ports The default port numbers for Coyote and Warp connectors in Plesk are 9080 and 9008. If you want Tomcat Java to work on other ports (e.g. 8090 and 8009), you should connect to the Plesk database and add two parameters to the database as in the following example: insert into misc (param,val) values ('coyote_connector_port', '8090'); insert into misc (param,val) values ('warp_connector_port', '8009'); Alternatively, you can use the dbclient.exe utility to add the information to the Plesk database. For information about using the dbclient.exe utility, consult Plesk for Windows Command Line Interface Reference. Note: It is recommended that you change the Tomcat Java ports right after Plesk is installed on server, or prior to enabling the Tomcat Java service for your domains. Restoring Mail Configuration Sometimes, Plesk mail server configuration becomes corrupt and it is necessary to restore it. The restoration is carried out by internal mchk utility, intended for use by Plesk Control Panel. However, as administrator, you can use it for restoring the Qmail and Courier-imap configuration when needed. By default mchk is running in the background mode. To execute it in the foreground, use the -v option. For example: /usr/local/psa/admin/sbin/mchk -v Note: You may not wish to restore SpamAssassin settings for mail accounts, as it requires running Perl interpreter. To speed up restoring use the --without-spam option.


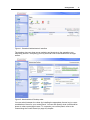


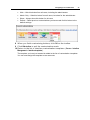


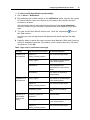
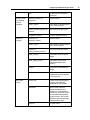


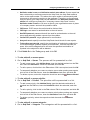

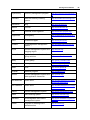
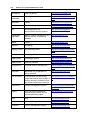
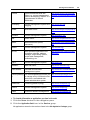


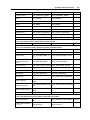
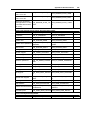
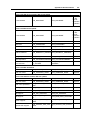
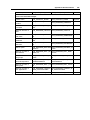
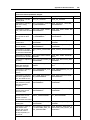
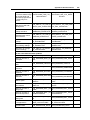
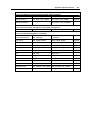
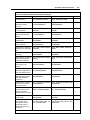
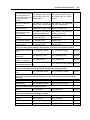

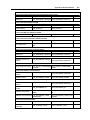
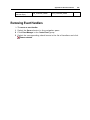


![Anwenderhandbuch für xt:Commerce 3.0.4 [SP2.1]](http://vs1.manualzilla.com/store/data/006783642_1-08d60571a7e2d062868696d30c15140a-150x150.png)