1
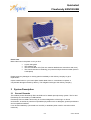
Flowhandy ZAN100 USB
Quickstart Guide
1/31
Status: 080208
Quickstart
Flowhandy ZAN100USB
Dears Customer,
Thank you for purchasing the Flowhandy ZAN100USB System.
The product complies to the newest state of technical development. In order to improve the lifetime of
this product, only materials of extremely high quality are used. All materials are environmentally safe
and can be recycled.
The manual provides instructions for operating the ZAN 100 USB system.
The instructions in this manual assume the user is familiar with the intended use and application of
pulmonary laboratory systems.
To avoid damage to the device or incorrect measurement, it is strongly recommended to follow the
instructions in the manual and the technical description.
Your nSpire Health-Team
nSpire Health GmbH
Schlimpfhofer Str.14
97723 Oberthulba
Germany
Tel. +49 9736 8181-0
Fax +49 9736 8181-20
[email protected]
www.nspirehealth.com
2/31
Status: 080208
Quickstart
Flowhandy ZAN100USB
Table of Contents
Page
1 GENERAL INFORMATION ABOUT THE DOCUMENTATION ..................................................... 4
1.1
RANGE ....................................................................................................................................... 4
1.2
WARRANTY ................................................................................................................................. 4
1.3
COPYRIGHT ................................................................................................................................ 4
1.4
TRADEMARKS ............................................................................................................................. 4
1.5
ZAN SOFTWARE LICENSE AGREEMENT ....................................................................................... 4
2 PACKING ........................................................................................................................................ 4
3 SYSTEM DESCRIPTION ................................................................................................................ 5
3.1
GENERAL REMARKS .................................................................................................................... 5
3.2
PC-SYSTEM REQUIREMENTS ....................................................................................................... 6
4 INITIAL START-UP ......................................................................................................................... 7
4.1
SET-UP AND CONNECTIONS ......................................................................................................... 7
4.2
INSTALLATION OF THE HARDWARE .............................................................................................. 7
4.3
INSTALLING THE ZAN-GPI 3.XX SOFTWARE ................................................................................. 8
4.4
FIRST STEPS AND FUNCTIONAL TEST ......................................................................................... 14
5 USER INTERFACE ....................................................................................................................... 15
5.1
STARTING THE PROGRAMME ..................................................................................................... 15
5.2
PATIENT DATA ENTRY ............................................................................................................... 15
5.3
ENTRY OF AMBIENT CONDITIONS ............................................................................................... 16
6 EXCHANGING THE FLOW SENSOR .......................................................................................... 16
7 VOLUME CALIBRATION.............................................................................................................. 18
7.1
PERFORMING VOLUME CALIBRATION .......................................................................................... 18
8 DISINFECTION.............................................................................................................................. 20
8.1
DISINFECTING THE FLOW SENSOR ............................................................................................. 20
8.2
DISINFECTION OF THE SHUTTER (ROCC OPTION ONLY).............................................................. 21
8.3
USING FILTERS ........................................................................................................................ 21
8.4
USING MOUTHPIECES................................................................................................................ 22
9 PERFORMING MEASUREMENTS............................................................................................... 23
9.1
SPIROMETRY (SVC).................................................................................................................. 23
9.1.1
Performing SVC Testing ..................................................................................................... 24
9.1.2
SVC Guidelines................................................................................................................... 25
9.1.3
Adjusting Lung Volume Sub-Divisions Manually ................................................................ 26
9.1.4
Co-operation ....................................................................................................................... 26
9.2
FLOW/VOLUME MEASUREMENT ................................................................................................. 27
9.2.1
FV Measurement Guidelines .............................................................................................. 27
9.2.2
Co-operation ....................................................................................................................... 28
9.2.3
Flow/Volume Screen after Measurement And Editing Results........................................... 28
9.3
COMBINED SVC AND F/V MEASUREMENT .................................................................................. 29
10
VIEW MODE .............................................................................................................................. 30
10.1
REVIEWING THE MEASUREMENTS OF THE DAY ....................................................................... 30
10.2
DISPLAYING ARCHIVED MEASUREMENTS ................................................................................ 30
10.3
PRINTING REPORTS ............................................................................................................... 31
10.4
ARCHIVE, EXPORT OR DELETE MEASUREMENTS ..................................................................... 31
3/31
Status: 080208
Quickstart
Flowhandy ZAN100USB
1 General Information About The Documentation
1.1
Range
This document, as well as the documents on the documentation CD, are about the Flowhandy ZAN
100 USB and the ZAN software GPI 3.xx.
The documentation assumes, the user has sufficient knowledge in operating standard Windows®
programmes and performing pulmonary diagnostics.
Note:
The quickstart guide is designed to provide basic information about the Flowhandy
ZAN 100 USB. This should help the user to start using the device very quickly, but is
no replacement for the user manual. There are more important informations and
instructions in the user manual and the technical description on the CD.
To avoid damage to the device or faulty measurements, please read the user manual
and the documents on the documentation CD carefully.
Information in this manual is subject to change without notice and does not represent a commitment
on the part of nSpire Health GmbH.
1.2
Warranty
nSpire Health GmbH does not warrant that this or the other documents on the CD are free of errors.
The documentation is provided "as is" without warranty of any kind, either expressed or implied
including, but not limited to, the implied warranties of merchantability or fitness for a particular
purpose. Some states do not allow the exclusion of implied warranties, so the above exclusion may
not apply to you. This warranty gives you specific legal rights and you may also have other rights
which vary from state to state.
1.3
Copyright
No part of this manual may be reproduced or transmitted in any form or by any means, electronic or
mechanical, including photocopying and recording, for any purpose without the express written
permission of nSpire Health GmbH.
1.4
Trademarks
All Microsoft products are registered trademarks of the Microsoft corporation.
ZAN is a registered trademark of nSpire Health GmbH.
1.5
ZAN Software License Agreement
Please read the end user license agreement (EULA), shipped with this software, carefully. When
installing the software, you will be asked if you agree. You can only install the software if you do.
By registering the product you obtain the right to both technical and user support.
2 Packing
When you receive the product, please check the content of the delivery immediately. There is a
packing list inside, to check if all parts have been shipped. Check also, if all parts are free from visible
damage.
4/31
Status: 080208
Quickstart
Flowhandy ZAN100USB
Please note:
Behind the foam in the plastic cover you find:
•
•
•
•
A quick start guide
The Software-CD
The Documentation CD (This one contains detailed user instructions and more)
The License document containing your personal unique license number (Store in
a safe place)
Please report any damages or missing parts immediately to the delivery company to get a
replacement.
nSpire Health GmbH or your local nSpire Health dealer have no commitment to replace or
compensate damages caused by delivery. This obligation belongs to the delivery company.
3 System Description
3.1
General Remarks
The medical product Flowhandy ZAN 100 USB is a PC based open spirometry system. The PC and
Flowhandy are connected by a USB interface.
Flowhandy ZAN 100 USB is built mainly for functional diagnostics of the lung in a clinical
environment, as well as in practices of specialised physicians such as allergists, general practitioners
and occupational medicine.
It can be used stationary (connected to a local PC) or ambulant (when used in connection with a
notebook).
5/31
Status: 080208
Quickstart
Flowhandy ZAN100USB
Beyond standard measurements, the following methods are optional available.
-
Rocc, Resistance Measurement according to the occlusion method
Rhinomanometry (mask or olive version)
MVV Measurement
P0,1- / PImax- / PEmax Measurement
Please ask your local dealer or nSpire Health directly for more information.
The delivery includes the software for the medical device, running under MS Windows® WIN98SE,
Win2000, WinXP, Vista. Because of the missing support of USB, WinNT is not supported.
Beginning with simple Spirometry, a pre/post comparison, a provocation test up to trend analysis, all
usual procedures can be found in the measurement software.
3.2
PC-System Requirements
Minimum Requirements
Operating system
CPU
RAM Size
Hard disc
Installation drive
Device interface
Video
Monitor:
Screen resolution
Printer resolution b/w
Printer resolution colour
Warning
WIN 98 SE (Second Edition), WIN 2000, WIN XP, Vista
Pentium II, 266 MHz or better
32MB
1,2GB
CD-ROM
USB 1.0 or better
≥90 Hz
15“ Colour monitor
800x600 Pixel or better
360x360 dpi
600x300 dpi
The Flowhandy ZAN100 USB device must only be used in connection with PC's and
peripheral devices which are compliant to DIN EN 60950 and also have a valid CE
clearance.
Plugs and connectors must not be connected to devices, other than those mentioned
in this manual
Clearance between the ZAN 100 USB and a non certified (non medical) mains driven
PC (or device) must at least be 1.5 m.
6/31
Status: 080208
Quickstart
Flowhandy ZAN100USB
4 Initial Start-up
4.1
Set-up and Connections
2
6
6
3
5
1
1
2
4
Standard
Flowhandy ZAN 100 USB with attached Flow Sensor
USB Plug of the Flowhandy ZAN 100 USB to the PC system
Optional
3
4
5
6
4.2
Shutter II for Rocc-, P0,1-, PImax and PEmax Measurement
Connection cable from Shutter II to Accu Switch
Accu Switch for control of the Shutter II
USB connection from Accu Switch to PC-system
Installation Of The
Hardware
Insert the USB plug of the Flowhandy
ZAN 100 USB and the optional Accu
Switch in a free USB port each.
If the PC supplies only one free USB
port, a hub may be employed. Please
make sure that the hub provides
enough power to drive the devices
7/31
Status: 080208
Quickstart
Flowhandy ZAN100USB
The device will automatically be recognised by your
PC, and the appropriate driver will be installed..
Note
4.3
If the PC fails to recognise the device: remove the USB plug from the USB port of the
PC and wait 30 seconds, then connect again. If necessary reboot your PC and
connect the cable after the reboot again. After that, install the ZAN software GP3.xx
as explained below..
Installing the ZAN-GPI 3.xx Software
Insert the ZAN CD into your CD ROM drive and the
installation will start automatically. Follow the prompts to
install the software. If the installation does not start, use
Windows Explorer to locate the set-up file (setup.exe) on
your CD ROM and start it manually
A window pops up. Select the language of the installation
and the ZAN Software and confirm by pressing [OK].
Available languages are: English, German, French and
Spanish.
The Install Shield Wizard will be prepared......
8/31
Status: 080208
Quickstart
Flowhandy ZAN100USB
...and opened. Click [Continue].
If you agree with the license agreement click
[OK].
Enter the license number that came with your
system and click on [Continue].
As mentioned above: You find the license
number on the license agreement behind the
foamed plastic cover of the 'Betterflow'-Case.
If you have the measuring device only for
demonstration, you can use the programme in the
DEMO mode for 30 days. To use the DEMO mode,
enter the license number 1.1.1
9/31
Status: 080208
Quickstart
Flowhandy ZAN100USB
The standard installation directory is C:\ZAN
Caution:
Do not change the destination
folder. This may cause problems with the
software. Contact nSpire Health GmbH or your
local dealer if you have any questions. If you
change the destination folder nSpire Health
GmbH cannot be held responsible for resulting
problems
If you have selected a directory that contains an
older ZAN version, the set-up will suggest you
make a backup. Clicking on [Yes] will store the
older ZAN installation at
C:\ZANOLD\ZAN,<Date>,<Time>.
Clicking on [No] will permanently delete the older
ZAN installation as well as the archive, and the
new version will be installed.
If you have an Internet Explorer Version that is
older than the version 6.0, you are prompted to
update. It is recommended to install Internet
Explorer 6.0 or a newer version.
10/31
Status: 080208
Quickstart
Flowhandy ZAN100USB
Only in DEMO MODE!
If you are installing the DEMO software, select
the ZAN Option (measuring device) you want to
install.
Caution:
If you selected a main device,
all options will also be chosen. Therefore, also
click on the + symbol on the left, next to the
relevant option.
Check the set-up before installation and click on
[Continue]. If necessary, click on [Back] and
change the set-up.
The ZAN programme will be installed
automatically.
11/31
Status: 080208
Quickstart
Flowhandy ZAN100USB
Only with Option RHINOMANOMETRY!
During the install you will be asked if the
Rhinomanometry will be performed with olives
or with a mask. Check the appropriate box and
press [Continue].
The Installation continues.
After the Installation the Report Header
Editor pops up.
Enter your practice or clinic data as
desired.
To store this data, click on <Save>.
Note:
This data can be changed at any time
using the Set-up option.
Will NOT appear in DEMO mode!
Next you will be prompted to enter the CAL
Code of the mounted flow sensor. You find
the Cal Code on a sticker on top of the
frontal rim of the sensor. You find a two
character code. Enter the two characters
and press [OK]
Note:
The Cal code must be checked on every
change of the flow sensor! Change the
settings using the option "Calibration" and
the chapter „Volume calibration“.
12/31
Status: 080208
Quickstart
Flowhandy ZAN100USB
If not already done, you are prompted to connect the
device to the PC and press [OK]
The installation is complete. Click on [Finish] in
order to close the Install Shield Wizard. The
software is ready for operation.
After installation the ZAN
programme will start automatically
and you will see the patient entry
form.
From the desktop, start the Software, clicking on
the ZAN icon or the Windows Start Menu.
13/31
Status: 080208
Quickstart
Flowhandy ZAN100USB
4.4
First Steps and Functional Test
After the software has been installed successfully, we recommend a functional test to ensure proper
communication between the PC and the ZAN devices.
Perform the following steps
•
•
•
•
Start the PC and the ZAN software
Look for the tiny flowhandy tray icon in the taskbar, in the lower right corner.
Activate the icon with a right click of the mouse. A menu pops up.
Select <Einstellen.> => to open the „ZAN Device Control“ window.
The device communicates properly if you find an entry "ZAN100 " with a 10 digit number in
brackets followed by the word „Running“, e.g.: ZAN100 (0320903001) : Running...
The 10 digit number is the unique internal code of your ZAN 100 Flowhandy and varies
accordingly.
•
Select <Close> to leave the Window
Your Flowhandy ZAN 100 USB is ready for operation.
14/31
Status: 080208
Quickstart
Flowhandy ZAN100USB
5 User interface
5.1
Starting The Programme
After successful installation, the ZAN main
programme can be started by selecting the
Icon on your PC desktop.
The main window shows up
Æ
The ZAN GPI 3.xx software interface is designed for ease of use. The list of patients and the
measurement results are shown in the form of an ‘index’ card (tabular form) on the screen.
There are 4 programme modes: Patient
Measure
View
Archive
Mode
Mode
Mode
Mode
The visible 'index card' lets you handle the data sets of up to 5 different patients simultaneously. You
can switch to single patient mode using the set-up [alt/S].
The number of patients in the archive is limited by the capacity of your harddrive only.
5.2
Patient Data Entry
Select a blank tab form either with the mouse or the
keyboard and enter the last name (just the last name
without any add on's). Press the [enter] key.
The system will now check the database to see if this
name has been stored before.
If so, you will see a list of all patients with this name.
Additionally this list contains an entry "NEW
PATIENT".
Using the mouse or the arrow keys, you can select a
patient or the "NEW PATIENT" Option to enter a new
one. Press the [Enter] key to confirm the selection.
If you selected "NEW PATIENT", an input form appears.
Each field should be completed with the relevant data and confirmed with [Enter]. The cursor will
automatically jump to the next field.
Accurate patient biographical data is important for the calculation of reference values; it is a critical
step so as to avoid miscalculations.
It is important to ensure the correct format is used for each field. If the wrong format is used in the
date of birth field (correct format: MM/DD/YYYY), it must be corrected to continue
15/31
Status: 080208
Quickstart
Flowhandy ZAN100USB
Note :
If all Tab forms are in use, use the 'Archive' option to free one.
Once all fields are completed, the record can be saved using the save button.
The patient’s name will appear at the top of the
index card, the system is now ready to begin.
5.3
Entry of Ambient Conditions
Select [B] from the bottom menu
or click the BTPS box
Caution:
with the mouse to activate the ambient conditions entry form.
Correct temperature adjustment is very
important. A mistake of 2 degrees will
cause a drift in breathing of about 1
percent.
The absolute barometric pressure must also be entered into the system. Meteorological barometers
indicate a pressure, which can be converted according to the sea level.
Note: For each 100 meters of altitude, the pressure will lower by 12 mbar.
For Example:
The meteorological barometer indicates 1000 mbar at 680 meters above sea level.
1000mbar – (6 x 12mbar) = 1000-72= 928 mbar
6 Exchanging the Flow Sensor
Every Flow Sensor is delivered with a calibration code on it. You find the calibration code on the small
yellow template on the front end of the Flow Sensor. This code is different for each Flow Sensor.
16/31
Status: 080208
Quickstart
Flowhandy ZAN100USB
If the Flow Sensor needs to be exchanged, the code has to be entered into the software or a volume
calibration must be performed to get correct results.
Select Calibration from the bottom menu
If you want to change the Flow Sensor select the
yellow AB icon.
If you want to perform volume calibration, select
START and refer to instructions in the following
chapter for more information..
After selection AB the calibration code input
form appears.
Enter the two letter code, found on the yellow
sticker on the rim of the new Flow Sensor and
press [Enter] or push the [OK] button.
17/31
Status: 080208
Quickstart
Flowhandy ZAN100USB
7 Volume Calibration
Disinfection and use of the flow sensor can change the mechanical quality of the plastic membrane,
which is situated on the inside of the flow sensor. The elasticity of the membrane fades and the
difference of pressure before and behind the membrane will grow. This will affect the accuracy of the
measurement results.
To assure optimum quality of the measurements, at any time a calibration of the system can be
performed with the optional available calibration syringe.
Using filters can reduce the number of necessary disinfections, because the filter protects the Flow
Sensor from contamination (as well as the filter protects the patient from contamination through the
device).
Note
7.1
Calibration of the Flow Sensor should be done at least after 50 disinfections, or
it should be sent to nSpire Health for a service. If this is not possible, replace
the Flow Sensor with a new one..
Performing Volume Calibration
Make sure the Flow Sensor (including the adapter) is
attached tightly to the calibration syringe. Verify that the
piston of the syringe is completely inserted
The syringe volume (1.000L in this case) can be changed
by selecting the [F4] icon..
.
To start the recording of the measuring values, press
and begin to pump steadily.
To ensure an identical volume is provided in every stroke, the syringe’s piston has to be pushed in
and pulled out as far as possible.
18/31
Status: 080208
Quickstart
Flowhandy ZAN100USB
A well defined and constant volume of air is pumped through
the Flow Sensor.
The recording of the volume/time curve is displayed.
After about 5 to 10 pump strokes, select
to end the
calibration and begin the analysis. Results of the analysis are
displayed in the following window. The calibration factors for each
flow direction are stated.
Select
Important:
to complete the calibration and save the calibration parameters.
Please refer to the 'Calibration' chapter in the user manual for important
additional information (you find the user manual on the documents CD ).
19/31
Status: 080208
Quickstart
Flowhandy ZAN100USB
8 Disinfection
8.1
Disinfecting the Flow Sensor
Breath from the patient contaminates the Flow Sensor
as well as the mouthpiece or the nose clip. They must
be disinfected after every patient.
To disinfect the flow sensor, the sensor must be
removed from the Flowhandy ZAN 100 USB body and
put into a disinfecting bath. Mouthpiece and nose clip
can also be put in the same bath.
.
You find detailed description of the disinfection process in the user manual in chapter 'Disinfection' on
your documentation CD.
Before reassembling, the skin of the Flow Sensor should be covered with a thin layer of Vaseline
(accessories) to make it slide easily.
Caution :
Do not block the holes on the top
side of the flow sensor.
Insert the flow sensor in a way that the holes (and the
yellow mark on the front rim) are in the upper position.
This will prevent liquid to get inside the device.
If properly inserted, you can see the yellow calibration
label on top of the Flow Sensor. The Flow Sensor has
to be inserted completely into the Flowhandy.
Caution:
Always consider the disinfection
instructions in the user manual (documentation CD!)
carefully.
20/31
Status: 080208
Quickstart
Flowhandy ZAN100USB
8.2
Disinfection of the Shutter (ROCC Option only)
The Shutter can be dismantled in three parts.
1. Shutter engine
2. Shutter valve
3. Shutter head
Shutter valve and shutter head can be plunged into
disinfectant liquid. Spray can also be used.
Important :
Do NOT place the shutter engine into any liquid
Disassembly of the shutter:
The shutter head can be drawn upwards. The magnetic valve can be removed with a left turn.
Assemble in reverse sequence.
Magnetic valve and shutter head must be disinfected after every patient.
8.3
Using Filters
Two filters come with the Betterflow case.
Every patient must use a new filter. The filter
prevents cross contamination between
patients and protects the Flow Sensor.
The filter can simply be inserted between
mouthpiece and Flow Sensor.
The filter is single use and has to be
disposed of in accordance with local
regulations.
When filters are used, the Flow Sensor does
not need to be disinfected after each patient,
but after every day of use.
21/31
Status: 080208
Quickstart
Flowhandy ZAN100USB
8.4
Using Mouthpieces
Select round mouthpieces (paper or plastic) or bite
mouthpieces on demand. Simply push mouthpiece onto the
front end of the Flow Sensor.
You find different examples of mouthpieces in different sizes
in the Betterflow case.
Using bite mouthpieces creates an air tight seal at the mouth.
This reduces leaks and improves accuracy of results.
Caution:
Every patient must have a new or
disinfected mouthpiece.
22/31
Status: 080208
Quickstart
Flowhandy ZAN100USB
9 Performing Measurements
In 'Measure' mode select the requested
programme with either the mouse or the
arrow keys.
The selected field turns red.
Start the programme by clicking on it again or
pressing the [Enter] key.
A detailed description of the particular
programme can be found in the
corresponding chapter of the user manual.
If the cursor hovers over an icon for a while, additional hints are
displayed, explaining the functionality of the button.
Note : The number of different programmes, displayed in the measure mode window, depends on
the license that has been installed. If you are missing a measurement, you expected to be active,
please ask your authorised dealer about adjusting your license.
9.1
Spirometry (SVC)
Selecting the
option, activates the spirometry (SVC) window.
First, the zero point adjustment is
performed, signalled by display of
the red warning hint.
The patient must not breathe at the
mouthpiece as long as the message
is displayed.
23/31
Status: 080208
Quickstart
Flowhandy ZAN100USB
Symbol Definitions
9.1.1
Select this icon or press the [ESC]
key to stop the measurement and
exit the programme.
Select this icon or press the [F1]
key to display a dialogue box to
enter comments.
Select this icon or press the [L]
key to select a reference value
from another test for comparison.
Select this icon or press the [F2]
key to define the user.
Select this icon or press the [F9]
key to enter the test set-up
Select this icon or press the [F3]
key to select the medication.
Select this icon or press the [F7]
key to print a single test result.
Select this icon or press the [F8]
key to print out one or multiple
templates
Select this icon or press the [F12]
key to Check the results meet
ERS/ATS 2005 Standards
Select this icon or press the
[Enter] key to save the
measurement and exit module.
Performing SVC Testing
The patient should apply a nose-clip and form a tight seal with his lips around the mouthpiece. The
flowhandy should be held horizontally.
Button (on the right window part) to start measurement. On the screen the
Press the
recording is displayed as a thin line growing from the left to the right.
The patient performs tidal breathing. If the breathing varies significantly because, for example, the
button and start with a clean display. This
patient is excited, you can reset the curve using the
should help you get rid of mixed up displays. The recording will continue.
24/31
Status: 080208
Quickstart
Flowhandy ZAN100USB
Symbol Definitions
Select this icon or press the [ESC] key to end
the test without saving.
Select this icon or press the
[Enter] key to save the
measurement and exit.
If the trace is unsatisfactory, the
measurement can be re-started by pressing
the [F3] key. This deletes the results and
continues the measurement.
Select this icon or press the
[space] key to save the
measurement and start a new
measurement.
To determine the tidal volume, the patient should breathe normally through the mouthpiece at least 6
– 8 times. If the automatic mode is selected in the set up (after the predetermined number of breaths)
the computer instructs you to expire maximally. The patient should be encouraged to exhale as much
as possible.
The count of tidal breaths should be significantly greater than the count of extended breathing
manoeuvres, to feed the statistical methods in the programme with enough data to compute a
significant tidal volume.
The normal depth of a tidal breathe should be around 0.5 l and the frequency should be around 30
breaths/minute
From tidal breathing, the patient should exhale as deeply as possible at least once, to inhale slowly
and as deeply as possibly. Breathing should be performed slowly and steadily to measure exact
values of IVC.
9.1.2
SVC Guidelines
In many cases, the patient is nervous before the measurement resulting in erratic tidal breathing. The
patient’s respiration should be corrected by verbal encouragement to give a more stable baseline for
the rest of the measurement.
To ensure accurate results, the patient should be encouraged to exhale and inhale completely. This is
demonstrated by a plateau at the end of each part of the manoeuvre.
If the patient leaks air at the mouthpiece or comes off the mouthpiece, the measurement should be
repeated to achieve correct calculations of the partial volumes.
Pressing the
button stops the measurement, and the result is displayed.
25/31
Status: 080208
Quickstart
Flowhandy ZAN100USB
9.1.3
Adjusting Lung Volume Sub-Divisions Manually
The position of the lung volume sub-divisions can be changed, and the values recalculated, by
selecting one of the lines with the mouse and holding down the left mouse button. To illustrate the line
was selected with the mouse; it is shown as a thicker green line.
9.1.4
Co-operation
To ensure accurate and reproducible results, the patient should be encouraged throughout the
measurement. It is recommended that the test be repeated until three acceptable manoeuvres have
been obtained. Optimum co-operation will result in reproducible results.
26/31
Status: 080208
Quickstart
Flowhandy ZAN100USB
9.2
Flow/Volume Measurement
F/V measurement starts after selecting the
Click the go icon
test.
option in the measure mode window.
to start the
On the screen the recording of the
volume/time line displays in the left
part of the window.
The flow/volume curve (on the right)
displays when respiration starts.
It is important that the patient uses a
nose clip and tightly encloses the
mouthpiece. The patient should tidal
breathe several times.
Using the delete key F3, the recording
can be re-started and the screen can be cleared.
Symbol Definitions
Select this icon or press the [ESC] key to
stop the measurement and exit the
programme.
Select this icon or press the
[Enter] key to stop recording of
the measurement.
Select this icon or press the [F3] key to
delete previous recordings.
Select this icon or press the
[space] key to save and perform
another effort.
Select this icon or press the [F8] key to
switch on incentive graphics.
9.2.1
FV Measurement Guidelines
A successful F/V Measurement is hard and requires optimum co-operation of the patient.
It is important that the patient inhales and exhales the complete volume of his or her lungs with
maximum flow speed.
You have to distinguish between an inspiratory and an expiratory F/V curve. To measure the
inspiratory curve, the patient has to slowly exhale the complete volume of his or her lungs in order to
inhale as fast and as deeply as possible afterwards. In order to measure the expiratory flow, the
patient has to exhale as fast and as deeply as possible after maximum inhalation.
27/31
Status: 080208
Quickstart
Flowhandy ZAN100USB
To guarantee a complete exhalation, it is recommended to exhale for at least 6 seconds. During the
measurement, a time bar will be displayed in the upper right of the screen. It starts to increase with
each exhalation and changes colour from red to green after 6 seconds. When this occurs, the patient
should inhale again. Also in the right hand side of the screen is the plateau graphic which is an
indication of flow nearing zero. This gives information to the technician on the quality of the
manoeuvre performed by the patient.
9.2.2
Co-operation
To judge the patient’s co-operation, the maximum exhalation should be repeated 3 times. It is
important that the patient exhales as fast and as deeply as possible. With optimum co-operation, all
curves will be positioned closely on top of each other and have a nearly identical form.
The curve’s form will be pointed if the patient’s co-operation was at an optimum. See picture below.
To exhale the whole volume, the patient must exhale for at least 6 seconds. The measurement curve
must slowly merge into the base line.
To finish the measurement and display the results, press the
9.2.3
icon
Flow/Volume Screen after Measurement And Editing Results
28/31
Status: 080208
Quickstart
Flowhandy ZAN100USB
Symbol Definitions
9.3
Select this icon or press the [ESC] key to
stop the measurement and exit the
programme.
Select this icon or press the [F1] key
to display a dialogue box to enter
comments.
Select this icon or press the [L] key to select
a reference value from another test for
comparison.
Select this icon or press the [F2] key
to define the user.
Select this icon or press the [F9] key to
enter the test set-up
Select this icon or press the [F3] key
to select the medication.
Select this icon or press the [F7] key to print
a single test result.
Select this icon or press the [F8] key
to print out one or more templates.
Select this icon or press the [F12] key to
check that results meet ERS/ATS 2005
Standards
Select this icon or press the [Enter]
key to save the measurement and
exit module.
Combined SVC and F/V Measurement
Selecting the
icon in the MEASURE mode enables the measurement of SVC
as well as F/V measurement with one single procedure
SVC measurement, as explained above, is performed first.
Directly following, the FVC test will be performed. Please refer to the user manual, chapter F/V
measurement, for more details.
Stop recording of the measurement and display the results, selecting this icon
29/31
.
Status: 080208
Quickstart
Flowhandy ZAN100USB
10 View Mode
The opening screen of the View mode will look very similar to that of the Measurement mode. Once
the measurement is completed, all tests can be reviewed, compared, and printed under the View
button or pressing the [V] key.
mode by clicking the
10.1 Reviewing the Measurements of the Day
With the measurement type selected, the results of the
selected day are shown with the corresponding times.
Select one or more measurements that are to be displayed on the screen.
These examples can be selected using the mouse or the corresponding number keys and then
viewed using [Enter]. If no field is selected, all measurements can be viewed by pressing the relevant
measurement button again.
10.2 Displaying Archived Measurements
View measurements performed previously (week, month, or year) on the same patient by accessing
the archive folder with the Archive button
or pressing the [-] key.
Archived measurements appear in fields 1-10, each
with the measurement date.
When the [?] symbol is shown, it indicates the patient’s file was opened on the date shown,
but the selected measurement was not carried out.
Select measurements of a particular day with a double click.
Once a date has been selected with the mouse or appropriate number key, the Archive can be closed
with the Archive button
or by pressing the [+] key.
30/31
Status: 080208
Quickstart
Flowhandy ZAN100USB
10.3 Printing Reports
Select a report in VIEW-mode and click on the
icon
The report menu pops up
Select the appropriate report type and press [Enter] to start the printout.
10.4 Archive, Export or Delete Measurements
From the main window menu the user is able to perform the following functions on the entire patient
file, using the
option
Three methods are available:
1. Archive: automatically archives the entire patient file to the database.
2. Paper basket: completely deletes the current patient file.
Caution: If confirmed, this action is not reversible.
3. Export: Exports the complete ZAN patient files to a specified location for import
31/31
Status: 080208