1
Oracle® RetailValue Chain Collaboration
User Guide
12.0
May 2006
Oracle® Value Chain Collaboration
Copyright © 2006 Oracle. All rights reserved.
The Programs (which include both the software and documentation) contain proprietary information; they
are provided under a license agreement containing restrictions on use and disclosure and are also protected
by copyright, patent, and other intellectual and industrial property laws. Reverse engineering, disassembly,
or decompilation of the Programs, except to the extent required to obtain interoperability with other
independently created software or as specified by law, is prohibited.
The information contained in this document is subject to change without notice. If you find any problems in
the documentation, please report them to us in writing. This document is not warranted to be error-free.
Except as may be expressly permitted in your license agreement for these Programs, no part of these
Programs may be reproduced or transmitted in any form or by any means, electronic or mechanical, for any
purpose.
If the Programs are delivered to the United States Government or anyone licensing or using the Programs on
behalf of the United States Government, the following notice is applicable:
U.S. GOVERNMENT RIGHTS Programs, software, databases, and related documentation and technical data
delivered to U.S. Government customers are "commercial computer software" or "commercial technical data"
pursuant to the applicable Federal Acquisition Regulation and agency-specific supplemental regulations. As
such, use, duplication, disclosure, modification, and adaptation of the Programs, including documentation
and technical data, shall be subject to the licensing restrictions set forth in the applicable Oracle license
agreement, and, to the extent applicable, the additional rights set forth in FAR 52.227-19, Commercial
Computer Software—Restricted Rights (June 1987). Oracle Corporation, 500 Oracle Parkway, Redwood City,
CA 94065
The Programs are not intended for use in any nuclear, aviation, mass transit, medical, or other inherently
dangerous applications. It shall be the licensee's responsibility to take all appropriate fail-safe, backup,
redundancy and other measures to ensure the safe use of such applications if the Programs are used for such
purposes, and we disclaim liability for any damages caused by such use of the Programs.
Oracle, JD Edwards, Siebel, and PeopleSoft are registered trademarks of Oracle Corporation and/or its
affiliates. Other names may be trademarks of their respective owners.
The Programs may provide links to Web sites and access to content, products, and services from third
parties. Oracle is not responsible for the availability of, or any content provided on, third-party Web sites.
You bear all risks associated with the use of such content. If you choose to purchase any products or services
from a third party, the relationship is directly between you and the third party. Oracle is not responsible for:
(a) the quality of third-party products or services; or (b) fulfilling any of the terms of the agreement with the
third party, including delivery of products or services and warranty obligations related to purchased
products or services. Oracle is not responsible for any loss or damage of any sort that you may incur from
dealing with any third party.
Contents
Preface ............................................................................................................................................................... xv
Audience.....................................................................................................................................................
Related Documents ...................................................................................................................................
Customer Support .....................................................................................................................................
Part I
xv
xvi
xvi
Oracle Retail Value Chain Collaboration
1 About the Value Chain Collaboration User Guide
Oracle Retail VCC Help .......................................................................................................................... 1-1
2
Introduction to Oracle Retail VCC Day-to-Day Tasks
Browser Compatibility ............................................................................................................................ 2-1
Platform Support ...................................................................................................................................... 2-1
Logging In to Oracle Retail VCC .......................................................................................................... 2-1
Logging Out of Oracle Retail VCC ....................................................................................................... 2-3
The Oracle Retail VCC User Interface ................................................................................................. 2-4
Title Bar................................................................................................................................................ 2-4
General Icons ...................................................................................................................................... 2-5
Export Data .................................................................................................................................. 2-5
Stream Info................................................................................................................................... 2-6
List View Icons ................................................................................................................................... 2-8
Menus and Submenus ....................................................................................................................... 2-9
Context Chooser .............................................................................................................................. 2-10
Context....................................................................................................................................... 2-10
Display Mode ........................................................................................................................... 2-19
Display Pane .................................................................................................................................... 2-22
Table Mode ............................................................................................................................... 2-22
Graph Mode.............................................................................................................................. 2-24
Required Fields................................................................................................................................ 2-28
3
Data
Introduction............................................................................................................................................... 3-1
Using the Right-Click Menu Utility ..................................................................................................... 3-1
iii
Clear All Cells ..................................................................................................................................... 3-2
Cut / Copy - Paste ............................................................................................................................. 3-2
Zero Fill................................................................................................................................................ 3-4
Mass Entry of Data................................................................................................................................... 3-5
Viewing Data............................................................................................................................................. 3-6
About Period Overlays............................................................................................................................ 3-8
About Accumulation Rules .................................................................................................................... 3-9
Adding, Reading, and Deleting Data Stream Comments ............................................................. 3-10
Editing a Data Stream........................................................................................................................... 3-12
Creating Aggregates.............................................................................................................................. 3-13
Working with Aggregates .................................................................................................................... 3-15
Using a Disaggregation Profile ..................................................................................................... 3-15
Using Proportional Disaggregation.............................................................................................. 3-15
Using Period Overlays ................................................................................................................... 3-16
Viewing Data in Expand Mode .......................................................................................................... 3-16
Viewing Data Stream Revision History............................................................................................ 3-18
4
Extracts
Introduction...............................................................................................................................................
Retrieving Extracted Data .................................................................................................................
Extracting Master Data......................................................................................................................
About Repeat Frequency ...........................................................................................................
Extracting Other Data Types ............................................................................................................
Extracts File Formats ................................................................................................................................
5
4-1
4-2
4-2
4-2
4-5
4-8
Exceptions
Introduction............................................................................................................................................... 5-1
Viewing Exceptions and Exception Data ............................................................................................. 5-8
Viewing Exceptions in the Individual Inbox .............................................................................. 5-10
Viewing Exceptions and Exception Data in Individual Expanded View........................ 5-10
Viewing Exceptions and Exception Data in Individual Collapsed View ........................ 5-13
Viewing an Individual Exception's Criteria......................................................................... 5-16
Viewing an Individual Exception's Status History ............................................................. 5-17
Viewing Exceptions in the Group Inbox...................................................................................... 5-18
Viewing a Group Exception in Group Expanded View..................................................... 5-18
Viewing a Group Exception in Collapsed View.................................................................. 5-20
Viewing a Group Exception's Criteria .................................................................................. 5-21
Viewing a Group Exception's Status History ...................................................................... 5-21
Viewing Exceptions in the Partner Inbox .................................................................................... 5-22
Managing Data Stream Exceptions.................................................................................................... 5-22
Exception Statuses........................................................................................................................... 5-22
Managing Data Stream Exceptions Automatically .................................................................... 5-22
Changing the Status of Data Stream Exceptions Manually ...................................................... 5-23
Creating and Viewing Exception Comments ................................................................................... 5-24
Exception Inbox Filter and Search Features ..................................................................................... 5-24
About Exception Inbox Filter and Search .................................................................................... 5-24
Using the Exception Inbox Filter and Search Features .............................................................. 5-26
iv
6
Exception Criteria
Data Stream Exception Criteria ............................................................................................................. 6-1
Creating Data Stream Exception Criteria............................................................................................. 6-2
Individual Exception Criteria........................................................................................................... 6-2
Individual Exception Criteria List ............................................................................................ 6-2
Creating Individual Exception Criteria ................................................................................... 6-6
Creating Group Exception Criteria............................................................................................... 6-17
Group Exception Criteria........................................................................................................ 6-20
Exception Severity Levels .................................................................................................................... 6-21
Viewing Exception Criteria ................................................................................................................. 6-22
Viewing Active Exceptions............................................................................................................ 6-22
Viewing Exception Criteria and Details from the Exceptions - Criteria - List Screen........... 6-23
Copying Exception Criteria ................................................................................................................. 6-23
Deleting Exception Criteria ................................................................................................................. 6-23
Viewing an Exception's Status History from the Active Exceptions Screen.............................. 6-23
Changing an Exception's Status from the Exception Inbox Screen ......................................... 6-24
Processing Exception Criteria on Demand....................................................................................... 6-25
Exception Inbox E-Mail Alerts............................................................................................................ 6-26
Sample HTML E-Mail Alert........................................................................................................... 6-26
Sample Text E-Mail Alert............................................................................................................... 6-27
Data Stream Exception Criteria Formulas ........................................................................................ 6-27
7
Reports
Introduction............................................................................................................................................... 7-1
About Reports ........................................................................................................................................... 7-2
Viewing Reports ................................................................................................................................. 7-2
Creating Reports - Templates........................................................................................................... 7-3
Common Report Settings........................................................................................................................ 7-3
Creating Reports.................................................................................................................................... 7-10
Comment .......................................................................................................................................... 7-11
Data Change..................................................................................................................................... 7-11
Data Stream...................................................................................................................................... 7-12
Distributed Exception..................................................................................................................... 7-13
Exception Log .................................................................................................................................. 7-14
Extract ............................................................................................................................................... 7-14
Last Transaction .............................................................................................................................. 7-15
No Transaction ................................................................................................................................ 7-16
Promotion Detail ............................................................................................................................. 7-16
Promotion Item................................................................................................................................ 7-17
Generating Reports ............................................................................................................................... 7-17
Deleting a Report .................................................................................................................................. 7-18
Deleting a Template .............................................................................................................................. 7-18
8
Metrics
Introduction............................................................................................................................................... 8-1
Viewing and Editing Metrics ................................................................................................................. 8-1
v
Creating Metrics ....................................................................................................................................... 8-5
Deleting Metrics ....................................................................................................................................... 8-6
Processing Metrics.................................................................................................................................... 8-6
Batch Processing................................................................................................................................. 8-8
Metrics Error Messages ..................................................................................................................... 8-8
Metric Types .............................................................................................................................................. 8-8
Metric Output ..................................................................................................................................... 8-8
Period Overlays with Period Offsets............................................................................................... 8-9
Average............................................................................................................................................. 8-10
Count Missing.................................................................................................................................. 8-10
Exception Count .............................................................................................................................. 8-11
Forecast Error/Accuracy................................................................................................................ 8-11
Growth.............................................................................................................................................. 8-12
Inventory Turns............................................................................................................................... 8-12
Period to Date .................................................................................................................................. 8-14
Periods of Supply ............................................................................................................................ 8-14
Perpetual Inventory ........................................................................................................................ 8-15
Rolling Error .................................................................................................................................... 8-16
Simple Math ..................................................................................................................................... 8-16
Time Average................................................................................................................................... 8-18
Variability......................................................................................................................................... 8-19
Weighted Average Forecast Error ................................................................................................ 8-20
Access Control........................................................................................................................................ 8-21
9
Preferences
Introduction............................................................................................................................................... 9-1
General Preferences ................................................................................................................................. 9-1
Layout ......................................................................................................................................................... 9-3
Table/Graph Preferences.................................................................................................................. 9-3
Setting Table/Graph Defaults Preferences ............................................................................. 9-3
Creating and Editing Period Overlays..................................................................................... 9-4
Setting Highlight Source Preferences.................................................................................... 9-13
Creating and Editing Groups ................................................................................................. 9-15
Setting Inbox Filters Preferences................................................................................................... 9-20
Setting List Screen Preferences...................................................................................................... 9-22
Changing Your Password..................................................................................................................... 9-25
Part II Value Chain Collaboration Modules
10 Events
Introduction............................................................................................................................................
Events.......................................................................................................................................................
Events Calendar Tab.......................................................................................................................
Events List Tab ................................................................................................................................
Events Create Tab............................................................................................................................
Copying an Event............................................................................................................................
vi
10-1
10-2
10-2
10-4
10-6
10-7
Promotions..............................................................................................................................................
About Promotion Attributes..........................................................................................................
About Promotional Tactics ............................................................................................................
Viewing Promotions .....................................................................................................................
Changing the Status of a Promotion ...................................................................................
Adding Promotions ......................................................................................................................
Deleting Promotions .....................................................................................................................
Promotion Items ..................................................................................................................................
Viewing Promotion Items ............................................................................................................
Creating Promotion Items............................................................................................................
Deleting Promotion Items ............................................................................................................
Table/Graph View in Promotion Items.....................................................................................
Documents ............................................................................................................................................
Viewing Documents .....................................................................................................................
Attaching Documents to Events and Promotions ....................................................................
Removing Documents ..................................................................................................................
Promotion Status Changes ................................................................................................................
10-8
10-8
10-8
10-11
10-15
10-21
10-26
10-26
10-28
10-30
10-33
10-34
10-34
10-35
10-35
10-36
10-37
11 Demand
Introduction............................................................................................................................................
Demand Policy Parameters..................................................................................................................
Advanced Parameters ....................................................................................................................
Viewing Demand Policies ...................................................................................................................
Creating a Demand Policy ...................................................................................................................
Using Interactive Demand.................................................................................................................
Time-Aggregate Demand Forecasting .......................................................................................
Batch Jobs..............................................................................................................................................
Creating Batch Requests...............................................................................................................
Demand Batch Request .........................................................................................................
Lift Factor Batch Request ......................................................................................................
Running Batch Requests with Scheduler Tasks ................................................................
Using Lift Factors ................................................................................................................................
Calculated Lift Patterns................................................................................................................
History .....................................................................................................................................
Specifying Lift Patterns .........................................................................................................
11-1
11-2
11-5
11-5
11-6
11-10
11-14
11-15
11-16
11-17
11-17
11-17
11-18
11-18
11-19
11-19
12 An Analyzer
About the Analyzer ............................................................................................................................... 12-1
Viewing Cubes with the Analyzer..................................................................................................... 12-1
Managing Custom Cube Views.......................................................................................................... 12-2
13 Supply
Introduction............................................................................................................................................
Creating a Supply Policy .....................................................................................................................
Using Interactive Supply .....................................................................................................................
Using Supply Batch ..............................................................................................................................
13-1
13-2
13-6
13-9
vii
Using the Safety Stock Feature......................................................................................................... 13-11
Safety Stock Calculation Rules .................................................................................................... 13-15
Processing Safety Stock Jobs On Demand ................................................................................. 13-16
Part III
14
Value Chain Collaboration Administration
Introduction to VCC Administration
Administration Overview....................................................................................................................
The Superuser ..................................................................................................................................
The Server Admin ...........................................................................................................................
The Integrator User .........................................................................................................................
The Administrators .........................................................................................................................
About the Company Chooser..............................................................................................................
Starting and Stopping Oracle Retail VCC........................................................................................
Where To Begin......................................................................................................................................
Superuser Responsibilities.............................................................................................................
Administrator Responsibilities .....................................................................................................
14-1
14-1
14-2
14-2
14-2
14-4
14-5
14-5
14-6
14-6
15 Server-Level Configuration and Management
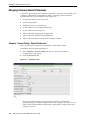
About Server-Level Configuration ....................................................................................................
Managing Company Creation.............................................................................................................
Creating a Company with Company - Create ..................................................................................
About Oracle Retail VCC Program Modules...................................................................................
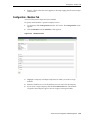
Configuration - Modules Tab..............................................................................................................
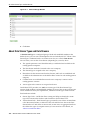
About Data Stream Types and Data Streams...................................................................................
About Accumulation Rules .................................................................................................................
Configuration - Stream Types Tab .....................................................................................................
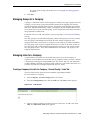
Assigning Data Streams With Configuration - Stream Types - Assign ....................................
Creating Data Stream Types..............................................................................................................
Managing Links...................................................................................................................................
Configuring Links with the Configuration - Links Tab ..........................................................
Editing a Link ................................................................................................................................
Deleting a Link ..............................................................................................................................
Hiding Links ..................................................................................................................................
Managing Users and Roles at the Server Level with the Roles and Users Screen .................
Selecting the Appropriate Tree Display..........................................................................................
Roles & Users Search..........................................................................................................................
Creating Users ...............................................................................................................................
Setting and Editing User Access Control...................................................................................
Accessing the User Access Control Screens .......................................................................
Hierarchy Access....................................................................................................................
Stream Access .........................................................................................................................
Module Access........................................................................................................................
Examining a User ..........................................................................................................................
Disabling a User ............................................................................................................................
Moving a User to a New Role .....................................................................................................
viii
15-2
15-2
15-3
15-4
15-5
15-6
15-7
15-8
15-11
15-13
15-13
15-13
15-14
15-14
15-15
15-16
15-17
15-17
15-19
15-20
15-20
15-21
15-22
15-23
15-23
15-23
15-24
Changing a User Password.......................................................................................................... 15-24
Copying a User .............................................................................................................................. 15-25
Designating a System User .......................................................................................................... 15-26
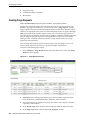
Managing Data Purging with the Purge Data Screen .................................................................. 15-26
Purging Transaction Data ............................................................................................................ 15-27
Purging the Job Monitor............................................................................................................... 15-28
Purging Master Data..................................................................................................................... 15-29
Purging Event Promotions .......................................................................................................... 15-29
Purging Collaboration Item Comments..................................................................................... 15-30
Checking the Purge Progress ...................................................................................................... 15-30
Managing Time Periods for All Companies .................................................................................. 15-32
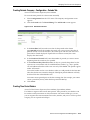
Guidelines for Creating Time Periods........................................................................................ 15-32
Creating Periods: Company - Configuration - Periods Tab.................................................... 15-33
Creating Time Period Folders ..................................................................................................... 15-33
Configuring a Language for Oracle Retail VCC with the Configuration - Language Tab ... 15-34
Configuration - General Tab ............................................................................................................. 15-35
Renaming Labels ........................................................................................................................... 15-35
Setting Export Compression Size................................................................................................ 15-36
Setting the Usage Statistics E-mail Notification in the Billing Tab ........................................ 15-37
Purging Transaction Data, the Job Monitor Log File, Current Connections, Event Promotions,
Exceptions, Collaboration Item Comments, and Master Data. .................................................. 15-37
16 Managing Company General Information and Preferences
About Your Company General Information ....................................................................................
Managing Company General Preferences........................................................................................
Company - General Config - General Preferences .....................................................................
Managing Groups for a Company .....................................................................................................
Managing Links for a Company.........................................................................................................
Creating a Company Link with the Company - General Config - Links Tab ........................
Editing a Company Link ................................................................................................................
Deleting a Company Link ..............................................................................................................
Hiding Company Links..................................................................................................................
The Period Overlays Tab......................................................................................................................
Using the Real Time Extract Tab.........................................................................................................
Configuring Real Time Extracts ....................................................................................................
Using the Stream Types Tab ..............................................................................................................
Configuring E-mail Alerts .................................................................................................................
16-1
16-2
16-2
16-5
16-5
16-5
16-6
16-7
16-7
16-8
16-8
16-9
16-10
16-11
17 Master Data
About Master Data ................................................................................................................................
About Entering Master Data ...............................................................................................................
Managing Company Locations...........................................................................................................
Managing Company Products ............................................................................................................
Managing Product Hierarchies...........................................................................................................
Guidelines for Creating Product Folders..........................................................................................
Managing Time Period Hierarchies...................................................................................................
17-1
17-2
17-2
17-2
17-3
17-3
17-4
ix
Managing Company Trading Partners ..............................................................................................
Removing Hierarchy Nodes through the Recycle Bin ...................................................................
Managing Master Data Folders ..........................................................................................................
About Master Data Hierarchies ..........................................................................................................
Master Data Search .........................................................................................................................
Tree Behavior ...................................................................................................................................
Working With Tree Hierarchies ..........................................................................................................
The Start Editing Button and the Right-Click Menu..................................................................
Tree Behavior ...................................................................................................................................
Adding a Local Location ..............................................................................................................
Adding a Partner Location ..........................................................................................................
Adding a Product..........................................................................................................................
17-4
17-4
17-5
17-5
17-5
17-6
17-8
17-8
17-8
17-11
17-12
17-13
18 Managing Company Module Configuration
Managing Events Module Configurations.......................................................................................
Events Stream Set Configuration ..................................................................................................
Configuring Labels in the Events Module .......................................................................................
Managing Supply Module Stream Set for a Company..................................................................
Setting and Viewing the Shipping/Receiving Calendar for Supply...........................................
Managing Demand Module Stream Set for a Company ...............................................................
Configuring E-Mail for the Exception Module ...............................................................................
Sample Exception Inbox E-Mail Alerts...........................................................................................
18-1
18-1
18-2
18-4
18-6
18-8
18-9
18-10
19 Creating Product Price Profiles
About Product Price Profiles............................................................................................................... 19-1
Creating a Product Price Profile with the Company - Price Profile - Create Tab...................... 19-1
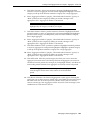
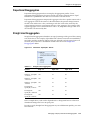
20 Managing Company Aggregates
About Aggregates..................................................................................................................................
Creating a Data Aggregate with the Company - Aggregates - Create Tab .................................
Viewing Aggregates with the Company - Aggregates - List Tab .................................................
Deleting Aggregates with the Company - Aggregates - List Tab.................................................
Exporting Aggregates.....................................................................................................................
20-1
20-2
20-5
20-5
20-6
21 Managing Company Data Stream Disaggregation
About Data Stream Disaggregation................................................................................................... 21-1
Profile-Based Disaggregation ............................................................................................................. 21-1
Proportional Disaggregation............................................................................................................... 21-3
Straight Line Disaggregation .............................................................................................................. 21-3
About Disaggregation Profiles ........................................................................................................... 21-5
Configuring Disaggregation Factors ................................................................................................. 21-5
Configuring Time-Only Disaggregation with the Company - Disagg. Setup - Time Only Subtab
21-8
Daily Allocation with the Company - Disagg. Setup - Daily Allocation Tab ......................... 21-10
Listing, Viewing, and Editing Disaggregation Profiles with the Company - Disagg. Setup - List
Tab .......................................................................................................................................................... 21-12
x
22 Managing Company Collaborations
About Collaborations ........................................................................................................................... 22-1
Creating Collaborations Between Trading Partners with the Company Collaborations Screen......
22-1
23 Managing Roles and Users
About Roles and Users ......................................................................................................................... 23-1
An Overview of Oracle Retail VCC Roles........................................................................................ 23-3
Selecting the Appropriate Tree Display............................................................................................ 23-3
Roles & Users Search............................................................................................................................ 23-4
Creating a New User for a Company with the Company - Roles and Users Screen ................ 23-5
Copying a User....................................................................................................................................... 23-6
Setting or Editing User Hierarchy Access Rights with the Company - Roles and Users Screen......
23-7
Access Control........................................................................................................................................ 23-9
Assigning Users Data Stream Access ........................................................................................... 23-9
Assigning Modules to the Users ...................................................................................................... 23-10
Examining a User with the Company - Roles and Users Screen............................................ 23-10
Disabling a User with the Company - Roles and Users Screen ................................................. 23-11
Moving a User to a New Role with the Company - Roles and Users Screen .......................... 23-12
Changing a User Password with the Company - Roles and Users Screen ............................... 23-12
24 Managing the Monitor
About the Oracle Retail VCC Monitor..............................................................................................
Monitoring Oracle Retail VCC Jobs ..................................................................................................
Monitoring Usage Statistics ................................................................................................................
Sending Usage Statistics E-mail Notification..................................................................................
Monitoring Current Connections.......................................................................................................
Monitoring Server Locks .....................................................................................................................
24-1
24-1
24-4
24-5
24-6
24-7
25 Managing the Scheduler
About the Scheduler ............................................................................................................................
Working with the Scheduler Interface ..............................................................................................
Working with Scheduler Events.........................................................................................................
Adding an Event ....................................................................................................................................
Deleting events ......................................................................................................................................
Working with Tasks ..............................................................................................................................
Adding a Task ........................................................................................................................................
Editing a Task.......................................................................................................................................
Deleting a Task ....................................................................................................................................
25-1
25-2
25-3
25-3
25-5
25-5
25-9
25-10
25-10
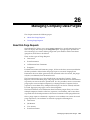
26 Managing Company Data Purges
About Data Purge Requests ................................................................................................................ 26-1
Creating Purge Requests...................................................................................................................... 26-2
xi
27 Managing Company UOM Factors
About UOM Factors ..............................................................................................................................
Viewing the UOM List .........................................................................................................................
Creating New UOM Factors ................................................................................................................
Deleting UOM Factors..........................................................................................................................
27-1
27-2
27-3
27-4
Part IV Appendices
A Glossary
B VCC-Supported Platforms
C User and Role Permissions
D Browser Settings
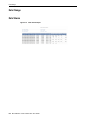
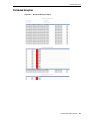
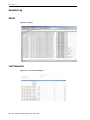
E Sample PDF Report Screens
Comment...................................................................................................................................................
Data Change .............................................................................................................................................
Data Stream ..............................................................................................................................................
Distributed Exception.............................................................................................................................
Exception Log ...........................................................................................................................................
Extract ........................................................................................................................................................
Last Transaction .......................................................................................................................................
No Transaction .........................................................................................................................................
Promotion Detail .....................................................................................................................................
Promotion Item ........................................................................................................................................
E-1
E-2
E-2
E-3
E-4
E-4
E-4
E-5
E-5
E-5
F Geneva Forecast Engine
How Does Geneva Work? ...................................................................................................................... F-1
G VCC Locks and Jobs
About Locks and Jobs.............................................................................................................................
Job Types ............................................................................................................................................
Lock Types .........................................................................................................................................
User Generated Jobs ...............................................................................................................................
User Save-Action Locks..........................................................................................................................
Scheduler Jobs .........................................................................................................................................
Loader Jobs ...............................................................................................................................................
Extractor Jobs............................................................................................................................................
xii
G-1
G-1
G-1
G-2
G-4
G-4
G-6
G-7
H Safety Stock Calculation
Input Variables.........................................................................................................................................
Formulas Used .........................................................................................................................................
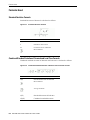
Standard Deviation Formula ...........................................................................................................
Combined Standard Deviation of Demand and Lead-Time Formula.......................................
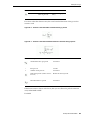
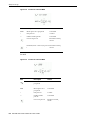
Standard Fill Rate-Driven Safety Stock Calculation Formula ....................................................
Safety Stock Logic ...................................................................................................................................
Single Value Calculations ................................................................................................................
Poisson ................................................................................................................................................
Periods Forward ................................................................................................................................
Periods Back.......................................................................................................................................
Time - Series Calculation..................................................................................................................
Safety Stock Constants.........................................................................................................................
I
Language Encoding for Files Generated
J
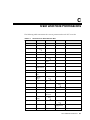
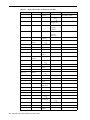
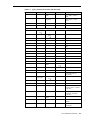
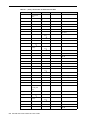
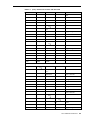
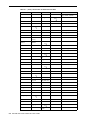
Data Stream Type Codes
H-1
H-2
H-2
H-2
H-3
H-3
H-4
H-7
H-8
H-9
H-9
H-10
Index
xiii
xiv
Preface
The Oracle Retail Value Chain Collaboration User Guide explains the basic
configuration procedures of the Value Chain Collaboration Module through the web
Graphical User Interface (GUI). This guide provides an easy, intuitive interface that
lets anyone to view, create, edit, delete data and share that data in whatever way that
is most meaningful. It contains procedures:
■
To view, edit and compare data streams
■
To configure extracts and data stream exceptions
■
To manage exceptions
■
To generate different types of reports
■
To calculate the business metrics
■
To configure events to create visibility and collaboration on Promotions
■
To calculate time-series based statistical forecasts
■
To configure an Analyzer
■
To develop supply plans that meet target service levels
■
To configure appropriate roles and User rights to the appropriate level of users
■
To manage read/write access through different levels of security
■
To create purge requests
■
To provide the Scheduler user interface that allows user to instruct the Scheduler
Server to execute any predefined tasks.
Audience
Anyone with an interest in developing a deeper understanding of the underlying
processes and architecture supporting Oracle Retail Value Chain Collaboration (VCC)
functionality will find valuable information in this guide. There are three audiences in
general for whom this guide is written:
■
■
Business analysts looking for information about processes and interfaces to
validate the support for business scenarios within VCC and other systems across
the enterprise.
System analysts and system operations personnel
–
Who are looking for information about VCC's processes internally or in
relation to the systems across the enterprise.
xv
–
■
Who operate on VCC regularly.
Integrators and implementation staff with overall responsibility for implementing
VCC.
Related Documents
For more information, see the following documents:
■
Oracle VCC Release Notes and Online Help
■
Oracle VCC Installation Guide
■
Oracle VCC Operations Guide
Customer Support
■
https://metalink.oracle.com
When contacting Customer Support, please provide:
xvi
■
Product version and program/module name.
■
Functional and technical description of the problem (include business impact).
■
Detailed step-by-step instructions to recreate.
■
Exact error message received.
■
Screen shots of each step you take.
Part I
Oracle Retail Value Chain Collaboration
Part I contains the following chapters:
■
About the Value Chain Collaboration User Guide
■
Introduction to Oracle Retail VCC Day-to-Day Tasks
■
Data
■
Extracts
■
Exceptions
■
Exception Criteria
■
Reports
■
Metrics
■
Preferences
1
About the Value Chain Collaboration User
Guide
Oracle Retail VCC Help
Due to the modular nature of the Oracle Retail VCC, many of the images contained in
this User Guide may be different than what appears on your screen.
The options that appear in the VCC’s left menu are determined by the user role you
are assigned, which modules you have access to, and whether or not your company
has obtained a license for those modules. Therefore, there may be some menu options
displayed in the screenshots that will not be accessible to you.
Current screenshots display only the "Tea Leaves" color scheme, which is configured in
Preferences - General - Theme.
About the Value Chain Collaboration User Guide
1-1
Oracle Retail VCC Help
1-2 Oracle® Value Chain Collaboration User Guide
2
Introduction to Oracle Retail VCC Day-to-Day
Tasks
This chapter includes the following topics:
■
Browser Compatibility
■
Platform Support
■
Logging In to Oracle Retail VCC
■
Logging Out of Oracle Retail VCC
■
The Oracle Retail VCC User Interface.
Browser Compatibility
Oracle Retail VCC supports Internet Explorer versions 5.0, 5.5, and 6.0.
If you experience difficulties when using Oracle Retail VCC, set your browser settings
according to guidelines provided in Browser Settings.
Platform Support
For a list of what platforms Oracle Retail VCC supports, see VCC-Supported
Platforms.
Logging In to Oracle Retail VCC
Before you can log in to Oracle Retail VCC, you must
■
be previously established as a valid Oracle Retail VCC user
■
know your Oracle Retail VCC username and password
■
■
have an assigned a role that enables you to specific user privileges dependant on
the user group to which you are assigned.
have a system that is running.
Contact your system administrator or hosting provider for details.
To log in to a local Oracle Retail VCC system:
1.
Make sure that the web server is up and running.
2.
Enter a URL in VCC Configurations that will direct the JSP engine to the correct
context path. This can be done by selecting Start - Programs - VCC - VCC
Introduction to Oracle Retail VCC Day-to-Day Tasks
2-1
Logging In to Oracle Retail VCC
Configurations - VCC Configuration. Select the Client tab, and enter a URL in the
File Path field. The URL format would resemble
http://host_name/Syncra_virtual_directory_name/jsp/login.jsp
For example:
http://odyssey/xt/jsp/login.jsp
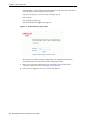
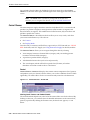
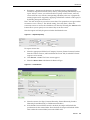
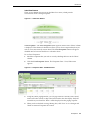
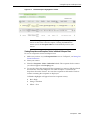
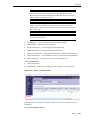
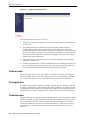
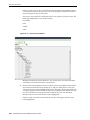
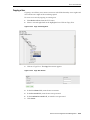
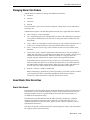
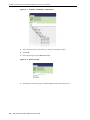
The Oracle Retail VCC login screen appears.
Figure 2–1 Oracle Retail VCC Login screen
This step may already have been completed by your administrator. For more
information, refer to the Installation and Configuration Guide.
3.
Enter your user name and password. You can change your password after
entering a valid password. See Changing Your Password.
4.
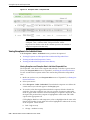
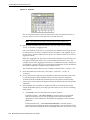
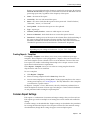
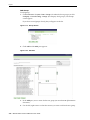
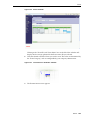
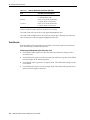
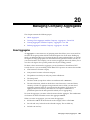
Once you have logged in, the VCC user interface appears.
2-2 Oracle® Value Chain Collaboration User Guide
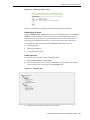
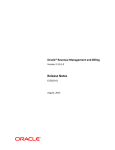
Logging Out of Oracle Retail VCC
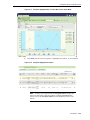
Figure 2–2 VCC User Interface
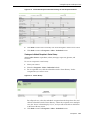
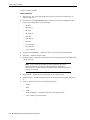
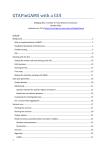
Logging Out of Oracle Retail VCC
Figure 2–3 Logging Out of Oracle Retail VCC
To log out of VCC, click Logout at the bottom of the Menu. If you do
not log out of VCC using the Logout button, your session
information is maintained until it expires (the default is 15 minutes).
If you return before your session has expired, VCC continues your
previous session.
Introduction to Oracle Retail VCC Day-to-Day Tasks
2-3
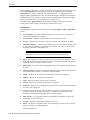
The Oracle Retail VCC User Interface
The Oracle Retail VCC User Interface
Before you begin using the Oracle Retail VCC user interface, familiarize yourself with
its basic components and layout, which include
■
Title Bar
■
General Icons
■
List View Icons
■
Menus and Submenus
■
Context Chooser
■
Display Pane
■
Required Fields
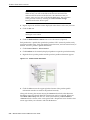
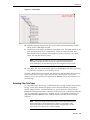
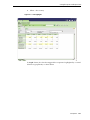
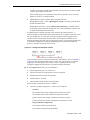
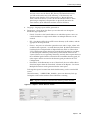
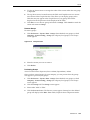
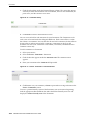
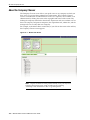
Below is the Oracle Retail VCC user interface, including its basic components (Context
Chooser, Menu and Submenus, and Display pane) and layout.
Figure 2–4 Oracle Retail VCC User Interface
Title Bar
The Title Bar displays the Oracle Retail VCC menu item you have selected at the right
of the blue banner at the top of the interface in yellow text.
2-4 Oracle® Value Chain Collaboration User Guide
The Oracle Retail VCC User Interface
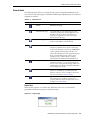
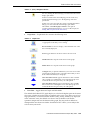
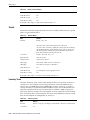
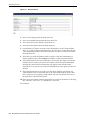
General Icons
The following icons allow you to refresh, copy, export, and print information in the
user interface. The icons appear in different combinations depending on what menu or
submenu is selected.
Table 2–1
General Icons
Icon
Icon Name
Description
Refresh
Refreshes the page.
Get link to this page
Copies the URL of your current page to a new
window for pasting into another application. Use
the URL in the new window (shown below) to
paste into an application in order to navigate
directly back to this page.
Email this page
Mails a link of the current page electronically
to the e-mail address of your choice.
Printer-Friendly View
Displays a printable version of the current page.
You must set the paper orientation to Landscape in
order to print the entire printer friendly-view.
The Printer-Friendly View will only print the page
that is currently displayed. In order to print
multiple pages, you must display each page
individually and click the Printer-Friendly icon.
Configure List
A shortcut that allows you to configure List screen
preferences exactly as you would in Preferences Layout - Lists. Changes made through either route
will effect the same change and will be reflected in
both configuration screens.
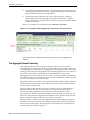
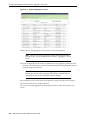
Export Data
Exports data to either a .csv (Excel spreadsheet
format) or an HTML file (viewable in Internet
Explorer). This icon is not available on all screens.
For more information, see Export Data.
Stream Info
Opens a new browser window which displays the
data stream types available to you based on
company and user stream assignments. For more
information, see Stream Info.
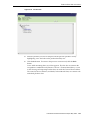
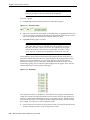
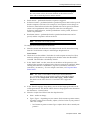
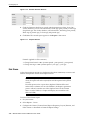
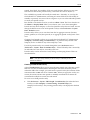
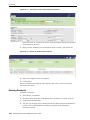
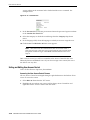
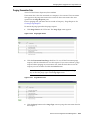
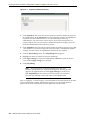
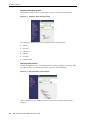
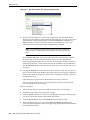
Export Data
Some screens export in .csv format only. When this is the case, you will not be
presented with the above option to select file format.
Figure 2–5 Export Type
Introduction to Oracle Retail VCC Day-to-Day Tasks
2-5
The Oracle Retail VCC User Interface
All List screens allow exporting in either file format. The file will be saved to a location
that you specify in the Save As dialog box.
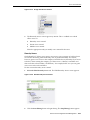
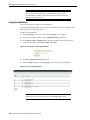
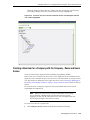
■
When you click Export Data, the following File Download dialog box appears:
Figure 2–6 File Download
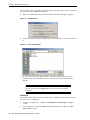
■
Click Save, and you will be prompted for the location that you wish to save the file
to.
Figure 2–7 Save As Dialog Box
■
In .csv format, file will be downloaded as a comma-delimited flat file to the
location you specify. If HTML format was selected, the file will be formatted as
HTML.
Note: If you decide to open the file directly, rather than saving to a
file, you need to click the Open button on two consecutive dialog
windows.
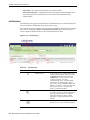
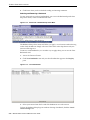
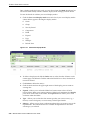
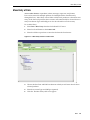
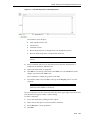
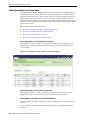
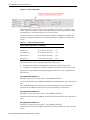
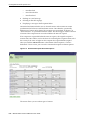
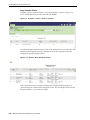
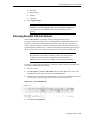
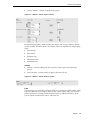
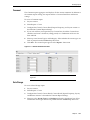
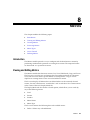
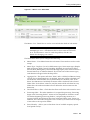
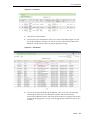
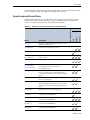
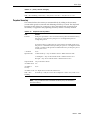
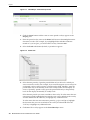
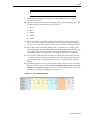
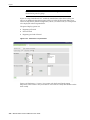
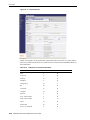
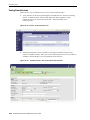
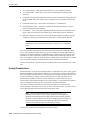
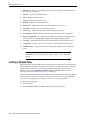
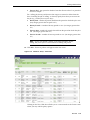
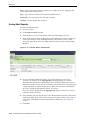
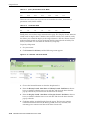
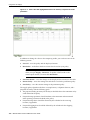
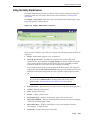
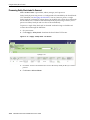
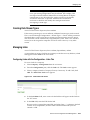
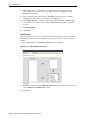
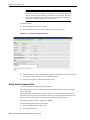
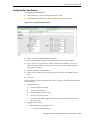
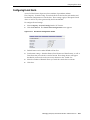
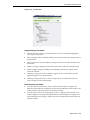
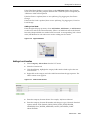
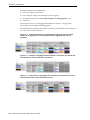
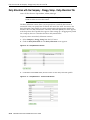
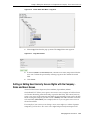
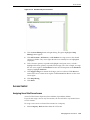
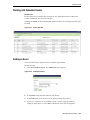
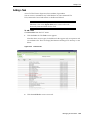
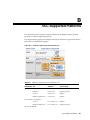
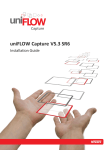
Stream Info
Stream Info screen displays the data stream types available to you based on company
and user stream assignments.
■
■
Company Assignments – assigned in Configuration - Stream Types - Assign
screen
User Assignments assigned in Roles and Users (company or hub-level) - Edit
Stream Access screen
2-6 Oracle® Value Chain Collaboration User Guide
The Oracle Retail VCC User Interface
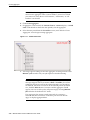
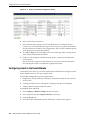
Users see a list of assigned company streams. Check the Full Access column to see
if you have Full (Y) or Read-Only (N) access to the company streams assigned to
you.
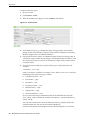
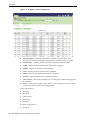
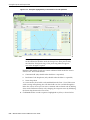
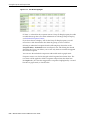
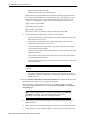
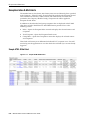
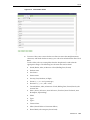
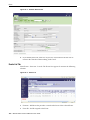
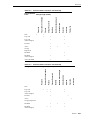
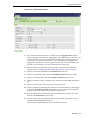
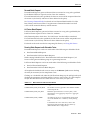
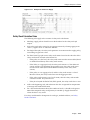
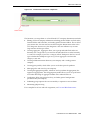
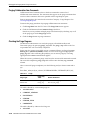
Figure 2–8 Stream Info screen
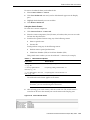
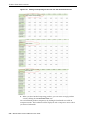
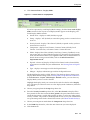
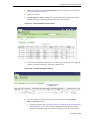
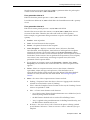
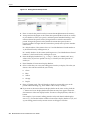
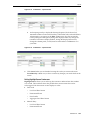
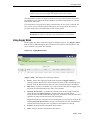
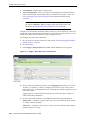
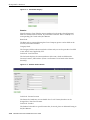
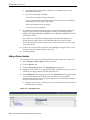
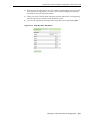
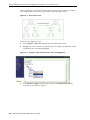
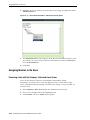
Figure 2–9 Stream Info Detail screen
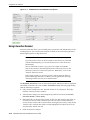
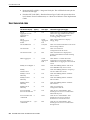
Stream Name – the name of the stream
Stream Type – the stream type code
Accumulation Rule – a fixed attribute of the data stream that indicates how it
behaves when aggregated. There are three accumulation rules that can apply to a
data stream: movement, balance, and measure. Movement accumulates across all
dimensions (product, partner, local, and period); balance accumulates across three
dimensions (product, partner, and local); measure does not accumulate at all.
Revision History – if the stream has a revision history, Y (Yes), if not, N (No)
Edited By – either the seller, buyer, or both
Edited When – either the past, future, or always
Introduction to Oracle Retail VCC Day-to-Day Tasks
2-7
The Oracle Retail VCC User Interface
Substreams – the number of substreams for the data stream
Printer-Friendly View – Clicking this button will open the printer-friendly view.
You can then generate a printed list of your current stream information by
selecting Print.
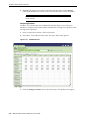
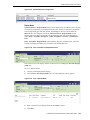
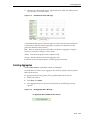
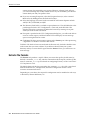
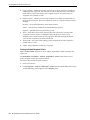
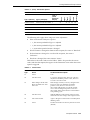
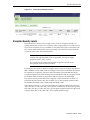
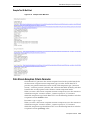
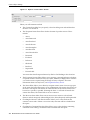
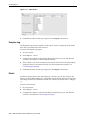
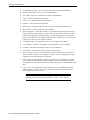
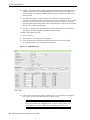
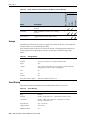
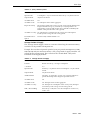
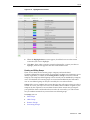
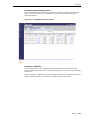
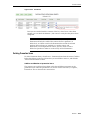
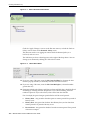
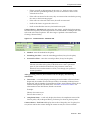
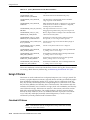
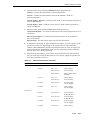
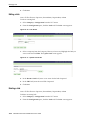
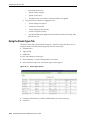
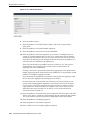
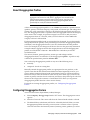
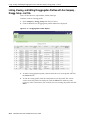
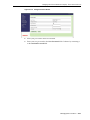
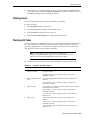
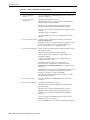
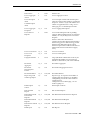
List View Icons
The following icons appear most frequently in tabbed List views in Oracle Retail VCC.
They are located in the Display Pane section of the screen.
As a convenience, some of these icons are actively clickable to allow for mass selection.
For instance, clicking the Delete or Override Execute Time icons will allow you to
select or deselect all the check boxes in the column below the icon.
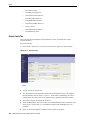
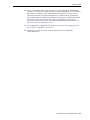
Figure 2–10 List View Icons
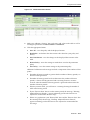
Table 2–2
Icon
List View Icons
Icon Name
Description
Drilldown Dot
Indicates that there is additional data that
can be viewed or edited on the next screen
by drilling down through the link. The
drilldown has a variety of uses, such as
viewing comments, accessing
printer-friendly views, viewing/editing
item details, etc. When the dot appears
grey, such as in the Comment column, this
indicates an absence of data. You may click
the grey dot to leave a comment; after
doing so it will become blue.
Delete
Allows for multi-selection of check boxes in
its column. To select or deselect all items for
deletion, click the Delete icon. Click the
individual check boxes in the column
beneath it to select/deselect items to be
deleted.
View/Edit
This column contains blue drilldown dots
that allow you to view or edit item details.
2-8 Oracle® Value Chain Collaboration User Guide
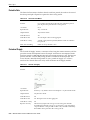
The Oracle Retail VCC User Interface
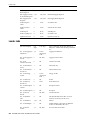
Table 2–2 (Cont.) List View Icons
Icon
Icon Name
Description
Copy
This icon appears in only two places, the
Promotion - List screen, and Exceptions Criteria - List. Clicking on the Copy icon
will provide a duplicate of the selected
criterion or promotion. The copy can then
be modified and renamed.
View/Edit Comment
This icon displays a column of drilldown
dots that can be clicked to view or add
comments about a given item. Comments
are posted in a discussion-thread style.
Printer-Friendly View
Drilldown dots can be clicked to access
details about the selected item in a
printer-friendly format.
Override Execute Time
Overrides the execution time for job
processing when checked and Apply
Changes is clicked. Click the Override icon
to select/deselect all items on the current
page to be overridden. Click the individual
check boxes in the column beneath it to
select/deselect items to be overridden.
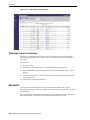
Menus and Submenus
Menus and Submenus open screens in the Display pane. Depending on the modules
and menu items accessible to you, Menus and Submenus will allow you to
■
Create and edit events (VCC Events)
■
View and analyze multidimensional data (VCC Analyzer)
■
Create demand forecasts (VCC Demand)
■
Create supply plans (VCC Supply)
■
Display data streams in table or graph mode (VCC Platform)
■
Create values for a data stream (VCC Platform)
■
Display a data stream revision history (VCC Platform)
■
Display exceptions in the Exceptions Inbox (VCC Platform)
■
Display exception criteria (VCC Platform)
■
Create exception criteria (VCC Platform)
■
Create and display metrics (VCC Platform)
■
Make extract requests (VCC Platform)
■
Generate reports (VCC Platform)
■
Create and edit display preferences (VCC Platform)
■
Change Password (VCC Platform)
■
Open custom links (VCC Platform)
■
■
Display Help options, which consist of an online user manual, access to the
Support web site, and the software's About screen information. (Xt Platform)
Log out of Oracle Retail VCC (Platform)
Introduction to Oracle Retail VCC Day-to-Day Tasks
2-9
The Oracle Retail VCC User Interface
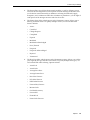
You can hide/show the Menu by clicking the left arrow image above the Context
Chooser. To show the menu again, click the right arrow in the upper left corner of the
screen.
Note: The Menu items available to you depend on the role and
modules you are assigned. For details, see User and Role Permissions.
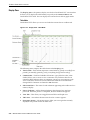
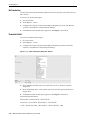
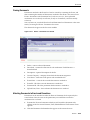
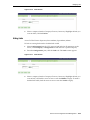
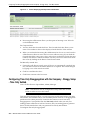
Context Chooser
The inter-enterprise supply chain data stored in Oracle Retail VCC is associated with
products (or product categories) moving between seller locations (or regions) and
buyer locations (or regions). The combination of seller locations, buyer locations and
products specifies the Context.
The Context Chooser is divided into tabs that allow you to view, search, and select
your context in different ways. The tabs are:
■
See Context.
■
See Display Mode.
Two other tabs, Parameters and Trial Data, appear only in VCC Demand (see <CROSS
REF> for details) and VCC Supply (see Using Interactive Supply for details) modules.
The Context Chooser allows you to navigate through this data by selecting
■
Your company location or location folder (category) and your trading partner
location or location folder (category).
■
A product or product folder (category).
■
A bookmarked context that you had saved previously.
■
The search option, which will look for specific Local, Partner, or Product
identifiers and return search results in a list format.
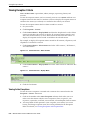
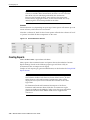
Context
Context Chooser -Context tab displays the current context components (local, partner,
and product) you have selected, and also allows you to select a different context. When
applicable, you will be able to see the 3 nearest hierarchy items for each dimension.
Figure 2–11 Context Chooser - Context Tab
Viewing Local, Partner, and Product Details
The small diamond-shaped icon to the left of the context links can also be selected. By
clicking on this icon, you can drill down for detailed information on the current local,
partner, or product. By clicking the Examine icon, the detail view appears, as seen
below.
2-10 Oracle® Value Chain Collaboration User Guide
The Oracle Retail VCC User Interface
Figure 2–12 Examine Location screen
When you are finished viewing the component's information, click Done.
Bookmarking a Context
Click the Bookmark this context icon in the lower right-hand corner of the Context
Chooser to bookmark the context. You can later access the bookmarked contexts
without having to reselect Local, Partner and Product levels. For information on
retrieving your bookmarked contexts, see Selecting and Removing a Bookmark.
It is possible to select your context in the Context tab three different ways:
■
Clicking the links
■
Selecting a bookmark
■
Using the Search feature
Clicking the Links
To select the context components by clicking the links
1.
Select Context Chooser - Context tab.
2.
Click on the links next to the context components (Local, Partner, and Product)
and a hierarchy tree screen appears in the Display pane.
Figure 2–13 Hierarchy Tree
3.
Select the leaf or folder you want for your context.
Introduction to Oracle Retail VCC Day-to-Day Tasks 2-11
The Oracle Retail VCC User Interface
Once you have selected something other than the current
folder or leaf, you will see the link in the chooser turn bold. This
indicates that the context in the chooser is in transition or not yet
current, since you have not yet clicked the Set button. You can return
to the previous context by selecting the Cancel Context Change
button located on the chooser pane.
Note:
4.
Repeat steps 2 &3 until the context displayed in the chooser is the one you want.
5.
Click the Set icon.
You must click either Set or Cancel Context Change before
moving to a new screen.
Note:
6.
Click the Bookmark this context icon to save the context. (Optional)
Each product has a profile that specifies the product's UPC (universal product code),
stat factor, product name, local part number, unit of measure, and conversion factors, if
defined. To view a product's profile information
1.
Click Context Chooser - Select Context.
2.
Click Products or the currently displayed product to open the product hierarchy.
3.
Right click on a specific product and the product's profile information appears.
Figure 2–14 Product Profile Information
4.
Click the Close icon in the upper right-hand corner of the product profile
information window to return to the product hierarchy.
Along with showing the current context, the Context tab includes other functions
depending upon what Oracle Retail VCC menu item you have selected. When you
select Data - Mass Entry from the VCC menu (shown below), Context Chooser
-Context includes a link to select a time period and a drop-down list to select the data
stream type. Make your selections and click the Set icon.
2-12 Oracle® Value Chain Collaboration User Guide
The Oracle Retail VCC User Interface
Figure 2–15 Context Chooser - Context Tab
Collaboration Comments
The Collaboration Comments icon allows you to add comments to the context you
have selected (leaf-level contexts only). These comments can be viewed by your
partners, and can contain up to 255 characters per post. Comments will appear in a
threaded-discussion style format, with many comments, and replies to those
comments visible on the same screen. When there are no comments at a selected
context, the speech bubble icon will appear with no babble inside to indicate an
absence of data. After a comment has been entered, the icon will contain filled speech
bubbles.
To enter a comment for a given context
1.
Select Context Chooser - Context.
2.
Set your context.
3.
Click on the Collaboration Comment icon. The comment screen appears.
Figure 2–16 Collaboration Comment screen
4.
Enter a comment and click Post. Your comment will appear under the Comment
column, and your name and company under the Author column.
Figure 2–17 Collaboration Comment Detail screen
Your partners will be able to post new comments on the same context thread,
which will be viewable by once again clicking on the Collaboration Comments
icon for that given context.
Introduction to Oracle Retail VCC Day-to-Day Tasks 2-13
The Oracle Retail VCC User Interface
5.
Click Done when you have finished reading and entering comments.
Selecting and Removing a Bookmark
To view contexts that you have bookmarked, you can use the Bookmark quick-select
drop-down menu, or the View Bookmarks tool.
Figure 2–18 Context Tab - Bookmark Drop-down Menu
The Bookmark drop-down menu will allow you apply a saved context without having
to then click the Set icon. Simply select one of the items in the drop-down and your
context will change to it.
To remove saved Bookmarks, or as another way to apply them, you can use the View
Bookmarks tool:
1.
Access the Context Chooser
2.
Click View Bookmarks icon and your list of bookmarks appear in the Display
pane.
Figure 2–19 List of Bookmarks
3.
Select your context from the list and click the Set icon to set the context.
To close the bookmark display pane without selecting a bookmark, click the Cancel
Context Change icon.
2-14 Oracle® Value Chain Collaboration User Guide
The Oracle Retail VCC User Interface
To remove a bookmark from your bookmark list
1.
Select Context Chooser - Context.
2.
Click View Bookmarks icon and your list of bookmarks appear in the Display
pane.
3.
Highlight the bookmark you want to delete.
4.
Click Remove Bookmark.
Using the Search Feature
To search for a context component
1.
Click Context Chooser - Context tab.
2.
Select the context component (Local, Partner, or Product) that you want to search
for from the drop-down list.
3.
Search local or partner location using any of the following criteria:
■
Name or partial name
■
Location ID
Search products using any of the following criteria:
■
Product name or partial product name
■
Global Item Number (GIN) or Local Item Number (LIN)
With partial name searches you use the wildcard "*" character, for example,
Table 2–3
Wildcard Search Options
If You Enter
Search Result
Any alphanumeric character and Everything starting with the letter "N".
"*", e.g., "N*"
"*" and any alphanumeric
character, e.g., "*w"
Everything ending with the letter "w".
"*", any alphanumeric character,
and "*", e.g., "*d*"
Everything that contains the letter "d"
The wildcard search feature applies to all criteria.
If your locale is set to a language that does not use ASCII
characters, you can search using those characters.
Note:
4.
After selecting your search criteria, click the search icon. The search returns a
sorted list of all leaves that match your search criteria in the Display pane.
Figure 2–20 Search Result Screen
Introduction to Oracle Retail VCC Day-to-Day Tasks 2-15
The Oracle Retail VCC User Interface
5.
Highlight the item you want in the sorted list and close the list in the Display
pane. Click the Set icon to set the context. The selected item is set for the context.
If the search returns only one item, it automatically is chosen
for the context.
Note:
Comparing Products
The Data - View/Edit screen has an additional icon that allows you to select two
products to compare. This feature enables simultaneous viewing of two products' data.
To compare two products
1.
Select a context that contains a leaf-level Product.
2.
Select Data - View/Edit from the menu. The View/Edit screen appears.
Figure 2–21 View/Edit Screen
3.
Click the Compare Products icon in the chooser pane. The product tree appears.
2-16 Oracle® Value Chain Collaboration User Guide
The Oracle Retail VCC User Interface
Figure 2–22 Product Tree
4.
Select the product you wish to compare with the previous product's data by
highlighting a new leaf node on the product hierarchy tree.
5.
Click the Set button. To return to the previous screen instead, click the Back
button.
A new table containing three sets of data appears. The first data set contains the
two products' combined totals (Planters Cashews + Planters Mixed Nuts), as seen
in See Viewing and comparing Product data sets with the Context Chooser below.
The second (Cashews Planters) and third (Cashews Mixed Nuts) sets contain each
individual product's data.
Introduction to Oracle Retail VCC Day-to-Day Tasks 2-17
The Oracle Retail VCC User Interface
Figure 2–23 Viewing and Comparing Product data sets with the Context Chooser
6.
When you have finished comparing products, you can return to single product
view by clicking the Go to Normal View icon.
You can bookmark product comparisons by clicking the bookmark icon while in
comparison mode. This bookmark will be displayed with a comparison arrow when
you retrieve bookmarks.
2-18 Oracle® Value Chain Collaboration User Guide
The Oracle Retail VCC User Interface
Figure 2–24 Bookmark Product Comparisons
Display Mode
Context Chooser - Display Mode allows you to choose how you display data streams,
to search for exceptions, to customize how you view criteria, or to select a promotion
event comparison type and time period, depending on what you select from the
Menu. Below are examples of how the Context Chooser -Display Mode screen
appears when you have selected one of the following from the Oracle Retail VCC
menu: Data - View/Edit, Exceptions - Inbox, Exceptions - Criteria, or Promotions Plan.
Data - View/Edit - Display Mode (shown below) lets you customize how your data
streams are displayed. Make your selections and click the Set icon.
Figure 2–25 Data - View/Edit - Display Mode Screen
You can also save your display modes for future use by clicking the Save this display
mode icon.
To save a display mode
1.
Choose your Display Mode settings.
2.
Click the Save this display mode icon , and the following screen appears:
Figure 2–26 Save a Display Mode
3.
Enter a name for your display mode in the Name text box.
4.
Click Save.
Introduction to Oracle Retail VCC Day-to-Day Tasks 2-19
The Oracle Retail VCC User Interface
Once a display mode has been saved, you can select it from the Mode drop-down list.
The screen automatically refreshes with the display mode settings you have chosen.
To view the details of or delete your saved display modes
1.
Click the View saved display modes icon and a list of your saved display modes
(shown below) appears showing the display modes'
■
Name
■
Group
■
View by Period
■
Comparison
■
UOM
■
Expand
■
Type
■
SubType
■
Default View
Figure 2–27 View Saved Display Modes
2.
To delete a display mode click the Delete icon to select/deselect all items on the
current page to be deleted. Click the individual check box to select/deselect that
item to be deleted.
3.
Click Delete to delete the item(s).
4.
Click the check mark in the upper right corner of the display pane to return to
viewing data.
■
■
■
Expand – Allows you to select the folder-level context item to show all of its
leaf-level data. When your context contains a folder-level component, the Display
pane shows all the items in the folder. The Expand function allows you to view
each item within the folder.
Type – Allows you to select the data stream type that you want to view (e.g., a
forecast, actual sales figures, or an inventory) in the Expand mode.
Subtype – Allows you to select a substream subtype that you want to view in the
Expand mode. The substreams that are available are dependent on what data
stream type you selected.
2-20 Oracle® Value Chain Collaboration User Guide
The Oracle Retail VCC User Interface
■
■
■
■
Group – Allows you to select the group of stream types you would like to view.
View by Period – Allows you to select a time period, e.g., Base Periods or any
other period overlays that you have access to.
Comparison – Allows you to choose the data streams that you want to compare:
–
Local Current to Local Previous – compares your current local data stream
with your previous local data stream.
–
Local Current to Partner Current – compares your current local data stream to
your partner's current data stream.
–
Partner Current to Partner Previous – compares your partner's current data
stream with your partner's previous data stream.
UOM– Allows you to select the unit of measure that you want to display in the
Display pane such as base units, stat factor, loads, and currency, or any other
custom UOMs that may be loaded and are applicable to the product. For details
about creating custom UOMs, refer to the Oracle Retail VCC Implementor Guide.
Custom UOMs appear as a choice only if all three dimensions
of a context are at leaf levels.
Note:
Exceptions - Inbox - Display Mode contains filters and search features to allow
you to quickly search for exceptions. Make your selections and click the Set icon.
Figure 2–28 Exceptions - Inbox - Display Mode
■
■
Filter – Allows you to select previously created filters from a drop-down list to
display all exceptions within specified ranges from an original data stream. For
details about filters, see Exception Inbox Filter and Search Features. For details
about creating filters, see Setting Inbox Filters Preferences.
Search – Allows you to select search criteria from a drop-down list to quickly
locate any individual exception without having to manually page through
numerous exceptions. For details about the search feature, see Exception Inbox
Filter and Search Features.
Exceptions - Criteria - Display Mode allows you to select whether to show criteria at
and above your context or at and below your context from a drop-down list. Make
your selection and click the Set icon.
Introduction to Oracle Retail VCC Day-to-Day Tasks 2-21
The Oracle Retail VCC User Interface
Display Pane
The Display pane is the primary display area for the Oracle Retail VCC user interface.
It allows you to display the information you specify in the Context Chooser and
Oracle Retail VCC menu. You can display data stream data in table or graph mode.
Table Mode
Oracle Retail VCC allows you to view and edit data stream data in a table mode.
Figure 2–29 Display Pane - Table Mode
The following items comprise the table format in the Display pane.
■
■
■
■
Time Periods – Each column represents a time bucket (e.g.daily or weekly [base
periods], or monthly, quarterly, yearly, or anything else [period overlay]).
Comment Box – Each local editable cell contains a gray/blue box that, when
clicked, allows you to create or view a comment. Gray indicates there are no
comments. Blue indicates there are comments. Anyone in your company with
access to the data stream can read and delete the comment associated with a
changed field. Comments are limited to 100 characters.
Substream Name – The name of each substream appearing in the table area for a
context/display.
Process Indicator – A blue diamond indicates that changes have not been
processed. When the process is completed, the blue diamond disappears.
■
View Tabs – Tabs allow you to toggle between Table and Graph view.
■
Table Area – Area where the time-series data for a context appears.
■
Navigation Arrows – Navigation arrows allow you to navigate the currently
displayed time period data in the Table Area:
2-22 Oracle® Value Chain Collaboration User Guide
The Oracle Retail VCC User Interface
Table 2–4
Navigation Arrows
Beginning – If the first column in the current display period is
not in the view, clicking this button brings you to the beginning
of the current display period data.
If the first column in the current display period is in the view,
clicking this button brings you to the beginning of the previous
period data.
If there are no more previous periods to retrieve, clicking this
button brings you to the beginning of the current display period
data.
The number of Period Display Columns in each period
grouping is defined in Preferences - Layout - Table/Graph (see
Setting Table/Graph Defaults Preferences).
Back a page – clicking this button brings you to the previous
page of the display period data you are viewing.
Forward a page – clicking this button brings you to the next
page of the display period data you are viewing.
End – If the last column in the current display period is not in
the view, clicking this button brings you to the end of the current
display period data.
If the last column in the current display period is in the view,
clicking this button brings you to the beginning of the next
period data.
If there are no more next periods to retrieve, clicking this button
brings you to the end of the current display period data.
The number of Period Display Columns in each period
grouping is defined in Preferences - Layout - Table/Graph (see
Setting Table/Graph Defaults Preferences).
Back – clicking this button moves you one column back in the
display period.
Forward – clicking this button moves you one column forward
in the display period.
Introduction to Oracle Retail VCC Day-to-Day Tasks 2-23
The Oracle Retail VCC User Interface
Graph Mode
Oracle Retail VCC allows you to view a data stream in Graph Mode.
Figure 2–30 Display Pane - Graph Mode
The Graph Mode comprises the following items
■
■
■
Graph Key – Shows each substream's short name and the line to which it is
assigned.
Graph – Area where the time-series data is displayed graphically.
Navigation Arrows – Navigation arrows allow you to navigate the currently
displayed time period data in the Graph Area:
Table 2–5
Navigation Arrows
Beginning – If the first column in the current display period is
not in the view, clicking this button brings you to the beginning
of the current display period data.
If the first column in the current display period is in the view,
clicking this button brings you to the beginning of the previous
period data.
If there are no more previous periods to retrieve, clicking this
button brings you to the beginning of the current display period
data.
The number of Period Display Columns in each period
grouping is defined in Preferences - Layout - Table/Graph (see
Setting Table/Graph Defaults Preferences).
Back a page – clicking this button brings you to the previous
page of the display period data you are viewing.
Forward a page – clicking this button brings you to the next
page of the display period data you are viewing.
2-24 Oracle® Value Chain Collaboration User Guide
The Oracle Retail VCC User Interface
Table 2–5 (Cont.) Navigation Arrows
End – If the last column in the current display period is not in
the view, clicking this button brings you to the end of the current
display period data.
If the last column in the current display period is in the view,
clicking this button brings you to the beginning of the next
period data.
If there are no more next periods to retrieve, clicking this button
brings you to the end of the current display period data.
The number of Period Display Columns in each period
grouping is defined in Preferences - Layout - Table/Graph (see
Setting Table/Graph Defaults Preferences).
■
Graph Icons – Graph Mode also contains the following icons:
Table 2–6
Graph Icons
Rescale–adjusts the vertical scale of the graph to distribute lines
as appropriate to the data you are viewing.
Rescale Visible–zooms in to display a more detailed view of the
data currently displayed.
Zoom–toggles between "Zoom In" and "Zoom Out" mode.
Disable All–hides all points in the stream on the graph.
Enable All–shows all points in the stream on the graph.
Configure–lets you pick the substreams you want to show in the
graph in the Graph Key. This is especially useful when you have
more substreams than keys in the graph.
View Data Above Arrow–appears when there is data available
above current view. Clicking this arrow will adjust graph view
to include data that was previously out of the picture.
View Data Below Arrow–appears when there is data available
below current view. Clicking this arrow will adjust graph view
to include data that was previously out of the picture.
■
View Tabs – Toggles between Graph and Table Mode.
The default Oracle Retail VCC graph display is scaled to the highest point in the entire
data series, whether or not that point is currently in the user's view. In the case of very
large promotions, or when mixed time buckets (daily, weekly, monthly) are displayed
in the same time series, the default view shows data for buckets with smaller
quantities compressed near the bottom of the graph. This may make it difficult to
distinguish the lines from one another. Oracle Retail VCC allows you to readjust the
scale to meet your needs.
Introduction to Oracle Retail VCC Day-to-Day Tasks 2-25
The Oracle Retail VCC User Interface
Oracle Retail VCC automatically rescales the graph after you
make any changes to the active items in the Graph Key.
Note:
To rescale a graph
1.
Click Rescale and the following text boxes and buttons appear:
Figure 2–31 Rescale a Graph
2.
Adjust the vertical scale of the graph to distribute lines as appropriate to the data
you are viewing by entering the maximum and minimum values for the vertical
scale on the graph into the edit boxes labeled "Min" and "Max".
3.
Click OK and the graph is rescaled.
In some instances, the graph scale will only approximate the
"Min" and "Max" values you entered to rescale graph. For example, if
the "Min" and "Max" values are "0" and "10", respectively, the graph
will rescale to those values. However, if the "Min" and "Max" values
are "4" and "12", respectively, the graph may rescale to "0" and "20".
Note:
The Graph Key (shown below) to the right of the graph indicates which lines are
assigned to which substreams for your selected context. By clicking on the colored
buttons next to each substream, you can show/hide that substream. (When a
substream is hidden, the box turns grey.) Although more than 12 streams can be
selected for a group, only 12 streams will be displayed in the applet. Those streams
ordered in the top 12 of your group will display.
Figure 2–32 Graph Key
Your comparison mode, available data, and selected stream groups will determine
which data streams are visible by default. The 12 streams shown in the column can
indicate a combination of both primary and/or secondary streams. Which primary
and secondary streams you see depend on the comparison mode you have selected.
For example, if you choose as your comparison mode
■
Local Current to Local Previous, the primary stream is your local current stream
and the secondary stream is your local previous stream.
2-26 Oracle® Value Chain Collaboration User Guide
The Oracle Retail VCC User Interface
■
Local Current to Partner Current, the primary stream is your local current stream
and the secondary stream is your partner's current stream.
Year Ago streams (data streams containing year-ago data for
the subtype) can only be viewed if they are editable by the seller or the
buyer, but not by both. Year ago streams appear in the secondary
streams column regardless of whether they are editable by the seller or
the buyer. When displayed in the graph mode, a Year Ago stream
appears in the Secondary Stream (right-hand) column and the current
version of that Year Ago stream appears in the Primary Stream
(left-hand) column regardless of whether it is editable by you or your
partner.
Note:
■
Partner Current to Partner Previous, the primary stream is your partner's current
stream and the secondary stream is your partner's previous stream.
In addition, each Graph Key item displays a tool tip identifying its associated
substream and comparator when the cursor passes over it.
The Configure icon allows you to assign all or some of the substreams that you want
to be included in the Graph Key. Simply select the subtype name from the drop-down
list next to each line and click Save.
The default substreams initially active in the Graph Key are the first twelve
substreams of the defined group. (See the Group's Preview screen to see how the
group's substreams are ordered within the comparison modes).
Use the Graph's Configure utility to temporarily modify the active substream order or
list. Graph Key modifications are only retained for the current applet session. You can
navigate between Table and Graph, but applying changes in the Context Chooser or
moving to a new screen will cause the Graph Key to revert to the default substreams.
If you want the Display Mode to default to the Streams - View/Edit - Graph view, you
may want to create a specific graph view group in Preferences - Layout - Table/Graph
- Groups (see Creating and Editing Groups) or Company -General Config - Groups
(see Managing Groups for a Company) to establish the default available substream
selections for the Graph Key.
1.
Click the Configure icon. The Graph Key changes to a series of drop-down lists.
Figure 2–33 Graph Key Drop-down Lists
Introduction to Oracle Retail VCC Day-to-Day Tasks 2-27
The Oracle Retail VCC User Interface
2.
Choose a subtype from the drop-down list. The list contains all the subtypes for
the group (in the Context Chooser - Display Mode ) that you have selected. Only
the subtypes you select will appear in the graph.
3.
Click OK and the changes appear in the graph.
The subtype names that appear in the drop-down lists are the
long names that are given to the subtype when the stream is created in
Configuration - Streams - View. See Configuration - Stream Types
Tab for details. The names you see in the legend are the short names.
Note:
Required Fields
All required fields will be marked with a red asterisk (*). If a required field is left blank
and an action button is clicked, an error message requesting that you fill in the
required field will appear. Carefully check your screen for any required fields you may
have missed to avoid getting error messages.
2-28 Oracle® Value Chain Collaboration User Guide
3
Data
This chapter covers the following topics:
■
Introduction
■
Using the Right-Click Menu Utility
■
Mass Entry of Data
■
Viewing Data
■
About Period Overlays
■
About Accumulation Rules
■
Adding, Reading, and Deleting Data Stream Comments
■
Editing a Data Stream
■
Creating Aggregates
■
Working with Aggregates
■
Viewing Data in Expand Mode
■
Viewing Data Stream Revision History
Introduction
The VCC user interface allows you to view, edit, and compare data streams. You can
view data streams and data stream exceptions in Table format or Graph format for
individual product data streams or entire product categories.
Using the Right-Click Menu Utility
Access to this feature: superadmin, admin, and manager.
While in Table view, there are options available to you through a right-click pop-up
menu. You can cut (ctrl+x), copy (ctrl+c), and paste (ctrl+v) all the cells that are
currently in view by selecting the cells you want to copy, or cut, and selecting the
action from the right-click drop-down list. You can also Undo (ctrl+z) the previous
action, zero-fill a row (ctrl+0), or clear all cells in the table (ctrl+w).
Data 3-1
Using the Right-Click Menu Utility
This feature allows you to cut, paste, zero-fill and clear only
those cells that you have editing access to. You can, however, copy any
cell that is currently in view (including cells for which you do not
have editing privileges) to paste into a cell for which you do have
editing privileges.
Note:
Clear All Cells
Clearing all cells empties the table of data, and replaces it with empty cells. Clear All
Cells will not replace previously saved data, only those cells that were modified prior
to clicking Save. You do not need to select a particular row to clear all cells, but you
must have some cell selected in the Table in order to access the right-click menu with
the "Clear All Cells" option.
Figure 3–1 Clear All Cells Option
The option to Clear All Cells is only available in the Data Mass Entry - Table view, and will not be accessible in View/Edit
mode.
Note:
Cut / Copy - Paste
To Cut, Copy or Paste using the Right-Click Menu Utility
1.
Set your context.
Click Data - View/Edit, and click the Table mode tab.
2.
When the data stream data appears in table mode, select the cell(s) that you want
to cut/copy.
3-2 Oracle® Value Chain Collaboration User Guide
Using the Right-Click Menu Utility
Figure 3–2 Select Cells
3.
Either right-click you mouse and select the action
Figure 3–3 Cut, Copy, or Paste
or,
use the following keys to perform the actions:
■
Ctrl+x – Cut
■
Ctrl+c – Copy
■
Ctrl+v – Paste
■
Ctrl+z – Undo
4.
Click into the first editable cell where you want to “start” the paste and right-click
paste
5.
Click Save
Data 3-3
Using the Right-Click Menu Utility
Zero Fill
VCC’s Data - Mass Entry screen also provides an option which can automatically Zero
Out a specific data stream. After you have selected the context, the data stream and the
period, the system will present the Zero Out option that will populate that datastream
with zero values for all the selected periods.
In previous versions, Oracle Retail VCC would default all values for a selected period
to "0." Now, cells default to empty. Cells that are not modified remain empty, unless
Zero-Fill is selected.
To apply Zero Fill to your data streams
1.
Set your context.
2.
Click Data - Mass Entry, and click the Table mode tab. The Mass Entry screen
appears
3.
Select a leaf level context in the Context Chooser, and pick a Start Date and End
Date.
4.
Click Set. The table display pane appears.
5.
Once the stream is created, you must select a table cell within the Table display
pane. The border of the cell you have selected darkens to indicate you have
selected it.
6.
Right-click to access the pop-up menu.
Figure 3–4 Zero Fill
7.
Select Zero Fill Row from the pop-up menu. You may also use Zero Fill by using
the keystroke combination Ctrl+0.
The entire row containing the cell you selected will be filled with zeros, even if you
previously entered other numbers. This method zeroes-out all data contained in the
row.
If you would like to restore the empty cells and eliminate the zeroes you just added to
the table, select Clear All Cells (ctrl+w) from the right-click menu. The zero values
will be replaced with empty cells. For more information, see Clear All Cells.
■
The option to Clear All Cells is only available in the Data - Mass Entry - Table
view, and will not be accessible in View/Edit mode.
3-4 Oracle® Value Chain Collaboration User Guide
Mass Entry of Data
Mass Entry of Data
Access to this feature: superadmin, admin, manager, supervisor, and planner.
Data can be entered for multiple products and multiple folders simultaneously
through the Data - Mass Entry screen. When a folder-level product is selected for mass
entry, all the leaf-level products that it contains will automatically be selected for mass
entry. Data Stream Type and SubType can also be selected for mass data entry.
To use Mass Entry
1.
Select Data - Mass Entry from the Oracle Retail VCC menu.
2.
Select Local and Partner in the Context tab.
3.
Select the folders or products to enter data for from the Product tree.
Figure 3–5 Mass Entry of Data - Product Tree
4.
Choose the Start Date and End Date between which you will enter data for these
selected products.
5.
Select data stream Type and SubType (optional).
6.
Click Set. The Mass Entry table view appears.
Data 3-5
Viewing Data
Figure 3–6 Mass Entry Table View
7.
Enter data for the products you selected.
8.
Click Save.
Viewing Data
Access to this feature: superadmin, admin, manager, supervisor, planner, and
reviewer.
You can view data streams in table or graph view for individual products or product
categories. Both views allow you to review and compare data values in the following
comparison modes:
■
■
■
Local Current - Local Previous – compares your current local data stream with
your previous local data stream.
Partner Current - Partner Previous – compares your partner's current data stream
with your partner's previous data stream.
Local Current - Partner Current – compares your current local data stream to your
partner's current data stream.
To view a data stream
1.
Select your context.
2.
Select Data - View/Edit from the Oracle Retail VCC menu. The data stream
appears in Table or Graph format, depending on how you configured your
default data stream view in Preferences - Layout - Data - Defaults subtab (see
Table/Graph Preferences for details).
3.
Click the tab of the view (table format or graph format) that you want.
3-6 Oracle® Value Chain Collaboration User Guide
Viewing Data
4.
Click Context Chooser - Display Mode.
Figure 3–7 Context Chooser - Display Mode
If you have previously saved Display Mode settings, click the View saved display
modes icon and a list of your saved display modes appears in the Display pane.
Saved Display Modes include
■
■
■
■
■
■
Stream View – displays in table (default) or graph.
Group – displays "All" (default) or some other group you have created or have
access to.
View by Period – displays "Base Period" (default) or period overlay you have
created or have access to.
Comparison – displays Local Current - Partner Current (default), Local
Current - Local Previous, or Partner Current - Partner Previous
UOM – displays Base Units (default), Stat Units, Currency, Truckload, or any
conversion units you have loaded using the VCC Integrator. For descriptions
of the standard Oracle Retail VCC-supplied UOMs, refer to Introduction. For
details about creating custom UOMs, refer to the Oracle Retail VCC
Implementor Guide.
Expand – when used, displays all the leaf-level items for the selected folder,
even items not available for your collaboration. See Viewing Data in Expand
Mode.
■
Type – displays stream type used for the Expand feature.
■
Subtype – displays substream type used for the Expand feature.
The Default Display mode is called "default." For details on how to change your
Display Mode default settings refer to Setting Table/Graph Defaults Preferences.
In the Preferences - Layout - Table/Graph - Defaults screen, you can select any
Display Mode you have saved as default.
Highlight the display mode you want in the list and close the list in the Display
pane. The item you selected is now set as the display mode. Otherwise, follow the
steps below.
5.
Choose your group from the Group: drop-down list.
6.
From the View by Period drop-down list, select Base Periods to display all the
base periods for the data stream (the base period is the period increment used to
create the data stream– usually either weekly or daily), or select any other period
overlay available. The periods available depend on how you or your administrator
set-up the time periods for the selected data stream. (See About Period Overlays.)
7.
Choose your comparison mode from the Comparison: drop-down list.
8.
In the UOM drop-down list, select the unit of measure you want displayed.
9.
Click the Set icon.
Data 3-7
About Period Overlays
Using the Refresh icon restores the original data stream if you
make changes you do not want to save.
Note:
About Period Overlays
Access to this feature: superadmin, admin, manager, supervisor, planner, and
reviewer.
A period overlay allows you to view data accumulated across time by fixed, rolling, or
telescoping periods.
A fixed period overlay totals the figures in a data stream based on how the overlay
was defined by the Oracle Retail VCC system administrator. For example, you may
have a monthly overlay or quarterly overlay defined for your Oracle Retail VCC. A
bi-weekly overlay would allow you to view figures by two-week totals; a quarterly
overlay would allow you to view figures accumulated on a quarterly basis.
A rolling period overlay totals the figures in a data stream across time periods,
specified relative to the current date or current time period. For instance, if you created
a four-week rolling period overlay, it displays figures that are the sum of the current
week and three weeks into the future. After the current week ends, the rolling period
advances and the new current week automatically becomes the first week of the
overlay. The period overlay in this example always displays figures that are in the
current week and three weeks in the future.
Telescoping period overlays are similar to rolling period overlays except the time
buckets are aligned relative to the current date or your period hierarchy. For example,
if your period hierarchy contains days, fiscal weeks, and fiscal months, you can specify
an overlay to display the next seven days, then three weeks, and then six months. The
number of periods of each size will be rounded up to break according to your period
hierarchy.
Period overlays created through Company - General Config - Period Overlays are
company specific and once created are accessible by all users of the company. Period
overlays cannot be deleted if they are currently in use within the application.
Period overlays created through Preferences - Layout - Table/Graph - Period
Overlays are available only to the user who created them.
The default period overlay is "Base Period". "Base Period" is
your only choice if you have not created any period overlays. For
details about how to create period overlays, see Creating and Editing
Period Overlays.
Note:
3-8 Oracle® Value Chain Collaboration User Guide
About Accumulation Rules
About Accumulation Rules
Associated with each data stream is an Accumulation Rule, which is a fixed attribute
of the data stream that indicates how it behaves when aggregated. There are three
accumulation rules that can apply to a data stream: movement, balance, and measure.
■
A Movement stream can accumulate data across context dimensions (product,
partner, and local) and across time dimensions (period overlays).
When viewed in an aggregate context, data is totaled across each dimension
chosen at folder level.
When viewed in an aggregate period (period overlay), data is totaled across the
period defined.
Any kind of exception criteria can be created for a Movement stream.
■
A Balance stream can accumulate data across context dimensions (product,
partner, and local) but not across time dimensions.
View data across context dimensions by establishing aggregate streams (see
Managing Company Aggregates) for combinations of context leaf and folder
levels.
When a Balance stream is viewed in a period overlay, the value displayed will be
the value listed in either the first or the last period contained in the range of the
periods specified in the period overlay. (For each company, its administrator will
specify whether to use the first or the last period. See Creating and Editing Period
Overlays.)
A "sum" exception criteria on Periods cannot be created for a Balance stream.
■
A Measure stream can neither accumulate data across context dimensions
(product, partner and local) nor across time dimensions (period overlays).
Unlike the aggregates formed for Movement and Balance streams, Measure stream
aggregates are not computed by summing the individual items included in the
selected aggregate level folder.
Measure stream aggregates will be editable according to the current Stream Type
configuration attributes for 'Edit By' and 'Edit When'. Values can be entered
manually or can be data loaded using the Integrator.
Measure streams aggregates cannot be disaggregated.
Similar to the aggregates stored for Movement and Balance streams, both current
and previous values are stored at the aggregate level for Measure streams.
When a Measure stream is viewed in a period overlay there will be no values
displayed.
A "Sum" exception criteria on Periods cannot be created for a Measure stream.
Data 3-9
Adding, Reading, and Deleting Data Stream Comments
Adding, Reading, and Deleting Data Stream Comments
Access to this feature: superadmin, admin, manager, supervisor, and planner.
Movement and Balance aggregates are editable if they adhere to the current Stream
Type configuration attributes for ‘Edit By’ and ‘Edit When’. (Values can be entered
manually or can be data loaded using the Integrator.)
AND
there is a Disaggregation Profile existing for the specified periods.
OR
if no periods for the specified stream type have a Disaggregation Profile, and the
Proportional Disaggregation option is set to “Yes” (in Company - General Config Preferences).
Oracle Retail VCC allows you to add a comment to any data stream item in table
mode. This is useful if you want to add a comment to a field you have changed.
Comments are attached to a context and data stream item type for that period. They
remain until explicitly deleted. They are not removed automatically when the data
item changes.
Data stream item comments are designated by a solid blue square in the data stream
item cell (in table mode). When the cursor passes over the blue square, the comment
appears in a tooltip.
In graph mode, comments are designated by a purple circle. When the cursor passes
over the purple circle, the comment appears in a tooltip text box next to the stream
name.
Note:
Data stream comments are not visible in Revision History.
To add or edit a comment to a data stream item
1.
Select your context.
2.
Click the Context Chooser Display Mode and select one of the following data
stream comparison types from the Comparison: drop-down list.
3.
■
Local Current - Local Previous
■
Local Current - Partner Current
■
Partner Current - Partner Previous
Click on the gray box (blue box if comments already exist for the cell) in the upper
right corner of the cell. A comment input area appears in the Display pane.
3-10 Oracle® Value Chain Collaboration User Guide
Adding, Reading, and Deleting Data Stream Comments
Figure 3–8 Comment Input Area on the Display Pane
The comment screen displays
■
Value contained in the cell
■
Current Date
■
Comment text box
■
Reason drop-down list (a drop-down list of adjustment reasons)
■
Revision Status drop-down (a drop-down status list)
Note: The Revision Status drop-down is only available at a leaf-level
context.
4.
Enter a comment and select an adjustment reason from the drop-down list.
Comments are limited to 100 characters.
5.
Select a Revision Status, if applicable.
6.
Click OK to save changes and return to the Table view. Click Cancel to cancel
changes and return to the Table view.
After a comment is added, the gray box turns blue.
7.
Once back in Table view, click Save at the top of the Display pane to save the
comment.
You can only delete a comment while in the "Base Units"
UOM. The other UOMs are read-only.
Note:
To read a comment, rest the cursor on the blue box in the upper right corner of the cell.
The comment text appears within a yellow tooltip.
To delete a comment
1.
Access the comment by clicking the blue square.
2.
Delete all text and spaces associated with the comment.
3.
Set the Reason to "<none specified>."
4.
Click Save.
Data 3-11
Editing a Data Stream
Both you and your partner can read a comment you create.
However, only you or your company users can delete or modify it.
Note:
Editing a Data Stream
Access to this feature: superadmin, admin, manager, supervisor, and planner.
Oracle Retail VCC allows you to edit your local data stream only. You cannot edit a
data stream received from a trading partner.
To edit a local data stream in table format
1.
Select your context.
2.
Click Context Chooser - Display Mode and choose your settings with regards to
groups, time period, comparison type, and UOM from the drop-down lists.
Figure 3–9 Context Chooser - Display Mode
3.
Click the Set icon.
4.
Select Data - View/Edit from the Oracle Retail VCC menu and click the Table tab
when the stream appears in the display pane.
Figure 3–10 Display Pane Grid
5.
Double-click on an editable cell to change a value or add a comment.
6.
Click Save and the changes to the stream are saved.
3-12 Oracle® Value Chain Collaboration User Guide
Creating Aggregates
7.
The message "Successfully Saved" appears below the table. This indicates that
your data was saved successfully.
Figure 3–11 "Saved Successfully" Message
A colored diamond (process indicator) appears to the left of the relevant folder or
stream name to indicate whether aggregates, exceptions, or neither have been
processed. Indicator colors include:
Blue – Data has not been processed for either exceptions or aggregates. Appears
whenever you make a change to a data stream.
Yellow – Data has been processed for exceptions only.
Orange – Data has been processed for aggregates only.
For details on processing exceptions, see Managing the Scheduler.
Creating Aggregates
Access to this feature: superadmin, admin, and manager.
Oracle Retail VCC allows you to aggregate data for local, partner, and/or product
folder-level contexts.
To aggregate data for local, partner, and/or product folder-level contexts
1.
Select your context.
2.
Click Data - View/Edit.
3.
If no aggregate data exist for your selected context, the following message
appears:
Figure 3–12 "No Aggregate Data" Message
Data 3-13
Creating Aggregates
Note: If no Create Aggregates button appears, it is because you
cannot create aggregates when a context folder is at root level. Check
your context to verify that no "All Locations," "All Partners," or "All
Products" are selected.
4.
Click Create Aggregates.
5.
If aggregates can be created, the Context Chooser - Context displays a Period
Link. Click the link to choose the time period(s) for the aggregates.
6.
Select the time period from the Period Tree screen, and Click the "Create
Aggregates" icon to begin creating aggregates.
Figure 3–13 Period Tree Screen
7.
A message appears telling you that the aggregates are being created. Check
Monitor - Jobs to make sure your job request has finished running.
Note: If the "no aggregate data exists for your selected context",
message reappears when you return to Data - View/Edit , the reason
could be that no data exists for the selected periods; or, if the job has
not finished, data does not exist for all the selected periods (in which
case, click the Refresh icon a few times and the aggregates should
appear). You can see if the job is still processing by selecting Monitor Jobs from the Oracle Retail VCC menu.
If an aggregate data stream existed previously for a context is
removed and then recreated at a later date, you must run "Recalc
Aggs" to display aggregated data.
3-14 Oracle® Value Chain Collaboration User Guide
Working with Aggregates
Working with Aggregates
Access to this feature: superadmin, admin, manager, supervisor, and planner.
Reviewer cannot edit (read only).
There are three ways in which you can disaggregate data. F or information on how to
create aggregates, see Creating Aggregates. This section covers
■
See Using a Disaggregation Profile.
■
See Using Proportional Disaggregation.
■
See Using Period Overlays.
Using a Disaggregation Profile
Two items must be created before you can use a disaggregation profile in Data View/Edit:
■
aggregates (see Creating Aggregates)
■
disaggregation profile (see Managing Company Data Stream Disaggregation.)
Once those exist, you can edit the aggregate as you would any other stream (see
Editing a Data Stream).
When you save your changes, the value of the aggregates are saved and the values of
each leaf-level item are updated. Values for related aggregates are updated when
either of the tasks, "Process Leaves and Update Aggregates" of "Process Aggregates",
are run through the Scheduler.
Using Proportional Disaggregation
Proportional disaggregation allows you to create data at a folder level that will
proportionally disaggregate to a leaf level without having to create disaggregation
profiles. This feature determines the proportional value of each leaf to the current
aggregate and allocates the new value using the same proportions.
For example, if the original aggregate value is 60 and there are three leaf-level items in
the aggregate (Leaf 1 = 10, Leaf 2 = 20, and Leaf 3 = 30), the proportional value of each
leaf is: Leaf 1 = .16, Leaf 2 = .33, and Leaf 3 = .50.
When you adjust the aggregate value to, say, 70, the leaf values increase proportionally
to the current value (i.e., Leaf 1 = 11.3, Leaf 2 = 23.2, and Leaf 3 = 35).
If there is no data in the selected aggregate and you change the aggregate value to, say,
60, that aggregate value is distributed evenly across all collaboration items in the
aggregate. So, if you are aggregating on a product folder that has three leaves, and you
collaborate with your partner on all three leaves, each leaf is changed to 20. If,
however, you only collaborate on two items in a product folder that contains three
items, only the leaves that you collaborate on are changed. (In this case each
collaboration item would change to 30.)
Note that if your aggregate values add up to zero, you will receive an error message,
since it is impossible to aggregate on zero (i.e., Leaf 1 = -30, Leaf 2 = 30, and leaf 3 = 0).
In such an instance, Oracle Retail VCC will display the following error message:Some
cell data could not be saved. Divide by zero error. Click Refresh to get latest stream
data.
To activate Proportional Disaggregation, select either "Self" or "Total" from the
drop-down lists in the Proportional Disaggregation section. See Managing Company
General Preferences for details.
Data 3-15
Viewing Data in Expand Mode
As with using disaggregation profiles, you must first create aggregates (see Creating
Aggregates). Then you can edit the aggregate as you would any other stream (see
Editing a Data Stream).
Using Period Overlays
Oracle Retail VCC allows you to disaggregate daily databases (from week to day)
when in a fixed weekly period overlay at leaf- or folder-level contexts. However, the
following conditions apply:
■
You must have already created a disaggregation profile for context
■
Your period overlay must be defined as running from Monday through Sunday
■
This is only available for movement streams
Viewing Data in Expand Mode
Access to this feature: superadmin, admin, manager, supervisor, planner, and
reviewer.
Oracle Retail VCC allows you to select a combination of folder and leaf-level context
items to display data. When your context contains a folder-level component the
Display pane normally shows the total of all the items in the folder. The "Expand"
function displays the figures for each item within the folders you selected, except
items not available for your collaboration. You can now select combinations of leaf and
folder levels, such as two folders and one leaf, or two leaves and one folder. However,
at least one folder must be selected in order to use the Expand feature.
The Display pane shows the data stream values for each of the active items currently
in the folder. For inactive items, there will be no values shown.
Expand Mode is available in the Data - View/Edit Display Mode screen when
multiple context items (Product, Partner, or Local) are at a folder level.
The selected Comparison Mode affects what is displayed. Only the Primary
comparator is in effect while in Expand Mode. For example,
■
■
In the Partner Current-Partner Previous Comparison mode, only the Partner
Current comparator is in effect in Expand Mode. This is used to view (read-only)
the folder items in a data stream that only your partner can edit.
In either the Local Current-Partner Current or Local Current-Local Previous
Comparison modes, only the Local Current comparator is in effect. You will use
this when you want to view/edit folder items in a data stream where you have
edit privilege.
For your active items, you can view/edit the data and enter comments. Those items
not yet available to you will be viewable but not editable.
To expand a folder-level item
1.
Click Data - View.
2.
Select your context. Click the "Set" icon.
3.
Click Context Chooser - Display Mode. When the Display Mode screen appears,
select the folder level item (Local, Partner, or Product) from the "Expand:"
drop-down list.
3-16 Oracle® Value Chain Collaboration User Guide
Viewing Data in Expand Mode
Figure 3–14 Context Chooser - Display Mode
4.
Choose the data stream "Type:" and "Subtype:" from the drop-down lists.
5.
Click the "Set" icon.
6.
Click OK and your data stream view in the Display pane shows all the items in
the folder component of your context.
Make sure to select the appropriate comparison mode for
viewing the selected data stream. Oracle Retail VCC allows you to
compare Partner Curr–Partner Prev, Local Curr–Local Prev, and Local
Curr–Partner Curr data with the Display Mode tab's Comparison
drop-down list.
Note:
Figure 3–15 Display Pane Grid
The table rows are displayed in alphanumeric ascending order in Expand mode. The
table display includes a "Total" row. The Total row totals all the data stream values
displayed in the "Expanded" view. The totals are updated automatically whenever any
value in the data stream is modified.
The "Total" row is included in the CSV "export" file. For more
information on exporting data, see General Icons.
Note:
Data 3-17
Viewing Data Stream Revision History
Figure 3–16 Display Pane Grid with Totals
Viewing Data Stream Revision History
Access to this feature: superadmin, admin, manager, supervisor, planner, and
reviewer.
If a data stream's attribute "Maintain Revision History" is activated, Oracle Retail VCC
maintains a complete revision history of specific products, partners, and time periods
for that data stream. The data stream history maintains a record of each change made
to a particular data stream.
Note:
Data stream comments are not visible in Revision History.
To view a data stream's revision history
1.
Select Data - Revision History from the Oracle Retail VCC menu.
2.
Click Context Chooser - Select Context and select your context.
3.
The Revision History screen for the data stream appears in the Display pane.
3-18 Oracle® Value Chain Collaboration User Guide
Viewing Data Stream Revision History
Figure 3–17 Revision History Screen
The listings on this screen may be sorted by Creation Date, Stream Type,
Company, or User Name by clicking on the column headings. Under the "View"
icon, click a colored dot to view the corresponding data stream that you want to
view.
4.
The historic dates and values for the time period selected appear in the Display
pane. You can view the data in table or graph format.
Figure 3–18 Display Pane Grid with the "Return to List" link
5.
Click on a column heading to view all changes made for that period. The headings
show the dates when changes were made.
Figure 3–19 Display Pane Grid with the "Back" Link
6.
Click the Back button (shown above) to return to the Revision History pane.
7.
Click the Return to List button (shown above) to return to the Revision History
pane.
Data 3-19
Viewing Data Stream Revision History
3-20 Oracle® Value Chain Collaboration User Guide
4
Extracts
This chapter contains the following topics:
■
Introduction
■
Retrieving Extracted Data
■
Extracting Master Data
■
Extracting Other Data Types
■
Extracts File Formats
Introduction
Access to this feature: superadmin, admin, manager, supervisor, planner, and
reviewer.
The Extracts tool allows you to obtain the following data items in your Oracle Retail
VCC's database as a text file that you then can process using any other third-party tool.
■
■
Master Data – including Location, Partner, Product, and Period Hierarchies, as
well as Collaboration Products.
Other – including Collaboration Items, Price profiles, Exception Criteria, Events,
Exceptions, Exception Criteria, Disagg. Profiles, Disagg. Factors, Metrics, Supply
Policies, and Demand Policies, based on modules assigned to your company.
To use this feature, you must
1.
Configure Extracts using the Oracle Retail VCC configuration tool. For details on
configuring the Oracle Retail VCC Servlet, see the Oracle Retail VCC Installation and
Configuration Guide.
2.
Schedule the event to perform extract. For details on scheduling events, see
Managing the Scheduler.
3.
Optionally, define the format for extracted files. For details see the Oracle
RetailVCC Implementor Guide.
Once you or the system administrator completes these procedures, you can use the
Extracts tool by selecting Extracts from the Oracle Retail VCC menu.
Extracts 4-1
Introduction
Retrieving Extracted Data
To extract specific data, you must specify a context for extraction. The Extracts tool
obtains the data at the time the extraction event is scheduled. When the data you
requested is processed, it is available to you as a hyperlink in compressed (zip) format
from the Extracts - List screen. Click the link and save the data on your computer.
The Extracts - List screen contains the following:
■
Delete – deletes an extraction job (access to this feature is limited to superadmin,
admin, manager, and supervisor). Click the Delete icon to select/deselect all items
on the current page to be deleted. Click the individual check box to select/deselect
that item to be deleted.
■
Extract Type – extract types: Master Data, or Other (modular data)
■
View/Edit – drilldown dot that allows you to examine extract details
■
Local – the local location for the retrieval file
■
Partner – the partner location for the retrieval file
■
Product(s) – name of the product or product folder included by the extracted file
■
Download – displays "Scheduled" or a links to a file download
■
Period – shows the time period
■
Last Executed – date time stamp for when the Data Extract was last executed
■
Override Execute Time – overrides the execution time for job processing
■
Exception Status – column can contain multiple exception statuses. These include:
Active, Dismissed, Escalated, In-Process, Obsoleted, Resolved, Supersedes,
Superceded, Unresolvable, Auto Dismissed, Auto Escalated, Auto Incomplete,
Auto In-Process, Auto Resolved, Auto Unresolvable. See Exceptions for status
definitions.
One or more of the columns described above may be hidden
depending on your settings in Preferences - Layout - Lists - Extracts.
Note:
You can arrange the order of the columns to suit your needs.
For details, see Setting List Screen Preferences.
Note:
Extracting Master Data
To extract specific master data, you specify the master data context and the Extracts
tool obtains the master data at the time the retrieval event is scheduled. When the
master data you requested is processed, it is available to you as a hyperlink in
compressed (zip) format from the Extracts screen. Click the link and save the data file
on your computer.
About Repeat Frequency
Each extraction type contains a Repeat Frequency option. Setting up a Repeat
Frequency involves specifying
■
Dates – dates during which the extract will be performed. Start Date defaults to
the current date, and End Date is optional. A specific time of day can be set, or the
extract can be run at "Any Time".
4-2 Oracle® Value Chain Collaboration User Guide
Introduction
■
Recurrence – determines the frequency at which the report is generated. The
recurrence drop-down includes: Once, Always, Daily, Weekly, and Monthly. If you
opt to "Always" extract, you will not be able to specify a Start At time, since the
extract will run every time the corresponding scheduler job is run. A perpetually
running report can be stopped by supplying an End Date at which it will expire, or
by deleting the report from the List.
Time – the time of day that you wish to extract data. This option does not appear when
recurrence is set to "Always". The default setting, "Start Any Time", allows the
extraction to occur as soon as the scheduler is run that day. Selecting the Start At radio
button allows you to specify an exact time of day to run the extract.
Note that reports will only be processed when the Scheduler runs.
Figure 4–1 Repeat Frequency
To request master data
1.
Select the appropriate Folder level Company Location, Partner Location, Product
from the Context Chooser, and Period from the Create Tab, for which the Extract
request is to be created.
2.
Click Extracts - Create. The Create screen appears.
3.
Select the Master Data radio button for Retrieval Type.
Figure 4–2 Create Screen
4.
Select the master data Type (Location Hierarchy, Partner Hierarchy, Product
Hierarchy, Period Hierarchy, or Collaboration Products).
5.
If the Include Current Folder control is checked, the output will include the
specification for the current folder. If un-checked, the output will include all the
items within the current folder, but not the folder itself.
Extracts 4-3
Introduction
6.
If you do not enter a Filename, your file will be given a default filename. For
example,
<username>_<xxxx>.dat
where <username> would be, for example, "Dave_Wilson" and <xxxx> would be,
depending on the Extraction type, as follows:
■
Period – "per"
■
Product – "prod"
■
Location – "loc"
■
Partner – "part"
■
Collaboration Product – "clp"
So, if you were retrieving a period hierarchy, the default filename would be dave_
wilson_per.dat, and the file would be contained in a.zip file named, dave_wilson_
per.zip.
You can enter a name for the file in the Filename field (e.g., Myfile) and the file
would be Myfile.dat, and the .zip file would be Myfile.zip.
In case of non-ASCII characters in the username, the default
filename is converted to a temporary filename that contains a time
stamp in the format, temp1023806054789.dat. The .zip file temporary
filename (with time stamp) format is temp1023806054789.zip.
Note:
7.
Enter a Time and or an End Date. Start Date will default to today's date, and is the
only required date field.
8.
Configure the Repeat Frequency options, which allow repetitive processing of the
same job. The default is "Once", but the job can also be scheduled to run daily,
weekly, monthly, or always. For more information on Repeat Frequency, see About
Repeat Frequency.
9.
If you selected "Period Hierarchies" from the Type drop-down, select a period by
clicking the Period link and selecting the period from the Period Tree screen.
After selecting the period, click the checkmark in the top right-hand corner of the
Period Tree screen to close the tree.
4-4 Oracle® Value Chain Collaboration User Guide
Introduction
Figure 4–3 Period Tree
10. Select the language Character Set the extracted file will contain.Options include:
ASCII, UTF-8, UNICODE, and SJIS.
11. The Directory Path field is available to superadmin users. This field defaults to the
path designated in the VCC Configuration - Client tab, under File Path. This
default path can be overwritten for individual extracts by entering a new path
where you wish the file to be stored.
If no path is specified in the VCC Configuration dialog box,
you will not be able to create an extract request, and Oracle Retail
VCC will display an error message upon accessing the Extracts screen.
Note:
12. Click Save. The data stream request appears in the Extracts pane. After processing,
a hyperlink is available to access the data stream.
To delete a file that has been extracted with the Extracts tool, check the check box next
to the stream that you want to delete. If you delete it directly from your system
directory and try to extract the file again from the Extracts screen, you will receive an
error message.
Extracting Other Data Types
To extract other types of data (e.g., Collaboration Items, Disagg. Profiles, Price Profiles,
Disagg. Factors, Price Profiles, Exception Criteria, Event Promotions, Exceptions,
Metrics, Supply Policies, and Demand Policies), specify the data's context and the
Extracts tool will obtain that data at the time the retrieval event is scheduled. When the
data you requested is processed, it is available to you as a hyperlink in compressed
(zip) format from the Extracts screen. Click the link and save the data file on your
computer.
You must configure the format file to extract data based on the
desired file format and configuration in order to extract data. Only
Event and Exception Criteria do not need this configuration. See the
Oracle Retail VCC Implementor Guide for details.
Note:
Extracts 4-5
Introduction
To request other data types
1.
Set your context.
2.
Click Extracts - Create.
3.
When the Create screen appears, select the Other radio button.
Figure 4–4 Create Screen
4.
Select the data Type (e.g., Collaboration Items, Disagg. Profiles, Price Profiles,
Disagg. Factors, Price Profiles, Exception Criteria, Event Promotions, Exceptions,
Metrics, Supply Policies, and Demand Policies)
5.
For Exception Criteria, there is an additional control for Extract Changes Only. If
selected, the output will be the net changes, including both adds and deletes, since
the last time the extract was run. If un-selected, the output will be all the current
exception criteria.
6.
If you do not enter a Filename, your file will be given a default filename. For
example,
<username>_<xxxx>.dat
where <username> would be, for example, "Dave_Wilson" and <xxxx> would be,
depending on the Extraction type, as follows:
■
Collaboration Data – "cirt"
■
Price Profile – "pprt"
■
Exceptions – "exrt"
■
Exception Criteria – "ecrt"
■
Demand Policy – "dprt"
■
Supply Policy – "rprt"
■
Events Promotions – "pert"
So if you were retrieving a collaboration item, the default filename would be
dave_wilson_cirt.dat, and the file would be contained in a .zip file named, dave_
wilson_cirt.zip.
You can enter a name for the file in the Filename field (e.g., Myfile) and the file
would be Myfile.dat, and the .zip file would be Myfile.zip.
For Events Promotions and Exception Criteria, the following files are extracted
4-6 Oracle® Value Chain Collaboration User Guide
Introduction
■
Myfile_pert.xml
■
Myfile_ecrt.xml
■
Myfile_pert.zip
■
Myfile_ecrt.zip
In case of non-ASCII characters in the username, the default
filename is converted to a temporary filename that contains a time
stamp in the format, temp1023806054789.dat. The .zip file temporary
filename (with time stamp) format is temp1023806054789.zip.
Note:
7.
Enter a Time and or an End Date. Start Date will default to today's date, and is the
only required date field.
8.
Configure the Repeat Frequency section, which allows the repetitive processing of
the same job. The default is "Once", but the job can also be scheduled to run daily,
weekly, monthly, or always. For more information on Repeat Frequency, see About
Repeat Frequency.
9.
For Disagg. Profiles, Disagg. Factors, Price Profiles, Exception Criteria, Event
Promotions, and Exceptions, select the period by clicking the Period link and
selecting the period from the Period Tree screen.
Figure 4–5 Period Tree
After selecting the period, click the Checkmark in the top right-hand corner of the
Period Tree screen.
For Disagg. Profiles, Disagg. Factors, and Exceptions, you can choose either
"Fixed", as described above, or "Rolling" periods. For rolling periods enter the
Start Period and End Period .
10. For Events only, an optional On or After date field is available. By selecting a date
here, you can specify that data beginning on and after a certain date be extracted.
This will exclude any data prior to the date specified.
11. For Exceptions and Events, the Created by drop-down allows you to select which
data you wish the file to contain. If you select Partner, the data extracted will only
Extracts 4-7
Extracts File Formats
contain stream data entered by your partner. Likewise, selecting Local will give
you a file containing only locally created streams. If you select Both, your file will
contain both your and your partner's data.
12. If you are extracting Exceptions, select the Exception Status(es) to be extracted.
Multi-select by holding down the Shift and Ctrl keys.
13. Select the language Character Set the extracted file will contain.Options include:
ASCII, UTF-8, UNICODE, and SJIS.
14. The Directory Path field is available to superadmin users. This field defaults to the
path designated in the VCC Configuration - Client tab, under File Path. This
default path can be overwritten for individual extracts by entering a new path
where you wish the file to be stored.
15. If no path is specified in the VCC Configuration dialog box, you will not be able to
create an extract request, and Oracle Retail VCC will display an error message
upon accessing the Extracts screen.
16. Click Save. The data stream request appears in the Extracts pane. After processing,
a hyperlink is available to access the data stream.
To delete a file that has been extracted with the Extracts tool, check the check box next
to the stream that you want to delete. If you delete it directly from your system
directory and try to extract the file again from the Extracts screen, you will receive an
error message.
Extracts File Formats
The Extracts tool produces a zip file. When you extract the zip file, the file name, by
default, is username_<+++>.dat, which is contained inside the zip file, and the zip file
name is username_<+++>.zip. For details on configuring Extracts, see the Oracle Retail
VCC Implementor Guide.
The default format of the data extracted in the username_<+++>.dat, file is translated
from Oracle Retail VCC Configuration/Extractor Configuration for the various
extractors contained in Extracts.
Depending on your choice, the output file configuration can be modified in such ways
as file format, column definitions, etc.
4-8 Oracle® Value Chain Collaboration User Guide
5
Exceptions
This chapter contains the following topics:
■
Introduction
■
Viewing Exceptions and Exception Data
■
Managing Data Stream Exceptions
■
Creating and Viewing Exception Comments
■
Exception Inbox Filter and Search Features
Introduction
Data stream exceptions are differences between two data streams, or between two
versions of the same data stream, or a stream and a fixed value that exceed the
threshold you set for a specific context (locations, partner, product, and period).
Data stream exceptions appear in the Exceptions - Inbox tabs (individual, group,
partner, or external) as data streams are received and processed from your trading
partners. You can receive and process data streams during off-peak hours or receive
and process them as they arrive in real time. In any case, once the data stream is
processed, generated exceptions appear in the inbox based on the context you have
selected. Exceptions you have viewed are highlighted in yellow.
Along with viewing basic individual and group exception information described
below, the Inbox allows you to
■
■
■
■
View the data streams that triggered the exception(s), view the exception's status
history, and view the criteria that triggered the exception, see Viewing Exceptions
and Exception Data.
Manage exceptions automatically or manually and change the status of an
exception, see Managing Data Stream Exceptions.
Create or edit exception comments and set resolution codes, see Creating and
Viewing Exception Comments.
Filter and search exceptions in the Inbox, See Exception Inbox Filter and Search
Features.
The Exceptions - Inbox - Individual screen (shown below) provides the following
individual exception information in the Display pane:
Exceptions
5-1
Introduction
Figure 5–1 Exceptions - Inbox - Individual Screen
The inbox initially shows all exceptions generated at or below the context you have
selected. However, you may customize your view in the following ways:0
■
Apply a default filter to see only the exceptions important to you.
■
To create a filter, see Setting Inbox Filters Preferences for details.
■
To set a filter as your default, see Setting List Screen Preferences for details.
When you select Exceptions - Inbox from the Menu, the Context Chooser - Display
Mode tab shows your default filter in the "Select A Filter" drop-down seen below.
Figure 5–2 "Select A Filter" Drop-down List
You can view all the exceptions generated on your selected context by clicking
Unfiltered View on the Display Mode tab. This also changes the Display Mode to
display the filter and search features. For details, see Exception Inbox Filter and Search
Features.
■
■
Arrange the order of the columns to suit your needs. For details, see Setting List
Screen Preferences.
Specify a multi-column sort order.
5-2 Oracle® Value Chain Collaboration User Guide
Introduction
Inbox View Buttons
There are two buttons that appear on the Inbox List screen, which provide
conveniences while viewing exceptions.
Figure 5–3 Inbox View Buttons
View Exceptions – The View Exceptions button appears whenever the "Show" column
is displayed. This column of check boxes allows you to select exception data that you
wish to view consecutively in more detail. The View Exceptions button will appear
disabled until at least one check box is selected to show.
To use View Exceptions
1.
Mark the exceptions that you wish to view by checking the boxes in the "Show"
column.
2.
Click the View Exceptions button. The Exceptions Data - View/Edit screen
appears.
Figure 5–4 Exceptions Data - View/Edit Screen
3.
Using the yellow paging buttons, you can page forward 1 record, back 1 record,
return to the first record, or skip to the final record in the data display. Only the
records that you selected to "Show" will be displayed in this paging sequence.
4.
When you have finished viewing/editing data, click "Save" to save changes and
"Back" to return to Exceptions List screen.
Exceptions
5-3
Introduction
View Collapsed / Expanded – If you are viewing an Exceptions List in collapsed view,
the View Expanded button will appear. If viewing in expanded mode, the View
Collapsed button will be displayed. This button functions as a toggle between the
collapsed and expanded inbox views. The initial list display (collapsed or expanded)
will depend on your preference settings. For more information on selecting a display
mode in user preferences, see Setting List Screen Preferences.
The third button, Apply Changes on the Exception Inbox screen, does not affect
viewing and is used to apply status changes made on the screen.
List Columns
The following are descriptions of the columns in the Exceptions - Inbox - Individual
screen:
■
View Exception – click the colored dot below the "View" icon to view the data
streams that triggered the exception.
■
Criteria Name – displays the name of the causal exception criteria.
■
Severity – displays the severity level of the exception: Low, Medium, or High.
■
View/Edit Comment – click the colored dot below the "View/Edit Comment" icon
to view/edit the comments entered for the exception. Also allows you to select a
resolution code from a drop-down list.
The View/Edit Comment dot appears grey when individual
exceptions do not have an associated comment or resolution code.
Note:
■
■
■
Show – check boxes that allow the consecutive viewing of Exceptions Data. Data View/Edit screens for each checked exception can be paged forward or backward
without the need to return to the List screen.
Shared with – the name of the trading partner that each exception is shared with,
or "none".
Collapsed Count – number of exceptions that have been collapsed. This column is
only visible when the Inbox is viewed in collapsed mode.
■
Period – displays the time period for which the exception was triggered.
■
Product – displays a description of the product.
■
Local – displays the local location for the exception.
■
Partner – displays the partner location for the exception.
■
■
■
■
■
Deviation – displays the amount the new data stream varies from the data stream
to which it was compared.
Percent – displays the value of the deviation expressed as a percentage of the
exception criteria for the type selected.(e.g., a common representation of the
formula for calculating percentage value is ((A-B)/B * 100)).
View Criteria – the exception criteria that triggered the exception. Click on the
colored dot to view the criteria.
Created – displays the date the exception was created.
Status – displays the exception status. You can change the status of an exception.
Exception status can be changed from
Active supersedes to:
5-4 Oracle® Value Chain Collaboration User Guide
Introduction
■
In-Process
■
Resolved
■
Unresolvable
■
Dismissed
■
Escalated
Escalated/Auto Escalated supersedes to:
■
Resolved
■
Unresolvable
■
Dismissed
In-Process/Auto In-Process to:
■
Resolved
■
Unresolvable
■
Dismissed
■
Escalated
Only exceptions that have a status of "Active", "In-Process", "Escalated", "Auto
Escalated", "Supersedes", "Auto Incomplete" or "Auto In-Process" are displayed in
the Inbox.
■
Status History – When the colored dot is clicked, drills down to the Status History
screen to show the status change history for the exception.
The Exceptions - Inbox - Group screen (shown below) provides the following group
exception information in the Display pane:
Exceptions
5-5
Introduction
Figure 5–5 Exceptions - Inbox - Group Screen
■
View Exceptions – When the colored dot is clicked, below the "View" icon
displays the individual exceptions that triggered/caused the group exception.
■
Criteria Name – displays the name of the causal group exception criteria.
■
Period – displays the time period of the data stream exception.
■
Product – displays a description of the product.
■
Local – displays the local location for the exception.
■
Partner – displays the partner location for the exception.
■
Created – displays the date the exception was created.
■
■
View Criteria – click on the colored dot to view the group criterion that triggered
the exception.
Status – displays the exception status. Allows you to change the status of a group
exception. Exception status can be changed from
Active supersedes to:
■
In-Process
■
Resolved
■
Unresolvable
■
Dismissed
■
Escalated
In-Process supersedes to:
■
Resolved
5-6 Oracle® Value Chain Collaboration User Guide
Introduction
■
Unresolvable
■
Dismissed
■
Escalated
Escalated to:
■
Resolved
■
Unresolvable
■
Dismissed
Only exceptions that have a status of "Active", "In-Process", "Escalated", or
"Supersedes" are displayed in the Inbox.
■
■
Status History – When the colored dot is clicked, drills down to the Status History
screen to display the status change history for the group exception.
View/Edit Comment – When the colored dot is clicked below the "View
Comment" icon displays the view/edit screen for the comments entered for the
exception. Also allows you to select a resolution code for the comment from a
drop-down list.
The View/Edit Comment dot appears gray when exceptions
do not have an associated comment or resolution code.
Note:
■
Collapsed Count – When in collapsed mode, shows the number of collapsed
exceptions in the row.
The Exceptions - Inbox - External screen shows only exceptions loaded through the
Exceptions Loader. Delete is the only action that can be performed upon these
exceptions.
Figure 5–6 Exceptions - Inbox - External Screen
Exceptions
5-7
Viewing Exceptions and Exception Data
■
Local – displays the local location for the exception.
■
Partner – displays the partner location for the exception.
■
Product – displays a description of the product.
■
Period – displays the time period of the data stream exception.
■
Type 1 – displays the first source data stream used to calculate the exception.
■
Type 2 – displays the second source data stream used to calculate the exception.
■
Offset – displays the offset: In the "current to current" comparison type, the period
of the data stream being compared to the current data stream, i.e., current = "0",
most recent previous = "-1", etc. A period offset of 2 would appear as Period/2.
In the "current to previous" comparison type, the version of the data stream being
compared to the current data stream, i.e., current = "0", most recent previous = "1",
etc. A generational offset of 5 would appear as Generation/5.
■
■
■
■
Deviation – displays the amount the new data stream varies from the data stream
to which it was compared.
Percent – displays the value of the deviation expressed as a percentage of the
exception criteria for the type selected.(e.g., a common representation of the
formula for calculating percentage value is ((A-B)/B * 100)). For more information
on the percentage formula, see Data Stream Exception Criteria Formulas.
UOM – displays unit of measure: Base Units, Stat Units, Load, or Currency.
Source – displays one of the two values used to calculate deviation as a Percentage
or an Absolute for any comparison type.
■
Compared – displays the value that "Source" is compared to.
■
Created – displays the date the exception was created.
■
■
View Comment – click the colored dot below the "View Comment" icon to
view/edit the comments entered for the exception. Also allows you to select a
resolution code for the comment from a drop-down list.
Severity – displays the severity level of the exception: Low, Medium, High.
One or more of the columns described above may be hidden
depending on your settings in Preferences - Layout - Lists - Exception
Inbox.
Note:
■
Status – displays the exception status.
Viewing Exceptions and Exception Data
Access to this feature: superadmin, admin, manager, supervisor, planner, and
reviewer.
The Exception Inbox appears in the Display pane containing the exceptions for the
context you selected in four tabs: Individual, Group, External, and Partner. However,
only three tabs, Individual, Partner and Group, can be examined in detail.
5-8 Oracle® Value Chain Collaboration User Guide
Viewing Exceptions and Exception Data
If you delete a leaf or all leaves from a folder that has
exception criteria (either Sum or Any) with active exceptions, the old
exceptions for this criteria will not be removed. Additionally, for
aggregate exceptions (Sum), the drilled-down Grid View cannot be
displayed.
Note:
Expanded View
You can view individual or group exceptions in "expanded" view or "collapsed" view.
"Expanded" view shows each exception individually at or below a given context, as
shown below.
Figure 5–7 Exception Inbox - Expanded View
Collapsed View
The collapsed view collapses multiple exceptions to a single entry in the Inbox. The
exceptions are collapsed on the following fields:
■
Local
■
Partner
■
Product
■
UOM
■
Base stream type code (Type 1 and Type 2)
■
Criteria name
Exceptions
5-9
Viewing Exceptions and Exception Data
Figure 5–8 Exception Inbox - Collapsed View
Exceptions on period folders are not collapsed. When in
"collapsed" view, a column called "Collapsed Count" will be
displayed. The number value in this column represents the number of
collapsed exceptions for that entry.
Note:
Viewing Exceptions in the Individual Inbox
In the Exceptions - Inbox - Individual screen, you have the options of
■
Viewing Exceptions and Exception Data in Individual Expanded View
■
Viewing an Individual Exception's Criteria.
■
Viewing an Individual Exception's Status History.
Viewing Exceptions and Exception Data in Individual Expanded View
The "Expanded" view shows each exception individually at or below a given context.
To set your Exception Inbox view to "Expanded", see Setting List Screen Preferences.
To view an individual exception and the data stream that produced it in Expanded
view
1.
Make sure you have set your Exception Inbox view to "Expanded", see Setting List
Screen Preferences.
2.
Select your context.
3.
Select Exceptions - Inbox - Individual. The individual exceptions at or below the
current context you selected appear in the Display pane.
4.
To view the value that triggered the individual exception, click the colored dot
under the "View this exception" icon. You can view the exception in either table
mode or graph mode. The data stream containing the exception is displayed, and
the figure that produced the exception is highlighted in table mode with a blue
square in the appropriate cell.
Cell highlights: Both base and comparison value are highlighted in the same color.
Note that the border of some table cells will be highlighted to indicate the severity
of the exception. Colors include
■
Red = high severity
■
Orange = medium severity
5-10 Oracle® Value Chain Collaboration User Guide
Viewing Exceptions and Exception Data
■
Yellow = low severity
Figure 5–9 Cell Highlights
In Graph format, the value that triggered the exception is highlighted by a vertical
blue line in graph mode, as shown below.
Exceptions 5-11
Viewing Exceptions and Exception Data
Figure 5–10 Exception Highlighted by a Vertical Blue Line in Graph Mode
If you change a value in the data stream view, the change will
not be reflected in the Inbox until the changes have been processed by
the Scheduler. Until processing, a blue processing indicator appears
next to the changed exception.
Note:
Both the Table and the Graph view contain additional fields under the context
chooser area. These fields include
■
Comment field (only editable when the Inbox is expanded)
■
Resolution Code drop-down (only editable when the Inbox is expanded)
■
Status drop-down
As a convenience, these fields can be modified from the Data - View/Edit screen
while viewing and updating data. All three fields are also available through the
Inbox List screen, where you can enter a comment and resolution code by drilling
down in the Comment column, or by changing the exception status by modifying
the Status drop-down on the List screen.
5.
Click Back and the viewed exception is highlighted in yellow, as shown below.
5-12 Oracle® Value Chain Collaboration User Guide
Viewing Exceptions and Exception Data
Figure 5–11 Viewed Exception Highlighted in Yellow
Viewing an exception from the Exception Inbox changes the
context to that of the selected exception. Clicking the Back button
returns you to the Exception Inbox and automatically restores your
context.
Note:
Viewing Exceptions and Exception Data in Individual Collapsed View
To view an exception's criteria in collapsed view.
1.
Make sure you have set your Exception Inbox view to "Collapsed", see Setting List
Screen Preferences.
2.
Select your context.
3.
Select the Exceptions - Inbox - Individual subtab. The exceptions for the context
you selected appear in the Display pane.
4.
To view the values that triggered all the exceptions for a context, click the colored
dot under the "View this exception" icon while "multiple" is selected in the
drop-down list under "Period". You view the exceptions in table mode. The data
streams containing the exceptions are displayed.
Cell border highlights will appear based on exception severity:
■
Red = High
■
Orange = Medium
■
Yellow = Low
Exceptions 5-13
Viewing Exceptions and Exception Data
Figure 5–12 Cell Border Highlights
If "None" is selected for the exception criteria's Group To Display option, the table
resemble the image above. For more information on selecting Group To Display,
see Individual Exception Criteria.
If you have chosen to display "All" for the Group To Display option, you will
instead see a table that includes data from the groups you have selected.
Selecting an individual exception from the following drop-down lists in the
Exception Inbox - Individual screen in collapsed view and clicking the colored
dot under the "View" icon allows you to view only the data stream that triggered
the selected exception.
You can view the individual exception in either table mode or graph mode.
Exception statuses can also be changed in the Exception Data Stream View. The
new status will be applied to all the exceptions collapsed into the edited row.
In Graph mode, the value that triggered the exception is highlighted by a vertical
blue line in graph mode, as shown below.
5-14 Oracle® Value Chain Collaboration User Guide
Viewing Exceptions and Exception Data
Figure 5–13 Exception Highlighted by a Vertical Blue Line in Graph Mode
5.
Click Back and the viewed exception is highlighted in yellow, as shown below.
Figure 5–14 Exception Highlighted in Yellow
Viewing an exception from the Exception Inbox changes the
context to that of the selected exception. Clicking the Back button
returns you to the Exception Inbox and automatically restores your
context.
Note:
Exceptions 5-15
Viewing Exceptions and Exception Data
Viewing an Individual Exception's Criteria
Access to this feature: superadmin, admin, manager, supervisor, planner, and
reviewer.
To view an exception's criteria
1.
Select your context.
2.
Select the Exceptions - Inbox - Individual subtab.
3.
For expanded/collapsed view, click the colored dot under "View Criteria" column
to view the details of the criteria that triggered the selected exception. The
Exceptions - Criteria - Individual - Create screen appears as a read-only display.
Figure 5–15 Exceptions - Criteria - Individual - Create Screen
4.
Click Advanced to view the automated exception resolution settings for theexception criterion.
5-16 Oracle® Value Chain Collaboration User Guide
Viewing Exceptions and Exception Data
Figure 5–16 Automated Exception Resolution Settings for the Exception Criterion
5.
Click Back to return to the read-only view of the Exception Criteria Create screen.
6.
Click Back to return to Exceptions - Inbox - Individual screen.
Viewing an Individual Exception's Status History
Access to this feature: superadmin, admin, manager, supervisor, planner, and
reviewer.
To view an exception's status history
1.
Select your context.
2.
Select the Exceptions - Inbox - Individual subtab.
3.
For an expanded view, click the colored dot under "Status History" for the
exception that you want to view.
Figure 5–17 Status History
For collapsed view, select the individual exception from the drop-down lists and
click the colored dot under "Status History". When the exceptions are in multiple
view, the "Status" column displays "N/A", and you will not be able to drill down
to the Status History screen.
4.
Click Back to return to Exceptions - Inbox - Individual screen.
Exceptions 5-17
Viewing Exceptions and Exception Data
Viewing Exceptions in the Group Inbox
In the Exceptions - Inbox - Group screen, you have the options of selecting either the
Context Only or Period Only subtab. This controls the display of exceptions that are
grouped by either Period or Context. When you create a group exception, the Display
Matched option on the Exceptions - Criteria - Group - Create screen allows you to
select whether you wish to use this option. The group exceptions that are not assigned
Period or Context matching will default to context and period, and will appear in the
Context Only subtab.
Both subtabs offer the following choices
■
Viewing a Group Exception in Group Expanded View.
■
Viewing a Group Exception in Collapsed View.
■
Viewing a Group Exception's Criteria.
■
Viewing a Group Exception's Status History.
Viewing Exceptions in the Context Only Subtab
The Exceptions - Inbox - Group - Context Only screen displays exceptions that are
triggered by a group criteria with a comparison type set to "Context & Period" or
"Context Only".
Figure 5–18 Exceptions - Inbox - Group - Context Only Screen
Viewing Exceptions in the Period Only Subtab
The Exceptions - Inbox - Group - Period Only screen displays exceptions that are
triggered by a group criteria with a comparison type set to "Period Only".
Viewing a Group Exception in Group Expanded View
The "Expanded" view shows each group exception individually at or below a given
context.
To view a group exception and the individual exceptions that triggered the group
exception
5-18 Oracle® Value Chain Collaboration User Guide
Viewing Exceptions and Exception Data
1.
Make sure you have set your Exception Inbox view to "Expanded", for details see
Setting List Screen Preferences.
2.
Select your context.
3.
Select Exceptions - Inbox - Group. The Context Only subtab will be selected by
default. The group exceptions for the context you selected appear.
Figure 5–19 Group Exceptions for the Context
4.
To view the individual exceptions that caused the group exception to be triggered,
click the colored dot under the "View this exception" icon.
Figure 5–20 Individual Exceptions of Group
5.
You can perform all the operations that can be performed in the Exceptions Inbox - Individual screen.
■
Viewing exceptions (See Viewing Exceptions and Exception Data in Individual
Expanded View, to view the value that triggered the individual exception,
click the colored dot under the "View this exception" icon. You can view the
Exceptions 5-19
Viewing Exceptions and Exception Data
exception in either table mode or graph mode. The data stream containing the
exception is displayed, and the figure that produced the exception is
highlighted in table mode with a blue square in the appropriate cell.)
■
■
■
■
6.
Viewing criteria (See Viewing an Individual Exception's Criteria. For
expanded/collapsed view, click the colored dot under "View Criteria" column
to view the details of the criteria that triggered the selected exception. The
Exceptions - Criteria - Individual - Create screen appears as a read-only
display.)
Viewing status history (Viewing a Group Exception's Status History)
Changing exception status (Changing the Status of Data Stream Exceptions
Manually)
Viewing/editing an exception comment Creating and Viewing Exception
Comments.
Click Back to return to Exceptions - Inbox - Group - Context Only.
Viewing a Group Exception in Collapsed View
To view a Group exception and Individual Exceptions that triggered the Group
Exception
1.
Make sure you have set your Exception Inbox view to "Collapsed", see Setting List
Screen Preferences.
2.
Select your context.
3.
Select Exceptions - Inbox - Group - Context Only. The group exceptions for the
context you selected appear in the Display pane.
4.
Being at a multiple level, you cannot click the colored dot under the "View" icon to
view the exception. You must select a group exception from the drop-down lists
under the "Period" or "Created" column and then click the colored dot under the
"View" icon to view the individual exceptions that caused the group exception to
trigger.
5.
Now that you are at this individual exception level, you can perform all the
operations that can be performed in the Exceptions - Inbox - Individual screen.
■
■
■
■
■
6.
Viewing exceptions (See Viewing Exceptions and Exception Data in Individual
Expanded View, to view the value that triggered the individual exception,
click the colored dot under the "View this exception" icon. You can view the
exception in either table mode or graph mode. The data stream containing the
exception is displayed, and the figure that produced the exception is
highlighted in table mode with a blue square in the appropriate cell.)
Viewing criteria (See Viewing an Individual Exception's Criteria. For
expanded/collapsed view, click the colored dot under "View Criteria" column
to view the details of the criteria that triggered the selected exception. The
Exceptions - Criteria - Individual - Create screen appears as a read-only
display.)
Viewing status history (Viewing a Group Exception's Status History)
Changing exception status (Changing the Status of Data Stream Exceptions
Manually)
Viewing/editing an exception comment Creating and Viewing Exception
Comments.
Click Back to return to Exceptions - Inbox - Group - Context Only.
5-20 Oracle® Value Chain Collaboration User Guide
Viewing Exceptions and Exception Data
Viewing a Group Exception's Criteria
Access to this feature: superadmin, admin, manager, supervisor, planner, and
reviewer.
To view an exception's criteria
1.
Select your context.
2.
Select Exceptions - Inbox - Group. The exceptions for the context you selected
appear in the Display pane.
Figure 5–21 Exceptions - Inbox - Group Screen
3.
For expanded/collapsed view, click the colored dot under "View Criteria" for the
exception criteria that you want to view.
From this screen, you can view the individual group criteria for the exception by
clicking the colored dot under the "View Criteria for This Group" column.
4.
Click Back to return to Exceptions - Inbox - Group - Context Only.
Viewing a Group Exception's Status History
Access to this feature: superadmin, admin, manager, supervisor, planner, and
reviewer.
To view a group exception's status history
1.
Select your context.
2.
Select Exceptions - Inbox - Group. The exceptions for the context you selected
appear in the Display pane.
3.
For expanded view, click the colored dot under "Status History" for the group
exception that you want to view.
For collapsed view, select a group exception from the drop-down lists and click the
colored dot under "Status History".
4.
Click Back to return to Exceptions - Inbox - Group - Context Only.
Exceptions 5-21
Managing Data Stream Exceptions
Viewing Exceptions in the Partner Inbox
The Partner tab is similar to the Individual tab except that all the exceptions which
appear in this list were triggered by partners. You will be able to see any partner
exceptions here that have been shared with you. All the actions available in the
Individual Inbox tab are also available in the Partner Inbox tab. Refer to Viewing
Exceptions in the Individual Inbox for more information on navigating the Inbox
views and options.
Managing Data Stream Exceptions
Exceptions are displayed in the Exceptions - Inbox screen in the Display pane. Oracle
Retail VCC provides automatic exception management of all exceptions in the inbox,
and also allows you to manage exceptions manually.
Exception Statuses
Valid Exception Statuses include:
■
Active – exception is currently active.
■
Dismissed – set manually by the user. Will be removed from the inbox.
■
Escalated – set manually by the user. Will be displayed in Inbox.
■
In-Process – set manually by user. Will be displayed in Inbox.
■
Obsoleted – data no longer meets criteria conditions and is removed from Inbox.
■
Resolved – set manually by the user. Will be removed from Inbox.
■
■
■
Supersedes – new exceptions whose quantities have superceded existing
exceptions. Exceptions with this status will also carry forward the previous
comment and reason code from the superceded exception.
Superceded – Existing exceptions whose quantities have been superceded by
newly triggered exceptions. Any comment and reason codes will be passed on to
the exception that supercedes them.
Unresolvable – set manually by the user; exception cannot be resolved. Will be
removed from Inbox.
■
Auto Dismissed – set by auto-resolution. Will not be displayed in the Inbox.
■
Auto Escalated – set by auto-resolution, and will be displayed in the Inbox.
■
Auto Incomplete – set by auto-resolution, and will be displayed in the Inbox.
■
Auto In-Process – set by auto-resolution, and will be displayed in the Inbox.
■
Auto Resolved – set by auto-resolution. Will not be displayed in the Inbox.
■
Auto Unresolvable – set by auto-resolution. Will not be displayed in the Inbox.
Managing Data Stream Exceptions Automatically
Oracle Retail VCC automatically manages exceptions in the Exceptions - Inbox in
order that old, obsolete, or redundant exceptions do not clutter the inbox. Oracle Retail
VCC does the following for active exceptions:
■
■
New exceptions replace older exceptions if they are for the same context.
Obsolete exceptions are deleted from the inbox. An exception is obsolete if it no
longer applies to a viable context.
5-22 Oracle® Value Chain Collaboration User Guide
Managing Data Stream Exceptions
Oracle Retail VCC does the following for exceptions marked as "Active", "In-Process",
"Escalated", Auto Escalated" Auto Incomplete", Supersedes", or "Auto In-Process":
■
■
If a change in a data stream affects an Active/In-Process/Auto
In-Process/Escalated/Auto Escalated/Auto Incomplete exception, it is marked
"superseded" in the database. It then disappears from the Inbox. A new active
exception with a status of "Supersedes" is generated in its place.
An Active/In-Process/Auto In-Process/Escalated/Auto Escalated/ Auto
Incomplete/Supersedes exception is marked "Obsolete in the database" if the
exception criterion that triggered the exception is dismissed. The exception then
disappears from the Inbox.
An active, auto inprocess, escalated, auto escalated, auto incomplete, supersedes, or
in-process exception is removed from the inbox if you delete the criterion that
triggered it after the next processing round.
Changing the Status of Data Stream Exceptions Manually
Access to this feature: superadmin, admin, manager, supervisor, and planner.
Oracle Retail VCC allows you to manually change the status of
Active/In-Process/Auto In-Process/Escalated/Auto Escalated/Auto Incomplete/
Supersedes exceptions by
■
Dismissing an exception - removes the exception from the inbox
■
Marking an exception "Unresolvable" - removes the exception from the inbox
■
■
Resolving an exception (it is not deleted) - marks the exception as resolved and
removes it from the inbox
Managing the status of an exception from "Active" to "In-Process" the exception as
being worked on
See Exception Statuses for a list of valid exception statuses and their descriptions.
To change the status of an exception
1.
Select the appropriate status ("In-Process," "Resolved," "Unresolved," "Dismissed"
or "Escalated") from the drop-down list in the Exceptions - Inbox screen.
2.
Click the "Apply Changes" icon.
When an exception is marked "Resolved," "Unresolvable," or
"Dismissed," it disappears from the Exceptions - Inbox.
Note:
Exceptions 5-23
Creating and Viewing Exception Comments
Creating and Viewing Exception Comments
Access to this feature: superadmin, admin, manager, supervisor, planner, and
reviewer.
Oracle Retail VCC allows you to add a comment to an exception, and set a resolution
code. This is useful if you want to add a comment to an exception. Anyone in your
company with access to the data stream associated with the exception can read the
comment. Comments are limited to 100 characters. You can also select a resolution
code for the exception from a drop-down list.
To add or edit an exception comment
1.
Select your context.
2.
Click the Exceptions - Inbox - Individual (or Group ).
3.
In expanded view, click the dot below the "View/Edit Comment" icon to open the
comment box for the exception. In collapsed view, you must first select an
individual exception.
The dot in the "View/Edit Comment" column is grey if no
comment is entered nor resolution code set for an exception. Once a
comment is entered or a resolution code set for an exception, the dot
turns blue.
Note:
4.
Enter a comment and select a Resolution Code from the drop-down list.
Comments are limited to 100 characters.
Any Comments and Resolution Codes that are attached to an exception that
becomes "Superseded" by another exception will be carried forward to new
exceptions marked with the "Supersedes" status (i.e., the exceptions that replace or
supersede the prior exception will retain the comments and reason codes).
5.
Click OK.
The comment appears in the Context Chooser - Context tab when you view the
exception from the Inbox.
Exception Inbox Filter and Search Features
Access to this feature: superadmin, admin, manager, supervisor, planner, and
reviewer.
About Exception Inbox Filter and Search
Access to this feature: superadmin, admin, manager, supervisor, planner, and
reviewer.
You can create multiple Exception Inbox Filters and apply them as needed. Filters
apply to any context. Filters can be thought of as "saved" searches, because they are
searches that you have configured for repeat usage. For details about creating filters,
see Setting Inbox Filters Preferences.
The Exception Inbox Search feature allows you to quickly locate any individual
exception without having to manually page through numerous exceptions. A Search is
a temporary, single-use setting that you configure in the Display Mode tab. It is a
convenient option if you would like to quickly find specific data without going
through the process of setting up a Filter in user preferences. If you think that the
5-24 Oracle® Value Chain Collaboration User Guide
Exception Inbox Filter and Search Features
particular Search setting you select may be used on a regular basis, it would save time
to create a Filter instead, which can be reused at will.
When you search for exceptions in the collapsed mode, the
results are displayed in collapsed mode.
Note:
If you do a search on Partner column providing the string "Drug", Oracle Retail VCC
displays all records in the database that match the string "*Drug*" anywhere in the
Partner tree, such as the folder "Drug Stores" and the leaf name "Wall Drugs at
Jacksonville". The asterisk tells Oracle Retail VCC that any letters before or after the
word "Drug" are acceptable. If you did a search for "Drug*" your results might turn up
"Drug Store", but would not show "Wall Drug". To find "Wall Drug", you would have
to search using "*Drug" or "*Drug*". Since "Wall" precedes "Drug", the asterisk is
placed at the beginning of the word. Searching on the word "*Drug*" would turn up
both Wall Drug and Drug Store, because the asterisk is both at the beginning and end
of the word, meaning that all results with the word "Drug" in them would be
displayed.
Examples of viable searches are:
*Drug* *Drug Drug* Dru* *rug
*rug*
The asterisk (or wildcard) search is available only for the following criteria: Product,
Local Name, Partner name, Type 1, Type 2, and Criteria Name.
Using either Search or Filter, you can locate exceptions based on any of all of the
following criteria:
■
Period (Before, After, or Between a Selected Period)
The "Period Configuration" selected in Preferences - Layout Lists determines which dates are displayed in the Period column.
Options include: Beginning and end of period, End of period, or
Beginning of period. (Period Configuration option not available for
daily time buckets.)
Note:
■
Product (product name)
■
Local name
■
Partner name
■
Deviation (<, >, or =, and a value)
You can filter your exception inbox based on deviation values you specify. This
allows you to display all exceptions with specific deviations from the original data
stream value. You can specify a deviation value that is greater than (>), less than
(<), or equal to (=) a specific deviation value. For example, if you want to display
all exceptions that vary by at least +10% than the original data stream value, you
would specify a deviation value of ">10."
■
Percent (<, >, or = and a percentage or Infinity)
Infinity will display all exceptions where the % deviation is
equal to infinity.
Note:
Exceptions 5-25
Exception Inbox Filter and Search Features
■
Created (Before, After, or Between a Period) (format: MM/DD/YYYY)
Note:
■
"Between" includes both start & end dates.
Status (Active, In-Process, Escalated, Auto-Escalated, Auto Incomplete,
Supersedes or Auto In-Process)
■
Severity (Low, Medium, or High)
■
UOM (Base Units, Stat Units, Loads, or Currency)
■
Type 1 (type 1 stream name)
■
Type 2 (type 2 stream name)
■
Criteria Name
The above search/filter criteria allow you to display specific exceptions or broad
categories of exceptions based on your requirements.
Using the Exception Inbox Filter and Search Features
To locate an individual exception using the Exception Inbox Search or Filter feature
1.
Set your context.
2.
Select Exceptions - Inbox - Individual.
3.
Select Context Chooser - Display Mode.
Figure 5–22 Context Chooser - Display Mode Screen
4.
Select either the Filter or Search option.
■
■
5.
If you wish to Filter, select the filter name from the drop-down list. For
example, if you have created a filter to display only exceptions that are by
percentages greater than 20%, select that filter.
If you would like to Search, select the search criteria from the drop-down list.
For example, search for "Percent" > 20.
Click the "Apply Changes" icon and a list matching your selected search or filter is
displayed.
5-26 Oracle® Value Chain Collaboration User Guide
6
Exception Criteria
This chapter includes the following topics:
■
Data Stream Exception Criteria
■
Creating Data Stream Exception Criteria
■
Exception Severity Levels
■
Viewing Exception Criteria
■
Copying Exception Criteria
■
Deleting Exception Criteria
■
Exception Inbox E-Mail Alerts
■
Data Stream Exception Criteria Formulas
Data Stream Exception Criteria
Oracle Retail VCC allows you to create and manage fixed exception criteria and
rolling exception criteria. Fixed exception criteria apply to specific time periods and
automatically expire with the time period; rolling exception criteria move forward
relative to the current time period and persist indefinitely until deleted.
For fixed and rolling exception criteria you can create the following comparison types:
■
■
Current to Current Comparison – allows you to compare the current versions of
two streams. These streams can be local, partner, or one of each. They can be
compared within the same period or across offset period.
Current to Previous Comparison – compares your local current data stream with
your local previous data stream, or your partner's current data stream with your
partner's previous data stream. You can compare your current and previous
streams with or without a generational offset. If your criterion is a generational
offset, you can compare, for example, your current POS forecast data stream (e.g.,
weekly data) to any of its previous versions. So you can compare Week 6 data
(offset = "0") with Week 3 (offset = "3").
For criteria without a generational offset, you can only compare your current data
stream with the last previous version.
You can also compare the current version of one stream to a version of another
stream with generational offset.
■
Current to Threshold Comparison – compares your local current data stream or
your partner's current data stream with an absolute threshold value.
Exception Criteria
6-1
Creating Data Stream Exception Criteria
Creating Data Stream Exception Criteria
The method you use to create data stream exception criteria is essentially the same no
matter what data stream condition you are trying to detect. The type of exception
criteria is determined by the data stream comparison type you specify. Exceptions are
not generated until a change or edit is made to the data stream that meets the
exception criteria specified or the exception criteria is processed on demand.
There are two types of exception criteria: Individual and Group. When you select
Exceptions - Criteria from the Oracle Retail VCC menu, two tabs appear in the
Display pane that allow you to view and create individual and group exception
criteria.
Individual Exception Criteria
The Exceptions - Criteria - Individual screen contains the following components
■
Individual Exception Criteria List
■
Creating Individual Exception Criteria
Individual Exception Criteria List
Access to this feature: superadmin, admin, manager, supervisor, planner, and
reviewer. However, planners and reviewers cannot delete exception criteria or process
exception criteria "On Demand".
Click Exceptions - Criteria - Individual - List, and the following screen appears in the
Display pane.
Figure 6–1 Individual Exception Criteria List
This displays the current individual exception criteria for a given context. Information
about each exception criteria are shown in the following columns:
You can arrange the order of the columns to suit your needs.
For details, see Setting List Screen Preferences.
Note:
6-2 Oracle® Value Chain Collaboration User Guide
Creating Data Stream Exception Criteria
■
■
■
View Criteria Details– displays a read-only view of the Exceptions - Criteria Create screen when the colored dot below the "View" icon is clicked. For details
see Creating Individual Exception Criteria.
Name – the name of the exception criteria.
Process On Demand – allows you to process immediately an individual exception
criterion. See Processing Exception Criteria on Demand. Not available for planners
and reviewers.
■
Type1 – the first source data stream used to calculate the exception.
■
Type2 – the second source data stream used to calculate the exception.
■
Period – the time period of the data stream exception.
■
■
■
AbsoluteThreshold – the absolute value of the deviation that must be exceeded to
trigger an exception. Also indicates whether the exception is triggered if the value
is an "increase" (only), "decrease" (only), or "change" (either).
Percent Threshold – the percentage value of the deviation that must be exceeded
to trigger an exception. Also indicates whether the exception is triggered if the
value is an "increase" (only), "decrease" (only), or "change" (either).
Comparison – the comparison type: "current to current" "current to previous", or
"current to threshold". If your comparison type is current to current with one
stream being your partners, the comparison description depends on the formula
you select for the criteria:
■
Seller to Buyer
■
Buyer to Seller
■
Max to Min
If your comparison type is current to current with period offset, the comparison
description depends on whether the streams are local or partner.
■
Local Current To Partner Period Offset
■
Local Current To Local Period Offset
■
Partner Current To Local Period Offset
■
Partner Current To Partner Period Offset
If your comparison type is current to previous with generational offset, the
comparison description depends on whether the streams are local or partner.
■
Local Current To Partner Generational Offset
■
Local Current To Local Generational Offset
■
Partner Current To Partner Generational Offset
■
Partner Current To Local Generational Offset
About Generation Offset
Generation Offset allows you to compare a current Data Stream with a previously
saved generation of the same Data Stream. It can only be accessed when the
comparison type is Current to Previous, because only then is a Type 2 data stream
accessible. The Type 2 stream you select is the Previous (older) stream you will be
comparing the current (Type 1) stream to. After selecting the Generational radio
button, the number of generations you type in determines how far back the compared
data stream is located.
Exception Criteria
6-3
Creating Data Stream Exception Criteria
Figure 6–2 Generation Offset
Generation Offset can be used to go back a number of revisions for a particular data
stream with revision history. This is especially useful for forecast type streams, when
determining how accurate the forecast is for each revision.
Generation Offset is available in the Exceptions, Metrics, and Reports modules.The
following examples demonstrate how Generation Offset is applied to a selected data
stream.
Table 6–1
Generation Offset Sample
Time Period of Data Stream = 10/15/2003
Revision of Data Stream
Creation Date
Quantity
First Revision
10/10/2003 11:00:00 AM
11.5
Second Revision
10/11/2003 11:00:00 AM
12.8
Third Revision
10/13/2003 11:00:00 AM
10.6
Final Revision
10/14/2003 11:00:00 AM
22.4
Oracle Retail VCC arrives at the generation offset quantity by
■
Going back the number of time periods specified in the Generation Offset.
■
Getting the Latest Revision created on or before the End Date of that time period.
This process can be understood by applying generation offsets to the sample data in
Table 2 above.
For a generation offset of 1:
End date of the previous time period = 10/14/2003 11:59:59 PM.
Latest Revision before 10/14/2003 11:59:59 PM is the Final Revision, with a quantity of
22.4.
Since the Final Revision was created one time period before the data stream time
period of 10/15/2003, this final revision also gets picked up as Generation 1.
For a generation offset of 2:
End Date for 2 time periods previous = 10/13/2003 11:59:59 PM.
Latest Revision before 10/13/2003 11:59:59 PM is the Third Revision with a quantity of
10.6.
For a generation offset of 3:
End Date for 3 time periods previous = 10/12/2003 11:59:59 PM.
Latest Revision before 10/12/2003 11:59:59 PM is the Second Revision, with a quantity
of 12.8.
6-4 Oracle® Value Chain Collaboration User Guide
Creating Data Stream Exception Criteria
Since there were no revisions dated 10/12/2003, a generation offset of 3 picks up the
second revision dated 10/11/2003 11:00:00 AM.
For a generation offset of 4:
End Date for 4 time periods previous = 10/11/2003 11:59:59 PM.
Latest Revision before 10/11/2003 11:59:59 PM is the Second Revision with a quantity
of 12.8.
For a generation offset of 6:
End date for 6 time periods previous = 10/09/2003 11:59:59 PM.
Since the First revision of the data stream is on 10/10/2003 11:00:00, there were no
revisions for this offset. Therefore, this offset will result in a NULL quantity.
In this example, any generation offset greater than or equal to 6 will yield a NULL
quantity.
■
Product – name of product.
■
Local – the local location for the exception.
■
Partner – the partner location for the exception.
■
■
■
■
Active Exceptions – displays a count of the Active, In-Process, Escalated,
Auto-Escalated, Auto-Incomplete, Auto In-Process and Supersedes exceptions
related to the criterion. Click on the number in the Active Exceptions column
which takes you to an inbox view that contains only the active exceptions (statuses
listed above) for that criteria. You can perform all the operations (view exception,
view criteria, view status history, and change exception status) that can be
performed in the Exceptions Inbox.
If you change an exception's status in the Exceptions - Criteria - List - Active
Exception, you must refresh the screen before the new Active Exception Count
appears.
Delete – deletes an exception criterion (access to this feature is limited to
superadmin, admin, manager, and supervisor). Click the Delete icon to
select/deselect all items on the current page to be deleted. Click the individual
check box to select/deselect that item to be deleted. See Deleting Exception
Criteria.
Status – the status of the exception criteria. Statuses include:
■
■
■
■
Pending – Exception Criteria that have at least one "Aggregate On" check box
selected are created with a status of "Pending".
Valid – when the Complete Criteria Creation task is run, the "Pending" Criteria
statuses are updated to "Valid".
Stale – a Criteria status becomes stale whenever
–
any of the Location/Partner/Product dimensions are at folder-level, and a
hierarchy change affects the folder.
–
the Roll Criteria scheduler task is run for all Leaf Rolling Criteria.
–
"Any" is applied to the period dimension of a Rolling Period Overlay, and
the Roll Criteria scheduler task is run.
In-Process – the status of any "stale" Criteria in the process of being synched
up will become "In-Process". Status is reverts to "Active" when the sync-up is
complete.
Exception Criteria
6-5
Creating Data Stream Exception Criteria
■
■
Copy Criterion – duplicate criterion. You can copy a given criterion's settings by
clicking the blue copy icon. This will take you to the Create screen, where many
fields will have the same settings as the copied criterion. You must, however,
assign the new criterion a name.
Effective Status – effective status of the criterion. This column is indicated by an
image in the list header. There are 3 effectivity states an exception criteria can pass
through:
Inactive – the specified effectivity hasn't been reached.
Active – current date is within the specified effectivity period.
Expired – specified effectivity period has passed.
■
■
■
Show – check boxes that, when selected, allow for consecutive viewing of the
exception examine screens. Checking the Show check boxes allow you to
drilldown once, and then click next to page back and forth through the Detail
views of each exception you selected in the list.
Shared with – the name of the trading partner company that each exception is
shared with, or "none".
UOM – Unit of Measure used by the exception.
Creating Individual Exception Criteria
Access to this feature: Superuser, server admin, superadmin, admin, manager, and
supervisor.
The Individual - Exceptions - Criteria - Individual - Create screen allows you to
create exception criteria for selected contexts.
To create a data stream exception criterion
1.
Select your context.
2.
Click Exceptions - Criteria - Individual - Create from the Oracle Retail VCC menu
and the following screen appears in the Display pane:
6-6 Oracle® Value Chain Collaboration User Guide
Creating Data Stream Exception Criteria
Figure 6–3 Creating Individual Exception Criteria
3.
Enter a name (40 character maximum) in the Name text box.
4.
The Group To Display drop-down allows you to select
■
■
■
from a list of groups that have already been created (Groups are created in the
Company - General Config - Groups tab)
a group called "All", which includes all streams assigned to that company. The
All group gets automatically updated whenever a new stream is assigned.
the "None" option, which will not display any groups.
Only company-specific groups will display in the "Group to
Display" drop-down. User-specific groups will not be available in this
list.
Note:
5.
Enter the Start and End Effectivity Dates manually or through the calendar icon.
Click the calendar icon and a pop-up calendar appears allowing you to choose the
dates. Double-click on a date in the pop-up calendar and it automatically appears
in the Start or End Effectivity Date text box.
Exception Criteria
6-7
Creating Data Stream Exception Criteria
Figure 6–4 Calendar
This is an optional feature. You may choose not to enter any effectivity dates, or
you may choose to enter a start date only, or an end date only.
Note:
6.
The effectivity end date cannot be prior to the current date.
If your context includes folder-level items, you may check any of "Product",
"Local", or "Partner" to Aggregate On.
Once you check one of the boxes, a text field next to Number of Levels Down will
be activated. You can enter a number in the box, though it is not required. If you
do not select a specific number of levels down, your criteria will be created at that
aggregate context.
When the "Aggregate On" check box is checked, the Number of Levels below text
box appears (this option allows you to create multiple criteria all at once). For
example, if you select "Aggregate On Product", an additional text box "Number of
Levels below:" appears. This gives you the option of indicating at what level below
the product context the exception criteria will be created.
The maximum number allowed in the "Number of Levels below:" text box is "99".
7.
Select the UOM (unit of measure): "Base Units", "Stat Units", "Loads", or
"Currency".
8.
Choose the Partner Company you would like to share the Exceptions with, if any,
by selecting from the Share with drop-down. The list of partner companies
available in the Share With drop-down depend on the partner location/folder
chosen in the context chooser. Exceptions cannot be shared with non-local partner
companies.
9.
Select whether you would like to use Base Periods or a Period Overlay for the
Period. With either option, you will be given the choice to use "Fixed" or "Rolling"
Time periods.
■
Click Fixed to create an absolute time exception criterion.
Fixed Base Periods – when Base Periods is selected, choose a fixed period
from the Period tree. If you wish to aggregate on that period, check the
Aggregate On Period check box. This reports the aggregate on the selected
dimension.
Fixed Period Overlay – when Fixed Period Overlay is selected, choose a
period overlay from the drop-down and, optionally, set the period Start/End
Dates/Periods by clicking the Set Period Range check box. In version 6.1, only
6-8 Oracle® Value Chain Collaboration User Guide
Creating Data Stream Exception Criteria
1 criteria is created per fixed Period Overlay, where previous versions created
a criteria per period overlay item.
Note: Period ranges are evaluated in terms of base periods - days in a daily
database, weeks in a weekly database.
■
Click Rolling to create a relative time exception criterion.
Rolling Base Periods – when a Rolling Base Period is selected, enter the Start
Period and End Period.
Rolling Period Overlay – when a Rolling Period Overlay is selected, choose
the desired overlay from the drop-down. The "Set Period Range" option is not
available for Rolling Period Overlays.
In a Rolling time exception criterion, zero indicates the current period, "1"
indicates begin one period from the current period. For example, if you enter "0" in
the start period and "2" in the end week, the exception criterion applies to the
current week and two periods into the future. The exception criterion moves
forward automatically with each passing period. That is, after the first period ends
in which the rolling time exception criterion applies, the start period that was
period "1" becomes period "0" and so forth.
Figure 6–5 Rolling Time Exception Criterion
To roll a relative criteria, you must schedule the "Roll Criteria" task. See Working
with Tasks. Every time the "Roll Criteria" task is run, it obsoletes the exception
triggered by the first period. For instance, in the example given above, the
exceptions triggered by the Week 1 "0" period would be obsoleted.
10. In the Comparison section, you can determine
■
what comparison type you wish to use
■
what data streams and substreams are to be compared
■
whether the streams are local or partner
■
whether there is an offset
■
what formula will be used in the calculation
There are three comparison modes, as follows:
■
Current to Current Comparison – allows you to compare
–
no offset
local current data stream with partner current data stream
local current data stream with local current data stream
partner current data stream with local current data stream
partner current data stream with partner current data stream
–
and period offset comparisons
local current with local period offset
local current with partner period offset
Exception Criteria
6-9
Creating Data Stream Exception Criteria
partner current with local offset
partner current with partner period offset
When selecting a Percent Formula in Current to Current Comparison mode,
you can only select formulas 2, 3, or 4 if Stream Type 1, Stream Type 2, and
Stream Item Types are the same, and if both subtypes and "Type 1 is:" and
"Type 2 is:" are different (e.g., both are not Local, or both are not Partner):
[(type 1-type 2)/type 2]*100
[(seller-buyer)/buyer]*100
[(buyer-seller)/seller]*100
[max (buyer, seller) - min (buyer, seller)]/min (buyer, seller)*100
■
Current to Previous Comparison – allows you to compare
–
your local current data stream with your local previous data stream (only
when offset is set to "none")
–
your partner's current data stream with your partner's previous data
stream (only when offset is set to "none")
–
your local current data stream with your partner's previous data stream
(only with generational offset)
–
your local current data stream with your previous data stream. (only with
generational offset)
–
your partner's current data stream with your local previous data stream.
(only with generational offset)
–
your current data stream with your local previous data stream. (only with
generational offset)
The last four cases are only possible when a generational offset
is chosen.
Note:
–
Current to Threshold Comparison – allows you to compare your local
current data stream or your partner's current data stream with an absolute
threshold value.
11. Set the Absolute Threshold, the Percent Threshold field, or both. Enter the value
that the data stream must vary to trigger the exception.
Choose the type of change (Increase, Decrease, or Change) for the exception
criterion from the drop-down list next to the Percent Threshold or the Absolute
Threshold field.
If the comparison type is Current to Threshold, only Absolute
Threshold is available. Also, "Above Threshold" and "Below
Threshold" are the only options in the drop-down list.
Note:
■
Select "Change" if the exception applies to any increase or decrease in the
threshold value.
■
Select "Increase" if the exception applies to an increase in the threshold value.
■
Select "Decrease" if the exception applies to a decrease in the threshold value.
6-10 Oracle® Value Chain Collaboration User Guide
Creating Data Stream Exception Criteria
12. Choose the Severity ("None", "Percent", or "Absolute") to match your threshold
criteria and enter the values for Medium Severity and High Severity levels. For
more details on Severity Levels, see Exception Severity Levels.
Note: The severity for all Current to Threshold exceptions is based
on the base quantity and not on the deviation.
All exceptions that are generated from criteria where the medium and
high thresholds were not provided, will always trigger exceptions
with a "Low" severity.
13. Check the Trigger even if part of group box if the exception is to be triggered even
if it is part of a group exception. For example, if the exception you are creating is to
be part of a group exception and you want the exception to be triggered as a lone
exception in addition to being triggered as part of the group, check the box.
14. Check the Treat missing value as zero box if you wish to treat a null value in a data
stream as a zero for comparison purposes. When a criteria has the "Treat missing
value as zero" option checked, trading partners are allowed to identify new
promotions even when they have not planned them themselves.
If not used carefully, value vs. null exceptions can lead to
many spurious exceptions.
Note:
15. Click Advanced to set automated resolution options, or click Create. If you click
Create, the exception criterion appears in the Exceptions - Criteria - Individual List screen in the Display pane. You may also click Cancel to cancel the creation of
exception criterion and return to the Exceptions - Criteria - Individual - List
screen.
About Automated Exception Resolution with the Action Specification Screen
The VCC's Automated Exception Resolution feature automatically adjusts values,
changes status, and notifies individuals based upon rules specified when an exception
occurs, or after a time-out passes.
Automated resolution expands the range of possible actions associated with each
severity level (low, medium, and high) of an exception criterion to the following:
■
■
Adjusting a local data stream value. The options include
–
matching to local value (when a stream to adjust is other than type 1 or type
2).
–
matching to partner value.
–
using the higher or lower of the partner and local values.
–
using the average of the partner and local values.
Changing the status of the exception. The options include
–
None
–
Auto
–
Auto Dismissed
–
Auto In-Process
Exception Criteria
6-11
Creating Data Stream Exception Criteria
–
Auto Resolved
–
Auto Unresolvable
–
Auto Escalated
■
Sending an e-mail message.
■
Selecting an E-mail Language.
■
Displaying a message in the Exceptions Inbox.
Automated resolution includes one set of initial actions and two time-out action
specifications for In-Process and Resolution actions. One identifies a potentially
different set of actions to be taken if the exception was not marked "In-Process" or
"Auto In-Process" in a prescribed amount of time. The other triggers another selection
of actions if the exception were not resolved before the time out expired.
If an exception is superseded before the time out expires, the original exception's
creation date/time will be used as the basis for evaluating the exception action rule if
the severity is the same or higher on the exception that superseded the original.
After you click the Advanced button at the bottom of the Exceptions - Criteria Individual - Create screen, you can set the automated exception resolution options.
Figure 6–6 Automated Exception Resolution Options
The screen allows you to set three types of actions:
6-12 Oracle® Value Chain Collaboration User Guide
Creating Data Stream Exception Criteria
When actions defined on multiple criteria result in changing
the same stream values, the actions defined on the criteria created
latest will override the previous criteria actions.
Note:
■
■
■
Initial Actions – performed when the exception is triggered.
In-Process Actions – performed after the specified in-process time out has passed
but the exception is still active. For example, if an exception's status changes to
In-Process/Auto In-Process before the specified time out has passed, In-Process
actions are not performed. It the exception's status has not changed to
In-Process/Auto In-Process, and the specified time out has passed, In-Process
actions are performed.
Resolution Actions – performed when the specified resolution time out has
passed, and the exception is still not resolved.
Note:
All actions are severity-specific.
To configure Automated Exception Resolution
1.
Select the stream and substream to be adjusted at the end of Action Processing
from the "Local Stream to Adjust" and Sub Type drop-down lists.
Initial Actions
2.
Check the "Put alert in Inbox" check-box for each exception severity level (low,
medium, and high) that is to be displayed in the Inbox when that threshold is
exceeded. The check-box is checked by default.
3.
In the "Send E-Mail:" text box, enter the e-mail address of the person(s) to be
notified if the exception is triggered at the chosen severity level (optional). When
entering more than one e-mail address, separate each address with either a
semicolon (;) or comma (,). To view sample e-mail alerts, see Exception Inbox
E-Mail Alerts.
The "from" e-mail address used for all e-mail notifications
(e.g., exception alerts or usage reports) will show the E-Mail address
that was set in Configuration - Server-Messaging - Sender E-Mail.
For details see the Oracle Retail VCC Installation and Configuration
Guide.
Note:
4.
In the "E-mail Language:" drop-down, you can set the language that the e-mail
will be generated in. The default will be whatever language has been selected on
the Preferences - General screen.
5.
Select the "Adjust Local Value" from the drop-down list:
■
■
None – makes no change
Type 1/Type 2 – depending on your criteria (local current to partner current,
or partner current to local current), adjusts your local value to your partner's
value. For example:
–
local current to partner current: Type 2 adjusts local value to match your
partner's
Exception Criteria
6-13
Creating Data Stream Exception Criteria
–
■
■
■
6.
partner current to local current: Type 1 adjusts local value to match your
partner's
Higher – changes your local value to your partner's value if your partner's
value is higher
Lower – changes your local value to your partner's value if your partner's
value is lower
Average – changes to an average of your partner's and your values.
Set the status from the "Set Status" drop-down list. The Set Status option has the
following values:
■
None
■
Auto Dismissed
■
Auto In-Process
■
Auto Resolved
■
Auto Unresolvable
■
Auto Escalated
When "None" is selected from the Adjust Local Value
drop-down list, you can manually select "Auto Dismissed", "Auto
In-Process", "Auto Resolved", or "Auto Unresolvable" or "Auto
Escalated" from the Set Status drop-down list. If you select any other
Adjust Local Value item is chosen, the status is automatically set to
"Auto".
Note:
Table 3 shows all the possible status options depending the Stream to Adjust and
the adjustment method chosen.
Table 6–2
Auto Status Options
Stream
Adjust Method Status Code
1
S1
S2
-
S3
S3
S4
Local Current
Partner Current
3
S1
-
S7
S7
S7
S7
Partner Current
Local Current
2
S1
S2
-
S3
S3
S4
Partner Current
Local Current
3
S1
S7
-
S7
S7
S7
Local Current
Local Previous
1
S1
-
S2
S8
S8
S10
Local Current
Local Previous
3
S1
-
S7
S7
S7
S7
Local Current
Local Generation Offset
1
S1
-
S2
S8
S8
S10
Local Current
Local Generation Offset
3
S1
-
S7
S7
S7
S7
Local Current
Local Period Offset
1
S1
-
S2
S8
S8
S10
Local Current
Local Period Offset
3
S1
-
S7
S7
S7
S7
Partner Current
Partner Previous
3
S1
-
S9
S9
S9
S9
6-14 Oracle® Value Chain Collaboration User Guide
Lower
None
Average
Partner Current
Higher
Local Current
Type 2
Type 2 (Compare)
Type 1
Type 1 (Source)
Type 3
(Local
Stream to
Adjust)
Creating Data Stream Exception Criteria
Table 6–2 (Cont.) Auto Status Options
Average
Lower
Higher
Type 2
Type 3
(Local
Stream to
Adjust)
Type 1
Adjust Method Status Code
None
Stream
Type 1 (Source)
Type 2 (Compare)
Partner Current
Partner Generation Offset 3
S1
-
S9
S9
S9
S9
Partner Current
Partner Period Offset
3
S1
-
S9
S9
S9
S9
Local Current
Threshold
1
S1
-
S2
S8
S8
S8
Local Current
Threshold
3
S1
-
S7
S7
S7
S7
Partner Current
Threshold
3
S1
-
S9
S9
S9
S9
The following rules apply when using auto status adjustment:
■
■
■
■
If the Local Stream to Adjust is equal to
–
1, the stream specified for Type 1 is adjusted
–
2, the stream specified for Type 2 is adjusted.
–
3, some other specified stream is changed
If Local Current is changed to eliminate the exception, the status is "Resolved"
If a third stream is changed as a result of the exception, the status is
"In-Process".
If no data is changed, the status remains "Active"
Table 4 shows the status codes used in Table 3. Table 3 also provides the reason
codes (and their description) that appear in the Comments screen when that status
option is triggered.
Table 6–3
Status Codes
Status
Type
Status
Set Resolution Description
S1
Active
none
S2
Auto Resolved
Local issue: changed value: The local value was
adjusted to match the partner's value, because a
local error was discovered.
S3
If the change is made: Auto
Resolved; Otherwise: Auto
In-Process
If the change is made, local issue, changed value:
The local value was adjusted to match the
partner's value, because a local error was
discovered. If the change is not made, partner
issue: value unchanged: A partner's error was
discovered, and is expected to be corrected in the
next planning cycle.
S4
Auto Resolved
Split the difference: The partner and local values
were both set to the average of the original values.
S5
Auto Unresolvable
Agree to disagree: Partner and local stand by their
differing values.
S6
Active
Not Resolved: The issue has not yet been resolved.
(default)
Exception Criteria
6-15
Creating Data Stream Exception Criteria
Table 6–3 (Cont.) Status Codes
Status
Type
Status
Set Resolution Description
S7
Auto In-Process
Local issue, value unchanged: A local error was
discovered, and is expected to be corrected in the
next planning cycle.
S8
If the change is made: Auto
Resolved; Otherwise: Auto
In-Process
If the change is made, local issue, changed value:
The local value was adjusted to match the
partner's value, because a local error was
discovered.
If the change is not made, partner issue: value
unchanged: A partner's error was discovered, and
is expected to be corrected in the next planning
cycle.
S9
Auto In-Process
Partner issue: value unchanged: A partner's error
was discovered, and is expected to be corrected in
the next planning cycle.
S10
Auto In-Process
Local issue, changed value: The local value was
adjusted to match the partner's value, because a
local error was discovered
In-Process Actions
7.
Set "Time Out Threshold".
8.
In the "Send E-Mail:" text box, enter the e-mail address of the person(s) to be
notified if the exception has passed the time-out threshold and the exception status
has not changed to "In-Process" or "Auto In-Process".
9.
In the "E-mail Language:" drop-down, you can set the language that the e-mail
will be generated in. The default will be whatever language has been selected on
the Preferences - General screen.
10. Select the "Adjust Local Value" from the drop-down list, as in step 5.
11. Set your status from the "Set Status" drop-down list, as in step 6. The Set Status
option has the following values.
Resolution Actions
12. Set "Time Out Threshold".
13. In the "Send E-Mail:" text box, enter the e-mail address of the person(s) to be
notified if the exception has passed the time-out threshold and is still in a status of
Active, In-Process, or Auto In-Process, Escalated, Auto-Escalated, Auto
Incomplete.
14. In the "E-mail Language:" drop-down, you can set the language that the e-mail
will be generated in. The default will be whatever language has been selected on
the Preferences - General screen.
15. Select the "Adjust Local Value" from the drop-down list, as in step 5.
16. Set your status from the "Set Status" drop-down list, as in step 6. The Set Status
option has the following values.
17. Click Finish.
6-16 Oracle® Value Chain Collaboration User Guide
Creating Data Stream Exception Criteria
If you have similar entries across multiple severity levels, you
can save time by clicking the copy buttons located to the left of each
action. Clicking on the copy icons next to "Initial Actions", "In-Process
Actions", and "Resolution Actions" will copy ALL the settings from
the low severity column into both the Medium and High columns.
Note:
Creating Group Exception Criteria
Access to this feature: superadmin, admin, manager, supervisor, planner, and
reviewer. However, planners and reviewers cannot create or delete group exception
criteria.
The Group screen lets you create one significant exception instead of many
independent exceptions in the situation where independent exceptions are
meaningless unless all of their thresholds are exceeded. This feature eliminates a vast
number of unwanted exceptions. For example, you can create a group exception
criteria for "All Natural Potato Chips" that triggers an exception when sales drop by 7
percent, or by 600 cases and 5 percent.
The Group screen, shown below, comprises two subscreens: List and Create. The List
screen shows the group exceptions for your selected context.
The Create allows you create group exception criteria. To create group exception
criteria
1.
Select your context.
2.
Click Exceptions - Criteria - Group - Create from the Oracle Retail VCC menu,
and the following screen appears:
Figure 6–7 Creating Group Exception Criteria
3.
Enter a name (40 character maximum) in the text box next to "Name:".
Exception Criteria
6-17
Creating Data Stream Exception Criteria
4.
In the "E-Mail:" text box, enter the e-mail of the person(s) to be notified when a
group exception is triggered (optional).
5.
Select the E-mail Language you would like to have any e-mail sent in, if you opted
to have group exceptions trigger an e-mail alert.
The default "E-mail Language" will be whatever language has
been selected on the Preferences - General screen.
Note:
6.
Select whether you wish to trigger if matched on Context and Period, Context
Only or Period Only. Trigger if matched on options are
■
Context and Period – A group exception will be triggered only if all the
criteria (based on the "AND" or "OR" rules) in the group trigger an exception
for the same context and period.
For example, if you create a group criteria with the following rules:
Criteria A, Location 1, Partner 1, Product 1, which is for periods 1 through 5
OR Criteria B, Location 1, Partner 1, Product 1, which is for periods 3 through
7
AND Criteria C, Location 1, Partner 1, Product 1, which is for periods 2
through 4
The following example condition will trigger a group exception:
Criteria A triggered in period 3, Criteria B triggered in period 4, and Criteria C
triggered in periods 2, 3, and 4. In this condition, you will receive two group
exceptions for periods 3 and 4.
The following example condition will not trigger a group exception:
Criteria A triggered in period 1, Criteria B triggered in period 5, and Criteria C
triggered in period 3. In this condition you will not receive any group
exceptions.
–
Context Only – A group exception will be triggered only if all the criteria
in the group trigger an exception for the same context.
–
Periods Only – A group exception will be triggered only if all the criteria
in the group trigger an exception for the same period.
When "Context and Period" is selected, the "OR", "AND" and
"REMOVE" options are accessible. If "Periods Only" or "Context Only"
are selected, "OR" will not be available. Only "AND" and "REMOVE"
will be accessible.
Note:
7.
Enter the Start and End Effectivity Dates manually or through the calendar icon.
Click the calendar icon and the following calendar pops up to help you choose the
dates. Double-click on a date and it automatically appears in the Start or End
Effectivity Date text box.
6-18 Oracle® Value Chain Collaboration User Guide
Creating Data Stream Exception Criteria
Figure 6–8 Calendar
This is an optional feature. You do not have to enter any effectivity dates, or you
may choose to enter a start date only, or an end date only.
Note:
8.
The effectivity end date cannot be prior to the current date.
Add the individual exception criteria to be included in the group exception criteria
by highlighting the individual exception criteria in the left window. Then, click the
rule (either an "And" or "Or" condition) to be used for triggering the group
exception. The exception criteria will appear in the right window.
A group exception will be triggered only if all the criteria
(based on the "AND" or "OR" rules) in the group trigger an exception
for the same context, same period, or same context and period. This is
determined by the "Trigger if matched on" option selected. For more
"Trigger if matched on" details, see Step 6.
Note:
In previous versions, the list of criteria from which you could select was limited to
only those criteria that had the same context as the selected context. Now all the
criteria at and below the selected context are displayed.
Highlight an exception criteria in the right window and click Remove to remove
items from the group exception list.
9.
Put alert in Inbox displays the group exception in the inbox when checked. The
default is checked.
10. Click Create. The group exception criteria will appear in the
Exceptions - Criteria - Group - List.
Exception Criteria
6-19
Creating Data Stream Exception Criteria
Group Exception Criteria
To delete a group exception criterion, access the Exception - Criteria - Group - List
screen. Check the box next to the name and click Delete.
Figure 6–9 Exception - Criteria - Group - List Screen
To examine Group Exception Criteria, click on the colored dot next to each name. The
following screen appears showing a detailed list of all the exception criteria that
comprise the group exception criteria.
Figure 6–10 Examine Group Exception Criteria
Active Exceptions can be viewed by clicking on the number link that appears in
"Active Exceptions" column of the Group List screen. This will display Active Group
Exception Criteria, as seen in the list below.
6-20 Oracle® Value Chain Collaboration User Guide
Exception Severity Levels
Figure 6–11 Active Group Exception Criteria
Exception Severity Levels
Oracle Retail VCC allows you to assign severity levels to exceptions to help you
quickly identify the severity of an exception in the exception inbox. To create severity
levels for an exception you set a medium severity limit and a high severity limit. The
low severity limit automatically sets itself as being any value that is below medium
severity and above the deviation threshold.
All exceptions that are generated from criteria where the
medium and high thresholds were not provided, will always trigger
exceptions with a `Low' severity.
Note:
The severity for all Current to Threshold exceptions is based on the
base quantity and not on the deviation.
For example, you create an absolute exception criteria with an exception deviation of
100, a medium severity limit of 120, and a high severity limit of 150. If the deviation is
99 or below, no exception is generated. If the deviation is between 100 and 119, the
exception would be low. If the deviation is between 120 and 150, the exception would
be medium. If the deviation is greater than 150, the exception would be high.
The same is true for percent deviation exceptions except calculations are done as a
percent of the data stream value. For example, you set the exception percent at 20%,
the medium threshold at 30%, and the high threshold at 50%.
If the result is between +/-19%, there would be no exception. If the result is between
-20% and -30% or +20% and +30%, the exception would be low. If the result is greater
than -30% and -49% or +30% and +49%, the exception would be medium. If the result
is greater than +50% or less than -50%, the exception would be high.
Exception Criteria
6-21
Viewing Exception Criteria
Viewing Exception Criteria
Access to this feature: superadmin, admin, manager, supervisor, planner, and
reviewer.
To view the exception criteria you have created, you must set a context and then view
exception criteria for that context. You then can elect to display all exception criteria at
and above the context you selected, or at and below the context you selected.
To view the exception criteria that have been created for a context
1.
Set your context.
2.
Click Exceptions - Criteria.
3.
Click Context Chooser - Display Mode and from the drop-down list select "Show
criteria at and above this context" to display all exception criteria created at and
above the selected context; or, select "Show criteria at and below this context" to
display all exception criteria created at and below the selected context.
For example, to display all exception criteria created for all locations, all partners, and
all products at and below a context
1.
Click Context Chooser - Select Context and select "All Locations", "All Partners",
and "All Products".
Figure 6–12 Context Chooser - Select Context
2.
Click Context Chooser - Display Mode and select "Show criteria at and below this
context."
Figure 6–13 Context Chooser - Display Mode
3.
Click the "Set" button.
Viewing Active Exceptions
To view the active exceptions associated with a criterion for a context listed in the
Exceptions - Criteria - List screen
1.
Click on the number in the Active Exceptions column, which takes you to an
inbox view that contains only the active exceptions (active, in-process, auto
in-process, supersedes, escalated, auto escalated, auto incomplete) for that criteria.
2.
You can perform all the operations (view exception, view criteria, view status
history, and change exception status) that can be performed in the Exceptions
Inbox. For details, see Viewing Exceptions and Exception Data.
6-22 Oracle® Value Chain Collaboration User Guide
Viewing an Exception's Status History from the Active Exceptions Screen
If you change an exception's status to resolved, unresolvable,
or dismissed and click on the Back button, taking you back to the
Exceptions - Criteria - List page, you must refresh the screen before
the new Active Exception Count appears.
Note:
3.
Click Back to return to the Exceptions - Criteria - List screen.
Viewing Exception Criteria and Details from the Exceptions - Criteria - List Screen
To display a read-only view of the exception criterion from the Exceptions - Criteria List screen, click the colored dot below the "View" icon. For details on how the screen
looks see Creating Individual Exception Criteria.
Copying Exception Criteria
To copy exception Criteria, navigate to the Criteria List screen and select the copy icon
for that criterion (located in the "Copy Criterion" column). Copying a criterion
duplicates the original criterion's settings. A name must be entered for the new copy,
but does not need to be unique.
Deleting Exception Criteria
Access to this feature: superadmin, admin, manager, and supervisor.
To delete an exception criterion, click Exceptions - Criteria - Individual - List. Click
the check box below the "Check" column next to the exception criterion, and then click
Delete.
The Delete check box is available next to the criteria at or below the current context.
Criteria above the current context do not have the Delete check box next to them.
Viewing an Exception's Status History from the Active Exceptions Screen
To view the status history of an exception from the Active Exceptions screen
1.
Click Exceptions - Criteria - Individual - List.
2.
Click the number link in the Active Exceptions column. This number represents
the total of active exceptions contained in that criteria. The Active Exception
Criteria screen appears.
Exception Criteria
6-23
Viewing an Exception's Status History from the Active Exceptions Screen
Figure 6–14 Active Exception Criteria Screen
3.
Click the Status History drilldown dot to view the status history of that exception.
The Status History screen appears.
Figure 6–15 Status History Screen
4.
Click Back to return to the Active Exceptions List.
5.
Click Back again to return to the Criteria - List screen.
Changing an Exception's Status from the Exception Inbox Screen
To change an exception's status
1.
Click Exceptions - Inbox - Individual.
2.
Select a status from the Status drop-down list.
■
In-Process:
6-24 Oracle® Value Chain Collaboration User Guide
Processing Exception Criteria on Demand
3.
■
Resolved
■
Unresolvable
■
Dismiss
■
Escalated
Click Apply Changes.
Note: If you change an exception's status in the Exceptions - Criteria
drilldown - Active Exceptions link - Active Exception list page, you
must refresh the screen before the new Active Exception Count
appears.
Processing Exception Criteria on Demand
Access to this feature: superadmin, admin, manager, and supervisor.
Exception criteria processing occurs as a background task controlled by the Oracle
Retail VCC Scheduler (see Managing the Scheduler). You can, however, process a
single exception criterion "on demand" without having to schedule and execute the
task through the scheduler. This is called on-demand exception criteria processing. It
allows you to process one exception criterion and view the results immediately.
If you create a criterion at the aggregate level that uses a Sum,
the criterion is created with a "Pending" status. One must first run
"Complete Criteria Creation" through the Scheduler before the
criterion becomes "Valid" and available for on-demand processing.
Note:
To process a single exception criterion "on demand" without having to schedule and
execute the task through the Scheduler
1.
Set your context.
2.
Click Exceptions - Criteria - Individual from the Oracle Retail VCC menu. The
individual exception criteria are listed in the Display pane.
3.
Click the "Process On Demand" radio button next to the exception criteria that you
want to process. You may only select one criteria to process at a time.
Figure 6–16 Process On Demand
4.
Click Process On Demand.
Exception Criteria
6-25
Exception Inbox E-Mail Alerts
Exception Inbox E-Mail Alerts
The number format, date format, time format, time zone and decimal places specified
in the Company - General Config - E-mail tab will be applied to the Exception E-mail
Alert. Default E-mail format, visible columns and multi-column sort order rules
specified in the Company -Module Config - Exceptions tab will be applied to
Exception E-mail Alerts.
In addition to the individual and group exceptions that are displayed in the E-Mail
alert, there are links. Both Plain text and HTML formats provide access to the
following screens:
■
■
■
Inbox – Opens the Exception Inbox screen that displays the selected context and
exceptions.
View Exception – Opens the Exception Detail screen.
Group Inbox – Opens the Group Inbox screen that displays the selected context
and exceptions.
These links will return you to different Oracle Retail VCC exception views. You will
need to log into the application to view the details for each link if you are not already
logged in.
Sample HTML E-Mail Alert
Figure 6–17 Sample HTML E-Mail Alert
6-26 Oracle® Value Chain Collaboration User Guide
Data Stream Exception Criteria Formulas
Sample Text E-Mail Alert
Figure 6–18 Sample Text E-Mail Alert
Data Stream Exception Criteria Formulas
Oracle Retail VCC generates data stream exceptions based on the specific formula for
the data stream exception criteria comparison type you select. Oracle Retail VCC
provides one general formula that can be used by each comparison type ("current to
current", "current to previous" (default), and "current to threshold" (default)), and three
formulas that are only options for the current to current comparison mode.
When you create a data stream exception criterion to compare any two data streams or
substreams using the "current to current", "current to previous", or "current to
threshold" comparison type, Oracle Retail VCC uses the following formula to calculate
exceptions based on absolute value:
Deviation = type 1 - type 2
When you create a data stream exception criterion to compare any two data streams or
substreams using the "current to current", "current to previous", or "current to
threshold" comparison type Oracle Retail VCC uses the following formula to calculate
exceptions based on percentage value:
Exception Criteria
6-27
Data Stream Exception Criteria Formulas
Figure 6–19 Formula to Calculate Exceptions Based on Percentage Value
When you create a "seller to buyer" data stream exception criterion based on the
"current to current" comparison type, Oracle Retail VCC uses the following formula to
calculate exceptions based on an absolute value:
Deviation = seller - buyer
When you create a "seller to buyer" data stream exception criterion based on the
"current to current" comparison type, Oracle Retail VCC uses the following formula to
calculate exceptions based on a percentage value:
Figure 6–20 Formula to Calculate Exceptions Based on a Percentage Value
When you create a "buyer to seller" data stream exception criterion based on the
"current to current" comparison type, Oracle Retail VCC uses the following formula to
calculate exceptions based on an absolute value:
Deviation = buyer - seller
When you create a "buyer to seller" data stream exception criterion based on the
"current to current" comparison type, Oracle Retail VCC uses the following formula to
calculate exceptions based on a percentage value:
Figure 6–21 Formula to Calculate Exceptions Based on a Percentage Value
When you create a "maximum (buyer, seller) to minimum (buyer, seller)" data stream
exception criterion based on the "current to current" comparison type, Oracle Retail
VCC uses the following formula to calculate exceptions based on an absolute value:
Deviation = max (buyer, seller) - min (buyer, seller)
When you create a "maximum (buyer, seller) to minimum (buyer, seller)" data stream
exception criterion based on the "current to current" comparison type, Oracle Retail
VCC uses the following formula to calculate exceptions based on an percentage value:
Figure 6–22 Formula to Calculate Exceptions Based on a Percentage Value
6-28 Oracle® Value Chain Collaboration User Guide
7
Reports
This chapter contains the following topics:
■
Introduction
■
About Reports
■
Common Report Settings
■
Creating Reports
■
Generating Reports
■
Deleting a Report
■
Deleting a Template
Introduction
Oracle Retail VCC allows you to generate various types of reports to show the
progress of the collaboration between you and your trading partners.
Reports are created by a superadmin, admin, or manager. The report is scheduled to
run through the Oracle Retail VCC Scheduler (See Managing the Scheduler). The
reports continue to run at the frequency you choose until the report is deleted or the
Scheduler job is deleted. The time frame for reports rolls forward in time. Sample
report screens formats are shown in Appendix F Sample PDF Report Screens.
There are 10 report types:
■
■
■
■
■
■
See Comment displays all data stream comments.
See Data Change reports Data Stream values for the period selected, and compares
them to last period, last week, and the same period last year. The report also
includes data stream, local location, partner location and product.
See Data Stream report contains no calculations other than summation; it extracts
and formats multiple data streams for multiple contexts and multiple periods.
See Distributed Exception report shows some or all existing exceptions, depending
on the context. You can choose to see all exceptions or only exceptions with a
certain status. You may choose to view exceptions of all severities or only
exceptions of a particular severity.
See Exception Log counts the exceptions under a given context.
See Extract creates CSV and pipe (|) delimited reports for data streams. This
report can be used to load data back into the Oracle Retail VCC system.
Reports 7-1
About Reports
■
■
■
■
See Last Transaction. report is used to identify those products that might be
purged based on lack of activity. It shows when the last transaction occurred for
any given products.
See No Transaction. report identifies products with no transactions for any data
streams.
See Promotion Detail provides the details of each promotion.
See Promotion Detail displays key promotion item information from multiple
promotions.
All of the above reports may not be available to you. Access to
each of the reports is determined by the modules your company has
purchased, and which ones you have been assigned.
Note:
About Reports
Reports are divided into three screens: List, Template, and Create.
Viewing Reports
The Reports - List screen allows you to view, sort, and delete the reports you have
created.
Figure 7–1 Reports - List screen
■
■
■
Delete – deletes the report when checked and Apply Changes is clicked. Click the
Delete icon to select/deselect all items on the current page to be deleted. Click the
individual check box to select/deselect that item to be deleted.
Edit (View) – displays an editable view of the report when the colored dot below
the "Edit" icon is clicked.
Override Execute Time – overrides the execution time for the report when
checked and Process Selected Items is clicked. Click the Override icon to
select/deselect all items on the current page to be overridden. Click the individual
check box to select/deselect that item to be overridden.
7-2 Oracle® Value Chain Collaboration User Guide
Common Report Settings
Reports are executed based on the frequency specified for each report. By selecting
Override Execute Time, the report is executed the next time the Scheduler task for
processing report runs, regardless of the frequency of the report.
■
Name – the name of the report.
■
Created By – the user who created the report.
■
Status – the status of whether the report has been processed: "Need To Deliver",
"Delivered", "Active", or "Processed".
■
Last Updated – the date that the report was last updated.
■
Type – report type.
■
Location, Partner, Product – context at which report was created.
■
Process on Demand – check check boxes to execute the reports selected.
■
Download – clicking on one of the icons in this column allows for downloading of
the report in that specific file format. Formats include: Excel, RTF, CSV, Pipe
delimited, and PDF. This column will contain file icons only if the Create screen's
"Download" option has been selected from the "Destination" drop-down.
One or more of the columns described above may be hidden
depending on your settings in Preferences - Layout - Lists - Reports.
Note:
Creating Reports - Templates
The Reports - Template screen allows you to view, create, and delete report type
templates. These templates can be "plugged into" a report as they are created to save
time. Each template and its selections can be saved to different versions of the same
base report. This enables each trading relationship to have unique versions of each
report based on their business requirements.
In the Reports - Template screen you can select an existing template from the
drop-down list and view its attributes.
To view a template
1.
Click Reports - Template.
2.
Select an existing template from the Name drop-down list.
3.
You can create templates by clicking New. Creating report templates is the same as
creating actual reports, see Creating Reports. The only difference is that a template
is not bound to a specific context.
On Reports - Template - Create /Edit screens, the only validations performed are to
check the duplicate selection of stream type and subtypes. Context related validations
are not performed while creating the report template.
Common Report Settings
Each report is a combination of common and unique settings that you select and save.
Each report type can have multiple saved settings that can be named and recalled for
editing.
Common settings are described below. Unique settings are described in the procedures
for creating the individual reports. Not all reports contain all of the common settings
described below, though these settings do appear across multiple reports.
Reports 7-3
Common Report Settings
Common settings include:
General Settings
■
Report Type – the report type drop-down allows you to choose which type of
report to generate.
■
Date Format – The Date Format lets you choose how dates are displayed in the
report from a drop-down list. For example,
–
dd-mon
–
dd-mon-yy
–
dd/mm
–
dd/mm/yy
–
mm/dd
–
mm/dd/yy
–
mon-dd
–
yyyy-mm-dd
–
yyyy.mm.dd
–
yyyy/mm/dd
■
Display Period Numbers – check box allows you to display period numbers.
■
File Name – filename for the report.
■
Number Format – determines how numerical data are displayed in the report from
a drop-down list.
If you select the number format, 123.456,789, do not use
Microsoft Excel to view reports. Microsoft Excel's proprietary
formatting may conflict with this number format and the data will not
display as expected.
Note:
■
■
■
Report Name – report title that will display in the report header.
Decimal Places – maximum decimal places to be allowed in the report. Default is
"2".
Format – Select at least one of the following formats:
–
- Excel
–
- RTF
–
- PDF
–
- PIPE delimited (|), facilitates commas in description fields
–
- CSV (comma separated values)
7-4 Oracle® Value Chain Collaboration User Guide
Common Report Settings
If the Scheduler and Server are running on different machines,
and you want to use the E-mail, FTP, Extract, and Download features,
you will need to make sure of the following: a. The directory and
directory path (found in VCC Configurations as "Report Directory
Path") exist on the Server as well as on the Scheduler machine. b. Once
processing is completed, all report files are physically moved to the
same directory (from Scheduler machine to Server machine).
Note:
■
■
Language – language report will be generated in.
Destination – a drop-down list allows you to select and save the report's
destination type. Options are:
–
E-mail – Provide a valid e-mail addresses to which the report is sent as an
e-mail attachment. A single e-mail address or multiple addresses can be
entered.
–
FTP – Provide the full path to an FTP server directory (or IP address) and the
appropriate ID and password.
–
Extract – Any user can select this option but users under "super_admin" role
would be able to provide / override Directory Path. By default the Directory
Path display the Path provided in "Report Directory Path" on Client tab in
VCC Configuration. Super admin can override this path either by providing
an Absolute path or Relative path (relative path should be relative to the
"Syncra_Home/server/reportemp" directory) and only those reports that have
the overridden path would be extracted to the overridden directory path, all
other reports will be extracted to the directory path provided in the VCC
Configuration.
–
Download – If the Destination is set to "Download", the user will be able to
download reports from the "Download" column on the Reports - List screen.
Multiple file formats can be generated for the same report.
To change the report's location from the default directory, use the standard OS
syntax:
(current location), ..\<DIRECTORY_NAME>), (move one directory level up)
etc.Reports reside on the machine where Scheduler is running.
Note:
Reports will not be extracted if the directory path is incorrect.
Figure 7–2 Reports - Create "General" section
Reports 7-5
Common Report Settings
Context Detail Settings
Labels – Each report contains context elements. These are by default the Company,
Local, Partner and Product names. However, what is displayed in the report can be
changed in the Context Details section by selecting a combination of names, IDs and
URLs from the respective select boxes.
Each of the select boxes allow for multiple selections (Ctrl + click), but will default to
"Name". Multiple selections will appear in the appropriate column of the report
(Company, Local, Partner or Product columns) separated by a circumflex accent mark
(^).
Figure 7–3 Reports - Create "Context Detail" section
Repeat Frequency
■
Dates – dates during which the report will be generated. Start Date defaults to the
current date, and End Date is optional. A specific time of day can be set, or the
report can be run at "Any Time".
■
■
Recurrence – determines the frequency at which the report is generated. The
recurrence drop-down includes: Once, Always, Daily, Weekly, and Monthly. If you
opt to "Always" run the report, you will not be able to specify a Start Time, since
the report will run every time the corresponding scheduler job is run. A
perpetually running report can be stopped by supplying an End Date at which it
will expire, or by deleting the report from the List.
Time – the time of day that you wish the report to run. This option does not
appear when recurrence is set to "Always". The default setting, "Start Any Time",
allows the extraction to occur as soon as the scheduler is run that day. Selecting the
"Start At" radio button allows you to specify an exact time of day to run the report.
Note that reports will only be processed when the Scheduler runs.
Figure 7–4 Reports - Create "Repeat Frequency" section
Layout
■
Page Size – paper size that the report will be printed on (letter, legal, ledger,
banner, large, A4, A3).
■
Orientation – printout orientation for the report (portrait, landscape).
■
Hide / Show Columns – to display or not to display columns in the report.
■
Sort Columns – the order in which the report displays "Visible" columns.
7-6 Oracle® Value Chain Collaboration User Guide
Common Report Settings
■
Group Columns – columns to group in the report.
Figure 7–5 Reports - Create "Layout" section
For the following reports, "Multi-Column Sort Order" and "Group Columns" options
are not available. For these reports, the column order is the implied sort and grouping
order:
■
Data Change
■
Data Stream
■
Exception Log
■
Promotion Detail
■
Promotion Item
Horizon
Horizon – fixed or rolling start date, end date, or date span for the reporting
period.
■
■
Period Overlay – period overlay to apply to the report, if any.
Figure 7–6 Reports - Create "Horizon" section
Filter
The report type you select may contain no filter or several types of filters. Many report
types have filters that are unique to the data they contain. Filters allow you to return
precise report data. Checking a filter check box opens up additional fields in which
you can specify creation dates, names, and status, etc.
Reports 7-7
Common Report Settings
Figure 7–7 Reports - Create "Filter" section
Filters you will encounter include
■
■
The Creation Date filter lets you specify a fixed or rolling start and end date that
the data was created on.
The Exception Status filter allows for the selection of specific statuses. These
include
–
Active
–
Auto Dismissed
–
Auto Escalated
–
Auto In-Process
–
Auto Incomplete
–
Auto Resolved
–
Auto Unresolvable
–
Dismissed
–
Escalated
–
In-Process
–
Obsoleted
–
Resolved
–
Superceded
–
Unresolvable
You can multi-select Exception Statuses by Shift or Ctrl-clicking in the select box.
■
■
■
■
■
The Exception Severity Filter allows you to generate a report displaying only those
exceptions with the desired severity level (Low, Medium, or High). This is useful if
you wish to create a report listing of all high severity exceptions. For more
information about severity levels, see Exception Severity Levels.
The Name Filter allows you to filter by exception criteria name. You can type part
of the name, the full criteria name, or any combination of characters that appear in
the name. Your report will contain all viable matches for the criteria name, so it is
best to be as specific as possible. (Entering the letter "t" will fetch all names that
contain that letter.) The Name filter is not case sensitive.
The Revision Status filter allows one or more revision statuses to be selected.
Statuses include Accepted, Acknowledged, New, None, Rejected, and Superceded.
Checking the Reason Code filter check box allows you to select for data that
contains reason codes. If there is no reason code, that item will be excluded from
the report.
Checking the Comment filter check box allows you to select for data containing
comments. Data lacking a comment will be excluded from the report.
7-8 Oracle® Value Chain Collaboration User Guide
Common Report Settings
■
■
■
The Source filter can pull data from specific modules, as well as allowing you to
select for the data origination source. Options include choosing whether the data
was loaded or entered manually, in addition to selecting for Demand, Supply,
Exceptions, and/or Metrics module data. Numbers in parenthesis ( ) to the right of
each option are the interger constant codes for the source.
The Promo Status filter, which appears in the Promotions reports, allows you to
filter by promotion status. To specify multiple statuses, use Ctrl or Shift-click.
Statuses include
–
Active
–
Cancelled
–
Change Request
–
Completed
–
Expired
–
Modified
–
Modified Acknowledged
–
New, Planned
–
Proposed
–
Proposed Acknowledged
–
Rejected
–
Terminated
The Data Type filter, which appears in the Promotions reports, allows you to filter
your report by the type of data it will contain. To specify multiple data types, use
Ctrl or Shift-click while selecting. Options include
–
Actual Lift
–
Actual Sales
–
Average Base Price
–
Average Promo Price
–
Base Sales Forecast
–
DC Order Forecast
–
DSD Order Forecast
–
Forward Buy Forecast
–
Monitor Sales
–
On Hand Inventory
–
Percent Sell
–
Planned Lift
–
Promo Sales Forecast
Reports 7-9
Creating Reports
When the Report has a Period Overlay, is at an Aggregate
Context, or includes Data Stream Totals, the filter is in use even if the
filter finds only one underlying individual data stream item.
However, the reported quantity/count will treat the appropriate
Period Overlay, Aggregate Context, or Data Stream Total as if every
underlying data stream item qualified for the filter.
Note:
Streams
Stream selections vary depending on report type. Some reports will contain up to 10
stream selectors, while others have no streams.
Note that a selection of "both" for the Creator option will make the selection of "local"
or "partner" invalid if all other components are the same.
Figure 7–8 Stream Selections Section
Creating Reports
Access to this feature: superadmin and admin.
Many reports share common features and options that are described in Common
Report Settings. Details on the following report types will focus solely on
characteristics that are unique to each report.
Samples of each report type (generated PDF format) can be found in See Sample PDF
Report Screens.
For the Promotion Detail and the Promotion Item Reports: the
Total columns for Base Sales Forecast, Promo Sales Forecast, all three
Order Forecasts, On hand Inventory and Monetray Sales will be
displayed even if you have not selected these columns in the "Data
Type" filter.
Note:
For Promotion Detail and Promotion Item reports: if the Event,
Promotion and Promotion Items fields that are common to report
outputs are hidden in the Module Config screen, the report will still be
generated with these fields. Hidden fields are not supported for
version 6.1.
7-10 Oracle® Value Chain Collaboration User Guide
Creating Reports
Comment
The Comment report aggregates and displays all data stream comments. In addition to
the common report settings, this report contains a Creation Date Filter and Stream
settings.
To create a Comment report
1.
Set your context.
2.
Select Reports - Create.
3.
Configure the General, Context Detail, Repeat Frequency, and Layout sections as
described in Common Report Settings.
4.
If you wish to Filter your report data by Creation Date, check the Creation Date
check box and enter a fixed date, rolling period, or a combination of the two for
Start and End.
5.
Select up to ten Stream Type(s) and Subtype(s). Select whether the stream types are
local or partner from the Creator drop-down lists.
6.
Click Save. The created report appears in the Reports - List screen.
Figure 7–9 Streams Selection Sections
At a folder-level context, Partner comments cannot be
reported.
Note:
Data Change
To create a Data Change report
1.
Set your context.
2.
Select Reports - Create.
3.
Configure the General, Context Detail, Context Detail, Repeat Frequency, Layout,
and Horizon sections as described in Common Report Settings.
4.
Select up to five Stream Type(s) and Subtype(s) from the drop-down lists. Select
whether the stream types are local or partner from the Creator drop-down lists.
Reports 7-11
Creating Reports
Figure 7–10 Streams Selection Sections
5.
Click the Compare check box to specify which comparison to show, if any. On a
weekly database, you can select from None, Week Ago (prior period), or Year Ago
(52 periods ago). On a Daily database, select from None, Yesterday (prior period),
Week Ago (7 periods ago), or Year Ago (365 periods ago).
6.
Click Save. The created report appears in the Reports - List screen.
Figure 7–11 Compare Section
Formula (applied to all five streams):
% Change Prior Period = 100 * ((current period - prior period) / prior period)
% Change Year Ago = 100 * ((current period - year ago) / year ago)
Data Stream
A Data Stream report contains no calculations other than summation; it extracts and
formats multiple data streams for multiple contexts.
If the specified horizon falls outside of the Period Overlay you
select, the report will not be rejected, but will be reported at the period
overlay.
Note:
If records processed in a report have duplicate UOM or Offset and
either of these columns are set to be "Hidden", the Report's generation
process will only consider one of the duplicate rows for the column
that is set to be visible (i.e. Output will display one record for each
Offset or UOM).
To create a Data Stream report
1.
Set your context.
2.
Select Reports - Create.
3.
Configure the General, Context Detail, Repeat Frequency, Layout, Horizon, and
Filter sections as described in Common Report Settings.
7-12 Oracle® Value Chain Collaboration User Guide
Creating Reports
Figure 7–12 Filter and Stream Selections Sections
4.
Select up to ten Stream Type(s) and Subtype(s) from the drop-down lists. Select
whether the stream types are local or partner from the Creator drop-down lists.
Select the UOM for each stream you have chosen. If you want to include a
Generation Offset, enter a number in the text box. This field will automatically
default to "0", indicating no offset. For more information on Generation Offset,
refer to About Generation Offset. If you want to include Year Ago streams, that is,
data streams containing year-ago data for the subtype, select "Yes" in the
drop-down.
When selecting a Filter for a Generation Offset stream, the
Filter will only be applied if the latest revision of the Data Stream Item
qualifies for the Filter.
Note:
Distributed Exception
The Distributed Exception report shows some or all existing system exceptions at and
below a given context. View all exceptions or only exceptions with a certain status.
Also, choose to see exceptions of all severities or only exceptions of a certain severity.
To create a Distributed Exception report
1.
Set your context.
2.
Select Reports - Create.
3.
Configure the General, Context Detail, Repeat Frequency, Layout, and Horizon
sections as described in Common Report Settings.
4.
Select a Filter if you want to structure your report results based on Creation Date,
Exception Status, Exception Severity, and/or Name. For more information on
filters, see Common Report Settings.
Reports 7-13
Creating Reports
Figure 7–13 Filter Section
5.
Click Save and the created report appears in the Reports - List screen.
Exception Log
The Exception Log counts exceptions under a given context and groups at the folder
level that is one folder above the leaf level.
To create an Exception Log report
1.
Set your context.
2.
Select Reports - Create.
3.
Configure the General, Context Detail, Repeat Frequency, Layout, and Horizon
sections as described in Common Report Settings.
4.
Select a Filter if you want to structure your report results based on Creation Date,
Exception Status, or Exception Severity. For more information on Filters, see
Common Report Settings.
5.
Click Save and the created report appears in the Reports - List screen.
Extract
The Extract report replaces the "Data Retrieval - Streams" type of data retrieval. The
format is a flat, delimited file that is compatible with the Oracle Retail VCC Integrator
for loading back into Xt. Delimiters include CSV (comma separated values), and pipe
(|).
To create an Extract file
1.
Set your context.
2.
Select Reports - Create.
3.
Configure the General, Context Detail, Repeat Frequency, Layout, and Horizon
sections as described in Common Report Settings.
7-14 Oracle® Value Chain Collaboration User Guide
Creating Reports
Figure 7–14 Filter and Stream Selections Sections
4.
Select a Filter if you want to structure your report file based on Creation Date,
Revision Status, Reason Codes, Comments, or Source. For more information on
Filters, see Common Report Settings.
5.
Select up to ten Stream Type(s) and Subtype(s) from the drop-down lists. Select
whether the stream types are local or partner from the Creator drop-down lists.
Choose the UOM from the drop-down for each stream type you select.
If any of the products do not have a Custom UOM defined, the Product is selected
at Folder Level (Leaves Only), Custom UOM is selected for a stream, and report
output displays Quantity as NULL, then either
Custom UOM is not defined for that Product
OR
Data stream base units value is NULL for that product.
6.
Click Save and the created report appears in the Reports - List screen.
Last Transaction
The Last Transaction report tries to identify those products that should be purged
based on sales activity. Note that the report output will display data for each leaf level
context if the report is created at folder level.
To create a Last Transaction report
1.
Set your context.
2.
Select Reports - Create.
3.
Configure the General, Context Detail, Repeat Frequency, Layout, and Horizon
sections as described in Common Report Settings.
4.
Click Save and the created report appears in the Reports - List screen.
Reports 7-15
Creating Reports
No Transaction
The No Transaction report identifies products that never had any transactions for any
data streams.
To create a No Transaction report
1.
Set your context.
2.
Select Reports - Create.
3.
Configure the General, Context Detail, Repeat Frequency, Layout, and Horizon
sections as described in Common Report Settings.
4.
Click Save and the created report appears in the Reports - List screen.
Promotion Detail
To create a Promotion Detail report
1.
Set your context.
2.
Select Reports - Create.
3.
Configure the General, Context Detail, Repeat Frequency, Horizon, and Filter
sections as described in Common Report Settings.
Figure 7–15 Filter and Streams Selections Section
4.
Select whether the Promotion View should be "Local" or "Partner" from the
drop-down.
5.
In the UOM drop-down, select which unit of measure the report should use to
display data.
6.
Click Save and the created report appears in the Reports - List screen.
Promotion Details Formula:
Planned Lift = Promo POS FC / Base POS FC
Actual Lift = (Actual POS - Base POS FC) / Base POS FC
% Sell = Actual Total POS / (Base POS FC + Promo POS FC) * 100
7-16 Oracle® Value Chain Collaboration User Guide
Generating Reports
Promotion Item
To create a Promotion Item report
1.
Set your context.
2.
Select Reports - Create.
3.
Configure the General, Context Detail, Repeat Frequency, Layout, Horizon, and
Filter sections as described in Common Report Settings.
4.
Select whether the Promotion View should be "Local" or "Partner" from the
drop-down.
5.
In the UOM drop-down, select which unit of measure the report should use to
display data.
6.
Click Save and the created report appears in the Reports - List screen.
Promotion Item Report Formula:
Planned Lift = Promo POS FC / Base POS FC
Actual Lift = (Actual POS - Base POS FC) / Base POS FC
% Sell = Actual Total POS / (Base POS FC + Promo POS FC) * 100
Generating Reports
After creating a report, you must process the reports in order to send them. "Send
Reports" needs to be run using the Scheduler.
Check the "Process on Demand" check box on the Reports - List screen, and click the
"Process Selected Items" button. Next, schedule the "Run Report" task to generate the
reports in the Scheduler. Click "Send Reports" to send the reports to the addresses
entered for the report, and "Run and Send Report" to generate and send the report
through the Scheduler.
To schedule the "Report Usage" task
1.
Select Scheduler - Events.
2.
When the Scheduler - Events screen appears, click the Add Event button.
Figure 7–16 Scheduler - Events Screen
3.
In the Scheduler - Add Event screen enter a name for the event.
Reports 7-17
Deleting a Report
Figure 7–17 Add Event Screen
4.
Select "Run Reports", "Send Reports", "Run and Send Reports" from the Task
drop-down list.
■
■
■
"Run Reports" processes the reports and displays the HTML through the UI
only.
"Send Reports" distributes/sends the reports to the destination selected (e.g.,
e-mail, FTP, and/or extraction).
"Run and Send Reports" processes and sends reports simultaneously and
displays the HTML through the UI.
5.
Enter the date and time for the task to begin running in the Execute Time text box.
Use the format: mm/dd/yy hh/mm/ss.
6.
To repeat the report generation task, check the Repeats check box. Enter the
frequency that the task is to be repeated in the Repeats Every text box and select a
time period from the drop-down list. For example, Repeats Every 2 Weeks.
7.
Click Create.
8.
The new event appears in the Scheduler - Events screen.
Deleting a Report
To delete a report from the List screen
1.
Select the "Delete" check box next to the report to be deleted.
Note: Click the Delete icon to select/deselect all items on the current
page to be deleted.
2.
Click Apply Changes.
Deleting a Template
To delete a template from the Template screen
1.
Select a template from the drop-down list.
2.
Click Delete.
7-18 Oracle® Value Chain Collaboration User Guide
8
Metrics
This chapter includes the following topics:
■
Introduction.
■
Viewing and Editing Metrics
■
Creating Metrics
■
Processing Metrics
■
Metric Types.
■
Access Control
■
Deleting Metrics
Introduction
The Metrics module provides a way to configure and calculate business metrics by
performing mathematical operations on existing data streams. The computed results
are then stored as a separate data stream.
Viewing and Editing Metrics
The Metrics module has three main screens: List, View/Edit Details, Copy, and Create.
The List view is used to view and manage the most important details of each metric.
View/Edit is used to edit the specific details of existing metrics. Copy is used to
duplicate an existing metric. Create is used to build new metrics.
The list view displays all Metrics that are defined relative to the currently selected
context. You can select between "at-and-below" and "at-and-above" the current context
in the Context Chooser's Display Mode tab.
The Display Mode tab also contains a Search option, which allows you to search by
any of the following criteria:
■
Local
■
Partner
■
Product
■
Metric Name
■
Metric Type
The list view contains the following data and available actions:
■
Delete – Deletes any selected Metrics.
Metrics 8-1
Viewing and Editing Metrics
■
Override Execute Time – Resets the execution time of any selected Metrics.
■
Process on Demand – Processes any selected Metrics.
■
View/Edit – Displays a detailed view of the selected Metric.
■
Local – The local location for the Metric.
■
Partner – The partner location for the Metric.
■
Product – A description of the product.
■
Metric Type – The type of Metric selected, such as Ratio, Forecast Error, etc.
■
Metric Name – User-entered name of the Metric.
■
Processing Order – The order (numbers 1-5) assigned for processing. Processing
begins with "Processing Order 1" metrics and is completed for all metrics at this
level before beginning "Processing Order 2." Processing continues in a stepwise
fashion until all metrics have been calculated. This is useful if you want to use the
output of one metric as the input for another.
■
Last Updated By – The name of the last user who updated the Metric.
■
Last Updated – The date and time the metric definition was last updated.
■
Last Run – The date and time the metric was last calculated.
■
Last Run By – The name of the last user to run processing.
■
■
■
Status – Status of metric. Status includes both "Active" and "Processed" metrics.
When a metric is created, it is assigned an "Active" status. After job processing is
completed, status will change to "Processed."
Sum – If your context contains a folder that you choose to aggregate on, all the
leaves under the selected folder will be summed. On the list screen this column
can be blank, or will contain either Local, Partner, Product, or a combination of the
three.
Copy – Copy an existing metric. This will take you to a screen duplicating the
original metric's settings, where you can name the metric, change the context,
make adjustments or save it as is.
One or more of the columns described above may be hidden
depending on your settings in Preferences - Layout - Lists - Metrics.
Note:
8-2 Oracle® Value Chain Collaboration User Guide
Viewing and Editing Metrics
Figure 8–1 Metrics - List - Detail View
The Metrics - List - Detail View is used to view and edit the details of each metric.
Metrics - List may contain collaborations that no longer exist.
Attempting to access a collaboration that has been removed will result
in an "Invalid context" error. To avoid this problem, click the "Set"
button after changing your context.
Note:
The Detail View allows you to configure the following:
■
■
■
■
■
■
Metric Name – User-defined name for each metric. The name does not have to be
unique.
Metric Type – Displays a list of available metric types. Some metric types (Simple
Math operations, Ratio, Growth, Variability, Weighted Average Forecast Error,
Forecast Error, Rolling Error, and Count Missing) require you to choose between a
Percent formula or an Absolute formula. If you select one of these metric types,
radio buttons will appear after the drop-down.
Aggregate On – This option will show "None" unless a folder level Metric is being
viewed. For any dimension that is un-checked, the metric will be calculated each
leaf under the selected folder. For any dimension that is checked, if the "levels
below" that dimension is left blank, the metric will be calculated at the selected
folder. If the "levels below" control is used, the metric will be calculated at every
folder that is the indicated number of levels below the current context in that
dimension.
Treat Null Value as Zero – Check box that allows null values to be treated as zeros.
Processing Order – The order (numbers 1-5) assigned for processing. Processing
begins with "Processing Order 1" metrics and is completed for all metrics at this
level before beginning "Processing Order 2", and processing continues in a
stepwise fashion until all metrics have been calculated. When using "Process on
Demand", the same order also applies. This is useful if you want to use the output
of one metric as the input for another.
Period Overlay – Allows you to select from a list of available company specific
fixed period overlays.
Metrics 8-3
Viewing and Editing Metrics
■
■
■
Periods – Select from fixed or rolling periods and enter the Start and End dates or
number of periods. When selecting rolling periods, entering a "0" indicates the
current period. Use negative numbers for past periods and positive numbers for
future periods.
The Repeat Frequency section configures how often the calculation will be
repeated. The default will be today's Start Date, with a recurrence of "once", which
means that the calculation will not repeat. If you wish the calculation to repeat,
change the Recurrence drop-down to the desired frequency. Other options include:
always, daily, weekly, and monthly.
Streams – Configure the input and output streams and options for each metric.
The options available depend on the Metric Type selected.
To Edit or View Metrics Details
1.
Select a context.
2.
Select Metrics - List. The List screen appears.
3.
Click the appropriate colored dot under the binoculars icon to View/Edit
pre-existing metrics. The View/Edit screen appears.
Figure 8–2 View/Edit Screen
4.
After you have made your changes, click Save to save and return to the Metric List screen, or Cancel to return to the list without saving.
Data derived from Metrics calculations can be displayed in
Data - View/Edit with a highlight color. To select for this option, see
the Preferences - Layout - Table/Graph - Highlight Source screen.
Note:
8-4 Oracle® Value Chain Collaboration User Guide
Creating Metrics
Creating Metrics
To create new metrics
1.
Select a context.
2.
Select Metrics - Create. The Create screen appears.
Figure 8–3 Create Screen
3.
Enter the Metric Name. This does not have to be a unique name.
4.
Select the Metric Type you would like to use, and if available, whether you wish it
to be a percentage or an absolute formula.
5.
If you have selected a context that contains folders, you will be offered the option
to Aggregate on the folder level(s). Otherwise, for leaf-level contexts, "None" will
be displayed.
6.
Select the Processing Order you wish to assign the metric. Highest priority
processing can be set to one. Five levels of processing are provided, with five being
the lowest priority, and three being the default.
7.
If you have chosen a Metric Type that contains period overlays, you can select an
overlay from the View by Overlay drop-down. When you select an overlay, a
check box, "Set Period Range," allows you to specify a fixed or rolling set of
periods for your overlay to Begin and End on. Whole period overlays will be used
if "Set Period Range" is not checked. When a Begin and End Date are specified,
only the intersecting periods will be used. Oracle Retail VCC will default to Base
Periods whether or not you have period overlays.
8.
Determine whether the metric will occur during a fixed or rolling Period. If the
metric should occur during a specific time frame, select the Fixed radio button and
enter the "Start" and, optionally, the "End" date. If you want the metric period to
more forward relative to the "Start" period specified, select the Rolling radio
button, and enter the "Start" and "End" periods. Entering "0" indicates the current
period.
Metrics 8-5
Deleting Metrics
9.
The Repeat Frequency section configures how often the calculation will be
repeated. The default will be today's Start Date, with a recurrence of "once", which
means that the calculation will not repeat. If you wish it to repeat, change the
Recurrence drop-down to the desired frequency. Other options include: always,
daily, weekly, and monthly.
10. Select the Type, Subtype, and (optionally) Creator from the available streams. Your
options in this portion of the screen will vary depending on which metric type and
streams you have selected.
11. Click Save to create the Metric, or Cancel to return to the Metric - List screen
without saving.
Deleting Metrics
To delete a metric
1.
Select a context.
2.
Select Metrics - List. The List screen appears.
Figure 8–4 List Screen
3.
Select the individual check boxes under the Delete icon. Or click the Delete icon to
select all metrics for deletion.
4.
Click Process Selected Items.
Processing Metrics
Metrics can be "processed on demand," much like Exceptions.
To process Metrics on demand
1.
Select a context.
2.
Select Metrics - List. The List screen appears.
3.
Click the check boxes under the "Process on Demand" column to select the Metrics
you wish to process.
8-6 Oracle® Value Chain Collaboration User Guide
Processing Metrics
Figure 8–5 List Screen
4.
Click Process Selected Items.
5.
You may then view the Monitor screen if you wish to check the progress of your
job. In the "Job Name" column, you will see an entry called "Process Metrics On
Demand", which indicates that your job has begun processing.
Figure 8–6 Jobs Screen
6.
You can click on the Job ID link in the Monitor - Jobs tab to view a detailed log
containing the Name, Start and End Time, number of Data Stream Items,
Processed and Rejected counts, and Status. If the metric has an output stream that
needs to be disaggregated, you may view disaggregation-related messages in case
of failure.
Metrics 8-7
Metric Types
Batch Processing
Although Metrics can be scheduled for processing at any desired frequency, each
Metric will only process if the specified period has elapsed since the last processing.
If a scheduler job is set to process the metrics, but a metric's repeat frequency specifies
processing on a less frequent schedule (once monthly, or weekly, for instance), the
scheduled event will pass over this job until the time elapsed coincides with the repeat
frequency.
Checking the "Override Execute Time" check box under the clock icon on the Metrics List screen will cause the selected Metrics to be processed during the next scheduled
cycle, regardless of when they were last processed.
Metrics Error Messages
The following table describes the messages you may encounter upon processing
Metrics.
Table 8–1
Metrics Error Messages
Error Message
Description
Completed Successfully.
Processing completed successfully. Please check output and the
number of items processed.
Output stream not editable
by Local Company.
The Output stream type code defined for the metric should be
editable by the metric creator company.
Output stream should be a
measure stream.
The Output stream type code defined for the metric should be a
Measure Stream.
Disaggregation failed for
some contexts.Please check
the reject details for more
information.
Disaggregation failed while trying to disaggregate the output.
The reject log will have the disaggregation error message for
each of the failed contexts.
Dates do not fall within
Period Overlay.
The Begin - End Dates used in the metric are outside of the
period overlay. No period overlay items were found within the
range specified.
Periods out of range. Please
check to see if Current,
Begin and End dates are
defined in the system.
Current Date may not correspond to any period in the system, or
no periods are defined in the system for the Range specified.
Metric Types
The Metrics module allows for the calculation of fourteen fixed business metrics. Some
of the metrics are available at leaf-level and folder-level contexts, and some only at
folder-level, as shown below. In addition, some metrics can be calculated according to
period overlays.
Metric Output
The output of a metric calculation is written to the chosen output stream, which is
editable by the company creating the metric. The output will be either at leaf level or at
the aggregate level based on the "sum on" option chosen at the time of metric creation
as well as the Period option.
If any of the four dimensions (Creator Location, Partner Location, Product, Period) are
at a folder level, the output will be written at an aggregate level (for Measure Stream
output only).
8-8 Oracle® Value Chain Collaboration User Guide
Metric Types
If a fixed period overlay which has folder period items is used, then the output will be
written at folder periods. This applies to all but Balance streams.
Period Overlays with Period Offsets
When Period Overlays have "Period Offsets," the offset refers to the overlay periods,
not the base periods. For instance, if you set up a monthly overlay, and specify an
offset of "1", then the comparison is "this month to last month".
Metrics that Calculate on the Basis of Period Overlays
Average
Averages a single data stream for all leaf values
under a selected context.
1
Count Missing
Counts leaves with missing values
1
Exception Count
Count of exceptions at or below a context
0
Forecast
Error/Accuracy
Forecast error or accuracy between forecast and
actual streams.
2
Growth
Difference of B to A, either absolute or percent
1
Inventory
Turns/Average
Periods Of Supply
Ratio of Annualized Consumption to Inventory.
2
Period to Date
For each base period, the result is the sum of that 1
base period, plus all prior base periods in the
overlay period. The sum resets with each overlay
period.
Periods of Supply
Number of periods of consumption that the given 2
inventory call Supply.
Perpetual Inventory
The current balance of inventory is maintained
daily by adding to the inventory account when
goods are received and deducting when they are
used.
3
Rolling Error
MAD of the error over a rolling horizon
2
Simple Math
– Sum ( + )
Simple math operation types consisting of: sum,
ratio, product, and difference.
1
Simple Math – Ratio (
/)
Simple math operation types consisting of: sum,
ratio, product, and difference.
2
Simple Math –
Product ( * )
Simple math operation types consisting of: sum,
ratio, product, and difference.
2
Simple Math –
Difference ( - )
Simple math operation types consisting of: sum,
ratio, product, and difference.
2
Percent
Description
Folder
Metric
Available
Leaf
No. of Input Streams
Table 8–2
(Consumption is the average across a
user-defined range.)
Metrics 8-9
Metric Types
Time Average
Average of a single data stream over a rolling
horizon.
1
Variability
MAD or PMAD of a stream over a rolling
horizon.
1
Weighted Average
Forecast Error
Weighted average forecast error or accuracy
aggregated for all items under a folder.
2
Percent
Description
Folder
Metric
Available
Leaf
No. of Input Streams
Table 8–2 (Cont.) Metrics that Calculate on the Basis of Period Overlays
Average
This Metric calculates the average of a single data stream for all leaf values under the
selected context, on a period-by-period basis.
If the output stream selected is not a measure stream, a Disaggregation Profile must
first be in place for the appropriate context, stream type and period range of the
metric.
Table 8–3
Average Metric
Item
Details
Formula
Average of streams for all contexts under folder.
Input
Any
Output
Any streams. If not Measure, an aggregate context will need a
disaggregate profile in order to disaggregate.
Leaf
No
Sum
Yes
Overlay
No
Treat Null As Zero Option
Null values will be treated as "0".
Count Missing
This counts all leaves contained in the specified folder that have no value.
Table 8–4
Count Missing
Item
Details
Formula
Result = count (all leaves)- count(all leaves with a value)
% Formula
Result = 100* [count (all leaves)- count(all leaves with a
value)]/count(all leaves)
Input Streams
Any one stream
Output Stream
Any stream
Additional Items
N/a
8-10 Oracle® Value Chain Collaboration User Guide
Metric Types
Table 8–4 (Cont.) Count Missing
Available at leaf
Yes
Available at sum
Yes
Available at overlay
No
Null / Zero handling
N/a
Exception Count
This provides a count of exceptions that match selected statuses at and below the
selected context.
Table 8–5
Exception Count
Item
Details
Formula
Result = count (exceptions that match a status)
% Formula
n/a
Input Streams
n/a
Output Stream
Any stream
Additional Items
Status selection check boxes: select one or more status from all
available exception statuses.
Available at leaf
Yes
Available at sum
No.
Available at overlay
No
Null / Zero handling
N/a
Forecast Error/Accuracy
This Metric calculates forecast error for single periods, either on an absolute or a
percentage basis, with forecast accuracy in percentage points.
Table 8–6
Forecast Error
Item
Details
Error Formula
Result = Forecast - Actual
If "Absolute Value" is checked, the output will be in positive units.
% Error Formula
Result = 100 * (Forecast - Actual) / Divisor stream (User has the
option of picking either Actual Stream or Forecast Stream as the
Divisor Stream.)
If "Absolute Value" is checked, the output will be in positive units.
% Accuracy Formula
Result = 100 - ABS(% Error)
Input Streams
Any two streams
Output Stream
Any measure stream
Additional Item
Generational offset = # of generations back to take the forecast
value. Text entry, restricted to integers >= 0, default = 0 (i.e.,
current stream).
Absolute Value
Can be used to create output datastream items with an absolute
value of the forecast error formula. Not available with Accuracy.
Metrics 8-11
Metric Types
Table 8–6 (Cont.) Forecast Error
Item
Details
Available at leaf
Yes
Available at sum
Yes
Available at overlay
No.
Treat Null as Zero Option Null values will be treated as "0".
Growth
This metric calculates the growth from one value to another, either based on a period
offset, or a generational offset.
Table 8–7
Growth Metric
Item
Details
Formula
Result = (A2 - A1)
A2 is the value of the current generation of stream A.
A1 is the value of stream A, either the current generation offset by
the specified number of periods back, or the value of stream A at
the current period, offset by the specified number of generation
back. The result goes into the period of A2.
% Formula
Result = 100 * (A2 - A1) / A1
Input Streams
Any one stream.
Output Stream
Any measure stream.
Offset Type
Select field - either Period or Generation
Offset Qty
Text entry box, integer >0, default=1
Available at leaf
Yes
Available at sum
Yes. The inputs are the aggregate values.
Available at overlay
Yes.
Treat Null as Zero Option
If value is null, it will be treated as "0".
Inventory Turns
The term "Inventory Turns" refers to the number of times per year than inventory is
"turned over". For example, if your average inventory was worth $100, and your
annual sales were $600, then you had $600/$100 = 6 "turns". Likewise, if you had
average inventory in a particular month of $100, and your sales for that month were
$50, your annualized rate of sales for that month was $50*12 = $600, so again your
turns are 6. The key concept is that consumption is always adjusted to an annualized
basis. So for daily data, the consumption for a period is multiplied by 365, for weekly
data, the consumption is multiplied by 52, and so on.
Table 8–8
Inventory Turns
Item
Details
Formula
Result = Average Consumption (annualized) / Inventory (same bucket)
% Formula
n/a
8-12 Oracle® Value Chain Collaboration User Guide
Metric Types
Table 8–8 (Cont.) Inventory Turns
Item
Details
Input Streams
Consumption = any movement stream Inventory = any balance stream
Output Stream
Any measure stream
Available at leaf
Yes.
Available at sum
Yes. The input values are the aggregates.
Report in Overlay
The inventory input is the average of each overlay period. Nulls should
be ignored in the average (i.e., if inventory is only reported for one
period in the overlay, Xt will use that value, and will not divide by the
number of base periods in the overlay period).
Available at overlay Yes. The input for consumption is the overlay value. The input for
inventory is the average of each overlay period.
Treat Null as Zero
Option
If value is null, it will be treated as "0".
Average Periods Of Supply
The "Average Periods Supply" metric is a measure of how long the current inventory
would last at the periodic consumption rate.
Example: If 4 were the # of periods specified, your past period consumption was 100,
160, 180, 120, and your current inventory is 168; your periods of supply would be 1.27
periods for the current period. This is similar to the "Periods Back" safety stock
calculation in the Supply module.
Table 8–9
Average Periods of Supply
Item
Details
Formula
Result = Inventory / Average Consumption
% Formula
n/a
Input Streams
Inventory = any balance stream Consumption = any movement
stream
Output Stream
Any measure stream
Additional Item
Text entry - # of periods to average. Use a negative integer for
periods back and positive integer for periods forward.
Available at leaf
Yes
Available at sum
Yes. The input values are the aggregates.
Available at overlay
Yes. The input for consumption is the overlay value, the input
for inventory is the average of each overlay period.
Null / Zero handling
If inventory = null, treat as zero.If consumption = null or zero,
result = zero.
Metrics 8-13
Metric Types
Period to Date
The Period to Date metric calculates that for each base period, the result is the sum of
that base period plus all prior base periods in the overlay period.
Table 8–10
Period to Date Metric
Item
Details
Formula
For each base period, the result is the sum of that base period
plus all prior base periods in the overlay period.
% Formula
N/A
Input Streams
Any one stream.
Output Stream
Any balance stream
Available at leaf
Yes
Available at sum
Yes. The input values are the aggregates.
Available at overlay
A fixed overlay must be specified, but the results are written to
base periods.
Null / Zero handling
Nulls are always treated as zero.
Periods of Supply
The "Periods of Supply" metric is a measure of how long the current inventory will last
given the current consumption forecast. Example: Your forecast consumption for the
next four periods is: 100, 160, 180, 120, and your current inventory is 332. The first two
periods consume a total of 260, leaving 70 units available for the third period. This
covers 70/180 = 0.4 of the third period. So your "periods of supply" is 2.4. This is
similar to the "Periods Forward" safety stock calculation in the Supply module.
Table 8–11
Periods of Supply
Item
Details
Formula
% Formula
n/a
Input Streams
Inventory = any balance stream Consumption = any movement stream
Output Stream
Any measure stream
Available at leaf
Yes
Available at sum
Yes. The input values are the aggregates.
Available at overlay
Yes
Report in Overlay
The inventory input is the average of each overlay period. Nulls
should be ignored in the average (i.e., if inventory is only reported for
one period in the overlay, Xt will use that value, and will not divide by
the number of base periods in the overlay period).
8-14 Oracle® Value Chain Collaboration User Guide
Metric Types
Table 8–11 (Cont.) Periods of Supply
Item
Details
Null / Zero Handling If Inventory = null, result = zero.If Cx = null, treat Cx as a zero.
Perpetual Inventory
The current balance of inventory is maintained daily by adding to the inventory
account when goods are received and deducting when they are used. The Perpetual
Inventory metric allows for a company to have more timely and accurate data on
inventories, as opposed to only reporting inventory when it is actually counted.
Table 8–12
Perpetual Inventory Metric
Item
Details
Formula
If the prior period has a value in actual inventory, then calculated inventory
this period = actual inventory last period - consumption this period +
receipts this period.
If actual inventory is null for the prior period, then calculated inventory for
this period = calculated inventory for the prior period - consumption for this
period + receipts for this period. If calculated inventory for the prior period
is null, treat as zero.
% Formula
N/A
Input Streams
Actual Inventory – Any one balance stream – Nulls treated as nulls.
Consumption – Any one movement stream – Nulls treated as zeros.
Receipts – Any one movement stream – Nulls treated as zeros.
Output Stream
Any one balance stream.
Available at leaf
Yes
Available at
Overlay
N/A
Available at sum Yes. Input values are the sum of the leaves.
Null / Zero
handling
If inventory = null, treat as zero.If consumption = null or zero, result = zero.
It is possible that the calculated inventory may not match the
actual inventory.
Note:
Metrics 8-15
Metric Types
Rolling Error
This metric calculates forecast error over a user-defined rolling horizon, using the
MAD (Mean Absolute Deviation) or PMAD (Percent MAD) method.
Table 8–13
Rolling Error
Item
Details
Error Formula
% Error Formula
% Accuracy Formula
Result = 100 - % Error
Input Streams
Any two streams
Output Stream
Any measure stream
Generational Offset
# of generations back to take the forecast value. Text entry,
restricted to integers >= 0, default = 0 (i.e., current stream).
Rolling Horizon
N in above formula.
Available at leaf
Yes
Available at sum
Yes
Available at overlay
Yes. If an overlay, then the horizon (number of periods to
average) is automatically set to the number of periods in each
period overlay item.
Treat Null as Zero Option
If value is null, it will be treated as "0".
Simple Math
The Simple Math metric is a collection of the four simple mathematical operators:
■
Sum (+)
■
Ratio (/)
■
Product (*)
■
Difference (-)
Difference
The Difference Metric finds the difference between two streams.
Table 8–14
Difference Metric
Item
Details
Formula
Result = A - B
8-16 Oracle® Value Chain Collaboration User Guide
Metric Types
Table 8–14 (Cont.) Difference Metric
Item
Details
Percent Formula
N/A
Input Streams
Any two stream(s). Streams should use same accumulation rule.
Output Stream
Any stream. Must use same accumulation rule as Input Stream.
Offset Type
N/A
Offset Quantity
N/A
Available at leaf
Yes
Available at sum
Yes. The inputs are the aggregate values.
Available at overlay
Yes. The inputs are the overlay values.
Treat Null as Zero Option
If value is null, it will be treated as "0".
If "Treat Null as Zero" is checked, and if either one or both inputs
are null, treat null as zero.
If unchecked, and if either input is null, then ignore those
periods.
Ratio
The Ratio type of Metric calculates the ratio between two values, either as a fraction or
a percentage.
Table 8–15
Ratio Metric
Item
Details
Formula
Result = A / B
Percent Formula
Result = 100 * (A / B)
Input Streams
Any one or two stream(s). A = B is permitted, but only if Period
Offset or Generation Offset <>0.
Output Stream
Any stream.
Offset Type
Select radio button - period or generational
Offset Quantity
Text entry box - integer >= 0, default = 0
Available at leaf
Yes
Available at sum
Yes. The inputs are the aggregate values.
Available at overlay
Yes. The inputs are the overlay values.
Treat Null as Zero Option
If checked, null values will be treated as zero.
Product
The product metric multiplies data streams together.
Table 8–16
Product Metric
Item
Details
Formula
Result = A * B
Percent Formula
N/A
Input Streams
Any two streams.
Output Stream
Any one stream.
Metrics 8-17
Metric Types
Table 8–16 (Cont.) Product Metric
Item
Details
Offset Type
N/A
Offset Quantity
N/A
Available at leaf
Yes
Available at sum
Yes. The inputs are the aggregate values.
Available at overlay
Yes. The inputs are the overlay values.
Treat Null as Zero Option
If checked, null values will be treated as zero.
Sum
The sum metric adds multiple data streams together, on a period-by-period basis. You
can select up to 10 stream combinations to create the sum. All input streams will have
the same accumulation rule, and the output stream will also have this same
accumulation rule. Available only at leaf/base periods.
Table 8–17
Sum Metric
Item
Details
Formula
Sum of 1-10 streams at base periods.
Input
All streams should have the same accumulation rule.
Output
Same accumulation rule as the input streams.
Leaf
Yes
Sum
No
Overlay
No
Null / Zero Handling
Nulls will be treated as zeros.
Time Average
The "Time Average" metric is the value of a single data stream averaged over a rolling
horizon, with optional data filtering. The filters remove the "H" highest and "L" lowest
values in the specified horizon before calculating the average of the remaining values.
Table 8–18
Time Average Metric
Item
Details
Formula
% Formula
N/A
Input Streams
Any one stream.
Output Stream
Any stream.
N
# of periods to average (relative to period x) Could be either
leading or trailing.
8-18 Oracle® Value Chain Collaboration User Guide
Metric Types
Table 8–18 (Cont.) Time Average Metric
Item
Details
High Filter = H
H is an integer such that H+L < n
Low Filter = L
L is an integer such that H+L < n
Available at leaf
Yes
Available at sum
Yes. The input values are the aggregates.
Available at overlay
Yes. "n" is automatically set to the number of base periods in
each overlay item. (If period overlay is chosen, high and low
filter options are not available.)
Treat Null as Zero Option
If checked, null values will be treated as zeros.
Examples:
Table 8–19
Time Average Example
n=3:
R(1)=(A1+A2+A3)/3, R(2)=(A2+A3+A4)/3, ...
n=-4:
R(6)=(A6+A5+A4+A3)/4, R(7)=(A7+A6+A5+A4)/4, ...
n=5, H=1, L=1:
For each 5-period window, throw out the highest value and the
lowest value, and average the remaining three values.
n=7, H=2, L=0:
For each 5-period window, throw out the two highest values,
and average the remaining five values.
Variability
This METRIC measures the period-to-period variability in a data stream, using the
Mean Absolute Deviation method (or the Percent Mean Absolute Deviation method).
It applies on a rolling basis across some user-defined horizon. For example, if the data
stream is: 10, 17, 12, 11, 15, 13, and the horizon is specified as 6, the average is 13, and
the MAD is (3+4+1+2+2+0)/6=2. In percentage terms, this is 100* 2/13 = 15.39%
Table 8–20
Variability Metric
Item
Details
Formula
% Formula
Input Streams
Any one stream.
Result Stream
Any measure stream.
Additional Items
Number of Periods To Average: text entry box for number of
periods - must be an integer; can go either forward or backward.
Available at leaf
Yes
Metrics 8-19
Metric Types
Table 8–20 (Cont.) Variability Metric
Item
Details
Available at sum
Yes
Available at overlay
Yes. If at an overlay, the horizon is automatically set to match the
number of base periods in each overlay item.
Treat Null as Zero Option
If checked, null values will be treated as zeros.
Weighted Average Forecast Error
This Metric calculates forecast error for single periods, either on an absolute or
percentage basis. Available only at folder-level, it creates aggregated error or accuracy
for all collaboration items under that folder.
Example: Category X contains two products, A and B. Product A had a forecast of 12
and actual sales of 10. Product B had a forecast of 19 and actual sales of 20. Average
forecast error at Category X, using "actual" as the weighting factor, is:
Product A: abs(12-10)/10=20% * 10 = 200%
Product B: abs(19-20)/20=5% * 20 = 100%
Category X: (200% + 100%) / (10+20) = 300% / 30 = 10%
Table 8–21
Weighted Average Forecast Error
Item
Details
Error Formula
where:
R = result
Fx = Forecast for product x
Ax = Actual for product x
Wx = Weighting Factor for product x
% Error Formula
where:
R = result
Fx = Forecast for product x
Ax = Actual for product x
Dx = Either Forecast or Actual can be selected for the denominator
Wx = Weighting Factor for product x
% Accuracy Formula
Result = 100 - % Error
Input Streams
Any two streams
Result Stream
Any measure stream
8-20 Oracle® Value Chain Collaboration User Guide
Access Control
Table 8–21 (Cont.) Weighted Average Forecast Error
Item
Details
Additional Item
Generational offset = # of generations back to take the forecast
value. Text entry, restricted to integers >= 0, default = 0 (i.e.,
current stream).
Weighting Basis
Pick either Actual or Forecast
Available at leaf
Yes, when Period Overlay is used.
Available at sum
Yes
Available at overlay
Yes. When using period overlay, computation will be for each
base period within the period overlay item and not a SUM on
periods.
Treat Null as Zero Option
If checked, null values will be treated as zeros.
Access Control
Access control to the METRIC functions is as follows:
Metrics
Reviewer
Plan-ner
Super-visor
Manager
Admin
Super-Admin
super-user
Tabs
Buttons / Other
Access control to the METRIC functions
Sub Menu
Main Menu
Table 8–22
List
Create
==>
Delete
==>
Process on Demand
==>
Override Execute Time
==>
Details
==>
Copy
Edit Edit Edit Edit View View
METRIC definitions are visible and editable to all users of a local company with the
appropriate role and hierarchy permissions. Metric streams are access controlled the
same as any other data stream would be.
Metrics 8-21
Access Control
8-22 Oracle® Value Chain Collaboration User Guide
9
Preferences
This chapter contains the following sections:
■
Introduction
■
General Preferences
■
Layout
■
Changing Your Password
Introduction
Any option that you can choose to view, you can set as a personal preference so that it
appears by default when you use Oracle Retail VCC. This allows you to personalize
Oracle Retail VCC according to your requirements. You can choose the layout you
desire and localize the display for your language, number and date format, and time
zone. You can even set your home page to display a particular screen within the
product. Some of the layout preferences you can configure include
■
the general appearance and source indicator for data streams
■
display of the period columns in Data screen views
■
the look and feel of the Exception - Inbox
■
the look and feel of the Exception - Criteria - List view
■
the look and feel of the Promotions - List view
■
the look and feel of the Extract - List view
■
the look and feel of the Metrics - List view
General Preferences
The General preferences feature allows you to select the Language, Number Format,
Date Format, Time Format, Detected Time Zone, Time Zone, Product Label for Tree
Display, Default Context, Default Screen and Themes.
To set the general preferences
1.
Select Preferences - General. The General screen appears.
Preferences
9-1
General Preferences
Figure 9–1 General Screen
2.
Select your Language from the drop-down list.
3.
Select your Number Format from the drop-down list.
4.
Select your Date Format from the drop-down list.
5.
Select your Time Format from the drop-down list.
6.
Oracle Retail VCC detects your time zone and displays it as the "Detected Time
Zone" (e.g., EST, for Eastern Standard Time). If you wish to use this detected time,
select "Detected Time Zone" from the drop-down list. Select your time zone from
the drop-down list.
7.
Select how you want the Product Labels to display. Click the radio buttons to
display product name, GIN (global
p item number), or LIN (local item number).
8.
Select the Default Context you would like to see directly after login. Last Viewed
indicates the last context you accessed. All other contexts must be bookmarked
through the Context Chooser before they will appear in the default context
drop-down list. If you have no contexts bookmarked, the only option will be Last
Viewed.
9.
Select the Default Screen you wish to see after login. Options will include any
viable module screen or subscreen that can be accessed through the menu. Since
this is subject to your company configuration and user role, options will vary in
the drop-down. The default is Home.
10. Select your color Theme from the drop-down list. You have the choice of "Evening
Sky" (default), "Tea Leaves," or "Rocket Fuel." Have fun!
11. Click Set.
9-2 Oracle® Value Chain Collaboration User Guide
Layout
Layout
Access to these features: superadmin, admin, manager, supervisor, planner, and
reviewer.
The Preferences - Layout screen controls the content and display of the following
Oracle Retail VCC components:
■
Data - Table/Graph
■
Inbox Filters
■
List Screens
Table/Graph Preferences
The Table/Graph preferences allow you to modify the following subscreens:
■
Setting Table/Graph Defaults Preferences.
■
Creating and Editing Period Overlays.
■
Setting Highlight Source Preferences.
■
Creating and Editing Groups.
Setting Table/Graph Defaults Preferences
The Table/Graph Defaults screen allows you to set the following items that define
how data streams will appear:
■
Display Mode. Choose your default display mode from those created in the Data View/Edit, or use the "Default" display mode, which consist of the following (for
details, see Display Mode):
–
Screen View: Table
–
Period View: Base Period
–
Comparison: Local Curr - Partner Curr
–
UOM: Base Units
–
Group: All
■
Stream Period Display (Begin Date or End Date)
■
Start Period (Current Period, n periods in the past, n periods in the future)
■
Number of Period Display columns (number of periods that appear per upload)
Note: If you select the "n" periods at a time with "n" periods in the
past option in the Preferences - Data - Defaults screen and there is no
current period, the periods displayed will default to the first period in
the data stream. Otherwise, they will be the periods you select.
■
■
Graph Y Axis (Scale to fit, Min, and Max according to the values you enter). This
lets you choose the best way to view data streams in graph mode.
Collapse empty columns (in the past or in the future). Oracle Retail VCC allows
you to collapse empty time buckets in table mode to more easily view data
without having to scroll to the left or to the right. If there are six or more
consecutive empty time buckets across all the data streams being retrieved at a
Preferences
9-3
Layout
context, those columns can be collapsed so that they will not be displayed. This
feature can be used for the following cases:
–
You and your partner collaborate using uniform weekly data on a Oracle
Retail VCC database set up with daily time buckets. If there are six or more
consecutive empty time buckets across all the data streams being retrieved at a
context, those columns are collapsed. Collapsed periods may be in the past or
in the future.
–
You and your partner collaborate using daily history information, but have
data streams with differing time buckets (daily, weekly, monthly, or quarterly).
If there are six or more consecutive empty time buckets in the future across all
the data streams being retrieved at a context, those columns are collapsed.
Unlike when you and your partner use uniform data, periods in the past are not
collapsed. This prevents "locking out" daily product activity data edits for past
periods by inadvertently collapsing them.
■
Number of Digits is used to specify the default width of each column in the table
view. This does not apply to the data contained in the column, only to the width of
the column containing the data. Maximum column width is 22 digits wide.
To set your preferences in Defaults
1.
Select the Preferences - Layout- Data - Defaults subtab. The following screen
appears in the Display pane.
Figure 9–2 Table/Graph Screen
2.
Choose your data stream default settings.
3.
Click Save and your data stream preferences are set.
Creating and Editing Period Overlays
In Oracle Retail VCC, your data is displayed across time. Depending on how your
Oracle Retail VCC database is configured, the data will display in a time series where
the base periods are either weekly or daily. Base periods represent the smallest or
leaf-level time series "buckets" to contain your data.
A period overlay allows data to be viewed in a time series folder or aggregate-level
bucket. For example, if you have a daily database and your sales forecast data for next
week shows a value of 10 for each day (bucket), you could create a period overlay
9-4 Oracle® Value Chain Collaboration User Guide
Layout
named `Next Week', that includes all of next week's buckets. When you view your
Sales Forecast data in this period overlay, it will show the value at 70 (10 x 7).
The available base periods will usually be sorted into a `hierarchy' or `tree' (by the
Oracle Retail VCC Administrator) consisting of various folder levels like weekly or
monthly or quarterly. You can use these categories or you can select individual periods
to create your period overlays.
Base Periods is the default view for your data in Data - View. The View select box in
the Chooser - Display Mode allows you to choose your "view" from among Base
Periods and any other company- or user-level period overlays that are listed. You can
change the default view to one of the period overlays in the Preferences - Layout Data - Defaults screen.
Period overlays allow you to view data from leaf or aggregate contexts (location,
partner, product) in a leaf (base periods) or an aggregate (period overlay) time series
view.
Company-level period overlays are set up by the Oracle Retail VCC Administrator
(Company - General Config - Period Overlays ). A period overlay created at the
company level is available to any of that company's users.
User-level period overlays are created through the (user) Preferences menu
(Preferences - Layout - Data - Period Overlays ). A Period Overlay that is created by
an individual user can only be accessed by that user.
Period overlays can be created in a fixed, rolling, or telescoping format. These are
described below.
For all overlay formats, if the overlay is currently in use, it
cannot be deleted.
Note:
Creating a Fixed Period Overlay
A fixed Period Overlay allows you to group the time periods you select into a single
folder to view the accumulated data stream figures for all the fixed time periods
within the folder. For example, you could create a period overlay that contains all the
summer months in 2001 and call it "Summer 2001." When you apply the overlay to a
stream, the stream contains time periods in monthly increments that contain the
accumulated weekly data streams for each month.
To create a new fixed period overlay
1.
Click Preferences - Layout - Table/Graph - Period Overlay (for individual user
overlays) or click Company - General Config - Period Overlays (for
company-level overlays). Any existing period overlays are displayed in the List
screen.
Preferences
9-5
Layout
Figure 9–3 Table/Graph - Period Overlay Screen
2.
Click the Create button and the screen to create period overlays appears in the
Display pane.
3.
Enter the period overlay name in the Name field (no more than 40 alphanumeric
characters) text box. For example, if you highlighted the individual Summer
months in a year or Qtr 3, you could call the overlay "Summer 2001."
4.
Select the Fixed radio button (default). A period tree appears.
Figure 9–4 Period Tree
5.
Select the time period(s). Open the period folder only to the level at which you
want to create the overlay. For example, if you created categories (not overlays) for
each month, and you want to create a period overlay called "Monthly," open the
period folder only to the monthly level so the weekly buckets do not display. To
create a "Quarterly" period overlay, open the period folder only to the quarterly
level. Do not display the monthly or weekly levels.
Select the time periods you want to include in the overlay. To select more than one
consecutive period, highlight the first item that you want to include in the overlay
and then hold down the "Shift" key to highlight any additional items.
To select more than one non-consecutive period (e.g., Qtr 1 and Qtr 3), highlight
the first item that you want to include in the overlay and then hold down the
"Ctrl" key to highlight any additional items.
6.
Click Save. The overlay appears in the Period Overlays screen.
9-6 Oracle® Value Chain Collaboration User Guide
Layout
Creating a Rolling Period Overlay
A rolling period overlay is not fixed in time but rolls forward with each new stream
period and does not become obsolete once the time period passes. For example,
starting from the current period, you can aggregate eight periods into a single period
overlay. As the current period becomes the past period, you still can apply the period
overlay to aggregate eight periods into the future. It rolls forward with time and
continues to aggregate the eight future periods.
In the figure below, a rolling period overlay is defined for six time periods (P1 through
P6). As P2 becomes the current period and P1 becomes the past period, the overlay
moves forward in time to meet the new week, P7.
Figure 9–5 Rolling Period Overlay
To create a rolling period overlay
1.
Click Preferences - Layout - Data - Period Overlay (for individual user overlays)
or click Company - General Config - Period Overlays (for company-level
overlays).
2.
Click the Create button and the create period overlay screen appears in the
Display pane.
3.
Select the Rolling button, and the rolling period overlay screen appears in the
Display pane.
Preferences
9-7
Layout
Figure 9–6 Rolling Period Overlay Screen
4.
Enter a name for the period overlay (no more than 20 alphanumeric characters).
5.
Your period overlay begins at the current base period (defined as daily or weekly
in your database) unless you specify a reference period number. Entering a start
reference directs the period overlay to begin before or after the current base
period. To begin the period overlay before the current base period, enter a
negative number. To begin after the current base period, enter a positive number.
For instance,
In a daily database: if the current date is 9/7 and the Reference Period number is
-3, the Period Overlay will begin on 9/4.
In a weekly database: if the current week begins on 9/7 and the Reference Period
number is 3, the Period Overlay will begin on 9/28.
6.
Enter the Display Bucket Size (e.g., 1 = Day, 7 = Week, 28 = Month, 365= Year);
where 1=Day if your base periods are days, 1= Week if your base periods are
weeks, etc.
7.
Enter Number of Consecutive Display Buckets.
8.
Select a color that you want your rolling period overlay to display. The color you
choose is the color that will mark your overlay.
9.
■
Green
■
Blue
■
Yellow
■
Orange
■
Purple
Enter a Column prefix. This will display in the data stream table view on the
period column heading (e.g., enter "Week" if the overlay is weekly).
10. If you want to show more than one display bucket in the same overlay, click the
"+" button and a new display bucket characteristic entry line appears. Enter the
characteristics of the new display bucket. To remove a display bucket, click the "-"
button.
For example, if you created a rolling period overlay with three bucket displays
sizes of 1, 7, and 28 that had the number of consecutive display buckets of 7, 4, and
4, your rolling period overlay creation screen would appear as below.
9-8 Oracle® Value Chain Collaboration User Guide
Layout
Figure 9–7 Rolling Period Overlay Screen
11. Click Save. The new overlay appears in your period overlay list. Once an overlay
has been created, it appears in Period View under the Display Mode tab of the
Context Chooser. When this overlay is selected, your data stream table view
would appear as below.
Figure 9–8 Data Stream Table View
Creating a Telescoping Period Overlay
Telescoping period overlays are similar to rolling period overlays except the time
buckets are not fixed. They allow you to specify the number of time buckets in the
overlay, but the telescoping period overlay automatically rounds up any extra time
buckets in the overlay to get to the next size.
To create a telescoping period overlay
1.
Click Preferences - Layout - Data - Period Overlay (for individual user overlays)
or click Company - General Config - Period Overlays (for company-level
overlays).
2.
Click the Create button and the create period overlay screen appears in the
Display pane.
3.
Select the Telescoping button, and the telescoping period overlay screen appears
in the Display pane.
Preferences
9-9
Layout
Figure 9–9 Telescoping Period Overlay Screen
4.
Enter a name for the period overlay (no more than 20 alphanumeric characters).
5.
Your period overlay begins at the current base period (defined as daily or weekly
in your database) unless you specify a reference period number. Entering a start
reference directs the period overlay to begin before or after the current base
period. To begin the period overlay before the current base period, enter a
negative number. To begin after the current base period, enter a positive number.
For instance, in a daily database: if the current date is 9/7 and the Reference
Period number is -3, the Period Overlay will begin on 9/4. In a weekly database: if
the current week begins on 9/7 and the Reference Period number is 3, the Period
Overlay will begin on 9/28.
6.
Uncheck the "Use existing period labels" check box if you do not want to use the
existing period labels. You will be prompted to enter a Column Prefix if this box is
not checked.
7.
Click the Period link and the period tree screen appears in the Display pane.
Select Base Period, a time period folder (cannot select at leaf level), and click the
Close button in the upper right-hand corner of the period tree screen to continue.
Figure 9–10 Period Tree
8.
Enter the "Levels Above Leaf":
0 - leaf level
1 - folder level containing the leaf
2 - next folder level
9-10 Oracle® Value Chain Collaboration User Guide
Layout
Note: Levels must be entered in ascending order (i.e., 0, 1, 2 not 2, 0,
1).
9.
Enter "Minimum Number of Consecutive Display Buckets" that you want to
include for each level.
10. Select a color that you want your telescoping period overlay to display. The color
you choose is the color that will mark your overlay.
■
Green
■
Blue
■
Yellow
■
Orange
■
Purple
11. If you would like to override the column prefix labels that will be displayed in
Data - View/Edit - table view, uncheck the "use existing period labels" check box,
and the inaccessible fields that previously read "N/A" will be working text fields.
12. If you unchecked "Use Existing Period Labels", you must enter a Column prefix.
This will display in the data stream table view on the period column heading (e.g.,
enter "Week" if the overlay is weekly). Column Prefix defaults to the existing
period labels which are configured in the Company - Master Data - Period tree.
13. If you want to show more than one display bucket in the same overlay, click the
"+" button and a new display bucket characteristic entry line appears. Enter the
characteristics of the new display bucket. To remove a display bucket, click the "-"
button.
14. Click Save. The new overlay appears in your period overlay list. Once an overlay
has been created, it appears in the View by Period drop-down under the Display
Mode tab of the Context Chooser. When this overlay is selected, your data stream
table view would appear highlighted as seen below.
Figure 9–11 Data Stream Table View
Preferences 9-11
Layout
Editing, Renaming, and Viewing a Period Overlay
To select, delete, view, rename, or create a new period overlay
1.
Click Preferences - Layout - Table/Graph - Period Overlay (for individual user
overlays) or click Company - General Config - Period Overlays (for
company-level overlays).
Figure 9–12 Table/Graph - Period Overlay Screen
2.
Click the colored dot next to the overlay you want to view.
■
A fixed overlay is displayed showing its name and a period tree with its
period highlighted. You can rename the overlay or change the time period.
Click Save to save your edits.
Figure 9–13 Period Tree
■
A rolling overlay is displayed showing the display bucket size, number of
consecutive buckets, each bucket color, and each bucket's column prefix as it
appears in the Data - View screen. You can rename the overlay, change the
display bucket size, change the number of consecutive display buckets, change
the display bucket color, change the column prefix, or add/remove time
buckets. Click Save to save your edits.
9-12 Oracle® Value Chain Collaboration User Guide
Layout
Figure 9–14 Preferences - Layout Screen
■
A telescoping overlay is displayed showing the period, levels above leaf,
minimum number of consecutive buckets, each bucket color, and each bucket's
column prefix as it appears in the Data - View screen. You can rename the
overlay, change the time period, change the display bucket size, change the
number of consecutive display buckets, change the display bucket color,
change the column prefix, or add/remove time buckets. Click Save to save
your edits.
Figure 9–15 Preferences - Layout Screen
3.
Click Cancel when you are finished viewing the overlay to return to the main
Period Overlay subtab view, or Save to retain any changes you made while on the
screen.
Setting Highlight Source Preferences
Highlight Source allows you to color tag data streams to indicate how that number
was created. The list below shows the possible data stream sources that can be
color-tagged. Each data stream source displays in color
■
■
Data Load
–
Leaf Level Data Stream
–
Promotional Event
–
Price Profile
–
Aggregate Level Data Stream
Manual Entry
–
Leaf Level Data Stream
–
Promotional Event
Preferences 9-13
Layout
■
–
Price Profile
–
Aggregate Level Data Stream
Exceptions Module
–
■
Metrics Module
–
■
■
Exception Action Processing
Metrics Calculation
Demand Module
–
Demand Calculation
–
Lift Factor Calculation
–
Migrated from Oracle Retail VCC Demand
Supply Module
–
Supply Calculation
–
Safety Stock Calculation
–
Migrated from Oracle Retail VCC Supply
You will not see the Exceptions Module, Metrics Module,
Demand Module, or Supply Module sections in the Highlight Source
screen if you do not have access to the appropriate modules.
Note:
To highlight data streams
1.
Click Preferences - Layout - Data - Highlight Source. The Highlight Source screen
appears.
9-14 Oracle® Value Chain Collaboration User Guide
Layout
Figure 9–16 Highlight Source Screen
2.
When the Highlight Source screen appears, check the box next to the stream
source that you want to highlight.
3.
Click Save. Now, when a stream is created or changed by a source you chose to
highlight, the data will appear in the color code for that source.
Creating and Editing Groups
There are two kinds of data stream groups: company and user-defined.
Company-defined data stream groups are created by an admin user (superuser, server
admin, superadmin, or admin) in the Configuration - Groups screen for a selected
company. The company-defined groups can be viewed, but not modified, by company
users. User-defined data stream groups are created and modified by the individual
user. A user-defined group can only be viewed by the user who created it.
Groups allow you to combine data stream subtypes that will appear when you select a
context. As a user, you may have access to all streams that have been assigned to your
company by the superuser or server admin. Some of these streams may not impact
your particular duties and therefore do not need to be accessed by you. This feature
lets you combine streams that you need into user-defined groups.
In Groups you can
■
Edit Groups
■
Add Groups
■
Remove Groups
■
Previewing Groups
Preferences 9-15
Layout
Edit Groups
To edit user-defined groups
1.
Click Preferences - Layout - Data - Groups (for individual user groups) or click
Company - General Config - Groups (for company-level groups). The Groups
screen appears.
Figure 9–17 Groups Screen
2.
Select the group you want to edit. Click Edit and the Edit pane appears:
Figure 9–18 Edit Pane
Streams can have the designation of Primary, Secondary, and Year-Ago, as shown
in the legend. Depending on the comparison type these designations apply to
different streams. For example, if the comparison type is
■
Local Current to Local Previous, the Primary data stream is your local current
data stream and the Secondary data stream is your local previous data stream.
9-16 Oracle® Value Chain Collaboration User Guide
Layout
■
■
3.
Local Current to Partner Current, the Primary data stream is your local current
data stream, the Secondary data stream is your partner's current data stream,
and the Year-Ago data stream is either your local or your partner's year ago
data stream. (Year-Ago streams are only editable by the buyer or seller.
Year-Ago streams are not available for streams editable by both.)
Partner Current to Partner Previous, the Primary data stream is your partner's
current data stream and the Secondary data stream is your partner's previous
data stream.
In the Edit pane, you can rename the group (no more than 40 alphanumeric
characters). Use the left/right arrows to select/deselect streams, and/or use the
up/down arrows to arrange the order of the streams when they are displayed.
In order for your group to display properly in Data - View, for
each substream selected, make sure that the selected designations are
in this order: primary, secondary and year-ago.
Note:
For example, if your group includes stream types sales forecast, actual sales and
seller inventory, your ordering of `selected' subtypes should show:
■
First: sales base primary, sales promo primary, sales seasonal primary. Then,
sales base secondary, sales promo secondary, sales seasonal secondary.
Your ordering of `selected' subtypes should show:
■
First: sales base primary, sales promo primary, sales seasonal primary. Then,
sales base secondary, sales promo secondary, sales seasonal secondary.
or,
–
Actual sales base primary, Actual sales promo primary
–
Actual sales base secondary, Actual sales promo secondary
–
Actual sales base year-ago, Actual sales promo year-ago
4.
Click the "Streams Info" icon to display your company's assigned data streams in a
separate browser. For details, see Help - Stream Info in General Icons.
5.
Click Save to save the edit(s) and return to the Groups subtab. Click Cancel to
cancel the edit(s) and return to the Groups subtab.
Preferences 9-17
Layout
Add Groups
To add groups
1.
Click Preferences - Layout - Data - Groups (for individual user groups) or click
Company - General Config - Groups (for company-level groups). The Groups
screen appears.
If you have created groups already, they will appear in the list.
Figure 9–19 Groups Screen
2.
Click Add and the Add pane appears:
Figure 9–20 Add Pane
3.
In the Add pane, enter a name for the new group (no more than 40 alphanumeric
characters).
4.
Use the left/right arrows to select the streams you want to add to the new group.
9-18 Oracle® Value Chain Collaboration User Guide
Layout
5.
Use the up/down arrows to arrange the order of the streams when the new group
is displayed.
6.
The up/down arrows located between the Table and Graph boxes move streams
into and out of the Graph select box. This allows you to display groups in the
Table that may not appear in the Graph. However, any groups that will be
displayed in the Graph must also be displayed in the Table.
7.
Click Save to save the new group and return to Groups. Click Cancel to cancel the
action and return to Groups.
Remove Groups
To remove groups
1.
Click Preferences - Layout - Data - Groups (for individual user groups) or click
Company - General Config - Groups (for company-level groups). The Groups
screen appears.
Figure 9–21 Groups Screen
2.
Select the stream you want to remove.
3.
Click Delete.
Previewing Groups
Access To This Feature: Superuser, Server Admin, SuperAdmin, Admin
Once you have created groups for your company, you can preview how the groups
will appear. To preview your groups
1.
Click Preferences - Layout - Data - Groups (for individual user groups) or click
Company - General Config - Groups (for company-level groups). The Groups
screen appears.
2.
Click the Groups tab. The Groups screen appears.
3.
Select either "Add" or "Edit."
4.
Click the Preview button. The Preview screen appears showing how the defined
group will display in the Data - View Table/Graph for three comparison modes.
Preferences 9-19
Layout
Figure 9–22 Preview Screen
Setting Inbox Filters Preferences
Filters allows you to create and edit filters to sort the exceptions.
To create or edit an Inbox Filter
1.
Click Preferences - Layout - Inbox Filters and the Inbox Filters screen appears.
9-20 Oracle® Value Chain Collaboration User Guide
Layout
Figure 9–23 Inbox Filters Screen
2.
To create a filter, enter a name for the new filter (no more than 20 alphanumeric
characters) and check whichever item(s) you want to be included in the filter. Click
Save.
To edit a filter, select an existing filter from the drop-down list and make the
appropriate changes. The following lists the items that can be edited.
■
Period (Before, After, or Between a Fixed/Rolling Date/Period)
■
Product name
■
Local name
■
Partner name
■
Severity (Low, Medium, or High)
■
Percent (<, >, or = and a percentage)
■
Deviation (<, >, or =, and a value)
■
■
Created (Before, After, or Between a Fixed/Rolling Date/Period) Sorts by the
creation date.
Status (Active, In-Process, Auto In-Process, Escalated, Auto Escalated, Auto
Incomplete, Superceding)
■
UOM
■
Type 1
■
Type 2
■
Criteria Name
■
Offset (Period Offset or Generation Offset)
■
Shared With (select company shared with)
Preferences 9-21
Layout
To return a selected existing filter to its pre-edited settings, click Revert.
To delete a filter, select an existing filter from the drop-down list and click Delete.
3.
Click Save.
Setting List Screen Preferences
The Lists preferences tab allows you to choose how the following lists will be
displayed.
■
Analyzer
■
Demand Policy
■
Events
■
Events Calendar
■
Exception Criteria
■
Exception Inbox
■
Extracts
■
Metrics
■
Promotion Items
■
■
■
Promotion Item Sublist (tabbed view appearing on Events - Overview - Examine
Event screen)
Promotions
Promotion Sublist (tabbed view appearing on Events - Overview - Examine Event
screen)
■
Reports
■
Supply Policy
You can set the following preferences for how the list screens appear:
■
View (Collapsed or Expanded).
■
Number of results per page.
■
■
Hide Columns: Sets which columns will appear, in what order, and which are
hidden.
Set the Multi-Column Sort Order: Sets how the items are sorted when you access
the Inbox (e.g., items first are sorted by name, then period, partner, product, etc.).
You can set as many (or as few) columns to be sorted as you wish.
To set the Lists preferences
1.
Click Preferences - Layout - Lists. Select the list from the drop-down list and that
List Preference screen appears.
9-22 Oracle® Value Chain Collaboration User Guide
Layout
Figure 9–24 List Preferences Screen
2.
Select your view: either Collapsed or Expanded. Refer to Table/Graph Preferences
for details about collapsed and expanded views.
3.
Enter how many results you want to view by page.
4.
For the Exceptions - Inbox screen, you may select a default filter to sort the entries
in the Exceptions - Inbox. See Setting Inbox Filters Preferences for details on how
to create an Inbox filter.
5.
Use the arrow buttons to order or hide columns.
To order the columns: Scroll up or down the list of Visible columns and select the
column you want to move. Click the "up" or "down" arrows to move the selected
column to the Visible list. Each click moves the column one position. When saved,
the order you choose will be how the columns appear.
To hide a column: Scroll up or down the list of Visible columns and select the
column you want to hide. Click the "right" arrow to add the selected column to the
Hidden list. When saved, the columns you moved to the Hidden list will not
appear in the list.
To show a column that is hidden: Scroll up or down the list of Hidden columns
and select the column you want to show. Click the "left" arrow to add the selected
column to the Visible list. When saved, the columns you moved to the Visible list
will appear in the list.
6.
Use the arrow buttons to set the Multi-Column Sort Order.
To add a column to the Multi-Column Sort Order list: Scroll up or down the list of
column(s) on the right and select the column you want to sort. Click the "right"
arrow to add the selected column(s) to the multi-column sort list. You can add as
many columns as you wish. When saved, items in the list will be sorted
automatically by the column(s) you selected.
To remove a column from the Multi-Column Sort Order list: Scroll up or down the
list of Hidden columns and select the column(s) you want to remove. Click the
"left" arrow to move the selected column to the Available list. When saved, items
will not be sorted automatically by the column you removed.
7.
Click Save.
Preferences 9-23
Layout
Streams that have been hidden will not appear when they are
selected to be part of a group.
Note:
If you are using Oracle Retail VCC with daily time buckets rather than weekly, you
will see an additional drop-down option when you select the Exception Inbox view.
This new drop-down, Period Configuration, allows you choose how you wish periods
to be displayed in the Exception Inbox.
The period display options are
■
Beginning of Period
■
End of Period
■
Beginning and end of Period
Figure 9–25 Preferences - Layout Screen
Figure 8-25: Preferences - Layout - Lists screen with the Period Configuration
drop-down. This feature is only accessible to users who have daily time buckets rather
than weekly.
9-24 Oracle® Value Chain Collaboration User Guide
Changing Your Password
Changing Your Password
The Password feature allows you to change your password for Oracle Retail VCC.
To change your password
1.
Select Preferences - Password. The Change Password screen appears.
Figure 9–26 Change Password Screen
2.
Enter your current password in the Password: text box (40 alphanumeric character
limit).
Quotation marks and apostrophes are valid alphanumeric
characters for all password fields.
Note:
3.
Enter your new password in the New Password: text box.
4.
Reenter your new password in the Confirm Password: text box.
5.
Click Save
Preferences 9-25
Changing Your Password
9-26 Oracle® Value Chain Collaboration User Guide
Part II
Value Chain Collaboration Modules
The following modules are separately priced options, and access to them as menu
items will only appear if you have obtained a license for each.
Part II contains the following chapters:
■
Events
■
Demand
■
An Analyzer
■
Supply
10
Events
This chapter contains the following topics:
■
Introduction
■
Events
■
Promotions
■
Promotion Items
■
Documents
■
Promotion Status Changes
The Events module is a separately priced option, and access to
it as a menu Item will only appear if you have obtained an Events
license.
Note:
Introduction
The Event Collaboration module provides visibility and collaboration on Promotions.
Promotions are sale occurrences such as introductory offers, seasonal sales, etc. They
contain attributes, have a status, and can also contain multiple tactics and Items. Items
within a Promotion occur at the collaboration-Item level.
The Events module allows you to:
■
Create an Event from scratch, or by copying a previous Event
■
Add and remove Products/Locations for the Promotion
■
Attach Documents to the Event
■
Download Documents attached to the Event
■
Change the Promotion Status
■
Apply sales and order volume estimates and pricing
■
Report on the actual performance of the Promotion vs. plans for it
A Promotion has a status and attributes, and contain tactics (something that
contributes to the event, like an ad or a display) and Items (collaboration Items that are
included in the Promotion). The tactics and Items also have their own attributes. Some
Item attributes are initially populated from the corresponding Promotion attributes.
Although Items within an event occur at the collaboration-Item level, Promotions
themselves exist independent of context because many different Items may be tied-in
to the same Promotion. For instance, you could have a Holiday Clearance Sale that
Events 10-1
Events
included both candy and toys. These Items would share the same Promotion (Holiday
Clearance Sale), but could exist at different contexts because you may have different
partners associated with different Items (candy and toys). Therefore, in order to view
all the Items relevant to a particular Promotion, you would need to select a folder-level
partner in the Context Chooser when viewing a specific Promotion.
Figure 10–1 Events and Promotions
When selecting from the Partner tree, you may not select a
folder that contains locations from more than one company.
Attempting to do so will prompt the VCC to display an error message.
Note:
Events
The Events - Overview is comprised of three tabbed views:
■
Events Calendar Tab
■
Events List Tab
■
Events Create Tab
Before editing an Event that has been loaded in an Edit
Operation using the Integrator, check the Monitor - Job screen to
verify that the job is complete before allowing a user to edit the Event.
This will avoid creating any data discrepancy.
Note:
Check the Monitor - jobs screen to see if the jobs corresponding to that event is
completed and then allow the user for editing.
Events Calendar Tab
The Events - Calendar screen provides a calendar view of the Events you have created.
The calendar is useful in viewing where Events overlap, and for providing a visual
overview of where they begin and end. The calendar also allows you to drill down
within each date that contains one or more Promotions in order to view or edit the
details of that Promotion.
To edit Events in the calendar:
1.
Select Events - Overview - Calendar tab. The Events calendar appears. If today's
date is included in the range of existing Events, the calendar will open to the
current date.
10-2 Oracle® Value Chain Collaboration User Guide
Events
Figure 10–2 Events Calendar
Clicking in the "Event ID" and "Event Name" lists on the left of the calendar will
display the first activity planned for the Event name/ID you selected.
2.
Click the colored cell for the Event you wish to view. The colors are determined by
the "Event Category", and are configurable by your company administrator.
Figure 10–3 Colored Cells in the Events Calendar
3.
The Examine Event screen appears.
Events 10-3
Events
Figure 10–4 Examine Event Screen
4.
If you modify the Event, click Save. If you have viewed the Event and wish to
return to the calendar without editing, click Cancel.
Events List Tab
Select Events - Overview - List tab. The Events List appears. It contains the following
columns:
Figure 10–5 Events List
■
Examine – drilldown dot provides a more detailed view of the selected Event.
■
Event ID – the ID assigned to the Event.
10-4 Oracle® Value Chain Collaboration User Guide
Events
■
Event Name – name of the Event.
■
Event Description – optional description entered for the Event.
■
Event Category – category the Event belongs to. Category indicates the reason for
planning the Event (i.e., Holiday, Price Change, Retailer Promotion, etc.).
■
Creator Company – company that created the Event.
■
Begin Date – date the Event will begin.
■
End Date – date the Event will end.
■
Copy – duplicate this Event.
■
Number Of Promotions – number of Promotions contained in this Event.
■
Number Of Items – total number of Items contained in the Event Promotions
■
■
View/Edit Comment – clicking the drilldown dot enables you to view and edit
comments. Grey dots indicate there is not yet a comment created for the Event.
Delete – allows you to delete Events by checking the check box and then clicking
the "Process Selected Items" button.
■
Printer-Friendly View – view data in format that is suitable for printing.
■
Created By - name of user who created the Event.
■
Created Date — date the Event was created.
■
Last Changed Date — date the Event was last modified.
■
Last Changed By — name of user who last updated this Event.
■
Number Of Locations — number of locations included in the Event.
■
Number Of Partners — number of partners involved in the Event.
■
Number Of Products — number of products affected by the Event
■
URL — website where Event details can be viewed.
■
■
Set Sales Impacts — Yes or No will be displayed depending on whether or not
sales impacts have been set for this Event
Set Order Impacts — Yes or No will display, depending on whether or not order
impacts have been set for this Event.
■
Stream Set — stream set used by the Event.
■
Last Totaled Date — date data was last totaled.
■
Event Theme — Additional descriptive field.
■
Target Audience — Event’s target audience
■
Event - User Defined — One to three custom fields that are company specific.
■
■
Partner Exclusivity — Indicates whether promotion is shared exclusively with one
partner company. If selected, the partner added in the first promotion is the only
partner allowed for the event.
Total Crossdock Order Forecast — Allows for total order computation. Computed
results display in the Promotion Item - Examine screen. Totals all four order values
(DC orders, DSD orders, Crossdock orders and Forward Buy) minus the
pre-ordered quantity.
Event Data displayed in the List includes:
Events 10-5
Events
–
Total Actual Sales
–
Total Base Sales Forecast
–
Total Promo Sales Forecast
–
Total DC Order Forecast
–
Total DSD Order Forecast
–
Total Forward Buy Forecast
–
Process Totals
–
Total On-Hand Inventory
–
Total Monetary Sales
Events Create Tab
An Event must be created before any Promotions, Items, or Documents can be
associated with it.
To create an Event:
1.
Select Event - Overview - Create. The Create screen appears as shown below:
Figure 10–6 Create Screen
2.
Assign a Name to your Event.
3.
The Event forms are populated without any predetermined value. This implies
that the default value is taken as <space>. As the field is mandatory, the user is
compelled to enter the valid event/promotion id.a specific Event ID in the box.
4.
Select the Category to include the Event in.
5.
Enter the Begin Date, and select when you would like the Event to terminate. The
End can be a specific date, or a set Number of Days from the Begin Date you
establish.
6.
Enter an Event Description, Comment. These fields are optional.
10-6 Oracle® Value Chain Collaboration User Guide
Events
7.
Enter the final creation Details by selecting your Stream Set from the drop-down,
and checking or unchecking the Impact boxes.
8.
If you wish the promotion to be shared only with one partner company, check the
Partner Exclusivity check box.
9.
Enter a Target Audience (optional), and provide a URL if so desired. Be sure to test
any link you provide.
10. Click Create.
Once you have created the Event, you will be directed to the Examine Event screen.
This is where you can add Promotions and attach Documents to the new Event. For
more information on performing these tasks, see Adding Promotions and Attaching
Documents to Events and Promotions.
Copying an Event
In order to save time, Events can be duplicated to create similar Events. This can be
easily done with the Copy icon.
Any Event that appears in the Event - List screen can be copied, and that copy can be
modified.
To copy an Event:
1.
Select a context.
2.
Select Event - List. The List screen appears.
3.
Click the copy icon under the Copy column for the Event that you wish to
duplicate. The Copy Event screen appears.
Figure 10–7 Copy Event Screen
4.
Enter a new name in the Name field, verify Begin Date, and select either the
Number of Periods you wish the Event to span, or a specific End Date. If you do
not specify an Event ID, the system will provide one for you.
5.
Click Create to proceed. The Examine Event screen appears.
6.
All of the fields that were filled from the original Event will appear with the same
information in the copy. Modify the Event, its Items, and Tactics. For more
information on adding and configuring Items, see Creating Promotion Items.
Events 10-7
Promotions
If the dates applied to the original Event do not relate directly
to the new copy, some Items may not be included in the copied event.
For instance, if the original Event span is 12/16 - 12/22, with Items
that begin on dates12/17, 12/19, 12/21, and the copy specifies a span
from 12/16 - 12/18, then the copied Event would only include the first
Item.
Note:
Promotions
During the Promotion creation process, you will define the Promotion with specific
data such as which partner company you will share the Promotion with, a brief
description of the Promotion, how long it should run, which sale category the
Promotion falls under (a holiday sale, a regular Promotion, etc.), how much the
Promotion will affect the original price of the Item, etc
About Promotion Attributes
The above mentioned terms or descriptors are called Attributes. After you have
created a Promotional event, many of its attributes will be visible in the Events Promotions screen.
The Promotion is also given a Status attribute, which is tracked. This helps determine
what stage the Promotion has reached in its life cycle. The behavior of the Promotion
changes as its status changes. For more information on Promotion statuses and
changing them, see Changing the Status of a Promotion. Promotions can also have
external (unique per creator company) IDs which can be used as keys to synchronize
events with external system(s).
About Promotional Tactics
A Tactic categorizes the type of Promotion being planned. Examples of tactics are ads,
coupons, and rebates. A Promotion may contain no tactic, a single tactic, or multiple
tactics.
Tactic attributes enable you to provide more detail on each tactic. They can be accessed
and configured at the bottom of the Events - Promotions create and edit screens.
The Tactics section includes options for the following:
■
Category
■
Tactic
■
Value
■
Unit-Of-Measure
■
Comment
■
Begin and End Date
If you are viewing a partner's promotion, and there are no comments in the tactics
section, the tactics comment icon will not be clickable.
The Tactics Category drop-down contains the following classifications:
■
Ad
■
Display
■
Consumer Incentive
10-8 Oracle® Value Chain Collaboration User Guide
Promotions
■
Assortment Change
■
Location Change
■
Packaging
■
Trade Funds
■
Other
Each Category has its own set of tactics attributes. These attributes further describe the
tactic, with the exception of "Other" and "Trade Funds". These two categories only
have a Value, Unit-Of-Measure, Begin and End Date, and Comment option when they
are selected. Selecting any other tactics from the drop-down will produce a new list
that appears in the next drop-down immediately to its right (i.e., when a selection is
made in the Category column, the Tactic column becomes active with the appropriate
choices). All categories includes a numeric Value, text UOM, Begin Date, End Date,
and a text Comment can be entered for every activity. Comments can be up to 255
characters.
The table below shows a list of all the available options that can be selected for a tactic.
The Value, Unit-Of-Measure, and Comment fields are always available for each
category, regardless of what is selected in the drop-downs.
Table 10–1
Promotion Tactics
Category
Tactic
Ad
Billboard
Direct Mail Ad
Direct Mail Blow-In
Flyer
Free-Standing Insert
Handbill
Internet Ad
Line Ad
Magazine Ad
Mobile Ad
Newspaper Ad
Radio Ad
Retail Circular
Shelf Talker
Television Ad
Events 10-9
Promotions
Table 10–1 (Cont.) Promotion Tactics
Category
Tactic
Display
Display (general)
Dump Bin Display
End Cap Display
Floor Stack Display
In-Store Dispenser
Module Display
On-Counter Display
Rack Display
Shelf-Extender Display
Shipper Display
Transparency
Temporary Outpost
Consumer Incentive
BOGO/Buy x Get y
Coupon
Coupon Book
Free Item
Gift with Purchase
Instant Rebate
In-Store Sample/Demo
Mail-In Rebate
Mailed Samples
Major Event
Membership Card
No Price Change
Purchase with Purchase
Other Consumer Incentive
Scan
Special EDLP Event
Sweepstakes
Temporary Price Reduction
Assortment Change
Product Introduction
Product Retirement
Location Change
Add Locations
Drop Locations
Packaging
Bonus Pack
Co-Branded Item
In-Pack Item
Near-Pack Item
On-Pack Item
Pre-Priced Item
Trade Funds
N/A
10-10 Oracle® Value Chain Collaboration User Guide
Promotions
Table 10–1 (Cont.) Promotion Tactics
Category
Tactic
Other
N/A
Additional Categories and Tactics can be added or modified using the Tactics creator.
Contact a Oracle Tech Support Executive for more details on adding and modifying
Categories and Tactics.
Viewing Promotions
There are three ways in which you can view a list of Promotions:
1.
A list of Promotions can be access through the VCC menu by selecting Events Promotions. This list will display Promotions regardless of the Event they were
created for. The Events - Promotions list is context-specific.
2.
Any Promotions that exist for an Event can be viewed from within Events Overview. By drilling down to examine the Event, you will see a tabbed view of
both Promotions and Promotion Items that exist for the selected Event. This is
useful for finding out which Promotions or Items exist specific to an Event
Figure 10–8 Events - Promotions List
3.
Similarly, Promotions can be viewed by accessing the Examine Events screen,
where a "Number of Promotions" link exists in the Context Chooser area. This
number is clickable, and will display a list of Promotions for that Event.
Figure 10–9 "Number of Promotions" Link in the Context Chooser Area
The Events - Promotions screen displays the list of attributes and tactics that define
each Promotion. In addition to displaying read-only information, this screen also
allows you to:
Events
10-11
Promotions
■
view a Promotions's history
■
delete Promotions
■
change the status of a Promotion
■
view and add/edit comments for each Promotion
■
view/edit the number of Items in each Promotion
■
visit a link for each Promotion
■
process totals
The initial list view will show the default column option selections and order. You can
change the columns that display in the Events - Promotions - List screen by revising
selection options in the Preferences - Layout - Lists - Promotions screen by selecting
the “Configure List” icon, or by going to the Preferences - General - Layout screen
directly. For more information on configuring Lists, see Setting List Screen Preferences.
Promotions List
The Event - Promotions list screen contains many of the same columns that the Event
List contains, which can also be applied to the Promotion level. For more details on
columns not included in the list below, see column descriptions in the “Events List
Tab”. The following column options and actions are unique to the Promotion List:
Figure 10–10 Columns in the Events - Promotions Tab
■
Promotion Category — category the Promotion has been assigned to.
■
Partner Company — partner company who is collaborating on the Promotion
■
■
■
■
■
Status — dropdown displays the status of the Promotion. Includes “Proposed”
and “Cancelled” options.
Condition — “OK” displays when Promotion condition is okay
Status History — Displays a list status modifications that were made to the
Promotion, and their dates
Planned By — name of user who planned the Promotion
Entire Promotion – yes or no value will display in this column, indicating that the
Sales Impact Qty is to be distributed among Items for the entire Promotion period.
(Available when Sales Impact Type = Absolute Increase, Absolute Decrease, or Set
Value To.) When selecting to disaggregate type and quantity among the entire
Promotion, the following rules apply:
–
The new equally distributed Sales Impact Value will apply to all Promotion
Items, whether or not they had been previously overridden at the Item level.
–
If there are no Items for this Promotion, the Sales Impact for all Items that are
added will be the Sales Impact of the Promotion, equally divided among all
the Items. If there are one or more Items for a given Promotion, the Sales
Impact for all Items being added will be 0.
10-12 Oracle® Value Chain Collaboration User Guide
Promotions
If you create an Event with "Entire Promotion" selected, and
later add, edit, or remove Promotion Items, the Promotion's Sales
Impact Value will not be automatically readjusted. This may result in
some numbers to being out of sync.
Note:
After Processing Totals, two kinds of fields will display as
empty: (1) Each Stream Set data type that has not been selected to
'Enable Totals' (2) Each Stream Set data type that has null values in the
Event date range.
Note:
Totals displayed in the Event are the sum of the current value
of all items in the Event.
Note:
■
First Ship Date — first available date product can be shipped.
■
Planned Date — date Promotion is planned.
■
Proposed Due Date — due date proposed for Promotion.
■
Planned Due Date — due date planned for Promotion.
■
Partner Promotion ID — collaboration partners ID assigned to the Promotion.
■
E-Mail Notification — e-mail addresses of to be sent notification of promotion.
■
E-Mail Language — language to be used in e-mail notification.
To view a Promotion:
1.
Select your context.
2.
Select Events - Promotions - Display, the screen appears as shown below.
Figure 10–11
Events - Promotion Screen
From the Events - Promotions - Display screen, you can view the history of each
Promotion.
To view a Promotion's history:
Events
10-13
Promotions
1.
Click the colored dot under the Examine History column. The screen that appears
will tell you when the Promotion was last modified, the user who modified it, the
prior status, and the current or new status.
Figure 10–12 Promotion History
2.
Click Back to return to the Promotions screen.
You can view and add or edit comments for your Promotion. The Comments are for
each event are located under the dialogue bubble icon. Each event will have a white
dot if there is no comment. You can click this dot and add a comment; the dot will then
change color to indicate it now holds a comment. A comment can be up to 255
characters for each event. Comments can be added, overwritten, and deleted on the
Comment screen only.
To add a comment to a Promotion
1.
Select your context.
2.
Select the Events - Promotions - List screen
3.
Click the dot that appears under the comments icon. The comment screen
appears.
4.
Enter your comment in the Comment field provided.
Figure 10–13 Events - Promotions - Comment Screen
5.
Click Post to save your comment, or Done to quit without saving and return to the
Events - Promotions screen.
To access a printer-friendly version of the Promotion you are interested in printing,
click the appropriate blue drilldown dot under the Printer Friendly icon. This will
display the Printer-Friendly view of the Promotion.
10-14 Oracle® Value Chain Collaboration User Guide
Promotions
Figure 10–14
Printer-friendly View of the Promotion
You can then click Print to send your data to the printer, or Back to return to the List
view.
To View a Promotion's Default Screen:
The scren below shows the default view with future events/promotions.
Figure 10–15
Promotions Default Screen
Changing the Status of a Promotion
Promotions have a status. Status can be changed manually or automatically. Any
change of status automatically updates the "last changed by" field to the user who
changed the status. The following are the various status states:
Promotios are non-editable by the creator company when the status of the promotion
is "Planned".
Events
10-15
Promotions
■
■
■
■
■
■
■
■
■
■
■
New – Promotion is in creation process, only visible to creator company, and does
not impact promo forecast. All possible changes are allowed.
Proposed – Effect of Promotion is reflected in the creator's promo forecast stream.
Promotion is made visible to partner with status of "awaiting approval", but does
not impact partner forecast stream.
Planned – Effect of Promotion applied to partner forecast stream.
Modified – Modified effect of Promotion is reflected in the creator's promo forecast
line. Modified Promotional event is made visible to partner, but does not change
partner forecast until accepted.
Change Req. – A change is requested - no changes are made to either forecast line.
User needs to enter a Promotion-level comment with the requested change.
Rejected – Effect of Promotions zeroed-out from partner forecast.
Cancelled – Effect of Promotion zeroed-out from local and partner forecast. No
further changes are allowed.
Completed – End date of an "accepted" Promotion has passed. No further changes
are allowed.
Expired – End date of a Promotion other than "accepted" or "cancelled" has passed.
No further changes are allowed.
Planned Change Request – Once in Planned, promotions can be set to
'Planned Change Request' by the partner on request from the creator.
Planned Modified – Creator can make changes, and then set the status to "Planned
Modified". Partner then reviews the promotion, and then sets it to "Planned"
again.
■
Proposed Acknowledged – (Partner)
■
Modified Acknowledged – (Local)
■
Active – (system)
■
Terminated – (Local/Partner)
■
Active Modified – (Local)
Note: User cannot edit promotion item detail when promotion is set
to an "acknowledged" status.
Only certain user-initiated changes in status state are allowed, as shown in the three
tables below.
10-16 Oracle® Value Chain Collaboration User Guide
Promotions
Table 10–2
Promotion Status Transitions and Ownership
New
v
v
Proposed
v
v
Proposed
Acknowledged
v
v
Planned
v
v
Active
v
Change
Requested
v
v
v
v
Modified
v
Modified
Acknowledged
v
Active Modified
v
Table 10–3
Terminated
Cancelled
Rejected
Active Modified
Modified Acknowledged
Modified
Change Requested
Planned
Proposed Acknowledged
Proposed
Change Allowed
From
Change To (By Creator)
v
v
Promotion Status Transitions and Ownership
Terminated
Cancelled
Rejected
Active Modified
Modified Acknowledged
Modified
Change Requested
Planned
Proposed
Proposed Acknowledged
Change Allowed From Change To (By Partner)
New
Proposed
Proposed
Acknowledged
v
v
v
v
v
v
v
Planned
v
v
Active
v
Change Requested
Modified
Modified
Acknowledged
v
v
v
v
v
v
Events
10-17
Promotions
Table 10–3 (Cont.) Promotion Status Transitions and Ownership
Active Modified
Promotion Status Transitions and Ownership
Expired
Completed
Modified
Change To (By System)
Active
Change From
New
v
Proposed
v
v
Proposed
Acknowledged
v
v
Planned
v
Active
v
v
v
v
v
Change
Requested
v
Modified
v
v
Modified
Acknowledged
v
v
Active Modified
v
Table 10–5
Terminated
v
Active Modified
Table 10–4
Cancelled
Rejected
Active Modified
Modified Acknowledged
Modified
Change Requested
Planned
Proposed
Proposed Acknowledged
Change Allowed From Change To (By Partner)
v
v
Promotion Status Transitions for a Planned Promotion
From Status
To Status
Transition Allowed by
Planned
Planned ChangeRequest
Partner
Planned ChangeRequest
Planned Modified
Creator
Planned Modified
Planned
Partner
When the creator company makes a modification to a planned promotion through the
Integrator/Loader, the Promotion goes to Planned Modified status.
10-18 Oracle® Value Chain Collaboration User Guide
Promotions
To Delete/Change Promotions Status
The circled content shows whether the partner can delete and change the promotion
status. The delete check boxes are disabled and status change list contains only
allowed transitions.
Figure 10–16
Delete/Modify Promotion Status
Promotions - Editability
In certain promotion status, the promotion/promotion item is not editable by one
partner or both the partners. Thus, the content is grayed out as shown in the following
screen view.
When a promotions is editable by the creator, add/delete/modify of promotion items is allowed.
When it is partner editable, only Comments are editable at the promotion level.
Events
10-19
Promotions
Figure 10–17 Edit Promotions
While accessing the events/promotion/promotion items screens for view/edit/delete,
the UI view should meet the access control criteria as mentioned in Editability Rules in
the Table below:
Table 10–6
Edit Rules for Promotion Work Flow
Status
Creator Editable
Partner Editable
New
Y
N
Proposed
Y
N
Planned
N
N
Modified
Y
N
Change_Req
N
Y
Rej
N
N
Cancelled
N
N
Complete
N
N
Expired
Y
N
Prop_Acknowledge
Y
N
Mod_Acknowledge
Y
N
Active
N
N
Terminated
N
N
Non_Local_Planned
Y
N
10-20 Oracle® Value Chain Collaboration User Guide
Promotions
Table 10–6 (Cont.) Edit Rules for Promotion Work Flow
Status
Creator Editable
Partner Editable
Active_Modified
Y
N
The following general rules apply for the various status states:
■
■
■
■
■
■
All Promotions are initially created as "new".
The states of "proposed", "accepted", "change requested", "rejected" and "cancelled"
are all set manually, as per the above table.
The status of "modified" is automatically set whenever the Promotion creator
saves modifications to an existing Promotion (other than "new" Promotions, which
remain "new"). Promotion Items are also considered "Modified" whenever Impact
Type or Impact Value are changed.
The status of "completed" is automatically set when the end period of a "accepted"
Promotion has passed.
The status of "expired" is automatically set when the end period of a Promotion
other than "accepted" or "cancelled" has passed.
User cannot edit promotion item detail when promotion is in an "acknowledged"
status
Adding Promotions
It is only possible to add Promotions once an Event has been created, since each
promotion is a subset of an Event. Promotions are added to Events through the Events
- Overview - Examine Event screen. Creation of promotions can be done immediately
after Event creation, or added later by examining the Event you wish to add
Promotions to.
Promotions can be created for any leaf or folder level context. To create an Event, you
must first have an available stream set selected. For more information on creating a
stream set, see Mass Entry of Data.
If a message displaying "No stream sets exist. Please create a
stream set" appears at the Events - Promotions - Create screen, you
must first create a stream set. Event stream sets can be configured by
the superuser or server admin in Company - Module Config - Events Stream Set Configuration.
Note:
To create a Promotion:
1.
Examine the Event for which you wish to create a Promotion. The Examine Event
screen appears.
Events
10-21
Promotions
Figure 10–18 Examine Event Screen
2.
The context chooser area on this screen gives you access to Items, Promotions, and
Documents associated with this Event. If a Promotion has not been created, Items
will not display. If Promotions already exist, the link after "Number of Promotions"
will indicate how many Promotions are attached to the Event at this time. By
clicking "Add Promotion", you can increase that number. Clicking on the
numbered link will display the list of Promotions that exist for that Event. Click
Add Promotion. The Create Promotion screen appears.
10-22 Oracle® Value Chain Collaboration User Guide
Promotions
Figure 10–19
Create Promotion Screen
3.
Select either "New" or "Proposed" from the Promotion Status drop-down. New is
the default status. For more details on Promotion status, see Changing the Status
of a Promotion.
4.
Enter a Promotion ID. The Promotion forms are populated without any
predetermined value ie. Default value as <space>, as seen in the screenshot above.
As this field is mandatory, the user is compelled to enter a valid promotion id. This
alphanumeric ID can be used as a key to synchronize the event with external
systems. The ID is unique per creator company.
5.
Select a Partner Company from the drop-down list of companies available to you.
This is the partner location for which the Promotion is defined. It may be at leaf or
folder-level, but if at folder-level, must contain only locations from a single
company.
6.
Enter a Partner Promotion ID, if desired.
7.
Specify a list of E-mail Notification recipients (optional). Separate multiple entries
with a semi-colon (;).
8.
Select the E-mail Language that will be used when E-mail is sent.
9.
In the Details section, a Price Impact and Sales Impact Qty must be entered. The
default Price Impact Type is "Absolute Decrease." The Sales Impact Type defaults
to "Absolute Increase". If you want the Impact entered to affect the Entire
Promotion, check the check box.
Events
10-23
Promotions
Figure 10–20 Create Promotion Screen - Details Section
Price and Sales Impacts both allow you to enter positive,
negative, and fractional numbers.
Note:
10. Select a First Ship Date that will display the first available date product can be
shipped (optional). You can also enter a Delivery Date, Store Invoice Date, and
Promotional Item Definition Date, if desired.
11. Enter an Ordering Policy, if any.
12. Enter the URL associated with the new event (optional). This feature is useful if
there is an online Promotion with a direct URL that displays the advertised
product, etc. Be sure to test the link after pasting it in.
13. Enter a comment for the Promotion (optional).
14. Enter the Due Date information for the Promotion. Select Proposed and Planned
Milestone Dates, and enter the number of days to offset notification.
15. Under Metrics, you can assign values to metrics you would like to use during the
promotion (optional).
Figure 10–21 Create Promotion Screen - Metrics Section
16. Enter Milestone Dates and Notification Offset in the Due Dates section (optional).
Figure 10–22 Create Promotion Screen - Due Dates Section
17. If you wish to add tactics at this point, click the Add button in the Tactics section.
If you do not want to create tactics at this time, click Create to create and return to
the List screen, Cancel to return to the List screen without saving, or Create & Add
Item to begin adding Items.
10-24 Oracle® Value Chain Collaboration User Guide
Promotions
After clicking the Add button, the first Tactics row will appear. You can then add
Tactics to the Promotion. For more information on Tactics, see About Promotional
Tactics.
To create and manage multiple Tactics
■
click the + sign to add each new row of Tactics
■
click the - sign to remove any unwanted rows.
Select an Promotion Category from the drop-down (optional). This gives you the
option of specifying a categorical reason for the Promotion. "Holiday" is the default.
Options include:
■
Holiday
■
Inventory Policy Change
■
Jointly-Sponsored Retail Promotion
■
Labor
■
Location Closing
■
Location Opening
■
Manufacturer Promotion
■
Other - Non-Promotional
■
Other- Promotional
■
Packaging/labeling change
■
Price change
■
Product Discontinuation
■
Product Introduction
■
Retailer Promotion
■
Seasonal Promotion
■
Store Closing Promotion
■
Store Opening Promotion
■
Store Format Change
■
Test Market
■
Weather
You can now save the Promotion you created by clicking Create, or Cancel to cancel
the Promotion and return to the List. Click Create & Add Item to begin adding Items
to the Promotion. For more instructions on how to add Promotion Items, see Creating
Promotion Items.
Events
10-25
Promotion Items
Deleting Promotions
Promotions can be deleted in the Promotions List views.
To delete a promotion:
1.
Select a context.
2.
Access the Promotions List through the Oracle Retail VCC menu (Events Promotions), or by drilling down to the Promotions List from an Event Examine
screen.
3.
Check the Promotions you wish to remove in the "Delete" column.
Deleting a Promotion from the Events - Promotions screen is shown below:
Figure 10–23 Delete a Promotion from the Events - Promotions Screen
4.
Check the check box under the Delete icon.
5.
Click Process Selected Items.
The Promotion Items list screen will continue to list Items even
if the collaboration is removed or deleted for existing Promotion
Items. You may wish to delete such Promotion Items. See User and
Role Permissions for Permissions and Accessibility for deleting
Promotions and Promotion Items.
Note:
Promotion Items
Promotion Items are located at the collaboration level. Only one Promotion Item can
be defined for the a given product/location context and period. Promotion Items can
be generated for a single-period, or can span multiple contiguous periods. To create
and access Promotion Items, a leaf-level location, a partner location, and a product
must be selected in the context chooser.
Each Item includes a collection of attributes, such as the price point, sales forecast, and
order forecast for the Item. Some of the Event Item attributes will be inherited from the
Promotion itself. However, establishing a local value for the attribute can override the
inherited Item attributes. This allows pricing, timing, and quantities to vary by
location and product.
10-26 Oracle® Value Chain Collaboration User Guide
Promotion Items
If "Entire Promotion" is turned in use, and some Items are
deleted, the Sales Impact Qty for the Items will not be re-adjusted.
Note:
The Events - Promotion items screen appears as shown:
Promotion Item attributes include:
■
Price Impact Type
■
Price Impact
■
Sales Impact Type
■
Sales Impact Qty
■
DSD Order Forecast Qty
■
DC Order Forecast Qty
■
Foreward Buy Forecast Qty
■
Item Type
The impact of events is applied according to the rules shown in Rules for Applying
Event Impact. For absolute impacts, the specified impact is applied uniformly to all
Item/time periods specified. For instance, if the you specify an absolute increase of 500
units, 500 is entered in the promo line for all time periods and all Items specified.
There is no disaggregation of the entered value.
Table 10–7
Rules for Applying Event Impact
Impact Type
POS FC Impact
Price Impact
Percent Increase
Promo Qty = Base * (Impact QTY)
/100
Promo Price = Base * (1 + Impact
QTY/100)
Percent Decrease
Promo Qty = -1 * Base * (Impact QTY) Promo Price = Base * (1 - Impact
/100
QTY/100)
Absolute Increase
Promo Qty = Impact QTY
Promo Price = Base + Impact QTY
Absolute Decrease Promo Qty = -1 * (Impact QTY)
Promo Price = Base - Impact QTY
Absolute Change
Promo Price = Impact QTY
Promo Qty = (Impact QTY) - Base
If Set Sales Impact and/or Set Order Impacts at Event level are
not selected, the forecast for the unselected one will not be generated.
Note:
Algorithms for optimizing the timing, pricing, or calculating expected
sales for an event are not included.
Events
10-27
Promotion Items
Viewing Promotion Items
There are two ways in which you can view a list of Promotion Items:
1.
A list of Items can be accessed through the Oracle Retail VCC menu by selecting
Events - Promotion Items. This list will display the Items regardless of the
Promotion they were created for. The Events - Promotion Items list is
context-specific.
Figure 10–24 Events - Promotion Items List
2.
Similarly, Promotions can be viewed by accessing the Examine Events screen,
where a "Number of Items" link exists in the Context Chooser area. This number is
clickable, and will display a list of Promotions for that Event.
Figure 10–25 "Number of Items" Link in the Context Chooser Area
10-28 Oracle® Value Chain Collaboration User Guide
Promotion Items
To Freeze Column Headers
The Events module has a long list of columns that can be chosen and they normally
don't fit on to single screen window making it difficult for the user to view
Events/Promotions. Hence the column headers can be frozen when scrolling vertically.
Also under Preferences>>Layout>>Lists the number of columns to freeze can be set to
a desired value, allowing columns to be frozen horizontally.
A combination will thus allow column headers to be frozen
vertically and columns to be frozen horizontally.
Note:
Events - Promotion Items List
The Promotion Items screen displays a list of the following columns and enables the
following actions:
■
■
■
Delete – select a specific Item for deletion, or select all to delete.
Examine – view/edit an individual Item's Begin and End Dates, Price and Sales
Impact, Item Type, Item ID, and Comment.
View Data – displays data stream data if all the streams in the stream set are
accessible.
■
Promotion Name - user defined name for the promotion.
■
Event ID – the ID assigned to the Event
■
Promotion ID – ID assigned to the Promotion
■
Local Location – local location name
■
Partner Location – partner name
■
Product – product name
■
■
■
Promotion Item ID – ID number assigned to the Promotion. This ID will be
assigned by the system if not specified while creating the Promotion
Event Name – User defined name of the Event
Event Category – category the Event belongs to. Category indicates the reason for
planning the Event (i.e., Holiday, Price Change, Retailer Promotion, etc.).
■
Begin Date – date the Item's Promotion begins
■
End Date – date the Item's Promotion ends
■
Promotion Status – status of the Promotion for which the Item is a part
■
Condition – "OK" displays when Promotion condition is okay.
■
Entire Promotion (hidden)
■
Sales Impact quantity (hidden)
■
Price Impact Type (hidden)
■
Price Impact (hidden)
■
DC Order Offset (hidden)
■
DC Order quantity (hidden)
■
Created By – Name of the User who created the Event (hidden)
■
Created Date – Date the Promotion Item was created (hidden)
Events
10-29
Promotion Items
■
■
■
■
■
■
■
Last Changed Date – Date the Promotion Item was last modified (hidden)
Last Changed By – Name of the User who last modified the Promotion Item
(hidden)
Comment – Item-specific comments can be viewed and edited by clicking the dots
in this column. Grey dots indicate that a comment has not yet been made for the
Item.
Promotion Item Type – can be either "Promoted" or "Cannibalized.
Printer-Friendly View – dots in this column can be clicked to display a screen
formatted specifically for printing.
Overridden – "Yes" if any of the following fields for that Item are modified: Price
Impact Type, Price Impact, Sales Impact Type, Sales Impact Qty are modified.
Edit All – check boxes allow for selection of Promotion Items in order to change
Attributes. Changes will take effect for all the Items selected under "Edit All"
One or more of the columns seen above may be hidden
depending on your settings in Preferences -Layout - Lists - Promotion
Items.
Note:
You can view, edit, comment on, and delete Items from the Event - Promotion Items
screen. The comment column allows you to leave comments on individual Items by
clicking on the dot beneath the speech bubble icon. Comment dots will appear white
when they are empty. When they contain a comment, they will change color. If you
have access rights to delete an Item, the delete column will contain check boxes which
you can select for deletion, and then hit the Process Selected Items button.
To view the details for a particular Item, click the drilldown dot under the View/Edit
icon.
Creating Promotion Items
Promotion Items can be viewed within the Event - Promotions list screen. They appear
under the Number of Items column. If there are any Items for a particular Promotion,
the exact number of Items that exist will appear in the column. You may add, edit and
examine the Items by clicking on the numeric link. If you add more Items to the
Promotion, the number on the List screen will increase, and will decrease if you
remove Items. If the number displayed for a Promotion is "0", this indicates that there
are no existing Items at present. You can click the "0" link to add Items.
You cannot add Items from the Event level screens. Items are created for and
associated with a Promotion, not Events. To view/edit/create items, you must always
access them through either the Promotion or the main menu.
After a Promotion Item have been created, if any of its
included context items (Local, Partner, Product) are subsequently
removed from their Master Data hierarchies and into the Recycle Bin,
the Item is removed from the list of Event-Promotion Items. However,
the Promotion Item number link will not be adjusted to reflect the
reduced count until after the next Master Data Purge.
Note:
To add, view or edit Items through the Promotion screens
10-30 Oracle® Value Chain Collaboration User Guide
Promotion Items
1.
Select a context.
2.
Drill down to examine the Promotion for which you would like to create Items.
The Examine Promotion screen appears. From the Examine Promotion screen,
click the Number of Promotions link in the chooser area.
Figure 10–26
3.
Events - Overview Screen - Examine Promotion Section
Click the "Number of Items" link in the chooser area. The tree view appears.
Figure 10–27
Tree View
4.
Select the context at which to create the Items.
5.
Enter Start and End dates, or leave the default dates.
6.
Select the Promotion Item Type from the drop-down. Choices are "Promoted" and
"Cannibalized". Cannibalization is used when the forecast for an Item is lowered
due to a particular type of Promotion. This could include a substitute item being
promoted because a complimentary item is out of stock or discontinued.
7.
If you want to create your own ID Prefix for the Items created, uncheck the System
Generated ID check box. This allows you to set a Sequence Begin Number (default
is "1") and Item ID Prefix, or to Manually enter the ID information for each item. If
you uncheck this box
Events
10-31
Promotion Items
■
■
Select the Manual radio button, and enter the IDs manually on the next (Item
List) screen. The "Promotion Item ID" column will be left blank, so that you
can enter each Item ID yourself.
Select the Generated radio button, and enter an Item ID Prefix and/or a
Sequence Begin Number.
–
The Item ID Prefix allows you the option of entering your own sequence
of 10 alphanumeric characters that will help you customize and identify
the Items you create.
–
The Sequence Begin Number allows you to enter up to 5 numeric
characters that determine with which number the Item ID sequence will
begin. For instance, if you create 3 Items, and have entered 2000 as the
Sequence Begin Number, your Items will be numbered: 2000, 2001, and
2002. Each consecutive number will be incremented by 1.
If you have opted to manually assign Promotion Item IDs by
unchecking the "System Generated" check box, you will be required to
assign unique alphanumeric Item IDs to each Item prior to clicking the
Create button on the Promotion Item List screen.
Note:
8.
Click Review Selections. The screen which allows you to review Collaboration
Item selections appears.
Figure 10–28 Review Collaboration Item Selections
9.
Configure the Begin and End Dates, if needed, and remove any unwanted Items in
the list by checking the boxes in the Delete Column. Click the Delete button to
remove items, or Create to proceed.
10. If date conflicts appear in the Error column during creation, resolve them by
deleting unnecessary Items from the list or by changing the date range for that
Item. All errors must be resolved prior to creating the Items.
10-32 Oracle® Value Chain Collaboration User Guide
Promotion Items
Figure 10–29
Item Errors
Once you are satisfied with the contents of the list, select Create. After Item
creation, you can check the Monitor - Jobs screen to verify that the job has been
completed.
On the Events - Promotions - List screen, the newly created
Promotion will only be visible if the context chooser's product is at
folder level, or if Items exist for the Promotion that match the selected
product. Because Items are attached to a specific context and
Promotions exist independent of context, you may need to select a
folder-level product in order to see the newly created Promotions.
Note:
Deleting Promotion Items
To delete Promotion Items, select Events - Promotion Items from the menu. Click the
Delete check boxes in the list of Items that you would like to remove, and click the
"Process Selected Items" button.
Addition and Deletion of promotion items:
The partners are not allowed to perform add, edit and delete operations on the
promotion items while the promotion is in certain statuses like Active, Complete,
Planned etc. This is shown in the screen below:
Events
10-33
Documents
Figure 10–30 Add / Delete Promotion Items
Table/Graph View in Promotion Items
The Events - Promotion Items list allow you to view both you and your partner's
datastream data with the "View Data" feature. You may also edit your data while in
this mode.
To view data:
1.
Set your context.
2.
Select Events - Promotion Items. The Promotion Item screen appears.
3.
Click the drilldown dot under the View Data column. The Table/Graph screen
appears.
4.
Edit data and click Save. "Successfully Saved" message appears at the bottom of
your display pane.
5.
Click Back to return to the Item list.
Documents
Documents are attachments that can be associated with either Events or with
Promotions. Documents must be added to one of these levels in order to be accessible
for download.
File size limitations for document attachments can be configured by the superuser in
the Configuration - General tab. The default maximum file size is 1Mb.
10-34 Oracle® Value Chain Collaboration User Guide
Documents
Viewing Documents
Documents attached at the Event level can be viewed by examining the Event, and
then examining the number of Documents attached to that Event. You cannot access
Events' documents at the Promotion level, and vice versa (i.e., these uploaded
attachments are saved only to an Event, or only to a Promotion, and are mutually
exclusive).
You can, however, view both Event level and Promotion level documents at the same
time by accessing the Events - Documents list screen.
The columns that appear in the list screen include:
Figure 10–31
■
■
Events - Documents List Screen
Delete – remove selected document.
Download – contains the filename of each attachment. Each filename is a
download link.
■
Description – optional description of the file.
■
Creator Company – company from which the document originates.
■
User Name – username of the person who attached the file.
■
Event Name – name of the event the document is attached to.
■
Event ID – ID of the event the document is attached to.
■
Promotion ID – ID of the promotion the document is attached to.
■
Upload Date/Time – date and time the document was attached.
Attaching Documents to Events and Promotions
Documents can be attached at either the Event or Promotion level in precisely the
same fashion. Once the event or the promotion you would like to create the
attachment for is selected
1.
Examine the Event or Promotion which you will attach the document to by
clicking on the List screen Examine/View/Edit drilldown. The Examine screen
appears.
2.
Click the Documents link number that appears in the context chooser.
Events
10-35
Documents
Figure 10–32 "Documents" Link in the Context Chooser Area
If the link reads "0", it indicates that there are no documents attached to the Event
or Promotion at this time.
3.
Browse for the document you would like to attach, or enter a path for the file.
Figure 10–33 Browse for the Document to Attach
4.
Enter a Description for the file (optional).
5.
Click Upload.
The new attachment will appear in the upload screen's list, as well as the Events Documents list screen.
Removing Documents
To delete a document:
1.
Select Events - Documents
2.
Check the delete check box of the document or documents you wish to remove.
3.
Click Process Selected Items.
4.
The user can configure VCC to disable documents delete option for collaborative
partners. This would disable the collaborative partner from deleting the
documents created.
10-36 Oracle® Value Chain Collaboration User Guide
Promotion Status Changes
The screen below shows how the user can disable the delete column option to certain
documents based on the User preferences.
Figure 10–34
Delete a Document
Promotion Status Changes
The figure below illustrates the promotion status lifecycle, with all the The figure at
the bottom shows the two additional transitions that are allowed when the partner
company is non-local.
Events
10-37
Promotion Status Changes
Figure 10–35 Promotion Status Changes
10-38 Oracle® Value Chain Collaboration User Guide
11
Demand
This chapter consists of the following:
■
Introduction
■
Demand Policy Parameters
■
Viewing Demand Policies
■
Creating a Demand Policy
■
Using Interactive Demand
■
Batch Jobs.
■
Using Lift Factors
The Demand module is a separately priced option, and access
to it as a menu item will only appear if you have obtained a Demand
license.
Note:
Introduction
The Demand module creates base forecasts by applying statistical algorithms to
historical time series. The module allows you to view and enter overrides to the
system-generated forecast prior to saving the forecast. This module also allows you to
create batch forecast jobs that can be run on a routine schedule through Scheduler
tasks.
Because the Demand module provides time-series based statistical forecasts, it is not
appropriate for the following tasks:
■
Generating promotional forecasts.
■
Providing causal forecasting, like a rise in sales due to coupons.
■
■
Providing order, inventory or price forecasts (order forecasting can be
accomplished with Oracle Retail VCC Supply Planning).
Applying supply chain or business constraints to the statistically generated
forecast, such as production capacity limitations.
You begin by selecting an aggregate context or a leaf-level context. If an aggregate
context is chosen and no "Sum" is specified, forecasts for all valid leaf level
combinations below the aggregates will automatically be generated. This is a powerful
feature for forecasting a large number of items, since you will not need to explicitly
select every possible combination.
Demand 11-1
Demand Policy Parameters
You select the historical date range to serve as the input to the statistical forecast, a
future date range for the forecast series, and the forecast method to be used. The
Demand module submits historical data from each of the selected contexts to the
software forecasting engine (called Geneva, see Geneva Forecast Engine for details) to
generate a forecast. For each historical data series, the forecasting engine preprocesses
the data using the specified method. Next, the engine optimizes the forecast model
parameters for the selected model and computes the forecasted time series. An expert
system is available to create a "best-fit" forecast based on your historical data. When
submitting multiple contexts, the expert system optimizes each context individually.
The user-driven forecasting process has the following steps:
■
Choose your demand policy contexts
■
Choose demand policy parameters
■
Submit the job
An alternate process that automates the task of creating forecasts is also available:
■
■
You can create a batch forecast job with preset parameters that can roll forward as
time elapses.
This batch forecast job is scheduled to execute using the Oracle Retail VCC
Scheduler.
Demand Policy Parameters
The demand parameters stored in the permanent policy are used to initialize the
temporary policy in the interactive forecasting screen. These permanent policies are
also used when processing batch forecasts. The parameters include:
■
Method – The Demand policy uses one of the following methods of time-series
statistical forecasting:
–
Expert System (Default) tests each of the other methods against the data set,
and automatically selects the forecast model that best fits your actual data. The
expert system also automatically optimizes the various parameters required
for the best-fit model.
–
Linear Regression measures the long-run trend in the data. All historical data
points are given the same weight in predicting the policy.
–
Nonlinear Regression assumes that trends vary over time. The Demand
module includes the following Nonlinear Regression transforms:
*
Nonlinear Regression 1: x' = log(x); y' = log(y)
*
Nonlinear Regression 2: x' = x; y' = ln(y)
*
Nonlinear Regression 3: x' = log(x); y' = y
*
Nonlinear Regression 4: x' = 1/x; y' = 1/y
*
Nonlinear Regression 5: x' = x; y' = ln(y / (K-y))
–
Single Exponential Smoothing weights recent data more heavily than older
data, and also assumes that there is no trend or seasonal pattern in the data.
–
Double Exponential Smoothing adds a trend term.
–
Holt-Winters Exponential adds a seasonal component to the forecast. The
Holt-Winters method is sensitive to outliers.
11-2 Oracle® Value Chain Collaboration User Guide
Demand Policy Parameters
If there is not enough data to calibrate the seasonal factors from Holt-Winters
method, the Double Exponential Smoothing method, which is basically the
Holt-Winters method without seasonal adjustment, is automatically
substituted.
■
Smoothing Pre-Filter – The smoothing pre-filter is a moving-median type filter
that smooths outliers from the input data stream before it is submitted to the
forecasting engine.
The median pre-filters are useful for filtering out short events, such as a
promotion, or a weather-related event. The number of periods determines how
long of an event the filter will remove.
For example, a one-period event, a data stream may look like:
100, 100, 180, 100, 100
■
■
■
For period 2, a 3-point median would use: 100, 100, 180. The median value is
100.
For period 3, a 3-point median would use: 100, 180, 100. The median value is
100
For period 4, a 3-point median would use: 180, 100, 100. The median value is
100.
So it has perfectly smoothed out the outlier.
General rule is the number of points in the filter must be (1+2x) where x is the
length of the event you want to filter out. So a three-period median smooths
one-period events, a nine-period median smooths four-period events, etc.
■
■
■
■
Seasonal Pre-Filter – A filter that de-seasonalizes the outliers from the input data
stream before it is submitted to the forecasting process. The Demand module
includes the following seasonal pre-filters:
–
Moving Periodic Total pre-filters the data by aggregating weekly data into 52
week moving totals. The forecasting engine predicts the moving total of the
information and then unravels this aggregate forecast back into weekly
buckets.
–
Seasonal Adjustment pre-filter that calculates seasonal factors with less than a
complete year of history as well as calculates seasonal factors that are not
unduly influenced by outliers caused by trade or consumer promotion.
Trials – The number of times, 1 through 5 (3 is default), that the calculations are
performed to generate a forecast. The default number of trials is generally
sufficient. A higher number may provide more accurate forecasts but will require
more processing time.
End of Life – The policy can specify an end-of-life date, which can be any period
in the database. If specified, then the forecast is forced to zero for all periods after
the end-of-life date.
Use Like Item – Since historical data is required to generate a forecast, new or
replacement SKU's can present a challenge. One way around the problem is to
allow the use of history data from a "like item".
For example, "Use like item" = "yes", "End Date" = 9/1/2001, Multiplier = 1.5.
Request a forecast using history range from 6/1/2001 to 10/31/2001 Current item
is A, "Like Item" is B. The history from item B for the periods 6/1 to 9/1 is
multiplied by 1.5, and pre-pended to the history from item A from 9/2 through
10/31, yielding a single composite history stream from 6/1 through 10/31. This
Demand 11-3
Demand Policy Parameters
entire composite stream is passed to the forecasting engine, to generate the future
forecast for item A.
If "Use Like Item" is set to "No", then "Context", "End Date", and "Multiplier" do
not apply.
Match Option
When setting a like-item at an foldercontext by using the "edit all" functionality, or
when first creating leaf-level policies at a folder, the "match" option will set that
dimension of the like item to match that of the leaf-level policy, while using the
other dimensions from the selected like item. For example, consider there were
two demand policies under the All Locations, Partner X, Product 1 context:
Location A, Partner X, Product 1
Location B, Partner X, Product 1
The user selects "edit all", and chooses All Locations, Partner X, Product 2 as the
like item, and selects "Match Location". The resulting policies are as follows:
Table 11–1
Demand Policies
Policy Context
Like Item
Location A, Partner X, Product 1
Location A, Partner X, Product 2
Location B, Partner X, Product 1
Location B, Partner X, Product 2
Not all combinations of the above selections are valid. For instance,
■
■
■
If "Expert System" is the method selected, then no selection is allowed for
either Smoothing or Seasonal. (The forecasting engine determines them
automatically.)
If Holt-Winters is the method selected, then Seasonal Pre-Filter is
automatically set to "None".
If "disabled" is the method selected, then no other options are available, and
this item is not forecast. Batch forecast jobs that contain this item skip it, and if
a user enters the interactive forecast screen for this item, they get a message
that it has been disabled.
Disabled policies are essentially "saved" or "stored" policies that are inactive until
their method is manually changed. This method is useful when large batches of
"pending" policies are generated from folder root levels, and then stored until
further notice. The disabled method can also be used to avoid the inconvenience of
deleting and recreating policies when you wish some policies to be inactive while
others are active and being processed in a batch job. With the "disabled" feature,
you have a finer degree of control over which policies you wish to affect your data
now, and which policies you would like to store until needed.
11-4 Oracle® Value Chain Collaboration User Guide
Viewing Demand Policies
Advanced Parameters
These advanced parameter can be shown or hided by checking or un-checking the
"Advanced" box.
■
■
■
■
■
■
■
Fit Type – "All Points" calculates the fit against all data points (including any
outliers) in the holdout period. "Baseline" calculates the fit against a
moving-median smoothed baseline of the data in the holdout period.
Fit Ratio – The size of the holdout period, expressed as a ratio of the entire history
range. A smaller fit ratio will more heavily weight the more recent point in the
best-fit forecasting competition.
Lower Bound % – A hard floor on future forecasts, expressed as a percentage of
the lowest historical value.
Upper Bound % – A hard ceiling on future forecasts, expressed as a percentage of
the highest historical value.
Seasonality Waves – Selects the periodicity of the seasonality waves. The system
has the capability of modeling multiple nested seasonality waves.
Allocate Days– [Only available on databases with daily base periods.] If set to
"yes", forecasts are generated at a weekly level, then allocated to days based on an
internally-calculated day-of-week profile. If set to "No", forecasts are generated
directly at the daily level.
Parameter Search Step Size – This sets the step size used in the search algorithm
for the best-fit parameters. "Small" may yield more accurate results, but will be
slower, as a larger number of possible parameter values must be considered.
Viewing Demand Policies
The Demand - Policy - List screen shows all Demand policies at and below the
currently selected context. The list is sortable by any of the data columns. The
following default columns are displayed:
Figure 11–1 Demand - Policy - List Screen
■
Delete – deletes the policy when checked and Apply Changes is clicked. Click the
Delete icon to select/deselect all items on the current page to be deleted. Click the
individual check box to select/deselect that item to be deleted.
Demand 11-5
Creating a Demand Policy
■
Edit (View) – displays an editable view of the policy when the colored dot below
the "Edit" icon is clicked.
■
Product – displays the product name.
■
Local – displays the local name.
■
Partner – displays the partner name.
■
Method – displays the selected method.
■
End-of-Life – displays the date if end-of-life feature is used, or n/a.
■
Lift Factor – displays "Yes" if a lift factor is used.
■
Created By – displays the user name of the creator of the policy.
■
Last Updated – displays the date and time when the policy was last updated.
■
Process on Demand – this check box will enable you to generate forecasts for the
selected policies. To initiate processing click the "Apply Changes" button.
■
Last Plan – displays the date that the last demand plan for this policy was run.
■
Last Plan By – displays the user that ran the last demand plan for this policy.
■
Period Overlay – displays the period overlay name selected. Default display is
"none".
One or more of the columns described above may be hidden
depending on your settings in Preferences - Layout - Lists - Demand
Policy.
Note:
Creating a Demand Policy
Demand policies contain collaboration-specific data relevant to the forecasting process.
Demand policies can apply at leaf-level and folder-level collaboration items. You must
specify which streams to use in both the demand and lift factor calculations by
creating stream sets in Company - Module Config - Demand. For details see
Managing Demand Module Stream Set for a Company.
When creating Demand policies bear in mind that an aggregate Demand policy cannot
be created with a Measure stream for an output stream. Output streams at aggregate
level must be disaggregated, and Measure streams are not disaggregated.
To create a Demand policy
1.
Set your context.
2.
Select Demand - Policy - Create and the following screen appears:
11-6 Oracle® Value Chain Collaboration User Guide
Creating a Demand Policy
Figure 11–2 Demand Policy Screen
3.
For each context dimension that is at folder level, an Aggregate On check box
appears giving you the choice of aggregating on that dimension. If you choose not
to check any of the boxes, the policy will be created for all leaf-level contexts. If
you do not have a folder level selected, "None" will display for Aggregate On.
Aggregate On check boxes will not appear for and "All" level (All Locations, All
Partners, or All Products), but only at the folder levels beneath it.
4.
Select the Stream Set Name for which you want to create the policy from the
drop-down list (see Managing Demand Module Stream Set for a Company).
5.
Choose a forecasting method from the Method drop-down list.
6.
Choose a smoothing pre-filter from the Smoothing Pre-Filter drop-down list.
7.
Choose seasonal pre-filter from the Seasonal Pre-Filter drop-down list.
8.
Select the number of trials, 1 through 5 (3 is default), from the Trials drop-down
list.
9.
Select a Period Overlay, if you have previously created one.
10. Choose whether the demand policy will have an end-of-life date by selecting Yes
or No from the End of Life Date drop-down list. If Yes, select the date from the
pop-up calendar, or manually enter the date in the text box.
11. Choose whether the demand policy will use a lift factor by selecting Yes or No
from the Use Lift Factor drop-down list.
12. Choose whether the demand policy will use a like item by selecting Yes or No
from the Use Like Item drop-down list.
If you select Yes, click Select and choose the like item context.
Demand 11-7
Creating a Demand Policy
Figure 11–3 Select Like Item Context Screen
Click the "Apply Changes" icon to set the like item context, or click the "Back to
Policy" icon to return to the Demand - Policy screen
The like item can be at an aggregate context while the demand policy is at
leaf-level, and vice versa.
The Like Item you have selected appears to the right of the drop-down. You can
change your selection by clicking the "Select New" button.
Figure 11–4 "Select New" Button
13. If you are using a like item, enter the Like Item End Date by selecting the date
from the pop-up calendar, or manually enter the date in the text box.
14. If you are using a like item, enter the Like Item Multiplier (a decimal number
greater than "0").
15. Determine whether the History and Forecast Start and End dates should be Fixed
or Rolling by selecting from the drop-downs. If you choose Rolling, enter the
number of periods. If you select Fixed, select a date from the calendar.
For a fixed job, the period ranges specified below will be actual periods:
■
■
■
History Start – Any period in database prior to current period. First period of
history to use.
History End – Any period in database after History Start, and no later than
current period. Last period of history to use.
Forecast Start – Any period in database later than current period. First period
of forecast to output.
11-8 Oracle® Value Chain Collaboration User Guide
Creating a Demand Policy
■
Forecast End – Any period in database later than Forecast Start. Last period of
forecast to output.
For a rolling job, history and forecast date ranges are entered as offsets from the
date of running the job. If "rolling" is selected, specify how often you want to run
the job (e.g., run the job every five days).
■
■
■
■
History End – number of periods back from the period in which the job is run.
(Any integer greater than or equal to "0".)
History Periods – number of history periods to use. (An integer greater than
"0".)
Forecast Start – number of periods forward from the period in which the job is
run. (An integer greater than "0".)
Forecast Periods – number of forecast periods to use. (An integer greater than
"0".)
If your start period is rolling, your end period must also be
rolling, but you may have a fixed start and a rolling end period.
Note:
16. Click Save. Your new policies will appear in the List screen.
Figure 11–5 Demand - Policy - List Screen
Clicking on the View/Edit dot will take you to a screen similar to the Create screen
where you may edit the policy options.
Demand 11-9
Using Interactive Demand
Figure 11–6 View/Edit Screen with Editable Policy Options
Using Interactive Demand
Interactive Demand allows you to modify policy parameters and immediately see the
resulting forecast. You can also enter manual overrides to the statistically generated
demand policy before saving the forecast.
Note:
If you do not have access to all the streams in the stream set associated
with the Demand policy, you are not allowed access to the interactive
functionality.
You can edit all the streams as per your access rights and editable
rules of the streams in the Demand Interactive screen, but access to the
interactive screen is not allowed if you have "Read Only" access to the
"Output" (Forecast) stream.
If the output stream is a "measure" stream, and an aggregate Policy is
processed through Interactive or Batch, you will get an error message,
"No Disag Profile exists for one or more Periods".
The Demand - Interactive screen is where the historical and forecast data is displayed
and edited. It functions the same as Data - View/Edit (in both table and graph mode),
with the following exceptions:
■
■
■
■
Only streams configured in the "demand stream set" are displayed. This helps
limit the vertical size of the window.
All interactive changes are stored temporarily, until the user chooses Save All,
Save Data Stream, or Save Policy.
Individual cells can be manually "locked" by the user. For instance, they make an
override to a forecast value, and then "lock" the cell. If the statistical forecast is
re-run, the new results will overwrite all the existing forecast results, except for the
"locked" cell(s). Locked cells will be visually highlighted as locked. The user can
also manually "unlock" the cell.
Nulls are treated as follows:
11-10 Oracle® Value Chain Collaboration User Guide
Using Interactive Demand
–
If there are nulls at the beginning of the series (i.e., the data starts at some
point after the specified begin date), the series is truncated so that it starts
when the data starts.
–
If the nulls are internal to the series, they are converted to zeros before passing
the series to the forecasting engine.
–
If the nulls are at the end of the series, the nulls are truncated.
–
Nulls in lift factors are given the value of "1".
–
Nulls are handled the same way for batch forecast jobs.
Context Chooser - Parameter tab contains the date ranges, and the default parameters
from the forecast policy. The default parameters can be modified according to the same
rules used in the forecast policies. The date range is specified as described under
Creating a Demand Policy.
Figure 11–7 Context Chooser - Parameter Tab
■
Method – enter the method for the policy.
■
Smoothing Pre-Filter – enter the smoothing pre-filter (if any) for the policy.
■
Seasonal Pre-Filter – enter the seasonal pre-filter (if any) for the policy.
Demand calculations may ignore your seasonal pre-filter
selection (set either in the policy or the Interactive screen's parameter
pane). If you recalculate in Interactive, the parameter screen may
indicate that no transformation was done, even though you specified a
seasonal pre-filter.
Note:
After generating a forecast, the Parameters tab also displays the following
information:
■
Data Count – a read-only display containing the total number of Forecast Points
Requested, the number of Actual Forecast Points, the number of History Points
Requested, and the number of Actual History Points. Actual History Points do not
include certain periods with Null values. See Nulls are treated as follows: for
information on how Null Points/Periods are treated.
Example:
History data count: 21,19
Forecast data count: 6, 8
■
Completion Status – a read-only display that shows the completion status of the
forecast policy: OK, inadequate history, no history, less than req. history, other.
Context Chooser - Trial Data tab displays the results of the policy run. If a policy has
not yet been run for this context during the current session, the values are blank.
Demand 11-11
Using Interactive Demand
Figure 11–8 Context Chooser - Trial Data Tab
There are no user actions on this tab - it is for display only. The results include
■
Gamma – The seasonal parameter in Holt-Winters
■
Trend Hold – The degree to which the trend has held steady in recent periods.
■
Cyclic Decay – The degree to which cyclical effects in the data decrease over time.
■
■
■
■
■
■
■
■
Alpha – The level parameter in Single Exponential Smoothing, Double
Exponential Smoothing and Holt-Winters Exponential Smoothing.
Period Overlay – The period overlay name selected. Default is "none".
RMS (Root Mean Square Error) – A measure of the error between the forecast
values and the actual values in the hold-out period - calculated as the square root
of the average squared error.
MAD (Mean Absolute Deviation) – Mean Absolute Deviation - a measure of the
error between the forecast values and the actual values in the hold-out period calculated as the average error in absolute value.
MAPE (Mean Absolute Percent Error) – A measure of the error between the
forecast values and the actual values in the hold-out period - calculated as the
average percentage error.
Beta – The trend parameter in Double Exponential Smoothing and Holt-Winters
Exponential Smoothing.
Moving Period Decay – The degree to which the trend has held steady in recent
periods.
Method – The forecasting method selected (i.e., linear regression, Holt-Winters,
etc.) either by the user, or if the user selected "expert", then by the system.
■
Smoothing – Type of smoothing used.
■
Transform – Seasonal transform used.
To use the Demand Interactive feature
1.
Set your context
2.
Select Demand - Interactive and the following screen appears
11-12 Oracle® Value Chain Collaboration User Guide
Using Interactive Demand
Figure 11–9 Demand Interactive Screen
3.
Make your additions/changes. You can change/add values in the table as well as
reconfigure parameters in Context Chooser - Parameters.
4.
Click the appropriate button:
■
■
■
■
■
Save All – saves the policy and the displayed streams.
Recalculate – recalculates the data stream values based on your policy and
history.
Save Data Stream – saves the changes to the displayed data streams in the
table.
Restore Policy – resets the settings to match those saved in the permanent
policy.
Save Policy – saves the current settings to the permanent policy.
Additional validations on date ranges include a comparison of the number of data
points.
■
■
■
■
■
If number of forecast periods is greater that the number of history periods, no
forecast will be generated.
If number of history periods less than three times the number of forecast
periods, a forecast will be generated with a warning. Forecasts are most
accurate when the number of history periods is greater than three times the
number of forecast periods.
If history contains nulls, you will receive a warning showing the number of
nulls in the history period.
If your "Forecast Start" date is not the current period, the message, "Warning:
Adjusted Forecast Periods.", appears informing you that the forecast was
adjusted to accommodate the new range.
If there is a gap between your "History End" date and the "Forecast Start" date
the current period, the message, "Warning: Adjusted Forecast Periods",
appears informing you that the forecast was adjusted to accommodate the
new range.
Demand 11-13
Using Interactive Demand
■
■
If your history period contains nulls at the beginning or the end, the message,
"Warning: Adjusted History Periods.", appears informing you that the history
range has been truncated, as described above.
If your history period contains nulls at the end, the message, "Warning:
Adjusted History Periods. Warning: Adjusted Forecast Periods.", appears
because the history period end nulls are added to the forecast period and both
periods are adjusted.
Below is an example of a warning message in Demand - Interactive.
Figure 11–10 Example of a Warning Message in the Demand - Interactive Screen
Any settings that are different than the permanent profile are highlighted as
different.
Time-Aggregate Demand Forecasting
Time-Aggregate Demand Forecasting is designed to allow the user to specify
time-aggregate granularity forecasting on any Oracle Retail VCC database. When this
is specified, the base-period history is aggregated to the specified period overlay prior
to being passed to the forecasting engine. The forecasting engine forecasts in terms of
the period overlay buckets, and then logic in Oracle Retail VCC allocates the
time-aggregate level forecast back into days. This is a useful approach for forecasting
items where the history is intermittent, for instance DC withdrawals, which only tend
to occur a few times per week or per month.
The period overlay used will have all periods included in the History Begin to Forecast
End. The periods in the period overlay and period overlay items must be continuous
in order to be used in Demand.
All base periods within period overlay items, where the user has specified history
begin date, history end date, forecast begin date, and forecast end date, will be
considered for time aggregation. However, forecast data stream items will be
generated only at those base periods included in the forecast begin and end dates. If
the history end and forecast begin dates fall within the same period overlay item, the
history end will be adjusted to the previous period overlay item.
When Lift Factor is used for each time-aggregate bucket, the total history quantity is
divided by the average lift factor for that time-aggregate bucket, prior to passing the
data to the forecasting engine. For the purposes of calculating the average lift factor,
any null values are treated as equal to 1.
11-14 Oracle® Value Chain Collaboration User Guide
Batch Jobs
If no lift factor is applied, total history quantity at each time-aggregate bucket is used.
Nulls in time-aggregated history quantity will be treated the same way as at base
periods.
When writing forecast data, the time-aggregate forecast quantity returned from the
Geneva engine is divided by the number of base periods in the aggregate bucket.
If lift factor is specified, the forecast at each base period within the period overlay item
is the product of the average forecast quantity at that base period multiplied by the lift
factor for that base period. If lift factor is not specified, the forecast at each base period
within the period overlay item is the average forecast quantity at that base period.
Batch Jobs
Demand Batch Forecast or Lift Factor jobs are used to create automated forecast or lift
factor values for multiple demand policies. These jobs are configured through a tabbed
screen including List and Create/Edit views.
The Demand - Batch - List screen (shown below) lists all batch forecast jobs at and
below the currently selected context. The list is sortable by any of the data columns.
Figure 11–11
Demand - Batch - List Screen
Delete – deletes the batch forecast job when checked and Apply Changes is clicked.
Click the Delete icon to select/deselect all items on the current page to be deleted.
Click the individual check box to select/deselect that item to be deleted.
Edit (View) – displays an editable view at the context of the selected batch forecast job
when the colored dot below the "Edit" icon is clicked.
Override Execute Time – overrides the execution time for batch forecast jobs when
checked and Apply Changes is clicked. Click the Override icon to select/deselect all
items on the current page to be overridden. Click the individual check box to
select/deselect that item to be overridden.
Batch forecast jobs are executed based on the frequency you specify for each job. By
selecting Override Execute Time, the job is executed the next time the Scheduler task
for processing batch jobs runs, regardless of the frequency of the job.
Local – local name
Partner – partner name
Product – product name
Demand 11-15
Batch Jobs
Sum – sums leaf levels up wherever context was at folder level and "Aggregate On"
was checked in the creation screen
Type – type of forecast; either Lift Factor or Demand Forecast
Created By – the user name of the user who created it
Last Run – the last update date and time
Creating Batch Requests
To create a batch forecast job
1.
Set your context.
2.
Click Demand - Batch - Create.
3.
Enter the Date(s) and/or Time during which the Batch Request will run.
4.
Select the Recurrence from the drop-down. This indicates the amount of time you
wish to pass between each scheduled batch job. The default is "Once", which
means this job will run only once. Other options include: Always, Daily, Weekly,
Monthly.
Figure 11–12 Demand - Batch - Create Screen
5.
If your context has folder-level items, you will see check boxes for "Local",
"Partner", or "Product" in the Aggregate On area. Aggregating on a context
dimension will group into a batch all the policies at (but not below) that context
dimension. If you do not check any of the boxes, Oracle Retail VCC will group into
a batch all policies at and below the context. What you select here will display in
the "Sum" column on the Demand - Batch - List screen.
If you see "None" displayed for the Aggregate On option, it is because you have
selected a leaf-level context.
6.
Select whether you wish the Job Type to be a Demand Forecast job or a Lift Factor
job from the drop-down. Lift Factor will only be an option to those users who are
using daily time buckets. For more information on Lift Factors, see Using Lift
Factors.
7.
Click Save.
11-16 Oracle® Value Chain Collaboration User Guide
Batch Jobs
Demand Batch Request
Demand Batch Requests generate Demand forecast streams for every policy qualified
by the Demand Forecast request based on "Sum On" attributes.
For each Demand Policy thus qualified, the forecast stream will be computed based on
the stream set, the history and forecast dates defined in the policy.
See Creating a Demand Policy for details on how Demand Batch handles Use Like
Item, History and Forecast Dates. Using Interactive Demand describes how Null
values will be treated for History and Lift streams.
Lift Factor Batch Request
Lift Factor Batch Requests generate lift factor streams for every policy qualified by the
batch Lift Factor request based on "Sum On" attributes.
Only Demand policies which have "Use Lift Factors" checked will be considered.
For each Demand Policy thus qualified, the Lift Factor stream will be computed based
on the stream set, the history and forecast dates defined in the policy.
For details on the math involved in computing Lift Factors, see Using Lift Factors.
Running Batch Requests with Scheduler Tasks
Demand Batch Requests can be run with either of the following two Scheduler Tasks:
■
Run Demand Batch Requests
■
Run Demand & Lift Factor Batch Requests
While running Scheduler Tasks' "Run Demand & Lift Factor Batch Requests", lift
factors will be generated before going on to generating forecasts.
Lift Factor Batch Requests can be run with either of the following two Scheduler Tasks:
■
Run Lift Factor Batch Requests
■
Run Demand & Lift Factor Batch Requests
All completed scheduled tasks create an entry in the Monitor - Jobs screen detailing
what the job contained, and its completion status.
Clicking on a scheduled task under the Job ID column brings up the job log for that job
detailing the parameters (including policies, forecasts, error counts, etc.) that comprise
the job. The table below lists the errors that can occur when your job is run.
Table 11–2
Batch Forecast Job Error Conditions
Error Message
Triggered When...
COMPLETION_FAIL_INAD_HIST
The number of history periods is less than the number
of forecast periods.
COMPLETION_FAIL_NO_HIST
Either the input stream has no history data, or the
input stream of an aggregate policy has no aggregate
context data.
COMPLETION_FAIL_OTHER
An unknown error has occurred which doesn't meet
one of the defined error conditions, usually during
save.
To determine the cause of the error, refer to the
Demand log file generated in the Log Directory
(defined in the VCC Configuration).
Demand 11-17
Using Lift Factors
Table 11–2 (Cont.) Batch Forecast Job Error Conditions
Error Message
Triggered When...
COMPLETION_FAIL_
FORECASTING_DISABLED
The method selected is disabled in the policy.
COMPLETION_FAIL_INVALID_
OFFSET
The offset dates of the demand job fall outside the
range of periods in the database.
COMPLETION_FAIL_INVALID_
STREAMS
Either the demand streams configuration is incomplete
in the stream set or there is no lift factor configured,
and the policy uses the lift factor.
COMPLETION_FAIL_NO_DISAGG_ The output stream does not have a valid
PROFILE
disaggregation profile for the policy forecast periods.
COMPLETION_FAIL_PO_ALL_
PERIODS_IN_SAME_ITEM
History begin and Forecast begin cannot both be in the
same Period Overlay Item.
COMPLETION_FAIL_PO_LEAF_
PERIODS_NOT_CONTIGUOUS
Invalid leaves in Period Overlay, either non unique
base periods, or non contiguous base periods.
COMPLETION_FAIL_DATES_NOT_ Period Overlay range is less than the history begin to
IN_PO_RANGE
forecast end.
COMPLETION_FAIL_PO_ITEMS_
NOT_CONTIGUOUS
Period overlay items in PO are not contiguous.
COMPLETION_FAIL_INVALID_
HIST_START_PERIOD
Invalid History Start Date. History Start specified with
'is_rolling = true' is out of range.
COMPLETION_FAIL_INVALID_
HIST_END_PERIOD
Invalid History End Date. History End specified with
'is_rolling = true' is out of range.
COMPLETION_FAIL_INVALID_
FORECAST_START_PERIOD
Invalid Forecast Start Date. Forecast Start specified
with 'is_rolling = true' is out of range.
COMPLETION_FAIL_INVALID_
FORECAST_END_PERIOD
Invalid Forecast End Date. Forecast End specified with
'is_rolling = true' is out of range.
These error conditions can be found under Error Count in the log file. For more details
on viewing a Batch Forecast Job Error log, see Monitoring Oracle Retail VCC Jobs.
Using Lift Factors
Lift factors are used to indicate how each period compares to an "average" period. For
instance, a popular dinner restaurant is typically busier on Friday and Saturday nights
than on Monday and Tuesday nights. If an "average" day has a lift factor of 1.0, the
busy days (Friday and Saturday, in this example) might have a lift factor of 1.5, while
the slow days (Monday and Tuesday) have a lift factor of 0.7. This indicates that sales
on Friday and Saturday are 1.5 times the average, while sales on Monday and Tuesday
are 0.7 times the average. Lift factors are stored as a data stream, and can be used on
both daily and weekly databases. On weekly databases, the data stream is edited
directly. On daily databases, there is an additional interface to provide a convenient
way to add, edit, and deploy manually entered lift patterns, as well as a way to
calculate day-of-week patterns based on historical data.
Calculated Lift Patterns
Time buckets must be configured for daily, rather than weekly,
in order to access this feature.
Note:
11-18 Oracle® Value Chain Collaboration User Guide
Using Lift Factors
History
The History selection calculates the lift pattern based on history. For each day, the
value is the average for that day of week in the history period compared to all days of
the week in the selected input period, according to the following formula:
Figure 11–13
Formula to Calculate History
where the history day is equal to the count of all periods divided by the count of all
periods equal to day times the sum of data values for all periods equal to day divided
by the sum of data values for all periods (see below).
Figure 11–14
Definition of Terms Used in the History Calculation
Specifying Lift Patterns
Lift Patterns are specified very much like the way time-only disaggregation is
specified, with a few exceptions.
Each week set has a "normalize" check box, which functions as follows: When the box
is empty, the values entered in the edit boxes will be saved as-is. When the box is
checked, the values entered in the edit boxes will be normalized so that their average
is equal to 1.0. This is done by calculating their average, and dividing each number by
the average, so that they maintain the same ratio to one another.
If "Normalize" is selected for a lift factor, and the sum of the values in a row total 0.0,
the normalized values will be all of the initial values incremented by 1.0. In such an
instance, the average will be 1.0.
This feature allows you to enter a week's worth of "actual sales" and then normalize
the numbers instead of having to calculate the normalized ratios. For example, if you
entered the following actual sales for the week:
Table 11–3
Actual Sales for the Week
M
T
W
T
F
S
S
192
164
157
185
124
329
401
Normalized to
Demand 11-19
Using Lift Factors
Table 11–3 (Cont.) Actual Sales for the Week
M
T
W
T
F
S
S
0.87
0.74
0.71
0.83
0.56
1.49
1.81
There are cases where you may not want to normalize the values, for instance, a
promotion week (shown in bold).
Table 11–4
Promotion Week
0.0
1.2
1.2
1.2
1.2
1.2
1.0
0.0
1.2
1.2
1.2
3.0
3.0
1.0
Finally, there are two date ranges entered on this page. The "Display Period" indicates
which weeks to display. Since a database may contain several years' worth of weeks,
this allows you to limit the display to the range of interest. Also the "History Period"
indicates which periods to use for calculating the lift patterns based on history. The
history calculation uses data from the stream set you specify.
To specify a lift pattern
1.
Set your context.
2.
Click Demand - Lift Factor, and the following screen appears.
Figure 11–15 Demand - Lift Factor Screen
3.
Choose the Stream Selection set from the drop-down list.
4.
Enter the History Period - Start Date and History Period - End Date in the text
boxes, or click the calendar icon next to each box and select the dates from the
pop-up calendar if you want to base the lift factors on history.
5.
Enter the Display Period - Start Date and Display Period - End Date in the text
boxes, or click the calendar icon next to each box and select the dates from the
pop-up calendar.
6.
Click Set, and the specified Display Periods appear. The first row contains
normalized historical data for the history period (if one was selected). The
remaining rows contain actual data in lift factor stream cells.
11-20 Oracle® Value Chain Collaboration User Guide
Using Lift Factors
Figure 11–16
Demand Lift Factor Calculation Screen
7.
Make your modifications/additions.
8.
Select the actions to be performed by clicking on one of the following radio
buttons:
■
■
■
Save All Periods in Display Range - this saves the values as shown for the
display period. Note that the display period can be longer than what is
actually on the screen at one time - you may need to scroll down to see the
entire display period.
Save First Row for All Periods - this copies the values in the first row to every
week of the display period, and then saves.
Save First Row for All Periods in Display Range - this copies the values in the
first row to every week in the entire database.
Note: The earliest period that the Lift Factor screen will display is
the first full week (starting with Monday) that exists in the database. If
the database contains a partial week prior to the first full week, the
partial week cannot be displayed. However, they can be manually
edited from the Data - View/Edit screen.
9.
Click Save.
Demand 11-21
Using Lift Factors
11-22 Oracle® Value Chain Collaboration User Guide
12
An Analyzer
This section contains the following topics:
■
About the Analyzer
■
Viewing Cubes with the Analyzer
■
Managing Custom Cube Views
About the Analyzer
The Analyzer module takes a snapshot of the raw data from Oracle Retail VCC and
transforms it into an easy-to-manage, highly compressed multi-dimensional OnLine
Analytical Processing (OLAP) data cube. The Analyzer provides an easy, intuitive
interface that lets anyone view, create reports on, and share that data in whatever ways
are most meaningful to them, including both tabular and chart (pie, bar, line, etc.)
views.
The Analyzer module is a separately priced option, and access
to it as a menu item will only appear if you have obtained an Analyzer
license.
Note:
For information about installing and configuring the Analyzer, refer to the Oracle
Retail VCC Installation and Configuration Guide.
Viewing Cubes with the Analyzer
You can open and view data cubes through Oracle Retail VCC’s Analyzer screen. The
Analyzer screen consists of 6 columns that contain the following:
■
■
■
View — Located in the binoculars column. Clicking on the colored dot will take
you to the selected data cube.
Name — Name of the data cube.
Partner — The partner company that applies to each cube. If the cube contains
multiple partner companies, this column will display All Partner Companies
rather than a specific partner company name.
■
Description — The description assigned to that particular cube.
■
UOM — The Units of Measure that will apply to all data contained in the cube.
■
Build Time — Each data cube is a “snapshot” of the data in Oracle Retail VCC.
Build Time denotes the time the snapshot was taken.
An Analyzer 12-1
Managing Custom Cube Views
One or more of the columns described above may be hidden
depending on your settings in Preferences - Layout - Lists - Analyzer.
Note:
To view cubes:
1.
Click Analyzer in the menu. The Analyzer screen appears
Figure 12–1 Analyzer screen
2.
Select a cube by clicking on the blue View dot located to the left of the company
name column. The data cube appears. Note that: When you right-click on the data
cell area and select “Show Value As” as “% of Grand Total”, the cells will be
empty.
The “Performance Index” option in the data cube view is not
supported.
Note:
Managing Custom Cube Views
You can save and select different analyzer cube views from the button panel at the top
of the screen.
Figure 12–2 Analyzer View Buttons
This enables you to configure a view to your liking and save is as either a Company
View or a User View. Saved views include your selection of context, stream type codes,
and quantity (yours or your partner’s).
The “Save Company View” option is only available to admin and superadmin, though
views saved by these roles will be visible to the whole company. Saving a “User View”
will display that saved view only to the user who saved it. User Views can only be
deleted by the users who created them. Company views can be deleted by admin or
superadmin roles.
For more information on how to navigate and utilize data cubes, consult DataBeacon’s
User Guide.
12-2 Oracle® Value Chain Collaboration User Guide
13
Supply
This chapter consists of the following:
■
Introduction.
■
Creating a Supply Policy.
■
Using Interactive Supply.
■
Using Supply Batch.
■
Using the Safety Stock Feature
The Supply module is a separately priced option, and access to
it as a menu item will only appear if you have obtained a Supply
license.
Note:
Introduction
The Supply module allows customers and buyers to develop supply plans that meet
target service levels.
The resupply function compares current inventory to planned consumption and
expected receipts to determine supply needs.Ordering rules (from the Supply policies)
are applied to generate a set of forecast orders to fulfill this need.
The data for starting inventory, planned consumption, and expected receipts is read
directly from the corresponding data streams. The particular streams used are
configurable in the Company - Module Config - Supply screen by the superadmin or
admin.
The Supply module consists of six general areas:
■
■
Policy – Business rules that specify parameters to use in both supply and safety
stock calculation. Stored at leaf- or folder-level collaboration item.
Interactive Planning – Interactive "what-if" supply planning of single collaboration
items.
■
Batch – Automatic supply planning of multiple items.
■
Safety Stock – A utility that calculates the required safety stock.
■
Stream Configuration – Specifies which streams to use in both the supply and
safety stock calculations (see Managing Supply Module Stream Set for a Company
for details).
Supply 13-1
Creating a Supply Policy
■
Shipping/Receiving Calendar – Specifies which days are valid for shipping or
receiving. This feature is only available when you are using daily time buckets (see
Managing Supply Module Stream Set for a Company for details).
The VCC Supply module is collaborative; both the buyer and seller have access to
"what if" planning, commentary, and exception alerts for the products they trade.
Graph and table displays provide effective decision support and analysis; users have a
view that is customized to fit their company's perspective and their individual access
rights.
Creating a Supply Policy
Supply policies contain collaboration-specific data relevant to the resupply calculation.
Supply policies can apply at leaf-level and folder-level collaboration items. In order to
use an aggregate-level supply policy, disaggregation profiles for each output stream
and aggregates for each input stream are required for the period covered by the Plan
Horizon.
Here are some specific rules about creating Supply policies:
■
■
■
An aggregate Supply policy cannot be created with a Measure stream for an
output stream. Output streams at aggregate level must be disaggregated, and
Measure streams are not disaggregated. So, when attempting to save a policy, if
the selected stream set has a Measure stream for Projected Inventory, Receipt FC,
or Shipment FC, and the context has a sum on any dimension, you will receive an
error message.
Measure streams cannot be used as output streams for a leaf-level policy that uses
a telescoping overlay, because accumulation across time would be required.
However, Measure streams CAN be output streams for leaf level policies that do
not use a telescoping period overlay because no disaggregation is required.
Balance streams cannot be used for Receipt or Shipment Forecasts for a leaf- or
aggregate-level policy that uses a telescoping overlay, because accumulation across
time would be required and Balance streams cannot be accumulated across time.
The Supply - Policy - List screen (shown below) allows you to view, sort, and delete
supply policies you have created at and below the currently selected context.
13-2 Oracle® Value Chain Collaboration User Guide
Creating a Supply Policy
Figure 13–1 Supply - Policy - List Screen
■
■
Delete – deletes the policy when checked and Delete is clicked. Click the Delete
icon to select/deselect all items on the current page to be deleted. Click the
individual check box to select/deselect that item to be deleted.
Edit (View) – displays an editable view of the policy when the colored dot below
the "Edit" icon is clicked.
■
Product – displays the selected product.
■
Local – displays the selected location.
■
Partner – displays the selected partner.
■
■
■
■
Safety Stock – displays the safety stock value if the policy is using fixed safety
stock, or the words "from stream" If the safety stock values are coming from a
designated stream in the stream set.
Total Lead Time – displays the total order processing time and transit lead time
combined.
Minimum Order Qty – displays the minimum number of items that can be
ordered.
Created By – the user who created the policy. The user's name is a link. Click the
name to Examine User.
Figure 13–2 Examine User
■
Last Updated – the date that the policy was last updated.
Supply 13-3
Creating a Supply Policy
■
Last Plan – displays the date that the last supply plan for this policy was run.
■
Last Plan By – displays the user that ran the last supply plan for this policy.
■
Process on Demand – allows you to immediately process supply jobs. Not
available for planners and reviewers.
One or more of the columns described above may be hidden
depending on your settings in Preferences - Layout - Lists - Supply
Policy.
Note:
Supply policies can be created at leaf-level and folder-level contexts. When
creating/editing at the folder level, an "aggregate on" selector is displayed for each
folder-level collaboration item that allows you choose whether the edits apply only to
the currently selected folder or to all the contained leaves.
To create a Supply policy
1.
Set your context.
2.
Click Supply - Policy - Create and the following screen appears.
Figure 13–3 Supply - Policy - Create Screen
3.
For each context dimension that is at folder level, an Aggregate On check box
appears. Select the dimension(s) you want to aggregate on by clicking on the check
boxes.
4.
Select your stream set from the Stream Set Name drop-down list. The stream
selections referred to are stream sets created in Company - Module Config Supply (see Managing Supply Module Stream Set for a Company for details).
5.
Select "Yes" from the Apply Frozen Period drop-down list if you want to take the
Total Lead Time (sum of Order Processing Time and Transit Lead Time) into
account in the supply calculation. Usually you will want to apply frozen periods.
13-4 Oracle® Value Chain Collaboration User Guide
Creating a Supply Policy
For example, if you receive an order and your total lead time is 3 days (to process
the order and get the physical shipment from here to there), then your customer
cannot receive it until three days from now. This three-day period is the "frozen
period". It is "frozen" because there is no way to change it. When you run a supply
policy, you usually want to apply frozen periods, so that the system will not
propose new orders inside the frozen period.
If, however, there is some way to expedite order processing, and your customer
was going to be out-of-stock on this key item, you might NOT want to "apply
frozen period". In this case Transit Lead Time is still applied, but Order Processing
Time is not.
6.
Select whether the safety stock type is "fixed" or "stream based" from the Safety
Stock Type drop-down list. Alternatively, use the safety stock calculator to
determine this number.
If you select "Fixed", enter the Safety Stock number. This number is the target
inventory level for the item in terms of base units.
7.
Enter the maximum inventory value in the Max Inventory text box. This is a
percent value of safety stock to use as the maximum allowable inventory. This is
used only to highlight items on the Interactive screen.
8.
Enter the minimum inventory override value in the Min Inventory Override text
box. This is a percent value of safety stock to use as the minimum allowable
inventory. Resupply plans will be calculated to keep inventory above this value.
9.
Select the inventory period from the Inventory Period drop-down list: either
"Current" or Previous".
10. Enter the Unavailable Stock number. This is the number of inventory items that
cannot be used but must be counted as part of the total.
11. Enter the Order Processing Time in base periods. This value is the Seller's
required internal processing lead-time to get an order in-transit to the buyer.
12. Enter the theoretical Transit Lead Time integer in number of base periods. This
value is the travel time between the seller location and buyer location. This is the
value used in the resupply calculation.
13. Enter the Lead Time Average in base periods. This value is the average lead time
(time between when you ship it, and when it arrives) over a period range. This is
the value used in the safety stock calculation.
14. Enter the Lead Time Variability in base periods. This value is the standard
deviation of the lead time over a period range. This is used in the safety stock
calculation.
15. Enter the Min. Order Quantity. This value is the minimum quantity that may be
ordered.
16. Enter the Order Increment Qty. After the minimum quantity, this value is the
increment by which an order quantity may be increased.
17. Enter the Service Level. This is the target service level, which is a number from
80.0% to 99.9%, inclusive, expressed as a percentage. This is used in the safety
stock calculation.
18. Choose whether you want an end-of-life date for the product by selecting Yes or
No from the End of Life Date drop-down list. When Yes is selected, a text box
appears where you can enter the end-of-life date. You may enter the date manually
or by clicking the calendar icon. A pop-up calendar appears from which you can
Supply 13-5
Using Interactive Supply
select and double-click on a day to enter a date. If "Yes" is selected, no orders are
created beyond the End of Life date.
19. Enter the Telescoping Overlay. None (default), or any telescoping overlay you
have created or have access to. If an overlay is used, all results will be placed in the
first bucket of each overlay period.
20. Enter the Planning Horizon in base periods. This value is the number of periods
to perform supply planning. Null is not a valid planning horizon value. The
planning horizon must be an integer (0 or greater).
21. The following four text fields are for user information only and are not used for
the supply calculation:
Enter the Order Interval Days (i.e., number of days between orders). This number
must be equal to or greater than 0.
Enter the Safety Stock Rules. This is a textual description of suggested treatment
of safety stock (for example, whether minimum days of supply or service level
should be used).
Enter the Rounding Rules (i.e., round up/round down).
Enter the Transportation Strategy Description, a textual description of suggested
transportation strategy (e.g. preferred carrier, customer pickup, etc.).
22. Click Save to create the Supply Policy.
Using Interactive Supply
Interactive Supply allows you to create, edit, and view supply plans interactively. The
Supply - Interactive screen shows the results of the resupply calculations, and allows
you to edit a "temporary policy" that supersedes the permanent supply policy values.
(Temporary policies are not saved as changes to the permanent profile unless you click
the Save Policy or Save All buttons - they are transient values for the current
interactive session only.) The temporary policy is initially populated with values from
the permanent supply policy.
If you do not have access to all the streams in the stream set
associated with the Supply policy or if you have read-only access to
one or more of the input streams, you are not allowed access to the
interactive functionality.
Note:
When you are using Supply - Interactive , the Context Chooser - Display Mode
screen displays the permanent supply policy values at the start of your interactive
session, which can be changed.
Figure 13–4 Permanent Supply Policy Values
■
b – Percentage of Safety Stock to use as minimum allowable inventory. Number >
0%, < Max, Inventory. expressed as a percentage
13-6 Oracle® Value Chain Collaboration User Guide
Using Interactive Supply
■
■
■
■
■
■
■
■
■
Max Inventory – Percentage of Safety Stock to use as maximum desired inventory.
Number >100%, expressed as a percentage
Order Processing Lead Time – Seller's required internal processing lead-time to
get an order in-transit to the buyer. Integer >= 0
Transit Lead Time – Travel time between the seller location and buyer location.
Integer >= 0
Receiving Lead Time – Time allowed for receiving prior to consumption. For
example, if a chemical requires a 2-day quality assurance test after it is received,
prior to allowing it to be consumed, the consumption plan is to use it on
Wednesday, the material must be received on Monday. These additional 2 days
would be the Receiving Lead Time. Integer >= 0
Min. Order Quantity – The minimum quantity that may be ordered. Number >= 0
Order Increment Qty. – After the minimum quantity, the increment by which that
order quantity may be increased. Number > 0
Safety Stock – Target inventory level for the item in terms of base units. If SS Type
= "Fixed", then Number >= 0, otherwise n/a
Unavailable Stock – Unusable inventory that must be counted as part of total on
hand. Number >= 0
Apply Frozen Period – Takes Total Lead Time (sum of Order Processing Time and
Transit Lead Time) into account in the supply calculation.
The projected inventory cells in the table are highlighted based on comparing the
inventory to certain parameters:
■
Blue – Projected ending inventory < min inventory
■
Yellow – Projected ending inventory > max inventory
■
Red – Projected ending inventory < 0
■
■
Orange – Projected beginning inventory < consumption forecast for the next
period
None – All other
Supply 13-7
Using Interactive Supply
Figure 13–5 Cells in the table highlighted based on the inventory compared to certain
parameters
In addition to editing the values in the temporary profile, you can choose one of the
following actions:
■
Save All – saves the policy and the displayed streams
■
Recalculate – recalculates the data stream values based on your policy
The output stream values do not automatically recalculate
when you open Supply - Interactive. To update values based on the
current input streams you must click Recalculate.
Note:
■
Save Data Stream – saves the changes to the displayed data stream(s) in the table
■
Restore Policy – resets the settings to match those saved in the permanent policy
■
Save Policy – saves the current settings to the permanent policy
The supply policy algorithm calculates a receipt forecast, a shipment forecast, and a
projected inventory, with the following goals:
■
■
■
■
The projected ending inventory for the buyer should be above the minimum safety
stock defined in the policy.
Projected receipt quantities should conform to the minimum and incremental
order quantity parameters defined in the policy.
Projected receipt dates should be allowed by the calendar for the receiving
location, if applicable.
Projected shipping dates should be allowed by the calendar for the shipping
location, if applicable.
13-8 Oracle® Value Chain Collaboration User Guide
Using Supply Batch
Note: All the streams in the Supply - Interactive screen can be
edited as per your access rights and editable rules of the streams.
The calculation is iterative. It begins with the current day and continues forward for
the number of days defined in the Plan Horizon parameter of the policy, or until the
End-of-Life date occurs.
The calculation is always done at the base time buckets. If an overlay is selected, the
base values are first calculated, then summed by an overlay period. The result is
placed in the first base-period bucked of each overlay period.
If you edit a stream, you must click Save prior to clicking
Recalculate in order for you edits to be included in the recalculation.
Note:
Using Supply Batch
Batch supply jobs allow automated supply for multiple contexts. The Supply - Batch List tab shows all Batch Supply jobs at and below the currently selected context. The
list is sortable by any of the data columns.
Figure 13–6 Supply Batch Screen
Supply - Batch - List displays the following columns:
■
■
■
Delete – deletes the supply batch job when checked and Apply Changes is
clicked. Click the Delete icon to select/deselect all items on the current page to be
deleted. Click the individual check box to select/deselect the item to be deleted.
Edit (View) – displays an editable view at the context of the selected supply batch
job when the colored dot below the "Edit" icon is clicked.
Override Execute Time – overrides the execution time for the supply batch jobs
when checked and Apply Changes is clicked. Click the Override icon to
select/deselect all items on the current page to be overridden. Click the individual
check box to select/deselect the item to be overridden.
Supply batch jobs are executed based on the frequency you specify for each job. By
selecting Override Execute Time , the job is executed the next time the Scheduler
task for processing batch jobs runs, regardless of the frequency of the job.
■
Product – displays product component of the context.
■
Local – displays location component of the context.
Supply 13-9
Using Supply Batch
■
■
Partner – displays partner component of the context.
Sum – displays whether the policy is aggregated on a context dimension. If the
policy does not aggregate on a dimension, displays "None".
■
Frequency – displays selected frequency.
■
Created By – displays the user name.
■
Last Updated – displays the last update date and time.
To create a batch job
1.
Set your context.
2.
Click Supply - Batch - Create. The following screen appears:
Figure 13–7 Supply - Batch - Create Screen
3.
Set the Repeat Frequency , or how often the batch job is to repeat, by selecting
from the Recurrence drop-down. You can select either one-time or repeating
calculations.
4.
If your context has folder-level items, you will see check boxes for "Local",
"Partner", or "Product" in the Aggregate On area. If there are no folder-level items,
"None" will be displayed. If "None" is displayed, Oracle Retail VCC will group
into a batch all policies (but not below) that context dimension. If you do not check
any of the boxes, Oracle Retail VCC will group into a batch all policies at and
below the context.
5.
Click Save.
All other required parameters are read from the permanent supply policy. The job is
executed by the Scheduler. A completed batch job creates an entry in Monitor - Jobs ,
with details about what the job contained, and the completion status.
13-10 Oracle® Value Chain Collaboration User Guide
Using the Safety Stock Feature
Using the Safety Stock Feature
The Safety Stock feature provides an estimate of the inventory required to support a
specified service level. For details about safety stock calculation, see Safety Stock
Calculation.
The Supply - Safety Stock - List screen shows all Safety Stock calculation jobs at and
below the currently selected context.
Figure 13–8 Supply - Safety Stock - List Screen
The list can be sortable by any of the data columns. The following default columns are
displayed:
■
■
Delete – delete button appears if any are checked.
Override Execute Time – overrides the execution time for the safety stock
calculation jobs when checked and Apply Changes is clicked. Click the Override
icon to select/deselect all items on the current page to be overridden. Click the
individual check box to select/deselect the item to be overridden.
Safety stock calculation jobs are executed based on the frequency you specify for
each job. By selecting Override Execute Time, the job is executed the next time the
Scheduler task for processing batch jobs runs, regardless of the frequency of the
job.
Once a job has been scheduled and processed, you can view
the job details in Monitor Jobs by clicking in the link for that entry's
job ID number. See Monitoring Oracle Retail VCC Jobs for details.
Note:
■
Examine Details – opens the edit view at the context of the selected Supply policy.
■
Product – displays product name.
■
Local – displays local name.
■
Partner – displays partner name.
■
Safety Stock Type – displays selected type: single value or time series.
■
■
■
Safety Stock Method – displays selected method: Normal, Poisson, Period Supply
- Forward, or Period Supply - Back.
Safety Stock Basis – displays selected basis. Actual Consumption, Forecast
Consumption, or Forecast Error.
Created By – displays the creator's user name.
Supply 13-11
Using the Safety Stock Feature
■
■
Last Updated – displays the last update date.
Process On Demand – allows you to process immediately an individual Safety
Stock calculation job. You can only "Process On Demand" one job at a time. See
Processing Safety Stock Jobs On Demand. Not available for planners and
reviewers.
Once a job has been processed "On Demand", you can view the
job details in Monitor - Jobs by clicking in the link for that entry's job
ID number. See Monitoring Oracle Retail VCC Jobs for details.
Note:
The job is executed by the scheduler; similar to the way a report request is executed. A
completed safety stock calculation job creates an entry in the existing "monitor", with
details about what the job contained, and the completion status.
To configure the safety stock calculation
1.
Be sure you have created a Stream Set. For details, see Managing Supply Module
Stream Set for a Company.
2.
Set your context.
3.
Click Supply - Safety Stock Calc - Create, and the following screen appears:
Figure 13–9 Supply - Safety Stock Calc - Create Screen
4.
If your context has folder-level items, set the Aggregate On check box for "Local",
"Partner", or "Product". If "None" is displayed, it is because your context has no
folder-level items, and Oracle Retail VCC will group into a batch all policies at and
below the context.
Aggregating on a context dimension groups into a batch all policies at (but not
below) that context dimension.
5.
Set the safety stock calculation value Type from the following radio buttons:
Single Value – calculates a single safety stock value for all future periods. Stored
as a single value in the policy.
Time Series – calculates safety stock as a time series for a defined range of future
periods. Stored in a stream.
13-12 Oracle® Value Chain Collaboration User Guide
Using the Safety Stock Feature
6.
Select the safety stock calculation Method from the drop-down list.
Normal – assumes deviation follows a normal distribution.
Poisson – assumes deviation follows a Poisson distribution. (Used for
slow-moving items.)
Periods Supply - Forward – calculates safety stock as a fixed number of periods of
forecast consumption.
Periods Supply - Back – calculates safety stock as a fixed number of periods of
actual consumption.
7.
Select the safety stock calculation Basis from the drop-down list.
Actual Consumption – uses mean and deviation of actual consumption as basis of
calculation.
Forecast Consumption – uses mean and deviation of forecast consumption as
basis of calculation.
Forecast Error – uses the forecast error as the basis of calculation.
8.
In addition to specifying the type/method/basis options, you must specify certain
parameters, which vary depending on the options selected. The table below
outlines valid combinations, and the required parameters for each. Average Lead
Time and Lead Time Standard Deviation are also required parameters where the
default values are 1 and 0, respectively.
9.
Enter the Repeat Frequency, or how often you wish the job to run. The default is
for it to occur only once. If the Recurrence is set to repeat, supply the specifics for
how often and when it will run.
Table 13–1
Safety Stock Calculation Parameters
Type
Method
Basis
Parameters
Single Value
Single Value
Act. Cons.
History Range
Forecast Cons.
Forecast Range
Forecast Error
History Range, Error
Estimator
Act. Cons.
History Range
Forecast Cons.
Forecast Range
Per Fwd
Forecast Cons.
Forecast Range,
Periods Supply
Per Back
Act. Cons.
History Range,
Periods Supply
Normal
Forecast Cons.
Forecast Range,
Rolling Horizon
Poisson
Forecast Cons.
Forecast Range,
Rolling Horizon
Per Fwd.
Forecast Cons.
Forecast Range,
Periods Supply
Per Fwd.
Actual Cons.
History Range
Normal
Poisson
Time Series
Supply 13-13
Using the Safety Stock Feature
Table 13–1 (Cont.) Safety Stock Calculation Parameters
Type
Method
Basis
Parameters
Per Fwd.
Forecast Error
History Range, Error
Estimator
Descriptions of the parameters are as follows:
Table 13–2
Description of the Safety Stock Calculation Parameters
Parameter
Description
Allowable Values
History Range
Range of historical data values
One-Time: Any range of periods in the
DB prior to the current period.
Repeating: Integer number of periods >0
Forecast Range
Range of future forecast data
One-Time Any range of periods in the
DB from the current period forward.
Repeating: Integer number of periods>0
Error Estimator
Method of estimating the forecast
error
MAD = Mean Absolute Deviation, MSE
= Mean Square Error
Periods Supply
Target inventory in terms of
number of periods
Value > 0.
Rolling Horizon Number of periods to use in
rolling average
Integer number of periods > 0 and <
number of periods in the Forecast
Range.
10. Click Save.
Time Series, Periods Forward, and Actual Consumption jobs calculate future safety
stock values based on automatic Periods of Supply. The Periods of Supply value is
computed using the Single Value / Normal /Actual Consumption method.
Figure 13–10 Formula to Calculate Periods of Supply
Time Series, Periods Forward, and Forecast Error jobs calculate future safety stock
values based on automatic Periods of Supply. Periods of Supply value is computed
using the Single Value / Normal / Forecast Error method. Formula used is the same as
seen above.
Example:
13-14 Oracle® Value Chain Collaboration User Guide
Using the Safety Stock Feature
Figure 13–11
Example for Periods of Supply
Safety Stock Calculation Rules
The following rules apply in the creation of safety stock calculations:
■
■
■
■
■
■
Matching supply policies should exist in the database for the safety stock job
request.
If the safety stock job is created at an aggregate context by selecting aggregate on
"None", it applies to all "at and below contexts".
For Single Value jobs, the safety stock quantities are written into the supply policy,
overwriting any previous value.
For Time Series Type jobs create safety stock streams based on the edit rules of the
safety stock stream selected in the Stream Set.
–
If the policy is at leaf level, the safety stock writes into the stream tables (Based
on the Revision History of the safety stock stream).
–
If the Policy is at aggregate level, the safety stock stream is a "Non Measure"
stream, and the exact matching disagg profile exists, the safety stock writes
into the stream tables (Based on the Revision History of the safety stock
stream).
–
If the policy is at an aggregate level, and the safety stock stream is a Local
Measure stream, the safety stock writes into the Aggregate table.
–
If the safety stock stream is not a Local stream, then the safety stock records
cannot be created. The job errors out.
–
If the job is beyond the End of Life (EOL) period, the safety stock value is zero.
Nulls at the beginning, end, and in between the data are ignored for computation
of Average and Standard Deviation.
For a Poisson distribution method, the number of trials (x') should not be greater
40 and the computed safety stock quantity is rounded up. Apply this method
where the data is very small.
For safety stock formulae descriptions for each type, method and basis, see Safety
Stock Calculation.
Supply 13-15
Using the Safety Stock Feature
Processing Safety Stock Jobs On Demand
Access to this feature: superadmin, admin, manager, and supervisor.
Safety Stock job processing occurs as a background task controlled by the Oracle Retail
VCC Scheduler (see Managing the Scheduler). You can, however, process a single
Safety Stock job "on demand" without having to schedule and execute the task through
the scheduler. This is called on-demand Safety Stock job processing. It allows you to
process one Safety Stock job and view the results immediately.
To process a single Safety Stock job "on demand" without having to schedule and
execute the task through the Scheduler
1.
Set your context.
2.
Click Supply - Safety Stock - List from the Oracle Retail VCC menu.
Figure 13–12 Supply - Safety Stock - List Screen
3.
Check the "Process On Demand" box next to the Safety Stock job that you want to
process.
4.
Click Process Selected Items.
13-16 Oracle® Value Chain Collaboration User Guide
Part III
Value Chain Collaboration Administration
Part III consists of the following chapters:
■
Introduction to VCC Administration
■
Server-Level Configuration and Management
■
Managing Company General Information and Preferences
■
Master Data
■
Managing Company Module Configuration
■
Creating Product Price Profiles
■
Managing Company Aggregates
■
Managing Company Data Stream Disaggregation
■
Managing Company Collaborations
■
Managing Roles and Users
■
Managing the Monitor
■
Managing the Scheduler
■
Managing Company Data Purges
■
Managing Company UOM Factors
14
Introduction to VCC Administration
This chapter includes the following topics:
■
Administration Overview
■
About the Company Chooser
■
Starting and Stopping Oracle Retail VCC.
■
Where To Begin
Administration Overview
The Oracle Retail VCC administrator tasks allow you to create and manage the
information required by VCC. In most cases, the Integrator is the most efficient way to
set up the VCC and enter your data. You then can use the Administrator to verify and
edit your data.
There are several administrative roles in Oracle Retail VCC including server admin,
superadmin, limited admin, and admin. Each role has specific functions for Oracle
Retail VCC configuration and management. (For details on the functions each role can
perform, see Managing Roles and Users or User and Role Permissions.) In addition, a
superuser is supplied that allows you to create users and assign them to specific roles.
The Superuser
Oracle Retail VCC is supplied with a superuser account. The user name is "superuser"
and the default password is "lemonyellow". The superuser is charged with setting up
the overall environment that affects all companies on the server. The superuser screen
shown below is the screen every superuser sees when they log in.
Introduction to VCC Administration
14-1
Administration Overview
Figure 14–1 Superuser Welcome Screen
The superuser role has exclusive access to
■
■
■
■
Company creation. The superuser must create all companies that will do business
on the server.
The Configuration screen (not to be confused with the specific Company Configuration pane) in the Oracle Retail VCC menu allows the superuser to
modify attributes of the data streams available to all companies, specify the Oracle
Retail VCC program modules that can be used by all companies, set up links that
are displayed in the Links menu, specify the language to be used, and configure
billing usage report information.
Time period creation. The superuser must create the time periods to be used by
companies on the server.
Database purge functions. Company administrators can submit purge requests to
the superuser to purge their transaction data. The superuser can also purge all
master data (hierarchy folders) that has been placed in recycle bins.
The Server Admin
The server admin has the same access rights as superuser, with only one exception.
The server admin cannot create other superusers or server administrators. All other
roles can be created by the server admin. Refer to The Superuser for full details.
The Integrator User
In addition to the superuser and server admin, an Integrator user role exists with the
username "integratoruser" and the default password "pinkrhino". The Integrator user
is independent of any company and cannot log in to the Client. The Integrator user is
the default user for the VCC Integrator and is allowed to load data for all companies.
The Administrators
There are three types of company-specific administrators in VCC superadmin, limited
admin, and admin. The only function to which the superadmin has exclusive access is
the VCC Scheduler, which is used to schedule various Oracle Retail VCC jobs that
cannot be performed in real time. The screen shown below is similar to the screen a
superadmin sees when they log in. for details on the context chooser, see Context
Chooser.
14-2 Oracle® Value Chain Collaboration User Guide
Administration Overview
Figure 14–2 Context Chooser Area for a Superuser
The functions you can perform as a Oracle Retail VCC company administrator include:
■
■
■
Editing your local company information including product folders and leaf nodes,
location folders and leaf nodes, and trading partner location folders. This is called
your master data. You can enter master data using the administrator tasks or the
VCC Integrator. In most cases, the Integrator is the most efficient way to enter
large amounts of this type of data.
Creating aggregates. Aggregates allow you to group individual leaf nodes in a
hierarchy into a single unit so you can treat the individual leaves in the hierarchy
as a unit. For example, if you have a category called "Toothpaste" that has several
types of individual toothpaste types in it, you can aggregate it and treat the
category as one unit.
Creating collaboration items between your company and a trading partner
company.
■
Creating price profiles, which allow you to set the base price for products.
■
Managing roles and users for your company.
■
■
Creating disaggregation profiles, which are used to perform disaggregation (the
opposite of aggregation). The disaggregation profile allows you to set up the ratios
used when allocating an aggregate number across individual leaves.
Configuring, links, time period overlays, and other general configuration
parameters for your company.
■
Submitting purge requests that are executed by a superuser or server admin.
■
Monitoring job processing.
For a complete list of user and role assignments, see User and Role Permissions.
Introduction to VCC Administration
14-3
About the Company Chooser
About the Company Chooser
The Company Chooser screen allows you quick access to any company to which you
have access so you can edit or administer its information. The Company Chooser
screen is available from all administrative screens to a superuser, server admin, or an
administrator by clicking the arrow in the top right-hand corner of the screen or by
clicking the company name link in the title bar. Superusers and server admins can see
their own company and partner companies; the superadmin role, admin role, and the
manager role can see only their own company.
For example, in the Master Data screen below, if you click on the arrow in the title bar,
the Company Chooser screen appears.
Figure 14–3 Master Data Screen
To print all the data in the printer friendly view you may have
to change the browser page setup to landscape by selecting
"landscape" from the browser's File - Page Setup menu.
Note:
14-4 Oracle® Value Chain Collaboration User Guide
Where To Begin
Starting and Stopping Oracle Retail VCC
To start Oracle Retail VCC
1.
Select VCC - VCC Server - Start from the VCC program group.
2.
Enter the following URL in your browser:
http://hostname/Syncra_instance_name/jsp/login.jsp
The following login screen appears:
Figure 14–4 Login Screen
3.
In the login screen enter "superuser" and the default superuser password
(lemonyellow).
You can use the default password initially to log in and then you can change the
password. For details on creating new users and roles, see Managing Roles and
Users.
4.
Click Login. The Oracle Retail VCC Home page for the superuser role appears.
5.
To exit Oracle Retail VCC, click Logout. If you do not log out of Oracle Retail VCC
using the logout button and your session is idle, your session information is
maintained until it expires (the default is 15 minutes). If you return before your
session information has expired, Oracle Retail VCC continues your previous
session.
6.
To stop Oracle Retail VCC, go to the VCC program group and select VCC - VCC
Server - Stop.
Where To Begin
Before you can begin to import data into Oracle Retail VCC, you must configure VCC
and create a basic framework for it that includes creating all companies, creating
hierarchy folders and leaf nodes that will contain your data, creating time periods, and
users; and other basic configuration information.
These functions are divided between the superuser, super admin, and the
administrators (superadmin and admin). The superuser has the responsibility for the
overall configuration of Oracle Retail VCC for all companies; the administrators are
responsible for company-specific configuration.
To create a framework with Oracle Retail VCC, follow the guidelines below. The steps
outlined are not hard and fast rules. As you become familiar with the Administrator,
you might choose to perform some actions before or after others. The guidelines are
meant to help and give you a basic road map for getting started. They follow the topics
detailed in subsequent chapters.
Introduction to VCC Administration
14-5
Where To Begin
Superuser Responsibilities
On a new VCC installation, the superuser is the only user in the System and it is her
responsibility to "set up" VCC and provide the environment in which companies can
collaborate. As superuser, your first duties are to
1.
Create all trading partner companies that will exist on the server. You can create
companies only through the Administrator Create tool.
2.
Create users. Company administrators can also create users for their specific
companies.
3.
Assign the Oracle Retail VCC modules for each company.
4.
Configure all data stream types and assign them to specific companies as
appropriate.
5.
Configure the languages that will be available to user.
6.
Configure billing and usage report monitoring.
7.
Create server-level links.
8.
Execute purge requests (that is, purge data) when submitted by company
administrators.
These tasks are further described in See Server-Level Configuration and Management.
Administrator Responsibilities
Administrators (superadmin and admin) are responsible for company-level
administration and configuration. They do not have access to any superuser functions.
There is no specific order in which initial administrative functions are performed. As a
recommendation, you might
1.
Configure your company's general preferences. This includes revising a company
name and ID, if applicable; managing the automatic creation of collaboration
items; managing freeze periods; managing the display period for balance streams.
2.
Create users, assign them to roles, and give them access control.
3.
Manage company-level links.
4.
Manage company period overlays.
5.
Configure optional fields for promotional events.
6.
Add the products on which you intend to collaborate. You can add them manually
or import them in batch mode. Batch mode is the preferred method for large
numbers of products. For more information about batch mode loading, see the
Oracle Retail VCC Implementor Guide.
Once you have added your products, you can create product folders and group
the products within them. Specifying folders creates a hierarchy that you can
expand and collapse in the VCC Client.
7.
Create price profiles for products.
8.
Create your company locations and trading partner locations. You can add them
manually or import them in batch mode (see the Oracle Retail VCC Integrator Guide
). For details for adding them manually, see Managing Company Collaborations.
Once you have added your company locations, you can create location folders
such as "Northeast" and group all northeast locations within that category.
9.
Add your trading partners.
14-6 Oracle® Value Chain Collaboration User Guide
Where To Begin
10. Create your collaborations. This allows you to specify individual collaborations
between your company locations and those of your trading partners, and includes
the products contained in each collaboration. Oracle Retail VCC allows you to
enter them manually using the Oracle Retail VCC Administrator, or bulk load
your collaborations using the Oracle Retail VCC Integrator's Collaboration Parser.
For details, see Creating Collaborations Between Trading Partners with the
Company Collaborations Screen. For details on bulk loading collaborations, see
the Oracle Retail VCC Implementor Guide.
11. Create aggregates, if applicable. For details, see Creating a Data Aggregate with
the Company - Aggregates - Create Tab.
12. Schedule your tasks to execute using the Oracle Retail VCC Scheduler
(superadmin only).
Introduction to VCC Administration
14-7
Where To Begin
14-8 Oracle® Value Chain Collaboration User Guide
15
Server-Level Configuration and Management
This chapter contains the following topics:
■
About Server-Level Configuration
■
Managing Company Creation
■
Creating a Company with Company - Create
■
About Oracle Retail VCC Program Modules
■
Configuration - Modules Tab
■
About Data Stream Types and Data Streams
■
About Accumulation Rules
■
Configuration - Stream Types Tab
■
Managing Links
■
Managing Users and Roles at the Server Level with the Roles and Users Screen.
■
Managing Data Purging with the Purge Data Screen.
■
Managing Time Periods for All Companies
■
Configuring a Language for Oracle Retail VCC with the Configuration - Language
Tab
■
Configuration - General Tab
■
Renaming Labels
■
Setting Export Compression Size
■
Setting the Usage Statistics E-mail Notification in the Billing Tab
■
Purging Transaction Data, the Job Monitor Log File, Current Connections, Event
Promotions, Exceptions, Collaboration Item Comments, and Master Data.
Server-Level Configuration and Management 15-1
About Server-Level Configuration
About Server-Level Configuration
Server-level configuration includes all tasks that must be performed by the superuser
or server admin. Server-level configuration tasks affect all companies doing business
on the server. A superuser/server admin can perform most functions a company
administrator (superadmin and admin) can perform, but a superuser/server admin
cannot configure price profiles or disaggregation for a company.
Server-level superuser and server admin tasks include
■
■
Company creation.
The Configuration screen (not to be confused with the specific Company Configuration pane) in the VCC menu that allows the role to create data streams
available to all companies, specify the Oracle Retail VCC program modules that
can be used by all companies, create links, specify the language to be used, and
configure billing usage report information.
■
Time period creation.
■
Database purge functions.
Each is described below.
Once you create the companies whose users will log on to this server, company
administrators can perform all company specific configuration and management
including
1.
Defining master data for the company, which includes products; your trading
partners; your company locations; time periods. You can create master data
manually using the administrator tasks, or you can load master data from a file
(see the Oracle Retail VCC Implementor Guide).
2.
Creating collaborations.
3.
Creating Price Profiles, which sets the base price for each product.
4.
Creating aggregates, if applicable.
5.
Creating company roles and users. A superuser/server admin also can create
users and assign them to roles for specific companies.
To facilitate information loading, you have the option of loading your product,
partner, and location information from a file. If you have a large amount of data to
load, you should prepare these files before you begin defining company information.
For details see the Oracle Retail VCC Implementor Guide.
Managing Company Creation
A superuser or server admin must create all information for all companies using the
administrator tasks before you begin using the companies in collaborative
relationships.
Once you create companies, you can begin creating the frameworks for the companies
you created. When your company or trading partner information changes, you must
make the changes using the administrator tasks.
The company information you must define for your company includes
1.
Your company name.
2.
Whether the company is a local company (users of this company log on to this
server) or not.
15-2 Oracle® Value Chain Collaboration User Guide
Creating a Company with Company - Create
3.
Whether your company is a buyer or seller in the collaboration.
4.
Your company ID (a DUNS number or any other ID).
5.
The name you want to assign to the highest level in your hierarchy (root) for
locations, partners, products, and periods.
Creating a Company with Company - Create
Access To This Feature: Superuser, server admin
To create a company
1.
Log in as "superuser." You can only create company information if you are logged
in as "superuser."
2.
Click Company - Create from the VCC menu. The Create Company screen
appears.
Figure 15–1 Create Company Screen
3.
From the Local drop-down list, select "Yes" if you are creating a company whose
users will log on to this system. Select "No" if you are creating a partner (non-local)
company whose data resides on a separate database.
4.
In the Role field, click Seller or Buyer depending on your company's role with its
partner.
5.
Enter the company name in the Company Name field.
6.
Enter the company ID or DUNS code (DUNS codes are assigned to a company by
Dun and Bradstreet) in the Company ID field. (DUNS code are in the following
format including hyphens: nn-nnn-nnnn.) A company ID can be from 1 to 40
alphanumeric characters.
7.
Select the the type of Company ID you entered in Step 6 from the ID Type
drop-down. Standard options include: GLN, DUNS, DUNS_PLUS_FOUR, SCAC,
SELLER_ASSIGNED, BUYER_ASSIGNED, UN_LOCATION_CODE.
8.
Assign an alternate company ID in the Alternate ID field (optional). If an Alternate
ID is entered, partners will be able to view the ID, though its primary purpose is
for internal company use.
Server-Level Configuration and Management 15-3
About Oracle Retail VCC Program Modules
9.
If you entered an Alternate ID, Select an ID Type from the drop-down.
10. Enter the Location, Partner, Product, and Period Roots, or keep the default roots,
"All Locations". Roots are the names assigned to the highest level in the company
hierarchy for locations, partners, products, and periods. Keep in mind that you
will not be able to assign user access to the company root folder for locations,
partners, or products. If you want to assign access to the highest level folder to a
user or users, you should create a "dummy" root folder below the default root
folder to which you then can assign user access. This will allow you, for example,
to create aggregates at the root (All) level that users can view in the Client.
11. Click Create. The company name now appears in the Companies list within the
Company Chooser screen and you can configure its master data and other
company-related information.
12. To access the newly created company from the Company Chooser, click Company
- Master Data from the VCC menu and then click on the triangle icon in the upper
right corner of the screen. The Company Chooser opens. Double click on it to set it
as the company on which you are working. You can also
■
■
Click on a company name, the name is displayed in the text field, click Set.
Begin typing a name in the company name field, it is highlighted in the
Companies list, click Set.
Once you create a company, company administrators can configure company-specific
parameters.
About Oracle Retail VCC Program Modules
Oracle Retail VCC can implement up to nine modules depending on your company's
license. The modules include
■
■
■
■
■
■
■
■
Reports – allows you to generate various types of reports to show the nature of the
collaboration between you and your trading partners.
Analyzer – a tool that allows you to view and analyze the data in the Oracle Retail
VCC database as an OLAP cube. The Analyzer is an OLAP tool that enables users
to analyze different dimensions of multidimensional data. For example, it
provides time series and trend analysis views.
Data – Time series supply chain data. The data can represent various metrics, such
as forecast, actual inventory, goods in transit, etc. In addition, the data can be
provided on a daily, weekly, or monthly basis. Oracle Retail VCC provides over
100 predefined data streams that you can name and customize according to your
needs. Each data stream is comprised of up to 3 substreams and a total substream.
You can request new data streams from Oracle Retail VCC, and maintain revision
histories for all data streams.
Events – allows Admin and end users to create Promotions on Products between
trading partners.
Metrics – allow you to track key performance indicators.
Exceptions – allow you to be notified when a data stream varies beyond
user-defined thresholds.
Extract – allows you to extract information from your database and export it into a
third-party application.
Demand – creates base forecasts by applying statistical algorithms to historical
time series.
15-4 Oracle® Value Chain Collaboration User Guide
Configuration - Modules Tab
■
Supply – allows customers and suppliers to develop supply plans that meet target
service levels.
Configuration - Modules Tab
Access To This Feature: Superuser, ServerAdmin
To specify which modules a specific company can use
1.
As superuser, click Configuration from the VCC menu. The Configuration screen
appears.
2.
Click the Modules tab. The Modules screen appears.
Figure 15–2
Modules Screen
3.
Highlight a company or multiple companies for which you want to assign
modules.
4.
Select the check boxes next to the module you want active for the company.
5.
If you select a single company, click the View Selected button. The modules
assigned to that company appear. You can assign or unassign modules.
Server-Level Configuration and Management 15-5
About Data Stream Types and Data Streams
Figure 15–3 View and Assign Modules
6.
Click Save.
About Data Stream Types and Data Streams
A Data Stream Type is a configured group of fixed and modifiable attributes that
define the way you can view and manipulate data in Oracle Retail VCC. When a Data
Stream Type is combined with a set of time-series data, it is called a Data Stream.
You can create, view or edit a Data Stream (depending on your role) when
■
The agreed-upon time series Period hierarchy is established and available to the
trading partner companies.
■
The Data Stream module is licensed to the user's company.
■
The Stream Type is assigned to the user's company.
■
■
■
Hierarchies for the context items Product, Partner, and Local are established and
available to the administrators in the Master Data screens for each trading partner
company.
Collaborations are established between the user's company's contexts and its
trading partners' contexts.
Access rights to the contexts are assigned to the user.
Oracle Retail VCC provides over 100 data stream types. Each Data Stream Type
contains fixed attributes and modifiable attributes. If none of the existing stream types
can be modified to meet your requirements, additional stream types can be created.
Fixed attributes include
■
■
Stream Type Code – An ID that allows sorting and helps to identify the stream
type/data stream in the database and elsewhere in Oracle Retail VCC.
Accumulation Rule – Each Stream Type is governed by one of three accumulation
rules: Movement, Balance, or Measure. This rule indicates how data in the Data
Stream behaves if and when its context and/or time series is aggregated and how
that affects the types of exception criteria you can create for it. For details, see
About Accumulation Rules.
15-6 Oracle® Value Chain Collaboration User Guide
About Accumulation Rules
■
Number of Subtypes – Each Stream Type has a fixed number of subtype
substreams; either one, two, or three. If there are two or three subtypes, there will
be a Total substream included as well.
Modifiable attributes include
■
■
■
Revision History – Defines whether or not the stream type will maintain a revision
history when data is changed in any of the subtypes in the Data - View.
Edit When – Defines whether or when substreams can be edited in the Data View. Choose among the options: Never, Past, Future, or Always.
Edit By – Indicates which trading partner "Status", Buyer or Seller, will be able to
create and edit in the Data Stream.
■
Name – Name of the stream.
■
Description – Description of the stream.
There is a third designation called "Year-ago" that becomes accessible for each
substream when the "Edit By" attribute has been defined to be either Buyer or Seller.
Under that condition, a check box for Year-Ago will appear next to each substream. If
you select the option, then a data stream containing year-ago data for the subtype can
be viewed by the end-user.
When established as a trading partner in Oracle Retail VCC,
each company is assigned a trading status of either Seller or Buyer
depending on its position in collaborations.
Note:
About Accumulation Rules
The Accumulation Rule is a fixed attribute of the Stream type that indicates how data
in a Data Stream behaves if and when its context and/or time series is aggregated, and
how that affects the types of exception criteria you can create for it.
See Managing Company Aggregates for additional details regarding context
aggregates.
There are three accumulation rules that can apply to a Stream Type/Data Stream:
Movement, Balance, and Measure.
■
A Movement stream can accumulate data across context dimensions (product,
partner, and local) and across time dimensions (period time series).
View across the context by establishing aggregate streams for combinations of
context leaf levels and category levels.
View across time by establishing an overlay of groups of the periods contained in
your time series. Period overlays can be used to view across time for leaf or
aggregate forecasts.
Any kind of exception criteria can be created for a movement stream.
■
A Balance Stream can accumulate data across context dimensions (product,
partner, and local) but not across time dimensions.
View across the context by establishing aggregate streams for combinations of
context leaf and category levels.
When a balance stream is viewed in a period overlay, the value displayed will be
the value listed in either the first or the last period contained in the range of the
periods specified in the period overlay.
Server-Level Configuration and Management 15-7
Configuration - Stream Types Tab
Value entered into Balance Strem Period Overlays will be disaggregated to 1st or
last.
The Balance Stream first or last configuration is defined in Company - General
Config - Preferences. See Managing Company General Preferences.
Admins override the First/Last configuration in Company - General Config Stream Type by selecting its "Fill Bucket". The value entered into period overlays
will be placed in each underlying period.
A "sum" exception criteria on Periods cannot be created for a balance stream.
Movement and Balance aggregates may be editable if there is a
Disaggregation Profile existing for the specified periods or, if no
periods for the specified stream type have a Disaggregation Profile,
and, the Proportional Disaggregation option is set to Yes (in
Company-General Config-Preferences ). You must also adhere to the
current Stream Type configuration attributes for `Edit By' and `Edit
When'. You can load values manually or can get data using the
Integrator.
Note:
■
A Measure stream cannot accumulate data across context dimensions (product,
partner, and local) nor across time dimensions (period overlays).
Unlike the aggregates formed for Movement and Balance streams, Measure stream
aggregates are not computed by summing the individual items included in the
selected aggregate level folder. They are simply values that exist at the folder level.
Measure stream aggregates are editable according to the current Stream Type
configuration attributes for "Edit By" and "Edit When." You can enter values
manually or by using the Integrator.
Similar to the aggregates stored for Movement and Balance streams, both current
and previous values are stored at the aggregate level for Measure streams.
When a Measure stream is viewed in a period overlay, there will be no values
displayed.
A "sum" exception criteria on Periods cannot be created for a Measure stream.
Disaggregation profiles cannot be created for Measure streams.
Configuration - Stream Types Tab
Access To This Feature: Superuser, server admin
To modify stream type attributes
1.
Click Configuration in the VCC menu. The Configuration screen appears. (Note
that you can click any column heading to sort the list by that attribute.)
2.
Click the Stream Types tab. The Stream Types screen appears listing current data
streams. On this screen you can
■
click any column heading to sort the list by that attribute
■
refresh the screen by clicking the refresh icon
■
print the screen by clicking the print icon
15-8 Oracle® Value Chain Collaboration User Guide
Configuration - Stream Types Tab
Figure 15–4 Stream Types Tab
3.
Click the colored dot under the binocular icon next to the stream type you want to
modify (or view). The data stream View/Edit screen appears that allows you to
change the characteristics of any stream type.
Figure 15–5 Data Stream View/Edit Screen
Server-Level Configuration and Management 15-9
Configuration - Stream Types Tab
4.
Select a stream Type from the pulldown.
5.
In the Name field, enter a name for the data stream or change the data stream
name if required.
The name change is reflected in the Stream Type drop box and anywhere the
Stream Type is listed throughout Oracle Retail VCC. DO NOT CHANGE THE
MEANING of the stream when changing a stream name. Use the existing subtype
descriptions and review the other attributes to discover the purpose of the stream.
6.
In the Description field, enter a new description name if the current one does not
apply.
7.
In the Subtypes fields, you can enter a new long name, short name and
description in the fields provided. For example, if you have a stream type called
"Sales," you may want to have a subtype called "Store Sales" and another called
"Catalog Sales."
After saving name changes, areas where the stream/substream is listed
immediately reflect the revisions.
8.
If the data stream subtype supports totals you can rename the Totals field by
entering an alternate name in the Totals field and you can enter a new description
name. For example, if you have a stream type called "Sales," a subtype called
"Store Sales" and another called "Catalog Sales," you might want to rename the
total substream to "Total Sales."
9.
Check the Maintain a Revision History check box if you intend to keep a record
of each time changes are made manually or by `data loading' to the Data Stream,
and/or if you want allow end-user ability to create exception criteria based on a
generational offset. A generational offset allows end-users to compare a current
Data Stream with any with any previously saved Data Stream histories. A list and
details of the histories will be accessible in the Revision History screen.
10. In the Created/Edited by section, choose the appropriate radio button option.
Click Buyer & Seller if valid users from both the buyer and the seller trading
partner companies can edit in this Data Stream. Click Buyer if valid users from
only the buyer trading partner companies can edit in this Data Stream. Click Seller
if valid users from only the seller trading partner companies can edit in this Data
Stream.
When either Buyer or Seller is selected, the substreams display an option to
establish "Year-Ago" substream designations for the subtypes. Under that
condition, a check box for Year-Ago appears next to each substream. If you select
the option, you can view a data stream containing Year-Ago data for the subtype.
11. In the Streams-View Edit When section choose the appropriate radio button
option. Click Never Editable if editing in the Data - View is not to be allowed
under any circumstance for any user. Click Editable in Future if editing in the
Data - View is only to be allowed in future time periods by valid users. Click
Editable in Pas t if editing in the Data - View is only to be allowed in past time
periods by valid users. Click Always Editable if editing in the Data - View is only
to be allowed in both past and future time periods by valid users.
12. The Assigned to field, lists the trading partner companies who are assigned this
stream.
13. Check the Real Time Export box for each data stream that, after changes are made
in the Data - View/Edit screen, will automatically "export" the changes to a file
after you press the Save button. The Real Time Export file will be located on the
machine where the Server is installed in directory Integrator\Exports\Realtime
15-10 Oracle® Value Chain Collaboration User Guide
Assigning Data Streams With Configuration - Stream Types - Assign
or in the directory as configured in the Realtime Export File Path in VCC
Configurations - Server.
14. If you want to modify another data stream, select it from the Type drop-down list
and modify it.
15. Click Save.
Assigning Data Streams With Configuration - Stream Types - Assign
Access To This Feature: Superuser, ServerAdmin
You must assign data streams to a company. When you assign a stream type to a
company, a data stream for each subtype becomes available to the end-user in both the
primary and secondary designations (where "primary" indicates the first of the two
comparators) to allow data streams viewing and editing within the Comparison
modes (Local Current to Partner Current; Local Current to Local Previous; and Partner
Current to Partner Previous).
To assign data streams to a company
1.
As superuser or serveradmin, click Configuration in the VCC menu. The
Configuration screen appears that includes all data streams supported by Oracle
Retail VCC.
2.
Click the Stream Types tab. On the Stream Types pane, click Assign in the upper
right-hand corner. The Assign Streams screen appears.
Figure 15–6 Assign Streams Screen
3.
Highlight a company or multiple companies (by holding down the Ctrl key and
clicking the companies) in the Company box and click View Selected. (Note that
View Selected only displays after you have selected a company.)
Server-Level Configuration and Management 15-11
Assigning Data Streams With Configuration - Stream Types - Assign
Figure 15–7 Stream Types Tab
4.
Move the streams you want to assign to the company by highlighting a stream in
the Available Streams box and moving it to the Accessible Streams box.
5.
Click Save. When you view the stream, the company name appears in the
Available Streams list box.
Figure 15–8 Stream Types Tab - Assign Section
15-12 Oracle® Value Chain Collaboration User Guide
Managing Links
Note: If a stream type is unassigned from a company and/or its
users, pre-existing configurations may be affected. For example, if the
unassigned stream had been defined for an existing Metrics or Report
configuration, it may be replaced by another stream type by default,
and results will not be as expected. Administrators should alert
end-users to check for and modify their configurations before
unassigning a stream type.
Creating Data Stream Types
Access To This Feature: Superuser, ServerAdmin
If the existing stream types are not sufficient, additional stream types can be created.
This is accessed through Configuration -> Stream Types -> Create. All the parameters
described above can be set for the new stream type. Stream names must be unique,
and stream ID's will be automatically assigned by the system. Once a new stream is
created, it can be assigned to companies and users in the same way as any other
stream.
Managing Links
Access To This Feature: Superuser, Server Admin, SuperAdmin, Admin
A superadmin can create a link for any company on the Server to any Web site, which
then appears under Links in the VCC menu.
Configuring Links with the Configuration - Links Tab
To create a link for a company
1.
Select Company - Configuration from the VCC menu.
2.
From the Configuration pane, click the Links tab. The Links screen appears.
3.
Select a company from the Company Chooser, if necessary. To add a link, click
Add. The Add a New Link screen appears.
Figure 15–9 Add a New Link Screen
4.
In the Link Name field, enter a name for the link that will appear under Links in
the VCC menu.
5.
In the URL field, enter the URL for the link.
Be sure you have entered the entire URL (including "http://"); otherwise the link
will fail. To avoid problems, click Test Link to make sure the URL you have
entered is valid.
Server-Level Configuration and Management 15-13
Managing Links
6.
Click Save.
Editing a Link
Access To This Feature: Superuser, ServerAdmin, SuperAdmin, Admin
To edit an existing link
1.
Select Company - Configuration from the VCC menu.
2.
From the Configuration pane, click the Links tab. The Links screen appears.
Figure 15–10 Link Screen
3.
Select a company from the Company Chooser, if necessary. Highlight the link you
want to edit and click Edit. The Update Link screen appears.
Figure 15–11 Update Link Screen
4.
In the Rename Link field, enter a new name for the link if required.
5.
In the URL field, enter the new URL if required.
6.
Click Save.
Deleting a Link
Access To This Feature: Superuser, ServerAdmin, SuperAdmin, Admin
To delete an existing link
1.
Select Company - Configuration from the VCC menu.
2.
From the Configuration pane, click the Links tab. The Links screen appears.
15-14 Oracle® Value Chain Collaboration User Guide
Managing Links
Figure 15–12
3.
Links Screen
Select a company from the Company Chooser, if necessary. Highlight the link you
want to delete, and click Delete.
Hiding Links
Access To This Feature: Superuser, ServerAdmin, SuperAdmin, Admin
To hide an existing link or make a hidden link visible
1.
Select Configuration from the VCC menu to hide links for all companies on the
Server; select Company - Configuration to hide links for a specific company.
2.
From the Configuration pane, click the Links tab. The Links screen appears.
Figure 15–13
3.
Links Screen
Select a company from the Company Chooser, if necessary. Highlight the link you
want to hide, and click the arrow to move it into the Hidden category. To make a
hidden link visible, click the arrow to move it into the Visible category.
Server-Level Configuration and Management 15-15
Managing Users and Roles at the Server Level with the Roles and Users Screen
Managing Users and Roles at the Server Level with the Roles and Users
Screen
Managing users involves tasks that include:
■
Selecting the Appropriate Tree Display
■
Roles & Users Search
■
Creating Users
■
Setting and Editing User Access Control
■
Examining a User
■
Disabling a User
■
Moving a User to a New Role
■
Changing a User Password
■
Copying a User
■
Designating a System User
Oracle Retail VCC defines the following roles into which you can group users:
■
■
■
■
■
■
■
Serveradmin– permits access to all administrative functions except creating price
profiles and disaggregation profiles. A serveradmin can create companies, create
users and assign them to roles at any level, purge data, and access all local trading
partners. Username "superuser" is created by default. All other subsequent
serveradmin users must be created by the superuser and will have the same
priveleges as superuser (except creation of user roles at or above serveradmin
level).
Superadmin– permits access to all administrative functions. A superadmin,
however, cannot create a company or purge data, can only schedule task events,
and create price profiles and disaggregation profiles for his own company and
roles below his own level.
Admin – permits access to all administrative functions except the Scheduler,
creating a company, and purging data. An admin can only create price profiles and
disaggregation profiles of his own company and roles below his own level.
Supervisor – In addition to planner and manager privileges, can create users,
aggregates, and disaggregation profiles.
Manager – permits read-and-write access to Oracle Retail VCC and allows you to
create exception criteria and metrics.
Planner – permits read-and-write access to Oracle Retail VCC to create and edit
data streams, and create promotional events. A planner has read-only access to
exception criteria and metrics.
Reviewer– permits read-only access to Oracle Retail VCC.
For details on the functions each role can perform, see User and Role Permissions.
15-16 Oracle® Value Chain Collaboration User Guide
Roles & Users Search
Selecting the Appropriate Tree Display
Access To This Feature: Superuser, ServerAdmin, SuperAdmin, Admin
The user tree defaults to show Active Users, which are users who currently have
access control and can log in to Oracle Retail VCC. Users who have been disabled will
appear in a separate user tree.
In order to access the disabled user tree
1.
Select Company - Roles & Users from the menu
2.
Choose Disabled Users from the Display drop-down. The Disabled Users tree
appears.
Figure 15–14
Disabled Users Tree
For details on how to disable a user, see Disabling a User.
Roles & Users Search
Access To This Feature: Superuser, ServerAdmin, SuperAdmin, Admin
Roles & Users Search allows you to find specific users by name. You can find users by
entering their username, or by doing a wildcard (*) search on part of their username.
For instance, if you know the user's first name is Jane, and would like to see a list of
users with the first name of Jane, you would
1.
Go to Company - Roles & Users
2.
In the Search field, type: Jane*
3.
Click the Search button , or hit the Enter key.
Server-Level Configuration and Management 15-17
Roles & Users Search
If there is only one Jane, the tree will display her information immediately. If there
is more than one Jane in the user tree, a list of all the people with the first name of
Jane will appear for you to select from.
You can use the asterisk for a wildcard search at any point in a person's name. The
following combinations are all viable searches:
Jane Smith
Jane*
*Smith
*Smi*
Figure 15–15 Search Users and Roles
Multiple search results are returned on a user search, and a list is then presented
with all the users listed who fit the search criteria.
4.
Search results will be displayed in a list format, if there are multiple results found.
Select the name from the list by clicking on it, and you will be shown a new tree
view with the user's name highlighted in the tree hierarchy. Their Name, Role, and
Company displayed above the tree. If there are no multiple results found, and only
one user who fits the search criteria, there will be no list; you will instead go
directly to the tree view with the user name highlighted.
If there is only one search result match, the user tree will appear with the user's
name highlighted.
15-18 Oracle® Value Chain Collaboration User Guide
Roles & Users Search
Creating Users
Access To This Feature: Superuser, ServerAdmin
Once you create a new user, you must set the access control for the user. For details on
setting the access control for a new user, see Setting and Editing User Access Control.
To create a new user in a specific role
1.
Click Roles & Users from the VCC menu.
2.
Highlight "reviewer," "planner," "supervisor," "manager," "admin," "super_admin,"
or "server_admin" depending on the role to which you want to assign the user.
3.
Right click on the Role folder to access the Create User pop-up
Figure 15–16
4.
"Create User" option
Left click the Create User pop-up. The Create User screen appears.
Figure 15–17
Create User Screen
5.
In the User Name field, enter a user name.
6.
In the Real Name field, enter the user's real name. Enter the user's E-Mail Address,
Telephone Number, and Fax Number, if desired. This contact information will
Server-Level Configuration and Management 15-19
Roles & Users Search
appear whenever the username link is clicked and the user is examined. See
example below.
Figure 15–18 Examine User
7.
In the Password field, enter the password and enter the password again to confirm
in the Confirm Password field.
8.
Select the company to which the user belongs from the Company drop-down
menu.
9.
In the Language field, select the language to which you want to assign the user.
10. Click Create. The Edit Roles & Users screen appears.
You cannot use the same browser that was used to create a
new user to log in as the new user. A new browser (new session) must
be opened in order to log in. Wait 50-60 seconds before the new user
logs in.
Note:
Once a user is created, you will see a reminder to Set Access Control for the users
Hierarchy, Stream and Module access. If you do not assign access control, the user is
not able to view any data.
Setting and Editing User Access Control
Access To This Feature: Superuser, ServerAdmin
Accessing the User Access Control Screens
All user Access Control are managed through a right-click menu in the Roles & Users
screen. To access this screen
1.
Select Roles & Users from the VCC menu.
2.
Highlight the user whom you want to add or change Access Control for and
right-click. Select "Access Control" from the menu.
15-20 Oracle® Value Chain Collaboration User Guide
Roles & Users Search
Figure 15–19
3.
Assign User Access Control
The Hierarchy Access screen appears by default. This is a tabbed view which
allows access to
■
Hierarchy access control
■
Stream access control
■
Module access control
Select the appropriate tab(s) to modify access control for that user.
Hierarchy Access
Oracle Retail VCC allows you to grant a user access to any category or leaf-level item
in a location hierarchy, partner hierarchy, and/or product hierarchy. You cannot,
however, grant a user access to the company root folder for any hierarchy. If you want
to do this, when creating the company, you must create a "dummy" root folder and
then create the real root folder ("All Products," for example) below it so you can grant
users access to the real root folder.
To edit or create hierarchy access control
1.
Select the Edit Hierarchy Access tab. The Edit Hierarchy Access screen appears.
Figure 15–20
2.
Edit Hierarchy Access Screen
Click the Start Editing button to begin editing. The Stop Editing button appears.
Server-Level Configuration and Management 15-21
Roles & Users Search
3.
Click "All Locations," "All Partners," or "All Products" to assign access to the
desired category or folders. Any access rights that the user currently has are
highlighted (in purple).
4.
Click a location, partner, or product to highlight it and grant access, or click a
highlighted location, partner, or product to unassign access.
5.
Click Apply Changes to commit the changes you have selected. Click Revert to
return to the user's current access control. Click Preview User Tree to verify the
new tree.
6.
Click Stop Editing.
7.
Click Done.
Stream Access
You can assign a user access to any data stream or streams that have been assigned to
the company to which the user belongs. To assign a user access to a data stream or
streams
1.
Select the Streams tab. The Edit Stream Access screen appears.
Figure 15–21 Edit Stream Access Screen
2.
Highlight a stream in the Available Streams list box and click the left arrow to add
it to the Full Access or Read Only list box.
3.
Click Save.
15-22 Oracle® Value Chain Collaboration User Guide
Roles & Users Search
Module Access
Oracle Retail VCC modules can be turned on or off for specific users. To enable or
diable a user's access to certain modules
1.
Select the Modules tab. The Edit Module Access screen appears.
Figure 15–22
Edit Module Access Screen
2.
Enable/disable modules by checking the check boxes.
3.
Click Save to save changes, Done to exit without saving.
To expand or collapse the entire tree, see Working With Tree
Hierarchies.
Note:
Examining a User
Access To This Feature: Superuser, ServerAdmin
Examining a user allows you to view and update the login status and to change a
user's password. To examine a user
1.
Select Roles & Users from the Administrator main page.
2.
Select a user and right-click on the highlighted user.
3.
Click Examine User. The Examine User screen appears.
4.
Click Done when you are finished to return to the Roles & Users screen.
Disabling a User
Access To This Feature: Superuser, ServerAdmin
To disable a user
1.
Select Roles & Users from the VCC Administrator main page.
2.
Highlight the user you want to disable and right-click on the user. Click
"Examine". The user's Examine User screen appears.
3.
Click the check box next to Login Allowed to deselect it.
Server-Level Configuration and Management 15-23
Roles & Users Search
4.
Click Update User.
5.
Click Done.
The user remains in the tree but is not able to log in.
Moving a User to a New Role
Access To This Feature: Superuser, ServerAdmin
To move a user to a new role, you must cut the user and paste the user under the new
role.
Note that a user cannot move herself or another user at her own level to a new role.
Changing a User Password
Access To This Feature: Superuser, ServerAdmin
As superuser or server admin, you can change any user password. Any administrative
role can change passwords for subordinate roles. All users are allowed to change their
own passwords.
To change the password for a user
1.
Select Roles & Users from the VCC menu.
2.
Select a user and right-click on the highlighted user.
3.
Click "Examine". The Examine User screen appears.
4.
In the New Password field, enter the new password.
5.
Reenter the password in the Confirm Password field.
6.
Click Update User.
7.
Click Done.
To change your own password
1.
Select Preferences - Password from the VCC menu. The Change Password screen
appears.
2.
Enter your password in the Password field.
Figure 15–23 Change Password Screen
3.
Enter your new password in the New Password field. Confirm it by reentering it
in the Confirm Password field.
4.
Click Save.
15-24 Oracle® Value Chain Collaboration User Guide
Roles & Users Search
Copying a User
Copying a user allows you to create a new user with all the hierarchy access rights and
data stream access rights of the user being copied.
To create a new user by copying an existing user
1.
Select Roles & Users from the VCC menu.
2.
Select a user and right-click on the highlighted user. Click on Copy User.
Figure 15–24
3.
Copy an Existing User
Click on "Copy User." The Copy User screen appears.
Figure 15–25
Copy User Screen
4.
In the User Name field, enter the new user name.
5.
In the Password field, enter the new user password.
6.
In the Confirm Password field, re-enter the user password.
7.
Click Create.
Server-Level Configuration and Management 15-25
Managing Data Purging with the Purge Data Screen
Designating a System User
To designate a system user, the "System User" check box on the Roles & Users Examine User screen must be checked.
Note that usage reports will not include users designated as System Users. Users can
also be loaded and extracted with System User status. For more information, refer to
the Implementor Guide.
Managing Data Purging with the Purge Data Screen
You can purge five types of data:
■
Transaction Data – the data substreams loaded into the Oracle Retail VCC
database.
■
Entries in Monitor – includes Jobs and User Activity purges.
■
Event Promotions – event promotions.
■
Exception Purge – purges based on status, creation date, period, and inbox type.
■
Collaboration Item Comments – context-based collaboration item comments.
■
Master Data – any product folders and names, trading partner locations, local
company locations, forecast time periods (Time periods cannot be purged. They
are hidden from end users when placed in the recycle bin), and period overlays
that have been deleted by company administrators and placed in the Oracle Retail
VCC recycle bin. Purging master data effectively empties the recycle bin of any
master data. Prior to purging master data, you can, if necessary, recover the
contents of the Oracle Retail VCC recycle bin.
When company administrators want data stream data purged, they must submit a
purge request by selecting Company - Purge Requests from the VCC menu. Once a
company administrator submits a purge request, it appears in the superuser's and
server admin's Purge Data screens. As superuser/server admin, you then can execute
the purge requests submitted. To execute a purge request, see Purging Transaction
Data.
A purge request specifies the data stream type the company administrator wants to
delete (purge) from the database and the time frame (purge date) of the data to be
deleted. When you execute the purge request, all data created in the data stream
between the dates specified is deleted. Purge requests are not required for Jobs
Monitor log purging.
After executing a purge, a log file called purgedata.log is created in the [SYNCRA_
HOME]\server directory. It contains information about the purge and whether it was
successful or not.
If you are unable to restart your server after a Transaction
Purge Request fails, it may be a result of purge lock settings. These can
be reset by clicking the following executable:
[SYNCRA_HOME]\db\Oracle\script\ReleasePurgeLock.exe
Note:
15-26 Oracle® Value Chain Collaboration User Guide
Managing Data Purging with the Purge Data Screen
Purging Transaction Data
Access To This Feature: Superuser, ServerAdmin
Transaction data is the data contained in a company's data streams. The transactions
that appear on the purge transaction data screen are those transactions that were
specified in the Purge Requests pane.
Prior to purging data, jobs must first be created in Company - Purge Requests. See
Creating Purge Requests.
To initiate the purge procedure for purge requests
1.
Click Purge Data in the VCC menu. The Purge Type screen appears.
Figure 15–26
2.
Purge Type Screen
Click the Transaction Data Purge check box. To view all the Transaction purge
requests, click the colored dot to view the requests. If you want to delete a purge
request without purging any transactions data, click the check box next to the
request you want to delete and click the Delete button.
You can perform multiple purges simultaneously by checking
any or all of the purge types in the Purge Type screen.
Note:
Figure 15–27
3.
Purge Data Screen
Click the Purge button on the Purge Type screen to purge the transaction data for
that request.
Server-Level Configuration and Management 15-27
Managing Data Purging with the Purge Data Screen
You may see an error if the server shuts down during the
process of a Transaction Purge or a Master Data Purge: "Error
Unmarshalling exception." This error can be ignored, and will not
affect the purge in any way.
Note:
Purging the Job Monitor
Access To This Feature: Superuser, ServerAdmin
The Job Monitor purge allows you to purge the Job Monitor of all of the jobs or some
of the jobs that ran in the VCC Server.
To purge the Job Monitor
1.
Click Purge Data in the VCC menu. The Purge Type screen appears.
2.
Click the colored dot adjacent to the Job Monitor Purge check box.
3.
In the Retain n Jobs in Monitor field, enter the number of most recent jobs to
retain after purging. The default is 50000. Click Save.
Figure 15–28 Retain n Jobs in Monitor Field
4.
Check the Job Monitor Purge check box.
5.
Click the Purge button on the Purge Type screen to purge the Job Monitor.
Figure 15–29 Purge Data Screen
Note that you can perform multiple purges simultaneously by
checking any or all of the purge types in the Purge Type screen.
Note:
15-28 Oracle® Value Chain Collaboration User Guide
Managing Data Purging with the Purge Data Screen
Purging Master Data
Access To This Feature: Superuser, ServerAdmin
Oracle Retail VCC allows you to empty folders that you have moved to your recycle
bin. Company administrators also can place aggregate folders into a recycle bin to be
purged. When you (superuser/server admin) purge the recycle bin, all folders and
subfolders are purged.
Time periods cannot be purged. They are hidden from end
users when placed in the recycle bin.
Note:
Placing Periods and Period Folders in the recycle bin removes those
periods from the user's view only. It does not remove the Periods for
the company. This is because Periods are shared across all companies.
If an item is placed in the recycle bin that has links to folders or leaves in the main
parent tree, those relationships will be broken during the purge process. Purging items
from the recycle bin will not affect related, linked, or copied items in the parent tree,
but will only remove those items placed directly in the recycle bin.
To purge the recycle bin of master data
1.
Log in as superuser/serveradmin.
2.
Click Purge Data from the VCC menu. The Purge Data screen appears.
3.
Click the Master Data Purge check box.
Note that you can perform multiple purges simultaneously by checking any or all
of the purge types in the Purge Type screen.
4.
Click the Purge button to purge all data in the VCC recycle bin.
Purging Event Promotions
Event Promotions data includes the information stored in promotion periods, where
the product is offered at a changed or reduced price. The items that appear on the
purge event promotions data screen are those transactions that were specified in the
Purge Requests pane.
Prior to purging data, jobs must first be created in Company - Purge Requests. See
Creating Purge Requests.
To initiate the purge procedure for purging event promotions
1.
Click Purge Data from the VCC menu. The Purge Data screen appears.
2.
Click the Event Promotions Purge check box.
Note that you can perform multiple purges simultaneously by checking any or all
of the purge types in the Purge Type screen.
3.
Click the Purge button to purge promotional events.
Server-Level Configuration and Management 15-29
Managing Data Purging with the Purge Data Screen
Purging Collaboration Item Comments
Collaboration Item Comments refers to the data contained in context-level
collaboration item comments. The comments that appear on the purge comments data
screen are those comments that were specified in the Purge Requests pane.
Prior to purging data, jobs must first be created in Company - Purge Requests. See
Creating Purge Requests.
To initiate the purge procedure for purging collaboration item comments
1.
Click Purge Data from the VCC menu. The Purge Data screen appears.
2.
Click the Collaboration Item Comments Purge check box.
Note that you can perform multiple purges simultaneously by checking any or all
of the purge types in the Purge Type screen.
3.
Click the Purge button to purge comments.
Checking the Purge Progress
The Database Administrator can verify the progress of both Master Data and
Transaction purges by querying purge_step table. The purge_step will have the last
step number that was successfully completed.
Purge stops if it cannot successfully execute a command. Errors are logged to purge_
data.log file in [SYNCRA_HOME]\server\ and are also be logged in appropriate
purge_log table. After correcting the problem, you can restart purge by executing
appropriate the restart command from sqlplus.
When the restart is performed, purge starts from last unsuccessful command executed.
On successful completion, purge_step table will have 0 in the last_step_executed
column.
After a successful purge completion, run the following analyze schema command as
sys
Exec dbms_utility.analyze_schema('<SCHEMAOWNER>','ESTIMATE',NULL,35);
Table 15–1
Purge
Purge Type
Purge Log
Table
Restart Command
Transaction
Purge_log
Exec transaction_purge
Master data
Purge_log
Exec recycle_purge
The tables affected by a transaction purge are
■
AGGREGATES
■
CURRENT_STREAM
■
EXCEPTIONS
■
STREAM
■
STREAM_ITEM
■
COMMENTS
The tables affected by a Master data Purge are
■
AGGCRIT
15-30 Oracle® Value Chain Collaboration User Guide
Managing Data Purging with the Purge Data Screen
■
AGGREGATES
■
COLLABORATION
■
COLLABORATION_ITEM
■
COMMENTS
■
CONTEXT_COMMENTS
■
CURRENT_STREAM
■
DATA_EXTRACT_REQUEST_LIST
■
DEMAND_JOB_REQ
■
DEMAND_POLICY
■
DISAGG_EFFECTIVE_PERIODS
■
DISAGG_FACTORS
■
DISAGG_PROFILE
■
EVENT
■
EVENT_COMMENTS
■
EVENT_COMPONENTS
■
EVENT_ITEM
■
EVENT_STATUS_HISTORY
■
EXCPT_CRITERIA
■
EXCPT_EXCEPTION
■
EXCEPTION_STATUS_HISTORY
■
EXCPT_GRP_CRITERIA
■
EXCPT_GRP_CRIT_DETAIL
■
EXCPT_GRP_EXCEPTION
■
GROUP_EXCEPTION_STATUS_HISTORY
■
LOCATION_SET
■
LOCATION_SET_NAMES
■
METRIC
■
METRIC_PARM
■
PARTNER
■
PARTNER_SET
■
PARTNER_SET_NAMES
■
PRODUCT
■
PRODUCT_SET
■
PRODUCT_SET_NAMES
■
PROFILE
■
REP_OUTPUT
■
REP_REPORT
Server-Level Configuration and Management 15-31
Managing Time Periods for All Companies
■
REP_REPORT_PARAMS
■
RP_JOB_REQ
■
RP_POLICY
■
RO_SS_JOB_REQ
■
STREAM
■
STREAM_ITEM
Managing Time Periods for All Companies
As superuser/server admin, you must create the time periods that will be used by all
companies on the server.
You can create time periods in weekly or daily increments for as many periods as
required. Once you create the time periods, company-specific administrators can
organize them into a hierarchy, for example, of years, months and weeks using the
New Category tool.
A period hierarchy contains period master data, which includes
■
period name
■
begin date
■
end date
Company-specific administrators can create period overlays. A period overlay allows
you to group the time periods you select into a single category allowing you to view
the accumulated forecast figures for all the time periods within the category. For
example, you can create a period overlay that contains all the months in 2002 and call
it "Monthly 2002." When you apply the overlay to a forecast, the forecast contains time
periods in monthly increments that contain the accumulated weekly or daily forecasts
for each month.
Only superusers, serveradmins, and superadmins can modify periods.
Guidelines for Creating Time Periods
To be effective, the time periods or time buckets must match the business's regular
cycle of sales or supply activities. A retailer who runs promotions on a weekly
schedule probably forecasts the promotion as a unit aligned by the promotional week.
A supplier who makes daily store deliveries forecasts stores in daily time buckets.
Account-level forecasts, on the other hand, may be for fiscal months (4 individual
weeks that can be grouped into a monthly period overlay) reflecting the focus of the
sales organization on corporate financial targets.
It is recommended that one or both parties in a collaboration change their time buckets
to match one another. An alternate method would be to aggregate finer-grained
information from one party to a level where it can be compared with the other
partner's base data.
15-32 Oracle® Value Chain Collaboration User Guide
Managing Time Periods for All Companies
Creating Periods: Company - Configuration - Periods Tab
Access To This Feature: Superuser, ServerAdmin
To create the time periods for a data stream manually
1.
Select Configuration from the VCC menu. The company configuration screen
appears.
2.
Click the Periods tab. Click Start Editing. The Add Periods screen appears.
Figure 15–30
Add Periods Screen
3.
In the Start Date field, enter the start date for the periods in the format
yyyy-mm-dd and enter the number of periods you want to create. Note that if
periods already exist in the database, the screen opens with the date of the next
period to be created displayed. If periods have not been created, the screen
displays the date format.
4.
In the Number of Periods field, enter the number of periods you want to create
beginning from the start date you specified.
5.
In the Number of Days/Period (number of days in a period) drop-down list, the
superuser or serveradmin with an established time bucket (e.g., 7 days/period)
can add additional buckets of the same size only. Click Create. The periods appear
under "All Periods."
You set the bucket size for a new database when you add periods for the first time.
After that, bucket size cannot be changed. Subsequent period additions will only
be allowed for this selected bucket size.
You cannot create periods prior to the first existing date (for example, you cannot
create a period for January when the first period is February).
6.
Click Create.
Creating Time Period Folders
Access To This Feature: Superuser, ServerAdmin, SuperAdmin, Admin
Use folders to organize data stream time periods. Time periods in your database can
be in either weekly increments or daily increments. No matter which type you use,
you can organize the time increments into weeks, months, and years to create a period
category you can expand and collapse.
Server-Level Configuration and Management 15-33
Configuring a Language for Oracle Retail VCC with the Configuration - Language Tab
If your periods include more than one year, the labels for
subfolders created under any year should include that year's number.
If year labels are not added to subfolders, confusion can result when
the same month and different years are selected anytime you use
periods; for example, when you create exception criteria or trading
partner metrics.
Note:
To create a period category
1.
Select Company -Master Data from the VCC menu.
2.
Click the Periods tab and highlight any period category where you want to insert
a category.
3.
Click Start Editing. The Stop Editing button appears.
4.
Right-click the period category and select "New Category" from the pop-up menu.
Note that leaf-level periods only display the options "Create Link" and "Cut."
5.
New Category screen appears.
Figure 15–31 New Category Screen
6.
In the Name field, enter the new category name; in the Local ID field, enter the
company local ID if applicable.
7.
Click Create.
Configuring a Language for Oracle Retail VCC with the Configuration Language Tab
Access To This Feature: Superuser, ServerAdmin
Once the message bundles have been translated in bundleproperties.jar and
reinstalled, you can add the language by selecting Configuration from the VCC menu
and clicking the Language tab.
In most instances, to change languages you should use a language already available. If
you do need to add a language manually, contact Oracle for more information.
To add the language
1.
Log in as superuser or serveradmin. Only superuser or serveradmin can add a
new language so other users can select it.
2.
Select Configuration from the VCC menu and then click the Language tab. The
language screen appears.
15-34 Oracle® Value Chain Collaboration User Guide
Configuration - General Tab
Figure 15–32
3.
Language Screen
Click Add. In the Language Name field, enter the name of the new language; in
the Language Code field (see
http://java.sun.com/products/jdk/1.2/docs/guide/internat/locale.doc.html),
enter the code for the new language; in the Country Code field, enter the country
code abbreviation. See CountryCode abbreviations in column 2a at
http://java.sun.com/products/jdk/1.2/docs/guide/internat/locale.doc.html
The Language Code and Country Code you use must correspond to codes you
used when saving the message bundle files and in the language identifier column
of the database files.
4.
The Language Encoding section allows the selection of different character sets for
use in E-mail, files, and attachments sent through Oracle Retail VCC. For Asian
languages, select the appropriate "iso-2022" combination (Japanese = jp, Korean =
kr).
If you would like to use the Export Data icon for Korean, you
must select "MS949" for both the E-mail Attachment Character Set and
File Character Set drop-downs.
Note:
5.
Click Save. The language is added and individual users may select this language
from their Preferences -Localization screen.
You can view language pack details by selecting View Details. Viewing language
details allows you to view the language name, language code, and country code.
Configuration - General Tab
Access To This Feature: Superuser, ServerAdmin
Renaming Labels
In the Labels section of the General tab, you will see a list of Default Labels on the left
and on the right a corresponding text box for each label given. The default in each text
box will be automatically filled in, but by changing the text in the Custom Labels
column, you can rename them.
Server-Level Configuration and Management 15-35
Configuration - General Tab
The label names, like the stream names, are language specific.
If you have selected a language in Preferences, create new names, and
later switch to another language, you will not see the names stored for
the previous language. They can, however, be accessed by switching
back to the original language they were created in.
Note:
To rename a label
1.
Select Configuration in the left menu.
2.
Select the General tab. The General configuration screen appears.
Figure 15–33 General Configuration Screen
3.
Under the Labels section, highlight the default text (or double-click) in the text box
for any given label, and type your desired label name.
4.
Click the Save button at the bottom of the screen.
Setting Export Compression Size
Access To This Feature: Superuser, ServerAdmin
File compression is a way of reducing file size, so that download-time for larger files
can be shortened.
Setting the Export Compression for files will allow you to determine the format of a
file based on file size. Files under the limit will be sent in un-compressed format, files
that are above the limit when uncompressed will then be zipped and sent.
The default compression size will be set to 100 Kb.
To change the Export Compression setting
1.
Select Configuration from the menu.
2.
Select the General tab.
15-36 Oracle® Value Chain Collaboration User Guide
Purging Transaction Data, the Job Monitor Log File, Current Connections, Event Promotions, Exceptions, Collaboration Item
3.
Under the Export Compression section, type a new number in the Compress file if
greater than text box. Select an increment size from the drop-down list.
Screens that will be affected by the export compression you set will appear to
users with the Export Data icon in the upper right part of the screen. Users can
open or decompress the zipped files with unzip programs such as WinZip® or
PKZIP®.
4.
Change the size limit of Events documents by selecting the Reject file if greater
than text box and entering a new number. Select the size increment from the
drop-down.
5.
Click the Save button.
Setting the Usage Statistics E-mail Notification in the Billing Tab
Oracle Retail VCC allows you to send an e-mail message to a user or group of users
each time Oracle Retail VCC recalculates usage statistics. To send an e-mail in a foreign
language, first ensure the language is loaded for Oracle Retail VCC.
To send an e-mail notification
1.
Click Configuration in the VCC menu.
2.
Click the General tab. The General screen appears.
3.
Under the Billing section, in the E-Mail list box, enter the e-mail address or
addresses (separated by a semicolon) to the users to be notified.
4.
Select the Language you wish e-mail to be generated in.
5.
Check the check box labeled Send e-mail every time the Usage Report is run to
send e-mail every time usage statistics are calculated. For a usage report to be
calculated, you must schedule the Report Usage task to run at specific intervals.
Note that usage reports will not include System Users in the active user count.
This setting is configured by the superuser or serveradmin in Roles & Users Examine User screen by checking the "System User" check box. Users can also be
loaded and extracted with System User status. For more information, refer to the
Implementor Guide.
6.
Click Save.
Purging Transaction Data, the Job Monitor Log File, Current Connections,
Event Promotions, Exceptions, Collaboration Item Comments, and Master
Data.
Access To This Feature: Superuser, ServerAdmin
New in 6.1, the User Activity Purge allows you to purge the
Current Connections log table.
Note:
To view purge requests submitted by administrators and purge data
1.
Select Purge Data from the VCC menu. The Purge Data screen appears.
Server-Level Configuration and Management 15-37
Purging Transaction Data, the Job Monitor Log File, Current Connections, Event Promotions, Exceptions, Collaboration Item
Figure 15–34 Purge Data Screen
2.
To execute a purge, check the check box next to purge type and click Purge.
3.
To view Transaction Data purge requests, click the colored dot next to Transaction
Data Purge. A screen displaying all purge requests appears.
Figure 15–35 Purge Data Screen
4.
To reject a purge request, check the check box next to the request you want to
reject, and click Reject.
15-38 Oracle® Value Chain Collaboration User Guide
16
Managing Company General Information and
Preferences
This chapter includes the following topics:
■
About Your Company General Information
■
Managing Company General Preferences
■
Managing Groups for a Company
■
Managing Links for a Company.
■
The Period Overlays Tab
■
Using the Real Time Extract Tab
■
Using the Stream Types Tab
■
Configuring E-mail Alerts
About Your Company General Information
Once a superuser or serveradmin creates your company in Oracle Retail VCC, you can
begin creating the framework for it. When your company information changes, you
must make the changes using the administrator tasks.
The company information you must define for your company includes
1.
General company-specific configuration information including Groups, Links,
Period Overlays, Real Time Extract, Stream Types and E-mail.
2.
Master data, which includes products; your trading partners; your company
locations; data stream time periods; and period overlays, if applicable. You can
create master data manually using the administrator tasks, or you can load master
data from a file (see the VCC Operations Guide ).
3.
Collaborations, which are the products you and your trading partner collaborate
on.
4.
Users and roles.
5.
Base Price Profiles for products.
6.
Disaggregation, if applicable. For details about disaggregations, see About Data
Stream Disaggregation.
7.
Aggregates, if applicable. For details about aggregates, see About Aggregates.
8.
Data purge. For details about data purging, see About Data Purge Requests.
Managing Company General Information and Preferences 16-1
Managing Company General Preferences
Managing Company General Preferences
A company's general preferences can be configured by a superuser, serveradmin, or by
a company administrator (superadmin or admin). Company general preferences
configuration allows you to configure your company to
■
Change the company name and/or ID.
■
Freeze future periods.
■
Set Balance Stream view preferences.
■
Set the number of results displayed per page.
■
Set the number of decimal places.
■
Allow or disallow proportional disaggregation.
■
Allow or disallow straight line disaggregation.
■
Allow or disallow partner editing of the company calendar.
Company - General Config - General Preferences
Access To This Feature: Superuser, ServerAdmin, SuperAdmin, Admin
To configure company general preferences
1.
Select Company - General Config from the VCC menu. The Company
Configuration screen appears.
2.
Click the Preferences tab.
Figure 16–1 Preferences Tab
The upper section contains the current Name, ID, ID Type, Alternate ID,
[Alternate] ID Type, and Role configuration for your company. You can revise the
Name and or ID, but the Role configuration is permanently assigned when your
company is created.
16-2 Oracle® Value Chain Collaboration User Guide
Managing Company General Preferences
The lower section contains a set of the following parameters that affect various
Oracle Retail VCC features and are applied for every user of your company:
■
■
■
■
■
■
■
Allow Partner Company to Edit Calendar: Affects the Shipping/Receiving
Calendars in the Supply module. Select Yes" to allow your partner company to
edit your shipping or receiving calendar or "No" to disallow it. Note that
either you or your partner may edit the calendar, but not both. If you give
your partner permission to edit your calendar, you are not able to make
changes, but you can still view.
Freeze Future Periods: Affects actions in Data - View/Edit. In the Freeze
Future Periods field, enter the number of periods from the current period in
which you want to disallow data entry or editing. Enter 0 if you do not want
to freeze future periods. When you make a change to this field, it does not take
effect until the next logon.
In the Auto Create Collaborations field, select "Yes" if you want collaboration
items created by your partner to appear in your collaboration hierarchy. If you
select "No," any Collaboration Items created by your partner will not appear in
your hierarchy. You must contact the partner manually to determine if new
Collaboration Items were created. This feature applies to trading partners
located on the same server machine only.
Display period for Balance Streams: Applies when Balance streams are viewed
in a period overlay in Data - View/Edit. In the Display period forBalance
Streams field, select "First" to view the value contained in the first period of
the period overlay; select "Last" to view the value contained in the last period
of the period overlay. Since Balance streams are not accumulated over time,
you must select a specific period to display. For details, see About
Accumulation Rules.
Results per page: Applies to aggregate and disaggregate lists. In the Results
per page field, enter the maximum number of list items that can be displayed
per page. The default is 500.
Decimal places displayed: Affects how numerical values are displayed. In the
Decimal places displayed field, enter the number of decimal places you want
displayed. The default is two decimal places.
Start Day of Week allows selection of which day to begin the calendar week
with. If your business week begins on Wednesday, you have the ability to
change the starting weekday that appears in the pop-up calendar.
Figure 16–2 Pop-up Calendar
■
Days in 1st Week of Year indicate the number of days that should be counted
in the first week of the new year. Setting this option maintains accuracy in the
Events calendar, as well as the pop-up calendar used throughout Oracle Retail
VCC. Example:
Managing Company General Information and Preferences 16-3
Managing Company General Preferences
The first week of the new year contains N number of days. N is configurable
from 1 - 7. On a Sunday - Saturday week, where January 1st falls on a
Thursday, "3" is selected from the Days in 1st Week of Year drop-down. This
will sync up the first week of the year with the traditional first day of the year.
Figure 16–3 Pop-up Calendar
If, however, your calendar's Start Day of Week begins on Monday, selecting "7"
would result in the calendar seen below. In this calendar, Jan. 1 - 4 are assigned
to the prior year, not the new year, as indicated by week number "52" in the
lefthand column. The first week of the year doesn't begin until Monday,
January 5th.
It is recommended that you ensure the Start Day of Week and Days in 1st
Week of Year work in conjunction.
Figure 16–4 Pop-up Calendar
■
Allow Proportional Disaggregation (UI only): Select whether the factor for
Subtype1, 2, and 3 will be based on "Self," "None," or "Total" from each
drop-down.
Self – based on value contained in Subtypes1, 2 and 3 None – no base factor
used Total – based on total value of Subtype1, 2 and 3
Proportional disaggregation allows you to enter a value at the aggregate level
and allocate it based on the relative proportions of the current leaf values.
Proportional Disaggregation has the advantage of not requiring you to
maintain disaggregation factors. The calculation is dynamic. This approach
also is useful when the ratios among the component values being adjusted are
different than the historical demand; for example, during a promotional
period. In this case, factors created through an analysis of historical data might
not be accurate, and the relative proportions set manually when the promotion
was set up should be maintained when changes are made at an aggregate
value. Note that if no data exists for a period, the aggregate value is equally
allocated across all valid collaboration items under that context. See
Proportional Disaggregation for details.
■
Allow Straight Line Disaggregation (Dataload only): enable Straight Line
Disaggregation by selecting "Yes" from the drop-down. Oracle Retail VCC
defaults to "No." Straight Line Disaggregation distributes an equal percentage
16-4 Oracle® Value Chain Collaboration User Guide
Managing Links for a Company
of a given value among each of the leaves. See Straight Line Disaggregation
for details.
3.
Click Save.
Managing Groups for a Company
A group is a collection of data stream subtypes to which you assign a group name. For
example, you can create a group that includes primary base shipping data streams,
primary promotional shipping data streams, and primary total shipping data streams
and call it "My Shipments Group." When viewing data streams in Oracle Retail VCC's
data stream view, you can select the group, and its components are displayed in either
the graph mode or table mode.
For details on how to add, edit, rename, or preview groups, see Creating and Editing
Groups.
The "All" group is your initial default group. Unlike other groups you create yourself,
the "All" group is preconfigured to include all of the streams assigned to your
company. Each time a new stream is assigned to your company, it will be included in
the "All" group. Users may be assigned stream access to some or all of the streams in
the "All" group. This will be reflected appropriately when users view streams within
the "All" group in Data - View/Edit. Administrators can edit the "All" group to suit
company requirements.
Managing Links for a Company
A superadmin or an admin can create Web links for his or her own company. A
superuser or serveradmin can create links for any company. When you create a link for
a company, the link appears under Links in the VCC menu. You also, can make links
visible or hidden, edit links, and remove links. Links are a convenience and allow you
to link to any Web site you might require from the VCC menu.
Creating a Company Link with the Company - General Config - Links Tab
Access To This Feature: Superuser, ServerAdmin, SuperAdmin, Admin
To create a link for a company
1.
Select Company - General Config from the VCC menu.
2.
From the Configuration pane, click the Links tab. The Links screen appears.
Figure 16–5 Links Screen
3.
Select a company from the Company Chooser, if necessary. To add a link, click
Add. The Add a New Link screen appears.
Managing Company General Information and Preferences 16-5
Managing Links for a Company
Figure 16–6 Add a New Link Screen
4.
In the Link Name field, enter a name for the link that will appear under Links in
the VCC menu.
5.
In the URL field, enter the URL for the link and click Test Link to ensure it works.
6.
Click Save.
Editing a Company Link
Access To This Feature: Superuser, ServerAdmin, SuperAdmin, Admin
To edit an existing link
1.
Select Company - General Config from the VCC menu.
2.
From the Configuration pane, click the Links tab. The Links screen appears.
Figure 16–7 Link Screen
3.
Select a company from the Company Chooser, if necessary. Highlight the link you
want to edit and click Edit. The Update Link screen appears.
Figure 16–8 Update Link Screen
4.
In the Rename Link field, enter a new name for the link if required.
5.
In the URL field, enter the new URL if required.
16-6 Oracle® Value Chain Collaboration User Guide
Managing Links for a Company
6.
Click Save.
Deleting a Company Link
Access To This Feature: Superuser, ServerAdmin, SuperAdmin, Admin
To delete an existing link
1.
Select Company - General Config from the VCC menu.
2.
From the Configuration pane, click the Links tab. The Links screen appears.
Figure 16–9 Links Screen
3.
Select a company from the Company Chooser, if necessary. Highlight the link you
want to delete, and click Delete.
Hiding Company Links
Access To This Feature: Superuser, ServerAdmin, SuperAdmin, Admin
To hide an existing link or make a hidden link visible
1.
Select Company - General Config from the VCC menu.
2.
From the Configuration pane, click the Links tab. The Links screen appears.
Figure 16–10
3.
Links Screen
Select a company from the Company Chooser, if necessary. Highlight the link you
want to hide, and click the arrow to move it into the Hidden category. To make a
hidden link visible, click the arrow to move it into the Visible category.
Managing Company General Information and Preferences 16-7
The Period Overlays Tab
The Period Overlays Tab
Period Overlays can be created and configured both in the Company - General Config
- Period Overlays tab, as well as in the client's user Preferences - Layout - Table/Graph
- Period Overlays screen. See Creating and Editing Period Overlays for more details
about using period overlays.
Using the Real Time Extract Tab
Access To This Feature: Superuser, ServerAdmin, SuperAdmin, Admin
About Real Time Extracts
Real Time Exports affect both period overlays and stream items. Each stream item in
Configuration - Stream Types - View/Edit (superuser/serveradmin only) includes a
Real Time Export check box where either a subtype or total stream can be selected. For
Period Overlay Extracts, when a change is entered via period overlay, the data
extracted applies only to the overlay and does not filter down to base periods.
Real Time Exports always export in UTF-8 encoding. This is not configurable. Files
generated from Real Time Export will contain a Creation Date that is in GMT.
You can configure Real Time Extracts in the Company - General Config. - Real Time
Extract tab. Extract settings on this screen allow you to specify:
■
The file path
■
File delimiter
■
Precision, by setting the number of decimal places
■
Which columns to include
■
Column order
■
UOM
Comment, Reason, and Revision Status will not be extracted if
a Data Stream is saved using either a Period Overlay, or with "Total
Stream" selected for Real Time Extract. Additionally, data from Real
Time Extract will have a creation date that is in GMT.
Note:
16-8 Oracle® Value Chain Collaboration User Guide
Using the Real Time Extract Tab
Configuring Real Time Extracts
To configure Real Time Extracts
1.
Select Company - General Config from the VCC menu.
2.
Click the Real Time Extract tab. The Real Time Extract screen appears.
Figure 16–11
Real Time Extract Screen
3.
Enter a File Path, if different from the default.
4.
Select a File Delimiter. Options are: comma, tab, or other (user specified).
5.
If you wish to set data precision, check the Set Precision check box. This will
enable the Decimal Places text box where you can enter the number of decimal
places that will display.
6.
Select a UOM from the drop-down.
7.
Hide or show columns by moving items into the "Visible" and "Hidden" select
boxes.
8.
Click Save.
Be advised that saving Data Streams in the above scenario will result in file extraction
of the following:
■
Leaf Stream Data
■
- stream subtype leaf period
■
- stream total leaf period
■
- stream subtype period overlay
■
- stream total period overlay
■
■
- standard UOM will be applied if selected from the General Config - Real
Time Extract tab
Aggregate Stream Data
■
When Product is at aggregate level:
*
- leaf period stream subtype
Managing Company General Information and Preferences 16-9
Using the Stream Types Tab
■
*
leaf period stream total
*
- period overlay subtype
*
- period overlay total
*
- only Base Units' value will be extracted, UOM is not applied.
Only Local and/or Partner at aggregate level:
*
- stream subtype leaf period
*
- stream total leaf period
*
- stream subtype period overlay
*
- stream total period overlay
*
- standard UOM will be applied if selected from the General Config - Real
Time Extract tab
Using the Stream Types Tab
The Stream Types tab is located under Company - General Config, and allows you to
configure some or all of the following options for each stream type:
■
Decimal Places
■
Apply UOM
■
Fill Bucket
To view and configure stream types
1.
Select Company - General Config from the VCC menu.
2.
Select the Stream Types tab. The Stream Types screen appears.
Figure 16–12
Stream Types Screen
3.
Configure Decimal Places, UOMs, and Fill Buckets for each stream type.
4.
Click Save.
16-10 Oracle® Value Chain Collaboration User Guide
Configuring E-mail Alerts
Configuring E-mail Alerts
Access To This Feature: Superuser, ServerAdmin, SuperAdmin, Admin
The Company - General Config - E-mail tab allows for the format, and number and
localization configurations of e-mail alerts. These settings apply to Exception E-mail
Alerts as well as any alerts generated by the Events Module.
To configure E-mail settings
1.
Select Company - General Config from the VCC menu.
2.
Click the E-mail tab. The E-mail Alert Configuration screen appears.
Figure 16–13
E-mail Alert Configuration Screen
3.
Default format can be either HTML or Plain Text
4.
Localization settings – Number Format, Date Format and Time Format, as well as
Time Zone that you wish the e-mail to contain. These drop-downs will appear
disabled if you do not have the necessary columns in the "Visible" list.
5.
Select the number of Decimal Places you wish the e-mail alerts to contain.
6.
Click Save.
Managing Company General Information and Preferences
16-11
Configuring E-mail Alerts
16-12 Oracle® Value Chain Collaboration User Guide
17
Master Data
This chapter contains the following topics:
■
About Master Data
■
About Entering Master Data
■
Managing Company Locations
■
Managing Company Products
■
Managing Product Hierarchies
■
Guidelines for Creating Product Folders
■
Managing Time Period Hierarchies
■
Managing Company Trading Partners
■
Removing Hierarchy Nodes through the Recycle Bin
■
Managing Master Data Folders
■
About Master Data Hierarchies
■
Working With Tree Hierarchies
About Master Data
A company's master data includes its product hierarchies and leaf nodes, partner
hierarchies and leaf nodes, location hierarchies and leaf nodes, and period hierarchies
and leaf nodes. It does not include the time-series data associated with leaf nodes, only
the hierarchy folder names and leaf names and other leaf-level data such as UOM
conversion factors. A superuser can create master data for any company; a
superadmin or an admin can create master data for their own company only.
For example, a product hierarchy might contain the topmost folder called "Shampoo."
Shampoo could have subfolders called "Normal" and "Extra Body." Each of those
subfolders could contain leaf items called "16 ounce" and "24 ounce." All hierarchies
are built in this manner: a topmost folder, multiple subfolders, and finally leaf item
nodes.
Master Data
17-1
About Entering Master Data
About Entering Master Data
In most instances, you will use the administrator tasks to view and edit your hierarchy
folders, but most companies' master data is too voluminous to actually create using
the administrator tasks although you can use the administrator tasks to create new
folder. For details on entering master data in bulk mode, see the VCC Operations
Guide.
Most often, master data is exported from an existing legacy system using a third-party
tool that extracts the data from the legacy system and formats it in the required master
data flat-file format for loading. If this is the method you initially used to load your
master data, you must always use this method to load any additional master data.
Loading additional data using the administrator tasks could cause the primary keys
stored in your Oracle Retail VCC database to conflict. Also, if you create a folder using
the administrator tasks, you can add children to that folder using the master data
hierarchy loader as long as you use the same local ID to reference it.
Managing Company Locations
Oracle Retail VCC allows you to establish a collaboration between your company and
a partner. If you and your trading partner have only one location, the collaboration is
simple. This is seldom the case. It is more likely that you and your trading partner
each have multiple locations, and you want to establish multiple collaborations
between multiple locations. To accomplish this, the VCC Client allows you to define
location hierarchies for yourself and your trading partners and to create collaborations
between any two folders in the location hierarchies. For example, this allows your
northeast region to establish a collaboration with your trading partner's Chicago office
while your San Francisco office can establish a collaboration with your trading
partner's west coast region. Any combination is possible as long as you define the
appropriate hierarchies.
The location hierarchies you define with the VCC Administrator appear in the VCC
Client locations tree.
Managing Company Products
It is your responsibility to create the products on which you intend to collaborate with
your trading partners. This means creating the product folder names and product leaf
folder names. The Oracle Retail VCC Client allows you to enter product folders
manually or in batch mode through a correctly formatted flat file. For detail on batch
mode, refer to the VCC Operations Guide.
Also, for each product you can enter a product price profile that specifies the product
price and the time period during which the price is effective. A product can have
multiple price profiles for multiple time periods that reflect price changes over the
product life cycle. For more information on price profiles, see Creating Product Price
Profiles.
The products and product folders you define are displayed in all the views where the
product hierarchy is accessed.
17-2 Oracle® Value Chain Collaboration User Guide
Guidelines for Creating Product Folders
Managing Product Hierarchies
A product hierarchy contains product master data, which includes
■
■
■
Name – the name of the product
Global Item Number and GIN Type – the global item number you assign to the
product and the type it is (GTIN, UPC, buyer assigned or seller assigned)
Local Item Number and LIN Type – the local item number of the product, and
type it is (GTIN, UPC, buy assigned or seller assigned)
■
Unit of measure – unit of measure used by the product
■
Weight – product unit weight
■
Volume – volume of the product
■
■
■
Stat Factor (UOM) – Consolidates many different units of measure (UOM) into a
common, single unit of measure. Must be "0" if a common unit-of-measure factor is
not provided. This unit-of-measure conversion factor is usually used to reduce a
larger number to a smaller one; for example, to reduce cases to individual units
(each). If a case has 12 units, the UOM conversion factor would be 12, and the
forecast number is multiplied by 12.
Units per Load – allows you to enter a "rough-cut" transportation capacity
estimate for this product. This is the number of units expected to be shipped per
load for this product. When the Loads UOM is applied to a data stream, each of its
values is divided by the maximum load to determine which portion of the load
each value represents.
URL – the URL to any link. For example, it can be a URL to a product image or
product information.
Guidelines for Creating Product Folders
Products are, for the most part, grouped under product folders for convenience and
ease-of-use. Folders help you identify and locate products quickly and easily. For
example, if you are a clothing manufacturer, you might construct a product folder
containing the folder "Clothing" under which you would create "Shirts," "Pants,"
"Jackets," etc. Under shirts you might create additional folders for "Casual Shirts,"
"Dress Shirts," "Polo Shirts." Superusers can create products and product folders for
trading partners as long as they are local; superadmin can create products and product
folders for her own company as long as it is local. A sample product hierarchy is
shown below.
You have the option of creating product folders
■
manually by using administrator tasks
■
automatically by using the VCC Integrator
For details on the VCC Master Data Hierarchy loader, see the VCC Operations Guide.
Retailers tend to plan to a greater level of detail by location. It is typical for a retailer to
produce store-level forecasts, while it is not the usual practice for suppliers to produce
them.
Suppliers plan to a greater level of detail by product. A retailer may plan promotional
sales for a product folder, but the supplier needs to know how much of each product
in the folder actually needs to be produced. A supplier may have forecasts for multiple
generations that it identifies differently, while the retailer continues to assign each
generation the same SKU.
Master Data
17-3
Managing Time Period Hierarchies
To be able to compare forecasts produced at different levels of granularity, create an
additional folder in the product or location folder for the higher-level element that is
being planned. For example, if a brand offers four varieties of one liter fruit-flavored
sparkling water, but the retailer does not forecast each flavor, the supplier can enter
forecasts for each flavor, and Oracle Retail VCC aggregates and compares them with
the retailer's single-flavored number. The resulting products' folder is shown in the
figure below.
Figure 17–1 Resulting Products' Folder
Managing Time Period Hierarchies
The superuser creates (adds) periods that are appended to the root node of a period
hierarchy for each company on a hub. Each company's administrator must create and
maintain their own company's category (folders), allowing collaborating companies to
have different hierarchies. End-users see only their own company's tree.
Managing Company Trading Partners
It is the administrator's responsibility to add the name, DUNS number or company ID,
and locations and DUNS plus 4 number, or location ID for each of your trading
partners; and also to add the trading partner to your trading partner list. This allows
you to configure collaborations between your locations and products, and between
those of your trading partners. See Managing Company Trading Partners.
Removing Hierarchy Nodes through the Recycle Bin
Each of the Master Data hierarchies (Products, Locations, Partners, and Periods)
includes a Recycle Bin category.
Although nodes cannot be directly deleted from hierarchies, items placed (Cut/Paste)
in the Recycle Bin for Products, Locations, Partners, or Periods can no longer be seen
in any End User hierarchy view (though associated data remains in the database).
In addition, items placed in the Products, Locations, or Partners Recycle Bins are
defined for removal upon the next corresponding Master Data Purge. (After purge,
these items are removed from the database.)
The Period Hierarchy Recycle Bin is not affected by Master
Data purge. Items placed there will remain.
Note:
17-4 Oracle® Value Chain Collaboration User Guide
About Master Data Hierarchies
Managing Master Data Folders
Administrator use folders to manage four different hierarchies:
■
Products
■
Partners
■
Locations
■
Periods
These hierarchies can be accessed in the Company - Master Data screen, under their
respective tabs.
Administrator options accessed through the hierarchy tree's right-click menu include
■
■
■
■
■
New Category – create new folder.
Cut – temporarily places the selected folder or item on the clipboard for pasting to
a new place in the hierarchy. You can also cut and paste items or folders into the
Recycle Bin.
Copy – allows you to duplicate a folder. When you copy a folder and add leaves to
it, the leaves are reflected only in the copied folder and not in the original.
Paste – used after Cut or Copy to move folders or items to new locations in the
hierarchy.
Create Link – links a folder or folder item in the hierarchy to any other folder or
folder item. This allows you to duplicate any folder and its contents, and place it at
another location in the hierarchy. The link is similar to a copy, but does not
actually copy the information; it creates a link to the original information.
If the folder link you create has leaves, the leaves are also linked. If you create a
Link to a folder and add leaves to the link, the added leaves are reflected in both
the linked folder and the original folder. When you copy a folder and add leaves
to it, the leaves are reflected only in the copied folder not in the original.
■
Rename – renames a folder or folder item.
Before attempting to perform any of these operations, ensure that you have loaded
your company and have selected the appropriate tab (Products, Partners,
Locations, or Periods) from the Company - Master Data screen.
About Master Data Hierarchies
Master Data Search
The Master Data Search toolbar appears under the Master Data Tabs. The Master Data
Search allows you to search the Products, Partners, and Locations hierarchy trees by
entering attributes to locate a specific folder or leaf node. (No Search options are
available on the Period hierarchy.)
The Master Data Search finds the desired folder of leaf by searching on a defined
attribute (listed below) entered exactly, or entered as a wildcard search. (To use a
wildcard search, enter an asterisk alone, before, or after a known sequence or set of
alphanumeric characters.)
If no items are found, "No Records Found" will be displayed, along a with instructions
for using the wild card search feature.
Master Data
17-5
About Master Data Hierarchies
Table 17–1
Search Attributes For Each Tab/Tree
Tree
Possible Search Attributes
Products
Name, Global ID Number (GIN),
Local ID Number (LIN)
Partners
Name, Location ID, Alternate ID,
Company Name, Company ID
Locations
Name, Location ID, Alternate ID,
Company Name, Company ID
*Name search on Folder and Leaf, all others are leaf only.
*If search yields only one result, it will appear highlighted in tree.
*If search yields multiple results, the search list screen opens allowing item selection.
After selection, the item will appear highlighted in the tree.
Tree Behavior
Each of the Master Data hierarchy trees (Products, Locations, Partners, and Periods)
have the following standard tree behaviors:
Collapsing and Expanding the Hierarchy Tree
■
Ctrl-click the minus sign next to the root node. The whole tree collapses to the
root-node level.
■
■
■
Ctrl-click the plus sign next to the root node. The whole tree expands to the fullest
leaf-level degree in all underlying nodes.
Ctrl-click the minus sign next to a category node. The whole node collapses to the
level clicked.
Ctrl-click the plus sign next to the category node. The whole node expands to the
fullest leaf-level degree in the node.
17-6 Oracle® Value Chain Collaboration User Guide
About Master Data Hierarchies
Figure 17–2 Product Tree
Single-Selecting Tree Nodes
■
Click on the root, category, or leaf node item to select it. It becomes highlighted.
Click again to deselect it.
■
■
■
■
■
■
After a category item is selected, clicking a leaf item will cause the category item to
be deselected.
After a leaf item is selected, clicking a category item will cause the leaf item to be
deselected.
Within a category, clicking each leaf-level item causes each to be selected in turn.
Within a higher category, clicking each underlying same-level category causes
each to be selected.
Clicking a category-level after a higher category level is selected will cause the
higher category level to be deselected.
Clicking a category level after a lower category level is selected will cause the
lower category level to be deselected.
Multi-Selecting Tree Nodes
■
To multi-select leaf-level items, select a leaf-level item within a category and
Shift-click on another non-contiguous leaf-level item within the same category. All
of the leaf-level items between the two become selected.
■
To multi-select same-level category items, select a category-level item that exists
within a higher-level category and Shift-click on a non-contiguous category-level
item within the same category. All the same-level category items between the two
become selected.
Master Data
17-7
Working With Tree Hierarchies
Working With Tree Hierarchies
The Master Data Hierarchies include a right-click menu that provides access to various
aspects of tree functionality. Right-clicking on a root, category, or leaf node will display
the pop-up menu.
Previous versions of Syncra included an option to "Hide
Folder". If a hidden folder is migrated to version 6.0 or later, the
hidden folder and its contents are moved to the Recycle Bin of the
corresponding hierarchy and will be removed at the next Master Data
Purge.
Note:
The Start Editing Button and the Right-Click Menu
The tree's right-click menu provides different options depending on whether or not
you have clicked the Start Editing button, and are in edit-mode, or whether you have
decided to Stop Editing, and are in examine-mode only. While editing, there are more
options than while not editing. If you simply wish to examine a Root, Category, or the
Recycle Bin, there is no need to "Start Editing".
Figure 17–3 Right-click Menu
The only level that cannot be examined when not in edit-mode is the leaf nodes on the
Period Tree. Also, all local partners' leaf nodes will be read-only while not in
edit-mode.
When Start Editing has been activated, you are able to examine, create new categories,
add products/partners/locations/periods, create links, and cut/copy/paste categories
and leaves.
Tree Behavior
Cut and Paste
To utilize Cut and Paste
1.
Enable edit-mode by clicking the Start Editing button.
2.
Select the folders or leaves you wish to Cut and Paste to another folder, then
right-click and choose Cut from pop-up menu. The selected items are greyed-out
to indicate they are ready to be cut from the hierarchy.
3.
Click on the folder into which to Paste the cut items and choose Paste from the
right-click menu. The items are removed from the original category and placed
into new the category.
4.
If you decide that you do not want to Paste the selection, disable edit-mode by
clicking Stop Editing to restore your selection to its original hierarchy location.
17-8 Oracle® Value Chain Collaboration User Guide
Working With Tree Hierarchies
Copy and Paste
You can copy a folder, but cannot directly copy leaf items. If you copy a folder then
rename it, it will retain the different names. The underlying leaf items contained in the
copied folder behave in the same fashion as a created link. See Creating Links for more
information.
To utilize Copy and Paste
1.
Click Start Editing to enable edit-mode.
2.
Select the folders you wish to Copy and Paste to another folder, then right-click
and choose Copy from pop-up menu. The selected items become bold to indicate
they are ready to be copied.
3.
Select the folder into which you will Paste the copied items and choose Paste from
right-click pop-up menu. The items are copied from the original category and
placed into the new category. The copied items will also remain in original
category.
Creating Links
This option is similar to Copy and Paste except that this allows the same category and
leaves to be represented in more than one position in your hierarchy. If a linked folder
or leaf item attribute is revised in one position, the change is reflected in the other
position as well.
For example, if you have a category called "Muffins", with leaf items "Bran" and
"Banana", you may want the category listed within two upper level categories,
"Snacks" and "Baked Goods". If you change the "Banana" name to "Banana Nut" from
the "Snacks" category, it will automatically change to "Banana Nut" in the "Baked
Goods" category too.
To create a link
1.
Select Start Editing.
2.
Select the folders or leaves for which you wish to create a link.
3.
Right-click on the selected leaves and choose Create Link from the pop-up menu.
The items become italicized to indicate they are ready to be linked.
4.
Click on the folder into which to paste the selected items and choose Paste from
Hierarchy menu. The items are copied from original category and placed into the
new category. The items also remain in the original category.
To remove linked items and restore the tree to its original hierarchy, Cut and Paste the
linked items into their original position.
Creating a New Category
Enable the Edit, select the root node or a category node, then choose New Category to
add another category (folder) to your hierarchy. The Category node must include a
Name and you can also provide a Local ID or one will be auto-supplied by VCC.
Master Data
17-9
Working With Tree Hierarchies
Figure 17–4 Create New Category
Examine
Select Examine to View/Edit the current attributes for the node selected. Required
fields are marked with an asterisk. If you Examine while the 'Edit' is enabled, see a
corresponding "Job" listed in the Jobs Monitor.
Root Node
The Root node is generated during the Create Company process and its label can be
revised, but must be included.
Category Node
The Category (folder) node must include a Name and you can also provide a Local ID
or one will be auto-supplied by VCC.
Leaf Node - Local Location
The Leaf node displays the current attributes of the item, which are different for
Location, Partners, and Products. (There is no Examine at Leaf node in the Periods
hierarchy.)
Figure 17–5 Examine Product Screen
Leaf Node - Partner Location
The Partner leaf attributes are not editable for a 'Local' Partner, but these can be
changed for a 'Non-Local' Partner.
Leaf Node - Product
The Product leaf node has special features that, if revised, place an additional listing in
the Jobs Monitor.
17-10 Oracle® Value Chain Collaboration User Guide
Working With Tree Hierarchies
If the Global Item Number is revised, then see the GIN Status field in this Examine
screen and a new job listing "Replace Product GIN". When the job has completed, the
"GIN Status" field will be updated.
If the Stat Factor is updated, then see new job listing "Tag Aggregates/Stat Factor
Change".
If the Units Per Load is updated, then see new job listing "Tag Aggregates/ Units Per
Load Change".
Adding a Leaf Node
From the right-click pop-up menu, select Add Product, Add Partner, or Add Location
to add a new node to the current hierarchy. (There is no Add Leaf node in the Periods
hierarchy.) Required fields are marked with an asterisk. A corresponding "Job" is listed
in the Jobs Monitor for each edit session used in adding new leaf nodes.
Figure 17–6 Right-click Menu
Adding a Local Location
1.
Select Company - Master Data from the VCC menu.
2.
Select the Location tab
3.
Click Start Editing, highlight the category folder under which to place the new
Local location.
4.
Right-click on the category and select Add Location from the pop-up menu. The
Add Location screen appears.
Figure 17–7 Add Location Screen
5.
Enter the company Location Name. For example, "My Store at Boston".
6.
Enter the company Location ID number and change its type, if desired. Standard
options include: GLN (Default), DUNS, DUNS_PLUS_FOUR, SELLER_
ASSIGNED, SCAC, BUYER_ASSIGNED, and UN_LOCATION_CODE.
About ID Fields:
Master Data 17-11
Working With Tree Hierarchies
■
■
A Location Name, ID or Alternate ID can be any combination of 1 to 40
alphanumeric characters.
If you use a DUNS plus 4 number:
- it must be in the format nn-nnn-nnnn-nnnn
- the first nine numbers (the DUNS number) must be the same as the DUNS
number defined as the parent company ID
-the last four numbers must be unique
-you must include the hyphens
7.
In the Alternate ID field, enter the company's alternate location ID number and
change its type, if desired. Standard options include: GLN (Default), DUNS,
DUNS_PLUS_FOUR, SELLER_ASSIGNED, SCAC, BUYER_ASSIGNED, and UN_
LOCATION_CODE.
This attribute is a convenience intended primarily for internal company use,
though partners will be able to see the Alternate ID if one has been created.
If a unique Alternate ID is not assigned, the system will assume it to be the same
as the Location ID.
8.
Click Create. The new node is added to your highlighted category. Click "Cancel"
to return to the tree without adding a new node.
9.
Click Stop Editing.
Adding a Partner Location
You can add a Local or Non-Local Trading Partner Location under the "Partner" tab.
1.
Select Company - Master Data from the VCC menu.
2.
Click the Partners tab.
3.
Click the Start Editing button. The Stop Editing button appears.
4.
Highlight "All Partners" or the appropriate partner folder into which you want to
add the new trading partner name and right-click on it.
5.
Select Add Partner from the pop-up menu. The Add Partner screen appears with a
list of available partners in the drop-down. The drop-down is organized
alphabetically, and the first partner appearing in the list will determine whether
the view is Local or Non-Local.
■
Adding a Local partner – when you select a local partner from the drop-down,
the following tree appears.
Figure 17–8 Add Partner Tree
17-12 Oracle® Value Chain Collaboration User Guide
Working With Tree Hierarchies
Note that if there are no local partners listed, it is because your local partners
have not yet added locations to their own Master Data.
■
Adding a Non-Local partner – when you select a non-local partner to add, the
following fields will be included in the creation process.
Figure 17–9 Add Non-local Partner Tree
■
■
■
■
In the Name field, enter the company name.
In the Location ID field, enter the trading partner location ID. The ID can be a
DUNS plus 4 numbers in the format nn-nnn-nnnn-nnnn, or any 1-40
alphanumeric characters.
Select the Type of location ID from the Type drop-down. Standard options are:
GLN, DUNS, DUNS_PLUS_FOUR, SCAC, SELLER_ASSIGNED, BUYER_
ASSIGNED, UN_LOCATION_CODE.
In the Company ID field, enter a company ID. A company ID can be from 1 to
40 alphanumeric characters.
6.
Click Create to add a partner, or Cancel to exit.
7.
Click Stop Editing after you have finished adding your partner.
Adding a Product
1.
Select Company - Master Data from the VCC menu.
2.
Select the Product tab
3.
Click Start Editing.
4.
Highlight the category folder under which the new Product will be created.
5.
Right-click on the highlighted category and select Add Product from pop-up
menu. The Add Product screen appears.
Master Data 17-13
Working With Tree Hierarchies
Figure 17–10 Add Product Screen
6.
Enter the Product Name.
7.
Enter the product's GIN (Global Item Number) and select its type from the
drop-down.
8.
Enter the product's Local Item Number (optional).
9.
Enter the product's unit of measure in the UOM field.
10. Enter the product's Stat Factor (optional). A stat factor is a multiplier that you
specify as a product attribute that you can use to convert base units to common
statistical units. Stat Factors allow you to create a uniform unit of measure across
all products by allowing you to multiply the unit of measure for the product by a
stat factor that you determine to be appropriate.
There are no hard and fast guidelines for what stat factor to use. This must be
determined by your company policy and the factor you determine to be
appropriate for your requirements.
Creating a stat factor is particularly useful when aggregating across product lines.
Simply aggregating units-of-measure that are different for several products would
produce a meaningless aggregate amount.
If you determine an appropriate stat factor for each product and aggregate using
the stat factor, the aggregate has meaning for your context.
Do not confuse the stat factor with unit-of-measure conversion which you can
specify when loading product information. Unit-of-measure conversion allows
you to convert units-of-measure from one unit of measure to another, usually a
large number to a smaller number. For example, if you want to create cases to
individual units (each) and there are 12 units in a case, the unit-of-measure
conversion factor would be 12.
11. Enter the product's maximum Load capacity (optional). The Units per Loads field
allows you to enter a "rough-cut" transportation capacity estimate for this product.
This is the number of units expected to be shipped per load for this product
12. Enter the product's load Weight (optional).
13. Enter the product's load Volume (optional).
14. Enter a URL to associate with this product (optional).
17-14 Oracle® Value Chain Collaboration User Guide
Working With Tree Hierarchies
The URL should appear in the format
"http://www.Oracle.com", and not "www.oracle.com". Make sure to
begin your links with "http://" and that you test them by clicking on
the Test Link button. (Some links may not need "www".)
Note:
15. Click Create. The new node is added to your highlighted category. Click "Cancel"
to return to the tree without adding a new node.
16. Click Stop Editing.
Master Data 17-15
Working With Tree Hierarchies
17-16 Oracle® Value Chain Collaboration User Guide
18
Managing Company Module Configuration
This chapter includes the following topics:
■
Managing Events Module Configurations.
■
Configuring Labels in the Events Module
■
Managing Supply Module Stream Set for a Company
■
Setting and Viewing the Shipping/Receiving Calendar for Supply
■
Managing Demand Module Stream Set for a Company
■
Sample Exception Inbox E-Mail Alerts
■
Configuring E-Mail for the Exception Module
Managing Events Module Configurations
Access To This Feature: Superuser, ServerAdmin, SuperAdmin, Admin
Events Stream Set Configuration
With the Company - Module Config - Events - Stream Set Configuration tab you can
you can add, delete, or edit stream sets for the Events module.
To configure Stream Sets
1.
Click Company - Module Config in the VCC menu.
2.
Pick a company from the Company Chooser, if necessary
3.
Click the Events tab.
4.
Select the Stream Set Configuration subtab under Events. The Events - Stream Set
Configuration screen appears.
Figure 18–1 Events - Stream Set Configuration screen
5.
If no Stream Sets are configured, click Add. The Event Stream Set Configuration
screen appears.
Managing Company Module Configuration
18-1
Configuring Labels in the Events Module
Figure 18–2 Events - Stream Set Configuration Screen
6.
Enter a Name for the stream set.
7.
Select from the Type, Subtype, and Creator drop-downs to configure the new
stream set. If an exclamation point appears next to any given option, this indicates
that the selection is invalid for your configuration. You can select a different option
in the drop-down to correct the problem.
8.
To enable a Total row that will display for each stream type when viewing stream
data, click the Enable Totals check box.
9.
Click Save. The Company - Module Config - Events - Stream Set Configuration
screen appears.
The new stream set appears in the select box. It can now be edited or deleted by
first selecting the stream set and then the appropriate button.
Configuring Labels in the Events Module
Oracle Retail VCC allows you to tailor custom fields and labels that will appear on the
Events module screens if you opt to display them.
The possible configurations for these fields include
■
designating a custom label that will display in conjunction with the text entry box
on the screen
■
showing the field you have configured, or hiding it from the user altogether
■
adding a default value the field will contain
To configure labels and fields
1.
Select Company - Module Config from the VCC menu
2.
Pick a company from the Company Chooser, if necessary
3.
Click the Events tab.
4.
Select the Labels subtab under Events. The Events - Labels screen appears.
18-2 Oracle® Value Chain Collaboration User Guide
Configuring Labels in the Events Module
Figure 18–3 Events - Labels Screen
5.
The Events Labels are comprised of 6different Label Types, or categories, within
the Events module.
■
■
■
Common – Labels that are common throughout the Events module. Changing
these labels will make a global Events module change.
Events – Labels that appear at the Events level.
Promotions – Labels that appear at the Promotions level, on Promotions
screens.
■
Tactics – Labels concerning tactics.
■
Promotion Items – Labels appearing at the Promotion Items level.
■
Event Categories - Labels in the Event Category enumerated list. This is also
used to configure the color-coding of the Event calendar.
Accessing these labels is as easy as selecting your level from the Label Type
drop-down. You have the option of configuring some, none, or all of the labels
available. All labels will default to the Default Label seen on these screens, unless
a New Label is specified. Some labels will appear with the option to Show or hide
only. When this is the case, the entire label and input field will be hidden from
view if Show is not checked.
Providing a Default Value will add a specific value to the field each time the screen
containing it is accessed by a user. If you hide the column where a Default Value
can be provided, a red asterisks may appear to indicate that you must enter a
value. Fields that are not required can be hidden without supplying a value. They
are thus exempted from use within Oracle Retail VCC when hidden. Opting to
Show a value that contains a default gives a user the option of overriding the
default you provide. Hiding the field and supplying a value will simplify things
for the end user, but will restrict their control in the process.
6.
Once you have configured the Events labels to your satisfaction, click Save.
Managing Company Module Configuration
18-3
Managing Supply Module Stream Set for a Company
Managing Supply Module Stream Set for a Company
Access To This Feature: Superuser, ServerAdmin, SuperAdmin, Admin
Supply module configuration allows you to specify the streams used to calculate
safety stock, projected inventory, receipt forecasts, and shipment forecasts. To calculate
this information you must identify the streams used for your consumption forecast,
actual consumption, inventory, safety stock, if it is from a stream, and up to five
expected arrival streams. You can create as many stream sets as required for your
supply calculations.
Some guidelines for creating stream sets include the following:
■
All output streams must be unique.
■
At least one output stream must be defined.
■
■
■
Output streams cannot be the same as any input stream except for the Inventory
input stream. The Inventory input stream and output stream can be the same
stream.
Balance and Measure streams cannot be used for the shipment forecast or receipt
forecast output streams for policies using telescoping period overlays.
Measure streams cannot be used as input or output streams for policies at the
aggregate level.
To select streams for a Supply calculation
1.
Select Company - Module Config from the VCC menu and click the Supply tab.
Figure 18–4 Company - Module Config Screen
2.
Click Add to create a new stream set or Edit to edit an existing one.
18-4 Oracle® Value Chain Collaboration User Guide
Managing Supply Module Stream Set for a Company
Figure 18–5 Company - Module Config - Edit Screen
3.
If you are creating a new stream set for the Supply module, enter its name in the
Name field. When you are creating the Supply Policy for this module, the stream
set name appears in the Supply Policy screen in the stream set drop-down list.
4.
In the Consumption Forecast drop-down list, select the stream, subtype, and
creator that you are using as your Consumption forecast.
Note that if a yellow triangle with a black exclamation point appears next to the
creator column for a stream, it means you have selected a creator who does not
have edit access to the stream. For example, if only a buyer company is allowed to
edit a stream and the partner you have selected is the seller company, you must
change your creator. Alternately, though less likely, the supervisor for the hub may
need to change the configuration for whomever edits that stream.
5.
In the Consumption Actual drop-down list, select the stream, subtype and creator
that you are using as your Consumption Actual stream.
6.
In the Inventory drop-down list, select the stream, subtype and creator that you
are using as your Inventory stream.
7.
In the Expected Arrivals drop-down list, select the stream, subtype and creator or
streams you are using as your Expected Arrivals forecast. You can specify none for
this field. These streams are used as input to calculate the output streams: Safety
Stock, Projected Inventory, Receipt Forecast, and Shipment Forecast.
8.
In the Safety Stock drop-down list, select the stream, subtype and creator that you
are using as your Safety Stock forecast, or select none.
9.
In the Projected Inventory drop-down list, select the stream and subtype that you
are using as your Projected Inventory forecast.
10. In the Receipt Forecast drop-down list, select the stream and subtype that you are
using as your Receipt forecast.
11. In the Shipment Forecast drop-down list, select the stream (or streams) and
subtype you are using as your Shipment forecast. These streams are used as
output from calculations performed on the input streams: Consumption Forecast,
Consumption Actual, Inventory, and Expected Arrivals.
The Safety Stock stream is an output stream for the Safety Stock calculation, but an
input stream for the Supply Policy calculation.
12. Click Save.
Managing Company Module Configuration
18-5
Setting and Viewing the Shipping/Receiving Calendar for Supply
Setting and Viewing the Shipping/Receiving Calendar for Supply
Setting and Viewing the Shipping/Receiving Calendar for Supply
Access To This Feature: Superadmin, Admin, Manager
The shipping/receiving calendar for Supply allows you to block out dates for which
you are not available to ship or receive. If you are a seller, you ship goods; if you are a
buyer, you receive goods.
You can view your partner's shipping/receiving calendar and view blocked dates;
and, if you are using a daily database, the superuser/serveradmin, may give you
access to edit your partner's shipping/receiving calendar.
To set shipping/receiving Supply blocked dates
1.
Select Company - Module Config from the VCC menu and click the Supply tab.
Figure 18–6 Company - Module Config - Supply Screen
2.
Click Shipping Calendar if you are a seller and wish to set blocked dates; or
Receiving Calendar if you are a buyer and wish to set blocked dates. If allowed,
you can set blocked dates for your partner. In this case, if you are a seller, you can
select Receiving Calendar; if you are a buyer, you can select Shipping Calendar.
Even if you cannot set blocked dates for your partner, you may view them by
clicking the appropriate link.
Figure 18–7 Company - Module Config - Supply - Shipping Calendar Screen
3.
If you are a buyer, for a shipping calendar, select a parameter from the partner
hierarchy; for a receiving calendar, select a location from the location hierarchy. (If
you are a seller, do the reverse.)
4.
From the Display Period select boxes, select the start and end dates to be
displayed. This is for display purposes only. You can change the display setting at
any time. The shipping/receiving calendar appears for the date range you
selected.
18-6 Oracle® Value Chain Collaboration User Guide
Setting and Viewing the Shipping/Receiving Calendar for Supply
Figure 18–8 Company - Module Config - Supply - Shipping Calendar - Display Periods
Screen
5.
You now can click on any date to block it. The date is highlighted in grey. (If the
date selected is in the first row, the date can act as a base marker for the Save
options if you select Save First Row for All Displayed Periods.) You have three
Save options for the selected date: Save First Row for All Displayed Periods,
Save First Row for All Periods, or Save Displayed Periods. If you check the Save
First Row for All Displayed Periods radio button and click Save, all the displayed
dates under the selected date are highlighted and marked as blocked. If you select
Save First Row for All Periods, all periods in the entire database (displayed or
not) are highlighted and marked as blocked. If you select Save Displayed Periods,
only the periods highlighted are marked as blocked.
You can select multiple random dates that are not in a row, save them as Save
Display Periods, and they will be marked as blocked.
Figure 18–9 Display Period
Managing Company Module Configuration
18-7
Managing Demand Module Stream Set for a Company
Managing Demand Module Stream Set for a Company
Access To This Feature: Superuser, ServerAdmin, SuperAdmin, Admin
Demand module configuration allows you to specify the streams used to calculate a
forecast. To calculate this information, you must first identify the history stream used
for your Demand forecast and the output stream for the demand forecast. You can
create as many stream sets as required for your Demand calculations.
To select streams for Demand calculation
1.
Select Company - Module Config from the VCC menu and click the Demand tab.
2.
Click Add to create a new set of Demand stream sets or Edit to edit an existing
one.
Figure 18–10 Demand Stream Set Configuration Screen
3.
If you are creating a new stream set for the Demand module, enter its name in the
Name field. When you are creating the Demand Policy for this module, the stream
set name appears in the Demand Policy screen in the Stream Set drop-down list.
Note that if a yellow triangle with a black exclamation point appears next to the
creator column for a stream, it means you have selected a creator who does not
have edit access to the stream. For example, if only a buyer company is allowed to
edit a stream and the partner you have selected is the seller company, you must
change your creator. Alternately, though less likely, the supervisor for the hub may
need to change the configuration for whomever edits that stream.
4.
Select the stream type from the Type drop-down.
5.
Select the subtype from the Subtype drop-down.
6.
Select whether the Creator is local or partner.
7.
Click Save.
18-8 Oracle® Value Chain Collaboration User Guide
Configuring E-Mail for the Exception Module
Configuring E-Mail for the Exception Module
Within Exceptions, during criteria creation, you can elect to send e-mail alerts to
specific users when exceptions are triggered by that criteria (for more information on
setting up e-mail alerts see <CROSS REF>). The specific format or layout of these
e-mail alerts is configurable in the Company - Module Config - Exceptions tab, as seen
below.
Figure 18–11
Company - Module Config - Exceptions Screen
The E-mail Alert Configuration section of the Exceptions tab permits the following to
be configured:
■
■
Default Format – Select whether you wish the e-mail to be Plain Text or HTML
format. See Sample Exception Inbox E-Mail Alerts.
Hidden Columns – Select which columns you do not want to display in the e-mail
by moving column header names from the Visible to Hidden select box with the
left/right arrows.
View Exception, Criteria Name, and Inbox columns cannot be
moved to the Hidden, and will be visible in all exception e-mail alerts.
Note:
■
■
Reorder Columns – Reorder columns by moving selected column headers up or
down with the up/down arrows.
Multi-Column Sort Order – Select which column contents should be sorted in
what order. Note that columns must first be in the Visible box in order to be
appear in the Multi-Column Sort Order Select box.
E-mail alerts will contain both Group Exceptions and
Individual Exceptions. Most of the E-mail Alert Configuration settings
pertain to Individual Exception alerts. Group Exception format will
use the same Default Format, and the same localization settings (i.e.,
Number, Date, Time Formats, and Time Zone). Columns are not
sortable or allowed to be hidden for the Group Exceptions displayed
in e-mail alerts.
Note:
Managing Company Module Configuration
18-9
Sample Exception Inbox E-Mail Alerts
Sample Exception Inbox E-Mail Alerts
Links contained in the HTML and plain text e-mail will return you to VCC's Exception
Inbox screen, and Exception Detail views. The Group Inbox links will take you to the
Group Inbox screen that displays the selected context and exceptions.
Figure 18–12 Sample HTML E-Mail Alert
Figure 18–13
Sample Plain Text E-Mail Alert
18-10 Oracle® Value Chain Collaboration User Guide
19
Creating Product Price Profiles
This chapter contains the following topics:
■
About Product Price Profiles
■
Creating a Product Price Profile with the Company - Price Profile - Create Tab
About Product Price Profiles
A product price profile defines the base price of a product for a specific time period
for a specific collaboration. You can create multiple profiles for a product reflecting
different prices for different time periods. For example, you might want to create a
specific price for snow shovels during the winter that differs from the price of snow
shovels during the summer. Before creating a price profile, you should define the time
periods in your forecast as well as your trading partner and trading partner locations.
A product price profile is always defined in terms of a collaboration between your
local company location and your partner's location. You can select any leaf-level
location or location folder, and any leaf-level product or product folder, partner
location, or partner location folder.
Only users with administrative privileges can create a product price profile.
Superusers and ServerAdmins cannot create a price profile because the
superuser/serveradmin roles are not associated with any specific company. The
superadmin role, however, can create a product price profile only for her own
company since a superadmin is always associated with a company.
Creating a Product Price Profile with the Company - Price Profile - Create
Tab
To create a product price profile
1.
Click the Company - PriceProfile in the VCC menu.
2.
Click the Create tab.
Creating Product Price Profiles 19-1
Creating a Product Price Profile with the Company - Price Profile - Create Tab
Figure 19–1 Company - PriceProfile - Create Screen
3.
Select each context level at which you wish to create price profiles.
4.
Click Edit.
5.
Enter the base price in the Base Price field.
Figure 19–2 Base Price Field
6.
Click Set to set the base price, or click Cancel to return to the List screen.
19-2 Oracle® Value Chain Collaboration User Guide
20
Managing Company Aggregates
This chapter contains the following topics
■
About Aggregates
■
Creating a Data Aggregate with the Company - Aggregates - Create Tab
■
Viewing Aggregates with the Company - Aggregates - List Tab
■
Deleting Aggregates with the Company - Aggregates - List Tab
About Aggregates
An aggregate is a convenient way of grouping items that allows you to view totals for
the items in the group rather than the individual figures for all the items. Rolling up
totals is an indispensable way of viewing figures for entire product folders, or viewing
the figures for large geographic areas that contain many partner locations or many of
your own locations. For example, you can create an aggregate that easily allows you to
view the sales figures for a specific product for all your trading partners.
To obtain a data stream total or aggregate, you must indicate to Oracle Retail VCC
exactly what it is you are totalling. Oracle Retail VCC operates on contexts that include
■
Your location or location category
■
Your partner's location or location category
■
The products on which you and your partner collaborate
■
The time period
■
The data stream (except those whose accumulation rule is measure.)
■
The unit of measure, which can be the base unit of measure, a statistical factor,
currency, or loads. To aggregate using statistical units or loads, you must have
supplied a statistical factor or a load factor for the product. If you create an
aggregate based on currency, there must be a base price established or a
promotional price for the time period for which you are aggregating.
To create the aggregate, you must select the context for the aggregate. The combination
of selections on these hierarchies creates the aggregate context.
When you create an aggregate, you can create the aggregate
■
based on the sum of all the leaf nodes in the category. This is called sum.
■
for each and every leaf node in the selected category. This is called any.
■
for both sum and any.
Managing Company Aggregates 20-1
Creating a Data Aggregate with the Company - Aggregates - Create Tab
By default, the aggregate is created for the sum of all entries in the category if you
selected a category.
Clicking on a category changes the category to a specific color. You can change the
color of a selection to purple, green, or yellow by successively clicking on it. The
meaning of each color is as follows:
■
Purple – aggregate on folder
■
Green – select individual locations
■
Yellow – both
Sum/Any/Both does not apply to time periods. Use the period overlay feature in the
data streams view to view data summed across time periods.
Creating a Data Aggregate with the Company - Aggregates - Create Tab
Access To This Feature: Superuser, ServerAdmin, SuperAdmin, Admin
Before you create an aggregate, you should be aware of the following:
■
■
An aggregate must contain at least one category in the context. Every element in
the context cannot be at the leaf level.
You can create aggregates only for the products on which you and your partner
collaborate. Oracle Retail VCC automatically determines which of the contexts you
select have collaborations. If none of the contexts you select contains a
collaboration, you get an error screen message.
To create an aggregate
1.
Load the company for which you want to create aggregates using the company
chooser (superuser/serveradmin only).
2.
Select Company -Aggregates from the VCC menu. The aggregates screen appears.
EnsCure that the Create tab is selected to create the aggregate
Figure 20–1 Company -Aggregates- Create Screen
3.
From the Type selection box, select the streams for which you want to create the
aggregate. (You can select multiple, contiguous data streams using Shift-Click, or
multiple, non-contiguous data streams using Control-Click.)
4.
From the UOM selection box, select the unit(s) of measure on which you want to
aggregate: “Base Units,” “Stat Units,” “Currency,” or “Load.” Multiselection is
available
20-2 Oracle® Value Chain Collaboration User Guide
Creating a Data Aggregate with the Company - Aggregates - Create Tab
5.
Click Select Locations. Select your location or locations. Highlight individual
locations to create an aggregate for each location highlighted. Highlight a location
category to roll up all the locations under the category into a single aggregate
6.
Select “Aggregate on Folder” (purple), “Select Individual Locations” (green), or
“Both” (yellow) for the category by clicking on it until it changes to the
appropriate color. “Aggregate on Folder” is the default.
Note that you can select multiple folders so be sure to
highlight only the category or folders you require.
Note:
7.
Click Select Partners. Select a partner location or locations. Highlight individual
partner locations to create an aggregate for each location highlighted. Highlight a
partner location category to roll up all the partner locations under the category
into a single aggregate
8.
Select “Aggregate on Folder” (purple), “Select Individual Locations” (green), or
“Both” (yellow) for the category by clicking on it until it changes to the
appropriate color. “Aggregate on Folder” is the default
9.
Click Select Products. Select a product or products. Highlight individual products
to create an aggregate for each product highlighted. Highlight a product category
to roll up all the products under the category into a single aggregate
10. Select “Aggregate on Folder” (purple), “Select Individual Locations” (green), or
“Both” (yellow) for the category by clicking on it until it changes to the
appropriate color. “Aggregate on Folder” is the default
11. Click All Periods. Select the period category for which you want to create the
aggregate. You cannot select a leaf-level period, but all aggregates you create are
created on leaf-level periods. For example, if you highlight “March,” and there are
four weekly periods in March, four aggregates are created, one for each period.
An aggregate does not sum the figures for multiple periods. It
sums the figures for the items in the context for each individual
period.
Note:
12. Click Review Selections. The Selected Aggregations screen appears showing the
aggregates you are about to create. Stream types and UOMs are listed at the top of
the screen. Each row in the list represents a distinct context, but not a distinct
context/stream type/uom. Aggregates will be created for each stream type/uom
combination for each context in the list.
Managing Company Aggregates 20-3
Creating a Data Aggregate with the Company - Aggregates - Create Tab
Figure 20–2 Selected Aggregations screen
If there are no valid aggregates to be created, an error screen appears.
You can also create aggregates without Reviewing Selections
by clicking the “Create” button on the Company - Aggregates - Create
screen.
Note:
13. Click the check box in the “Delete” column next to any aggregate you do not want
to create and click Delete or enter the Start ID and End ID in the Mark Entries field
to mark entries to be deleted.
You can select/deselect all the aggregates on the page by
clicking the “Check” icon at the top of the “Delete” column. You can
sort the list by any of the underlined column headings.
Note:
14. Click Back if you want to return to the previous screen to change your selections.
15. Click Create if you are ready to proceed.
You can view created aggregates by clicking the List tab or in the data streams view
screen.
20-4 Oracle® Value Chain Collaboration User Guide
Deleting Aggregates with the Company - Aggregates - List Tab
Viewing Aggregates with the Company - Aggregates - List Tab
Access To This Feature: Superuser, ServerAdmin, SuperAdmin, Admin
To view the aggregates you have created
1.
Select your company (superuser/serveradmin only).
2.
Select Company - Aggregates from the VCC menu and click the List tab. Set the
context for the aggregates you want to view by selecting the location, partner, and
product.
3.
Select the type of data streams you wish to view in the Type selection box. The
Type selection box allows multiple data streams, or a specific set of data streams,
to be selected.
4.
Select the units of measure you wish to display in the UOM selection box. The
UOM selection box allows one or multiple UOMs to be chosen for display.
5.
If you wish to see a list of aggregates at and below the Location/Partner/Product
folder, check the At and below Location/Partner/Product check box.
6.
Click the Set button. If aggregates are available for the selected context, they
appear in a list.
The aggregates can be displayed either at and below the location/partner/product or
at the location/partner/product context. Multi-selecting on the Type and UOM
options gives you the ability to limit the list to only aggregates of a specific UOM or a
specific set of UOMs. The list may be sorted by location, partner, product, type,
number of aggregates or UOM by clicking on the appropriate column header.
The Company - Aggregates - List screen displays a list of items that are unique at the
Local, Partner, Stream Type, Product, and UOM combination level. Periods can be
viewed by drilling down through the number link located in the Number Of
Aggregates column. The number link indicates the number of periods you will see
upon drilling down. It is also possible to delete aggregates from this screen.
The total number of items displayed in the list can not exceed 50,000. However, it is
possible to set the number of items to be displayed per page. This is configured in the
Results per page field on the Company - General Config - Preferences screen.
Deleting Aggregates with the Company - Aggregates - List Tab
Access To This Feature: Superuser, ServerAdmin, SuperAdmin, Admin
To delete aggregates in the list
1.
Select your company (superuser/serveradmin only).
2.
Select Company - Aggregates from the VCC menu and click the List tab. Set the
context for the aggregates you want to view by selecting the location, partner, and
product.
3.
Select the type of data streams you wish to view in the Type selection box. The
Type selection box allows multiple data streams, or a specific set of data streams,
to be selected.
4.
Select the units of measure you wish to display in the UOM selection box. The
UOM selection box allows one or multiple UOMs to be chosen for display.
5.
If you wish to see a list of aggregates at and below the Location/Partner/Product
folder, check the At and below Location/Partner/Product check box.
6.
Click the Set button after choosing your context.
Managing Company Aggregates 20-5
Deleting Aggregates with the Company - Aggregates - List Tab
7.
If aggregates are available for the selected context, they appear in a list.
To delete specific aggregates under a context you may
8.
Check each aggregate you want to delete, or enter a range by entering the ID of the
first aggregate you want to delete in the Start ID text box and the ID of the last
aggregate you want to delete in the End ID text box. Click the Mark Entries
button. Check marks are automatically placed in the delete column for all the
aggregates with IDs in the range specified.
9.
Click the Delete button.
You can select/deselect all the aggregates on the page by clicking the icon at the
top of the Delete column. Clicking the Delete button will eliminate all the selected
aggregates for that particular page.
You may only select up to 1000 items for deletion at any given time.
Note: Aggregates associated with disaggregation profiles or
exception criteria cannot be deleted. They display without a check box
in the delete column.
Exporting Aggregates
Aggregates can be exported using the Export Data icon. This is located on the
Company - Aggregates - List screen. By selecting this icon, you export Aggregate
definitions in the following order:
Creator company Id, Creator Location Id, Partner company Id, Partner Location Id,
Global Item Number,Period Begin, Period End, Stream Type code, UOM,Creator
Aggregate type, partner aggregate type, product aggregate type
The file you export will resemble the following sample:
111,111- 001,111,PartLoc_Test1,Prod_Test1,20020120,20041225,5,1,0,1,1
111,Loc_Test1,111,PartLoc_Test1,Prod_Test1,20020204,20020331,2,1,1,1,1
111,Loc_Test1,111,PartLoc_Test1,Prod_Test1,20020204,20020331,5,1,1,1,1
111,Loc_Test1,111,PartLoc_Test1,Prod_Test1,20020204,20020210,15,1,1,1,1
20-6 Oracle® Value Chain Collaboration User Guide
21
Managing Company Data Stream
Disaggregation
This chapter contains the following topics:
■
About Data Stream Disaggregation
■
Profile-Based Disaggregation
■
Proportional Disaggregation
■
Straight Line Disaggregation
■
About Disaggregation Profiles
■
Configuring Disaggregation Factors
■
■
■
Configuring Time-Only Disaggregation with the Company - Disagg. Setup - Time
Only Subtab
Daily Allocation with the Company - Disagg. Setup - Daily Allocation Tab
Listing, Viewing, and Editing Disaggregation Profiles with the Company - Disagg.
Setup - List Tab
About Data Stream Disaggregation
Oracle Retail VCC provides three methods for data stream disaggregation
■
Profile-based disaggregation
■
Proportional disaggregation
■
Straight Line disaggregation
Each is described below.
Profile-Based Disaggregation
Profile-based disaggregation allows you to select multiple dimensions in a context
and time. The disaggregation factors indicate the fraction of the total value that is to be
applied to the context. The factors are applied to the data sequentially to create the
disaggregated values.
For example, if you want to convert weekly-level data to daily data you can create
disaggregation factors for each distribution center (East .3, West .2 North .28, South
.22) and for each day (Monday .1, Tuesday .14, Wednesday .12, etc.). If the input value
is 40 then the east receives 12 which is further disaggregated into 1.2 for Monday, 1.68
for Tuesday, etc.
Managing Company Data Stream Disaggregation 21-1
Profile-Based Disaggregation
This frees you from the task of updating hundreds or even thousands of individual
data stream items each time the data stream for a category changes. Moreover, the
disaggregation (or allocation) of a single value for a category into individual leaf items
is applicable only to the context (product, location, and partner) you specify.
You can enter data streams using any of the usual data entry methods – manually or
bulk loading using the VCC Integrator – and Oracle Retail VCC automatically
allocates the correct values to each of the leaf items in the hierarchy. Prior to entering
your data stream data, however, you must define the disaggregation profile that tells
Oracle Retail VCC how to allocate the data among the leaf items in a category. For
details about the disaggregation profile, see About Disaggregation Profiles
Data stream disaggregation provides the following benefits
■
■
■
■
Allows you to allocate values from higher level folders to leaf items without
having to change each leaf item individually.
Allows you to collaborate with trading partners who use leaf-level forecasts even
though your forecasts are not entered at their level of detail (sometimes called the
level of abstraction ).
Allows you to disaggregate on a time only basis taking data that are based on a
weekly schedule and disaggregating it into daily data. This allows you to
collaborate with partners who forecast on a daily basis. This feature is available
only if your forecasts are based on daily time periods.
Disaggregation profiles are easy to set up.
The ability to enter a single value for a category, and to calculate and assign values to
all leaf items in a hierarchy provides increased flexibility when you are comparing
data streams with a trading partner. Often, trading partners operate at different levels
of abstraction. For example, one trading partner may provide values at the product
category level while another provides forecasts at the product leaf level. The data
stream disaggregation feature makes it easy for a trading partner who only provides
data streams at the category level to assign forecast values to leaf items, and then
compare them with a trading partner who uses a leaf-level method.
For example, you have a product category called All Natural Potato Chips. The
forecast value for it is 100. You collaborate with your trading partner on this item, but
your trading partner further refines the All Natural Potato Chips category into several
leaf items: 16 oz. potato chips, 32 oz. potato chips, and Jumbo Pack. Your problem is
to take the forecast value for the entire category (100), which represents an aggregate
value for all subfolders, and to allocate it among the leaf items so you can collaborate
with your partner on individual product items such as Jumbo Pack. Once you have
defined the disaggregation profile for the product category, Oracle Retail VCC
calculates and assigns the appropriate values for you.
On the other hand, data stream aggregation allows a trading partner who uses the
leaf-level forecasting method to roll-up (total or aggregate) individual forecast values
for any category and compare them with a trading partner who forecasts at the
category level.
Data stream disaggregation and aggregation provide the complete solution to allow
trading partners with different forecast methods to synchronize their methods quickly
and easily, and to collaborate.
21-2 Oracle® Value Chain Collaboration User Guide
Straight Line Disaggregation
Proportional Disaggregation
Proportional disaggregation does not employ disaggregation profiles. To use
proportional disaggregation, data must already exist for the selected context. Equal
distribution is performed if data does not exist for the selected context.
Proportional disaggregation compares the aggregate value for a specific context with a
new aggregate value for the context. It then determines the percent change between
the old value and the new value, and changes each leaf value in the context by the
same percentage increase or percentage decrease as the aggregate. For example, if the
original aggregate value is 10 and the new value is 15, the percent change is 50% and
all leaf items are increased by 50%.
Straight Line Disaggregation
Straight Line Disaggregation distributes an equal percentage of the given Value among
each of the leaves. For example, if SpeedyRx had selected a context that resembled the
tree below, and they wished to allocate each type of Snack evenly by period across all
locations, they would see a distribution similar to the one in See Straight Line
Disaggregation below.
Figure 21–1 North East - SpeedyRx - Snacks
Table 21–1
Straight Line Disaggregation
Periods:
Sept. 1-7
Sept. 8-14
Sept. 15-21
Value:
600
492
300
Waltham - SpeedyRx
- Cashews
100
82
50
Waltham - SpeedyRx
- Almonds
100
82
50
Waltham - SpeedyRx
- Walnuts
100
82
50
Framingham SpeedyRx, Cashews
100
82
50
Framingham SpeedyRx - Almonds
100
82
50
Framingham SpeedyRx - Walnuts
100
82
50
In the example above, each week in September has a designated forecast value to be
distributed amongst the leaves in equal parts.
In order to apply Straight Line Disaggregation to your collaboration profiles, you must
first enable it.
Managing Company Data Stream Disaggregation 21-3
Straight Line Disaggregation
To enable Straight Line Disaggregation.
1.
Click on Company in the menu.
2.
Select General Config. The Preferences tab view appears.
3.
Change the drop-down called Enable Straight Line Disaggregation to yes.
4.
Click Save.
You may then create a new Disaggregation Profile in Company - Disagg. Setup Create which uses Straight Line Disaggregation.
The following tables illustrate the options available for each method when contexts are
at various levels of leaf and folder:
Figure 21–2 Context and Period are at aggregate levels. Although only one of them
needs to be at aggregate level, choosing to have both at aggregate level is also a
possibility
Figure 21–3 If Context is at aggregate-level and Period is at leaf-level, you should read
the table below as if the Period coluns did not exist
Figure 21–4 If the Period is at aggregate-level and Context is at leaf-level, you should
read the table as if the Context column did not exist
21-4 Oracle® Value Chain Collaboration User Guide
Configuring Disaggregation Factors
About Disaggregation Profiles
When you create a disaggregation profile, the associated
aggregates are created as well; that is, aggregates are created for the
same location/partner/product context and stream_type for each
period in the effectivity period of the disaggregation profile.This is
specifically for use by the Demand module.
Note:
A data stream disaggregation profile is a set of factors you enter for a specific context
(product, partner, or location category), time period, and stream type and subtype that
permits any value entered for a category to be allocated (disaggregated) among leaves
in it. The disaggregation factor is a percent of the total aggregate value for the category
in the context. For example, if a product category has two leaves and you enter a
disaggregation factor of .5 for each, when you load a forecast value of 100 for the
category each leaf is allocated 50.
For disaggregation profiles based on existing data for the period, if you subsequently
change any leaf-level quantity in the period range used for the disaggregation profile
calculation, new disaggregation factors/ratios are calculated for the other product
leaves. For example, if you change one of the two leaves in the previously mentioned
example to 60, the aggregate total for the category becomes 110. The disaggregation
profiles are recalculated as 50/110 = .454 and 60/110 = .545 when you run the
recalculation tool.
The context (location, partner, product), stream type and subtype and the
disaggregation factors are referred to as the disaggregation profile . A profile is only
valid for the specified time period or effective date .
You can develop disaggregation profiles in any one of the following ways:
■
manually
■
computed – based on existing data
Manually entered disaggregation profiles are appropriate for new products, or for
special events that do not reflect historical behavior. More frequently, however, you
want to utilize automated factors based upon historical analysis of forecast behavior.
Historical analysis takes the historical values for any data stream type you choose by
context or period, sums the data for each item, and derives the percentage of each item
relative to the category that contains it. Oracle Retail VCC allows you to generate
disaggregation profiles based on a data stream's history.
For details on creating disaggregation profiles, see Configuring Disaggregation
Factors
Configuring Disaggregation Factors
Access To This Feature: SuperAdmin, Admin, Manager
1.
Select Company - Disagg. Setup from the VCC menu. The disaggregation screen
appears.
2.
Select the Create tab. This screen will show the Context Based subtab as selected.
3.
The Manual Entry radio button will also be selected by default. When you enter
disaggregation profiles manually, you must enter a numeric value or a percent
value for each leaf in the hierarchy context (location, partner, product) you select.
Managing Company Data Stream Disaggregation 21-5
Configuring Disaggregation Factors
For example, if your context resembled the one below, you might have up to
twenty four Collaboration Items.
Figure 21–5 Manual Disaggregation Factors
B-1-XB-2-XB-3-XB-4-X
B-1-YB-2-YB-3-YB-4-Y
A-1-XA-2-XA-3-XA-4-X
A-1-YA-2-YA-3-YA-4-Y
C-1-XC-2-XC-3-XC-4-X
C-1-YC-2-YC-3-YC-4-Y
Any value entered for disaggregation at the aggregate context would be
multiplied by the factors assigned to each of the partner leaves to determine what
value to assign to each leaf-level context. If you enter a zero value for one of the
factors, zero is multiplied by the disaggregation value, and the result would be
that zero is the value assigned to that leaf.
Note: Note that the Time Only subtab and the Daily Allocation tab
appear only if your base time periods are daily.
For Manual Entry disaggregation
1.
Choose one or more Type/Sub-Type(s) from the selection box by holding
down the Ctrl key and clicking on individual types, or by holding down the
Shift key and selecting multiple types. Note that measure streams cannot be
disaggregated so they are not included in the drop-down list.
2.
Select the context (Location, Partner, Product, Period) on which you want to
disaggregate. Note that one of location, partner, or product must be at the
folder level and the other two must be at the leaf-level since disaggregation
progresses from the folder level to the leaf level and you cannot disaggregate
on two folders at once. You cannot use the root folder for any of these three
dimensions to create a disaggregation profile. If you select a Partner category,
all the leaf partners in the category with whom you collaborate are assigned a
disaggregation value based on the factor.
21-6 Oracle® Value Chain Collaboration User Guide
Configuring Disaggregation Factors
Figure 21–6 For Manual Entry Disaggregation
Oracle Retail VCC will automatically calculate the appropriate disaggregation
factors for a context based on the historical data for the context.
To configure disaggregation automatically for a context
For disaggregation based on Computed Data
4.
1.
a. Choose one or more Type/Sub-Types from the selection box by holding
down the Ctrl key and clicking on individual types, or by holding down the
Shift key and selecting multiple types.
2.
Select specific Source Data from the Type and Sub-Type drop-downs below,
and whether or not the dates should encompass a fixed or rolling time period.
Note that measure streams cannot be disaggregated so they are not included
in the drop-down list.
3.
Select the context (Location, Partner, Product, Period) on which you want to
disaggregate. Note that one of location, partner, or product must be at the
folder level and the other two must be at the leaf-level since disaggregation
progresses from the folder level to the leaf level and you cannot disaggregate
on two folders at once. You cannot use the root folder for any of these three
dimensions to create a disaggregation profile. If you select a Partner category,
all the leaf partners in the category with whom you collaborate are assigned a
disaggregation value based on the factor.
Click the Create button. The screen displaying the requested Collaboration
appears.
Managing Company Data Stream Disaggregation 21-7
Configuring Time-Only Disaggregation with the Company - Disagg. Setup - Time Only Subtab
Figure 21–7
5.
Screen Displaying the Requested Collaboration
Reviewing the collaboration allows you the option of entering a new Value for
each collaboration item.
For Computed data
1.
You may check the Override check box. The Override check box allows you to
enter a new number in the text box displayed under the New Value column.
2.
When you are finished reviewing the collaboration, hit Save to save and view the
collaborations or Done to exit to the List screen without saving. If you check the
Override check box, enter a new value, and wish to recalculate based on that new
number, click the Save and Recalc button. You may also review time factors from
this screen by clicking on the Review Time Factors button.
For Manually entered data
1.
Factors that will allocate evenly across all leaves are automatically supplied. You
may edit those factors for the folder dimension as required. This can be changed
by typing a new value into the text field.
2.
Click Save and Recalc or Save.
3.
Click Done to return to the list screen.
Configuring Time-Only Disaggregation with the Company - Disagg. Setup
- Time Only Subtab
Access To This Feature: SuperAdmin, Admin, Manager
Time buckets must be configured for daily, rather than weekly,
UOMs in order to access this feature.
Note:
Time-only disaggregation allows you to disaggregate weekly time buckets into daily
time buckets. It is available only if your base time periods are daily. A disaggregation
profile must have been previously created for the context to access time-only
disaggregation. Create profiles from the Time Only subtab when you and your
trading partner collaborate at leaf-level contexts, but your trading partner generates
data in weekly time buckets and you generate data in daily time buckets.
To configure time-only disaggregation
21-8 Oracle® Value Chain Collaboration User Guide
Configuring Time-Only Disaggregation with the Company - Disagg. Setup - Time Only Subtab
1.
Select Company - Disagg. Setup from the VCC menu. The disaggregation screen
appears.
2.
Click the Time Only subtab. The Time Only disaggregation screen appears.
Figure 21–8 Time Only Disaggregation Screen
3.
In the Time Only screen, select a context at any level on each dimension (more
than one can be at the folder level). A Time-Only profile will be created for each
leaf-level collaboration contained in the context you choose. Select a stream type
and subtype. Select a context for which you want to assign the same daily
allocation profiles for each week. Click Create.
4.
For each time period, select the daily allocation disaggregation profile you want to
use.
Figure 21–9 Time Period for the Daily Allocation Disaggregation
5.
Click Save.
Managing Company Data Stream Disaggregation 21-9
Daily Allocation with the Company - Disagg. Setup - Daily Allocation Tab
Daily Allocation with the Company - Disagg. Setup - Daily Allocation Tab
Access To This Feature: SuperAdmin, Admin, Manager
Time buckets must be configured for daily, rather than weekly,
UOMs in order to access this feature.
Note:
The Daily Allocation screen allows you to specify how your daily data stream is
structured. It lets you specify how to allocate data across the week. You can use the
daily allocation setup profiles you create, when creating disaggregation profiles for
databases that use daily time buckets. The Daily Allocation profile you create appears
in the drop-down list of profiles that appears when setting up a disaggregation profile
for a company that uses a database based on daily time buckets.
To specify a data stream daily allocation structure
1.
Select Company - Disagg. Setup from the VCC menu.
2.
Click the Daily Allocation tab. The Daily Allocation screen appears.
Figure 21–10 Daily Allocation Screen
3.
Click New. In the Name field, enter the name for this daily allocation profile.
Figure 21–11 Daily Allocation - Create Profile Screen
21-10 Oracle® Value Chain Collaboration User Guide
Daily Allocation with the Company - Disagg. Setup - Daily Allocation Tab
4.
Enter the new allocation factors for each weekday and click Save. You can use the
daily allocation setup profiles you create, when creating disaggregation profiles
for databases that use daily time buckets.
5.
When you select a Default Daily Allocation from the drop-down, it will appear by
default each time you enter the Daily Allocation screen.
6.
You can edit a profile by selecting it in the drop-down menu and clicking Edit.
Figure 21–12
Daily Allocation - Edit Screen
Managing Company Data Stream Disaggregation
21-11
Listing, Viewing, and Editing Disaggregation Profiles with the Company - Disagg. Setup - List Tab
Listing, Viewing, and Editing Disaggregation Profiles with the Company Disagg. Setup - List Tab
Access To This Feature: SuperAdmin, Admin, Manager
To delete or edit an existing profile
1.
Select Company - Disagg. Setup from the VCC menu.
2.
Click the List tab. The disaggregation profiles defined are displayed.
Figure 21–13 Disaggregation Profiles Display
3.
To delete a disaggregation profile, click the check box next to the profile and click
the Delete button.
4.
To edit an existing profile, click the colored dot next to the profile. The screens
used to create the profile are displayed. Click the Edit button. Make any edits
necessary in the same manner you would if you were creating the profile and click
Done.
21-12 Oracle® Value Chain Collaboration User Guide
Listing, Viewing, and Editing Disaggregation Profiles with the Company - Disagg. Setup - List Tab
Figure 21–14
Create Profile Screen
The number of items displayed on the disaggregation list page is controlled by The
Results per page field under the Company Preferences screen.
Managing Company Data Stream Disaggregation
21-13
Listing, Viewing, and Editing Disaggregation Profiles with the Company - Disagg. Setup - List Tab
21-14 Oracle® Value Chain Collaboration User Guide
22
Managing Company Collaborations
This chapter contains the following topics:
■
■
About Collaborations
Creating Collaborations Between Trading Partners with the Company
Collaborations Screen
About Collaborations
Oracle Retail VCC allows you to bulk load your collaborations using the VCC
Integrator, or to enter them manually using Oracle Retail VCC administrator tasks. For
details on bulk loading collaborations, see the Oracle Retail VCC Implementor Guide.
Collaboration is central to Oracle Retail VCC. You can configure VCC to manage
collaborations between any company location in your location hierarchy with any
trading partner location. This chapter describes how to add collaborations using the
VCC administrator tasks and how to add the products required for a specific
collaboration.
If you want collaboration items created by your partner to appear in your
collaboration hierarchy, see Company - General Config - General Preferences.
Creating Collaborations Between Trading Partners with the Company
Collaborations Screen
Access To This Feature: Superuser, ServerAdmin, SuperAdmin, Admin
To create a collaboration manually using the VCC administrator tasks
1.
Click the Company - Collaborations from the Oracle Retail VCC menu. The
Company Collaboration screen appears.
2.
Select your company from the Company Chooser.
Managing Company Collaborations 22-1
Creating Collaborations Between Trading Partners with the Company Collaborations Screen
Figure 22–1 Company Collaboration Screen
3.
Click AllPartners and select the leaf-level partner or partner category location for
the collaboration. At the All Partners level, all company products are highlighted
no matter what the collaborations are. So, when creating or removing
collaborations, you must select a lower context. If you add a new partner to a
partner category that was previously a collaboration partner category, you must
create the collaboration item for the new partner.
4.
Click AllProducts and select the leaf-level product or product category. If you add
a new product to a product category that was previously a collaboration product
category, you must create the collaboration item for the new product.
5.
Click the Start Editing button. The Stop Editing button appears.
6.
Highlight the items on which you want to collaborate.
7.
Click Apply Changes to create the collaboration or Revert to return to the last
state at which Apply Changes was selected.
8.
Click Stop Editing
Any collaborations created when both root nodes (All
Partners/All Locations) are selected will be ignored. The changes will
appear to be applied when you click Apply Changes, but when you
click Stop Editing the tree will revert to its previous state. You must
have one non-root node selected in order to add collaborations.
Note:
Also see Company - General Config - General Preferences for information on the Auto
Create Collaborations feature. Selecting this option gives your trading partners
permission to create collaborations that will appear in your hierarchy.
22-2 Oracle® Value Chain Collaboration User Guide
23
Managing Roles and Users
This chapter includes the following topics:
■
About Roles and Users
■
An Overview of Oracle Retail VCC Roles
■
Selecting the Appropriate Tree Display
■
Roles & Users Search
■
Creating a New User for a Company with the Company - Roles and Users Screen
■
Copying a User
■
Setting or Editing User Hierarchy Access Rights with the Company - Roles and
Users Screen
■
Access Control
■
Assigning Modules to the Users
■
Disabling a User with the Company - Roles and Users Screen
■
Moving a User to a New Role with the Company - Roles and Users Screen
■
Changing a User Password with the Company - Roles and Users Screen
About Roles and Users
Oracle Retail VCC manages read/write access through different levels of security built
into the application. These different levels of security are defined by a list of Roles.
User roles can be viewed and edited through two separate menu options at two
different administrative levels:
■
See Company Level Roles & Users.
■
See Hub Level Roles & Users.
Managing Roles and Users 23-1
About Roles and Users
Company Level Roles & Users
The Company - Roles & Users screen displays all user roles for a given company.
Figure 23–1 Company - Roles & Users Screen
As a company administrator, you can assign users the following roles:
■
admin
■
manager
■
supervisor
■
planner
■
reviewer
■
limited admin
Hub Level Roles & Users
The hub level Roles & Users screen displays all user roles regardless of company. Hub
level Roles & Users can only be accessed by superuser and superadmin.
Figure 23–2 Hub Level Roles & Users Screen
Only a superuser or serveradmin can create the user for the superadmin role for a
company.
23-2 Oracle® Value Chain Collaboration User Guide
Selecting the Appropriate Tree Display
An Overview of Oracle Retail VCC Roles
For details on the functions each role can perform, see <CROSS REF>
■
■
■
■
■
■
■
■
Superuser – responsible for setting up all companies on the server, with access to
all administrative functions. For more information see <CROSS REF>.
Server Admin – access to all administrative functions except creation of
superusers or server administrators.
Super Admin – has exclusive rights to the Oracle Retail VCC Scheduler, is
associated with a specific company, and has access to both company-specific
administrative tasks as well as client modules.
Integrator User – no access to the client, and not associated with any company.
Role exists solely to load data for all companies.
Admin – permits access to all administrative functions except the Scheduler,
creating a company, and purging data. An admin can only create price profiles and
disaggregation profiles for their own company.
Manager – In addition to all the privileges of the planner role, a manager can
create disaggregation profiles, and access the Supply Calender.
Supervisor – In addition to all the privileges of the planner role, a supervisor can
create exception criteria and metrics.
Planner – permits read-and-write access to Oracle Retail VCC to create and edit
data streams, and create promotional events. A planner has read-only access to
exception criteria and metrics. Depending on how VCC is configured, access to
partner information, product folders, or specific operations might be restricted by
the role or roles to which you belong.
■
Reviewer– has read-only access to VCC.
■
Limited Admin – combines admin rights with access to VCC modules.
Selecting the Appropriate Tree Display
Access To This Feature: Superuser, ServerAdmin, SuperAdmin, Admin
The user tree defaults to show Active Users, which are users who currently have
access rights and can log in to Oracle Retail VCC. Users who have been disabled will
appear in a separate user tree.
In order to access the disabled user tree
1.
Select Company - Roles & Users from the menu
2.
Choose Disabled Users from the Display drop-down. The Disabled Users tree
appears.
For details on how to disable a user, see Disabling a User with the Company - Roles
and Users Screen- Roles and Users Screen.
Managing Roles and Users 23-3
Roles & Users Search
Roles & Users Search
Access To This Feature: Superuser, ServerAdmin, SuperAdmin, Admin
Roles & Users Search finds specific users by name. You can find users by entering their
full name, or by doing a wildcard (*) search on part of their name. For instance, if you
would like to see a list of users with the first name of Jane, you would
1.
Go to Company - Roles & Users
2.
In the Search field, type: Jane*
3.
Click the Search button or hit the Enter key.
If there is only one Jane, the tree will display her information immediately. If there
is more than one Jane in the user tree, a list of all the people with the name Jane
will appear.
The asterisk can be used for a wildcard search at any point in a person's name. The
following combinations are all viable searches:
Jane Smith
Jane*
*Smith
*Smi*
Figure 23–3 Multiple search results are returned on a user search, and a list is then
presented with all the users listed who fit the search criteria
4.
Search results will be displayed in a list format, if there are multiple results found.
Select the name from the list by clicking on it, and a new tree view with the user's
name highlighted in the tree hierarchy will appear. Their Name, Role, and
23-4 Oracle® Value Chain Collaboration User Guide
Creating a New User for a Company with the Company - Roles and Users Screen
Company displayed above the tree. If there only one user fits the search criteria,
VCC will go directly to the tree view with the user name highlighted.
Figure 23–4 If there is only one search result match, the user tree will appear with the
user's name highlighted.
Creating a New User for a Company with the Company - Roles and Users
Screen
Access To This Feature: Superuser, ServerAdmin, SuperAdmin, Admin
Once a new user is created, you must set the access rights for the user. Without access
rights, the user is not able to log in since no access is the default for any newly created
user. For details on setting the access rights for a new user, see Setting or Editing User
Hierarchy Access Rights with the Company - Roles and Users Screen- Roles and Users
Screen.
To create users for a company, superusers and serveradmins must have created
superadmin and admin user.
Whenever a new user is created, or the Name of an existing
user is changed, a 40-50 second wait may be necessary prior to
logging in as that user. Be advised that VCC may also require the new
user to log in through a new browser session.
Note:
To create a new user in a specific role
1.
Click Company -Roles & Users from the Oracle Retail VCC menu.
Managing Roles and Users 23-5
Copying a User
Figure 23–5 Oracle Retail VCC Menu
2.
Pick a company from the Company Chooser, if necessary.
3.
In the User Name field, enter the user name.
4.
In the Password field, enter the password and enter the password again to confirm
in the Confirm Password field.
5.
Click Create. The Edit Roles/Users screen appears.
Once you create the user, you are directed to the Edit Hierarchy Access screen where
you must assign access rights for the user. If you do not assign access rights, the user is
not able to view any data.
Copying a User
You can create a new user based on an existing users profile and access rights by
copying the existing user. Copying a user copies the following attributes:
■
Role
■
Hierarchy Access
■
Stream Access
■
Preferences
■
Groups
■
Overlays
It does not copy the display modes of the user.
To create a new user by copying an existing user
1.
Click Company -Roles & Users from the Oracle Retail VCC menu.
2.
Highlight the user you want to copy and right-click on the user.
23-6 Oracle® Value Chain Collaboration User Guide
Setting or Editing User Hierarchy Access Rights with the Company - Roles and Users Screen
Figure 23–6 Oracle Retail VCC Menu - Copy User
3.
Select Copy User from the pop-up menu. The Copy User screen appears.
Figure 23–7 Copy User Screen
4.
In the User Name and Password fields, enter the user name and password for the
new user. Confirm the password by entering it again in the Confirm Password
field.
5.
Click Create.
Setting or Editing User Hierarchy Access Rights with the Company Roles and Users Screen
Access To This Feature: Superuser, ServerAdmin, SuperAdmin, Admin
Oracle Retail VCC allows you to grant a user access to any category or leaf-level item
in a location hierarchy, partner hierarchy, or product hierarchy. You cannot, however,
grant a user access to the company root folder for any hierarchy. If you want to do this,
when creating the company, you must create a dummy root folder and then create the
real root folder (All Products, for example) below it so you can grant users access to
the real root folder.
For example, if you want to set or change a users access rights to a subset of partner
companies, you can do so. If a user's access right had previously encompassed all
Managing Roles and Users 23-7
Setting or Editing User Hierarchy Access Rights with the Company - Roles and Users Screen
partner companies as shown in the figure below, you can select a subset, for example
only company 4, the user's access tree would resemble the figure below.
Figure 23–8 User's Access Tree
To create access rights for a user
1.
Select Company - Roles & Users from the Oracle Retail VCC menu.
2.
Highlight the user to whom you want to grant access rights and right-click. In the
screen below, the user test is highlighted.
Figure 23–9 Company - Roles & Users Screen - User Test Highlighted
3.
Select Edit Access Rights from the pop-up menu. The Edit Hierarchy Access
screen for the selected user appears.
23-8 Oracle® Value Chain Collaboration User Guide
Access Control
Figure 23–10
Edit Hierarchy Access Screen
4.
Click the Start Editing button to begin editing. The green-highlighted Stop
Editing button appears.
5.
Click All Locations, All Partners, or All Products to assign access to the desired
category or folders. Any access rights that the user currently has are highlighted
(in purple).
6.
Click a location, partner, or product to highlight it and grant access, or click a
highlighted location, partner, or product to unassign access. For example, to assign
the user access rights to the Northeast location and all companies in the Northeast
category, highlight Northeast.
7.
Click Apply Changes to commit the changes you have selected. Click Revert to
return to the user's current access rights. Click Preview User Tree to see the user's
access rights.
8.
Click Stop Editing.
9.
Click Done.
Access Control
Assigning Users Data Stream Access
Access To This Feature: Superuser, ServerAdmin, SuperAdmin, Admin
If you do not assign a user to any data streams, the user will have very limited access
to VCC features.
To assign a user access to selected data streams for a company:
1.
Select Company - Roles & Users from the VCC menu.
Managing Roles and Users 23-9
Assigning Modules to the Users
2.
Highlight the user to whom you want to grant access rights and right-click. Select
Edit Stream Access.
Figure 23–11 Oracle Retail VCC Menu - Edit Stream Access Option
3.
The Edit Stream Access screen appears. From the Available Streams list box, select
the streams you want to assign to the user and add them to either the Full Access
list or the Read-Only list.
4.
Click Save.
Assigning Modules to the Users
Examining a User with the Company - Roles and Users Screen
Access To This Feature: Superuser, ServerAdmin, SuperAdmin, Admin
Examining a user allows you to view and update the user's e-mail address, login
status, exception notification settings, and URL and to change a user's password. To
examine a user
1.
Select Company - Roles & Users from the Administrator main page.
2.
Select a user and right-click on the highlighted user.
3.
Click Examine. The user's Profile screen appears.
23-10 Oracle® Value Chain Collaboration User Guide
Disabling a User with the Company - Roles and Users Screen
Figure 23–12
4.
User's Profile Screen
Click Done when you are finished to return to the Edit Roles/Users screen.
Disabling a User with the Company - Roles and Users Screen
Access To This Feature: Superuser, ServerAdmin, SuperAdmin, Admin
To disable a user
1.
Select Company - Roles & Users from the VCC menu.
2.
Highlight the user you want to disable and right-click on the user. Click Examine.
The user's Profile screen appears.
Figure 23–13
User's Profile Screen
3.
Click the check box next to Login Allowed to deselect it.
4.
Click Update User.
5.
Click Done.
The user is moved to the Disabled Users tree, and is not able to log in.
Managing Roles and Users
23-11
Moving a User to a New Role with the Company - Roles and Users Screen
Moving a User to a New Role with the Company - Roles and Users Screen
To move a user to a new role, you must cut the user and paste the user under the new
role.
Note that a user cannot move him/herself or another user at his own level to a new
role.
Changing a User Password with the Company - Roles and Users Screen
Access To This Feature: Superuser, ServerAdmin, SuperAdmin, Admin
As a company administrator, you can change any user password for your company.
Users always have access to change their own passwords.
To change the password for a user
1.
Select Company - Roles and Users from the VCC menu
2.
Select a user and right-click on the highlighted user
3.
Click Examine. The Examine User screen appears.
Figure 23–14 Examine User Screen
4.
In the New Password field, enter the new password.
Quotation marks and apostrophes are valid alphanumeric
characters for all password fields.
Note:
5.
Reenter the password in the Confirm Password field.
6.
Click Update User.
7.
Click Done.
To change your own password
1.
Select Preferences - Password from the VCC menu. The Change Password screen
appears.
23-12 Oracle® Value Chain Collaboration User Guide
Changing a User Password with the Company - Roles and Users Screen
Figure 23–15
Change Password Screen
2.
Enter your password in the Password field.
3.
Enter your new password in the New Password field. Confirm it by reentering it
in the Confirm Password field.
Managing Roles and Users
23-13
Changing a User Password with the Company - Roles and Users Screen
23-14 Oracle® Value Chain Collaboration User Guide
24
Managing the Monitor
This chapter contains the following topics:
■
About the Oracle Retail VCC Monitor
■
Monitoring Oracle Retail VCC Jobs.
■
Monitoring Usage Statistics.
■
Sending Usage Statistics E-mail Notification.
■
Monitoring Current Connections
■
Monitoring Server Locks
About the Oracle Retail VCC Monitor
The Oracle Retail VCC Monitor screens include
■
■
■
■
Jobs Monitor – view, filter, sort, or delete the current and completed list of job
actions processed through the VCC user interface, Scheduler, and Integrator.
Usage Monitor – view and evaluate the current collaboration usage statistics for
the companies in the hub.
Current Connections Monitor – observe the activity of users currently logged into
Oracle Retail VCC.
Server Locks Monitor – view and/or reset the currently active global locks or
company locks.
Each is described below.
Monitoring Oracle Retail VCC Jobs
Access To This Feature: All
A tab to this screen is available to all users. A read-only view of the Oracle Retail VCC
jobs for the user's company will be displayed. Additional functionality in this screen is
available to superusers, serveradmins, and superadmins: a superadmin can delete his
company's jobs from the list; a superuser/serveradmin can delete jobs for any
company in the collaboration in addition to server-wide jobs.
There are three categories of Oracle Retail VCC jobs reported in the Jobs Monitor:
■
Integrator loader jobs
■
Scheduler event processing jobs
■
User-generated jobs
Managing the Monitor 24-1
Monitoring Oracle Retail VCC Jobs
For a complete list of jobs,.refer to Appendix VCC Locks and Jobs
To monitor VCC jobs
1.
Log in as a superuser or serveradmin.
2.
Click Monitor from the VCC menu.
3.
Click the Jobs tab. The Jobs pane appears, which contains a list of all jobs
currently in process or completed. The Jobs List contains the following:
■
■
■
■
■
■
User Name: Each User Job will display the User Name of the actual user who
generated the job. The Loader and Scheduler job use, respectively,
integratoruser, and superuser.
Company: Name of individual company affected by job, or All companies.
Job ID: The Job ID is automatically generated in sequence by the VCC Server.
Each Integrator Job will have a link to a Details page on its Job ID. All Job IDs
with a Job Name of Process Leaf Exceptions, Process Aggregate Exceptions or
Recalc Aggregates, will contain links while the status is Active. Clicking on the
Job ID link will take you to a view of the job's current progress.
Job Name: Expected Job Names.
Start Time/End Time: To help differentiate between similarly named Jobs and
to establish when results from completed jobs may be expected.
Status: For all Jobs, the following Statuses could be displayed: Active; Waiting
on Lock; Could not obtain lock; Aborted. For Scheduler and User jobs, the
completion status is simply Completed. For Integrator jobs, completion status
could be one of the following: Completed with no rejects and no errors;
Completed with rejects and no errors; Completed with no rejects and errors;
Completed with rejects and errors.
If a job is aborted before completion, its status may continue to
be displayed as Active until the server is restarted.
Note:
4.
Optionally, you can filter the job list by User Name, Company, Job ID, Job Name,
Start Date, End Date, or Status. Simply select a filter criteria from the drop-down
list and enter the required information for the filter criteria selected. Click the
Apply Changes icon to see the filtered job list.
24-2 Oracle® Value Chain Collaboration User Guide
Monitoring Oracle Retail VCC Jobs
Figure 24–1
5.
Set job list items for deletion in any of three ways:
■
■
■
■
6.
Jobs Pane
Click in a check box - see a checkmark appear; see the Delete button appear.
Click the X-Mark Icon - see a checkmark appear in all of the check boxes on
the page. Click the Delete button to remove the checked items.
Click the Mark Entries Before check box to indicate you are setting a date
before which you want to delete all items. You can enter the date directly into
the date box (be sure to use the defined date format), or you can click the
Calendar icon and select a date from it. Click the Apply Changes icon to add
the checkmark to the targeted items; click the Delete button to remove the
checked items.
Superusers and serveradmins can delete any job; superadmins can delete jobs
for their own companies. Deleted jobs are removed from the user interface
view only. To permanently remove jobs from the VCC database, run the
Scheduler task Purge Jobs Monitor.
Integrator jobs and some Scheduler jobs contain additional information. Click the
active link under the Job ID column. A separate simple browser window opens
displaying the first link to the Job details. Click on the first bullet to expand. Click
on the sub-bullets to drill to desired information. Be precise when clicking a bullet
to expand or contract the XML file. Clicking near the bullet could cause the
opposite of the intended action.
Managing the Monitor 24-3
Monitoring Usage Statistics
Figure 24–2
Job Details Window
7.
Click the Refresh icon to see End Time and Status Updates.
8.
Click on the Printer -Friendly Icon to obtain a Printer-Friendly View of this
screen, or click the Export Data icon to extract the job list as an HTML or CSV file.
Monitoring Usage Statistics
Access To This Feature: Superuser, ServerAdmin, SuperAdmin, Admin, Manager
A tab to this screen is only available to superusers, serveradmins, superadmins,
admins and managers. It will not display at all when users in other roles access the
Monitor.
For each local company in a collaboration, usage statistics display the number of
■
locations
■
partners
■
products
■
aggregates
■
single collab items
■
shared collab items
■
total collab units
■
streams
■
substreams
■
active users
■
inactive users
■
system users
Additional details are available through links for aggregates and collaboration items.
Usage information is initially generated and subsequently updated by executing a
24-4 Oracle® Value Chain Collaboration User Guide
Sending Usage Statistics E-mail Notification
Scheduler event for the Report Usage task. Also, each time this event executes, an
e-mail can be sent.
To view company usage statistics
1.
Generate the initial Usage Report by using the Scheduler to execute an event for
the Report Usage task.
Figure 24–3 Report Usage Task Screen
2.
Click Monitor from the VCC menu. The Monitor pane appears.
3.
Click the Usage tab to display the usage statistics for the companies to which you
have access in your database.
4.
The Aggregates column and the Shared Collaboration Items column contain
hyperlinks that allow you to view the aggregates and the shared collaboration
items, respectively.
5.
Click the Refresh icon to see any changes that have been made since you entered
this screen.
6.
Click on the Printer Icon to obtain a Printer-Friendly View of this screen.
7.
Click on the Export Icon to export the information displayed on the screen. Choose
from HTML and CVS file format options.
8.
To send an e-mail notification each time the Report Usage event is executed in the
Scheduler, see Sending Usage Statistics E-mail Notification.
Superusers and serveradmins have two additional informational items on the screen
from the VCC license: maximum number of users, and the maximum number of
collaboration units. These numbers are set in the license generated for the hub.
Sending Usage Statistics E-mail Notification
Access To This Feature: Superuser, ServerAdmin
Oracle Retail VCC allows you to send an e-mail message to a user or group of users
each time VCC recalculates usage statistics. To send an e-mail in a foreign language,
ensure the language is loaded for VCC.
To send an e-mail notification
1.
Click Configuration in the VCC menu.
2.
Click the General tab. The General screen appears.
Managing the Monitor 24-5
Monitoring Current Connections
Figure 24–4
General Screen Under Configuration Section
3.
In the Billing section at the bottom of the screen, check the box labeled Send
e-mail every time the Usage Report is run to send an e-mail each time usage
statistics are calculated. For a usage report to be calculated, you must schedule the
Report Usage task to run at specific intervals.
4.
Select a Language for e-mail recipients from the Language drop-down.
5.
In the E-Mail list box, enter the e-mail address or addresses (separated by a
semicolon) to the users to be notified.
6.
Click Save.
Monitoring Current Connections
Access To This Feature: Superuser, ServerAdmin, SuperAdmin, Admin
Administrators can monitor the users who are currently logged in to VCC, how long
they have been logged in and the time of their last activity.
To monitor user connection time
1.
Click Monitor from the VCC menu.
2.
Click the Current Connections tab. The Current Connections pane appears
showing the users who are logged in, the date and time they logged in, and the
time of the user's last activity.
3.
To view details on a specific user, click the user's name in the User Name column.
24-6 Oracle® Value Chain Collaboration User Guide
Monitoring Server Locks
Figure 24–5 Current Connections Pane
4.
Click the Refresh icon to see any changes that have been made since you entered
this screen.
5.
Click on the Printer Icon to obtain aPrinter-Friendly View of this screen.
Monitoring Server Locks
Access To This Feature: Superuser, ServerAdmin, SuperAdmin
Whenever a task or job requires exclusive access, VCC acquires a lock for it. This lock
may block other VCC activity.
For a complete list of server locks, their descriptions, and behavior, refer to VCC Locks
and Jobs.
To monitor server locks
1.
Select Monitor from the VCC menu.
2.
Click the Server Locks tab. The Server Locks - Process screen appears.
Figure 24–6 Server Locks - Process Screen
3.
Click on the Refresh icon. If a job has been completed, the lock will no longer
display.
4.
If a server lock is retained inadvertently or occurs due to a contention for system
resources, you can clear the lock by clicking the Clear Lock button.
Do not clear a lock until you verify that the locked process has
terminated by viewing the appropriate log file. Clearing a lock does
not halt the activity which generated the lock. Though the lock is no
longer listed, it will continue blocking until processing has completed.
Note:
Managing the Monitor 24-7
Monitoring Server Locks
You can view, clear, and monitor Data Stream locks in the same way you do
Process Server Locks. The Data Stream subtab displays data stream server locks, as
seen below.
Figure 24–7 Data Stream Server Locks Pane
Click on the Printer Icon to obtain a Printer-Friendly View of the screen.
24-8 Oracle® Value Chain Collaboration User Guide
25
Managing the Scheduler
This chapter includes the following topics:
■
About the Scheduler
■
Working with the Scheduler Interface
■
Working with Scheduler Events
■
Adding an Event
■
Deleting events
■
Working with Tasks
■
Adding a Task
■
Editing a Task
■
Deleting a Task
About the Scheduler
Oracle Retail VCC provides the Scheduler user interface to allow you to instruct the
Scheduler Server to execute any predefined Oracle Retail VCC tasks and any Windows
or Unix command you specify. These commands are called Tasks.
The Scheduler Server processes these commands at a designated execution time. Each
task scheduled becomes an Event.
Only a superuser, serveradmin, and superadmin have access to the scheduler. A
superuser or Server Admin has the option to create an Event for either one company
or all companies. A superadmin-created Event will affect only superadmin companies.
You have the option to create/edit new Tasks/commands that the Scheduler will
retain for ongoing usage until deleted. Additionally, to facilitate basic processing
needs, the Scheduler also includes a number of selectable preloaded Task commands.
These preloaded tasks will work in a Windows or Unix environment.
Tasks/commands initiate the execution of defined Processes. You have the option to
specify an Event to execute a Task at one particular time or at designated time
intervals.
The Scheduler log provides a view of the processed Events. This log shows the times
the Processes were executed and if any problems occurred in scheduling or processing
the Event. The Scheduler log is stored in the bin directory of your application server
installation.
Some of the tasks require more system processing time to process than others. These
tasks acquire system locks to prevent other processes from interfering until the task
Managing the Scheduler 25-1
Working with the Scheduler Interface
process completes. The superuser, serveradmin, and superadmin can see active locks
in the Server Locks Monitor (see Monitoring Server Locks).
The Oracle Retail VCC Scheduler Server reports the ID and processing information for
all the preloaded processes to the Jobs Monitor that is available for any user by
selecting Monitor on the Oracle Retail VCC menu.
Working with the Scheduler Interface
The Scheduler allows you to schedule the execution of VCC predefined tasks. A
scheduled task is called an event. The Scheduler also allows you to create and
schedule any other valid system command.
The Scheduler Server must be running before access is allowed
from the user interface.
Note:
To access the Scheduler, click Scheduler from the VCC menu. If the Scheduler is not
running or if there is a problem with the configurations, a message will inform you of
this. These issues must be resolved before the Scheduler screen will open.
The interface provides these utilities:
■
Pause and Resume the Scheduler processing.
■
Work with Tasks and Events.
Be aware of all event scheduling and task/command processing recommendations
when working with the preloaded tasks.
The Scheduler List screens contain combinations of icons that allow you to
■
Refresh the screen to view updates.
■
Access a Printer-Friendly view of the current list.
■
Eport data as an an HTML file or as a CSV file.
For a detailed explanation of icons and their uses, see The Oracle Retail VCC User
Interface.
25-2 Oracle® Value Chain Collaboration User Guide
Adding an Event
Working with Scheduler Events
Events List
Events allow you to schedule the execution of VCC predefined tasks or other tasks
(system commands) that you have created.
Clicking the Events tab opens the Events window. If there are existing Events they will
be listed.
Figure 25–1 Events Window
Adding an Event
Access To This Feature: Superuser, ServerAdmin, SuperAdmin
To add an event
1.
Click the Add Event button. The Add Event screen appears.
Figure 25–2 Add Event Screen
2.
In the Name field, enter the name for your Event.
3.
In the Task field, select a Process to run from the drop-down menu.
4.
If you are a superuser or serveradmin, select a specific company from the
Company drop-down, or select All to schedule an event for all companies.
Managing the Scheduler 25-3
Adding an Event
Figure 25–3 Add Event Screen with selected company name
5.
The Execute Time appears as a date/time combination. The date field initially
displays the current date in the default date format dd/mm/yy. You can revise the
date format by selecting from options available in Preferences - General. The
Time field always displays the time in military format HH:mm:ss and is not
affected by time format changes made in Preferences - General.
It is recommended that all installation and user machines be
synchronized to avoid apparent discrepancies in reading processing
times
Note:
In the Execute Time field, you can leave the date/time as displayed to schedule
the processing to run or begin immediately or you can edit to schedule the
processing to begin later. Be sure to revise the date using the current Date Format
defined in Preferences - General. Enter the time in the military format: HH:mm:ss.
The Execute Time field initially displays the same time as the selected time zone's
local time.
6.
Leaving the Repeats box unchecked means that your Event will only execute one
time. It will be listed on the Events screen only until its processing has completed.
Clicking this check box brings up a field to let you schedule the Event to repeat at
designated intervals.
A Repeating Event will remain in the Events screen until you delete it.
Once you select an interval type, enter the name for your Event from the Task
menu and define how often to run it.
Points to remember
■
Allow enough time for each event to process before the next event begins.
■
Schedule at times when processing loads are light.
■
■
■
Click the Create button to save the Event. The Events screen opens displaying the
new Event. The Event created can be edited and deleted.
Click the Cancel button to exit the Add Event screen without saving.
When scheduling events, be aware of the Repeat Frequency configured for
processing times in Reports, Extracts, Disagg. Setup, Supply Batch, Demand Batch,
and Safety Stock screens.
25-4 Oracle® Value Chain Collaboration User Guide
Working with Tasks
■
Processing on a particular feature may or may not occur when a Scheduler Event
is executed. Those configuring Repeat Frequency for a feature shoudl be aware of
scheduled repeating Events affecting the feature.
Deleting events
Access To This Feature: Superuser, ServerAdmin, Superadmin
To delete an Event
1.
Click Scheduler from the VCC menu.
2.
Click the Events tab to display all scheduled events.
3.
Click the Delete check box next to an Event.
4.
Click the Delete Selected button to delete the checked Event.
Working with Tasks
The VCC Scheduler is preloaded with the tasks (commands) required to facilitate basic
VCC processing needs. Ordinarily, you do not have to add new tasks for any VCC
processing requirements. You can, however, add any other system task (command)
and schedule it for processing using the scheduler.
Superadmin will see list of Tasks associated with
company-assigned Modules; Superuser and ServerAdmin will see a
list of Tasks associated with Modules licensed to the Hub.
Note:
See Scheduler Task Descriptions. lists a brief description of each preloaded Task.
Table 25–1
1.
Scheduler Task Descriptions
Scheduler Tasks
Descriptions
Complete Exception
Criteria Creation
- Creates a new aggregate stream, or links to an existing
aggregate stream.
- Changes the aggregate exception criteria `Status' from
Pending to Active.
2.
Extract Supply Blocked
Dates
- Extracts Supply Blocked Dates from the Oracle Retail VCC
Database.
- Extracts data to: Syncra\Integrator\Exports\Extraction
(Scheduler machine).
3.
Extract UOMs
- Extracts the current Unit-of-Measure (UOM) options from the
Oracle Retail VCC database.
- Extracts data to: Syncra\Integrator\Exports\Extraction
(Scheduler machine).
- (Or, to directory path configured in the Oracle Retail VCC
Integrator UI).
4.
Extract Users
- Extracts the current Users from the Oracle Retail VCC
database.
- Extracts data to: Syncra\Integrator\Exports\Extraction
(Scheduler machine).
- (Or, to directory path configured in the Oracle Retail VCC
Integrator UI).
Managing the Scheduler 25-5
Working with Tasks
Table 25–1 (Cont.) Scheduler Task Descriptions
Scheduler Tasks
Descriptions
5.
Process Aggregate
Actions
- Processes In-Process and Resolution actions for all leaf and
aggregate exceptions.
6.
Process Aggregate
Exceptions
- Identifies aggregate data revisions.
- Identifies and re-synchs aggregate criteria with any folders
marked 'dirty' by hierarchy changes.
- Obsoletes any exceptions triggered by items no longer
included in folder marked 'dirty' by hierarchy changes.
- Identifies any exceptions resulting from the aggregate stream
revisions.
- Identifies any group exceptions.
- Processes Initial actions for all new Aggregate exceptions
triggered.
7.
Process Exception Alerts - Sends e-mails to supplied e-mail addresses in Exceptions'
Send Alert Requests list.
- Run this task after processing exceptions through these tasks: ·
Process Leaf Exceptions · Process Aggregate Exceptions ·
Process Leaf Actions; Process Aggregate Actions
8.
Process Extract Requests - When an extract request has been created in the Extract UI for
any/all of the options:
· Extracts requested data from theVCC Database.
· Extracts data to: Syncra\Integrator\Exports\Retrieval
(Scheduler machine).
· (Or, to the 'File Path' / 'File URL' as configured in VCC
Configuration-Client screen.)
- If the data_retrieval.log file (generated in Syncra_
Home/integrator/logs directory) contains errors like
FileNotFound or NoSuchFileOrDirectory, it could mean the
following:
1. Either the user who is processing the Extract request does not
have permission to the Directroy path where the system
(integrator) is trying to save the extracted file.
2. The Directory Path where the system is trying to save the
extracted file does not exist.
9.
Process Leaf Actions
10. Process Leaf Exceptions
- Processes In-Process and Resolution actions for all leaf
exceptions.
- Identifies leaf stream data revisions.
- Identifies and re-synchs the any folders marked 'dirty' by
hierarchy changes.
- Obsoletes any exceptions triggered by items no longer
included in folder marked 'dirty' by hierarchy changes.
- Identifies any exceptions resulting from the leaf stream
revisions.
- Tags any aggregates affected by the leaf stream revisions.
- Identifies any group exceptions.
- Processes Initial actions for all new Leaf exceptions triggered.
25-6 Oracle® Value Chain Collaboration User Guide
Working with Tasks
Table 25–1 (Cont.) Scheduler Task Descriptions
Scheduler Tasks
11. Purge Jobs Monitor
Descriptions
- Purges all Job Monitor items (included in purge requests for
the hub) in the Purge Request screen at the time this task event
is executed.
- Purges these items up to the "Retain 'N" number" (initial
default = 50k) specified in the edit screen for the Purge Jobs
Monitor option in the Purge Data screen.
12. Purge User Activity
- Purges all current connections (included in purge requests) in
the Purge Request screen at the time this task is executed.
13. Recalculate Aggregates
- Identifies leaf stream data revisions.
- Identifies and recalculates aggregates created on folders that
were affected by a hierarchy change.
- Tags any aggregates affected by the leaf stream revisions.
- Updates the tagged aggregates. Identifies any group
exceptions.
14. Recalculate
Disaggregation Factors
- Recalculates the Profile factors set in Disagg. Profiles.
15. Recalculate Metrics
-Recalculates all Metrics that are check marked in the Run
Override column in the Metrics UI at the time this task event is
executed.
- Computes the proportion to distribute aggregate values
among the aggregates' leaves.
- Also recalculates whenever the Repeat Frequency time has
been reached.
16. Report Usage
Whenever this event is executed:
- Computes the current collaboration usage status and sends it
to Monitor-Usage.
- Sends copy of usage status to any email addresses supplied in
the Configuration-Billing screen when its Send Email check
box is checked.
17. Roll Criteria
-Roll the Start Date forward, and obsolete the exception
(triggered by the first period) for criteria defined with rolling
dates.
-Roll Criteria defined using Rolling Period Overlays.
-Roll Criteria defined using fixed Period Overlays with Rolling
Dates.
18. Run And Send Reports
- Processes 'flagged' reports (in each format type defined) as
created in the Reports UI. (See Run Reports description on this
page.)
- For each report where Destination = Email, Sends report (in
defined formats) to respective email address supplied.
- For each report where Destination = FTP, Sends report to the
IPAddress/name with Username/Password.
(While processing reports, if java.lang.OutOfMemoryError
occurs, the java.runtime.params parameter in the
ServerCommon.properties file should be modified to increase
the JVM size. This file is found in Syncra_Home/lib directory
on the server machine.)
19. Run Demand & Lift
Factor Batch Requests
- Creates a Demand forecast for each Demand Request created
since last time this task event was executed.
- Calculates Lift Factors for each Lift Factor request created
since last time this task event was executed.
Managing the Scheduler 25-7
Working with Tasks
Table 25–1 (Cont.) Scheduler Task Descriptions
Scheduler Tasks
Descriptions
20. Run Demand Batch
Requests
- Creates a Demand forecast for each Demand Request created
since last time this task event was executed.
21. Run Lift Factor Batch
Requests
- Calculates Lift Factors for each Lift Factor request created
since last time this task event was executed.
22. Run Reports
- Processes all reports that had been 'flagged' at the time this
task event is executed.
- Reports will be flagged in one of two ways:
- The 'Run' schedule defined in the Report UI has been reached.
- The Override Run Schedule check box for a Report has been
checked in the Report-List screen.
23. Run Safety Stock Batch
Requests
- Calculates Safety Stock for each Safety Stock Calc Request
created since last time this task event was executed.
24. Run Supply & Safety
Stock Batch Requests
- Creates a Supply Plan for each Supply Request created since
last time this task event was executed.
- Calculates Safety Stock for each Safety Stock Calc Request
created since last time this task event was executed.
- Also runs if Run Override is performed on a batch job, or if
the Repeat Frequency time has been reached.
25. Run Supply Batch
Requests
- Creates a Supply Plan for each Supply Request created since
last time this task event was executed.
- Also runs if Run Override is performed on a batch job, or if
the Repeat Frequency time has been reached.
26. Send Promotion Alerts
For any email addresses/notification offsets supplied within
any Promotion:
- Sends email notification about Status changes to Promotion.
- Sends email notification about Milestone Due Date changes to
Promotion.
27. Send Reports
For each report where the Report's Destination = E-mail
- Sends report (in defined formats) to respective email address
supplied.
- For each report where Destination = Extract
- Extracts data to: Syncra\Integrator\Exports\Retrieval
(Scheduler machine).
- (Or, to directory path configured in the Report UI.)
28. Update Promotions
- Performs system updates to Promotion Status.
- Updates Condition based on Milestone Due Dates.
29. Process Events Totals
- Process the computation of Totals for Events and Promotions.
25-8 Oracle® Value Chain Collaboration User Guide
Adding a Task
Adding a Task
Access To This Feature: Superuser, ServerAdmin, Superadmin
You can create a new task for any valid Windows or Unix command. The
Task/command is listed and remains available until deleted.
Do not use double quotes in task fields. It can cause the
Scheduler's List screen Export Data icon to extract a file with
incorrectly formatted fields for this Task.
Note:
To add a task
Click Scheduler from the VCC menu.
1.
Click the Tasks tab. The Tasks screen appears.
Note that there are two types of scheduler task that appear only to superuser and
serveradmin roles. These are Purge Jobs Monitor and Purge User Activity, as seen
below.
Figure 25–4 Tasks Screen
2.
Click the Add Task to create a new task.
Managing the Scheduler 25-9
Editing a Task
Figure 25–5 Add Task Screen
3.
In the Name field, enter the task name.
4.
In the Command field, enter the task command.
5.
The new task is listed. It can be selected, edited, and deleted. Click the Cancel
button to exit this dialog without saving.
Editing a Task
Access To This Feature: Superuser, ServerAdmin, SuperAdmin
User-created Task names and commands can be modified at any time. Preloaded Tasks
cannot be changed.
To edit a user-created task
1.
Click the Edit button (colored dot) next to a task.
2.
The Edit a Task screen opens and allows you to revise the Task name and
command (if allowed).
Figure 25–6 Edit a Task Screen
3.
Click Set to set the edit or Cancel to return to the Scheduler screen.
Deleting a Task
Access To This Feature: Superuser, ServerAdmin, SuperAdmin
A user-created Task is listed with a Delete check box next to it. User-created tasks can
be deleted at any time. Preloaded tasks cannot be deleted.
To delete a user-created task
1.
Click the Delete check box next to the user-created Task.
2.
Click the Delete Selected button to delete the checked Task.
25-10 Oracle® Value Chain Collaboration User Guide
26
Managing Company Data Purges
This chapter contains the following topics:
■
About Data Purge Requests
■
Creating Purge Requests
About Data Purge Requests
Oracle Retail VCC allows you to create purge requests for a specific company that you
then can display and manage in the Purge Data pane. A purge request specifies the
data stream type you want to delete (purge) from your database and the time frame
(purge date) of the data to be deleted.
There are four types of Purge Requests:
■
Transaction
■
Event Promotions
■
Collaboration Item Comments
■
Exceptions
For both Transaction and Comments purges, all data in the data stream created before
the date specified is deleted when the purge request is executed. Purging Event
Promotions does not delete (generated) data contained in the data stream, but purges
only the (user-defined) Event Promotion itself.
The Transaction purge type is the default when you enter the Company - Purge
Requests screen. Transaction purge will purge all data between the start and end dates
or periods you enter in the date/period fields. It is also possible to create a transaction
purge request across multiple companies by selecting from the Companies list box
(superuser/serveradmin only). Multiple Stream Types can also be selected, and both
Leaf and Aggregate purge types can be selected together.
The Event Promotion and Collaboration Item Comments purges allow you to select
multiple companies from the select box (superuser/serveradmin), and to enter dates
or periods that all related promotions and context comments will be purged between.
Once a purge request is submitted, a superuser or serveradmin can execute the actual
purge. Superusers/serveradmins are allowed to purge the following data:
■
Transaction
■
Job Monitor
■
User Activity
■
Event Promoations
Managing Company Data Purges 26-1
Creating Purge Requests
■
Exception Purge
■
Collaboration Item Comments
■
Master Data
Creating Purge Requests
Access To This Feature: Superuser, ServerAdmin, SuperAdmin, Admin
Purging data effectively deletes the transaction data for the data stream from your
database. To purge transaction data, you first must create a purge request. A purge
request specifies the data stream to be purged and the creation dates between which
all data is to be purged. Once you have created the purge request, it appears in Purge
Data screen with all other purge requests where you can start the purge process or
reject the request. In addition, any master data (product, partner, or location hierarchy)
you cut and paste into the recycle bin can be purged by a superuser/serveradmin.
Placing it in the recycle bin effectively submits a purge request similar to a purge
request for transaction data.
You can purge data between specific creation dates (static data purge), or you can
create a purge request for data that is a specified number of periods old.
To create a Transaction purge request
1.
Select Company - Purge Requests from the Oracle Retail VCC menu. The Purge
Requests screen appears.
Figure 26–1 Purge Requests Screen
2.
Transaction is the default purge request type selected. Other requests include:
Event Promotions, Collaboration Item Comments, and Exceptions.
3.
Select the company or companies to purge data from in the Company select box
(superuser/serveradmin).
4.
In the Stream Type field, select the data stream type from the multi-select box.
5.
In the Purge Type field, select the type: leaf, aggregate, or both.
26-2 Oracle® Value Chain Collaboration User Guide
Creating Purge Requests
6.
Select a Range Based On radio button. Purge request period or date ranges can
begin based on either Time Period or Creation Date.
7.
If you have selected a Fixed start or end date from the Dates/Periods drop-down,
enter the dates between which you want all data purged. Dates can be entered in
the mm/dd/yy format or by clicking the calendar icon and selecting a date (the
calendar icon does not apply to rolling horizon data purges).
8.
If you are creating a rolling horizon purge request, enter the number of periods in
the Dates/Periods field.
9.
Click Add Request. The request appears in the Current Requests pane below.
To create Event Promotions or Collaboration Item Comments purge requests, select the
appropriate radio button and complete steps 3, 6, and 8 above.
Note: For Event Promotion Purges, a purge request created for a company
will also purge events created by non-local partners for that company
To create an Exceptions purge request, complete all the steps above except for step See
In the Purge Type field, select the type: leaf, aggregate, or both... In place of Purge
Type, select Local, Read-Only, or Both from the Type drop-down.
Managing Company Data Purges 26-3
Creating Purge Requests
26-4 Oracle® Value Chain Collaboration User Guide
27
Managing Company UOM Factors
This chapter contains the following topics:
■
About UOM Factors
■
Viewing the UOM List
■
Creating New UOM Factors
■
Deleting UOM Factors
About UOM Factors
Unit-of-measure (UOM) factors allow you to visualize the conversion of product
quantities between two different UOMs. The UOM List and Create screens in Oracle
Retail VCC allow you to add, edit, and delete conversion factors that will affect UOMs.
Usually, the conversion factor is used to convert a product UOM such as Base Units
into a UOM such as Case.
For example, a retailer sends you a forecast that uses 6 packs as the unit of measure for
soda, and you, as the supplier, need to be able to view the product in 4 different types
of packaging: single cans, 6 packs, 12 packs, and cases of 32. Your Base Unit is the
individual can, so you would specify a conversion factor of 6, 12, and 32. The
conversion factors are multipliers which represent the amount of Base Units required
to complete each pack or case.
The "single can" UOM could be called "EA," which represents the Base Unit. The new
Units of Measure could be labeled "6-pack," "12-pack," and "Case." If the forecast
covers 1000 cans of soda, out of that number they are packaged as follows:
■
fifteen cases – conversion factor of 32
■
twenty 12-packs – conversion factor of 12
■
thirty 6-packs – conversion factor of 6
■
forty EA units
Units of Measure, using the conversion factors above, allow you to view data from the
perspective of each type of package. You can see how many 6-packs have been
forecasted in the Data - View/Edit - Table, which may display thirty 6-packs. If you
then want to find out how many individual units that equates to you can change the
table view to the EAUOM to find that a total of 180 cans of soda have been forecasted
for the retailer using the 6-pack UOM. Units of Measure allow conversion up or down
depending on the business requirement.
Managing Company UOM Factors 27-1
Viewing the UOM List
Viewing the UOM List
The List screen contains a product-only context selector, and has an at-and-below list.
To access the Company - UOM - List screen
1.
Click on Company in the menu.
2.
Select UOM. The UOM - List screen appears.
Figure 27–1 UOM - List Screen
To change the Product you are viewing UOM factors for
1.
Click on the product name. The Product selection tree appears.
2.
Choose a new Product.
3.
Click Set.
Figure 27–2 Product Selection Tree
The List screen contains a column of links that will allow you to view and edit specific
details for each UOM by clicking on the colored dots under the binoculars column.
UOM properties that can be modified though the List - Detail View include:
■
Other GIN – This is the new Global Item Number for the converted product
27-2 Oracle® Value Chain Collaboration User Guide
Creating New UOM Factors
■
■
■
Other UOM - New check box – Rather than selecting from a pre-existing Other
UOM, you can enter a new UOM not already in the list by clicking the check box
and entering the name in the text field provided.
Other UOM – This is the name of the new unit-of-measure into which you are
converting the product. It is the name that will appear in the data stream Display
Mode tab under UOM. For example, if you are converting from each to case, this
new UOM can be named: CASE.
Multiplier – The conversion factor used to convert the number of individual units
into the required unit-of-measure. Example: to convert individual units into
SIXPACKS, the multiplier would be "6."
Creating New UOM Factors
To access the UOM Factor creation screen
1.
Select Company from the menu.
2.
Choose UOM from the Company sub-menu.
3.
Select the Create tab. The Product tree appears.
Figure 27–3 Product Tree Screen
4.
Select the Product name from the tree that you wish to create new UOM factors
for. You cannot create new UOM factors at folder level, and must select a leaf level
product.
5.
Click the Set button. The Create screen appears.
Managing Company UOM Factors 27-3
Deleting UOM Factors
Figure 27–4 Create Screen
6.
Enter the Other GIN in the text box. The parameters you enter here must be
unique for each company.
7.
If Other UOM is new, select the check box and enter the information in the text
box.
8.
If the Other UOM is not new, select a pre-existing Other UOM from the
drop-down.
9.
Enter the Multiplier. The multiplier must be a numeric value.
10. Click Save.
Deleting UOM Factors
UOM Factors can be deleted by accessing the Company - UOM - List screen. To delete
a UOM Factor
1.
Select Company from the menu.
2.
Select UOM. The List screen appears.
3.
Select the Product name from the Product selector and click Set. The UOM Factors
assigned to that Product name appear in the list below.
4.
In the Delete column, choose the factors you wish to remove by clicking the check
boxes individually, or by clicking on the delete icon which selects all check boxes
for delete. The Delete button appears.
5.
Click Delete.
27-4 Oracle® Value Chain Collaboration User Guide
Part IV
Appendices
Part IV consists of the following appendices:
■
Glossary
■
VCC-Supported Platforms
■
User and Role Permissions
■
Browser Settings
■
Sample PDF Report Screens
■
Geneva Forecast Engine
■
VCC Locks and Jobs
■
Safety Stock Calculation
■
Language Encoding for Files Generated
■
Data Stream Type Codes
A
Glossary
English Term
Function/Module Definition
administrator
(admin)
Role and Users
A type of user role that has access to all
administrative functions except the Scheduler,
creating a company, and purging data. An admin
can only create price profiles and disaggregation
profiles for her own company.
aggregate
General
The sum of items in a category (Local, Partner,
Product, or Time Period) in a given context. For
example, a user can aggregate all data in a
product category as one number.
Alpha
Demand
The level parameter in Single Exponential
Smoothing, Double Exponential Smoothing and
Holt-Winters Exponential Smoothing.
Balance Stream
General
A data stream that measures counts of inventory,
open orders or other quantities that are reported
as an ending balance. Balance Streams can be
aggregated across products and locations, but not
time.
base forecast
General
The projection of future demand or supply, not
including any special one-time events (such as
promotions). Depending upon the situation, the
base forecast may or may not include a seasonal
profile (which tracks the typical variation of
demand at different times of the year).
base price
General
A price of a product for a specific time period for
a specific collaboration, not including any
one-time changes (such as a promotion)
Beta
Demand
The trend parameter in Double Exponential
Smoothing and Holt-Winters Exponential
Smoothing.
buyer
General
A company that is operating in the role of
receiving products from one or more trading
partners.
collaboration
General
A trading relationship between a specific buyer
location and seller location, over which
information about products may be exchanged in
Oracle Retail VCC.
Collaboration
Units
General
A count of a company's utilization of Oracle Retail
VCC, measured by the number of buyer
location/seller location/product combinations
(collaboration items) that are being collaborated
upon.
Glossary
A-1
English Term
Function/Module Definition
Collapsed View Exception
A display mode for the exception inbox where
exceptions with the same value for certain fields
are displayed as a single line item ("collapsed").
Commitment
Report
Report
Report that provides a daily snapshot of
yesterday's actual sales vs. one week ago,
yesterday's actual orders vs. one week ago, the
current forecast for today and a snapshot of how
much inventory is in the store.
context
General
The combination of Local Location, Partner
Location, Product, and Time Period that is used to
view data streams.
Context
Chooser
General
The Context Chooser is a pane in the main Oracle
Retail VCC interface that allows users specify the
data view. The specification identifies which data
to display by context (I.e., local location, partner
location, product) and data stream, as well as
format (comparison type, UOM, expand by
mode).
Cyclic Decay
Demand
The degree to which cyclical effects in the data
decrease over time.
Daily
Allocation
Disaggregation
A specification of the proportion of weekly data
that is attributed to each daily time bucket during
the week during the data disaggregation process.
Extract
General
A tool that allows the user to retrieve data stored
the VCC Server's database as a delimited file. Data
types included stream data as well as other types
such as hierarchies, etc.
Data Stream
General
Time series supply chain data. The data can
represent various metrics, such as forecast sales,
actual inventory, goods in shipment, etc. In
addition, the data can be provided on a daily,
weekly, or monthly basis.
Data Stream
Sub-Types
General
A data stream that is a component of a major data
stream. For example, the "Actual POS" data
stream has three sub-types, "Base POS,"
"Promotional POS," and "Total POS."
Data Stream
Type
General
A configured group of fixed and modifiable
attributes that define the way data in a VCC data
stream can be viewed and manipulated.
Demand Policy
Demand
Business rules that specify collaboration-specific
data relevant to the resupply calculation
disaggregation
Disaggregation
A method that allows the user to convert data
entered at an aggregate (category) level into
estimated values at a more detailed level.
Display Mode
General
Display options that are available for any given
view of the data.
Distributed
Exceptions
Report
Report
Report that shows some or all existing system
exceptions at and below a given context.
Event
General
1) An execution of a task (both VCC defined and
system tasks) in the Scheduler. 2) A promotional
event
A-2 Oracle® Value Chain Collaboration User Guide
English Term
Function/Module Definition
Event Plan
Report
Report
Report that provides detail of planned promotions
by manufactures and retailers and the
discrepancies between the promotions.
Event Sales
Forecast By
Ship-To Report
Report
Report that provides a quick summary of
promotion sales forecast by week and retailer.
exception
Exception
An alert triggered by the deviation of a data
stream from another data stream or from a
constant threshold by more than a specified
tolerance. Exceptions indicate misalignment of
demand and/or supply.
exception
criteria
Exception
User-defined rules that govern how data streams
are compared, and when exceptions should be
generated.
Exception
Inbox
Exception
Summary view in which users review and
manage exceptions
Exception Log
Report
Report
Report that provides a summary for products that
have promotions planned in the future.
Exception
severity level
Exception
A level assigned to help prioritize exceptions.
Exception
Summary
Report
Report
Report that counts exceptions under a given
context and groups at the folder level that is one
folder above the leaf level.
Filter
General
A set of user-specified values that restrict which
items appear in a list view, such as the exception
inbox. The list item will only appear if it matches
the filter specification.
Fixed Period
Overlay
General
A period overlay that shows data streams
summed for a specific period (Jan. 4, 2002 through
Feb. 5, 2002, for example).
Forecast
Accuracy
Report
Report
Report that shows whether forecast accuracy has
or has not improved over time at both leaf and
aggregate levels.
Forecast
Accuracy
Summary By
Product Type
Report
Report
Report that tracks forecast accuracy trends
Forecast Error
Report
Report
Report that shows whether forecast error has or
has not improved over time at both leaf and
aggregate levels.
forecast method Demand
The model used to generate a statistical forecast.
Frozen Periods. General
A period in the future in which data entry or
editing is disallowed. Companies utilize a frozen
period to prevent changes to a forecast in periods
where changes would have no effect on delivery
or execution of the plan. For example, if
transportation time of a shipment is a week, the
first future week of the forecast should be frozen,
because goods covered by the forecast within that
period may have already shipped.
Gamma
The seasonal parameter in Holt-Winters
Demand
Glossary
A-3
English Term
Function/Module Definition
Generational
Offset
General
A offset that allows users to compare a current
Data Stream with a previously saved generation
of the same Data Stream.
Demand
Geneva
Forecast Engine
(Geneva)
A comprehensive library of more than 500
different combinations of data transformations
and statistical methods.
group
General
A named set of data streams that can be displayed
together in the grid or graph.
Group
Exception
Exception
An exception generated from a Group Exception
Criterion.
Group
Exception
Criteria
Exception
An exception criterion that is composed of more
than one Individual exception criterion grouped
together by a Boolean expression. Group criteria
allow users to set up compound rules that more
closely match their business needs.
Hierarchy
General
A tree-like taxonomy composed of leaf-nodes and
categories. Categories can contain leaf-nodes and
other categories. In VCC, there are four primary
master data hierarchies: product, partner, location,
and period.
Individual
Exception
Exception
An exception generated from an Individual
Exception Criterion
Individual
Exception
Criteria
Exception
A rule for triggering an exception, based upon the
comparison of a data stream with another data
stream or a constant threshold. Individual
exception criteria can be used as part of a Group
Criteria
Inventory
Levels
Scorecard
The average in-stock quantities for the period
specified
Inventory
Turns/Period
of Supply
Report
Report
Report that shows how inventory turns have or
have not improved over time at both leaf and
aggregate levels for both the buyer and the seller.
Last
Transaction
Report
Report
Report that identifies those products that might be
purged based on sales activity.
Leaf
General
A specific data object in the dimension of product,
partner, location, or period hierarchy. Unlike
categories (folders), leaves cannot have child
objects.
Lift
Promotion
The impact of a promotion, expressed as the
positive deviation from the base forecast
lift factor
Demand
Factor that indicates how each period compares to
an "average" period.
Load
General
A transportation unit of capacity
Local
General
Local location of your organization/business,
which can include specific stores, warehouses,
distribution centers, factories, etc., or logical
regions, tiers, or other location categories that
contain many specific locations.
Local Current Local Previous
General
Comparison of your current data with your
previous data.
A-4 Oracle® Value Chain Collaboration User Guide
English Term
Function/Module Definition
Local Current - General
Partner Current
Comparison of your current data with your
partner's current data.
Local Part
Number (LPN)
General
A company-specific identifier for a product, part
or material.
location
General
A company's place of operation, which can
include physical locations such as stores, as well
as logical locations, such as regions. Used to
specify Local and Partner.
Manager
Role and Users
A type of user role where in addition to all the
privileges of the Planner role, she can create users,
aggregates, and disaggregation profiles.
Master Data
General
Data that describes the characteristics of products,
locations, companies, and periods that controls
how Oracle Retail VCC processes data streams.
Mean Absolute
Deviation
(MAD)
Demand
A measure of the error between the forecast
values and the actual values in the hold-out
period
Mean Absolute
Percent Error
(MAPE)
Demand
A measure of the error between the forecast
values and the actual values in the hold-out
period - calculated as the average percentage
error.
Measurement
Stream
General
A data stream that measures key performance
indicators or ratios that cannot be aggregated.
median
Demand
A specific type of demand policy filter that
employs a median number.
minimum order Supply
quantity
The minimum number of items that can be
ordered.
Modules
General
Related groups of screens and features that can be
enabled or disabled in Oracle Retail VCC, based
upon a company's license or usage preference.
Movement
Stream
General
A data stream that measures a flow of material or
value through a location during a period, which
can be aggregated across products, locations, and
periods.
Moving Period
Decay
Demand
The degree to which the annual trend has held
steady in recent periods.
No Sell Report
Report
Report that identifies products that never had any
transactions for any data streams
order
Supply
processing time
The Seller's required internal processing lead-time
to get an order in-transit to the buyer.
Partner
Partner location of their organization/business,
which can include specific stores, warehouses,
distribution centers, factories, etc., or logical
regions, tiers, or other location categories that
contain many specific locations.
General
Partner Current General
- Partner
Previous
Comparison of partner's current data with
partner's previous data.
Performance
Report
Report that shows metrics in terms of product
availability and product waste
Report
Glossary
A-5
English Term
Function/Module Definition
period overlay
General
An aggregate time series. For example, a user can
create a monthly overlay that will total all weekly
data into a set of monthly totals.Period overlays
are flexible; they can include time periods of
varying lengths, and can be for a fixed timeframe,
or on a rolling basis.
Periods supply
Supply
A measure of the number of periods of demand
that could be supplied by the given inventory.
plan horizon
Supply
The number of days to perform supply planning.
Planner
Role and Users
A type of user role where she has read-and-write
access to Oracle Retail VCC to create and edit data
streams, and create promotional events. A planner
has read-only access to exception criteria and
metrics.
Point-of-Sales
(POS)
General
Measurement of quantity or value of units sold to
the consumer in stores.
Poisson
distribution
Supply
A probability density function that models the
number of outcomes obtained in a specified
interval of time. Used to calculated safety stock
for slow moving items.
Primary
General
The local value in a local-to-partner comparison,
or the current value in a current-to-previous
comparison.
promotion
Promotion
Stimulating demand by advertising, displaying,
and/or reducing the price of a product.
promotional
event
Promotion
A period in which a promotional advertisement,
display, and/or price reduction is offered.
supply policy
Supply
Business rules that specify parameters to use in
both supply and safety stock calculation.
Reviewer
Role and Users
A type of user role that has only read access to
VCC
Rolling Period
Overlay
General
A period overlay that shows data streams
summed from the present period onwards (for
example, the next 4 weeks are aggregated into a
monthly number).
Root Mean
Square Error
(RMS)
Demand
A measure of the error between the forecast
values and the actual values in the hold-out
period - calculated as the square root of the
average squared error.
safety stock
Supply
The minimum inventory level for a product that is
required to maintain a specified service level.
safety stock
calculator
Supply
A utility that calculates the required safety stock.
scenario
planning
Supply
Interactive "what-if" supply planning of single
collaboration items.
Scheduler
Scheduler
A Oracle Retail VCC facility that allows users to
execute any predefined VCC tasks or any
Windows or Unix command on a one-time or
periodic basis.
Scorecard
Scorecard
A set of key performance measures, including
goals and results achieved.
A-6 Oracle® Value Chain Collaboration User Guide
English Term
Function/Module Definition
Seasonal
forecast
General
A factor that describes the deviation of the
forecast for a given period from the average across
all periods, based upon period (seasonal) effects.
Seasonal
Pre-Filter
Demand
A filter that smooths seasonal outliers from the
input data stream before it is submitted to the
forecasting process.
Secondary
General
The partner value in a local-to-partner
comparison, or the previous value in a
current-to-previous comparison.
seller
General
A company that is operating in the role of
supplying products to one or more trading
partners.
service level
General
The percent of time that sufficient inventory exists
to meet demand.
shipping/receiv Supply
ing calendar
Specifies which days are valid for shipping or
receiving.
Smoothing
Pre-Filters
Demand
A median type filter that smooths outliers from
the input data stream before submittal to the
forecasting engine.
statistical
forecast
Demand
A forecast of future values generated by fitting a
statistical model to actual historical values.
Stream
General
Another name for a data stream.
Stream Data
General
The values in a data stream
stream item
type
General
The identifier for a substream (component stream)
in a data stream
stream set
Supply
Sets of streams that specifies which streams to use
in demand, supply and safety stock calculations
Substreams
General
Another name for a data stream subtype
Super Admin
Role and Users
A user role that has access to all administrative
functions.
supervisor
Role and Users
A user role that, in addition to all the privileges of
the Planner role, can create exception criteria and
metrics.
VCC Integrator
General
A facility in Oracle Retail VCC that maps,
validates and loads data into a VCC database.
Task
Scheduler
A command executed by the Scheduler.
telescoping
overlay
General
Similar to a rolling period overlay. This type of
overlay automatically rounds up any extra time
buckets in the overlay to get to the next size.
Threshold
Exception
A value, specified in an exception criterion, that is
used as the point of comparison for determining
whether an exception has occurred.
time bucket
General
A period of time in which quantities of data
should be summed up. For example, if you are
creating a period overlay for weekly data, then
you specify a bucket size of 4 to total 4 weeks of
data for each column that you are creating.
transit lead
time
Supply
The travel time between the seller location and
buyer location.
Glossary
A-7
English Term
Function/Module Definition
Trend Hold
Demand
The degree to which the periodic trend has held
steady in recent periods.
trials
Demand
The number of times a statistical model is
calculated to optimize the model's parameters.
unavailable
stock
Supply
The number of inventory items that cannot be
used but must be counted as part of the total.
Unit of Measure General
(UOM)
The scalar type used to measure quantities of the
item (e.g., kilograms, meters, ""each,"" ""truck
load,"" etc.)
Usage Report
General
A report of the current consumption of
collaboration units that is visible in the Oracle
Retail VCC usage monitor.
Deviation
Exception
The amount a source data stream varies from its
comparison. The comparison could be another
data stream or a fixed threshold.
Volatility
Scorecard
The percentage difference between the high
values and low values for a selected stream within
a period range collected for a context.
A-8 Oracle® Value Chain Collaboration User Guide
B
VCC-Supported Platforms
This appendix contains platform support information for English, French, Spanish,
Japanese, and Korean Operating Systems.
The diagram below applies to the English OS only. See Platforms supported by Oracle
Retail VCC. for additional languages.
Figure B–1 Platforms supported by Oracle Retail VCC
Table B–1 Platforms supported by Oracle Retail VCC
Supporting
Software
OS Language
HP-UX 11
Oracle 9.2.x
English, Japanese
Solaris 8
Oracle 9.2.x
English
Windows 2000 Server
Oracle 9.2.x
English
Solaris 8
Java 2 SDK 1.4.x
English
Windows 2000 Server
Java 2 SDK 1.4.x
English, Japanese
Component OS
Oracle Retail VCC Database
Oracle Retail VCC Integrator
OLAP Cube Builder
VCC-Supported Platforms
B-1
Table B–1 Platforms supported by Oracle Retail VCC
Component OS
Solaris 8
Windows 2000 Server
Supporting
Software
Java 2 SDK 1.4.x,
ActivePerl 5.6.x
Java 2 SDK 1.4.x,
ActivePerl 5.6.x
OS Language
English
English
Oracle Retail VCC Server
Solaris 8
Java 2 SDK 1.4.x,
WebLogic 8.1
English
Windows 2000 Server
Java 2 SDK 1.4.x,
WebLogic 8.1
English, Japanese
Oracle Retail VCC Scheduler
Solaris 8
Java 2 SDK 1.4.x
English
Windows 2000 Server
Java 2 SDK 1.4.x
English, Japanese
Solaris 8
Apache 1.3.x,
WebLogic plug-in
English
Windows 2000 Server
IIS 5.0, WebLogic
plug-in
Web Server
English, Japanese
Client
Windows 2000 Pro
IE 5.5, JVM,
Acrobat 5.0
Windows XP
Professional
IE 6.0, JVM,
Acrobat 5.0
B-2 Oracle® Value Chain Collaboration User Guide
English, Japanese, Spanish,
French, Korean
English
C
User and Role Permissions
The following table summarizes the various permission for each VCC user role.
Table C–1
Main Menu
Home
Permissions for Each VCC User Role
Sub Menu
Tabs
NONE
NONE
Create
NONE
Master Data
ALL
Subtabs
Action
Company
Aggregates
Create
List
NONE
Collaborations
Price Profile
Roles &
Users
ALL
NONE
Disagg.
Setup
List
Create
Context Based
Time Only
Create
Daily
Allocation
New / Edit / Save
Module
Config
Events
Stream Set
Configuration
Add / Edit / Delete
General
User and Role Permissions C-1
Table C–1 (Cont.) Permissions for Each VCC User Role
Main Menu
Sub Menu
Tabs
Subtabs
Demand
Action
Add / Edit / Delete
Supply
Stream Set
Configuration
Add / Edit / Delete
DAILY Db:
Shipping
Calendar
DAILY Db:
Receiving
Calendar
Exceptions
General
Config
Preferences
Save
Groups
Edit / Add / Delete
Links
Add / Edit / Delete
Period
Overlays
Create / View / Delete
Purge
Requests
Add / Delete Requests
UOM
Scheduler
NONE
Monitor
NONE
List
Set
Create
Set
ALL
Jobs
Delete
Usage
Current
Connections
Server Locks
Purge Data
NONE
NONE
Roles & Users
NONE
NONE
Configuration
NONE
Stream Types
List
Assign
Modules
C-2 Oracle® Value Chain Collaboration User Guide
Save
Save
Table C–1 (Cont.) Permissions for Each VCC User Role
Main Menu
Sub Menu
Tabs
Subtabs
Action
Links
Save / Edit / Delete /
Add
Language
View Details / Add /
Delete
General
Period
Create
Events*
Overview
Calendar
List
View
Edit
Copy
Delete
Change Status
Status History
Upload Documents
Download Documents
Create
Attributes
Edit Attributes
Upload, Download
Documents
Promotions
Calendar
List
Edit Items / Copy Event
/ Change Status / Delete
Promotion
Status History / Add
Comment / Examine
Promotion
Create
View: Attributes / Tactics
/ Items
Upload, Download
Documents
User and Role Permissions C-3
Table C–1 (Cont.) Permissions for Each VCC User Role
Main Menu
Sub Menu
Tabs
Subtabs
Action
Promotion
Items
List
Delete Item
Edit Item
Examine
Edit Item
View Data
Documents
List
View / Edit / Delete
Demand
Policy
List
Delete
Edit All
View
Edit
Create
Interactive
NONE
Batch
List
Apply Changes
View
Edit
Create
Lift Factor
Edit
(weekly DB
only)
View
Supply
Policy
List
Delete
Edit All
C-4 Oracle® Value Chain Collaboration User Guide
Table C–1 (Cont.) Permissions for Each VCC User Role
Main Menu
Sub Menu
Tabs
Subtabs
Action
View
Edit
Create
Interactive
NONE
Batch
List
Apply Changes
View
Edit
Create
Safety Stock
List
Apply Changes
View
Edit
Create
Analyzer
NONE
NONE
Links
NONE
NONE
Inbox
ALL, but
these:
Exception
Individual
View Comments
Edit Comments
Change Status
Group
View Comments
Edit Comments
Change Status
Read-Only
Delete
View Comments
Criteria
Individual
List
Delete
Create
Create / Advanced
Apply Changes
User and Role Permissions C-5
Table C–1 (Cont.) Permissions for Each VCC User Role
Main Menu
Sub Menu
Tabs
Subtabs
Action
Copy / New / Delete
Group
List
Delete
Create
Data
View/Edit
NONE
Create Aggregates
Metrics
Create
NONE
Revision
History
NONE
NONE
List
Apply Changes
Create
Reports
NONE
List
Template
Create
Extracts
NONE
List
Create
Preferences
General
NONE
Layout
ALL, but one:
Lists
Password
NONE
Help
ALL
NONE
Logout
NONE
NONE
Home
NONE
NONE
Create
NONE
Master Data
ALL
Company
Aggregates
Create
C-6 Oracle® Value Chain Collaboration User Guide
Report
Table C–1 (Cont.) Permissions for Each VCC User Role
Main Menu
Sub Menu
Tabs
Subtabs
Action
List
NONE
Collaborations
Price Profile
Roles &
Users
ALL
NONE
Disagg.
Setup
List
Create
Context Based
Time Only
Create
Daily
Allocation
New / Edit / Save
Module
Config
Events
Stream Set
Configuration
Add / Edit / Delete
General
Demand
Add / Edit / Delete
Supply
Stream Set
Configuration
Add / Edit / Delete
DAILY Db:
Shipping
Calendar
DAILY Db:
Receiving
Calendar
* Although this table broadly defines Role access and editing privileges, Events
module promotion editability may vary depending on the Creator Company and User
stream and hierarchy access privileges. For instance, a Creator Company's superadmin
can edit any events created by the company's users, while a manager can only edit
promotions they create themselves. Likewise, Trading Partners will only be able to
view, comment on, and change the promotion status of events not created by them.
User and Role Permissions C-7
C-8 Oracle® Value Chain Collaboration User Guide
D
Browser Settings
If you experience browser issues when using Oracle Retail VCC, the following steps
will help you configure your Internet Explorer version 5.5 or 6.0 for optimal use.
1.
Select Tools - Internet Options.
2.
Click the General tab. In the Temporary Internet files section click Settings.
Under Check for newer version of stored pages;, select the Automatically radio
button
3.
If you are experiencing problems running Internet Explorer, click the Advanced
tab. Under Browsing, make sure that Reuse windows for launching shortcuts is
not checked. This will ensure that downloads appear in a new window, and do not
interfere with your use of Oracle Retail VCC.
Also under Browsing , be sure that the Display a notification about every script
error check box is likewise not checked
4.
Click OK to save browser configuration
Browser Settings
D-1
D-2 Oracle® Value Chain Collaboration User Guide
E
Sample PDF Report Screens
Reports can be generated in Excel, RTF, CSV, Pipe delimited, or PDF format. The
Extract report is a CSV (Microsoft® Excel) file. All remaining sample VCC Reports that
follow were generated in PDF format:
■
Comment.
■
Data Change.
■
Data Stream.
■
Distributed Exception.
■
Exception Log.
■
Extract.
■
Last Transaction.
■
No Transaction.
■
Promotion Detail.
■
Promotion Detail.
Comment
Figure E–1
Comment Report
Sample PDF Report Screens E-1
Data Change
Data Change
Data Stream
Figure E–2
Data Stream Report
E-2 Oracle® Value Chain Collaboration User Guide
Distributed Exception
Distributed Exception
Figure E–3
Distributed Exception Report
Sample PDF Report Screens E-3
Exception Log
Exception Log
Extract
Figure E–4
Extract
Last Transaction
Figure E–5
Last Transaction Report
E-4 Oracle® Value Chain Collaboration User Guide
Promotion Item
No Transaction
Figure E–6
No Transaction Report
Promotion Detail
Figure E–7
Promotion Detail Report
Promotion Item
Sample PDF Report Screens E-5
Promotion Item
E-6 Oracle® Value Chain Collaboration User Guide
F
Geneva Forecast Engine
How Does Geneva Work?
The Geneva algorithm seeks to optimize forecasts by minimizing a Mean Squared
Error (MSE). This is completed by conducting a competition between combinations of
data filters and forecasting models, each of which is optimized over its relevant
parameter vector. The optimal model is derived by a two-stage optimization process.
At one level, different combinations of data filters and models are compared. At
another level, each model is optimized according to its own specific parameters, each
of which is adjusted to hone the individual method to yield its best results. The
competition is conducted by predicting the last data values provided using the data
values from time periods prior to the predicted ones.
The top-level competition is between each combination of a specific type of forecasting
method used in conjunction with a specific form of the filtered data series. The
different forecasting methods include different types of linear and non-linear
regression methods and exponential smoothing methods. The different forms of the
data series are generated by the application of smoothing functions and
deseasonalization functions to the original series. Combinations of these two choices
are compared to find the method-series model that gives the best fit over the most
recent data.
For each model under consideration, a further optimization is conducted to adjust the
model internally to its best state. Each parameter is allowed to range over a set of
values as specified by the user or by system defaults. Since all the parameters must be
varied concurrently, this generally yields a large number of comparisons even within a
specific model. Therefore, although full optimization is a powerful tool, it must be
utilized with some care, as the magnitude of operations requested increases
multiplicatively with every augmentation to parameter searching.
The candidate data filters used are: no transformation, a moving median filter, a
moving periodic total (MPT) filter, an MPT filter of the moving median filtered data,
seasonal adjustment of untransformed data, and seasonal adjustment of the moving
median filtered data.
The candidate forecasting methods used are: linear regression, five types of non-linear
transformation regression, single exponential smoothing, double exponential
smoothing with trend damping, and Holt-Winters smoothing with trend damping.
The Holt-Winters method incorporates seasonal adjustment and is therefore not valid
when used with the MPT filter or with seasonally adjusted data.
The optimization problem can be restated as follows:
Geneva Forecast Engine F-1
How Does Geneva Work?
1.
Find the optimal data filter i* and optimal method j* by solving:
t=n
min E ( f(j(i(y1)))t - yt )2/v
i,j t=n-v+1
where
n = Length of time series
v = Length of holdout period, usually n/3
y1 = Historical data from t=1 to t=n-v
y = Historical data
f(j(i(y1))) = Forecast using filter i and method j on input data y1
■
■
2.
Data Filters
–
1 = No data filtering
–
2 = Moving median of window length w
–
3 = Moving periodic total of cycle length p for original data
–
4 = Moving periodic total of cycle length p for data prefiltered by method
2
–
5 = Seasonally adjusted original data
–
6 = Seasonally adjusted data prefiltered by method 2
Forecasting Methods
–
1 = Regression
–
2 = Nonlinear Regression 1: x' = log(x); y' = log(y)
–
3 = Nonlinear Regression 2: x' = x; y' = ln(y)
–
4 = Nonlinear Regression 3: x' = log(x); y' = y
–
5 = Nonlinear Regression 4: x' = 1/x; y' = 1/y
–
6 = Nonlinear Regression 5: x' = x; y' = ln( y / (K-y) )
–
7 = Single Exponential Smoothing
–
8 = Double Exponential Smoothing
–
9 = Holt-Winters Exponential Smoothing
Forecast with optimal filter i* and optimal method j* using entire time series y,
re-optimize method-specific forecasting parameters.
F-2 Oracle® Value Chain Collaboration User Guide
G
VCC Locks and Jobs
This appendix contains the following topics:
■
About Locks and Jobs.
■
User Generated Jobs.
■
User Save-Action Locks.
■
Scheduler Jobs.
■
Loader Jobs.
■
Extractor Jobs.
About Locks and Jobs
Jobs and Locks are divided into category Types that are integral to understanding the
tables that follow.
Job Types
Each job does one or more of the following:
1.
Reads hierarchy – takes a snapshot of current hierarchy before continuing
processing
2.
Reads data stream – reads information included as of the time processing begins
3.
Updates data stream – configures the number of retries
4.
Updates hierarchy – updates the hierarchy
5.
Extracts data – extracts data from VCC database
6.
Other – may read or write to other tables
Lock Types
Each job can activate one or more of the 3 types of lock:
■
Company-Self Lock (CSL) – User and Scheduler jobs. This will block the same job
for the same company.
Example:
While Scheduler event processing "CompanyA - Recalc Metrics" is active, another
attempt to run the same task for the same company is blocked.
VCC Locks and Jobs G-1
User Generated Jobs
■
■
Integrator-Self Lock (ISL) – Integrator Load jobs. This will block the same job for
the same Loader type.
Database STC Lock (DSL) – Database Stream Type Code Locks operate based on
load volume. For more information, see "About Load Volume" in the Implementor
Guide.
User Generated Jobs
Job
Type(s)
Lock Type
Job/Lock Trigger (UI Trigger)
Create
Aggregates/Create
Aggregates on
Demand
1, 2
CSL
Click Create in Co-Agg-Review Selections;
Click Create Agg-on-Demand from Data
Stream > View/Edit; Click Create in
Co-Disagg. Setup > Create.
Create
Disaggregation
Profile
1, 2
Create
Aggregates
lock
Click "Create" button in Company >
Disagg. Setup.
Create/Edit Event
3
CSL, DSL
Click "Save" button in Events-Create screen
after creating an Event.
Create Periods
4
None
Click "Save" button in
Configuration-Periods screen.
Create Price Profile
1, 3
DSL
Click "Set" button in Company-Price
Profiles-Create-Edit screen after entering
Base Price.
Delete Aggregates
6
Create
Aggregates
lock
Click "Delete" or "Delete All" in the
Aggregate List screen.Click "Delete" or
"Delete All" in an Aggregate's View Period
screen.
Modify Access Rights 4
None
Click "Start Editing" button on Roles &
Users-Edit Hierarchy Access screen.
Modify
Collaborations
1
None
Click "Start Editing" button in Company >
Create Collaboration screen.
Modify Location
Hierarchy
4
CSL
Click "Start Editing" button on Master
Data-Locations.
Modify Product
Hierarchy
4
CSL
Click "Start Editing" button on Master
Data-Products.
Modify Partner
Hierarchy
4
CSL
Click "Start Editing" button on Master
Data-Partners.
Modify Period
Hierarchy
4
CSL
Click "Save" button in
Configuration-Periods.
Process Demand
2,3
Forecast On Demand
CSL
Click "Process Selected Items" after
checking box for Process on Demand in
Demand Policy List.
Process Event Totals
on Demand
2
None
Click "Process Selected Items" after
checking box for Process Totals in
Events-List or in Promotions-List.
Process Exceptions
on Demand
1, 2, 3
DSL
Click "Process Selected Items" after
checking box for Process on Demand in
Exceptions List.
Job Screen Display
G-2 Oracle® Value Chain Collaboration User Guide
User Generated Jobs
Job Screen Display
Job
Type(s)
Lock Type
Job/Lock Trigger (UI Trigger)
Process Lift Factor on 1, 2, 3
Demand
DSL
Click "Save" after clicking "Set" in Lift
Factor screen.(Only available for Daily
database).
Process Metrics on
Demand
1, 2, 3
DSL
Click "Process Selected Items" after
checking box for Process on Demand in
Metrics List.
Process Reports on
Demand
1, 2
None
Click "Process Selected Items" after
checking box for Process on Demand in
Reports List screen.
Process Safety Stock
on Demand
1, 2, 3
DSL
Click "Process Selected Items" after
checking box for Process on Demand in
Supply Stream Set-List.
Process Supply
Policies on Demand
1, 2, 3
DSL
Click "Process Selected Items" after
checking box for Process on Demand in
Supply Policy List.
Purge Collab. Item
Comments
6
None
Click "Purge" button in Purge Data screen
after selecting "Collab. Items Comments
Purge" check box.
Purge Events
6
None
Click "Purge" button in Purge Data screen
after selecting "Events Purge" check box.
Purge Exceptions
6
None
Click "Purge" button in Purge Data screen
after selecting "Exceptions Purge" check
box.
Purge Jobs Monitor
6
None
Click "Purge" button in Purge Data screen
after selecting "Jobs Monitor Purge" check
box.
Purge Master Data
6
None
Click "Purge" button in Purge Data screen
after selecting "Master Data Purge" check
box.
Purge Transaction
Data
6
None
Click "Purge" button in Purge Data screen
after selecting "Transaction Purge" check
box.
Replace Product GIN 6
None
Click "Save" after changing GIN in Product
Examine screen. (Click "Start Editing" not
required here. No job if other than GIN is
changed.)
TagAggregates/Stat
Factor Change
1, 2
None
Click Save in Master Data - Product Examine after making change to Stat
Factor.
TagAggregate/Units
Per Load Change
1, 2
None
Click Save in Master Data - Product Examine after making change to Units Per
Load.
Update
Disaggregation
Factors
1, 2
None
Click "Process on Demand" in Co-Disagg.
Setup-List-Edit screen after selecting check
box for "Computed Factors" profile orClick
Save & Recalc in Review or Edit screen
after entering new value for checked
override for "Computed Factors" profile.
VCC Locks and Jobs G-3
User Save-Action Locks
User Save-Action Locks
Save Data Stream
Screen
Job Type
Lock Type Lock Trigger
Save data stream in
Data-Mass Entry
3
DSL
Click "Save" button after entering data.
Save data stream in
Data-View Edit
3
DSL
Click "Save" button after entering data.
Save data stream in
Demand-Interactive
3
DSL
Click "Save" or "Save All" button after entering
data.
Save data stream in
Demand-Lift Factor
3
DSL
Click "Save" on a Lift Factor Set-up.
Save data stream in
Event-Promotion
Item-View Data
3
DSL
Click "Save" button after entering data.
Save data stream in
Supply-Interactive
3
DSL
Click "Save" or 'Save All' button after entering
data.
Save data stream in
Supply-Safety Stock
3
DSL
Click Process on Demand on a Safety Stock
"Time Series" listing.
(UI Trigger)
Scheduler Jobs
Job Screen Display
Job Type Lock Type
Job/Lock Trigger
(Execute a task event through the Scheduler)
Complete Exception
Criteria Creations
1, 2
CSL
Complete Exception Criteria Creation
Extract Collaboration 5
Items
None
See Job ID 1115
Extract Demand
Policy
5
None
See Job ID 1115
Extract Disagg.
Factors
5
None
See Job ID 1115
Extract Disagg.
Profile
5
None
See Job ID 1115
Extract Events
5
None
See Job ID 1115
Extract Exception
Criteria
5
None
See Job ID 1115
Extract Exceptions
5
None
See Job ID 1115
Extract Collaboration 5
Products
None
See Job ID 1115
Extract Master Data
5
None
See Job ID 1115
Extract Metrics
5
None
See Job ID 1115
Extract Price Profile
5
None
See Job ID 1115
Extract Supply
Blocked Dates
5
None
Extract Supply Blocked Dates
Extract Supply Policy 5
None
See Job ID 1115
G-4 Oracle® Value Chain Collaboration User Guide
Scheduler Jobs
Extract UOMs
5
None
Extract UOMs
Extract Users
5
None
Extract Users
Process Aggregate
Actions
3
CSL
Process Aggregate Actions
Process Exception
Alerts
6
None
Process Exception Alerts and Send Exception
Alerts. If recipient e-mail address is supplied in
Exception - Criteria - Create and sender e-mail
address is supplied in VCC Config - Server Messaging, also see Send Exception Alerts.
Process Aggregate
Exceptions
1, 2, 3
CSL
Process Aggregate Exceptions
Process Extract
Requests
5
None
Process Extract Requests with no pending
requests. When pending requests are in Extract
Module, also see job entry for Process Extract
Requests:
& Send Exception
Alerts
Extract Collaboration Items Extract
Collaboration Products Extract Demand Policy
Extract Disagg. Factors Extract Disagg. Profile
Extract Events Extract Exception Criteria
Extract Exceptions Extract Master Data Extract
Metrics Extract Price Profile Extract Supply
Policy
Process Leaf Actions
1, 2, 3
CSL
Process Leaf Actions
Process Leaf
Exceptions
1, 2, 3
CSL
Process Leaf Exceptions
Purge Jobs Monitor
6
None
Purge Jobs Monitor When there are more jobs
listed than the Number n to be retained (n
defaults to 50k in the UI, and can be modified)
Recalculate
Aggregates
1, 2, 3
CSL
Recalculate Aggregates
Recalculate
Disaggregation
Factors
1, 2
CSL
Recalcualte Disaggregation Factors
Recalculate Metrics
1, 2, 3
CSL, DSL
Recalculate Metrics
Report Usage and
Send Usage Report
1, 2
CSL
Report Usage ...If recipient e-mail address is
supplied and 'Send' check box is checked in
Config-Billing, and sender e-mail address is
supplied in VCC
Configuration-Server-Messaging...also see
Send Usage Report
Roll Exception
Criteria
1, 2
CSL
Roll Exception Criteria
Run and Send
Reports
1, 2
CSL
Run and Send Reports
Run Demand & Lift
Factor Batch
Requests
1, 2, 3
CSL, DSL
Run Batch Demand & Lift Factor Requests
Run Demand Batch
Requests
1, 2, 3
CSL, DSL
Run Batch Demand Requests
Run Lift Factor Batch 1, 2, 3
Requests
CSL, DSL
Run Batch Lift Factor Requests
Run Reports
CSL
Run Reports
1, 2
VCC Locks and Jobs G-5
Loader Jobs
Run Safety Stock
Batch Requests
1, 2, 3
CSL, DSL
Run Safety Stock Requests
Run Supply & Safety
Stock Batch Requests
1, 2, 3
CSL, DSL
Run Batch Supply Requests
Run Supply Batch
Requests
1, 2, 3
CSL, DSL
Run Supply Batch Requests
Send Exception
Alerts
6
None
See Job ID 1109
Send Promotion
Alerts
6
None
Send Promotion Alerts
Send Reports
6
None
Send Reports
Send Usage Report
6
None
See Job ID 1136
Update Promotion
6
None
Update Promotions
Job Screen Display
Job
Type
Lock Type
Job/Lock Trigger: Click "Run" button on
Integrator - Loader after selecting control file
for...
Int - Load Aggregate
Definitions
1, 2
Create
Aggregates
Lock
Aggregate Definitions
Int - Load Aggregate
Stream
3
ISL, DSL
Aggregate Stream Data
Int - Load
Collaboration Item
6
ISL
Collaboration Item
Int - Load Demand
Policy
1
ISL
Demand Policy
Int - Load Demand
Stream Set
1
ISL
Demand Stream Set
Int - Load Disagg.
Profile
1
Create
Aggregates
lock
Disagg. Profile
Int - Load Events
3
ISL
Events
Int - Load Event
Stream Set
6
None
Event Stream Set
Int - Load Exception
Criteria
6
ISL
Exception Criteria
Int - Load Exceptions 6
ISL
Exception
Int - Load Leaf
Stream
3
ISL, DSL
Leaf Stream Data
Int - Load Master
Data
6
ISL
The desired Master Data files: Location
Partners, Products, Periods, User's
Int - Load Metrics
1, 2, 3
ISL
Metrics
Int - Load Multiple
6
ISL
(When multiple control files for different
loaders are included in the `run'.)
Int - Load Price
Profile
1, 3
ISL, DSL
(Price) Profile Stream Data
Loader Jobs
G-6 Oracle® Value Chain Collaboration User Guide
Extractor Jobs
Int - Load Supply
Blocked Dates
6
ISL
Supply Blocked Dates
Int - Load Supply
Policy
6
ISL
Supply Policy
Int - Load Supply
Stream Set
6
None
Supply Stream Set
Int - Load UOMs
6
None
UOM
Int - Local Custom
Tasks
6
None
Custom Tasks
Extractor Jobs
Job Screen Display
Job Type
Job/Lock Trigger: Click "Run" button on Integrator Extractor after selecting control file for...
Int - Extract All
Stream Changes
5
All Stream Changes
Int - Extract Current
Aggregate Stream
5
Current Aggregate Stream
Int - Extract Current
Leaf Stream
5
Current Leaf Stream
Int - Extract Manual
Stream Changes
5
Manual Stream Changes
VCC Locks and Jobs G-7
Extractor Jobs
G-8 Oracle® Value Chain Collaboration User Guide
H
Safety Stock Calculation
Input Variables
Variable
Units
Symbol
Notes
Service Level
%
SL
Static input, value chosen by user
from list.
Average Product
Demand
Units per base period
(Consumption) in units per day
Calculated, choice of generation
basis (Actual, Calculated, or
Forecasted) and choice of date
range
Standard Deviation
of Demand
Units per base period s(D)
(Consumption) Formula 1, below,
is used
Average Order
Processing Time
Base period
Defaults to the value specified in
the Profile; may be manually
edited by the user
Average Transit Time Base period
Manually input by user.
Average Lead Time
Base period
Average delivery lead time:
calculated as sum of Average
Order Processing Time and
Average Transit Time
Standard Deviation
of Lead Time
Base period
s(LT)
Formula 2, below, is used.
Safety Stock Calculation H-1
Formulas Used
Formulas Used
Standard Deviation Formula
Standard Deviation of demand is calculated as follows.
Figure H–1 Standard Deviation Formula
where:
s(D)
Standard Deviation of demand
n
Number of observations
Di
Each observation of demand
Mean demand
Combined Standard Deviation of Demand and Lead-Time Formula
Combined standard deviation of demand and lead-time is calculated as follows.
Figure H–2 Combined Standard Deviation of Demand and Lead-Time Formula
where:
s(D)
Standard Deviation of demand
Mean demand
Average lead time
s(LT)
Standard deviation of lead time
s(D,LT)
Combined standard deviation
H-2 Oracle® Value Chain Collaboration User Guide
Safety Stock Logic
Standard Fill Rate-Driven Safety Stock Calculation Formula
Safety Stock. A standard fill rate-driven safety stock calculation is used; it assumes that
the underlying distribution of demand is normal.
Figure H–3 Standard Fill Rate-Driven Safety Stock Calculation Formula
where:
SS
Safety Stock
K
Safety Stock Factor
s(D,LT)
Combined standard deviation
The "safety stock factor" is calculated as the inverse of the
standard normal cumulative distribution, taking the desired service
level (SL) expressed as a probability (i.e., 99.9% = .9990)
Note:
The following table shows examples of k for various service levels.
Service Level
k
99.9%
3.08
99.0%
2.33
95.0%
1.645
90.0%
1.28
Safety Stock Logic
This section describes the logic used to perform safety stock calculations. Note that
some data elements are read from the job, some are read from the Supply policy, and
some are read from data streams, as configured in Stream Configuration. If Safety
Stock Type = Fixed in the Supply policy, then the output value is saved back to the
Safety Stock field in the policy. If Safety Stock Type = Stream, then the safety stock
values are calculated out in time to the Planning Horizon specified in the Supply
policy, and are populated back into the configured stream. If the Planning Horizon is
null, then safety stock is calculated for as many periods as there is forecast data.
Safety Stock Calculation H-3
Safety Stock Logic
Single Value Calculations
The Safety Stock value (or time series) is calculated as follows:
Normal:
Figure H–4 Single Value Calculations
Item
Description
Source
SS
Safety Stock
Calculated - output of the formula
k
Service Level Factor
The inverse of the standard normal cumulative distribution,
taking the desired service level (from the item profile) as a
probability. This can be calculated using the
inverseNormalCdf method in class
VisualNumerics.math.Statistics in the JNL available from
Visual Numerics, Inc. Alternatively, a lookup table can be
generated using the normsinv() function in Microsoft Excel.
Estimator of
Standard Deviation
of demand during
the lead time
Calculated using the given basis, date range, and error
estimator
Sigma in the above equation is calculated as follows:
Figure H–5 Formula to Calculate Estimator of Standard Deviation of Demand
Item
Description
Source
Standard deviation of Calculated
demand during the
lead time
Mean demand
during the lead time
Calculated
Standard deviation of Calculated
demand during a
period
Standard deviation of Read from Supply
lead time (in terms of Policy
periods)
Mean of demand
during a period –
calculated
H-4 Oracle® Value Chain Collaboration User Guide
Calculated
Safety Stock Logic
Item
Description
Source
Mean lead time (in
terms of periods)
Read from Supply
Policy
For a basis other than forecast error, the actual standard deviation of the given data
stream is used:
Figure H–6 Formula to Calculate Mean of Demand during a period
Figure H–7 Formula to Calculate Standard deviation of demand during a period
Item
Description
Source
Standard deviation per period
Calculated
i
time period i
Counter
n
number of time periods
Calculated
Demand at period i (either actual or
forecast)
Read from current_stream
Mean demand for a period
Calculated
If the forecast error is chosen as the basis, then you are allowed to pick the estimator
used, either MAD or MSE
For MAD:
Safety Stock Calculation H-5
Safety Stock Logic
Figure H–8 Formula to Calculate MAD
Item
Description
Source
MAD
Mean square error per period
Calculated
i
time period i
Counter
n
number of time periods
Calculated
Forecast at period i
Read from current_
stream
Demand (actual or forecast) at period Read from current_
i
stream
For MSE:
Figure H–9 Formula to Calculate MSE
Item
Description
Source
Standard deviation
per period
Calculated
MSE
Mean square error
per period
Calculated
i
time period i
Counter
n
number of time
periods
Calculated
Forecast at period i
Read from current_
stream
H-6 Oracle® Value Chain Collaboration User Guide
Safety Stock Logic
Item
Description
Source
Demand (actual or
forecast) at period i
Read from current_
stream
Poisson
For a Poisson distribution, the equation must be solved iteratively:
SS = x'- µ, such that x' satisfies:
Figure H–10 Poisson Formula
Item
Description
SS
Safety Stock
Calculated
SL
Service Level,
expressed as a
Probability (i.e., 95%
Service Level would
be expressed as 0.95)
Read from Supply
Policy
Mean demand
during the lead time
Calculated
Mean demand for a
period
Calculated
Mean lead time (in
terms of periods)
Read from Supply
Policy
Reorder Point
Calculated
For example, given:
Mean demand = 2 units per day
Mean lead time = 3 days
Desired Service Level = 85%
Then:
Safety Stock Calculation H-7
Safety Stock Logic
Figure H–11 Example for Poisson Formula
So, find the next highest x that most closely satisfies:
Figure H–12 Formula that Calculates Highest Reorder Point
Solving, we find f(6) = 0.8311, f(7) = 0.9134, so we choose 7, therefore:
Figure H–13 Safety Stock Formula Example
Periods Forward
Periods forward calculates the sum of the specified number of periods forward from
the given period. For instance, if the number of periods of supply were specified as
four, then the safety stock for each period is the sum of demand for the next four
periods.
Figure H–14 Periods Forward Formula
Item
Description
Source
SS
Safety Stock
Calculated
Forecast at period i
Read from current_
stream
Number of periods
forward
Specified in SS job
n
H-8 Oracle® Value Chain Collaboration User Guide
Safety Stock Logic
Periods Back
"Periods back" is the average demand per period times the specified number of
periods.
Figure H–15 Periods Back Formula
Item
Description
Source
SS
Safety Stock
Calculated
Demand at period i
Read from current_
stream
n
Number of periods of Specified in SS job
supply
Mean demand per
period, for the given
range
Calculated
Time - Series Calculation
Time-series calculations work similar to the above, but add the element of a rolling
horizon. Consider the following example:
User selects: Time Series. Normal. Forecast Consumption, for forecast periods 1
through 10, with a 5-period rolling horizon. For period 1, use the above equations with
a range of periods from 1-5 as the input. For period 2, use the above equations with a
range of periods from 2-6 as the input, for period 3, use the above equations with a
range of periods form 3-7 as input, etc.
For Time Series Period Forward calculations: For each period in the forecast range, the
safety stock equals the sum of the forecasts for the next n periods, where n is the
"Periods of Supply".
So, if the period of supply is 4 the safety stock for
■
1. period 1 is the sum of the forecasts for periods 1 through 4
■
2. period 2 is the sum of the forecasts for periods 2 through 5
■
3. period 3 is the sum of the forecasts for periods 3 through 6
...until you are out of the specified forecast range.
Safety Stock Calculation H-9
Safety Stock Constants
Safety Stock Constants
The following are safety stock constants defined for supply policies.
Method values from rp_ss_job_requests table */
Description
Constant Number
G_SS_NORMAL
0
G_SS_POISSON
1
G_SS_PER_FORWARD
2
G_SS_PER_BACK
3
Basis valuesfrom rp_ss_job_request table*/
Description
Constant Number
G_SS_ACTUAL
0
G_SS_FORECAST
1
G_SS_MAD
2
G_SS_MSE
3
SS_type Values from rp_policy table */
Description
Constant Number
G_SS_FIXED
0
G_SS_TIME_SERIES
1
STC_TYPE Values in rp_streams table */
Description
Constant Number
G_RP_CONSUMP_FORE
0
G_RP_CONSUMP_ACT
1
G_RP_INVENTORY
2
G_RP_EXPECTED_
ARRIVALS
3
G_RP_SAFETY_STOCK
4
G_RP_PROJECTED_INV
5
G_RP_RECEIPT_FC
6
H-10 Oracle® Value Chain Collaboration User Guide
I
Language Encoding for Files Generated
The following table shows which features can be configured for Language, and where
to configure them.
Feature
Configured in...
Export Data using Export Configuration - Language - File Character Set
button on UI
Extracts Module
Oracle Retail VCC Extracts - Create screen
Integrator Extracts
Integrator Extractor Configuration
Exceptions Email Alert
1. Configuration - Language - Email body Character Set.
2. Configuration - Language - Email attachment Character Set.
Promotion Email Alert
1. Configuration - Language - Email body Character Set.
2. Configuration - Language - Email attachment Character Set.
Reports Email
1. Configuration - Language - Email body Character Set.
2. Configuration - Language - Email attachment Character Set.
Reports Download
Configuration - Language - File Character Set
Reports Extracts
Configuration - Language - File Character Set
Reports FTP
Configuration - Language - File Character Set
Integrator Loaders
Integrator Loader Configuration
Real Time Export
Not configurable. UTF-8 encoding will be used.
Language Encoding for Files Generated
I-1
I-2 Oracle® Value Chain Collaboration User Guide
J
Data Stream Type Codes
The following is a list of data stream type codes:
Table J–1 Stream Type Codes
Stream Code
Description
0
Price
2
Actual "Sales"
3
Store On-hand
4
Store+DC On-hand
5
Store Receipts
6
Store Shipments
7
Store Returns
8
Store Waste
9
Shrink (Units)
10
POS/Retail Sales ($)
11
POS/Retail Sales (i)
12
POS/Retail Sales (£)
13
POS/Retail Sales (¥)
14
Lost Sales
15
Open-to-Buy
16
Store Open Orders
17
Sales Forecast
18
POS Forecast ($)
19
POS Forecast (i)
20
POS Forecast (£)
21
POS Forecast (¥)
22
Store Receipt Fcst
23
Store Rainchecks
24
Locations Stocked
25
Locations Promoted
26
Locations Planned
Data Stream Type Codes J-1
Table J–1 Stream Type Codes
Stream Code
Description
27
DC Withdrawals
28
DC Inventory
29
DC Receipts
30
DC Receipt Fcst
31
DC Withdrawal Fcst
32
Expected Arrivals
33
Finished Goods Inv
34
Mfg Consumption
35
DC Shipments
36
Unloaded Quantity
37
Unavailable Stock
38
Quality Hold
39
Safety Stock Thresh
40
Raw Matl Inv (Units)
41
Mfg Consumption Fcst
42
Work in Process
43
Actual Shipments
44
Shipment Forecast
45
Scrap Quantity
46
Consignment Inv
47
RMA/RTV Inventory
48
Supplier Inv (Units)
49
Available to Promise
50
Planned Orders
51
Customer Allocation
52
Capacity
53
Mfg Org Fcst
54
Logistics Org Fcst
55
Sales Org Fcst
56
Finance Org Fcst
57
Marketing Org Fcst
58
Planning Org Fcst
59
Working Forecast
60
Consumer Inv (Units)
61
Consumer Inv (Days)
62
Items Processed
63
Items Rejected
J-2 Oracle® Value Chain Collaboration User Guide
Table J–1 Stream Type Codes
Stream Code
Description
64
Downtime
65
Collaboration Units
66
Gross Margin (%)
67
Category Rank
68
Category Share (%)
69
POS Forecast Error %
70
Receipt Fcst Error %
71
Fill Rate (%)
72
Sales Growth Rate %
73
Inventory Turns
74
RDC Availability (%)
75
Store In-Stock (%)
76
Store Out-of-Stock %
77
Shrink (%)
78
Retail DC Stockout %
79
Store Inv (Days)
80
Raw Mat Inv (Days)
81
Raw Mat Inv (Weeks)
82
On-Time Delivery (%)
83
Canceled Orders
84
Emergency Orders
85
Store Orders Placed
86
RDC Orders Placed
87
Unit Cost (Standard)
88
Unit Cost (Actual)
89
Shipments ($)
90
DC Inventory (Days)
91
DC Inventory (Weeks)
92
Open Order Qty ($)
93
Inventory at Cost
94
Store Inv (Weeks)
95
Store Inventory ($)
96
GMROII (%)
97
GMROII Forecast (%)
98
Store Markdowns ($)
99
Store Markdown %
100
Lead Time (Days-Avg)
Data Stream Type Codes J-3
Table J–1 Stream Type Codes
Stream Code
Description
101
Lift Factor
102
Inventory (Proj)
103
Capable to Promise
104
Aged Inventory
105
Shipment Fcst Calc
106
Average POS
107
Order Forecast
108
Cust Allocation Fcst
109
Cross-Docking Fcst
110
Forward Buy Fcst
111
Inventory Target
112
Inventory Target (Max)
113
Upside Percentage
114
Downside Percentage
115
Past Due Demand
116
Cumulative Quantity Received
117
Cumulative Quantity Consumed
118
Cumulative Demand
119
Upside Demand
120
Downside Demand
121
Channel Demand
122
Seasonal Demand
123
Committed Quantity
124
Base Unit Factor
125
Promo Unit Factor
126
Calculated Stream 1
127
Calculated Stream 2
128
Calculated Stream 3
129
Calculated Stream 4
130
Calculated Stream 5
131
Calculated Stream 6
132
Calculated Stream 7
133
Calculated Stream 8
134
Calculated Stream 9
135
Calculated Stream 10
136
DSD Receipt Fcst
137
Lost Sales %
J-4 Oracle® Value Chain Collaboration User Guide
Table J–1 Stream Type Codes
Stream Code
Description
138
Locations Stocked 2
139
Average POS 2
140
Calculated Stream 11
141
Calculated Stream 12
142
Calculated Stream 13
143
Calculated Stream 14
144
Calculated Stream 15
145
Calculated Stream 16
146
Calculated Stream 17
147
Calculated Stream 18
148
Calculated Stream 19
149
Calculated Stream 20
150
POS/Cost ($)
151
Store Mrkdwn (Units)
152
Store Shpmnt (Cost)
153
Store Shpmnt (Ret)
Data Stream Type Codes J-5
J-6 Oracle® Value Chain Collaboration User Guide
Index
A
about
repeat frequency, 4-2
scheduler, 25-1
UOM factors, 27-1
VCC monitor, 24-1
about aggregates, 20-1
about collaborations, 22-1
about roles and users, 23-1
access control, 8-21, 23-9
hierarchy, 15-21
module, 15-23
stream, 15-22
accumulation rules, 3-9, 15-7
add
event, 25-3
local location, 17-11
partner location, 17-12
product, 17-13
promotions, 10-21
tasks, 25-9
administration, 14-1
administrator, 14-2
advanced parameters, 11-5
aggregates
about, 20-1
create, 20-2
delete, 20-5
export, 20-6
view, 20-5
analyzer, 12-1
data cubes, 12-1
assign data stream access, 23-9
assign data streams, 15-11
assign modules, 23-10
auto status options, 6-14
automated exception resolution, 6-11
average, 8-10
average periods of supply, 8-13
B
batch request
demand, 11-17
lift factor, 11-17
scheduler tasks, 11-17
browser compatibility, 2-1
C
change data stream exception, 5-23
change password, 9-25, 15-24
change promotion status, 10-15
change user password, 23-12
check purge process, 15-30
collaboration item comments, 15-30
company
manage groups, 16-5
manage links, 16-5
company chooser, 14-4
company general information, 16-1
company general preferences, 16-2
company level roles and users, 23-2
company link
create, 16-5
delete, 16-7
edit, 16-6
hide, 16-7
company locations, 17-2
company products, 17-2
company trading partners, 17-4
configuration
general tab, 15-35
language tab, 15-34
links tab, 15-13
modules tab, 15-5
server, 15-2
stream types tab, 15-8
configure
email alerts, 16-11
real time extract, 16-9
configure disaggregation
automatically, 21-7
configure disaggregation factors, 21-5
configure e-mail for the exception module,
configure language, 15-34
configure time-only disaggregation, 21-8
configuring labels, 18-2
consumption forecast, 18-5
context at aggregate-level, 21-4
context at leaf-level, 21-4
18-9
Index-1
context chooser, 2-10
copy
event, 10-7
copy and paste, 17-9
copy user, 15-25, 23-6
count missing, 8-10
create
aggregates, 3-13
batch requests, 11-16
category, 17-9
collaborations between trading partners,
company, 15-3
company link, 16-5
data aggregate, 20-2
data stream types, 15-13
demand policy, 11-6
metrics, 8-5
new UOM factors, 27-3
new user, 23-5
period overlays, 9-4
periods, 15-33
product folders, 17-3
promotion items, 10-30
purge requests, 26-2
supply policy, 13-2
time period folders, 15-33
create groups, 9-15
create period overlays
fixed, 9-5
rolling, 9-7
telescoping, 9-9
create product price profile, 19-1
create report
comment, 7-11
data change, 7-11
data stream, 7-12
distribution exception, 7-13
exception log, 7-14
extract, 7-14
last transaction, 7-15
no transaction, 7-16
promotion detail, 7-16
promotion item, 7-17
create time periods
guidelines, 15-32
create users, 15-19
creating links, 17-9
current connections, 24-6
cut and paste, 17-8
D
daily allocation, 21-10
data cubes, 12-1
data mass entry, 3-5
data purge requests, 26-1
data stream
edit, 3-12
types, 15-6
data stream comments
22-1
add, 3-10
delete, 3-10
read, 3-10
data stream exception
formulas, 6-27
data stream exception criteria, 6-1
create, 6-2
data streams
assign, 15-11
delete
aggregates, 20-5
company link, 16-7
events, 25-5
link, 15-14
metrics, 8-6
promotion items, 10-33
promotions, 10-26
tasks, 25-10
UOM factors, 27-4
demand, 11-1
create policy, 11-6
interactive, 11-10
view policies, 11-5
demand batch jobs
batch forecast jobs, 11-15
lift factor, 11-15
demand parameters
advanced, 11-5
policy, 11-2
disable a user, 23-11
disable user, 15-23
disaggregate data
using disaggregation profile, 3-15
using period overlays, 3-16
using proportional disaggregation, 3-15
disaggregation
profile-based, 21-1
proportional, 21-3
straight line, 21-3
disaggregation factors, 21-1
disaggregation profiles, 21-5
edit, 21-12
list, 21-12
view, 21-12
display pane, 2-22
graph mode, 2-24
table mode, 2-22
E
edit
company link, 16-6
link, 15-14
metrics, 8-1
period overlays, 9-4
tasks, 25-10
edit groups, 9-15
edit user access, 15-20
email alerts, 16-11
e-mail notification for usage statistics, 24-5
Index-2
event promotions, 15-29
events, 10-2
attach documents, 10-35
calendar tab, 10-2
create tab, 10-6
delete documents, 10-36
documents, 10-34
list Tab, 10-4
events labels, 18-3
events module, 10-1
events module configurations, 18-1
events stream, 18-1
examine user, 15-23, 23-10
exception comments
create, 5-24
view, 5-24
exception count, 8-11
exception criteria
copy, 6-23
delete, 6-23
process, 6-25
view, 6-23
exception inbox
filter, 5-24
locate individual exception, 5-26
search, 5-24
exception inbox email alerts, 6-26
exception severity levels, 6-21
exception status
change, 6-24
exception statuses, 5-22
exceptions
inbox view buttons, 5-3
list columns, 5-4
export aggregates, 20-6
extract
file formats, 4-8
master data, 4-2
other data types, 4-5
F
forecast error, 8-11
G
general icons, 2-5
general preferences, 9-1
general tab
rename labels, 15-35
generation offset, 6-3
group exception criteria
create, 6-17
delete, 6-20
examine, 6-20
group exception status history
view, 5-21
group excepton criteria
view, 5-21
groups
add, 9-18
edit, 9-16
preview, 9-19
remove, 9-19
growth, 8-12
guidelines for creating stream sets, 18-4
H
hide
company link, 16-7
link, 15-15
hierarchies, 4-4
highlight source, 9-13
horizon, 7-7
hub level roles and users, 23-2
I
inbox filter preferences, 9-20
individual exception criteria
components, 6-2
create, 6-6
list, 6-2
view, 5-16
individual exception status history
view, 5-17
integrator user, 14-2
interactive demand, 11-10
interactive supply, 13-6
inventory turns, 8-12
J
job monitor, 15-28
L
layout, 7-6, 9-3
lift factors, 11-18
lift patterns, 11-18
specify, 11-19
list screen preferences, 9-22
list view icons, 2-8
local location, 17-11
localize, 9-1
log in, 2-1
log out, 2-3
M
manage
custom cube views, 12-2
manage company creation, 15-2
manage company locations, 17-2
manage company products, 17-2
manage data purge, 15-26
manage data streams exceptions, 5-22
automatically, 5-22
manage demand module stream, 18-8
manage groups, 16-5
Index-3
manage links, 15-13, 16-5
manage product hierarchies, 17-3
manage time periods, 15-32
manage users and roles, 15-16
master data, 15-29, 17-1
master data folders, 17-5
master data hierarchies, 17-5
master data search, 17-5
menus, 2-9
metrics
average, 8-10
average periods of supply, 8-13
count missing, 8-10
create, 8-5
delete, 8-6
edit, 8-1
exception count, 8-11
forecast error, 8-11
growth, 8-12
inventory turns, 8-12
output, 8-8
period offsets, 8-9
period to date, 8-14
periods of supply, 8-14
perpetual inventory, 8-15
process on demand, 8-6
product, 8-17
rolling error, 8-16
simple math, 8-16
time average, 8-18
types, 8-8
variability, 8-19
view, 8-1
weighted average forecast error, 8-20
monitor VCC jobs, 24-1
move user to new role, 23-12
R
N
new role,
safety stock jobs, 13-16
process metrics, 8-6
batch, 8-8
error messages, 8-8
product, 17-13
product folders
guidelines, 17-3
product hierarchies, 17-3
product price profiles, 19-1
profile-based disaggregation, 21-1
program modules, 15-4
promotion items, 10-26
create, 10-30
delete, 10-33
table/graph view, 10-34
view, 10-28
promotional tactics, 10-8
promotions, 10-8
add, 10-21
attach documents, 10-35
delete, 10-26
delete documents, 10-36
documents, 10-34
status changes, 10-37
view, 10-11
proportional disaggregation, 21-3
purge
collaboration item comments, 15-30
collabration item comments, 15-37
current connections, 15-37
event promotions, 15-29, 15-37
exceptions, 15-37
job monitor, 15-28, 15-37
master data, 15-29, 15-37
transaction data, 15-27, 15-37
15-24
P
partner location, 17-12
period at aggregate-level, 21-4
period at leaf-level, 21-4
period offsets, 8-9
period overlays, 3-8, 9-4
edit, 9-12
rename, 9-12
view, 9-12
period overlays tab, 16-8
period to date, 8-14
periods of supply, 8-14
perpetual inventory, 8-15
personalize, 9-1
platform
support, 2-1
policy parameters, 11-2
process
real time extract, 16-8
configure, 16-9
remove hierarchy nodes, 17-4
repeat frequency, 7-6
report settings, 7-3
context detail, 7-6
general, 7-4
reports, 7-1
comment, 7-11
create, 7-10
data change, 7-11
data stream, 7-12
delete, 7-18
distribution exception, 7-13
exception log, 7-14
extract, 7-14
last transaction, 7-15
no transaction, 7-16
promotion detail, 7-16
promotion item, 7-17
send, 7-17
view, 7-2
Index-4
report-templates
create, 7-3
required fields, 2-28
responsibilities
administrator, 14-6
superuser, 14-6
retrieve extracted data, 4-2
right-click menu utility, 3-1
roles
overview, 23-3
roles and users search, 23-4
rolling error, 8-16
rules
safety stock calculation, 13-15
S
safety stock feature, 13-11
sample exception e-mail alerts, 18-10
scheduler events, 25-3
scheduler interface, 25-2
scheduler task descriptions, 25-5
search roles and users, 15-17
server admin, 14-2
server locks, 24-7
server-level configuration, 15-2
set
export compression size, 15-36
highlight source, 9-13
inbox filter preferences, 9-20
list screen preferences, 9-22
usage statistics, 15-37
set user access, 15-20
shipping/receiving calendar, 18-6
simple math, 8-16
difference, 8-16
ratio, 8-17
sum, 8-18
status codes, 6-15
straight line disaggregation, 21-3
enable, 21-4
stream types tab, 16-10
streams, 7-10
submenus, 2-9
superuser, 14-1
supply, 13-1
batch jobs, 13-9
supply module stream set, 18-4
supply policy
create, 13-2
supported platforms, 2-1
system user, 15-26
T
table/graph preferences, 9-3
create period overlays, 9-4
edit period overlays, 9-4
set, 9-3
set highlight source, 9-13
table/graph view, 10-34
tasks, 25-5
template
delete, 7-18
time aggregate demand forecast,
time average, 8-18
time period hierarchies, 17-4
title bar, 2-4
transaction data, 15-27
tree behavior, 17-6, 17-8
collapse, 17-6
copy and paste, 17-9
create category, 17-9
creating links, 17-9
cut and paste, 17-8
examine, 17-10
expanding, 17-6
leaf node, 17-11
multi-select, 17-7
single-select, 17-7
tree display, 23-3
select, 15-17
tree hierarchies, 17-8
right-click menu, 17-8
start editing button, 17-8
11-14
U
usage statistics, 24-4
user hierarchy access rights
edit, 23-7
set, 23-7
user interface, 2-4
context chooser, 2-10
display pane, 2-22
general icons, 2-5
list view icons, 2-8
menus and submenus, 2-9
required fields, 2-28
title bar, 2-4
V
variability, 8-19
view
active exceptions, 6-22
aggregates, 20-5
data in expand mode, 3-16
data stream revision history, 3-18
demand policies, 11-5
documents, 10-35
exception criteria, 6-22, 6-23
group exception criteria, 5-21
group exception status history, 5-21
individual exception criteria, 5-16
individual exception status history, 5-17
metrics, 8-1
promotion items, 10-28
promotions, 10-11
UOM list, 27-2
Index-5
view data, 3-6
view exception status history
active exceptions screen, 6-23
view exceptions, 5-8
collapsed view, 5-9
context only subtab, 5-18
expanded view, 5-9
group inbox, 5-18
individual collapsed view, 5-13
individual expanded view, 5-10
individual inbox, 5-10
partner inbox, 5-22
period only subtab, 5-18
view group exception
collapsed view, 5-20
group expanded view, 5-18
view group exception status history, 5-21
W
weighted average forecast error, 8-20
Index-6