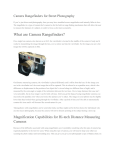
1
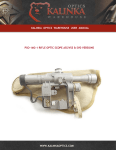
2.
3.
4.
5.
6.
Include a note with your name, address, telephone number, email, and a description of the problem.
Pack the scope securely using proper packing materials.
Ship the scope (insured if possible) by parcel or mail service
with delivery confirmation.
If the date of sale can not be determined the warranty period
assumed to begin at the date of manufacture of the scope.
If maintenance or feasible and justifiable repairs have to be done
upon expiration of the warranty period, all costs related to these
services are the responsibility of the customer.
Kalinka Optics Warehouse – Your Best Choice
for the Finest in Optics and Accessories!
Kalinka Optics Warehouse
User Manual
www.kalinkaoptics.com
PO Fixed Magnification Rifle Scope Manual
Thanks for Shopping with US!
WWW.KALINKAOPTICS.COM
12
We thank you for purchasing a quality rifle scope from
Kalinka Optics Warehouse®. We carry and produce only
the finest rifle scopes. While there are several companies in
the world that make quality scopes, only ours combine
professional performance without breaking the bank. The
only thing better than owning a world-class instrument is
owning one inexpensively. Our scopes are based on Soviet
military designs, which are extremely rugged and have the
very best optical properties. The advanced technologies used
in crafting these fine scopes are based on the groundbreaking
work of the Carl Zeiss-Jena factory in Jena, Germany which
was captured by the US & Soviet armies during World War
II. The Zeiss-Jena factory and its trove of advanced physics
and engineering technology was literally disassembled and
taken to the Soviet Union at the end of the war. Additional
Zeiss factories located in the Baltics and other Eastern Bloc
countries were taken over by the Soviet military machine.
Thus, our scopes come from a handful of small, private
factories with a rich tradition of producing fine optics for the
Soviet and Russian military. The optics sold here are of the
highest quality for military, law enforcement and sporting
use. Compare their performance and price with Leupold and
other top brands. The optics are very clear and come in a
variety of styles, magnifications and wit h many different
reticles to suit every purpose.
Know Your Scope
Rifle scopes have seen great advances over the last half century.
However the major optical parts are still the same:
1. Objective lens – The front lens which provides clarity and light
gathering ability.
2. Inverting lens – Also known as the internal erector lenses.
3. The reticle – The cross hairs which provide the aim point and
are often designed to find your range to target. Russian rangefinding reticles on both the 1000 meter Dragunov and 400 meter
Simonov reticles are measured in equal amounts of MOA
(minutes of angle, ~1inch at 100 yards), either range-finding
reticle can be used effectively with any caliber of weapon.
2
1.
2.
3.
4.
5.
Check the mount. Make sure the scope is mounted securely to
the rifle. Try, with bare hands only, to twist the scope in the
rings or see if anything moves when pressure is applied.
Make sure the action of your rifle is properly bedded in the
stock and that all receiver screws are tight and have been
tightened in the sequence recommended by the manufacturer. A
loosely fitted stock can cause changes in the point of impact.
When test firing a rifle to check the point of impact relative to
windage and elevation adjustments, be sure to fire from a solid
bench with sandbags supporting the forearm and butt stock.
Be sure to use factory-loaded ammunition of the same bullet
type, weight and lot number. If one type of ammunition does not
shoot well, try another brand or bullet weight.
Be certain that both the barrel and chamber are clean. Heavy
factory grease on a new rifle and copper fouling on an older one
can diminish the accuracy of the firearm.
SAFEKEEPING
Avoid hard strikes to the scope or dropping it. After using the scope in
wet conditions wipe it with a dry, soft cloth and leave it to dry out at
temperatures not exceeding 112 F°. To protect the glass surfaces of the
scope always use the objective lens and eyepiece cups when the scope is
not in use. When not in use, keep the scope in a dry place at room
temperature with humidity not exceeding 80%.
NEVER ATTEMPT TO FIX THE SCOPE YOURSELF OR TAKE
IT APART FOR ANY REASON. VIOLATION WILL VOID THE
WARRANTY.
WARRANTY
The scope meets or exceeds the quality standards set forth by the
manufacturer and its technical specifications match those listed in this
manual. The scope carries a 12 months limited warranty against
manufacturing defects from the date of sale.
If the scope fails during the warranty period the customer is entitled to
have the scope repaired of fixed at the desecration of the dealer or the
manufacturer. Each party is responsible for shipping costs of the scope at
their end. The scope must be shipped to Kalinka Optics as outlined by
their Warrant & Return policy which is available for viewing on the
website, www.kalinkaoptics.com.
Please follow these instructions in accordance to the policies listed
online:
1. Remove the rings and any other accessories from the scope.
11
4.
For German Post and Duplex Reticles
Both reticles will fit a 70 cm (.77 yards) long target within the two side
pickets at 100 meters. If the same size target is twice the width of the open
space between the pickets then you can estimate its distance at 50 meters.
Conversely, if that same target only fills half the open space, its distance
would be 200 meters.
For MilDot Reticles
Range estimating with the Mil Dot Reticle , with practice, is simple. Dots
are spaced in one mil (milliradian) increments on the crosshair. Using the
mil formula, a table can be created that is based on the size of the object
being targeted. Just look through the scope, bracket the object between
dots, and refer to the table for an estimated distance to target.
MAINTENANCE
Our scope lenses are coated to reduce light reflections and light scattering
thus increasing light transmission through the scope. They should be
cleaned as carefully as you would a camera lens. For optimal cleaning
use a special glasses or lenses lint-free cleaning cloth. When cleaning,
use a standard lens brush to remove dust and then wipe with the cleaning
cloth.
The windage and elevation adjustments as well as the focusing ring are
permanently lubricated. There is no need to lubricate any part of your
scope.
Our scopes are made of advanced alloys which require no other care then
to be wiped down after use with a clean, dry cloth.
TROUBLE SHOOTING TIPS
If you are having a problem with your scope, try these tips.
10
Eyepiece. The ocular lens works in tandem with the other lenses
to provide the correct magnification, gives you proper eye relief
(how far away you can place your eye from the scope and see
the full image, and make diopiter (focus) corrections. The
inverting lens system transfers the image and reticule onto the
focal plane of the eyepiece and at the same time inverts the
image. The user sees the directly magnified view of the image
and the reticule. Our scopes are parallax-free which means that
the reticule won’t appear to be shifted related to the target once
the user changes its position relative to the optical axis of the
scope for magnifications of 7x or less. In higher magnification
ranges parallax is set to a particular distance, usually 100 yards.
Many models have a separate parallax focusing ring on the front
objective. Many models also offer a binocular-style ocular
focusing ring. Use it to get a sharper image by adjusting the
focus to meet the needs of your eyesight. Once set to the desired
position the setting can be secured by the locking nut.
INTRODUCTION
• Please Read This Entire Manual Before Mounting Your Scope!
• Our rifle scopes are designed to assist in aiming at distant
targets and can be mounted onto any hunting or assault rifle
regardless of caliber. Models designated with an “L” or an “S”
have an illuminated reticule for target acquisition in low light
conditions.
• The scope can be mounted onto a weapon using 1” or 30 mm
mounting rings or adapters depending on the tube width. A solid
mount is critical to proper performance of your scope. Our
scopes are easily mountable to any weapon that takes Weaverstyle rings, Ruger rings, Dovetail rings or other standard rings.
The dimensions of each scope are shown on the on-line item
page so you can be sure of whether proper ring placement is
possible for your specific rifle. Kalinka Optics Warehouse®
carries a broad selection of mounting platforms, rings and other
accessories. Take a look through our accessories section or
contact us for the mounting accessories necessary for your KO
scope.
•
The reticule can be adjusted in any direction as needed during
sighting. The reticule is adjusted by using windage and
elevation turrets. Windage and elevation turrets have scaled
cams to assist you during the sighting process. The value of
each click varies by the type of the scope.
• As opposed to Chinese and other scopes from low-quality/lowcost countries, our scopes allow for more precise long distance
3
•
•
•
shooting, as they are parallax free, meaning that your target does
not float around as you move/adjust the angle of your eye.
All reticules available have range-finding capability. The
German Post and Duplex reticles can fit a 1/2 yard target
between the side pickets at 100 yards while the metered reticles
such as the Dragunov and Simonov provide full range-finding
capability for multiple -sized targets.
The 1000 meter Dragunov military reticle has an extremely
effective and useful height-based rangefinder for dual use, with
graduated scales for both standing and prone figure estimation.
It includes extended distance inverted chevrons providing
aiming points for 1000, 1100, and 1200 meters. The 400 meter
Simonov military reticle also has a rangefinder for dual use. It
includes extended distance inverted chevrons providing aiming
points for 200, 300, and 400 meters. Since the range calibrations
are measured in equal amounts of MOA for both rangefinders,
these reticles can be used effectively with any caliber of
weapon.
All of our scopes are dry nitrogen purged to minimize fogging
in wet conditions. The scope can be used in various climate
conditions from -50F° to +110 F°.
Scope Click Value
PO scopes with 6x mag or lower
1 MOA @ 100 yards
PO scopes with 8x mag or higher
1.2 MOA @ 100 yards
Parallax settings on scopes 8x magnification and higher are set at 100
meters.
For the 1000 meter reticle:
For the 400m reticle:
To set aiming angles correctly during the sighting process you’ll need to
know the ballistics of your ammo or determine it by experimentation.
OPERATION
Mounting the Scope
The scope can be mounted on the gun using 1” mounting rings or
adapters that accept scopes with 1” tube. You should determine which
rings or adapter is required to mount the scope on your gun as all guns
have specific mounting options. Keep in mind that accuracy of your
scope depends on how well the scope is bore sighted on your gun and the
quality of the mount being used. Choose the mounting option that will
hold the scope securely and won’t be compromised by recoil. Be sure to
use mounts that are tall enough to clear the front objective bell of the
scope from hitting the barrel. The lower the scope, the better. For most
shooters, a lower scope provides better cheek weld on the stock for a
stable firing position and allows for rapid target acquisition. However,
4
9
position.
the height of the scope is purely shooter preference.
Aiming and shooting at moving targets
While shooting at moving targets it is necessary to aim ahead of the
target. To determine how far the aiming point has to be taken out you’ll
need to estimate the speed of the target and the distance to it. The faster
the target moves and the further the distance to it the further ahead you’ll
have to aim. Have the moving target aligned with horizontal hairs of the
reticule as you aiming.
Illuminated Reticle
On items with an illuminated reticle, you will need a 3V power supply.
Power supply for your scope is listed in the tech table online. All scopes
take one of the following: 2 x D-357 small button batteries or 1 x
CR2032 flat lithium battery. You can tell the type of batteries necessary
by the battery well. If it is narrow and deep then it takes D-357, if it is
shallow and wide then you need the CR2032. Note that the Pilade series
takes 2 x LR43. All batteries are available online at
www.kalinkaoptics.com or most anyplace where watch & electronics
batteries are sold
RETICULE
Rangefinder
The rangefinder works by placing the target (1.7 m or 5’8” in height)
between the horizontal and the top reclining lines with the numbers. On
the reclining line locate the number closest to the point where the target
touches the line. Multiply that number by 100; this is the distance to the
target in meters. 1 meter = 1.11 yards.
Windage scale / rangefinder
Windage scale can be used to make horizontal adjustments or as a
rangefinder. Shifting the aiming point by one division left or right will
move the point of impact by 10cm / 4” for every 100m / 333 ft of the
distance. The distance to the target can be determined by assuming that a
1m / 3’4” wide/long object fits between the small divisions at 100 m /
333 ft.
Aiming chevrons
The chevrons are designed to adjust for bullet drop of ANY caliber,
provided you know the ballistics of the ammo. If the top chevron is
zeroed at 100 yards, aiming with 2nd, 3rd and the 4th will drop the
aiming point by 1.2”, 2.5” and 4” accordingly for each 100 yards of the
distance.
Diopiter Adjustment (Focus Ring)
Many models have a binocular-style diopiter adjustment from –3 to +3
D. To adjust the scope to your eyesight release the locking ring by
turning it, adjust the eyepiece and tightly secure the locking ring.
Eye Relief
Because of the safety considerations associated with proper eye relief we
recommend that you mount your scope as far forward as possible. With
the scope as far forward as possible hold the rifle in your normal
shooting position. Variable power scopes should be set at the highest
magnification for this process. Slowly move the scope back towards you
until you can comfortably see the full field-of-view while in a shooting
position. Position your scope here for maximum eye relief. It is always
helpful to take a shooting position in the kneeling, seated, prone and
upright positions both uphill and downhill to ensure the best mounting
position for proper eye relief. Be aware that if a scope is mounted too far
to the rear, the eyepiece can injure the shooter’s brow. Shooting at an
uphill angle also increases this hazard because it shortens the distance
between the brow and the rear of the scope.
Sighting and Zeroing the Scope
IMPORTANT! Before mount-firing the scope, remove the windage and
the elevation turret covers. Tightly secure the gun at the firing station
using sand bags or special sighting rack to avoid shooter related
inaccuracy. After trial shots (4-5) have been made, adjust the reticule
position using the windage and the elevation turrets to reflect the average
striking point. One or two shots may deviate from the shot group, this is
normal, disregard those shots, and make adjustments based on the
concentrated group of shots. After the reticule has been adjusted to
deliver reasonable firing accuracy you’ll need to set the scale on the
elevation and the windage turrets back to the “0” position without
8
5
actually changing the set windage and elevation settings. To do so release
the two top screws and very carefully, without turning the turrets, adjust
the scale (little top disk ONLY) by aligning the “0” mark on the scale
with fixed mark on the scope. Tighten the screws and put the turret
covers back on, you are done. The scope is ready for use.
ATTENTION: The adjustment range for the windage and the
elevation turrets may exceed one full turn in either direction
resulting in having the scope being set to false “0”. In this case the
reticule will be significantly shifted off the center and won’t
represent the actual results of sighting. To avoid this, refrain from
excessively turning the turrets.
Sighting and Zeroing the Scope in Greater Depth
While aiming you must put your eye on the optical axis of the scope so
the image appears flat and without shadows at the edges. Using the soft
rubber eyepiece available with most models will help you to properly
align your eye to the optical axis and ensure the proper eye relief. If
included, use the rubber sunshade for shooting in bright daylight
conditions to prevent sunshine directly striking the objective lens causing
excessive glare.
The first step is to ensure that the rifle is zeroed with the iron sights. Also
this process is much easier with little wind effects so do this on a day that
isn't windy if possible. Set up the rifle on a firm and solid base and aim
at a target with the iron sights at a distance of 50 meters. Zero the scope
at 50 meters or 100 meters by using the scope. Set the windage to "0".
Now see if the aiming reticle is lined up with the target. If it is, then your
sight is considered an adjusted one. If it is not in line then rotate the dials
(range and/or windage as necessary) to bring the reticle onto the target.
At this point if you have to reset your dials so that they show ‘0’ when
you are zeroed for a target 50 meters away without changing the position
of the aiming reticle.
To move the reticle to the shot (assuming you can keep the rifle in the
same position as you make adjustments - otherwise trial and error will do
the same thing...just take more ammo) you have to loosen the two screws
on the top of each dial. Loosen the screw but do not remove them. As
an example we will walk through the above example. We need to move
the reticle over to the right since the rifle is hitting to the right. Rotate the
windage dial clockwise until the reticle is approximately under the bullet
hole when looking through the scope (make sure the silver part of the dial
with the numbers on it does not move (I had to hold the range dial with
pliers)). If you have to pick up the rifle to do this or otherwise can't keep
it on target you will have to do guess work when moving the reticle.
This may cause you to overcompensate but several iterations of firing
and adjusting should zero the rifle. Then rotate the range dial
counterclockwise to raise the reticle. Once you believe that you are close
to where the bullet hit, screw the silver screws back in and repeat firing
the rifle. Repeat this process until the rifle is zeroed.
Aiming and shooting at fixed targets.
Adjust the elevation turret or chose the appropriate chevron with respect
to the range to the target and the ballistics of the ammo being fired.
Assuming there is no cross wind, keep the windage turret at the “0”
6
7