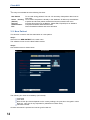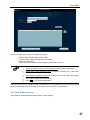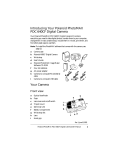
1
PhotoMAX
User Manual
Version 3.0
PhotoMAX
2
PhotoMAX
Section I - INTRODUCTION
1. General Information.................................................................................................6
1.1. How to Use this Manual........................................................................................6
1.2. Principle of Operation ..........................................................................................6
1.3. PhotoMAX Software ............................................................................................7
1.4. How to Start the Software ....................................................................................7
Section II - SOFTWARE MANUAL
2. Software Installation ..............................................................................................10
3. PhotoMAX Software ..............................................................................................13
3.1. Main Menu .........................................................................................................13
3.2. New Patient .......................................................................................................14
3.3. Select Existing (Patient) .....................................................................................26
3.4. Patient Menu Screen .........................................................................................27
3.4.1. Follow Up / Monitoring ....................................................................................28
3.4.1.1. Standard Follow Up / Monitoring .................................................................28
3.4.1.2. New image within Follow Up ........................................................................37
3.4.1.3. Compare Saved Images ..............................................................................37
3.5. New image .........................................................................................................38
3.6. e-m@il ...............................................................................................................39
3.7. Reports ..............................................................................................................40
3.8. Scoring ..............................................................................................................41
3.8.1 Manual Scoring (MoleAtlas ABCD and 7-Point rules).......................................42
3.8.1.1. ABCD-Score ................................................................................................42
3.8.1.2. Seven-Point Checklist ..................................................................................44
3.8.2. Automatical Scoring ........................................................................................46
3.8.2.1 TrichoScan ...................................................................................................46
3.8.2.2 MoleCount .....................................................................................................48
4. Services.................................................................................................................49
4.1. MoleAtlas ...........................................................................................................49
4.1.1. MoleAtlas – ELM (Review Reference Images) ...............................................50
4.1.2. MoleAtlas – Diagnosis (Review Reference Images) .......................................51
4.1.3. MoleAtlas – Self Assessment (Review Reference Images) ............................52
4.2. Database Backup ..............................................................................................56
4.3. Statistics .............................................................................................................57
4.4. Data Export ........................................................................................................59
4.5. Data Import ........................................................................................................61
4.6. Patient Management ..........................................................................................62
5. Administration .......................................................................................................64
5.1. Multi User Environment ......................................................................................65
5.2. Dummy and Diagnoses ......................................................................................67
5.2.1. Diagnosis configuration ..................................................................................67
5.2.2. Location Nomenclature ...................................................................................67
3
PhotoMAX
5.3. Display and Presentation....................................................................................68
5.4. e-mail Settings in PhotoMAX ..............................................................................68
5.4.1. email Address Book.........................................................................................68
5.4.2. e-mail SMTP Server Setup ..............................................................................69
5.5. Backup Settings..................................................................................................70
5.6. Languages..........................................................................................................71
5.7. Infobox................................................................................................................76
6. AllSkin Module ......................................................................................................72
6.1. Introduction ........................................................................................................72
6.2. Selecting the Diagnosis ......................................................................................73
6.3. Searching For Desired Diagnosis ......................................................................74
6.4. Settings ..............................................................................................................74
Section III - FAQ
7. Troubleshooting ....................................................................................................76
7.1. Problem Solving ................................................................................................76
7.2. Service Support .................................................................................................77
Ver. 3.0.20 EN
01.2009
4
PhotoMAX
PhotoMAX
USER MANUAL
Section I - INTRODUCTION
1. General Information.................................................................................................6
1.1. How to Use this Manual........................................................................................6
1.2. Principle of Operation ..........................................................................................6
1.3. PhotoMAX Software ............................................................................................7
1.4. How to Start the Software ....................................................................................7
5
PhotoMAX
1. General Information
Thank you for buying PhotoMAX, manufactured by the worldwide leader in digital epiluminescence
microscopy (DELM) and digital skin imaging.
PhotoMAX is using MoleMax technology developed in co-operation with the University of Vienna
Medical School, Department for Dermatology (Prof. Klaus Wolff, MD).
International patents are pending.
But PhotoMAX can also be effectively used as a documentation system for ALL Skin problems (e.g.
“before and after” laser treatments as well as the progress of psoriasis and acne treatments etc.).
1.1. How to Use this Manual
This manual consists of three sections. The first section describes the safety requirements and
provides general information about DELM and the system. The second section explains the
installation and the different functions of the PhotoMAX software. In the last section a troubleshooting
guide will help to answer the most frequently asked questions and to solve possible problems.
If you need further assistance please contact your local dealer.
The users of PhotoMAX have access to the Service-Hotline:
+43 1 318 69 90
Monday-Friday from 09:00 to 16:00 (CET), communication in German and English.
Or send an email to [email protected].
1.2. Principle of Operation
PhotoMAX software is an advanced software for digital skin imaging and documentation.
The hard disks of modern computer can store thousands of images and they are immediately
available for comparison. Therefore, simultaneous dermatologist/patient on-screen observation of
potential mole alteration is possible.
6
PhotoMAX
1.3. PhotoMAX Software
The PhotoMAX software version 3.0 is supported by Windows XP operating system (registered trade
mark of Microsoft).
The software was designed by doctors for doctors and not by computer specialists. Therefore, the
software is user-friendly and can be used without computer/software skills.
1.4. How to Start the Software
Turn your computer on. Start PhotoMAX software by double-clicking on PhotoMAX icon placed on the
desktop, unless it is already starting in case of automatic startup.
The software is ready to work when the main menu of the PhotoMAX software is visible on the screen.
Before switching off the computer always exit the PhotoMAX program first. Then click on the Start
button in the lower left corner and Shut down to log off the system. Choose the option Shut down the
computer? and confirm with YES.
7
PhotoMAX
Content
Page
PhotoMAX
USER MANUAL
Part II – SOFTWARE MANUAL
2. Software Installation ..............................................................................................10
3. PhotoMAX Software ..............................................................................................13
3.1. Main Menu .........................................................................................................13
3.2. New Patient .......................................................................................................14
3.3. Select Existing (Patient) .....................................................................................26
3.4. Patient Menu Screen .........................................................................................27
3.4.1. Follow Up / Monitoring ....................................................................................28
3.4.1.1. Standard Follow Up / Monitoring .................................................................28
3.4.1.2. New image within Follow Up ........................................................................37
3.4.1.3. Compare Saved Images ..............................................................................37
3.5. New image .........................................................................................................38
3.6. e-m@il ...............................................................................................................39
3.7. Reports ..............................................................................................................40
3.8. Scoring ..............................................................................................................41
3.8.1 Manual Scoring (MoleAtlas ABCD and 7-Point rules).......................................42
3.8.1.1. ABCD-Score ................................................................................................42
3.8.1.2. Seven-Point Checklist ..................................................................................44
3.8.2. Automatical Scoring ........................................................................................46
3.8.2.1 TrichoScan ...................................................................................................46
3.8.2.2 MoleCount .....................................................................................................48
4. Services.................................................................................................................49
4.1. MoleAtlas ...........................................................................................................49
4.1.1. MoleAtlas – ELM (Review Reference Images) ...............................................50
4.1.2. MoleAtlas – Diagnosis (Review Reference Images) .......................................51
4.1.3. MoleAtlas – Self Assessment (Review Reference Images) ............................52
4.2. Database Backup ..............................................................................................56
4.3. Statistics .............................................................................................................57
4.4. Data Export ........................................................................................................59
4.5. Data Import ........................................................................................................61
4.6. Patient Management ..........................................................................................62
8
5. Administration .......................................................................................................64
5.1. Multi User Environment ......................................................................................65
PhotoMAX
Content (continued)
Page
Part II – SOFTWARE MANUAL
5.2. Dummy and Diagnoses ......................................................................................67
5.2.1. Diagnosis configuration ..................................................................................67
5.2.2. Location Nomenclature ...................................................................................67
5.3. Display and Presentation....................................................................................68
5.4. e-mail Settings in PhotoMAX ..............................................................................68
5.4.1. email Address Book.........................................................................................68
5.4.2. e-mail SMTP Server Setup ..............................................................................69
5.5. Backup Settings..................................................................................................70
5.6. Languages..........................................................................................................71
5.7. Infobox................................................................................................................76
6. AllSkin Module ......................................................................................................72
6.1. Introduction ........................................................................................................72
6.2. Selecting the Diagnosis ......................................................................................73
6.3. Searching For Desired Diagnosis ......................................................................74
6.4. Settings ..............................................................................................................74
9
PhotoMAX
2. Software Installation
IMPORTANT
To install the PhotoMAX software you need to have administrative
privilege. Please contact your computer administrator for obtaining a
temporary administrator password.
The PhotoMAX software requires Windows XP operating system. The
other operational systems are not fully supported.
Step 1:
Put the CD-ROM labeled PhotoMAX Version 3.0 into the computer’s disk drive.
Step 2:
Installation procedure will start automatically.
Select “Start with PhotoMAX Installation”. Alternatively select how to install to see detailed installation
instructions.
Step 2a:
If installation screen does not come automatically (computer autorun function is disabled) press Start
button in the left lower corner on the screen and select the option Run.
Type the following path (including the quotation marks): “[disk drive]: \photomax_3.exe” ([disk
drive]: is the letter of the disk drive on the computer) and confirm with OK. The installation process will
be started.
10
PhotoMAX
Step 3:
Following Screen will appear:
Select Next to install fresh copy of
PhotoMAX.
Select Checkbox “Search for Previous
PhotoMAX 2.2. Installation” if there is
PhotoMAX 2.2 installed on this computer.
In this case old installation will be
updated and all patients and images
will be transferred to the new, PhotoMAX
version 3.0 format.
Step 4:
Accept the License Agreement and
Click next.
Step 5:
Select the destination folder for PhotoMAX. Normally PhotoMAX is installed into following folder:
“C:\Program Files\Derma Medical Systems\PhotoMAX”, but any other folder can be used too,
providing there is enough disk space on the hard drive.
Also select destination for PhotoMAX Atlas Images.
Step 6:
In next two steps advanced options might be selected.
- Select already activated external modules (TrichoScan or MoleCount) if already present (only in case
of update)
- Select Language for the software. (Country settings and database style can be selected too). If there
is requirement for not displaying the Patient name on the screen select “European conformity
Regulation” option.
Step 7:
Ready to install message is displayed
Click Install to start with the installation.
Installation starts and progress bar is
displayed.
After PhotoMAX and MoleAtlas images
are installed AllSkin database needs to
be installed. Select Next to do so.
Step 8:
After installation of AllSkin database
PhotoMAX creates all the necessary files
and icons on the hard drive, updates the
database (if update option was selected)
and the installation is completed
Step 9:
Restart the computer. PhotoMAX is ready for use !
11
PhotoMAX
When starting the software for the first time after the installation or upgrade the software prompts for
PhotoMAX Authorization Code:
This is to be obtained on one of following ways:
Online in Derma Medical Systems Online Shop, per Fax, thru the authorized PhotoMAX Plus dealer or
directly by calling Derma Medical Systems service hotline. Please note the Site Code as well as CD
Registration code if purchased CD was obtained thru the dealer.
By clicking button Purchase, following options are offered:
Use appropriate button to either purchase online, or to get detailed information how to do it by using
an alternative option.
If you experience problems with the installation of the software please contact your local dealer or the
software hotline.
12
PhotoMAX
3. PhotoMAX Software
After Authorization Code is obtained from Derma Medical Systems, PhotoMAX is ready for use!
3.1. Main Menu
It is recommended to read the heading "General Information" from chapter 1.1. to 1.4. of this
handbook prior to using the software. PhotoMAX can be used even with basic computer knowledge
only.
Before getting started please make sure that all components of the system are switched on, including
Monitor and Printer (if available). During routine use, always leave these individual units on.
The system is ready for use when the Start Menu is shown, as on the image below.
Log On / Log Off
If different user profiles are defined each user needs to log on with his user name and his password at
the log on screen. Select the down arrow to open the list box and select a user name from the list.
Enter the appropriate password and select LOGON to enter the Main Menu.
After having finished working with the PhotoMAX system the user needs to log off. To do so, select
the symbol LOG OFF in the Main Menu.
(Contact your dealer if You wish to activate “User Profiles")
13
PhotoMAX
The easy-to-use icons have the following functions:
New Patient
Select Existing
(Patient)
Services
Administration
Exit
To be used during patient’s first visit. All necessary data patient data must be
input here.
To be used if the patient is already in the database. All follow up examinations
of patient and all other patient related functions are located in this menu
Includes all services such as Backup, Patient Edit, Export/import or Statistics
Complete PhotoMAX administration tools
Close PhotoMAX software and exit to Windows
3.2. New Patient
This function is used for the first examination of a new patient.
Step 1:
Select the icon NEW PATIENT in the main menu.
The software moves on to the New Patient window.
Step 2:
New Patient screen is shown below:
The following four lines are mandatory (red colored):
Last name
First name
Date of birth (the format depends on the country settings, the year has to be typed in with 4
digits e.g. 1950, this is very important for patients born before 1929)
Insurance number
All other information is optional and can be typed in later too.
14
PhotoMAX
IMPORTANT
Two first or last names of a patient have to be typed with space between the
names.
To move from one line to the next, move the cursor into the specific line and
press the left mouse button or press the TAB key.
The Insurance number looks different in different country settings.
Additionally face image can be acquired by clicking on the appropriate icon on the top right side. File
Import, Direct Import from the camera or TWAIN Import can be chosen to acquire face image. This
image is shown in the search screen for easier patient recognition.
Detailed patient data such as address, email, phone number etc can be set up in second card
CONTACT.
IMPORTANT
The appointment for a follow-up visit needs to be entered in this function.
Select ADDITIONAL and enter the date of the follow-up visit. Only a defined follow-up visit date allows
the software to check whether the patient has been seen for his scheduled appointment by using
patient menu in SERVICE screen.
Apart from follow-up date family relation index and patient related custom comment can be set up in
this screen.
REMEMBER
Two first or last names of a patient have to be typed with space between the
names.
It depends on the country settings how to enter the date of birth. Always use 4
digits for the year e.g. 1950. This is very important for patients born before
1929.
To calculate the Risk Group the patient falls into, select the option
MELANOMA RISK and answer the four questions together with the patient.
The result is immediately displayed at the bottom of the screen. There are four
possible risk groups (low, average, increased and high risk).
SHORTCUTS:
Press Tab: to move from one line to the next
Press Esc: to return to the main menu
Press F10: to return to the Main Menu
To edit or delete a patient record SERVICE function must be used. This function is accessible from
the start screen.
IMPORTANT
There is no Undo feature.
After patient record is set up patient details are shown on the top right side of
the screen!
15
PhotoMAX
Step 3:
Select SINGLE IMAGE FILE IMPORT to store
the patient in to database and to start importing
images for this patient.
Alternatively MULTI IMAGE FILE IMPORT,
DIRECT IMPORT FROM CAMERA or TWAIN
IMPORT can be selected as image source by
using the arrow on the right side of LIVE IMAGE
button.
Also Patient Menu may be entered from this
screen without taking the image. For this press button SAVE & PATIENT MENU.
Proceed to Step 4.
Step 3.1 (Taking images by using SINGLE IMAGE IMPORT):
Select SINGLE IMAGE FILE IMPORT to store the patient in to database and to start importing images
for this patient, image by image. Following screen appears:
Simply select the file location of the image to be imported and confirm if image is micro image or
macro image by clicking on IMPORT AS MICRO or IMPORT AS MACRO buttons.
Current path location is shown in the path bar on the top of the screen and selected image preview is
displayed in the big frame. Preview of additional images is displayed in thumbnails on the right side.
Arrow buttons on the top are used for the standard Windows Explorer navigation. The button with
arrow refreshes the Explorer tree.
The functionality of last 5 icons (from left to right) is following: “Show images from the same folder as
thumbnails”, “Display only detailed list of the images from the same folder”, “Image file properties
(properties of selected image)”, “Display image in external associated viewer” and “Open containing
folder in Windows Explorer (in external window)”.
If you want to delete image after import click the checkbox “Delete Image After Import”
16
PhotoMAX
To enter image saving screen press IMPORT AS MICRO (for ELM images) or IMPORT AS MACRO
(for macro / close-up images). Image saving screen is activated.
Proceed to Step 4.
Step 3.2 (Taking images by using MULTI IMAGE FILE IMPORT):
This function enables import of more images at once. It is included in PhotoMAX software mainly to
keep compatibility to previous programs, MoleMax Foto (versions 1.x) and PhotoMAX (versions 2.x)
In order to complete Multiple Image Import, all images have to be taken first, then marked one by one
on a PhotoMAX location sheet and then finally transferred into the database. Sometimes this process
might be time consuming and it may contain big number of images. Very helpful tool to exclude
possible mistakes is PhotoMAX Empty Sheet Printout.
PhotoMAX Empty Sheet can be printed out from Patient Menu of each Patient by simply clicking on
the button “Print Empty Dummy Sheets” and it looks as follows:
After empty sheet is printed simply take images and mark them one by one on the appropriate location
following the order the images were taken. Use different markers for micro and macro images.
Select now MULTI IMAGE FILE IMPORT to store the patient in the database and start importing
multiple images for this patient. Following screen appears:
17
PhotoMAX
After all images are taken and marked on printed sheet, the next step is to mark all these images on
the PhotoMAX Dummy Localization Sheet as shown above (Mark only images that should be
imported).
The best option is to localize them in opposite order as when they were taken. This way the latest
image is shown as first one in the selection list, second latest as second one etc.
Click TRANSFER IMAGES button and TRANSFER screen appears:
18
PhotoMAX
Select the path where images for import are stored. This can be any location on the computer such as
local or external drive, floppy, CD, DVD, flash card or network drive. Latest image is shown as first
one. If more than 8 images are present on the source destination, scrolling arrows are available.
Choose the appropriate image number (from dropdown menu above the image) to assign the image to
localization marked on the PhotoMAX Dummy sheet.
If images should be deleted (on their original location) after import click the checkbox “Delete original
files after import”.
Click on TRANSFER button to complete the transfer and confirm with SAVE & CLOSE to end the
session. All images are stored and localized now. In order to assign diagnose and see the images use
Patient Menu.
IMPORTANT
Mark localization of all images on the PhotoMAX localization sheet before
import. Do it in the opposite order as when taking images
Step 3.3 (Taking images by using DIRECT IMAGE IMPORT FROM DIGITAL CAMERA):
Select “Direct image import from digital camera” to store the patient into database and to enter
direct import from the camera. This is available only if the images are stored in the camera memory
and if the camera is recognized from the computer as digital camera.
Following screen appears:
Select the camera in the dropdown menu in the top left corner to display the images stored in the
camera. Select the image and choose to import it as a micro (click the button OK-MICRO) or macro
(click the button OK-MICRO) image.
Proceed to step 4.
IMPORTANT
Direct import from digital still camera is available only for cameras that are
recognized from the computer as “digital cameras” i.e. supports STI/WIA
interface.
19
PhotoMAX
Step 3.4 (Taking images by using IMPORT FROM TWAIN COMPLIANT DEVICES):
This is the special option used for import from TWAIN compliant devices such as Scanner, very old
digital cameras or similar.
When in New Patient input mask screen select “Import from TWAIN compliant devices” to store
the patient and enter TWAIN import screen. This screen can look different depending on which
TWAIN device is used. Appropriate driver must be installed on the system.
After image is obtained from the TWAIN source take the picture over by clicking on OK & Edit button
and then select OK-MICRO for import as micro image or OK-MACRO for import as macro image.
IMPORTANT
In order to use TWAIN import correctly TWAIN driver must be installed on the
system.
Step 4 (Saving image):
After image is acquired by either using LIVE IMAGE or any FILE IMPORT method (apart from Multi
Import) it must be localized on the body before it is saved into the patient database. Optional
comments and diagnose can be assigned to the image. This is done in DETAILS screen as will be
shown on next three images below.
PhotoMAX systems differ between three basic types of the images: MACRO, CLOSE-UP and MICRO
images.
IMPORTANT
PhotoMAX system differs between three type images: Macro images, CloseUp images and Micro (ELM) images
All Images in the database must be localized and this is only mandatory action
in the PhotoMAX software
IMPORTANT
After image is acquired it must be localized before it is saved. This applies for
all image acquisition methods but Multi Image Import
Images acquired thru Multi Image Import are localized before they are
imported
(1) Macro Image
Defining the location
Specify the location by framing the corresponding body region on the Body Figure. Note that the Body
Figure can be viewed from various directions. There are also separate displays of the head, the hands
and the feet. To see the different displays use the scroll icons under the Body Figure. As soon as the
position is selected, the corresponding location text will automatically appear in the Location bar.
20
PhotoMAX
REMEMBER
If a wrong position was chosen simply redo. If the Body Figure is scrolled after
a location is specified, the location needs to be defined again.
To alter the pre-defined frame move the cursor into the frame until it changes
to a black 4-arrow symbol. Keep the left mouse button pressed to move the
whole frame. To change the size of the frame move over the sidelines until a
two-arrow symbol appears. Keep the left mouse button pressed and move the
mouse to change the width or the height of the frame.
Additional information can be written in the comments box under the Location
bar. Move the mouse into the box and press the left mouse button to be able
to type in your comments.
As a standard procedure all images are saved in a lossless compressed
mode. This saves time and storage capacity.
Please note that only image localization is mandatory and required! All other definitions such
as diagnose, comment etc can but do not have to be determined!
Diagnose assignment is same for all three types of image. See Giving a Diagnosis below for more
details
Select button SAVE to save the image. The image is stored into the database and PhotoMAX
software returns to the previous screen and the next image of this patient can be taken.
Optionally, following functions can be performed in DETAILS screen:
Giving a diagnosis:
Usually the diagnosis is assigned immediately upon image acquire, but there is also the possibility to
enter it later, whenever DETAILS screen is used.
21
PhotoMAX
To assign the diagnosis, simply select one of the diagnosis buttons and select one of pre-defined
diagnosis by double-clicking on it, and then confirm it with SELECT DIAGNOSIS button! Or simply
start to type your diagnosis into the diagnose text field: “MY DIAGNOSIS”. Multiple diagnosis can be
entered into this box.
There are five Diagnosis buttons: Diagnosis (contains all given diagnosis), Favorites (list of your
favorite diagnosis), Recent (list of all recent given diagnosis), All (list of all diagnosis) and All Skin
module (external module with the list of all diagnosis including image examples) For more information
about All Skin module see Chapter ALL SKIN.
To pre-define and customize the list of diagnosis use “Diagnosis Configuration” option located in
ADMINISTRATION.
SHORTCUTS:
Press RB: to get to the next display of the Body Figure (the cursor must be
inside the Body Figure)
Keep RB or LB Pressed on the scrollbar: all displays will be scrolled through
automatically until the button is released
Press F1-F8: to enter the Customized diagnoses (see "Administration →
Diagnoses Configuration")
If there is intention to send image over email check the email checkbox. This allows user to search
later easily for images to be sent.
Additionally any type of document can be attached to the image record. Simply click the button
ATTACH DOCUMENTS” and file import screen will open. Document is stored as an addition to the
image in the database. If original of the document should be deleted on the previous location after
import simply select “Delete original documents after import”
Full screen view of the image can be recalled by clicking on to image thumbnail on the top left corner
of the DETAILS screen.
In the Full Screen view image can be seen in the full screen size, can be zoomed in and out, scrolled
in all directions as well as seen in a real size view (pixel per pixel view), by simply selecting
appropriate icon on the right side of the image.
(2) Close-Up Image
A close-up image is an additional macro image, which covers only a part of a pre-taken macro
overview image.
To take a close-up image, repeat the same procedure (Step 3) as for the macro image.
Defining the location
IMPORTANT
A close-up image needs to be defined on the corresponding macro image and
not on the Dummy view, the software recognizes automatically that this image
is an close-up image and mathematically evaluates the localization on the
Dummy.
Select MACRO and choose the appropriate macro overview image. If there
are more than four macro images available, use the scrollbar (+/-) to see the
following / previous ones. Open the corresponding macro image by selecting
it. Mark the appropriate region on the macro image and select OK to return to
the New Diagnosis window.
Macro localization screen looks as follows:
22
PhotoMAX
REMEMBER
If a wrong position was chosen simply redo. If the Body Figure is scrolled after
a location is specified, the location needs to be defined again.
To alter the pre-defined frame move the cursor into the frame until it changes
to a black 4-arrow symbol. Keep the left mouse button pressed to move the
whole frame. To change the size of the frame move over the sidelines until a
two-arrow symbol appears. Keep the left mouse button pressed and move the
mouse to change the width or the height of the frame.
Additional information can be written in the comments box under the Location
bar. Move the mouse into the box and press the left mouse button to be able
to type in your comments.
As a standard procedure all images are saved in a lossless compressed
mode. This saves time and storage capacity.
Please note that only image localization is mandatory and required! All other definitions such
as diagnose, comment etc can but do not have to be determined!
Diagnose assignment is same for all three types of image. See Giving a Diagnosis above for more
details. All other functions such as Full Screen view, email and Attach Documents are identical to
those assigned to the macro image.
SHORTCUTS:
Press RB: to get to the next display of the Body Figure (the cursor must be
inside the Body Figure)
Keep RB or LB Pressed on the scrollbar: all displays will be scrolled through
automatically until the button is released
Press F1-F8: to enter the Customized diagnoses (see "Administration →
Diagnoses Configuration")
Select button SAVE to save the image. The image is stored into the database and PhotoMAX
software returns to the previous screen and the next image of this patient can be taken.
23
PhotoMAX
(3) ELM Image
To take an ELM image follow the image taking guidelines in Step 3 using the import already taken
ELM image.
Defining the location on the Body Figure:
Locations of the micro images are stored differently from locations of macro and close-up images.
While macro and close-up images are marked and localized as an area on the body, micro images
are determined and localized as a single spot on the body.
After taking the micro image following DETAILS screen appears:
In order to localize micro image specify the location by marking the corresponding position of the body
where the lesion is situated. Note that the Body Figure can be viewed from various directions. There
are also separate displays of the head, the hands and the feet. To see the different displays use the
scrollbar under the Body Figure
As soon as the position is selected, the corresponding location text will automatically appear in the
Location bar.
REMEMBER
If a wrong position was chosen simply redo. If the Body Figure is scrolled after
a location is specified, the location needs to be defined again.
Smaller gray crosses mark other lesions that were localized on the same
Body Figure display. This allows localizing the lesion in relation to other
lesions on the body.
Defining the location on a Macro or Close-Up Image
If a corresponding macro or close-up image was taken earlier, the location of the lesion can, in
addition to the localization on the Body Figure, also be defined on that image. Select MACRO button
in the top left corner of the DETAILS screen to define the lesion on a macro or close up image.
The macro images are displayed in the left column, the close-up images in the right column, as
showed on the image above.
24
PhotoMAX
If there are more than two images available, use the scrollbar underneath the appropriate column to
see the next / previous images. Choose the appropriate macro or close-up image and select it. Mark
the corresponding lesion on the macro or close-up image and select OK to return to the New
Diagnosis window.
In order to make sure that the position is set on the correct macro or close-up image, the other images
linked to the selected image are displayed to the right. If a macro image is selected the related closeup images defined on the macro overview image are listed. In the large view of the macro image the
frames showing the positions of the close-ups as well as their image numbers are displayed. To
localize the ELM on a better-suited close-up image select the appropriate close-up on the right and
mark the ELM position on it.
If a close-up image is selected the related macro overview image and other close-ups also located on
that macro image are listed. In the large view of the macro image the frames showing the positions of
the close-ups as well as their image numbers are displayed. To localize the ELM on a better-suited
close-up image or directly on the macro overview select the appropriate image on the right and mark
the ELM position on it.
REMEMBER
If a wrong position was chosen simply redo.
Gray circles mark other lesions that were localized on the same macro or
close-up image.
Please note that only image localization is mandatory and required! All other definitions such
as diagnose, comment etc can but do not have to be determined!
Diagnose assignment is same for all three types of image. See Giving a Diagnosis above for more
details. All other functions such as full Screen view, email and Attach Documents are identical to those
assigned to the macro image.
One additional function can be applied to micro images.
Field “EXCISION PLANNED” marks that this image should be cut out in the near future. It allows user
to search later easily for images to be cut out.
Select button SAVE to save the image. The image is stored into the database and PhotoMAX
software returns to the live image and the next image of this patient can be taken.
REMEMBER
If the ELM image has not been defined on the Body Figure and/or on a
macro/close-up/body mapping image the corresponding button is highlighted
in red. After the definition the button turns white.
The examination date is preset.
Additional information can be written in the comments box under the Location
bar. Move the mouse into the box and press the left mouse button to be able
to type in your comments.
As a standard procedure all images are saved in a lossless compressed
mode. This saves time and storage capacity.
To evaluate the lesion interactively according to the ABCD method or the
7-Point rule select SCORING. Same applies if using external TrichoScan
module.
Step 5 (Finalizing the patient):
After all images are recorded exit to the Patient Menu Screen either by using F10 or Escape button. In
the patient menu screen further actions (described later in this manual) can be performed.
If no other actions with this patient are planned simply exit to the main menu by using F10.
25
PhotoMAX
3.3. Select Existing (Patient)
From second patient visit on option Select Existing (Patient) my be used. No matter if patient record
has images or not, if the patient is already in the database all patient-related functions can be
performed from Patient Menu screen.
Existing Patient can be selected either directly from the Main Menu or over advanced search functions
by clicking the button SELECT EXISTING
(1) Fast patient search directly from the Main Menu
Input the patient data in one of the search fields and all matching patients will show up in the list
automatically. If the patient is highlighted pop-up balloon with additional data will be shown. If there is
face image acquired, this image will be shown right next to search fields.
Select the Patient and choose one of following options:
-
Select Patient to enter Patient Menu screen.
(Further actions will be selected within this screen)
Follow Up / Monitoring
(Follow Up screen is shown directly skipping Patient Menu screen)
The bar at the top of the screen indicates the selected and active patient. All functions entered will be
saved to this patient’s record. The date of the last visit of this patient is also displayed.
(2) Advanced Search for a patient
Select button SELECT EXISTING from the Main Menu. SIMPLE patient selection screen with
following options is displayed:
Either select the button of the first letter of the patient’s Last Name or
Type in parts of the last name and/or first name and/or insurance number in the
corresponding line and select SEARCH or
Clear all input fields and select SEARCH to search the complete patient list.
26
PhotoMAX
Select the Patient and choose one of following options:
-
Select Patient to enter Patient Menu screen.
(Further actions will be selected within this screen)
Follow Up / Monitoring
(Follow Up screen is shown directly skipping Patient Menu screen)
SHORTCUTS:
Simply move the mouse over the patient name and patient is highlighted!
Double-click on the patient’s name: to select the patient and to enter the
Patient Menu screen
Face image of highlighted patient is shown in the box right next to the patient
list (if available)
Press Esc: to return to the Main Menu
Press F10: to return to the Main Menu
The bar at the top of the screen indicates the selected and active patient. All functions entered will be
saved to this patient’s record. The date of the last visit of this patient is also displayed.
3.4. Patient Menu Screen
After patient is selected following Patient Menu screen appears.
27
PhotoMAX
This is main and central patient switching point that contains all the necessary functions for a full and
comprehensive patient management. All important functions can be accessed from this menu.
The bar at the top of the screen indicates the selected and active patient. All functions entered will be
saved to this patient’s record. The date of the last visit of this patient is also displayed.
The easy-to-use icons have the following functions:
Single Image Import/
Multi Image Import/
Direct Import/TWAIN
Follow Up /
Monitoring
Scoring
e-m@il
Reports
Function for adding images of new moles to the existing patient
All follow up examinations of a patient (follow up of lesions, follow-up
macro and close-up images as well as new images of new lesions)
Interactive evaluation of the lesion according to the ABCD method or the
7-Point. Also to apply external TrichoScan and MoleMapping modules for
automatical image evaluation.
Transmission of images and data files via Email
Printout for documentation
3.4.1. Follow Up / Monitoring
This is essential function of the PhotoMAX and is used for all follow-up visits of a patient.
Select Follow Up button (second icon from the top on the left side) in the Patient Menu for this
function!
3.4.1.1. Standard Follow Up / Monitoring
That includes follow-up images of already examined ELM, close-up or macro images as well as new
ELM, close-up and macro images that were not taken at the first visit. Furthermore detailed evaluation
of the development of one lesion over time with its details is accessible thru Follow-Up option.
In the Follow-Up mode it is not only possible to compare two stored images but also to compare any
stored image with an actual image.
28
PhotoMAX
IMPORTANT
Always take new images of already examined lesions or body regions within
the Follow-Up function. Only that gives the possibility to view all images of a
lesion or a body region, taken over a period of time, in the picture gallery (see
“History”).
Step 1 (Image selection for Follow-Up):
Select the button FOLLOW UP in the Patient Menu. Depending on the individual setting the software
moves on to the 3x3, the Macro and Close-Up images, or the Dummy display of the patient’s sheet.
Macro and Close-Up images
Display
3×3 Display
Dummy Display
IMPORTANT
All image of the patient are visible only in 3x3 mode
Only micro or macro and close-up images are visible in dummy and
macro/close-up modes respectively
Previous recordings (old pre follow-up images) are visible only in fourth
column
Within the Follow Up screen it is very easy to switch fast between these three views. This is simply
done by clicking on appropriate button located in the top right corner.
3×3 Display ....................................................................................................................................
In the 3×3 Display, the macro images are displayed in the left column, the close-up images in the
center column and the ELM images in the right column. Each row shows a specific link between a
macro image and/or a close-up image and/or an ELM image. The images are sorted descending by
the examination date of the ELM images. Use the arrows at the right bottom and the left top to see the
next / previous images.
In the fourth column history of selected image is displayed. If there are more than three recordings in
the history scrolling arrows are visible.
REMEMBER
The green line shows where the ELM image is located on the
corresponding macro or close-up image, respectively where the close-up
image is located on the corresponding macro image.
If the ELM image was not defined on a macro image the corresponding
Body Figure (Dummy) position is displayed.
Above the columns the total numbers of the different Macro, Close-Up
and ELM images in the patient’s file are displayed.
If more information about an image is needed or a correction has to be
made, select the image and select DETAILS.
The first number in brackets on top of each image indicates the picture
number; the second how many follow-ups of this image have already
been taken.
The images of each image type (macro, close-up or ELM) are numbered
ascending within the patient file. The numbers are however not fixed, but
vary depending on the chosen sorting criterion.
29
PhotoMAX
Additional features
Finding and Selecting specific close-ups and ELM images
Sorting
Filtering specific images
Finding and Selecting specific close-up and ELM images
To select a specific close-up or ELM image move the cursor over the corresponding macro or closeup image and press RB.
IMPORTANT
Selecting specific close-up and ELM images
To select a specific close-up or ELM image move the cursor over the corresponding
macro or close-up image and press RB
Selecting a specific ELM image
If more than one ELM image was defined on the same macro or close-up image it might be useful to
enlarge the specific image and directly select the lesion that should be followed-up. This is done by
right clicking this image. Image is displayed in full screen with ELMs (and Close-Ups) localized on this
image shown in white. Select appropriate image for Follow-Up by clicking on it, it becomes green and
mouse jumps to OK. Select OK to return. The selected image is highlighted and ready for Follow-Up.
Sorting
It is possible to sort the images descending by the macro image examination date, the close-up image
examination date or the ELM image examination date (default setting). Select Macro, Close-Up, or
ELM buttons located on the top to see all images sorted from the last image taken to the first image
taken according to the examination dates in that column. The respective button above the columns is
highlighted.
Filtering specific images
In the case of patient files with many images it can be helpful to have only images of a specific
category displayed to find a specific image more easily. The following categories can be selected:
All images (default setting)
Images taken at Last Visit
Images with Pending Diagnoses
Lesions at Risk (not available in the “Macro and Close-Up images” display)
Planned Excisions (not available in the “Macro and Close-Up images” display)
Images selected for Email transfer
Macro and Close-Up images Display .........................................................................................
In the Macro and Close-Up images display, only the macro and close-up images of this patient are
shown. The macro images are framed in white color, the close-up images in green. The latest macro
is displayed on the left top corner. The other macros follow to the right in descending order according
to their image number. If close-ups are defined on a macro overview image they are shown right after
the corresponding macro. Use the arrows at the right bottom and the left top to see the next / previous
images.
30
PhotoMAX
REMEMBER
The green frames show where the close-up images are located on the
corresponding macro image.
On top of the sheet the total numbers of the different Macro and Close-Up
images in the patient’s file are displayed.
If more information about an image is needed or a correction has to be made,
select the image and select DETAILS.
The first number in brackets on top of each image indicates the picture
number; the second how many follow-ups of this image have already been
taken.
The images of each image type (macro or close-up) are numbered ascending
within the patient file. The numbers of macro images are displayed in white,
the numbers of the close-ups in green.
Additional features
Selecting a specific close-up image
Filtering specific close-up images
Selecting a specific macro image
Filtering specific macro images
Selecting a specific close-up image
If more than one close-up image was defined on the same macro image it might be useful to enlarge
the specific image and directly select the close-up image that should be followed-up. To select a
specific close-up move the cursor over the corresponding macro overview image and press RB to
enlarge it. Select the specific close-up. The selected image appears with green border. Select OK to
return. The selected image is highlighted.
Filtering specific close-up images
In the case of patient files with many close-up images it can be helpful to have only images of a
specific category displayed to find a specific image more easily. See above for the functions of the
various filters.
Selecting a specific macro image
Simply click on Macro image to select it. The image is highlighted and ready for Follow-Up.
Filtering macro images
In the case of patient files with many macro images it can be helpful to have only images of a specific
category displayed to find a specific image more easily. See above for the functions of the various
filters.
Dummy (Body Figure) Display ....................................................................................................
In the Dummy Display, only the locations of the ELM images of this patient are displayed either by
crosses or by circles if they correspond with a macro image. The selected lesion is indicated by the
dark blue cross or circle and is displayed in the right upper corner. To change to another Body Figure
display select the appropriate small view on the side and it is enlarged in the center.
31
PhotoMAX
REMEMBER
Lesions can only be selected in the enlarged view in the center.
The colors of the crosses and circles depend on the diagnosis given. White
ones indicate benign lesions; red ones lesions at risk, yellow ones indicate a
Diagnosis Pending and black ones mark excised lesions.
Above the body figure displays the total number of ELM images in the
patient’s file is shown. Within each Dummy Display a number shows how
many lesions are localized on this display.
If more information about an image is needed or a correction has to be made,
Select the image and Select DETAILS.
The first number in brackets on top of the selected image indicates the picture
number; the second how many follow-ups of this image have already been
taken.
Additional features
Filtering specific ELM images
Filtering specific ELM images
In the case of patient files with many images it can be helpful to have only images of a specific
category displayed to find a specific image more easily. See above for the functions of the various
filters.
Step 2 (Follow Up):
Same as when taking new image, Follow-Up can be obtained by any type of image import.
IMPORTANT
Every image of the patient is controlled (within follow-up) the same way as
originally imported.
Still, every image can still be controlled by using any other import type
(previous selection needed)
Step 2.1 (Follow Up by using Single Image Import):
Find and select the image to follow-up by using instructions from above. If this image was originally
obtained by Single Image import it is enough to select FOLLOW UP button to proceed. If this image
was obtained thru other option select Single Image Import option by first clicking arrow on the right
side of Follow-Up button and then click on the Single Image File Import .
Automatically the selected image is compared to the next image to import. To compare image to one
of previous recordings of the same image (one of pre follow-up images) simply select this recording in
the fourth column. Three latest recordings are visible in the Follow-Up screen, more images (if
available) can be accessed by clicking on the arrow icons.
32
PhotoMAX
Following screen appears:
Original image is displayed on the left side, and is compared to image selected for import.
Current path location is shown in the path bar on the top of the screen and selected image preview is
displayed in the big frame. Preview of additional images is displayed in thumbnails on the right side.
Arrow buttons on the top are used for the standard Windows Explorer navigation. The button with
arrow refreshes the Explorer tree.
The functionality of last 5 icons (from left to right) is following: “Show images from the same folder as
thumbnails”, “Display only detailed list of the images from the same folder”, “Image file properties
(properties of selected image)”, “Display image in external associated viewer” and “Open containing
folder in Windows Explorer (in external window)”.
If you want to delete image after import click the checkbox “Delete Image After Import”
To enter image saving screen press IMPORT MICRO IMAGE (for ELM images) or IMPORT MACRO
IMAGE (for macro / close-up images). Image saving screen is activated.
IMPORTANT
In Follow-Up screen software already knows if image is MICRO or MACRO,
so import is possible only in the same type as original image
Proceed to Step 3.
Step 2.2 (Follow Up by using Multi Image Import):
Find and select the image to follow-up by using instructions from above. If this image was originally
obtained by Multi Image import it is enough to select FOLLOW UP button to proceed. If this image
was obtained thru other option select Multi Image Import option by first clicking arrow on the right side
of Follow-Up button and then click on the Multi Image File Import.
33
PhotoMAX
IMPORTANT
Multi Image File Import is introduced into PhotoMAX software to keep
compatibility to older versions. Still it is a powerful import tool for options
where multiple images are taken offline.
Following screen appears:
When taking images offline, it is recommended to use Empty Patient Sheet as described in Chapter
3.2 under Step 3.2. Mark images taken one by one with digits and differ between micro and macro
images.
IMPORTANT
PhotoMAX Empty Sheet can be printed out from Patient Menu of each Patient
by simply clicking on the button “Print Empty Dummy Sheets”
Mark images selected for Follow-Up by simply clicking on them with LEFT BUTTON to select them
and with RIGHT BUTTON to confirm the selection for follow up.
It is possible to toggle between adding the New Images to the patient record (if new previously non
recorded lesions were also taken) and images to Follow-UP by clicking onto corresponding buttons
(NEW and FOLLOW-UP) located in the top left corner of the screen. Same applies to macro images.
Take care in which order the images were taken and try to mark them in opposite order since latest
image taken is always shown as first one in the transfer screen.
IMPORTANT
To remove the selection select the appropriate image in the list and click the
X icon located right next to the list
To select between Micro and Macro images choose DEFINE MACRO and
DEFINE ELM buttons
34
PhotoMAX
Click button TRANSFER IMAGES to open transfer screen:
Select the path where images for import are stored. This can be any location on the computer such as
local or external drive, floppy, CD, DVD, flash card or network drive. Latest image is shown as first
one. If more than 8 images are present on the source destination, scrolling arrows are available.
Choose the appropriate image number (from dropdown menu above the image) to assign the image to
localization marked on the PhotoMAX Dummy sheet. Localizations of old images to follow up are
shown with * mark in the end.
If images should be deleted (on their original location) after import click the checkbox “Delete original
files after import”.
After images are assigned previous recordings (for follow-up images) are displayed in the window
below original image for easy comparison.
Click on TRANSFER button to complete the transfer and return to previous screen.
Images transferred are now shown in the list with their thumbnail in front of the image. By clicking on
the thumbnail the selected image is shown in the windows in the top right corner of the screen for
easy comparison.
Confirm with SAVE & CLOSE to end the session. All images are stored and localized now. In order to
assign diagnose and see the images use Patient Menu.
IMPORTANT
Mark localization of all images on the PhotoMAX localization sheet before
import. Do it in the opposite order as when taking images
Images selected for Follow Up are displayed with * mark in the dropdown
menu
After follow-up image is selected previous recording is shown in the window
below
Proceed to Step 3.
35
PhotoMAX
Step 2.3 (Follow Up by using Direct Camera Import):
Find and select the image to follow-up by using instructions from above. If this image was originally
obtained by Direct Digital Camera Import it is enough to select FOLLOW UP button to proceed. If this
image was obtained thru other option select Direct Digital Camera Import option by first clicking arrow
on the right side of Follow-Up button and then click on the Direct Image Import From Digital
Camera.
Automatically the selected image is compared to the next image to import. To compare image to one
of previous recordings of the same image (one of pre follow-up images) simply select this recording in
the fourth column. Three latest recordings are visible in the Follow-Up screen, more images (if
available) can be accessed by clicking on the arrow icons.
Import screen identical to one shown in Chapter 3.2. Step 3.3 appears. The only difference is that
original image selected for follow-up is displayed in the top right corner and the type of the image
(MICRO or MACRO) is already known. Camera is displayed in the drop-down menu on the top left
corner of the screen
Select the image to import and confirm (OK-MICRO or OK-MACRO)
Image saving screen is activated.
Proceed to Step 3.
Step 2.4 (Follow Up by using TWAIN Import):
Find and select the image to follow-up by using instructions from above. If this image was originally
obtained by TWAIN Import it is enough to select FOLLOW UP button to proceed. If this image was
obtained thru other option select TWAIN Import option by first clicking arrow on the right side of
Follow-Up button and then click on the Import From TWAIN Compliant Device(s).
Automatically the selected image is compared to the next image to import. To compare image to one
of previous recordings of the same image (one of pre follow-up images) simply select this recording in
the fourth column. Three latest recordings are visible in the Follow-Up screen, more images (if
available) can be accessed by clicking on the arrow icons.
Import is identical to one described in Chapter 3.2 Step 3.4. The only difference is that original image
selected for follow-up is displayed in the bottom left corner and the type of the image (MICRO or
MACRO) is already known.
Select the image to import and confirm. Pres OK & Edit and then select OK to import the image.
(either OK-MICRO or OK-MACRO will be available depending on image type)
Image saving screen is activated.
Proceed to Step 3.
Step 3 (Saving the image):
After clicking OK button DETAILS screen (as known from Chapter 3.2) is shown.
To save time in the follow up examinations the mouse pointer is positioned automatically on the next
logical step.
Select either OK to save the image.
The program returns to the Image Listing window (depending on which follow-Up method is used) and
the next image is automatically selected. Redo Steps 1 to 3 to follow up this image.
36
PhotoMAX
REMEMBER
The localization is already pre-set. Give a new diagnosis if necessary. For a
more detailed description see Giving a diagnose in New Patient.
If the box Excision planned was activated at the last examination it will be
automatically activated in the follow up examination. This ensures a
continuous history of a lesion.
Images that have been followed-up are labeled by a dark red localization text
underneath the image.
3.4.1.2. New image within Follow Up
New Image
In order not having to switch between functions it is
possible to record new images during a follow up visit of a
patient directly within the Follow Up function. In such a
case, select NEW IMAGE button in the patient’s sheet to
get to the live image mode.
Click on the arrow located on the right side of NEW
IMAGE button to select between LIVE IMAGE, and
diverse IMPORT options as known from the Chapter
3.4.1.1
Take the new macro, close-up and/or ELM image as
described in New Patient section in the beginning of this
manual.
IMPORTANT
Always take “new” images of already existing images of lesions or body
regions in the Follow up live image mode as described above in (1) Follow Up.
First select the option and then click on the button to use it
Use the CANCEL button to return to the Patient Main Menu or simply press F10.
3.4.1.3. Compare Saved Images
In order to compare two already saved images select two recordings in the fourth (history) column in
Follow-Up selection screen. As soon as two images are selected button COMPARE appears instead
of button DETAILS in the middle of the bottom bar. By clicking this button following screen appears:
37
PhotoMAX
IMPORTANT
In order to activate COMPARE button within Follow-Up selection screen TWO
recordings of the same image must be selected in the fourth (history) column.
In order to PRINT comparison select PRINT COMPARISON button in the left bottom corner of the
screen.
REMEMBER
Older image is always shown on the lest side of the screen
It is possible to zoom, scroll and move images by using appropriate buttons
on the top right side of the screen
3.5. New image
New Image can also be obtained directly from the Patient Main menu. When entering Patient Main
menu (right after patient selection) Single Image File Import is active and shown inside top left icon
on the screen.
To obtain the new image by using Single Image File Import function, click on SINGLE IMAGE FILE
IMPORT button.
To obtain new image by
using Multi Image Import
function click on the arrow
located on the right side of
the
icon
and
select
between displayed options.
Selection screen:
38
PhotoMAX
Take the new macro, close-up and/or ELM image as described in the New Patient section in the
Chapter 6.4 of this manual.
3.6. e-m@il
The PhotoMAX e-m@il option offers you the possibility to send your images to any email address in
the world.
IMPORTANT
To be able to use this option you need to have
Access to the Internet,
The email address of the recipient(s) in your Address Book
The email set up properly on your system
To send the images that were specified in the DETAILS screen (prior to
saving) for obtaining a second opinion use the option “Administration / Patient
Menu / Images to send”.
Step 1:
Select e-m@il button in the Patient Main menu (second icon from the top on the right side). Standard
3x3 screen is displayed.
Step 2:
Select the images that should be transmitted and select SEND E-MAIL. Multiple images can be
selected. Selected Images will be highlighted and marked with the text inside the image.
Step 3:
Select one or more recipients from the list of available recipients in the screen shown below.
REMEMBER
Only the sex and the date of birth of the patient are transmitted. To easily find
the images again for discussion the Image IDs (but not Patient ID data) are
also transferred.
To send the corresponding macro, close-up and/or ELM images check the box
Include not selected corresponding images.
39
PhotoMAX
Insert your question to the recipient or any type of the comment into the question text box. If
necessary change the subject of the message. Your email address (as preset in email settings) will be
shown in Sender ID field.
Step 4:
Select SEND and the Communication screen as displayed below will open.
Simply click SEND IMAGE(S) button and image transfer procedure will start. Wait until the transfer
has been finished and the message inside the screen confirms image has been sent.
Step 5:
Click CLOSE button to return back to previous screen. Press F10 to return back to Main menu.
3.7. Reports
This function is used to print a detailed report with images enclosed. The information that is given can
be chosen individually for each report.
IMPORTANT
PRINT function is also available on diverse locations within PhotoMAX
software, whenever PRINT button is present.
Step 1:
Select what to print from the icon REPORTS in the Patient main menu (third icon from the top on the
right side):
Top print out empty Patient dummy sheets as described in Chapter 3.2 select “Print Empty Dummy
Sheets”, and select how many to print.
To print all localizations of the images that Patient already has in the database on one sheet select
“Print Patient Dummy Sheet Report”
To print out images of the patient or Patient Report select “Reports”
Step 2:
Select the images that should be printed and select PRINT. Images to print will be highlighted and
marked with the text inside the image. Following screen with PRINT PREVIEW is displayed:
40
PhotoMAX
Use icons on the left side of the Print Preview screen to select between different printing options and
to determine which information should be included into printout.
Use icons on the top right side to zoom in and out in the printout preview and to move the preview on
the screen.
Step 3:
Printer icon on the right side is selected. Document can now be printed on the default printer. If other
printer than default should be used click on the check box “Show printer setup dialog” and standard
windows print dialog will open. Chose any installed printer and confirm with PRINT to print the page.
If there is no printer available or installed Adobe PDF document can be created.
Step 4:
Press F10 to exit to main menu.
3.8. Scoring
To enter the Scoring screen use SCORING button in the Patient Menu (top icon on the right side).
Click the button to enter Scoring screen and familiar 3x3 screen is displayed.
There are two different SCORING methods available within PhotoMAX software:
Manual using common method and expertise of the user.
Automatic using diverse advance algorithms.
41
PhotoMAX
Remember
Scoring methods are also available in DETAILS screen prior to saving the
image
Scoring methods are implemented in the PhotoMAX software to assist the
doctor only. No scoring method can better the doctors experience!
3.8.1 Manual Scoring (MoleAtlas ABCD and 7-Point rules)
Manual scoring methods in PhotoMAX have its source in worldwide acknowledged MoleMax
Expertizer software, though refined and adjusted to digital images.
The Expertizer software was developed in co-operation with the Department of Dermatology at the
Medical School Vienna. It was designed to be an interactive learning add-on module to the standard
MoleMax Software and in time it was transferred to all products designed by Derma Medical Systems..
It draws presently on a pool of more than 700 selected reference images that were recorded with high
sophisticated MoleMax systems at the Vienna Medical School, Department of Dermatology. Those
images chosen among 25.000 ELM images should help those users who are not so familiar with the
technique of ELM to train them in that method. The reference images are grouped according to their
diagnoses and to the ELM criteria they exhibit.
The software package contains state-of-the-art image analyses functions and aids in the classification
of lesions according to the clinically approved ABCD-rule and the extended ABCD-E (where E stands
for the evolutionary change of the nevus) method. A newer scoring method, the Seven-Point Checklist
(also known as Argenziano Score), is also implemented in the manual scoring to give a diagnostic
support. But, it cannot be emphasized enough that these scoring methods are not a provider of simple
black-box diagnosis. It is a sophisticated aid to the doctor to improve his diagnostic accuracy - this is
the primary purpose and philosophy behind the creation of these methods.
To strengthen this idea, the MoleAtlas is included into PhotoMAX
software. It offers a self-assessment module, where the doctor can test
his diagnostic accuracy. By receiving the proper feedback, he can
further improve his ability to diagnose pigmented skin lesions. Also full
detailed list of different criteria and diagnose examples are available.
Manual scoring methods (ABCD and 7-Point rule) are integrated into
the SCORING menu, Self Assessment, Diagnose examples and ELM
Criteria examples are available in SERVICES Menu and are described
in “Services” Chapter of this manual.
To score the image by using ABCD rule or alternative
7 Point Check List first select the image in the 3x3 screen and click appropriate button in the scoring
menu (ABCD Check List or 7 Point Check List).
3.8.1.1. ABCD-Score
The ABCD rule of dermoscopy is a worldwide accepted classification method based on a semiquantitative analysis of four criteria: A stands for the Asymmetry of the lesion, B for the Border of the
lesion, C for the Color(s) in the lesion and D for Differential Structural Component(s) found in the
lesion.
Step 1:
Select the symbol ABCD in the screen above. First step / screen of ABCD method is displayed.
42
During each step of the evaluation process reference images are displayed on the right side of the
screen. Those images are already evaluated on the base of the ABCD criteria and are sorted
according to their single ABCD values. In the image description box the specific ABCD criteria seen in
the lesion are described. The histological proven diagnosis can be found above the image. Select the
+ or - buttons under the image description to see the next or the previous image.
In each step of the evaluation the software tries to find similar reference images based on the criteria
that you selected.
PhotoMAX
At any time during the ABCD-Method it is possible to select BACK to go back one step in the
evaluation process.
Step 2:
First, evaluate the asymmetrical characteristics of the lesion:
Choose one out of three options:
Lack of asymmetry in both axes if the lesion is fully symmetrical,
Asymmetry in one axis if the lesion exhibits an asymmetry in one axis,
Asymmetry in both axes if the lesion is fully asymmetrical.
Select OK.
Step 3:
Second, evaluate the number of segments with an abrupt cutoff of pigment pattern:
Choose the number of segments (1 to 8) in which the lesion has a clearly defined and sharp border to
the surrounding skin.
Select OK.
Step 4:
Third, evaluate the different colors in the lesion:
Select the specific colors of the lesion. There are six options offered. Note that more than one
selection can be made.
Select OK.
Step 5:
Last, evaluate the differential structural components in the lesion:
Select differential structural components in the lesion. There are five options offered. Note that more
than one selection can be made.
Select OK.
Step 6:
The ABCD SCORE is displayed by the bar chart at the right side of the screen. The corresponding
ABCD total score and the description of the identified ABCD criteria are shown below the lesion.
43
PhotoMAX
Next to the ABCD total score, the extended ABCD-E score is displayed. The extension to the
traditional ABCD method, E, stands for the evolutionary change of the evaluated lesion. To calculate
the extended ABCD –E score answer the question whether the particular lesion has changed or not.
Step 7:
Select CANCEL to return to the Patient Menu.
When returning to the PhotoMAX Patient Menu the program asks whether or not to save the
calculated ABCD-score. Select YES to store the ABCD-score in the database. It will be displayed in
the comments box when opening the corresponding image.
3.8.1.2. Seven-Point Checklist
The Seven-Point Checklist is the newest approach to the analysis of criteria in pigmented skin lesions.
It is based on a blind study of 342 malignant lesions (117 melanomas and 342 malignant lesions). The
doctor has to identify major and minor criteria. In criteria with several variables, the variables that had
a significant influence in the diagnosis of melanoma were determined. Significant major criteria
receive two points each and significant minor criteria receive one point. A score of three or greater has
a 95 percent sensitivity of being a melanoma.
Step 1:
Select the symbol 7-Point Check List in the selection screen. First step / screen of 7 Point Check List
is displayed.
During each step of the evaluation process reference images are displayed on the right side of the
screen. Those images are already evaluated on the base of the 7 Point criteria and are mainly used to
as example for the answer checked on the left side in one of Check Boxes. The histological proven
diagnosis can be found above the image. Select the + or - buttons under the image description to see
the next or the previous image.
In each step of the evaluation the software tries to find similar reference images based on the criteria
that you selected.
At any time during the 7 Point Check List it is possible to select BACK to go back one step in the
evaluation process.
Step 2:
Identify the major criterion atypical pigment network.
Only a prominent & irregular network in a lesion receives two points; a network that is absent, regular,
irregular or prominent, is, according to the study of Argenziano, not significant in the diagnosis of
melanoma.
Select OK.
Step 3:
Identify the major criterion Gray-blue areas (Blue-whitish veil).
Gray-blue areas are defined as irregular, confluent, gray-blue to whitish-blue zones and are not
associated with red-blue lacunes or maple leaf pigmentation.
Select OK.
Step 4:
Identify the major criterion atypical vascular pattern.
Atypical vascular patterns are defined as linear, dotted or globular red structures and are irregularly
distributed outside of areas of regression. These patterns are associated with other malignant
structures.
Select OK.
44
Step 5:
Identify the minor criterion Streaks (pseudopods/radial streaming).
Radial streaming or streaks are defined as radially and asymmetrically arranged linear bulbous
extensions at the edge of the lesion. Only irregular Streaks in a lesion receive one point; streaks that
are regular, are, according to the study of Argenziano, not significant in the diagnosis of melanoma.
PhotoMAX
Select OK.
Step 6:
Identify the minor criterion Irregular pigmentation/blotches.
Blotches appear as brown, gray or black areas of diffuse pigmentation with irregular shape or
distribution and abrupt ending.
Select OK.
Step 7:
Identify the minor criterion Dots and globules.
Irregular dots and globules appear as black, brown, or blue round structures irregularly distributed
within the lesion. Only irregular Dots and globules in a lesion receive one point; Dots and globules that
are regular, are, according to the study of Argenziano, not significant in the diagnosis of melanoma.
Select OK.
Step 8:
Identify the minor criterion Regression pattern.
A regression pattern appears as scar like depigmentation or sometimes as speckled blue-gray dots
within a hypopigmented area (i.e. peppering).
Select OK.
Step 9:
The Seven-Point Checklist result is displayed by the bar chart at the right side of the screen. The
corresponding Seven-Point total score and the description of the identified criteria are shown below
the lesion.
Step 10:
Select CANCEL to return to the Patient Menu.
When returning to the PhotoMAX Patient Menu the program asks whether or not to save the
calculated ABCD-score. Select YES to store the ABCD-score in the database. It will be displayed in
the comments box when opening the corresponding image.
45
PhotoMAX
3.8.2. Automatical Scoring
There are two Auto-Score options installed with PhotoMAX
software.
Both options are OPTIONAL that should be purchased and
activated separately prior to use.
To Auto-Score select image(s) to score and select appropriate
scoring method by clicking on one of following buttons displayed on
the bottom of the Scoring screen (to be chosen in the scoring
button):
TrichoScan is used to score tricho images and MoleCount (Auto
MoleMapping) to score and examine changed and new moles on
macro images.
3.8.2.1 TrichoScan
A unique option for hair analysis is available with an external software called TrichoScan. It is an
addition to the PhotoMAX software and must be purchased separately. Start this module by clicking
TRICHOSCAN button located in the scoring bar.
The TrichoScan software allows you to automatically measure biological parameters of hair growth in
situating the images taken with the PhotoMAX digital camera in ELM mode. For the automatic
analysis with TrichoScan a certain hair area needs to be shaved (ca. 1.8 cm²), dyed and digitally
documented at a 30x magnification.
The patient should be recalled in three days where one image with 30x magnification has to be taken
and the TrichoScan Analysis has to be performed.
In contrast to the traditional Trichogramm, TrichoScan is painless, reproducible and allows a digital
documentation. It enables to compare different capacities of hair growth promoting substances
(anagen/telogen) and can be used for monitoring the treatment through PhotoMAX software.
The TrichoScan program package is available on all product s from Derma Medical Systems as addon module or for later installation.
TrichoScan Software provides a unique hair count system and hair growth detection with
mathematical evaluation.
After the button
TRICHOSCAN is selected
Tricho-Analysis is being
performed automatically.
In order to see the
Trichogramm, click on
button “Trichogramm”
Typical TrichoScan screen
is shown on the following
image:
46
PhotoMAX
In order to see the score, click the button Score. The Score is presented as a traffic light bar. If the
marker is in the green zone hair growth is in normal zone, if the score bar is in the red zone it needs
medical treatment.
The output values of TrichoScan module are:
Analyzed area
Corrected number of hairs (In the brackets uncorrected number of hairs)
Hair density (number of hairs per area)
Anagen hairs (percentage of normally growing hairs)
Telogen hairs (percentage of non-growing hairs)
Vellus hairs density
Terminal hairs density
Number of Vellus hairs (percentage in brackets)
Number of Terminal hairs (percentage in brackets)
Diagram shows frequency of distribution of the hair length. Red marker signs the maximum
length defined for Telogen hairs.
Indicator bar (green – normal Trichogram ; yellow – mild Telogen effluvium; red- distinctive
Telogen effluvium)
With every TrichoScan Software delivered one set for hair coloration is delivered as an optimum result
is achieved when hair is colored.
After exiting the module calculated score can be saved in the database, and viewed at any time in the
comment bar in DETAILS screen or in SCORE field within TRENDING screen.
Remember
To read more about TrichoScan please read separated manual installed with
every TrichoScan software
TrichoScan is OPTIONAL external module and as such must be purchased
AND activated separately
Activation is completed over internet and activation code can be obtained
directly from the module (internet connection required)
Additional trimmer and TrichoScan set are delivered with every TrichoScan
module.
Additional Demo CD is delivered with every TrichoScan module.
47
PhotoMAX
3.8.2.2 MoleCount
The change of nevi is one of the most import factors for the early detection of melanoma in high risk
patients. It is often difficult to identify changed or new moles in the follow-up of these patients.
Changes of moles in the back are difficult to be discovered by the patients themselves.
MoleCount is the one of the worldwide most advanced mole mapping and screening systems for the
detection of changes in nevi.
The software is best used with new digital cameras and a image resolution of 4 mega pixel or higher.
It works also with a lower image resolution. Only macro images can be used within this module
To enter Mole Mapping module simply select two follow up images of the same area and start the
Mole Mapping module. Two similar follow-up images of a relevant body site for one patient will be
compared. MoleCount automatically detects nevi in the first and in the follow-up image and computes
the mole mapping. Additionally the software extracts features relevant to the size, shape, and
brightness of each lesion, and these features are compared for all mapped nevi. Extracted moles are
shown in full resolution giving a detailed image of the nevus.
New Moles are surrounded by yellow circles and changed moles are surrounded by red circles.
Remember
To read more about MoleCount please read separated manual installed with
every MoleCount software
MoleCount is OPTIONAL external module and as such must be purchased
AND activated separately
Activation is completed over internet
48
PhotoMAX
4. Services
PhotoMAX Services Menu is activated by clicking the SERVICES button in main screen.
Important functions such as Database Backup, as well as Patient Management, Data Import,
Data Export, Statistics and MoleAtlas services are located within this menu.
After entering PhotoMAX Services Menu following screen is displayed:
4.1. MoleAtlas
MoleAtlas has its source in MoleMax Expertizer software, though refined and adjusted to digital
images
The Expertizer software was developed in co-operation with the Department of Dermatology at the
Medical School Vienna. It is designed to be an interactive learning add-on module to the standard
MoleAtlas software is divided into two parts. While manual scoring methods (ABCD and 7-Point rule)
are integrated into PhotoMAX SCORING menu (described in “Scoring” Chapter of this manual), Self
Assessment, Diagnose examples and ELM Criteria examples are available within SERVICES Menu.
MoleAtlas Services Menu is activated by clicking the arrow on the right side of MoleAtlas icon in
Services Menu.
49
PhotoMAX
4.1.1. MoleAtlas – ELM (Review Reference Images)
Select the symbol MoleAtlas – ELM in the MoleAtlas icon within Services Menu to view the reference
images according to the list of ELM criteria as known from pattern analysis study.
IMPORTANT
Reference images are installed on your hard drive during the installation of
PhotoMAX software
To clarify the ELM-criteria in each image, these elements have been highlighted in each example to
improve the utility of the MoleAtlas, and to further aid the understanding of the user.
Select an ELM criterion from the list to view the corresponding reference images. The chosen
category opens. Use arrows to navigate and select the criteria as known from Windows Explorer.
Below the reference images the description of the corresponding ELM criteria in the lesion can be
found. Use the scrollbar on the right side to scroll down in the text. Above the reference images the
diagnosis is displayed.
To change to the original size of the reference image Select FULL PICTURE or move the cursor over
the image and press a mouse button. In the full size picture mode the following functions can be
executed:
zooming in / out
moving the image left and right
viewing the image in full size pixel by pixel
To use these functions select the corresponding icon on the right side of the image.
Select the + or - buttons under the image description to get to the next or the previous image.
Select the BACK buttons to exit the MoleAtlas or simply press the F10 key to return to the PhotoMAX
Main menu.
50
PhotoMAX
4.1.2. MoleAtlas – Diagnosis (Review Reference Images)
Select the symbol Mole-Atlas – DIAGNIOSIS in the MoleAtlas icon in Services Menu to view
reference images grouped according to the Diagnosis criteria they exhibit.
Please note this diagnosis list is build from melanoma point of view as known from pattern analysis
study.
Select one of the following main categories of diagnoses on the left side of the screen: Melanoma,
Nevi and Non-Melanocytic Lesions to view the corresponding reference images. The chosen category
opens. Use arrows to navigate and select the criteria as known from Windows Explorer.
Below the reference images the description of the main features in the lesion can be found. Use the
scrollbar on the right side to scroll down in the text. Above the reference images the diagnosis is
displayed.
To change to the original size of the reference image Select FULL PICTURE or move the cursor over
the image and press a mouse button. In the full size picture mode the following functions can be
executed:
zooming in / out
moving the image left and right
viewing the image in full size pixel by pixel
To use these functions select the corresponding icon on the right side of the image.
Select the + or - buttons under the image description to get to the next or the previous image.
Select the BACK buttons to exit the MoleAtlas or simply press the F10 key to return to the PhotoMAX
Main menu.
51
PhotoMAX
4.1.3. MoleAtlas – Self Assessment (Review Reference Images)
Select the symbol MoleAtlas – ASSESSMENT in the MoleAtlas icon in Services Menu to enter SELF
ASSESSMENT module.
In the self-assessment function the doctor can test her/his diagnostic accuracy. The physician can
choose from three different levels.
In Level A tests, the physician is asked to classify the test lesions in definitely benign, more benign
than malignant, more malignant than benign and definitely malignant.
In Level B tests, the test person has to be more distinctive than in Level A and has to decide whether
or not to excise the lesion.
In Level C tests, the doctor has to diagnose the test lesions.
After each test the doctor can review her/his wrong answers. Using this feedback possibility, the
physician can improve her/his diagnostic accuracy.
Step 1:
Select the test level.
Choose Level A for classification between benign and malignant, Level B for deciding on interventions
or Level C for giving the diagnosis.
Step 2:
Enter the number of images that should be included in the test. If not a different number is specified
each test includes 30 images.
In Level A and B between 4 and 129 images can be evaluated, in Level C between 1 and 291.
Enter the name of the test person in the appropriate line (optional).
Step 3:
Select START to start the test.
In Level A choose one of the following possible answers for each image:
52
This lesion is definitely benign
This lesion is more benign than malignant
I don’t know
This lesion is more malignant than benign
PhotoMAX
This lesion is definitely malignant
In Level B choose one of the following possible answers for each image:
No intervention
Intervention
In Level C choose one of the following possible answers for each image:
Common Nevus
Spitz’s Nevus
Atypical / Dysplastic Nevus
Melanoma
REMEMBER
Diagnoses that indicate benign lesions are displayed in green, diagnoses that
indicate atypical lesions are displayed in white and diagnoses that indicate
malignant lesions are displayed in red.
Select NEXT to receive the next test lesion.
REMEMBER
The number of lesions left in the test is displayed above the current image.
Test Results
After the test has been finished the following results are displayed on-screen.
Level A
ROC (Receiver Operating Characteristics) Curve shows the Sensitivity (% of correctly identified
melanoma) in relation to the Specificity (% of correctly identified benign lesions). It is a graphical
representation of the test person’s performance.
Correctly identified lesions are those images where a correct classification in definitely benign or
definitely malignant was made.
Performance is the percentage of how many lesions were classified into the correct category (benign
lesions classified as definitely benign or more benign than malignant and vice versa).
Gain shows by how many percent the test person’s result is better than answers just guessed. If all
answers are wrong (benign lesions classified as definitely malignant or more malignant than benign
and vice versa) the gain is 0. Correct answers for improving the gain are those where the lesion was
classified into the correct category (benign lesions classified as definitely benign or more benign than
malignant and vice versa).
Max. Sensitivity / Specificity indicates the highest percentage value where the sensitivity and the
specificity equal each other. This point is displayed in yellow on the ROC curve.
PhotoMAX Test Score is a weighted average score given in % for the performance in this test. For
Level A tests it is calculated by adding up the following values for each answer and by dividing it by
the number of test lesions:
Correct Answer
Doctor’s answer
Definitely benign
Definitely benign
Definitely benign
Definitely benign
Definitely benign
Definitely malignant
Definitely malignant
Definitely malignant
Definitely malignant
Definitely malignant
Definitely benign
More benign than malignant
I don’t know
More malignant than benign
Definitely malignant
Definitely benign
More benign than malignant
I don’t know
More malignant than benign
Definitely malignant
Points received (in %)
100
60
30
10
0
0
10
30
60
100
53
PhotoMAX
Level B
Correctly identified lesions are those images where the correct intervention was defined - no
interventions for benign lesions and excisions for melanoma.
Sensitivity is the percentage of correctly identified or diagnosed melanoma. It is calculated by the
following formula:
Correctly identified melanoma / (Correctly identified melanoma & Missed Melanoma)
Specificity is the percentage of correctly identified or diagnosed benign lesions. It is calculated by the
following formula:
Correctly identified benign lesions / (Correctly identified benign lesions & Unnecessarily excised
benign lesions)
Accuracy is the ratio of correctly identified lesions and the number of test lesions.
PhotoMAX Test Score is a weighted average score given in % for the performance in this test. For
Level B tests it is calculated by adding up the following values for each answer and by dividing it by
the number of test lesions:
Correct Answer
Doctor’s answer
Result
No intervention
Intervention
No intervention
Intervention
No intervention
Intervention
Intervention
No intervention
Correct Decision
Correct Decision
Unnecessary Excision
Missed Melanoma
Points received (in %)
100
100
40
0
Level C
Number of correct diagnoses shows how many test lesions were correctly diagnosed.
Correct category – wrong diagnosis are those cases where a common nevus was diagnosed as
Spitz’s nevus and vice versa.
Incorrect diagnoses – missed by one category shows those cases where the test person missed the
correct diagnosis by one category (benign lesions diagnosed as atypical, malignant lesions diagnosed
as atypical or atypical lesions diagnosed as benign or malignant).
Incorrect diagnoses – missed by two categories shows those cases where the test person missed the
correct diagnosis by two categories (benign lesions diagnosed as malignant or malignant lesions
diagnosed as benign).
PhotoMAX Test Score is a weighted average score given in % for the performance in this test. For
Level C tests it is calculated by adding up the following values for each answer and by dividing it by
the number of test lesions:
54
Correct Answer
Doctor’s answer
Common Nevus
Common Nevus
Common Nevus
Common Nevus
Spitz’s Nevus
Spitz’s Nevus
Spitz’s Nevus
Spitz’s Nevus
Atypical/Dyspl. Nevus
Atypical/Dyspl. Nevus
Atypical/Dyspl. Nevus
Melanoma
Melanoma
Melanoma
Common Nevus
Spitz’s Nevus
Atypical/Dyspl. Nevus
Melanoma
Spitz’s Nevus
Common Nevus
Atypical/Dyspl. Nevus
Melanoma
Atypical/Dyspl. Nevus
Common or Spitz’s Nevus
Melanoma
Melanoma
Atypical/Dyspl. Nevus
Common or Spitz’s Nevus
Points received (in %)
100
80
40
0
100
80
40
0
100
40
40
100
40
0
PhotoMAX
Test Review
To improve the diagnostic accuracy, the test person should review the incorrect answers after the test.
Depending on the test results the following images for review can be chosen to be included in the
feedback.
Level A
Include wrong identified melanoma
Include wrong identified benign lesions
Include correctly and almost correctly identified lesions
Select one or more review options and Select REVIEW.
Above each image the correct diagnosis and the test person’s answer is displayed.
Correct answers are marked by a green check mark on the right side of the image.
REMEMBER
Diagnoses that indicate benign lesions are displayed in green; diagnoses that
indicate malignant lesions are displayed in red.
Answers that suggest definitely benign lesions are displayed in green;
answers that suggest definitely malignant lesions are displayed in red.
Answers where the test person was not definitely sure (more benign, I don’t
know or more malignant) are displayed in white.
Level B
Include wrong identified melanomas
Include wrong identified benign lesions
Include correctly identified lesions
Select one or more review options and Select REVIEW.
Above each image the correct diagnosis and the test person’s answer is displayed.
Correct answers are marked by a green check mark on the right side of the image.
REMEMBER
Diagnoses that indicate benign lesions are displayed in green; diagnoses that
indicate malignant lesions are displayed in red.
Answers that suggest no intervention are displayed in green; answers that
suggest an excision are displayed in red.
Level C
Include lesions with wrong diagnoses, missed by two categories
Include lesions with wrong diagnoses, missed by one category
Include lesions from correct category with wrong diagnoses
Include lesions with correct diagnoses
Select one or more review options and Select REVIEW.
Above each image the correct diagnosis and the test person’s answer is displayed.
Correct answers are marked by a green check mark on the right side of the image.
REMEMBER
Diagnoses that indicate benign lesions are displayed in green, diagnoses that
indicate atypical lesions are displayed in white and diagnoses that indicate
malignant lesions are displayed in red.
.
Select the BACK buttons to exit the MoleAtlas or simply press the F10 key to return to the PhotoMAX
Main menu.
55
PhotoMAX
4.2. Database Backup
Apart from functions described in chapters “New Image” and “Follow Up” the most important
function of the PhotoMAX system is BACKUP.
This functions backs up all PhotoMAX data necessary to rebuild the PhotoMAX system with ALL
PATIENT DATA in case of physical or mechanical failure of PhotoMAX system.
TAKE CARE TO DO BACKUP AT LEAST ONCE A WEEK
As a standard procedure during the work with PhotoMAX system all data is stored on the internal hard
disk. In case of an emergency it is helpful to have the patient data and the images saved on an
external media. The system is therefore equipped with DVD-writer. Please contact your local dealer if
such a break down should occur.
Select BACKUP icon in the Services Menu to start BACKUP procedure. Following backup screen
appears:
First define if backup should be done onto CD-R or DVD-R media by typing the size of a backup set. If
size is less than 650 MB use CD-R media, and if size is bigger use DVD-R media.
Insert a CD-R or DVD-R into the DVD-writer and click the button START BACKUP. Backup is starting
and backup progress bar is shown. After backup is completed the message “Backup Completed” will
be displayed in the message field. Select CLOSE to return to the PhotoMAX main menu.
Take out the media and store it at a secure location!
Other Backup Options
PhotoMAX offers external backup option (Backup by using external software, automatically performed
from PhotoMAX system). For more info see Administration Menu, Backup section.
Server Backup
If the System is running in a network it is highly recommended to store the pictures on a server,
mainly because of automatized backup methods used on servers. Please contact your dealer for more
details.
REMEMBER
Please note that also external backup writing procedure is available. See the
Administration section of this manual to learn how to activate external backup
.
56
PhotoMAX
4.3. Statistics
To enter Statistics menu click the icon STATISTICS in the Services Menu.
Statistics menu is divided into 4 sections: Diagnoses, Patient Statistics, Images Statistics and
Database Info and Statistics.
IMPORTANT
Please note that STATISTICS menu is the only menu in the PhotoMAX
software where images of different patients can be compared.
Diagnoses
When STATISTICS menu starts Diagnose Statistics screen is displayed.
To get diverse statistics about examined images over a certain period of time click on SEARCH
button. The results will be promptly displayed on the screen. The results include the full list of all given
diagnoses in the database, the type of images recorded (macro or close-up) and the number of
images taken.
If no time frame is displayed PhotoMAX software will display statistics of whole database, from the
very first image. If SEARCH within certain time frame is desired simply input the start and end date in
the appropriate fields.
If only recent (last) images without their pre follow ups should be displayed, click the check box “Count
current images only”.
All ELM, macro and/or close-up images with similar diagnoses (e.g. melanomas or acne) can be
viewed and compared in a non-patient related picture gallery.
Select these by clicking appropriate check boxes on the bottom of the screen.
To do so select the diagnoses that should be displayed in the picture gallery and select GALLERY.
REMEMBER
To include/exclude Macro, Close-Up or ELM images in the evaluation select
the specific option on the bottom of the screen (all images selected is the
default setting).
Show image in full size picture mode
To view an image in the full size picture mode select the specific image and select FULL PICTURE.
Comparing two images
To compare two images select two images and select COMPARE. Press CANCEL to return.
REMEMBER
If one image is selected FULL PICTURE button is displayed
If more than one image is selected COMPARE button is displayed
Details about an image
To get more detailed information about an image or to make corrections select the specific image and
Select DETAILS. Press OK to save and return.
57
PhotoMAX
Patient Statistics
To get some statistics on a specific patient click the icon Patient Statistics located on the top of the
screen.
Select the patient and choose whether the statistics should be calculated for all images of the patient
or for the images taken at the last visit by selecting the appropriate Selection Criteria.
If only recent (last) images without their pre follow ups should be displayed, click the check box “Count
current images only”.
Select SEARCH and the results for the chosen selection criteria are displayed in the lower window.
The statistics include the diagnoses given, the type of images recorded (macro or close-up) and the
number of images taken.
To view the images of a specific diagnosis select the diagnosis and select GALLERY.
Show image in full size picture mode
To view an image in the full size picture mode select the specific image and select FULL PICTURE.
Comparing two images
To compare two images select two images and select COMPARE. Press CANCEL to return.
REMEMBER
If one image is selected FULL PICTURE button is displayed
If more than one image is selected COMPARE button is displayed
Details about an image
To get more detailed information about an image or to make corrections select the specific image and
Select DETAILS. Press OK to save and return.
Find Images
To search for specific images select the button Find Images on the top of the screen corner.
The following search criteria are available
Search for ELM ID numbers,
Search for File names (including wildcard characters such as * etc.)
Enter the search values in the appropriate line and select SEARCH. The corresponding patient names
are displayed.
Select the patients and select GALLERY.
Show image in full size picture mode
To view an image in the full size picture mode select the specific image and select FULL PICTURE.
Comparing two images
To compare two images select two images and select COMPARE. Press CANCEL to return.
REMEMBER
If one image is selected FULL PICTURE button is displayed
If more than one image is selected COMPARE button is displayed
Details about an image
To get more detailed information about an image or to make corrections select the specific image and
Select DETAILS. Press OK to save and return.
58
PhotoMAX
Database Statistics
To get more detailed information about Database click Database Statistics icon on the top of the
screen.
Comprehensive DATABASE STATISTICS are shown. This includes:
Database location and name
Database size
Number of folder sued
Folder location on the hard drive
Number of images
Size images occupy on the hard drive
Number of other (attached) documents
Total number of files
Total space occupied
User name
Number of active users
After Statistics are done click either BACK to return to Services menu or F10 to return to PhotoMAX
Main menu.
4.4. Data Export
If there is a need to transfer images of one patient to another computer as in the case when Patient
moves from one city to another, or if there is need to export one or more particular images Data
Export function is used.
Click on DATA EXPORT icon in the Services menu to enter Exporting menu shown below.
59
PhotoMAX
There are two basic options when using Data Export:
Patient export
Image Export
Select Either Patient Export or Image Export by clicking appropriate check box on the top of the
screen.
Patient Export
There are two Patient Export formats to choose from:
PhotoMAX 3.0 Export format
HTML Export format
Select export format from the selection menu on the bottom of the Exporting screen. Use PhotoMAX
3.0 format when transferring patient record to another PhotoMAX and use HTML format if you simply
want to give the patient his patient record that can be viewed by using any common HTML browser
software such as Internet Explorer, Opera or Mozilla Firefox.
Select Patient to export from the top window and a destination where to export it in the bottom window
(Tree as known from standard Windows Explorer).
Click EXPORT PATIENT button to export the patient and wait until files are transferred.
REMEMBER
If Patient export is done in PhotoMAX 3.0 format all images are exported in
their original format
Patient file is exported in PhotoMAX proprietary format
After Export is completed click either BACK to return to Services menu or F10 to return to PhotoMAX
Main menu.
Image Export
If you want to export particular images click check box Export Images and Image Export screen is
displayed.
Select export format from the selection menu on the bottom of the Exporting screen. Diverse export
formats such as JPEG, PDF, BMP or PCX formats are offered within PhotoMAX software.
Select Patient whose images you want to export from the top window and a destination where to
export it in the bottom window (Tree as known from standard Windows Explorer).
Click the button SELECT IMAGES to choose the images to export and familiar 3x3 screen appears.
Select the images to export, click the button EXPORT and wait until files are transferred.
After Export is completed click either BACK to return to Services menu or F10 to return to PhotoMAX
Main menu.
60
PhotoMAX
4.5. Data Import
If there is a need to import a patient record as in the case when Patient moves from one city to
another, Data Import function is used.
IMPORTANT
Data import should be used only for transferring patient data from one
PhotoMAX to another
For all other import functions Image File import should be used
Click on DATA EXPORT icon in the Services menu to enter Exporting menu shown below.
Point to the PhotoMAX import file by using tree menu as known from Windows Explorer. After correct
file is selected it is shown in the window on the right side and associated files to import are listed in the
bottom window.
Select if the eventually existing patient files should be replaced or if new images should only be
appended by clicking the appropriate check box in the top right corner.
Import the patient data by clicking the IMPORT button. Wait until patient is transferred into the
database.
After Patient import is completed click either BACK to return to Services menu or F10 to return to
PhotoMAX Main menu.
61
PhotoMAX
4.6. Patient Management
Within feature Patient Management several patient related administrative functions can be performed.
User can perform search after images with no diagnose or images selected for excision, edit patient
data or check dates for patient recall. Furthermore images or whole patients can be deleted in this
menu. After clicking on PATIENT MANAGEMENT in Service screen following screen appears:
In this window the following options can be chosen:
Edit or delete a patient or delete single images of a patient
Find images without diagnose and add a diagnose
Find images selected for excision
Patient recall
Find images selected for email and send these images
View last visit date of patients
To search for Patient simply type the patient name in the Search field in the middle of the
screen!
Edit Patient data
To edit patient data select the patient and select EDIT PATIENT. It is possible to correct any spelling
mistakes or other incorrect information. Also the date of the follow-up visit can be entered. This
function is equal to creating the patient as described in Chapter “New Patient”.
IMPORTANT
The appointment for a follow-up visit needs to be entered in this function.
Select ADDITIONAL and enter the date of the follow-up visit. Only a defined follow-up visit date allows
the software to check whether the patient has been seen for his scheduled appointment. For more
detailed information see Patient Recall below.
Select SAVE to store the corrected patient data.
62
PhotoMAX
REMEMBER
Two first or last names of a patient have to be typed with space between the
names.
It depends on the country settings how to enter the date of birth. Always use 4
digits for the year e.g. 1950. This is very important for patients born before
year 1929.
To calculate the Risk Group the patient falls into, select the option
MELANOMA RISK and answer the four questions together with the patient.
The result is immediately displayed at the bottom of the screen. There are four
possible risk groups (low, average, increased and high risk).
Delete Patient or Patient Images
To delete the patient data select the patient first and then select DELETE button. Following screen
appears:
Choose to delete the patient with all images from the database, to delete all images of the patient or to
select images to delete. Please note any deletion is permanent and can’t be rolled back.
When patient (“Delete Patient with all related images”) or all images of a patient (“Delete images
only”) are selected for deletion, screen with exact information about the files to be deleted is
displayed. Confirm with DELETE to delete the patient or images permanently.
If you want to select images to delete choose last option “Select Images to Delete”. Familiar 3x3
patient screen is displayed. Select images to delete (including pre follow ups in the fourth column) and
confirm with SELECT. Screen with exact information about the files to be deleted is displayed.
Confirm with DELETE to delete selected images permanently.
IMPORTANT
There is no Undo feature.
Pending Diagnoses
To see the list of all images without diagnose data select the PENDING DIAGNOSES. The list of all
images without diagnosis is displayed in the bottom window. Click on the particular image in the list
and select SHEET button on the right side to enter DETAILS screen where diagnosis can be
assigned.
Confirm with SAVE to return to the list of pending diagnosis. Next image can be selected now.
Choose to display between ELM, Macro and Close Up images by clicking appropriate check boxes on
the bottom of the screen.
63
PhotoMAX
Planned Excisions
To see the list of all images checked for excision select the PLANNED EXCISIONS. The list of all
images noted for excision is displayed in the bottom window. Click on the particular image in the list
and select SHEET button on the right side to enter DETAILS screen.
Only micro images apply for this function.
Patient Recall
To see the list of Patient noted for recall select the function PATIENT RECALL. The list of all patients
noted for recall is displayed on the right side and required follow up date is displayed in the bottom
window. The patients that are overdue on their scheduled follow-up visit are displayed RED in the list.
The other, for follow up marked patients, are displayed in standard BLACK letters.
If the patient is not due for recall any more use button REMOVE on the right side to remove the patient
from the list. If patient should be noticed for recall use button EMAIL to send a reminder email to the
patient (this patient’s email should be preset in the patient record to enable this function).
Last Visit
To display last visit of all patients as well as number of visits and number of images of every single
patient use function LAST VISIT.
List of patients with the dates of their last visit is displayed in the right window. Selecting the patient in
the list to see details of the last visit, total number of visits and number of images.
The full list of patients with dates of their last visits can be exported by using EXPORT PATIENT LIST
function on the right side of the screen.
Images to Send
To see the list of all images checked for email select the IMAGES TO SEND. The list of all images
noted for email is displayed in the bottom window. Click on the particular image in the list and select
SHEET button on the right side to enter DETAILS screen.
Choose to display between ELM, Macro and Close Up images by clicking appropriate check boxes on
the bottom of the screen.
5. Administration
PhotoMAX Administration Menu is activated by clicking the ADMINISTRATION button in PhotoMAX
Main menu
All important settings such as email settings, Diagnose configurations, PhotoMAX Backup
settings and User profiles, as well as additional functions such as Patient search mechanism
and module to Delete Images are located within this menu.
After entering PhotoMAX Administration Menu following screen is displayed:
64
PhotoMAX
List of settings and functions are located in the top left corner of this screen. Simple select an option
by clicking on it.
5.1. Multi User Environment
By clicking on Multi-User Environment button administration screen for setting a multi user option is
displayed. Following screen is shown:
Simply add new users by clicking the button ADD or edit an existing user by clicking the button EDIT.
When adding a new user first step is to determine name and password as on the image left below.
After the user name and password are determined second step is to adjust user rights for this
particular by using checkboxes “Read Only”, “Read/Write” and “Delete”.
If editing the patient first step would be to edit user name and password as sown on the image right
below and second step is to edit the rights of this user.
Please note ONLY administrator user “admin” is allowed to do this.
65
PhotoMAX
After user names and rights are defined, activate Multi User Environment by clicking the check box
“Show Login Dialog”.
After Multi User Environment is activated the Log Out button is shown in the bottom left corner of
PhotoMAX Main menu (as shown on the left image below).
Also Login is required when entering PhotoMAX software (as shown on the right image below).
IMPORTANT
Please note that STATISTICS menu is the only menu in the PhotoMAX
software where images of different patients can be compared.
Current user is always displayed in the top right corner (yellow letters)
After Multi User Environment is set up as desired, exit the screen by clicking the CLOSE button and
save the changes by clicking OK. Software will prompt you to Log In as desired user.
REMEMBER
A user can see only his patients, patients of defined users or patients of all
users. To be able to view the patients of other users adjust user rights within
Administration menu
To log on as a different user select LOGOFF on the main menu, and select
the appropriate user name in the Log-on window.
Only Administrator (“admin”) can change user rights and set up user profiles.
66
PhotoMAX
5.2. Dummy and Diagnoses
If you want to define your own diagnose list and / or to change titles of body locations function Dummy
and Diagnoses located within Administration menu is used.
5.2.1. Diagnosis configuration
With this feature diagnoses can be changed, added and deleted and individual shortcuts can be set.
Step 1:
Select DIAGNOSIS CONFIGURATION in the Administration menu.
By using this function it is possible to edit and configure all diagnosis available in the list. This way
personal diagnosis tree can be configured for each user.
Step 2:
To add a new diagnosis select ADD DIAGNOSE. Type in the diagnosis and define whether it is
pending or risky by selecting the particular option. To assign a diagnosis to a function key select a
button from F1 to F8. Confirm by selecting OK. Also define if this diagnose should be displayed in the
list of favorite diagnosis
To edit a diagnosis select the diagnosis from the list and select EDIT. Change the diagnosis text and
define whether it is pending or risky by selecting the particular option. To assign a diagnosis to a
function key select a button from F1 to F8. Confirm by selecting OK. Also define if this diagnose
should be displayed in the list of favorite diagnosis
To reset all diagnoses to defaults click the button R located in the top right corner.
To create a new category in the diagnosis tree select ADD CATEGORY button.
To delete a diagnosis from the list select it and select DELETE.
Step 3:
Select CLOSE and confirm with OK to save changes.
5.2.2. Location Nomenclature
With this feature the location texts of the various body regions can be edited. This is useful in
particular if PhotoMAX software is not yet available in your language.
Step 1:
Select the LOCATION NOMENCLATURE in the Administration menu.
Step 2:
Select the specific Dummy position and select the body region. Change the location text below the
dummy. Repeat this procedure for all regions that should be renamed.
REMEMBER
To rename the Micro location texts select the particular check box on the top
right corner.
To rename the Macro location texts select the particular check box on the top
right corner.
To reset all locations to default click the button R
Step 3:
Save the changes by selecting CLOSE and confirming the changes with OK.
67
PhotoMAX
5.3. Display and Presentation
Use this function to set the import options that should be visible in the software and the way how
Follow-Up is displayed.
By clicking on Display and Presentation button administration screen for display options is shown.
Following screen appears:
Click on Live Image selection to determine Live Image options:
Choose between Full Screen and Compare options to determine if only new image or comparison with
previous image should be shown when entering Live Image Follow-Up.
Choose if flash, digital zoom and Camera Grip should be enabled or disabled.
Click on Image Selection preview to determine if software should start with 3x3, M+C or Dummy view.
Click on Image Sources selection to determine which Image Sources should be enabled.
Choose between: LIVE IMAGE, MULTI IMAGE FILE IMPORT, SINGLE IMAGE FILE IMPORT,
DIRECT CAMERA IMPORT and TWAIN IMPORT
5.4. e-mail Settings in PhotoMAX
Use this function to set up email Address Book and email settings in the PhotoMAX software.
5.4.1. email Address Book
This function is used to set up Email recipients for email function within PhotoMAX. Click on
ADDRESS BOOK and then on ADD button to open following screen:
68
PhotoMAX
Input the name of the recipient, and the Nick that should be shown for selection within email function.
Input correct Email address of the recipient. Confirm with OK.
It is also possible to edit existing recipient by using the button EDIT, or to delete it by clicking the
DELETE button.
5.4.2. e-mail SMTP Server Setup
This function is necessary in order to set up email properly. In order to send an email, SMTP server
must be defined. If you are not sure how to do this please contact your system administrator or
nearest PhotoMAX dealer.
After clicking on SMTP SERVER SETUP following screen is displayed:
There are 3 possibilities to get connected to the Internet:
The oldest one is that you have a modem directly connected to your system and that you
dial into a server of your Internet Service Provider (Dial-Up Networking).
There are Providers that offer a “24 hours online” service which means that whenever you
turn on your system you are automatically connected with one of their Internet servers and
you are online as long as you have your system running. Usually the connection is through a
network-card in your system where a Tools type of modem is connected (Direct
Connection).
In a network neighborhood you often find a proxy server solution. That means that the
workstations in the network are connected to a so-called Proxy Server that establishes the
connection to the Internet (Proxy Server).
Depending on your individual setup you need to configure the email Settings as described below.
Dial Up Networking
Select DIAL-UP NETWORKING if you have a modem connected to your system and you are calling
your Internet Provider.
If the Dial-Up networking is set up correctly in the operating system you can open the Phone Book
Entry list and select the Dial-Up networking name of your Internet Service provider. If your personal
User name and Password for the Internet connection is not filled in automatically, you need to fill them
in manually in the appropriate lines.
Enter the SMTP server name or address (the name of the mail server for outgoing mails) in the
appropriate line. Your Internet Service Provider provides this information to you. If you do not have this
information please contact your Internet Service Provider.
Enter your email address in the appropriate line.
Select CLOSE and confirm with OK to save your settings.
69
PhotoMAX
Direct or Proxy Connection
Select DIRECT CONNECTION when you are always online when your system is turned on or if you
are currently online.
Enter the SMTP server name or address (the name of the mail server for outgoing mails) in the
appropriate line. Your Internet Service Provider provides this information to you. If you do not have this
information please contact your Internet Service Provider.
Enter your email address in the appropriate line.
Select OK to save your settings.
5.5. Backup Settings
Performing backup in regular intervals is one of the most important PhotoMAX functions. Only
by performing successful backup all Patient Data are safe in case of machine failure!
The backup settings are pre-defined when the system is installed. But in case o system upgrade or
reinstallation following changes need to be made before using the backup function for the first time.
Step 1:
Select INTERNAL AND EXTERNAL BACKUP SETTINGS from the menu. Following screen is
displayed:
Internal and external backup are possible using PhotoMAX software. Internal backup program is using
proprietary PhotoMAX burning and external program is using a control to start external procedure
such as Windows burning routine or Nero burning software.
Internal Burning (standard):
Select the option Use internal backup program.
Enter a temporary backup folder on the local hard drive in the line Backup destination
folder (c:\program files\derma medical systems\photomax 3.0\backup).
Choose one of the following options in the section Backup type:
Full (default setting)
Copy
Incremental
Differential
70
Backup every file, regardless of the archive attribute
Removes the archive attribute after the file is backed up
Backup every file, regardless of the archive attribute
Does not remove the archive attribute after the file is
backed up
Backup only the files that have the archive attribute
Removes the archive attribute after the file is backed up
Backup only the files that have the archive attribute
Does not remove the archive attribute after the file is
backed up
PhotoMAX
Choose one of the following options
Select the option Verify after backup.
Select the option Write to CD after backup.
External Backup:
Select the option Use external backup program.
Enter a command line to start external backup program
Enter a flag describing the files to be recorder during backup.
IMPORTANT
Backup is VERY IMPORTANT function. Perform it in regular intervals.
Contact your administrator immediately if your backup drive is broken.
See Section ”Backup” in order to learn how to perform backup correctly!
5.6. Languages
Click on LANGUAGES to choose PhotoMAX system language.
Choose between languages offered to change display language of your PhotoMAX software.
IMPORTANT
Only supported languages are offered within this option.
Select checkbox Change Resources to change not only screen display but
also resources such as list of localizations or diagnoses to new language.
5.7. Infobox
Click on INFOBOX to get web links for Derma Medical Systems homepage and for our parental
company MacQuarie Health Corporation, as well as for Derma Medical Systems Online Store.
71
PhotoMAX
6. AllSkin Module
6.1. Introduction
AllSkin is a diagnosis library, which is illustrated with images, descriptions and has ability to browse
and search through. The images are categorized by diagnosis in one hierarchical list.
To start to use AllSkin, select the menu item "Images". This menu will exist on all dialogs where the
possibility of giving diagnosis exists.
IMPORTANT
The AllSkin is not a standard standalone application and it can be started only
with PhotoMAX
The startup screen of AllSkin:
72
On the left side the hierarchy list of diagnoses is shown, and the right side is the preview panel.
PhotoMAX
6.2. Selecting the Diagnosis
To select the category, just click on it in the left panel. The content of this category is shown in the
preview panel as thumbnail images.
To select the diagnosis, just mark the desired thumbnail and click Select and Exit button from the
toolbar, or press F1 button.
If the selected item on the hierarchy list is an image, then the preview of this image with details is
shown in the preview panel:
To select the diagnosis, just click Select and Exit button from the toolbar, or press F1, or just double
click on description.
73
PhotoMAX
6.3. Searching For Desired Diagnosis
To search through database, click Find button on the toolbar or press Ctrl/Strg + F keyboard
combination. The following dialog will appear:
Type the desired keyword (or part of it) in the search box, select option where to look in (in categories
or/and in descriptions) and press Search.
The searched item, if exist, will be located in diagnosis hierarchy list and the details will be in the
preview panel. To search another occurrence of given keywords, just press Find Next on the toolbar
or press F3.
6.4. Settings
Click on the menu item "View → Options...". The following dialog will appear:
The options are:
Don't show confirmation messages - Select these options to avoid the messages at selecting
diagnosis and leaving from AllSkin.
Remember the last diagnosis - Select this option, and AllSkin at the next start will locate and
select the last selected diagnosis.
When generating thumbnail preview, enumerate all images in subcategories too - Select this
option if you want to have a preview of all thumbnails in the selected category and it's
subcategories.
IMPORTANT
This last option is not recommended for slower computers, because
generating of preview may take a lot of time.
74
PhotoMAX
PhotoMAX
USER MANUAL
Section III – FAQ (Frequently Asked Questions)
7. Troubleshooting ....................................................................................................76
7.1. Problem Solving ................................................................................................76
7.2. Service Support .................................................................................................77
75
PhotoMAX
7. Troubleshooting
7.1. Problem Solving
Problem
Check/Action
a) No display on monitor
;
;
Computer in power saving mode, activate
Computer off, switch on
;
;
No or wrong backup disk (CD-R/DVD-R) inserted
Backup settings in Special
b) Backup is not performed
c) Printing not possible / Printout is of bad quality
;
Printer power switch
;
Cable connection between computer and printer
;
Printer settings
;
Clean printer cartridges or exchange them if
necessary
d) Email not working
;
;
;
;
;
76
Is Internet running?
Connection to internet online?
Is the Computer online?
Incorrect email address book entry
Incorrect email settings in Special
PhotoMAX
7.2. Service Support
The information contained in this manual has been carefully written and is accurate for the existing
system. We are, however, continually striving to improve and refine our product. Some minor changes in
the hard- and software configuration resulting from such improvements will not affect the basic operation
procedure but will provide the newest technology available at the time.
If you encounter any problems not covered in this manual, please contact your local dealer or use the
PhotoMAX SERVICE-HOTLINE
+43 1 318 69 90
Monday-Friday from 9:00 to 16.00 (CET).
German or English language.
Or send an email to [email protected]
Thank you for your co-operation and please recommend
PhotoMAX
77