1
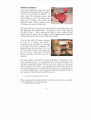
User
Manual
Version 1.0 - February 2002
Table of Contents
Please Drive Safely ...................................................................................... 1
Installation Requirements ............................................................................ 3
Unpacking and Setup Jnstructions ......................... ...................................... 4
Using the CoWorker Handheld Remote Control... ...................................... 9
Network Installation .................................................................................. 12
Network Firewalls and System Administration ........................................ 16
Tour of the User Interface ............... ........... ............................................... 18
Driver's Education .............................. ....................................................... 19
Trouble Shooting ....................................................................................... 30
Contact and Support .................................................................................. 33
CoWorker Ml - Beta Field Test
User Manual
Version 1.0 G- February 2002
[email protected]
Copyright 2002 iRobot Corporation
All rights reserved
iRobof
iRobot Corporation
22 McGrath Highway
Somerville, MA 02143
(617) 629-0055
http://www. irobot.com
Please Drive Safely
The CoWorker robot is a sophisticated
mobile device, with the ability to sense
most things found in office and industrial
environments and either stop or drive
around them. However, like a forklift or
any piece of motorized equipment, safe
operation requires an alert and trained
operator exercising appropriate caution .
A dangerous driver could drive this robot into people or objects, either
willfully or by ignoring the safe driving instructions included in the Driver' s
Education section of this manual. Certain items in offices are not readily
sensed by the robot. Overhanging table tops or chairs without legs at their
comers can be missed by the robot's sensors and struck by an incautious
driver. The robot also cannot sense stair wells or holes in flooring, and if an
unsafe driver commands the robot over such an edge, it will dutifully drive
over the edge and fall.
So, while the robot ' s driving is augmented by its sensors, people will always
be better able to see unsafe situations and avoid driving the robot into those
situations. When using the robot, please remember that you are ultimately
responsible for maintaining safe operation.
Similarly, people near the robot should be aware of its movement and make
reasonable attempts to allow the robot to pass them. The CoWorker robot is
quite good at seeing people and driving around them, however it is possible
for the robot to graze or bump people. People ' s toes are particularly
susceptible, since the robot does not sense anything shorter than 3 inches off
the floor.
When driven by trained individuals with care and consideration for those
near it, the CoWorker robot is as safe as a rolling mail cart. However,
people should not allow themselves to be lulled into a false sense of security,
presuming that it can find its way around as well as a person or see potential
trouble as well as a person.
While driving the robot the following cautions should be observed:
•
•
•
•
•
•
Do not operate near stairs, the robot can fall down them.
Do not operate outside, the robot is not waterproof or dirtproof.
Do not drive under overhangs, the robot cannot see above 20 inches.
Do not drive over chair castors, the robot cannot see below 3 inches.
Do not purposely drive at people or objects. The robot's sensors are
to augment careful driving, not replace common sense.
Remember that YOU ARE THE DRIVER, and not a passive
passenger.
2
Installation Requirements
Before the robot arrives, you will need to have some infrastructure set up
and ready for the robot. If you believe that any of these items will not be
ready at the date of your install , please contact CoWorker Support to see if
the install should continue or if it should be rescheduled.
The following infrastructure is required for the installation and continued
operation ofthe robot.
•
•
•
Standard 120V AC power where the robot wi II be parked
POTS jack and AC power for telephone base station
802.11 b radio network
The POTS (plain old telephone service) jack is for the base station for the
embedded speaker phone in the robot's head . Note that like most speaker
phones, the robot's telephone base station cannot plug into a PBX phone
jack. If you wish to use a PBX system to host your robot's telephone, you
must acquire a PBX to POTS adapter that works with your PBX system.
The radio range from the telephone base station to the robot is
approximately 200 feet, so the POTS line should be installed near the center
of the area of use for the robot. The 802.11 b radio network should also
provide coverage for the area of use for the robot.
You will need the following items to open the shipping crate and set up the
robot.
•
•
•
•
#2 Phillips head screwdriver
PS/2 computer keyboard
PS/2 mouse
VGA monitor supporting 800x600 pixel resolution
Once the robot is set up you will only need these items to fix problems if
something goes wrong with the robot. Otherwise, these items are not
required for continued usage.
3
Unpacking and Setup Instructions
During this initial Beta Field Test
deployment of the CoWorker Ml robot,
each installation includes a visit from
iRobot personnel who will unpack and
perform the initial setup of your robot.
However, if for any reason your robot
must be shipped after the initial
installation, for example for repair or
redeployment at a different facility, you may need to unpack the robot and
set it up yourself. In this case, please follow the instructions below to take
your robot out of its crate, install its batteries, put the robot on its charger,
and setup the robot' s accessories.
Opening the CoWorker Robot's Crate
The CoWorker robot comes in a crate approximately 36 inches long, by 36
inches tall , by 28 inches wide. lt weighs approximately 100 pounds. Please
handle this crate using a palette loader or with at least two
people picking up either end of the crate by the bottom.
Each crate is shipped with shock indicators that will turn
red if the crate is subjected to a 75 G or higher shock. If
the indicator is red, you should not accept shipment of the
crate and return it immediately to iRobot for inspection,
repair, and reshipping.
The crate consists of a bottom platform that supports all of the weight of the
robot, and a cover that is screwed down onto the bottom platform.
To open the crate, remove the Phillips head
screws through the bottom edge of the cover
that hold the cover down onto the base
platform.
The screws that should be
removed are circled in blue on the crate.
4
Remove the cover by lifting it straight up
and off the base platform, lifting it high
enough to clear the robot' s head then
moving the cover off to the side. This takes
two people.
The robot is strapped onto the base platform
and the batteries are trapped within framing
on the base platform. Remove the strapping
holding down the robot, and then lift the robot off the platform and place it
on the floor. It takes two people to lift a CoWorker robot, with one person
grasping the handles on either end.
Remove all packing foam and plastic wrappings from the robot. Place the
packing materials back into the crate so these
materials will be available for future shipments.
Verify that the following items have arrived.
• CoWorker Robot
• Four Sealed Lead/Acid Gel Pack Batteries
• Charger "Drive-Off' Cable
• Telephone Base Station
• CoWorker Handheld Remote Control
• Foam Handheld Carrier
Place the gray foam handheld carrier into the payload bay on the robot. The
red CoWorker remote control can be kept in the fitted holder in this tray.
There is also an extra handset for the robot ' s speakerphone that can be held
in this carrier. (This handset is in the Telephone Base Station box, which we
will unpack in a moment.)
Installing the Batteries
Before you begin installing the batteries, ensure that the black power rocker
switch on the back of the robot is in the off position, with the "0" side
depressed. This will guarantee that the robot cannot accidentally turn on
during the battery installation.
5
Release the batteries from their entrapments in the base platform and place
them into the battery tray in the bottom of the robot. The battery tray may
be opened by releasing the thumb screws on the lower back end of the
CoWorker chassis and opening the access door. Pull on the battery drawer
to slide it out the back of the robot. (Note that on carpeted floors you may
have to lift the back end of the robot somewhat while sliding out the tray to
get it to clear the rubber stops on the access door.)
Inside the battery tray you will find the CoWorker charger. Set this to the
side for installation in a moment.
There are four batteries wired
together into two pairs. The two
batteries wired together should be
placed side-by-side in the tray, with
the electrical battery tabs oriented
towards the front of the robot.
Route the battery cables so that the
connections protrude out through the
back of the tray.
Push the battery tray back into the
robot, being careful to not snag the battery cables or fuses on the inside of
the robot. Next, plug in the two battery connectors to the receptacles just
inside the battery access door. It does not matter which plug goes into which
receptacle, and the plugs are keyed so you can only plug them in the right
way.
Close the battery access door and tighten down the thumb screws to secure
the door.
Setup the CoWorker Charger
Plug the black charger transformer into an
AC power jack. The robot comes with a
short extension cable that plugs into the
robot's white charger plug on the back
panel ofthe robot. The latch on the female
end of this connector has been filed off so
that the robot can be driven off its charger,
and this receptacle will easily pull free of
6
the charger. This is the so-called "remote drive-off charger cable", and it
should be used between the charger and the robot to prevent the charger
from being dragged behind the robot if someone neglects to unplug the robot
before driving it.
Plug the remote drive-off charger cable into the charger socket on the back
end of the robot. Turn the battery power switch on by depressing the end of
the rocker switch labeled " I" . Next plug the charger into the remote driveoff charger cable. It is normal to see a blue spark when you plug in the
charger.
Within 5 or 10 seconds of plugging in the charger, the amber LED next to
the charger plug should begin blinking quickly (about 4 times per second) to
indicate that the battery is being charged. Once charged, the amber LED
will blink slowly (once per second) to indicate that the batteries are full and
that they are being trickle charged to keep them topped off.
Setup the Robot Phone Base Station
Inside the head of the robot there is a
wireless speakerphone.
Remove the
telephone base station from its box. Plug
the phone cable to the bottom of the phone
base station and plug the other end into a
POTS jack (i.e. plain old telephone
service). Plug in its power cable to an AC
jack and into the connector on the bottom
of the phone.
There is an extra handset for the phone packed in the base with the base
station. Please turn on the handset and verify that you have a dial-tone.
Hang up the handset and place it into the charger on the base station.
There is a foam holder for the extra telephone handset and for the CoWorker
handheld remote control that fits into the payload bay on the back of the
CoWorker robot. When the robot is going to be in use and you expect the
handset is going to be used, you may want to remove the handset from the
base station charger and put it into the foam holder. However, note that the
handset' s battery will run down over a few days time and must be recharged
on the base station.
7
Power Up the Robot
Before powering up the robot, ensure that
the Emergency Stop button is released.
Check this by twisting the big red ESTOP
button on the back panel of the robot to the
clockwise one quarter turn. It will release
and pop out if it had been depressed.
To power up you use the small black
button on the back panel of the robot. Press and release this button to power
up the robot. You should see the green LED next to the robot light up as the
robot begins to power up. It takes approximately 2 Yz minutes for the robot
to fully power up. During this time the robot boots its onboard computer,
performs health checks on its onboard real-time control systems and sensors,
and verifies the position of its head and neck by moving them to their lower
limit switches. When the robot has passed its health checks and is ready to
be operated, it will play its "spinning up" sound to indicate that it is ready
for operation. If the "spinning up" sound has not played after 3 minutes,
please refer to the troubleshooting guide for possible solutions or contact
CoWorker Support.
8
Using the CoWorker Handheld Remote Control
Your CoWorker robot comes with an infrared handheld remote control.
This controller lets you manually drive the robot, move its head and neck,
and power down the robot. While not intended for long term operation of
the robot, it allows you to move it around for basic maintenance purposes
such as driving the robot back to its charger. The receiver for the remote
control signals is on the top of the robot body, next to the point where the
robot neck is attached.
Note that to get good signals to the robot from the handheld remote control,
you must point the remote control directly at the receiver, while also holding
it low enough for the signal to go underneath the cover on the top of the
rece1ver.
With your robot, we have included a foam holder for the remote control that
fits into the pickup bed on the back of the robot. The natural tendency when
finished using a remote control is to put it down on a nearby table. While
this is a perfectly fine approach for TV remotes, it is somewhat inconvenient
for the robot remote control, because unlike a TV the robot can start up and
drive away. For that reason we have found that always placing the remote
control into the holder is the most convenient way to have it where you need
it, when you need it. Most of us at iRobot have learned to replace it back on
the robot when we are finished, at least some of the time.
Powering Down
The "PWR" button on the remote control can be used to turn the robot off
To turn off the robot, press and hold down the Power button for 5 seconds.
As the robot sees the first signals to power down it will beep. If the power
down button is held down long enough, the robot will play a " spinning
down" sound and initiate its shutdown . It takes approximately 30 seconds
for the power down to complete.
Note that you should try to always shut down the robot using the remote
control. If you shut down the robot by pressing the black power button on
the back of the robot, or by disconnecting the batteries with the black battery
cutoff switch, or if you allow the robot batteries to run down completely,
you risk corrupting the robot ' s hard drive.
9
Why You Should Power Down Cleanly
Like a desktop PC, during the power down sequence initiated from the
remote control the onboard computer is saving information out to its hard
drives. If you power down the robot by any means other than the remote
control , then the hard drive will not be cleanly shut down. If this happens,
then several minutes of hard drive clean up will happen on the next powerup of the robot, just like a desktop PC. In rare cases the robot will not be
able to automatically clean up the hard drives, in which case you would need
to hook up a monitor and keyboard to the robot and contact CoWorker
Support about how to remedy the problem.
Manually Driving the Robot
The buttons on the remote control labeled forward , back, left and right can
be used to drive the robot. Press and hold these buttons while pointing at the
robot to make it move. Releasing these buttons will stop the robot.
You can use the Fast and Slow buttons to set the speed of movement when
controlling the robot with the handheld remote control. When first started,
the robot defaults to Slow manual driving. Pressing the Fast button once
will change all subsequent manual driving to go faster. Pressing the Slow
button will change back to the default slow driving mode.
If someone is driving the robot over the computer interface, you can still
control the robot with the handheld remote control. When both the computer
interface and the handheld controller are both controlling the robot, the
handheld controller wins as long as you are pressing and holding the drive
buttons. As soon as you release them, control reverts back to the computer
interface.
In the center of the drive control buttons there is a small button labeled Stop.
If you press this button it is exactly like hitting the red Stop button in the
computer interface. It will cancel any current waypoints and stop the robot.
However, the computer user can still create more waypoints, starting the
robot moving again if they do not realize that you are attempting to stop the
robot. You can prohibit all robot movements by hitting the Emergency Stop
button on the back of the robot body.
Please note that the robot is still paying attention to its sensors when you are
driving the robot manually, and it may decline to move if it senses
something in its way. This is done to protect the robot from hitting things as
10
it moves. However, sometimes the sensors will prevent the robot from
moving when you can see that it would really be OK. In this case, you can
just grab a handle on the robot and drag it a short distance away from any
obstacles.
Moving the Neck
You can move the neck up and down by pressing the Neck Up or Neck
Down buttons on the remote control. Once pressed , you do not have to
continue holding these buttons down to keep the neck moving, but can
release them and allow the movement to complete. Note that when moving
the neck up it will move slowly until it is clear of its lower limit switches.
When moving down it will move quickly until it gets to the limit switches, at
which point it will slow down and allow gravity to slowly settle the neck
down to rest against its lower stop.
Moving and Tilting the Head
You can tilt the head up and down by pressing and holding the Head Up and
Head Down buttons on the handheld remote control. The head will continue
to move while you hold the button down.
Note that you are setting a head tilt set point when pressing this button, and
the head will continue to maintain the same tilt angle regardless of the
movement of the neck. When the robot first starts up the head tilt command
is positioned at its lowest limit, pointing nearly straight down . Since the
neck can only move as far down as the neck position allows, there are cases
where the tilt set point is below the allowable range of motion of the head.
This is the case when the robot first starts up and the neck is down.
Therefore, when first moving the head up after the robot has started, it can
take a while before the tilt set point clears the neck and actually begins to
move the head upwards.
II
Network Installation
After initial unpacking, setup, and a short
manually driven joyride, the robot needs to
be set up on your 802.11 b network. To
easily access the keyboard, mouse, and
monitor plugs on your robot please power
down your CoWorker robot (using the
handheld remote control), unplug it from its charger and remove the back shell.
The back shell can be removed by loosening the four retaining screws and
then pulling the shell straight back. Occasionally it takes a little wiggle of
the shell to free it. When replacing the shell, be sure to slide the shell
straight forwards , taking care to engage the shell appropriately through the
volume knobs and buttons on the left-hand side speaker.
With the back shell off, please reconnect
the robot to its charger and attach a
keyboard, mouse, and monitor to the plugs
on the back of the robot ' s computer. The
keyboard plugs into the bottom of the two
PS/2 connectors, and the mouse plugs into
the one on top. Please press the black
button on the back of the robot to power it
up agam.
The robot contains a standard PC running the Red Hat 7.1 distribution of the
Linux operating system. An experienced Linux system administrator will
find these instructions familiar, but they have been written so that anyone
should be able to follow them. For experienced users, they know that there
are several alternative ways to apply these settings, such as using linuxconf
or by directly editing files . These instructions represent an approach that we
have tested and which should be usable by anyone.
1. Log in to the robot as the user root.
When you plug in the monitor and hit the Enter key a few times, you should
see the following (or a similar) prompt:
coworker-prodOl login:
12
Enter the user name " root", hit the Enter key, and then enter the default
password for a new robot. If you do not know the password, or the
password you try did not work, contact CoWorker Support for instructions
on how to boot the robot into single user mode and reset the root password.
2. Change the root password
You should change the root password to one appropriate for your site. This
password need only be known by the system administrator for this robot. [t
is very poor practice to leave the default root password on your robot. Enter
the " passwd" command as shown below, and then enter your password twice
as prompted. If the program complains that it is a bad password because it is
based on a dictionary word, then it might be prudent to pick another more
obscure password, but if you merely continue the robot will accept whatever
password you give it.
coworker-prod 01 root$ passwd
"'J/Afl/X
1r t~(AJ/N']Jows ..().?(.5 N'oT
3. Set the IP address and host information for your robot.
Sr/I~Zr
a. Click on the start "foot", and click through the menus to start
the application found under Programs -> System -> Network
Configuration.
b. Edit the host name, TP address, DNS servers, Hosts, and
Gateways tabs to set the network to whatever is appropriate for
your installation. Here are example values, though you will
have to get appropriate values for your network from your
system administrator.
Names
Hostname : coworker-boston.irobot.com
Domai n : <b l ank>
Search in Ad d i tional d o mains: <bl a n k>
Na meservers: 192.168. 1 .2
1 92. 1 68. 1 .254
Hosts
1 27.0.0.1: local host. l oca l domain l ocalhost
Address
Address 192 . 168.1. 1 5: coworker-boston.irobot.com coworker-boston
Inter f aces
l o:
(as defau l ted)
et h O: 1 92. 1 68. 1 .15
Routing
Default Gateway: 192.168 . 1.254
c. Save the settings and exit the application .
;r- Sf5Tq,ll f/.4;/GS
8N Tt£J(.
t#
~TIC'/,1L. ~ 'lJeL.
/J~~~ ~~Cf(/..&11/'C.ff
4 . Reboot and Setup Networking
a. Shutdown the robot with /sbin/shutdown -h now.
b. Boot the robot, start X Windows, and use the /opt/cisco/bin/acu
program to set the ssro and ensure that the radio broadcasts at
100 m W. The following instructions handle that in detail.
c. Log in as root to the robot, and start X windows with the
command "startx". As your human coworkers for the password
if you do not know it. If it complains that it cannot look up an
IP address for the host name of the robot, click on Continue to
ignore this message. Click on Close or OK to get rid of all the
other "helpful" warning screens presented.
d. Click on the black terminal icon near the bottom of the page to
start a terminal window.
e. Within
the
terminal
window type
the
command
"/opt/cisco/bin/acu" to start the interface to configure the radios.
f. Click on the menu "Commands" -> "Edit Properties" to get the
"350 Series Properties" dialog. In the "System Parameters" tab,
set client name to the your host name. Set the SSID to match
the SSID, for your site.
g. In the "RF Network" tab of the "350 Series Properties" dialog,
set the transmit power to I 00 m W. Some of these radios seem
to start with a default transmit power of 30 mW, and we would
prefer to get the better range implied by the higher power. Hit
"OK" to save these settings. The radio should now associate
with your 802.11 access point..
h. Exit the ACU application.
1.
In the black terminal window, change directories and set the
passwords for the robot web site. There is one user for the web
site named "admin" which will have special privileges in the
"Configurations" part of the web site. Change its password and
14
reserve that account for systems administration . Add another
user name and password of your choosing
J. Shutdown the computer with /sbin/shutdown -h now
k. Remove the keyboard, mouse, and monitor.
Unplug the
charger and replace the back shell on the robot. Once the back
shell is on the robot again, plug in the charger and power up the
robot again by pressing the black button on the back panel of
the robot. The robot is now ready for driving.
15
Network Firewa/ls and System Administration
The Co Worker robot is a rolling Linux networked computer containing a
secure web server specialized to deliver real-time telemetry. All interactions
with the robot by users are performed through this secure web server.
For security reasons, often companies set up 802.11 b Ethernet radio access
within a subnet that has limited access to the rest of the corporate network.
Since the robot is a web server, your systems administrators will need to
open up some firewall access from the robot users' computers to the static IP
address for the robot. Also, the robot needs to be able to access some
services itself, and so the firewall will need to have some services open to
the robot.
The robot needs to be able to initiate access to the following services. (Note
that NTP is optional, but helpful.)
• Domain Name Service- UDP/TCP port 53
• Network Time Protocol- UDP port 123
Users need to connect to the robot using the following services. (Note that
HTTP is optional , but helpful. We plan to use it to redirect users into the
secure web server.)
•
•
HTTPS - TCP port 443
HTTP - TCP port 80
For systems administrators, we have an SSH server running on the robot.
You should allow SSH access into the robot from the computers where your
systems administrators will be working. It will help us to provide the
highest level of support for your robot if it is also possible for iRobot staff to
access this robot via SSH from the machine firewalltl .irobot.com.
However, we fully understand if your network security policies preclude this
kind of access.
•
SSH - TCP port 22
Like all secure web servers, the Co Worker server requires a secure server
certificate. iRobot can provide a trusted secure web server certificate to you
from within the coworker.irobot.com domain . For example, we could
16
provide
a
trusted
server
certificate
for
the
host
name
yourcompany.coworker.irobot.com. However, if you want the robot to have
a host name based in yourcompany.com, only the owner of the
yourcompany.com domain can get a trusted certificate with that name.
However, if you are willing to have a certificate signed only by iRobot
Corporation, I can provide any name you wish . When users connect up to
this host name, they will be told that the server certificate was signed by an
untrusted authority, iRobot Corporation, and asked to confirm that they are
willing to connect to it.
17
Tour of the User Interface
To drive the CoWorker robot, users connect to its onboard secure web server
and use web pages in their browser to see its real-time interfaces. Users'
computers should be running Windows and Internet Explorer 5.0 or later.
The robot control software runs as a Java applet in that environment. Other
operating systems and other browsers may be tried, but our experience is
that it runs best in Windows on recent releases of Internet Explorer.
Within the interface there are 6 major areas .
•
•
•
•
•
•
Real-time video image with heads-up display overlays in the center of
the screen
Overhead sensor map showing the things in the surrounding
environment that the robot is currently sensing
Button bar on the left for controlling the phone, laser, and guarded
motion
Power and data connection status displays on the left
Inching arrows and rotation controls in the center
Camera, head, and neck controls on the right.
The Driver' s Education section below describes the use of these controls.
18
Driver's Education
Driving a CoWorker robot is as
"]CoWorker Ml - Microsoft Internet EMplorer
intuitive as we could make it you c I.IC k on a spot ·m t he File Edit View Favorites Tools Help
picture and the robot goes
there. However, there are tricks
to using the robot well and
certain things you should know
about the robot to use it safely and effectively.
Connecting to the Robot
The first thing to do is to log in to the web site on your robot. Enter the site
for your robot, such as https://host.yourcompany.com/. Remember to put
the "s" in "https", since that is the only way to connect to the robot' s secure
web server.
When you connect to the web server on
the robot, it wi II ask you for a user
name and password. Enter these and
you will be taken to the home page for
the robot.
~
Pleese type your user neme and pl!lssword
Site
c.oworker-someMile I!Obot com
Ree!m
•RobotWebdnve
UserNMne
r
Seve !his pesSWOfd '"your password lial
After successfully entering your User
Name and Password, you will be taken to the robot' s home page. In this
page there are several links. The page for driving the robot is called " Web
Drive". Click on that and you will be taken to the Web Drive page.
19
Web Drive Application
The robot is driven and controlled using the Web Drive page. On this page
you ' ll find the application shown below.
Neck Down
1539.9 Kbps
Video A~te
I
17.8 fps
All of the elements of the interface are described in detail below.
Sensor Map
In the upper left hand corner of the interface there is
an overhead map, showing a picture of the robot and
all of the robot' s current obstacle sensor readings.
The robot is facing up in this map.
This picture represents what the robot itself can see
of the room around it. The dots represent objects in
the room that the robot can see with its sensors.
This information is used by the robot ' s Guarded Motion system. The
Guarded Motion system is the software process that continually monitors
this map and the current drive commands given to the robot. When the robot
20
is moving, Guarded Motion will compare its current drive commands to this
map and this system will either steer the robot towards the clearest path or
will stop the robot from moving if no clear path exists.
If you are trying to drive the robot and it doesn ' t move, you can look to this
map to see if the robot believes its path is blocked. The current speed of the
robot is also shown here, in miles per hour.
Colors are used to show which sensor originated a reading and the relative
age of that reading. Each green dot represents a sonar echo off something
near the robot, with older sensor readings turning a darker green . The
SonaScan is a unique scanning sonar developed specially for this robot. It
senses objects up to 12 feet away from the robot, making 22 separate sonar
pings across the front of the robot twice a second .
Red dots are used to show sensor readings from the infra-red ranging
sensors. These are a shorter range sensor, seeing a maximum of 2 feet away
from the robot. There are 16 infra-red range sensors mounted around the
robot, and each is read 10 times per second .
Yellow dots are used to show sensor readings from the infra-red proximity
sensors . These are the shortest range sensors, detecting objects from 3 to 6
inches away from the robot. These are used a close up bump sensors . There
are 10 infra-red proximity sensors mounted in various locations on the robot,
each read 20 times per second .
Button Bar
On the left near the lower edge of
the applications is the button bar
with its associated buttons.
On the far left is a red phone button. This is used to answer the
speakerphone in the robot' s head. To use this button you should first call the
telephone number and wait for it to ring a couple times. This will make the
phone in the robot ring. Click once on this button to pick up the robot
speakerphone extension on its phone line (the button picture will change to
show that the telephone has been picked up). After picking up robot ' s
phone, speak through the robot as you would any speakerphone. When
done with your call , remember to hand up the phone.
21
The microphone button next to the phone is used to reset the microphone
volume in the robot' s speakerphone. If the sound from the robot is too soft,
click on this button to reset the automatic gain control in the robot's
speakerphone. This will turn up the volume, allowing you to hear better.
(People near the robot will hear a soft beep as you do this.)
The third button shows the eye exposure warning label for the laser pointer
built into the robot head. Click this button to turn on the laser so you can
point things out to people near the robot. Click this button again to turn it
off. When the laser is on the button picture will change to show the laser
light. Note that the laser is mounted in the robot's head below the camera.
This means that the laser spot will always show up below the center of the
image you see from the robot. Because of the extreme zoom available in the
robot's camera, you can actually zoom in tight enough that the laser spot
will be lost off the bottom edge of the picture. Zoom out to see the laser
spot again . The laser pointer in the robot is rated at 4 mW. This is
somewhat more powerful than typical pocket laser pointers, but is still
considered eye safe. However, recommending practice is to avoid any
occurrence of looking into the laser. Please be careful to not shine the laser
pointer into people' s eyes.
The last button in the button bar is the "GO" button. This button directs the
robot's Guarded Motion system to turn off and to ignore the sensor readings
in the Sensor Map. This lasts for I 0 seconds, or until the " STOP" button is
pressed. The "GO" button should be used with extreme care, if at all. This
button is included for situations where the robot ' s sensors indicate an
obstacle blocking the path of the robot, but where you, as the human driver,
decide to override the sensors and direct the robot to continue moving
anyway.
An example situation where we have used this button appropriately is where
there was a large, leafy plant in an office hallway. The leaves of the plant
protruded quite far into the hallway. While people will simply brush past
these leaves, the robot' s sensors detected the leaves and Guarded Motion
then prevented the robot from continuing past the plant. When driving past
that plant we would get close to it, verify that no one was in front of or near
the robot, then hit the "GO" button and drive the robot past the plant.
Examples of situations where is it inappropriate to use the "GO" button are
when the robot is moving slowly in a narrow or turning passage or where the
22
robot hasn't gone far enough around an obstacle to get into a clear path. In
most situations where you are tempted to use the "GO", it is more
appropriate to use the "STOP" button to cancel an unobtainable driving
command, and instead to give the robot a sequence of driving commands to
go around an obstacle.
Battery Charge, Network Status, and Stop
On the lower left of the screen there rrlflf;=~:F:!~~~~J~i~
are several displays that show the Data Rate j5399 Kbps
amount of charge in the battery, the Video Rate ].""7-:.B-:-fps _ ___..;___..;__
network status, and a " STOP" button .
The green bar is like a fuel guage, filling up with green from right to left as
the battery approaches full charge. Printed over the top of the battery is the
current battery voltage. This number will range from 21 volts for a nearly
empty battery up to 29.5 volts during the last stages of the battery fast charge
stage. When the batteries are fully charged , the voltage will read 27.3 volts,
as the batteries are "floated " at this level to keep them topped off.
To the left of the battery icon is an icon indicating whether the battery is
currently being charged or whether the robot is running off battery power.
When the robot is plugged in to the charger, the "Juice Bar" icon will appear
to show that the robot is drinking deeply and recharging its batteries. When
not plugged in, this icon will change to a battery to show that the robot is
running off battery power.
The "Data Rate" display shows how much network bandwidth is currently
being used between the robot and your computer to transmit video images
and telemetry such as the Sensor Map. You will see 22.0 Kbps or lower
when connecting through a telephone modem, or up to 600.0 Kbps when the
robot is showing images at its maximum rate.
The " Video Rate" display shows how frames (or images) per second are
making it to your computer from the robot. You will see 0.3 fps for
telephone modems, and up to 9.5 fps for fast network connections.
The "STOP" button is used to stop the robot and cancel any current driving
commands. Hitting the space bar on your keyboard is the same thing as
clicking on the "STOP" button. Pressing this button will immediately stop
23
the robot and cancel all currently outstanding driving targets (called
"waypoints").
Drive Controls
The lower center area of the interface contains
additional controls for moving the robot body. These
controls are used in addition to the standard approach
for driving, clicking in the image.
+
Click Below To Rotate
The arrows are used to move the robot in small
increments.
These are generally called " inching
arrows", since they move the robot in small increments of a few inches at a
time. Clicking the top arrow will move the robot forward 4 inches, and
clicking the bottom arrow will move the robot backwards 4 inches. Clicking
on the side arrows will rotate the robot 5 degrees in the direction of the
arrow.
At the bottom of this area is a rotation bar. Clicking in the white area will
rotate the robot the indicated number of degrees to the right or left. Clicking
in the white area beyond the 90 degree mark will rotate between 90 and 180
degrees, depending on how close you click to the edge of the white area.
Note that if you click the forward or backward arrow while a current
waypoint (i.e. a driving target location) already exists, that exiting waypoint
will be moved forwards or backwards by 4 inches. If you click a rotation
inching arrow, or a large rotation in the bottom rotation bar while a waypoint
exists, then that rotation will be added to the existing waypoint. That means
that the rotation will be done when the robot reaches the waypoint it is
currently approaching. This is useful when you are driving the robot and
want to turn a corner. For example, if you are driving down a hallway and
want to turn through a doorway on the left, you can click to place a waypoint
in front of the doorway, then click to rotate 90 degrees left, before you reach
the doorway. This directs the robot to drive down the hallway to the spot in
front of the door, then turn towards the door. You are then ready to click
through the door to enter the room.
24
Zoom, Head, and Neck Controls
On the lower right side of the interface you can
find the controls for elements of the neck and
head ofthe robot.
I
zoom
.
-
Head
.
r-
NeckU";J
'II Neck Down
The vertical scrollbar next to the word "Zoom"
1.--:
controls the camera zoom. The low end of the
::~
scale zooms the camera out to its widest angle
setting. Moving the scroll thumb (the little square in the scroll bar) up
towards the top of the scale zooms the camera in to tight telephoto field of
view. This camera contains a 72x zoom, so this control is very sensitive,
and a little adjustment zooms the camera a lot.
~
~
The next vertical scroll bar, labeled "Head" controls the tilt angle of the
head. Pulling the slider up towards the top will point the head to look up at
the ceiling, pulling it down looks to the floor. Note that when the neck is
down, the downward range of motion is limited due to the robot's "chin '
hitting the neck. To look straight down at the floor, move the neck up, and
then pull the head all the way down .
The two buttons at the far right move the neck into its up and down
positions. Note that when moving the neck up it will move slowly for the
first part of its travel , and then move quickly for the remainder. This is
because of speed limits we've placed on the neck while it is within its limit
switches. Also note that when moving the neck down it will move quickly
for a while, and then go very slowly. As the neck enters its optical limit
switch, we relax the controllers and let gravity settle the neck down into its
hard stop. This ensures that we don't drive the neck hard into its stop, and it
provides a "zero power" location to hold the neck. (Note that the head is
driven via a worm gear, which inherently holds its position , which means all
positions can be held while expending zero energy.)
Real-Time Video Image
The primary means for driving the robot is to click on the floor in the image,
and the robot will drive on the top of the spot that you clicked on. There are
some subtleties to doing this well , but to get started pick a spot on the floor
close to the robot, with a clear path to that spot, and far away from anything
else in the room. Click there to make the robot drive. When you click, a
blue "waypoint" will be created on that spot on the floor, and the robot will
25
I
drive on top of the waypoint. When the robot reaches that waypoint, it
disappears and the robot waits for its next command.
In the center of the interface
you ' ll find real-time video with
30 overlays.
This image is to be used to let
you see what is near the robot, to
let you click on new places where
you want the robot to go, and to
show progress towards driving
targets that the robot is already
moving towards.
Within the display there are some overlays that are always drawing in white
and green lines, as seen in the image above The white lines are always draw
at the center of the image. The green lines are drawing "on the floor" .
There is a grid that lies under the robot, and there are two arcs. The first arc
is drawn I meter (39 inches) away from the center of the robot, and the
second arc is drawn 2 meters (78 inches) away from the center of the robot..
(These displays were largely tools used during development, and in the next
release of the software these overlays will be removed.)
To drive the robot, you move your mouse into the image and click on the
floor. The spot you click on will be the position of the center of the robot.
This target is called a "waypoint" . When you are moving the robot over the
image, there will be a white and gray set of circles drawing on the floor
around your mouse. These circles represent the position ofthe robot. When
placing waypoints you should be careful that no part of the outer circle
touches anything in the surrounding environment. If it does, then you are
commanding the robot to drive into the thing that the circle touches.
When you click, then the white and gray circles will disappear and in their
place you ' ll find a blue and black waypoint, exactly where the previous
circles were. The inner blue circle represents the minimum width of the
robot. The output black circle represents the outer edges of the robot. For
safety, we recommend that you not try to use the inner blue circle, but
instead use the output black circle as your guide to where there are safe
waypoints. This waypoint continue to be drawn as the robot drives towards
26
and ultimately on top of this waypoint, disappearing when the robot arrives
at its target. Note that when a rotation has been commanded, the target
direction ofthe waypoint is shown as a red arrow on the top of the waypoint.
Driving Tips
As the driver of the robot, you are responsible for its safe and efficient
operation. While the interface to driving the robot is straightforward in
many ways, there are subtleties to driving that take some practice to learn.
We recommend that you review the driving tips below while taking the
robot on a practice drive of an hour or two.
•
Start with Short Steps: Whi le learning to drive, it is helpful to use
many, short driving steps to get to where you are going. The first
inclination when people initially use the CoWorker interface is to find
the furthest away piece of carpet in the image and click on it. This is
likely a bad idea until you are more experienced in driving the robot.
At first it is very helpful to take short steps as you learn what the robot
can and cannot sense in its environment.
•
Freely Use the Stop Button and Space Bar: It is OK to use the space
bar or click on the stop button while driving. This will cancel the
current waypoint and stop the robot. Often people are shy at first
about using the STOP button . Remember that the robot will not be
offended, and that it is much easier to stop the robot before it gets near
trouble than it is to back the robot out of a tight spot once it has gotten
too close to a wall , table, or chair.
•
Steer Clear, Down the Middle : In order to give the robot the best
chance of making it to the waypoints that you create, try to keep the
target positions for the robot as far away from walls, tables, and chairs
as possible. Placing waypoints in the middle of the hall gives the
robot the most maneuvering room while it is driving. If the robot ends
up too close to something, hit the STOP button and give the robot a
new target, right where you want it.
•
Avoid Things the Robot Can't Sense: There are limitations to the
sensors on the robot, that make it hard for the robot to see some
things. Don ' t drive the robot close to those things, and use many
short waypoints if you must drive near them .
27
There are four types of objects that the robot has a hard time seeing:
• drop-offs such as stair wells,
• things shorter than 3 inches tall,
• things that overhang from above 20 inches tall, and
• very smooth, shiny surfaces such as polished metal chair or table legs.
The robots itself is designed to be able to roll over thresholds or other bumps
in floors. As part of that design we arranged the robot's sensors such that
they do not detect anything shorter than three inches tall. This means first
that we don ' t detect holes in the floor and if commanded to do so, the robot
will fall down into such holes.
Short items, such as the castored legs of certain popular types of office
chairs, are too short for the robot to see. So, if you drive the robot too close
to these chairs, the robot will drive over these chair legs, possibly becoming
entrapped in the chair. When driving the robot near chairs, it is always a
good idea to use many, short steps.
Overhangs are items that are suspending in the air without any support
directly underneath the outer edge. Conference room tables typically present
large overhangs, since the table legs are generally not at the corners of the
table, but are underneath and close to the center of the table. Other such
itmes are many kinds of ship work tables. The robot cannot sense above
about 20 inches high, and so will not see overhanging surfaces. If the robot
is driven too close to these, it can hit its head on these items and become
entrapped beneath them.
The robot ' s sensors use sound and infra-red light to detect objects. Surfaces
that are very smooth or very shiny often will not bounce sound or light back
towards the robot, but will reflect our signals off in another direction.
Typical objects that the robot has a hard time seeing are very shiny metal
chair or table legs. [f driven towards these items, the robot may not detect
them and may hit them.
•
Enter Doors in Two Steps, Get Close then Go Through: When
driving the robot through a doorway, it is often tempting to put the
next waypoint deep into the room you are entering. When the robot is
more than a few feet away from a door, it can be difficult for the robot
sensors to determine that there is an opening big enough for the robot
28
to pass through. As a result the robot may veer off away from the
door, looking for an opening. If this happens, hit the STOP button,
and drive the robot back. To avoid this circumstance in the first place
it is useful to place a waypoint right in front of a door, and then place
the next waypoint through the door and into the next room. This way
the robot is close enough to the door to easily see it and drive through
into the next room.
•
Make More than One Waypoint at a Time: When driving long
distances, down hallways for example, it is useful to create the next
waypoint before the current one is reached. The robot can queue up
an arbitrarily long sequence of waypoints. When there is another
waypoint after the one currently being sought, the robot will not slow
down as it gets to the first waypoint. The waypoints you can enter are
limited to being about 20 feet away from the robot (due to camera
resolution issues). By creating the next waypoint in line before the
current one is reached, you can much more quickly move the robot
distances that are greater than 20 feet.
Our experience is that it takes a full run through the Driver' s Education
materials and about 8 hours of driving practice to become an expert driver.
29
Trouble Shooting
For each of the possible problems listed below there are several alternative
causes listed. These are generally ordered from the simplest or most obvious
to the least likely and most obscure. Often you will be able to discount the
first suggestions out of hand. Please use this list by reading through the
issues and trying out those you think are most likely first. If they do not
work, then we suggest a more exhaustive elimination of the potential causes.
These lists are not intended as a wild goose chase, but as an attempt to
suggest some hypotheses for common problems.
If going through these suggestions does not help, please do not hesitate to
contact CoWorker Support through any ofthe means listed below. We will
help you as best we can.
• Phone: (617) 629-0055
• Email : coworker-support@ irobot.com
Robot Will Not Power Up
• Check that the battery connector switch is turned on , with the " I"
depressed .
• Check that the battery plugs in the battery tray in the bottom back of
the robot are plugged in.
• If the hard drive has been removed for any reason, it is possible to
incorrectly plug in the hard drive connector, and this can prevent the
CPU from powering up. Remove the back shell , open up the CPU
box by unscrewing the two thumb screws on the case, and inspect the
hard drive. You should see four pins (the jumper pins) on the back of
the hard drive above where the connector plugs in to the hard drive.
You should also see a small gap between these pins and the plastic
edge of the connector. Assure yourself that this connector is aligned
correctly and is pressed fully into the hard drive.
Handheld Remote Control Does Not Work
• Check that the red LED on the remote control lights up when buttons
are pressed. If it does not, then replace the remote ' s batteries. If
replacing the batteries does not work, then call CoWorker Support for
a replacement remote.
• Point the remote at the robot and press button number 7. This makes
the robot play a sound that lets you know that the remote itself is
working. (For fun , button number 8 plays a longer sound. Pressing 7
30
does play a sound, check for remote control reprogramming below, or
try the suggestions under Robot Does Not Move below.
• On rare occasion the remote control can get into a state where its
buttons have been reprogrammed. This can prevent manual driving
from actually moving the robot. If the red LED lights when the
buttons are pressed, and pressing 7 plays the sound, but other
functions do not work, then this may have happened to your remote.
To reset the remote control, remove its batteries and press the Power
button until the red LED on the light goes out. Replace the batteries
and check that the red LED works again when the Power button is
pressed .
• In some cases bright lighting conditions can blind the remote control.
Try shading the remote control receiver on the robot with your hand
and shooting the remote control directly at the receiver. Under some
lighting conditions, acrobatics of this sort might be required.
Robot Does Not Move
• Check that the green LED on the back panel of the robot is on , to
indicate that the robot is turned on. If not, please press the black
button on the back of the robot to turn it on.
• If the green LED is on, then check that the red LED on the back panel
ofthe robot is blinking. Note that this red LED is somewhat dim, and
you may need to shade it with your hand to see it blinking. If it is not
blinking, then the robot ' s control system is not running. You should
report this to Co Worker Support and attempt to restart your robot. To
restart the robot, you should press the black button on the back of the
robot and hold this button down for 5 seconds. This should turn off
the robot, turning off the green LED. Once the green LED is off,
press and release the black button on the back of the robot again to
turn it on. It may take more than 2 Y2 minutes to restart the robot in
this situation, but it should not take more than 5 minutes. Once the
robot has restarted and played its "spinning up" sound, attempt to
drive the robot again.
• Check that the red Emergency Stop button on the back of the robot is
not depressed. If it is depressed, you can release it by turning it one
quarter turn to the right. It is a latching spring loaded button that stays
in when depressed. To release the Emergency Stop you should gentl y
twist the red button one quarter turn clockwise. This should release
the button latch, allowing it to pop back out again.
31
•
•
Check that there is nothing in the way of the robot that its sensors are
picking up. Even when driving the robot with the hand-held remote
control, the robot is monitoring its sensors and will not drive into
anything it can see.
Occasionally we have seen a bug in which the hardware motor drivers
trip into a BRAKE mode. This will cause all motors to cease moving
until the robot is restarted again . If you suspect that this has occurred,
use the remote control to power down the robot and then press the
black button on the back of the robot to restart it. Please inform us at
coworker-support@ irobot.com if you experience this problem.
RobotDoes Not Respond to Network
• Make sure that the robot is on. If you are at a site remote from the
robot, someone on site may have turned it off.
• Make sure you type https ://<your-host>/. You cannot simply type the
host name, nor can you type just http before the host name. The robot
uses a secure web server, which requires an "S" for "secure" on the
end ofthe http protocol name.
• Open a command window and try to ping the robot. On Windows,
click in the taskbar on Start -> Run, and then enter "cmd.exe" as the
command. In the DOS window the is presented, type "ping <yourrobot-host-name>". This should print a response saying that it
contacted the robot and giving response time information.
• Check that you are using the correct user name and password when
logging in to the robot.
• If the robot could not be pinged , please contact your systems
administrator. If necessary, network configuration parameters can be
checked by following the procedures listed above that were used to
initially set the network parameters.
32
Contact and Support
We have set up a support database for this field test at the following email
address.
•
•
Email: [email protected].
Phone: (617) 629-0055 , ask for Co Wo rker Support at extension 250
All email to the address above will cause an entry to be created in our issue
tracking system and we will then use the generated issue number in all
further correspondence with you on that issue. An engineer from iRobot
will get back to you as soon as possible.
33