1
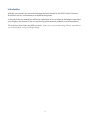
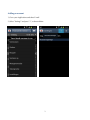
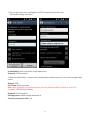
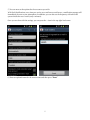
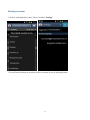
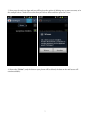
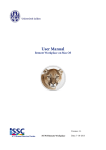
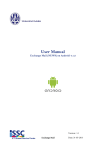
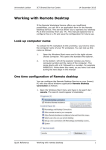
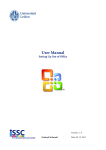
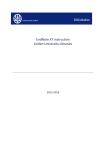
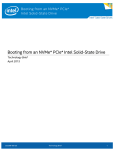
Manual
Exchange (NUWS) on Android 4.x
Version: 1.1
Exchange 2010
Date: 13-03-2013
Introduction
With this user manual, you can set the Exchange mail and calendar for the NUWS (New University
Work Place Services) environment on an Android smartphone.
At the end of this user manual you will find an explanation of how to delete the Exchange account from
your telephone (for instance if you are experiencing synchronisation problems on your smartphone).
The screenshots shown below may differ per device. Always try to use manual settings, because many devices
try to autocomplete (wrong) Exchange settings.
2
Adding an account
1) Go to your Applications and select E-mail
2) Select “Settings” and press “+”, as shown below.
3
3) You can now enter your e-mail address and ULCN password and select your
“Microsoft Exchange ActiveSync”
E-mail Address: Enter your faculty e-mail address here
Password: ULCN password
4) Enter the details below, as shown in the example above and then press the > icon in the top right-hand
corner.
Domain: VUW
User Name: ULCN user name
Note: when the domain is not listed separately, then the domain should be entered for the ULCN
username: VUW\ULCN-username
Password: ULCN password
Exchange Server: mobile.campus.leidenuniv.nl
Use Secure Connection (SSL): Yes
4
5) You can now set the options for the account as you wish.
With Push Notifications, every time you receive an e-mail on our mail server, a notification message will
immediately be sent to your smartphone. In addition, you can also set the frequency with which the
system checks for new e-mail (every x minutes).
Once you are done with the settings, you can press the > icon in the top right-had corner.
6) Enter an optional name for the new account and then press “Done”
5
Deleting an account
1) In the E-mail application, select “Menu” and then “Settings”
2) You will now be shown an overview of all the accounts in your E-mail application.
6
3) Now press the trash can logo and you will be given the option of deleting one or more accounts, as in
the example below. Check the accounts that you wish to delete and then press the V icon.
4) Now select “Delete” (only the data on your phone will be deleted, the data on the mail server will
remain available).
7