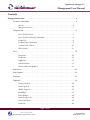
1
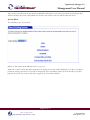
Opportunity Manager 3.2
Management User Manual
Contents
Management Section . . . . . . . . . . . . . . . . . . . . . . . . . . . . . . . . . . . . . . . . . . . . . . . . . . . . . . . . . 3
Customer Information . . . . . . . . . . . . . . . . . . . . . . . . . . . . . . . . . . . . . . . . . . . . . . . . . . . . . . . 4
Search . . . . . . . . . . . . . . . . . . . . . . . . . . . . . . . . . . . . . . . . . . . . . . . . . . . . . . . . . . . 4
Management Notes . . . . . . . . . . . . . . . . . . . . . . . . . . . . . . . . . . . . . . . . . . . . . . . . 5
Company Info . . . . . . . . . . . . . . . . . . . . . . . . . . . . . . . . . . . . . . . . . . . . . . . . . . . . . . . . . . . . . . 6
Gross Profit Divisors . . . . . . . . . . . . . . . . . . . . . . . . . . . . . . . . . . . . . . . . . . . . . . . 7
Gross Profit Per Man Day Minimums . . . . . . . . . . . . . . . . . . . . . . . . . . . . . . . . . 8
Global Tax. . . . . . . . . . . . . . . . . . . . . . . . . . . . . . . . . . . . . . . . . . . . . . . . . . . . . . . . 8
Loaded Labor Calculation . . . . . . . . . . . . . . . . . . . . . . . . . . . . . . . . . . . . . . . . . . 9
Commission / Divisor . . . . . . . . . . . . . . . . . . . . . . . . . . . . . . . . . . . . . . . . . . . . 10
Phase Codes . . . . . . . . . . . . . . . . . . . . . . . . . . . . . . . . . . . . . . . . . . . . . . . . . . . . 12
Cost . . . . . . . . . . . . . . . . . . . . . . . . . . . . . . . . . . . . . . . . . . . . . . . . . . . . . . . . . . . . . . . . . . . . . 13
Inclusions: . . . . . . . . . . . . . . . . . . . . . . . . . . . . . . . . . . . . . . . . . . . . . . . . . . . . . . 14
Exclusions. . . . . . . . . . . . . . . . . . . . . . . . . . . . . . . . . . . . . . . . . . . . . . . . . . . . . . . 15
Equipment . . . . . . . . . . . . . . . . . . . . . . . . . . . . . . . . . . . . . . . . . . . . . . . . . . . . . . 17
Search Pointers . . . . . . . . . . . . . . . . . . . . . . . . . . . . . . . . . . . . . . . . . . . . . . . . . 22
How to add a new product . . . . . . . . . . . . . . . . . . . . . . . . . . . . . . . . . . . . . . . . 23
Sales Force . . . . . . . . . . . . . . . . . . . . . . . . . . . . . . . . . . . . . . . . . . . . . . . . . . . . . . . . . . . . . . . 26
Sales Reports . . . . . . . . . . . . . . . . . . . . . . . . . . . . . . . . . . . . . . . . . . . . . . . . . . . . . . . . . . . . . 28
Configure. . . . . . . . . . . . . . . . . . . . . . . . . . . . . . . . . . . . . . . . . . . . . . . . . . . . . . . . . . . . . . . . . 33
Proposals. . . . . . . . . . . . . . . . . . . . . . . . . . . . . . . . . . . . . . . . . . . . . . . . . . . . . . . . . . . . . . . . . 34
Proposal Search. . . . . . . . . . . . . . . . . . . . . . . . . . . . . . . . . . . . . . . . . . . . . . . . . 34
View Proposal . . . . . . . . . . . . . . . . . . . . . . . . . . . . . . . . . . . . . . . . . . . . . . . . . . 36
Modify Proposal. . . . . . . . . . . . . . . . . . . . . . . . . . . . . . . . . . . . . . . . . . . . . . . . . . 37
Job Budget . . . . . . . . . . . . . . . . . . . . . . . . . . . . . . . . . . . . . . . . . . . . . . . . . . . . . . 37
Labor Budget . . . . . . . . . . . . . . . . . . . . . . . . . . . . . . . . . . . . . . . . . . . . . . . . . . . 38
Labor Assignment . . . . . . . . . . . . . . . . . . . . . . . . . . . . . . . . . . . . . . . . . . . . . . . 38
Instruction Sheet . . . . . . . . . . . . . . . . . . . . . . . . . . . . . . . . . . . . . . . . . . . . . . . . 39
Load Calc . . . . . . . . . . . . . . . . . . . . . . . . . . . . . . . . . . . . . . . . . . . . . . . . . . . . . . . 41
Page 1 of 57
Solutions For Profit & Growth
����������� ������������ ����
1-877-816-6649
www.opactive.com
Opportunity Manager 3.2
Management User Manual
System Sheet . . . . . . . . . . . . . . . . . . . . . . . . . . . . . . . . . . . . . . . . . . . . . . . . . . . 42
Comfort Concerns. . . . . . . . . . . . . . . . . . . . . . . . . . . . . . . . . . . . . . . . . . . . . . . 43
Job Log. . . . . . . . . . . . . . . . . . . . . . . . . . . . . . . . . . . . . . . . . . . . . . . . . . . . . . . . . . . . . . . . . . . 45
Presentations . . . . . . . . . . . . . . . . . . . . . . . . . . . . . . . . . . . . . . . . . . . . . . . . . . . . . . . . . . . . . 46
Add Pictures. . . . . . . . . . . . . . . . . . . . . . . . . . . . . . . . . . . . . . . . . . . . . . . . . . . . 48
Customize Comfort Concerns and Comfort Considerations . . . . . . . . . . . . 53
Load Calc . . . . . . . . . . . . . . . . . . . . . . . . . . . . . . . . . . . . . . . . . . . . . . . . . . . . . . . . . . . . . . . . 56
Select Salesperson . . . . . . . . . . . . . . . . . . . . . . . . . . . . . . . . . . . . . . . . . . . . . . 56
Component Ratings. . . . . . . . . . . . . . . . . . . . . . . . . . . . . . . . . . . . . . . . . . . . . . . 57
Page 2 of 57
Solutions For Profit & Growth
����������� ������������ ����
1-877-816-6649
www.opactive.com
Opportunity Manager 3.2
Management User Manual
This manual refers to 5 (five) Types of Proposals: (1) Custom, (2) General, (3) Production, (4) Home Depot and (5) Retro. If
you did not purchase a license for all Types disregard the references to ones you are not licensed for, as their functionality will
not be activated in your customized program.
Management Section
The Management Section is divided into 10 sections:
1.
Customers: used to manage the customer database (Homeowners & Builders)
2. Company Info: used to manage the company settings and profit factors: margins, divisors, GPMD, commissions,
loaded labor.
3. Proposals: used to manage the sales proposals: Reproduce Proposals produce Job Budgets, Labor Budgets, Labor
Assignments, Pull Sheets, and Installation Instructions.
4. Sales Reports: used for statistics and reports on sales performance, closing ratios, upsell ratio, add on ratio,
Page 3 of 57
Solutions For Profit & Growth
����������� ������������ ����
1-877-816-6649
www.opactive.com
Opportunity Manager 3.2
Management User Manual
equipment report etc.
5. Sales Force: used to manage sales force goals and to add or remove sales personnel.
6. Configure: used to input computer and network settings (used when installing the software)
7.
Job Log: form used to track vital job statistics, start to completion
8. Presentations: used to manage Wheel of Value, Wheel of Comfort, Comfort Concerns, Comfort Considerations, and
Cyber Showroom.
9. Cost: used to manage Equipment, Products and / or Services: Material cost, Labor hours, Spiffs, Sales Memos,
Descriptions. Also, used to manage the Selection page labels and Sales selection criteria.
10. Load Calc: the newest addition to Opportunity Manager is used to manage Sales Person details and assign Good/
Better/Best ratings for components.
As you can see, there is also a FAQ button and a Version button. The former is still being compiled, and thus appears a little
empty if you click on it. The latter simply provides a quick way for you to know what version of Opportunity Manager with which
you’re working (in this case, 3.2).
Customer Information
The Customer Information Section is divided into two tables: one is for Home Owners and the other contains Builders. From
here you may access all customers entered into the Opportunity Manager Program.
Search
The Home Owner search page is the easiest way to find particular customers quickly. The Opportunity Manager can use 3
different criteria to locate customers.
1.
Last Name
2.
First Name
3.
Address
Page 4 of 57
Solutions For Profit & Growth
����������� ������������ ����
1-877-816-6649
www.opactive.com
Opportunity Manager 3.2
Management User Manual
The fastest way to find the customer is by the Last Name. If you do not know the complete name simply type in the first letter of
the name or first few letters of the name, select the Last Name in the “Select By” field. Now click Start Search. Any customer
whose last name contains that sequence of characters will appear in the results.
Once you have found the customer, click on the name to highlight the homeowner, then click on the View button and the
homeowner will be displayed in the homeowner info page.
Builders may be found following the same Search and View, procedures outline for the Home Owners above.
In this section you can view, delete, or edit customers. All customers must be added during the Sales Process. Click on the
Home Owner tab or Builder tab and use the Search function to find the customer quickly.
Management Notes
On the Home Owner Info page the manager may enter Management Notes, which are seen only by the manager, and not by the
sales person.
Page 5 of 57
Solutions For Profit & Growth
����������� ������������ ����
1-877-816-6649
www.opactive.com
Opportunity Manager 3.2
Management User Manual
Company Info
The Company Information screen contains all the basic company statistics: Company Name, Address, Phone numbers,
Company Slogan, etc. The Company Slogan entered here will appear at the top of both pages of the proposal. As with any
Slogan, keep it simple and to the point. In addition this screen contains six (6) links; two are view-only links (Global Gross Profit
Divisors and Gross Profit Per Man Day Minimums). The remaining four links open input screens (Global Tax, Loaded Labor
Calculation, Commission / Divisors, and Phase Codes).
Page 6 of 57
Solutions For Profit & Growth
����������� ������������ ����
1-877-816-6649
www.opactive.com
Opportunity Manager 3.2
Management User Manual
The two screen links which cannot be modified, only viewed, are Global Gross Profit Divisors and Gross Profit Per Man Day
Minimums.
The former lets you view the global divisors set for each type of proposal - Retro, Custom, General, or Production, while the
latter lets you view the minimum Gross Profit Per Man Day for each type of proposals.
Gross Profit Divisors
This is a view-only area for a quick glance at the Global Divisors; the divisors are set on the Commission / Divisors table. A
global divisor is used to mark up all products in a category unless overwritten by an item divisor set at the Cost section at the
entry screens. (Item divisor will be covered later).
Page 7 of 57
Solutions For Profit & Growth
����������� ������������ ����
1-877-816-6649
www.opactive.com
Opportunity Manager 3.2
Management User Manual
Gross Profit Per Man Day Minimums
The GPMD minimums are set on the Commission / Divisors table, but can be viewed here. The Gross Profit Per Man Day
(GPMD) Minimum is one of the most exciting tools provided in the Opportunity Manager. Whenever the sales person performs
a proposal using the Opportunity Manger sales process, in the background, the software calculates the actual GPMD for a
proposal and compares it to the minimum that is set here in the management section. In our case, the minimum is set at 500
for General Homes. If the actual GPMD for a General Homes proposal came out to be less than the 500, the program would
automatically increase the price of the proposal to meet the 500 GPMD minimum. Let’s go through an example of this. We
propose a job that would normally price for $4000. The Total cost for the job is $2800, giving us a $1200 Gross Profit (GP).
The job has a total of 24 labor hours (3 days) in it. This will give us a GPMD of $400. The Opportunity Manager Software
will perform a check against the minimum GPMD, which we have at 500 minimum per Man Day. It then increases the price
of the proposal by 300. Displaying a retail cost of $4300 (4300-2800=1500 GP, 1500/3days = 500 GPMD). The Opportunity
Manager software has now calculated a profitable job based on the GPMD minimum (that you have set previously). The
salesperson, following your company policy, still has the ability to give a discount in the discount field of the Proposal Preview if
he so chooses. This would have the effect of overriding the GPMD minimum calculator.
The four Input Screen links: Global Tax links to a screen for inputting taxes that are part of Cost of Goods sold. Loaded Labor
Calculation links to a screen for calculating the loaded labor for each type of proposal. Commission Divisors links to a screen
for inputting profitability factors. Phase Codes links to a screen for changing the descriptions for the available phase codes.
Global Tax
This is where you set the tax rate, if tax is paid to the distributor on materials or if tax is calculated on cost, do not enter the
retail sales tax here. Tax must be entered as a percentage value, not a decimal value, for example 10 not .10 or 6 not .06, or 8.75
not .0875. If tax is entered here and marked as active in the Cost Section of management module for a particular product, the
calculated tax amount becomes part of Cost of Goods Sold and is marked up. (You will have the choice per product or item to
include this tax as part of cost or not to include it as part of cost) Some states do not impose this type of tax.
Page 8 of 57
Solutions For Profit & Growth
����������� ������������ ����
1-877-816-6649
www.opactive.com
Opportunity Manager 3.2
Management User Manual
Loaded Labor Calculation
This is where you will enter the values necessary for the program to calculate the loaded labor for: Retro, Custom, General, and
Production.
Page 9 of 57
Solutions For Profit & Growth
����������� ������������ ����
1-877-816-6649
www.opactive.com
Opportunity Manager 3.2
Management User Manual
Paid Sick-vacation-Holidays: Enter the number of days that you offer your installation employees per year. In our example,
we offer 5 days vacation and 3 paid holidays with 2 sick days. This gives us a total of 10, which is the value that would
be entered in this text box.
Health Insurance: Enter the cost in this text box. The cost is entered is per employee, per month. More than likely, each
employee’s health insurance cost will differ, so it may be best to use the average monthly rate or to use the highest rate.
For example, if one employee costs you $61.79 a month and two others cost you $50 a month, use the average rate of
$53.93 or the highest rate of $61.79 a month as the amount to enter in the Heath Insurance text box.
Other Benefits refers to any other benefits offered to employees, such as 401K or tool allowance, etc. The figure must
be entered in dollars per hour cost per employee. In our example this is 1.03 per hour. This is an often-overlooked
amount that is necessary to correctly calculate your true Loaded Labor cost per employee.
Payroll Tax % must also be entered. The entry here is a percentage value, for example use 10 not .10. Do not use decimals
(except as part of a percent). For further explanations of the math formulas, refer back to your pre-install guide.
Labor Unit Value Enter the number of minutes that are to represent one (1) labor unit. This value is used to calculate the
total number of labor units on the Labor Budget and Labor Assignment reports, by breaking each installation hour into
units. For example, your labor manager wants to use 6 units to make up one hour (each unit is = 10 minutes). Thus,
your unit value entered here would be10.
Hourly Wages Enter the highest hourly pay rate for the senior employee in each grouping: Custom, General, Production,
Retro, and Fab. (A few companies average the rate within a grouping.)
With each change of these entries, the “Loaded Labor” values will recalculate. The Loaded Labor amount for each group will
be divided by the Divisor, while creating a proposal, resulting in the retail price for your Labor. For example, you have an install
loaded labor of $31.43. The program would then divide 31.43 by your Global Divisor (.55 which is a 45% GP) to generate a
retail price of $57.15 per hour.
Let’s say that you have been charging 65.00 per hour, retail, for Custom installation labor. With the current settings, you would
be giving up $8.85 per hour of revenue. In order for you to set the Opportunity Manger Program to calculate everything at
a 65.00 per hour rate, we have to manipulate the numbers we entered above to reach this level. The easiest way to find the
proper Install Loaded labor is to reverse the math process. Take 65.00 and multiply that by the global divisor (65 X .55). This
gives us 35.75. We must have an Install Loaded Labor of 35.75 with your Global Divisor set at .55 to reach a 65.00 per hour
charge for Custom labor. The easiest way to achieve this value is to enter zero (0) for each of the following fields: Paid SickVacation-Holiday, Health Insurance, Other Benefits, and Payroll Tax, and then enter the 35.75 in the Custom Hourly wage field.
Also, this procedure is to be used if you want to use a different loaded labor value than the one the program calculates.
Commission / Divisor
This link opens the screen containing the “Commission application”, Global “Gross Profit Divisors”, “Gross Profit Per Man
Day Minimums” and the “Optional Divisors”. A Global Divisor is the divisor that is applied to ALL the items your company
sells in the Opportunity Manager Application. The Opportunity Manager will calculate the divisors for you; under the heading
Profitability Factors, enter your desired Gross Profit % and Commission % to be paid at that Gross Profit level, with that
information the program will calculate the Divisor (Note, enter the Commission and Gross Profit as whole numbers, do not use
decimal numbers). You can also use the checkboxes to select which Commission levels are available for which proposal type.
Page 10 of 57
Solutions For Profit & Growth
����������� ������������ ����
1-877-816-6649
www.opactive.com
Opportunity Manager 3.2
Management User Manual
1) First, answer the question: Is commission part of Cost? Select “Yes” or “No”. If “Yes” is selected, the commission
will be marked up as part of Cost of Goods sold. “Yes” is recommended, because Commission is part of the cost of
a project and if you do not mark it up, your finances will not be correct. If you select “No”, Commission will not be
marked up and will not be part of Cost of Goods sold. If you select “No”, remember that the Estimated Gross Profit
on the Opportunity Manager Job Budget report will generally be higher than the actual Gross Profit reported on your
accounting financials. (Not including commission as a cost is one of the reasons many HVAC Contractors make such a
low net profit.) The rows to the right of the Comm # Code contain all the information associated with the code, if that
code is selected by the Salesperson to create a proposal these will be the factors that the program will use to calculate
commission and profit. Each Comm # Code will have the following associated with it:
2) Profitability Factors: this is where you enter your Gross Profit, Commissions, and Gross Profit Per Man-Day
Minimums. With the information entered here the program will calculate the DIVISORS.
A) Enter your Gross Profit % Estimated. (Your desired Gross Profit level) Use percentage values, not decimals.
B) Enter the corresponding Commission you want to pay your Salesperson for selling a project at that Gross
Profit level. Use whole numbers, not decimals.
Page 11 of 57
Solutions For Profit & Growth
����������� ������������ ����
1-877-816-6649
www.opactive.com
Opportunity Manager 3.2
Management User Manual
C) Enter the corresponding Gross Profit Per Man Day (GPMD) Minimums that you are willing to accept at this
Gross Profit level.
3) Global Divisors
This is where you select your GLOBAL DIVISORS; you may select only one global for each, Custom, General,
Production and Retro. This is the default divisor that will be used to mark up all Product and Labor, unless you
overwrite it with an item divisor.
A) Select one Global Divisor from each column, Custom, General, Production, and Retro.
B) If you do not select a Global Divisor you will not be able to perform that type of proposal
4) Optional Divisors
This is where you may select additional Divisors, if selected the Sales person will be given the choice of all the Divisors
that are checked. If the Salesperson chooses one of the Optional Divisors, to create a proposal, it will overwrite the
Global divisor using the Profitability Factors associated with the Optional Divisor. IF Optional Divisors are SELECTED,
YOU WILL NEED TO TRAIN YOUR SALES STAFF ON THE PROPER TIMES TO USE EACH DIVISOR. NOTE: EACH
DIVISOR IS GIVEN A COMM # CODE. You will need to make a chart for your sales staff with the Comm # and its
Commission level and your policies / rules, indicating under what circumstances an Optional Divisor Comm # may be
used to create a proposal. Select all the Optional Divisors you want to be available, to the Sales Staff, for each type of
proposal: Custom, General, Production, or Retro.
To save, click on “OK” and click on “Save” at the Company Information screen. To exit without saving, click on “Cancel”.
Phase Codes
This is where you select and Edit the Descriptions for 13 of the 17 phase codes. Descriptions and the Codes for M1, S1,
E1, and O1 are not editable. The Alpha-Numeric Codes (R1, R2 etc) are not editable, but you are allowed to change their
descriptions, and reorder the Phase Codes to make the more frequently used codes easier to select
A) Editing a Description: click on and highlight the description you want to edit, then click “Edit”. This opens the editing
screen. Here, highlight the portion of the description you want to change and type in your new description.
B) Re-ordering: click on the Code you want to move, click on the arrows to move it up or down. This is the order in which
the Phase Codes will appear in the Cost section.
Phase Codes are used on the Job Budget, Labor Budget, Labor Assignment, and Pull Sheets to organize labor and material by
type of crew or job phase. Tracking projects by phase is an accounting and labor management tool.
Page 12 of 57
Solutions For Profit & Growth
����������� ������������ ����
1-877-816-6649
www.opactive.com
Opportunity Manager 3.2
Management User Manual
Cost
The Cost section is where you will manage all the products and labor. This is where you can:
•
Add or edit products or scenarios,
•
Add or edit cost and labor hours,
•
Add or edit Inclusion or Exclusions,
•
Make a product or scenario active or inactive.
•
Add or edit an item divisor.
•
Add or edit Sub-categories and Search Criteria.
The products are separated into the Categories; each category represents a selection screen in the sales module. Each product
input screen will have entry fields and selection dropdown boxes. There is a search engine available for each category. In
addition there is a Cost Report and Retail Report available for each proposal type, within a Category.
The Cost Report lists the material cost, spiff and labor hours for each item; active or inactive, within the Category. The Retail
Report lists the retail price of active items only.
Clicking on “Cost” button opens the screen displayed below.
Page 13 of 57
Solutions For Profit & Growth
����������� ������������ ����
1-877-816-6649
www.opactive.com
Opportunity Manager 3.2
Management User Manual
Inclusions:
This is where you add or edit inclusions. (Inclusions are selected during the proposal process and print onto the proposal.)
To add or edit:
A) Click on the Inclusions button.
B) Search Inclusions: From the dropdown select the type of inclusions you want to see; Custom, General, Production or
Retro. Then click Start Search. This will display all the inclusions that active for the type you selected in the dropdown.
(Clicking the Browse button will display all of the existing inclusions, even if a given inclusion isn’t marked as active for
any of the types.)
a.
Scroll to find the inclusion.
b.
Click on the inclusion to select it.
c.
Click on the Edit button.
Page 14 of 57
Solutions For Profit & Growth
����������� ������������ ����
1-877-816-6649
www.opactive.com
Opportunity Manager 3.2
Management User Manual
d.
In the Description, highlight the word or phrase and type in the changes you want to make.
e.
Check the boxes in front of all the proposal types you want this inclusion to be active for in the Sales Module,
and uncheck those for which you don’t want this inclusion to be active.
f.
Click on the “Save” button to save the changes you have just made. (Fail to save and the changes will need to
be done again.)
C) To Add a new inclusion: Click on the Inclusions button, click on Add, (or click on Add New in the Inclusion Information
window), fill in the description, make it Active for each proposal type required, and click on Save.
NOTE: Use the inclusions to help reinforce the value of your product and your company. The inclusions are designed to allow
your company to really set yourselves apart from the competition. “Brand” these to your company. Instead of saying “remove
and dispose of old equipment”, say “Value Heating’s recycling program”. Instead or saying “Disconnect switch”, say “Includes
Safety Shut-off Switch”.
Exclusions
This is where you add or edit exclusions. (Like inclusions, exclusions are selected during the proposal process and print onto
the proposal.)
Page 15 of 57
Solutions For Profit & Growth
����������� ������������ ����
1-877-816-6649
www.opactive.com
Opportunity Manager 3.2
Management User Manual
To add or edit:
A) Click on the Exclusions button.
B) Search Exclusion: From the dropdown select the type of exclusions you want to see; Custom, General, Production or
Retro. Then click Start Search. This will display all the exclusions that active for the type you selected in the dropdown.
a.
Scroll to find the exclusion
b.
Click on the exclusion to select it
c.
Click on the Edit button
Page 16 of 57
Solutions For Profit & Growth
����������� ������������ ����
1-877-816-6649
www.opactive.com
Opportunity Manager 3.2
Management User Manual
d.
In the Description, highlight the word or phrase and type in the changes you want to make
e.
Check the boxes in front of all the proposal types you want this exclusion to be active for in the Sales Module,
and uncheck any types for which you don’t want this exclusion to be active.
f.
Click on the “Save” button to save the changes you have just made. (Fail to save and the changes will need to
be done again.)
C) To Add a new exclusion: Click on the Exclusions button, click on Add, (or click Add New from the Exclusion Information
page) fill in the description, make it Active for each proposal type required, and click on Save.
Equipment
This is where you add or edit items that are displayed on the Equipment Selection page of the Sales Module. While there are
ten different categories (of which “Equipment” is only one), they are similar enough to be included here under the same process
description.
You can change the order in which the subcategories appear in a given cost section. To do this, first click on one of the
subcategories in the subcategory field. Then use the vertical arrows on the right-hand side of the field to bring it up or down in
the order. Be sure to click “Save Order” once you’ve determined what order the subcategories should be in.
Page 17 of 57
Solutions For Profit & Growth
����������� ������������ ����
1-877-816-6649
www.opactive.com
Opportunity Manager 3.2
Management User Manual
To change a large amount of equipment prices simultaneously, click on the “View All Models” button. The following page will
be displayed:
Page 18 of 57
Solutions For Profit & Growth
����������� ������������ ����
1-877-816-6649
www.opactive.com
Opportunity Manager 3.2
Management User Manual
Input the percentage value for the mark-up (or mark-down) in the appropriate field at the top of the page. In this example,
there’s a 5% mark-up. For any component with a material cost you wish to alter, click the leftmost checkbox (or, if every
component in this subcategory needs to be updated, click the “Select All” checkbox). Once you have all of the required boxes
checked and the percentage change entered, click the “Save” button in the upper right-hand corner. The material costs will be
updated, and the checkboxes and percentage increase/decrease fields will be cleared.
On this page, you can also make changes on a case by case basis with respect to the Material Cost, Labor, Fab Labor, Spiff,
Warranty, Active Status or Taxable Status.
To add a subcategory:
A) Click the “Add Categories” button:
Page 19 of 57
Solutions For Profit & Growth
����������� ������������ ����
1-877-816-6649
www.opactive.com
Opportunity Manager 3.2
Management User Manual
B) On the Add/Modify Equipment/Product Labels page,
1.
Decide whether you want to modify Major Equipment (Equipment, Other Equipment and Equipment
Accessories) or Other Products, and select the corresponding button.
2.
Select the category into which you want to add a new subcategory from the dropdown menu.
3.
Enter the name of the new subcategory.
4.
Click the “Add Label” button.
Page 20 of 57
Solutions For Profit & Growth
����������� ������������ ����
1-877-816-6649
www.opactive.com
Opportunity Manager 3.2
Management User Manual
The “Delete Label” and “Modify Label” buttons work broadly the same way, but you have to select one of the existing
subcategories first. You can use the lower level fields to delete, modify, or add criteria within the subcategory.
To add or edit a component:
A) Click on the Equipment button.
B) Select a type of Equipment from the Sub-category window by: pointing at and clicking on it; (Furnaces, Air Handlers,
Split Heating, Split Cooling etc.)
To Edit a component:
Click Search. This will display the Equipment Search window.
a.
In the dropdown box, located under the words “Search By”, select the field to search by.
b.
Next in the field you have just chosen: select an item from the dropdown, or type in the required info.
c.
Click on the Start Search button. (this will find the Active items, to find Inactive items, Check the box in front
Page 21 of 57
Solutions For Profit & Growth
����������� ������������ ����
1-877-816-6649
www.opactive.com
Opportunity Manager 3.2
Management User Manual
of Search for inactive items only)
d.
Under Search Results, highlight the item you want to edit or view
e.
Click on Edit.
f.
Edit the item
g.
Click on the Save button, to save the changes you have just made. (Fail to save and the changes will need to
be done again).
To Add:
Click on the Equipment button, click on (highlight) a Subcategory, click on Add, this will open the add screen.
Open each tab and specification, fill in each field as explained below, activate it for each proposal type
required, then click on Save. (Forgetting this last step will make you need to do the changes again.)
Other product selection pages follow the same procedure as outlined above, although the editing process is different in some
cases.
Search Pointers
Generally the fastest way to search is by TYPE.
If searching by Model Number use may use part of the model number, for example: when looking for model TUD080R936F,
Page 22 of 57
Solutions For Profit & Growth
����������� ������������ ����
1-877-816-6649
www.opactive.com
Opportunity Manager 3.2
Management User Manual
you may search by, T or TUD or 80 etc.
If searching by Manufacturer, you must type in the full manufacturer name. Here, partial searches aren’t allowed.
How to add a new product
a.
Type in a Model Number
b.
Select an Equipment Type from the dropdown
a.
c.
(Note if the Equipment Type you want is not there and you want to add it, follow the instructions for Adding
Categories
Select a Class from the drop-down. (Again, if the Class you want is not there and you want to add it, follow the
instructions for Adding Categories)
Page 23 of 57
Solutions For Profit & Growth
����������� ������������ ����
1-877-816-6649
www.opactive.com
Opportunity Manager 3.2
Management User Manual
d.
Type in the Product Family
e.
Type in the Manufacturer. (Be consistent, type it the same way each and every time you enter a new product. A good
rule of thumb is to use all capitals.)
f.
Type in a Description
g.
Click on the Specifications button.
a.
Enter all the specifications that apply. (Fields may be left blank if you do not want to use them, or if there is
nothing to input into them.)
b.
Click on OK to save. If you do not click OK, the entries will not be saved.
h. Click on each tab and fill in all applicable fields (as explained below).
a.
RNC Memos/Memos: enter a Custom / General Memo and a Production Memo. (These memos will be
displayed in the Sales Module, list customer benefits, and/or salesperson prompts. You may want to copy
and paste these memos under the other memo tabs, Benefit Memo, Management Memo.) Under the Gas
Appliance, Add Ons, Additional Components, Venting, Duct Work, Miscellaneous, or Labor Matrix pages,
a Memo tab appears rather than the RNC Memo tab you’ll find on the Equipment, Other Equipment, and
Equipment Accessories pages.
b.
Fab Labor: make an entry here only if this product has fabrication labor (work performed by fabricators, not
installers). Fabrication labor will not appear on the installers’ Labor budget or Labor Assignment.
c.
Taxable: this box’s default setting is: checked, when checked it will use the Global Tax rate entered at the
Company Information page. The Global Tax is set at Zero (0) unless you pay tax at the distributor level.
Uncheck the box if you pay tax at the purchase level, if you do not want tax to be applied to this particular
product, or if you collect tax on the retail price from the customer. Check this box if tax is paid on cost of
product or labor. (For example, if you pay tax to the distributor for products or directly to the state on product
you purchase for resale.)
Page 24 of 57
Solutions For Profit & Growth
����������� ������������ ����
1-877-816-6649
www.opactive.com
Opportunity Manager 3.2
Management User Manual
d.
Labor: enter the hours associated with installing this product or scenario - the hours may vary by proposal type
of installation. Then, select a Phase Code by clicking on the desired Phase Code description. Then click on
the button next to each type you want to assign the highlighted phase code. (A different Phase Code may be
selected for each Type or used for all Types. Note: phase codes are used to order product & labor on the Job
Budget, Labor Budget, and Labor Assignment.)
e.
Active For: check the box in front of each type of proposal for which you want this to be active in the sales
module.
f.
Benefit Memo - for Retro proposals only: enter a benefit statement or salesperson prompt.
g.
Material: enter the cost for each type of product or Scenario. The cost may vary for each type of proposal. (Do
not include warranty, install labor, fab labor, or spiffs, they each have their own entry tab)
h.
Retail Price: this is the price the product will be sold for using the default Global Divisor or the Item Divisor
you have selected. This is a Read-Only field that is calculated from the values in the other fields.
i.
Addon: check all the boxes where this product is to be considered an add-on for a particular type of proposal.
(This is a management tool with which you will be able to track a salesperson’s performance and ability to sell
Add-ons against their Add-ons Goal entered in Sales Force area.)
j.
Spiff Type: enter the dollar amount of the spiff, then check the box for each type for which the spiff is to be
Marked UP. (Spiffs are additional commission, paid to the salesperson, used as a strategy to entice your sales
staff to promote a particular product. We suggest that you mark up all spiffs. If you do not mark them up, your
estimated Gross Profit will be lower on the budgets because this is truly part of cost and you have not treated
as such.)
k.
Total Cost: This Read Only field totals up all cost fields: material, warranty, labor, tax etc associated when
entering this item. Use this cost to compare to your previous estimating system to see if costs are comparable.
If there is a difference look for input errors here or determine if the previous cost were incorrect. After you’ve
entered the cost, use the drop-down menu to select which proposal type you want the cost reports to use.
l.
Upsell: check all the boxes where this product is to be considered an upsell for a particular type of proposal.
(This is a management tool with which you will be able to track the salespersons performance and ability to
Upsell against their Upsell Goal entered in the Sales Force area.)
m. Item Divisors: enter an item divisor for each proposal type in which you want to overwrite the Global Divisor
for this item. If used, item divisors must be entered as a decimal. Then, check the box in front of each type you
want the Item Divisor to be active for. A Margin (GP) of 1 will be displayed if the active button is not checked.
n.
Warranty: enter an amount for warranty reserve if this is your method of tracking warranty.
o.
Mgmt Memo: type in a memo. This memo is viewed here in the management module only. This is where you
can make notes or formula explaining how or why you developed the entries made for this product or scenario.
Example: if you use the warranty cost, you could put your warranty formula here, $25.00 for…Furnaces ...etc
Page 25 of 57
Solutions For Profit & Growth
����������� ������������ ����
1-877-816-6649
www.opactive.com
Opportunity Manager 3.2
Management User Manual
Sales Force
The Sales Force area is where you can manage the settings and data assigned to your salespeople, and assign them sales goals
to reach.
This is the first screen to appear. If you want to search for an existing salesperson, use the search options at the top, to find
a salesperson. If you need to add a salesperson in, click the Add button at the bottom. You can also get a quick view of every
salesperson on your staff by clicking the Browse button.
Page 26 of 57
Solutions For Profit & Growth
����������� ������������ ����
1-877-816-6649
www.opactive.com
Opportunity Manager 3.2
Management User Manual
Only the lines marked with an asterisk necessarily have to be filled in. The rest of the lines are used to set a salesperson’s goals
for each month. When finished adding or editing a salesperson’s information, be sure to click Save.
Page 27 of 57
Solutions For Profit & Growth
����������� ������������ ����
1-877-816-6649
www.opactive.com
Opportunity Manager 3.2
Management User Manual
Sales Reports
To create a sales report, first decide what the range of the report is going to be. Select a start date and an end date for the
range by using the date selectors at the top of the page.
Click on the desired report and it will be displayed. If you receive an error message, it means that the date range you have
selected does not contain any proposals that you are looking for. Most of the reports are self-explanatory.
The Summary reports will give you a report sorted by salesperson, while the detailed report will display each individual
proposal, sorted by Proposal ID. All reports will be displayed in an Explorer window.
The Pending, Sold, and Lost reports will show you all proposals during the time frames requested that have those particular
statuses.
The Total Proposals reports will give you reports of all proposals during the time frame requested.
Page 28 of 57
Solutions For Profit & Growth
����������� ������������ ����
1-877-816-6649
www.opactive.com
Opportunity Manager 3.2
Management User Manual
The Delete Proposals link will allow you to delete extraneous proposals. Keeping your system relatively free of excess proposals
will save you a lot of time when you synchronize.
Page 29 of 57
Solutions For Profit & Growth
����������� ������������ ����
1-877-816-6649
www.opactive.com
Opportunity Manager 3.2
Management User Manual
For any proposal you wish to delete, click on the Delete checkbox next to the proposal information. Then, click the “Delete”
link. Any proposal you’ve selected will be deleted.
The Sales Force Performance report will give you a report of closing ratios by salesperson and company wide, for the time frame
requested.
The Equipment Proposed/Sold report will give you a report of the total number of individual pieces of equipment that were
proposed to customers during the time frame requested.
Page 30 of 57
Solutions For Profit & Growth
����������� ������������ ����
1-877-816-6649
www.opactive.com
Opportunity Manager 3.2
Management User Manual
Each category has its own section to look at. Off to the right is the first list of proposed and sold items for each category. To
narrow down specific items in a category, click on a category and then click the “View” tab. Repeat this process until you get to
the level you wish to scrutinize, at which point, click “Report”. The report will open in an Explorer window, as displayed below:
Page 31 of 57
Solutions For Profit & Growth
����������� ������������ ����
1-877-816-6649
www.opactive.com
Opportunity Manager 3.2
Management User Manual
Page 32 of 57
Solutions For Profit & Growth
����������� ������������ ����
1-877-816-6649
www.opactive.com
Opportunity Manager 3.2
Management User Manual
Configure
The configure section is set up by an Opportunity Interactive trainer. This section determines how the program reads the
information in the Opportunity Manager program. Changing anything in here may cause the program not to work, so it’s best to
avoid opening it, unless instructed to by an Opportunity Interactive Technical Support Specialist.
Page 33 of 57
Solutions For Profit & Growth
����������� ������������ ����
1-877-816-6649
www.opactive.com
Opportunity Manager 3.2
Management User Manual
Proposals
After the salespeople have synchronized, or you have done proposals on the same machine as the management program, the
proposals will show up here. After you click on the button, the first screen you will come to is this:
Proposal Search
This is the page to search for proposals. You may search for a proposal by using any of the criteria fields listed above. For
example, if you know what the customer’s last name is Smith, then type Smith in the “Home Owner (L), change the “Search By”
drop down box to “Home Owner (L)” and then click “Start Search”:
As you can see at the bottom of the screen, in this case the search brought up 2 different proposals for the last name of “smi”.
To view a particular proposal, highlight one of them and then click “View”. In this case, columns without information in them
(“Builder Name,” “Job No.,” “Lot #,” “Subdivision,” and “Plan”) have been collapsed
Page 34 of 57
Solutions For Profit & Growth
����������� ������������ ����
1-877-816-6649
www.opactive.com
Opportunity Manager 3.2
Management User Manual
After selecting a proposal and clicking “View”, this is the page that shows up.
Page 35 of 57
Solutions For Profit & Growth
����������� ������������ ����
1-877-816-6649
www.opactive.com
Opportunity Manager 3.2
Management User Manual
On the left hand side of this screen is the “proposal ID, builder name (if applicable), home owner name, the sales price of
this proposal, the total cost of this job, the gross profit made on this job, the GPMD made on the job, the install hours, any
additional hours and the sales person who proposed the job. The “Memo” field is where the notes that the salesperson
entered are displayed. In the permit fields is a place to type in the permit numbers for this job. On the right hand side is
where you can put in the model numbers and their respective serial numbers. This can be used in case of recalls to see which
customers received which model and serial numbers. Below that is the status of this proposal. All proposals that come into the
management program will initially be marked as pending. For the closing ratios of your salespeople to be accurate, the status
of their jobs needs to be marked accurately. Use the drop-down box to change the job from pending to either sold, lost or
duplicate. When you marked the job “sold”, there is a place to underneath to put it the date the job was sold. This is an optional
field. The “Job No.” is a unique number you will assign to the job. If the job is marked “sold”, this field is required. The HD
button is for Home Depot proposals – in other proposals, it isn’t active.
View Proposal
On the far right hand side is a place to view specific items in the proposals. The first tab is “View Proposal”. This tab will take
you to the 3 pages that were printed out for the customer. For more information on these pages, consult the Sales module
manual.
Page 36 of 57
Solutions For Profit & Growth
����������� ������������ ����
1-877-816-6649
www.opactive.com
Opportunity Manager 3.2
Management User Manual
Modify Proposal
The next tab is “Modify Proposal”. This will actually take you to a modified version of Opportunity Manager’s Sales module.
This button allows you to make changes to an existing proposal. For example, if the customer calls back and wants to add an
electronic air cleaner to their proposal, instead of running through another proposal, you can edit this proposal to add it in.
When you edit any proposal, it will create a new proposal using a different “Proposal ID”, to leave the original intact.
Job Budget
The next tab is “Job Budget”. When you click on this tab, it will take you to this screen:
At the top of the screen is the customer’s information. There are also 2 drop down boxes to use. The first one is to select which
system to look at. If a proposal has more than 1 system, use this drop down box to look at each job budget. The other drop
down box is used to look at the job budget. The default is to look at it by “category”. The other is to sort the job budget out by
“phase code”.
At the bottom of the page is a list of the items that were selected on the proposals. Next to that is their quantity, material and
equipment cost, any material tax, warranty cost, install labor hours and cost per item, any shop fab hours and cost, any no install
hours and cost, labor tax, the phase code for each item, the individual divisors, the spiffs and the spiff divisors. All of the totals
are listed at the bottom. The other item listed is the commission the salesperson made on the job. This report also lists the
Page 37 of 57
Solutions For Profit & Growth
����������� ������������ ����
1-877-816-6649
www.opactive.com
Opportunity Manager 3.2
Management User Manual
man-days needed, what gross profit % was used, what the gross profit of the job proposed was and the estimated GPMD.
Labor Budget
The next button on the Proposal Information screen is “Labor Budget”:
This page is used to view the actual times your install crew installed each item. Once again, the drop down box at the top can be
changed to look at different system for the same job.
Labor Assignment
The next button is “Labor Assignment”.
Page 38 of 57
Solutions For Profit & Growth
����������� ������������ ����
1-877-816-6649
www.opactive.com
Opportunity Manager 3.2
Management User Manual
You can use this as a time sheet for the installers to take with them out on the job. On the left-hand side, you can select the
items you want them to install on a particular day and put them in the order you want them installed. Change the number in the
order field on the left and use the “Delete Row” link on the right to take out the items you don’t want them to install that day. To
the left of the “Delete Row” lines is a place for the installers to write in the actual hours they finished each item in.
At the bottom of the page are a series of spaces in which the installer can input information about the day’s installation. The
starting and ending odometer of their vehicle, did they finish their labor budget on time, if they were in an accident or were
injured on the job and if so, if they reported it to a supervisor and finally a place for them to sign each day.
Instruction Sheet
The next button is the “Instruction Sheet”.
Page 39 of 57
Solutions For Profit & Growth
����������� ������������ ����
1-877-816-6649
www.opactive.com
Opportunity Manager 3.2
Management User Manual
This is where the installation instructions that the salesperson put in during the proposal show up for the installer. Also, if the
salesperson put in any existing photos, they will also show up here.
Page 40 of 57
Solutions For Profit & Growth
����������� ������������ ����
1-877-816-6649
www.opactive.com
Opportunity Manager 3.2
Management User Manual
At the bottom of the page is a place to add in 2 additional photos for the installer to look at before they go out on the job. To
add them in, use the browse button to search for them in your computer. The next tab is the Pull Sheet.
The pull sheet lists everything that proposed on the job. You can once again, put these items in order of how you want to appear
to the installer by entering values in the Order Field column and then clicking “Re-order” at the bottom. You can also delete
items off of the pull sheet by clicking the “Delete row” line on the right.
Load Calc
The next tab is “Load Calc”.
Page 41 of 57
Solutions For Profit & Growth
����������� ������������ ����
1-877-816-6649
www.opactive.com
Opportunity Manager 3.2
Management User Manual
This is used to review the load calc the salesperson did while out at the house. Select the system and room by using the drop
down box and then click “View”. Below will be the summary of the load for each room and the total for the house.
System Sheet
The next button is the “System Sheet”.
When you click on this tab, this will be the first screen you see.
NOTE: This section is only used for Retro proposals. If an existing form was not completed during the sales process, it will tell
you that no existing system has been selected, meaning that the sales staff did not complete the form when they created the
proposal. To view the system sheet, click on the category of the sheet that was filled in.
Page 42 of 57
Solutions For Profit & Growth
����������� ������������ ����
1-877-816-6649
www.opactive.com
Opportunity Manager 3.2
Management User Manual
Provided it’s been filled out, this sheet should be printed out and given to the installer to look at along with the pictures from the
other pages.
Comfort Concerns
The last tab is the “Comfort Concerns”.
Page 43 of 57
Solutions For Profit & Growth
����������� ������������ ����
1-877-816-6649
www.opactive.com
Opportunity Manager 3.2
Management User Manual
This page is used to review the comfort concerns the customer answered during the sales process. If this was not filled out,
it will state that at the top of the screen. This would tell us that the sales person did not go through this with the home owner
during the presentation. When closing out of the proposal section, the program will ask if you have saved any changes.
Selecting no will stop the window from closing, but clicking yes will close the window – regardless of whether you’ve actually
saved or not.
Page 44 of 57
Solutions For Profit & Growth
����������� ������������ ����
1-877-816-6649
www.opactive.com
Opportunity Manager 3.2
Management User Manual
Job Log
The job log is used to track certain information about each job that has been sold.
Page 45 of 57
Solutions For Profit & Growth
����������� ������������ ����
1-877-816-6649
www.opactive.com
Opportunity Manager 3.2
Management User Manual
Presentations
The presentation section is where you will set up your Wheel of Value, Wheel of Comfort, Comfort Concerns and Comfort
Consideration. The Wheel of Comfort and the Comfort Considerations are used if you have purchased the New Construction
module. Both of the wheels are set up the same way, as are both of the comfort questions.
Under the “text” side of either wheel you will come to a screen like this:
Page 46 of 57
Solutions For Profit & Growth
����������� ������������ ����
1-877-816-6649
www.opactive.com
Opportunity Manager 3.2
Management User Manual
This is for the “Wheel of Value”. The Wheel of Comfort looks the same but has some different categories. The two are set up
exactly the same. Click on the category to which you would like to add some things or edit them.
Page 47 of 57
Solutions For Profit & Growth
����������� ������������ ����
1-877-816-6649
www.opactive.com
Opportunity Manager 3.2
Management User Manual
As you can see, there are a few default items pre-entered in this category. If you would like to edit a particular item, type the
new phrase or word in the “Individual fields on web page” box. You can also change the way they show up by changing the
order field. Use the “Order of fields” box to adjust the numbers. The left and right arrows will take you one item forward or
back. The arrows on the far left and right will skip to the beginning or end of your list of items. To add a new item in, click “Add”.
To see what the “wheels” look like to the salesperson or the customer, click “View”. And when making any changes, remember
to click on “Save”.
Add Pictures
To add in pictures to either wheel, click on the Images button on the initial Presentations window. This will take you to a list of
tabs to choose from to add in pictures.
Page 48 of 57
Solutions For Profit & Growth
����������� ������������ ����
1-877-816-6649
www.opactive.com
Opportunity Manager 3.2
Management User Manual
Click on any category for which you will be adding in a picture.
Page 49 of 57
Solutions For Profit & Growth
����������� ������������ ����
1-877-816-6649
www.opactive.com
Opportunity Manager 3.2
Management User Manual
This will display the first picture in this category. You’ll also notice an order field in here, just like the one on the text side.
There’s also a field in which to select the type of the image – you can choose between Graphic and Movie. To add an image,
click “Add”:
Page 50 of 57
Solutions For Profit & Growth
����������� ������������ ����
1-877-816-6649
www.opactive.com
Opportunity Manager 3.2
Management User Manual
After you click Add, the screen will go blank. Add in a caption, which will show above the picture for the customer. Also, put in
an order number for the picture. To select which picture you will be using, click the “Browse” tab:
Page 51 of 57
Solutions For Profit & Growth
����������� ������������ ����
1-877-816-6649
www.opactive.com
Opportunity Manager 3.2
Management User Manual
This will take you to this screen. Locate the picture on your computer and select it. The picture will show up in the “File
Name” box at the bottom. Click the “Save” button to continue. The picture will transfer into the wheel. Click the “Save”
button to finish. If you want to make sure the picture has been saved, click on the “View” button. The next section on the main
Presentation window is called “Our Showroom”:
Page 52 of 57
Solutions For Profit & Growth
����������� ������������ ����
1-877-816-6649
www.opactive.com
Opportunity Manager 3.2
Management User Manual
Use the drop down box in the “Category” section to select in which category to add pictures.
Adding in pictures to this section is done exactly the same as on the wheels. You can still add a caption and an order number for
each picture. Remember to click on the “Save” tab.
Customize Comfort Concerns and Comfort Considerations
In the Comfort Concerns and Comfort Considerations, you are able to change which questions you want to ask your customers.
Changing both sections is done exactly the same way. Click on the tab for “Comfort Concerns”:
Page 53 of 57
Solutions For Profit & Growth
����������� ������������ ����
1-877-816-6649
www.opactive.com
Opportunity Manager 3.2
Management User Manual
This is the first screen you will come to. To change a question, just highlight the old question …
and enter a new one in its place.
Page 54 of 57
Solutions For Profit & Growth
����������� ������������ ����
1-877-816-6649
www.opactive.com
Opportunity Manager 3.2
Management User Manual
Remember to click on the “Save” tab to continue.
You can also set up some possible HVAC solutions to handle the various issues raised by the Comfort Concerns questions. To
do so, click the “Solutions” button next to each Comfort Concern, and enter whatever solutions you believe will be best.
The “Set Graphics Folder” is to be used by an Opportunity Interactive trainer. Changing anything in here may have an adverse
effect on the graphics that you use in presentations to your customers.
Page 55 of 57
Solutions For Profit & Growth
����������� ������������ ����
1-877-816-6649
www.opactive.com
Opportunity Manager 3.2
Management User Manual
Load Calc
In this section, you set up the regional and material information that your sales people use when running Load Calcs on their
versions of Opportunity Manager. Note that while these settings should be similar to the ones that you use on your version of
Comfort Optimizer, CO is a separate product from Opportunity Manager, and changing these settings on one will have no effect
on the other.
Select Salesperson
First, select the salesperson for whom you wish to provide information. Select your state, and select the closest city in your
state to your sales area. The cities provided in this list are identical to those listed in Manual J, and thus so are the temperature
readings. Your salespeople will have an opportunity to change any temperature information on a case by case basis, but you
must select a city to begin with. Click “Save” once you’re finished.
Page 56 of 57
Solutions For Profit & Growth
����������� ������������ ����
1-877-816-6649
www.opactive.com
Opportunity Manager 3.2
Management User Manual
Component Ratings
Having done that, you must now select your component ratings. Click the “Select Component” drop box and choose the first
component, “Ceiling”. Then select the three most common types ceiling that you find in your sales area. From the top down,
select the features of those types. (The contents of lower boxes are determined by the choices selected in the ones above it, so
selecting lower features first may erase your work.) As you finish each component, click the “Save” button and continue to the
next component in the list. You may wish to think of the “Good,” “Better,” and “Best” settings as “Common,” “More Common,”
and “Most Common,” or you may wish to rate things in terms of quality, as was intended. Whichever the case, make sure you
communicate your decision to your salespeople, and make sure they understand how you’ve rated things. They will have the
opportunity to check the ratings you provide, but it’s always better to make sure that things are clear beforehand.
Page 57 of 57
Solutions For Profit & Growth
����������� ������������ ����
1-877-816-6649
www.opactive.com