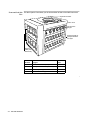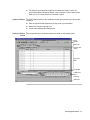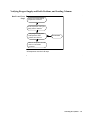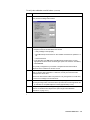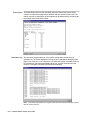
1
ABI 3900 High Throughput DNA Synthesizer User’s Manual © Copyright 2001, Applied Biosystems All rights reserved For Research Use Only. Not for use in diagnostic procedures. ABI PRISM and its design, Aquapore, AmpliCover, Anitron, Biobytes, Brownlee, FastPhoramidite, GeneScan, Genotyper, HLP, INHERIT, MicroAmp, MicroCoat, MPLC, NEWGUARD, ONESTEP, OPC, PCR-MATE, Phosphalink, POLYPORE, Precipitette, ProBlott, PROCISE, ProFocus, ProSort, ProSpin, SeqEd, Sequence Navigator, SPHERI5, SPHERI10, StockMarks, Stretch, Synergy, SynthAssist, and VeloSep are registered trademarks of PE Corporation or its subsidiaries in the U.S. and certain other countries. ABI, ABI Masterpiece, AmpF<Mistral>lSTR, Applied Biosystems, AutoAssembler, BaseSprinter, CATALYST, GeneAssist, LV40, MatchMaker, PDQ, Primer Express, and ProSorb are trademarks of PE Corporation or its subsidiaries in the U.S. and certain other countries. AmpErase, AmpliTaq, AmpliTaq Gold, EnviroAmp, GeneAmp, and TaqMan are registered trademarks of Roche Molecular Systems, Inc. AppleScript and Macintosh are registered trademarks of Apple, Inc. Kalrez and Teflon are registered trademarks of the Dupont Corporation. All other trademarks are the sole property of their respective owners. PE Corporation is committed to providing the world’s leading technology and information for life scientists. PE Corporation consists of the Applied Biosystems and Celera Genomics businesses. LIMITED WARRANTY STATEMENT Applied Biosystems, Molecular Biology Division Applied Biosystems (“AB”) warrants to the customer that, for a period ending on the earlier of one (1) year from the completion of installation or thirteen (13) months from the date of shipment to the customer (the “Warranty Period”), the ABI 3900 High-Thoughput DNA Synthesizer (the “Instrument”) purchased by the customer will be free from defects in material and workmanship, and will perform in accordance with the specifications set forth in the ABI 3900 Specification Sheet (the “Specifications”). During the Warranty Period, if the Instrument's hardware becomes damaged or contaminated or if the Instrument otherwise fails to meet the Specifications, AB will repair or replace the Instrument so that it meets the Specifications, at AB's expense. However, if the Instrument's valves or reagent lines become damaged or contaminated, or if the chemical performance of the Instrument otherwise deteriorates due to solvents and/or reagents other than those supplied or expressly recommended by AB, AB will return the Instrument to Specification at the customer’s request and at the customer's expense. After this service is performed, coverage of the parts repaired or replaced will be restored thereafter for the remainder of the Warranty Period. This Warranty does not extend to any Instrument or part which has been (a) the subject of an accident, misuse, or neglect, (b) modified or repaired by a party other than AB, or (c) used in a manner not in accordance with the instructions contained in the Reference Manual or the Instrument User's Manual. This Warranty does not cover the customer-installable accessories or customer-installable consumable parts for the Instrument that are listed in the Reference Manual or Instrument User's Manual. Those items may have their own separate warranties. AB's obligation under this Warranty is limited to repairs or replacements that AB deems necessary to correct those failures by the Instrument to meet the Specifications of which AB is notified prior to expiration of the Warranty Period. All repairs and replacements under this Warranty will be performed by AB on site at the Customer's location at AB's sole expense. No agent. employee, or representative of AB has any authority to bind AB to any affirmation, representation, or warranty concerning the Instrument that is not contained in AB's printed product literature or this Warranty Statement. Any such affirmation. representation or warranty made by any agent, employee, or representative of AB will not be binding on AB. AB shall not be liable for any incidental, special, or consequential loss, damage or expense directly or indirectly arising from the purchase or use of the Instrument. AB makes no warranty whatsoever with regard to products or parts furnished by third parties; such products or parts will be subject to the warranties, if any, of their respective manufacturers. This Warranty is limited to the original site of installation and is not transferable. THIS WARRANTY IS THE SOLE AND EXCLUSIVE WARRANTY AS TO THE INSTRUMENT AND IS IN LIEU OF ANY OTHER EXPRESS OR IMPLIED WARRANTIES, INCLUDING, WITHOUT LIMITATION, ANY IMPL!ED WARRANTY OF MERCHANTABILITY OR FITNESS FOR A PARTICULAR PURPOSE AND OF ANY OTHER OBLIGATION ON THE PART OF AB. Printed in the USA, 03/2001 Part Number P/N 4316015 Rev. A2 Contents 1 Introduction Overview . . . . . . . . . . . . . . . . . . . . . . . . . . . . . . . . . . . . . . . . . . . . . . . . . . . . . . . . . . . . . . . . . . 1-1 About This Chapter . . . . . . . . . . . . . . . . . . . . . . . . . . . . . . . . . . . . . . . . . . . . . . . . . . . . . 1-1 ABI 3900 DNA Synthesizer Documentation . . . . . . . . . . . . . . . . . . . . . . . . . . . . . . . . . . . . . . . 1-2 Background Needed. . . . . . . . . . . . . . . . . . . . . . . . . . . . . . . . . . . . . . . . . . . . . . . . . . . . . 1-2 About the Documentation Set . . . . . . . . . . . . . . . . . . . . . . . . . . . . . . . . . . . . . . . . . . . . . 1-2 Safety . . . . . . . . . . . . . . . . . . . . . . . . . . . . . . . . . . . . . . . . . . . . . . . . . . . . . . . . . . . . . . . . . . . . . 1-3 Documentation User Attention Words . . . . . . . . . . . . . . . . . . . . . . . . . . . . . . . . . . . . . . . 1-3 Chemical Hazard Warning. . . . . . . . . . . . . . . . . . . . . . . . . . . . . . . . . . . . . . . . . . . . . . . . 1-3 Chemical Waste Hazard Warning . . . . . . . . . . . . . . . . . . . . . . . . . . . . . . . . . . . . . . . . . . 1-3 Site Preparation and Safety Guide. . . . . . . . . . . . . . . . . . . . . . . . . . . . . . . . . . . . . . . . . . 1-4 About MSDSs . . . . . . . . . . . . . . . . . . . . . . . . . . . . . . . . . . . . . . . . . . . . . . . . . . . . . . . . . 1-4 Ordering MSDSs . . . . . . . . . . . . . . . . . . . . . . . . . . . . . . . . . . . . . . . . . . . . . . . . . . . . . . . 1-4 Instrument Safety Labels . . . . . . . . . . . . . . . . . . . . . . . . . . . . . . . . . . . . . . . . . . . . . . . . . 1-5 About Waste Profiles . . . . . . . . . . . . . . . . . . . . . . . . . . . . . . . . . . . . . . . . . . . . . . . . . . . . 1-5 About Waste Disposal . . . . . . . . . . . . . . . . . . . . . . . . . . . . . . . . . . . . . . . . . . . . . . . . . . . 1-5 Before Operating the Instrument . . . . . . . . . . . . . . . . . . . . . . . . . . . . . . . . . . . . . . . . . . . 1-5 Safe and Efficient Computer Use. . . . . . . . . . . . . . . . . . . . . . . . . . . . . . . . . . . . . . . . . . . 1-6 Technical Support . . . . . . . . . . . . . . . . . . . . . . . . . . . . . . . . . . . . . . . . . . . . . . . . . . . . . . . . . . . . 1-8 Contacting Technical Support . . . . . . . . . . . . . . . . . . . . . . . . . . . . . . . . . . . . . . . . . . . . . 1-8 To Contact Technical Support by E-Mail . . . . . . . . . . . . . . . . . . . . . . . . . . . . . . . . . . . . 1-8 Hours for Telephone Technical Support . . . . . . . . . . . . . . . . . . . . . . . . . . . . . . . . . . . . . 1-8 To Contact Technical Support by Telephone or Fax . . . . . . . . . . . . . . . . . . . . . . . . . . . . 1-8 To Reach Technical Support Through the Internet . . . . . . . . . . . . . . . . . . . . . . . . . . . . 1-12 To Obtain Documents on Demand. . . . . . . . . . . . . . . . . . . . . . . . . . . . . . . . . . . . . . . . . 1-12 2 Tour of the Instrument Overview . . . . . . . . . . . . . . . . . . . . . . . . . . . . . . . . . . . . . . . . . . . . . . . . . . . . . . . . . . . . . . . . . . 2-1 About This Chapter . . . . . . . . . . . . . . . . . . . . . . . . . . . . . . . . . . . . . . . . . . . . . . . . . . . . . 2-1 About the 3900 DNA Synthesizer . . . . . . . . . . . . . . . . . . . . . . . . . . . . . . . . . . . . . . . . . . . . . . . 2-2 Overview . . . . . . . . . . . . . . . . . . . . . . . . . . . . . . . . . . . . . . . . . . . . . . . . . . . . . . . . . . . . . 2-2 Types of DNA Chemistry Supported. . . . . . . . . . . . . . . . . . . . . . . . . . . . . . . . . . . . . . . . 2-2 DNA Synthesis Cycles. . . . . . . . . . . . . . . . . . . . . . . . . . . . . . . . . . . . . . . . . . . . . . . . . . . 2-2 How the 3900 System Works. . . . . . . . . . . . . . . . . . . . . . . . . . . . . . . . . . . . . . . . . . . . . . 2-2 About Cartridge Banks . . . . . . . . . . . . . . . . . . . . . . . . . . . . . . . . . . . . . . . . . . . . . . . . . . 2-2 About Processing Cartridge Banks . . . . . . . . . . . . . . . . . . . . . . . . . . . . . . . . . . . . . . . . . 2-2 i 3900 DNA Synthesizer System Hardware. . . . . . . . . . . . . . . . . . . . . . . . . . . . . . . . . . . . . . . . . 2-3 3900 System . . . . . . . . . . . . . . . . . . . . . . . . . . . . . . . . . . . . . . . . . . . . . . . . . . . . . . . . . . 2-3 Front and Left Side View . . . . . . . . . . . . . . . . . . . . . . . . . . . . . . . . . . . . . . . . . . . . . . . . 2-4 Front Details . . . . . . . . . . . . . . . . . . . . . . . . . . . . . . . . . . . . . . . . . . . . . . . . . . . . . . . . . . 2-5 Top View . . . . . . . . . . . . . . . . . . . . . . . . . . . . . . . . . . . . . . . . . . . . . . . . . . . . . . . . . . . . . 2-6 Beneath the Valve Rack Cover . . . . . . . . . . . . . . . . . . . . . . . . . . . . . . . . . . . . . . . . . . . . 2-6 Synthesis Chamber . . . . . . . . . . . . . . . . . . . . . . . . . . . . . . . . . . . . . . . . . . . . . . . . . . . . . 2-7 Beneath the Cartridge . . . . . . . . . . . . . . . . . . . . . . . . . . . . . . . . . . . . . . . . . . . . . . . . . . . 2-8 Back View . . . . . . . . . . . . . . . . . . . . . . . . . . . . . . . . . . . . . . . . . . . . . . . . . . . . . . . . . . . . 2-9 3900 Instrument Columns . . . . . . . . . . . . . . . . . . . . . . . . . . . . . . . . . . . . . . . . . . . . . . . . . . . . 2-10 About Columns . . . . . . . . . . . . . . . . . . . . . . . . . . . . . . . . . . . . . . . . . . . . . . . . . . . . . . . 2-10 Color Coding of Columns. . . . . . . . . . . . . . . . . . . . . . . . . . . . . . . . . . . . . . . . . . . . . . . 2-10 About the Software . . . . . . . . . . . . . . . . . . . . . . . . . . . . . . . . . . . . . . . . . . . . . . . . . . . . . . . . . 2-11 Overview. . . . . . . . . . . . . . . . . . . . . . . . . . . . . . . . . . . . . . . . . . . . . . . . . . . . . . . . . . . . 2-11 Passwords and Levels of Access . . . . . . . . . . . . . . . . . . . . . . . . . . . . . . . . . . . . . . . . . . Types of Files Used. . . . . . . . . . . . . . . . . . . . . . . . . . . . . . . . . . . . . . . . . . . . . . . . . . . . Conventions Used for Software Procedures . . . . . . . . . . . . . . . . . . . . . . . . . . . . . . . . . Main Menu and Toolbar . . . . . . . . . . . . . . . . . . . . . . . . . . . . . . . . . . . . . . . . . . . . . . . . 2-11 2-11 2-12 2-12 3 Performing DNA Synthesis Overview . . . . . . . . . . . . . . . . . . . . . . . . . . . . . . . . . . . . . . . . . . . . . . . . . . . . . . . . . . . . . . . . . . 3-1 About This Chapter. . . . . . . . . . . . . . . . . . . . . . . . . . . . . . . . . . . . . . . . . . . . . . . . . . . . . 3-1 Overview of DNA Synthesis Events . . . . . . . . . . . . . . . . . . . . . . . . . . . . . . . . . . . . . . . . . . . . . 3-2 Run Events Chart: Step 1 . . . . . . . . . . . . . . . . . . . . . . . . . . . . . . . . . . . . . . . . . . . . . . . . 3-2 Setup Task Lists . . . . . . . . . . . . . . . . . . . . . . . . . . . . . . . . . . . . . . . . . . . . . . . . . . . . . . . . . . . . . 3-3 Which Task List to Perform . . . . . . . . . . . . . . . . . . . . . . . . . . . . . . . . . . . . . . . . . . . . . . 3-3 Setup Tasks: First Run of the Day . . . . . . . . . . . . . . . . . . . . . . . . . . . . . . . . . . . . . . . . . . . . . . . . . . . . 3-3 Setup Tasks: Before Each Run . . . . . . . . . . . . . . . . . . . . . . . . . . . . . . . . . . . . . . . . . . . . 3-5 Setup Tasks: After Long-Term Shutdown. . . . . . . . . . . . . . . . . . . . . . . . . . . . . . . . . . . . 3-7 Entering Sequence and Cycle Information into Software . . . . . . . . . . . . . . . . . . . . . . . . . . . . . 3-8 Run Events Chart: Step 2 . . . . . . . . . . . . . . . . . . . . . . . . . . . . . . . . . . . . . . . . . . . . . . . . 3-8 Overview. . . . . . . . . . . . . . . . . . . . . . . . . . . . . . . . . . . . . . . . . . . . . . . . . . . . . . . . . . . . . 3-8 Guidelines for Using Columns and Banks . . . . . . . . . . . . . . . . . . . . . . . . . . . . . . . . . . . 3-8 About Entering Sequence and Cycle Information . . . . . . . . . . . . . . . . . . . . . . . . . . . . . 3-9 Synthesis Window. . . . . . . . . . . . . . . . . . . . . . . . . . . . . . . . . . . . . . . . . . . . . . . . . . . . . . 3-9 Synthesis Window Details . . . . . . . . . . . . . . . . . . . . . . . . . . . . . . . . . . . . . . . . . . . . . . . 3-9 Verifying Reagent Supply and Bottle Positions, and Loading Columns . . . . . . . . . . . . . . . . . 3-13 Run Events Chart: Step 3 . . . . . . . . . . . . . . . . . . . . . . . . . . . . . . . . . . . . . . . . . . . . . . . 3-13 Verifying Reagents Supply and Bottle Positions . . . . . . . . . . . . . . . . . . . . . . . . . . . . . 3-14 Loading Columns . . . . . . . . . . . . . . . . . . . . . . . . . . . . . . . . . . . . . . . . . . . . . . . . . . . . . 3-15 ii Perform Setup Tasks for the Next run or Shut Down Procedure . . . . . . . . . . . . . . . . . . . . . . . 3-17 Run Events Chart: Step 4. . . . . . . . . . . . . . . . . . . . . . . . . . . . . . . . . . . . . . . . . . . . . . . . 3-17 High Throughput Production . . . . . . . . . . . . . . . . . . . . . . . . . . . . . . . . . . . . . . . . . . . . . 3-17 To Leave Instrument Idle . . . . . . . . . . . . . . . . . . . . . . . . . . . . . . . . . . . . . . . . . . . . . . . . 3-17 Short-Term Shutdown . . . . . . . . . . . . . . . . . . . . . . . . . . . . . . . . . . . . . . . . . . . . . . . . . . 3-18 Long-Term Shutdown . . . . . . . . . . . . . . . . . . . . . . . . . . . . . . . . . . . . . . . . . . . . . . . . . . 3-18 4 Instrument Maintenance Overview . . . . . . . . . . . . . . . . . . . . . . . . . . . . . . . . . . . . . . . . . . . . . . . . . . . . . . . . . . . . . . . . . . 4-1 About This Chapter . . . . . . . . . . . . . . . . . . . . . . . . . . . . . . . . . . . . . . . . . . . . . . . . . . . . . 4-1 Scheduling Necessary Maintenance . . . . . . . . . . . . . . . . . . . . . . . . . . . . . . . . . . . . . . . . . . . . . . 4-3 Introduction . . . . . . . . . . . . . . . . . . . . . . . . . . . . . . . . . . . . . . . . . . . . . . . . . . . . . . . . . . . 4-3 Required Maintenance Items . . . . . . . . . . . . . . . . . . . . . . . . . . . . . . . . . . . . . . . . . . . . . . 4-3 Instrument Maintenance Log. . . . . . . . . . . . . . . . . . . . . . . . . . . . . . . . . . . . . . . . . . . . . . 4-5 Pressure Tests . . . . . . . . . . . . . . . . . . . . . . . . . . . . . . . . . . . . . . . . . . . . . . . . . . . . . . . . . . . . . . . 4-6 Introduction . . . . . . . . . . . . . . . . . . . . . . . . . . . . . . . . . . . . . . . . . . . . . . . . . . . . . . . . . . . 4-6 Testing Chamber Pressure . . . . . . . . . . . . . . . . . . . . . . . . . . . . . . . . . . . . . . . . . . . . . . . . 4-6 Calibrating Valves. . . . . . . . . . . . . . . . . . . . . . . . . . . . . . . . . . . . . . . . . . . . . . . . . . . . . . . . . . . . 4-7 About Calibrating Valves . . . . . . . . . . . . . . . . . . . . . . . . . . . . . . . . . . . . . . . . . . . . . . . . . 4-7 When to Calibrate Valves. . . . . . . . . . . . . . . . . . . . . . . . . . . . . . . . . . . . . . . . . . . . . . . . . 4-7 Calibrating Valves By Weight of Reagent Dispensed . . . . . . . . . . . . . . . . . . . . . . . . . . . 4-7 Verifying Home Position . . . . . . . . . . . . . . . . . . . . . . . . . . . . . . . . . . . . . . . . . . . . . . . . . . . . . . 4-9 Procedure . . . . . . . . . . . . . . . . . . . . . . . . . . . . . . . . . . . . . . . . . . . . . . . . . . . . . . . . . . . . . 4-9 Verifying Valve Calibration . . . . . . . . . . . . . . . . . . . . . . . . . . . . . . . . . . . . . . . . . . . . . . . . . . . 4-10 About Verifying Calibration . . . . . . . . . . . . . . . . . . . . . . . . . . . . . . . . . . . . . . . . . . . . . 4-10 Schedule for Verifying Valve Calibration . . . . . . . . . . . . . . . . . . . . . . . . . . . . . . . . . . . 4-10 30-Valve Calibration Verification . . . . . . . . . . . . . . . . . . . . . . . . . . . . . . . . . . . . . . . . . 4-10 Single Valve Calibration Verification. . . . . . . . . . . . . . . . . . . . . . . . . . . . . . . . . . . . . . . 4-12 Replacing Valves . . . . . . . . . . . . . . . . . . . . . . . . . . . . . . . . . . . . . . . . . . . . . . . . . . . . . . . . . . . 4-13 Valve Part Number. . . . . . . . . . . . . . . . . . . . . . . . . . . . . . . . . . . . . . . . . . . . . . . . . . . . . 4-13 About Valves . . . . . . . . . . . . . . . . . . . . . . . . . . . . . . . . . . . . . . . . . . . . . . . . . . . . . . . . . 4-13 Valve Graphic . . . . . . . . . . . . . . . . . . . . . . . . . . . . . . . . . . . . . . . . . . . . . . . . . . . . . . . . 4-13 Valve Numbering . . . . . . . . . . . . . . . . . . . . . . . . . . . . . . . . . . . . . . . . . . . . . . . . . . . . . . 4-14 Valve Bottle Position Map . . . . . . . . . . . . . . . . . . . . . . . . . . . . . . . . . . . . . . . . . . . . . . . 4-15 Removing Malfunctioning Valves . . . . . . . . . . . . . . . . . . . . . . . . . . . . . . . . . . . . . . . . . 4-16 Removing Non-Functional Valves . . . . . . . . . . . . . . . . . . . . . . . . . . . . . . . . . . . . . . . . . 4-17 Installing New Valves . . . . . . . . . . . . . . . . . . . . . . . . . . . . . . . . . . . . . . . . . . . . . . . . . . 4-19 Changing the Dispense Lines . . . . . . . . . . . . . . . . . . . . . . . . . . . . . . . . . . . . . . . . . . . . . . . . . . 4-20 Dispense Lines Part Number . . . . . . . . . . . . . . . . . . . . . . . . . . . . . . . . . . . . . . . . . . . . . 4-20 Procedure . . . . . . . . . . . . . . . . . . . . . . . . . . . . . . . . . . . . . . . . . . . . . . . . . . . . . . . . . . . . 4-20 iii Maintaining O-Rings, Gaskets and Bottle Seals . . . . . . . . . . . . . . . . . . . . . . . . . . . . . . . . . . . Checking the Synthesis Chamber O-Ring . . . . . . . . . . . . . . . . . . . . . . . . . . . . . . . . . . Replacing the Synthesis Chamber O-Ring . . . . . . . . . . . . . . . . . . . . . . . . . . . . . . . . . . Replacing Phosphoramidite Bottle O-Rings. . . . . . . . . . . . . . . . . . . . . . . . . . . . . . . . . Replacing the Synthesis Chamber Gasket . . . . . . . . . . . . . . . . . . . . . . . . . . . . . . . . . . Replacing EPR and Kalrez Gaskets . . . . . . . . . . . . . . . . . . . . . . . . . . . . . . . . . . . . . . . 4-21 4-21 4-21 4-21 4-21 4-22 A Setup Tasks In This Appendix . . . . . . . . . . . . . . . . . . . . . . . . . . . . . . . . . . . . . . . . . . . . . . . . . . . . . . . . . . . . A-1 Topics Covered . . . . . . . . . . . . . . . . . . . . . . . . . . . . . . . . . . . . . . . . . . . . . . . . . . . . . . . . A-1 Preparing the Instrument . . . . . . . . . . . . . . . . . . . . . . . . . . . . . . . . . . . . . . . . . . . . . . . . . . . . . . A-2 Emptying Waste Containers . . . . . . . . . . . . . . . . . . . . . . . . . . . . . . . . . . . . . . . . . . . . . . A-2 Changing the Argon Tank . . . . . . . . . . . . . . . . . . . . . . . . . . . . . . . . . . . . . . . . . . . . . . . . A-2 Storing Phosphoramidites, Reagents, and Dyes . . . . . . . . . . . . . . . . . . . . . . . . . . . . . . . . . . . . A-4 Introduction. . . . . . . . . . . . . . . . . . . . . . . . . . . . . . . . . . . . . . . . . . . . . . . . . . . . . . . . . . . A-4 Storage Conditions . . . . . . . . . . . . . . . . . . . . . . . . . . . . . . . . . . . . . . . . . . . . . . . . . . . . . A-4 Preparing and Installing Phosphoramidites and Dye Amidites . . . . . . . . . . . . . . . . . . . . . . . . . A-5 Introduction to Phosphoramidites . . . . . . . . . . . . . . . . . . . . . . . . . . . . . . . . . . . . . . . . . . A-5 Guidelines for Dissolving Phosphoramidites . . . . . . . . . . . . . . . . . . . . . . . . . . . . . . . . . A-5 Quantities of Acetonitrile for Dissolving Phosphoramidites . . . . . . . . . . . . . . . . . . . . . A-5 Installing Phosphoramidite Bottles . . . . . . . . . . . . . . . . . . . . . . . . . . . . . . . . . . . . . . . . . A-6 Changing Reagent Bottles . . . . . . . . . . . . . . . . . . . . . . . . . . . . . . . . . . . . . . . . . . . . . . . . . . . . . A-7 Introduction. . . . . . . . . . . . . . . . . . . . . . . . . . . . . . . . . . . . . . . . . . . . . . . . . . . . . . . . . . . A-7 Guidelines for Handling Reagents . . . . . . . . . . . . . . . . . . . . . . . . . . . . . . . . . . . . . . . . . A-7 Procedure . . . . . . . . . . . . . . . . . . . . . . . . . . . . . . . . . . . . . . . . . . . . . . . . . . . . . . . . . . . . A-7 B Post-Synthesis Processing In This Appendix . . . . . . . . . . . . . . . . . . . . . . . . . . . . . . . . . . . . . . . . . . . . . . . . . . . . . . . . . . . . B-1 Topics Covered . . . . . . . . . . . . . . . . . . . . . . . . . . . . . . . . . . . . . . . . . . . . . . . . . . . . . . . . B-1 Deprotection Procedures . . . . . . . . . . . . . . . . . . . . . . . . . . . . . . . . . . . . . . . . . . . . . . . . . . . . . . B-2 Introduction. . . . . . . . . . . . . . . . . . . . . . . . . . . . . . . . . . . . . . . . . . . . . . . . . . . . . . . . . . . B-2 Cleavage/Deprotect Option I . . . . . . . . . . . . . . . . . . . . . . . . . . . . . . . . . . . . . . . . . . . . . B-2 Cleavage/Deprotect Option II . . . . . . . . . . . . . . . . . . . . . . . . . . . . . . . . . . . . . . . . . . . . . B-4 Reconstitution . . . . . . . . . . . . . . . . . . . . . . . . . . . . . . . . . . . . . . . . . . . . . . . . . . . . . . . . . . . . . . B-6 Diluting Reconstituted Oligonucleotides for Quantitation . . . . . . . . . . . . . . . . . . . . . . . B-6 iv C Parts List In This Appendix . . . . . . . . . . . . . . . . . . . . . . . . . . . . . . . . . . . . . . . . . . . . . . . . . . . . . . . . . . . .C-1 Topics Covered . . . . . . . . . . . . . . . . . . . . . . . . . . . . . . . . . . . . . . . . . . . . . . . . . . . . . . . .C-1 3900 DNA Synthesizer Parts List: . . . . . . . . . . . . . . . . . . . . . . . . . . . . . . . . . . . . . . . . . . . . . . .C-2 3900 High Throughput Columns . . . . . . . . . . . . . . . . . . . . . . . . . . . . . . . . . . . . . . . . . . .C-2 Chemicals . . . . . . . . . . . . . . . . . . . . . . . . . . . . . . . . . . . . . . . . . . . . . . . . . . . . . . . . . . . .C-2 Other Consumables . . . . . . . . . . . . . . . . . . . . . . . . . . . . . . . . . . . . . . . . . . . . . . . . . . . . .C-3 Hardware . . . . . . . . . . . . . . . . . . . . . . . . . . . . . . . . . . . . . . . . . . . . . . . . . . . . . . . . . . . . .C-3 D Synthesizer Window/ Database Import Utility In This Appendix . . . . . . . . . . . . . . . . . . . . . . . . . . . . . . . . . . . . . . . . . . . . . . . . . . . . . . . . . . . D-1 Topics Covered . . . . . . . . . . . . . . . . . . . . . . . . . . . . . . . . . . . . . . . . . . . . . . . . . . . . . . . D-1 Overview of Synthesizer and Database Import Utility Windows. . . . . . . . . . . . . . . . . . . . . . . D-3 Introduction . . . . . . . . . . . . . . . . . . . . . . . . . . . . . . . . . . . . . . . . . . . . . . . . . . . . . . . . . . D-3 Main Application Windows . . . . . . . . . . . . . . . . . . . . . . . . . . . . . . . . . . . . . . . . . . . . . . D-3 3900 Software and Database Utility Differences . . . . . . . . . . . . . . . . . . . . . . . . . . . . . D-4 3900 Synthesizer Window Overview . . . . . . . . . . . . . . . . . . . . . . . . . . . . . . . . . . . . . . . . . . . . D-5 Introduction . . . . . . . . . . . . . . . . . . . . . . . . . . . . . . . . . . . . . . . . . . . . . . . . . . . . . . . . . . D-5 Main Menu and Toolbar . . . . . . . . . . . . . . . . . . . . . . . . . . . . . . . . . . . . . . . . . . . . . . . . D-5 The Synthesizer Window . . . . . . . . . . . . . . . . . . . . . . . . . . . . . . . . . . . . . . . . . . . . . . . . D-6 3900 Synthesizer Window Commands. . . . . . . . . . . . . . . . . . . . . . . . . . . . . . . . . . . . . . . . . . . D-7 Introduction . . . . . . . . . . . . . . . . . . . . . . . . . . . . . . . . . . . . . . . . . . . . . . . . . . . . . . . . . . D-7 Command Activation and Special Terms. . . . . . . . . . . . . . . . . . . . . . . . . . . . . . . . . . . . D-7 File Menu. . . . . . . . . . . . . . . . . . . . . . . . . . . . . . . . . . . . . . . . . . . . . . . . . . . . . . . . . . . . D-7 Edit Menu . . . . . . . . . . . . . . . . . . . . . . . . . . . . . . . . . . . . . . . . . . . . . . . . . . . . . . . . . . . D-9 View Menu. . . . . . . . . . . . . . . . . . . . . . . . . . . . . . . . . . . . . . . . . . . . . . . . . . . . . . . . . . D-10 Tools. . . . . . . . . . . . . . . . . . . . . . . . . . . . . . . . . . . . . . . . . . . . . . . . . . . . . . . . . . . . . . . D-11 Instrument . . . . . . . . . . . . . . . . . . . . . . . . . . . . . . . . . . . . . . . . . . . . . . . . . . . . . . . . . . D-13 Help . . . . . . . . . . . . . . . . . . . . . . . . . . . . . . . . . . . . . . . . . . . . . . . . . . . . . . . . . . . . . . . D-14 Instrument Menu Window Details . . . . . . . . . . . . . . . . . . . . . . . . . . . . . . . . . . . . . . . . . . . . . D-15 Introduction . . . . . . . . . . . . . . . . . . . . . . . . . . . . . . . . . . . . . . . . . . . . . . . . . . . . . . . . . D-15 Status Reporting and Status Window. . . . . . . . . . . . . . . . . . . . . . . . . . . . . . . . . . . . . . D-15 Waste Report . . . . . . . . . . . . . . . . . . . . . . . . . . . . . . . . . . . . . . . . . . . . . . . . . . . . . . . . D-16 Instrument Log. . . . . . . . . . . . . . . . . . . . . . . . . . . . . . . . . . . . . . . . . . . . . . . . . . . . . . . D-16 Valve Configuration . . . . . . . . . . . . . . . . . . . . . . . . . . . . . . . . . . . . . . . . . . . . . . . . . . . D-17 Manual Control . . . . . . . . . . . . . . . . . . . . . . . . . . . . . . . . . . . . . . . . . . . . . . . . . . . . . . D-18 Diagnostics . . . . . . . . . . . . . . . . . . . . . . . . . . . . . . . . . . . . . . . . . . . . . . . . . . . . . . . . . D-20 Service . . . . . . . . . . . . . . . . . . . . . . . . . . . . . . . . . . . . . . . . . . . . . . . . . . . . . . . . . . . . . D-21 Database Import Utility Overview . . . . . . . . . . . . . . . . . . . . . . . . . . . . . . . . . . . . . . . . . . . . . D-25 Introduction . . . . . . . . . . . . . . . . . . . . . . . . . . . . . . . . . . . . . . . . . . . . . . . . . . . . . . . . . D-25 The Import Utility Window . . . . . . . . . . . . . . . . . . . . . . . . . . . . . . . . . . . . . . . . . . . . . D-26 Toolbar Icons . . . . . . . . . . . . . . . . . . . . . . . . . . . . . . . . . . . . . . . . . . . . . . . . . . . . . . . . D-27 v Database Import Utility Main Menu Commands . . . . . . . . . . . . . . . . . . . . . . . . . . . . . . . . . . D-28 Introduction. . . . . . . . . . . . . . . . . . . . . . . . . . . . . . . . . . . . . . . . . . . . . . . . . . . . . . . . . . D-28 Command Activation and Special Terms . . . . . . . . . . . . . . . . . . . . . . . . . . . . . . . . . . . D-28 File Menu . . . . . . . . . . . . . . . . . . . . . . . . . . . . . . . . . . . . . . . . . . . . . . . . . . . . . . . . . . . D-28 Edit Menu . . . . . . . . . . . . . . . . . . . . . . . . . . . . . . . . . . . . . . . . . . . . . . . . . . . . . . . . . . . D-29 View Menu . . . . . . . . . . . . . . . . . . . . . . . . . . . . . . . . . . . . . . . . . . . . . . . . . . . . . . . . . . D-30 Database Import Menu . . . . . . . . . . . . . . . . . . . . . . . . . . . . . . . . . . . . . . . . . . . . . . . . . D-31 Synthesis, Bank, and Sequence Files. . . . . . . . . . . . . . . . . . . . . . . . . . . . . . . . . . . . . . . . . . . . D-33 Types of Files . . . . . . . . . . . . . . . . . . . . . . . . . . . . . . . . . . . . . . . . . . . . . . . . . . . . . . . . D-33 Overview of File Use . . . . . . . . . . . . . . . . . . . . . . . . . . . . . . . . . . . . . . . . . . . . . . . . . . D-33 Importing Text Files . . . . . . . . . . . . . . . . . . . . . . . . . . . . . . . . . . . . . . . . . . . . . . . . . . . D-34 Looking at Imported File Contents . . . . . . . . . . . . . . . . . . . . . . . . . . . . . . . . . . . . . . . . D-35 File Formats . . . . . . . . . . . . . . . . . . . . . . . . . . . . . . . . . . . . . . . . . . . . . . . . . . . . . . . . . . . . . . . D-36 Introduction. . . . . . . . . . . . . . . . . . . . . . . . . . . . . . . . . . . . . . . . . . . . . . . . . . . . . . . . . . D-36 Tab Delimited Text File . . . . . . . . . . . . . . . . . . . . . . . . . . . . . . . . . . . . . . . . . . . . . . . . D-36 Space Delimited Text File. . . . . . . . . . . . . . . . . . . . . . . . . . . . . . . . . . . . . . . . . . . . . . . D-36 Comma Delimited Text File . . . . . . . . . . . . . . . . . . . . . . . . . . . . . . . . . . . . . . . . . . . . . D-37 Short Format Files. . . . . . . . . . . . . . . . . . . . . . . . . . . . . . . . . . . . . . . . . . . . . . . . . . . . . D-37 Long Format Files. . . . . . . . . . . . . . . . . . . . . . . . . . . . . . . . . . . . . . . . . . . . . . . . . . . . . D-38 Excel Files. . . . . . . . . . . . . . . . . . . . . . . . . . . . . . . . . . . . . . . . . . . . . . . . . . . . . . . . . . . D-39 E Using the Fume Hood In This Appendix . . . . . . . . . . . . . . . . . . . . . . . . . . . . . . . . . . . . . . . . . . . . . . . . . . . . . . . . . . . . Topics Covered . . . . . . . . . . . . . . . . . . . . . . . . . . . . . . . . . . . . . . . . . . . . . . . . . . . . . . . . Assembling and Using the Fume Hood . . . . . . . . . . . . . . . . . . . . . . . . . . . . . . . . . . . . . . . . . . . Introduction. . . . . . . . . . . . . . . . . . . . . . . . . . . . . . . . . . . . . . . . . . . . . . . . . . . . . . . . . . . Unfolding and Assembling the Fume Hood . . . . . . . . . . . . . . . . . . . . . . . . . . . . . . . . . . Inserting and Using the Fume Hood . . . . . . . . . . . . . . . . . . . . . . . . . . . . . . . . . . . . . . . . Index vi E-1 E-1 E-2 E-2 E-2 E-3 Introduction 1 1 Overview About This Chapter This chapter provides an overview of the ABI 3900 High Throughput DNA Synthesizer documentation, safety considerations, and technical support resources available. Topic ABI 3900 DNA Synthesizer Documentation See Page 1-2 Background Needed 1-2 About the Documentation Set 1-2 Safety 1-3 Documentation User Attention Words 1-3 Chemical Hazard Warning 1-3 Chemical Waste Hazard Warning 1-3 Site Preparation and Safety Guide 1-4 About MSDSs 1-4 Ordering MSDSs 1-4 Instrument Safety Labels 1-5 About Waste Profiles 1-5 About Waste Disposal 1-5 Before Operating the Instrument 1-5 Safe and Efficient Computer Use 1-6 Technical Support 1-8 Contacting Technical Support 1-8 To Contact Technical Support by E-Mail 1-8 Hours for Telephone Technical Support 1-8 To Contact Technical Support by Telephone or Fax 1-8 To Reach Technical Support Through the Internet 1-12 To Obtain Documents on Demand 1-12 Introduction 1-1 ABI 3900 DNA Synthesizer Documentation Background Needed This manual assumes that you are familiar with the following: ♦ Basic Windows NT operations, such as using the mouse, selecting commands, working with windows, and using the Windows NT computer file management system ♦ The general manipulation of data files ♦ Good laboratory practices and basic laboratory techniques ♦ DNA synthesis chemistry About the Use the following table to determine which 3900 instrument document you need for Documentation Set the task at hand. All of the documents listed are sent to 3900 instrument customers. If you want... Refer to the 3900 DNA Synthesizer... ♦ To prepare your laboratory for installation of the instrument Site Preparation and Safety Guide 4316012 User’s Manual 4316015 3900 Specification Sheet 108SP01-01 P/N ♦ The instrument’s electrical, ventilation and space requirements ♦ A Site Preparation Checklist ♦ Explanations of instrument safety alert symbols in several languages ♦ Instructions for general instrument setup and run initiation using pre-programmed cycles ♦ Routine maintenance information ♦ Operational safety information ♦ Information about the release of new products that can be used on or with this instrument 1-2 Introduction Safety Documentation User Five user attention words appear in the text of all Applied Biosystems user Attention Words documentation. Each word implies a particular level of observation or action as described below. Note Calls attention to useful information. IMPORTANT Indicates information that is necessary for proper instrument operation. ! CAUTION Indicates a potentially hazardous situation which, if not avoided, may result in minor or moderate injury. It may also be used to alert against unsafe practices. ! WARNING Indicates a potentially hazardous situation which, if not avoided, could result in death or serious injury. ! DANGER Indicates an imminently hazardous situation which, if not avoided, will result in death or serious injury. This signal word is to be limited to the most extreme situations. Chemical Hazard ! WARNING CHEMICAL HAZARD. Some of the chemicals used with Applied Biosystems Warning instruments and protocols are potentially hazardous and can cause injury, illness, or death. ♦ Read and understand the material safety data sheets (MSDSs) provided by the chemical manufacturer before you store, handle, or work with any chemicals or hazardous materials. ♦ Minimize contact with and inhalation of chemicals. Wear appropriate personal protective equipment when handling chemicals (e.g., safety glasses, gloves, or protective clothing). For additional safety guidelines, consult the MSDS. ♦ Do not leave chemical containers open. Use only with adequate ventilation. ♦ Check regularly for chemical leaks or spills. If a leak or spill occurs, follow the manufacturer’s cleanup procedures as recommended on the MSDS. ♦ Comply with all local, state/provincial, or national laws and regulations related to chemical storage, handling, and disposal. \ Chemical Waste ! WARNING CHEMICAL WASTE HAZARD. Wastes produced by Applied Biosystems Hazard Warning instruments are potentially hazardous and can cause injury, illness, or death. ♦ Read and understand the material safety data sheets (MSDSs) provided by the manufacturers of the chemicals in the waste container before you store, handle, or dispose of chemical waste. ♦ Handle chemical wastes in a fume hood. ♦ Minimize contact with and inhalation of chemical waste. Wear appropriate personal protective equipment when handling chemicals (e.g., safety glasses, gloves, or protective clothing). ♦ After emptying the waste container, seal it with the cap provided. ♦ Dispose of the contents of the waste tray and waste bottle in accordance with good laboratory practices and local, state/provincial, or national environmental and health regulations. Introduction 1-3 Site Preparation and A site preparation and safety guide is a separate document sent to all customers who Safety Guide have purchased an Applied Biosystems instrument. Refer to the guide written for your instrument for information on site preparation, instrument safety, chemical safety, and waste profiles. About MSDSs Some of the chemicals used with this instrument may be listed as hazardous by their manufacturer. When hazards exist, warnings are prominently displayed on the labels of all chemicals. Chemical manufacturers supply a current MSDS before or with shipments of hazardous chemicals to new customers and with the first shipment of a hazardous chemical after an MSDS update. MSDSs provide you with the safety information you need to store, handle, transport and dispose of the chemicals safely. We strongly recommend that you replace the appropriate MSDS in your files each time you receive a new MSDS packaged with a hazardous chemical. ! WARNING CHEMICAL HAZARD. Be sure to familiarize yourself with the MSDSs before using reagents or solvents. Ordering MSDSs You can order free additional copies of MSDSs for chemicals manufactured or distributed by Applied Biosystems using the contact information below. To order MSDSs... Then... Over the Internet a. Go to our Web site at www.appliedbiosystems.com/techsupport. b. Click MSDSs. If you have... Then... The MSDS document number or the Document On Demand index number Enter one of these numbers in the appropriate field on this page. The product part number Select Click Here, then enter the part number or keyword(s) in the field on this page. Keyword(s) c. You can open and download a PDF (using Adobe® Acrobat Reader) of the document by selecting it, or you can choose to have the document sent to you by fax or email. By automated telephone service Use “To Obtain Documents on Demand” on page 1-12 By telephone in the United States Dial 1-800-327-3002, then press 1. By telephone from Canada By telephone from any other country 1-4 Introduction To order in... Dial 1-800-668-6913 and... English Press 1, then 2, then 1 again French Press 2, then 2, then 1 See the specific region under “To Contact Technical Support by Telephone or Fax” under “Technical Support.” For chemicals not manufactured or distributed by Applied Biosystems, call the chemical manufacturer. Instrument Safety Safety labels are located on the instrument. Each safety label has three parts: Labels ♦ A signal word panel, which implies a particular level of observation or action (e.g., CAUTION or WARNING). If a safety label encompasses multiple hazards, the signal word corresponding to the greatest hazard is used. ♦ A message panel, which explains the hazard and any user action required. ♦ A safety alert symbol, which indicates a potential personal safety hazard. See the ABI 3900 DNA Synthesizer Site Preparation and Safety Guide for an explanation of all the safety alert symbols provided in several languages. About Waste Profiles A waste profile was provided with this instrument and is contained in the ABI 3900 DNA Synthesizer Site Preparation and Safety Guide. Waste profiles list the percentage compositions of the reagents within the waste stream during a typical user application, although this application may not be used in your laboratory. The profile assists users in planning for instrument waste handling and disposal. Read the waste profile and all applicable MSDSs before handling or disposing of waste. IMPORTANT Waste profiles are not a substitute for MSDS information. About Waste As the generator of potentially hazardous waste, it is your responsibility to perform the Disposal actions listed below. ♦ Characterize (by analysis if necessary) the waste generated by the particular applications, reagents, and substrates used in your laboratory. ♦ Ensure the health and safety of all personnel in your laboratory. ♦ Ensure that the instrument waste is stored, transferred, transported, and disposed of according to all local, state/provincial, or national regulations. Note Radioactive or biohazardous materials may require special handling, and disposal limitations may apply. Before Operating the Ensure that everyone involved with the operation of the instrument has: Instrument ♦ Received instruction in general safety practices for laboratories ♦ Received instruction in specific safety practices for the instrument ♦ Read and understood all related MSDSs ! CAUTION Avoid using this instrument in a manner not specified by Applied Biosystems. Although the instrument has been designed to protect the user, this protection can be impaired if the instrument is used improperly. Introduction 1-5 Safe and Efficient Operating the computer correctly prevents stress-producing effects such as fatigue, Computer Use pain, and strain. To minimize these effects on your back, legs, eyes, and upper extremities (neck, shoulder, arms, wrists, hands and fingers), design your workstation to promote neutral or relaxed working positions. This includes working in an environment where heating, air conditioning, ventilation, and lighting are set correctly. See the guidelines below. ! CAUTION MUSCULOSKELETAL AND REPETITIVE MOTION HAZARD. These hazards are caused by the following potential risk factors which include, but are not limited to, repetitive motion, awkward posture, forceful exertion, holding static unhealthy positions, contact pressure, and other workstation environmental factors. ♦ ♦ – The bulk of the person’s weight should be supported by the buttocks, not the thighs. – Feet should be flat on the floor, and the weight of the legs should be supported by the floor, not the thighs. – Lumbar support should be provided to maintain the proper concave curve of the spine. Place the keyboard on a surface that provides: – The proper height to position the forearms horizontally and upper arms vertically. – Support for the forearms and hands to avoid muscle fatigue in the upper arms. ♦ Position the viewing screen to the height that allows normal body and head posture. This height depends upon the physical proportions of the user. ♦ Adjust vision factors to optimize comfort and efficiency by: ♦ ♦ 1-6 Introduction Use a seating position that provides the optimum combination of comfort, accessibility to the keyboard, and freedom from fatigue-causing stresses and pressures. – Adjusting screen variables, such as brightness, contrast, and color, to suit personal preferences and ambient lighting. – Positioning the screen to minimize reflections from ambient light sources. – Positioning the screen at a distance that takes into account user variables such as nearsightedness, farsightedness, astigmatism, and the effects of corrective lenses. When considering the user’s distance from the screen, the following are useful guidelines: – The distance from the user’s eyes to the viewing screen should be approximately the same as the distance from the user’s eyes to the keyboard. – For most people, the reading distance that is the most comfortable is approximately 20 inches. – The workstation surface should have a minimum depth of 36 inches to accommodate distance adjustment. – Adjust the screen angle to minimize reflection and glare, and avoid highly reflective surfaces for the workstation. Use a well-designed copy holder, adjustable horizontally and vertically, that allows referenced hard-copy material to be placed at the same viewing distance as the screen and keyboard. ♦ Keep wires and cables out of the way of users and passersby. ♦ Choose a workstation that has a surface large enough for other tasks and that provides sufficient legroom for adequate movement. Introduction 1-7 Technical Support Contacting Technical You can contact Applied Biosystems for technical support by telephone or fax, by Support e-mail, or through the Internet. You can order Applied Biosystems user documents, MSDSs, certificates of analysis, and other related documents 24 hours a day. In addition, you can download documents in PDF format from the Applied Biosystems Web site (please see the section “To Obtain Documents on Demand” following the telephone information below). To Contact Technical Contact technical support by e-mail for help in the following product areas: Support by E-Mail Product Area E-mail address Genetic Analysis (DNA Sequencing) [email protected] Sequence Detection Systems and PCR [email protected] Protein Sequencing, Peptide and DNA Synthesis [email protected] Biochromatography, PerSeptive DNA, PNA and Peptide Synthesis systems, CytoFluor®, FMAT™, Voyager™, and Mariner™ Mass Spectrometers [email protected] Applied Biosystems/MDS Sciex [email protected] Chemiluminescence (Tropix) [email protected] Hours for Telephone In the United States and Canada, technical support is available at the following times: Technical Support Product Hours Chemiluminescence 8:30 a.m. to 5:30 p.m. Eastern Time Framingham support 8:00 a.m. to 6:00 p.m. Eastern Time All Other Products 5:30 a.m. to 5:00 p.m. Pacific Time To Contact Technical In North America Support by To contact Applied Biosystems Technical Support, use the telephone or fax numbers Telephone or Fax given below. (To open a service call for other support needs, or in case of an emergency, dial 1-800-831-6844 and press 1.) 1-8 Introduction Product or Product Area Telephone Dial... Fax Dial... ABI PRISM® 3700 DNA Analyzer 1-800-831-6844, then press 8 1-650-638-5981 DNA Synthesis 1-800-831-6844, then press 21 1-650-638-5981 Fluorescent DNA Sequencing 1-800-831-6844, then press 22 1-650-638-5981 Fluorescent Fragment Analysis (includes GeneScan® applications) 1-800-831-6844, then press 23 1-650-638-5981 Integrated Thermal Cyclers (ABI PRISM ® 877 and Catalyst 800 instruments) 1-800-831-6844, then press 24 1-650-638-5981 Product or Product Area Telephone Dial... Fax Dial... ABI PRISM ® 3100 Genetic Analyzer 1-800-831-6844, then press 26 1-650-638-5981 BioInformatics (includes BioLIMS ®, BioMerge ®, and SQL GT™ applications) 1-800-831-6844, then press 25 1-505-982-7690 Peptide Synthesis (433 and 43X Systems) 1-800-831-6844, then press 31 1-650-638-5981 Protein Sequencing (Procise Protein Sequencing Systems) 1-800-831-6844, then press 32 1-650-638-5981 PCR and Sequence Detection 1-800-762-4001, then press 1 for PCR, 2 for the 7700 or 5700, 6 for the 6700 or dial 1-800-831-6844, then press 5 1-240-453-4613 Voyager MALDI-TOF Biospectrometry and Mariner ESI-TOF Mass Spectrometry Workstations 1-800-899-5858, then press 13 1-508-383-7855 Biochromatography (BioCAD Workstations and Poros Perfusion Chromatography Products) 1-800-899-5858, then press 14 1-508-383-7855 Expedite Nucleic acid Synthesis Systems 1-800-899-5858, then press 15 1-508-383-7855 Peptide Synthesis (Pioneer and 9050 Plus Peptide Synthesizers) 1-800-899-5858, then press 15 1-508-383-7855 PNA Custom and Synthesis 1-800-899-5858, then press 15 1-508-383-7855 FMAT 8100 HTS System and CytoFluor 4000 Fluorescence Plate Reader 1-800-899-5858, then press 16 1-508-383-7855 Chemiluminescence (Tropix) 1-800-542-2369 (U.S. 1-781-275-8581 only), or 1-781-271-0045 Applied Biosystems/MDS Sciex 1-800-952-4716 1-650-638-6223 Telephone Dial... Fax Dial... Outside North America Region Africa and the Middle East Africa (English Speaking) and West Asia (Fairlands, South Africa) 27 11 478 0411 27 11 478 0349 Africa (French Speaking; Courtaboeuf Cedex, France) 33 1 69 59 85 11 33 1 69 59 85 00 South Africa (Johannesburg) 27 11 478 0411 27 11 478 0349 Middle Eastern Countries and North Africa (Monza, Italia) 39 (0)39 8389 481 39 (0)39 8389 493 Introduction 1-9 Telephone Dial... Region Fax Dial... Eastern Asia, China, Oceania Australia (Scoresby, Victoria) 61 3 9730 8600 61 3 9730 8799 China (Beijing) 86 10 64106608 or 86 800 8100497 86 10 64106617 Hong Kong 852 2756 6928 852 2756 6968 India (New Delhi) 91 11 653 3743/3744 91 11 653 3138 Korea (Seoul) 82 2 593 6470/6471 82 2 593 6472 Malaysia (Petaling Jaya) 60 3 758 8268 60 3 754 9043 Singapore 65 896 2168 65 896 2147 Taiwan (Taipei Hsien) 886 2 2358 2838 886 2 2358 2839 Thailand (Bangkok) 66 2 719 6405 66 2 319 9788 Europe Austria (Wien) 43 (0)1 867 35 75 0 43 (0)1 867 35 75 11 Belgium 32 (0)2 532 4484 32 (0)2 582 1886 Czech Republic and Slovakia (Praha) 420 2 35365189 420 2 35364314 Denmark (Naerum) 45 45 58 60 00 45 45 58 60 01 Finland (Espoo) 358 (0)9 251 24 250 358 (0)9 251 24 243 France (Paris) 33 (0)1 69 59 85 85 33 (0)1 69 59 85 00 Germany (Weiterstadt) 49 (0) 6150 101 0 49 (0) 6150 101 101 Hungary (Budapest) 36 (0)1 270 8398 36 (0)1 270 8288 Italy (Milano) 39 (0)39 83891 39 (0)39 838 9492 Norway (Oslo) 47 23 12 06 05 47 23 12 05 75 Poland, Lithuania, Latvia, and Estonia (Warszawa) 48 (22) 866 40 10 48 (22) 866 40 20 Portugal (Lisboa) 351 (0)22 605 33 14 351 (0)22 605 33 15 Russia (Moskva) 7 095 935 8888 7 095 564 8787 South East Europe (Zagreb, Croatia) 385 1 34 91 927/838 385 1 34 91 840 Spain (Tres Cantos) 34 (0)91 806 1210 34 (0)91 806 1206 Sweden (Stockholm) 46 (0)8 619 4400 46 (0)8 619 4401 Switzerland (Rotkreuz) 41 (0)41 799 7777 41 (0)41 790 0676 The Netherlands (Nieuwerkerk a/d IJssel) 31 (0)180 331400 31 (0)180 331409 or 31 (0)180 392499 United Kingdom (Warrington, Cheshire) 44 (0)1925 825650 44 (0)1925 282502 All other countries not listed (Warrington, UK) 44 (0)1925 282481 44 (0)1925 282509 Japan Japan (Hacchobori, Chuo-Ku, Tokyo) 1-10 Introduction 81 20 477392 (Toll free) 81 20 477120 (Toll free) or or 81 3 5566 6230 81 3 5566 6507 Region Telephone Dial... Fax Dial... Latin America Caribbean countries, Mexico, and Central America 52 55 35 3610 52 55 66 2308 Brazil 0 800 704 9004 or 55 11 5070 9654 55 11 5070 9694/95 Argentina 800 666 0096 55 11 5070 9694/95 Chile 1230 020 9102 55 11 5070 9694/95 Uruguay 0004 055 654 55 11 5070 9694/95 Introduction 1-11 To Reach Technical We strongly encourage you to visit our Web site for answers to frequently asked Support Through questions and for more information about our products. You can also order technical the Internet documents or an index of available documents and have them faxed or e-mailed to you through our site. The Applied Biosystems Web site address is http://www.appliedbiosystems.com/techsupp To submit technical questions from North America or Europe: Step Action 1 Access the Applied Biosystems Technical Support Web site. 2 Under the Troubleshooting heading, click Support Request Forms, then select the relevant support region for the product area of interest. 3 Enter the requested information and your question in the displayed form, then click Ask Us RIGHT NOW (blue button with yellow text). 4 Enter the required information in the next form (if you have not already done so), then click Ask Us RIGHT NOW. You will receive an e-mail reply to your question from one of our technical experts within 24 to 48 hours. To Obtain Free, 24-hour access to Applied Biosystems technical documents, including MSDSs, Documents on is available by fax or e-mail or by download from our Web site. Demand To order documents... Then... by index number a. Access the Applied Biosystems Technical Support Web site at http://www.appliedbiosystems.com/techsupp b. Click the Index link for the document type you want, then find the document you want and record the index number. c. Use the index number when requesting documents following the procedures below. by phone for fax delivery a. From the U.S. or Canada, call 1-800-487-6809, or from outside the U.S. and Canada, call 1-858-712-0317. b. Follow the voice instructions to order the documents you want. Note through the Internet for fax or e-mail delivery There is a limit of five documents per request. a. Access the Applied Biosystems Technical Support Web site at http://www.appliedbiosystems.com/techsupp b. Under Resource Libraries, click the type of document you want. c. Enter or select the requested information in the displayed form, then click Search. d. In the displayed search results, select a check box for the method of delivery for each document that matches your criteria, then click Deliver Selected Documents Now (or click the PDF icon for the document to download it immediately). e. Fill in the information form (if you have not previously done so), then click Deliver Selected Documents Now to submit your order. Note There is a limit of five documents per request for fax delivery but no limit on the number of documents you can order for e-mail delivery. 1-12 Introduction 2 Tour of the Instrument 2 Overview About This Chapter This chapter provides an overview of the ABI 3900 High Throughput DNA Synthesizer hardware and the software components that you will use most often. Topic About the 3900 DNA Synthesizer See Page 2-2 Overview 2-2 Types of DNA Chemistry Supported 2-2 DNA Synthesis Cycles 2-2 How the 3900 System Works 2-2 About Cartridge Banks 2-2 About Processing Cartridge Banks 2-2 3900 DNA Synthesizer System Hardware 2-3 3900 System 2-3 Front and Left Side View 2-4 Front Details 2-5 Top View 2-6 Beneath the Valve Rack Cover 2-6 Synthesis Chamber 2-7 Beneath the Cartridge 2-8 Back View 2-9 3900 Instrument Columns 2-10 About Columns 2-10 Color Coding of Columns 2-10 About the Software 2-11 Overview 2-11 Passwords and Levels of Access 2-11 Types of Files Used 2-11 Conventions Used for Software Procedures 2-12 Main Menu and Toolbar 2-12 Tour of the Instrument 2-1 About the 3900 DNA Synthesizer Overview The 3900 instrument couples single nucleotides (bases) together in a step-wise fashion to form customized oligonucleotides linked to polystyrene solid support at the 40 nmol, 0.2 µmol, and 1 µmol scales. The 3900 instrument can synthesize 48 primer-length sequences at the 40 nmol and 0.2 µmol scales in less than 1.5 hours. The pressure of inert argon gas delivers reagents to the columns and purges the columns between deliveries. Types of DNA The 3900 system supports: Chemistry ♦ Standard and FastPhoramidite® amidites Supported ♦ Dye-labelling with 6-Fam, HEX, TET ♦ TFA Aminolink, Biotin, Phosphalink DNA Synthesis A cycle is a protocol that tells the instrument the steps to perform in order to Cycles synthesize the DNA sequences you have entered. An optimal cycle program is provided with the 3900 instrument software, and is the only type of oligonucleotide production that will be covered in this manual. However, you can also program cycles to further customize the DNA synthesis process in your laboratory. The cycle file provided is a single cycle, but each customized cycle file has the capability of driving two different cycles. The dual cycle program can be used interchangeably during production of the oligonucleotide. How the 3900 At the heart of the 3900 system is the rotary cartridge, which holds the open-ended System Works columns containing the solid support and the lengthening oligonucleotides. Chemicals are delivered through dedicated tubing and two-way valves to stationary dispense tips situated over the cartridge. The cartridge rotates to position the columns under the appropriate dispense tips, in the order according to the cycle(s) chosen by the customer. The dedicated tubing eliminates the chance of cross-contamination of chemicals, and the rotary motion of the cartridge maximizes the efficiency of the production process. About Cartridge The columns are arranged in the cartridge in 4 banks of 12 columns. Each column Banks may be destined to produce a different oligonucleotide sequence. However, the columns within any one bank must be the same scale, and the columns within any one bank are processed with the same customer-defined cycle. The only exception to this arrangement is for customers producing oligonucleotides at the 1 µmol scale. The 1 µmol scale of production requires that either Banks 1 and 2, or Banks 3 and 4 must be loaded with 1 µmol scale columns. Only the 40 nmol and 0.2 µmol scale cycles can be run on different banks of the same run. About Processing The 3900 system processes cartridge banks in parallel, Banks 1 and 2 first, then Cartridge Banks Banks 3 and 4. Parallel processing allows for even greater efficiency, and shorter production times. 2-2 Tour of the Instrument 3900 DNA Synthesizer System Hardware 3900 System The 3900 system consists of the 3900 DNA Synthesizer and a Dell desktop computer GR1948 in the configuration shown here. Tour of the Instrument 2-3 Front and Left Side This three-quarter view shows you the front and the left side of the 3900 instrument. View Synthesis chamber Power on/off Gas pressure gauges A B C D Reagent banks for phosphoramidites and dyes A B GR1923 C D Reagent banks (see table below) Bottle Position 2-4 Tour of the Instrument Reagent P/N A Tetrazole/Acetonitrile (ACN) 401173 B 1-Methylimidazole/Tetrahydrofuran (THF) 401175 C Acetic anhydride/pyridine/THF 402220 D 0.02 M Iodine/water/pyridine/THF 401632 Front Details The components on the front of the 3900 instrument are shown here: On/Of Pressure gauge Chamber Pressure A G Amidite/ ACN C T C Cap/ Activator 5 T 8 Deblock/ Oxidizer 6 Bottle release buttons 7 9 Reagent banks for phosphoramidites and dye amidites 0 GR1921 A G Purge Pressure Component Function Buttons On/Off Powers the instrument on and off Release buttons Releases the seal on the bottle neck to allow removal and reinsertion Pressure Gauges Chamber pressure Indicates the actual pressure within the synthesis chamber Purge pressure Manufacturer sets pressure of purge cycle to 5 psi Amidite/ACN Indicates the delivery pressure for the amidites and ACN - set to 6 psi Cap/Activator Indicates the delivery pressure for Cap and Activator - set to 6 psi Deblock/Oxidizer Indicates the delivery pressure for Deblock and Oxidizer - set to 6 psi Bottle Positions A, G, C, T These are the recommended positions for phosphoramidites: Position 5, 6, 7, 8, 9, 0 Phosphoramidite Bottle Label Color P/N A dAbz Green 401159 G dGdmf Yellow 401165 C dCbz Red 401160 T T Blue 401162 Positions available for reagents used in customized production. Empty bottles (or ACN) must occupy any unused positions. Tour of the Instrument 2-5 Top View The view through the chamber window with the lid down and the valve rack cover on is shown here. Valve rack cover GR1924 Cover lock screws Beneath the Valve The details of the top-down view with the valve rack cover removed are shown here. Rack Cover Delivery line Valve rack Valve (beneath rack) Dispense line Wash tower Dispense tip ACN wash lines GR1938b Cartridge 2-6 Tour of the Instrument Component Function Delivery lines Tubing from the chemical bottles to the valves Dispense lines Tubing from the valves to the dispense tips Dispense tips Deliver chemicals to columns Wash towers Washes precipitate from tetrazole dispense tip. ACN wash lines Tubing delivering ACN to the wash towers Valve (beneath rack) Gates the delivery of chemicals to each dispense tip Cartridge Holds columns and rotates to position them under dispense tips Synthesis Chamber The details of the cartridge within the synthesis chamber are shown here. Bank 1, positions 1-12 Prime waste position Chamber O-ring Bank 2, positions 13-24 (currently empty) Cartridge retaining ring Cartridge lock screw GR1925 Note Columns must be pressed completely down into the cartridge. Component Function Banks 1, 2, 3, 4 Each bank has 12 column positions, 48 positions in all Prime waste position Small metal tube that collects fluid when lines are primed, and delivers fluid to waste Cartridge retaining ring Holds the cartridge firmly against the drain plate when screwed down Cartridge lock screws Locks the retaining ring into place Tour of the Instrument 2-7 Beneath the The details of the drain plate beneath the cartridge are shown here. Cartridge Prime Waste Position Waste trough (bank 2) Drain hole (bank 2) Seating pin holes for cartridge Threaded hole GR1937 Optical eye Homing screw 2-8 Tour of the Instrument Component Function Optical Eye and Homing screw The optical eye senses the screw on the edge of the cartridge to establish the cartridge home position Waste trough Collects the waste fluid from each bank of columns Drain holes Pathway for waste to exit the waste trough Prime waste position Small metal tube that collects fluid when lines are primed, and delivers fluid to waste Threaded holes Accept cartridge retaining ring locking screws Seating pin (non-threaded) holes Accept seating pins from cartridge retaining ring Back View Argon input Motor control Motor Control Power Power input Serial port Serial port Waste GR1922 Waste lines Waste vent (to lab ventilation system) Waste bottle cap assembly Bulk reagent bottles in secondary containers ACN ACN TCA Waste bottle in secondary container Tour of the Instrument 2-9 3900 Instrument Columns About Columns The 3900 instrument uses specifically designed, open-ended columns for DNA synthesis. Columns contain the first base of an oligo sequence linked to a solid polystyrene support. Top and bottom frits, or plugs, of porous material hold the powdery support within the column. Columns are available in 40 nmol, 0.2 µmol, and 1 µmol scales. Lip 1µ Seating recess Top frit Solid support Bottom frit Tip Color Coding of The 3900 instrument columns are color-coded, depending on the base linked to the Columns solid support within the column. Column Color Phosphoramidite Green dAbz Yellow Red Blue 2-10 Tour of the Instrument dGdmf dCbz T Scale P/N (tubs of 200) 40 nmol 4316671 0.2 µmol 4316675 1 µmol 4316679 40 nmol 4316673 0.2 µmol 4316677 1 µmol 4316681 40 nmol 4316672 0.2 µmol 4316676 1 µmol 4316680 40 nmol 4316674 0.2 µmol 4316678 1 µmol 4316682 About the Software Overview The ABI 3900 High Throughput DNA Synthesizer software graphical user interface (GUI) allows you to enter information about the sequences you are synthesizing and to operate the instrument. The GUI allows you to easily: ♦ Enter custom sequences in several ways: – Individually, by typing or cutting and pasting from a text file – Importing entire banks of sequences – Importing all four banks of sequences simultaneously ♦ Use the optimized cycles that are included in the software, or customize the cycles using Microsoft® Excel. ♦ Save up to four banks of sequences and cycle information to repeat the run without re-entry. Passwords and No passwords are necessary to synthesize DNA on this instrument. Levels of Access Applied Biosystems service engineers will use the Service page on the Instrument menu to service your instrument. This page is password protected to avoid accidental editing of critical instrument adjustment parameters. Types of Files Used The following file types (extensions) are used with the 3900 instrument software: File Type Created In Used For *.seq 3900 Software A single oligonucleotide sequence (used in one column) *.bnk 3900 Software Entire bank of sequence and cycle information *.txt Word Pad, Note Pad, or Word Copying and pasting a single oligonucleotide sequence or portions of sequences *.xls Microsoft Excel Spreadsheet data for cycle programs Tour of the Instrument 2-11 Conventions Used Bold Font for Software Titles of windows and dialog boxes, menu choices, and options you choose within lists Procedures are all in bold font. Cascading Menus Directions for navigating through cascading menus will appear as a single line of options you are to select, each option separated by an arrow (>). For example, the directions “Select: File > Import Column” indicate that from the File menu you click on Import Column. Main Menu and The elements that are unique to the 3900 software main menu and toolbar are shown Toolbar and explained in the graphic and table that follow. For information on menu and toolbar items that are common to most word processing programs, consult a word processing user’s guide. Main Menu and Toolbar Toolbar Icon 2-12 Tour of the Instrument Menu Alternative Function File > Import Bank Allows you to enter an entire bank of sequences and cycles from a *.bnk file (created in 3900 software). File > Export Bank Allows you to save an entire bank of sequences and cycles from the 3900 software as a *.bnk file. Instrument > Status Lists the steps performed by the instrument updated in real-time. Instrument > Instrument Log Saved files of steps performed by the instrument for previous runs. Instrument > Waste Report Summarizes the approximate contents of the waste bottle. Tools > Amidite Summary Summarizes the numbers of each type of column that will be required for the run, and the volume of reagents needed for synthesis. Main Menu and Toolbar (continued) Instrument > Prime Dispenses reagents through all of the lines. Instrument > Start Begins the run. Instrument > Pause This command (executed from the toolbar icon or from the Instrument menu) suspends instrument operation at one of the safe points listed below. It may take up to 5 minutes for the instrument to pause, and the icon/command will change to Resume. Select Resume to continue the run. Suspends the run at the following safe points. ♦ Initiating a pause during pre-wash - the instrument pauses at the end of the pre-wash. ♦ Initiating a pause during synthesis before coupling - the instrument pauses at the coupling step. ♦ Initiating a pause after coupling is in progress - the instrument pauses at the end of base addition. ♦ Initiating a pause during post-synthesis the instrument pauses at the end of the post-synthesis. Instrument > Stop Immediately stops the run and closes the software. The run cannot be resumed. This button should be used only in emergencies. A warning box will appear. Tour of the Instrument 2-13 Performing DNA Synthesis 3 3 Overview About This Chapter This chapter provides procedures for performing the various tasks required to synthesize DNA on the ABI 3900 High Throughput DNA Synthesizer. Topic See Page Overview of DNA Synthesis Events 3-2 Run Events Chart: Step 1 3-2 Setup Task Lists 3-3 Which Task List to Perform 3-3 Setup Tasks: First Run of the Day 3-3 Setup Tasks: Before Each Run 3-5 Setup Tasks: After Long-Term Shutdown 3-7 Entering Sequence and Cycle Information into Software 3-8 Run Events Chart: Step 2 3-8 Overview 3-8 Guidelines for Using Columns and Banks 3-8 Synthesis Window 3-9 Synthesis Window Details 3-9 About Entering Sequence and Cycle Information 3-10 Verifying Reagent Supply and Bottle Positions, and Loading Columns Run Events Chart: Step 3 3-13 3-13 Verifying Reagents Supply and Bottle Positions 3-14 Loading Columns 3-15 Perform Setup Tasks for the Next run or Shut Down Procedure 3-17 Run Events Chart: Step 4 3-17 High Throughput Production 3-17 To Leave Instrument Idle 3-17 Short-Term Shutdown 3-18 Long-Term Shutdown 3-18 Performing DNA Synthesis 3-1 Overview of DNA Synthesis Events Run Events Chart: A run refers to complete simultaneous synthesis of up to 48 oligonucleotide Step 1 sequences. The chart below shows the order of events required for an ABI 3900 DNA Synthesizer run. Perform the Setup Tasks to prepare the instrument Enter sequences* and cycle file(s) into the software Verify reagent supply and bottle positions, load columns, and start run Perform Setup Tasks for the next run or shutdown procedure *All sequences must be in all caps. 3-2 Performing DNA Synthesis You are here Setup Task Lists Which Task List to The task list or procedure you use to begin instrument setup depends upon the status Perform of the instrument. Use the chart below to determine which procedure to use in preparing the instrument for a run. The tasks listed under the “Before Each Run” procedure on page 3-5 always need to be performed. Refer to the pages listed in the table below for the contents of the other procedures. If the instrument will be... If the instrument has been... Then start with Setup Task List... On page. . . — idle for less than 12 hours Before each run 3-5 — idle for 12 hours to 5 days* First run of the day 3-3 idle for more than 5 days — After long-term shutdown, before running the instrument again 3-7 * If the instrument is scheduled for shutdown for a several day period, it is recommended that the Long-Term Shutdown procedure be performed. IMPORTANT As indicated in the 3rd row of the table above, it is necessary to prepare for scheduled shutdowns longer than 5 days by performing the Long-Term Shutdown procedure. Then, to restore the instrument to running condition, perform the After Long-Term Shutdown procedure. Setup Tasks: These are the setup tasks that should be performed at the start of each day, or when First Run of the Day the instrument has been idle for more than 12 hours. After completing these steps, go to “Setup Tasks: Before Each Run” on page 3-5. To setup for the first run of the day: Step 1 For details, see topic/page. . . Action Check the maintenance logs and perform maintenance as follows: a. Check the laboratory weekly and monthly maintenance logs to ensure that no maintenance procedures are overdue. “Required Maintenance Items” on page 4-3 b. Perform any needed maintenance procedures. 2 Check the chamber O-ring and clean if necessary: a. Inspect the chamber O-ring for wear or chemical residue. ! WARNING CHEMICAL HAZARD. Acetonitrile (ACN) is a flammable liquid and vapor that may cause eye, skin, and respiratory tract irritation, central nervous system depression, and damage to the heart, liver, and kidneys. Please read the MSDS, and follow the handling instructions. Wear appropriate protective eyewear, clothing, and gloves. b. Clean with a cotton swab or laboratory tissue moistened with acetonitrile, if necessary. Performing DNA Synthesis 3-3 To setup for the first run of the day: Step 3 (continued) Action For details, see topic/page. . . Verify the chemical bottle positions. a. Select Instrument > Valve Configuration. b. Check the positions of the reagents and amidites against the map shown on the Valve configuration window. ! WARNING CHEMICAL HAZARD. Tetrazole/acetonitrile is a flammable liquid and vapor that may cause eye, skin, and respiratory tract irritation, central nervous system depression, and damage to the heart, blood system, liver, and kidneys. Please read the MSDS, and follow the handling instructions. Wear appropriate protective eyewear, clothing, and gloves. Note If the instrument was idle for 2 to 5 days, the bulk TCA and amidite bottles may have been changed to acetonitrile to avoid line clogs. Ensure that a bottle of TCA is attached to the correct line at the back of the instrument and tetrazole/acetonitrile and amidites are attached at the proper positions. 4 Make the following reagent checks (using information listed to the right): a. Add reagents and amidites if necessary. b. Check the dates of installation of all reagent and amidite bottles and replace outdated chemicals. c. Mark dates of opening amidite and reagent bottles. ♦ Expected chemical lifetimes, see “Storage Conditions” – pg. A-4. ♦ Procedures for dissolving amidites and changing amidite bottles, see page A-5 ♦ Procedures for changing reagent bottles, see page A-7 3-4 Performing DNA Synthesis To setup for the first run of the day: Step 5 (continued) For details, see topic/page. . . Action Check that amidite and tetrazole/acetonitrile bottles contain appropriate filters and Trap-Paks: ! WARNING CHEMICAL HAZARD. Tetrazole/acetonitrile is a flammable liquid and vapor that may cause eye, skin, and respiratory tract irritation, central nervous system depression, and damage to the heart, blood system, liver, and kidneys. Please read the MSDS, and follow the handling instructions. Wear appropriate protective eyewear, clothing, and gloves. 6 Reagent Size Trap-Pak P/N Amidites Mini GEN084034 Bulk ACN and Tetrazole Medium GEN084033 Verify that the cartridge reaches the home position properly: a. Look directly down through the synthesis chamber window (use a step-stool if necessary). “Verifying Home Position” on page 4-9 b. Check to be sure that dispense tip 1 is directly over column 1. 7 Prime the lines to eliminate air bubbles and crystals. a. Select Instrument > Manual Control. b. Click Long Prime All. c. Watch through the synthesis chamber window to observe the instrument priming all of the lines into the prime waste position. 8 Perform a 30-valve calibration verification test. 4-10 IMPORTANT Ensure that appropriate containers are in column positions 1 through 30 before performing test 9 Perform Chamber Pressure Test. “Testing Chamber Pressure” on page 4-6 10 Continue to “Setup Tasks: Before Each Run.” 3-5 Setup Tasks: Before Perform the following setup tasks before each run. If you do not know how to perform Each Run a step, see the detailed instructions on the pages listed. To setup before each run: Step 1 For details, see page... Action Empty the waste container if it is more than one-half full. ♦ The waste and vent lines must be free of plugs or kinks. ♦ The vent line must be connected to the laboratory ventilation system. “Emptying Waste Containers” on page A-2 Performing DNA Synthesis 3-5 To setup before each run: Step 2 (continued) Action Check the argon tank pressure. Values from the two-stage regulator should be: ♦ High pressure: 500 psi. If the value is below this, change the tank before setting up the run. For details, see page... “Changing the Argon Tank” on page A-2 ♦ Low pressure: Between 60–80 psi. If the pressure is outside this range, adjust the regulator. 3 Ensure that all bottles are installed correctly, with a tight seal, on every position. 2-4 (figure on page) IMPORTANT Empty bottles, or bottles containing acetonitrile, must be placed on unused bottle positions. ! WARNING CHEMICAL HAZARD. Acetonitrile (ACN) is a flammable liquid and vapor that may cause eye, skin, and respiratory tract irritation, central nervous system depression, and damage to the heart, liver, and kidneys. Please read the MSDS, and follow the handling instructions. Wear appropriate protective eyewear, clothing, and gloves. 4 Visually inspect the valve fittings and the valve and solenoid assemblies for chemical residue that may indicate leaks. If any residue is noted, replace that valve. 5 Clean residue from the delivery tips in the following manner: a. Place a lint-free absorbent barrier over the synthesis chamber bowl. ! WARNING CHEMICAL HAZARD. Acetonitrile (ACN) is a flammable liquid and vapor that may cause eye, skin, and respiratory tract irritation, central nervous system depression, and damage to the heart, liver, and kidneys. Please read the MSDS, and follow the handling instructions. Wear appropriate protective eyewear, clothing, and gloves. b. Squirt a few drops of acetonitrile onto each delivery tip. c. Dry tips gently with a lint-free laboratory tissue. 6 Check the cartridge and synthesis chamber for residue and/or moisture and clean as necessary. ♦ Clean the cartridge with acetonitrile and air-dry. ♦ Wipe the bowl dry with a lint-free laboratory tissue. 7 3-6 Performing DNA Synthesis If the cartridge is not already in the synthesis chamber, place it into the synthesis chamber by seating the pins into the drain plate, and screw down the lock screws on the cartridge retaining ring. “Replacing Valves” on page 4-13 Setup Tasks: After If the instrument has been idle for the last five days or more, it should have gone Long-Term through a Long-Term Shutdown. After a Long-Term Shutdown, all of the instrument Shutdown bottle positions contain acetonitrile which means that new chemical bottles will need to be installed in their appropriate places on the instrument. After installing new chemical bottles, continue to “Setup Tasks: First Run of the Day” on page 3-3. To install: ♦ Phosphoramidites on the instrument, see “Preparing and Installing Phosphoramidites and Dye Amidites” on page A-5. ♦ Reagents on the instrument, see “Changing Reagent Bottles” on page A-7. Performing DNA Synthesis 3-7 Entering Sequence and Cycle Information into Software Run Events Chart: Step 2 Perform the Setup Tasks to prepare the instrument Enter sequences* and cycle file(s) into the software You are here Verify reagent supply and bottle positions, load columns, and start run Perform Setup Tasks for the next run or shutdown procedure *All sequences must be in all caps. Overview To prepare for entering sequence and cycle information, you must know: ♦ The sequences to be synthesized, or their file locations ♦ The cycle to be used to synthesize each sequence ♦ The production scale (40 nmol, 0.2 µmol, or 1 µmol) to be used for each sequence Guidelines for Using The following guidelines will help you to decide how to position columns in particular Columns and Banks banks. ♦ Columns are arranged in the cartridge in 4 banks of 12 columns. The banks are labelled on the cartridge, and correspond to the bank tabs on the Synthesis window. ♦ The columns loaded within any one bank must be of the same scale, but different banks can have either 40 nmol or 0.2 µmol scale. IMPORTANT The exception to the above point is if 1 µmol scale columns are being used, tandem banks must be dedicated to this scale. To use 1 µmol scale columns, either Banks 1 and 2, or Banks 3 and 4 must be loaded with 1 µmol scale columns. ♦ The columns within any one bank are processed with the same customer-defined cycle. The cycle dictates the scale of production and the steps used to synthesize that bank of oligonucleotides. Note ♦ 3-8 Performing DNA Synthesis The cycle must be appropriate for the scale of columns loaded in that bank. A bank may only be completely filled with other columns of the same scale during a run. If a bank contains any columns, all 12 positions must be filled. Positions in which no DNA will be synthesized must contain a placeholder column of the same scale. Placeholders should be plug columns. ♦ Two banks are processed in parallel by the instrument. Banks 1 and 2 are processed together, followed by Banks 3 and 4 together. If only 2 banks will be used in a run, it is most efficient to use Banks 1 and 2. Synthesis Window The 3900 software opens to the Synthesis window upon launching.You will use this window to: ♦ Enter all oligonucleotide sequences (in caps) and cycle information ♦ Monitor the instrument during a run ♦ Access other windows and dialog boxes Synthesis Window The components of the Synthesis window are shown on the graphic below. Details Menu Toolbar Bank tabs Column color (code) Sequence fields Cycle field Amidite and base summary Status bar Performing DNA Synthesis 3-9 About Entering Use the procedure below to enter sequence and cycle information into the software. Sequence and Cycle Information To enter sequence and cycle information: Step Action 1 Launch the 3900 program from the desktop icon or Start menu. The Synthesis window will be displayed. 2 Click the appropriate Bank tab, starting with Bank 1. 3 When entering sequences into the software, keep in mind the following: ♦ Each bank is processed with a single cycle program, which must match the scale of the columns. ♦ Each bank can process only one scale. Do not mix scales within a bank. ♦ Banks 1 and 2 are processed in parallel. To minimize synthesis time on runs requiring only 2 banks, load Banks 1 and 2. ♦ If you are using 1µmol columns, tandem banks (either 1 and 2, or 3 and 4) must be dedicated to 1µmol. 3-10 Performing DNA Synthesis To enter sequence and cycle information: Step (continued) Action 4 To enter sequences by... Follow these steps... Typing each sequence a. In the Synthesis window, click on a sequence field row to highlight it. b. Begin typing the sequence (using all caps) from 5´ to 3´. It will display from the right side of the screen scrolling left. Note Clicking off the row will display the sequence in 3-letter groups, and the color code of the column for the 3´ base will display. Cutting and pasting each sequence from a *.txt file or word processing file (*.doc) a. Choose File > Open, and use the Open File dialog box to navigate to and open the file containing the appropriate sequence(s). b. Highlight one sequence and select Edit > Copy. (All sequences must be in all caps.) c. In the Synthesis window, click on the sequence field row, and select Edit > Paste. Note Clicking off the row will display the sequence in 3-letter groups, and the color code of the column for the 3´ base will display. Importing each sequence from a *.seq file (created in the 3900 software) a. In the Synthesis window, click on a sequence field row to highlight it. b. Click the Import Column icon. (All sequences must be in all caps.) c. Use the Import Column navigation window to select the *.seq file containing the appropriate sequence, and click Open. Importing a bank of sequences from a *.bnk file (created in the 3900 software) a. Be sure the tab of the current bank is selected b. Click the Import Bank icon. (All sequences must be in all caps.) c. Use the Import Bank navigation window to select the *.bnk file containing the appropriate bank information. d. Click Open. Importing information from a database 5 This is done using the Import Utility. See Appendix D for information on using the utility. Identify the oligonucleotide and the column (if required by your laboratory) by filling in the Oligo ID and Column ID fields. Note You can fill any number of sequential rows with identical input by: ♦ Highlighting (clicking and dragging over) the text to be copied at the top of the vertical group of fields to be filled. ♦ Selecting Edit > Fill Down. Performing DNA Synthesis 3-11 To enter sequence and cycle information: Step 6 (continued) Action In the Trityl Off column, a check in the row of a sequence means that the trityl will be removed from that oligonucleotide. A clear check box means that the trityl will be left on that oligonucleotide. If you need the trityls either on or off the entire bank of sequences, use the Trityl Off check box at the top of the column. 7 Choose the cycle appropriate for the current bank. To do this: a. Be sure the appropriate Bank tab is selected. b. Click Browse. c. In the Open Cycle navigation window, select the cycle program (*.xls) for the current bank. The cycle provided by Applied Biosystems is at: d. Highlight the appropriate file, click Open, and the program will load into the Cycle field of the current bank. Note Be sure that the cycle chosen is appropriate for the scale of columns you will be loading. 8 Repeat steps 2 through 7 for all banks that are to be included in this run. 9 Save the current bank in a *.bnk file, or save all four banks and their cycles in a *.syn file by: a. Select File > Save As. b. In the Save As dialog box, type the name of the file. c. In the drop-down list of file types, choose either *.bnk (for the current bank) or *.syn (for all 4 banks in one file). d. Click Save. 3-12 Performing DNA Synthesis Verifying Reagent Supply and Bottle Positions, and Loading Columns Run Events Chart: Step 3 Perform the Setup Tasks to prepare the instrument Enter sequences* and cycle file(s) into the software Verify reagent supply and bottle positions, load columns, and start run You are here Perform Setup Tasks for the next run or shutdown procedure *All sequences must be in all caps. Performing DNA Synthesis 3-13 Verifying Reagents To verify reagents supply and bottle positions: Supply and Bottle Step Action Positions 1 Verify the presence of reagents needed for a run by comparing the quantities listed on the Amidite Summary window (window presented with the Amidite Summary command, Tools menu) with the quantities of reagents physically present on the instrument. IMPORTANT The quantities physically present should be quite a bit greater than the actual quantities required to avoid delivery problems. 2 IMPORTANT The positions of the bottles on the instrument must be consistent with the valve configuration recorded in the software. To verify the bottle positions: a. Choose Instrument > Valve Configuration. b. Check the positions of the reagents and amidites on your instrument against the map shown on the Valve Configuration window. Note Applied Biosystems recommends using the default settings to optimize instrument performance. Positions 5, 6, 7, 8, 9, and 0 can be customized according to the needs of your laboratory. To restore the settings from the original installation of the instrument, click Default Settings. 3-14 Performing DNA Synthesis Loading Columns To load columns: Step 1 Action Choose the columns to load into each bank of the cartridge. ♦ The scale of column to use depends on the cycle you loaded into that bank. ♦ The type (color) of column to use is determined by the 3´ base of each sequence, and is shown by the column color code in the Synthesis window for that bank. 3´ base of sequence Use column color A = dAbz Green G = dGdmf Yellow C= dCbz T 2 Red Blue Load the columns into the cartridge as follows: a. Load the banks in order, Banks 1 through 4. b. Push each column down until the seating recess presses firmly against the cartridge. c. Make sure that all columns are firmly seated by making a second pass, pressing each column down into the cartridge to ensure that it is firmly seated against the seating recess lips. 1 Top frit Seating recess Solid support Cartridge retaining ring lock screw GR1925 3 Load columns of the same scale into the unused column positions of any bank being used for synthesis. If a bank contains any columns, all of the column positions must be filled. 4 Make sure that the cartridge retaining ring lock screw is firmly tightened. 5 Inspect the dispense tips for chemical residue (white crystals). To clean the tips, use a lint-free laboratory tissue moistened with acetonitrile. 6 Close the lid and tighten the lid lock screws. 7 Click the Start icon. Performing DNA Synthesis 3-15 To load columns: Step 8 (continued) Action A dialog box will pop up asking, “Do you want to Prime All lines?” a. Click Yes. b. Watch each delivery into the prime waste position to be sure the lines are free of clogs and delivering properly. Use a flashlight to see this clearly, if necessary. 9 Watch the Chamber pressure gauge at the beginning of the run to ensure that the chamber is holding pressure properly. Chamber pressure should register 5 psi as the chamber pressurizes, decreasing to 0 psi between pressurizations. 10 You can monitor the run from the: ♦ Status bar ♦ Instrument log, by clicking the Instrument Log icon 3-16 Performing DNA Synthesis Perform Setup Tasks for the Next run or Shut Down Procedure Run Events Chart: Step 4 Perform the Setup Tasks to prepare the instrument Enter sequences* and cycle file(s) into the software Verify reagent supply and bottle positions, load columns, and start run Perform Setup Tasks for the next run or shut down procedure You are here *All sequences must be in all caps. High Throughput To take full advantage of the high-throughput features of the Production ABI 3900 DNA Synthesizer, prepare the instrument and begin another run prior to processing the oligonucleotides from the previous run. To do so, return to “Setup Tasks: Before Each Run” on page 3-5. If you plan to leave the instrument idle for more than 2 days, you must perform a short-term shutdown procedure, in order to avoid clogs in the lines or valves. If you plan to leave the instrument idle for more than 5 days, you must perform the long-term shutdown procedures in the section which follows, in order to avoid clogs in the lines or valves. After beginning the next run, or after performing the long-term shutdown procedures, process the oligonucleotides (if required by your laboratory protocol) using the information in “Post-Synthesis Processing” on page B-1. To Leave Instrument When the instrument is left idle, chemicals may crystallize in the lines and valves, Idle clogging them. Serious clogs may necessitate replacing lines and/or valves. To avoid these costly repairs and down time, follow these recommendations: If you plan to leave the instrument idle for... Then see... 2 to 5 days “Short-Term Shutdown” on page 3-18. Over 5 days “Long-Term Shutdown” on page 3-18. Performing DNA Synthesis 3-17 Short-Term If you plan to leave the instrument idle for 2 to 5 days (for instance, over the weekend), Shutdown perform the short-term shutdown procedure to avoid line and valve clogs. To shut the instrument down for 2 to 5 days: Step 1 Action ! WARNING CHEMICAL HAZARD. Tetrazole/Acetonitrile is a flammable liquid and vapor that may cause eye, skin, and respiratory tract irritation, central nervous system depression, and damage to the heart, blood system, liver, and kidneys. Please read the MSDS, and follow the handling instructions. Wear appropriate protective eyewear, clothing, and gloves. Replace each amidite, tetrazole/acetonitrile bottle, and trichloroacetic acid bottle with a bottle of pure acetonitrile. 2 On the 3900 software, select Instrument > Manual Control 3 Choose each of the Valves listed below from the drop-down list, and click Prime 4 times. (Refer to the illustration on page 3-14 for a default map of valve configuration.) ♦ Valves 1 and 16 - trichloroacetic acid valves ♦ Valves 6, 7, 8, 9, 10, 21, 22, 23, 24, and 25 - valves for amidites, not counting specialty amidites ♦ Valve 12, 13, 14, 27, 28, or 29 - only If specialty amidites are used in bottle positions 5, 6, 7, 8, 9, or 0 Note Only the valve positions corresponding to speciality amidites actually used need to be prepared for short term shutdown by priming. Long-Term It is necessary to remove all reagents and run clean up procedures if you plan to leave Shutdown the instrument idle for more than 5 days. For such planned shutdowns, perform the long-term shutdown procedure below to avoid line and valve clogs. Note Applied Biosystems recommends that you discard reconstituted phosphoramidites rather than store them for reuse. IMPORTANT The instrument must be properly shut down if it is to be left idle for more than 5 days. Failure to properly shut down the instrument could cause tubing clogs that will interfere with reagent deliveries. To perform Long-term shutdown: Step Action 1 Remove the retaining ring and cartridge from the synthesis chamber. 2 ! WARNING CHEMICAL HAZARD. Acetonitrile (ACN) is a flammable liquid and vapor that may cause eye, skin, and respiratory tract irritation, central nervous system depression, and heart, liver, and kidney damage. Please read the MSDS, and follow the handling instructions. Wear appropriate protective eyewear, clothing, and gloves. Using a lint-free laboratory tissue moistened with acetonitrile, wipe the chamber, cartridge and retaining ring. 3-18 Performing DNA Synthesis To perform Long-term shutdown: Step 3 Action Switch to acetonitrile bottles only: a. Remove all reagent bottles, except for the bulk acetonitrile bottles. b. Empty the bottles and place a minimum amount of acetonitrile in each bottle. Guidelines for these amounts are: – Amidite bottles - 5 mL – 450 mL bottles - 10 to 15 mL – TCA bottle - 50 mL c. Replace the two 4 L acetonitrile bottles with empty bottles. 4 Select Instrument > Manual Control and click Prime All four times. 5 Empty the reagent bottles partially filled in step 3. 6 Select Instrument > Manual Control and click Prime All until no more fluid is delivered from any delivery line into the prime waste position. When no more fluid is delivered from any delivery line, delivery lines are empty. 7 Empty the waste container, and replace the waste cap assembly. For details, see “Emptying Waste Containers” on page A-2 ♦ The waste and vent lines must be free of plugs or kinks. ♦ The vent line must be connected to the laboratory ventilation system. Performing DNA Synthesis 3-19 Instrument Maintenance 4 4 Overview About This Chapter This chapter provides the information you will need for preventive maintenance and minor calibrations of the ABI 3900 High Throughput DNA Synthesizer. Topic Scheduling Necessary Maintenance See Page 4-3 Introduction 4-3 Required Maintenance Items 4-3 Instrument Maintenance Log 4-5 Pressure Tests 4-6 Introduction 4-6 Testing Chamber Pressure 4-6 Calibrating Valves 4-7 When to Calibrate Valves 4-7 Calibrating Valves By Weight of Reagent Dispensed 4-7 Verifying Home Position 4-9 Procedure 4-9 About Verifying Calibration 4-10 Schedule for Verifying Valve Calibration 4-10 30-Valve Calibration Verification 4-10 Single Valve Calibration Verification 4-12 Replacing Valves 4-13 Valve Part Number 4-13 About Valves 4-13 Valve Graphic 4-13 Valve Numbering 4-14 Valve Bottle Position Map 4-15 Removing Malfunctioning Valves 4-16 Removing Non-Functional Valves 4-17 Installing New Valves 4-19 Instrument Maintenance 4-1 Topic (continued) Changing the Dispense Lines 4-2 Instrument Maintenance See Page 4-20 Dispense Lines Part Number 4-20 Procedure 4-20 Maintaining O-Rings, Gaskets and Bottle Seals 4-21 Checking the Synthesis Chamber O-Ring 4-21 Replacing the Synthesis Chamber O-Ring 4-21 Replacing Phosphoramidite Bottle O-Rings 4-21 Replacing the Synthesis Chamber Gasket 4-21 Replacing EPR and Kalrez Gaskets 4-22 Scheduling Necessary Maintenance Introduction Following the necessary maintenance procedure schedule will help: ♦ Ensure proper instrument operation ♦ Prevent service calls ♦ Prevent instrument downtime ♦ Prevent reagent wastage Required The maintenance schedule required for the 3900 instrument is listed in the table Maintenance Items below. Maintenance Items or Tasks Instrument Part or Test Amidite O-rings (P/N 221014) Perform at Each Run Perform at First Run of the Day Perform Weekly Examine Inspect and clean 4 L Cap Assembly Gasket P/N 004498) Gaskets, Kalrez ♦ P/N 1212 for 450-mL bottles Perform Monthly Perform Every 6 Months Replace Inspect and replace as needed Kalrez gaskets are not renewable with each bottle change since they have a service lifetime of 6 months to 1 year. Perform as Needed See Page If pressure test(s) or inspections show a leak 4-21 Examine with every bottle change 4-21 Replace 4-21 ♦ P/N 004297 for 2-L TCA bottle Chamber Gasket (P/N 4318893) If cartridge is removed to insert or remove columns, examine at each removal. Inspect and replace as needed Weekly or monthly inspections apply when cartridge is not routinely removed. Chamber O-ring (P/N 4318891) 30-Valve Calibration Verification Valve Calibration Examine whenever cartridge is removed 4-21 Note Remove columns before removing cartridge. Replace as needed Examine Perform Inspect and replace as needed Perform Replace as needed 4-21 Before first run of the day 4-10 Only when 30-Valve Calibration Verification Test indicates a problem 4-7 Instrument Maintenance 4-3 Maintenance Items or Tasks Instrument Part or Test Perform at Each Run Perform at First Run of the Day Perform Weekly Perform Monthly Perform Every 6 Months Perform as Needed Short-Term Shutdown When instrument will be idle for 2–5 days, leave acetonitrile at trichloroacetic acid, tetrazole/acetonitrile, and amidite positions. Long-term shutdown When instrument will be idle for more than 5 days, leave with acetonitrile on all positions. Chamber Pressure Test 4-4 Instrument Maintenance Perform Before first run of the day See Page 3-18 Instrument Applied Biosystems recommends keeping an instrument maintenance log to ensure Maintenance Log that the required maintenance procedures are performed in a timely manner. Instrument Maintenance 4-5 Pressure Tests Introduction Delivery of reagents and purging of waste fluid is dependent upon pressure gradients between the chemical bottles, the synthesis chamber, and the waste lines. Leaks through gaskets or O-rings may affect chemical delivery and oligonucleotide quality. Periodically test the seal integrity with pressure tests to ensure proper instrument function. Testing Chamber Use the procedure below to verify that the chamber O-ring and waste valves are Pressure functioning correctly. To test chamber pressure: Step 1 Action Status of the system: ♦ Instrument and computer on ♦ 3900 software running ♦ Does not matter if the cartridge or columns are present ♦ Instrument lid closed and locked 2 Select Instrument > Diagnostics. This presents the Diagnostics window. 3 Under Chamber Pressure Test, click Run Test to pressurize the synthesis chamber. A timer will appear in the Test window. 4 Watch the Chamber pressure gauge. Passing = Less than 1 psi drop in one minute 5 4-6 Instrument Maintenance Click Release Pressure to end test. Calibrating Valves About Calibrating Valves can be calibrated by the weight or volume of reagent dispensed. Since Valves calibration by weight is much more accurate, Applied Biosystems recommends this method. Both protocols are listed in the following sections. When to Calibrate Valves need to be calibrated: Valves ♦ After being replaced ♦ Whenever a valve calibration verification shows that the valve is no longer calibrated to within your laboratory’s specifications Calibrating Valves The procedure below shows you how to calibrate valves by the weight of the reagent By Weight of dispensed. Use a Microsoft Excel spreadsheet to calculate the volume of each Reagent Dispensed reagent dispensed, based on the reagent’s density. To calibrate valves: Step 1 Action Status of the system: ♦ Instrument and computer on and 3900 software running ♦ Instrument lid up ♦ Reagent(s) on the valve position(s) to be tested ! WARNING CHEMICAL HAZARD. Some of the chemicals used with Applied Biosystems instruments and protocols are potentially hazardous and can cause injury, illness, or death. ♦ Fume hood in place to prevent any deleterious effects from exposure to chemicals - see 3900Appendix E for installation instructions 2 Record the empty tube weight (tare) on a balance with 0.1 mg resolution. Note It is easiest to use tubes which can be capped 3 Select Instrument > Valve Configuration, and click Calibrate. 4 On the Valve drop-down list, select the appropriate valve number. 5 Select the Weight option. 6 Ensure that a check is present in the Use column check boxes for Points 1, 2, and 3. 7 On the Number of Dispenses column for rows 1, 2, and 3, enter 3. 8 With the empty, tared tube positioned directly under the dispense tip for the valve selected in Step 4, click Dispense 1 and catch the reagent delivered. 9 a. Enter the weight of reagent delivered with Dispense 1 in the Total Weight Measured column. b. Empty or discard the tube of reagent. 10 Repeat steps 8 and 9 for Dispenses 2 and 3. Instrument Maintenance 4-7 To calibrate valves: Step 11 (continued) Action A properly calibrated valve will have a correlation value between 0.995 and 1.0. If the correlation value for this valve does not fall within this range, you will need to: a. Ensure that no chemical residue (white material) is on or under the valve, or visible at the line between two-way valve and the solenoid. This can be an indication of leaks, and the valve should be replaced. b. Check that the appropriate reagent is installed for the valve being calibrated. c. Repeat the calibration procedure. d. Change the valve. 4-8 Instrument Maintenance Verifying Home Position Procedure Home position is verified as described in the following procedure: To verify Home position: Step 1 Action Rules Open the ABI Control software and set instrument password by: a. Clicking Instrument. b. Selecting Service. c. Click OK to accept a blank for the user level password. 2 Prepare for testing by: a. Opening software. b. From the menu, select: Instrument > Service > Motion tab. 3 Click the Home button. a. Observe the cartridge moving slowly clockwise, then fast counterclockwise, then slowly clockwise. b. Check the alignment of dispense tip 1. It should be directly over the center of column 1. 4 If column 1 and Valve 1 are not aligned, use the Home Offset field to adjust the position. a. Make an estimate of how many degrees Column 1 is offset from the Home position and change the Home Offset value. b. Click the Home button again and readjust the Home Offset value until Column 1 is positioned directly under dispense tip 1. c. Click Done Home Offset Adjustment Rules ♦ Units are in degrees of rotation. ♦ Making the number more negative rotates the cartridge counterclockwise. ♦ There are about 1650 steps across a column, 100,000 steps around a cartridge. ♦ Change the Home Offset value in a range of +/- 0.5 degrees for fine adjustments Instrument Maintenance 4-9 Verifying Valve Calibration About Verifying Valves are calibrated during the manufacturing process to deliver accurate volumes Calibration over a specified range, depending on the chemical being delivered. Over time, valves may lose calibration or begin to fail, but may continue to deliver chemicals. Since the deliveries will no longer be accurate, oligonucleotide quality or yield may be affected. Performing daily calibration verifications will ensure that malfunctioning valves are recalibrated or replaced before impacting oligonucleotide production. Schedule for The calibration of all 30 valves needs to be verified: Verifying Valve ♦ While setting up the first run of the day Calibration ♦ After recalibrating a valve ♦ Whenever oligonucleotide yield is lower than expected 30-Valve Calibration The calibration of all 30 valves can be tested simultaneously with the procedure below. Verification To verify valve calibration on all 30 valves: Step 1 Action Status of the system: ♦ Instrument and computer are on and 3900 Software is running. ♦ Column positions 1-30 contain 200 µL MicroAmp Reaction Tubes (P/N N8010540). It does not matter what is in the remaining positions. ♦ The cartridge retaining ring and instrument lid are locked into position 2 Verify that the cartridge reaches the home position properly: a. Look directly down through the synthesis chamber window (use a step-stool if necessary). b. Check to be sure that dispense tip 1 is directly over column 1. 3 a. Select Instrument > Manual Control. b. In the Manual Control window, click Prime All. 4-10 Instrument Maintenance 4 Watch the delivery tips to see that each tip delivers reagent straight into the prime waste position. 5 Click Done. To verify valve calibration on all 30 valves: Step 6 (continued) Action Select Instrument > Diagnostics. This presents the Diagnostics window. 7 You will be using the Calibration Verification Test. a. Prepare for the test as described in the window: – Verify cartridge homes properly. – Place MicroAmp reaction tubes or other suitable containers into positions 1 to 30. – Close and lock lid. b. In the text field, enter 288 (when using MicroAmp reaction tubes), or other appropriate number for other container types. (This is the volume in microliters.) c. Click Run Test. The quantity of reagent that you entered or accepted into the text box will be dispensed to the containers in columns 1 to 30. 8 Note If you remove the containers from the cartridge, it is important to either label them or preserve their orientation in a tube rack, so that you know which tube corresponds to which valve. Remove the PCR reaction tubes from positions 1–30, placing them into a tube rack, or remove the cartridge from the instrument. 9 Evaluate the level of reagent in each container, comparing their volumes. ♦ Using microfuge tubes, a meniscus at the lip of the tube or at the ridge below the lip indicates an acceptable dispense volume (approximately ± 13%). 10 If any of the dispensed volumes appears high or low, note the valve affected, and perform an individual valve dispense test. (See “Single Valve Calibration Verification” on page 4-12.) Instrument Maintenance 4-11 Single Valve This test is run to check the volume dispensed from a single valve. Calibration To verify calibration of single valve: Verification Step 1 Action Status of the system: ♦ Instrument and computer on with 3900 software running ♦ All Positions Primed 2 Select Instrument > Manual Control. 3 In the Manual Control window Motion and Dispensing field, select the valve you want to test from the drop-down list. 4 In the microliters text field, enter 288. 5 Position an appropriate collection container directly under the dispense tip for the valve you are testing. 6 Click Dispense. 7 Measure the volume dispensed. If the valve is correctly calibrated, the volume should be no more than ± 5% different than the volume entered. ♦ If calibration is needed, see “Calibrating Valves” on page 4-7. ♦ If valves need to be replaced, see “Replacing Valves” on page 4-13. The part number for the valve is P410323. 4-12 Instrument Maintenance Replacing Valves Valve Part Number The valves replaced by this procedure have the following Part number, P410323. About Valves Since the valves control the delivery of reagents they should be changed whenever a leak is noted or the calibration values fall outside of your laboratory’s dispensing accuracy specifications. Leaks can be detected by looking for chemical residue, either moisture or white crystals below valves and at the junction of the two halves of the valve body. Leaks can also be detected by monitoring drips from the dispenser tips. Two procedures are provided for removing valves; one for valves that are malfunctioning, but still able to dispense, and one for valves that are completely non-functional. Valve Graphic This entire apparatus is a valve. Two-way valve Inlet and Outlet Port Plugs Solenoid Electrical connector GR1980 Component Function Two-way valve Mechanical gating device that opens and closes according to signals from its solenoid, allowing chemicals to flow along the pressure gradient. Inlet and Outlet Port Plugs Connect to the reagent delivery and dispense lines. Electrical connector Connect the instrument and the solenoid. Instrument Maintenance 4-13 Valve Numbering Valves are mounted beneath the valve rack. Valves are numbered consecutively 1 to 30, from your left to your right as you face the front of the instrument. All of the instrument bottle positions are served by a single valve. The bulk bottles are attached by lines to the back of the instrument and are served by more than one valve. To determine which valve serves which bottle position, see the “Valve Bottle Position Map” on page 4-15. Delivery line Valve rack 1 2 3 4 5 6 7 8 9 Dispense line GR1936 Wash tower 4-14 Instrument Maintenance Dispense tip Valve Bottle Position The following reagent map shows correspondence between 3900 instrument valves Map and bottle positions: Valve Reagent 1 DEBLOCK 2 OXIDIZER 3 CAPA (top) 4 CAPB (top) 5 ACN 6 A (top) 7 G (top) 8 ACTIVATOR (top) 9 C (top) 10 T (top) 11 ACN 12 5 13 6 14 7 15 ACT Wash1 16 DEBLOCK 17 OXIDIZER (bottom) 18 CAPA (bottom) 19 CAPB (bottom) 20 ACN 21 A (bottom) 22 G (bottom) 23 ACTIVATOR (bottom) 24 C (bottom) 25 T (bottom) 26 ACN 27 8 28 9 29 0 30 ACT Wash2 Bulk Bottle 1 (TCA/DCM) Bulk Bottle 2 (ACN) Bulk Bottle 3 (ACN) Instrument Maintenance 4-15 Removing Use the following procedure to remove valves that are malfunctioning, but still able to Malfunctioning dispense. Valves To remove malfunctioning valves: Step Remove the cover over the valve rack by grasping along the inner edge of the cover and lifting up. GR1923 1 Action . 2 Determine the number of the valve to be replaced. 3 Replace the bottle served by the valve to be removed with a clean, empty bottle. 4 Clear the delivery and dispense lines of reagent. a. Select Instrument > Manual Control. b. Select the correct valve number from the drop-down list. c. Click Prime 3 times or until you have constant flow. Then watch the dispense tip until no more reagent is dispensed. 5 Turn the 3900 instrument OFF and then unplug the power cord for the instrument. 6 Detach the electrical connection from the valve to be replaced. To solenoid ← Pull → To instrument GR1974 7 Unscrew both the delivery line and dispense line connections to the valve. ! WARNING There may be some residual chemicals in the tubing of the valves you are replacing. Wear appropriate protective gloves and clothing. Valve (under valve rack) Delivery line (from bottle) Dispense line (to dispense tips) Screws Unscrew GR1973 Unscrew 4-16 Instrument Maintenance To remove malfunctioning valves: Step 8 (continued) Action Unscrew the two screws holding the valve onto the valve rack, and the valve will release. Removing Non-functional valves will not allow you to purge chemicals from the delivery line prior Non-Functional to valve removal, so a different procedure is required to remove them. Valves ! WARNING CHEMICAL HAZARD. Be aware that there will be potentially hazardous chemicals in the line that can leak out during this procedure, and take appropriate precautions. To remove non-functioning valves Step Action 1 Turn the 3900 instrument off. 2 Release pressure from the bottle served by the valve to be replaced by doing one of the following: ♦ For phosphoramidite and dye bottles, push the bottle release button and rock the bottle gently. ♦ For reagent bottles, turn the bottle counterclockwise just until the seal releases. You may hear a slight hiss or puff of air escaping as the pressure is released. 3 Do the following with the bottle served by the valve to be replaced: a. Remove the bottle. b. Wipe the delivery line and bottle gasket free of reagent. c. Put an empty bottle on the position but do not tighten it. Leave it loose to equalize pressure. d. Place an absorbent towel underneath the bottle. Remove the cover over the valve rack by grasping the inner edge and lifting up. GR1923 4 Instrument Maintenance 4-17 To remove non-functioning valves Step 5 (continued) Action Unscrew only the delivery line from the valve. This should allow any chemicals remaining in the line to flow backwards into the bottle. Dispense line (to dispense tips) Delivery line (from bottle) GR1973 Unscrew this side only 6 Wipe the free end of the delivery line with lint-free laboratory tissue, and position it so that chemical residue will not escape from the end of the tubing while you work on the valve. 7 Unscrew the dispense line from the valve. ! CAUTION There may be some residual chemicals in the tubing. N Dispense line (to dispense tips) Screws GR1973 Unscrew 8 4-18 Instrument Maintenance Unscrew the two screws holding the valve onto the valve rack, and the valve will release. Installing New Use the following procedure to install new valves into place. Valves To install new valves: Step Action 1 On the new valve, connect the electrical connections.3 2 Connect the delivery line. Screw these lines on Delivery line GR1973 Dispense line 3 Align the valve under the valve rack and fasten the valve to the rack with two screws. 4 Connect the dispense line, referring to the graphic in step 2. 5 Place the valve rack cover back on. 6 Turn the 3900 instrument on. 7 Perform a valve calibration and dispense check on the valve just replaced. For details, see: a. “Calibrating Valves” on page 4-7. b. “Verifying Valve Calibration” on page 4-10 8 Check valve as follows: a. Check for drips. b. Perform Chamber Leak Test. Instrument Maintenance 4-19 Changing the Dispense Lines Dispense Lines Part The Part number for the dispense lines is P/N P440042. Number Procedure If the dispense line leading from the valve to the dispense tip gets clogged, use the following procedure to change the line assembly. ! WARNING CHEMICAL HAZARD. Depending on the line you are changing, there may be potentially hazardous chemicals in the line. To change the dispense lines: Step Action 1 Turn off instrument and wear gloves. 2 Unscrew both end of the dispense line assembly. Unscrew Valve Unscrew Dispense tip GR1975 3 Clean the connections on the valve and dispense tip with a lint-free tissue using a small amount of acetonitrile. 4 Screw the connections on each end of the new assembly firmly onto the dispense tip and the valve. 5 Prime the line. a. Select Instrument > Manual Control. b. Select the valve you just changed from the drop-down list. c. Click Prime and watch the dispense tip for chemical dispensing. d. Continue to click Prime until fluid flows smoothly from the dispense tip. 4-20 Instrument Maintenance Maintaining O-Rings, Gaskets and Bottle Seals Checking the Check the O-Ring as follows: Synthesis Chamber Step Action O-Ring 1 Check the synthesis chamber O-ring (P/N 4318891) for particulate matter by running a gloved hand along the O-ring. ♦ If a white precipitate appears on the O-ring, clean it off with a cotton-tipped swab or lint-free laboratory tissue moistened with acetonitrile. ♦ If the O-ring appears to be slightly flattened or is not holding pressure well, remove the O-ring, flip it over, and reinsert it into the groove. 2 If the O-ring still does not hold pressure, replace it. Replacing the To replace the synthesis chamber O-ring: Synthesis Chamber ♦ Remove it by grasping it with a gloved hand and pulling it out of the groove. O-Ring ♦ Push the new O-ring into the groove with your fingers. Replacing Follow the procedure below to replace the phosphoramidite O-ring (P/N 221014). Phosphoramidite Bottle O-Rings To replace bottle O-rings: Step Action 1 Remove the O-ring by gripping it with a gloved hand or hemostat and pulling it away from its groove. Be careful not to mar the white Teflon® insert that holds the O-ring. 2 a. Check that the Teflon is free of particulates before inserting the new O-ring. b. Push the new o-ring into the groove with your fingers. 3 If, after a period of use, a white precipitate appears on an O-ring, clean it with a cotton-tipped swab moistened with acetonitrile. \ Replacing the To replace the gasket (P/N 4318893) between the cartridge and the drainplate: Synthesis Chamber ♦ Pull the old gasket out and put the new gasket in its place. Make sure that the new Gasket gasket lies flat against the drainplate. ♦ Perform a pressure check after replacing the gasket to ensure that the seal is adequate. Instrument Maintenance 4-21 Replacing EPR and Note EPR gaskets for 4-L bottles are replaced on an “as needed” basis (see maintenance Kalrez Gaskets schedule on page 4-3). Kalrez gaskets have a lifetime of 6 months to 1 year and are replaced at 6 month intervals. To replace EPR and Kalrez® gaskets (part numbers listed below): ♦ Pull the old gasket out and put the new gasket in its place. ♦ Make sure the new gasket lies flat in the cap assembly. 4-22 Instrument Maintenance P/N Description 004498 EPR gasket (acetonitrile bottle, 4-L) 004297 Kalrez gasket (trichloroacetic acid bottle, 2-L) 1212 Kalrez gasket (450-mL) Setup Tasks A A In This Appendix Topics Covered This appendix contains detailed instructions for the setup tasks summarized in Chapter 4, Performing DNA Synthesis. The following topics are covered in this appendix: Topic Preparing the Instrument See Page A-2 Emptying Waste Containers A-2 Changing the Argon Tank A-2 Storing Phosphoramidites, Reagents, and Dyes A-4 Introduction A-4 Storage Conditions A-4 Preparing and Installing Phosphoramidites and Dye Amidites A-5 Introduction to Phosphoramidites A-5 Guidelines for Dissolving Phosphoramidites A-5 Quantities of Acetonitrile for Dissolving Phosphoramidites A-5 Installing Phosphoramidite Bottles A-6 Changing Reagent Bottles A-7 Introduction A-7 Guidelines for Handling Reagents A-7 Procedure A-7 Setup Tasks A-1 Preparing the Instrument Emptying Waste Check the level of the waste bottle before each run. Empty the waste bottle using the Containers procedure below when it is 1/2 to 3/4 full. To empty waste containers: Step Action 1 Before emptying a waste bottle, locate an extra cap for the next step. 2 Unscrew the cap assembly, and immediately recap the bottle with the extra cap to prevent release of vapors. 3 Place the liquid from the waste bottle into a properly labeled, sealed container. ! WARNING CHEMICAL WASTE HAZARD. Wastes produced by Applied Biosystems instruments are potentially hazardous and can cause injury, illness, or death. 4 After disposing of the waste, securely screw the cap assembly back on to the emptied waste bottle. 5 Check that the waste and vent lines are free of clogs and kinks. IMPORTANT Waste bottles are the low pressure side of the delivery system and must always be kept vented to the laboratory ventilation system. If a vent line is blocked, back pressure will be generated and will inhibit deliveries of reagents. See the ventilation requirements and graphics in the ABI 3900 DNA Synthesizer Site Preparation and Safety Manual (P/N 4316012) for details. Changing the Argon Monitor the level of argon before each run. Change the tank when the pressure is less Tank than 500 psi prior to a run. You cannot change a tank after beginning a run. ! WARNING EXPLOSION HAZARD. Pressurized gas cylinders are potentially explosive. Always cap the gas cylinder when it is not in use and attach it firmly to the wall or gas cylinder cart with approved brackets or chains. To change the argon tank: Step Action 1 Turn the 3900 instrument off. 2 Close the tank valve. The chamber pressure gauge will read 0 psi when the tank valve is properly turned off.. A-2 Setup Tasks 3 Disconnect the regulator from the tank. 4 Cap the empty tank. 5 Remove the cap from the full tank. 6 For maximum gas lifetime, wrap the threads with Teflon tape. 7 Attach the full tank to the regulator (both customer supplied). 8 When the regulator is tightly attached to the tank, turn the regulator knob counterclockwise. To change the argon tank: Step (continued) Action 9 Open the tank valve. 10 Turn the regulator knob clockwise until the inlet pressure gauge reads approximately 60-80 psi. Setup Tasks A-3 Storing Phosphoramidites, Reagents, and Dyes Introduction This section gives guidelines for storing chemicals, and lists the storage conditions recommended, expected shelf life, and expected lifetime of each chemical used on the 3900 instrument. Please follow the storage recommendations, and change reagent bottles when they have reached their expected lifetime. Improper storage of chemicals can impair product quality and can compromise reagent bottle integrity when pressurized under normal instrument operation. Storage Conditions IMPORTANT Keep all reagents, on or off the instrument, out of direct sunlight. Sunlight degrades the chemicals and elevates the temperatures within the bottles. Store at... Shelf Life Lifetime on Instrument Room Temperature 1 yr 2 wk Room Temperature 1 yr 1 wk Room Temperature 1 yr 1 wk 401160 Room Temperature 1 yr 1 wk 401162 Room Temperature 1 yr 1 wk Reagent Description/P/N 1-Methylimidazole/ Tetrahydrofuran 450 mL bottle: 401175 Acetic Anhydride/ Pyridine/ Tetrahydrofuran 450 mL bottle: 402220 Trichloroacetic acid/ DCM 2 L bottle 401272 Tetrazole/ acetonitrile 450 mL bottle 401173 Acetonitrile 4L 401087 Room Temperature Iodine/ Water / Pyridine/ Tetrahydrofuran 450 mL bottle: 401632 4 °C A 401159 G 401165 C T A-4 Setup Tasks Preparing and Installing Phosphoramidites and Dye Amidites Introduction to The phosphoramidites are bottled as powders and sealed under argon. In this state, Phosphoramidites they are stable for one year from the date of shipment. Powdered phosphoramidites must be dissolved in acetonitrile (ACN) prior to installation on the ABI 3900 DNA Synthesizer. Since phosphoramidites are extremely sensitive to acid, oxygen, and water, you must take special care when dissolving them. Guidelines for Use the following guidelines for storing and using the acetonitrile used to dissolve the Dissolving phosphoramidites: Phosphoramidites ! WARNING CHEMICAL HAZARD. Acetonitrile (ACN) is a flammable liquid and vapor that may cause eye, skin, and respiratory tract irritation, central nervous system depression, and damage to the heart, liver, and kidneys. Please read the MSDS, and follow the handling instructions. Wear appropriate protective eyewear, clothing, and gloves. ♦ Use anhydrous acetonitrile with less than 100 ppm water. ♦ After opening acetonitrile, keep it blanketed with argon to avoid contamination with air. ♦ When transferring acetonitrile to a phosphoramidite bottle, use a clean, dry, glass syringe with a needle. – The syringe should be dedicated to acetonitrile transfer. – Dry the syringe in a 100 to 120 °C oven. – Store the syringe in a 100 to 120 °C oven to prevent atmospheric moisture contamination. Cool down in a dissicator to room temperature before using. – Rinse the syringe with acetonitrile. Do not use water. – Do not allow the syringe needle to contact the phosphoramidites as this will contaminate other phosphoramidite bottles. – Shake bottle well until no crystals are visable on the bottom. Quantities of When preparing .05 M phosphoramidites, add the correct amount of acetonitrile to Acetonitrile for each phosphoramidite as shown in the table below. Dissolving Weight (g) Add either... Phosphoramidites P/N Phosphoramidite 401159 dAbz 401165 dGdmf 401160 dCbz 401162 T ACN (mL) ACN (g) 2.0 44.8 35.2 2.0 46.2 36.3 2.0 47.2 37.1 2.0 52.8 41.5 Setup Tasks A-5 Installing You must dissolve the phosphoramidite before installing the bottle on the instrument. Phosphoramidite For details, see “Guidelines for Dissolving Phosphoramidites” on page A-5. Bottles Sufficient phosphoramidites must be present on the instrument to complete a run before beginning the run. : To replace phosphoramidite bottles: Step 1 Action Remove the old bottle by firmly pulling it straight down while pressing the black button above its receptacle. Note If the bottle seems to stick, carefully move it from side to side while pulling down. A-6 Setup Tasks 2 Wipe the delivery line with a lint-free laboratory tissue. 3 Place a mini-size Trap-Pak (P/N GEN084034) into the phosphoramidite bottle. 4 Thread the delivery line into the bottle. 5 Push the bottle release button, and firmly push the neck of the bottle into the bottle receptacle while rocking the bottle gently side to side. 6 Release the button, and let go of the bottle. Changing Reagent Bottles Introduction Change the reagent bottles when your pre-run check shows that the reagents will run out during the run. Reagent bottles are located in two banks on the front of the instrument, on two banks on the left side of the instrument, and 3 bulk bottles have lines which input to the back of the instrument. Each of the bottle positions on the reagent banks are labeled. Guidelines for Here are some of the important guidelines for handling reagents, which are potentially Handling Reagents hazardous chemicals: Procedure ♦ Read and understand all applicable MSDSs before handling hazardous chemicals. ♦ When replacing reagents, always install a new bottle on the instrument. Do not add new solution to previously used reagent bottles. Some chemicals reduce the integrity of glass bottles. As a result, repeated use beyond 6 weeks may result in the bottle fracturing when it is pressurized during operation. ♦ Always wear gloves, safety glasses, and protective clothing when handling chemicals. ♦ Always provide adequate ventilation when handling chemicals. Some chemicals require handling only in a properly functioning fume hood. ♦ Provide secondary containment for all reagent bottles. ! WARNING Wear gloves when changing bottles to avoid direct contact with chemicals. To change reagent bottles: Step 1 Action Remove a bottle as follows: a. Slowly turn the bottle counterclockwise until it releases. b. Remove the bottle from its position and recap to minimize residual vapor release. Note Kalrez gaskets have a service lifetime of 6 months to 1 year and are replaced at 6 month intervals. 2 Install a new bottle as follows: a. Open the new bottle. b. Place a medium-size Trap Pak (P/N GEN084033) into acetonitrile and acetonitrile/tetrazole bottles. c. Make sure the Kalrez gasket is in place and did not fall off when the bottle was removed. d. Screw the bottle snugly into its threaded receptacle on the instrument by turning it clockwise. Note The reagent bottle receptacles have a ratchet cap assembly. A built-in torque-limiting feature reduces the possibility of overtightening. Do not continue to turn the bottle when clicking starts as this can cause the cap assembly to leak. Setup Tasks A-7 Post-Synthesis Processing B B In This Appendix Topics Covered This chapter provides procedures for post-synthesis processing of DNA produced on the ABI 3900 High Throughput DNA Synthesizer. Topic Deprotection Procedures See Page B-2 Introduction B-2 Cleavage/Deprotect Option I B-2 Cleavage/Deprotect Option II B-4 Reconstitution Diluting Reconstituted Oligonucleotides for Quantitation B-6 B-6 Post-Synthesis Processing B-1 Deprotection Procedures Introduction After synthesis in the 3900 instrument, the oligonucleotides within the columns are still linked to the solid support and bound to their protective groups. Many laboratories will need to cleave the oligonucleotides from the support and deprotect the bases. Two procedures for this type of post-synthesis processing are provided here. This appendix also provides a procedure for reconstituting the DNA for quantitation by standard spectrophotometry. The following procedures are covered in this section: ♦ Cleavage/Deprotect Option I - see below ♦ Cleavage/Deprotect Option II - see page B-4 ♦ Diluting Reconstituted Oligonucleotides for Quantitation - page B-4 Cleavage/Deprotect Materials Required Option I ♦ 2-mL Cryogenic polypropylene screw top vials, 1 vial per oligonucleotide ♦ Fresh concentrated (30%) ammonium hydroxide ♦ Tweezers ♦ Rotary evaporator ♦ 65 °C oven or heat block ♦ Deionized water To perform cleavage/deprotection by Option I: Step 1 Action Set up vials and use with columns as follows: a. Label 2-mL vials (1 per sample) and place them into a tube rack. b. Remove each column from the 3900 synthesizer cartridge and place into its labeled vial. Note Use a lab tissue to wipe off moisture from the tip of each column, if necessary, before placing into a labeled vial. c. Add 1.2 mL of ammonium hydroxide to each column at all scales (40 nmole, 0.2 µmole, and 1 µmole). ! DANGER CHEMICAL HAZARD. Ammonium hydroxide solution (aqueous ammonia) causes burns to the eyes, skin, and digestive and respiratory tracts. Please read the MSDS, and follow the handling instructions. Wear appropriate protective eyewear, clothing, and gloves. d. Cap all of the vials, and let them sit at room temperature for 1 hr. B-2 Post-Synthesis Processing 2 Place the capped vials into the rotary evaporator at room temperature and spin for 1 min. 3 Remove the vials from the rotary evaporator, remove the caps, and add 250 µL of ammonium hydroxide to each column. 4 Place the uncapped vials into the rotary evaporator at room temperature and spin for 1 min. The oligonucleotide should now have been cleaved from the support material and eluted into the ammonium solution. 5 Using clean tweezers, remove each column from its vial, and recap the vial. To perform cleavage/deprotection by Option I: Step (continued) Action 6 Place the capped vials into an oven or heat block at 65 °C for 1.5 hr. The oligonucleotides should now be deprotected. 7 Remove the vials from the heating apparatus and allow to cool to room temperature. 8 When the vials are cool to the touch, remove the caps. 9 Place the uncapped vials into the rotary evaporator at room temperature for 1 hr (or until dried down) with the vacuum on to dry down the oligonucleotides. 10 If you want to... Then... Reconstitute the oligonucleotide within the vials Add 1 mL of DI water to each vial. Quantitate the oligonucleotide within the vials a. Add 1 mL of DI water to each vial. b. Use the chart, “Diluting Reconstituted Oligonucleotides for Quantitation” on page B-6. Post-Synthesis Processing B-3 Cleavage/Deprotect Materials Required Option II ♦ 2-mL Nalgene plastic vials (P/N 140099) with red screw caps (P/N 201579), 1 vial per oligonucleotide ♦ Fresh concentrated (30%) ammonium hydroxide ♦ Tweezers ♦ Rotary evaporator ♦ Deionized water ♦ PVC cutters To perform cleavage/deprotection by Option II: Step 1 Action Set up a vial and use with a single column as follows: a. Label 2-mL Nalgene plastic vials (1 per sample) and place them into a tube rack. b. Remove one column from the 3900 synthesizer cartridge. c. Using PVC cutters (or similar sturdy tool), cut the column below the lip, but above the top frit. Do not allow the powdery solid support to fall out of the column. Lip 1 Solid support Note Cut in this area Top frit Cut column as little as possible to fit inside of a Nalgene vial. Use a lab tissue to wipe off moisture from the lip of the column, if necessary. d. Insert the column into its labelled plastic vial. 2 Repeat steps 1a through 1d for all of the columns in the cartridge that contain oligonucleotide. 3 ! WARNING CHEMICAL HAZARD. Ammonium hydroxide solution (aqueous ammonia) causes burns to the eyes, skin, and digestive and respiratory tracts. Please read the MSDS, and follow the handling instructions. Wear appropriate protective eyewear, clothing, and gloves. Follow these steps to begin cleavage: a. Add 1.2 mL of fresh 30% ammonium hydroxide to each vial and agitate gently. b. Cap all of the vials and tighten the caps firmly. 4 a. Place the capped vials into the rotary evaporator. b. Spin for 2 hr at 65 °C with vacuum OFF. 5 Remove the vials from the rotary evaporator, observing the listed precaution: a. Remove the vials from the rotary evaporator and allow to cool to room temperature. Place them in a freezer at 15 to -20 °C for 10 minutes if necessary. ! WARNING CHEMICAL HAZARD. Warm ammonium hydroxide will spatter if the vials are opened while they are still warm. b. Once the vials are cool to the touch, remove the caps. B-4 Post-Synthesis Processing To perform cleavage/deprotection by Option II: Step (continued) Action 6 Remove the caps from the vials, then place the vials back into the rotary evaporator. 7 Spin until almost dry, about 45 minutes at 65 °C with the vacuum ON. 8 Use clean tweezers to remove the columns from the vials. Since there is very little liquid in the vials, the tweezers will not cross-contaminate the samples. 9 The samples can be put back into the rotary evaporator for about 0.5 hour to complete the drying process if dried oligonucleotide is required. 10 If you want to... Then... Reconstitute the oligonucleotide within the vials Add 1 mL of DI water to each vial. Quantitate the oligonucleotide within the vials a. Add 1 mL of DI water to each vial. b. Use the chart, “Diluting Reconstituted Oligonucleotides for Quantitation” on page B-6. Post-Synthesis Processing B-5 Reconstitution Diluting Use the table below to determine the dilution for quantifying the oligonucleotides via Reconstituted standard spectrophotometry. Oligonucleotides for Expected Expected ODU Quantitation B-6 Post-Synthesis Processing Scale Dilution Ratio Reconstituted Oligo: DI water ODU Per Base for Standard 20-mer 40 nmol 1:10 0.25 5 200 nmol 1:50 1.0 20 1 µmol 1:200 5.0 100 Parts List C C In This Appendix Topics Covered This appendix contains lists of parts and chemicals needed to operate and maintain the 3900 instrument. Topic 3900 DNA Synthesizer Parts List: See Page C-2 3900 High Throughput Columns C-2 Chemicals C-2 Other Consumables C-3 Hardware C-3 Parts List C-1 3900 DNA Synthesizer Parts List: 3900 High High Throughput Columns List Throughput Columns Item Pkg Size P/N dAbz 200 4316671 dGdmf 200 4316673 dCbz 200 4316672 T 200 4316674 dAbz 200 4316675 dGdmf 200 4316677 dCbz 200 4316676 T 200 4316678 dAbz 200 4316679 dGdmf 200 4316681 dCbz 200 4316680 T 200 4316682 40 nmol columns 0.2 µmol columns 1 µmol columns Chemicals Chemicals List Item Pkg Size P/N dAbz 2g 401159 dGdmf 2g 401165 dCbz 2g 401160 T 2g 401162 Tetrazole/Acetonitrile 450 mL 401173 Acetic anhydride/pyridine/THF 450 mL 402220 1-Methylimidazole/THF 450 mL 401175 0.02 M Iodine/water/pyridine/THF 450 mL 401632 Phosphoramidites Reagents C-2 Parts List Trichloroacetic acid/DCM 2L 401272 Acetonitrile 4L 401087 Other Consumables Other Consumables List. Item Pkg Size P/N Plug columns 50 each 4324072 MicroAmp reaction tubes without cap 2000 @ 0.2 mL N8010533 MicroAmp reaction tube caps 1000 N8010540 Trap-Packs, Medium size 1 each GEN084033 Trap-Packs, Mini size 1 each GEN084034 Chamber Gasket 1 each 4318893 Valve and solenoid, 2-way, NC 24 VDC 1 each P410323 Dispense tip assembly 1 each P440042 O-Ring, hollow, 0.25 in. x .25 in., Silicon, 50 Duro 1 each 4318891 Filter, inlet bottle bottom, 1/8 in. 1 each 4323693 Amidite Filter, HD Polyethylene 1 each 4323968 Fume Hood 1 each P4324014 Hardware Hardware List Item P/N O-rings and Gaskets O-ring, Kalrez, 5/16 in. ID x 1/2 in. OD, for amidite bottles 221014 Gasket, EPR, 1.38 x .88 x .030 4498 (for ACN) Gasket, Kalrez, 1.38 x .775 x .06 4297 (for TCA/DCM) Gasket, Kalrez, 1.08 x .37 x 0.03 (for sealing of 450 mL bottles) 1212 Bottle Assemblies Cap assembly for 4 L bottle, 1/8 in. fitting 602458 Lid, receptacle, ratchet 3560 Receptacle, ratchet, 16 oz 3559 Safety carrier with lock handle for 4 L bottle 140041 Spring, wavy, nickel-plated 1.80 OD 2571 Parts List C-3 Synthesizer Window/ Database Import Utility D D In This Appendix Topics Covered This appendix describes the interfaces of the 3900 software and the Database Import Utility and provides information on how to use these applications. The following topics are covered in this appendix: Topic See Page Overview of Synthesizer and Database Import Utility Windows D-3 Introduction D-3 Main Application Windows D-3 3900 Software and Database Utility Differences D-4 3900 Synthesizer Window Overview D-5 Introduction D-5 Main Menu and Toolbar D-5 3900 Synthesizer Window Commands D-7 Introduction D-7 Command Activation and Special Terms D-7 File Menu D-7 Edit Menu D-9 View Menu D-10 Tools D-11 Instrument D-13 Help D-14 Instrument Menu Window Details D-15 Introduction D-15 Status Reporting and Status Window D-15 Waste Report D-16 Instrument Log D-16 Valve Configuration D-17 Manual Control D-18 Diagnostics D-20 Service D-21 Synthesizer Window/ Database Import Utility D-1 Topic Database Import Utility Overview See Page D-25 Introduction D-25 The Import Utility Window D-26 Toolbar Icons D-27 Database Import Utility Main Menu Commands D-28 Introduction D-28 Command Activation and Special Terms D-28 File Menu D-28 Edit Menu D-29 View Menu D-30 Database Import Menu D-31 Synthesis, Bank, and Sequence Files D-33 Overview of File Use D-33 Importing Text Files D-34 Looking at Imported File Contents D-35 File Formats D-36 Introduction D-36 Tab Delimited Text File D-36 Space Delimited Text File D-36 Comma Delimited Text File D-37 Short Format Files D-37 Long Format Files D-38 Excel Files D-39 D-2 Synthesizer Window/ Database Import Utility Overview of Synthesizer and Database Import Utility Windows Introduction This appendix provides information about the two software interfaces used with the ABI 3900 High Throughput DNA Synthesizer, the interface for 3900 software and the interface for the 3900 Database Import Utility. These applications are discussed together because the main windows of these applications are similar. This similarity makes the applications easier to use. The two applications are generally used in this order. First, the Database Import Utility is used to convert sequence information in the form of text files into the sequence (*.seq extension) files required for the 3900 software. Then, the 3900 software is used to import sequence files and other information required for synthesis. The 3900 software is also used to start synthesis and provide control and monitoring functions for the instrument. Main Application The main windows for the 3900 software (first) and Database Import Utility (second) Windows are shown below. Synthesizer Window/ Database Import Utility D-3 3900 Software and The 3900 software and Database Import Utility windows differ in the following ways: Database Utility ♦ Some 3900 software menus are different for the two windows: Differences – The 3900 software window has Tools, Instrument, and Help menus. These will be described under “3900 Synthesizer Window Commands” on page D-7. – The Database Import Utility has the Database Import menu. This menu will be described under “Database Import Menu” on page D-31. Besides these differences, the rest of the menus are common to the two windows. The View menu for the 3900 software window has two choices not available on the Database Utility View menu (Cycle, and Archived Logs). These selections will also be discussed under “View Menu” on page D-10. ♦ ♦ The toolbars for the two windows differ in these ways: – The 3900 software window has eight icons not available on the Database Import Utility window. These icons will also be described under “3900 Synthesizer Window Overview” on page D-5. – All of the icons on the Database Import Utility window are the same as those on the 3900 software window, except for presentation in a different order. The 3900 software window has the Cycle field, which is used to select a cycle for synthesis. Note For both 3900 software and Database Import Utility windows, four different views are presented for Banks 1 through 4, allowing discrete input for each bank. D-4 Synthesizer Window/ Database Import Utility 3900 Synthesizer Window Overview Introduction This section provides general information on the 3900 Synthesizer window as well as detailed descriptions of menus, toolbar icons, and other interface elements. Main Menu and The elements that are unique to the 3900 Synthesizer software main menu and Toolbar toolbar are shown and explained in the graphic and table which follow. For information on menu and toolbar items that are common to most word processing programs (New, Open, Save, Cut, Copy, Paste, Delete, Print), consult a word processing user’s guide. Note The last term in the second column below is the Toolbar Icon label. Toolbar Icon Menu Alternative (Tool Bar Icon Label) Function File > Import Column Allows you to enter a single sequence from a *.seq file (created in 3900 software or the Import Utility). File > Export Column - Allows you to save a single sequence as a *.seq file. File > Import Bank Allows you to enter an entire bank of sequences and cycles from a *.bnk file (created in 3900 software or the Import Utility). File > Export Bank Allows you to save an entire bank of sequences and cycles from the Import Utility as a *.bnk file. Instrument > Status Displays the status of the synthesis. Instrument > Instrument Log Displays the Synthesis Log window. Instrument > Waste Report Displays the Waste Report window. Tools > Amidite Summary Displays the Amidite Summary window. Instrument > Prime Initiates the instrument priming process, displaying the priming alert dialog box. Instrument > Start Starts the instrument to perform DNA synthesis or resumes a paused synthesis. Instrument > Pause Pauses the instrument. Allows the synthesis to resume from the pause point. Instrument > Stop Stops the synthesis. Synthesizer Window/ Database Import Utility D-5 The Synthesizer .The 3900 Synthesizer window has tabs for four panes. Each tab provides the Window capability to set up sequences for a single bank of a Synthesizer file for use in the instrument. Except for “Disable” and “Column ID,” the individual table columns, listed below, are mapped to individual text file input as described under “File Formats” on page D-36: ♦ Trityl Off (checked position) ♦ Oligo ID ♦ Bases ♦ Sequence Note The Disable column check box provides the capability of disabling a particular sequence after entry into the Import Utility window so that it won’t be synthesized when a file is output for the bank (.bnk file). The table column labeled “Column ID” provides the user with the capability of documenting the column to be used for synthesis. Note Four different views are presented for Banks 1 through 4, allowing discrete input for each bank. D-6 Synthesizer Window/ Database Import Utility 3900 Synthesizer Window Commands Introduction This section describes the commands available from the Main menu, except for those on the Edit menu common to word processing programs (see list in “Toolbar Icons” above). Command This section provides information on the two ways commands can be activated. Activation and The commands in this menu can be activated in two ways: Special Terms ♦ Clicking the command in the menu, or ♦ Using the special key combinations shown for the command in the menu. File Menu The commands in the File menu are used to open, save, close and otherwise manage Projects in the Project window, add sample files, export files, control printing, and log out or exit from 3900 software. Underscored single letters in commands are keyboard shortcuts for executing commands. The following table is provided as a reference for the File menu. Synthesizer Window File Menu Commands Item Description Enabling New [Ctrl+N] Opens a new untitled Synthesis document. Enabled when the instrument is not running. If previous project has pending changes, the following alert message is displayed: Do you want to save the current synthesis file? [Yes] [No][Cancel] Open [Ctrl+O] Displays the Open Synthesis dialog box. Enabled when the instrument is not running. Synthesizer Window/ Database Import Utility D-7 Synthesizer Window File Menu Commands (continued) Item Description Enabling Save If Synthesis document is untitled, displays the Save dialog box. Titled documents are saved to the current name (*.syn extension files) Enabled when the Synthesis document has pending changes. Save As Displays the Save dialog box. (saves as *.syn extension files) Always enabled.a Import Column [Ctrl+I] Opens the Import sequence dialog box. Box will be labeled with column selected in document. (*.seq extension files) Enabled when the instrument is not running and a sequence row is selected. Import Bank [Ctrl+M] Opens the Import Bank dialog box. (uses *.bnk extension files) Enabled when the instrument is not running. Export Column [Ctrl+X] Opens the Export sequence dialog box. (uses *.seq extension files) Enabled when the instrument is not running and a sequence row is selected. Export Bank Opens the Export Bank dialog box. (uses *.bnk extension files) Enabled when the instrument is not running. Print (Ctrl+P) Displays the Print dialog box. Always enabled. Exit Exits the Program: The standard Print Setup dialog is opened from the Print dialog. Always enabled. ♦ Displays Save alert/dialog if document has pending changes. ♦ If instrument is running, displays alert:Exit the program? This will stop the instrument, which will impact the synthesis. [No][Yes] a. Except when standard Windows functions or instrument function prevents access, such as when a modal dialog box is displayed or when an instrument is running. D-8 Synthesizer Window/ Database Import Utility Edit Menu The commands in the Edit menu are used to manage the contents of the Project window by performing standard actions like undo, delete, select, etc., and by enabling access to settings for Preferences. Underscored single letters in commands are keyboard shortcuts for executing commands. Note The first four commands are standard commands common to text processing applications and are not described here. The following table is provided as a reference for the Edit menu. Synthesizer Window Edit Menu Commands Item Description Enabling Select All (Ctrl+A) Selects all of the contents of the current bank of the Synthesis document. Always enabled. Fill Down [Ctrl+D] Fills the entry in the first selected table cell into all lower cells in this column. Limited to one column with each use. Enabled when an entry is made in the selected table cell. Can be used in the “Oligo ID,” “Sequences,” and “Column ID” table columns. Synthesizer Window/ Database Import Utility D-9 View Menu General The View menu is used to switch between the four bank views in the Synthesizer window, view the current synthesis cycle, and view archived logs. Underscored single letters in commands are keyboard shortcuts for executing commands. The following table is provided as a reference for the View menu. Synthesizer Window View Commands Item Description Enabling Bank 1 Shows the selected bank tab in the Synthesis document. If the tab is visible, a checkmark is placed next to the item. Always enabled. Cycle Displays the View Cycle window. Always enabled. Archived Logs Displays the Archived Log Viewer -described below. Always enabled. Bank 2 Bank 3 Bank 4 (Ctrl+F1-4) Archived Log Viewer The Archived Logs command presents the Archived Log Viewer window. D-10 Synthesizer Window/ Database Import Utility The Archived Log Viewer window is used to access archived instrument logs. Each instrument log provides a list of the system events that occurred during a synthesis run. The events displayed in the log are set in the Options dialog box (see page D-12). Each time a run is started, a new Synthesis Log file is created. Each Log file contains only the events associated with the run. This report is read-only but the contents of the window may be copied for pasting into another document. Other actions available from this window include: ♦ Open Last Log - accessed by clicking this button. This opens the Instrument Log referenced in the Instrument Log window after a run. ♦ Open - clicking this button presents an Open File dialog box enabling any archived log file to be accessed. ♦ Print - clicking this button prints out the current log file. Tools The View menu is used to display the Amidite Summary and to set various instrument options. Amidite Summary Command The Amidite Summary command presents the Amidite Summary window, as shown below, to display the required amidites and reagents for all banks. Synthesizer Window/ Database Import Utility D-11 Amidite Summary Window Elements Report Element Description Required Reagents The table in this window displays: ♦ First column - the valve number associated with the second column of the table. ♦ Second column -the name of each required reagent. ♦ Third column - the volume of reagent required in each bottle. The calculation for these volumes is based on the particular sequences in all banks and the cycle used for synthesis. Options Command The Options command presents the Options dialog box. This dialog box provides the elements listed in the table. Options Command Elements Element Description Message Logging Sets the level of information detail that is written to the instrument log. Logging is disabled if an instrument is not connected: ♦ Short = brief list of valve actions ♦ Detailed = precise timing for each valve/dispense Instrument Motion Checkbox This selection enables the instrument to perform motion operations. It is disabled if an instrument is not connected: ♦ Selected checkbox = Motion On ♦ Unselected checkbox = Motion Off Instrument Dispensing Checkbox This selection enables the instrument to perform dispensing operations. Disabled if an instrument is not connected: ♦ Selected checkbox = Dispensing On ♦ Unselected checkbox = Dispensing Off Default Cycle File Field D-12 Synthesizer Window/ Database Import Utility This editable text field is used to specify the pathname for the Cycle file to be automatically added to each bank when a new Sequence document is created. Instrument Overview of Instrument Menu The Instrument menu provides commands to control, test, and service the instrument and perform other functions such as status display, waste reporting, and logging of instrument operation. The windows presented by the Status, Waste Report, Instrument Log, Valve Configuration, Manual Control, Diagnostics, and Service commands are described in “Instrument Menu Window Details” on page D-15. Note No further descriptions are provided for the dialog boxes presented for the Prime, Start, Pause, and Stop commands since these dialog boxes are either progress indictors or describe one or more conditions which need to be corrected before the command can be executed. Synthesizer Window Instrument Menu Commands Item Description Enabling Prime [Ctrl+G] Initiates the Instrument priming process. Displays the Priming window. Enabled when an instrument is connected and is not running. Start Ctrl+R] Starts the instrument to perform DNA synthesis or resumes a paused synthesis. Enabled when an instrument is connected and is not running, or when the instrument is paused. Note Menu item changes to Resume when the instrument is paused. Pause [Ctrl+Y] Pauses the instrument. Stop [Ctrl+T] Stops the instrument and the synthesis. Enabled when the instrument is running or paused. Status [Ctrl+F5] Displays the Status window. Always enabled. Waste Report [Ctrl+W] Displays the Waste Report window. Always enabled. The instrument is allowed to resume from the pause point. Enabled when the instrument is running. Synthesizer Window/ Database Import Utility D-13 Synthesizer Window Instrument Menu Commands (continued) Item Description Enabling Instrument Log [Ctrl+F6] Displays the Instrument Log window. Always enabled. Valve Configuration Displays the Valve Configuration dialog box. Enabled when the instrument is not running. Manual Control Ctrl+M] Displays the Manual Control window. Enabled when the instrument is not running. Diagnostics Hierarchical menu. Items include: Enabled when the instrument is not running. ♦ Verify Calibration ♦ Verify Pressure Each items displays a dialog box containing the procedure and controls for the test. Service Displays the Service Password window. Enabled when the instrument is not running. Help The Help command presents the “About 3900 DNA Synthesizer” window. This window provides information identifying the instrument the software application is used with, the software version number, and date of release. D-14 Synthesizer Window/ Database Import Utility Instrument Menu Window Details Introduction The windows presented by the Status, Waste Report, Instrument Log, Valve Configuration, Manual Control, Diagnostics, and Service commands are described in some detail in this section Status Reporting The Status window, shown below, is one of three ways to monitor the status of and Status Window synthesis. Synthesis can be monitored: ♦ In the main 3900 software window through the: – Indication presented on the end of each row of the table for a sequence (indicated by underscore and by number of couplings completed) – Status line at the bottom of the window (for various synthesis steps in progress) ♦ In the Synthesis Instrument Log window - described under “Instrument Log” on page D-16. ♦ In the Status window shown below. This window displays status information in the following ways: ♦ ♦ The top portion of this window displays current status information for various system steps for each bank. – The first four line of the table display information graphically for four functions (Moving, Dispensing, Waiting, and Purging). – The actual chemistry cycle steps in progress are shown by a name presented in the rows labeled UC and LC. The UC row presents information for sequences entered in Upper Case format. The LC row presents information for sequences entered in Lower Case format. The bottom portion of the window displays general progress indicators, which include: – Base # and Total # Bases indicators - the Base # increments until 100% complete is reached when Base # equals Total # Bases. – A bar indicator - which increments upwards in percentage complete. – Elapsed Time and Est Time Remaining indicators - which increment during the progress of synthesis. . Synthesizer Window/ Database Import Utility D-15 Waste Report The Waste Report presents the calculated volumes of waste output to the waste container for each listed reagent since the date and time entered on the report. The relative volumes of consumption of two reagents can be determined by comparing the percentage values in the third column. Instrument Log The instrument log provides a list of the system events that occurred during a synthesis run. The events displayed in the log are set in the Options dialog box (see page D-12). Each time a run is started, a new Synthesis Log file is created. Each Log file contains only the events associated with the run. Log files are archived in this location: C:\Program Files\3900 DNA Synthesizer\3900Log Note The pathname provided for the Log file location assumes that 3900 and other program files are stored on Drive C. D-16 Synthesizer Window/ Database Import Utility During the run, the current instrument log presents the events in progress for viewing. After the run, the instrument log for the current run is identified, as shown in the illustration on the next page, in the Instrument Log window. To view the contents of instrument logs, including that for the run just completed, bring up the Archived Log Viewer using the Archived Logs command (View menu) - see “Archived Log Viewer” on page D-10. Use the Open Last Log button, in the Archived Log Viewer, to see the contents of the last Instrument Log. Valve Configuration The Valve Configuration window enables specification of the reagent to be associated with each valve array position. The Valve Configuration window has these elements: ♦ Valve Array 1 and Valve Array 2 - the 30 valves on the instrument are represented graphically at the top of the window. Synthesizer Window/ Database Import Utility D-17 ♦ The two tables in the window are associated with the valve array above. ♦ The reagent for each valve position may be specified in the Reagent columns for each portion of the table. ♦ The buttons on the bottom enable these settings: – Default Settings button - clicking this button returns setting to the factory defaults. – Calibrate button - clicking this button presents the Calibration dialog box (see “Calibrating Valves” on page 4-7). – Calibration Summary - clicking this button presents the Calibration Summary document reporting the results of the last valve calibration. – OK - clicking this button closes the dialog box while accepting any changes made to the valve configuration settings. – Cancel - clicking this button closes the dialog box discarding any changes made to the valve configuration settings. Manual Control The Manual Control window allows various instrument elements to be manually controlled. The Manual Control window has the following elements: ♦ Motion and Dispensing - these controls work as follows: – Prime/Column options - only one of these may be selected at a time. Sets what to move, either prime bucket or column (1-48). – Valve/Reagent field - sets the destination for the prime bucket or selected column. Note When using the Move, Dispense, or Prime buttons, be aware that only one of these buttons can be active (selected) at any time. – Move button - moves the item specified in the Valve/Reagent field to the specified column. D-18 Synthesizer Window/ Database Import Utility ♦ – Dispense button - dispenses reagent from the specified valve into the specified column or prime bucket. – “microliters” and “milliseconds” buttons - sets the volume and duration of a dispense. The fields are linked and a change to one automatically calculates the proper setting for the other. Microliter range is 0-999 and Millisecond range is 100 to 10,000. (These fields are linked to valve calibration and calculation for either valve is based on the other value specified and the calibration values for the specified valve.) – Prime button - activates the prime enabled by “Prime” option selection. – Not Dispensing into Cartridge checkbox - this button is used during valve calibration and disables the interlock for the top of the instrument so deliveries can be made with the top of the instrument open. Instrument - these controls work as follows: – 1st Bank field (Bank 1, Bank 2, Bank 3, or Bank 4) - only one of these may be selected at a time. Determines which bank is affected by a purge. – Default field - allows selection of the type of purge (DEFAULT, REACT, LONG PURGE, SHORT PURGE, or DRY BEADS). (In order to see any selection besides DEFAULT, a cycle file has to be loaded in selected Bank field above.) – Purge button - activates a purge. – 2nd Bank field (ALL, Bank 1, Bank 2, Bank 3, or Bank 4) - only one of these may be selected at a time. Determines which bank is affected by a wash. – Rinse Activator Tips button - rinses the activator tips into the prime bucket. – Prime All button - performs a prime for all valves. – Home button - moves the cartridge to the Home position. – Valve Control button - clicking this button presents the Valve Control window. The Valve Control window enables valves to be turned on and off. The symbols for the valves are numbered circles. Valve actuator buttons are Synthesizer Window/ Database Import Utility D-19 numbered squares. The six labeled rectangular buttons control the valves for the labeled functions. ♦ To turn a valve on, click the button next to the valve. The numbered valve symbol (or plain circle for labeled buttons) will turn red. ♦ To turn a valve off, click the button next to the valve again. The numbered valve symbol (or plain circle for labeled buttons will turn back to grey. Click the Done button to exit the Valve Control window and return to the main Manual Control window. Click the Done button on the Manual Control window to close this window. Diagnostics The Diagnostics window is used to perform two system tests: ♦ Chamber Pressure Test ♦ Calibration Verification Test To perform the Chamber Pressure Test, follow the instructions on the upper left side of this window. A more detailed procedure is provided in “Testing Chamber Pressure” on page 4-6. To perform the Calibration Verification Test, follow the instructions on the lower left side of this window. A more detailed procedure is provided in “” on page 4-9. D-20 Synthesizer Window/ Database Import Utility Service Clicking the Service command presents the Service Password dialog box. Clicking OK without entering a password allows a user to view all of the possible settings but only two parameters (in the Dispense view) can be changed by a user without a password. Note Besides providing information needed to make the two user entries enabled, the discussion of the Service window in this manual provides only general information about the parameters in the three views. Initial Service View (Dispense Parameters) Upon opening the Service window without a password, the initial view of the Service window is the Dispense view. Note All parameters are greyed out except for the Chamber Dry Time and Purge Pressurization Time. This indicates that these are the only parameters that can be edited. The Dispense view contains factory preset values for a number of parameters: ♦ Activator Rinsing Parameters – Activator Rinsing [bases] - number of bases upon which activator rinsing is performed during synthesis. – ACN Volume [µL] - the volume of acetonitrile to be used. – Activator Re-Prime [µL] - the activator re-prime volume. – Iterations - the number of times activator rinsing will be performed. – Interim [sec] - the wait time between rinsing. Synthesizer Window/ Database Import Utility D-21 ♦ ♦ ♦ ♦ Timing Parameters – Chamber Dry Time [sec] - this is one of the two parameters for which user entry is allowed. This parameter is the argon purge time before start of synthesis. Range = 0 to 20. Default = 20 sec. – Min. Valve Time [msec] - the minimum valve opening time. – Pre-Move Delay [msec] - the delay time between movements. – Purge Increment/Vial [sec] - the extra time that will be added to the purge time for each missing vial. – Purge Pressurization Time [sec] - this is the second of the two parameters for which user entry is allowed. This parameter is the time for pressure to build during purging. Range = 0 to 5. Default = 1.00. – Chamber Vent After Purge [sec] - the time that the chamber is vented after purge is complete. Miscellaneous Parameters – Wash Volume [µL] - the volume of the washes. – Prime Volume [µL] - the prime volume that the instrument uses. – Amidite Re-Prime Every [sec] - the time duration in which amidite must be dispensed during synthesis. – Amidite Re-Prime Volume [µL] - the volume used for the Amidite Re-Prime. Default Pump Parameters – Reps - the number of times that the default purge is repeated. – Duration - the duration of each purge in seconds. – Interim - the period between the purge reps. Factory Defaults Button - this button resets edited parameters (two fields in this case) to their original factory default values. When you are ready to close the Service window and apply changes to the two editable fields, click OK. If you make a change and want to revert to factory default values, click the Factory Defaults button and then click OK. D-22 Synthesizer Window/ Database Import Utility Motion View (Motion and Homing Parameters) To look at the Motion view, click the Motion tab. This presents the following window. No user changes can be made to the parameters in this view. The Motion view contains the following factory preset parameters: ♦ ♦ Motion Parameters – Smoothing Factor - the coefficient used to smooth cartridge motion – Speed - Speed-Counts/sec (slew speed) – Acceleration Rate - Counts/sec2 – Deceleration Rate - Counts/sec2 – Rev-Dir Acceleration - Reverse direction acceleration in Counts/sec2 Homing Parameters – Coarse Homing Speed - motor accelerates to the slew speed until the Home switch state is detected – Homing Fine Offset - the “dead-band” around the Home switch – Fine Homing Speed - the motor traverses forward until the encoder index pulse is detected – Home Offset [deg.] - the number of degrees used to compensate for a Home position error. Click OK to close the Service window. Synthesizer Window/ Database Import Utility D-23 Servo Tab To look at the Servo view, click the Servo tab. This presents the following window. Note No user changes can be made to the parameters in this view. The Servo view contains factory preset values for the Servo system: ♦ ♦ Servo Tuning Parameters – KP - damping parameter – KD - proportional gain parameter – KI - integrator parameter Proximity Arrival [deg] - deceleration range, specified in degrees, upon sensing of Home postion Click OK to close the Service window. D-24 Synthesizer Window/ Database Import Utility Database Import Utility Overview Introduction The 3900 DNA Synthesizer Database Import Utility is used to prepare sequence files for use in the synthesizer. The utility converts files from Excel as well as various types of text files into Synthesizer or Bank files, files with the *.bnk extension, which can be imported into 3900 software for use in the synthesizer. This section provides general information about the Import Utility under: ♦ The Import Utility Window - see page D-26 ♦ Toolbar Icons - see page D-27 The main purpose of the material supporting the Database Import Utility is to describe the formats needed for the Excel and text files to be used as input for the Import Utility. File types that can be converted by the Import Utility include: ♦ Tab delimited text files ♦ Space delimited text files ♦ Comma delimited text files ♦ Short format text files ♦ Long format text files ♦ Excel files The formats of the file types listed above are described in this appendix under “File Formats.” Sequence information must be prepared in one of the above formats before it can be imported into the 3900 Synthesis window. Synthesizer Window/ Database Import Utility D-25 The Import Utility When you compare the Import Utility window, shown below, with the Synthesizer Window window presented by 3900 software (see Chapter 3, “Performing DNA Synthesis”), you will find that it is very similar. Once you have learned how to use the 3900 software Synthesizer window, it is easy to learn how to use the Import Utility window. This window has tabs for four panes. Each tab provides the capability to set up sequences for a single bank of a Synthesizer file for use in the instrument. Except for “Disable” and “Column ID,” the individual table columns, listed below, are mapped to individual text file input as described under “File Formats” on page D-36: ♦ Trityl Off (checked position) ♦ Oligo ID ♦ Bases ♦ Sequence Note The Disable column check box provides the capability of disabling a particular sequence after entry into the Import Utility window so that it won’t be synthesized. The table column labeled “Column ID” provides the user with the capability of naming the column to be used for synthesis. Besides the File, Edit, and View windows, which work like those in the Synthesis window, the Import Utility has a new menu (Database Import), which is used to import the six file types listed under “Introduction” on page D-25. The next section provides an example of using the Import Utility to import the contents of one of these file types. Basically, the Database Import menu is used to select the type of text file to be imported. Each selection on this menu corresponds to one of the file types discussed under “File Formats” on page D-36. Note Four different views are presented for Banks 1 through 4, allowing discrete input for each bank. D-26 Synthesizer Window/ Database Import Utility Toolbar Icons The elements that are unique to the 3900 Import Utility toolbar are shown and explained in the graphic and table below. For information on toolbar items that are common to most word processing programs (New, Open, Save, Cut, Copy, Paste, Delete, Print), consult a word processing user’s guide. The commands available on the Database Import menu are used in conjunction with the text files described under “File Formats” on page D-36. Note The last term in the second column below is the Toolbar Icon label. Toolbar Icon Menu Alternatives (Toolbar Icon Label) Function File > Import Column Allows you to enter a single sequence from a *.seq file (created in 3900 software or the Import Utility). File > Export Column Allows you to save a single sequence as a *.seq file. File > Import Bank Allows you to enter an entire bank of sequences and cycles from a *.bnk file (created in 3900 software or the Import Utility). File > Export Bank Allows you to save an entire bank of sequences and cycles from the Import Utility as a *.bnk file. Synthesizer Window/ Database Import Utility D-27 Database Import Utility Main Menu Commands Introduction This section describes the commands available from the Main menu, except for those on the Edit menu common to word processing programs (see list in “Toolbar Icons” above). Command This section provides information on the two ways commands can be activated. Activation and The commands in this menu can be activated in two ways: Special Terms ♦ Clicking the command in the menu, or ♦ Using the special key combinations shown for the command in the menu. File Menu The commands in the File menu are used to open, save, close and otherwise manage Projects in the Project window, add sample files, export files, control printing, and log out or exit from the GeneMapper application. Underscored single letters in commands are keyboard shortcuts for executing commands. The following table is provided as a reference for the File menu. Project Window File Menu Commands Item Description Enabling New [Ctrl+N] Opens a new untitled Synthesis document. Always enabled. If previous project has pending changes, the following alert message is displayed: Do you want to save the current synthesis file? [Yes] [No][Cancel] Open [Ctrl+O] Displays the Open Synthesis dialog box. Always enabled. Save If Synthesis document is untitled, displays the Save dialog box. Titled documents are saved to the current name (*.syn extension files) Enabled when the Synthesis document has pending changes. D-28 Synthesizer Window/ Database Import Utility Project Window File Menu Commands (continued) Item Description Enabling Save As Displays the Save dialog box. (saves as *.syn extension files) Always enabled. Import Column [Ctrl+I] Opens the Import sequence dialog box. Box will be labeled with column selected in document. (*.seq extension files) Enabled when a column is selected in the Synthesis document. Import Bank [Ctrl+M] Opens the Import Bank dialog box. (uses *.bnk extension files) Always enabled. Export Column [Ctrl+X] Opens the Export sequence dialog box. (uses *.seq extension files) Enabled when a column is selected in the Synthesis document. Export Bank Opens the Export Bank dialog box. (uses *.bnk extension files) Always enabled. Print (Ctrl+P) Displays the Print dialog box. Always enabled. Exit Exits the Database Import application. Displays Save alert message if Project has pending changes. The standard Print Setup dialog is opened from the Print dialog. Always enabled. Edit Menu The commands in the Edit menu are used to manage the contents of the Project window by performing standard actions like undo, delete, select, etc., and by enabling access to settings for Preferences. Underscored single letters in commands are keyboard shortcuts for executing commands. Note The first four commands are standard commands common to text processing applications and are not described here. The following table is provided as a reference for the Edit menu. Project Window Edit Menu Commands Item Description Enabling Select All (Ctrl+A) Selects all of the contents of the current bank of the Synthesis document. Always Enabled. Synthesizer Window/ Database Import Utility D-29 Project Window Edit Menu Commands (continued) Item Description Enabling Fill Down [Ctrl+D] Fills the entry in the first selected table cell into all lower cells in this column. Limited to one column with each use. Enabled when an entry is made in the selected table cell. Can be used in the “Oligo ID,” “Sequences,” and “Column ID” table columns. View Menu The View menu is used to hide/show the Project window toolbar and switch between the three Project window views. Underscored single letters in commands are keyboard shortcuts for executing commands. The following table is provided as a reference for the View menu. Project Window View Commands Item Description Enabling Bank 1 (Ctrl+F1) Switches to Bank 1 of the Synthesis document from other banks. Always enabled. Bank 2 (Ctrl+F2) Switches to Bank 2 of the Synthesis document from other banks. Always enabled. Bank 3 (Ctrl+F3) Switches to Bank3 of the Synthesis document from other banks. Always enabled. Bank 4 (Ctrl+F4) Switches to Bank 4 of the Synthesis document from other banks. Always enabled. D-30 Synthesizer Window/ Database Import Utility Database Import The Database Import menu is used to import specified text files into the Database Menu Import Utility. Underscored single letters in commands are keyboard shortcuts for executing commands. Note The file types listed in this menu are described in “File Formats” on page D-36. Database Import Commands Item Description Import Prepfile [into Column] This is an ABI in-house format not intended for customers. Enabling Import Multiple Order, Short Format Opens the “Import M.O. Short Format” dialog box, allowing choice of this file type. Always enabled. Import Multiple Order, Long Format Opens the “Import M.O. Long Format” dialog box, allowing choice of this file type. Always enabled. Import Space Delimited Opens the “Import Space Delimited File” dialog box, allowing choice of this file type. Always enabled. Import Comma Delimited Opens the “Import Comma Delimited File” dialog box, allowing choice of this file type. Always enabled. Import Tab Delimited Opens the “Import Tab Delimited File” dialog box, allowing choice of this file type. Always enabled. Import Excel Opens the “Import Excel File ” dialog box, allowing choice of this file type. Always enabled. Synthesizer Window/ Database Import Utility D-31 Database Import Commands Item Description Enabling Substitute String Editor Opens the following dialog box, allowing string editing. Always enabled, but useful only to make changes to existing strings. D-32 Synthesizer Window/ Database Import Utility Synthesis, Bank, and Sequence Files Types of Files Three types of files are used with 3900 software and the Import Utility: ♦ Synthesizer files - files with a *.syn extension Sythesizer files are created with the New command (File menu). They can contain sequence information needed for all four instrument banks and are output using the Save and Save As commands. ♦ Bank files - files with a *.bnk extension Bank files can be imported into and exported out of the Import Utility. Note Bank 1 contains sequence information for positions 1–12 on the instrument. Bank 2 contains sequence information for positions 13–24. Bank 3 contains sequence information for positions 25–36. Bank 4 contains sequence information for positions 37–48. ♦ Sequence files - text files of various types used to input sequences are described under “File Formats” on page D-36. These files have the *.seq extension. Overview of File Use Sequence text files, Bank files, and Synthesizer files are generally used as follows: Stage Task 1 Sequence information is entered into the appropriate file format (described under “File Formats”). (Sequences must be entered using all caps.) 2 Sequence files are imported into the Import Utility. 3 After sequence entry into one or more banks of a Synthesizer file (with possible editing) in the Import Utility, the contents of the Synthesizer file can be output as follows: ♦ Complete Synthesizer files (with up to four banks) - using the Save or Save As commands ♦ Bank files containing the information for one of the four banks - using the Export Bank command or toolbar button ♦ Individual sequence files (files with .seq extension) - using the Export Column toolbar button 4 Once Synthesizer, Bank, and Sequence files are created from the Import Utility, these files can be input again into the Import Utility as follows: ♦ Use the Open command to input existing Synthesizer files. ♦ Use the Import Bank command or toolbar button to input existing Bank files. ♦ Use the Import Column toolbar button to input existing Sequence files. Synthesizer Window/ Database Import Utility D-33 Importing Text Files To import the sequence in a text file into the Import Utility: Step 1 Action Select the file type in the Database Import menu,for example Import Tab Delimited. This will present a Directory dialog box. 2 Navigate to the folder containing sequence files and choose a file created in the tab delimited format. Note The current example uses an example from the “DB Import Files” provided with the Import Utility. Using a file type other than that specified in step 1 creates an error. D-34 Synthesizer Window/ Database Import Utility To import the sequence in a text file into the Import Utility: Step 3 (continued) Action Click Open in the Directory dialog box to enter the contents of the tab delimited text file into the Import Utility window. Looking at Imported The file imported into the Import Utility provides information for the four columns of the File Contents main table and the two rows in the lower table with the following headings: ♦ Trityl Off (checked position) ♦ Oligo ID ♦ Bases ♦ Sequence ♦ # Columns ♦ # Bases Trityl Off - when the box in this column is checked, it indicates that the trityl is to be removed. In the text file, this is specified by default (no entry in the Trityl field). When the trityl is to be left on, ON must be entered in the Trityl field in the text file. Oligo ID - the name of the sequence from the Name field of the text file Bases - the number of bases for the sequence Sequence - the listings for the sequences entered from the text file # Columns - the number of columns of each type needed for synthesis # Bases - the numbers of each type of base in the sequences listed under Sequence Synthesizer Window/ Database Import Utility D-35 File Formats Introduction This section describes the formats required for the text and Excel files to be used for inputting sequence information into the Import Utility. Tab Delimited The format of the tab delimited text file imported into the Import Utility window on Text File page D-34 is shown below. When this text file is compared with the imported version shown on page D-34, it has the following characteristics: ♦ Information in the text file is delimited or organized in tabbed columns. ♦ Column 1 in the text file is mapped into the column labeled “Oligo ID” in the Import Utility. ♦ Column 2 contains the sequence listings mapped into the Import Utility column labeled “Sequence.” ♦ Column 2 contains either a blank or an ON entry, with a blank (indicating trityl to be removed) entered as a check in the Trityl Off column in the Import Utility. An ON entry in the text file leaves the Trityl Off column check box disabled for the sequence. Space Delimited The format of the space delimited text file is shown below. Text File This type of text file is very similar to the tab delimited type, except that spaces are used to organize information rather than tabbed columns. The contents of each field are mapped the same as described for the tab delimited text file above. D-36 Synthesizer Window/ Database Import Utility Comma Delimited The format of the comma delimited text file is shown below. Text File Like the space delimited text file, this type of text file appears very similar to the tab delimited except that commas are used to organize information rather than tabbed columns. The contents of each field are mapped the same as described for the tab delimited text file on page D-36. Short Format Files The short format text file is shown below. Note The name SYNTHMOSFORMAT is essential on the first line to identify a file as a short format file. In this type of text file, instead of being presented on a single line (like the tab, space, and comma delimited text files), information for each sequence is presented on two lines. Importing this type of file results in all boxes in the Trityl Off column being checked by default. Synthesizer Window/ Database Import Utility D-37 When the text file on the facing page is compared with the imported version shown on page D-34, it has the following characteristics: ♦ Line 1, of the two lines for each sequence, is mapped into the column labeled “Oligo ID” in the Import Utility. ♦ Line 2, of the two lines for each sequence, is mapped into the column labeled labeled “Sequence.” Note The short file format only provides the two lines described above. If you want to specify that trityls are to be left on, use one of the delimited type files or use the long format file described in the next section. Long Format Files The long format text file is shown below. Note The name SYNTHMOLFORMAT is essential on the first line to identify a file as a long format file. The above text file provides three examples, separated by blank lines. As is shown in the third example above, in this type of file only the information in the SEQ_NAME and SEQ_TEXT files is essential for the Import Utility. The third line shown in the first example above is optional. If the DMT line is not present or has a blank in the second column, the trityls will be removed. To request that trityls be left on for a sequence (indicated by a blank check box in the Trityl Off column), enter ON in the second column for the DMT line. D-38 Synthesizer Window/ Database Import Utility Excel Files The format of the Microsoft Excel file is shown below. Information from an Excel file maps into the Import Utility in a straight forward way. ♦ The oligo names in Column A are mapped into the column labeled “Oligo ID” in the Import Utility. ♦ The sequence listings in Column B are mapped into the Import Utility column labeled “Sequence.” ♦ The default or “blank” entry in Column C, for each sequence, indicates that the trityl is to be removed and enables this check box in the “Trityl Off” column of the Import Utility for the sequence. To leave a trityl on, ON must be entered in Column C. Synthesizer Window/ Database Import Utility D-39 D-40 Synthesizer Window/ Database Import Utility Using the Fume Hood E E In This Appendix Topics Covered This appendix contains instructions for using the Fume Hood provided with the instrument during calibration or cleaning up a reagent spill. The following topics are covered in this appendix: Topic Assembling and Using the Fume Hood See Page E-2 Introduction E-2 Unfolding and Assembling the Fume Hood E-2 Inserting and Using the Fume Hood E-3 Using the Fume Hood E-1 Assembling and Using the Fume Hood Introduction The fume hood is a polypropylene insert that is placed under the open top cover of the instrument to protect the user or service person during instrument calibration or chemical spill cleanup. The fume hood provides the connection to the laboratory fume exhaust system to remove fumes and protect the person performing work. Unfolding and The fume hood comes folded up with the two triangular sections secured together with Assembling the velcro strips. Fume Hood To unfold and assembly the fume hood: Step Action 1 Unfasten the top triangular flap from the velcro patch on the lower flap and swing it open so that the flap is oriented at about a right angle to the front section. 2 Secure the flap using the two support flaps with velcro patches. GR2033 Support flaps Swing the second flap up and secure as described in step 2. The fume hood should now look like this. 4 As can be seen on the triangular section on the right side above, the fume hood can be prepared for connection to any of three sizes of exhaust ducts in the laboratory: GR2031 GR2031 3 ♦ 2-in diameter ♦ 3-in diameter ♦ 4-in diameter Determine the proper size for the exhaust duct used in your laboratory and remove the perforated circle corresponding to your exhaust duct diameter. For example, remove the 2-in circle for this size of duct. E-2 Using the Fume Hood Inserting and Using The fume hood is now ready for insertion under the top cover. the Fume Hood To insert and use the fume hood: Step Action 1 Lift the top cover of the instrument to its upper position. 2 Insert the fume hood with the two triangular sections pointing to the rear and the exhaust opening oriented to the right. GR2032 The instrument with the fume hood installed should appear as shown below. 3 Connect the duct from your laboratory exhaust system to the opening you prepared on the right side. 4 Turn on the laboratory exhaust system and continue with calibration or spill cleanup. Using the Fume Hood E-3 Index Numerics 0.02 M Iodine/water/pyridine/THF bottle position 2-4 1-Methylimidazole/ Tetrahydrofuran storage conditions A-4 1-Methylimidazole/Tetrahydrofuran (THF) bottle position 2-4 30-Valve Calibration Verification when to perform 4-3 30–valve verification procedure schedule for verification 4-10 3900 High Throughput Columns part numbers C-2 3900 instrument back view 2-9 beneath the valve rack cover 2-6 Bottle positions 2-4 column color coding 2-10 column description 2-10 components on the front 2-5 front and left side views 2-4 overview 2-2 top view 2-6 3900 software and Database Import Utility windows differences D-4 3900 Synthesizer window Edit menu D-9 File menu D-7 Help menu D-14 Instrument menu D-13 introduction D-5 main menu and toolbar D-5 View menu D-10 3900 Synthesizer Window commands command activation and special terms D-7 introduction D-7 3900 system components 2-3 how it works 2-2 types of chemistry supported 2-2 4 L Cap Assembly Gasket maintenance schedule 4-3 5, 6, 7, 8, 9, 0 bottle positions 2-5 A A, G, C, T bottle positions 2-5 A, G. C, T storage conditions A-4 ABI 3900 DNA Synthesizer order of events during a run 3-2 types of information entered by software interface 2-11 Acetic Anhydride/ Pyridine/ Tetrahydrofuran storage conditions A-4 Acetic anhydride/pyridine/THF bottle position 2-4 Acetonitrile storage conditions A-4 ACN wash lines location 2-6 Amidite O-rings maintenance schedule 4-3 Amidite Summary icon 2-12 Amidite/ACN pressure gauge 2-5 Archived Log Viewer D-10 argon tank procedure for changing A-2 B Before each run procedure for setup 3-5 bold font convention 2-12 Bottle positions front details 2-5 Bottle release buttons location 2-5 C Calibrating valves by weight 4-7 calibration 30–valve verification procedure 4-10 procedure for calibrating valves by reagent delivery 4-7 schedule for valve calibration 4-3 single valve verification procedure 4-12 verifying valve calibration 4-9 Cap/Activator pressure gauge 2-5 Cartridge banks how columns are arranged 2-2 cartridge banks how they are processed 2-2 cascading menus convention 2-12 Chamber gasket maintenance schedule 4-3 Chamber O-ring maintenance schedule 4-3 Chamber pressure gauge 2-5 Chamber Pressure test when to perform 4-4 Chemical warnings Index-1 extensions used with software First run of the day procedure for setup 3-3 Free 1-12 Fume Hood Assembling and using E-2 hazard 1-3 waste 1-3 Chemicals list part numbers C-2 Cleavage/Deprotect Option I procedure B-2 Cleavage/Deprotect Option II procedure B-4 Command activation three ways of D-7, D-27 computer use safe and efficient 1-6 customer support 1-8 to 1-12 G Guidelines for using columns and banks 3-8 H Hardware list part numbers C-3 Help see technical support 1-8 High throughput production recommendations 3-17 Home position procedure for verifying 4-9 D Database Import Utility overview D-24 toolbar icons D-26 Deblock/Oxidizer pressure gauge 2-5 Delivery lines locations 2-6 Deprotection procedures general information B-2 Dispense lines locations 2-6 Dispense tips locations 2-6 Dissolving phosphoramidites acetonitrile quantities A-5 guidelines A-5 DNA synthesis cycles general definition 2-2 Documentation set 1-2 Documents on Demand 1-12 how to obtain 1-12 Drain holes location 2-8 drain plate details beneath the cartridge 2-11 I Import Bank icon 2-12 information types document to look in 1-2 Instrument Log icon 2-12 Instrument Maintenance log purpose of 4-5 Instrument Menu Window details Diagnostics D-20 Instrument Log D-16 Manual Control D-18 Service D-20 status reporting and Status window D-15 Valve Configuration D-17 Waste report D-16 Instrument operation instruction required before 1-5 Instrument Safety Labels 1-5 instrument setup list of tasks 3-3 Internet technical support 1-12 Internet address Documents on Demand 1-12 Iodine/ Water / Pyridine/ Tetrahydrofuran storage conditions A-4 2-8 E e-mail, address for technical support 1-8 Entering sequence and cycle information knowledge required 3-8 procedure 3-9 Export Bank icon 2-12 F File Formats Excel files D-38 Format of Comma Delimited Text file Long Format files D-37 Short Format files D-36 Space Delimited Text File D-35 file types Index-2 L D-36 Leaving instrument idle recommendations to prepare for 3-17 Loading columns procedure 3-15 Long-Term shutdown tasks to perform before operation 3-7 Long-term shutdown procedure to prepare for when to perform 4-4 3-18 M Main Menu and Toolbar contents 2-12 maintenance items list of required items 4-3 maintenance schedule 4-3 MSDSs general information 1-4 ordering 1-4 O Optical Eye and Homing screw location 2-8 Options command D-12 Outside 1-9 P Passwords and levels of access 2-11 Pause icon 2-13 Phosphoramidite bottles procedure for installing A-6 Phosphoramidites general information A-5 Phosphoramidites and dye amidites preparing and installing A-5 Phosphoramidites, reagents, and dyes storage conditions A-4 Preparing the instrument procedure for changing the argon tank A-2 procedure for emptying waste containers A-2 preparing the instrument for a run where to begin 3-3 Pressure gauge location 2-5 Prime icon 2-13 Prime waste position location 2-8 Project Edit menu commands D-28 Project File menu commands D-27 Project View menu commands D-29 Purge pressure gauge 2-5 R Reagents guidelines for handling Reagent banks locations 2-5 A-7 Reagent bottles general information A-7 Reagents procedure for changing bottles A-7 Reconstitution of oligonucleotides diluting reconstituted oligos for quantitation B-6 regional sales offices 1-9 to 1-12 run diagram of Run Events 3-2 Run Events Chart entering sequence and cycle information 3-8 performing setup tasks for the next run or shut down procedure 3-17 verifying reagent supply, bottle positions, and loading columns 3-13 S Safety labels three parts 1-5 Seating pin location 2-8 Setup task lists before each run 3-5 first run of the day 3-3 three task lists 3-3 Short-Term Shutdown when to perform 4-4 Short-term shutdown procedure to prepare for 3-18 site preparation and safety guide uses for 1-4 Software procedures conventions used 2-12 Start icon 2-13 Status icon 2-12 Stop icon 2-13 Synthesis chamber details of cartridge placement 2-7 Synthesis Window purposes 3-12 Synthesis Window details 3-12 Synthesis, Bank, and Sequence Files file contents D-34 importing text files D-33 overview of file use D-32 types of files D-32 Synthesizer and Database Import Utility windows main windows D-3 overview D-3 Synthesizer window general description D-6 T tasks performed before each run procedure 3-5 Index-3 Technical Support 1-8 to 1-12 hours 1-8 how to contact 1-8 Internet address 1-12 outside North America 1-9 technical support 1-8 to 1-12 e-mail address 1-8 telephone/fax (North America) 1-8 Tetrazole/ acetonitrile storage conditions A-4 Tetrazole/Acetonitrile (ACN) bottle position 2-4 Threaded holes location 2-8 top-down view beneath valve rack cover 2-6 Trichloroacetic acid/ DCM storage conditions A-4 U User attention words 1-3 Users background needed 1-2 Using columns and banks guidelines 3-8 V Valve locations 2-6 Valve calibration when to perform 4-3 Valves when to calibrate 4-7 Verifying reagents supply and bottle positions procedure 3-14 View menu Tools menu D-11 W waste disposal user’s responsibilities 1-5 waste profile where to find for instrument 1-5 Waste Report icon 2-12 Waste trough location 2-8 WWW address Applied Biosystems 1-12 Documents on Demand 1-12 Index-4 850 Lincoln Centre Drive Foster City, California 94404-1128 USA P/N 4316015 Rev. A2